Embed Size (px)
Citation preview
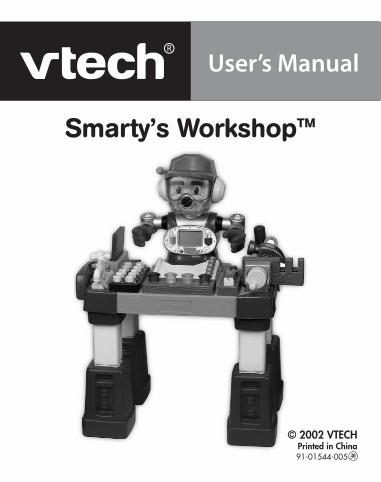
User’s Manual
Smarty’s Workshop™
91-01544-005
© 2002 VTECHPrinted in China
1
Dear Parent,
At VTech® we know that children have many different learning styles.While some children respond to more structured instruction, others learnbest through imaginative role-play. That’s why we created LearningAdventures™ - a line of entertaining learning products where fun-filledplay comes first, and learning comes to life in thematic, 3D environments.
Learning Adventures™ is a revolutionary way for children to learn,immersing them in an imaginative hands-on adventure. Children can directthe play and control the learning, creating a motivating environment. Inall products, fundamental curriculum is seamlessly integrated into the play.Children will be having so much fun, they won’t even notice that these toysare teaching too! As they expand their imaginations, children will developage-appropriate skills ranging from language development and problemsolving to communication and social skills — all while building strongself-confidence.
Products in the Learning Adventures™ line also have charming charactersthat act as coaches, helping your child explore the exciting world of learning.These characters encourage children to take on new learning challenges,guide them through activities and provide positive reinforcement for a jobwell done.
Learning Adventures™ products also incorporate advanced technologiesthat bring these characters to life, while encouraging a hands-on, multi-sensory approach to learning.
At VTech® we are committed to creating fun learning toys that foster achild’s intellectual and social development. We thank you for trustingVTech® with the important job of helping your child do great things!
Sincerely,
Your Friends at VTech®
To learn more about Learning Adventures™ and other VTech® toys, visit www.vtechuk.com
2
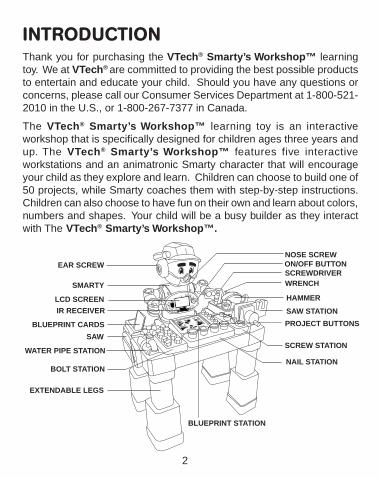
INTRODUCTIONThank you for purchasing the VTech ® Smarty’s Workshop™ learningtoy. We at VTech ® are committed to providing the best possible productsto entertain and educate your child. Should you have any questions orconcerns, please call our Consumer Services Department at 1-800-521-2010 in the U.S., or 1-800-267-7377 in Canada.
The VTech ® Smarty’s Workshop™ learning toy is an interactiveworkshop that is specifically designed for children ages three years andup. The VTech ® Smarty’s Workshop™ features five interactiveworkstations and an animatronic Smarty character that will encourageyour child as they explore and learn. Children can choose to build one of50 projects, while Smarty coaches them with step-by-step instructions.Children can also choose to have fun on their own and learn about colors,numbers and shapes. Your child will be a busy builder as they interactwith The VTech ® Smarty’s Workshop™.
SMARTY
EAR SCREW
LCD SCREEN
BLUEPRINT CARDS
SAW
WATER PIPE STATION
EXTENDABLE LEGS
BOLT STATION
IR RECEIVER
SCREW STATION
NOSE SCREWON/OFF BUTTONSCREWDRIVERWRENCH
HAMMER
SAW STATION
NAIL STATION
PROJECT BUTTONS
BLUEPRINT STATION
3
INCLUDED IN THIS PACKAGE• One VTech ® Smarty’s Workshop™ learning toy.
• Four workshop tools: screwdriver, wrench, hammer and saw.
• Five blueprint cards.
• One instruction manual.
WARNING: All packing materials such as tape, plastic sheets, wireties and tags are not part of this toy, and should be discarded foryour child’s safety.
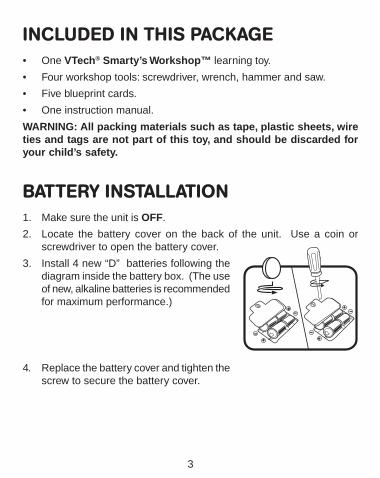
BATTERY INSTALLATION1. Make sure the unit is OFF.
2. Locate the battery cover on the back of the unit. Use a coin orscrewdriver to open the battery cover.
3. Install 4 new “D” batteries following thediagram inside the battery box. (The useof new, alkaline batteries is recommendedfor maximum performance.)
4. Replace the battery cover and tighten thescrew to secure the battery cover.
4
BATTERY NOTICE
• Non-rechargeable batteries are not to be recharged.
• Rechargeable batteries are to be removed from the toy before beingcharged (if removable).
• Rechargeable batteries are only to be charged under adult supervision(if removable).
• Different types of batteries or new and used batteries are not to bemixed.
• Only batteries of the same or equivalent type as recommended areto be used.
• Batteries are to be inserted with the correct polarity.
• Exhausted batteries are to be removed from the toy.
• The supply terminals are not to be short-circuited.
• The toy is not to be connected to more than recommended numberof power supplies.
• Do not dispose of battery in fire.
NOTE: If the unit suddenly stops working or the sound becomes weak,turn the unit off for 15 seconds, then turn it back on. If the problem persistsit may be caused by weak batteries. Please install a new set of batteriesand try the unit again.
5
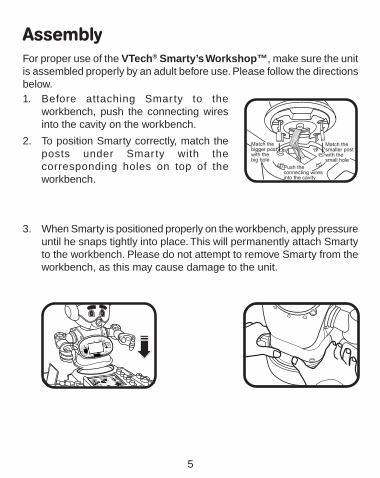
AssemblyFor proper use of the VTech ® Smarty’s Workshop™ , make sure the unitis assembled properly by an adult before use. Please follow the directionsbelow.1. Before attaching Smarty to the
workbench, push the connecting wiresinto the cavity on the workbench.
2. To position Smarty correctly, match theposts under Smarty with thecorresponding holes on top of theworkbench.
3. When Smarty is positioned properly on the workbench, apply pressureuntil he snaps tightly into place. This will permanently attach Smartyto the workbench. Please do not attempt to remove Smarty from theworkbench, as this may cause damage to the unit.
Push theconnecting wiresinto the cavity
Match thesmaller postwith thesmall hole
Match thebigger postwith thebig hole
6
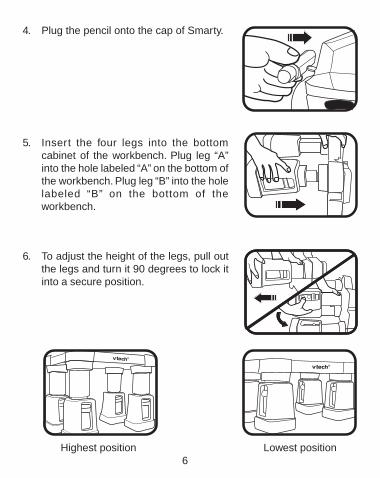
4. Plug the pencil onto the cap of Smarty.
5. Insert the four legs into the bottomcabinet of the workbench. Plug leg “A”into the hole labeled “A” on the bottom ofthe workbench. Plug leg “B” into the holelabeled “B” on the bottom of theworkbench.
6. To adjust the height of the legs, pull outthe legs and turn it 90 degrees to lock itinto a secure position.
®
®
Highest position Lowest position
7
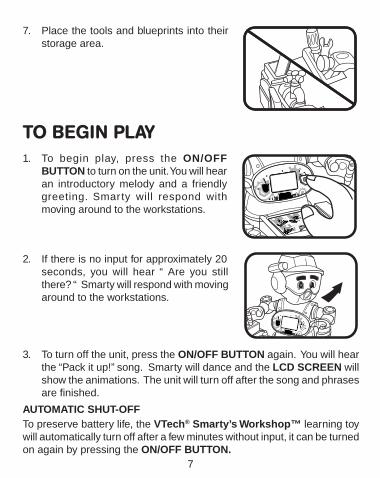
7. Place the tools and blueprints into theirstorage area.
TO BEGIN PLAY1. To begin play, press the ON/OFF
BUTTON to turn on the unit. You will hearan introductory melody and a friendlygreeting. Smarty will respond withmoving around to the workstations.
2. If there is no input for approximately 20seconds, you will hear “ Are you stillthere? “ Smarty will respond with movingaround to the workstations.
3. To turn off the unit, press the ON/OFF BUTTON again. You will hearthe “Pack it up!” song. Smarty will dance and the LCD SCREEN willshow the animations. The unit will turn off after the song and phrasesare finished.
AUTOMATIC SHUT-OFFTo preserve battery life, the VTech ® Smarty’s Workshop™ learning toywill automatically turn off after a few minutes without input, it can be turnedon again by pressing the ON/OFF BUTTON.
8
ACTIVITIESExploring Activity1. After the unit is turned on, it automatically enters the Exploring
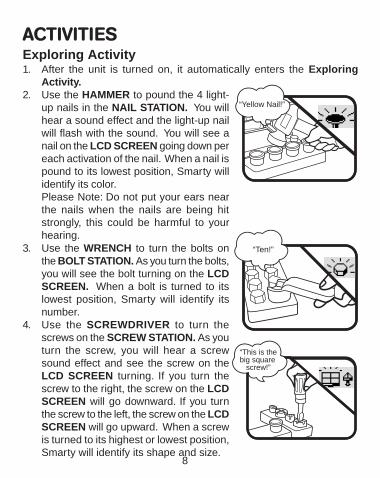
Activity.2. Use the HAMMER to pound the 4 light-
up nails in the NAIL STATION. You willhear a sound effect and the light-up nailwill flash with the sound. You will see anail on the LCD SCREEN going down pereach activation of the nail. When a nail ispound to its lowest position, Smarty willidentify its color.Please Note: Do not put your ears nearthe nails when the nails are being hitstrongly, this could be harmful to yourhearing.
3. Use the WRENCH to turn the bolts onthe BOLT STATION. As you turn the bolts,you will see the bolt turning on the LCDSCREEN. When a bolt is turned to itslowest position, Smarty will identify itsnumber.
4. Use the SCREWDRIVER to turn thescrews on the SCREW STATION. As youturn the screw, you will hear a screwsound effect and see the screw on theLCD SCREEN turning. If you turn thescrew to the right, the screw on the LCDSCREEN will go downward. If you turnthe screw to the left, the screw on the LCDSCREEN will go upward. When a screwis turned to its highest or lowest position,Smarty will identify its shape and size.
“Ten!”
“This is thebig square screw!”
“Yellow Nail!”
9
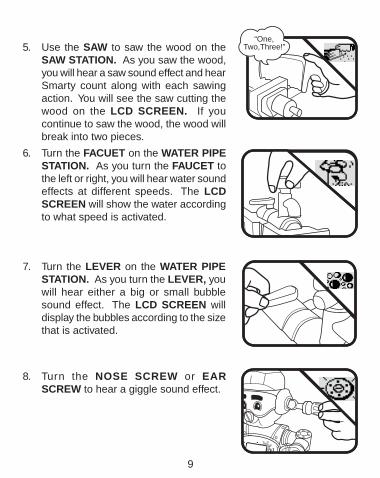
5. Use the SAW to saw the wood on theSAW STATION. As you saw the wood,you will hear a saw sound effect and hearSmarty count along with each sawingaction. You will see the saw cutting thewood on the LCD SCREEN. If youcontinue to saw the wood, the wood willbreak into two pieces.
6. Turn the FACUET on the WATER PIPESTATION. As you turn the FAUCET tothe left or right, you will hear water soundeffects at different speeds. The LCDSCREEN will show the water accordingto what speed is activated.
7. Turn the LEVER on the WATER PIPESTATION. As you turn the LEVER, youwill hear either a big or small bubblesound effect. The LCD SCREEN willdisplay the bubbles according to the sizethat is activated.
8. Turn the NOSE SCREW or EARSCREW to hear a giggle sound effect.
“One,Two,Three!”
10
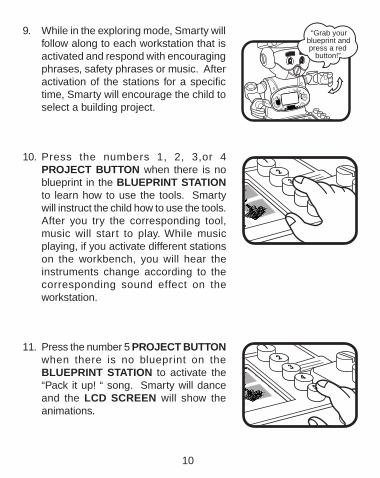
9. While in the exploring mode, Smarty willfollow along to each workstation that isactivated and respond with encouragingphrases, safety phrases or music. Afteractivation of the stations for a specifictime, Smarty will encourage the child toselect a building project.
10. Press the numbers 1, 2, 3,or 4PROJECT BUTTON when there is noblueprint in the BLUEPRINT STATIONto learn how to use the tools. Smartywill instruct the child how to use the tools.After you try the corresponding tool,music will start to play. While musicplaying, if you activate different stationson the workbench, you will hear theinstruments change according to thecorresponding sound effect on theworkstation.
11. Press the number 5 PROJECT BUTTONwhen there is no blueprint on theBLUEPRINT STATION to activate the“Pack it up! “ song. Smarty will danceand the LCD SCREEN will show theanimations.
“Grab your blueprint and press a red button!”
11
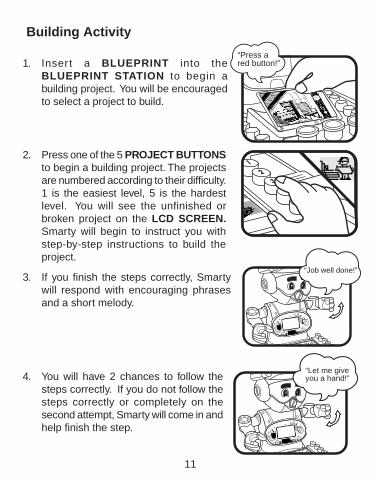
Building Activity
1. Inser t a BLUEPRINT into theBLUEPRINT STATION to begin abuilding project. You will be encouragedto select a project to build.
2. Press one of the 5 PROJECT BUTTONSto begin a building project. The projectsare numbered according to their difficulty.1 is the easiest level, 5 is the hardestlevel. You will see the unfinished orbroken project on the LCD SCREEN.Smarty will begin to instruct you withstep-by-step instructions to build theproject.
3. If you finish the steps correctly, Smartywill respond with encouraging phrasesand a short melody.
4. You will have 2 chances to follow thesteps correctly. If you do not follow thesteps correctly or completely on thesecond attempt, Smarty will come in andhelp finish the step.
“Let me give you a hand!”
“Job well done!”
“Press ared button!”
12
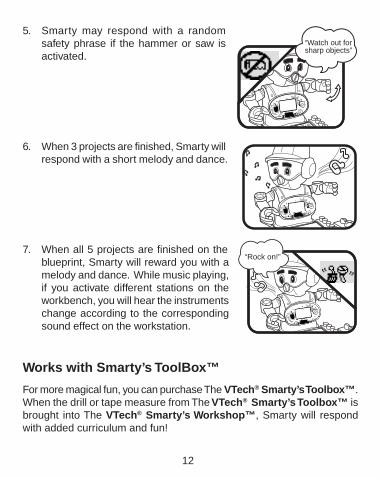
5. Smarty may respond with a randomsafety phrase if the hammer or saw isactivated.
6. When 3 projects are finished, Smarty willrespond with a short melody and dance.
7. When all 5 projects are finished on theblueprint, Smarty will reward you with amelody and dance. While music playing,if you activate different stations on theworkbench, you will hear the instrumentschange according to the correspondingsound effect on the workstation.
Works with Smarty’s ToolBox™
For more magical fun, you can purchase The VTech® Smarty’s Toolbox™ .When the drill or tape measure from The VTech ® Smarty’s Toolbox™ isbrought into The VTech® Smarty’s Workshop™ , Smarty will respondwith added curriculum and fun!
“Rock on!”
“Watch out for sharp objects”
13
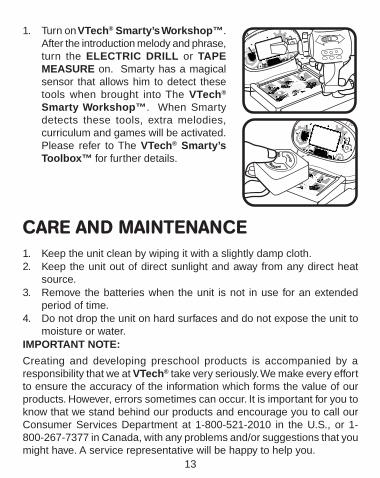
1. Turn on VTech® Smarty’s Workshop™ .After the introduction melody and phrase,turn the ELECTRIC DRILL or TAPEMEASURE on. Smarty has a magicalsensor that allows him to detect thesetools when brought into The VTech ®
Smarty Workshop™ . When Smartydetects these tools, extra melodies,curriculum and games will be activated.Please refer to The VTech ® Smarty’sToolbox™ for further details.
CARE AND MAINTENANCE1. Keep the unit clean by wiping it with a slightly damp cloth.2. Keep the unit out of direct sunlight and away from any direct heat
source.3. Remove the batteries when the unit is not in use for an extended
period of time.4. Do not drop the unit on hard surfaces and do not expose the unit to
moisture or water.IMPORTANT NOTE:
Creating and developing preschool products is accompanied by aresponsibility that we at VTech® take very seriously. We make every effortto ensure the accuracy of the information which forms the value of ourproducts. However, errors sometimes can occur. It is important for you toknow that we stand behind our products and encourage you to call ourConsumer Services Department at 1-800-521-2010 in the U.S., or 1-800-267-7377 in Canada, with any problems and/or suggestions that youmight have. A service representative will be happy to help you.