Embed Size (px)
Citation preview
User’s Guide for Nokia N95
Copyright © 2007 Nokia. All rights reserved. i
DECLARATION OF CONFORMITYHereby, NOKIA CORPORATION declares that this RM-159 product is in compliance with the essential requirements and other relevant provisions of Directive 1999/5/EC. A copy of the Declaration of Conformity can be found at http://www.nokia.com/phones/declaration_of_conformity/.
© 2007 Nokia. All rights reserved.Nokia, Nokia Connecting People, Nseries, N95, and Visual Radio are trademarks or registered trademarks of Nokia Corporation. Nokia tune is a sound mark of Nokia Corporation. Other product and company names mentioned herein may be trademarks or tradenames of their respective owners.Reproduction, transfer, distribution, or storage of part or all of the contents in this document in any form without the prior written permission of Nokia is prohibited.
This product includes software licensed from Symbian Software Ltd (c) 1998-2007. Symbian and Symbian OS are trademarks of Symbian Ltd.
Java and all Java-based marks are trademarks or registered trademarks of Sun Microsystems, Inc.
US Patent No 5818437 and other pending patents. T9 text input software Copyright (C) 1997-2007. Tegic Communications, Inc. All rights reserved.Portions of the Maps software are copyright © 2007 The FreeType Project. All rights reserved.This product is licensed under the MPEG-4 Visual Patent Portfolio License (i) for personal and noncommercial use in connection with information which has been encoded in compliance with the MPEG-4 Visual Standard by a consumer engaged in a personal and noncommercial activity and (ii) for use in connection with MPEG-4 video provided by a licensed video provider. No license is granted or shall be implied for any other use. Additional information, including that related to promotional, internal, and commercial uses, may be obtained from MPEG LA, LLC. See <http://www.mpegla.com>.
Nokia operates a policy of ongoing development. Nokia reserves the right to make changes and improvements to any of the products described in this document without prior notice.TO THE MAXIMUM EXTENT PERMITTED BY APPLICABLE LAW, UNDER NO CIRCUMSTANCES SHALL NOKIA OR ANY OF ITS LICENSORS BE RESPONSIBLE FOR ANY LOSS OF DATA OR INCOME OR ANY SPECIAL, INCIDENTAL, CONSEQUENTIAL OR INDIRECT DAMAGES HOWSOEVER CAUSED.THE CONTENTS OF THIS DOCUMENT ARE PROVIDED "AS IS". EXCEPT AS REQUIRED BY APPLICABLE LAW, NO WARRANTIES OF ANY KIND, EITHER EXPRESS OR IMPLIED, INCLUDING, BUT NOT LIMITED TO, THE IMPLIED WARRANTIES OF MERCHANTABILITY AND FITNESS FOR A PARTICULAR PURPOSE, ARE MADE IN RELATION TO THE ACCURACY, RELIABILITY OR CONTENTS OF THIS DOCUMENT. NOKIA RESERVES THE RIGHT TO REVISE THIS DOCUMENT OR WITHDRAW IT AT ANY TIME WITHOUT PRIOR NOTICE.The availability of particular products and applications and services for these products may vary by region. Please check with your Nokia dealer for details, and availability of language options.Export controlsThis device may contain commodities, technology or software subject to export laws and regulations from the US and other countries. Diversion contrary to law is prohibited.The third-party applications provided with your device may have been created and may be owned by persons or entities not affiliated with or related to Nokia. Nokia does not own the copyrights or intellectual property rights to the third-party applications. As such, Nokia does not take any responsibility for end-user support, functionality of the applications, or the information in the applications or these materials. Nokia does not provide any warranty for the third-party applications.BY USING THE APPLICATIONS YOU ACKNOWLEDGE THAT THE APPLICATIONS ARE PROVIDED AS IS WITHOUT WARRANTY OF ANY KIND, EXPRESS OR IMPLIED, TO THE MAXIMUM EXTENT PERMITTED BY APPLICABLE LAW. YOU FURTHER ACKNOWLEDGE THAT NEITHER NOKIA NOR ITS AFFILIATES MAKE ANY REPRESENTATIONS OR WARRANTIES, EXPRESS OR IMPLIED, INCLUDING BUT NOT LIMITED TO WARRANTIES OF TITLE, MERCHANTABILITY OR FITNESS FOR A PARTICULAR PURPOSE, OR THAT THE APPLICATIONS WILL NOT INFRINGE ANY THIRD-PARTY PATENTS, COPYRIGHTS, TRADEMARKS, OR OTHER RIGHTS.
9206321_N95-1_en_Apac.book Page i Friday, October 19, 2007 11:52 AM
ii
......................................10........................................................ 10........................................................ 10........................................................ 11........................................................ 14........................................................ 14
......................................16........................................................ 16........................................................ 18 ..................................................... 18
........................................................ 22
........................................................ 22
........................................................ 23
........................................................ 23
........................................................ 23
........................................................ 24
s ..................................25........................................................ 25........................................................ 29........................................................ 31........................................................ 34
9206321_N95-1_en_Apac.book Page ii Friday, October 19, 2007 11:52 AM
Copyrig
CoFor yo
SuppoHelp ....Get starAddition
Your NSoftwarSettingsWelcomTransferEssentiaFast dowVolumeMultimKeypad GameplHeadsetMemoryFile manDownlo
ht © 2007 Nokia. All rights reserved.
ntentsur safety........................................... v
rt .................................................... viii................................................................................... viiited ........................................................................... viiial applications..................................................... viii
okia N95.........................................1e updates .................................................................. 1.................................................................................... 1e .................................................................................. 1 content from another device............................. 1l indicators............................................................... 3nloading .................................................................. 4
and loudspeaker control ...................................... 4edia menu.................................................................. 4lock (keyguard)........................................................ 5ay ................................................................................. 5.................................................................................... 6 card........................................................................... 6ager .......................................................................... 8
ad! .............................................................................. 9
Web browser .....Connection security....Bookmarks view...........Browse the web...........End connection............Settings..........................
Connections........Wireless LAN ................Connection manager .Bluetooth connectivityInfrared connection ...USB ................................PC connections ............Synchronisation ..........Device manager ..........Modem ..........................
Media applicationMusic player ................Radio .............................Nokia Podcasting .......Video centre ................
07 Nokia. All rights reserved. iii
.....................................................62
..................................................... 63
..................................................... 63
..................................................... 68
..................................................... 69
vice ...........................71..................................................... 71..................................................... 72 device .....................................73..................................................... 74
...................................75..................................................... 75..................................................... 75
....................................77..................................................... 78s ................................................. 78
es ............................................... 80..................................................... 81 card .........................................82
..................................................... 83
....................................88..................................................... 88..................................................... 90
9206321_N95-1_en_Apac.book Page iii Friday, October 19, 2007 11:52 AM
Copyright © 20
RealPlayer .............................................................................36Adobe .....................................................................................37Nokia Lifeblog .....................................................................38
Camera..................................................... 41Take pictures.........................................................................41Take pictures in a sequence..............................................46You in the picture — self-timer.......................................47Record videos........................................................................47
Gallery ..................................................... 50View and browse files ........................................................50Print Basket...........................................................................52Albums....................................................................................52Edit images............................................................................53Edit video clips .....................................................................54Slide show .............................................................................54TV out mode..........................................................................54Presentations ........................................................................55Image print............................................................................55Print online............................................................................56Share online ..........................................................................57Home network .....................................................................57
Positioning............................................... 61GPS receiver ..........................................................................62
About satellite signals ..Position requests ............Maps .................................Landmarks .......................GPS data ..........................
Personalise your deProfiles — set tones ......3-D tones ........................Change the look of yourActive standby mode.....
Time managementClock .................................Calendar ..........................
Messaging ...........Write text .........................Write and send messageInbox — receive messagMailbox ............................View messages on a SIMMessaging settings........
Make calls ............Voice calls ........................Video calls ........................
iv
................................... 109......................................................109......................................................114......................................................116......................................................121
Q&A ......................... 122
on ............................. 125ing...............................................125ication guidelines ...................125
hancements.............. 127......................................................127
ance ......................... 128
information............. 129
................................... 133
9206321_N95-1_en_Apac.book Page iv Friday, October 19, 2007 11:52 AM
Copyright © 2007 Nokia. All rights reserved.
Video sharing........................................................................92Answer or decline a call ....................................................94Log ..........................................................................................95
Contacts (Phonebook) ............................97Save and edit names and numbers ................................97Copy contacts.......................................................................98Add ringing tones for contacts........................................99Create contact groups .......................................................99
Office..................................................... 100Quickoffice ........................................................................ 100Notes ................................................................................... 101Recorder ............................................................................. 101Adobe Reader ................................................................... 101Calculator .......................................................................... 102Converter ........................................................................... 102Zip manager ...................................................................... 102Wireless Keyboard ........................................................... 103Barcode reader ................................................................. 103
Tools....................................................... 105Application manager ...................................................... 105Digital rights management .......................................... 107Voice commands ............................................................. 108
Settings .............General ..........................Phone ............................Connection ..................Applications .................
Troubleshooting:
Battery informatiCharging and dischargNokia battery authent
Nokia original enBattery............................
Care and mainten
Additional safety
Index ...................
007 Nokia. All rights reserved. v
WHEN REFUELING Do not use a refueling point. Do not use near cals.
NEAR BLASTING Follow any o not use the device where progress.
Y Use only in the normal plained in the product n. Do not touch the antenna .
ERVICE Only qualified personnel repair this product.
NTS AND BATTERIES Use only ancements and batteries. Do not patible products.
STANCE Your device is not nt. Keep it dry.
PIES Remember to make back-eep a written record of all ormation stored in your device.
9206321_N95-1_en_Apac.book Page v Friday, October 19, 2007 11:52 AM
Copyright © 2
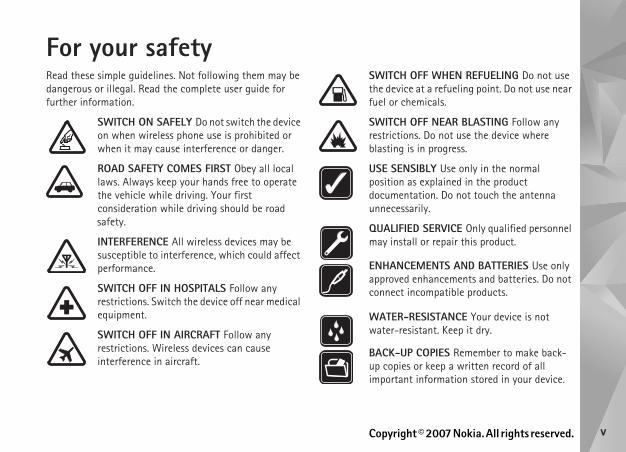
For your safetyRead these simple guidelines. Not following them may be dangerous or illegal. Read the complete user guide for further information.
SWITCH ON SAFELY Do not switch the device on when wireless phone use is prohibited or when it may cause interference or danger.
ROAD SAFETY COMES FIRST Obey all local laws. Always keep your hands free to operate the vehicle while driving. Your first consideration while driving should be road safety.
INTERFERENCE All wireless devices may be susceptible to interference, which could affect performance.
SWITCH OFF IN HOSPITALS Follow any restrictions. Switch the device off near medical equipment.
SWITCH OFF IN AIRCRAFT Follow any restrictions. Wireless devices can cause interference in aircraft.
SWITCH OFFthe device at fuel or chemi
SWITCH OFFrestrictions. Dblasting is in
USE SENSIBLposition as exdocumentatiounnecessarily
QUALIFIED Smay install or
ENHANCEMEapproved enhconnect incom
WATER-RESIwater-resista
BACK-UP COup copies or kimportant inf
vi
alicious messages and harmful content. Exercise caution ept connectivity requests, accept installations only from increase the security of your g antivirus software with a regular g a firewall application.
any features in this device, other lock, the device must be switched h the device on when wireless ause interference or danger.
pport common features of Microsoft Excel (Microsoft Office 2000, XP, ormats can be viewed or modified.
ion, such as an active video sharing ta connection, the device may feel is condition is normal. If you t working properly, take it to the ice facility.
reinstalled bookmarks and links for s. You may also access other third-r device. Third-party sites are not d Nokia does not endorse or . If you choose to access such
recautions for security or content.
e may differ from your device
9206321_N95-1_en_Apac.book Page vi Friday, October 19, 2007 11:52 AM
Copyright © 2007 Nokia. All rights reserved.
CONNECTING TO OTHER DEVICES When connecting to any other device, read its user guide for detailed safety instructions. Do not connect incompatible products.
EMERGENCY CALLS Ensure the phone function of the device is switched on and in service. Press the end key as many times as needed to clear the display and return to the standby mode. Enter the emergency number, then press the call key. Give your location. Do not end the call until given permission to do so.
About your deviceThe wireless device described in this guide is approved for use on the (E)GSM 850, 900, 1800, and 1900 and UMTS 2100 networks. Contact your service provider for more information about networks.
When using the features in this device, obey all laws and respect local customs, privacy and legitimate rights of others, including copyrights.
Copyright protections may prevent some images, music (including ringing tones), and other content from being copied, modified, transferred, or forwarded.
Your device supports internet connections and other methods of connectivity. Like computers, your device may
be exposed to viruses, mapplications, and other and open messages, accdownload content, and trustworthy sources. Todevice, consider installinupdate service and usin
Warning: To usethan the alarm con. Do not switcdevice use may c
The office applications suWord, PowerPoint, and and 2003). Not all file f
During extended operatsession or high-speed dawarm. In most cases, thsuspect the device is nonearest authorised serv
Your device may have pthird-party internet siteparty sites through youaffiliated with Nokia, anassume liability for themsites, you should take p
The images in this guiddisplay.
007 Nokia. All rights reserved. vii
, batteries, and
off and disconnect the charger ery.
of any charger before use with intended for use when supplied AC-4, or AC-5 charger and from CP-12, or LCH-12 charger when
rger adapter.
use with this device is BL-5F.
y batteries, chargers, and roved by Nokia for use with this he use of any other types may roval or warranty, and may be
ed enhancements, please check ou disconnect the power cord of and pull the plug, not the cord.
9206321_N95-1_en_Apac.book Page vii Friday, October 19, 2007 11:52 AM
Copyright © 2
Network servicesTo use the phone you must have service from a wireless service provider. Many of the features require special network features. These features are not available on all networks; other networks may require that you make specific arrangements with your service provider before you can use the network services. Your service provider can give you instructions and explain what charges will apply. Some networks may have limitations that affect how you can use network services. For instance, some networks may not support all language-dependent characters and services.
Your service provider may have requested that certain features be disabled or not activated in your device. If so, these features will not appear on your device menu. Your device may also have a special configuration such as changes in menu names, menu order, and icons. Contact your service provider for more information.
This device supports WAP 2.0 protocols (HTTP and SSL) that run on TCP/IP protocols. Some features of this device, such as MMS, browsing, and e-mail require network support for these technologies.
EnhancementschargersAlways switch the devicebefore removing the batt
Check the model numberthis device. This device iswith power from a DC-4,an AC-1, ACP-8, ACP-9, Aused with the CA-44 cha
The battery intended for
Warning: Use onlenhancements appparticular model. Tinvalidate any appdangerous.
For availability of approvwith your dealer. When yany enhancement, grasp
Copyright © 2007 Nokia. All rights reserved.
Supp
ort
viii
SupportModel number: Nokia N95-1
Hereinafter referred to as Nokia N95.
Help Your device has context-sensitive help. When an application is open, select Options > Help to access help for the current view.
When you are reading the instructions, to switch between help and the application that is open in the background, press and hold .
To open help from the main menu, select Tools > Utilities > Help. Select the desired application to view its help topics.
Get startedSee the Get started guide for keys and parts information and instructions for setting up the device for use.
Additional applicationsThere are various applications provided by Nokia and different third-party software developers to help you do more with your Nokia N95. These applications are explained in the Additional applications leaflet which is available at the Nokia N95 product support pages at www.nokia-asia.com/N95/support or your local Nokia web site.
9206321_N95-1_en_Apac.book Page viii Friday, October 19, 2007 11:52 AM
007 Nokia. All rights reserved.
Your
Nok
ia N
95
1
device for the first time, rom the following:figure various settings. See the s leaflet.
ansfer content, such as contacts from a compatible Nokia device. from another device", on page 1.
er, press , and select Tools > can also access the individual
menu locations.
Settings wizard, see the guides okia-asia.com/N95/support or
nt from
, such as contacts, from a to your Nokia N95 using infrared. Your device notifies you compatible.
9206321_N95-1_en_Apac.book Page 1 Friday, October 19, 2007 11:52 AM
Copyright © 2
Your Nokia N95Software updatesNokia may produce software updates that may offer new features, enhanced functions, or improved performance. You may be able to request these updates through the Nokia Software Updater PC application. To update the device software, you need the Nokia Software Updater application and a compatible PC with Microsoft Windows 2000, XP, or Vista operating system, broadband internet access, and a compatible data cable to connect your device to the PC.
To get more information and to download the Nokia Software Updater application, visit www.nokia-asia.com/softwareupdate or your local Nokia web site.
SettingsYour device normally has MMS, GPRS, streaming, and mobile internet settings automatically configured in the device, based upon your wireless service provider information. You may have settings from your service providers already installed in your device, or you may receive or request the settings from the service providers as a special message.
WelcomeWhen you switch on yourWelcome opens. Select f• Sett. wizard — to con
Additional application• Phone switch — to tr
and calendar entries, See "Transfer content
To open the Welcome latUtilities > Welcome. Youapplications in their own
For more information on for your device at www.nyour local Nokia website.
Transfer conteanother deviceYou can transfer contentcompatible Nokia device Bluetooth connectivity orif the other device is not
2
els, the Phone switch application device as a message. To install e other device, open the message, uctions on the display., connect the two devices. See ", on page 22.5, select the content you want to her device.
om the memory of the other device cation in your Nokia N95. ds on the amount of data to be
ncel transferring and continue
orts synchronisation, you can keep both devices. To start a compatible Nokia device, select vice, and select Options > e instructions on the display.
wo-way, and the data in both e. If an item is deleted from either the other device as well when ot restore deleted items with
vious transfer, select Transfer log.
9206321_N95-1_en_Apac.book Page 2 Friday, October 19, 2007 11:52 AM
Copyright © 2007 Nokia. All rights reserved.
Your
Nok
ia N
95 The type of content that can be transferred depends on the model of the device from which you want to transfer content. If the other device supports synchronisation, you can also synchronise data between the other device and your Nokia N95.
If the other device cannot be powered on without a SIM card, you can insert your SIM card in it. When Nokia N95 is switched on without a SIM card, the offline profile is automatically activated.Transfer content1 To use the application for the first time, on your Nokia
N95, select it in the Welcome application, or press , and select Tools > Utilities > Switch. If you have used the application before and want to start a new transfer, select Phone switch.
2 Select whether you want to use Bluetooth connectivity or infrared to transfer the data. Both devices must support the selected connection type.
3 If you select Bluetooth connectivity:To have Nokia N95 search for devices with Bluetooth connectivity, select Continue. Select the device from which you want to transfer content from the list. You are asked to enter a code on your Nokia N95. Enter a code (1-16 digits), and select OK. Enter the same code on the other device, and select OK. The devices are now paired. See "Pair devices", on page 20.
For some phone modis sent to the other Phone switch on thand follow the instrIf you select infrared"Infrared connection
4 From your Nokia N9transfer from the ot
Content is transferred frto the corresponding loTransferring time depentransferred. You can calater.
If the other device suppthe data up-to-date in synchronisation with a Phones, scroll to the deSynchronise. Follow th
The synchronisation is tdevices is made the samdevice, it is deleted fromsynchronising; you cannsynchronisation.
To view the log of a pre
007 Nokia. All rights reserved.
Your
Nok
ia N
95
3
onnection is active. indicates and that a connection is
tion is active in a part of the PRS. indicates the connection onnection is available. The icons ailable in the network, but your using EGPRS in the data transfer.
onnection is active. indicates and that a connection is
ce to scan for wireless LANs, and . See "Wireless LAN", on page 16.
ection is active in a network that
ction is active in a network that .
y is on.
itted using Bluetooth dicator is blinking, your device is other device.
active.
9206321_N95-1_en_Apac.book Page 3 Friday, October 19, 2007 11:52 AM
Copyright © 2
Essential indicators The device is being used in a GSM network.
The device is being used in a UMTS network (network service).
You have one or more unread messages in the Inbox folder in Messaging.
You have received new e-mail in the remote mailbox.
There are messages waiting to be sent in the Outbox folder.
You have missed calls.
Shown if Ringing type is set to Silent and Message alert tone, and E-mail alert tone are set to Off.
The device keypad is locked.
A clock alarm is active.
The second phone line is being used (network service).
All calls to the device are diverted to another number. If you have two phone lines (network service), a number indicates the active line.
A compatible headset is connected to the device.
A compatible TV out cable is connected to the device.
A compatible Text phone is connected to the device.
A data call is active.
A GPRS packet data cthe connection is on holdavailable.
A packet data connecnetwork that supports EGis on hold and that a cindicate that EGPRS is avdevice is not necessarily
A UMTS packet data cthe connection is on holdavailable.
You have set the devia wireless LAN is available
A wireless LAN connhas encryption.
A wireless LAN connedoes not have encryption
Bluetooth connectivit
Data is being transmconnectivity. When the intrying to connect with an
A USB connection is
4
ening to a sound, press the volume
r allows you to speak and listen ithout having to hold the device to
t hold the device near your ear eaker is in use, because the volume y loud.
during a call, select Options >
ker, select Options > Activate
enurovides quick access to multimedia applications.
9206321_N95-1_en_Apac.book Page 4 Friday, October 19, 2007 11:52 AM
Copyright © 2007 Nokia. All rights reserved.
Your
Nok
ia N
95 An infrared connection is active. If the indicator is blinking, the device is trying to connect to the other device or the connection has been lost.
Fast downloadingYou can activate or deactivate support for high-speed downlink packet access (HSDPA, also called 3.5G) in the device settings. See "Packet data", on page 119.
HSDPA is a network service in UMTS networks and it provides high data download speed. When HSDPA support in the device is activated and the device is connected to a UMTS network that supports HSDPA, downloading data such as messages, e-mail, and browser pages through the cellular network may be faster.
For availability and subscription to data connection services, contact your service provider.
HSDPA only affects the download speed; sending data to the network, such as sending messages and e-mail, is not affected.
Volume and loudspeaker controlTo increase or decrease the volume level when you have
an active call or are listkey.
The built-in loudspeakefrom a short distance wyour ear.
Warning: Do nowhen the loudspmay be extremel
To use the loudspeaker Activate loudspeaker.
To turn off the loudspeahandset.
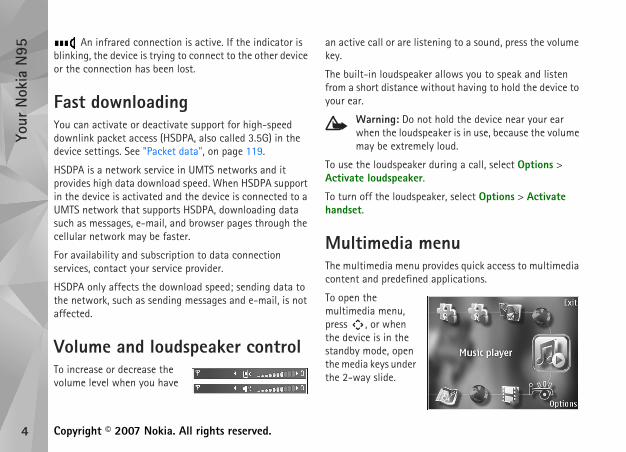
Multimedia mThe multimedia menu pcontent and predefined
To open the multimedia menu, press , or when the device is in the standby mode, open the media keys under the 2-way slide.
007 Nokia. All rights reserved.
Your
Nok
ia N
95
5
on, calls may be possible to the er programmed into your device.
with the N-Gage™ gaming , you can download and play games.
er one of the following
ication — With this preview et information about the
eplay experience, try out game and install the full N-Gage comes available The full featured application e complete N-Gage experience N-Gage application in the menu. es, try and buy games, find other ores, events, chat, and more.
es to get started.
ience, you need internet access ough the cellular network or r service provider for more ces.
it www.n-gage.com.
9206321_N95-1_en_Apac.book Page 5 Friday, October 19, 2007 11:52 AM
Copyright © 2
To scroll in the multimedia menu, use the scroll key. To scroll faster, press and hold the key. To open an application, press .
To change the shown shortcuts, select Options > Menu items. You can delete, add, or rearrange shortcuts to applications, browser bookmarks, and radio channels defined in Visual Radio.
You can customise the appearance of the multimedia menu. To change the images shown in the background, select Options > Background images and the desired option. To set zooming and panning on or off, select Options > Image effects. To set sounds on or off, select Options > Menu sounds.
Keypad lock (keyguard)To lock the keys, press , then .
To unlock the keys, open the 2-way slide, or press , then .
When the keys are locked, opening the camera lens cover unlocks the keys.
You can have the keypad lock activated automatically after a time-out or when the 2-way slide is closed. See "Security", on page 111.
When the keypad lock is official emergency numb
GameplayYour device is compatibleexperience. With N-Gagehigh-quality multiplayer
Your device includes eithapplications:• Discover N-Gage appl
application you can gupcoming N-Gage gamdemos, and downloadapplication when it be
• N-Gage application —gives you access to threplacing the DiscoverYou can find new gamplayers, and access sc
Press , and select Gam
For the full N-Gage experon your device, either thrwireless LAN. Contact youinformation on data servi
For more information, vis
6
nclude a microphone. For phone t with a remote control unit or the ce.
dset enhancements, for example, ller AD-43, to adjust the volume lume key in the device. The Nokia has multimedia volume controls the volume only for music or video
croSD cards se with this
oved industry ards, but fully compatible with this device. damage the card and the device on the card.
out of the reach of small children.
9206321_N95-1_en_Apac.book Page 6 Friday, October 19, 2007 11:52 AM
Copyright © 2007 Nokia. All rights reserved.
Your
Nok
ia N
95 HeadsetYou can connect a compatible headset or compatible headphones to the Nokia AV Connector (3.5 mm) of your device. You may need to select the cable mode.
Do not connect products that create an output signal as this may cause damage to the device. Do not connect any voltage source to the Nokia AV Connector.
When connecting any external device or any headset, other than those approved by Nokia for use with this device, to the Nokia AV Connector, pay special attention to volume levels.
Warning: When you use the headset, your ability to hear outside sounds may be affected. Do not use the headset where it can endanger your safety.
To use a headset or headphones with a remote control unit, for example, the Nokia Audio Controller AD-43, connect the unit to the connector in the device, then connect the headset or headphones to the unit.
Some headsets do not icalls, use such a headsemicrophone of the devi
When using certain heathe Nokia Audio Controduring a call, use the voAudio Controller AD-43that are used to adjust playback.
Memory cardUse only compatible miapproved by Nokia for udevice. Nokia uses apprstandards for memory csome brands may not beIncompatible cards mayand corrupt data stored
Keep all memory cards
007 Nokia. All rights reserved.
Your
Nok
ia N
95
7
, and close the door is
cardt remove the memory card in the tion when the card is being g the card in the middle of an age the memory card as well as
ta stored on the card may be
ard, press , and select d. All applications are closed.ory card will close all open anyway? is displayed, select
ry card and press 'OK' is or of the memory card slot.
d to release it from the slot.ard. If the device is switched on,
9206321_N95-1_en_Apac.book Page 7 Friday, October 19, 2007 11:52 AM
Copyright © 2
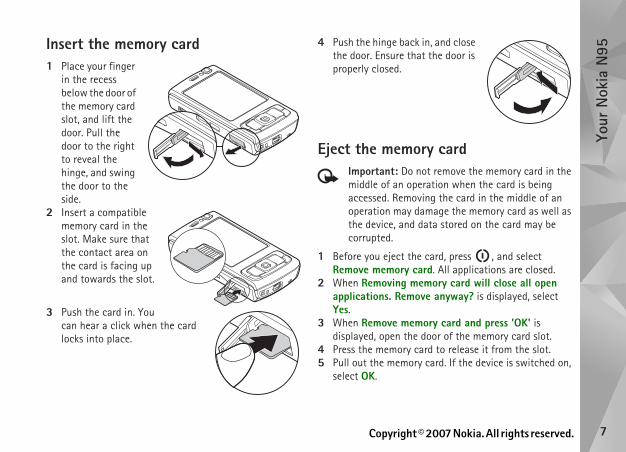
Insert the memory card1 Place your finger
in the recess below the door of the memory card slot, and lift the door. Pull the door to the right to reveal the hinge, and swing the door to the side.
2 Insert a compatible memory card in the slot. Make sure that the contact area on the card is facing up and towards the slot.
3 Push the card in. You can hear a click when the card locks into place.
4 Push the hinge back inthe door. Ensure that properly closed.
Eject the memoryImportant: Do nomiddle of an operaaccessed. Removinoperation may damthe device, and dacorrupted.
1 Before you eject the cRemove memory car
2 When Removing memapplications. RemoveYes.
3 When Remove memodisplayed, open the do
4 Press the memory car5 Pull out the memory c
select OK.
8
ess and hold while you press or copy the files to a folder, select der or Copy to folder.
ions > Find and the memory from search text that matches the file
ta you have in the device and how rent data types consume, select ails. The amount of available free e memory.
free memoryvice use memory to store data. The e device or the memory card
transfer data to a compatible le) or to a compatible PC.
memory, use File mgr. to delete , or go to the respective e, you can remove the following:ers in Messaging and retrieved m the mailbox
9206321_N95-1_en_Apac.book Page 8 Friday, October 19, 2007 11:52 AM
Copyright © 2007 Nokia. All rights reserved.
Your
Nok
ia N
95 Memory card tool Press , and select Tools > Utilities > Memory.
To back up information from the device memory to a compatible memory card (if available), select Options > Back up phone memory. The device notifies you if the memory card does not have enough free space to create a back-up.
To restore information from the compatible memory card to the device memory, select Options > Restore from card.
When a memory card is reformatted, all data on the card is permanently lost. Some memory cards are supplied preformatted and others require formatting. Consult your retailer to find out if you must format the memory card before you can use it.
To format a memory card, select Options > Format memory card. Select Yes to confirm.
File manager To browse files and folders in the device memory or on a compatible memory card (if inserted), press , and select Tools > File mgr.. The device memory view ( ) opens. Press to open the memory card view ( ), if available.
To mark several files, pr, , or . To move
Options > Move to fol
To find a file, select Optwhich to search. Enter aname.
To view what types of damuch memory the diffeOptions > Memory detmemory is shown in Fre
Memory low — Many features of the dedevice notifies you if thmemory is low.
To free device memory, memory card (if availab
To remove data to free files you no longer needapplication. For exampl• Messages in the fold
e-mail messages fro• Saved web pages• Contact information• Calendar notes
007 Nokia. All rights reserved.
Your
Nok
ia N
95
9
9206321_N95-1_en_Apac.book Page 9 Friday, October 19, 2007 11:52 AM
Copyright © 2
• Applications shown in App. mgr. that you do not need• Installation files (.sis) of applications you have installed
to a compatible memory card; first back up the installation files to a compatible PC
Download! With Download! (network service) you can discover; preview; buy; download; and upgrade content, services, and applications that work with your Nokia N95. Games, ringing tones, wallpapers, applications, and much more are easily accessible.
Press , and select Download!. The items are categorized under catalogs and folders provided by different service providers. The available content depends on your service provider. Some items may be chargeable, but you can usually preview them free of charge.
10
ot indicate that the data he gateway and the content server ested resource is stored) is secure. ures the data transmission nd the content server.
y be required for some services, s. You are notified if the identity of tic or if you do not have the correct ur device. For more information, vider. See also "Certificate 112 for more information on the ate details.
ewows you to select web addresses llection of bookmarks in the Auto. can also enter the URL address of to visit directly into the field ( ).
ng page defined for the default
sses as bookmarks while browsing also save addresses received in arks and send saved bookmarks.
9206321_N95-1_en_Apac.book Page 10 Friday, October 19, 2007 11:52 AM
Copyright © 2007 Nokia. All rights reserved.
Web
bro
wse
r Web browser Press , and select Web (network service).
Shortcut: To start Web, press and hold in the standby mode.
With Web, you can view hypertext markup language (HTML) web pages on the internet as originally designed. You can also browse web pages that are designed specifically for mobile devices, and use extensible hypertext markup language (XHTML), or the wireless markup language (WML).
With Web, you can zoom in and out on a page, use Mini map and Page overview to navigate on pages, read web feeds and blogs, bookmark web pages, and download content, for example.
Check the availability of services, pricing, and fees with your service provider. Service providers will also give you instructions on how to use their services.
To use Web, you need an access point to connect to internet. See "Access points", on page 117.
Connection securityIf the security indicator is displayed during a connection, the data transmission between the device and the internet gateway or server is encrypted.
The security icon does ntransmission between t(or place where the requThe service provider secbetween the gateway a
Security certificates masuch as banking servicethe server is not authensecurity certificate in yocontact your service promanagement", on pagecertificates and certific
Bookmarks viThe bookmarks view allfrom a list or from a coBookmarks folder. You the web page you want
indicates the startiaccess point.
You can save URL addreon the internet. You canmessages to your bookm
007 Nokia. All rights reserved.
Web
bro
wse
r
11
bly services that you trust and that urity and protection against
web pages as they are originally b page, in the bookmarks view, er the address in the field ( ).
tain material, such as graphics a large amount of memory to ut of memory while loading such e page are not shown. To browse ics to save memory, select ge > Load content > Text only.
standby mode with the browser und, press twice or . To r, press and hold , and select e list.
elections, press .
address you want to visit, select dress.
age saved as bookmark in the ile browsing, press , and
9206321_N95-1_en_Apac.book Page 11 Friday, October 19, 2007 11:52 AM
Copyright © 2
Your device may have preinstalled bookmarks and links for third-party internet sites. You may also access other third-party sites through your device. Third-party sites are not affiliated with Nokia, and Nokia does not endorse or assume liability for them. If you choose to access such sites, you should take precautions for security or content.
To open the bookmarks view while browsing, press , or select Options > Bookmarks.
To edit the details of a bookmark, such as the title, select Options > Bookmark manager > Edit.
In the bookmarks view, you can also enter other browser folders. Web allows you to save web pages during browsing. In the Saved pages folder, you can view the content of the pages you have saved offline.
Web also keeps track of the web pages you visit during browsing. In the Auto. Bookmarks folder, you can view the list of visited web pages.
In Web Feeds, you can view saved links to web feeds and blogs to which you have subscribed. Web feeds are commonly found on major news organisation web pages, personal weblogs, online communities that offer latest headlines, and article summaries. Web feeds use RSS and ATOM technologies.
Browse the weImportant: Use onoffer adequate secharmful software.
With Web, you can view designed. To browse a weselect a bookmark, or entThen press .
Some web pages may conand sounds, that requiresview. If your device runs oa page, the graphics on thweb pages without graphOptions > Settings > Pa
Tip! To return to theopen in the backgroreturn to the browsethe browser from th
To open links and make s
To enter a new web pageOptions > Go to web ad
Tip! To visit a web pbookmarks view, whselect a bookmark.
12
open windows. he page overview of the current in to zoom in and view the desired
new web address.he start page. zoom the page in or out.
ithin the current web page, select and enter a keyword. To go to the
. To go to the next match, press
keywords within the page,
an select most frequently used . To open the toolbar, press on page. To move within the toolbar, ect a feature, press .
m the following:ks to view a list of the web requentlyw the overview of the current web
9206321_N95-1_en_Apac.book Page 12 Friday, October 19, 2007 11:52 AM
Copyright © 2007 Nokia. All rights reserved.
Web
bro
wse
r To retrieve the latest content of the page from the server, select Options > Navigation options > Reload.
To save the web address of the current page as bookmark, select Options > Save as bookmark.
To use Visual history to view snapshots of the pages you have visited during the current browsing session, select Back (available if History list is set on in the browser settings). To go to a previously visited page, select the page.
To save a page while browsing, select Options > Tools > Save page. You can save pages to the device memory or compatible memory card (if inserted), and browse them when offline. You can also group the pages into folders. To access the pages later, in the bookmarks view, select Saved pages.
To open a sublist of commands or actions for the currently open page, select Options > Service options (if supported by the web page).
To allow or prevent the automatic opening of multiple windows, select Options > Window > Block pop-ups or Allow pop-ups.
Shortcuts while browsing are as follows:• Press to open your bookmarks.• Press to search for keywords in the current page.• Press to return to the previous page.
• Press to list all • Press to show t
page. Press agasection of the page.
• Press to enter a• Press to go to t• Press or to
Text searchTo search for keywords wOptions > Find > Text,previous match, press
.
Tip! To search forpress .
Browser toolbarWith the toolbar, you cfeatures in the browseran empty spot on a webpress or , To sel
In the toolbar, select fro• Frequently used lin
addresses you visit f• Page overview to vie
page
007 Nokia. All rights reserved.
Web
bro
wse
r
13
oll to an item, and select Options ads, or open, save, or delete
vigate on web pages that contain ion. When Mini map is set on in you scroll through a large web d shows an overview of the web l in Mini map, press , , , desired location, stop scrolling, and leaves you at the selected
ct Options > Settings > n.
web page that contains a large u can use Page overview to view
the page contains.
w of the current page, press . n the page, press , , , or oom in and view the desired
9206321_N95-1_en_Apac.book Page 13 Friday, October 19, 2007 11:52 AM
Copyright © 2
• Find to search for keywords within the current page• Reload to refresh the page• Subscribe (if available) to view a list of available web
feeds on the current web page, and subscribe to a web feed
Download and purchase itemsYou can download items such as ringing tones, images, operator logos, themes, and video clips. These items can be provided free of charge, or you can purchase them. Downloaded items are handled by the respective applications in your device, for example, a downloaded photo or an .mp3 file can be saved in Gallery.
Important: Only install and use applications and other software from trusted sources, such as applications that are Symbian Signed or have passed the Java VerifiedTM testing.
1 To download the item, select the link.2 Select the appropriate option to purchase the item (for
example, “Buy”).3 Carefully read all the information provided.
To continue the download, select Accept. To cancel the download, select Cancel.
When you start a download, a list of ongoing and completed downloads from the current browsing session is displayed. To also view the list, select Options >
Downloads. In the list, scrto cancel ongoing downlocompleted downloads.
Mini mapMini map helps you to nalarge amount of informatthe browser settings and page, Mini map opens anpage you browse. To scrolor . When you find theand Mini map disappearslocation.
To set Mini map on, seleGeneral > Mini map > O
Page overviewWhen you are browsing aamount of information, yowhat kind of information
To show the page overvieTo find the desired spot o
. Press again to zsection of the page.
14
n the network server collects ious web pages, select Options > elete cookies.
eces you have accessed are stored in e device.
cation that is used to store data tried to access or have accessed n requiring passwords, empty the e information or services you have he cache. To empty the cache, privacy data > Clear cache.
gs and from the following:
the default access point. See 16. Some or all access points may by your service provider; you may reate, edit, or remove them.
e home page.
ap on or off. See "Mini map", on
9206321_N95-1_en_Apac.book Page 14 Friday, October 19, 2007 11:52 AM
Copyright © 2007 Nokia. All rights reserved.
Web
bro
wse
r Web feeds and blogsWeb feeds are xml files on web pages that are widely used by the weblog community and news organisations to share the latest entry headlines or full text, for example, recent news in the form of news feeds. Blogs or weblogs are web diaries. Most of the web feeds use RSS and ATOM technologies. It is common to find web feeds on web, blog, and wiki pages.
Web automatically detects if a web page contains web feeds. To subscribe to a web feed, select Options > Subscribe, or click on the link. To view the web feeds to which you have subscribed, in the bookmarks view, select Web feeds.
To update a web feed, select it, and Options > Refresh.
To define how the web feeds are updated, select Options > Settings > Web feeds. See "Settings", on page 14.
End connectionTo end the connection and view the browser page offline, select Options > Tools > Disconnect; or to end the connection and close the browser, select Options > Exit.
Pressing does not end the connection but takes the browser to the background.
To delete the informatioabout your visits to varClear privacy data > D
Empty the cachThe information or servithe cache memory of th
A cache is a memory lotemporarily. If you haveconfidential informatiocache after each use. Thaccessed are stored in tselect Options > Clear
SettingsSelect Options > Settin
General settings
Access point — Change"Connection", on page 1be preset for your devicenot be able to change, c
Homepage — Define th
Mini map — Set Mini mpage 13.
007 Nokia. All rights reserved.
Web
bro
wse
r
15
le or disable automatic bookmark continue saving the addresses of o the Auto. Bookmarks folder, the bookmarks view, select Hide
u do not want the data you enter b page to be saved and used next select Off.
ble the receiving and sending of
fine whether you want the web matically or not, and how often . Setting the application to atically may involve the unts of data through your service ct your service provider for ransmission charges.
ate (only available when ) — Select the desired access
9206321_N95-1_en_Apac.book Page 15 Friday, October 19, 2007 11:52 AM
Copyright © 2
History list — While browsing, to use the selection key Back to see a list of the pages you have visited during the current browsing session, set History list on.
Security warnings — Hide or show security notifications.
Java/ECMA script — Enable or disable the use of scripts.
Page settings
Load images and sounds — Select whether you want to load images and other objects while browsing. If you select No, to load images or objects later during browsing, select Options > Tools > Load images.
Screen size — Select between Full screen and the normal view with the options list.
Default encoding — If text characters are not shown correctly, you can select another encoding according to language for the current page.
Block pop-ups — Allow or block automatic opening of different pop-ups while browsing.
Automatic reload — If you want the web pages to be refreshed automatically while browsing, select On.
Font size — Define the font size that is used for web pages.
Privacy settings
Auto. bookmarks — Enabcollecting. If you want to the visited web pages intbut hide the folder from folder.
Form data saving — If yoto different forms on a wetime the page is entered,
Cookies — Enable or disacookies.
Web feeds settings
Automatic updates — Defeeds to be updated autoyou want to update themretrieve web feeds automtransmission of large amoprovider's network. Containformation about data t
Acc. point for auto-updAutomatic updates is onpoint for updating.

16
nnections create an internet access point access point for applications that internet. See "WLAN internet 17.
ys enable one of the available ds to increase the security of your
n. Using encryption reduces the risk access to your data.
stablished when you create a data N internet access point. The active when you end the data connection. see "Connection manager", on
g a voice call or when packet data e connected to one WLAN access ut several applications can use the int.
e Offline profile, you can still use ember to comply with any
ements when establishing and on.
9206321_N95-1_en_Apac.book Page 16 Friday, October 19, 2007 11:52 AM
Copyright © 2007 Nokia. All rights reserved.
Conn
ectio
ns ConnectionsWireless LANYour device supports wireless local area network (WLAN). With WLAN, you can connect your device to the internet and compatible devices that have WLAN. For information about using your device with other compatible Universal Plug and Play (UPnP) devices through WLAN, see "Home network", on page 57.
To use WLAN, it must be available in the location and your device must be connected to the WLAN.
Some places, like France, have restrictions on the use of WLAN. Check with your local authorities for more information.
Features using WLAN, or allowing such features to run in the background while using other features, increase the demand on battery power and reduce the battery life.
Your device supports the following WLAN features:• IEEE 802.11b/g standard• Operation at a frequency of 2.4 GHz• Wired equivalent privacy (WEP) with keys up to 128
bits, Wi-Fi protected access (WPA), and 802.1x encryption methods. These functions can be used only if they are supported by the network.
Wireless LAN coTo use WLAN, you must(IAP) in a WLAN. Use theneed to connect to the access points", on page
Important: Alwaencryption methoWLAN connectioof unauthorised
A WLAN connection is econnection using a WLAWLAN connection ends To end the connection, page 18.
You can use WLAN durinis active. You can only bpoint device at a time, bsame internet access po
When the device is in thWLAN (if available). Remapplicable safety requirusing a WLAN connecti
007 Nokia. All rights reserved.
Conn
ectio
ns
17
nd you are not connected to any off is displayed. To set scanning le WLANs, select the status and
lable WLANs, select a status and LAN. To set WLAN scanning off, tion Switch WLAN scan off.
rd in the menu, press , and .
ccess pointslable within range, press , and ..
t from the following:s — Filter out WLANs in the list
e selected networks are filtered application searches for WLANs.tails of a network shown in the tive connection, the connection
Create an internet access point
dit the details of an existing IAP.
gr. to create internet access ", on page 18.
9206321_N95-1_en_Apac.book Page 17 Friday, October 19, 2007 11:52 AM
Copyright © 2
Tip! To check the unique media access control (MAC) address that identifies your device, enter *#62209526# in the standby mode.
WLAN wizardThe WLAN wizard helps you to connect to a WLAN and manage your WLAN connections.
The WLAN wizard shows the status of your WLAN connections in the active standby mode. To view the available options, scroll to the row showing the status, and press .
If the search results of found WLANs, for example, WLAN network found are displayed, to create an internet access point and start the web browser using this IAP, select the status, the option Start web browsing, and the network.
If you select a secured WLAN network, you are asked to enter the relevant passcodes. To connect to a hidden network, you must enter the correct network name (service set identifier, SSID). To create a new access point for hidden WLAN, select New WLAN.
If you are connected to a WLAN, the IAP name is displayed. To start the web browser using this IAP, select the status and the option Cont. Web browsing. To end the connection in the WLAN, select the status and the option Disconnect WLAN.
If WLAN scanning is off aWLAN, WLAN scanning on and search for availabpress .
To start a search for avaithe option Search for Wselect a status and the op
To access the WLAN wizaselect Tools > WLAN wiz
WLAN internet aTo search for WLANs avaiselect Tools > WLAN wiz
Select Options and selec• Filter WLAN network
of found networks. Thout the next time the
• Details — View the delist. If you select an acdetails are displayed.
• Define access point —(IAP) in a WLAN.
• Edit access point — E
You can also use Conn. mpoints. See "Wireless LAN
18
ect Options > Disconnect. To close lect Options > Disconnect all.
connection, select Options > n depend on the connection type.
ilable within range, press , and gr. > Available WLAN networks.
w shows a list of WLANs within de (Infrastructure or Ad-hoc),
icator. is shown for networks if your device has an active
ork.
network, select Options > Details.
cess point in a network, select ss point.
nectivity ssly to other compatible devices technology. Compatible devices nes, computers, and enhancements r kits. You can use Bluetooth
ages, video clips, music and sound t wirelessly to your compatible PC
9206321_N95-1_en_Apac.book Page 18 Friday, October 19, 2007 11:52 AM
Copyright © 2007 Nokia. All rights reserved.
Conn
ectio
ns Operating modesThere are two operating modes in WLAN: infrastructure and ad hoc.
The infrastructure operating mode allows two kinds of communication: wireless devices are connected to each other through a WLAN access point device, or wireless devices are connected to a wired LAN through a WLAN access point device.
In the ad hoc operating mode, devices can send and receive data directly with each other. To create an internet access point for an ad hoc network, see "Access points", on page 117.
Connection manager
Data connectionsPress , and select Tools > Connectivity > Conn. mgr. > Active data connections. In the active connections view, you can see the open data connections: data calls ( ), packet data connections ( or ), and WLAN connections ( ).
Note: The actual time invoiced for calls by your service provider may vary, depending on network features, rounding off for billing, and so forth.
To end a connection, selall open connections, se
To view the details of aDetails. The details show
Wireless LANTo search for WLANs avaselect Tools > Conn. m
The available WLAN vierange, their network moand signal strength indwith encryption, and connection in the netw
To view the details of a
To create an internet acOptions > Define acce
Bluetooth conYou can connect wirelewith wireless Bluetoothmay include mobile phosuch as headsets and caconnectivity to send imclips, and notes; connec
007 Nokia. All rights reserved.
Conn
ectio
ns
19
technology, or allowing such kground while using other and on battery power and
d, you cannot use Bluetooth and SIM card", on page 111 for ing the device.
ls > Bluetooth. When you open st time, you are asked to define a
:
wirelessly to another compatible connectivity On, then establish ff Bluetooth connectivity, select
o allow your device to be found tooth wireless technology, select e after which the visibility is set lect Define period. To hide your , select Hidden.
the name shown to other devices technology.
9206321_N95-1_en_Apac.book Page 19 Friday, October 19, 2007 11:52 AM
Copyright © 2
(for example, to transfer files); connect to a compatible printer to print images with Image print. See "Image print", on page 55.
Since devices with Bluetooth wireless technology communicate using radio waves, your device and the other device do not need to be in direct line-of-sight. The two devices only need to be within 10 meters (33 feet) of each other, but the connection may be subject to interference from obstructions such as walls or from other electronic devices.
This device is compliant with Bluetooth Specification 2.0 supporting the following profiles: Advanced Audio Distribution Profile, Audio/Video Remote Control Profile, Basic Imaging Profile, Basic Printing Profile, Dial-up Networking Profile, File Transfer Profile, Hands-Free Profile, Headset Profile, Human Interface Device Profile, Object Push Profile, SIM Access profile, and Synchronisation Profile. To ensure interoperability between other devices supporting Bluetooth technology, use Nokia approved enhancements for this model. Check with the manufacturers of other devices to determine their compatibility with this device.
There may be restrictions on using Bluetooth technology in some locations. Check with your local authorities or service provider.
Features using Bluetoothfeatures to run in the bacfeatures, increase the demreduce the battery life.
When the device is lockeconnectivity. See "Phone more information on lock
SettingsPress , and select Toothe application for the firname for your device.
Select from the following
Bluetooth — To connect device, first set Bluetootha connection. To switch oOff.
My phone's visibility — Tby other devices with BlueShown to all. To set a timfrom shown to hidden, sedevice from other devices
My phone's name — Edit using Bluetooth wireless
20
where the item you want to send le, to send an image to another pen Gallery.Options > Send > Via Bluetooth. oth wireless technology within r on the display.mputer, phone, audio or
other device.rch, select Stop.th which you want to connect.equires pairing before data can be sounds, and you are asked to enter r devices", on page 20.n has been established, Sending
ing for devices, some devices may ique address (device address). To ddress of your device, enter the the standby mode.
devices and view your paired h application main view, press .
ur own passcode (1-16 digits), and f the other device to use the same ot have a user interface have a e passcode is used only once.
9206321_N95-1_en_Apac.book Page 20 Friday, October 19, 2007 11:52 AM
Copyright © 2007 Nokia. All rights reserved.
Conn
ectio
ns Remote SIM mode — To enable another device, such as a compatible car kit enhancement, to use the SIM card in your device to connect to the network, select On. For more information, see "Remote SIM mode", on page 21.
Security tipsWhen you are not using Bluetooth connectivity, select Bluetooth > Off or My phone's visibility > Hidden. In this way, you can better control who can find your device with Bluetooth wireless technology, and connect to it.
Do not pair with or accept connection requests from an unknown device. In this way, you can better protect your device from harmful content.
Send data using Bluetooth connectivitySeveral Bluetooth connections can be active at a time. For example, if you are connected to a compatible headset, you can also transfer files to another compatible device at the same time.
For Bluetooth connectivity indicators, see "Essential indicators", on page 18.
Tip! To send text using Bluetooth connectivity, open Notes, write the text, and select Options > Send > Via Bluetooth.
1 Open the applicationis stored. For exampcompatible device, o
2 Select the item and Devices with Bluetorange start to appeaDevice icons: covideo device, and To interrupt the sea
3 Select the device wi4 If the other device r
transmitted, a tone a passcode. See "Pai
5 When the connectiodata is shown.
Tip! When searchshow only the unfind the unique acode *#2820# in
Pair devicesTo pair with compatibledevices, in the Bluetoot
Before pairing, create yoagree with the owner ocode. Devices that do nfactory-set passcode. Th
007 Nokia. All rights reserved.
Conn
ectio
ns
21
g Bluetooth
rough Bluetooth connectivity, a asked if you want to accept the
is shown, and the item is r in Messaging. Messages th connectivity are indicated by messages", on page 80.
eode with a compatible car kit oth connectivity on, and enable
mode with your device. See fore the mode can be activated,
paired and the pairing initiated hen pairing, use a 16-digit er device as authorised. See "Pair ivate the remote SIM mode from
s on in your device, Remote SIM y mode. The connection to the d off, as indicated by in the area, and you cannot use SIM requiring cellular network
9206321_N95-1_en_Apac.book Page 21 Friday, October 19, 2007 11:52 AM
Copyright © 2
1 To pair with a device, select Options > New paired device. Devices with Bluetooth wireless technology within range start to appear on the display.
2 Select the device, and enter the passcode. The same passcode must be entered on the other device as well.
Some audio enhancements connect automatically to your device after pairing. Otherwise, scroll to the enhancement, and select Options > Connect to audio device.
Paired devices are indicated by in the device search.
To set a device as authorised or unauthorised, scroll to a device, and select from the following options:
Set as authorised — Connections between your device and this device can be made without your knowledge. No separate acceptance or authorisation is needed. Use this status for your own devices, such as your compatible headset or PC, or devices that belong to someone you trust.
indicates authorised devices in the paired devices view.
Set as unauthorised — Connection requests from this device must be accepted separately every time.
To cancel a pairing, scroll to the device, and select Options > Delete. If you want to cancel all pairings, select Options > Delete all.
Receive data usinconnectivityWhen you receive data thtone sounds, and you aremessage. If you accept, placed in the Inbox foldereceived through Bluetoo
. See "Inbox — receive
Remote SIM modTo use the remote SIM menhancement, set Bluetothe use of the remote SIM"Settings", on page 19. Bethe two devices must be from the other device. Wpasscode, and set the othdevices", on page 20. Actthe other device.
When remote SIM mode iis displayed in the standbwireless network is turnesignal strength indicator card services or features coverage.
22
iving device activates the infrared
red port of your device to receive d, press , and select Tools > ared.ing device selects the desired start the data transfer. infrared, locate the desired file in
e file manager, and select ia infrared.
arted within 1 minute after the d port, the connection is cancelled ain.
infrared are placed in the Inbox w infrared messages are indicated
indicators, see "Essential .
ols > Connectivity > USB.
the purpose of the USB cable e cable is connected, select Ask on
9206321_N95-1_en_Apac.book Page 22 Friday, October 19, 2007 11:52 AM
Copyright © 2007 Nokia. All rights reserved.
Conn
ectio
ns When the wireless device is in the remote SIM mode, you can only use a compatible connected enhancement, such as a car kit, to make or receive calls. Your wireless device will not make any calls, except to the emergency numbers programmed into your device, while in this mode. To make calls from your device, you must first leave the remote SIM mode. If the device has been locked, enter the lock code to unlock it first.
To leave the remote SIM mode, press the power key, and select Exit remote SIM mode.
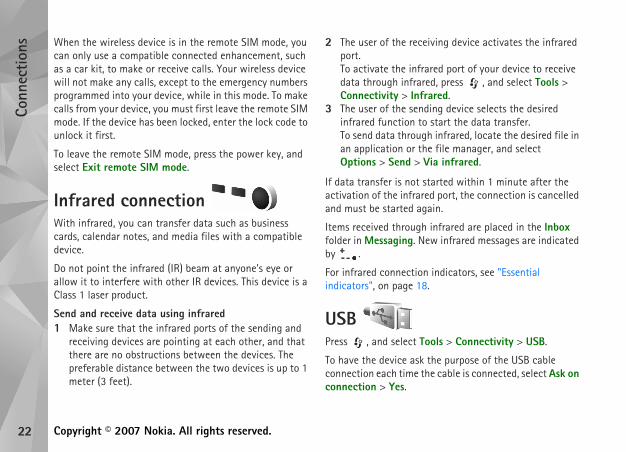
Infrared connection With infrared, you can transfer data such as business cards, calendar notes, and media files with a compatible device.
Do not point the infrared (IR) beam at anyone's eye or allow it to interfere with other IR devices. This device is a Class 1 laser product.
Send and receive data using infrared1 Make sure that the infrared ports of the sending and
receiving devices are pointing at each other, and that there are no obstructions between the devices. The preferable distance between the two devices is up to 1 meter (3 feet).
2 The user of the receport.To activate the infradata through infrareConnectivity > Infr
3 The user of the sendinfrared function toTo send data throughan application or thOptions > Send > V
If data transfer is not stactivation of the infrareand must be started ag
Items received through folder in Messaging. Neby .
For infrared connectionindicators", on page 18
USB Press , and select To
To have the device ask connection each time thconnection > Yes.
007 Nokia. All rights reserved.
Conn
ectio
ns
23
n ronise your notes, calendar, text
th various compatible ible computer or on the internet.
isation settings in a special ettings", on page 80.
u can see the different A synchronisation profile ttings to synchronise data in your abase on a server or compatible
ools > Sync. on profile and Options > l synchronisation before it
l.
r d receive configuration settings new server profiles, or to view er profiles, press , and select e mgr..
ofiles and different configuration providers and company department. These configuration
9206321_N95-1_en_Apac.book Page 23 Friday, October 19, 2007 11:52 AM
Copyright © 2
If Ask on connection is set to off or you want to change the mode during an active connection, select USB mode and from the following:
Media player — to synchronise music with Windows Media Player. See "Music transfer with Windows Media Player", on page 28.
PC Suite — to use Nokia PC applications such as Nokia Nseries PC Suite, Nokia Lifeblog, and Nokia Software Updater
Data transfer — to transfer data between your device and a compatible PC
Image print — to print images on a compatible printer. See "Image print", on page 55.
PC connectionsYou can use your device with a variety of compatible PC connectivity and data communications applications. With Nokia Nseries PC Suite you can, for example, transfer images between your device and a compatible PC.
Always create the connection from the PC to synchronise with your device.
SynchronisatioSync enables you to synchmessages, or contacts wiapplications on a compat
You may receive synchronmessage. See "Data and s
In the Sync main view, yosynchronisation profiles. contains the necessary sedevice with a remote datdevice.1 Press , and select T2 Select a synchronisati
Synchronise. To cancefinishes, select Cance
Device manageTo connect to a server anfor your device, to createand manage existing servTools > Utilities > Devic
You may receive server prsettings from your serviceinformation management
24
9206321_N95-1_en_Apac.book Page 24 Friday, October 19, 2007 11:52 AM
Copyright © 2007 Nokia. All rights reserved.
Conn
ectio
ns settings may include connection and other settings used by different applications in your device.
Scroll to a server profile, and select Options and from the following:
Start configuration — to connect to the server and receive configuration settings for your device
New server profile — to create a server profile
To delete a server profile, scroll to it, and press .
Modem Press , and select Tools > Connectivity > Modem. To connect your device to a compatible PC through infrared to use it as a modem, press . For how to connect the devices, see "Infrared connection", on page 22.
007 Nokia. All rights reserved.
Med
ia a
pplic
atio
ns
25
usic player, press and hold . the player from the multimedia edia menu", on page 4.
usic > Music player.under
r
ng or .
rn to the beginning of the song,
9206321_N95-1_en_Apac.book Page 25 Friday, October 19, 2007 11:52 AM
Copyright © 2
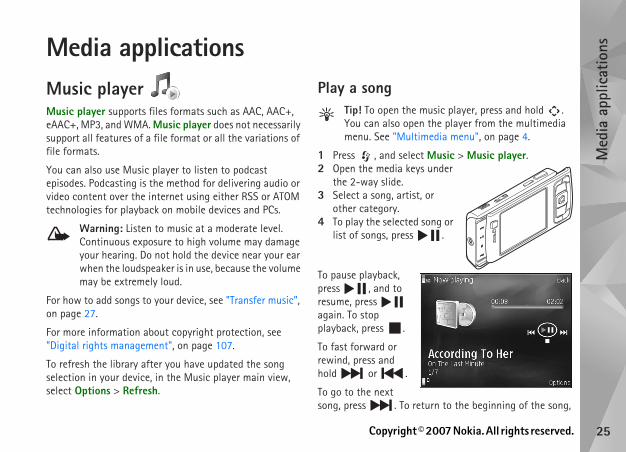
Media applicationsMusic player Music player supports files formats such as AAC, AAC+, eAAC+, MP3, and WMA. Music player does not necessarily support all features of a file format or all the variations of file formats.
You can also use Music player to listen to podcast episodes. Podcasting is the method for delivering audio or video content over the internet using either RSS or ATOM technologies for playback on mobile devices and PCs.
Warning: Listen to music at a moderate level. Continuous exposure to high volume may damage your hearing. Do not hold the device near your ear when the loudspeaker is in use, because the volume may be extremely loud.
For how to add songs to your device, see "Transfer music", on page 27.
For more information about copyright protection, see "Digital rights management", on page 107.
To refresh the library after you have updated the song selection in your device, in the Music player main view, select Options > Refresh.
Play a songTip! To open the mYou can also open menu. See "Multim
1 Press , and select M2 Open the media keys
the 2-way slide.3 Select a song, artist, o
other category.4 To play the selected so
list of songs, press
To pause playback, press , and to resume, press again. To stop playback, press .
To fast forward or rewind, press and hold or .
To go to the next song, press . To retu
26
d songs, select Albums, Artists, To view playlists, select Playlists.
isplays the currently playing song,
ylists, in the music menu, select playlists appear automatically: cently played songs, and Recent
list, select Options > Playlist details.
eate playlist. playlist, and select OK. the songs you want to include in to add items. To show the song list press . To hide the song list,
e your selections, select Done. If a card is inserted, the playlist is y card.
, when viewing the playlist, select
rtists, genres, and composers to a nt views of the music menu, select
9206321_N95-1_en_Apac.book Page 26 Friday, October 19, 2007 11:52 AM
Copyright © 2007 Nokia. All rights reserved.
Med
ia a
pplic
atio
ns press . To skip to the previous song, press again within 2 seconds after a song has started.
You can also use the scroll key to control the player.
To switch random play ( ) on or off, select Options > Shuffle.
To repeat the current song ( ), all songs ( ), or to switch repeat off, select Options > Repeat.
To adjust the volume, use the volume key.
To modify the tone of the music playback, select Options > Equaliser.
To modify the balance, loudness, and stereo image, or to enhance bass, select Options > Audio settings.
To view a visualization during playback, select Options > Start visualisation.
To return to the standby mode and leave the player playing in the background, press , or to switch to another open application, press and hold .
Music menuTo select more music to play in Now playing view, select Options > Go to Music menu.
The music menu shows the music available in the device and compatible memory card (if inserted). All songs lists
all music. To view sorteGenres, or Composers.
To open the view that dpress and hold .
PlaylistsTo view and manage plaPlaylists. The followingMost played tracks, Readditions.
To view details of the playCreate a playlist1 Select Options > Cr2 Enter a name for the3 Select artists to find
the playlist. Press under an artist title,press .
4 When you have madcompatible memorysaved to the memor
To add more songs laterOptions > Add songs.
To add songs, albums, aplaylist from the differe
007 Nokia. All rights reserved.
Med
ia a
pplic
atio
ns
27
ngsr the following settings:
the access point to use when store.
ay be able to edit the settings by ings.
okia Music Store from your kia.com. In the main page, select
ons.
om a compatible PC or other a compatible USB cable or or details, see "Bluetooth .
r you have updated the song n the Music menu, select library
C for music transfer:P operating system (or later)of Windows Media Player et more detailed information Player compatibility from the
the Nokia website.e version no. 1.6 or later
9206321_N95-1_en_Apac.book Page 27 Friday, October 19, 2007 11:52 AM
Copyright © 2
an item and Options > Add to a playlist > Saved playlist or New playlist.
To remove a song from a playlist, select Options > Remove from playlist. This deletion does not delete the song from the device; it only removes it from the playlist.
To reorder songs in a playlist, scroll to the song you want to move, and select Options > Reorder list. To grab songs and drop them to a new position, use the scroll key.
Nokia Music Store In the Nokia Music Store (network service) you can search, browse, and purchase music to download to your device. To purchase music, you first need to register for the service.
To check the Nokia Music Store availability in your country, visit music.nokia.com.
To access the Nokia Music Store, you must have a valid internet access point in the device. For more details, see "Access points", on page 117.
To open the Nokia Music Store, press , and select Music > Music store. In the main page, select Help for further instructions.
Tip! To find more music in different categories of the music menu, select Options > Go to Music store in the music player.
Music store settiYou may be asked to ente
Default acc. pt. — Selectconnecting to the music
In the music store, you mselecting Options > Sett
You can also access the Ncompatible PC at music.noHelp for further instructi
Transfer musicYou can transfer music frcompatible devices usingBluetooth connectivity. Fconnectivity", on page 18
To refresh the library afteselection in your device, iOptions > Refresh Music
The requirements of the P• Microsoft Windows X• A compatible version
application. You can gabout Windows MediaNokia N95 section of
• Nokia Nseries PC Suit
28
formation, see the corresponding guides and helps.
ationsation, you can select the songs ant to move, copy, or remove.
connected with Windows Media vice in the navigation pane on the ne device is connected.
n pane, browse the music files on ant to synchronise.
to the Sync List on the right.
unt of available memory in your nc List.
albums, select an item in the Sync select Remove from list.
nisation, click Start Sync.
nisation
matic synchronisation function in er, click the Sync tab, select Nokia ync..., and check the Sync this ly check box.
9206321_N95-1_en_Apac.book Page 28 Friday, October 19, 2007 11:52 AM
Copyright © 2007 Nokia. All rights reserved.
Med
ia a
pplic
atio
ns Transfer music from PCYou can use three different methods to transfer music:• To view your device on PC as an external hard drive
where you can transfer any data files, make the connection with a compatible USB cable or Bluetooth connectivity. If you are using the USB cable, select Data transfer as the connection mode. A compatible memory card needs to be inserted in the device.
• To synchronise music with Windows Media Player, connect the compatible USB cable and select Media player as the connection mode. A compatible memory card needs to be inserted in the device.
• To use Nokia Music Manager in Nokia Nseries PC Suite, connect the compatible USB cable and select PC Suite as the connection mode.
To change the default USB connection mode, press , select Tools > Connectivity > USB > USB mode.
Both Windows Media Player and Nokia Music Manager in Nokia Nseries PC Suite have been optimized for transferring music files. For information about transferring music with Nokia Music Manager, see the Nokia Nseries PC Suite user guide.
Music transfer with Windows Media PlayerThe functionality of the music synchronisation may vary between different versions of the Windows Media Player
application. For more inWindows Media Player
Manual synchronisWith manual synchroniand playlists that you w
1. After your device is Player, select your deright, if more than o
2. In the left navigatioyour PC which you w
3. Drag and drop songs
You can see the amodevice above the Sy
4. To remove songs or List, right-click, and
5. To start the synchro
Automatic synchro
1. To activate the autoWindows Media PlayHandset > Set Up Sdevice automatical

007 Nokia. All rights reserved.
Med
ia a
pplic
atio
ns
29
to the radio program on the tions that offer Visual Radio ervice uses packet data (network the FM radio while using other
t of all the stations that offer tp://www.visualradio.com.
to the Visual Radio service, the ns in your area may not support
costs, and to subscribe to the ice provider.
call or answer an incoming call o. The radio is muted when there
iohe radio broadcast depends on station in that particular area.
an antenna other than the A compatible headset or attached to the device for the erly.
sic > Radio. To start a station , or press and hold the media
9206321_N95-1_en_Apac.book Page 29 Friday, October 19, 2007 11:52 AM
Copyright © 2
2. Select the playlists you want to synchronise automatically in the Available playlists pane, and click Add.
The selected items are transferred to the Playlists to sync pane.
3. To finalise the setup for automatic synchronisation, click Finish.
If the Sync this device automatically check box is selected and you connect your device, the music library in your device is automatically updated based on playlists you have selected in Windows Media Player. If no playlists have been selected, the whole PC music library is selected for synchronisation. If there is not enough free memory in your device, Windows Media Player selects manual synchronisation automatically.
To stop automatic synchronisation, click the Sync tab, and select Stop Sync to "Nokia Handset".
Radio Press , and select Music > Radio.
When you open Visual Radio for the first time, a wizard helps you to save local stations.
You can use the application as a traditional FM radio with automatic tuning and saved stations, or with parallel
visual information relateddisplay, if you tune to staservice. The Visual Radio sservice). You can listen toapplications.
You can see the latest lisVisual Radio service at ht
If you do not have accessoperators and radio statioVisual Radio.
To check availability and service, contact your serv
You can normally make awhile listening to the radiis an active call.
Listen to the radNote that the quality of tthe coverage of the radio
The FM radio depends onwireless device antenna. enhancement needs to beFM radio to function prop
Press , and select Musearch, select or
30
ent content for a tuned station, select visual service. If the visual service or the station, enter it, or select t in the station directory (network
the visual service is established, urrent visual content.
saved stations, select Options >
ion, select Options > Station > e visual content for a station with ect Options > Station > Start
ls, select Options > Station > Edit.
gs and from the following:
whether a tone is played when the
9206321_N95-1_en_Apac.book Page 30 Friday, October 19, 2007 11:52 AM
Copyright © 2007 Nokia. All rights reserved.
Med
ia a
pplic
atio
ns keys or . To change the frequency manually, select Options > Manual tuning.
If you have previously saved radio stations, to go to the next or previous saved station, select or , or press the media keys or .
To adjust the volume, press the volume keys.
To listen to the radio using the loudspeaker, select Options > Activate loudspeaker.
Warning: Listen to music at a moderate level. Continuous exposure to high volume may damage your hearing. Do not hold the device near your ear when the loudspeaker is in use, because the volume may be extremely loud.
To view available stations based on location, select Options > Station directory (network service).
To save the current tuned station to your station list, select Options > Save station. To open the list of your saved stations, select Options > Stations.
To return to the standby mode and leave the FM radio playing in the background, select Options > Play in background.
View visual contTo view available visual
or Options > StartID has not been saved fRetrieve to search for iservice).
When the connection tothe display shows the c
Saved stationsTo open the list of yourStations.
To listen to a saved statListen. To view availablVisual Radio service, selvisual service.
To change station detai
SettingsSelect Options > Settin
Start-up tone — Selectapplication is started.
007 Nokia. All rights reserved.
Med
ia a
pplic
atio
ns
31
sing other connections. For plan can allow large data fee.
s available within range, press nnectivity > Conn. mgr. > ks.
ess point in a network, select point.
ttings, press and select tions > Settings > Connection.
elect the access point to define ternet.
fine the podcast search service to
tings, press , and select ptions > Settings > Download.
tion where you want to save your of storage space, mass memory
how often podcasts are updated.
9206321_N95-1_en_Apac.book Page 31 Friday, October 19, 2007 11:52 AM
Copyright © 2
Auto-start service — Select Yes to have the Visual Radio service start automatically when you select a saved station that offers Visual Radio service.
Access point — Select the access point used for the Visual Radio data connection. You do not need an access point to use the application as an ordinary FM radio.
Current region — Select the region you are currently located in. This setting is displayed only if there was no network coverage when the application was started.
Nokia Podcasting
With the Nokia Podcasting application, you can search, discover, subscribe to, and download podcasts over the air, and play, manage, and share audio and video podcasts with your device.
To open Nokia Podcasting, press , and select Music > Podcasting.
SettingsBefore using Nokia Podcasting, set your connection and download settings.
The recommended connection method is wireless LAN (WLAN). Check with your service provider for terms and
data service fees before uexample, a flat rate data transfers for one monthly
To search for wireless LAN and select Tools > Co
Available WLAN networ
To create an internet accOptions > Define access
Connection settingsTo edit the connection seMusic > Podcasting > OpDefine the following:
Default access point — Syour connection to the in
Search service URL — Debe used in Search.
Download settingsTo edit the download setMusic > Podcasting > ODefine the following:
Save to — Define the locapodcasts. For optimal useis recommended.
Update interval — Define
32
the podcast search service you set ions > Settings > Connection >
press ,select Music > nd enter the desired keywords.
for podcast titles and keywords in specific episodes. General topics, r hip-hop, usually give better cific team or artist.
channel or channels and add it to ubscribe. You can also add a ts by selecting one.
elect Options > New search.
e podcast select Options > Open ice).
odcast, select Options >
ast or podcasts to another ct Options > Send.
ay vary.
ind new podcast episodes to which
9206321_N95-1_en_Apac.book Page 32 Friday, October 19, 2007 11:52 AM
Copyright © 2007 Nokia. All rights reserved.
Med
ia a
pplic
atio
ns Next update date — Define the date of the next automatic update.
Next update time — Define the time of next automatic update.
Automatic updates only occur if a specific default access point is selected and Nokia Podcasting is running. If Nokia Podcasting is not running, the automatic updates are not activated.
Download limit (%) — Define the size of the memory that is used for podcast downloads.
If limit exceeds — Define what to do if the downloads exceed the download limit.
Setting the application to retrieve podcasts automatically may involve the transmission of large amounts of data through your service provider’s network. Contact your service provider for information about data transmission charges.
To restore the default settings, select Options > Restore default in the Settings view.
SearchSearch helps you to find podcasts by keyword or title.
The search engine uses up in Podcasting > OptSearch service URL.
To search for podcasts, Podcasting > Search, a
Tip! Search looksdescriptions, not such as football oresults than a spe
To subscribe to a markedyour Podcasts, select Spodcast to your Podcas
To start a new search, s
To go the website of thweb page (network serv
To see the details of a pDescription.
To send a selected podccompatible device, sele
The available options m
DirectoriesDirectories help you to fto subscribe.
007 Nokia. All rights reserved.
Med
ia a
pplic
atio
ns
33
age with an .opml file sent by pen the file to save the file into Open Received to subscribe to your Podcasts.
to a podcast, from Directories, RL, you can manage, download, asts.
ave subscribed to, select o see individual episode titles (an dia file of a podcast), select the
t the episode title. To download, selected or marked episodes, ad or Continue download. You isodes at the same time.
cast during download or after ct Podcasts > Options > Play
ts can be found in Podcasts wn until the music library is
y vary.
9206321_N95-1_en_Apac.book Page 33 Friday, October 19, 2007 11:52 AM
Copyright © 2
To open Directories, press , and select Music > Podcasting > Directories.
Contents of the Directories change. Select the desired directory folder to update it (network service). When the color of the folder changes, press the scroll key again to open it.
Directories can include top podcasts listed by popularity or themed folders.
To open the desired folder topic, press the scroll key. A list of podcasts is displayed.
To subscribe to a podcast, select the title, and press the scroll key. After you have subscribed to episodes of a podcast, you can download, manage, and play them in Podcasts.
To add a new directory or folder, select Options > New > Web directory or Folder. Enter a title, URL of the .opml (Outline Processor Markup Language), and select Done.
To edit the selected folder, web link, or web directory, select Options > Edit.
To import an .opml file stored on your device, select Options > Import OPML file. Select the location of the file, and import it.
To send a directory folder as a multimedia message or by Bluetooth connectivity, select the folder and Options > Send.
When you receive a messBluetooth connectivity, oReceived in Directories. any of the links to add to
DownloadAfter you have subscribedSearch, or by entering a Uand play episodes in Podc
To see the podcasts you hPodcasting > Podcasts. Tepisode is a particular mepodcast title.
To start a download, selecor continue downloadingselect Options > Downlocan download multiple ep
To play a portion of a podpartial downloading, selepreview.
Fully downloaded podcasfolder, but will not be shorefreshed.
The available options ma
34
nd a group of selected podcasts at Mark/Unmark mark the desired tions to choose the desired action.
the podcast (network service), web page.
the opportunity to interact with ting and voting. To connect to the
ct Options > View comments.
work service), you can download ver the air from compatible sing packet data or wireless LAN.
deo clips from a compatible PC to em in Video centre.
he same file formats as RealPlayer. ge 36.
redefined services. To connect to vailable services that you can add Add new services.
rovide free content or charge a fee. service or from the service
9206321_N95-1_en_Apac.book Page 34 Friday, October 19, 2007 11:52 AM
Copyright © 2007 Nokia. All rights reserved.
Med
ia a
pplic
atio
ns Play and manage podcastsTo display the available episodes from the selected podcast, select Options > Open. Under each episode, you will see the file format, the size of the file, and time of the upload.
When the podcast is fully downloaded, to play the full episode, select Podcasts > Options > Play, or press and select Music > Music player > Podcasts.
To update the selected podcast, or marked podcasts, for a new episode, select Options > Update.
To stop the updating of the selected podcast or marked podcasts, select Options > Stop update.
To add a new podcast by entering the URL of the podcast, select Options > New podcast.
If you do not have an access point defined or if during packet data connection you are asked to enter a user name and password, contact your service provider.
To edit the URL of the selected podcast, select Options > Edit.
To delete a downloaded podcast or marked podcasts from your device, select Options > Delete.
To send the selected podcast or marked podcasts to another compatible device as .opml files as a multimedia message or by Bluetooth connectivity, select Options > Send.
To update, delete, and seonce, select Options > podcasts, and select Op
To open the website of select Options > Open
Some podcasts provide the creators by commeninternet to do this, sele
Video centre With Video centre (netand stream video clips ointernet video services uYou can also transfer viyour device, and view th
Video centre supports tSee "RealPlayer", on pa
Your device may have pthe internet to browse ato Video centre, select
Service providers may pCheck the pricing in theprovider.
007 Nokia. All rights reserved.
Med
ia a
pplic
atio
ns
35
clips distributed in the internet u can add new feeds to Internet
e "Settings", on page 36.t the Internet videos folder. Your
, select Options > Feed
ilable in a feed, scroll to it, and rmation about a video, select ils. scroll to it, and select Options > e downloaded video, press .
videosnloading videos are saved in s. To play a downloaded video,
o clips from a compatible PC to m in Video centre > My videos. s to be available in Video centre, e location C:\Data\My Videos in r E:\My Videos in a compatible
r example, File manager available to transfer files to the correct
9206321_N95-1_en_Apac.book Page 35 Friday, October 19, 2007 11:52 AM
Copyright © 2
Find and view videos1 Press , and select Video centre.2 To connect to a service, select the desired video service.3 The device updates and displays the content available
in the service. To view videos by categories (if available), press and to scroll the other tabs.
4 To view information about a video, select Options > Video details.Some clips can be streamed over the air, but others must be first downloaded to your device. To download, select Options > Download.To stream a clip or view a downloaded clip, select Options > Play.
5 When the clip is playing, use the media keys to control the player. To adjust the volume, use the volume key. To view the video in full screen, pause or stop the video, and select Options > Resume in full screen or Play in full screen.
Downloads continue in the background if you exit the application. The downloaded videos are saved in Video Centre > My videos.
To connect to the internet to browse available services that you can add to the main view, select Add new services.
Internet videosInternet videos are video using RSS-based feeds. Yovideos in the settings. Se1 In Video centre, selec
feeds are displayed.To add or delete feedssubscriptions.
2 To view the videos avapress . To view infoOptions > Video deta
3 To download a video, Download. To play th
Play downloadedThe downloaded and dowVideo centre > My videopress .
You can also transfer videyour device, and view theIn order for the video clipyou must save them in ththe device memory (C:\) omemory card (E:\). Use, foin Nokia Nseries PC Suitelocation.
36
ervice received from the service
e a user name and a password that service provider.
ngs, select Options > Settings and
Select the access points used for ing packet data access points to lve transmission of large amounts rvice provider's network. Contact r information about data
elect whether downloaded videos memory or a compatible memory ory becomes full, the device saves
memory, if available. If there is not er memory, the application me of the oldest watched videos.
ether to view thumbnail images in services.
plications > Media > RealPlayer. n play video clips, or stream media t saving them to the device first.
9206321_N95-1_en_Apac.book Page 36 Friday, October 19, 2007 11:52 AM
Copyright © 2007 Nokia. All rights reserved.
Med
ia a
pplic
atio
ns When the clip is playing, use the media keys to control the player. To adjust the volume, use the volume key. To view the video in full screen, pause or stop the video, and select Options > Resume in full screen or Play in full screen.
If there is not enough free space in the device memory and compatible memory card, the application automatically deletes some of the oldest watched videos when new videos are downloaded. indicates videos that may soon be deleted. To prevent a video from being automatically deleted ( ), select Options > Protect.
To delete a video, select Options > Delete. To cancel an ongoing download, select Options > Cancel download. To change the folder or memory location of a video, select Options > Organise and the desired option.
SettingsDefine the services1 In Video centre, select Options > Settings > Video
service selection.2 To select video services, select Video on demand. To
add or delete internet video feeds, select Internet videos.
3 Select the services you want to appear in the application.To add a new internet video feed that is not displayed in the list, select Options > Add feed. Enter the name
and address of the sprovider.Some services requiryou receive from the
To define the other settifrom the following:
Default access points —the data connection. Usdownload files may invoof data through your seyour service provider fotransmission charges.
Preferred memory — Sare saved in the device card. If the selected memthe content in the otherenough space in the othautomatically deletes so
Thumbnails — Select whthe video lists of video
RealPlayer Press , and select ApWith RealPlayer, you cafiles over the air withou
007 Nokia. All rights reserved.
Med
ia a
pplic
atio
ns
37
. The content is not saved in your
gser settings in a special message
. See "Data and settings", on ation, contact your service
s and from the following:
trast of the video or have repeat video clips after they
hether to use a proxy server, s point, and set the port range ontact your service provider for
with compatible flash files made , and select Applications >
roll to a flash file, and press .
9206321_N95-1_en_Apac.book Page 37 Friday, October 19, 2007 11:52 AM
Copyright © 2
RealPlayer supports files with extensions such as .3gp, .mp4 or .rm. However, RealPlayer does not necessarily support all file formats or all the variations of file formats.
In landscape view, use the media keys to control the player.
Play video clips1 To play a saved media file, select Options > Open and
from the following:Most recent clips — to play one of the last six files played in RealPlayerSaved clip — to play a file saved in Gallery.
2 Scroll to a file, and press to play the file.
To adjust the volume, use the volume key.
Stream content over the airMany service providers require you to use an internet access point (IAP) for your default access point. Other service providers allow you to use a WAP access point.
In RealPlayer, you can only open an rtsp:// URL address. However, RealPlayer recognises an http link to a .ram file.
To stream content over the air, select a streaming link saved in Gallery, on a web page, or received in a text message or multimedia message. Before live content begins streaming, your device connects to the site and
starts loading the contentdevice.
RealPlayer settinYou may receive RealPlayfrom the service providerpage 80. For more informprovider.
Select Options > Setting
Video — to adjust the conRealPlayer automaticallyfinish playing
Streaming — to select wchange the default accesused when connecting. Cthe correct settings.
Adobe To view, play, and interactfor mobile devices, press Media > Flash Player. Sc
38
or DVD-ROM supplied with your
PC Suite (includes Nokia rivers for USB connection).
g for PC.
is not already installed on your PC, e time with Nokia Lifeblog for PC.
vice and your PCand a compatible PC using a USB
e installed Nokia Nseries PC Suite.ta cable to the device and the PC. ld be PC Suite, see "USB", on page ct your device to the PC for the ave installed Nokia Nseries PC the specific driver for your device. le.log PC application.
and a compatible PC using nology:e installed Nokia Nseries PC Suite
e paired your device and the PC ireless technology with Get Nseries PC Suite.
9206321_N95-1_en_Apac.book Page 38 Friday, October 19, 2007 11:52 AM
Copyright © 2007 Nokia. All rights reserved.
Med
ia a
pplic
atio
ns Nokia Lifeblog To start Lifeblog on your device, press , and select Applications > Media > Lifeblog.
Nokia Lifeblog is a combination of software for mobile phone and PC that keeps a multimedia diary of the items that you collect with your device. Nokia Lifeblog automatically keeps track of your multimedia items and organises your photos, videos, sounds, text messages, multimedia messages, and weblog posts into a chronology that you can browse, search, share, publish, and back up.
For more information on weblog services and their compatibility with Nokia Lifeblog, visit www.nokia.com/lifeblog, or press F1 in the Nokia Lifeblog PC application to open Nokia Lifeblog Help.
Installation on your PCBefore you install Nokia Lifeblog on a compatible PC, you need the following:• 1 GHz Intel Pentium or equivalent, 128 MB RAM• 400 MB of available hard disk space (if Microsoft
DirectX and Nokia Nseries PC Suite must be installed) • Graphics capability of 1024x768 and 24-bit color• 32 MB graphics card• Microsoft Windows 2000 or Windows XP
To install Nokia Lifeblog on your PC:
1 Insert the CD-ROM device.
2 Install Nokia NseriesConnectivity Cable d
3 Install Nokia Lifeblo
If Microsoft DirectX 9.0it is installed at the sam
Connect your deTo connect your device data cable:1 Ensure that you hav2 Connect the USB da
The USB mode shou22. When you connefirst time after you hSuite, the PC installsThis may take a whi
3 Start the Nokia Lifeb
To connect your device Bluetooth wireless tech1 Ensure that you hav
on your PC.2 Ensure that you hav
through Bluetooth wConnected in Nokia
007 Nokia. All rights reserved.
Med
ia a
pplic
atio
ns
39
ifeblog items, send them to your r others to see.
account with a weblog service, gs that you use as the destination e weblog account to Nokia ed weblog service for Nokia Six Apart, www.typepad.com.
e weblog account in Nokia Settings > Blog. On your PC, account manager window.
from your device:ites, select the items that you eb. to Web. for the first time, Nokia Lifeblog from the weblog server.g opens. Select the weblog you Post to: list. If you have created te the weblog list, select og list. tion for the post. You can also description in the body text field.ady, select Options > Send.
9206321_N95-1_en_Apac.book Page 39 Friday, October 19, 2007 11:52 AM
Copyright © 2
3 Activate Bluetooth connectivity on your device and on your PC. For details, see "Bluetooth connectivity", on page 18 and the documentation for your PC.
Copy itemsTo copy new or edited items from your device to your PC, and copy the selected items from your PC to your device:1 Connect your device to the PC.2 Start the Nokia Lifeblog application on your PC.3 In the Nokia Lifeblog PC application, select File > Copy
from Phone and to Phone.The new items from your device are copied to your PC. The items on the To Phone view on your PC are copied to your device.
Browse Timeline and FavoritesWhen you start Nokia Lifeblog on your device, the Timeline view opens and shows your multimedia items. To open your saved favorites, select Options > View favourites.
When you start Nokia Lifeblog on your PC, you have several ways to move around in the Timeline and Favourites views. The fastest way is to grab the slider handle and move it forward or backward, fast or slow. Alternatively, click the time bar to select a date, use the Go to date feature, or use the arrow keys.
Post to the webTo share your best Nokia Lweblog on the internet fo
You must first create an create one or more webloof your posts, and add thLifeblog. The recommendLifeblog is TypePad from
On your device, to add thLifeblog, select Options >edit accounts in the Blog
To post items to the web1 In Timeline or Favour
want to post to the w2 Select Options > Post3 If you use the feature
retrieves a weblog list4 The weblog post dialo
want to use from the new weblogs, to updaOptions > Refresh bl
5 Enter a title and a capwrite a longer story or
6 When everything is re
40
9206321_N95-1_en_Apac.book Page 40 Friday, October 19, 2007 11:52 AM
Copyright © 2007 Nokia. All rights reserved.
Med
ia a
pplic
atio
ns To post items to the web from your PC:1 In the timeline of favorites, select the items (a
maximum of 50) that you want to post to the web.2 Select File > Post to the Web....3 Enter a title and a caption for the post. You can also
write a longer story or description in the body text field.4 Select the weblog that you want to use from the Post
to: list.5 When everything is ready, click the Send button.
Import items from other sourcesIn addition to the .jpeg images of your device, you can also import .jpeg images and .3gp and .mp4 video clips, .amr sound files, and .txt text files from other sources (such as a CD, DVD, or folders on your hard disk) into Nokia Lifeblog.
To import images or videos from a compatible PC to Nokia Lifeblog for PC, in the timeline or favorites, select File > Import from PC....
007 Nokia. All rights reserved.
Cam
era
41
te the following:p the camera still.lly zoomed picture is lower than picture.the battery saving mode if there a moment. To continue taking .
following:
cover
he de,
om
n ure ain lable in close-up and landscape ked focus indicator appears on s was not locked, the red focus
ease the capture key, and press it
9206321_N95-1_en_Apac.book Page 41 Friday, October 19, 2007 11:52 AM
Copyright © 2
CameraYour Nokia N95 has two cameras, a high resolution camera on the back of the device (the main camera in landscape mode) and a lower resolution camera on the front (the secondary camera in portrait mode). You can use both cameras to take still pictures and record videos.
Your device supports an image capture resolution of 2592x1944 pixels using the main camera. The image resolution in this guide may appear different.
The images and video clips are automatically saved in the Images & vids. folder in Gallery. The cameras produce .jpeg images. Video clips are recorded in the MPEG-4 file format with the .mp4 file extension, or in the 3GPP file format with the .3gp file extension (sharing quality). See "Video settings", on page 49.
Tip! To enter Gallery and view the pictures you have taken, press the review key on the side of your device twice.
You can send images and video clips in a multimedia message, as an e-mail attachment, or by using Bluetooth connectivity, infrared, or wireless LAN connection. You can also upload them to a compatible online album. See "Share online", on page 57.
Take picturesWhen taking a picture, no• Use both hands to kee• The quality of a digita
that of a nonzoomed • The camera goes into
are no keypresses for pictures, press
To take a picture, do the 1 To activate the main
camera, open the lens by using the camera activation switch. If tcamera is in Video moselect Image mode frthe active toolbar.
2 To lock the focus on aobject, press the captkey halfway down (mcamera only, not avaiscenes). The green locthe display. If the focuindicator appears. Rel

42
indicator.
M - Med., or MMS 0.3M - Small.isplays the estimated number of ure using the current image quality in use (the counter is not displayed age capture).( ) and memory card ( ) re images are saved.
you with shortcuts to different re and after taking a picture or l to items, and select them by ou can also define when the active display.
9206321_N95-1_en_Apac.book Page 42 Friday, October 19, 2007 11:52 AM
Copyright © 2007 Nokia. All rights reserved.
Cam
era halfway down again. You can, however, take the
picture without locking the focus.3 To take a picture, in the main camera, press the capture
key. Do not move the device before the image is saved.
To zoom in or out, use the zoom key in your device.
To make lighting and color adjustments before taking a picture, use the scroll key to scroll through the active toolbar. See "Setup settings — adjust color and lighting", on page 45. Saving the captured image may take longer if you change the zoom, lighting, or color settings.
To activate the front camera, select Options > Use secondary camera.
To leave the camera open in the background, and use other applications, press . To return to the camera, press the capture key.
To close the main camera, close the lens cover.
Still image camera indicatorsThe still image camera viewfinder displays the following:1 The current capture mode indicator.2 The active toolbar, which you can scroll through before
capturing the image to select different items and settings (the active toolbar is not displayed during focus and image capture). See "Active toolbar", on page 42.
3 Battery charge level4 The image
resolution indicator indicates whether the quality of the image is Print 5M - Large, Print 3M - Medium, Print 2M - Medium, E-mail 0.8
5 The image counter dimages you can captsetting and memory during focus and im
6 The device memory indicators show whe
Active toolbarActive toolbar provides items and settings beforecording a video. Scrolpressing the scroll key. Ytoolbar is visible on the
007 Nokia. All rights reserved.
Cam
era
43
ct the current status of the
depending on the capture mode
tions in "After taking a picture", ing a video", on page 48, and 51 in Gallery.
cture, select the following from the nly if Show captured image is
amera settings): keep the image, select Delete.g multimedia, e-mail, Bluetooth
press the call key, or select Send. , see "Messaging", on page 77, ty", on page 18. This option is not tive call. image to a call recipient during end to caller (only available
compatible online album, select are. If you are already signed into ct Post to (available only if you t for a compatible online album). page 57.
9206321_N95-1_en_Apac.book Page 43 Friday, October 19, 2007 11:52 AM
Copyright © 2
If you want the active toolbar to be visible before and after taking a picture or recording a video, select Options > Show icons. To view the active toolbar only when you need it, select Options > Hide icons. Only the capture mode indicator is shown on the display. To activate the active toolbar, press the scroll key. To hide it again, press the capture key half way down.
Before taking a picture or recording a video, in the active toolbar, select from the following:
to switch between the video and image modes
to select the scene
to select the flash mode (images only)
to activate the self-timer (images only). See "You in the picture — self-timer", on page 47.
to activate the sequence mode (images only). See "Take pictures in a sequence", on page 46.
to select a color effect
to show or hide the viewfinder grid (images only)
to adjust white balance
to adjust the exposure compensation (images only)
to adjust light sensitivity (images only)
to adjust contrast (images only)
to adjust sharpness (images only)
The icons change to reflesetting.
The available options varyand view you are in.
See also active toolbar opon page 43, "After record"Active toolbar", on page
After taking a piAfter you take the pictureactive toolbar (available oset to Yes in still image c• If you do not want to• To send the image usin
connectivity, infrared,For more information"Bluetooth connectiviavailable during an acYou can also send thean active call. Select Sduring an active call).
• To send the image to aSign in for Online Shan online service, selehave set up an accounSee "Share online", on
44
end the image through MMS, all.
ly available in the main camera.
whether you want to save the in the gallery. If you select Yes, a
opens.
— Select Yes if you want to see the is taken, or No if you want to s immediately.
Define the default name for the
(main camera only) — Select On to nts to be smooth and continuous ended digital zoom. If you want to the selected image quality is
the tone you want to hear when
t where to store your images.
whether you want the image to be p when you open it in the gallery.
s — Select Yes to return the mera settings.
9206321_N95-1_en_Apac.book Page 44 Friday, October 19, 2007 11:52 AM
Copyright © 2007 Nokia. All rights reserved.
Cam
era • To tag images to the Print Basket for later printing,
select Add to Print Basket.
To use the picture as wallpaper in the active standby, select Options > Set as wallpaper.
To set the image as a call image for a contact, select Set as contact call img..
To return to the viewfinder to capture a new image, press the capture key.
Still image camera settingsThere are two kinds of settings for the still image camera: Image setup and main settings. To adjust Image setup, see "Setup settings — adjust color and lighting", on page 45. The setup settings return to the default settings after you close the camera, but the main settings remain the same until you change them again. To change the main settings, select Options > Settings and from the following:
Image quality — Print 5M - Large (2592x1944 resolution), Print 3M - Medium (2048x1536 resolution), Print 2M - Medium (1600 x 1200), E-mail 0.8M - Med. (1024x768 resolution), or MMS 0.3M - Small (640x480 resolution). The better the image quality, the more memory the image consumes. If you want to print the image, select Print 5M - Large, Print 3M - Medium, or Print 2M - Medium. If you want to send it through e-mail, select E-
mail 0.8M - Med.. To sselect MMS 0.3M - Sm
These resolutions are on
Add to album — Selectimage to a certain albumlist of available albums
Show captured image captured image after itcontinue taking picture
Default image name —captured images.
Extended digital zoomallow the zoom incremebetween digital and extlimit the zoom to wheremaintained, select Off.
Capture tone — Select you take a picture.
Memory in use — Selec
Rotate image — Select rotated the right way u
Restore camera settingdefault values to the ca
007 Nokia. All rights reserved.
Cam
era
45
(images only) — Adjust the era.
flash mode. See "Flash",
olor effect from the list.
only) — Select the light The darker the environment, the y should be.
es to match any settings you the change affects the pictures
y depending on the selected
mera specific; if you change the camera, the settings in the main e setup settings do, however, ge and video modes. The setup ault settings when you close the
, the color and lighting settings ed scene. See "Scenes", on the setup settings after selecting
9206321_N95-1_en_Apac.book Page 45 Friday, October 19, 2007 11:52 AM
Copyright © 2
FlashThe flash is available only in the main camera.
Keep a safe distance when using the flash. Do not use the flash on people or animals at close range. Do not cover the flash while taking a picture.
The camera has an LED flash for low light conditions. The following flash modes are available for the still image camera: Automatic ( ), R. eye redu. ( ), On ( ), and Off ( ).
To change the flash mode, in the active toolbar, select the desired flash mode.
Setup settings — adjust color and lightingTo enable the camera to reproduce colors and lighting more accurately, or to add effects to your pictures or videos, use the scroll key to scroll through the active toolbar, and select from the following options:
White balance — Select the current lighting condition from the list. This allows the camera to reproduce colors more accurately.
Exposure compensationexposure time of the cam
Flash — Select the desiredon page 45.
Colour tone — Select a c
Light sensitivity (imagessensitivity of the camera.higher the light sensitivit
The screen display changmake, so that you see howor videos.
The available settings varcamera.
The setup settings are casettings in the secondarycamera do not change. Thtransfer between the imasettings return to the defcamera.
If you select a new sceneare replaced by the selectpage 46. You can change a scene if needed.
46
ke six pictures or more in a mory available), in the active o sequence mode > Burst to take period for taking pictures. The n depends on the available
ss the capture key. To stop taking o take more than six pictures, press y. To stop taking pictures, release n capture up to 100 images, ble memory.
taking pictures, select Switch to time preriod. To start taking ure key. To stop taking pictures ress the capture key again.
res, they are shown in a grid on the re, press to open it. If you used pictures, the last taken picture is view other pictures, press .
quence mode with the self-timer. er, the maximum amount of
ce mode viewfinder, press the
9206321_N95-1_en_Apac.book Page 46 Friday, October 19, 2007 11:52 AM
Copyright © 2007 Nokia. All rights reserved.
Cam
era Scenes
A scene helps you to find the right color and lighting settings for the current environment. The settings of each scene have been set according to a certain style or environment.
Scenes are only available in the main camera.
In the active toolbar, select from the following options:
Video scenes
Automatic ( )(default) and Night ( )
Image scenes
Auto ( ) (default), User defined ( ), Close-up mode( ), Portrait ( ), Landscape ( ), Sports ( ), Night ( ), and Night portrait ( ).
When you take pictures, the default scene is Auto. You can select the User defined scene as the default scene.
To make your own scene suitable for a certain environment, scroll to User defined, and select Options > Change. In the user defined scene you can adjust different lighting and color settings. To copy the settings of another scene, select Based on scene mode and the desired scene.
Take pictures in a sequenceThe sequence mode is available only in the main camera.
To set the camera to tasequence (if enough metoolbar, select Switch tsix pictures, or the timenumber of pictures takememory.
To take six pictures, prepictures, press Cancel. Tand hold the capture kethe capture key. You cadepending on the availa
To use a time period forsequence mode, and a pictures, press the captbefore the time ends, p
After you take the pictudisplay. To view a pictua time period for takingshown on the display. To
You can also use the seWhen using the self-timpictures is six pictures.
To return to the sequencapture key.
007 Nokia. All rights reserved.
Cam
era
47
, on page 50. The maximum 60 minutes (if enough memory
time, press Pause. The pause isplay. Video recording ording is set to pause and there a minute. Press Continue to
ubject, press the zoom key on the
r adjustments before recording a o scroll through the active gs — adjust color and lighting",
, on page 46.
era, select Options > Use
icatorslays the following:ode indicator.icator.
ich you can scroll through before ferent items and settings (the d during recording). See "Active
9206321_N95-1_en_Apac.book Page 47 Friday, October 19, 2007 11:52 AM
Copyright © 2
You in the picture — self-timerThe self-timer is available only in the main camera.
Use the self-timer to delay the capture so that you can include yourself in the picture. To set the self-timer delay, in the active toolbar, select Self timer > 2 seconds, 10 seconds, or 20 seconds. To activate the self-timer, select Activate. The quadrangle blinks and the device beeps when the timer is running. The camera takes the picture after the selected delay elapses.
To switch off Self timer, in the active toolbar, select Self timer > Off.
Tip! In the active toolbar, select Self timer > 2 seconds to keep your hand steady when taking a picture.
Record videos1 To activate the main camera, open the lens cover. If the
camera is in the Image mode, select Video mode from the active toolbar.
2 Press the capture key to start recording. In the portrait mode, use the scroll key for recording. The red record icon is shown and a tone sounds, indicating that recording has started.
3 Select Stop to stop recording. The video clip is automatically saved to the Images & vids. folder of
Gallery. See "Gallery"length of the video is available).
To pause recording at anyicon ( ) blinks on the dautomatically stops if recare no keypresses within resume recording.
To zoom in or out of the sside of the device.
To make lighting and colovideo, use the scroll key ttoolbar. See "Setup settinon page 45 and "Scenes"
To activate the front camsecondary camera.
Video capture indThe video viewfinder disp1 The current capture m2 The audio mute on ind3 The active toolbar, wh
recording to select diftoolbar is not displayetoolbar", on page 42.
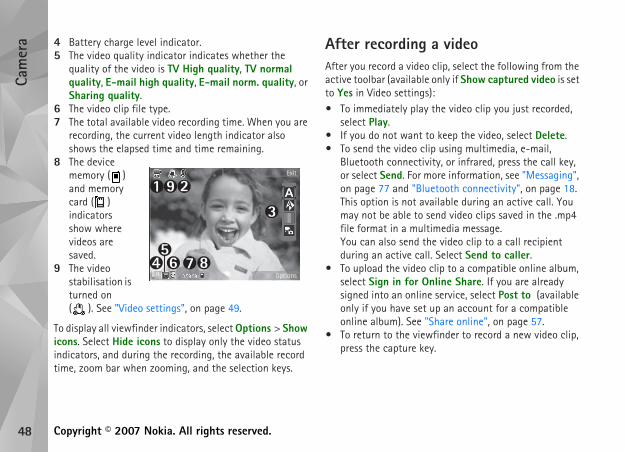
48
a video clip, select the following from the only if Show captured video is set ): the video clip you just recorded,
o keep the video, select Delete.ip using multimedia, e-mail, ity, or infrared, press the call key, ore information, see "Messaging", etooth connectivity", on page 18. ailable during an active call. You end video clips saved in the .mp4 imedia message.e video clip to a call recipient
l. Select Send to caller.clip to a compatible online album, nline Share. If you are already e service, select Post to (available up an account for a compatible Share online", on page 57.finder to record a new video clip,
y.
9206321_N95-1_en_Apac.book Page 48 Friday, October 19, 2007 11:52 AM
Copyright © 2007 Nokia. All rights reserved.
Cam
era 4 Battery charge level indicator.
5 The video quality indicator indicates whether the quality of the video is TV High quality, TV normal quality, E-mail high quality, E-mail norm. quality, or Sharing quality.
6 The video clip file type.7 The total available video recording time. When you are
recording, the current video length indicator also shows the elapsed time and time remaining.
8 The device memory ( ) and memory card ( ) indicators show where videos are saved.
9 The video stabilisation is turned on ( ). See "Video settings", on page 49.
To display all viewfinder indicators, select Options > Show icons. Select Hide icons to display only the video status indicators, and during the recording, the available record time, zoom bar when zooming, and the selection keys.
After recording After you record a videoactive toolbar (availableto Yes in Video settings• To immediately play
select Play.• If you do not want t• To send the video cl
Bluetooth connectivor select Send. For mon page 77 and "BluThis option is not avmay not be able to sfile format in a multYou can also send thduring an active cal
• To upload the video select Sign in for Osigned into an onlinonly if you have set online album). See "
• To return to the viewpress the capture ke
007 Nokia. All rights reserved.
Cam
era
49
ect On to reduce camera shaking .
Off if you do not want to record
hether you want to add the ertain album in Gallery. Select lable albums.
elect whether you want the first o clip to be shown on the display Select Play from the active Options > Play (secondary clip.
efine the default name for the
the default memory store: device (if inserted).
— Select Yes to return the era settings.
9206321_N95-1_en_Apac.book Page 49 Friday, October 19, 2007 11:52 AM
Copyright © 2
Video settingsThere are two kinds of settings for the video recorder: Video setup and main settings. To adjust Video setup settings, see "Setup settings — adjust color and lighting", on page 45. The setup settings return to the default settings after you close the camera, but the main settings remain the same until you change them again. To change the main settings, select Options > Settings and from the following:
Video quality — Set the quality of the video clip to TV High quality, TV normal quality, E-mail high quality, E-mail norm. quality (standard quality for playback through your handset), or Sharing quality. If you want to view the video on a compatible TV or PC, select TV High quality or TV normal quality, which have VGA resolution (640x480) and the .mp4 file format. You may not be able to send video clips saved in the .mp4 file format in a multimedia message. To send the video clip through MMS, select Sharing quality (QCIF resolution, .3gp file format). The size of the video clip recorded with Sharing quality is limited to 300 KB (about 20 seconds in duration) so that it can be conveniently sent as a multimedia message to a compatible device.
Video stabilisation — Selwhen recording the video
Audio recording — Selectsound.
Add to album — Select wrecorded video clip to a cYes to open a list of avai
Show captured video — Sframe of the recorded videafter the recording stops.toolbar (main camera) orcamera) to view the video
Default video name — Dcaptured video clips.
Memory in use — Define memory or memory card
Restore camera settingsdefault values to the cam
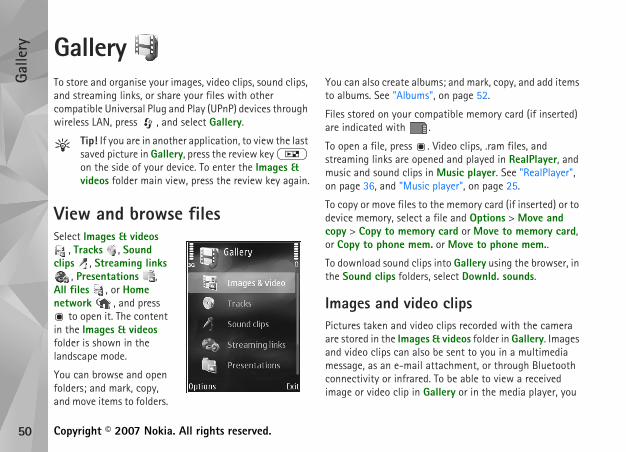
50
ms; and mark, copy, and add items ", on page 52.
patible memory card (if inserted) .
. Video clips, .ram files, and ned and played in RealPlayer, and n Music player. See "RealPlayer", player", on page 25.
the memory card (if inserted) or to file and Options > Move and y card or Move to memory card, . or Move to phone mem..
s into Gallery using the browser, in , select Downld. sounds.
o clipso clips recorded with the camera & videos folder in Gallery. Images be sent to you in a multimedia ttachment, or through Bluetooth . To be able to view a received allery or in the media player, you
9206321_N95-1_en_Apac.book Page 50 Friday, October 19, 2007 11:52 AM
Copyright © 2007 Nokia. All rights reserved.
Galle
ry Gallery To store and organise your images, video clips, sound clips, and streaming links, or share your files with other compatible Universal Plug and Play (UPnP) devices through wireless LAN, press , and select Gallery.
Tip! If you are in another application, to view the last saved picture in Gallery, press the review key on the side of your device. To enter the Images & videos folder main view, press the review key again.
View and browse filesSelect Images & videos
, Tracks , Sound clips , Streaming links
, Presentations , All files , or Home network , and press
to open it. The content in the Images & videos folder is shown in the landscape mode.
You can browse and open folders; and mark, copy, and move items to folders.
You can also create albuto albums. See "Albums
Files stored on your comare indicated with
To open a file, press streaming links are opemusic and sound clips ion page 36, and "Music
To copy or move files todevice memory, select acopy > Copy to memoror Copy to phone mem
To download sound clipthe Sound clips folders
Images and videPictures taken and videare stored in the Imagesand video clips can alsomessage, as an e-mail aconnectivity or infraredimage or video clip in G
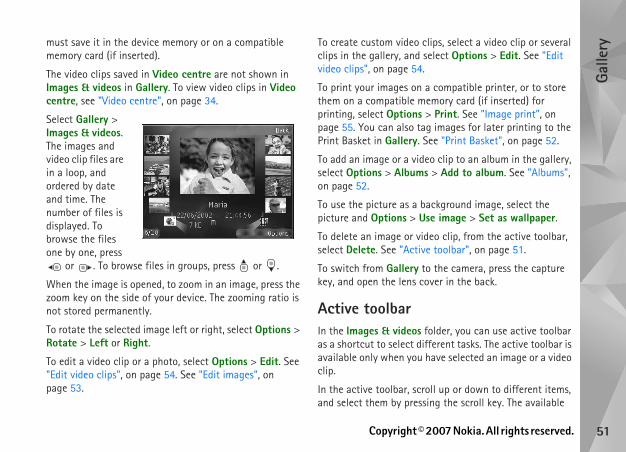
007 Nokia. All rights reserved.
Galle
ry
51
lips, select a video clip or several elect Options > Edit. See "Edit
compatible printer, or to store mory card (if inserted) for Print. See "Image print", on images for later printing to the
ee "Print Basket", on page 52.
o clip to an album in the gallery, > Add to album. See "Albums",
ckground image, select the e image > Set as wallpaper.
eo clip, from the active toolbar, toolbar", on page 51.
the camera, press the capture ver in the back.
older, you can use active toolbar ferent tasks. The active toolbar is ave selected an image or a video
ll up or down to different items, ng the scroll key. The available
9206321_N95-1_en_Apac.book Page 51 Friday, October 19, 2007 11:52 AM
Copyright © 2
must save it in the device memory or on a compatible memory card (if inserted).
The video clips saved in Video centre are not shown in Images & videos in Gallery. To view video clips in Video centre, see "Video centre", on page 34.
Select Gallery > Images & videos. The images and video clip files are in a loop, and ordered by date and time. The number of files is displayed. To browse the files one by one, press
or . To browse files in groups, press or .
When the image is opened, to zoom in an image, press the zoom key on the side of your device. The zooming ratio is not stored permanently.
To rotate the selected image left or right, select Options > Rotate > Left or Right.
To edit a video clip or a photo, select Options > Edit. See "Edit video clips", on page 54. See "Edit images", on page 53.
To create custom video cclips in the gallery, and svideo clips", on page 54.
To print your images on athem on a compatible meprinting, select Options >page 55. You can also tagPrint Basket in Gallery. S
To add an image or a videselect Options > Albumson page 52.
To use the picture as a bapicture and Options > Us
To delete an image or vidselect Delete. See "Active
To switch from Gallery tokey, and open the lens co
Active toolbarIn the Images & videos fas a shortcut to select difavailable only when you hclip.
In the active toolbar, scroand select them by pressi

52
he Print Basket, and print them printer or in a compatible printing Image print", on page 55. The ated with in the Images & s.
r printing, select an image, and m the active toolbar.
he Print Basket, select View Print toolbar, or select from the (available only when you have rint Basket).
the Print Basket, select an image folder or in an album, and Remove tive toolbar.
nveniently manage your images the albums list, select Images & ums > View albums.
eo clip to an album in the gallery, eo clip, and select Options > . A list of albums opens. Select the
nt to add the picture or video clip.
9206321_N95-1_en_Apac.book Page 52 Friday, October 19, 2007 11:52 AM
Copyright © 2007 Nokia. All rights reserved.
Galle
ry options vary depending on the view you are in and whether you have selected an image or a video clip. You can also define whether the active toolbar is always visible on the display or activated by a keypress.
If you want the active toolbar to be visible on the display, select Options > Show icons.
If you want the active toolbar to be visible only when you need it, select Options > Hide icons. To activate the active toolbar, press .
Select from the following:
to play the selected video clip
to send the selected image or video clip
/ to add or remove an image from the Print Basket. See "Print Basket", on page 52.
to view the images in the Print basket
to start a slide show of your images
to delete the selected image or video clip
to print the viewed image
The available options may vary depending on the view you are in.
Print BasketYou can tag images to tlater with a compatiblekiosk, if available. See "tagged images are indicvideos folder and album
To tag an image for lateAdd to Print Basket fro
To view the images in tBasket from the active Images & videos folderadded pictures to the P
To remove an image fromin the Images & videos from print from the ac
AlbumsWith albums you can coand video clips. To viewvideos > Options > Alb
To add a picture or a vidscroll to a picture or vidAlbums > Add to albumalbum to which you wa
007 Nokia. All rights reserved.
Galle
ry
53
cted areas form a rectangle that .
ed aspect ratio, select the upper be cropped. To resize the scroll key. To freeze the selected e area within the picture, use the rea to be cropped, press .
yes in an image, select Options > eduction. Move the cross onto oop appears on the display. To ize of the eye, use the scroll key. ess .
itor:e full screen, press . To return ress again.ckwise or counterclockwise,
ss or . image, scroll up, down, left, or
9206321_N95-1_en_Apac.book Page 53 Friday, October 19, 2007 11:52 AM
Copyright © 2
The added pictures and video clips are not deleted from the Images & videos folder.
To remove a file from an album, press . The file is not deleted from the Images & videos folder in Gallery.
To create a new album, in the albums list view, select Options > New album.
Edit imagesTo edit the pictures after taking them, or the ones already saved in Gallery, select Options > Edit.
Select Options > Apply effect to open a grid where you can select different edit options indicated by small icons. You can crop and rotate the image; adjust the brightness, color, contrast, and resolution; and add effects, text, clip art, or a frame to the picture.
Crop imageTo crop an image, select Options > Apply effect > Crop. To crop the image size manually, select Manual or a predefined aspect ratio from the list. If you select Manual, a cross appears in the upper left corner of the image. Use the scroll key to select the area to crop, and select Set. Another cross appears in the lower right corner. Again select the area to be cropped. To adjust the first selected
area, select Back. The seleforms the cropped image
If you selected a predefinleft corner of the area tohighlighted area, use thearea, press . To move thscroll key. To select the a
Reduce rednessTo reduce redness of the eApply effect > Red eye rthe eye, and press . A lresize the loop to fit the sTo reduce the redness, pr
Useful shortcutsShortcuts in the image ed• To view an image in th
to the normal view, p• To rotate an image clo
press or .• To zoom in or out, pre• To move on a zoomed
right.
54
the slide show, before starting the ns > Slide show > Settings >
move smoothly from one slide to lery randomly zoom in and out in and pan.
e show, select Options > Slide om the following:
ff.
file from the list.
the volume, use the volume key in
ages and video clips on a kia Video Connectivity Cable.
es and video clips on TV, you must tings for the applicable TV system "Enhancement", on page 110.
deo clips on TV, do the following:eo Connectivity Cable to the video le TV.d of the Nokia Video Connectivity V Connector of your device.
9206321_N95-1_en_Apac.book Page 54 Friday, October 19, 2007 11:52 AM
Copyright © 2007 Nokia. All rights reserved.
Galle
ry Edit video clipsTo edit video clips in Gallery and create custom video clips, scroll to a video clip, and select Options > Edit.
Video editing supports .3gp and .mp4 video file formats, and .aac, .amr, .mp3, and .wav audio file formats.
Tip! If you want to send a video clip that is over the maximum multimedia message size allowed by your service provider, send the clip using Bluetooth wireless technology. You can also transfer your videos to a compatible PC using Bluetooth connectivity, a compatible USB cable, or by using a compatible memory card reader enhancement.
Slide showIn the active toolbar, select Slide show ( ) to view a slide show of images in full screen. The slide show starts from the selected file. Select from the following:
Pause — to pause the slide show
Continue — to resume the slide show, if paused
End — to close the slide show
To browse the images, press (previous) or (next) (available only when Zoom and pan is off).
To adjust the tempo of slide show, select OptioDelay between slides.
To make the slide showanother, and let the galthe images, select Zoom
To add sound to the slidshow > Settings and fr
Music — Select On or O
Song — Select a music
To decrease or increase your device.
TV out modeTo view the captured imcompatible TV, use a No
Before viewing the imagconfigure the TV out setand TV aspect ratio. See
To watch images and vi1 Connect a Nokia Vid
input of a compatib2 Connect the other en
Cable to the Nokia A
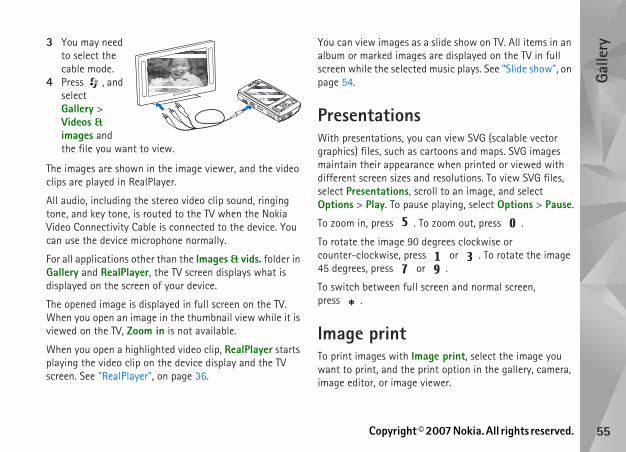
007 Nokia. All rights reserved.
Galle
ry
55
slide show on TV. All items in an are displayed on the TV in full music plays. See "Slide show", on
an view SVG (scalable vector rtoons and maps. SVG images e when printed or viewed with resolutions. To view SVG files, ll to an image, and select
playing, select Options > Pause.
zoom out, press .
egrees clockwise or or . To rotate the image .
reen and normal screen,
ge print, select the image you nt option in the gallery, camera, ewer.
9206321_N95-1_en_Apac.book Page 55 Friday, October 19, 2007 11:52 AM
Copyright © 2
3 You may need to select the cable mode.
4 Press , and select Gallery > Videos & images and the file you want to view.
The images are shown in the image viewer, and the video clips are played in RealPlayer.
All audio, including the stereo video clip sound, ringing tone, and key tone, is routed to the TV when the Nokia Video Connectivity Cable is connected to the device. You can use the device microphone normally.
For all applications other than the Images & vids. folder in Gallery and RealPlayer, the TV screen displays what is displayed on the screen of your device.
The opened image is displayed in full screen on the TV. When you open an image in the thumbnail view while it is viewed on the TV, Zoom in is not available.
When you open a highlighted video clip, RealPlayer starts playing the video clip on the device display and the TV screen. See "RealPlayer", on page 36.
You can view images as aalbum or marked images screen while the selected page 54.
PresentationsWith presentations, you cgraphics) files, such as camaintain their appearancdifferent screen sizes andselect Presentations, scroOptions > Play. To pause
To zoom in, press . To
To rotate the image 90 dcounter-clockwise, press 45 degrees, press or
To switch between full scpress .
Image printTo print images with Imawant to print, and the priimage editor, or image vi
56
ter, the selected images are ed layouts. To change the layout, se through the available layouts
If the images do not fit on a single display the additional pages.
ry depending on the capabilities of selected.
select Options > Default printer.
select Paper size, the size of paper elect Cancel to return to the
can order prints of images online r to a store where you can pick rder different products with the mugs or mouse pads. The available service provider.
9206321_N95-1_en_Apac.book Page 56 Friday, October 19, 2007 11:52 AM
Copyright © 2007 Nokia. All rights reserved.
Galle
ry Use Image print to print your images using a compatible USB data cable, wireless LAN, Bluetooth connectivity, or a compatible memory card (if available).
You can only print images that are in .jpeg format. The pictures taken with the camera are automatically saved in .jpeg format.
To print to a printer compatible with PictBridge, connect the data cable before you select the print option, and check that the data cable mode is set to Image print or Ask on connection. See "USB", on page 22.
Printer selectionWhen you use Image print for the first time, a list of available compatible printers is displayed after you select the image. Select a printer. The printer is set as the default printer.
If you have connected a printer compatible with PictBridge using a compatible USB data cable, the printer is automatically displayed.
If the default printer is not available, a list of available printing devices is displayed.
To change the default printer, select Options > Settings > Default printer.
Print previewAfter you select the prindisplayed using predefinpress or to browfor the selected printer.page, press or to
Print settingsThe available options vathe printing device you
To set a default printer,
To select the paper size,from the list, and OK. Sprevious view.
Print onlineWith Print online, you directly to your home, othem up. You can also oselected image, such as products depend on the
007 Nokia. All rights reserved.
Galle
ry
57
/support or your local
with Universal Plug and Play g a wireless LAN access point router, you can create a home patible UPnP devices that
he network, such as your Nokia ompatible printer, and a or TV, or a sound system or TV ble wireless multimedia receiver.
nction of the Nokia N95 in a working wireless LAN home other target home devices to be onnected to the same home
he security settings of the Use the home network feature in ure network with a wireless LAN ncryption enabled.
saved in Gallery with other using the home network. To . settings, press , and select ome netw.. You can also use the
lay, copy, or print compatible
9206321_N95-1_en_Apac.book Page 57 Friday, October 19, 2007 11:52 AM
Copyright © 2
To use Print online, you must have at least one printing service configuration file installed. The files can be obtained from printing service providers that support Print online.
For more information on the application, see the Additional applications leaflet for your device at www.nokia-asia.com/N95/support or your local Nokia website.
Share onlineWith Online share, you can share images and video clips in compatible online albums, weblogs, or in other online sharing services on the web. You can upload content, save unfinished posts as drafts and continue later, and view the content of the albums. The supported content types may vary depending on the service provider.
To use Online share, you must subscribe to the service with an online image sharing service provider, and create a new account. You can usually subscribe to the service on the web page of the service provider. Contact your service provider for details on subscribing to the service. For more information on compatible service providers, see the product support pages at www.nokia-asia.com/N95/support or your local Nokia website.
For more information on the application, see the Additional applications leaflet for your device at
www.nokia-asia.com/N95Nokia website.
Home networkYour device is compatiblearchitecture (UPnP). Usindevice or a wireless LAN network and connect comsupport wireless LAN to tN95, a compatible PC, a ccompatible sound systemequipped with a compati
Using the wireless LAN fuhome network requires aconnection setup and theUPnP enabled and to be cnetwork.
The home network uses twireless LAN connection. a wireless LAN infrastructaccess point device and e
You can share media filescompatible UPnP devicesmanage your Home netwTools > Connectivity > Hhome network to view, p
58
ccess point. This step reduces the rty joining the ad hoc network.
if another device attempts to ome network. Do not accept m an unknown device.
in a network that does not have haring Nokia N95 files with other any private media files. To change ome network settings", on page 58.
ettingsd in Gallery with other compatible ireless LAN, you must create and
LAN home Internet access point, e netw. application. See "Wireless e wireless LAN settings in "Access
ome netw. are not available in e netw. settings have been
me network application for the ard opens, and helps you to define ngs for your device. To use the e home network main view, select and follow the instructions on the
9206321_N95-1_en_Apac.book Page 58 Friday, October 19, 2007 11:52 AM
Copyright © 2007 Nokia. All rights reserved.
Galle
ry media files from Gallery. See "View and share media files", on page 59.
Important: Always enable one of the available encryption methods to increase the security of your wireless LAN connection. Using encryption reduces the risk of unauthorised access to your data.
Your device is connected to the home network only if you accept a connection request from another compatible device, or in Gallery, select the option to view, play, print, or copy media files on your Nokia N95 or search for other devices in the Home network folder.
Important security informationWhen you configure your wireless LAN home network, enable an encryption method on your access point device, then on the other devices you intend to connect to your home network. Refer to the documentation of the devices. Keep any passcodes secret and in a safe place separate from the devices.
To view or change the settings of the wireless LAN Internet access point in your device, see "Access points", on page 117.
If you use the ad hoc operating mode to create a home network with a compatible device, enable one of the encryption methods in WLAN security mode when you
configure the Internet arisk of an unwanted pa
Your device notifies youconnect to it and the hconnection requests fro
If you use wireless LANencryption, switch off sdevices, or do not sharesharing settings, see "H
Home network sTo share media files saveUPnP devices through wconfigure your wirelessthen configure the HomLAN", on page 16 and thpoints", on page 117.
The options related to HGallery before the Homconfigured.
When you access the hofirst time, the setup wizthe home network settisetup wizard later, in thOptions > Run wizard, display.
007 Nokia. All rights reserved.
Galle
ry
59
ther UPnP compatible devices in ew and copy your files you have e Images & video folder.
media files for sharing with other ng status of Images & video. To folder, select Options > Refresh
edia filesin your device, the other UPnP home network can view and have selected to share in Share nt the other devices to access aring off. Even if Content ice, you can still view and copy nother home network device if it evice.
red in your deviceos stored in your device, and me network device, such as a lowing:
age or a video clip.w via home network.
9206321_N95-1_en_Apac.book Page 59 Friday, October 19, 2007 11:52 AM
Copyright © 2
To connect a compatible PC to the home network, on the PC, you must install the related software from the CD-ROM or DVD-ROM supplied with your device.
Configure settings
To configure the home network application, select Tools > Connectivity > Home netw. > Settings and from the following:
Home access point — Select Always ask if you want the device to ask for the home access point every time you connect to the home network, Create new to define a new access point that is used automatically when you use Home netw. or None. If your home network does not have wireless LAN security settings enabled, you get a security warning. You can continue, and switch the wireless LAN security on later; or cancel defining the access point, and first switch on the wireless LAN security. See Wireless LAN in "Access points", on page 117.
Device name — Enter a name for your device that is shown to the other compatible devices in the home network.
Set sharing on and define content
Select Tools > Connectivity > Home netw. > Share content and from the following:
Content sharing — Allow or deny sharing media files with compatible devices. Do not set Content sharing on before you have configured all the other settings. If you set
Content sharing on, the othe home network can viselected for sharing in th
Images & video — Select devices, or view the shariupdate the content of thecontent.
View and share mIf Content sharing is on compatible devices in thecopy the media files you content. If you do not wayour files, set Content shsharing is off in your devthe media files stored in ais allowed by the other d
Show media files stoTo select images and videshow them in another hocompatible TV, do the fol1 In Gallery, select an im2 Select Options > Sho
60
ia file, select Options > Stop
Gallery through Home netw. with ter, select the print option in t", on page 55. Content sharing
itched on.
erent criteria, select Options > files, select Options > Sort by.
sia files from your device to another as a UPnP compatible PC, select a ons > Move and copy > Copy to e to home net.. Content sharing itched on.
from the other device to your e other device and Options > Copy emory card (the name of the ory card is available). Content
o be switched on.
9206321_N95-1_en_Apac.book Page 60 Friday, October 19, 2007 11:52 AM
Copyright © 2007 Nokia. All rights reserved.
Galle
ry 3 Select a compatible device in which the media file is shown. The images are shown both in the other home network device and your device, and the video clips are played only in the other device.
Show media files stored in the other deviceTo select media files that are stored on another home network device, and show them in your device (or in a compatible TV, for example), do the following:1 Press and select Tools > Connectivity > Home
netw. > Browse home. Your device starts the search of other compatible devices. Device names start to appear on the display.
2 Select a device from the list. 3 Select the type of media you want to view from the
other device. The available file types depend on the features of the other device.
4 Select the image, video clip, music clip, or folder you want to view, and select Show via home network (images and video) or Play via home network (music).
5 Select the device in which the file is shown. In the home network, you cannot play music in your device, but you can play it in compatible external devices, and use your device as a remote control.
To stop sharing the medshowing.
To print images saved ina UPnP compatible prinGallery. See "Image prindoes not have to be sw
To search files with diffFind. To sort the found
Copy media fileTo copy or transfer medcompatible device, suchfile in Gallery and Optihome network or Movdoes not have to be sw
To copy or transfer filesdevice, select a file in thto phone or Copy to mmemory card if the memsharing does not have t
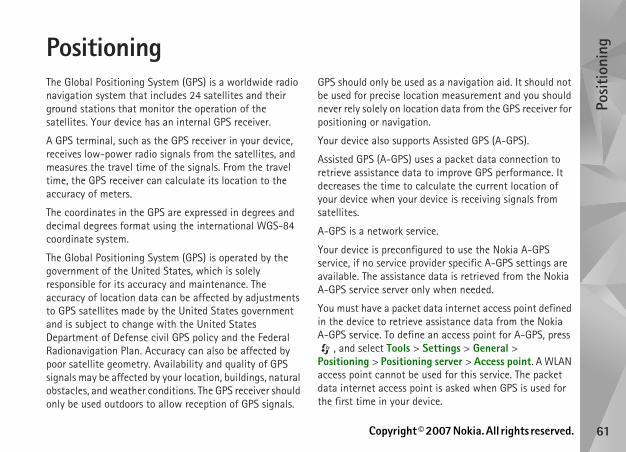
007 Nokia. All rights reserved.
Posi
tioni
ng
61
as a navigation aid. It should not on measurement and you should on data from the GPS receiver for .
Assisted GPS (A-GPS).
s a packet data connection to o improve GPS performance. It culate the current location of vice is receiving signals from
e.
red to use the Nokia A-GPS ider specific A-GPS settings are data is retrieved from the Nokia when needed.
ata internet access point defined ssistance data from the Nokia
an access point for A-GPS, press ettings > General > server > Access point. A WLAN
sed for this service. The packet t is asked when GPS is used for ice.
9206321_N95-1_en_Apac.book Page 61 Friday, October 19, 2007 11:52 AM
Copyright © 2
PositioningThe Global Positioning System (GPS) is a worldwide radio navigation system that includes 24 satellites and their ground stations that monitor the operation of the satellites. Your device has an internal GPS receiver.
A GPS terminal, such as the GPS receiver in your device, receives low-power radio signals from the satellites, and measures the travel time of the signals. From the travel time, the GPS receiver can calculate its location to the accuracy of meters.
The coordinates in the GPS are expressed in degrees and decimal degrees format using the international WGS-84 coordinate system.
The Global Positioning System (GPS) is operated by the government of the United States, which is solely responsible for its accuracy and maintenance. The accuracy of location data can be affected by adjustments to GPS satellites made by the United States government and is subject to change with the United States Department of Defense civil GPS policy and the Federal Radionavigation Plan. Accuracy can also be affected by poor satellite geometry. Availability and quality of GPS signals may be affected by your location, buildings, natural obstacles, and weather conditions. The GPS receiver should only be used outdoors to allow reception of GPS signals.
GPS should only be used be used for precise locatinever rely solely on locatipositioning or navigation
Your device also supports
Assisted GPS (A-GPS) useretrieve assistance data tdecreases the time to calyour device when your desatellites.
A-GPS is a network servic
Your device is preconfiguservice, if no service provavailable. The assistance A-GPS service server only
You must have a packet din the device to retrieve aA-GPS service. To define
, and select Tools > SPositioning > Positioningaccess point cannot be udata internet access pointhe first time in your dev
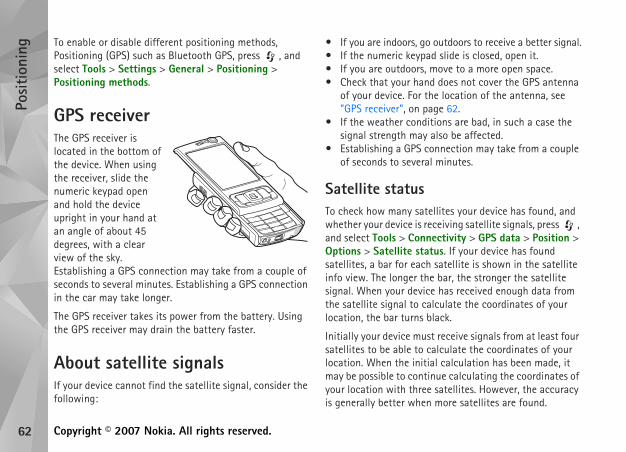
62
outdoors to receive a better signal.d slide is closed, open it.move to a more open space.d does not cover the GPS antenna he location of the antenna, see age 62.itions are bad, in such a case the also be affected.onnection may take from a couple l minutes.
ellites your device has found, and eceiving satellite signals, press , ectivity > GPS data > Position > tus. If your device has found satellite is shown in the satellite e bar, the stronger the satellite e has received enough data from lculate the coordinates of your lack.
t receive signals from at least four alculate the coordinates of your
ial calculation has been made, it inue calculating the coordinates of satellites. However, the accuracy more satellites are found.
9206321_N95-1_en_Apac.book Page 62 Friday, October 19, 2007 11:52 AM
Copyright © 2007 Nokia. All rights reserved.
Posi
tioni
ng To enable or disable different positioning methods, Positioning (GPS) such as Bluetooth GPS, press , and select Tools > Settings > General > Positioning > Positioning methods.
GPS receiverThe GPS receiver is located in the bottom of the device. When using the receiver, slide the numeric keypad open and hold the device upright in your hand at an angle of about 45 degrees, with a clear view of the sky. Establishing a GPS connection may take from a couple of seconds to several minutes. Establishing a GPS connection in the car may take longer.
The GPS receiver takes its power from the battery. Using the GPS receiver may drain the battery faster.
About satellite signalsIf your device cannot find the satellite signal, consider the following:
• If you are indoors, go• If the numeric keypa• If you are outdoors, • Check that your han
of your device. For t"GPS receiver", on p
• If the weather condsignal strength may
• Establishing a GPS cof seconds to severa
Satellite statusTo check how many satwhether your device is rand select Tools > ConnOptions > Satellite stasatellites, a bar for eachinfo view. The longer thsignal. When your devicthe satellite signal to calocation, the bar turns b
Initially your device mussatellites to be able to clocation. When the initmay be possible to contyour location with threeis generally better when
007 Nokia. All rights reserved.
Posi
tioni
ng
63
he first time, you may need to point for downloading map ent location. To change the , select Options > Settings > ss point.
aphy is inaccurate and t. Never rely solely on the nload for use in this device.
nvolve the transmission of large your service provider's network. ider for information about data
ownload maps by using a WLAN ugh the internet using Nokia ownload maps", on page 65.
ur device registers to a network r network, select Options > aming warning > On.
by country.
aps zooms in to the location that session. If no position was saved Maps application zooms in to the or region you are in, based on the
9206321_N95-1_en_Apac.book Page 63 Friday, October 19, 2007 11:52 AM
Copyright © 2
Position requestsYou may receive a request from a network service to receive your position information. Service providers may offer information about local topics, such as weather or traffic conditions, based upon the location of your device.
When you receive a position request, a message is displayed showing the service that is making the request. Select Accept to allow your position information to be sent or Reject to deny the request.
Maps Press , and select Maps. With Maps, you can see your current location on the map, browse maps for different cities and countries, search for addresses and different points of interest, plan routes from one location to another, and save locations as landmarks and send them to compatible devices.
You can also purchase extra services, such as city guides and a navigation service with voice guidance.
Maps uses GPS. You can define the positioning methods used with your device in the device settings. See "Positioning", on page 114. For the most accurate location information, use either the internal GPS or the external GSP receiver.
When you use Maps for tdefine an internet accessinformation for your currdefault access point laterNetwork > Default acce
Almost all digital cartogrincomplete to some extencartography that you dow
Downloading maps may iamounts of data throughContact your service provtransmission charges.
Tip! You can also dconnection. or throMapLoader. See "D
To receive a note when yooutside your home cellulaSettings > Network > Ro
Browse mapsThe map coverage varies
When you open Maps, Mwas saved from your last from the last session, the major city of the country
64
oints of interest are shown on the ap options > Categories and the
ut satellites when you are using Map options > Satellite info. You ator on the display when browsing her your device is receiving signals ellite information", on page 64.
landmark, in the desired location, e > As landmark, enter a name for t the categories you want to
your location, select Save > As s saved in Gallery.
s, select Options > Find place > ndmark to a compatible device, in ss , and select Send. If you send essage, the information is
outing, and general settings, select
ationn on the display when you browse icon are satellites.
9206321_N95-1_en_Apac.book Page 64 Friday, October 19, 2007 11:52 AM
Copyright © 2007 Nokia. All rights reserved.
Posi
tioni
ng information the device receives from the cellular network. At the same time, the map of the location is downloaded. The maps are automatically saved in the device memory or on a compatible memory card (if inserted).
To establish a GPS connection and zoom in to your current location, select Options > Find place > GPS position, or press .
To move on the map, scroll up, down, left, or right. To view detailed information of a location on the map, scroll to it, press and select Show details. To use the location, for example, as a starting point for a nearby search or to plan a route, press the scroll key, and select the desired option. To return to your current location, press , or select Options > Find place > GPS position.
When you browse the map on the display, for example, move to another country, a new map is downloaded automatically. These downloaded maps are free of charge, but downloading may involve the transmission of large amounts of data through your service provider's network. For more information on data transmission charges, contact your service provider.
The maps are automatically saved in the device memory.
To zoom in or out on the map, press or . To switch between the 2-D and 3-D views, select Options > Map options > 2D/3D.
To define what kind of pmap, select Options > Mdesired categories.
To view information aboMaps, select Options >can also see a GPS indicmaps. It indicates whetfrom satellites. See "Sat
To save a location as a press , and select Savthe landmark, and selecinclude it in.
To take a screenshot ofimage. The screenshot i
To view saved landmarkLandmark. To send a lathe landmarks view, prethe landmark in a text mconverted to plain text.
To adjust the network, rOptions > Settings.
Satellite informA GPS indicator is showmaps. The circles in the
007 Nokia. All rights reserved.
Posi
tioni
ng
65
data transmission charges, ider.
of transferred data from the data e display. The counter shows the c when you browse maps, create tions online.
ps that are downloaded to your on the map server, select twork > Options > Check for
m automatically downloading t, for example, when you are r network, select Options >
se network > Off.
e you want to use on a for saving maps data or voice ions > Settings > Network > %). This option is available only ry card is inserted. When the map data is deleted. The saved ted manually from the memory
oftware that you can use to s for different countries to your
9206321_N95-1_en_Apac.book Page 65 Friday, October 19, 2007 11:52 AM
Copyright © 2
A yellow circle indicates that the device has found a satellite, and a green circle that the device is receiving signal from the satellite. When all the circles are green, the device receives enough data from the satellites to calculate the coordinates of your current location.
To check how many satellites your device has found, and whether your device is receiving satellite signals from the satellites, select Options > Map options > Satellite info.
If your device has found satellites, a bar for each satellite is shown in the satellite info view. The longer the bar, the stronger the satellite signal. When your device has received enough data from the satellite signal to calculate the coordinates of your location, the bar turns black.
Initially your device must receive signals from at least four satellites to be able to calculate the coordinates of your location. When the initial calculation has been made, it may be possible to continue calculating the coordinates of your location with three satellites. However, the accuracy is generally better when more satellites are found.
Download mapsWhen you browse the map on the display, for example, move to another country, a new map is downloaded automatically. These downloaded maps are free of charge, but downloading may involve transmission of large amounts of data through your service provider's network.
For more information on contact your service prov
You can view the amountcounter (kB) shown on thamount of network traffiroutes, or search for loca
To check whether the madevice have been updatedOptions > Settings > Nemap updates.
To prevent the device fromaps through the interneoutside your home cellulaSettings > Network > U
To define how much spaccompatible memory cardguidance files, select OptMax. memory card use (when a compatible memomemory is full, the oldestmaps data cannot be delecard.
Nokia Map LoaderNokia Map Loader is PC sdownload and install map
66
interest by name, select Options > search, or start entering the first select Find place.
by address, select Options > Find u must enter the city and country. ave saved to a contact card in s > Find place > By address >
contacts.
n a map, press and select Show e results list, select Back.
evious locations, select Options >
e location to another (for example, office), do the following:
he map, press , and select Route
select Options > Select and the
g settings, such as the mode of t Options > Settings > Routing.
9206321_N95-1_en_Apac.book Page 66 Friday, October 19, 2007 11:52 AM
Copyright © 2007 Nokia. All rights reserved.
Posi
tioni
ng device from the internet. You can also use it to download voice files for turn-by-turn navigation.
To use Nokia Map Loader, you must first install it to a compatible PC. You can download the PC software from the internet at www.nokia.com/maps. Follow the instructions on the screen.
You must use Nokia Maps before using Nokia Map Loader. Nokia Map Loader uses the Maps history information to check the version of map data to be downloaded.
After you have installed the PC software to your PC, to download maps, do the following:
1. Connect your device to the PC by using a compatible USB data cable. Select Mass storage as the USB connection mode.
2. Open Nokia Map Loader in your PC. Nokia Map Loader checks the version of map data to be downloaded.
3. Select the maps you want, and download and install them to your device.
Search for locationsTo view points of interest near your current location or other locations on the map, select Options > Find place > Nearby and a category.
To search for a point of Find place > Keyword letters of the name, and
To search for a locationplace > By address. YoTo use an address you hContacts, select OptionOptions > Select from
To view a search result oon map. To return to th
To view a list of your prFind place > Recent.
Plan a routeTo plan a route from onfrom your home to your
1. Scroll to a point on tfrom.
2. Scroll to From, and desired option.
To adjust the routintransportation, selec

007 Nokia. All rights reserved.
Posi
tioni
ng
67
service with voice guidance to ns > Extra services > Add
igation upgrade, the service is The license you purchase for ific and cannot be transferred her device.
Maps, to start navigation to the GPS using voice guidance, select ion. See "Plan a route", on page igation by selecting any location s list, and Navigate to.
for the first time, you are nguage of the voice guidance, uidance files of the selected
ge the language later, in Maps s > Settings > General > Voice d download the voice guidance uage. You can also download Nokia MapLoader. See e 65.
te and use another route, select ute.
9206321_N95-1_en_Apac.book Page 67 Friday, October 19, 2007 11:52 AM
Copyright © 2
3. To select the destination, scroll to To, and select Options > Select, and the desired option.
4. To view the route itinerary, select Options > Show route. The route is calculated using the selected routing settings.
To view the itinerary waypoints on the map, select Options > Show on map.
To run a simulation of the created route, select Options > Start simulation.
Tip! You can also use a compatible GPS receiver with Bluetooth connectivity with Maps. For example, in a car, an external GPS receiver can be positioned so that it has a clear view of the sky. To enable the use of an external GPS receiver, see "Positioning", on page 114.
Extra services for MapsYou can purchase and download different kinds of guides, such as city and travel guides, for different cities to your device. You can also purchase a turn-by-turn navigation service with voice guidance to use it in Maps.
The downloaded guides are automatically saved in the device memory or on a compatible memory card (if inserted).
NavigationTo purchase a navigationuse in Maps, select Optionavigation.
After purchasing the navavailable through Maps. navigation is device specfrom your device to anot
After creating a route in desired destination with Options > Start navigat66. You can also start navon the map or in a result
When you use navigationprompted to select the laand download the voice glanguage online. To chanmain view, select Optionguidance, a language, anfiles for the selected langvoice guidance files using"Download maps", on pag
To discard the created rouOptions > Alternative ro
68
ols > Connectivity > Landmarks. n save the position information of r device. You can sort the saved categories, such as business, and uch as addresses, to them. You can ks in compatible applications, such .
PS are expressed in degrees and using the international WGS-84
rk, select Options > New sitioning request for the
rent location, select Current osition information manually,
ion to a saved landmark (for ss), scroll to a landmark, and press field and enter the information.
n the map, select Options > Show te to the location, select Options >
arks into the preset categories, ies. To edit and create new ess in Landmarks, and select ies.
9206321_N95-1_en_Apac.book Page 68 Friday, October 19, 2007 11:52 AM
Copyright © 2007 Nokia. All rights reserved.
Posi
tioni
ng To view only the next turns and hide the map, select Options > Map options > Next turns.
To stop navigation, select Options > Stop navigation.
GuidesTo purchase and download different kinds of guides, such as city and travel guides, for different cities to your device, select Options > Extra services > Guides.
The guides provide information about attractions, restaurants, hotels, and other points of interest. The guides must be downloaded and purchased before use.
To browse a downloaded guide, on the My guides tab in Guides, select a guide and a subcategory (if available).
To download a new guide to your device, in Guides, scroll right to the Nearest guides or All guides tab, select the desired guide, and press OK. To purchase the guide, scroll left to the My guides tab, select the downloaded guide, and enter your payment details. You can pay for the guides through a credit card or have the amount charged to your phone bill (if supported by your cellular network service provider).
To confirm the purchase, select OK twice. To receive a confirmation of the purchase through e-mail, enter your name and e-mail address, and select OK.
Landmarks Press , and select ToWith Landmarks, you caspecific locations in youlocations into different add other information, suse your saved landmaras GPS data and Maps
The coordinates in the Gdecimal degrees formatcoordinate system.
To create a new landmalandmark. To make a pocoordinates of your curposition. To enter the pselect Enter manually.
To edit or add informatexample, a street addre
. Scroll to the desired
To view the landmark oon map. To create a rouNavigate using map.
You can sort your landmand create new categorlandmark categories, prOptions > Edit categor
007 Nokia. All rights reserved.
Posi
tioni
ng
69
tating compass on the device the direction to the destination, ance to it is shown inside the
ed to show the straightest route to the destination, measured in cles on the route, such as tacles, are ignored. Differences in o account when calculating the is active only when you move.
n, select Options > Set ark as the destination, or enter e coordinates. Select Stop estination set for your trip.
informationmation of your current location, te of the accuracy of the location
tion as a landmark, select .
tions with more information, and compatible applications and patible devices.
9206321_N95-1_en_Apac.book Page 69 Friday, October 19, 2007 11:52 AM
Copyright © 2
To add a landmark to a category, scroll to the landmark in Landmarks, and select Options > Add to category. Scroll to each category to which you want to add the landmark, and select it.
To send one or several landmarks to a compatible device, select Options > Send. Your received landmarks are placed in the Inbox folder in Messaging.
GPS data Press , and select Tools > Connectivity > GPS data. GPS data is designed to provide route guidance information to a selected destination, position information about your current location, and traveling information, such as the approximate distance to the destination and approximate duration of travel.
The coordinates in the GPS are expressed in degrees and decimal degrees format using the international WGS-84 coordinate system.
To use GPS data, the GPS receiver of your device must receive position information from at least three satellites to calculate the coordinates of your location.
Route guidanceTo use route guidance, select Navigation. Start the route guidance outdoors. If started indoors, the GPS receiver may not receive the necessary information from the satellites.
Route guidance uses a rodisplay. A red ball shows and the approximate distcompass ring.
Route guidance is designand the shortest distancea straight line. Any obstabuildings and natural obsaltitude are not taken intdistance. Route guidance
To set your trip destinatiodestination and a landmthe latitude and longitudnavigation to clear the d
Retrieve positionTo view the position inforselect Position. An estimais shown on the display.
To save your current locaOptions > Save position
Landmarks are saved locathey can be used in othertransferred between com
70
9206321_N95-1_en_Apac.book Page 70 Friday, October 19, 2007 11:52 AM
Copyright © 2007 Nokia. All rights reserved.
Posi
tioni
ng Trip meterSelect Trip distance > Options > Start to activate trip distance calculation, and Stop to deactivate it. The calculated values remain on the display. Use this feature outdoors to receive a better GPS signal.
Select Reset to set the trip distance and time and average and maximum speeds to zero, and to start a new calculation. Select Restart to also set the odometer and total time to zero.
The trip meter has limited accuracy, and rounding errors may occur. Accuracy can also be affected by availability and quality of GPS signals.

007 Nokia. All rights reserved.
Pers
onal
ise
your
dev
ice
71
menu, in the main menu, select e to folder, or New folder. You plications into folders and place use more often into the main
tones ringing tones, message alert r different events, environments, , and select Tools > Profiles.
ct Tools > Profiles, a profile, and can also change the profile by by mode. Scroll to the profile you ct OK.
een the general and silent old .
, and select Tools > Profiles. select Options > Personalise. want to change, and press to tored on a compatible memory ated with .
9206321_N95-1_en_Apac.book Page 71 Friday, October 19, 2007 11:52 AM
Copyright © 2
Personalise your deviceTo personalise your device, select from the following:• To use the standby display for fast access to your most
frequently used applications, see "Active standby mode", on page 74.
• To change the standby mode background image or what is shown in the screen saver, see "Change the look of your device", on page 73.
• To customise the ringing tones, see "Profiles — set tones", on page 71 and "Add ringing tones for contacts", on page 99.
• To change the shortcuts assigned for the different presses of the scroll key and left and right selection keys in the standby mode, see "Standby mode", on page 110.
• To change the clock shown in the standby mode, press , and select Applications > Clock > Options >
Settings > Clock type > Analogue or Digital.• To change the welcome note to an image or animation,
press , and select Tools > Settings > General > Personalisation > Display > Welcome note / logo.
• To change the main menu view, in the main menu, select Options > Change Menu view > Grid or List.
• To use animated icons in your device, in the main menu, select Options > Icon animation > On.
• To rearrange the mainOptions > Move, Movcan move less used apapplications that you menu.
Profiles — set To set and customise thetones, and other tones foor caller groups, press
To change the profile, seleOptions > Activate. You pressing in the standwant to activate, and sele
Tip! To switch betwprofiles, press and h
To modify a profile, pressScroll to the profile, and Scroll to the setting you open the choices. Tones scard (if inserted) are indic
72
hone function by changing s been locked, enter the lock code.
d the Offline profile, you can still r example, to read your e-mail or Remember to comply with any ements when establishing and nnection. See "Wireless LAN", on se Bluetooth connectivity while in "Bluetooth connectivity", on
file, press the power key, and select ice re-enables wireless g there is sufficient signal
ls > 3-D tones. With 3-D tones imensional sound effects for nging tones support 3-D effects.
ts, select 3-D ringing tone e the ringing tone, select Ringing ging tone.
ct that is applied to the ringing ectory and the desired effect. To t from the following settings:
9206321_N95-1_en_Apac.book Page 72 Friday, October 19, 2007 11:52 AM
Copyright © 2007 Nokia. All rights reserved.
Pers
onal
ise
your
dev
ice In the tones list, the Download sounds link (network
service) opens a list of bookmarks. You can select a bookmark and start connection to a web page to download more tones.
If you want the caller’s name to be spoken when your device rings, select Options > Personalise, and set Say caller's name to On. The caller’s name must be saved in Contacts.
To create a new profile, select Options > Create new.
Offline profileThe Offline profile lets you use the device without connecting to the wireless network. When you activate the Offline profile, the connection to the wireless network is turned off, as indicated by in the signal strength indicator area. All wireless RF signals to and from the device are prevented. If you try to send messages, they are placed in the outbox to be sent later.
When the Offline profile is active, you can use your device without a (U)SIM card.
Important: In the offline profile you cannot make or receive any calls, or use other features that require cellular network coverage. Calls may still be possible to the official emergency number programmed into your device. To make calls, you
must first activate the pprofiles. If the device ha
When you have activateuse the wireless LAN, fobrowse on the internet.applicable safety requirusing a wireless LAN copage 16. You can also uthe Offline profile. Seepage 18.
To leave the Offline proanother profile. The devtransmissions (providinstrength).
3-D tones Press , and select Tooyou can enable three-dringing tones. Not all ri
To enable the 3-D effeceffects > On. To changtone and the desired rin
To change the 3–D effetone, select Sound trajmodify the effect, selec

007 Nokia. All rights reserved.
Pers
onal
ise
your
dev
ice
73
ation, in the main view, select an
e activating it, select Options > heme, select Options > Set. The by .
ble memory card (if inserted) are mes on the memory card are not ard is not inserted in the device. emes saved in the memory card , save the themes in the device
he main menu, select Themes >
tion and download more themes, , select Download themes
ly services that you trust and e security and protection against
power saver of the current allpaper to change the
display for the active standby change the power saver that r the active standby mode. See 9 for power saver time-out
9206321_N95-1_en_Apac.book Page 73 Friday, October 19, 2007 11:52 AM
Copyright © 2
Trajectory speed — Scroll left or right to adjust the speed at which sound moves from one direction to another. This setting is not available for all ringing tones.
Reverberation — Select the type of echo.
Doppler effect — Select On to have the ringing tone sound higher when you are closer to your device, and lower when you are farther away. When you get closer to the device, the ringing tone appears to become higher, and lower when you move away from it. This setting is not available for all ringing tones and sound trajectories.
To listen to the ringing tone with the 3–D effect, select Options > Play tone.
If you enable the 3-D tones but do not select any 3-D effect, stereo widening is applied to the ringing tone.
To adjust the ringing tone volume, select Tools > Profiles > Options > Personalise > Ringing volume.
Change the look of your device To change the look of the display, such as the wallpaper and icons, press , and select Tools > Settings > General > Personalisation > Themes.
To change the theme that is used for all the applications in your device, select Themes > General. To change the
theme of a certain applicapplication.
To preview a theme beforPreview. To activate the tactive theme is indicated
The themes on a compatiindicated by . The theavailable if the memory cIf you want to use the thwithout the memory cardmemory first.
To change the layout of tMenu view.
To open a browser connecin General or Menu view(network service).
Important: Use onthat offer adequatharmful software.
To edit the wallpaper andtheme, select Themes > Wbackground image on themode or Power saver to appears on the display foalso "Display", on page 10setting.
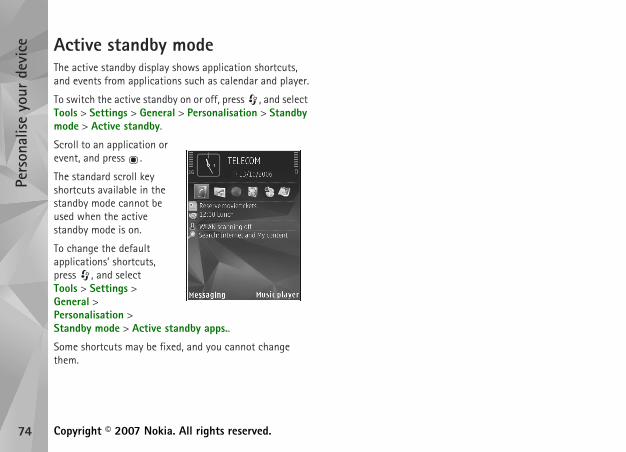
74
9206321_N95-1_en_Apac.book Page 74 Friday, October 19, 2007 11:52 AM
Copyright © 2007 Nokia. All rights reserved.
Pers
onal
ise
your
dev
ice Active standby mode
The active standby display shows application shortcuts, and events from applications such as calendar and player.
To switch the active standby on or off, press , and select Tools > Settings > General > Personalisation > Standby mode > Active standby.
Scroll to an application or event, and press .
The standard scroll key shortcuts available in the standby mode cannot be used when the active standby mode is on.
To change the default applications’ shortcuts, press , and select Tools > Settings > General > Personalisation > Standby mode > Active standby apps..
Some shortcuts may be fixed, and you cannot change them.

007 Nokia. All rights reserved.
Tim
e m
anag
emen
t
75
e network to update the time, mation to your device (network operator time > Auto-update.
iew, select Clock, and press view, you can view the time in ies to the list, select Options >
maximum of 15 cities to the list.
croll to a city, and select city. The city is displayed in the
time in your device is changed cted. Check that the time is time zone.
lications > Calendar. To add a l to the desired date, select d one of the following: you of an appointment that has eneral entry for a day
9206321_N95-1_en_Apac.book Page 75 Friday, October 19, 2007 11:52 AM
Copyright © 2
Time managementClock Press , and select Applications > Clock. To set a new non-repeated alarm, select Options > New quick alarm. To view your active and inactive alarms, press . To set a new alarm, select Options > Set alarm. When an alarm is active, is shown.
To turn off the alarm, select Stop. To stop the alarm for 5 minutes, select Snooze.
If the alarm time is reached while the device is switched off, the device switches itself on and starts sounding the alarm tone. If you select Stop, the device asks whether you want to activate the device for calls. Select No to switch off the device or Yes to make and receive calls. Do not select Yes when wireless phone use may cause interference or danger.
To cancel an alarm, select Applications > Clock > Options > Remove alarm.
To change clock settings, select Applications > Clock > Options > Settings > Time or Date, Clock type, or Clock alarm tone.
To allow the mobile phondate, and time zone inforservice), select Network
World clockTo open the world clock vtwice. In the world clock different cities. To add citAdd city. You can add a
To set your current city, sOptions > Set as currentclock main view, and theaccording to the city selecorrect and matches your
Calendar Press , and select Appnew calendar entry, scrolOptions > New entry an1 Meeting — to remind
a specific date and timMemo — to write a ge

76
gs to change the starting day of at is shown when you open the
select Options > Go to date. To .
month view, week view, day view, .
to a compatible device, select
t compatible with Coordinated e time information of received t be displayed correctly.
select Options > Settings > efault view, Week starts on, and
lendar entriese event at a time, go to the month s > Delete entry > Before date or
leted, scroll to it in the to-do view, ark as done.
9206321_N95-1_en_Apac.book Page 76 Friday, October 19, 2007 11:52 AM
Copyright © 2007 Nokia. All rights reserved.
Tim
e m
anag
emen
t Anniversary — to remind you of birthdays or special dates (entries are repeated every year)To-do — to remind you of a task that needs doing by a specific date
2 Fill in the fields. To set an alarm, select Alarm > On, and enter the Alarm time and Alarm date.To add a description for an entry, select Options > Add description.
3 To save the entry, select Done.
Shortcut: In the day, week, or month calendar view, press any key ( — ). An appointment entry opens, and the characters you enter are added to Subject. In the to-do view, a to-do note entry opens.
When the calendar alarms for a note, select Silence to turn off the calendar alarm tone. The reminder text stays on the screen. To end the calendar alarm, select Stop. To set the alarm to snooze, select Snooze.
You can synchronise your calendar with a compatible PC using Nokia Nseries PC Suite. When creating a calendar entry, set the desired Synchronisation option.
Calendar viewsSelect Options > Settinthe week or the view thcalendar.
To go to a certain date,jump to today, press
To switch between the and to-do view, press
To send a calendar noteOptions > Send.
If the other device is noUniversal Time (UTC), thcalendar entries may no
To modify the calendar,Calendar alarm tone, DWeek view title.
Manage your caTo delete more than onview, and select OptionAll entries.
To mark a task as compand select Options > M
007 Nokia. All rights reserved.
Mes
sagi
ng
77
To change the number of e "Other settings", on page 87.
waiting to be sent are outbox, for example, when your coverage.
quest the network to send you a t messages and multimedia network service).
requests (also known as USSD ation commands for network rovider, select Options > Service w of Messaging.
service) allows you to receive cs, such as weather or traffic ice provider. For available topics rs, contact your service provider. aging, select Options > Cell
cannot be received in UMTS onnection may prevent cell
9206321_N95-1_en_Apac.book Page 77 Friday, October 19, 2007 11:52 AM
Copyright © 2
Messaging Press , and select Messaging (network service).
Only devices that have compatible features can receive and display multimedia messages. The appearance of a message may vary depending on the receiving device.
To create a new message, select New message.
Messaging contains the following folders:
Inbox — Received messages, except e-mail and cell broadcast messages, are stored here. E-mail messages are stored in the Mailbox.
My folders — Organise your messages into folders.
Tip! To avoid rewriting messages that you send often, use texts in the templates folder. You can also create and save your own templates.
Mailbox — Connect to your remote mailbox to retrieve your new e-mail messages or view your previously retrieved e-mail messages offline. See "E-mail", on page 84.
Drafts — Draft messages that have not been sent are stored here.
Sent — The last messages that have been sent, excluding messages sent using Bluetooth connectivity or
infrared, are stored here. messages to be saved, se
Outbox — Messagestemporarily stored in thedevice is outside network
Reports — You can redelivery report of the texmessages you have sent (
To enter and send servicecommands), such as activservices, to your service pcommand in the main vie
Cell broadcast (network messages on various topiconditions, from your servand relevant topic numbeIn the main view of Messbroadcast.
Cell broadcast messages networks. A packet data cbroadcast reception.
78
xt, while pressing and holding , highlight text. To copy the text to holding , select Copy. To insert ment, press and hold , and
d messages multimedia message or write an he correct connection settings in ngs", on page 81 and "E-mail", on
ay limit the size of MMS messages. xceeds this limit, the device may it can be sent by MMS.
e and from the following:send a text messagee — to send a multimedia message
send an audio message (a that includes one sound clip) e-mail to select recipients or groups ter the recipient’s phone number or dd a semicolon (;) that separates . You can also copy and paste ss from the clipboard.
9206321_N95-1_en_Apac.book Page 78 Friday, October 19, 2007 11:52 AM
Copyright © 2007 Nokia. All rights reserved.
Mes
sagi
ng Write textABC, abc, and Abc indicate the selected character mode. 123 indicates the number mode.
To switch between the letter and number mode, press and hold . To switch between the different character modes, press .
To insert a number in the letter mode, press and hold the desired number key.
is displayed when you write text using traditional text input and when using predictive text input.
With predictive text, you can enter any letter with a single keypress. Predictive text input is based on a built-in dictionary to which you can add new words.
To activate predictive text input, press , and select Activate predictive text.
Tip! To turn predictive text input on or off, quickly press twice.
Edit text and lists• To mark an item in a list, scroll to it, and press and
at the same time.• To mark multiple items in a list, press and hold
while you press or . To end the selection, release , then release .
• To copy and paste tepress or to clipboard, while stillthe text into a docuselect Paste.
Write and senBefore you can create ae-mail, you must have tplace. See "E-mail settipage 84.
The wireless network mIf the inserted picture emake it smaller so that
1 Select New messagText message — to Multimedia messag(MMS)Audio message — tomultimedia messageE-mail — to send an
2 In the To field, pressfrom contacts, or ene-mail address. To athe recipients, pressthe number or addre
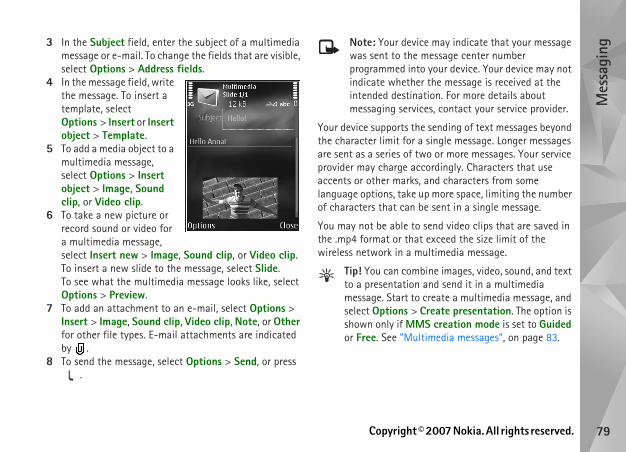
007 Nokia. All rights reserved.
Mes
sagi
ng
79
may indicate that your message essage center number your device. Your device may not the message is received at the on. For more details about s, contact your service provider.
sending of text messages beyond ingle message. Longer messages or more messages. Your service rdingly. Characters that use nd characters from some more space, limiting the number sent in a single message.
end video clips that are saved in xceed the size limit of the ltimedia message.
ne images, video, sound, and text nd send it in a multimedia reate a multimedia message, and eate presentation. The option is creation mode is set to Guided
media messages", on page 83.
9206321_N95-1_en_Apac.book Page 79 Friday, October 19, 2007 11:52 AM
Copyright © 2
3 In the Subject field, enter the subject of a multimedia message or e-mail. To change the fields that are visible, select Options > Address fields.
4 In the message field, write the message. To insert a template, select Options > Insert or Insert object > Template.
5 To add a media object to a multimedia message, select Options > Insert object > Image, Sound clip, or Video clip.
6 To take a new picture or record sound or video for a multimedia message, select Insert new > Image, Sound clip, or Video clip. To insert a new slide to the message, select Slide.To see what the multimedia message looks like, select Options > Preview.
7 To add an attachment to an e-mail, select Options > Insert > Image, Sound clip, Video clip, Note, or Other for other file types. E-mail attachments are indicated by .
8 To send the message, select Options > Send, or press .
Note: Your devicewas sent to the mprogrammed into indicate whether intended destinatimessaging service
Your device supports the the character limit for a sare sent as a series of twoprovider may charge accoaccents or other marks, alanguage options, take upof characters that can be
You may not be able to sthe .mp4 format or that ewireless network in a mu
Tip! You can combito a presentation amessage. Start to cselect Options > Crshown only if MMSor Free. See "Multi
80
s that have been included in the lect Options > Objects.
a multimedia presentation, is resentation, select the indicator.
s many kinds of messages that usiness cards, ringing tones, r entries, and e-mail notifications. ttings from your service provider or anagement department in a
e message, select Options and the
ssagesre notifications (for example, news tain a text message or a link. For tion, contact your service provider.
9206321_N95-1_en_Apac.book Page 80 Friday, October 19, 2007 11:52 AM
Copyright © 2007 Nokia. All rights reserved.
Mes
sagi
ng Inbox — receive messages In the Inbox folder, indicates an unread text message,
an unread multimedia message, an unread audio message, data received through infrared, and data received through Bluetooth connectivity.
When you receive a message, and 1 new message are shown in the standby mode. To open the message, select Show. To open a message in Inbox, scroll to it, and press . To reply to a received message, select Options > Reply
Multimedia messagesImportant: Exercise caution when opening messages. Multimedia message objects may contain malicious software or otherwise be harmful to your device or PC.
You may receive a notification that a multimedia message is waiting in the multimedia message center. To start a packet data connection to retrieve the message to your device, select Options > Retrieve.
When you open a multimedia message ( ), you may see an image and a message. is shown if sound is included, or if video is included. To play the sound or the video, select the indicator.
To see the media objectmultimedia message, se
If the message includesdisplayed. To play the p
Data and settingYour device can receivecontain data, such as boperator logos, calendaYou may also receive secompany information mconfiguration message.
To save the data from thcorresponding option.
Web service meWeb service messages aheadlines) and may conavailability and subscrip

007 Nokia. All rights reserved.
Mes
sagi
ng
81
ox and retrieve new e-mail lect Yes. When you view continuously connected to a ata connection.
d e-mail messages offline, select
essage, select New message > main view or Options > Create r mailbox. See "Write and send
essagesptions > Connect to start a mailbox.
se caution when opening messages may contain malicious ise be harmful to your device or
en connection to a remote ns > Retrieve e-mail and one of
new messages only the messages that have
essages from the mailboxsages, select Cancel.
9206321_N95-1_en_Apac.book Page 81 Friday, October 19, 2007 11:52 AM
Copyright © 2
Mailbox
E-mail settingsTip! Use Settings wizard to define your mailbox settings. Press , and select Tools > Utilities > Sett. wizard.
To use e-mail, you must have a valid internet access point (IAP) in the device and define your e-mail settings correctly. See "Access points", on page 117.
If you select Mailbox in the Messaging main view and have not set up your e-mail account, you are prompted to do so. To start creating the e-mail settings with the mailbox guide, select Start. See also "E-mail", on page 84.
You must have a separate e-mail account. Follow the instructions given by your remote mailbox and internet service provider (ISP).
When you create a new mailbox, the name you give to the mailbox replaces Mailbox in the Messaging main view. You can have up to six mailboxes.
Open the mailboxWhen you open the mailbox, the device asks if you want to connect to the mailbox (Connect to mailbox?).
To connect to your mailbheadings or messages, semessages online, you areremote mailbox using a d
To view previously retrieveNo.
To create a new e-mail mE-mail in the messaging message > E-mail in youmessages", on page 78.
Retrieve e-mail mIf you are offline, select Oconnection to the remote
Important: Exercimessages. E-mail software or otherwPC.
1 When you have an opmailbox, select Optiothe following:New — to retrieve all Selected — to retrievebeen markedAll — to retrieve all mTo stop retrieving mes

82
-mail headings in the remote delete the message content, the your device. If you want to remove must first delete the e-mail
ote mailbox, and then make a evice to the remote mailbox again
the device and the remote > Delete. In Delete message
d server.
mail from the device and server, has been marked to be deleted tion ( ), and select Options >
the mailbox end the data connection to the Options > Disconnect.
s on a SIM card messages, you must copy them to
ain view, select Options > SIM
9206321_N95-1_en_Apac.book Page 82 Friday, October 19, 2007 11:52 AM
Copyright © 2007 Nokia. All rights reserved.
Mes
sagi
ng 2 If you want to close the connection and view the e-mail messages offline, select Options > Disconnect.
3 To open an e-mail message, press . If the e-mail message has not been retrieved and you are offline, you are asked if you want to retrieve this message from the mailbox.
To view e-mail attachments, open the message, and select the attachment field indicated by . If the attachment has a dimmed indicator, it has not been retrieved to the device; select Options > Retrieve.
Retrieve e-mail messages automaticallyTo retrieve messages automatically, select Options > E-mail settings > Automatic retrieval. For more information, see "Automatic retrieval", on page 86.
Setting the device to retrieve e-mail automatically may involve the transmission of large amounts of data through your service provider's network. Contact your service provider for information about data transmission charges.
Delete e-mail messagesTo delete the contents of an e-mail message from the device while still retaining it in the remote mailbox, select Options > Delete. In Delete message from:, select Phone only.
The device mirrors the emailbox. Although you e-mail heading stays in the heading as well, youmessage from your remconnection from your dto update the status.
To delete an e-mail frommailbox, select Optionsfrom:, select Phone an
To cancel deleting an e-scroll to an e-mail thatduring the next connecRestore.
Disconnect fromWhen you are online, toremote mailbox, select
View messageBefore you can view SIMa folder in your device.1 In the Messaging m
messages.
007 Nokia. All rights reserved.
Mes
sagi
ng
83
Select which message center is ages.
whether the network sends essages (network service).
t how long the message center he first attempt fails (network annot be sent within the validity leted from the message center.
ct your service provider to learn able to convert text messages
Select the connection to be used.
Select whether you want the using the same text message service).
agessaging > Options > Settings > from the following:
ize of the image in a multimedia
f you select Guided, the device send a message that may not be t. If you select Restricted, the
9206321_N95-1_en_Apac.book Page 83 Friday, October 19, 2007 11:52 AM
Copyright © 2
2 Select Options > Mark/Unmark > Mark or Mark all to mark messages.
3 Select Options > Copy. A list of folders opens.4 To start copying, select a folder and OK. To view the
messages, open the folder.
Messaging settingsFill in all fields marked with Must be defined or with a red asterisk. Follow the instructions given by your service provider. You may also obtain settings from your service provider in a configuration message.
Some or all message centers or access points may be preset for your device by your service provider, and you may not be able to change, create, edit, or remove them.
Text messagesPress , and select Messaging > Options > Settings > Text message and from the following:
Message centres — View a list of all text message centers that have been defined.
Character encoding — To use character conversion to another encoding system when available, select Reduced support.
Message centre in use —used to deliver text mess
Receive report — Select delivery reports on your m
Message validity — Selecresends your message if tservice). If the message cperiod, the message is de
Message sent as — Contaif your message center isinto these other formats.
Preferred connection —
Reply via same centre —reply message to be sent center number (network
Multimedia messPress , and select MesMultimedia message and
Image size — Define the smessage.
MMS creation mode — Iinforms you if you try to supported by the recipien
84
ect how long the message center the first attempt fails (network cannot be sent within the validity eleted from the message center.
essaging > Options > Settings >
you want to use for sending in use and a mailbox.
mailbox to change the following ttings, User settings, Retrieval c retrieval.
d its messages from your device, .
x, select Options > New mailbox.
sthe e-mail you receive, select rom the following:
r user name, given to you by your
password. If you leave this field for the password when you try to mailbox.
9206321_N95-1_en_Apac.book Page 84 Friday, October 19, 2007 11:52 AM
Copyright © 2007 Nokia. All rights reserved.
Mes
sagi
ng device prevents you from sending messages that may not be supported. To include content in your messages without notifications, select Free.
Access point in use — Select which access point is used as the preferred connection.
Multimedia retrieval — Select how you want to receive messages. To receive messages automatically in your home cellular network, select Auto in home netw.. Outside your home cellular network, you receive a notification that there is a message to retrieve in the multimedia message center.
Outside your home cellular network, sending and receiving multimedia messages may cost you more.
If you select Multimedia retrieval > Always automatic, your device automatically makes an active packet data connection to retrieve the message both in and outside your home cellular network.
Allow anon. msgs. — Select whether you want to reject messages from an anonymous sender.
Receive adverts — Define whether you want to receive multimedia message advertisements.
Receive report — Select whether you want the status of the sent message to be shown in the log (network service).
Deny report sending — Select whether you want to deny your device sending delivery reports of received messages.
Message validity — Selresends your message ifservice). If the messageperiod, the message is d
E-mailPress , and select ME-mail.
To select which mailboxe-mail, select Mailbox
Select Mailboxes and asettings: Connection sesettings, and Automati
To remove a mailbox anscroll to it, and press
To create a new mailbo
Connection settingTo edit the settings for Incoming e-mail and f
User name — Enter youservice provider.
Password — Enter your blank, you are promptedconnect to your remote
007 Nokia. All rights reserved.
Mes
sagi
ng
85
e, Password, Access point in Port are similar to the ones in
wn name. Your name replaces e recipient’s device when the s this function.
how e-mail is sent from your ly for the device to connect to the Send message. If you select il is sent when the connection to ilable.
ct whether you want to send a r own mailbox.
ct whether you want to attach a messages.
ect whether you want to receive s (a tone, a note, and a mail
l is received.
ine which parts of the e-mail are artially (kB) (POP3), or Msgs. &
9206321_N95-1_en_Apac.book Page 85 Friday, October 19, 2007 11:52 AM
Copyright © 2
Incoming mail server — Enter the IP address or host name of the mail server that receives your e-mail.
Access point in use — Select an internet access point (IAP). See "Access points", on page 117.
Mailbox name — Enter a name for the mailbox.
Mailbox type — Defines the e-mail protocol that your remote mailbox service provider recommends. The options are POP3 and IMAP4. This setting cannot be changed.
Security (ports) — Select the security option used to secure the connection to the remote mailbox.
Port — Define a port for the connection.
APOP secure login (for POP3 only) — Use with the POP3 protocol to encrypt the sending of passwords to the remote e-mail server while connecting to the mailbox.
To edit the settings for the e-mail you send, select Outgoing e-mail and from the following:
My e-mail address — Enter the e-mail address given to you by your service provider.
Outgoing mail server — Enter the IP address or host name of the mail server that sends your e-mail. You may only be able to use the outgoing server of your service provider. Contact your service provider for more information.
The settings for User namuse, Security (ports), andIncoming e-mail.
User settingsMy name — Enter your oyour e-mail address in threcipient’s device support
Send message — Define device. Select Immediatemailbox when you select During next conn., e-mathe remote mailbox is ava
Send copy to self — Selecopy of the e-mail to you
Include signature — Selesignature to your e-mail
New e-mail alerts — Selthe new e-mail indicationindicator) when new mai
Retrieval settingsE-mail to retrieve — Defretrieved: Headers only, Pattachs. (POP3).
86
ssagesessaging > Options > Settings > t whether you want to receive want to set the device to
the browser and start a network ontent when you receive a service ad messages > Automatically.
ics and related topic numbers with ress , and select Messaging > ell broadcast and from the
ether you want to receive cell
languages in which you want to elected, or Other.
ct whether the device for new topic numbers, and saves ut a name to the topic list.
9206321_N95-1_en_Apac.book Page 86 Friday, October 19, 2007 11:52 AM
Copyright © 2007 Nokia. All rights reserved.
Mes
sagi
ng Retrieval amount — Define how many new e-mail messages are retrieved to the mailbox.
IMAP4 folder path (for IMAP4 only) — Define the folder path for folders to be subscribed.
Folder subscriptions (for IMAP4 only) — Subscribe to other folders in the remote mailbox and retrieve content from those folders.
Automatic retrievalE-mail notifications — To automatically retrieve the headings to your device when you receive new e-mail in your remote mailbox, select Auto-update or Only in home netw..
E-mail retrieval — To automatically retrieve the headings of new e-mail messages from your remote mailbox at defined times, select Enabled or Only in home netw.. Define when and how often the messages are retrieved.
E-mail notifications and E-mail retrieval cannot be active at the same time.
Setting the device to retrieve e-mail automatically may involve the transmission of large amounts of data through your service provider's network. Contact your service provider for information about data transmission charges.
Web service mePress , and select MService message. Selecservice messages. If youautomatically activate connection to retrieve cmessage, select Downlo
Cell broadcastCheck the available topyour service provider. POptions > Settings > Cfollowing:
Reception — Select whbroadcast messages.
Language — Select thereceive messages: All, S
Topic detection — Seleautomatically searches the new numbers witho
007 Nokia. All rights reserved.
Mes
sagi
ng
87
9206321_N95-1_en_Apac.book Page 87 Friday, October 19, 2007 11:52 AM
Copyright © 2
Other settingsPress , and select Messaging > Options > Settings > Other and from the following:
Save sent messages — Select whether you want to save a copy of the text messages, multimedia messages, or e-mail that you send to the Sent folder.
Number of saved msgs. — Define how many sent messages are saved to the Sent folder at a time. When the limit is reached, the oldest message is deleted.
Memory in use — If a compatible memory card is inserted in the device, select the memory where you want to save your messages: Phone memory or Memory card.
88
d number in the standby mode, number, and press .
ideo clip in a multimedia message of the call, select Options > Send ks only). You can edit the message t before sending. Press to send device (network service).
ll on hold while answering another tions > Hold. To switch between
call, select Options > Swap. To held calls and drop yourself from > Transfer.
gs (for example, a password), DTMF. Enter the DTMF string or s. To enter a wait character (w) or ress repeatedly. Select OK to add DTMF tones to the Phone in a contact card.
ve only one active voice call, to put ress . To activate the call, press
route the sound from the handset ct Options > Activate
9206321_N95-1_en_Apac.book Page 88 Friday, October 19, 2007 11:52 AM
Copyright © 2007 Nokia. All rights reserved.
Mak
e ca
lls Make callsVoice calls1 In the standby mode, enter the phone number,
including the area code. To remove a number, press . For international calls, press twice for the + character (replaces the international access code), and enter the country code, area code (omit the leading zero if necessary), and phone number.
2 Press to call the number.3 Press to end the call (or to cancel the call attempt).
Pressing always ends a call, even if another application is active. Closing the slide does not end an active voice call.
To adjust the volume during a call, use the volume key on the side of your device. You can also use the scroll key. If you have set the volume to Mute, select Unmute first.
To make a call from Contacts, press , and select Contacts. Scroll to the desired name, or enter the first letters of the name to the search field. Matching contacts are listed. To call, press .
You must copy the contacts from your SIM card to Contacts before you can make a call this way. See "Copy contacts", on page 98.
To call a recently diallepress . Scroll to the
To send an image or a vto the other participantMMS (in UMTS networand change the recipienthe file to a compatible
To put an active voice caincoming call, select Opthe active and the heldconnect the active and the line, select Options
To send DTMF tone strinselect Options > Send search for it in Contacta pause character (p), psend the tone. You can number or DTMF fields
Tip! When you hathe call on hold, p
again.
During an active call, toto the loudspeaker, sele
007 Nokia. All rights reserved.
Mak
e ca
lls
89
her participant, select Options > ll is automatically put on hold.answered, to join the first ference call, select Options >
o the call, repeat step 2, and ference > Add to conference. conference calls between a ipants, including yourself.ersation with one of the tions > Conference > Private.
nd select Private. The conference your device. The other ontinue the conference call.
rivate conversation, select ference to return to the
select Options > Conference > oll to the participant, and select
ference call, press .
e number, press , and select Tools > > Speed dialling > On.
to one of the speed dialling keys select Tools > Utilities > Speed
9206321_N95-1_en_Apac.book Page 89 Friday, October 19, 2007 11:52 AM
Copyright © 2
loudspeaker. If you have attached a compatible headset with Bluetooth connectivity, to route the sound to the headset, select Options > Activate handsfree. To switch back to the handset, select Options > Activate handset.
To end an active call and replace it by answering the waiting call, select Options > Replace.
If you have several calls active, to end them all, select Options > End all calls.
Many of the options that you can use during a voice call are network services.
Voice and video mailboxesTo call your voice or video mailbox (network services, video mailbox available only in the UMTS network), press and hold in the standby mode, and select Voice mailbox or Video mailbox. See also "Call divert", on page 115, and "Video calls", on page 90.
To change the phone number of your voice or video mailbox, press , and select Tools > Utilities > Call mailbox, a mailbox, and Options > Change number. Enter the number (obtained from your wireless service provider), and select OK.
Make a conference call1 Make a call to the first participant.
2 To make a call to anotNew call. The first ca
3 When the new call is participant in the conConference.To add a new person tselect Options > ConYour device supports maximum of six particTo have a private convparticipants, select OpSelect a participant, acall is put on hold on participants can still cAfter you finish the pOptions > Add to conconference call.To drop a participant,Drop participant, scrDrop.
4 To end the active con
Speed dial a phonTo activate speed diallingSettings > Phone > Call
To assign a phone number( — ), press , and
90
g, in the standby mode, press and ion key. If a compatible headset y is attached, press and hold the voice dialling.d, and Speak now is displayed. Say nickname that is saved on the
nthesised voice tag for the n the selected device language, e and number. After a timeout of
ice dials the number.ntact was not correct, select Next r matches or Quit to cancel voice
aved under the name, the device er if it has been set. Otherwise the vailable number of the following: , Mobile (business), Telephone, usiness).
call (network service), you can see deo between you and the recipient o image, or video image captured evice is shown to the video call
9206321_N95-1_en_Apac.book Page 90 Friday, October 19, 2007 11:52 AM
Copyright © 2007 Nokia. All rights reserved.
Mak
e ca
lls dial. Scroll to the key to which you want to assign the phone number, and select Options > Assign. is reserved for the voice or video mailbox, and for starting the web browser.
To call in the standby mode, press the speed dial key and .
Voice diallingYour device supports enhanced voice commands. Enhanced voice commands are not dependent on the speaker’s voice, so the user does not record voice tags in advance. Instead, the device creates a voice tag for the entries in contacts, and compares the spoken voice tag to it. The voice recognition in the device adapts to the main user’s voice to recognise the voice commands better.
The voice tag for a contact is the name or nickname that is saved on the contact card. To listen to the synthesised voice tag, open a contact card, and select Options > Play voice tag.
Make a call with a voice tagNote: Using voice tags may be difficult in a noisy environment or during an emergency, so you should not rely solely upon voice dialling in all circumstances.
When you use voice dialling, the loudspeaker is in use. Hold the device at a short distance away when you say the voice tag.
1 To start voice diallinhold the right selectwith the headset keheadset key to start
2 A short tone is playeclearly the name or contact card.
3 The device plays a syrecognised contact iand displays the nam2.5 seconds, the devIf the recognised coto view a list of othedialling.
If several numbers are sselects the default numbdevice selects the first aMobile, Mobile (home)Tel. (home), and Tel. (b
Video callsWhen you make a videoa real-time, two-way viof the call. The live videby the camera in your drecipient.
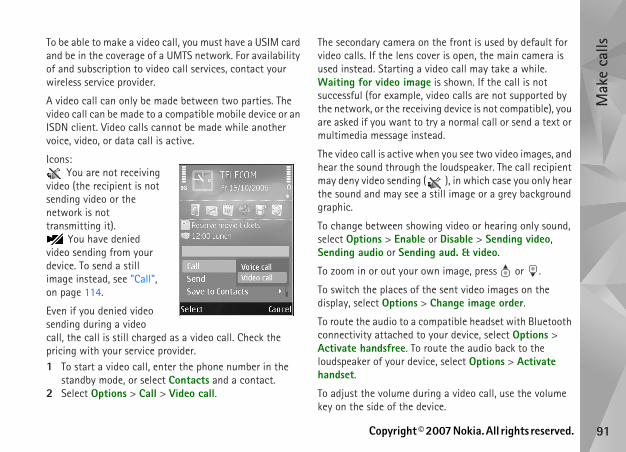
007 Nokia. All rights reserved.
Mak
e ca
lls
91
the front is used by default for er is open, the main camera is ideo call may take a while. is shown. If the call is not ideo calls are not supported by ing device is not compatible), you ry a normal call or send a text or ead.
en you see two video images, and e loudspeaker. The call recipient
), in which case you only hear still image or a grey background
ing video or hearing only sound, or Disable > Sending video, g aud. & video.
n image, press or .
e sent video images on the Change image order.
mpatible headset with Bluetooth your device, select Options > oute the audio back to the e, select Options > Activate
ing a video call, use the volume ice.
9206321_N95-1_en_Apac.book Page 91 Friday, October 19, 2007 11:52 AM
Copyright © 2
To be able to make a video call, you must have a USIM card and be in the coverage of a UMTS network. For availability of and subscription to video call services, contact your wireless service provider.
A video call can only be made between two parties. The video call can be made to a compatible mobile device or an ISDN client. Video calls cannot be made while another voice, video, or data call is active.
Icons: You are not receiving
video (the recipient is not sending video or the network is not transmitting it).
You have denied video sending from your device. To send a still image instead, see "Call", on page 114.
Even if you denied video sending during a video call, the call is still charged as a video call. Check the pricing with your service provider.1 To start a video call, enter the phone number in the
standby mode, or select Contacts and a contact.2 Select Options > Call > Video call.
The secondary camera onvideo calls. If the lens covused instead. Starting a vWaiting for video imagesuccessful (for example, vthe network, or the receivare asked if you want to tmultimedia message inst
The video call is active whhear the sound through thmay deny video sending (the sound and may see a graphic.
To change between showselect Options > Enable Sending audio or Sendin
To zoom in or out your ow
To switch the places of thdisplay, select Options >
To route the audio to a coconnectivity attached to Activate handsfree. To rloudspeaker of your devichandset.
To adjust the volume durkey on the side of the dev
92
active UMTS connection and are k coverage. See "Settings", on page aring session while you are within
rage and a handover to GSM ession is discontinued, but your You cannot start Video sharing if MTS network coverage. sender and recipient are TS network. If you invite someone
and the recipient’s device is not k coverage, or does not have Video person-to-person connections set s not know that you are sending an ve an error message that the ept the invitation.
ection settings
nection is also known as a Session connection. The SIP profile settings our device before you can use
r for the SIP profile settings, and e. Your service provider may send e air or give you a list of the needed
9206321_N95-1_en_Apac.book Page 92 Friday, October 19, 2007 11:52 AM
Copyright © 2007 Nokia. All rights reserved.
Mak
e ca
lls To use the main camera for sending video, open the lens cover in the back. To switch to the secondary camera, select Options > Use secondary camera. To switch back to the main camera, select Options > Use main camera.
To end the video call, press .
Video sharingUse Video sharing (network service) to send live video or a video clip from your mobile device to another compatible mobile device during a voice call.
The loudspeaker is active when you activate Video sharing. If you do not want to use the loudspeaker for the voice call while you share video, you can also use a compatible headset.
Video sharing requirementsBecause Video sharing requires a UMTS connection, your ability to use Video sharing depends on the UMTS network availability. Contact your service provider for more information on the service and network availability, and fees associated with using this service.
To use Video sharing you must do the following:• Ensure that your device is set up for person-to-person
connections. See "Settings", on page 92.
• Ensure you have an within UMTS networ92. If you start the shUMTS network coveoccurs, the sharing svoice call continues.you are not within U
• Ensure that both theregistered to the UMto a sharing sessionwithin UMTS networsharing installed or up, the recipient doeinvitation. You receirecipient cannot acc
SettingsPerson-to-person conn
A person-to-person conInitiation Protocol (SIP) must be configured in yVideo sharing.
Ask your service providesave them in your devicyou the settings over thparameters.
007 Nokia. All rights reserved.
Mak
e ca
lls
93
. To preview the clip, select
, your device sends the invitation have added to the contact card
ip, select Options > Invite. You he video clip into a suitable hare it. Clip must be converted ? appears. Select OK.tion of the recipient is saved in tact has several SIP addresses or ing the country code, select the ber. If the SIP address or phone
nt is not available, enter the SIP umber of the recipient including select OK to send the invitation.atically when the recipient . the sharing session. Select haring. To fast forward or rewind
or . To play the clip again,
sion, select Stop. To end the voice sharing also ends if the active
9206321_N95-1_en_Apac.book Page 93 Friday, October 19, 2007 11:52 AM
Copyright © 2
If you know a recipient’s SIP address, you can enter it on the person’s contact card. Open Contacts from your device main menu, and open the contact card (or start a new card for that person). Select Options > Add detail > SIP or Share view. Enter the SIP address in the format username@domainname (you can use an IP address instead of a domain name).
If you do not know a SIP address for the contact, you can also use the phone number of the recipient including the country code, for example +358, to share video (if supported by the wireless service provider).
UMTS connection settings
To set up your UMTS connection, do the following:• Contact your service provider to establish an
agreement for you to use the UMTS network.• Ensure that your device UMTS access point connection
settings are configured properly. For help, see "Connection", on page 116.
Share live video or video clip1 When a voice call is active, select Options > Share
video > Live video, and open the lens cover in the back.To share a video clip, select Options > Share video > Recorded clip. A list of video clips saved on the device memory or compatible memory card opens. Select a
clip you want to shareOptions > Play.
2 If you share live videoto the SIP address youof the recipient. If you share a video clmay need to convert tformat to be able to sfor sharing. ContinueIf the contact informaContacts, and the conphone numbers includdesired address or numnumber of the recipieaddress or the phone nthe country code, and
3 Sharing begins automaccepts the invitation
4 Select Pause to pauseContinue to resume sthe video clip, press press Play.
5 To end the sharing sescall, press . Video voice call ends.
94
lect Stop. Video sharing also ends nds.
line a calls , or open the slide.
e when a call comes in, select
swer a call, press . If you have t > If busy function to divert calls, all also diverts the call. See "Call
e to mute the ringing tone of the send a text message without ing the caller that you cannot
Options > Send text message. To rite a standard text message, see
t a video calls, is displayed.
video call. Allow video image to played. To start sending live video
9206321_N95-1_en_Apac.book Page 94 Friday, October 19, 2007 11:52 AM
Copyright © 2007 Nokia. All rights reserved.
Mak
e ca
lls To save the live video you shared, select Save to accept the Save shared video clip? query. The shared video is saved in the Images & videos folder in Gallery.
If you access other applications while you are sharing a video clip, the sharing is paused. To return to the video sharing view and continue sharing, in the active standby mode, select Options > Continue. See "Active standby mode", on page 74.
Accept an invitationWhen someone sends you a share invitation, an invitation message is displayed showing the sender’s name or SIP address. If your device is not set to Silent, it rings when you receive an invitation.
If someone sends you a share invitation and you are not within UMTS network coverage, you will not know that you received an invitation.
When you receive an invitation, select from the following:
Accept — to activate the sharing session.
Reject — to decline the invitation. The sender receives a message that you rejected the invitation. You can also press the end key to decline the sharing session and disconnect the voice call.
When you are receiving a video clip, to mute the sound of the clip, select Mute.
To end video sharing, seif the active voice call e
Answer or decTo answer the call, pres
To mute the ringing tonSilence.
If you do not want to anactivated the Call diverdeclining an incoming cdivert", on page 115.
When you select Silencincoming call, you can rejecting the call informanswer the call. Select set up this option and w"Call", on page 114.
Answer or rejecWhen a video call arrive
Press to answer thebe sent to caller? is disimage, select Yes.
007 Nokia. All rights reserved.
Mak
e ca
lls
95
s, select Options > Clear recent ain view. To clear one of the call r you want to erase, and select lear an individual event, open a t, and press .
te duration of your incoming and and select Tools > Log > Call
time invoiced for calls by your ay vary, depending on network off for billing, and so forth.
ers, select Options > Clear the lock code. See "Phone and
ata sent and received during press , and select Tools > xample, you may be charged for ions by the amount of data sent
9206321_N95-1_en_Apac.book Page 95 Friday, October 19, 2007 11:52 AM
Copyright © 2
If you do not activate the video call, video sending is not activated, and you only hear the sound of the caller. A grey screen replaces the video image. To replace the grey screen with a still image captured by the camera in your device, see "Call", Image in video call, on page 114.
To end the video call, press .
Call waitingYou can answer a call while you have another call in progress if you have activated Call waiting in Tools > Settings > Phone > Call > Call waiting (network service).
To answer the waiting call, press . The first call is put on hold.
To switch between the two calls, select Swap. To connect an incoming call or a call on hold with an active call and to disconnect yourself from the calls, select Options > Transfer. To end the active call, press . To end both calls, select Options > End all calls.
Log To monitor the phone numbers of missed, received, and dialled voice calls, press , and select Tools > Log > Recent calls. The device registers missed and received calls only if the network supports these functions, the device is switched on, and within the network service area.
To clear all recent call listcalls in the recent calls mregisters, open the registeOptions > Clear list. To cregister, scroll to the even
Call duration To monitor the approximaoutgoing calls, press ,duration.
Note: The actual service provider mfeatures, rounding
To clear call duration timtimers. For this you needSIM card", on page 111.
Packet dataTo check the amount of dpacket data connections,Log > Packet data. For eyour packet data connectand received.
96
view, you can copy a phone pboard, and paste it to a text ple. Select Options > Copy
t data counter how much data is g a certain packet data connection ing or outgoing event indicated by ns > View details.
9206321_N95-1_en_Apac.book Page 96 Friday, October 19, 2007 11:52 AM
Copyright © 2007 Nokia. All rights reserved.
Mak
e ca
lls Monitor all communication eventsIcons in Log are as follows:
Incoming Outgoing Missed communication events
To monitor all voice calls, text messages, or data and wireless LAN connections registered by the device, press
, select Tools > Log, and press to open the general log.
Subevents, such as a text message sent in more than one part and packet data connections, are logged as one communication event. Connections to your mailbox, multimedia messaging center, or web pages are shown as packet data connections.
To add an unknown phone number from Log to your contacts, select Options > Save to Contacts.
To filter the log, select Options > Filter and a filter.
To erase the contents of the log, recent calls register, and messaging delivery reports permanently, select Options > Clear log. Select Yes to confirm. To remove a single event from the log, press .
To set the log duration, select Options > Settings > Log duration. If you select No log, all the log contents, recent calls register, and messaging delivery reports are permanently deleted.
Tip! In the detailsnumber to the climessage, for examnumber.
To view from the packetransferred and how lonlasts, scroll to an incomPack., and select Optio
007 Nokia. All rights reserved.
Cont
acts
(Ph
oneb
ook)
97
t contact cards, you can also use tor available in Nokia Nseries PC
ail image to a contact card, open ct Options > Edit > Options > bnail image is shown when the
assigned to the contact, select a > Play voice tag. See "Voice
ion, select the card you want to business card > Via text , Via Bluetooth, or Via infrared. 77 and "Send data using
on page 20.
ct cards on a compatible Basic quipped printer with Bluetooth
as HP Deskjet 450 Mobile Printer 150), select Options > Print.
up, select Options > Add to have created a group). See
on page 99.
9206321_N95-1_en_Apac.book Page 97 Friday, October 19, 2007 11:52 AM
Copyright © 2
Contacts (Phonebook) Press , and select Contacts. In Contacts you can save and update contact information, such as phone numbers, home addresses, or e-mail addresses of your contacts. You can add a personal ringing tone or a thumbnail image to a contact card. You can also create contact groups, which allow you to send text messages or e-mail to many recipients at the same time. You can add received contact information (business cards) to contacts. See "Data and settings", on page 80. Contact information can only be sent to or received from compatible devices.
To view the amount of contacts, groups, and the available memory in Contacts, select Options > Contacts info.
Save and edit names and numbers1 Select Options > New contact.2 Fill in the fields that you want, and select Done.
To edit contact cards in Contacts, scroll to the contact card you want to edit, and select Options > Edit. You can also search for the desired contact by entering the first letters of the name to the search field. A list of the contacts starting with the letters appear on the display.
Tip! To add and ediNokia Contacts EdiSuite.
To attach a small thumbnthe contact card, and seleAdd thumbnail. The thumcontact calls.
To listen to the voice tag contact card and Optionsdialling", on page 90.
To send contact informatsend and Options > Sendmessage, Via multimediaSee "Messaging", on pageBluetooth connectivity",
Tip! To print contaPrint Profile (BPP) econnectivity (such or HP Photosmart 8
To add a contact to a grogroup: (shown only if you"Create contact groups",
98
r SIM card, in Contacts, select the y and Options > Copy to SIM Copy > To SIM directory. Only the orted by your SIM card are copied.
hronise your contacts to a th Nokia Nseries PC Suite.
nd other SIM servicesmation on using SIM card services, endor. This may be the service r.
ntacts > Options > SIM ry to see the names and numbers
In the SIM directory you can add, contacts, and you can make calls.
dialling numbers, select Options > ial contacts. This setting is only our SIM card.
ur device to selected phone s > Activate fixed dialling. You activate and deactivate fixed d dialling contacts. Contact your o not have the code. To add new alling list, select Options > New the PIN2 code for these functions.
9206321_N95-1_en_Apac.book Page 98 Friday, October 19, 2007 11:52 AM
Copyright © 2007 Nokia. All rights reserved.
Cont
acts
(Ph
oneb
ook) To check to which groups a contact belongs, select the
contact and Options > Belongs to groups.
To delete a contact card in Contacts, select a card, and press . To delete several contact cards at the same time, press
and to mark the contacts, and press to delete.
Default numbers and addressesYou can assign default numbers or addresses to a contact card. In this way if a contact has several numbers or addresses, you can easily call or send a message to the contact to a certain number or address. The default number is also used in voice dialling.1 In Contacts, select a contact.2 Select Options > Defaults.3 Select a default to which you want to add a number or
an address, and select Assign.4 Select a number or an address you want to set as a default.
The default number or address is underlined in the contact card.
Copy contactsTo copy names and numbers from a SIM card to your device, press , and select Contacts > Options > SIM contacts > SIM directory, the names you want to copy and Options > Copy to Contacts.
To copy contacts to younames you want to copdirectory, or Options >contact card fields supp
Tip! You can synccompatible PC wi
SIM directory aFor availability and inforcontact your SIM card vprovider or other vendo
Press , and select Cocontacts > SIM directostored on the SIM card.edit, or copy numbers to
To view the list of fixed SIM contacts > Fixed dshown if supported by y
To restrict calls from yonumbers, select Optionneed your PIN2 code todialling or edit your fixeservice provider if you dnumbers to the fixed diSIM contact. You need
007 Nokia. All rights reserved.
Cont
acts
(Ph
oneb
ook)
99
groups to open the groups list. group. group or use the default name . Options > Add members.d press to mark it. To add time, repeat this action on all
t to add.contacts to the group.
t Options > Rename, enter the .
from a groupct the group you want to modify.and select Options > Remove
the contact from the group.
9206321_N95-1_en_Apac.book Page 99 Friday, October 19, 2007 11:52 AM
Copyright © 2
When you use Fixed dialling, packet data connections are not possible, except when sending text messages over a packet data connection. In this case, the message center number and the recipient’s phone number must be included on the fixed dialling list.
When fixed dialling is activated, calls may be possible to the official emergency number programmed into your device.
Add ringing tones for contactsTo define a ringing tone for a contact or a contact group, do the following:1 Press to open a contact card or go to the groups list,
and select a contact group.2 Select Options > Ringing tone. A list of ringing tones
opens.3 Select the ringing tone you want to use for the
individual contact or the selected group. You can also use a video clip as a ringing tone.
When a contact or group member calls you, the device plays the chosen ringing tone (if the caller’s telephone number is sent with the call and your device recognises it).
To remove the ringing tone, select Default tone from the list of ringing tones.
Create contact1 In Contacts, press 2 Select Options > New3 Write a name for the
Group , and select OK4 Select the group, and 5 Scroll to a contact, an
multiple members at athe contacts you wan
6 Select OK to add the
To rename a group, selecnew name, and select OK
Remove members1 In the groups list, sele2 Scroll to the contact,
from group.3 Select Yes to remove
10
of Quickword that supports nt and select Options > Upgrade chargeable.
tion", on page 101.
an view native Microsoft Excel files
e viewing of spreadsheet files ted with Microsoft Excel 97, 2000, tions or features of the mentioned ed.
press , and select Quickoffice > Quicksheet and
of Quicksheet that supports eet and select Options > Upgrade chargeable.
tion", on page 101.
9206321_N95-1_en_Apac.book Page 100 Friday, October 19, 2007 11:52 AM
Copyright © 2007 Nokia. All rights reserved.
Off
ice
0
OfficeQuickoffice With Quickoffice, you can view .doc, .xls, .ppt, and .txt documents. All file formats or features are not supported. Apple Macintosh is not supported.
To use the Quickoffice applications, press , and select Applications > Office > Quickoffice. A list of files in the .doc, .xls, .ppt, and .txt file formats saved on your device and on a compatible memory card (if inserted) opens.
To open Quickword, Quicksheet, Quickpoint, or Quickmanager, press to reach the desired view.
QuickwordWith Quickword, you can view native Microsoft Word documents with your device.
Quickword supports the viewing of documents saved in .doc and .txt formats created with Microsoft Word 97, 2000, XP, and 2003. Not all variations or features of the mentioned file formats are supported.
To open a document, press , and select Applications > Office > Quickoffice > Quickword and the document.
To upgrade to a versionediting, open a documeto edit. The upgrade is
See also "More informa
QuicksheetWith Quicksheet, you cwith your device.
Quicksheet supports thsaved in .xls format creaXP, or 2003. Not all variafile formats are support
To open a spreadsheet, Applications > Office >the spreadsheet.
To upgrade to a versionediting, open a spreadshto edit. The upgrade is
See also "More informa
007 Nokia. All rights reserved.
Off
ice
101
s with Quickword, Quicksheet, ager, visit www.quickoffice.com port is also available by sending quickoffice.com.
at, press , and select Notes.
ress , and select Recorder. To record a telephone der during a voice call. Both 5 seconds during recording.
can read .pdf documents on the
optimized for .pdf document other mobile devices, and t of features compared with PC
9206321_N95-1_en_Apac.book Page 101 Friday, October 19, 2007 11:52 AM
Copyright © 2
QuickpointWith Quickpoint, you can view native Microsoft PowerPoint presentations with your device.
Quickpoint supports the viewing of presentations saved in .ppt format created with Microsoft PowerPoint 2000, XP, and 2003. Not all variations or features of the mentioned file formats are supported.
To open a presentation, press , and select Applications > Office > Quickoffice > Quickpoint and the presentation.
To upgrade to a version of Quickpoint that supports editing, open a presentation and select Options > Upgrade to edit. The upgrade is chargeable.
See also "More information", on page 101.
QuickmanagerWith Quickmanager, you can download software, including updates, upgrades, and other useful applications. You can pay for the downloads by phone bill or credit card.
To upgrade your Quickword, Quicksheet, or Quickpoint to a version that supports editing, you need to buy a license.
To open Quickmanager, press , and select Applications > Office > Quickoffice > Quickmanager.
More informationIf you experience problemQuickpoint, or Quickmanfor more information. Supan e-mail to supportS60@
Notes To write notes in .txt formApplications > Office >
Recorder To record voice memos, pApplications > Media > conversation, open Recorparties hear a tone every
Adobe Reader With Adobe Reader, you display of your device.
This application has beencontent on handsets andprovides only a limited seversions.

10
lect the measure you want to use.lect the unit from which you want xt Unit field, select the unit to onvert.field, enter the value you want to mount field changes automatically ed value.
cy and exchange rates> Options > Currency rates.
rrency conversions, you must select exchange rates. The rate of the
1.
change base currency, you must nge rates because all previously set re cleared.
pplication to compress files. s memory and are more convenient evices.
, press , and select Zip.
chives or to change the settings, desired option.
9206321_N95-1_en_Apac.book Page 102 Friday, October 19, 2007 11:52 AM
Copyright © 2007 Nokia. All rights reserved.
Off
ice
2
To open documents, press , and select Applications > Office > Adobe PDF. Your recent files are listed in the file view. To open a document, scroll to it, and press .
Use File mgr. to browse and open documents stored in the device memory and on a compatible memory card (if inserted).
More informationFor more information, visit www.adobe.com.
To share questions, suggestions, and information about the application, visit the Adobe Reader for Symbian OS user forum at http://adobe.com/support/forums/main.html.
Calculator Press , and select Applications > Calculator.
Note: This calculator has limited accuracy and is designed for simple calculations.
Converter To convert measures from one unit to another, press , and select Applications > Office > Converter.
Converter has limited accuracy, and rounding errors may occur.
1 In the Type field, se2 In first Unit field, se
to convert. In the newhich you want to c
3 In the first Amount convert. The other Ato show the convert
Set base currenSelect Type > CurrencyBefore you can make cua base currency and addbase currency is always
Note: When youenter new exchaexchange rates a
Zip manager Use the Zip manager aCompressed files use lesto send to compatible d
To open the applicationApplications > Office >
To create or manage arselect Options and the
007 Nokia. All rights reserved.
Off
ice
103
e keyboard appears, its status connected, and the green oard blinks slowly; the keyboard
on and maintenance of your de.
ion to decode different types of nd codes in magazines). The ation such as URL links, e-mail bers.
des, press , and select Barcode.
era to scan a code, open the lens a activation switch. To scan the et the code between the red lines de attempts to scan and decode d information appears on the
, select Options > Save. The data
decoded information in the main To open a code, press .
9206321_N95-1_en_Apac.book Page 103 Friday, October 19, 2007 11:52 AM
Copyright © 2
You can store archive files on the device or on a compatible memory card.
Wireless Keyboard To set up a Nokia Wireless Keyboard or other compatible wireless keyboard supporting the Bluetooth Human Interface Devices (HID) profile for use with your device, use the Wireless keybd. application. The keyboard enables you to enter text in comfort, using the full QWERTY layout, for text messages, e-mail, and calendar entries.1 Activate Bluetooth connectivity on your device.2 Switch on the keyboard.3 Press , and select Tools > Connectivity > Wireless
keybd..4 Select Options > Find keyboard to start searching for
devices with Bluetooth connectivity.5 Select the keyboard from the list, and press to start
the connection.6 To pair the keyboard with your device, enter a passcode
of your choice (1 to 9 digits) on the device and the same passcode on your keyboard.To enter the digits of the passcode, you may need to press the Fn key first.
7 If you are asked for a keyboard layout, select it from a list on your device.
8 When the name of thchanges to Keyboard indicator of your keybis ready for use.
For details on the operatikeyboard, see its user gui
Barcode readerUse the Barcode applicatcodes (such as barcodes acodes may contain informaddresses, and phone num
To scan and decode barcoApplications > Office >
To activate the main camcover by using the camercode, select Scan code. Son the display. The Barcothe code, and the decodedisplay.
To save the scanned datais saved in .bcr format.
To view previously saved, view, select Saved data.
10
9206321_N95-1_en_Apac.book Page 104 Friday, October 19, 2007 11:52 AM
Copyright © 2007 Nokia. All rights reserved.
Off
ice
4
When viewing the decoded information, the different links, URL links, phone numbers, and e-mail addresses are indicated by icons on the top of the display in the direction they appear in the decoded information.
In the Saved data view, select Options and you can scan new codes or use the decoded information.
The device reverts to the standby mode to save battery power if Barcode cannot be activated or if no keys are pressed for 1 minute. To continue scanning or viewing saved information, press .
007 Nokia. All rights reserved.
Tool
s
105
ns and softwareation, a Java application, fully installed, and that the the memory card.
nstall and use applications and m trusted sources, such as are Symbian Signed or have erifiedTM testing.
the following:n type, version number, and the rer of the application, select ils. certificate details of the cates, select View details. See ent", on page 112.t contains an update or repair to n, you can only restore the you have the original installation opy of the removed software
e original application, remove the ll the application again from the le or the back-up copy.
9206321_N95-1_en_Apac.book Page 105 Friday, October 19, 2007 11:52 AM
Copyright © 2
ToolsApplication manager Press , and select Applications > App. mgr.. You can install two types of applications and software to your device:• J2METM applications based on JavaTM technology with
the extension .jad or .jar ( ). • Other applications and software suitable for the
Symbian operating system ( ). The installation files have the .sis extension. Only install software specifically designed for your Nokia N95. Software providers will often refer to the official model number of this product: the Nokia N95-1.
Installation files may be transferred to your device from a compatible computer, downloaded during browsing, or sent to you in a multimedia message, as an e-mail attachment, or using Bluetooth connectivity or infrared. You can use Nokia Application Installer in Nokia Nseries PC Suite to install an application to your device. If you use Microsoft Windows Explorer to transfer a file, save the file to a compatible memory card (local disk).
Install applicatio indicates a .sis applic
that the application is notapplication is installed on
Important: Only iother software froapplications that passed the Java V
Before installation, note • To view the applicatio
supplier or manufactuOptions > View detaTo display the securityapplication, in Certifi"Certificate managem
• If you install a file thaan existing applicatiooriginal application if file or a full back-up cpackage. To restore thapplication, and instaoriginal installation fi
10
device can only support one tion. Having more than one antivirus functionality could ce and operation or cause the nctioning.
tions to a compatible memory sis) remain in the device memory. amounts of memory and prevent files. To maintain sufficient ies PC Suite to back up installation , then use the file manager to files from the device memory. See 8. If the .sis file is a message message from the Messaging
tions and softwarekage, and select Options > onfirm.
you can only reinstall it if you have ckage or a full backup of the
age. If you remove a software nger be able to open documents are.
9206321_N95-1_en_Apac.book Page 106 Friday, October 19, 2007 11:52 AM
Copyright © 2007 Nokia. All rights reserved.
Tool
s
6
• The .jar file is required for installing Java applications. If it is missing, the device may ask you to download it. If there is no access point defined for the application, you are asked to select one. When you are downloading the .jar file, you may need to enter a user name and password to access the server. You obtain these from the supplier or manufacturer of the application.
1 To locate an installation file, press , and select Applications > App. mgr.. Alternatively, search the device memory or a compatible memory card (if inserted) in File mgr., or open a message in Messaging > Inbox that contains an installation file.
2 In App. mgr., select Options > Install. In other applications, scroll to the installation file, and press to start the installation.During installation, the device shows information about the progress of the installation. If you are installing an application without a digital signature or certification, the device displays a warning. Continue installation only if you are sure of the origin and contents of the application.
To start an installed application, locate it in the menu, and press . If the application does not have a default folder defined, it is installed in the Applications folder.
To see which software packages are installed or removed and when, select Options > View log.
Important: Yourantivirus applicaapplication withaffect performandevice to stop fu
After you install applicacard, installation files (.The files may use large you from storing other memory, use Nokia Nserfiles to a compatible PCremove the installation"File manager", on pageattachment, delete the inbox.
Remove applicaScroll to a software pacRemove. Select Yes to c
If you remove software,the original software paremoved software packpackage, you may no locreated with that softw
007 Nokia. All rights reserved.
Tool
s
107
tware to access DRM-protected you can access content protected RM 1.0, and OMA DRM 2.0. If
ls to protect the content, content DRM software's ability to access ent be revoked. Revocation may uch DRM-protected content vocation of such DRM software f content protected with other of non-DRM-protected content.
t (DRM) protected content activation key that defines your
.
M protected content, to back up and the content, use the backup C Suite. Other transfer methods
vation keys which need to be t for you to be able to continue tected content after the device may also need to restore the e files on your device get
M protected content, both the ontent will be lost if the device may also lose the activation keys he files on your device get ivation keys or the content may
9206321_N95-1_en_Apac.book Page 107 Friday, October 19, 2007 11:52 AM
Copyright © 2
If another software package depends on the software package that you removed, the other software package may stop working. Refer to the documentation of the installed software package for details.
SettingsSelect Options > Settings and from the following:
Software installation — Select whether Symbian software that has no verified digital signature can be installed.
Online certificate check — Select to check the online certificates before installing an application.
Default web address — Set the default address used when checking online certificates.
Some Java applications may require a message to be sent or a network connection to a specific access point for downloading extra data or components. In the App. mgr. main view, scroll to an application, and select Options > Open to change settings related to that specific application.
Digital rights management Content owners may use different types of digital rights management (DRM) technologies to protect their intellectual property, including copyrights. This device uses
various types of DRM sofcontent. With this device with WMDRM 10, OMA Dcertain DRM software faiowners may ask that suchnew DRM-protected contalso prevent renewal of salready in your device. Redoes not affect the use otypes of DRM or the use
Digital rights managemencomes with an associatedrights to use the content
If your device has OMA DRboth the activation keys feature of Nokia Nseries Pmay not transfer the actirestored with the contenthe use of OMA DRM promemory is formatted. Youactivation keys in case thcorrupted.
If your device has WMDRactivation keys and the cmemory is formatted. Youand the content in case tcorrupted. Losing the act
10
nds ands to control your device. For
t the enhanced voice commands e, see "Voice dialling", on page 90.
ice commands for starting s, you must open the Voice comm. iles folder. Press , and select Profiles; the device creates voice s and profiles. To use enhanced and hold in the standby mode, d. The voice command is the name
ofile displayed in the list.
s to the list, select Options > New cond voice command that can be
ation, select Options > Change e new voice command as text. , abbreviations, and acronyms.
ised voice tag, select Options >
nd settings, select Options > the synthesiser that plays nd commands in the selected Synthesiser > Off. To reset voice r example, when the main user of , select Remove voice adapts..
9206321_N95-1_en_Apac.book Page 108 Friday, October 19, 2007 11:52 AM
Copyright © 2007 Nokia. All rights reserved.
Tool
s
8
limit your ability to use the same content on your device again. For more information, contact your service provider.
Some activation keys may be connected to a specific SIM card, and the protected content can be accessed only if the SIM card is inserted in the device.
To view the digital rights activation keys stored in your device, press , and select Applications > Media > Actv. keys and from the following:
Valid keys — View keys that are connected to one or more media files and keys whose validity period has not started yet.
Invalid keys — View keys that are not valid; the time period for using the media file is exceeded or there is a protected media file in the device but no connected activation key.
Not in use — View keys that have no media files connected to them in the device.
To buy more usage time or extend the usage period for a media file, select an invalid activation key and Options > Get new key. Activation keys cannot be updated if web service message reception is disabled. See "Web service messages", on page 80.
To view detailed information, such as the validity status and ability to send the file, scroll to an activation key, and press .
Voice commaYou can use voice commmore information abousupported by your devic
To activate enhanced voapplications and profileapplication and its ProfTools > Voice comm. >tags for the applicationvoice commands, press and say a voice commanof the application or pr
To add more applicationapplication. To add a seused to start the appliccommand, and enter thAvoid very short names
To listen to the synthesPlayback.
To change voice commaSettings. To switch off recognised voice tags adevice language, selectrecognition learning, fothe device has changed
007 Nokia. All rights reserved.
Sett
ings
109
s application. See "Change the age 73.
settings for the Voice comm. mmands", on page 108.
or to adjust the light sensor conditions and adjusts the The light sensor may cause the ght.
ze of the text and icons on the
Select the time-out period after activated.
The welcome note or logo is e you switch on the device. default image, Text to write a to select an image from Gallery.
a time-out after which the switched off.
9206321_N95-1_en_Apac.book Page 109 Friday, October 19, 2007 11:52 AM
Copyright © 2
Settings To change settings, press , and select Tools > Settings. Scroll to General, Phone, Connection, or Applications, and press . Scroll to a setting or setting group you want to change, and press .
Some settings may be preset for the device by your service provider, and you may not be able to change them.
General To edit the general settings of your device or restore the original default device settings, press , and select Tools > Settings > General > Personalisation, Date and time, Enhancement, Security, Factory settings, or Positioning.
For Date and time, see "Clock", on page 75.
PersonalisationTo edit settings related to the display, standby mode, and general functionality of your device, press , and select Tools > Settings > General > Personalisation.
Tones allows you to change the tones of calendar, clock, and the currently active profile.
Themes opens the Themelook of your device", on p
Voice comms. opens theapplication. See "Voice co
DisplayLight sensor — Press that observes the lightingbrightness of the display.display to flicker in low li
Font size — Adjust the sidisplay.
Power saver time-out —which the power saver is
Welcome note / logo — displayed briefly each timSelect Default to use thewelcome note, or Image
Light time-out — Selectbacklight of the display is
11
e until you change these settings
anging the language affects the haracters available when writing text dictionary used.
he predictive text input On or Off ice. The predictive text dictionary nguages.
tors, see "Essential indicators", on ent connectors do not indicate
cement is connected to the device.
pend on the type of enhancement. and from the following:
he profile that you want activated certain compatible enhancement files — set tones", on page 71.
t if you want the device to answer atically after 5 seconds. If the ep once or Silent, automatic
hts remain on, or are switched off setting is not available for all
9206321_N95-1_en_Apac.book Page 110 Friday, October 19, 2007 11:52 AM
Copyright © 2007 Nokia. All rights reserved.
Sett
ings
0
Standby modeActive standby — Use shortcuts to applications in the standby mode. See "Active standby mode", on page 74.
Active standby apps. — Select the application shortcuts you want to appear in the active standby. This setting is only available if Active standby is on.
Shortcuts > Left selection key and Right selection key — Assign a shortcut to the selection keys in the standby mode.
You can also assign keypad shortcuts for the different presses of the scroll key. The scroll key shortcuts are not available if the active standby is on.
Operator logo — This setting is only available if you have received and saved an operator logo. Select Off if you do not want the logo to be shown.
LanguagePhone language — Changing the language of the display texts in your device also affects the format used for date and time and the separators used, for example, in calculations. Automatic selects the language according to the information on your SIM card. After you change the display text language, the device restarts.
Changing the settings for Phone language or Writing language affects every application in your device, and the
change remains effectivagain.
Writing language — Chcharacters and special ctext and the predictive
Predictive text — Set tfor all editors in the devis not available for all la
EnhancementFor enhancement indicapage 3. Some enhancemwhich type of an enhan
The available settings deSelect an enhancement
Default profile — Set teach time you connect ato your device. See "Pro
Automatic answer — Sean incoming call automringing type is set to Beanswer is disabled.
Lights — Set whether ligafter the time-out. Thisenhancements.
007 Nokia. All rights reserved.
Sett
ings
111
d Lock code — You can change nd PIN2 code. These codes can from 0 to 9. If you forget any of service provider. See "Glossary of age 112.
similar to the emergency ental dialling of the emergency
— Select whether the keypad is has been idle for a certain period
To avoid unauthorised use, you hich the device automatically
not be used until the correct lock ff the autolock period, select
lock codes", on page 112.
d, calls may be possible to the er programmed into your device.
ice manually, press . A list of elect Lock phone.
— Select whether the keypad is e 2-way slide.
ck the keypad manually, press
9206321_N95-1_en_Apac.book Page 111 Friday, October 19, 2007 11:52 AM
Copyright © 2
To change the settings for a TV-Out connection, select TV-Out and from the following:
Default profile — Set the profile that you want activated each time you connect a Nokia Video Connectivity Cable to your device.
TV screen size — Select the aspect ratio of the TV: Normal or Widescreen for widescreen TVs.
Tv system — Select the analog video signal system that is compatible with your TV.
Flicker filter — To improve image quality on the screen of your TV, select On. The flicker filter may not diminish image flicker on all TV screens.
SecurityTo edit settings related to the security, press , and select Tools > Settings > General > Security > Phone and SIM card, Certificate management, or Security module.
Phone and SIM cardPIN code request — When active, the code is requested each time the device is switched on. Deactivating the personal identification number (PIN) code request may not be allowed by some SIM cards.
PIN code, PIN2 code, anthe lock code, PIN code, aonly include the numbersthese codes, contact yourPIN and lock codes", on p
Avoid using access codesnumbers to prevent accidnumber.
Keypad autolock periodlocked when your device of time.
Phone autolock period —can set a time-out after wlocks. A locked device cancode is entered. To turn oNone.
See "Glossary of PIN and
When the device is lockeofficial emergency numb
Tip! To lock the devcommands opens. S
Lock keys if slide closedlocked when you close th
Tip! To lock or unlo, then .
11
4 to 8 digits) is supplied with some d to access some functions in your
as security code) — This code (5 k the device to avoid unauthorised
for the lock code is 12345. To of your device, change the lock e secret and in a safe place ce. If you forget the code, contact
(PUK) code and PUK2 code — e required to change a blocked PIN ectively. If the codes are not ard, contact the operator whose ce.
(8 digits) is required to change a e code is not supplied with the
operator whose USIM card is in
mentot guarantee safety; they are used ftware.
ement main view, you can see a ates that are stored in your device. f personal certificates, if available.
9206321_N95-1_en_Apac.book Page 112 Friday, October 19, 2007 11:52 AM
Copyright © 2007 Nokia. All rights reserved.
Sett
ings
2
Lock if SIM card changed — You can set the device to ask for the lock code when an unknown SIM card is inserted into your device. The device maintains a list of SIM cards that are recognised as the owner’s cards.
Closed user group — You can specify a group of people to whom you can call and who can call you (network service).
When calls are limited to closed user groups, calls may be possible to the official emergency number programmed into your device.
Confirm SIM services — You can set the device to display confirmation messages when you are using a SIM card service (network service).
Glossary of PIN and lock codesIf you forget any of these codes, contact your service provider.
Personal identification number (PIN) code — This code protects your SIM card against unauthorised use. The PIN code (4 to 8 digits) is usually supplied with the SIM card. After three consecutive incorrect PIN code entries, the code is blocked, and you need the PUK code to unblock it.
UPIN code — This code may be supplied with the USIM card. The USIM card is an enhanced version of the SIM card and is supported by UMTS mobile phones.
PIN2 code — This code (SIM cards, and is requiredevice.
Lock code (also known digits) can be used to locuse. The factory settingavoid unauthorised usecode. Keep the new codseparate from your deviNokia Care Center.
Personal unblocking keyThese codes (8 digits) arcode or PIN2 code, respsupplied with the SIM cSIM card is in your devi
UPUK code — This codeblocked UPIN code. If thUSIM card, contact theyour device.
Certificate manageDigital certificates do nto verify the origin of so
In the certificate managlist of authority certificPress to see a list o
007 Nokia. All rights reserved.
Sett
ings
113
— check authenticity
he correct identity of a server he period of validity of a server cked.
ntity of the server is not t have the correct security .
ls, scroll to a certificate, and ate details. When you open idity of the certificate is checked, notes may be displayed:ed — You have not set any certificate. See "Change the trust . The period of validity has ended icate.yet — The period of validity has
selected certificate. — The certificate cannot be ificate issuer.
s
ificate settings, you must make the owner of the certificate and belongs to the listed owner.
9206321_N95-1_en_Apac.book Page 113 Friday, October 19, 2007 11:52 AM
Copyright © 2
Digital certificates should be used if you want to connect to an online bank or another site or remote server for actions that involve transferring confidential information. They should also be used if you want to reduce the risk of viruses or other malicious software and be sure of the authenticity of software when downloading and installing software.
Important: Even if the use of certificates makes the risks involved in remote connections and software installation considerably smaller, they must be used correctly in order to benefit from increased security. The existence of a certificate does not offer any protection by itself; the certificate manager must contain correct, authentic, or trusted certificates for increased security to be available. Certificates have a restricted lifetime. If "Expired certificate" or "Certificate not valid yet" is shown even if the certificate should be valid, check that the current date and time in your device are correct.
Before changing any certificate settings, you must make sure that you really trust the owner of the certificate and that the certificate really belongs to the listed owner.
View certificate details
You can only be sure of twhen the signature and tcertificate have been che
You are notified if the ideauthentic or if you do nocertificate in your device
To check certificate detaiselect Options > Certificcertificate details, the valand one of the following • Certificate not trust
application to use the settings", on page 113
• Expired certificate —for the selected certif
• Certificate not valid not yet begun for the
• Certificate corruptedused. Contact the cert
Change the trust setting
Before changing any certsure that you really trustthat the certificate really
11
Select the positioning methods ion of your device: the internal GPS luetooth GPS to use a compatible
ith Bluetooth connectivity, and information from the cellular e). The location information can be lications in your device.
ted to making and receiving calls, ls > Settings > Phone > Call, Call Network.
u can set your phone number to be den from (No) the person to whom alue may be set by your service e a subscription (Set by network)
ve activated call waiting (network tifies you of a new incoming call progress. Set the function on l), or check whether the function us).
9206321_N95-1_en_Apac.book Page 114 Friday, October 19, 2007 11:52 AM
Copyright © 2007 Nokia. All rights reserved.
Sett
ings
4
Scroll to an authority certificate, and select Options > Trust settings. Depending on the certificate, a list of the applications that can use the selected certificate is shown. For example:• Symbian installation: Yes — The certificate is able to
certify the origin of a new Symbian operating system application.
• Internet: Yes — The certificate is able to certify servers.• App. installation: Yes — The certificate is able to
certify the origin of a new JavaTM application.
Select Options > Edit trust setting to change the value.
Security moduleTo view or edit a security module (if available) in Security module, scroll to it, and press the scroll key. To view detailed information about a security module, scroll to it, and select Options > Security details.
Factory settingsTo reset some of the settings to their original values, select Factory settings. To do this, you need the lock code. See "Phone and SIM card", on page 111. After resetting, the device may take a longer time to power on. Documents and files are unaffected.
PositioningPositioning methods —used to detect the locatreceiver of your device, Bexternal GPS receiver wNetwork based to use network (network servicused by compatible app
Phone To edit the settings relapress , and select Toodivert, Call barring, or
CallSend my caller ID — Yodisplayed to (Yes) or hidyou are calling, or the vprovider when you mak(network service).
Call waiting — If you haservice), the network nowhile you have a call in(Activate) or off (Canceis activated (Check stat
007 Nokia. All rights reserved.
Sett
ings
115
e not subscribed to this network ble to make calls. When line 2 is he standby mode.
een the phone lines, press and ndby mode.
t line selection (network service), d by your SIM card. To change PIN2 code.
ivert your incoming calls to your phone number. For details, ider.
nt to divert and the desired voice calls when your number is ncoming calls, select If busy. Set or off (Cancel), or check whether heck status).
can be active at the same time. d, is shown in the
ting cannot be active at the same
9206321_N95-1_en_Apac.book Page 115 Friday, October 19, 2007 11:52 AM
Copyright © 2
Reject call with SMS — Select Yes to send a text message to a caller informing why you could not answer the call. See "Answer or decline a call", on page 94.
Message text — Write a text to be sent in a text message when you reject a call.
Image in video call — If video is not sent during a video call, you can select a still image to be displayed instead.
Automatic redial — Select On, and your device makes a maximum of 10 attempts to connect the call after an unsuccessful call attempt. To stop automatic redialling, press .
Show call duration — Activate this setting if you want the length of a call to be displayed during the call.
Speed dialling — Select On, and the numbers assigned to the speed dialling keys ( — ) can be dialled by pressing and holding the key. See also "Speed dial a phone number", on page 89.
Anykey answer — Select On, and you can answer an incoming call by briefly pressing any keypad key, except
, , , and .
Line in use — This setting (network service) is shown only if the SIM card supports two subscriber numbers, that is, two phone lines. Select which phone line you want to use for making calls and sending text messages. Calls on both lines can be answered irrespective of the selected line. If
you select Line 2 and havservice, you will not be aselected, is shown in t
Tip! To switch betwhold in the sta
Line change — To prevenselect Disable if supportethis setting, you need the
Call divertCall divert allows you to dvoice mailbox or anothercontact your service prov
Select which calls you wadiverting option. To divertbusy or when you reject ithe option on (Activate) the option is activated (C
Several diverting optionsWhen all calls are divertestandby mode.
Call barring and call divertime.
11
s. Contact your service provider for
elect Automatic to set the device one of the available networks, or lect the network from a list of tion to the manually selected ice sounds an error tone and asks k. The selected network must have ith your home cellular network.
ing agreement is an agreement ore network service providers to f one service provider to use the
service providers.
ct On to set the device to indicate lar network based on microcellular ogy and to activate cell info
other connection settings, press Settings > Connection > points, Packet data, Wireless
rnet tel., Configurations, or APN
9206321_N95-1_en_Apac.book Page 116 Friday, October 19, 2007 11:52 AM
Copyright © 2007 Nokia. All rights reserved.
Sett
ings
6
Call barring Call barring (network service) allows you to restrict the calls that you make or receive with the device. To change the settings, you need the barring password from your service provider.
Select the desired barring option, and set it on (Activate) or off (Cancel), or check whether the option is active (Check status). Call barring affects all calls, including data calls.
Call barring and call diverting cannot be active at the same time.
When calls are barred, calls may be possible to certain official emergency numbers.
NetworkYour device can automatically switch between the GSM and UMTS networks. The GSM network is indicated with
in the standby mode. The UMTS network is indicated with .
Network mode (shown only if supported by the wireless service provider) — Select which network to use. If you select Dual mode, the device uses the GSM or UMTS network automatically, according to the network parameters and the roaming agreements between the
wireless service providermore details.
Operator selection — Sto search for and selectManual to manually senetworks. If the connecnetwork is lost, the devyou to reselect a networa roaming agreement w
Glossary: A roambetween two or menable the users oservices of other
Cell info display — Selewhen it is used in a cellunetwork (MCN) technolreception.
Connection To edit access point and
, and select Tools >Bluetooth, USB, AccessLAN, SIP settings, Intecontrol.
007 Nokia. All rights reserved.
Sett
ings
117
oint settings in a message from a a and settings", on page 80. may be preset for your device by you may not be able to change, em. indicates a protected
ta access point, and a t.
internet access points in a he WLAN wizard. See "WLAN .
int, select Options > New access
access point, select Options > ons from your service provider.
r a descriptive name for the
data connection type.
nnection you select, only certain e. Fill in all fields marked with a red asterisk. Other fields can be ve been instructed otherwise by
9206321_N95-1_en_Apac.book Page 117 Friday, October 19, 2007 11:52 AM
Copyright © 2
For Bluetooth connectivity settings, see "Settings", on page 19. For USB data cable settings, see "USB", on page 22.
Data connections and access pointsYour device supports packet data connections (network service), such as GPRS in the GSM network. When you use your device in GSM and UMTS networks, multiple data connections can be active at the same time, and access points can share a data connection. In the UMTS network, data connections remain active during voice calls.
You can also use a wireless LAN data connection. See "Wireless LAN", on page 16. Only one connection in one wireless LAN can be active at a time, but several applications can use the same internet access point.
To establish a data connection, an access point is required. You can define different kinds of access points, such as:• MMS access point to send and receive multimedia
messages• Internet access point (IAP) to send and receive e-mail
and connect to the internet
Check the type of access point you need with your service provider for the service you want to access. For availability and subscription to packet data connection services, contact your service provider.
Access pointsYou may receive access pservice provider. See "DatSome or all access pointsyour service provider, andcreate, edit, or remove thaccess point.
indicates a packet dawireless LAN access poin
Tip! You can createwireless LAN with twizard", on page 17
To create a new access popoint.
To edit the settings of anEdit. Follow the instructi
Connection name — Enteconnection.
Data bearer — Select the
Depending on the data cosetting fields are availablMust be defined or with left empty, unless you hayour service provider.
11
v4 only) — Enter the IP address of
ary DNS address, enter the IP DNS server. In Secondary DNS dress of the secondary DNS server. ervice provider to obtain these
Define the address for the proxy
nter the proxy port number.
oints
from the wireless LAN service
Select Enter manually or Search lect an existing network, WLAN AN security mode are determined cess point device.
nes whether the network name is
— Select Ad-hoc to create an ad w devices to send and receive data access point device is not needed. ll devices must use the same
9206321_N95-1_en_Apac.book Page 118 Friday, October 19, 2007 11:52 AM
Copyright © 2007 Nokia. All rights reserved.
Sett
ings
8
To be able to use a data connection, the network service provider must support this feature, and if necessary, activate it for your SIM card.
Packet data access points
Follow the instructions from your service provider.
Access point name — You obtain the access point name from your service provider.
User name — The user name may be needed to make a data connection, and is usually provided by the service provider.
Prompt password — If you must enter the password every time you log in to a server, or if you do not want to save your password in the device, select Yes.
Password — A password may be needed to make a data connection, and is usually provided by the service provider.
Authentication — Select Normal or Secure.
Homepage — Depending on the access point you are setting up, enter the web address or the address of the multimedia messaging center.
Select Options > Advanced settings to change the following settings:
Network type — Select the internet protocol type to use: IPv4 or IPv6. The other settings depend on the selected network type.
Phone IP address (for IPyour device.
DNS address — In Primaddress of the primary address, enter the IP adContact your internet saddresses.
Proxy server address —server.
Proxy port number — E
Wireless LAN access p
Follow the instructions provider.
WLAN network name —for networks. If you senetwork mode and WLby the settings of its ac
Network status — Defishown.
WLAN network mode hoc network and to allodirectly; a wireless LANIn an ad-hoc network, aWLAN network name.
007 Nokia. All rights reserved.
Sett
ings
119
for Pre-shared key) — Enter a assword must be entered on the oint device.ly for WPA/WPA2) — Select Integrity Protocol (TKIP) is used.
me page.
ed settings and from the
ddress (the IP address of your e subnet IP address), Default nd DNS address. Enter the IP and secondary DNS server. vice provider for these addresses.
ress — Select Automatic, Well-
r Ad-hoc) — To enter a channel select User defined.
nter the address for the proxy
ter the proxy port number.
affect all access points using a
9206321_N95-1_en_Apac.book Page 119 Friday, October 19, 2007 11:52 AM
Copyright © 2
WLAN security mode — Select the encryption used: WEP, 802.1x (not for ad hoc networks), or WPA/WPA2. If you select Open network, no encryption is used. The WEP, 802.1x, and WPA functions can be used only if the network supports them.
WLAN security settings — Enter the settings for the selected security mode:
Security settings for WEP:• Wep key in use — Select the WEP key number. You can
create up to four WEP keys. The same settings must be entered on the wireless LAN access point device.
• Authentication type — Select Open or Shared for the authentication type between your device and the wireless LAN access point device.
• WEP key settings — Enter WEP encryption (length of the key), WEP key format (ASCII or Hexadecimal), and WEP key (the WEP key data in the selected format).
Security settings for 802.1x and WPA/WPA2:• WPA/WPA2 — Select the means of authentication:
EAP to use an extensible authentication protocol (EAP) plug-in, or Pre-shared key to use a password. Complete the appropriate settings:
• EAP plug-in settings (only for EAP) — Enter the settings as your service provider instructs.
• Pre-shared key (onlypassword. The same pwireless LAN access p
• WPA2 only mode (onwhether Temporal Key
Homepage — Define a ho
Select Options > Advancfollowing:
IPv4 settings: Phone IP adevice), Subnet mask (thgateway (the gateway), aaddresses of the primary Contact your internet ser
IPv6 settings > DNS addknown, or User defined.
Ad-hoc channel (only fonumber (1-11) manually,
Proxy server address — Eserver.
Proxy port number — En
Packet dataThe packet data settings packet data connection.
12
rotocol) settings are needed for s using SIP, such as video sharing. tings in a special text message er. You can view, delete, or create SIP settings.
tings call profile, select Options > New
ile, select Options > Edit.
server settings from your service ion message. You can save view or Configurations.
ice, you can restrict packet data your device to use only certain ts.
lable if your SIM card supports the vice.
9206321_N95-1_en_Apac.book Page 120 Friday, October 19, 2007 11:52 AM
Copyright © 2007 Nokia. All rights reserved.
Sett
ings
0
Packet data connection — If you select When available and you are in a network that supports packet data, the device registers to the packet data network. Starting an active packet data connection (for example, to send and receive e-mail) is quicker. If there is no packet data coverage, the device periodically tries to establish a packet data connection. If you select When needed, the device uses a packet data connection only if you start an application or action that needs it.
Access point — The access point name is needed to use your device as a packet data modem to your computer.
High speed packet access — Enable or disable the use of HSDPA (network service) in UMTS networks. For more information on HSDPA, see "Fast downloading", on page 4.
Wireless LANShow WLAN availability — Select whether is displayed when a wireless LAN is available.
Scan for networks — If you set Show WLAN availability to Yes, select how often the device searches for available wireless LANs and updates the indicator.
To view advanced settings, select Options > Advanced settings. Changing wireless LAN advanced settings is not recommended.
SIP settingsSIP (Session Initiation Pcertain network serviceYou may receive the setfrom your service providthese setting profiles in
Internet call setTo create a new internetprofile.
To edit an existing prof
ConfigurationsYou may receive trustedprovider in a configuratdelete these settings in
APN controlWith APN control servconnections and allow packet data access poin
This setting is only avaiaccess point control ser
007 Nokia. All rights reserved.
Sett
ings
121
9206321_N95-1_en_Apac.book Page 121 Friday, October 19, 2007 11:52 AM
Copyright © 2
To set the control service on or off or to change the allowed access points, select Options and the corresponding option. To change the options, you need your PIN2 code. Contact your service provider for the code.
Applications To edit the settings of some of the applications in your device, press , and select Tools > Settings > Applications. The settings are also available in each application by selecting the settings option.
12
nnected to your device, you can tion using the other device or by h connectivity. Select Tools > th > Off.
mudgy?
ra lens protection windows are clean.
lored, or bright dots appear on the rn on my device?
of this type of display. Some displays dots that remain on or off. This is
evice see the files stored on my
ave configured the home network ring is turned on in your device, and nP compatible.
ome network connection stops
s LAN connection from your ur device, and switch it on again. If
9206321_N95-1_en_Apac.book Page 122 Friday, October 19, 2007 11:52 AM
Copyright © 2007 Nokia. All rights reserved.
Trou
bles
hoot
ing:
Q&
A
2
Troubleshooting: Q&AAccess codes
Q: What is my password for the lock, PIN, or PUK codes?
A: The default lock code is 12345. If you forget or lose the lock code, contact your device dealer.If you forget or lose a PIN or PUK code, or if you have not received such a code, contact your wireless service provider.For information about passwords, contact your access point provider, for example, a commercial Internet service provider (ISP) or wireless service provider.
Application not responding
Q: How do I close an application that is not responding?
A: Press and hold . Scroll to the application, and press to close the application.
Bluetooth connectivity
Q: Why can’t I find my friend’s device?
A: Check that both devices are compatible, have activated Bluetooth connectivity, and are not in hidden mode. Check also that the distance between the two devices is not over 10 meters (33 feet) and that there are no walls or other obstructions between the devices.
Q: Why can’t I end a Bluetooth connection?
A: If another device is coeither end the connecdeactivating BluetootBluetooth > Bluetoo
Camera
Q: Why do images look s
A: Ensure that the came
Display
Q: Why do missing, discoscreen every time I tu
A: This is a characteristicmay contain pixels ornormal, not a fault.
Home network (UPnP)
Q: Why can’t the other ddevice?
A: Make sure that you hsettings, Content shathe other device is UP
Q: What can I do if my hworking?
A: Switch off the wirelescompatible PC and yo

007 Nokia. All rights reserved.
Trou
bles
hoot
ing:
Q&
A
123
. or Memory low. Delete some ory., try deleting items one by one lest item).ta you have and how much memory ps consume, press , and select Options > Memory details.
before deleting it?
e of the following methods:
uite to make a backup copy of all mputer.
mail address, then save the images
oth connectivity to a compatible
tible memory card.
tact?
ot have a phone number or an missing information to the contact
ssage is shown briefly. What is
etrieve a multimedia message from ing center. for multimedia messaging are
9206321_N95-1_en_Apac.book Page 123 Friday, October 19, 2007 11:52 AM
Copyright © 2
this does not help, restart your compatible PC and your device. If the connection still does not work, reconfigure the WLAN settings in both your compatible PC and device. See "Wireless LAN", on page 16, and "Connection", on page 116.
Q: Why can't I see my compatible PC in my device in the home network?
A: If you are using a firewall application in your compatible PC, check that it allows Home media server to use the external connection (you can add Home media server to the firewall applications exceptions list). Check from the firewall settings that the firewall application allows traffic to the following ports: 1900, 49152, 49153 and 49154. Some WLAN access point devices have a built-in firewall. In such cases, check that the firewall in the access point device does not block traffic to the following ports: 1900, 49152, 49153 and 49154.Check that the WLAN settings are the same in your device and compatible PC.
Memory low
Q: What can I do if my device memory is low?
A: You can delete unused items saved in your device regularly to avoid memory getting low. See "Memory low — free memory", on page 8. To delete contact information, calendar notes, call timers, call cost timers, game scores, or any other data, go to the respective application to remove the data. If you are deleting multiple items and one of the following notes are shown: Not enough memory to perform operation.
Delete some data firstdata from phone mem(starting from the smalTo view what kind of dathe different data grouTools > File manager >
Q: How can I save my data
A: Save your data using on
• Use Nokia Nseries PC Sdata to a compatible co
• Send images to your e-to your computer.
• Send data using Bluetodevice.
• Store data on a compa
Messaging
Q: Why can’t I select a con
A: The contact card does ne-mail address. Add thecard in Contacts.
Multimedia messaging
Q: The note Retrieving mehappening?
A: The device is trying to rthe multimedia messagCheck that the settings
12
less LAN (WLAN) access point even thin its range?
nt may use a hidden service set can only access networks that use a w the correct SSID, and have created ss point for the network on your
less LAN (WLAN) off on my Nokia
kia device will switch off when you ect, or are not connected to another ing for available networks. To further
ption, you can specify that your t scan, or scans less often, for the background. WLAN will switch round scans.
d scan settings: Tools > Settings > Connection >
how WLAN availability to Never to s, or increase the background scan for networks., press Back.
s is set to Never, the WLAN be shown in the standby mode. anually scan for available WLAN WLAN networks as usual.
9206321_N95-1_en_Apac.book Page 124 Friday, October 19, 2007 11:52 AM
Copyright © 2007 Nokia. All rights reserved.
Trou
bles
hoot
ing:
Q&
A
4
defined correctly and that there are no mistakes in phone numbers or addresses. Press , and select Messaging > Options > Settings > Multimedia msg..
Q: How can I end the data connection when the device starts a data connection again and again?
A: To stop the device from making a data connection, press , and select Messaging > Options > Settings >
Multimedia message > Multimedia retrieval and one of the following:Manual — to have the multimedia messaging center save messages to be retrieved later. You receive a notification when there is a new multimedia message that you can retrieve in the multimedia message center.Off — to ignore all incoming multimedia messages. After this change, the device does not make any network connections related to multimedia messaging.
PC connectivity
Q: Why do I have problems in connecting the device to my PC?
A: Make sure that Nokia Nseries PC Suite is installed and running on your PC. See the user guide for Nokia Nseries PC Suite on the CD-ROM or DVD-ROM. For further information on how to use Nokia Nseries PC Suite, see the help function on Nokia Nseries PC Suite or visit the support pages at www.nokia-asia.com.
Q: Can I use my device as a fax modem with a compatible PC?
A: You cannot use your device as a fax modem. However, with call diverting (network service), you can divert incoming fax calls to another phone number.
Wireless LAN
Q: Why can't I see a wirethough I know I'm wi
A: The WLAN access poiidentifier (SSID). You hidden SSID if you knoa WLAN Internet acceNokia device.
Q: How do I switch wiredevice?
A: The WLAN on your Noare not trying to connaccess point, or scannreduce battery consumNokia device does noavailable networks inoff in between backg
To change the backgroun1 Press , and select
Wireless LAN.2 Change the value of S
stop background scantime interval in Scan
3 To save your changes
When Scan for networkavailability icon will not However, you can still mnetworks, and connect to
Batt
ery
info
rmat
ionBattery inform
Charging and dischaYour device is powered by a rechargecan be charged and discharged hundeventually wear out. When the talk anoticeably shorter than normal, replaNokia approved batteries, and recharNokia approved chargers designated
If a replacement battery is being usethe battery has not been used for a pbe necessary to connect the chargerreconnect it to begin charging the b
Unplug the charger from the electricwhen not in use. Do not leave a fullyconnected to a charger, since overchlifetime. If left unused, a fully chargecharge over time.
If the battery is completely dischargeminutes before the charging indicatoor before any calls can be made.
Use the battery only for its intendedcharger or battery that is damaged.
Do not short-circuit the battery. Acccan occur when a metallic object succauses direct connection of the posit
ationrgingable battery. The battery reds of times, but it will nd standby times are ce the battery. Use only
ge your battery only with
terminals of the battery. (These look like metal strips on the battery.) This might happen, for example, when you carry a spare battery in your pocket or purse. Short-circuiting the terminals may damage the battery or the connecting object.
Leaving the battery in hot or cold places, such as in a closed car in summer or winter conditions, will reduce the capacity and lifetime of the battery. Always try to keep the battery
Copyright © 2007 Nokia. All rights reserved. 125
for this device.
d for the first time or if rolonged period, it may
, then disconnect and attery.
al plug and the device charged battery arging may shorten its d battery will lose its
d, it may take several r appears on the display
purpose. Never use any
idental short-circuiting h as a coin, clip, or pen ive (+) and negative (-)
between 15°C and 25°C (59°F and 77°F). A device with a hot or cold battery may not work temporarily, even when the battery is fully charged. Battery performance is particularly limited in temperatures well below freezing.
Do not dispose of batteries in a fire as they may explode. Batteries may also explode if damaged. Dispose of batteries according to local regulations. Please recycle when possible. Do not dispose as household waste.
Do not dismantle or shred cells or batteries. In the event of a battery leak, do not allow the liquid to come in contact with the skin or eyes. In the event of such a leak, flush your skin or eyes immediately with water, or seek medical help.
Nokia battery authentication guidelinesAlways use original Nokia batteries for your safety. To check that you are getting an original Nokia battery, purchase it from
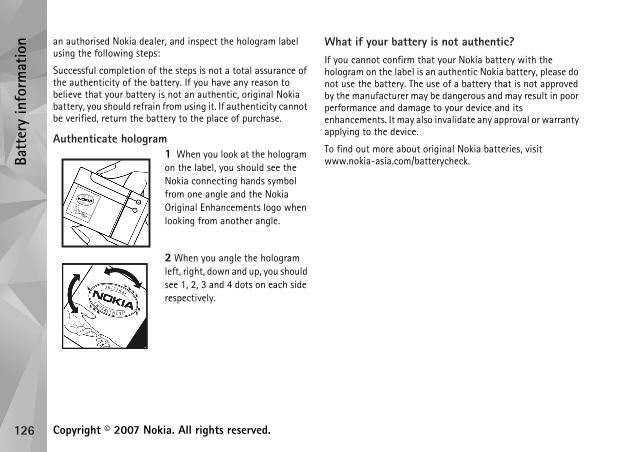
Copyright © 2007 Nokia. All r
Batt
ery
info
rmat
ion
126
an authorised Nokia dealer, and inusing the following steps:
Successful completion of the stepsthe authenticity of the battery. If ybelieve that your battery is not an battery, you should refrain from usibe verified, return the battery to th
Authenticate hologram1 Whenon the lNokia cfrom onOriginallooking
2 Whenleft, righsee 1, 2respecti
spect the hologram label
is not a total assurance of ou have any reason to authentic, original Nokia ng it. If authenticity cannot e place of purchase.
you look at the hologram
What if your battery is not authentic?If you cannot confirm that your Nokia battery with the hologram on the label is an authentic Nokia battery, please do not use the battery. The use of a battery that is not approved by the manufacturer may be dangerous and may result in poor performance and damage to your device and its enhancements. It may also invalidate any approval or warranty applying to the device.
To find out more about original Nokia batteries, visit www.nokia-asia.com/batterycheck.
ights reserved.
abel, you should see the onnecting hands symbol e angle and the Nokia Enhancements logo when from another angle.
you angle the hologram t, down and up, you should
, 3 and 4 dots on each side vely.
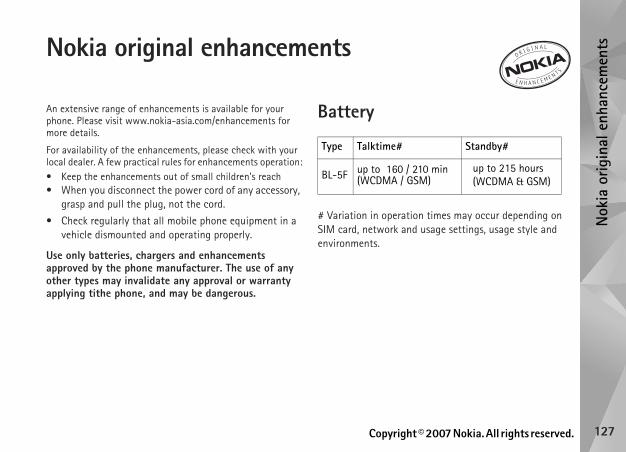
Copyright © 2007 Nokia. All rights reserved.
Nok
ia o
rigin
al e
nhan
cem
ents
127
Nokia original enhancements
An extensive range of enhancements is available for your phone. Please visit www.nokia-asia.com/enhancements for more details.
For availability of the enhancements, please check with your local dealer. A few practical rules for enhancements operation:• Keep the enhancements out of small children's reach• When you disconnect the power cord of any accessory,
grasp and pull the plug, not the cord.
• Check regularly that all mobile phone equipment in a vehicle dismounted and operating properly.
Use only batteries, chargers and enhancements approved by the phone manufacturer. The use of any other types may invalidate any approval or warranty applying tithe phone, and may be dangerous.
Battery
# Variation in operation times may occur depending on SIM card, network and usage settings, usage style and environments.
Type Talktime# Standby#
BL-5F up to 160 / 210 min (WCDMA / GSM)
up to 215 hours (WCDMA & GSM)
9206321_N95-1_en_Apac.book Page 127 Friday, October 19, 2007 11:52 AM
12
ce. Paint can clog the moving parts peration.cloth to clean any lenses, such as sor, and light sensor lenses. or an approved replacement d antennas, modifications, or mage the device and may violate radio devices.
p of data you want to keep, such as r notes.om time to time for optimum ff the device and remove the battery.
equally to your device, battery, ent. If any device is not working arest authorized service facility for
9206321_N95-1_en_Apac.book Page 128 Friday, October 19, 2007 11:52 AM
Copyright © 2007 Nokia. All rights reserved.
Care
and
mai
nten
ance
8
Care and maintenanceYour device is a product of superior design and craftsmanship and should be treated with care. The following suggestions will help you protect your warranty coverage.• Keep the device dry. Precipitation, humidity, and all types
of liquids or moisture can contain minerals that will corrode electronic circuits. If your device does get wet, remove the battery, and allow the device to dry completely before replacing it.
• Do not use or store the device in dusty, dirty areas. Its moving parts and electronic components can be damaged.
• Do not store the device in hot areas. High temperatures can shorten the life of electronic devices, damage batteries, and warp or melt certain plastics.
• Do not store the device in cold areas. When the device returns to its normal temperature, moisture can form inside the device and damage electronic circuit boards.
• Do not attempt to open the device other than as instructed in this guide.
• Do not drop, knock, or shake the device. Rough handling can break internal circuit boards and fine mechanics.
• Do not use harsh chemicals, cleaning solvents, or strong detergents to clean the device.
• Do not paint the deviand prevent proper o
• Use a soft, clean, dry camera, proximity sen
• Use only the suppliedantenna. Unauthorizeattachments could daregulations governing
• Use chargers indoors.• Always create a backu
contacts and calenda• To reset the device fr
performance, power o
These suggestions apply charger, or any enhancemproperly, take it to the neservice.
007 Nokia. All rights reserved.
Addi
tiona
l saf
ety
info
rmat
ion
129
smitting equipment, including fere with the functionality of dical devices. Consult a physician or edical device to determine if they m external RF energy or if you have our device in health care facilities d in these areas instruct you to do facilities may be using equipment xternal RF energy.
icesdevices recommend that a .3 centimeters (6 inches) should be less device and an implanted cemaker or implanted cardioverter tial interference with the medical uch devices should:ss device more than 15.3 from the medical device when the d on.evice in a breast pocket.
e to the ear opposite the medical potential for interference.e off immediately if there is any interference is taking place.
9206321_N95-1_en_Apac.book Page 129 Friday, October 19, 2007 11:52 AM
Copyright © 2
Additional safety informationSmall children
Your device and its enhancements may contain small parts. Keep them out of the reach of small children.
Operating environment
This device meets RF exposure guidelines when used either in the normal use position against the ear or when positioned at least 1.5 centimeters (5/8 inches) away from the body. When a carry case, belt clip, or holder is used for body-worn operation, it should not contain metal and should position the device the above-stated distance from your body.
To transmit data files or messages, this device requires a quality connection to the network. In some cases, transmission of data files or messages may be delayed until such a connection is available. Ensure the above separation distance instructions are followed until the transmission is completed.
Parts of the device are magnetic. Metallic materials may be attracted to the device. Do not place credit cards or other magnetic storage media near the device, because information stored on them may be erased.
Medical devices
Operation of any radio tranwireless phones, may interinadequately protected methe manufacturer of the mare adequately shielded froany questions. Switch off ywhen any regulations posteso. Hospitals or health carethat could be sensitive to e
Implanted medical devManufacturers of medical minimum separation of 15maintained between a wiremedical device, such as a padefibrillator, to avoid potendevice. Persons who have s• Always keep the wirele
centimeters (6 inches) wireless device is turne
• Not carry the wireless d• Hold the wireless devic
device to minimise the • Turn the wireless devic
reason to suspect that
13
ic speed control systems, and air bag ation, check with the manufacturer, ur vehicle or any equipment that has
should service the device or install aulty installation or service may be idate any warranty that may apply to ly that all wireless device equipment and operating properly. Do not store
s, gases, or explosive materials in the e device, its parts, or enhancements. h an air bag, remember that air bags o not place objects, including
less equipment in the area over the ployment area. If in-vehicle wireless
installed and the air bag inflates, t.
lying in aircraft is prohibited. Switch rding an aircraft. The use of wireless
may be dangerous to the operation e wireless telephone network, and
e environments
hen in any area with a potentially d obey all signs and instructions. ospheres include areas where you d to turn off your vehicle engine. d cause an explosion or fire resulting
9206321_N95-1_en_Apac.book Page 130 Friday, October 19, 2007 11:52 AM
Copyright © 2007 Nokia. All rights reserved.
Addi
tiona
l saf
ety
info
rmat
ion
0
• Read and follow the directions from the manufacturer of their implanted medical device.
If you have any questions about using your wireless device with an implanted medical device, consult your health care provider.
Hearing aids
Some digital wireless devices may interfere with some hearing aids. If interference occurs, consult your service provider.
Warning: For hearing aid compatibility, you must turn off the Bluetooth connectivity.
Your mobile device model complies with FCC rules governing hearing aid compatibility. These rules require an M3 microphone or higher value. The M-value, shown on the device box , refers to lower radio frequency (RF) emissions. A higher M-value generally indicates that a device model has a lower RF emissions level, which may improve the likelihood that the device will operate with certain hearing aids. Some hearing aids are more immune than others to interference. Please consult your hearing health professional to determine the M-rating of your hearing aid and whether your hearing aid will work with this device. More information on accessibility can be found at www.nokiaaccessibility.com.
Vehicles
RF signals may affect improperly installed or inadequately shielded electronic systems in motor vehicles such as electronic fuel injection systems, electronic antiskid (antilock)
braking systems, electronsystems. For more informor its representative, of yobeen added.
Only qualified personnel the device in a vehicle. Fdangerous and may invalthe device. Check regularin your vehicle is mountedor carry flammable liquidsame compartment as thFor vehicles equipped witinflate with great force. Dinstalled or portable wireair bag or in the air bag deequipment is improperly serious injury could resul
Using your device while foff your device before boateledevices in an aircraftof the aircraft, disrupt thmay be illegal.
Potentially explosiv
Switch off your device wexplosive atmosphere, anPotentially explosive atmwould normally be adviseSparks in such areas coul
007 Nokia. All rights reserved.
Addi
tiona
l saf
ety
info
rmat
ion
131
ency number for your present mbers vary by location.
e, you may first need to turn those make an emergency call. If the
ight profile mode, you may need to ate the phone function before you ll. Consult this guide or your service ion.
y call, give all the necessary s possible. Your wireless device
communication at the scene of an all until given permission to do so.
9206321_N95-1_en_Apac.book Page 131 Friday, October 19, 2007 11:52 AM
Copyright © 2
in bodily injury or even death. Switch off the device at refueling points such as near gas pumps at service stations. Observe restrictions on the use of radio equipment in fuel depots, storage, and distribution areas; chemical plants; or where blasting operations are in progress. Areas with a potentially explosive atmosphere are often, but not always, clearly marked. They include below deck on boats, chemical transfer or storage facilities, vehicles using liquefied petroleum gas (such as propane or butane), and areas where the air contains chemicals or particles such as grain, dust, or metal powders.
Emergency calls
Important: Wireless phones, including this device, operate using radio signals, wireless networks, landline networks, and user-programmed functions. Because of this, connections in all conditions cannot be guaranteed. You should never rely solely on any wireless device for essential communications like medical emergencies.
To make an emergency call:
1 If the device is not on, switch it on. Check for adequate signal strength. Some networks may require that a valid SIM card is properly inserted in the device.
2 Press the end key as many times as needed to clear the display and ready the device for calls.
3 Enter the official emerglocation. Emergency nu
4 Press the call key.
If certain features are in usfeatures off before you candevice is in the offline or flchange the profile to activcan make an emergency caprovider for more informat
When making an emergencinformation as accurately amay be the only means of accident. Do not end the c
13
pending on national reporting twork band. For SAR information in under product information at
9206321_N95-1_en_Apac.book Page 132 Friday, October 19, 2007 11:52 AM
Copyright © 2007 Nokia. All rights reserved.
Addi
tiona
l saf
ety
info
rmat
ion
2
Certification information (SAR)
THIS MOBILE DEVICE MEETS GUIDELINES FOR EXPOSURE TO RADIO WAVES.
Your mobile device is a radio transmitter and receiver. It is designed not to exceed the limits for exposure to radio waves recommended by international guidelines. These guidelines were developed by the independent scientific organization ICNIRP and include safety margins designed to assure the protection of all persons, regardless of age and health.
The exposure guidelines for mobile devices employ a unit of measurement known as the Specific Absorption Rate or SAR. The SAR limit stated in the ICNIRP guidelines is 2.0 watts/kilogram (W/kg) averaged over 10 grams of tissue. Tests for SAR are conducted using standard operating positions with the device transmitting at its highest certified power level in all tested frequency bands. The actual SAR level of an operating device can be below the maximum value because the device is designed to use only the power required to reach the network. That amount changes depending on a number of factors such as how close you are to a network base station. The highest SAR value under the ICNIRP guidelines for use of the device at the ear is 0.58 W/kg.
Use of device accessories and enhancements may result in different SAR values. SAR values may vary depending on national reporting and testing requirements and the network band. Additional SAR information may be provided under product information at www.nokia-asia.com.
* SAR values may vary derequirements and the neother regions, please lookwww.nokia.com.
07 Nokia. All rights reserved.
missed 95received 95settings 114sharing video 92transferring 95waiting 95ra
active toolbar 42adjusting lighting and color 45editing videos 54flash 45image setup settings 45saving video clips 47scenes 46self-timer 47sequence mode 46shooting video 47still image camera settings 44taking pictures 41video recorder settings 49roadcast 86icates 112ers vii 75s 112
133
9206321_N95-1_en_Apac.book Page 136 Friday, October 19, 2007 11:52 AM
IndAaccess poiactivation
See diactive stanadditionalAdobe reaalarm clocapplicationapplication
instalJava 1remov
Bbacking upbarcode reBatteries
chargbatteries
intendBattery 12Battery inf
type 1
Copyright © 20
exnts 116keysgital rights managementdby mode 74
applications viiider 101k 75 manager 105s
ling 10505ing 106
data 8ader 103
ing 125
ed for use vii7ormation27
Bluetooth 18device address 20pairing 20security 20sending data 20switching off 19
bookmarks 10
Ccache, clearing 14calculator 102calendar
creating entries 75synchronising Nokia Nseries PC
Suite 76call log
See logcalls
answering 94barring 116declining 94diverting 115duration 95international 88making 88
came
cell bcertifchargclockcode
editing images 53images and videos 50ordering files in albums 52, 57presentations 55print basket 52printing images 55slide show 54TV out mode 54eplay 5es 5
RSSee data connections
SGPS connection 61maps 63positioning 61
ds-free operationSee loudspeaker
dset 6p application viiiDPA 4
sceenSee standby mode
gesSee gallery
13
9206321_N95-1_en_Apac.book Page 137 Friday, October 19, 2007 11:52 AM
Copyright © 2007 Nokia. All rights reserved.
computer connections 23conference call 89connection settings 116contact cards 97
inserting pictures 97sending 97
converter 102copying contacts between the SIM card
and device memory 98copyright protection
See digital rights management
Ddata cable 22data connections
details 18ending 18establishing 117indicators 3network vi, 116settings
date 75delivery reports 84device manager 23dictionary 78digital rights management 107Download! 9DRM
See digital rights management
Eediting images 53e-mail
automatic retrieving 82deleting mailbox 84deleting messages 82opening 81, 82remote mailbox 81retrieving from mailbox 81saving 87sending 78settings 84viewing attachments 82writing 78
Ffile formats
.jad 105
.jar 105, 106
.sis 105music player 25RealPlayer 37
file manager 8fixed dialling 98FM radio 29
Ggallery
active toolbar 51
gamgamGP
GP
Hhan
heahelHS
Iidle
ima
4
07 Nokia. All rights reserved.
cSee music playerc playerdownloading music 27file formats 25music store 27playing songs 25playlists 26transferring music 27
ge 5a Lifeblog 38a original enhancements 127a wireless keyboard 103 101
e applications 100
et data settings 119nnections 23
iles 101nalisation 73e language 110ebookSee contact cardsodes 112ioning 61
135
9206321_N95-1_en_Apac.book Page 138 Friday, October 19, 2007 11:52 AM
Copyright © 20
indicators 3infrared connection 22installing applications 105internet
See webinternet access points (IAP)
See access pointsinternet videos 35
JJava 105
Kkeyguard 5, 111keypad lock 5, 111
Llanguage settings 110lock code 112log
duration 96erasing contents 96filtering 96
loudspeaker 4Mmailbox 81Maintenance 128maps
browsing maps 63searching for locations 66
memoryfreeing memory 8, 95viewing memory consumption 8
memory cardejecting 7inserting 7memory card tool 8
menu, rearranging 71messaging
cell broadcast 86e-mail 78inbox 80mailbox 81multimedia messages 78settings 83text messages 78
microSD card 6missed calls 95MMS
See multimedia messagesmodem 24multimedia menu 4multimedia messages
creating 78receiving 80retrieving 80saving 87sending 78settings 83
musi
musi
NN-GaNokiNokiNokinotes
Ooffic
PpackPC copdf fpersophonphon
PIN cposit
TV out 111UPIN code 112UPUK code 112 cardcopying names and numbers to
your device 98messages 82names and numbers 98using device without a SIM card 72
file 105SSee text messages
oze 75tware
installing applications 105removing applications 106transferring a file to
your device 105tware update 1gsfile formats 25transferring 27
nd clips 50ndsadjusting volume 4muting a ringing tone 94recording sounds 101
13
9206321_N95-1_en_Apac.book Page 139 Friday, October 19, 2007 11:52 AM
Copyright © 2007 Nokia. All rights reserved.
power saver 109printing
contact cards 97images 55
profiles 71PUK codes 112
QQuickoffice 100
Rradio 29RealPlayer 36recent calls 95recorder 101remote mailbox 81remote SIM mode 21ringing tones
3-D 72personal ringing tone 99See also profiles
SSafety
additional information 129emergency calls 131
safetyguidelines v
scenesimage scenes 46video scenes 46
security codeSee lock code
sendingcontact cards, business cards 97messages 78
service commands 77settings
access points 117application 109Bluetooth connectivity 19call barring 116call diverting 115certificates 112data connections 116defining 1display 109e-mail 81, 84keypad lock 111language 110lock code 112messaging 83multimedia messages 83original settings 114personalising the phone 71PIN code 112power saver 109SIP 120text messages 83
SIM
sis SM
snosof
sofson
sousou
6
07 Nokia. All rights reserved.
e controladjusting volume 4during a call 88loudspeaker 4
aperschanging 73using pictures 44, 51
access points, See access pointsblogs 14browser 10feeds 14service messages 80og 38ess LAN 16access point settings 118creating IAP 17, 18scanning 120security 58see also Universal Plug and Playsettings 120wizard 17
ng language 110
137
9206321_N95-1_en_Apac.book Page 140 Friday, October 19, 2007 11:52 AM
Copyright © 20
speaker phoneSee loudspeaker
speed dialling 89standby mode 71svg files 55synchronisation 23
Ttext messages
inbox 77receiving 80saving 87sending 78, 79settings 83writing 79
themes 73time 75tones
See ringing tonestransferring content from another
device 1transferring music 27troubleshooting 122TV out
settings 111viewing captured
media files on TV 54
UUMTS
see data connectionsUniversal Plug and Play 58UPIN code 112UPUK code 112USB data cable 22USSD commands 77
Vvideo call
answering 94making 90rejecting 94
video clips 50video on demand 34video player
See RealPlayervideos
See galleryvoice commands 108voice dialling 90voice mailbox 89
changing the phone number 89diverting calls to voice mailbox 115
voice messages 89voice tags 108
making calls 90
volum
Wwallp
web
weblwirel
writi
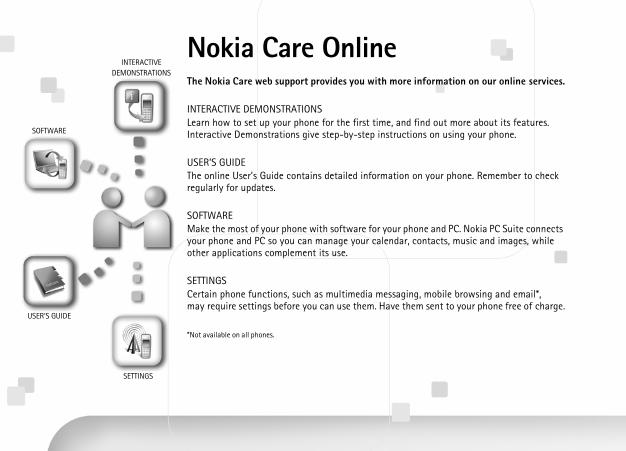
Nokia Care OnlineThe Nokia Care web support provides you with more information on our online services.
INTERACTIVE DEMONSTRATIONSLearn how to set up your phone for the first time, and find out more about its features. Interactive Demonstrations give step-by-step instructions on using your phone.
USER’S GUIDEThe online User’s Guide contains detailed information on your phone. Remember to check regularly for updates.
SOFTWAREMake the most of your phone with software for your phone and PC. Nokia PC Suite connects your phone and PC so you can manage your calendar, contacts, music and images, while other applications complement its use.
SETTINGSCertain phone functions, such as multimedia messaging, mobile browsing and email*, may require settings before you can use them. Have them sent to your phone free of charge.
*Not available on all phones.
INTERACTIVE DEMONSTRATIONS
SOFTWARE
USER’S GUIDE
SETTINGS
Nokia Care Online_166x120_en_v2_B&W.fm Page 2 Tuesday, August 7, 2007 7:20 PM
HOW DO I USE MY PHONE?The Set Up section, at www.nokia-asia.com/setup, helps you prepare your phone for use. Familiarise yourself with phone functions and features by referring to the Guides and Demos section at www.nokia-asia.com/guides.
HOW DO I SYNCHRONISE MY PHONE AND PC?Connecting your phone to a compatible PC with the requisite Nokia PC Suite version from www.nokia-asia.com/pcsuite lets you synchronise your calendar and contacts.
WHERE CAN I GET SOFTWARE FOR MY PHONE?Get more out of your phone with downloads from the Software section at www.nokia-asia.com/software.
WHERE CAN I FIND ANSWERS TO COMMON QUESTIONS?Look up the FAQ section at www.nokia-asia.com/faq for answers to your questions on your phone and other Nokia products and services.
HOW DO I KEEP UP WITH NOKIA NEWS?Subscribe online at www.nokia-asia.com/signup and be the first to know about the latest products and promotions. Sign up for "Nokia Connections" to receive monthly updates on latest phones and technology. Sign up for "Be The First To Know" to get exclusive previews of new phone announcements or subscribe to "Promotional Communications" for upcoming events.
Should you still require further assistance, please refer to www.nokia-asia.com/contactus.For additional information on repair services, please visit www.nokia-asia.com/repair.
Please visit your own country site for more details:
Australia and New Zealand www.nokia.com.au/support Malaysia www.nokia.com.my/supportIndia www.nokia.co.in/support Philippines www.nokia.com.ph/supportIndonesia www.nokia.co.id/support Singapore www.nokia.com.sg/supportJapan www.nokia.co.jp/support Thailand www.nokia.co.th/support
If your country is not listed above, please visit www.nokia-asia.com/support.
Nokia Care Online_166x120_en_v2_B&W.fm Page 3 Tuesday, August 7, 2007 7:20 PM