Embed Size (px)
Citation preview

1
Urban Grower’s Manual
Amanda Cather
Lincoln and Roxbury, Massachusetts

2
Copyright 2008 by The Food Project, Inc.
All rights reserved, No part of this book may be reproduced or transmitted in any form or by any means, electronic or mechanical, including photocopying recording, or by any information storage and retrieval system without the written permission of the publisher, The Food Project, Inc., except where permitted by law.
The Food Project, Inc.10 Lewis StreetLincoln MA 01773781-259-8621
www.thefoodproject.orgemail: [email protected]
First Edition, November 2003
Designer: Lisa MacCulloughEditor: Carlos ChristensenPhotographs: Greig Cranna, John Walker, Ellen Bullock, Food Project StaffCover photo by Greig Cranna

3
Our Vision: Creating personal and social change through sustainable agriculture.
Our Mission: The Food Project’s mission is to create a thoughtful and productive community of youth and adults from diverse backgrounds who work together to build a sustainable food system.
Our community produces healthy food for residents of the city and suburbs, provides youth leadership opportunities, and inspires and supports others to create change in their own communities.

4

5
Foreword
The Food Project started in 1991 in Lincoln, MA, on two and a half acres of farmland. It was a small, noisy, and energetic community of young people from very different races and back-grounds, working side by side with adults growing and distributing food to the hungry.
In the process of growing food together, we created a community which bridges the city and suburb, is respectful and productive, and models hope and purpose. We teach how one can love the land and it’s bounty and how to care for and respect the rich matrix of life to which we all belong. In doing this we as individuals and as a society grow and develop in healthy and sustainable ways.
We have grown since 1991 and now farm on twenty-one acres in Lincoln and on two acres of remediated land in Roxbury, a low income neighborhood in Boston. We provide year-round stipended programs for one hundred youth, and with the additional help of 1,100 volunteers, grow 150,000 pounds of food for fifteen shelters, our two farmers’ markets in low-income neighborhoods, and over one-hundred fifty Community Supported Agriculture sharehold-ers. Alumni interns are agricultural apprentices, support our technology, pilot food enter-prise with our chef, and play pivotal roles in outreach and education. Alumni are also Food Project staff, Trustees, and Advisors.
The Food Project’s inspiring model addresses critical national issues: the need for race rec-onciliation, the decline in local agriculture, a growing concern for the well being and pro-ductivity of youth, and the need to create sustainable and healthy inner-city neighborhoods and metropolitan areas. The Food Project addresses these issues with an integrative model that allows young people to develop communication, teamwork, and leadership skills, find meaningful employment, and make a connection to the land and to the natural environment that will stay with them for a lifetime.
Ahead of us are exciting challenges and opportunities. We are committed to expanding our local food production and distribution network and collaborations while creating materi-als and workshops for those who wish to create similar programs around the country. This manual is one of many publications we created to share our work with those committed to a similar vision. It is directed to the rural grower yet is written for a wide audience to under-stand how to integrate youth and volunteers into production agriculture.
Patricia GrayExecutive DirectorThe Food Project, Inc.

6

7
Acknowledgments
The Food Project’s urban agriculture work would not be possible without the generosity, hospitality, and understanding of the remarkable people in the Dudley neighborhood. In particular, Honario Correia, Joe Correia, and Laura Gibao (and grandson Aaron) made tremendous contributions to our work during my time on the urban lots. We owe them a debt of gratitude for their kindness, wisdom, and willingness to open their hearts and gardens to The Food Project.
Agriculture is a way of life that is best learned by doing it with a great teacher. The unique succession of farming mentors who have stimulated and challenged me over the past few years has been a great blessing to me. I deeply admire Don Zasada’s ability to lead a farm in a humane and efficient way, and I continue to learn from Tim Laird’s intuitive and adaptable farming methods. Caroline Dillon will always be agricul-ture’s version of Wonder Woman to me, and Judy Lieberman practices a sustainable balance between farm and family.
I am supported and inspired by the wide network of women in agriculture I’ve been fortunate enough to meet over the years. Kate Prescott, Amy Sprague, Hilary Chop, Michelle Ferrarese, Courtney Hennessey, Danielle Andrews, Christina Roth, Martha Boyd, Kristin Brennan, Ann Forsthoefel and Anne Pendleton are some of the courageous and graceful women who are growing organic food and healthy communities across the country.
When I told my parents that I wanted to learn to farm, my father took up gardening and bought himself a greenhouse. Now we compare notes on when our Sun Gold tomatoes are ready, and I make sure I never make a trip home without a bag of salad mix for my mother and father. Their love and support are with me every day of this rewarding and demanding profession.
And to Mark (and the wuppies, who never doubted), my deepest and most heartfelt thanks.
Amanda CatherJuly 2002

8

9
Additional Resources From The Food Project
French Fries and the Food SystemA Year-Round Curriculum Connecting Youth with Farming and Food—From Seed to Market to Table This agricultural curriculum features powerful, original lessons written and developed by The Food Project’s growers and educators. Organized by seasons, the material teaches youth how to develop a deep under- standing of and appreciation for the land and local food systems. Personal, firsthand stories of learning in the field complement each lesson and encourage further exploration. Lessons can be done both indoors and outside and can be easily adapted by instructors working in school-based plots, urban food lots, community gardens, rural farms, and environmental education programs.
Growing Together: A Guide for Building Inspired, Diverse and Productive Youth Communities This resource book is designed for communities of all ages and in almost any field. Designed as a comprehensive, practical and lively guide, it shares The Food Project’s three-part model which encourages all members of a community to grow together through meaningful work, shared standards, and interactive learning. The book describes the role of meaningful work within communities, outlines a complete process of establishing and maintaining shared standards within a community, offers over 100 exercises that bring learning, reflection and energy to any program, provides tips for facilitating groups, processing activities and building inclusion, and includes rich photographs and inspiring stories to complement the text.
Program Manuals These manuals describe the nuts and bolts of running all areas of The Food Project, including: the Summer Youth Program, the Academic Year Program, the Volunteer Program, the Alumni Program, Farmers’ Markets, Rural Agriculture and Urban Agriculture. All together, these describe in detail the implementation of The Food Project. These manuals will assist those who want to develop similar work in their own communities.

10
D.I.R.T.: The Next Generation This video is the story of a diverse group of teenagers who break through their stereotypes about one another to become a close-knit community learning leadership, public speaking and farming skills. The 22-minute video is a glimpse into the spirit of The Food Project from the eyes, words and voices of the young people who have experienced the program. An ideal way to learn more about The Food Project, this youth-produced video will also serve as a spring board for discussion about a model that is thoughtfully and creatively challenging youth to build a better future for themselves and their communities.
Training and Consulting Services The Food Project offers dynamic trainings and consulting around youth leadership, community building, youth-adult partnerships, organizational development, and mission-focused management practices. Workshops, mentoring, and site visits can be arranged to meet the needs of your organization, school or business.
Other Products: T-Shirts Mugs
For information on ordering these or any other publications by The Food Project, please contact us:
The Food ProjectAttn: Publications Department
10 Lewis StreetLincoln, MA 01773
phone: 781-259-8621 fax: 781-259-9659

11
Table of Contents Related AttachmentsI. Introduction 15 Welcome 15 Your Work 16 About This Manual 17 History of The Food Project’s Urban Agriculture 19
II. Food Project Urban Agriculture 28 Environmental Sustainability 29 1,2 Social Sustainability 36 3 Financial Sustainability 41 4 Community Sustainability 46
III. Working With People and the Land 49 Staff Members 52 Summer Youth Program Participants 56 5,6,7,8 Academic Year Program Participants 77 Agricultural Interns 89 3,9,10 Volunteers 94 Neighborhood Gardeners 113 11,12,14
IV. Urban Education and Outreach 120 Neighborhood Extension Work 120 Relationships with Neighborhood Gardeners 122 Opening Neighborhood Gardens 124 Soil Testing and Information 125 15 Compost Demonstration Day 127 16 Urban Agriculture Demonstration Sites 128 18 Pest and Disease Management With 129 Neighborhood Gardeners Closing Neighborhood Gardens 131
V. Food Project Urban Lot Farm Systems 134 Distribution of Produce 134 19,20 Farm Planning 148 21-28 Equipment Purchase and Maintenance 155 Infrastructure 162 Soil and Fertility Management 167 2,15,29,30,31 Pest and Disease Management 180 Greenhouse Work 189

12
Landscaping and Site Maintenance 191 32 Season Extension 193 Bees 195 Harvest and Wash Station Management 201 33 Irrigation Needs 204 Record Keeping 209 34 Relationships and Services 210
VI. Evaluation 212 Evaluation Formats 212 Implementation 212
Table of Contents Related Attachments

13
List of Attachments
1. Lead Level Table 2. Double Digging 3. Urban Agricultre Internship Work Schedule 4. Produce Growth Diagram 5. Summer Youth Program Crew Rotations 6. Roxbury Summer Youth Program Schedule 7. Urban Agriculture Workshop 8. Martin Luther King Jr. Quote 9. Urban Agriculture Internship Job Description 10. Urban Agriculture Internship Application 11. Neighbor Gardener Recruitment Letter 12. Neighbor Garden Acceptance 13. [unavailable] 14. Neighbor Gardener Plot Agreement 15. Soil Testing 16. Compost Demonstration Day Flyer 17. [unavailable] 18. Urban Tour Script 19. Annual Plan 20. Bulk Produce Invoice 21. Combined Urban Crop Plan 22. Crop Yields 23. Crop Plan Worksheet 24. Field Plan 25. Vegetable Field Placement 26. Seed Order 27. Greenhouse Schedule 28. Planting Schedule 29. Langdon Street Map 30. Crop Rotation 31. West Cottage Map 32. Yearly Maintenance Schedule 33. Harvest Log 34. Task List


15
Introduction• Welcome• Your Work • About this Manual• History of The Food Project’s Urban Agriculture
WelcomeIt is a sunny but chilly afternoon in late October. Above the tall buildings of the Boston skyline and the trembling yellow leaves of a poplar tree on the West Cottage food lot, the sky is very blue. You have spent the day cleaning out and organizing sheds and vehicles, the cheerful task of the farmer as the season draws to a close. You’ve been asked to deliver about 200 pounds of green tomatoes, eggplant, and peppers to the Dudley Street Neighborhood Initiative, just down the street, for the barbecue they’re having just after their fall cleanup. Children in the third grade classes from the Emerson and Mason, two neighborhood elementary schools, harvested the veggies earlier in the day, and now you pack the produce boxes into your cargo van for the short drive to DSNI.
When you arrive, a familiar neighbor is standing in the lobby with her grandson. As you carry the vegetable boxes in, she tells you about her husband’s recent hospitalization and the sad state of her own flower garden. “I don’t have anyone to rake the yard or shovel the sidewalk when it snows,” she says, “let alone help me clean up my garden for the winter. My knees are so sore I can’t bend to pick the squashes.” Her grandson (age eight) frowns and takes her arm in a manly way. “I’ll shovel the sidewalk, Grandma,” he says, and she smiles wearily and pats his head. You tell her that you think you can send over a crew of youth and volunteers on Saturday to help her clean up her gar-den, and her face lights up. Her grandson waves shyly to you as you take the van back toward your office.
When you come in, there is a gift on your desk. It is a waxed paper cup full of pumpkin seeds, marked with the name of a second grade boy from the neighborhood, and a note that reads “I brought some pumpkin seeds to plant.” You remember that the little boy goes to an elementary school whose second grade teacher bought several pumpkins at the farmers’ market on
Our West Cottage Street food lot in Dorchester.

16
Thursday afternoon. She said the students in her class would count and dry the seeds. Putting the cup of seeds aside, you smile at the ways the bounty of the little farms returns to you, even so late in the growing season.
The richness of your position as the urban grower at The Food Project extends far beyond the growing season, and far beyond the boundaries of the three food lots. You are called to work these three small parcels of land, resilient and full of capacity despite their histories of neglect and abuse. You are called to work in a neighborhood where passersby pull their cars over, nearly causing traffic accidents, to talk to you about collard greens; where children pelt your van with green tomatoes in the night, then sidle up to ask if they can pick in the strawberry patch the next morning; where old men gather each morning at Ideal Sub Shop to drink coffee, gossip, and greet the day; where an old woman struggles down the driveway with a three-wheeled shopping cart and some ragged garbage bags to carry home compost from your pile, and you find yourself driving her back to her own garden with her bounty; where a neighbor invites you into his backyard oasis, filled with peach trees, grape vines, and vegetables so skillfully interplanted that no pest or disease knows where to look for a host, and urges you to gather as many peaches as you can hold.
Your WorkThe real benefits of urban agriculture -- the growth of fertile soil, healthy food, and long-term relationships among individuals, communities, and the land -- do not happen quickly. At the be-ginning of your work in urban agriculture, you found yourself tentative about the land and neighborhood, wondering what the role of The Food Project and its improbably bountiful food lots could possibly be in this vibrant, chaotic, well-loved community. Your days as an urban farmer are as varied as the produce that you grow. Some mornings find you alone on the lots, working to the accompaniment of sirens and birdsong, while others bring the company of up to 50 youth and volunteers, each with a unique relationship to build with your little parcels of land. The Summer Youth Program is the keystone of your season, eight weeks of high-intensity work with youth on the land while pro-
Staking tomato plants at the Langdon Street food lot.

17
duce pours into the farmers’ market from your lots and the farm in Lincoln. The spring and fall bring work with more advanced youth, including interns and the DIRT crew.
Your work as the urban grower at The Food Project makes you part of an experience that is extraordinary both agriculturally and socially. Throughout your time at The Food Project, you will encounter challenges and rewards that are unique to your work in the city, as well as many that are an integral part of working within the organization. You will learn not only the cyclical rhythms of the land with which you work, but also the intricate and vital pulse of the city, the joyful cadences of the work of young people, and the delicate, changing tempos of neighborhood relationships. You will be changed by your expe-rience, and you will make an impact on the lives of many others through your work. In the pages that follow, you will find tools to help you in this endeavor.
About This ManualThis manual will help you manage the three food lots effectively while engaging the groups of youth, community members and volunteers served by The Food Project in meaningful, produc-tive work. It will introduce you to the depth and complexity of your task while providing some basic principles of farm systems and community relations.
This manual is a guide to urban agriculture, Food Project-style. It shows how to work with and inspire the groups of people from all backgrounds and walks of life who contribute their time and effort to the urban lots. It explains how to plan for, plant, harvest, and distribute thousands of pounds of produce from a city-size farm, for recipients who range from upscale restaurants to the local farmers’ market to community lunches held on the lots. It describes work with neighbor gardeners and community organizations to build and sustain critical relationships within the neighborhood. You can use this manual throughout your work at The Food Project, initiating the systems described here – and improving on them.

18
The manual is divided into five sections. The first, “Food Project Urban Agriculture”, describes principles that we draw upon to make our farming practices more sustainable, and our steward-ship of land that does not belong to us more responsible. The founder of The Food Project, Ward Cheney, was a farmer for fif-teen years. His vision of the city’s potential to produce not only powerful and committed young people, but also a rich bounty of organic produce, guides our continued efforts towards sus-tainability in our urban agriculture. Particularly in urban areas, where land is scarce and the visibility of agriculture is high, we strive to maintain a healthy and respectful approach to our farm work, never overusing our land or abusing the privilege of our tenure in the neighborhood. In addition, we consider the com-plex questions of economic sustainability, critical to the ongo-ing existence of urban agriculture in a quickly developing city, where housing, business and parks compete for limited space.
The second section of the manual, “Working with People and The Land”, describes the systems that we use at The Food Project to integrate a diverse labor force into a productive agricultural operation. Our farm and food lots combine edu-cation, service, and production. Meeting our goals in each of these areas, while guiding youth and volunteers into a relation-ship with the land and the neighborhood, requires a balance of management techniques, cooperation with other Food Project staff and thoughtful organization on the part of the grower. This section of the manual provides you with a grower’s toolbox of practices to facilitate your interaction with the many groups that use our land.
The third section, “Urban Education and Outreach”, describes a part of your work that is unique to your urban setting. An inte-gral part of The Food Project’s work in Boston revolves around the relations that staff and youth build with urban farmers in our neighborhood. Your role in these relationships is a vital one, since you are one of the most visible – and agriculturally knowledgeable – staff members in the urban office. This section of the manual will guide you through the parts of your work in the city that involve assisting and educating other growers in our community, often in conjunction with youth and other staff members.

19
The fourth section, “Food Project Urban Lot Farm Systems”, explains the farm planning and agricultural systems related to the urban lots. Because of the small size of our land, and the intensity with which we work it, it is important to give careful consideration to managing the everyday operations of the food lots to ensure that they remain viable, productive, and an asset to the community. In this section, you will find information that will provide a foundation for your work as a grower and educa-tor on our urban land.
The final section of this manual, “Evaluation”, discusses the evaluation formats that provide you with a framework for meaningful work. The Food Project is committed to improve-ment in all areas of the organization. At various points through-out the year you will be looking for feedback from stakeholders in the food lots, including community members. This section will help guide you in how to use the information you get to continually enact our vision and mission in your own work.
This manual tries to show how The Food Project’s urban lots reach their goals because of the people we work with, not in spite of them. We organize all of our farm planning and tasks to promote the integrity of the experience of all members of our community: youth and volunteers are necessary and vital contributors to the agricultural productivity of our land, not merely extra people to be supervised by an already busy grower. Once structure and organization are in place to make their con-tribution effective, it is natural for people to connect with their experience at the farm.
Thousands of people will be impacted by your work and actions each year on the land. Use this manual to carry out your impor-tant mission as a grower.
History of The Food Project’s Urban AgricultureWard Cheney, The Food Project’s founder, had a powerful vision of the potential of urban agriculture. Ward was committed to introducing young people and volunteers from the city and sub-urbs to healthy organic vegetable production on the fertile fields in Lincoln and the vacant lots of the city of Boston. He saw
Hoop houses are used on our urban land to extend the growing season.

20
urban agriculture as a way to redeem neglected land in the city, bridge generations and build community, and create a potential source of income for skilled growers. Boston’s Dudley neigh-borhood, a diverse community with a history of activism and a large base of experienced farmers from the American South, the Caribbean, and Cape Verde, Africa seemed the perfect place to launch such an enterprise.
In the early history of Boston, Dudley was a rich agricultural area. More recently, Dudley Square was a thriving urban neigh-borhood that experienced a marked decline throughout the late 1900s. Challenged by crime, dilapidated and abandoned build-ings, and a median income that plunged below the city aver-age, Dudley was seen from outside the city as one of the most menacing neighborhoods in Boston.
In the 1980s, the neighborhood was designated a Brownfields area by the US Environmental Protection Agency. Severe lead contamination, excessive noise, and garbage pollution combined with a lack of access to food – there was no grocery store within walking distance, and public transportation was unreliable and indirect – and a high use of food stamps, soup kitchens, and food pantries among neighborhood residents. In addition, the rampant destruction of houses that followed the redlining of the neighborhood by banks and real estate companies in the 1960s and 1970s left more than 1,000 vacant lots in the neighborhood, some very sizable.
The Dudley Street Neighborhood Initiative (DSNI), a communi-ty organization originally founded in the mid 1980s by residents to combat illegal dumping of slaughterhouse refuse and other waste products in their neighborhood, took on many of these challenges. By the early 1990s, DSNI had grown into a power-ful nonprofit with the right of eminent domain over all the land within an area designated as the Dudley Triangle, with Dudley Square at its heart. Ward Cheney recognized the potential of DSNI as a community-based partner for The Food Project’s work in Boston, respecting the high quality of leadership at the organization and its commitment to the large numbers of youth in their community.
Bugs that help the land? Founder Ward Cheney with some of the youth from our first year.

21
Ward and other Food Project staff began working with DSNI in 1993 to recruit youth from the neighborhood for The Food Project’s Summer Youth Program. In 1993 and 1994, The Food Project and DSNI piloted a “Farm-to-Family” youth-run com-munity supported agriculture program in the Dudley neighbor-hood. In 1994, The Food Project decided to focus on bringing produce grown in the neighborhood to a youth-run farmers’ market in Dudley Square, and asked DSNI for help in finding an appropriate spot in the neighborhood on which to begin farming.
In early 1995, DSNI offered The Food Project a half-acre parcel of city-owned land at the corner of Langdon and George Streets, less than a block from Dudley Street. City Year had worked on the land since 1993, clearing brush, debris, and weeds and helping to alleviate significant contamination by lead and other toxins. When City Year began work on the lot, three of the four buildings that originally stood on it were gone; only a garage used for auto repair remained, and City Year, with help from YouthBuild and the EPA, had taken on the task of removing that building. They also worked on leveling the grade of the lot, once rocky and steep enough for sledding, and asked the City of Boston to erect a white picket fence around the perimeter. Now they hoped to find an organization to maintain the site, and DSNI suggested The Food Project. With DSNI’s help, The Food Project crafted a renewable lease with the City of Boston that granted TFP the right to use the land for agriculture for one year for the cost of $1. During the summer of 1995, Food Project youth and the newly hired grower, Martha Boyd, spent a week in the city spreading 10 truckloads of compost – more than 300 cubic yards – on top of the contaminated land beneath and writ-ing about the potential for creating a farm in the city.
By the summer of 1996, lead tests showed that the land was clean enough to grow on. DSNI helped The Food Project orga-nize a neighborhood growers’ meeting with TFP youth to recruit gardeners to raise vegetables side-by-side with them on the lot. One gardener in particular, Clarimundo da Silva, who lived just across Langdon Street, became a community liaison and

22
informal guardian of the lot. Martha worked with youth and volunteers on the land to grow crops for the Dudley Farmers’ Market, and also sold some produce to restaurants in Dudley and neighboring communities.
Martha also began to develop a crop plan that built on the strengths of the Langdon Street lot to produce labor-intensive crops and specialty ethnic crops that were particularly popular in the neighborhood. Certain crops, such as melons, were con-sidered too vulnerable for the urban lot, which is highly visible and guarded only by a four-foot fence and the watchful eyes of neighbors; others, including corn, squash, and pumpkins, were grown only in Lincoln because of the amount of space that they needed. This planning allowed Martha to maximize the poten-tial of the both the land in Lincoln and urban land. Still, The Food Project hoped to expand its land base in the city, both to provide the growing numbers of youth taking part in its pro-grams with a more extensive agricultural experience in Boston and to grow more produce in the city that could go directly to the market, only a few blocks away.
In 1997, a large parcel of land only a few blocks from the Lang-don Street site became available. This land, located at the inter-section of West Cottage Street and Brook Avenue, had once been the site of a small neighborhood of 16 houses organized around Gouldville Terrace, a cul-de-sac that dropped down about 25 feet from the level of Brook Avenue, according to the memory of a neighbor. The brook for which Brook Avenue is named flowed behind the site in the southwest corner. When the 16 houses on the land were destroyed in the mid-1960s, the site became a construction landfill. In 1993, DSNI and Boston Urban Garden-ers applied for funding from the city of Boston to grade the site, fence it, and position boulders to prevent cars from being driven onto it.
Over the years, as neighbors in the area were approached with ideas for a park or playground on the lot, they rejected many of them because of concerns about noise or potential drug activity. When plans for a community center on the land fell through, DSNI offered the site to The Food Project. Again, youth, staff,
Bringing in compost to amend the soil in the urban lots.

23
and volunteers cleared the land of brush and trash, including a large but decrepit tree house that served as a play spot for neighborhood children. Initial protestations by children and their families were quieted by their interactions with the dynam-ic and sociable Food Project work crews, and the site remains a short cut for children, who often linger to play or work on the land.
Once again, soil and compost were trucked in, neighbor garden-ers were recruited, and the West Cottage lot became a produc-tive piece of land beginning in 1998 and 1999. Remediation of the southern side of the lot along Judson and Dean Streets, which required the addition of more soil from the Brook Avenue Co-op Project to fill a steep ravine, continued in the fall of 1998. While over half the productive space at West Cottage was laid out in beds in 1998, less than half grew vegetables. In 1999, all but the southern area of the lot grew vegetables for the markets, donation to shelters and occasional produce sales to local restaurants.
The addition of the West Cottage lot, which at 1.5 acres quadru-pled The Food Project’s land base in Boston, led the organiza-tion to reconsider staffing for the urban and suburban farm sites. For the first time in October of 1998, as remediation of the West Cottage lot was being completed, an urban grower was hired to focus on production on both lots and education of urban constituents.
The summer of 2000 was the first year that Food Project youth, staff and volunteers grew organic produce on the entire grow-ing area at Langdon and West Cottage Streets – more than 11,000 pounds, the majority of which was distributed through the market in Dudley Square. As Food Project staff recognized the potential for the urban lots to yield a significant portion of the market’s supply of critical crops, the rural and urban growers began to work together to further refine the crop plan that Mar-tha Boyd had developed, focusing on production of specialty crops such as okra and aji dulce peppers as well as other crops with intensive labor requirements, such as cherry tomatoes and beans.
Young people preparing for a hard day’s work.

24
Gideon Porth, the grower during the 2000 season, also recog-nized that the “urban heat island” effect combined with slightly warmer coastal temperatures to create a growing season in Bos-ton that was several weeks longer than in Lincoln, both in the spring and the fall. Gideon experimented with earlier planting dates in the city, using spun plastic row cover and heavy plastic “high tunnels” to produce root crops and brassicas for the first markets in early June.
The Food Project’s Farmers’ Market in Dudley Square grew in popularity during the late 1990s. Many neighborhood residents came to rely on the market for their weekly vegetable shopping, even after a Stop and Shop grocery store was built not far away in 1998. A high percentage of market sales were paid for with national and state farmers’ market coupons from low-income women, children, and seniors. Experiments with recruiting other growers to sell at the market alongside The Food Project met with mixed success. While other vegetable growers were discouraged by the volume of sales and low prices, a local fruit grower has been a vital fixture at the markets, providing corn, peaches, and apples in season, and a number of neighborhood growers became interested in selling alongside the youth at the market.
Food Project staff were excited by the economic and social benefits of including urban growers in the market. Nonetheless, concerns about selling produce that was grown in lead-contami-nated soil led TFP staff to recognize terrible fact of lead contami-nation: many gardeners whose vegetables fed entire extended families, including small children, were potentially poisoning their families and themselves through their use of contaminated land. Neighborhood growers needed further assistance not only to make their produce market-ready, but also to make it safe.
In 1999, The Food Project’s Pollution Prevention team of young people and staff was created to further The Food Project’s urban education goals. The Pollution Prevention team worked with neighborhood gardeners to increase their awareness of lead contamination and the hazards of using conventional pesticides and fertilizers on fragile urban land. They partnered with

25
several neighborhood gardeners to help them use organic methods in their gardens, and encouraged these gardeners to sell their produce at the farmers’ market. They mapped gardens within a square mile radius of DSNI, discovering that there were more than 160 home and community gardens, most on unreme-diated soil, within that area. The Pollution Prevention interns also continue to work on increasing awareness of the issues facing urban gardeners among legislators and companies such as Home Depot.
In the fall of 2000, The Food Project moved into an office in a for-mer restaurant at the corner of Dudley and West Cottage Streets, only a block from our largest urban lot. The opening of the ur-ban office, along with the urban kitchen a year later, represented great strides towards solidifying The Food Project’s presence in the neighborhood.
As The Food Project’s role in the Dudley neighborhood grew, the demand for produce once again outstripped capacity. The farmers’ market at the Dudley Town Common continued to grow in popularity, but the produce there was sold at prices that were close to or below those for conventional vegetables at the nearby supermarket. The Food Project’s urban agriculture was not sustaining itself financially, while rural agriculture worked towards economic sustainability through its growing Commu-nity Supported Agriculture Program. Because one of The Food Project’s goals in establishing food lots in the city was to dem-onstrate the income-generating potential of urban agriculture, the organization’s staff and board began to brainstorm ideas for enterprise projects that would make use of produce from the urban lots.
Eventually, two ideas came to the forefront of The Food Project’s plans for urban enterprise. The office into which the organi-zation had moved in 2000 came with space for a commercial kitchen. Many staff believed that the kitchen could be used to produce a value-added organic product such as salad dressing or salsa, using produce from the urban lots, that could be sold at a premium in high-end stores; others saw the potential of the kitchen to train and employ youth in a small-scale catering or
Pollution Prevention interns cleaning with a neighbor gardener.

26
takeout business incorporating seasonal produce. In addition to the kitchen, the organization began to consider the idea of adding a farmers’ market in a higher-income neighborhood as a way of ensuring that The Food Project’s urban agriculture could continue to provide food to people in the Dudley neighborhood while beginning to generate income as well. All of these enter-prise ideas, however, came with a significant stipulation: they all required that The Food Project increase urban production – and therefore, that we find more land in the city.
In May of 2001, as The Food Project was in the middle of an in-tensive search for additional land in the city, a neighbor offered a vacant lot next to her house, which she had purchased years earlier to prevent additional development on her street. In ex-change for helping with her home garden, in which she contin-ues to grow collards, beans, and squash, The Food Project was able to take over management of her sunny 5000 square foot lot. Teens in the Summer Youth Program and volunteers cleared the lot and spread compost over the soil, which again showed signs of lead contamination around the foundation of a house in the center of the lot. In 2002, this lot will grow crops for local res-taurants and catering companies and The Food Project’s urban kitchen.
Over the past decade of The Food Project’s existence, the or-ganization has become a national leader in the field of urban agriculture. Each year, youth and staff present our work at many conferences throughout the country. The thoughtful way in which The Food Project has built a strong foundation for our urban agriculture work one step at a time, with a fundamental respect for the history and culture of the neighborhood in which we are working, has been an inspiration to many other individu-als and organizations.
Through deliberate, considered growth, continued emphasis on the high quality of the work we already do, and faithful atten-tion to relationship building in our neighborhood, we are slowly becoming a leader in our community as well. The organiza-tion’s steps towards enterprise represent a recognition that in order to continue our mission of providing neighborhood-

27
grown food to community members and homeless shelters – and to create a true demonstration model of urban agriculture for people who might want to take it on to generate income -- our urban agriculture must become financially sustainable. Nonetheless, The Food Project remains committed to the histori-cal roots of our work, kept alive through our regular reflections on the mission and vision of the organization. Any growth or future steps for the organization’s work in the city of Boston will be carefully considered through the vision-mission lens that has guided our work throughout our history. As the urban grower, you will play an important role in shaping the next steps for The Food Project’s work in the city – you will help to write the next chapter of this history.

28
Food Project Urban Agriculture• Environmental Sustainability• Social Sustainability• Financial Sustainability• Community Sustainability
One of The Food Project’s primary goals in our agricultural and organizational operations is maintaining a sustainable sys-tem. We define agricultural sustainability as a balance between production and renewal that allows our agricultural work to continue over a long period of time. We want this balance to prevail throughout our work, and we strive to achieve several types of sustainability, as follows:
• Environmental sustainability means making a commitment to farming with nature, working with and responding to the natural systems at work on our urban lots. It means being aware of what we are taking away from the land when we use it to produce food so that we can take the necessary steps to help the land renew itself.
• Social sustainability means taking responsibility for our own renewal and that of our co-workers, both within our work and outside of work. Developing a work environment that nourishes us at the same time it challenges us is similar to creating an agricultural ecosystem that renews as it pro- duces. We strive for healthy work habits and a productive effort for the youth and communities with whom we work.
• Financial sustainability means creating a small-scale agricul- tural operation that can survive in an era in which the prevailing agricultural norm is large size and large profits. Financial sustainability for our agricultural operations is the point at which our agricultural operations generate enough revenue to cover their expenses. Becoming financially sustainable has two main effects: it gives our work in the area of creating alternative food systems economic credibil- ity; and it allows our organization to become less dependent on funding from grants and donations.
• Community sustainability means working within the context of our community for a long period of time, building relationships with neighbors and local organizations,
A Food Project young person leading a volunteer to the field.
29
making sure our agricultural operations conform to their aesthetic standards, and doing our best to direct our long- term goals in ways that will benefit our community.
The principles that govern our efforts towards each of these four types of sustainability are discussed in more detail in the sec-tions that follow. As you work on the urban land, remember that this balance between production and renewal is the essence of your work as an urban grower. You will embody these types of sustainability in your work with Food Project youth and staff, as well as with your vegetable crops on the land. The overall health and long-term productivity of both your position and the urban land depends on how well you incorporate sustainability into your work.
Environmental SustainabilityThe urban lots, on which The Food Project raises more than 15,000 pounds of produce each year, are excellent examples of the need to pay heed to environmental sustainability. All three lots have suffered severe environmental degradation, and in some cases, contamination. The Food Project’s task since 1996 has been to bring these lots back to a state of agricultural pro-ductivity, and to gently restore the land’s ability to renew itself. In our agricultural work, we accomplish these goals through careful attention to management of our soil and its fertility (including lead contamination), appropriate tillage methods and weed control, and prevention of plant pests and diseases. We choose not to use any chemical pesticides or fertilizers on the ur-ban lots, preferring to find longer-term, environmentally respon-sible solutions to the challenges with which the land presents us. The following sections describe the environmentally sustainable agricultural management strategies that allow us to direct and support the growth of vegetable crops in cooperation with the land.
Soil and Fertility ManagementThe soil quality at the urban lots is a great challenge to the urban grower – but it is also a powerful example of redemption and re-silience. All three urban lots have had serious problems of lead contamination and poor fertility, and some degree of environ-mental neglect or mistreatment exists in the history of each site.

30
The soil on each site is different (see section V on Food Project Urban Lot Farm Systems for a more in-depth discussion of the three sites), but all three lots share three characteristics that you will need to address as a grower with an eye towards environ-mental sustainability: problems with lead contamination, low overall soil fertility, and unusual soil structure and composition due to the addition of soil and compost to combat contamina-tion.
LEAD CONTAMINATIONLead contamination is a problem facing nearly every urban agri-culture enterprise. Many houses built before the mid-1970s con-tained large amounts of lead-based paints. Residue from this paint often accumulates in the soil along the dripline of older houses, where rainwater picks up the lead and carries it into the ground. When fire-damaged or otherwise irreparable houses were collapsed into their foundations, as was common practice in Boston and other cities, contamination from lead paint often spread over the entire house lot, with particularly high concen-trations in the area of the buried foundation.
People who play or work on contaminated soil can be exposed to unhealthy levels of lead by breathing in dust. Children under the age of six are particularly vulnerable to the effects of the accumulation of lead in their bodies, which include behavioral and developmental problems such as reduced IQ and attention span, learning disabilities, hyperactivity, insomnia, and hearing loss.
Plants that grow on contaminated soil also take up lead. If these plants are vegetables grown for consumption, they can become dangerous to eat, particularly in soil with very high lead levels (see Attachment 1: Lead Level Table). Plants concentrate lead primarily in their leaves and roots, leading to the recommen-dation that gardeners grow only fruiting crops on moderately contaminated soil; however, in soil where lead levels are very high, fruits and even the seeds saved by neighborhood growers may contain levels of lead that make them hazardous.
Be aware of the lead levels on the urban lots. While more than two feet of additional soil and compost lies on top of the
Attachment 1

31
contaminated soil on the Langdon Street and West Cottage Street lots, it is not yet clear whether that amount will be suffi-cient to prevent contamination in the long term. Do one or two sets of soil tests each year, and definitely consider doing plant tissue tests to measure the amount of lead that is being taken up by our vegetable crops. Managing lead is one of the most im-portant aspects of soil management on the urban lots, and The Food Project’s example can be an education to many others who are dealing with similar issues on their own land, in our own neighborhood, and in cities across the country.
A more detailed discussion of lead contamination appears in Section 5.
FERTILITY PROBLEMS The soil on the urban lots is primarily “replacement” soil, brought in and placed on top of the contaminated soil that already existed on the lots. For the most part, it is a mixture of subsoil or topsoil and compost, generally leaf mulch compost made by the City of Boston, Greenleaf Composting Company or City Soil, and Greenhouse Company. The fertility of the compost varies widely depending on how it was made, in what year it was made, and who provided it to us. Don’t assume that just because the soil is high in organic matter, there is enough available nitrogen and other nutrients to supply crops through the season. In some areas, the compost and soil are mixed well together; in others, they are layered and compacted. In some areas, drainage is efficient and soil dries out quickly; in others, rainwater pools and creates problems for plant roots starving for air.
The differences in soil structure and composition across the lots affect every aspect of crop growth, including yield, ability to compete with weeds, and vulnerability to pests and disease. The production demands that we place on the urban lots every year also have a powerful effect on the soil. While you will be-come an expert at dealing with the individual needs of the soil at the three lots, there are general rules of sustainability that you can follow to enhance the soil fertility across the board:
Moving compost to the outer beds.
32
• Remember that crop growth removes critical elements from the soil, including organic matter and nutrients. Build soil by continuing to add compost to replenish organic matter and soil microorganisms. This will also help improve water retention in areas that tend to dry out, while assisting with drainage in areas where water tends to pool.
• Work to improve soil fertility through cover cropping, crop rotation and the consistent use of organic fertilizers. These methods will help create an appropriate balance of minerals and nutrients essential to plant growth.
Using these methods will help you increase the productivity of the urban lots while building up the health of the soil. You will create a sustainable system that contributes to the natural recycling process, improves soil tilth and fertility, and makes our urban agriculture more efficient and productive. Remember, it takes years to build soil health, particularly in an area where soil has been damaged by neglect and misuse. But keep in mind that Roxbury was once a productive agricultural area, and that building soil and sustainable agriculture in this community is returning it to an earlier time in its history – in a thoroughly modern context. Your care and stewardship will help the pro-cess of transformation that began with the destruction of houses in the 1960s and 1970s, leaving the soil open to the sky. In the city, building soil is building hope.
Tillage and Weed ManagementBecause you have access to a large labor force, you should be able to use a combination of mechanical and manual labor to till and cultivate soil on the lots. The Troybilt eight horsepower til-ler is an excellent tool for tilling beds quickly, stale bedding, and incorporating small amounts of organic matter, including cover crop plantings that are less than one foot tall. You may also find it useful for keeping pathways clear of weeds. Using the tiller too often on the fragile soil of the urban lots, however, will de-stroy soil tilth, contribute to erosion and compaction, including the creation of a hardpan beneath the level of the tiller tines, and decrease the hard-won levels of organic matter in the soil.

33
When using the tiller, also consider soil moisture levels. The beating of the tiller tines will destroy the structure of soil that is too wet or too dry. To determine the appropriate soil moisture level for tilling, press a clump of soil in your fist. If the soil is too dry to form a ball, it is too dry to work with a tiller. If it forms a wet, sticky ball that will not crumble easily, it is too wet. Soil that is ready to be worked will form a ball that crumbles easily, like moist chocolate cake.
Make use of spring volunteer groups and DIRT crew youth for initial bed preparation in April – except on the earliest beds, which you’ll need to prepare yourself in late March. Prepare the site well and train youth and volunteers carefully to ensure that they spread compost thickly enough, work beds to an appropri-ate depth using pitchforks and the broadfork, dig out pathways and shape beds properly, and keep beds straight and consis-tently four feet wide. Consider developing a rotation in which certain beds are prepared each year using available labor to double dig them (see Attachment 2: Double Digging), reducing the effects of compaction and incorporating layers of soil and compost.
Plan to have sufficient time after youth and volunteers complete bed preparation to use the tiller or wheel hoe to stale bed before seeding. Stale bedding – allowing weed seeds to sprout, then running a cultivating tool over beds at a shallow depth on a sunny morning when exposed weeds will shrivel and die before they have a chance to re-root – kills weeds in the top layer of soil when they are less than an inch tall, saving you work later in the season. Youth and volunteers, however, will be your primary means of weed control once the season is underway.
Because you will not often be able to turn crop residues back into the soil when their productive life is over – spinach or salad mix may be an exception – make use of youth and volunteer labor to remove and compost these residues at the end of the season. Because the urban growing season is so long, crops are often in the fields until the end of the farmers’ markets, when days may be too short and cold to provide favorable conditions for cover crop growth. Consider undersowing cover crop in
Attachment 2
The Food Project’s young people are an invaluable resource in the fields.

34
long-season crops such as tomatoes, peppers, eggplant, and col-lards instead of waiting until you pull the plants to prepare beds and seed cover crops. This will minimize the amount of time you need to work the soil and maximize the area that will ben-efit from cool-season cover crop plantings. Be aware, however, that frost-tolerant crops such as winter rye will be tremendously difficult to incorporate with the limited power of the rototiller. Cover crops that winterkill, such as oats and peas, will probably best serve the needs of the urban lots. Pest and Plant Disease ManagementThe best way to approach organic management of insect pests and plant diseases is to build healthy soil for your crop plants. In many urban areas, the integrity of the soil has been so severe-ly compromised that this process, along with the creation of a diverse farm ecosystem, takes years. In addition, because of the small size of our urban lots, appropriate crop rotation, another powerful way to “hide” crops from their insect predators or diseases, can be challenging.
Don’t despair, or give in to synthetic pesticides! The process of reclaiming urban land and creating productive agricultural spaces is worth the work and the occasional losses that are the result of your unique circumstances in the city. Continue to use practices that will control insect pests and plant diseases by us-ing nature’s own methods:
• Diversify. We grow more than fifty types of vegetables on our urban lots, minimizing the damage from any particular pest or disease. Consider interplanting to confuse insects, but remember that whatever planting methods you use should be understandable to everyone who works on our land.
• Take advantage of natural enemies. Release beneficial insects that feed on pests, such as predatory wasps.
• Use buffer zones. Plan border area plantings to encourage natural enemies of our insect pests, such as ladybugs in Queen Anne’s Lace.
• Monitor. Walk around the lots each day and note growth of plants, paying special attention to stunting, yellowing,

35
disease problems, weed growth and any insect pests you see. With time and attention to the lots, you will learn to recognize problems quickly and assess them accurately for risk of crop damage.
• Use physical and chemical barriers. Many of the worst pests (both insect and pigeon) on the urban lots can be kept from doing damage to the crops by the use of row covers immediately after planting. Others, such as aphids, may be affected by Safer’s Soap or garlic barrier; use these sparingly, if at all, and never use them less than 24 hours before harvest.
• Use scare tactics. If it is not feasible to cover a large area of cover crop seed with row cover, consider using scary eyes or flash tape to prevent pigeons from eating seed.
• Pick ‘em off. Certain pests, such as imported cabbage worm, Mexican bean beetle and Colorado potato beetle, can be found and removed manually from their host crop.
• Use organic pesticides as a last resort. Rotenone and Bacil- lus thuringiensis (Bt) species can be highly effective in controlling significant outbreaks of pests on essential crops. Part of the reason for their effectiveness, however, is that responsible farmers try to use them as little as possible to maintain high levels of insect vulnerability to the pesticides. Using them too often can lead to immunity. Rotenone, a natural but broad-spectrum pesticide, is also highly poison- ous to many beneficials as well as to pests. Use it sparingly and not less than 24 hours before harvest.
Remember, your pest and disease control practices are highly visible to youth, volunteers, and neighbors in our community. Many neighbors will want advice or help in dealing with prob-lems similar to those you may see on the three Food Project lots. Often, these neighbors are from countries or communities where chemical agriculture was not an option because of the high cost of inputs such as fertilizer, pesticides, and herbicides. They will often be familiar with many of the principles of agriculture working with nature. Your expertise and assurances will help them use safer, healthier, and more sustainable methods to feed their own families.

36
SeedsAt The Food Project, we follow a few guiding principles when selecting seed stock for our vegetable crops:
• Begin with high-quality seeds from a reputable grower, if possible.
• Order non-treated seeds if they are available. If not, search out a similar variety that is offered as non-treated seed.
• Avoid genetically modified seeds at all costs.
In our urban agriculture, we occasionally need to find seeds for some unusual crops from sources outside traditional seed companies. The University of Massachusetts has been experi-menting with developing many Latino crops, including the popular aji dulce pepper and calabaza, a type of winter squash, for successful cultivation in the Northeast. Neighbors, who of-ten save and share seeds for foods from their own cultures, may also be good sources for seeds for crops such as calaloo, a leafy green amaranth that is popular among Jamaicans, or beans that are particular favorites of Cape Verdeans. Do some research to find local seeds – or, if you have space, consider saving some of your own. Do be careful in considering the potential for lead contamination in any neighborhood-grown seeds.
Social SustainabilityThe urban lots should be a place of enrichment and renewal for you and the youth and staff members who work on them. Too often, however, the pressures of the season can cause farms to become high-stress, unpleasant environments where production is vastly more important than process. Your careful planning can help alleviate stress during the most demanding times of the season and provide built-in opportunities for revitaliza-tion. As a grower, you have the opportunity to set an example of a healthy work schedule for the young people and other staff with whom you work. Include social interactions, vacations, and community building time that will allow you to do your job more successfully and create a better work environment for oth-ers on the urban land.

37
All The Food Project’s agriculture staff must work in a sustain-able fashion in order to maintain the long-term vigor of the organization’s work. If you work seventy-hour weeks from February through November, you will not do your job well, and you will probably not last long at it. As the urban grower, you have tremendous and varied responsibilities – set up struc-tures and a schedule that will allow you to fully carry out those responsibilities. Neither you nor anyone else who works on the land can work at their full capacity if they are physically, men-tally, and emotionally drained.
Create a socially sustainable work environment so that your job is not a fight against the land, the farmers’ market customers, the program staff, other agriculture staff, the organization, or yourself. The Food Project relies on your ability to inspire and motivate the staff and others with whom you work about inte-grating urban agriculture with youth, service, and education. Be fully present every day that you come to work; organize the urban lots so that they give you strength instead of draining it.
Building CommunityAs the urban grower, you are in a unique position within the organization. You are part of the agriculture staff, but you will not always interact with them on a daily basis. You are part of the urban staff, but your role as a grower is a distinctive one within that team. During the growing season, you may find that you form a kind of “mini-team” with the urban agriculture intern and farmers’ market manager, with whom you will inter-act most frequently on a daily basis. While the Summer Youth Program is going on, you will be in constant contact with the site supervisor. During the Volunteer Program, you will interact almost daily with the Volunteer Program Coordinator. It is your responsibility to balance all these interactions so that they create a supportive environment for you while enabling you to sup-port others.
Early in the season, try to spend time with the agriculture staff. The Lincoln grower and growers’ assistants, along with the farmers’ market manager, will be the people who are most able to understand the ebb and flow of your work during the
Warming up before field work.

38
growing season. Establishing positive, mutually supportive relationships and excellent communication with them will help you during the busiest times of the season. Sharing meals or work early in the season will help build a strong agriculture team for the upcoming year.
Interaction with the staff in the urban office is equally as impor-tant in ensuring that you have a strong community support sys-tem. You will be working closely with many of them on urban education work throughout the year. Keep the other urban staff up to date on what is happening on the lots. Organize a few mornings of work on the land during the spring and fall so that the urban staff can reinvest themselves in the work that you will be doing together all year. On these days, share a meal together after you work to celebrate your collective efforts and build ap-preciation for one another. While everyone will be busy, taking the time for this type of collaboration will build support systems that will sustain the whole urban staff through the season.
The urban agricultural intern(s), who will usually be working with you from April through October, is one of the most impor-tant people with whom you will build community. Shared work and time for reflection with a mentor can be an extremely pow-erful experience for a young person who is interested in pur-suing agriculture or The Food Project’s mission in some form. Demonstrating the ways in which you balance product and process on the land, and continuously emphasizing the impor-tance of community as an integral part of the work that we do at The Food Project, will provide a critical example of sustainabil-ity and inspiration to the urban agricultural intern. Encourage the intern to take part in potluck lunches or other community events with Summer Youth Program crews or other interns. He or she will need breaks from the demanding schedule of the growing season, as well as time to process the experience of the season with his or her peers.
Interaction with the PublicAn important aspect of social sustainability is contact with people who give you energy. Our youth programs, volunteer programs, farmers’ market, shelter drop-offs, and urban edu-

39
cation programs all allow the agriculture staff to interact with people affiliated with The Food Project. These people give you energy to do your job because they often speak with apprecia-tion for your efforts and open up new perspectives on your work on the land. Organize your schedule so that you don’t lose your link to the people who are affected by the work that you do. Also, make sure that you have sufficient time working alone to recharge and renew yourself in preparation for your interactions with our many constituents.
Hours and VacationAs you know, farming is not a forty-hour-a-week job. As a grower, your work may require you to be on the land for long hours during the height of the season; during the quiet time of the winter, it may require less. You may need to start work early in the morning, for example, in order to harvest crops that would otherwise wilt in the heat of the summer. You may need to come to work early or stay later in the evening simply to give yourself enough quiet time to plan for the coming days and weeks. With careful thought and organization, however, and – in particular – through productive management of the tremen-dous labor force to which you have access, you can reduce the amount of hours you need to be on the farm.
The season on the farm is long and demanding. Take proactive steps to make sure that you and the urban agriculture intern get the most out of your work with The Food Project. Although many urban agriculture interns are excited to dive into their work, make sure that the intern has a relatively light schedule early in the season – one or two afternoons a week, in addi-tion to Saturdays with volunteers and the DIRT crew, is usually enough for the spring (see Attachment 3: Urban Agriculture Internship Work Schedule). As you move into harvest season, allow the urban agriculture intern to increase their hours as they are able, in some cases up to 35 or 40 hours a week.
Don’t wait until you notice flagging energy and diminished en-thusiasm to give your intern a break. Even the most committed young person needs an extra three-day weekend here and there to recharge and rededicate themselves to their work. Remind
Attachment 3

40
them to take extra time off before and after the Summer Youth Program to spend time with friends and family and renew their energy. While it may be challenging to go without the intern’s labor and insight for a few days, the benefits of encouraging them to take the extra time far outweigh any difficulties it might pose.
The same, of course, is true of your own work. Coordinate your schedule with those of the other agriculture staff so that you can take a weekend off in the spring and a week off at some point during the growing season. The way the work on the urban lots is currently structured, you should only need to work six days a week during the months of April, May, June, and September. During July and August, the large labor force provided by the youth participants in the Summer Youth Program should enable you to take two days off a week. Two-day weekends will also enable you be more effective in carrying out the considerable motivational and management responsibilities required of you.
It is challenging to find a balance between working too many hours and not putting in sufficient time. Farmwork can become overwhelming and consuming on any farm, and The Food Project’s vision and mission can be so compelling that they are difficult to walk away from, even for a weekend. If you work too many hours on the urban lots, however, you will burn your-self out and will not be effective at communicating your passion for your work and the work of the organization. If you limit your hours too severely, however, you may find that you are not in touch with all of the many facets of your work. Making an effort towards incorporating sustainability into your work-day, whether it is sharing a meal with staff or youth, engaging neighbors or customers in conversation, or simply arriving early to make sure you have quiet time in the morning for planning or enjoying the land alone, will help you find the balance to enable you to take pleasure in your work while rising to its demands throughout the season.

41
Financial SustainabilityThe vegetables produced by The Food Project’s farm and urban lots contribute to two of the organization’s primary goals: hunger relief, providing fresh, organic, locally grown, cultur-ally appropriate produce for those who might not otherwise have access to it; and financial sustainability, our organiza-tion’s capacity to continue carrying out its mission and vision in a fiscally responsible manner. The annual plan takes both of these goals into consideration when making decisions about directing produce towards our five distribution streams – com-munity supported agriculture, shelters and food pantries, urban farmers’ markets, enterprise and the urban kitchen, and internal distribution.
In 1997, the organization realized that, because of the difficulty in raising money through grants and donations for our subur-ban agriculture work, that aspect of The Food Project’s agricul-ture needed to become financially self-sufficient over a period of three years – that is, within three years the Lincoln farm needed to generate enough revenue to cover its expenses. The Food Project’s Community Supported Agriculture Program (CSA), in which residents buy “shares” that entitle them to a portion of the harvest each week, has enabled the Lincoln farm to achieve its goal of becoming an economically viable farm system. The CSA also advances The Food Project’s vision and mission, increasing awareness about local agriculture and food systems among suburban families while enabling the farm to provide about half of its production to our hunger relief efforts.
In a similar way, one of the most important – and challenging – aspects of urban agriculture is its ability to be economically viable while also contributing to our goals of hunger relief. While it is easier to find funding through grants and donations for urban agriculture than suburban agriculture, it is not fiscally responsible to depend on grant funding in the long term to sup-port our urban agriculture work. In addition, working towards financial sustainability in our urban agriculture furthers The Food Project’s outreach and education aims. Part of the mission of the organization’s urban work is to demonstrate that urban agriculture is a constructive alternative to the mainstream food
42
system that benefits both producers and consumers. A signifi-cant part of the benefit to producers, of course, is the financial sustainability of the enterprise.
In urban agriculture, financial sustainability can take many forms. There are multiple ways to evaluate sustainability among urban farmers currently growing food in Boston. Many individuals in our community take pride in growing so much food for themselves and their families that they give a great deal away to neighbors and extended family. It is difficult to mea-sure the impact of such a powerful “alternative food system” on people’s spending power, but there is no doubt that urban agriculture makes an economic difference to many families in our community even if it does not contribute directly to increas-ing their income.
On the other hand, while it is unlikely that most people will be able to completely support themselves and their families by growing vegetables on a one-and-a-half acre lot in the middle of the city, The Food Project hopes to demonstrate through our work that urban land can produce enough food to become a secondary source of income for an individual or family with advanced growing skills and well-chosen markets. The Food Project’s urban agriculture has traditionally generated revenue primarily through our farmers’ markets, with a smaller portion of our vegetables being distributed through sales to restaurants, caterers, and groceries. (See Attachment 4: Produce Growth Dia-gram) This diagram illustrates the increasing challenge of grow-ing reliable quantities of high-quality produce for each of the types of customers in the pyramid. Each step up the pyramid represents an increased level of commitment – and, therefore, production capacity or skill – on the part of the grower. Each step up also represents the possibility of increased income for the grower, and a risk of losing customers if commitments are not met. On the other hand, each step down the pyramid repre-sents an increase in the potential to contribute to hunger relief.
Donating to homeless shelters, for example, requires the least degree of commitment for growers, since shelters are gener-ally able to accept almost anything we have for them and will
Attachment 4

43
not turn us away if we don’t have tomatoes for three weeks in a row. However, donating to shelters doesn’t bring in much income. Selling to upscale restaurants may bring in significantly more money than selling produce at our community market in Dudley Square.
The following paragraphs describe each of the levels on the pyramid, including their income potential, the commitment on the part of the farmer, the degree of risk that is involved in each, and how each has been part of The Food Project’s efforts at financial sustainability.
The earliest recipients of The Food Project’s produce were home-less shelters and food pantries. These customers are more willing than many others to accept produce even if the quantity and quality are inconsistent. While The Food Project’s farm and urban food lots are now able to provide high-quality produce on a consistent basis to the shelters with whom we work, beginning with these outlets meant that we were provid-ing food to people who appreciated it while limiting the degree of risk we were taking while we were in the process of develop-ing our production capacity. The income potential with home-less shelters is limited (only a few have budgets to purchase produce), but the opportunity to contribute to hunger relief at these outlets is very high.
In thinking about outlets for our urban agriculture that were able to generate some income as we developed our production capacity, The Food Project decided to begin with the farmer’s market in our community. It was important for us to begin sell-ing through farmers’ markets because, although we are commit-ted to providing quality produce no matter who our customers are, farmers’ markets offer more flexibility in terms of the quan-tity and variety of produce we are able to produce. Although customers may not return if the market does not carry the types or quantities of vegetables they need over the long term, they tend to be more flexible (particularly if prices are low) than res-taurant owners or grocery store produce managers.
The Food Project provides healthy, locally grown food to over eleven shelters in the Boston area.

44
In addition, while the income level at the Dudley market was not high enough for many other vegetable growers to make the trip into the city, our location in the neighborhood made our profit margin higher since our transportation costs (as well as the time spent by the grower in transit) are so much lower. Finally, the contribution that we make to hunger relief at this market, in an area of the city where many residents make use of food assistance and where, until recently, there was no major grocery store, means that these markets are an important part of The Food Project’s vision and mission.
Throughout its history, The Food Project has experimented with selling a small percentage of our harvest to restaurants and grocery stores. These customers are valuable relationships because if they become regular purchasers of produce, they may buy large quantities on a regular basis throughout the grow-ing season. While many of them can only pay wholesale prices for the produce, some are willing to pay more for high-quality vegetables, and the guaranteed purchase of a large quantity by a restaurant or grocery store can be more reliable than the whims of the farmers’ market customers.
These customers, however, often require a predetermined – and likely quite large – quantity of vegetables at a very high quality, often at a more advanced level of preparation than is needed for sale at the market. For example, a restaurant to which we were selling salad mix in the spring of 2001 requested ten pounds a week of uniform, perfectly cleaned and dried salad mix, a large quantity given our available labor at that time of the year and the space we had available for salad mix.
The financial benefits of these customers to our urban agricul-ture have been outweighed in the past by the additional work involved for the grower, both in preparation and transportation of produce, and by the need for the produce in other distri-bution streams. However, as The Food Project’s production capacity in the city increases and more staff and youth energy is directed towards producing for enterprise, production for these types of customers (including the urban kitchen) may become a larger part of our distribution goal.
The Food Project’s farmers’ market is a bustling hub of activity.

45
High-end farmers’ markets may offer the largest opportunity for high profit margins, but they also require a very high-qual-ity – and often exotic or unique – product. It is one thing, for example, for The Food Project to bring a wide array of beautiful, freshly harvested organic vegetables to our market in Dudley Square each week. We are usually the only vegetable grower at our market, and always supply our customers with the widest variety of produce. Customers enjoy supporting the youth who work the market, and they return each week because they ap-preciate the quality, variety and freshness of the vegetables we offer.
A high-end market such as Boston’s Copley Square, however, may feature up to 25 or 30 vegetable growers, all offering a wide array of beautiful, fresh, locally grown produce. Even if the prices that we are able to charge are much higher than those we charge at our Dudley Square market, if we are so lost in the shuffle at a big market that we are not able to sell all our pro-duce, the net income may be the same. On the other hand, if we are not able to produce sufficient quantities of vegetables to sup-ply the demands of a market like this, we will quickly develop a reputation for not having what customers want and they will simply move on to the next grower. The highest profit margins in these cases will go to the growers who provide a superior product, or a product that no one else provides (for example, fresh herbs, beautifully arranged flower bunches, unique heir-loom tomatoes, garlic braids, or carefully prepared salad mixes), along with excellent customer service, on a consistent basis.
Many of the products that sell the best – and command the highest prices – at these markets also require advanced levels of preparation which can be challenging in the rush to get to mar-ket, like preparing arrangements of braided garlic, washing and mixing salad greens, making flower bunches. As a result, high-end markets are some of the most challenging for a “learning grower” or organization to aspire to. However, with a dedicated crew of staff and young people for whom this type of market is a high priority, it may go a long way towards contributing to long-term financial sustainability. The Food Project continues to work towards directing a percentage of the produce from our urban lots to this type of market.

46
As is clear from the above examples, financial sustainability requires a careful choice of products and customers. Particu-larly on the small scale of most urban agricultural production, most growers will want to start with markets that are less risky and work up to markets that generate more income. This path has been effective for The Food Project in developing our urban agricultural capacity over the past five years. As we move into a new era of our work, in which financial sustainability joins hunger relief as an important goal for our urban agriculture, you will be responsible for overseeing the development of markets and customers that best fit our vision and mission, while provid-ing the most appropriate opportunities for income generation.
Community SustainabilityThe Food Project carries out our urban agriculture work in the stimulating context of an urban neighborhood – the Dudley Square community of Roxbury.
From the beginning, The Food Project has been an organization that is not a member of one community or another, but seeks to bridge communities by bringing young people into dialogue in our agricultural fields in the city and suburbs. As a result, although we have two offices in very different contexts (one in Lincoln, one in Boston), we strive to create organizational struc-tures and culture that are both unique to The Food Project and consistent across both offices. Nonetheless, because our agri-cultural work requires a physical setting, we are also necessarily grounded in the contexts of the communities in which we work.
Because we are guests in these communities, we do our best to evaluate and conform to their standards of aesthetics and ap-propriate action. For example, the community in Lincoln loves to see productive farmland, but they do not necessarily want to see the tractors and farm buildings that come along with it; we therefore arrange these necessary tools for our work so that they cannot be seen from the road or bike paths. In Roxbury, neigh-bors find the smell of fish emulsion difficult to stomach, particu-larly on a hot summer day. We try to spray on days when the wind will not carry the smell to neighboring houses, and only during hours when we know not many neighbors will be home.
Food Project staff members and Honario, a neighbor gardener.

47
Neighbors also love to see border plantings of colorful flowers and other decorative plants, and we therefore put aside space that might otherwise be devoted to vegetable crop production to cultivate a “crop” that is just as important – the happiness of our neighbors.
Maintaining our sites in the city also requires regular and dili-gent attention to things like trash pickup, mowing, and other maintenance of borders, definition and control of weeds in pathways, snow removal, and upkeep of and improvements to our fences. As the urban grower, these tasks should be among your primary responsibilities. During the volunteer season and Summer Youth Program, make these types of maintenance activities a part of each day’s work, and be sure to explain their importance to The Food Project and our community. At times of the year when you have less help, create a schedule for your-self that includes monitoring the lots and completing necessary maintenance tasks as soon as they arise. During the winter, for example, you may choose to spend one morning a week picking up trash, fixing fences and shoveling snow from sidewalks. De-veloping an awareness of these types of considerations is critical in ensuring that our agricultural work is contributing to the overall health of the neighborhood in which we work. In order to be able to continue our work in the city, we need to pay close attention to our neighborhood’s aesthetic requirements of us.
Our communities also have agricultural needs. Because we are a highly visible agricultural organization – with what can seem to outside observers like a surplus of resources and labor – we are often asked to provide help or technical assistance to indi-viduals and organizations in our neighborhood. Throughout The Food Project’s history, we have created programs and staff positions in response to the agricultural needs in our com-munity that are also compatible with our vision and mission (see Section IV: Urban Education and Outreach). As the urban grower, you will be part of many discussions in which staff and board members evaluate the organization’s ability to respond to requests or needs in our community. Use your agricultural judgment and knowledge of the community to contribute to these conversations. You will be an essential part of The Food

48
Project’s efforts to promote a balance of giving to our neighbor-hood as much as we gain from it.
A critical part of creating this balance is building relationships with individuals and organizations in the neighborhood. The Dudley Street Neighborhood Initiative continues to be one of the most significant of these relationships. Over the years, DSNI has continued to deepen its relationship with The Food Project while pursuing its own environmental and open space initia-tives, including lead testing, supplying compost to local gar-deners, carrying out a neighborhood food survey and mapping gardens. DSNI staff members are eager to integrate more activ-ity around land and food production into the neighborhood, and have created an Urban Agriculture Committee in which The Food Project participates on a regular basis. In 2001, The Food Project’s Executive Director was elected to the board of DSNI.

49
Working with People and The Land• StaffMembers• SummerYouthProgramParticipants• AcademicYearProgramParticipants• AgriculturalInterns• Volunteers• NeighborhoodGardeners
Late August is a critical time for the urban lots. The rush of the Summer Youth Program is over but the onslaught of vegetables is really just beginning, and volunteer groups at this time tend to be college groups, often incoming first-year students who have chosen to arrive at school a week early to participate in an outdoor or urban service project. Often, they arrive for their day of work at the lots a little bleary-eyed from a night of socializing, rousing themselves to complete the harvest-time tasks they’ve been given.
This was the case with the group of Boston University first-year students from all over the country who stumbled up the side-walk from the bus on August 31, a Thursday morning during the week following the end of the Summer Youth Program. Though somewhat the worse for their weeklong college experi-ence, they nonetheless threw themselves into the work at hand with enthusiasm, completing the harvest and participating in an urban agriculture workshop before preparing to weed with The Food Project’s youth leaders, newly graduated from the Sum-mer Youth Program, who approached them tentatively.
Shatara, Michelle, Warren, and Alex were a little overwhelmed at first by the fact that I expected them to take charge of the group of BU students. “How are we supposed to lead them?” Alex demanded. “They’re college students!” Even more sur-prising to them, the college students themselves also expected the youth to be in charge. Seeing the kids’ Food Project T-shirts, the students flocked to them, asking questions and following them off the farm for a neighborhood garden tour. Alex cast me a backward glance as he led his group away, shaking his head as though he couldn’t believe it himself.
Summer Youth Program participants picking toma-toes on one of the urban lots.

50
When they returned, the youth and volunteers were talking an-imatedly among themselves. It was clear that they had made unexpected connections, and the youth were glowing as they led the college students to weed the bean field. As they settled into their work, however, Joe Correia crossed the street from his house and leaned on the fence to watch the busy crew.
“This is our neighbor, Joe,” I said. “He raises incredible veg-etables and fruits in his backyard garden. He grows cucum-bers and squash in bottles, and he once grew a plant that was half potato, half tomato.” These were the mysteries about which Joe had told me all summer, chuckling to himself while never once revealing his secrets. Today, though, as I talked to the group about his accomplishments, he slowly walked back towards his house, returning with a cucumber in a bottle half-filled with a cloudy vinegar, the vegetable clearly too large to fit through the opening. The BU students put down their hoes and crowded around him. He was also holding a picture of his “potato/tomato”, a lush plant with red tomatoes that appeared to grow out of a vigorously producing potato.
In response to the BU students’ excited questions, Joe was sternly close-mouthed at first, shaking his head. He softened, however, finally revealing that he had bored a hole in the seed potato early in the spring, planting the tomato seedling in the ground right inside the potato. As the students and the youth passed his bottled cucumber around, he leaned towards me. “I have too many ripe peaches at my house,” he said. “Come over and get some for these kids.”
How could I resist? I followed Joe to his garden, a beauti-ful tangle of overhanging grape vines, peach trees burdened with fruit, and vegetables that ranged from climbing beans to beautiful, healthy tomatoes. It seemed that no pest or disease could find its intended target in Joe’s lush jungle. I gathered a basket of peaches, some cool from the shady spots under the trees, some warm from the sun, and left the garden reluctantly to return to the group working in the bean field. They stopped work just long enough to eat the peaches, smiles coming over their faces as they thanked Joe. Weary college students, ener-gized youth, and the contented older man gathered around the
The Food Project’s neighbor gardener and friend, Joe Correia.

51
rickety split-rail fence in the late-afternoon sun, shared fruit and swapped stories, as I drove the van loaded with produce off to the market.
One of the most powerful and successful things about The Food Project is the way in which groups of people of widely varying background and experience come together on the land to do meaningful work, connected across time through their common labor. We are often asked if The Food Project’s model of per-sonal and social change through shared work could be applied to another task, like building bridges or playing basketball. The truth is – we don’t know, but the resulting organization would undoubtedly be significantly different in its focus, rhythm and, emphasis from the one we know.
Ward Cheney recognized that agricultural work, despite the stigma that it may have from the days of slavery and sharecrop-ping, could be a powerful leveler. Work on the land has no preference for age, race, or gender, and its fruits are universally necessary. Ward also believed that the connection to natural cycles through agriculture was an essential human trait, one that could be resurrected in every person no matter how deeply buried in layers of cultural distaste or ignorance. The work of sustainable agriculture – producing tons of beautiful, healthy vegetables from tiny seeds through work in and with the rain, sun, air and soil – generates a unique shared sense of pride and satisfaction in those who undertake that work together.
In the sometimes chaotic environment of the city, agricultural land can be an oasis of peace and productivity. Work on the land can be therapeutic and constructive across lines of race, economic background, and social class. The city’s potential to generate healthy and diverse communities from a jumble of people from very different backgrounds is mirrored in the image of reclaimed urban soil yielding thousands of pounds of produce through the cooperative work of many different groups and individuals.
Ward Cheney recognized that at The Food Project, both the product itself and the process of bringing that product into being were of great importance, with much to be learned from

52
each aspect. Creating an agricultural context in which all this can happen is your task as a grower at The Food Project. Over the course of the season, you will work with many different groups of people. Some will have experience with garden-ing and farming, while some will never have touched the soil before. Some will be deeply familiar with the city of Boston, its history and potential, while others will be nervous about driv-ing into Roxbury for the morning. Through careful planning, organization, and explanation, you will guide these disparate groups to become essential contributors to the production of the urban lots. In the process, they will learn about The Food Project, the city, and themselves.
Staff MembersThe staff at The Food Project is a unique and remarkable group of people. Nearly all have come to work at The Food Project because of the organization’s commitment to land, youth, and community through sustainable agriculture; yet only a few can make the day-to-day connection with the land that you are able to make in your work as a grower. The organization has grown to include two offices in very different locations, so some staff members rarely experience the richness and complexity that is a daily part of your work in the city. Part of your role at The Food Project, then, is to be a link between staff members and the ur-ban land, representing the land and its stories at staff gatherings, meetings, and retreats. Help others make a connection with the land and its place in the city, either through their work with you or through your words and example.
Land RitualsThe programmatic year at The Food Project is influenced to a strong extent by the agricultural cycle. Winter is the time when the organization plans and renews itself for the upcoming year. Spring is the time of beginnings – interviews with youth for internships and the Summer Youth Program, a new round of volunteers, a time to get all the initiatives in the annual plan on track for the year. Summer is the time of greatest energy for the organization, when the Summer Youth Program brings sixty new youth into the community and the fields and harvests and markets are in full swing. Fall is the time of fruition, another round of volunteers and a harvest of youth leaders from the
The Food Project staff at a winter retreat.

53
Summer Youth Program, and the end of another season of markets and CSA distribution.
It is important for Food Project staff to reflect on the entire organization’s links to the agricultural year, and to ground it firmly in the land that is its foundation and, in many ways, its inspiration. We do this by celebrating land rituals with the whole staff twice during the year – once when we open the land in the spring, and again when we close down the land in the fall. These rituals are important ways to connect the staff to the land and its place in our work. As a grower, you will often be asked to lead or co-lead one or both of these rituals. One or both of them may take place on the urban lots. The following are some suggestions for land-based rituals; but don’t stop with these – feel free to elaborate in whatever direction the mood of the season takes you.
SPRING LAND RITUALThe spring ritual looks forward to the coming season, emphasiz-ing hope and possibilities. One way that we celebrate this ritual is outlined below.• Read a short quote on change, possibilities, or hope. Ask the staff to consider the ritual through the “lens” of the quote.• Give a short talk on the present status of the urban lots and the community, and the changes that will be taking place over the next few months.• Ask the staff to walk around the lots separately, contemplating areas of change, possibility, and hope that they see in their present work or their life outside of work. Or, ask if any staff member’s family or culture celebrates this time of year in a particular way.• Come back together after fifteen minutes to share some of the thoughts.• Repeat the quote that you began with.
FALL LAND RITUALThe fall ritual focuses on the bounty of the past season, empha-sizing gratitude and completeness. Again, one way to celebrate this ritual is:

54
• Read a quote that focuses on thanksgiving, completion, or learning. Ask the staff to consider the ritual through the “lens” of this quote.• Give a short talk on the status of the urban lots and the community, the changes that have taken place over the last few months, and what will happen in the next few months. • Ask the staff to walk around the lots separately, contemplating the areas of thanksgiving, completion, or learning that they see in their present work or their lives outside of work. Or, ask for ways in which staff members’ families or cultures express feelings of completion or thanksgiving.• Come back together after fifteen minutes to share some of the thoughts.• Repeat the quote that you began with.
WorkdaysEach year, the organization puts aside a half-day in the spring and a half-day in the fall when the entire staff works together on a project on the land. These experiences can be a powerful means of connection between staff members and the land, as well as among staff members who do not often have the op-portunity to work together. As a staff, we often spend a great deal of time sharing experiences of meeting and conversation; sharing the experience of manual labor creates a new type of connection and a new context for our work together. These workdays also link the staff with the experience of the youth in the Summer Youth Program, who spend seven weeks together on the land each year.
As the urban grower, you may be responsible for organizing one or more of these workdays each year. Provide an experience for people on the land that is challenging and meaningful and creates a sense of accomplishment among the group. Set the pace and goals for the group, and make your expectations clear through your directions and example. Ideally, choose a task that the whole staff can work on together, one that represents the aspirations of the organization. Completing a workday like this is one of the most memorable experiences of the year for many staff members, leading to a renewed sense of commitment to our
A staff workday in Lincoln.

55
work, the land, and the youth. Your influence and organization can make the difference in transforming an ordinary workday into an extraordinary one.
Learning LunchesDuring the winter, when the majority of work at The Food Project comes indoors, staff often share pieces of their jobs with one another through learning lunches. These shared meals offer staff the opportunity to learn about an aspect of a co-worker’s work in detail. The staff always shows particular interest in learning about agricultural subjects and issues at these lunches; offer to lead at least one learning lunch with the staff each win-ter. Choose topics that have particular relevance to the urban lots, such as lead testing and remediation, or broader issues in urban agriculture, such as land tenure and food security. These conversations will often lead you to new ways of thinking about your own work as well as opening avenues of discussion among the staff.
Food RitualsThe production and distribution of healthy food is at the heart of The Food Project’s vision and mission. Whenever the staff meets for a meal, at retreats or other functions, we remember the central nature of food in our lives and work through a food ritual. As a grower, you are the staff’s connection to their food, and will therefore share the responsibility of guiding the staff through these rituals. As with land rituals, feel free to improvise and create a ceremony that has meaning to you. Often, telling the story of a particular vegetable that is being used in a dish at the meal will help emphasize the combination of labor and luck that is necessary to bring that vegetable to the table – in-cluding the steps of seeding, germination, weeding, irrigation, harvesting, washing, and preparation, and mentioning by name some of the staff members or groups that were involved along the way. Telling the story of a vegetable reminds people at the meal everything that is eaten has a story that includes land and people, and makes that connection vividly through our own produce.

56
Summer Youth Program ParticipantsThe Food Project’s Summer Youth Program is the largest pro-gram in the organization, and has influenced the structure and schedule of Food Project agriculture since its inception. Sixty young people, with a balance of youth from the city and sub-urbs, take part in the seven-week Summer Youth Program, which incorporates work on the land with leadership training, community service, environmental and agricultural education, and personal development.
Young people from the Summer Youth Program can go on to participate in the Academic Year Program, as interns in all parts of the organization, and in some cases as staff or board mem-bers. The Summer Youth Program is the “doorway” to the orga-nization for many young people; for some others, it may be their only experience with us. Your task as a grower is to work with other staff to make this experience unlike any other the young people have had before, and one they will never forget – all while ensuring that the urban lots continue to operate efficiently and productively.
Managing the lots during the Summer Youth Program is a very different job from the rest of your agricultural year, requiring different skills, modes of organization and communication. Preparing yourself, other staff (including crew leaders and the urban agricultural interns), and the urban lots well for the Summer Youth Program will make all the difference when the program begins. A superb Summer Youth Program will set the stage for remarkable Academic Year and Volunteer Programs the following fall and spring. At The Food Project, each season and program builds on the one before rather than existing in isola-tion. The seven weeks of the SYP are an opportunity to take work on the urban lots to new heights, creating a foundation that you can build on for the rest of the year – but this requires doing the work of preparation during the spring so that you are ready for the program when it happens.
Managing Young PeopleThe goal of The Food Project is that young people learn about others and themselves and connect with land and community
The Summer Youth Program staff and crew workers.

57
through shared labor, service, and reflection. The organization’s firm commitment from the beginning was that young people should not just feel like they were hired labor on someone else’s farm, but that they were essential contributors and full partici-pants in the agricultural work of the organization.
Give the young people meaningful work. Young people rec-ognize when they are truly necessary in a situation, and when they are simply being given work to keep them busy. When writing a list of agricultural tasks for a group of young people, think about ways to do each task that can deepen and focus the experience, not merely get it done. Consider the context and reason for each task within the broader agricultural year, and make sure that the young people are aware of them. Don’t expect young people to be immediately aware of the agricultural framework or background for each task; be prepared to explain it in a way that emphasizes the importance of the particular work that they are about to undertake. While at times the sheer numbers of young people on the urban lots at any given time may seem to overwhelm the amount of agricultural work that needs to be done, these are the times to think creatively about how to bring new levels of depth and meaning to the work that needs to be done instead of creating jobs that are simply empty busy work to keep people occupied.
The farmer’s summer can be a blur – rushing from harvest to market to irrigating and weeding – never completing a task satisfactorily because of lack of time or labor. Use the available labor of the Summer Youth Program participants to take each task to a different level of completion. Challenge yourself to think beyond the frenzy of summer to consider new ways to approach tasks on the urban lots. If you were farming alone, for example, you might make weed control the main focus of your spring work. Once the farmers’ market season opened you might lower the intensity of your weeding, counting on the work you did earlier in the season to carry your crops through the height of the summer.
Make sure the young people know that their ability to finish tasks on time, with the appropriate level of rigor, is the key to

58
making sure that The Food Project achieves its goals. Their labor is not simply a way to pass the time between workshops and community service. It has a purpose and a product that are deeply important to the people who depend on our food every day. It is your job to communicate the importance of the work that the young people do.
The growers’ assistants in Lincoln teach a series of workshops on the fundamentals of sustainable agriculture to all the par-ticipants in the Summer Youth Program throughout the season. Similarly, when a crew works in the city, they also go through a workshop on urban agriculture. In addition to motivating and challenging young people in their work on the urban lots, take the opportunity to deepen this agricultural education through what is referred to as “end-of-the-row” teaching. Familiarize yourself with the schedule of workshops that the growers’ as-sistants are leading in Lincoln. As you move around from crew to crew on the urban lots, working alongside them, ask them if they have any questions about the week’s topic.
As you educate, encourage the young people to push their own limits. One of the beautiful things about working with the Sum-mer Youth Program participants is that for most, farm work is a new skill that all the young people are experiencing together for the first time. Some may have preconceived notions about their own physical ability or stamina, and some will definitely be reluctant to get dirty or use their bodies. Remind them of the inherent equality of each member of their crew, and encourage them to push themselves and each other to discover their innate strengths. The way you organize their work on the urban lots will provide a framework in which each crew can learn together across boundaries of race, gender, and background.
SchedulingThe schedule of the Summer Youth Program is a busy one. The sixty young people that take part in the program are divided into six crews with ten members in each. Each crew consists of eight first-time program participants or crew workers, one assis-tant crew leader (a past participant) and one crew leader, who is often a college or graduate student. The crews rotate so that at

59
any given time, two crews are in Roxbury – one for the first time and one for a second week – and four are in Lincoln. Exceptions to this rule include the first week of the program, when all crews work together in Lincoln; the second week, when both crews are new to the city; and the final week, when both crews have already spent a week in Roxbury (see Attachment 5: Summer Youth Program Crew Rotations). In the city, crews combine field-work with the workshops that make up the Roxbury curriculum, farmers’ market training and analysis, and running the farmers’ market (see Attachment 6: Roxbury Summer Youth Program Schedule).
The Summer Youth Program is managed by a Program Coordi-nator, who generally spends most of the time in Lincoln. Both Lincoln and Roxbury have site supervisors, who are responsible for coordinating all workshops and logistics on their sites. Each morning during the program, you will meet with the site su-pervisor, the crew leaders of the crews that are in the city that week, and the crew workers themselves. Use these meetings to communicate your plan for the day, to motivate and inspire the young people, and to address any issues or achievements that have arisen on the urban lots. Make sure to check in daily with the site supervisor and the farmers’ market manager to go over the schedule for the day and communicate any changes or per-ceived difficulties. Communication with other staff members on a regular basis is the only way to ensure that the complex sched-ule of the summer will run smoothly.
Leader Training WeekBefore the Summer Youth Program begins, crew leaders and as-sistant crew leaders are introduced to the organization and the program during leader training week. Throughout this week, crew leaders are trained in safety, evaluation of crew workers, youth development workshops, organizational protocols, and agricultural techniques. You will have one or more blocks of time in which to work with crew leaders to communicate your agri-cultural plan, as well as to prepare them for the work that they will be doing with their crews in the city. As with most aspects of your work at The Food Project, the more thoroughly you pre-pare for leader training week, the more successful your summer will be.
Attachment 5
Attachment 6
Mike Evans, the Summer Youth Program Coordina-tor, talking with crew leaders.

60
Crew leaders and assistant crew leaders are your link to the crew workers. They are the primary supervisors for their crews’ fieldwork, and you should see them as ultimately responsible for managing the young people in the program. Communicat-ing clearly with them from the beginning about how to manage their crews on the urban lots, including your expectations of quality and pace, will facilitate your work with the leaders as a team throughout the summer to complete tasks thoroughly and quickly.
When you meet with the crew leaders during leader training week, try to combine conversation with fieldwork, particularly when harvesting. Prepare a list of tasks that crews in the city might be expected to complete during the summer, including specific agricultural work as well as site maintenance work on the lots, managing compost piles, opening new urban land if it is available, and helping neighborhood gardeners. The more specific you can be, the better. Familiarize crew leaders with the context for each task or group of tasks, and make sure that they can communicate this context to the workers in their crews.
Tell crew leaders that helping their crews be successful in har-vesting and other fieldwork in the city will require a different type of management from them in the city than in Lincoln. In Lincoln, for example, a crew might harvest hundreds or even thousands of pounds of a single crop during the harvest period. There, the crew leader would need to focus primarily on speed and accuracy in the work of the crew. In Roxbury, on the other hand, a crew might be responsible for the entire harvest for the farmers’ market, a task that requires crew workers to split up and harvest several different types of vegetables over the course of the morning.
Encourage crew leaders to think through a hypothetical task like this one during leader training week. How would they man-age their crews to achieve the greatest efficiency and the high-est quality experience for each crew worker? How would they measure success with their crews? How would they motivate crew workers to take on a task very different from the ones they have done in Lincoln? Again, preparing crew leaders to think in

61
these ways from the beginning will not only help them manage their crews more efficiently when they get to the city, but it will also help you begin to think about motivating and challenging Summer Youth Program crews before the program begins.
Daily Task ListsDuring the Summer Youth Program, you have several choices about how to organize work for the crews that are in the city. Ei-ther prepare task lists for the crew leaders with a detailed expla-nation of the jobs that need to be completed that day; or assign each crew an area (for example, West Cottage Field 5) and ask the crew leaders to work with the members of their crew come up with a list of tasks that they feel should be completed in that area. In the beginning of the program, walk the fields early each morning and prepare a list for the crews that will be on the land each day. Consider having crews write their own task lists for one or two days during the second week that they are in the city, after they have had an opportunity to learn more about the needs of the urban lots. This will help the young people feel a sense of ownership and participation on the lots, while also giving them insight into the way that you make decisions about how to prioritize agricultural and site maintenance tasks on the lots.
Make sure that you give the crew enough information and back-ground to make their list accurately. For example, remind them that they should look not only at the vegetable crops in their area, but also any border areas and pathways. Does their crew need to do a trash pick-up? Do the pathways need weeding or mulching? Have they checked carefully for pests and diseases that might require their attention? Present the crew with a list of questions to answer as they create their task list for the next day.
The following procedures will help crews prepare tasks lists that are effective and well thought out:• Make sure that the young people are familiar with the vegetables in the area where they will be working. Before they begin to create their task list, at the beginning of the week if possible, have a discussion while they are working about the needs of the vegetables in their area. With the
Greg Gale, Director of Programs, with Jessica Libo-rio, a crew leader.

62
young people, develop an overall game plan for the area for the week.• Half an hour before the end of the workday, the assistant crew leader should walk the area with a few crew workers to discuss priorities for the following day. They should then give the list to their crew leader for revision.
Whether you help the crew create a task list or present them with one that is already prepared, walk around the lots with the crew leaders each morning and go over each list, item by item. If you have prepared a list, make sure that the crew leader knows your expectations for each task, along with any “stretch goals” for the day. Talk with the crew leader about how they plan to manage their crews on each task, and give them specific instructions on how to complete each one. When looking at a list that a crew has prepared for you, help the crew leader pri-oritize the tasks. Which ones need to be done in order to make sure that we meet our goals on the urban lots? Which tasks will help us improve the quality of our produce or the work that we do? And which ones will bring us to a new level on the lots?
Make sure the crew leaders have all the information they need to run the tasks themselves by the end of your daily walk. Make sure that both crew leaders accompany you if possible, even if their crews are working on different sites. Hearing instructions for the other crew leader will help each one prioritize and man-age their own tasks.
Morning MeetingsEach morning during the Summer Youth Program, there is time set aside for a short morning meeting after the program partici-pants arrive. These meetings are a time for the young people to check in and share their thoughts about the day or the week, for the site supervisor to review logistics and schedules for the day, and for you to share any advice, congratulations, or challenges you have for the crew workers. If you have noticed particu-lar problems within the crews that are working on the urban lots – for example, a breakdown in teamwork or an issue with motivation – these meetings are the time to address them. Work strategically with crew leaders and the site supervisor to ap-

63
proach this type of issue creatively. It is usually more effective to use a game or activity to address an issue than to berate the crews in question for five minutes, for instance. You might also use this time to give specific instructions on how to use a tool, or to comment on a particular agricultural situation on the lots.
Morning meetings can also be an important time to motivate the young people to gear up for a particular task, or to reconnect them with the significance of their work in the city. Don Zasada, The Food Project’s Lincoln grower, divides his motivational talks into the three sections, and his ideas can be adapted to the urban setting as follows: • Support. Most young people have never done agricultural work. Support them by helping them feel comfortable in their new environment. In Lincoln during the first week of the Summer Youth Program, young people are trained in specific techniques and applications that guide them in particular tasks. At specific times during the summer, you may need to reiterate and reinforce the training that they receive, offer new alternatives for their work in the city (for example, the wheel hoe is an additional tool for clearing pathways) or present advanced tips that will help them achieve the desired results in a more sophisticated way. • Challenge. Farming is difficult work. The Food Project is the first job for many of the young people in the summer program. Although the tasks are clear, it takes a great deal of physical effort to accomplish them, particularly during adverse weather conditions like extreme heat or rain. Understand and be sensitive to each person’s limits, but demand that every one work as hard as they can. Take the young people through an exercise to set “stretch goals” for their crew for the day, and encourage them to meet or exceed these goals. Remember that these goals in the city will be somewhat different from the goals in Lincoln, which tend to focus on quantity and speed. • Vision. The Food Project farms with a purpose. The majority of the produce is distributed in shelters, food pantries, and to low-income farmers’ markets. People in these communities would not have convenient or affordable access to local organic vegetables if we did not grow them

64
for them. Every Wednesday during the summer, the participants volunteer at one of the shelters that receive our produce. Every Tuesday and Thursday during their time in the city, they manage the Farmers’ Market. Ask them to share stories of working in the shelters or at the market. Have them reflect on how their hard work is making a difference in the lives of thousands of families in the city of Boston. Ask them to think about the purpose of doing agriculture in the city, with all the associated chal- lenges, and remind them of the reasons for all of their site maintenance work.
Following the morning meeting, the young people break into their crews and begin fieldwork. The site supervisor will intro-duce the new crew to the neighborhood. Take this time to visit the crew that is beginning their second week in the city and assist with their tasks. Model speed, accuracy, efficiency and the appropriate depth of work. Harvest DaysTuesdays and Thursdays are harvest days on the urban lots. In the past, one crew has been responsible for harvesting on the West Cottage Street lot; two members of that crew also run the wash station. The second crew has been responsible for harvest-ing on the Langdon Street lot. Encourage the crews to finish the harvest quickly, particularly on hot days when the vegetables are more likely to wilt as we harvest them later in the day. Make sure that crew leaders know the correct techniques for harvest-ing each of the vegetables on their list, and that they have a plan in place for spreading their crew workers out over the field to maximize their effectiveness. Encourage them to pair crew workers up rather than sending one crew worker to each vege-table; young people will motivate one another as they work, and often a faster crew worker will challenge a slower one to com-plete tasks more efficiently. Working alone gives young people nothing by which to gauge their own pace. Remember that the harvest in the city will require more management on the part of the crew leaders than they are used to in Lincoln. Give them all the support and information you can to ensure that they are successful.
Harvesting cucumbers on a summer day.

65
When the harvest is complete on either site, encourage the crew leaders to give their crews a short break for water and to ad-mire the harvest. Make sure that there are additional tasks on each crew leader’s list and that the crew starts on those tasks after they have taken a moment to regroup. Harvest mornings should be quickly paced and adrenaline-filled, no matter what the size of the harvest. The quicker the vegetables are harvest-ed, washed and packed in a cool place, the fresher they will be when they get to the market.
After lunch on a harvest day, gather the crews together and give them feedback on the harvest. Give them a rating of between one and ten, with one representing terrible work, five represent-ing average work, and ten representing exceptional work. Give the wash station crew a rating as well. The Lincoln grower observes that for the first few weeks of the Summer Youth Program, ratings will hover around average but will be steadily improving. He suggests that there are usually one or two weeks in the middle of the summer when crews lose focus and their work suffers. Use the harvest ratings as a way to comment on poor work performance clearly and honestly. Giving a crew a “three” for their harvest is a wake-up call for the rest of their work as well. The quality of work will usually improve again and rise until the final weeks of the program. Use the harvest rating system as a way to compare the quality of the work the young people do with what would be expected of them on a for-profit production farm.
Lunch and Recreation DaysTake some time during the week to interact with the crews on a more relaxed level. Lunches are the perfect time to get to know the young people and talk to them about topics other than farm-ing. Recreation days allow you to play and compete with the Summer Youth Program participants away from the urban lots. Take advantage of these times as much as you are able to build relationships with the young people.
Urban Agriculture WorkshopThe Urban Agriculture Workshop (see Attachment 7: Urban Agriculture Workshop) is usually given for the young people
Attachment 7

66
in the program on the Monday that they first arrive in the city. The goals of the workshop are to begin a dialogue with program participants about the specific challenges and goals of our urban work, to help them become familiar with the new environment of the city, and to share with them a little of the history of the reclamation of the urban lots. Before the start of the Summer Youth Program, make sure that the site supervisor and the urban agriculture intern(s) know all the parts of the workshop. Train the urban agriculture intern(s) carefully, including trial runs of the workshop with whatever audience is available, and make sure that he or she can help the site supervisor facilitate the workshop.
While the workshop is going on, focus your attention on helping the crew that is not in the workshop get started with their work for the week. This crew will be beginning their second week in the city, so your work with them should include preparing them to create task lists later in the week. Be sure to check in during the workshop to make sure it is flowing properly. Meet briefly with the site supervisor and urban agriculture intern following the workshops to make sure that they are satisfied with the way they are going and offer them feedback on the parts you have witnessed. Make sure to have crews evaluate the workshop af-ter they go through it so that you can make changes to it during the winter to enhance their experience.
Farm Task ManagementManaging the young people on the urban lots during the Sum-mer Youth Program is a complex and challenging process – almost an art. It requires the teamwork of all of the urban staff. • Balance a rigorous level of preparation with spontaneity and an ability to adapt to changing weather and agricultural conditions. • Adapt your level of management to harmonize with the character of the crews that are working on the lots – some will be highly motivated and independent, while others will require more help and incentive from you. • Combine acute observations of the work of the crews and the needs of your crops with hands-on, in-the-row education and interaction with the crew workers.
Topics of urban agriculture workshops range from community building to pest control.

67
• Manage and prioritize the needs of three sites, two crews, four produce distribution streams, one urban agriculture intern and a handful of neighbors and neighbor gardeners – all while maintaining a keen knowledge of everything that is happening on the urban lots.
When you achieve this balance, the work of the crews will flow smoothly. The urban lots will look beautiful and be productive. Your relationships with neighbors will deepen and enliven your work with the young people. At their best, the components of the Summer Youth Program work together like a living model of a productive natural community, with each part in symbiotic relationship with the rest. The following sections will help you begin to create a “natural ecology” on the urban lots.
LONG-TERM FARM PLANNINGDuring the Summer Youth Program, plan your farm labor at least two weeks into the future. Assign priorities to tasks that must be done, tasks that increase the quality of the produce that we grow and tasks that improve the overall status of the agricul-tural operation.
Coach the young people on the three levels of priority from the beginning of their time on the urban lots. Focus them on the tasks that must be done, but inspire them to go on to tasks of lower priority when time permits.
Be aware of the abilities and preferences of each crew. Crews have their own personalities and excel at different types of work. Some would rather hand weed a greens field, while oth-ers would rather hoe a field of tomatoes.Be sure to teach the young people the importance of each task on the lots. It is crucial that each young person be open to doing whatever job brings excellence to the urban lots. The Food Proj-ect’s Lincoln grower, shares the following story with the young people to illustrate this point:
Once two masons were working together on a project. A man walked by and wondered what they were doing. When asked, the first mason replied, “I’m just laying bricks.” When the

68
second mason was asked the same question, she replied, “I’m building the most beautiful building in the world.”
Encourage conversation among the young people about the meaning of dedication to work. Instill in each young person the fact that even the smallest jobs on the lots are essential. For instance, weeding carrots is a small repetitive task that needs to be done two to four times for each planting. However, if this small, time-consuming task is done faithfully and thoroughly, the carrots will yield bountifully and the urban lots will be able to bring many pounds of carrots to the farmers’ market and shelters. If produce is handled and washed well, it will sell at the market. This will generate more revenue for The Food Proj-ect and enable the organization to continue to expand its work.
“OVER THE TOP” TASKEvery summer, plan a task that requires a large amount of time and effort for the crews. This is your “over the top” task. It should be an undertaking so large that, on another farm, they would hire a machine or a professional crew to accomplish it. For The Food Project, this task can be an opportunity to build crew unity, to save the organization money, to show the young people some of the other issues involved in agriculture, to il-lustrate their power as a labor source, and to bring our urban agriculture work overall to another level.
Opening new land in the city is a productive “over the top” task. Each time we begin work on a new lot, it requires a great deal of work to clear the land of trees, shrubs, weeds, and rocks, spread and integrate compost or new soil, and lay out and construct growing beds. In the past, The Food Project has done this type of work with a combination of youth and volunteer labor along with help from machines and professionals when necessary. In 2001, the Summer Youth Program crews were the first to work on the new 5,000 square foot lot. While we could have brought in machines to clear the lot and turn the soil, the crews that worked there clearing weeds, removing rocks, and double dig-ging compacted sections of soil, had a powerful experience of leadership, hard work, and the process of reclaiming urban land for agriculture. By the time the Volunteer Program began in the
“What interests me most about this job is being able to interact with the people of Roxbury
and show them what they can do with their neglected space.”
Michelle, Summer Youth Program participant

69
fall, the lot was ready to have compost spread on it and turned under, and neighborhood gardeners would often wander by to comment on the excellent job that the young people had done.
Of course, you may not be opening new land in the city every year. If not, plan your “over the top” task early in the year to make sure that you have all the necessary materials and a moti-vational plan in place when the task begins. If you cannot find a task of this magnitude that needs to be done on the urban lots – landscaping borders, putting up new fence or digging trenches to extend our irrigation system are other ideas – consider asking a neighborhood community garden if there is a suitable task there that our crews might be able to take on. Make sure that they know it will take the whole summer, but also be sure that you will be able to complete any commitments you make to gardeners.
CREW ROTATIONSEach Summer Youth Program crew spends only two weeks in the city. During those two weeks, they should have the experi-ence of working on all three lots if possible. In 2001, the staff set up rotations so that crews spent the first week of their time in the city at the West Cottage Street lot and the second week working on both the Langdon and Albion Street lots. Crews were together for lunch and recreation day. This type of rotation ensures that each lot is getting attention from a crew each week, and also that each crew has the opportunity to take on different tasks throughout the week, since each lot produces a variety of crops with different needs. It also allows Summer Youth Pro-gram crews to focus on the differences in crops and growing methods used for different markets (West Cottage Street for the farmers’ market, Langdon Street and Albion Street for enterprise and the urban kitchen).
Remember that crews are more efficient when they have learned to do a job well. While ten young people can complete many of the tasks on the urban lots fairly quickly because of their small size, be sure to emphasize that they should be able to focus on thoroughness and quality when the overall size of the job is smaller.

70
Do try to make sure that crews have the opportunity to work together for at least one work block each week. Crews enjoy the chance to work with other groups and to alter their own dynamic for a short time. Give the crew who has “ownership” of the lot on which the two crews will be working together the opportunity to explain the lot and their work to the other young people before they begin their tasks for the work block. Intro-ducing this type of change in the schedule will help you break up the monotony of farm work that can sometimes lead to a loss of enthusiasm among young people in the Summer Youth Program. Strike a balance between maintaining the integrity of your schedule of tasks for the week and being responsive to the energy and enthusiasm of the crews on the lots. Before a crew loses energy, be proactive and have another task ready that will challenge them.
EQUIPMENT USAGEWhen a crew arrives on one of the urban lots for their assigned week, they should find an equipment inventory in the tool shed, completed by you for the first week of the program and by the crew before them for the subsequent weeks. On Fridays, take time during the half hour set aside for weekly chores to have two youth inventory the tools and equipment and make note of any that are missing or damaged. The crew that used the tools that week will have to pay for any that are lost or broken through neglect or misuse. This process encourages crews to take ownership of the tools and to care for them properly.Be sure that each crew is introduced to the tools that are used on the urban lots and the proper ways to use and maintain them. Summer Youth Program young people will be trained in Lincoln to use hula hoes and digging forks, among other tools, but they may need to review the proper techniques for these tools at the same time that you demonstrate how to use the wheel hoe and broadfork. Either you or the crew leader should correct improp-er use of tools whenever possible to enhance the efficiency of the crew and prevent damage to the tools.
EFFICIENCY TECHNIQUESThere are many ways in which the Crew Leader and Assistant Crew Leader can lead their crew to greater efficiency. As you
Cleaning tools at day’s end.

71
watch the crews work and interact with them, keep the follow-ing techniques in mind and advise the crew’s leadership if you notice that one or more would be helpful for the young people in their crew.• Manage and work. The crew leader and assistant crew leader should wander and heavily manage their crew for the first 15 to 30 minutes of a new task, making sure that each young person on the crew has command of the task. Then they should fold into the work and lead by example.• Stay with the crew. There should never be a time when either the crew leader or the assistant crew leader is not with the crew. If one is away, the other leader needs to do more managing and less work to enhance their crew’s efficiency. • Spread out. The crew leader and assistant crew leader should spread themselves out within their crew to motivate and educate their crew members. They should never be working side by side.• Work and talk. Emphasize the importance of continuing work while having a conversation. This is one of the most difficult skills for the young people, and is the leading cause of inefficiency among Summer Youth Program crews. As you work with the crews, model the ability to work and talk at the same time and encourage the crew leader and assis- tant crew leader to do the same. Of course, you don’t want the young people to work without speaking to one another; the ideal is to have crews that are able to give full attention to the agricultural tasks while engaging in fun and interest- ing conversations that are fueled by the intensity of their work environment.• Pair the young people. When the job is weeding, have the young people work in pairs across from each other on a single bed. This arrangement stimulates natural competition, and also allows the young people to talk to one another during the task. The crew leaders and assistant crew leaders should be very strategic about how to organize pairs. This is an opportunity to mix the personalities of the crew and allow the crew members to get to know each other – and also to use quicker members of the crew to encourage others to match their pace.• Break down the task. On the urban lots, a task as seemingly
Crew members putting up stakes for tomato plants.

72
straightforward as weeding a field or harvesting for the market may require more management from the crew leader and assistant crew leader than it would in Lincoln. Breaking the task down into several components and assigning each pair of young people one component can increase the quality of the work while engaging the young people more deeply in the task. For example, if the assigned task is “weed West Cottage Field 4”, a crew leader might assign three young people to begin hoeing between rows of crops. Two pairs of young people might follow behind them to hoe or hand weed close to the plants, within the rows themselves. Two or three more young people might bring up the rear as “checkers” to make sure that even the smallest weeds are taken care of. The crew leader and assistant crew leader could rotate young people through the roles, making sure that each crew member had the opportunity to experience each component of the task. In this way, tasks are completed thoroughly while young people are introduced to the complexities of their work on a different level than is possible in a larger-scale operation. Crew leaders and assistant crew leaders will definitely need your help and suggestions on how to break tasks down for their crew. Introduce this concept during leader training week, and reiterate it in the task lists that you create for each crew, making suggestions as necessary. • Organize leapfrogging. Weeding can be slow, backbreaking work. It is difficult to sustain a young person’s motivation for weeding over a long period of time. Encourage crew leaders and assistant crew leaders to try a “leapfrogging” method. Send three pairs down the same bed an equal distance apart and start working. When one of the pairs arrives at the spot where another pair started, have them walk down in front of the farthest pair and continue working. The groups proceed “leapfrogging” like this until they arrive at the end of the bed. At this point, they move to a new bed. This helps the young people by limiting the weeding distance to reasonable intervals. They are also able to get up and periodically stretch their bodies as they walk down the field. As they move past the other pairs, they feel as though they are progressing with the job and are inspired to continue.
Jon and Carline taking bugs off plants.

73
• Restrict tools. Advice the crews to take the minimum number of tools out to the fields. People are conditioned to rely on implements to make their work easier. Often the young people are more concerned with the tools than the job, and they bring extra tools out to the field simply because it is more exciting – and feels more “professional” – to use tools than to work with bare hands. This is particularly true of hoes and harvest knives. These tools have specific purposes on the lots and are effective for those tasks, but when used inappropriately they are inefficient and unnecessary. In the first few days of the program, all youth should weed by hand without tools. Occasionally, announce a work block in which tools are restricted during the summer as well. Without this you may never be able to overcome some young people’s fear of touching the soil.• Hoe backwards. Teach the young people to hoe backwards so that they are not walking over the weeds that they just hoed. Sometimes when you walk over previously hoed weeds, they will re-root, and you will have defeated the purpose of hoeing them in the first place.• Discourage sitting on the job. No one should sit in a field. It is hard to be efficient if you are not moving. If a young person claims that they can indeed sit and weed in a productive manner, challenge them to a weeding race. If they beat you, allow them to continue sitting and weeding. If you beat them, then they have to stop sitting and change their method of weeding. You should not lose.
MOTIVATIONAL TECHNIQUESOne of your primary responsibilities during the Summer Youth Program is to motivate the young people. During the morning meetings, throughout the workday, and even during lunch and recreation time, the organization looks to you to encourage the young people’s enthusiasm about agriculture. Here are some ways you can consider doing that, adapted from Don Zasada’s rural agriculture manual:• Organize them! Plan how to most effectively use the work time of the young people. If you don’t supply a clear work plan for the young people, they begin to feel as though their presence is unimportant for the overall success of the farm.

74
A specific task list gives a purpose and a structure to their fieldwork. Your own organization can be a powerful motiva- tional tool for others.• Support them! Make sure all of the crews know how to complete the tasks they are given. When you train people in any task, first verbally communicate what you need done. Then physically demonstrate the techniques necessary to complete the task. Ask someone to repeat what you have just said, and to recreate your demonstration. Finally, give the crew a written copy of all the tasks they will be taking on that day. Ask them if they have any questions about the work. Walk around the fields during the work time and visit each young person in order to answer any questions that they have about their work or the urban lots. An uninformed worker is usually inefficient, and your support is critical to the young people’s understanding of their tasks.• Inspire them! • Give them specific goals (in pounds, transplants, beds to weed, and so on). Explain the context for the day’s work. Describe the work that happened earlier in the season, and how their work is a continuation of those efforts. • Link them to a chain of activities and end goals that will be achieved if all who contribute are successful (for example, total pounds harvested). • Link them to our service goals by describing graphically how much food we grow (total poundage, how many thousands of hungry people in Boston will eat this food, how many trucks our annual harvest will fill). • Tap into their commitment to service and ask them to contribute from that place today. • Share with them a personal story about how our produce has affected someone’s life. • Read them the Martin Luther King quote about service, in which he said “you don’t need a college degree to serve…” (see Attachment 8: Martin Luther King, Jr., Quote). • Tell them how many hours of combined labor exist in their group (60 people working efficiently for one hour
Loading the day’s harvest for a farmers’ market.
Attachment 8

75
is equivalent to the grower working alone for six days!)• Challenge them! Most young people are new to farm work. They have no idea what is fast work or what is slow work. Put a time limit on when you want the harvest done. As you walk around the lots visiting the crews, challenge the young people to weeding or hoeing races in which you compete against three of them at once. This is to show them that you can weed three times as fast as them. They will follow your lead and begin to use your subtle techniques to help their crews weed faster. Make sure that they don’t sacrifice the quality of weeding for speed. • Thank them! At the end of a difficult task, make sure you take the time to celebrate all of the hard work. Put aside a couple of minutes to allow the group to look over the area they have just worked on in order to see the difference their efforts have made on the lots. Share with them how the job they just completed connects to the work that was done earlier in the season. Thank them for challenging themselves and accomplishing something special for The Food Project.• Enforce standards! The Food Project has set up a system for youth accountability called Standards and Straight Talk (see GrowingTogether). The Standards are expectations for conduct while working with us. There are also consequences for actions that are in violation of the Standards. This allows you to have a clear understanding with the young people about how you will view their work on the lots. Some of the consequences include losing money from their paycheck. This is a powerful motivator for many of the young people.• Use Straight Talk! Once young people understand and agree to the Standards, we introduce them to a new method of communication called Straight Talk. This communication method is a partner to the Standards and provides young people with critical information about what they are doing well, where they can improve, and whether they have committed any violations to the Standards. Once a week, speak with the crew leaders and share input with them on the young people for their weekly Straight Talk sessions.

76
Remember that the goals of the urban lots in terms of pounds produced, people fed and labor provided might seem insignificant to many of the young people in comparison with the work they are doing in Lincoln. Many of the most powerful goals of the urban lots are more subtle: community building, local food security, environmental justice, a more sustainable small-scale, hands-on agriculture that can be done in the city through the combined work of thousands of hands. It is your job to make those goals live for the young people. Quantity is an objective measure that all the young people can grasp quickly. Quality of agricultural work is much more chal-lenging and more subjective to evaluate, particularly for young people who have never been on a farm before. During their time in the city, try to create a work environment where young people can begin to evaluate their own work qualitatively. As you work alongside the young people, discuss your measures for success in your agricultural work, and relate them to parts of the young people’s lives with which they can identify more directly. What makes a day successful for them in school? On the basketball court? In their relationships with friends? Moti-vating the young people to begin to think about the depth and quality of their work, as well as the pace and productivity, is a good goal for their time on the urban lots.Finally, remember that putting all the work that the young people do in context, particularly on the urban lots, is one of the most important motivators you can offer them. All the crews start out working in Lincoln, and for better or worse, they will see whatever happens on the urban lots in contrast to that work. Do not attempt to “measure up” to the Lincoln farm. Make sure the young people recognize why it is so important for them to spend so much of their time in the city on site maintenance and beautification work as well as agricultural work. Talk to them about the neighborhood and introduce them to as many of our neighbors as possible. Only by experiencing your passion for the community, and by getting to know it a little themselves, will the young people be truly motivated to accomplish their work on the urban lots.

77
The Food Project relies on you to present challenging, meaning-ful work for everyone who comes onto the urban lots. All pro-gram activities are based on this premise. Your ability to create this environment has a powerful impact on the overall experi-ence that the young people have in the Summer Youth Program. Take this responsibility very seriously.
Academic Year Program Participants As the urban grower, you will have the opportunity to work closely with participants in The Food Project’s Academic Year Program. These young people have already completed the Summer Youth Program, and have extensive experience on the land as well as a strong motivation to continue their work with The Food Project. By training and coaching them to lead volun-teers in fieldwork, you will be able to rely heavily on this group of youth to reach your production and program goals. Assisting this enthusiastic group in developing their own skills and moti-vating others will be one of the greatest joys of your work.
HistoryThe Academic Year Program began in January of 1996. After three years of watching program participants leave after the Summer Youth Program, perhaps never to be heard from again, The Food Project’s staff realized that there was a gap in our programs. It was clear that the young people could contribute to and gain from The Food Project throughout the entire year, and the organization had at last reached the point where it could focus on providing the young people with continuing involve-ment during the academic year.
During the next few seasons, Food Project staff and youth devel-oped a structure for the Academic Year Program that started in the fall and continued through the spring. Each year, the dura-tion of youth involvement in the program grew a little longer. When the Volunteer Program ended because of cold weather, usually around Halloween, the young people continued work-ing outdoors with the grower. In the winter, they went on to work at homeless shelters and food pantries preparing and serving food.
Academic Year Program participants on their fall retreat, which includes team building activities.

78
As the program grew, it became obvious that the participating young people desired deeper training and education in agricul-ture. The Food Project staff developed an agricultural curricu-lum that dramatically increased the young people’s understand-ing of the farm. Since that time, the Academic Year Program participants have been valued not only for their ability to work hard on their own, but also for their capacity to share their agri-cultural knowledge and enthusiasm with others.After six years of development, the Academic Year Program is a dynamic, challenging, deep, enjoyable and rich program that is crucial to the success of our agricultural work.
Structure of ProgramThe Academic Year Program is intended for graduates of the Summer Youth Program and builds directly on the skills and activities introduced during the summer. It was designed to provide young people with further training in leadership, public speaking, service and agriculture. Young people who have just completed the Summer Youth Program fill the majority of the positions in the Academic Year Program. Occasionally, young people who have participated in a previous summer or who come back for a second Academic Year Program complete the group. The number of young people in the Academic Year Program each year ranges from sixteen to eighteen participants. The Academic Year Program participants are also known as the D.I.R.T. crew, which stands for Dynamic, Intelligent, Respon-sible Teenagers.
The schedule of the Academic Year Program is divided into trimesters of nearly equal length. During the spring and fall trimesters, the young people lead volunteers in farm work every Saturday morning. In the afternoons, they are involved in vari-ous agricultural and program workshops. During the winter trimester, the young people work in shelters on Saturday morn-ings and participate in workshops in the afternoon. Throughout the entire length of the Academic Year Program, from September to June, the young people have opportunities to work with Food Project staff members on weekdays after school. They also have many opportunities for public speaking, attending and present-ing workshops at conferences and symposia around the country with Food Project staff.
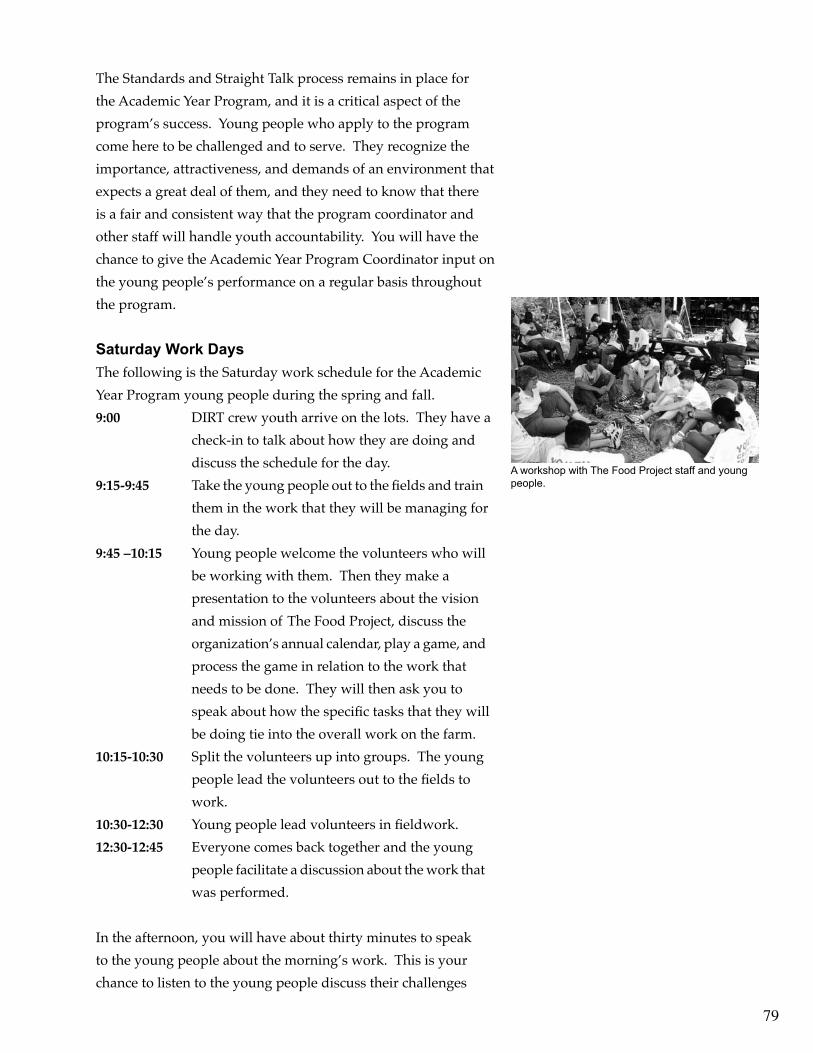
79
The Standards and Straight Talk process remains in place for the Academic Year Program, and it is a critical aspect of the program’s success. Young people who apply to the program come here to be challenged and to serve. They recognize the importance, attractiveness, and demands of an environment that expects a great deal of them, and they need to know that there is a fair and consistent way that the program coordinator and other staff will handle youth accountability. You will have the chance to give the Academic Year Program Coordinator input on the young people’s performance on a regular basis throughout the program.
Saturday Work DaysThe following is the Saturday work schedule for the Academic Year Program young people during the spring and fall. 9:00 DIRT crew youth arrive on the lots. They have a check-in to talk about how they are doing and discuss the schedule for the day.9:15-9:45 Take the young people out to the fields and train them in the work that they will be managing for the day.9:45 –10:15 Young people welcome the volunteers who will be working with them. Then they make a presentation to the volunteers about the vision and mission of The Food Project, discuss the organization’s annual calendar, play a game, and process the game in relation to the work that needs to be done. They will then ask you to speak about how the specific tasks that they will be doing tie into the overall work on the farm.10:15-10:30 Split the volunteers up into groups. The young people lead the volunteers out to the fields to work.10:30-12:30 Young people lead volunteers in fieldwork.12:30-12:45 Everyone comes back together and the young people facilitate a discussion about the work that was performed.
In the afternoon, you will have about thirty minutes to speak to the young people about the morning’s work. This is your chance to listen to the young people discuss their challenges
A workshop with The Food Project staff and young people.

80
in managing others, and your opportunity to share with them constructive techniques that will help them become successful leaders.
Management TrainingWhen the young people move on from the Summer Youth Pro-gram to the Academic Year Program, there is a shift in how they relate to the Lincoln farm and the urban lots. Instead of being unskilled young people who are undergoing their first orienta-tion to the land, they are now viewed as seasoned individuals who are needed to share their skills with others. It is your role to support them as they assume more responsibility and lead others. You do this by training them to effectively communicate with others and manage the work that needs to be done.
There are three aspects to leading volunteers for the DIRT crew: training them, managing them, and thanking them. Present these to the DIRT crew before their first day with the volunteers. Come back to them every time you evaluate the DIRT crew’s work with volunteers. They will give you a structure for every conversation you have with the young people about leadership.
TRAININGIntroducing the volunteers to the work that needs to be done for the day is one of the most important parts of the DIRT crew’s job. If volunteers are adequately and enthusiastically prepared for the day by the young people they are working with, they will be excited to take on their tasks and will be motivated for the whole day.
In the fall of 2001, three truckloads of compost were delivered to the Albion Street lot. Because there was no truck gate on the lot, the compost was dumped in Laura Gibao’s driveway. Laura was happy to provide the space for the compost, but reminded us that she needed it all moved and spread on the lot by the following week so that her visiting children could park in the driveway.
That Saturday morning, a group of volunteers led by DIRT crew youth who were leading their first volunteer day of the season
Jose, Academic Year Program Coordinator leading a workshop.

81
arrived at the Albion Street lot. Jose and Alex, the two crew leaders, were nervous about telling the large corporate group what to do. As the group drank some water and oriented them-selves to the site, Alex and Jose huddled and created a game plan for their crew. They explained the work clearly and coher-ently to the volunteers, infusing their directions with a sense of urgency that gave the group an extra boost of motivation. “You are the only people that can get this job done before next week,” they told their excited crew. “Now let’s get to work. We’ll need two shovelers, two wheelbarrow pushers, and three spreaders. We’ll all have the opportunity to do all the jobs, but who would like to go first on the shoveling?”
Around 11:00 in the morning, Laura came out of her house with freshly baked cake for the volunteer group. Alex and Jose were happy to take a short break with their crew, but almost before they had a chance to settle down, the group was insistent that they get back to work. “We have to finish moving this pile before the end of the day!” one crew member told Alex. “We re-ally have to get back to work.”
At 12:30, when the tired crew arrived back at the West Cottage Street lot for the closing circle, the urban grower quickly walked back to Albion Street to check on their progress. Not only was the compost pile gone from Laura’s driveway, and spread in an even two-inch layer over the entire surface of the lot, but the volunteers had taken the extra time to sweep and hose down the driveway to make sure that it was usable for Laura’s children on Monday morning. Alex and Jose were beaming. They knew that their excellent training had not only given their crew a clear sense of what they needed to accomplish, but also a powerful motivation to get the job done.
When the young people walk out to the fields to lead the volun-teers, remind them to be clear and direct about what needs to be done for the day. Training is challenging for young people who are not accustomed to speaking to a diverse audience of volun-teers. Here are some guidelines you can share with the volun-teer leaders; they are similar to ones you use yourself with the Summer Youth Program youth:

82
• After introducing the work to the volunteers, have the DIRT crew youth ask one of them to repeat what they have just said. If there is any difference between their directions and what the volunteers tell them, have them repeat the directions. Sometimes the volunteers aren’t interested in listening and want to get right to work, but the DIRT crew youth should repeat the directions until everyone understands the work.• Encourage DIRT crew youth to start the training with a general overview of the field. Explain the width of the beds and the location of the pathways. It is important to explain why we don’t walk on the beds. A few minutes of discussion about this at the beginning of the work day will avoid having to continually remind people later on.• Urge DIRT crew youth to be enthusiastic when speaking about the work. No one wants to follow a boring, unenthusiastic leader.• Remind youth to present the work clearly. If they are unsure what needs to be done, the volunteers will lose interest. It is difficult to work with a leader who doesn’t know what he or she is doing. • Discuss ways to present a task list to the group. In the example given above, Alex and Jose only had to present one task to the group. Often, crews working on the urban lots will have task lists that include several jobs. If DIRT crew youth leaders try to give specific directions for all the tasks at the beginning of the day, volunteers will lose the momentum that they usually gain from the opening circle, and will probably also forget many of the directions. If, on the other hand, the DIRT crew only tells their crew about one task at a time, volunteers will not have a sense that other tasks need to follow the one they are currently working on, and may not work at the appropriate pace. Encourage DIRT crew youth to go over the entire list with their group at the beginning so that volunteers have an overall sense of their group’s goals for the day. The DIRT crew will then be able to introduce the specifics of each task as it arises.• Speak up! Too often, mistakes on the field are a result of the fact that the volunteer didn’t hear the directions because the
The Food Project works with over 2000 volunteers each year.

83
leader wasn’t loud enough. Remind the DIRT crew not to turn their backs on the volunteers while giving directions. Young people who have not led volunteers before are often extremely nervous and vague about the training process. Once a young person from our Academic Year Program brought a group out to the field to transplant broc- coli. He said, “Today we are going to plant tomatoes. These are the seedlings, so we are just going to go down the field and put them in.” The young person then picked up a flat of broccoli and headed down the row. The volunteers were left wondering what in the world they were supposed to do. Fortunately, one of the volunteers went and got the grower. The grower called the young person back and, together, they presented the job again. By the end of that volunteer day, the group had successfully transplanted 3000 feet of broccoli.
MANAGINGSuccessfully managing a crew of volunteers is a challenging task for anyone to take on. When you first introduce the DIRT crew to the idea of managing a crew, share your own experi-ence and techniques with them. Remind them that they are now essentially in the role that their crew leaders played during the summer, and have them think about ways in which their crew leaders and assistant crew leaders managed their crews. Share some of the management techniques you suggest to the crew leaders at the beginning of the summer.
For the first fifteen to thirty minutes after the young people and volunteers have started working, the DIRT crew should be focused almost exclusively on walking around and helping the volunteers. This is the time to answer specific questions that the volunteers have about the job and to assist them in performing the work more efficiently. It is the best opportunity to correct improper techniques. This is a formative period of the work when the young people need to be bold in communicating with individual volunteers. If the young people are not diligent about this step in the work, it will be hard for them to maintain control of the task.

84
Very few young people are excited about walking around and correcting volunteers on their work. They don’t want to be irritating supervisors. Remind them that none of their crew members want to be inefficient in a work task. Volunteers come to The Food Project to assist in completing all of the challenging jobs on the urban lots, and most will welcome input from the DIRT crew. Communicate to the young people the difference between an overbearing manager and a thoughtful coach. The first fifteen to thirty minutes of a task should be viewed as an opportunity for the young people to teach and coach volunteers who are eager to receive instruction.
After the group is moving accurately and efficiently through a job, the young people should spread themselves out among the volunteers to model hard work. They need to remain aware of the volunteers and not work off on their own. Periodically, they should walk around and see how everyone is doing. The fre-quency of checking out how the group is progressing depends on the ability and age of the volunteers, as well as the complex-ity of the task.
Communicating with volunteers during the workday is another important part of management that members of the DIRT crew often need to practice. It can sometimes be easier to talk to volunteers when there is something specific to talk about (like directions for the work, or correcting a technique) than once the work is progressing smoothly. Some DIRT crew members are natural communicators. If not, the AYP coordinator and the DIRT crew members can help. They all recognize the impor-tance of talking to volunteers as a way of educating about The Food Project, making the volunteers feel at ease, and connecting them with the work that they were doing. The following were some of their suggestions:• Talk about The Food Project. All the volunteers share an interested in The Food Project, or at least in community service, or else they would not be working with us. Ask what first attracted the volunteer to this type of work. Why are they giving up their Saturday to spend it with the DIRT crew? • Talk about yourself. The young people who make up the
Clean up patrol!

85
DIRT crew are a fascinating group to our volunteers, because they are a diverse, personable group of young people who work together in a unique way. Volunteers are often interested in how crew members came to work at The Food Project, and in learning more about the specifics of their experiences. Learning about The Food Project is always more interesting through the eyes of a young person than through facts and statistics.• Talk about the volunteer. Ask questions about the volunteer’s background and interests, their connection with food and farming, or their experience with the city of Boston. Many volunteers may not be used to talking with young people. Often, they are anxious to find some common ground, but don’t know how to start a conversation. If young people are open and friendly from the beginning, volunteers will often open up and begin to talk.
Finally, another important part of managing a group is recog-nizing when it is time to take a rest. Make sure that the young people in the DIRT crew monitor their group’s energy level and take a water break halfway through the work block. Remind them that their group will lose momentum if the break is too long, and encourage them to keep their water breaks to ten min-utes or less.
THANKINGAfter the work has been completed for the day, the youth should take some time to review what has been accomplished and thank the volunteers for all of their hard work. Asking the volunteers to step back and look at the difference they have made on the lots is one way for the DIRT crew to make sure that volunteers know that their efforts are appreciated; giving them a direct connection to the people who will eat the food they have helped to grow, through personal stories and statistics, is another.
When you meet with the young people in the afternoon, ask them to reflect personally on these three aspects of leading vol-unteers. In the past, the training and thanking steps are relative-ly easy for the young people to understand. After a few weeks,
Redirecting energy through team building activities.

86
they recognize what they need to do in these areas even if they continue to work on the nuances of implementing them.
The most challenging concept for the young people in relation to managing volunteers has to do with actually managing the work. There is always a fine line between when they should be specifically walking around coaching the group and when they should simply model working skills. Usually, the young people fall into two categories as they deal with the challenge of this question: 1. The young people who are naturally hard workers are inclined to be more reluctant to coach volunteers and they err on the side of just working. The volunteers in their groups are less informed about the task, and may be less efficient, leading to the young person feeling like they have to work extra hard in order to get the job done. Although the work at the end of the day is done, it is the product of the young people’s efficient work, not that of the volunteers. Also, there is a risk that one of the poorly informed volunteers will inadvertently cause damage to the plants. Finally, volunteers will lack a connection to their work and the organization that conversation and coaching could provide.2. Young people who are more challenged themselves by the rigors of farm labor are more disposed to over-supervise a group and not model hard work at all. Their groups may not complete their goals since they are talking more than they are working. Also, since these young people don’t model speed, the pace of the work is inevitably slow. By the end of the work block, the volunteers are sometimes annoyed with these young people because they have been giving directions the whole time without doing any work themselves.
These are the extremes of these categories. One of the challeng-es in speaking to young people about the finer points of group management is that every Saturday they are dealing with differ-ent volunteers who present new challenges. The blend of coach-ing and modeling one work that is efficient and helpful one week may be completely inappropriate the following week. At
The Food Project staff, volunteers, crew workers, and neighborhood kids on one of the urban lots.

87
first, this is frustrating to the young people, since they genuinely want to learn how to manage well. However, the young people eventually learn to look forward to the challenge each group brings. They are able to reflect on their management tendencies and address them in response to the specific needs of the day.
Weekday Work DaysThe young people in the DIRT crew also have the opportu-nity – and, at some level, the obligation – to work on weekday afternoons or on weekdays when school is not in session. They can choose from various types of work with The Food Project, including work on the urban lots during the spring and fall.
If you are interested in working with young people from the Academic Year Program during the week, make a request to the Academic Year Program Coordinator at least a week in advance. The coordinator will speak to the young people, and you will know by Monday whether or not you will have help for the upcoming week.
The weekday is an excellent opportunity for you to provide advanced agricultural training for the young people in a one-on-one or small group setting. You will usually work with only one to three young people at a time, so it is easier to teach them specific skills. Also, the young people who sign up to work with you will be the ones most interested in agriculture and will often be eager to take on new projects.
In the fall, one of the most important activities on the city lots is spreading cover crops. This activity is difficult to do with a large group, but is ideal for three or four individuals.
Agricultural CurriculumAs one of the growers, you are partially responsible for imple-menting the fall, winter and spring agriculture curricula with the participants in the Academic Year Program. You will use the lessons from French Fries and the Food System, The Food Project’s agriculture curriculum, and hopefully contribute to the develop-ment of new curriculum material as well.

88
During the fall retreat, either you or the Lincoln grower will ask the young people what they would like to learn about The Food Project’s agriculture that wasn’t covered during the sum-mer. They will give you lots of ideas. Look through French Fries and the Food System for activities and lessons that address their interests. Work with the Lincoln grower to create a schedule of workshops for the spring and fall that cover the specific topics suggested by the DIRT crew.
During the winter trimester, you will help present a five-lesson farm planning curriculum. These lessons are workshops that help the DIRT crew understand how The Food Project makes its farm plans and teaches them how they could plan their own garden. During the first four lessons, the young people learn how to plan a garden next to one of the homeless shelters that receives produce from The Food Project in the summer. In the fifth lesson, you and the Lincoln grower will work together to help the young people apply the knowledge that they have gained to the issues involved in planning the urban lots and the Lincoln farm.
Remain in close communication with the Lincoln grower and the Academic Year Program coordinator about the agriculture curriculum. Find out when the lessons are scheduled at the start of each season, and make sure you are aware of the exact time and location of each workshop. A week before the lesson, speak to the coordinator about any supplies and help that you might need. Discuss the content of the workshop and let the coordinator know that his or her helpful participation is crucial to its success. Finally, try to attend one of the workshops of-fered by the Lincoln grower and ask him or her to attend one of yours. You can each provide valuable insight into one another’s teaching and communication styles, as well as the content of the workshops.

89
Agricultural InternsAs The Food Project has grown and more and more young people have graduated from the Summer Youth Program, the organization has made an effort to provide opportunities for these young people that allow them to progress in their particu-lar areas of interest while making an advanced contribution to the work of The Food Project. You will have the opportunity each year to work with an Urban Agriculture Intern (or two, as in the 2002 season), who will be a young person for whom The Food Project’s work in the city resonates particularly deeply. The Urban Agriculture Intern(s) will be an essential part of your farm management structure and a critical relationship for you throughout the season.
HistoryThe vision and mission of The Food Project (presented at the front of this manual) commit the organization to including young people in as many aspects of the organization as pos-sible. As a result, The Food Project has created opportunities for young people to work closely with staff members to pursue their own interests and build their own capacity while further-ing the vision and mission of the organization.
The Alumni Internship program, which began in 1999, is the programmatic manifestation of this effort. In 2000, the first alumni intern worked with an urban grower. All past Summer Youth Program participants are encouraged to apply for the range of internships that are available each year. Every year, the quantity and diversity of the alumni internships increases, providing youth with a new range of opportunities and staff with the incredible prospect – and responsibility – of mentoring a highly motivated young person.
HiringWhen interviewing and selecting an urban agriculture intern, you will be faced with a pool of applicants with differing skills and interests. Choose carefully from those applicants to select an intern who is interested in learning the lessons that you have to teach, in addition to taking on the diverse array of tasks for which the urban agriculture intern is responsible.
Wind-Starr, a remarkable young man from
Boston who had been through the Summer
Youth Program, Academic Year Program, and
a number of other experiences in the organiza-
tion, including the making of the DIRT video,
worked with urban grower Gideon Porth on
the city lots from April to October. In addi-
tion to leading summer crews and volunteer
groups, Wind-Starr took on projects of his
own, including the design and construction of
a compost bin at the Langdon Street lot. The
internship was a positive experience for Wind-
Starr, who moved on to other leadership roles
within the organization, and for Gideon, who
valued his relationship with the young man
very highly.

90
Agricultural internships at The Food Project attract a differ-ent type of young person than some other positions, including the very popular assistant crew leader positions. Many young people are attracted to positions that place them in a position of contact with and responsibility for other young people, offer many opportunities for public speaking and leadership, and combine agricultural work with other tasks. A few, however, fall in love with the work of agriculture for its own sake. They love the combination of teamwork and solitude, the challenge of physical work, and the close contact with the earth and the vegetables. Of those, most would rather work in the quiet of the Lincoln fields than the clamor of the city.
It takes a rare and special individual to combine the love of fieldwork with the willingness to lead crews on a regular basis, to be outgoing enough to build relationships with neighbor gardeners and others in the community, and to communicate the complex nature of The Food Project’s urban work to a varied au-dience. Of course, not every urban agriculture intern will begin his or her internship with all of these skills in place. It will be up to you to help these interns develop their capacity for lead-ership, public speaking, hard physical work and agricultural decision-making, and urban agricultural activism.
Sometimes you will depend heavily on the urban agriculture intern(s) to complete tasks independently, without your im-mediate supervision, and to lead summer and volunteer crews in sophisticated agricultural tasks. It takes a mature and self-motivated young person to take on the hard work of the urban agriculture internship.
Every year in late January, speak with the Alumni Internship Coordinator about the upcoming agriculture season. Look at the following items from the previous year, and make any adjustments that you need for the upcoming season. Make sure that the Alumni Internship Coordinator has the updated infor-mation.

91
• Intern Job Description and Responsibilities (see Attachment 9: Urban Agriculture Internship Job Description)• Application Schedule (see Attachment 10: Urban Agriculture Internship Application)• Work Schedule (see Attachment 3: Urban Agriculture Internship Work Schedule)
In February, call specific young people from previous years that you believe would be a good fit for the job of Urban Agriculture intern. Ask other staff for recommendations as well, particu-larly the Academic Year Program Coordinator. Encourage these young people to apply for the urban agriculture internship, but be sure to remind them that the hiring process is a competitive one with no guarantees of employment. Participate in the inter-views for alumni interns in early March and decide on a particu-lar individual within the next two weeks. Attend an internship training session with the intern that you have hired and the Alumni Internship Coordinator in late March.
The urban agriculture internship is in many ways as complex a position as your own. Issues of race, gender and social class are very real in our urban context, and can sometimes be brought to our attention in startling ways. Sometimes, expressing intel-ligent concerns about these issues can be the mark of a young person who is an excellent candidate for the position. Remem-ber to maintain an open and reflective dialogue about these issues with your intern, particularly if they express an interest in them. You will both benefit from these discussions.
ResponsibilitiesAgricultural internships at The Food Project generally begin the first week of April and end in October. During the spring, require the urban agriculture intern to work with you on the urban lots every Saturday, when you will be able to train him or her more intensively into the agricultural systems on the lots. It may also be possible to schedule some weekday afternoons with your intern, depending on where he or she lives and goes to school. Involve the urban agriculture intern in volunteer days, particularly when the DIRT crew is in Lincoln, as this will help you gauge and hone the intern’s leadership and communication
Attachment 9
Attachment 10
Attachment 3
Early morning in the “Garden of Eden” as it is called by our neighbor Clairmundo.

92
skills and will help acquaint the intern more intimately with the particularities of the urban lots. Introduce the intern to neigh-borhood gardeners and the neighbor gardeners who work on the lots. Take him or her on a tour of the neighborhood, point-ing out important historical sites and local community organiza-tions. Make sure the intern is familiar with the crop plan and planting schedule for the lots. Finally, spend some time training the intern in the Urban Agriculture workshop that he or she will help facilitate for the Summer Youth Program participants. Ask the intern for feedback on the workshop.
The urban agriculture intern has two extremely important roles when the Summer Youth Program begins- leading crews in ag-ricultural work and completing necessary tasks independently. Each morning, make sure the intern is familiar with the tasks that the Summer Youth Program crews will be accomplishing that day. Train him or her to work alongside crews, assisting them as necessary and helping to set pace and model hard work for them. Because you have three sites in the city, you may find it helpful throughout the season to have the urban agriculture intern on one site while you work with a crew on another site. Make sure to vary which crew you are working with so that each crew has the benefit of your knowledge and example. Con-sider safety at all times, making sure that a Nextel or cell phone is available at each site where a crew is working, even if the urban agriculture intern is with them.
In addition to his or her leadership role, the urban agriculture intern will also carry out individual projects such as tomato trellising or irrigation during the Summer Youth Program. The urban agriculture intern in 2001, did all the fall seeding at Lang-don Street as one of her projects. Make sure that the goals and quality standards for these projects are clearly defined before the intern takes them on, and make sure that at least one of the proj-ects helps the intern learn a new skill that interests him or her.
You will find that the responsibilities of the urban agriculture internship grow with the interest and enthusiasm of the intern. If the intern asks for more responsibility, find appropriate ways to give it. Make sure that you do not “give away” all the enjoy-

93
able parts of your own job, leaving only administration and less pleasurable tasks for yourself. Finally, remember that the intern is still a program participant, albeit an advanced one, and maintain boundaries that are appropriate to the mentor-intern relationship. It is easy to begin seeing a mature young person with whom you spend so much time each week, and on whom you depend for important tasks, as a junior staff member. It is very important, however, to practice restraint in the information about staff, finances, and other sensitive issues that you share with the intern. The ultimate responsibility for the urban lots, and for the urban agriculture intern, remains with you. Straight TalkThe Standards and Straight Talk process is critical to the success of the Urban Agriculture Internship. During the Alumni In-ternship Orientation in March, you and the intern will set goals for the internship that will include both the intern’s individual objectives and your hopes for the internship overall. Meet with the urban agriculture intern every other week during the intern-ship to discuss his or her performance, assess the progress that he or she is making towards meeting the goals that you set early in the year, and develop strategies to work successfully together as a team. Use the first sessions to present clear expectations about the quality of the work that you expect from the urban ag-riculture intern. Make sure to remind the intern of his or her im-portance to the success of The Food Project’s urban agriculture work this season. Ask about concerns or issues that the intern is having in his or her work, and work out strategies to address them. Twice during the growing season, prepare with the intern for Intensive Straight Talk, in which he or she provides feedback for you as well. These sessions will be extremely valuable in assessing your relationship with the intern and developing new approaches to working together.
Also, be prepared to discuss educational and career options with the urban agriculture intern. Because this position requires a mature young person, urban agriculture interns have often been older teenagers who are graduating from high school in one or two years and are thinking hard about their next steps. Help them assess their strengths and desires, and guide them towards
The Standards and Straight Talk process is used throughout the entire Food Project.

94
school or career options that will help them advance their goals. Remember that very few young people in the program will actually go on to be farmers! Maintain a familiarity with other related careers and organizations, and help the intern make informed choices about their next step, either within the organi-zation or outside of it.
Your relationship with the urban agriculture intern can be one of the most rewarding aspects of your position. Mentoring a talented young person with a deep interest in the work that you do is an incredibly powerful experience. By creating structures within which the internship can operate, including a schedule, a clear set of standards and expectations, and regular straight talk sessions, you will provide the urban agriculture intern with a unique opportunity to grow in his or her position while contrib-uting to the vision and mission of The Food Project. Enjoy this wonderful opportunity to teach and learn!
VolunteersThroughout the spring and fall, you will supervise the work of hundreds of volunteers on the urban lots. These volunteers will be essential to the complex work of bed preparation, planting, harvesting, and fall clean-up on the lots, and yet the majority of them will never have done farm work before. The Food Project has worked with volunteers since its inception in 1991, and has developed structures and methods to ensure that volunteers in our fields have a meaningful and compelling experience. The volunteers who come to The Food Project leave with the sat-isfaction of completing a challenging agricultural task that is firmly grounded in the context of the people who receive our produce, the soil that we nurture, and the communities we cre-ate and cultivate.
With the help of the volunteer coordinator and other program staff, you will guide the volunteers through the experience of contributing fully to urban agriculture at The Food Project. As with other participants in our programs, you will create struc-tures and plans that will allow the volunteers to make a momen-tous impact on the urban lots. You will train, educate, motivate and inspire the volunteers as they work, connecting them with
“Rolling five deep” to the next work site.

95
the importance of the work that they do throughout the growing season.
HistoryVolunteers are central to The Food Project story and success. The organization has always relied on the labor and service of volunteers to achieve the ambitious agricultural goals of the farm and urban lots.
Well-run, educationally focused agricultural operations of any size offer many levels of learning, from beginner to apprentice to master. At The Food Project, staff would run agriculture opera-tions that could integrate volunteers at whatever level of experi-ence they came with, introducing them or taking them deeper into the joys and challenges of small-scale farming. Volunteers are a critical source of labor for our urban lots, and also repre-sent a way for more people to become part of The Food Project’s vision and mission. Volunteers have become financial support-ers, CSA and farmers’ market customers, and even staff mem-bers. Their value to the organization cannot be overestimated.
Over the past decade, the goals for the Volunteer Program have remained the same, but the volume of participants and the sophistication of The Food Project’s ability to work with them have increased dramatically. In 1992, three hundred volunteers worked over a six-month period on 2 acres in Lincoln to assist in growing 25,000 pounds of vegetables. In 2001, one thousand volunteers worked over an eight-month period on 21 acres in Lincoln and 2.5 acres in Boston to help grow more than 200,000 pounds of vegetables. In 2001, the Volunteer Program became known as our Serve and Grow Program.
Relationship with Volunteer CoordinatorThe success of the Volunteer Program on the urban lots depends on your relationship with the volunteer coordinator and your enthusiasm for the Volunteer Program. It is a challenge to inte-grate large numbers of inexperienced people into the complex functioning of three small urban lots. As a grower, it may often seem easier to do the work yourself than to take the time it takes to plan for and explain the work to fifty people on a Saturday
96
morning. If you are flexible and creative in your approach to the volunteers’ work on the urban lots, and committed to making their experience meaningful to them and helpful to you, you will be able to work with the volunteer coordinator to provide an exceptional experience for the volunteers – and get a lot of work done, too!
Be sure to talk at length with the volunteer coordinator to estab-lish your expectations and standards for success. Clarify your individual roles in relation to volunteers and create a plan for communication about volunteer groups throughout the sea-son. Always check in with your supervisor during this process. Otherwise, you risk spending the entire volunteer season in a “push-pull” situation with the volunteer coordinator in which each of you has different expectations and the program is not as successful as it might be.
One of the primary goals of the Volunteer Program, for example, is to involve a certain number of individuals, as directed by the organization’s annual plan. As a grower, you may have the in-clination to limit the number of people that can volunteer on the urban lots at one time. If you do not have a conversation about numbers with the volunteer coordinator at the beginning of the season, it is easy to fall into a pattern where the volunteer coor-dinator calls you every Monday to let you know that he or she has scheduled fifty people for the lots on Saturday, you panic, grumble and complain, and the two of you go back and forth in an uncomfortable conversation for fifteen minutes until the issue is resolved. Conversations like this can definitely erode the strength of your relationship with the volunteer coordinator, who is just trying to get his or her job done! Instead, talk during the winter about the upcoming season.
Make sure you share an understanding of The Food Project’s philosophy on volunteers. If you look at volunteers simply as an unpaid work force that is there to accomplish the most possible work in the minimum amount of time, you will often be frustrated with the groups and impatient with the volunteer coordinator. If the volunteer coordinator focuses solely on the experience of the volunteers, without regard to the efficiency of

97
their work, then the program is not helping the urban lots meet their goals.
Work with the volunteer coordinator to create a structure for volunteer days that meets the need of the volunteers and the urban lots. In order to get the most out of their experience at The Food Project, volunteers need an orientation to the organi-zation and a conversation about of the context for their work. In order to perform the tasks that you ask them to complete in a way that is efficient for you and satisfying for them, they need a clear explanation of the tasks and how to complete them as well as your goals for the day. Remember, volunteer groups at The Food Project see the urban lots at only one point in time – two, if they are lucky. Help the volunteer coordinator create a picture of the continuum of potential that the volunteers’ work helps bring into being – the potential for the land to grow thousands of pounds of produce, for the produce to be harvested and distributed to people around the Boston area who depend on it, and for the land to be regenerated and the community made stronger by our work in the city.
RecruitmentThe volunteer coordinator works throughout the winter and summer to recruit volunteer groups and individuals. Speak with the coordinator a few months in advance about special situa-tions that require a certain number of volunteers. For example, you may want to request large groups the first few weeks of April to help with bed preparation on the urban lots. You may request similar groups the last two weeks of October and first two weeks of November to help with fall clean-up on the lots. It is not always easy to predict your need for volunteers so far into the future because of all the variables that are involved in agriculture. Still, try to mention these dates, and any others you see as being particularly important, to the volunteer coordinator. If you don’t mention any dates, the coordinator will schedule three groups of ten to thirty people each week throughout the season, which may or may not be appropriate for your needs. Look over your planting calendar carefully and try to give the volunteer coordinator as much information as possible to guide the recruitment process.

98
In addition, remember that many groups that express interest in volunteering with The Food Project will be middle- and high-school groups. These groups are important to us because they help us include more youth in our vision and mission, and can also serve as important recruitment tools for youth program participants. They can often be as effective as adult volun-teer groups in accomplishing tasks if the work is organized and explained well. Still, if there is a particular task for which you think an adult group would be more effective – or, on the other hand, if there is a task which you think would be great for young people – discuss it with the volunteer coordinator in advance.
As the groups are scheduled, the volunteer coordinator will provide you with an updated list at the beginning of every month, including the name of the groups that are scheduled, numbers of people they plan to bring (which will often be a range), whether the group is youth, adults, or a combination, and whether there is a specific goal for their visit (whether they are a potential funder or a college group interested in urban agriculture, for example). This allows you to have as much information as possible to plan your tasks for all the dates that volunteers will be on the urban lots during the spring and fall.
You will communicate with the volunteer coordinator on a regular basis at joint meetings of the Program and Production Teams and through telephone conversations and e-mail to dis-cuss the schedule of volunteers for the next two weeks. Review the schedule to make sure all your information about the vol-unteer groups is correct. Discuss staffing and logistics, finding out whether the volunteer coordinator and interns, the DIRT crew, or other program staff will be available to help you run the volunteer day. Make sure that any necessary preparation for the volunteer groups will be completed, either by you or by a mem-ber of the program staff. Let the volunteer coordinator know an overview of the agricultural tasks that you plan to accomplish with each volunteer group.
Who Volunteers At The Food ProjectVolunteers at The Food Project differ in age, geography, cultural background, organizational affiliation (church, business, school),
Cleaning carrots on a harvest day.

99
physical ability, and knowledge about or experience with service and agriculture. About sixty percent of the volunteers during the year are young people (middle- and high-school age), and forty percent are adults. The volunteers fall into several catego-ries:• Youth groups• Adult groups• Mixed youth-adult groups• Individual youth volunteers• Individual adult volunteers• College groups
Each of these categories is discussed individually in the follow-ing sections.
YOUTH GROUPSBecause the primary constituency of The Food Project over the years has been youth in grades 8-12 (ages 13-18) – the young people who have participated in our Summer Youth Program and other programs – the organization has the most experi-ence and structures in place to serve these young people. Our program structure and agricultural organization work well to integrate them into the work of the organization, since many of our farm systems were developed specifically with this age group in mind. We do work with middle school students (ages 11-13) when the appropriate infrastructure (committed teachers, appropriate student-to-adult ratios, time to prep students well, and informed students) is available. For these groups, we often combine a shorter work block with a more interactive introduc-tion, and often end with a workshop that helps the students as-similate what they have learned. With these structures in place, these students can be some of the most pleasurable to work with – without them, they can be a challenge to our systems.
Historically, we have not worked with children in grades K-5, but this has begun to change over the past few years. Particular-ly in the city, and especially within our neighborhood, there are large numbers of children who know of The Food Project, may be underserved by after-school or other programs, and are ex-cited to participate in the work of the organization. Because we deal with this age group very differently on the urban lots, it is
A crew of young people bonding after a day of work-ing and growing together.

100
discussed separately under the “Neighborhood School Groups” section below.
ADULT GROUPSIn addition to the youth groups who play such an important role in our agricultural work, The Food Project also works with adult groups, ages 21 to senior citizens. Like the young people we work with, adult groups come to us from many different back-grounds. Funding organizations – or potential funders – often send a group to work with us for day. A member of The Food Project’s funding team will often help you run the volunteer day when this happens, since this helps them build relationships with these groups. Teams of corporate employees often come to perform a day of service with us and build community or team-work among their staff. Faith-based organizations and service groups also often send teams, as do local peer organizations.
Groups from many of the graduate schools in the area also schedule workdays with us each year.
MIXED YOUTH-ADULT GROUPSOften, a group will consist of youth and adults who come to do service together . Alternatively, the volunteer coordinator may schedule two smaller groups on the same day, and one may be a youth group while the other is an adult group.
These groups require some careful management, particularly when they are working with the DIRT crew. In general, if a group is anywhere from middle school age up, we expect the young people in the group to work at about the same pace as the adults. Encourage the adults who come with these groups to model hard work and persistence as they take on the task they are assigned that day. If there is a wide range of ages among the young people in the group, however, some of the younger chil-dren may not be able to keep up with the pace or exertion of the work being done by their crew. Some young people lose interest altogether and wander off to join another crew or to sit in the grass and observe for a while. While this can be disconcerting as you try to accomplish several tasks with your group, if you continue to encourage and guide each group younger children will usually eventually return to work with the adults.

101
If you are managing a mixed youth-adult group with Food Project youth, work with the Academic Year Program Coordina-tor to prepare them beforehand for some of the challenges they might expect to encounter in their work that day. Have them come up with various scenarios they might face during their work, and talk through how they might deal with these. At the end of the day, review the accomplishments of the day. Was the management as challenging as they expected? More challeng-ing? Less challenging? How did it feel to “lose” a crew member to another work crew halfway through the volunteer day?
For some Food Project youth, this type of flexibility is easy to deal with. They enjoy showing young people new tasks and do not allow the movement of the youngest members of a group to disrupt the flow of work. Others find it more challenging to deal with an inconsistency in numbers. Listen to the comments of all youth leaders, and give them specific feedback in manag-ing this type of group. Help them consider the type of tasks that they might save for the youngest members of a mixed group. Remind the Food Project youth that this type of group exempli-fies how important it is for them to model hard work, excellent management skills and courtesy towards their group.
Mixed youth-adult groups can be some of the most rewarding that we work with at The Food Project, in part because they are examples of the type of bridging the gap between older and younger people that is so important to our work. With a little extra preparation on your part, and enthusiasm on the part of the Food Project young people, these groups can be wonderful opportunities to learn from our volunteers as we get work done together.
INDIVIDUAL YOUTH VOLUNTEERSOccasionally, high school students will come to The Food Project as part of a school internship or to fulfill individual service requirements. Often, the volunteer coordinator will ask these young people to join a Saturday volunteer group, since it can be challenging to rearrange your schedule to accommodate a single volunteer.

102
The largest numbers of our individual youth volunteers are Food Project alumni. Often, a group of them may be mobi-lized to come out to the farm or the urban lots on short notice if needed. If you have a need for these young people, speak to the Volunteer coordinator.
INDIVIDUAL ADULT VOLUNTEERSIndividual adult volunteers usually fall into one of two catego-ries on the urban lots.• Adults who are interested in the work that The Food Project does, have flexible or unusual work schedules, and come to help out in a general way, often with harvests or on Saturday volunteer days.• Adults with specific skills who volunteer their time on s specific projects on the urban lots.
Members of the former group came every Tuesday, Thursday, and Saturday to the urban lots during the fall of 2001. By the end of the harvest season, the individuals who came on Tues-days and Thursdays were able to set up the wash station and weigh and wash produce on their own. They were so familiar with the harvest routine that they became very helpful with vol-unteer groups who came on those days. They also took on vari-ous individual projects around the lots as they became available.
COLLEGE VOLUNTEERSCollege students (between 18 and 21 years old) work with us ei-ther as individuals or in groups. The orientation week for many of the colleges in the Boston area comes at a critical time for The Food Project. The end of August and beginning of September is a time when the Summer Youth Program has just ended, and the labor force of twenty young people who took on the larger summer harvests has disappeared. As a result, college orienta-tion groups can play an important role in helping to harvest and distribute the produce that is still coming in. These groups represent a transition from the Summer Youth Program to the beginning of the fall volunteer season.
Some college groups come to The Food Project for several days during their service weeks. For these groups, have come from
One large volunteer group who came during
the fall of 2001 brought a number of young
people of varying ages, along with about
fifteen adults. They were responsible for clear-
ing many of the crops from the land on our
lots and in our neighbor’s large garden, along
with organizing sheds for the winter and
washing and organizing the cargo van. The
DIRT crew worked extremely well with this
group, so much so that on arriving at Langdon
Street to check in with the crew leaders there,
the grower saw a tiny six-year old girl, her face
and arms covered with soap suds, perched on
top of the cargo van as she scrubbed it clean.
“I’m helping!” she squealed, delighted with
the opportunity to contribute to the energy of
the day.

103
Boston University and Harvard University, among others, we run a special College Week program that includes workshops and an introduction to the farmers’ market along with the usual volunteer schedule of orientation and fieldwork. Check in at the Program Production meetings to get specific details on any planned college week programs.
The college students who participate in the orientation week ser-vice projects arrive at the urban lots in a similar situation to the young people who begin our Summer Youth Program. They are strangers to one another and, in most cases, to the city of Boston. They may be taking part in the service project out of a genuine interest in urban agriculture and The Food Project’s work, or they may be more interested in meeting new people and getting accustomed to their new city. Often, daily work on service proj-ects is interspersed with evening social gatherings and parties, and students can arrive for work in the morning looking more than a little bleary-eyed from the night’s festivities. It is important to be clear with both the leaders of these groups and the participants about your expectations for the week and the needs of the land. Look at the week as a Summer Youth Pro-gram in miniature. Give the group feedback after their first day of work, communicate your goals for their work and encourage them to challenge themselves to meet and surpass those goals. Remember to thank them for participating in the week’s service project and to connect them with the meaning of their work to the overall mission of The Food Project. Throughout the week, take advantage of opportunities for learning and “end-of-the-row” teaching among the students as you would with Summer Youth Program participants. Wonderful things can happen when you bring these young people into contact with an area of the city that many of them will never see again in their four years in Boston.
Group Volunteer Day ScheduleIn order to coordinate the work of up to fifty youth and vol-unteers on three urban lots, and to ensure that every volunteer group that comes to The Food Project has a meaningful experi-ence with us, it is essential to prepare well and provide a clear structure for each volunteer day. Whether you are working with

104
the DIRT crew, the volunteer coordinator and youth interns, or other program staff, you will use the structure that The Food Project has developed as a framework for constructing a power-ful experience for the day’s volunteer group. This framework is a little like a “paint-by-numbers” picture of the day – only without the numbers.
The shapes and outlines of the various components that make up a successful volunteer day are laid out in our schedule, but the exact emphasis and enthusiasm with which they are filled brings the “color” to the day, the individual flourishes and quirks that make the experience unforgettable for the volun-teers. Practice and review your parts with Food Project youth and staff beforehand to ensure a smooth, satisfying volunteer day. Still, never forget to leave room for that spark of individual spontaneity that may add a new depth to the experience for all of you.
The schedule for a volunteer day can be divided into these parts:• Site preparation• When the volunteers arrive• Introduction to The Food Project• Introduction to the work• While the volunteers work• Wrap up
Each of these parts is described in one of the following sections.
SITE PREPARATIONBefore the volunteers arrive, review the task list that you have prepared for the day. Estimate the number of volunteers needed to complete each task and the amount of time required. Based on the volunteer coordinator’s projections of the numbers that you will have available that day, break the volunteers into groups with the appropriate number of workers to accomplish each set of tasks. Unlock sheds and porta-potties on each site. Set out the tools that will be used for each task. Ensuring that the appropriate tools or equipment necessary for the tasks them-selves are available in sufficient quantity for the day is your re-sponsibility, not the volunteer coordinator’s. If the tools are not
I have always believed that I could help change the world, because I have been lucky to have adults around me who did. Marian Wright Edelman

105
ready for the tasks, we waste volunteer time and leave people with the impression that we are not well prepared for the day. Volunteers feel respected when we are organized and ready for them to arrive.
If the tasks that you have planned for the day require other types of preparation, like marking beds or areas to be worked on or checking in with a neighbor who owns a garden where a group will be working, complete those tasks either the day before the volunteer day, or early in the morning on the day the volunteers will be working.
The volunteer coordinator is responsible for collecting all of the general supplies for the volunteers: water, water bottles, nametags, sunscreen, sign-in list, flip chart, permanent mark-ers, Food Project communications materials (flyers, brochures, and so on), camera with film, and first aid kit. If the volunteer coordinator will not be with you during a volunteer day, these materials should be stored in the tool shed at the West Cottage Street lot and should be easily accessible to the young people or program staff who are helping you lead the volunteer day.
Meet with the volunteer coordinator or other staff at least a half hour before the arrival of the group to make sure everything is ready. This meeting is crucial because last-minute changes (weather, illness of a staff member, etc.) may require shifts in re-sponsibilities or roles during the day. Tell the volunteer coordi-nator or other youth or staff about the tasks that will be accom-plished that day and how the groups will be divided. Finally, decide how the speaking parts will be divided for the initial presentation to the volunteers.
WHEN THE VOLUNTEERS ARRIVEThe volunteer coordinator, youth or other program staff will greet the volunteers, show them where to park, take their sign-in sheet, and ask them to fill out name tags. They should then find the leaders of the group and have a five-minute conversa-tion away from the group. The goal of this conversation is to es-tablish clear partnership with the group leaders and enroll them in making this a great volunteer day. If the leaders give us their

106
partnership, the resulting volunteer day is inevitably stronger. The ways in which they can be most helpful include:• Personally modeling hard work• Personally following all requests, directions and instructions• Placing themselves in a small group of people they may not know and not working exclusively with other group leaders• Assisting the staff in dividing their group into small groups that they know will work well together, and letting us know if there are any pre-existing or natural points of division• Keeping their group focused on their tasks• Staying in communication with our staff if they have a concern or suggestion• Handling individuals who are having a hard time• Assisting in discipline when and if we have to ask someone not to participate
This short talk is important for the overall success of the work for that day. This structured conversation also gives the group leaders guidance on how to effectively manage their group in an unfamiliar environment. If you and the volunteer coordinator successfully enlist their help, the leaders become allies in mak-ing the day an extraordinary experience for the volunteers, the staff and the urban lots. If groups or individuals arrive early, ask them to feel free to walk around the West Cottage Street lot and orient themselves, being respectful of the growing crops and neighbor garden plots. Point out the difference between growing beds and pathways, which may not be immediately clear to someone who is unfamiliar with agriculture or the urban lots. If the group is mostly young people, ask them to make a list of how many veg-etables they recognize on the lot. The volunteer coordinator or young people who are helping manage the day may put up the set of informational signs that take visitors on a self-guided tour of the West Cottage Street lot. If so, encourage early volunteers to take advantage of this opportunity to learn more about the history and practices of our urban agriculture.

107
INTRODUCTION TO THE FOOD PROJECTThe volunteer coordinator or young people running the day will bring the group together in a circle to start the introduction. Staff members and young people share parts of the welcome:• Introduction to The Food Project• The game• Processing the game• Safety rules• A site orientation
Work with the volunteer coordinator, youth or other staff to choose a game that is appropriate to prepare the group for the work that needs to be done that day or addresses the character of the group (see GrowingTogether). For example, don’t play a physically rough, energetic game and then hope to move into extremely delicate weeding. It is important to process the game so that the volunteers are in the proper mental and physical state to begin the work that you have planned.
INTRODUCTION TO THE WORKYou are given one chance to set the tone for the day’s work. After a young person or staff member processes the game, you need to deliver a clear, inspiring message about what you hope to accomplish that day. Your motivation is the cornerstone for the volunteers’ ability to do work. Begin by giving the volun-teers a reference point for their presence on the urban lots. Con-nect them with the community and neighborhood where the lots are located. Share with them the history of the land and what has been done on the lots up to that point in the season.
Encouraging the volunteers to think about the growing season as a clock, and telling them at what point on the clock their work is occurring, can be helpful to orient people who are not familiar with the agricultural cycle. Connect them with the thousands of other volunteers who have stood on this site before them. Tell them what is possible for The Food Project if they, like these other volunteers, successfully complete their tasks for the day. Let them know why specific work needs to be done and who will eventually be served by their efforts. As you do with Summer Youth Program participants, connect volunteers to the meaning of their work.

108
Tell the group the tasks for the day in simple, direct language. If you use too much agricultural jargon you will lose the interest of the group quickly. After telling them the jobs that they will do, ask the group some questions about those jobs. For example, if you are turning compost, ask the group about what compost is and why it is necessary to turn it. What are the components of compost? How often does it need to be turned? How do we know when compost is “finished”? What do we do with it when it is finished? Don’t respond to their answers, but encour-age them to think about your questions as they work. Often, questions about the neighborhood, urban agriculture, environ-mental justice, or community food security are also good for stimulating thoughtful conversation among a group. Ask the volunteer coordinator or group leaders if the group has any-thing special they want to learn about the urban lots, and gear your questions towards this information.
Finally, give your group a goal for the day. Whether it is an ac-curacy goal (how well they wash harvested vegetables), a speed goal (how many beds they can prepare well in the time that they have), or another type of goal (for example, a site maintenance goal), volunteers respond to challenges.
You may have to answer questions from volunteers about why we do the work in a certain way. For example, one volunteer asked why we spread all the woodchips that fill our pathways by hand, and why that was an important goal for our urban agriculture. If this job was so important and needed to be done so quickly, why didn’t we just get a Bobcat and have them all spread in a few hours? We explained that on the urban lots, site maintenance work is important for several reasons. The first is that we are guests in our community, and our sites need to look beautiful as a service and a debt of gratitude to our neighbors. The second is that a great deal of the work that seems to be simply beautification work has an agricultural or social purpose as well. Spreading woodchips in the pathways not only makes our land look better, it keeps down weeds that flourished on the land when it was a vacant lot and could spread into our grow-ing beds if we allowed them to grow up in the pathways.

109
WHILE THE VOLUNTEERS WORKUse many of the same techniques to encourage and challenge volunteers on the urban lots that you use for the young people (see Summer Youth Program efficiency and motivational tech-niques). Here are some additional tips on successful manage-ment of volunteers at The Food Project:• Be mindful that for many of the volunteers, this will be their only visit to the urban lots. • Don’t leave the volunteer group alone at any time. Make sure that a Food Project staff person or a youth leader is with each group at all times.• Understand that the volunteer groups may not be in excel - lent physical condition. You work outside every day and are accustomed to the strenuous physical tasks on the urban lots. Even so, the first week of fieldwork in the spring is robably physically challenging for you since you haven’t been doing it all winter. It is the same for the volunteers. • When setting the agricultural goals for the volunteers at the start of the day, don’t be overly ambitious. Everyone likes to attain his or her goals. On the other hand, the goals need to be challenging enough- running out of work to do is a deflating experience for volunteers, and it leaves you scrambling for more work.
WRAP-UPAfter the work session is over, it is important to close the day with a wrap-up. Make sure that the leaders of the volunteer group know this in advance, so that they can prepare their group. If volunteer groups are not aware that we are going to do a closing circle, they may wander towards their vehicles, start to eat lunch or stand around aimlessly when the work is complete. The components for a successful closing are as fol-lows:• The volunteer coordinator, youth leader or other Food Project staff will bring the group back together after they have completely finished cleaning up. Remember that clean-up is a critical part of completing a volunteer day.• The group forms a circle where everyone can see and hear one another.• The volunteer coordinator facilitates a discussion based on

110
sharing the work that was done, and lessons learned during the work time. • You thank the group for their work and speak to them about how their efforts have contributed to the overall mission of The Food Project. Remind them of the questions you asked at the beginning of the work day, and ask them if anyone came up with answers during the course of their work. Use these answers as a way to connect the volunteers to the meaning of their work. Tell them exactly who will benefit from their hard work. For example, you could tell them where the harvest will go, or how the work will impact agriculture on the urban lots. This is the moment when the volunteers understand the relevance of their work to our goals for the season. • The volunteer coordinator tells people about ways to stay involved with The Food Project, shares our publications and communications materials, and invites them to come back.
Neighborhood School GroupsThe Dudley Square neighborhood is full of children of all ages. Nearly every day after school, and often on Saturdays, several of them make their way over to the urban lots to “go to work.” The Food Project’s School Partnerships Program provides an op-portunity for children in local elementary schools to work and learn on the urban lots during the spring and fall. In the winter, they carry on their learning inside the classroom with lessons on hunger and homelessness, plants and seeds, and even soil. Con-necting with The Food Project is a powerful experience for many of our young neighbors, nearly all of whom are familiar with the sight of the urban food lots, the cargo van loaded with produce or tools, the farmers’ market, and the diverse groups of youth in Food Project T-shirts who walk through the neighborhood. Building relationships with them provides The Food Project with a link to our neighborhood that is unlike any other.
Your role in the School Partnerships Program is a great opportu-nity to “sow seeds” in the minds of the city’s youngest children, some of whom will later become participants in our Summer Youth Program and Academic Year Program. Hopefully, in a few years, one of the children who gently tug at carrots and turn

111
over bean leaves looking for beetles on the urban lots will grow up to become a new urban grower for The Food Project.
HISTORYFor years, The Food Project has recognized a need to expand the work that we do to include children who are not old enough to participate in our Summer Youth Program.
In 2001, the first year that the program was piloted, two neigh-borhood elementary schools visited the Langdon Street lot once a week during the spring and fall. One plot in the neighbor garden section was divided in half and designated for the two schools. Each school brought two classes to Langdon Street for 45 minutes apiece. This allowed the groups enough time to do a mini-lesson under the shelter, complete a simple work task in their own plot or the lot as a whole, and sample whatever crops were ready for harvest that week.
RELATIONSHIP WITH SCHOOL PARTNERSHIP PROGRAM COORDINATORAs is the case with the Volunteer Program, the success of the School Partnerships Program depends on your relationship with the program coordinator. It can be challenging for a grower to have sixty third grade children running, jumping, and learning but again, careful preparation, an enthusiastic approach, and exceptional communication will make “School Partnerships day” a time of the week that you look forward to with gusto instead of dread.
During the winter, meet with the School Partnerships Program coordinator to plan the spring and fall semesters for the follow-ing season. At the first meeting, go over the list of topics that he or she has prepared, and be ready to offer suggestions about ways in which each topic might lend itself to work on or other interaction with the land. Be flexible! Maintaining an open mind about the activities that children might be able to engage in on the land will help you and the program coordinator find common ground. If you are both committed to making the urban lots a place of learning for children, while maintaining the integrity of the crops that are planted there, you will have
Andy, a bilingual seven-year-old, wears his
Food Project t-shirt when he arrives at the lots
to work. He has transplanted lettuce, worked
with volunteers preparing beds, struggled
with wheelbarrows full of compost and wood-
chips, and carefully covered rows of pelleted
carrot seed. His gentle skill and thoughtful-
ness when he is on the urban lots are an influ-
ence on everyone, even the older Food Project
youth with whom he works.

112
a strong base on which to build your communication about the program. Communicate your availability to help guide school group visits to the program coordinator so that he or she can include you in the curriculum planning. For example, you may be too busy with planting or bed preparation on certain weeks during the spring, but you may want to make time to work with the school groups on other days. Keep in mind that your input is an important part of the School Partnerships Program, both during the planning stages and when the children are actually on the lots. As always, check in with your supervisor about your plans.
Schedule a second meeting with the school partnerships pro-gram coordinator to look over the curriculum for the spring once it is prepared (you may need to meet again before the fall semester). Note any special preparations that you need to make for each class, as well as the dates and times of any groups you’ll be helping guide. Work with the coordinator to come up with a list of guidelines for groups on the urban lots. Most of these will probably be self-evident from volunteer days and the Summer Youth Program, but it will help your communication with the coordinator to reiterate them with specific consider-ation for young children.
Finally, check in each week while the program is running, either at weekly meetings or by telephone or email. Go over plans for the upcoming week, and make sure you both know who is responsible for any preparations that need to be made, tools that are necessary to complete work tasks, and educational materials that should be on-site. Communicate one final time about the details of any work that the school groups are going to do on the urban lots, and make sure that the program coordinator checks in with you about their progress after the day is over.
Neighborhood GardenersA challenging aspect of growing food in the city is the lack of ac-cess to clean, safe, fertile land. In our neighborhood, the amount of people who grow food for their families and neighbors is tremendous. Their knowledge and expertise can be a great resource for us, and at the same time, they are often inspired by

113
seeing young people at The Food Project who share their pas-sion for land and food. As a result, we have shared our land in the city with gardeners from our neighborhood since we first be-gan growing in the city in 1996. Through their presence on the land at times when we cannot be there, neighbor gardeners help maintain the security of the lots and minimize theft of produce. Their gardens demonstrate planting techniques and vegetable varieties that provoke discussions with young people and volunteers. Neighbor gardeners have become teachers, com-munity supporters, and friends to The Food Project during our time in the city. In your role as urban grower, you will interact on a regular basis with neighbor gardeners during the growing season. The following section will give you some insight into the way we have managed their presence on our land in the past.
HistoryWhen The Food Project first began considering growing on the Langdon Street lot, grower Martha Boyd and representatives of DSNI convened a meeting of local gardeners to discuss The Food Project’s plans. Clarimundo Silva and his father-in-law, Jose Gomes, who live directly across Langdon Street from the lot, were some of the first at the meeting and the last to leave. Jose had grown food each year in Cape Verde, where the family was from, and he and Clarimundo were excited to hear that the half-acre lot across the street was to be turned into an agricul-tural space.
They were joined on the lot by other neighbor gardeners, and finally the group of about five growers was given a permanent home in one corner of the lot. There, neighborhood garden beds could be watered by Food Project staff or by hose from Clarimundo’s house whenever Jose thought that the soil looked dry. From the beginning, Martha encouraged neighbor garden-ers who were growing on the Langdon Street lot to use organic methods, and most were happy to comply. The relationship between The Food Project and the neighbor gardeners at the Langdon Street lot was so good that it was obvious that when the West Cottage Street lot was ready to be planted that The Food Project would offer some of the land there to neighborhood growers. Honario Correia, a local gar-

114
dener who already planted a large garden behind his own house, was one of the first to express interest. He and his large family quickly took on responsibility for many of the available neighbor garden plots. Interest in the plots was so high that Food Project staff had to create a waiting list for gardeners who wanted space to grow food on the West Cottage Street lot.
Growers on the Langdon Street and West Cottage Street lots have included individuals, families, neighborhood organiza-tions, and children’s groups. While the composition of garden-ers has changed somewhat over the history of the lots, most gardeners return each year to their own plots.
RecruitmentRecruiting enough neighbor gardeners to fill the available space at each lot has never been difficult. It has been more challeng-ing not to over-recruit, raising the expectations of people in the neighborhood only to have to tell them later that the plots are full. Following a few simple steps each year will help ensure that the plots are full while minimizing the number of people who have to be on our waiting list for another year.
In March or April, prepare a recruitment letter for neighbor gar-deners with an agreement for the upcoming season (see Attach-ment 11: Neighbor Gardener Recruitment Letter, and Attach-ment 12: Neighbor Garden Acceptance). Leave yourself suffi-cient time to have the letter translated into Cape Verdean Creole as well as any other languages you feel are important based on the list of neighbor gardeners from the previous season. Mail the letter to the gardeners who worked on the land last season first (assuming they all adhered to the agreement and gardening standards), and give them ample opportunity to reply before you include others in your outreach efforts.
In the past, one gardener on each lot has been willing to take on the role of an informal “coordinator” who speaks Creole and makes follow-up telephone calls or visits. If you do not speak Creole, it is a good idea either to create this type of relationship with the gardeners or to ask another Food Project staff member or youth who does speak Creole to call or visit with you. Verbal
Attachment 11Attachment 12

115
communication, preferably face-to-face, is the most effective way of making sure that you are making contact with the neigh-bors. When you visit, bring along extra copies of the recruit-ment letter and agreement to make sure that the neighbors see them and recognize that they come from you; many people discard mail with return addresses that they do not recognize.
When you speak with neighbors, ask them if they are interested in returning for the upcoming season, if they would like to keep the same plot or move to another one (remind them that this will also require the agreement of the person that was garden-ing in that plot) and go over the agreements and standards for gardening on Food Project lots (see below). This is a lengthy process, but it is worth carrying out in terms of the relationships that you’ll build with individual gardeners, the assurance that you will have that gardeners understand their role on the lots, and the fact that you will avoid assigning the plot to one person only to have another show up in May and begin gardening on it.
After contacting all the gardeners from the past season, make a map of the neighbor garden plots with the names of gardeners on their individual spaces. If you have remaining space, contact names on the waiting list or do a selected mailing to neighbors on the streets close to the lots. In general, recruiting neighbor gardeners who live very close to the lots is most effective both for The Food Project and the gardeners. Growers from the im-mediate neighborhood do not have very far to go to get to their plot, and are more likely to spend more time in the garden in the evenings and on weekends when Food Project staff are not able to have as active a presence there. Particularly because many neighbor gardeners are older people, proximity is a definite enticement when considering a garden plot. While you do not necessarily have to turn away potential neighbor gardeners who do not live within sight of the lots, this criterion can be a good cut off point if you have too many applicants for the available space.
When you have filled the available space with interested gar-deners, begin a waiting list with names and telephone numbers of additional growers. Make sure to mail a letter in the appro-

116
priate language to everyone on the waiting list, as well as those who do not fit the criteria for our neighbor gardeners.
Agreements and StandardsAs is the case with most community gardens, The Food Project asks neighbor gardeners to adhere to a set of standards while growing on our urban lots (see Attachment 14: Neighbor Gar-dener Plot Agreement). In return, we offer land and inclusion in our watering cycle free of charge to our neighbors. The four most important standards revolve around planting dates and methods:• Plots must be prepared and planted by June 1. Otherwise, it is difficult to get a decent crop out of the land, and weeds have the opportunity to take over. In Cape Verde, severe droughts are common, preventing crops from germinating or killing them at a young stage. In extreme cases, the islands may receive little or no rain for more than a year. As a result, many of our neighbors are reluctant to plant during a dry spell despite our irrigation. • Plots must be well-maintained and kept reasonably free of weeds. Weeds that grow and go to seed in one neighbor’s plot can easily spread to other plots and Food Project fields. Gentle reminder calls to neighbors about the state of their plots are acceptable, particularly when put in a context of how our youth might be able to help the gardener keep his or her plot free of weeds.• Plots must be gardened organically, without the use of chemical pesticides or fertilizers. This is a difficult standard to enforce, since we cannot be present every minute to make sure that neighbor gardeners don’t add a bit of Miracle-Gro to their tomatoes in the evenings. As a result, in the past, we have chosen to enforce the positive – rather than the negat - ive – aspects of this standard. Food Project staff and youth can encourage organic practices through conversations with gardeners, providing plenty of compost in the spring, and making organic pesticides and fertilizers available as needed. • Plots must be cleaned up at the end of the season, preferably by December 1. Many neighbor gardeners from our com- munity choose to leave crop residues in the garden during the winter. Encourage neighbor gardeners to clear their
Attachment 14

117
plots at the end of the season (one exception might be collard greens, which some gardeners like to harvest all winter long) and put crop residues in the compost bin. Offer to mulch their plots with straw to help prevent erosion during the winter months when the soil is bare. Encourage the use of cover crops, if possible.
Enforcing the neighbor gardener standards and agreements is an art, not a science. You should never feel like you need to “police” our neighbor gardeners’ plots. Most of them are knowledgeable growers with years of experience and a marked interest in organic methods (especially when they’re free!). Use your relationships with garden leaders like Honario Correia and Clarimundo Silva to put gentle pressure on gardeners to main-tain their plots. Ask these garden leaders to help you organize spring and fall cleanups where neighbor gardeners can share knowledge and get organic growing tips (a free meal is always beneficial to encouraging gardeners to attend). Make sure to ask gardeners if there is any way that you and Food Project youth can be helpful, particularly if they are older. Often a little help with bed preparation, weeding or fall clean-up can go a long way towards helping a neighbor gardener maintain his or her plot.
Learning OpportunitiesMany of the neighborhood growers who garden on the Lang-don Street and West Cottage Street lots have years of experience growing vegetables and fruits, both in Boston and in their native states or countries. By paying close attention to their practices, as well as the varieties that they grow, you can use their plots as important teaching tools when working with Food Project youth or volunteers.
Companion planting is a common practice among many of our neighbor gardeners. Growing beans, corn and squash together in a small area is a traditional Native American planting method that is also practiced by many of our Cape Verdean neighbors. Combining the corn-beans-squash grouping in a small plot with tomatoes, collards, carrots and herbs creates a lush, symbiotic mini-ecosystem that is rarely affected by insect pests or diseases.

118
Introducing this concept as you teach about crop rotations and the beneficial effects of cover crops will give youth and volun-teers insight into ways of growing that might work better in the small scale of their own gardens, and help to demonstrate important principles of organic pest and disease prevention.
Many neighbor gardeners grow herbs in their plots. Rue is a commonly grown herb that is found in nearly every front yard in our neighborhood. Parsley and other herbs are also wide-spread. Talking with neighbors about the way they use herbs can be a powerful connection for young people to older tradi-tions of food and medicine. Walking through plots and compar-ing the varieties that neighbors use to those that we plant on the urban lots can also be a great mini-lesson for youth, volunteers or neighborhood school children.
If you can, encourage gardeners to visit when youth are present and talk about some of their crops and planting methods. Many of the neighbor gardeners who work with us on our land, as well as some who simply grow in their yards nearby, are excited to share their gardening knowledge with young people. They are enthusiastic, sincere teachers and provide a powerful coun-terpoint to your own “end of the row” agricultural education.

119

120
Urban Education and Outreach• NeighborhoodExtensionWork• RelationshipsWithNeighborhoodGardeners• OpeningNeighborhoodGardens• SoilTestingAndInformation• CompostDemonstrationDay• UrbanAgricultureDemonstrationSites• Pest&DiseaseManagementwithNeighborhood Gardeners• ClosingNeighborhoodGardens
The Food Project has always been an organization that operates in the context of our communities. Because part of our mission is to build bridges between the suburbs of Boston and its inner-city neighborhoods, we have two offices that allow our staff and resources to be fully available to each community. We have implemented an organizational structure that functions in both locations, and hired a diverse staff that reflects the multiplicity of the neighborhoods in which we work. We recognize that our continued ability to carry out The Food Project’s vision and mis-sion in both of our communities is dependent on the support of our neighbors. These factors have led to The Food Project under-taking outreach and education projects throughout its ten-year history that respond to some of the needs of our neighbors.
In the city, the combination of need on the part of our neigh-bors and the knowledge, skill, and desire to help on the part of our youth has caused education and outreach to develop into a formal program. In the past five years, The Food Project has received grants from several government agencies to pursue ag-ricultural and environmental justice work with individuals and groups in the Dudley Square community. As the urban grower, your knowledge and expertise are at the heart of the urban outreach program. Working with other Food Project staff, youth from The Food Project’s programs, and neighborhood growers from many backgrounds, you will help shape the direction and content of the program to ensure that it is truly a reflection of both our community’s needs and the vision and mission of The Food Project.
Sylvia setting out the vegetables she sells at the farmers’ market.

121
Neighborhood Extension WorkYou are carrying forward a tradition of urban education that was begun by The Food Project’s first urban grower, Mar-tha Boyd, and the first urban education coordinator, Colleen O’Brien. Because urban education is a multifaceted undertak-ing, various Food Project staff members take on roles that are suited to their knowledge and expertise. It is important for ev-eryone involved in urban education to communicate the goals, challenges, and needs of their particular projects at regular urban staff team meetings.
Most of our urban education work is centered on building rela-tionships with individuals and organizations in the community. Excellent communication ensures that there is one staff member who is primarily responsible for each of these relationships, so that multiple staff members do not call the same gardener or organization. Ongoing communication also helps make sure that everyone in urban education gets the help they need from other staff, particularly at busy times of the season. At certain times (like the annual Compost Demonstration Day), the coordi-nated efforts of all staff who are working on urban education are needed to ensure the success of a big event. Your role in urban education will be primarily as an “organic farming extension agent” for neighborhood gardeners. Your relationships will range from casual conversation with an inter-ested passerby to ongoing involvement with a local gardener who is interested in selling at the farmers’ market. You will field questions from many neighborhood gardeners about soil fertili-ty management and pest and disease control. You may be asked to give workshops or hands-on demonstrations that explain the techniques that we use at The Food Project, or to be a techni-cal advisor to neighborhood groups who want to start gardens. You will definitely be involved in testing soil for neighborhood gardeners, and helping them interpret the results of these tests.
In all of this work, you will be engaged with a community of growers with intense vitality, an warm sense of humor, and – in many cases – years of agricultural experience. Many of the individuals with whom you work will be older people, with tremendous knowledge but restricted physical capacity. Quite

122
a few will have a limited command of English. Your success in the urban education component of your job will depend on your ability to draw upon the resources and relationships that you develop to provide these individuals and community groups with the agricultural help that they need. Relationships with Neighborhood GardenersDuring the course of your time with The Food Project, you will build relationships with individuals and groups in the neighbor-hood who are growing vegetables, either for themselves and their families and neighbors or for enterprise purposes. Always, always, check in with your supervisor when determining the level of your involvement with these gardeners. Many of these growers use traditional methods from their countries of origin to coax a rich bounty from soil that seems barren and forbidding without its covering of verdant crops. Many of them, unfortu-nately, produce this harvest on soil that is contaminated with lead. Others use chemical pesticides and fertilizers – some of which are inappropriate – simply because of a lack of informa-tion about where and how to access alternative products. You will engage with these growers at several levels, depending on their interest in a long-term relationship with The Food Project, as follows:
• One-time visits. You may receive a call or visit from a gardener asking you to come identify a weed, pest problem or unfamiliar plant. You may be asked to perform a soil test and help the gardener interpret the results. Often, these visits take no more than a few minutes, and while they may seem like a burden at the busiest times of the season, they can be a valuable way of making connections with neigh- bors and community growers. If you can, involve youth in these visits (perhaps as a translator), and make sure that the gardeners know that you are representing The Food Project when you arrive. Bring flyers and brochures with you so that the gardeners can become familiar with the range of services that The Food Project offers.• Technical assistance. Providing technical assistance is a deeper level of interaction with a neighbor gardener or garden group and requires the permission of your supervi-

123
sor. Examples are attending community meetings to help a group design a new garden, working with an indi- vidual or group to brainstorm ideas for remediating con- taminated soil (and then, in many cases, connecting them with the necessary resources to carry out their plan), giving a workshop, or providing a one-time group of young people or volunteers to help clean up a vacant lot to prepare it for being worked, or to do some maintenance work on an existing garden.
When you enter into a technical assistance relationship, be clear about the duration and boundaries of the help that you can provide. Make sure that the individual or group that you are assisting knows if the work you are doing is one- time only or extends over a period of several weeks. If they are interested, let them know more about the assistance we can provide if they commit to an ongoing relationship with The Food Project.
• Ongoing relationships. Long-term relationships require a degree of commitment on the part of the individual gar- dener or group to work with The Food Project in some way, whether by selling as a partner with us at the farm- ers’ market, providing an ongoing learning site for youth interns who are interested in urban outreach and educa- tion, or agreeing to participate in a series of workshops. Individuals or groups with whom we enter into ongoing relationships (for a full season or longer) may also agree to provide us with additional land to grow food on in ex- change for help with their own agricultural projects.
As with any relationship, these long-term interactions with our neighbors should be carefully cultivated and treated with great respect. Connect with these neighbors as often as you can to make sure you know their needs throughout the season. Tradi-tionally, neighbors who undertake long-term relationships with our organization need help with opening their gardens in spring and shutting them down in the fall. Often, they ask for extra seedlings or compost if any is available. Ask them if they are interested in having their garden soil tested on a regular basis
Honario Correia translates for us on many oc-casions, and also serves as an informal garden
coordinator for the neighbor gardeners who work on our West Cottage Street site. Laura Gibao,aneighborwholivesseveralstreets
overfromouroffice,agreedtoallowTheFoodProject to grow on a vacant lot that she owns next door to her own house in exchange with help in her garden, which she can no longer
manage alone.

124
and developing an ongoing plan with you for maintaining the fertility of their soil. They may also be interested in receiving regular assistance with organic pest and disease control from the urban outreach interns, a group of youth who work on urban education projects during the Summer Youth Program. Or, they may simply call on you when they have an unusual outbreak of a pest or disease that they don’t know how to control.
Make sure that any gardener with whom you enter into a long-term relationship is aware of the commitment that they are mak-ing in order to receive the services we provide. For example, if gardeners are interested in selling at the farmers’ market with us, they must make a commitment to growing organically for the season. The Food Project can offer resources that will make this transition successful, and gardeners need to be willing to do their part to ensure the success of the relationship.
As with everything we do at The Food Project, our relationships with neighbor gardeners are more successful if they include young people from The Food Project. Your experience will be enriched by the opportunity to mentor a young person in devel-oping neighborhood relationships, while the young people and the gardeners will have the opportunity to enjoy one another’s company and knowledge. Multilingual young people can also be valuable resources for translation if the gardeners have a limited command of English.
Make sure, however, that you have time and energy to ad-equately tend each connection that you make with a neighbor-hood group or individual. Meet with your supervisor so that you don’t take on more than you can handle. Be honest with yourself and others about the time and resources that you have available, particularly during the busy spring and summer months. If you are overextended in the community, you will not be able to give the appropriate attention to the Summer Youth Program, your agricultural intern(s), or your own crops.
Opening Neighborhood GardensEvery spring, individuals and garden groups in the neighbor-hood will ask you for help preparing their gardens for planting. These requests will come at one of the busiest times of the year
Community participation is a key part to mak-ing any project work. Without the support of neighbors, the Food Lot would not have had
such a succesful and positive result.
Caitlin, Summer Youth Program participant

125
for you, when you are working overtime to get your own beds prepared, your season extension in place, and your seeds and seedlings in the ground according to your planting schedule. If you can, contact individuals for whom we have done garden preparation in the past early in the season. Check in with them to make sure that they would like their gardens prepared again this year, and then build that work into your schedule of tasks for volunteer groups and the DIRT crew.
A group of ten or fifteen volunteers and DIRT crew members can usually open up a large individual garden in one morning’s work. Opening a garden usually involves three steps: 1. Clearing any straw or crops from last year that are left on the lot and putting them in a compost pile, either on the site or, if we have room, in our compost piles; 2. Turning over the soil, using pitchforks, the broadfork, or the rototiller, and spreading and incorporating any compost on the site; and 3. Constructing beds if the garden owner wants them.
Be sure to confirm the day and time that the group will come with the garden owner, and encourage the gardener to be pres-ent to help direct and work with the group.
Make sure that the parameters of the work that needs to be completed on neighbor gardens are clear to the person who is leading the work on that site, whether it is a DIRT crew member, an urban agricultural intern, or another staff member. If the vol-unteer group is not able to complete the work, you will need to do it, so try to allocate adequate person-power to complete the necessary work in the allotted time. Check in with the garden owner at the end of the day to make sure that their expectations have been met.
Soil Testing and InformationAnother urban outreach and education task that The Food Project is often asked to take on is the testing of soil in neighbor-hood gardens, both to identify existing problems with soil fertil-ity or nutrient deficiencies and to determine the levels of lead present in the soil. This type of testing is technically a tricky legal situation for the people who own the land – as well as for

126
whoever does the testing. Massachusetts state law requires that a property owner who has the soil tested must clean up the soil if the tests indicate severe contamination. That process is often exorbitantly expensive for homeowners in our neighborhood. While we recognize the dangers of lead contamination in soil and vegetables, we are also aware of the fact that many families depend on the vegetables that they grow at home to provide them with adequate nutrition throughout the season. We try to provide people with soil remediation alternatives that do not require them to take all of their land out of production for the entire season, and are within the budgets of families in our neighborhood.
When testing soil in neighborhood gardens, bring along a clip-board, pen, plastic bags, and a trowel. First, measure the garden (use your feet to pace it out if necessary) and make a simple map on your clipboard. Draw a grid on the map to break the garden into smaller squares, and number the squares. This way, you have a reference that will allow you to retrieve the location of samples if one or more are found to have fertility problems or high levels of lead. Lead can often collect in “hot spots” that are found near the borders of an old foundation or in the cur-rent or former dripline of a roof. If you can locate these “hot spots” through your testing, you may be able to help gardeners come up with alternative planting plans for these areas (flowers, raised beds, and so on) that allow them to continue growing on areas where lead levels are lower.
Follow the directions for soil sampling in the University of Mas-sachusetts soil testing brochure (see Attachment 15: Soil Testing). Mail the samples to the University of Massachusetts soil testing lab. If you are sending soil samples from more than one garden, make sure that each plastic bag is clearly marked, and make sure to keep a record of the notation you used to keep track of the gardens. When the results come back, you will also receive a sheet from the University of Massachusetts with recommenda-tions on how to work with soil that is contaminated with lead at various levels. If necessary, translate that sheet into Cape Ver-dean Creole or return to the neighbors with someone who can translate it for them. When you discuss options for soil fertility
Giving a tour of the West Cottage lot.
Attachment 15

127
management or remediation with neighbor gardeners, make sure that you are clear about whether The Food Project will do the necessary work, or whether you are simply giving the neigh-bors options of work that they will need to do themselves.
Compost Demonstration DayEach May, The Food Project sponsors an event for the neighbor-hood that is partly a spring festival, partly an opportunity to learn about The Food Project, and partly a compost giveaway. This event, which usually takes place on the West Cottage Street lot, has been traditionally been organized by urban education and outreach staff. (See Attachment 16: Compost Demonstra-tion Day flyer). Your role in the day can be discussed with both your supervisor and with the urban team during the initial plan-ning stages.
As the urban grower, you should be on hand during the Dem-onstration Day to answer questions about The Food Project’s urban agriculture, help guide visitors, and assist other urban education staff in making sure the event runs smoothly. Check with the person responsible for coordinating the Demonstration Day during the winter to see if they will need you to grow extra seedlings for the event so that you can incorporate these in your seed order and planting schedule if necessary. Get involved in ordering the compost and arranging for its delivery, as well as helping to coordinate its distribution at the Demonstration Day. In the past, The Food Project has either purchased between 30 and 60 cubic yards of compost from one of the local companies or requested it from the City of Boston. There is usually a tre-mendous demand for compost at the Demonstration Day. You may need to work with other urban education staff to set limits on the amount of compost that one individual can take away, since many neighbors arrive with pickup trucks in anticipation of filling them with compost, sometimes several times over.
While it is a good idea to encourage neighbors to bring their own containers for compost, keep heavy-duty trash bags on hand, since some neighbors may come without containers. Members of the DIRT crew should be available to help neigh-bors shovel compost into bags, wheelbarrows and trucks. In the
In 2001, it was planned very successfully by
Carla Campbell, a fifteen-year-old urban edu-
cation intern planned a very successful Com-
post Demonstration Day. The day includes a
barbecue lunch that costs a minimal amount
for people from the neighborhood, a seedling
sale, sale of The Food Project’s publications
and other products, and youth-led workshops
or tours in which visitors can participate in
order to take home free compost at the end of
the day.
Attachment 16

128
past, neighbors who lived within a certain radius of the West Cottage Street lot could request that members of the DIRT crew help them transport compost to their gardens. DIRT crew mem-bers and other Food Project youth should always travel in pairs to the homes of neighbors.
If you are counting on having some of the compost left over for use on the West Cottage Street lot, keep a close eye on the pile as it dwindles. Try to spread the remaining compost as quickly as possible after the Demonstration Day is over, since neighbors occasionally return on the weekends or in the evenings to refill their trucks or bags.
Urban Agriculture Demonstration SitesThe Food Project considers all three of our urban food lots dem-onstration sites for urban agriculture. Sturdy cards and their stands are kept in the Farmers’ Market shed at the West Cottage Street lot and are intended to be either self-guided or led by trained youth for a more complete introduction (see Attachment 18: Urban Tour). The Urban Outreach Program Coordinator is in charge of this presentation but may require your assistance dur-ing certain special times of the year.
From time to time, you or the youth who work with you may be asked to give visitors tours of the food lots. Familiarizing yourself with the West Cottage Street tour will provide you with a good general overview of the information most visitors want to learn about the lots. Train the urban agricultural intern(s) and other urban education staff into the tour as well. Make sure that other urban education staff members who might be giving tours of the food lots know about any special experiments or proj-ects that you might have going on at the lots (season extension, new varieties, companion or succession planting, and so on). Take the time during urban staff meetings to educate the staff working in the city office about the basic techniques and prac-tices that you use on the lots so that any one of them can give an informed tour for guests if necessary. Keep them updated throughout the season on major changes or new projects on the lots so that they will not be surprised when they arrive to give a tour.
Attachment 18

129
Remember, an important goal of The Food Project’s urban agriculture is to provide a functioning example of high-quality, sustainable urban agriculture for others who might be consid-ering a similar undertaking, whether they are neighbors from the community or guests from peer organizations in another city. Providing tours and interpretation of The Food Project’s sites is a critical part of the dissemination of our work to others. Make sure that your work on the lots is done in a way that can be explained easily to visitors, whether they have a great deal of agricultural knowledge or none at all. Be prepared to share your goals, methods and expectations with many interested people, using language that is free of agricultural jargon and accessible to anyone who is interested. Your role as an innova-tor and educator can make a difference in the lives of those who visit the food lots. Welcome them and the opportunity to share your experience as an urban grower!
Pest & Disease Management with Neighborhood GardenersPest and disease management is one of the biggest challenges to neighborhood gardeners who are interested in growing organi-cally. Low soil fertility on many neighborhood garden sites means that vegetable crops are more susceptible to attack by pests and diseases. In addition, some agricultural traditions from gardeners’ home countries can pose challenges to suc-cessful organic growing here. In Cape Verde, for example, the winters are warm enough to decompose vegetable wastes that are left in the ground. Few pests are able to overwinter in crop debris in the soil. In Massachusetts, on the other hand, leav-ing crops in the ground for the winter, then planting the same crops in the same place the following season is a recipe for pest disaster.
Many gardeners in our community, like growers around the world, were accustomed to growing fruits and vegetables in their countries of origin without the use of chemical pesticides or fertilizers. These inputs were often unavailable or too expen-sive to be worth using. Gardeners in our community are often very familiar with the use of organic fertilizers, such as animal

130
manure and vegetable waste, which were widely available to them at little or no cost. In urban areas in the United States, however, it is difficult to come by the resources that were so eas-ily found in other parts of the world, and many growers turn to chemicals to make up for the low soil fertility on their land and the lack of traditional inputs.
Growers often hear about fertilizers or pesticides by word of mouth from other gardeners in the neighborhood. If one grower uses Miracle-Gro, for example, others will learn about “that blue stuff” from their neighbor. They may even get small plastic bags of the product from the original user, and put it on their own plants without ever knowing its name or intended use. Too often, gardeners go to stores like Home Depot, look through the gardening section, and take home a bottle of pesticide because it has a bug on the label. Because instructions for use of these products are not written in the languages spoken by many of the gardeners in our community, growers may not be aware of the need to dilute chemical pesticides, or even the specific use for which the product was intended. Teams of urban outreach and education interns worked closely with several neighborhood gardeners during the 1999 and 2000 seasons to help them manage their gardens more safely and sustainably. They encouraged the addition of compost to the gardens to promote soil fertility and decrease lead contamina-tion, leading to healthier plants that were better able to fend off attacks by pests and diseases. The benefits of compost are well-known to many gardeners in our neighborhood, and grow-ers’ enthusiasm for it was the impetus for starting the Demon-stration Day. The youth interns also visited the growers’ gar-dens on a weekly basis during the growing season to monitor plant growth, check for the presence of pests and diseases, and demonstrate organic techniques for combating insect or disease outbreaks if they arose.
As you develop long-term relationships with growers in the neighborhood, you will find that working closely with them to prevent and solve weed, pest, and disease problems is an impor-tant piece of your partnership. While you will be the primary

131
resource for these gardeners, other staff members and youth may also become involved with them at specific times of the season. Check in with the urban education team at the begin-ning of the season as they plan their tasks for the summer. Let them know about neighborhood growers with whom you have established ongoing relationships (introduce them if necessary) and inform them about past issues with soil fertility, lead con-tamination, or pest and disease problems in each garden. If it fits into their agenda for the summer, the urban education team will visit neighborhood gardens once a week throughout the season, but you will remain the most important and knowledge-able source for the youth and the gardeners about the issues that they are dealing with in their gardens. You will also be The Food Project’s long-term memory about neighborhood gardeners, so be sure to document the work that you do with them.
Closing Neighborhood GardensAt the end of the season, some of the gardeners with whom we have ongoing relationships ask us for help closing down their gardens for the winter. As is the case with opening gardens in the spring, these jobs are usually perfect for a volunteer group. Closing down the lots in the fall is generally a two to three week process. As you plan tasks for the volunteer groups that will close your lots, check in with gardeners with whom you have been cultivating relationships to see if they need help closing their gardens down. If they do, give them a tentative date and time that the volunteers will arrive and make sure that you confirm it with them. Make sure that the gardener can greet the volunteer group and show them the area to be worked; if they cannot, walk the land with the gardener so that you can easily explain the tasks that need to be done to a volunteer crew leader. Closing a neighborhood garden for the winter usually involves three steps, as follows:
1. Pulling out all remaining crop plants and weeds. Check with the garden owner to see if there are any plants that they want to leave for the winter, since some growers like to continue harvesting collard greens through the holidays. Also be sure that the crew that will be working on the site is aware of any perennial plants that should be left in the ground.

132
2. Build a neatly layered compost pile or windrow with the crops that you pull out. Chop corn stalks and other dry plant material – which is rich in carbon – into small pieces and layer it with green or moist material – which is rich in nitrogen. Try to leave as much of the crop debris as you can in a compost pile in the garden itself, as that way it will help promote soil fertility while minimizing effort (that is, trans- portation of plant materials from the site in the fall, trans- portation of finished compost back to the site in the spring) and maximizing sustainability. If there is no room for a compost pile in the garden, bring the compost back to one of the bins on The Food Project’s land. If the owner of the garden has finished compost, or if The Food Project has extra, fall is a good time to spread and incorporate compost to provide additional fertility for the coming season.3. Spread straw or other mulch on the bare land if the gardener requests it. Mulching gardens helps make up for the fact that we remove the plant materials that growers in our neighborhood traditionally leave in the ground for the winter. These old crop plants and weeds help hold the topsoil and keep it from being eroded by wind or water – but they also act as a reservoir for next year’s pests and diseases. Covering the exposed soil with a layer of clean straw helps prevent erosion without harboring the same level of pests and diseases.
Closing a neighborhood garden generally requires a crew of between five and fifteen people, depending in the size of the garden and how much work needs to be done. Once again, be sure to check in with the garden owner at the end of the work day to make sure that their expectations were met.

133
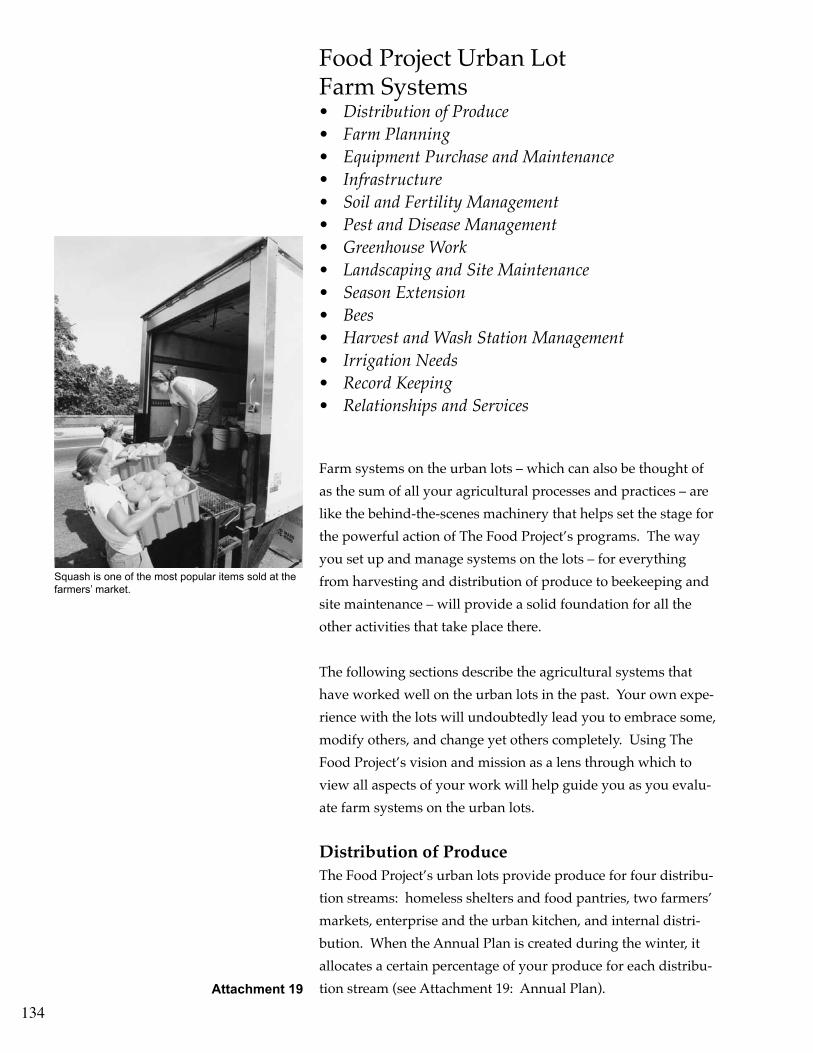
134
Food Project Urban Lot Farm Systems• DistributionofProduce• FarmPlanning• EquipmentPurchaseandMaintenance• Infrastructure• SoilandFertilityManagement• PestandDiseaseManagement• GreenhouseWork• LandscapingandSiteMaintenance• SeasonExtension• Bees• HarvestandWashStationManagement• IrrigationNeeds• RecordKeeping• RelationshipsandServices
Farm systems on the urban lots – which can also be thought of as the sum of all your agricultural processes and practices – are like the behind-the-scenes machinery that helps set the stage for the powerful action of The Food Project’s programs. The way you set up and manage systems on the lots – for everything from harvesting and distribution of produce to beekeeping and site maintenance – will provide a solid foundation for all the other activities that take place there.
The following sections describe the agricultural systems that have worked well on the urban lots in the past. Your own expe-rience with the lots will undoubtedly lead you to embrace some, modify others, and change yet others completely. Using The Food Project’s vision and mission as a lens through which to view all aspects of your work will help guide you as you evalu-ate farm systems on the urban lots.
Distribution of ProduceThe Food Project’s urban lots provide produce for four distribu-tion streams: homeless shelters and food pantries, two farmers’ markets, enterprise and the urban kitchen, and internal distri-bution. When the Annual Plan is created during the winter, it allocates a certain percentage of your produce for each distribu-tion stream (see Attachment 19: Annual Plan).
Squash is one of the most popular items sold at the farmers’ market.
Attachment 19

135
Each distribution stream represents a different aspect of The Food Project’s mission and vision: shelters represent the orga-nization’s commitment to a tradition of service to others; farm-ers’ markets provide an example of local economies and have a direct impact on food security in a low-income neighborhood; enterprise and the urban kitchen contribute to our financial sus-tainability; and internal distribution, whether used for Commu-nity Lunches or for staff and youth consumption, allows others in our community to share in the bounty of our farm and urban food lots.
Produce distribution is also one of the most complex decisions that The Food Project makes as an organization, since each distribution stream could undoubtedly use more produce than we are able to supply. Shelters, for example, can always use additional produce, and the farmers’ markets sell out of al-most everything on their busiest days in September. Deciding which distribution streams have priority sometimes depends on individual crops. For example, you will plan the urban lots so that certain crops are designated for the farmers’ market, while others are earmarked for enterprise.
What happens when the first strawberries ripen? Do they go to market, or are they used to make a dessert for our enterprise customers? Should the last tomatoes of the season be canned in the kitchen of a shelter or sent to the market for sale to our customers? These questions show why the conversations that happen among the whole staff during the winter, centering on our commitment to the groups that our produce serves, are criti-cal to your work throughout the season. These conversations, and the percentages that they lead to in the Annual Plan, will help guide you when the distribution streams are competing with one another for the produce from the urban lots.
You will also find that, while the overall percentages of produce sent to each distribution stream remains constant, the percent-age in any given week may fluctuate depending on the time of year and the varying demands of each stream. For example, you may decide with the grower in Lincoln that the urban lots will supply all the produce for the market during its first month,
Preparing both the produce and the young people for a busy market.

136
at a time when the farm in Lincoln is directing most of its pro-duction towards the Community Supported Agriculture (CSA) program. During the peak weeks of midsummer, when youth in Lincoln are harvesting tomatoes, green beans and peppers by the truckload, you may decide to divert most of your pro-duction to enterprise. You may grow mesclun mix exclusively for enterprise, or focus on producing herbs and flowers for an upscale market. Even within the parameters defined by the An-nual Plan, you have freedom to work creatively with other staff members to serve each distribution stream most effectively.
SheltersDonating produce to shelters is at the heart of The Food Project’s commitment to service. When youth work in shelters during the Summer and Academic Year Programs, preparing their own produce and serving it to people in need, they become an inte-gral part of a cycle of service to others.
HISTORY OF DONATIONS TO SHELTERSOver the history of The Food Project, the relationships that the organization has built with shelters have been more than those of a donor. The experience of preparing and serving our produce to others is a profound learning experience for youth involved in The Food Project. Over the years, therefore, the most powerful relationships that we have created have been essentially reciprocal – The Food Project grows, donates, pre-pares and serves our produce, and in exchange our community receives an education in service, a new context for our daily toil in the fields, and a connection with others with whom we might otherwise never come into contact.
When The Food Project first began, shelters received the bulk of the produce that we grew. As we became more skilled at pro-ducing food, and the demands of our farmers’ markets and CSA increased, shelters received a smaller percentage of our produce. Because production increased each year, however, even this reduced percentage translated into an increase in the number of pounds of food donated to shelters.
The grower in Lincoln consults with shelters on a yearly basis to find out what crops they use most, and grows certain crops spe-
Working at shelters is a weekly part of The Food Project’s youth programs.

137
cifically at their request. Providing shelters with produce that they can actually use reduces waste and heightens the impact that The Food Project has in this distribution stream. However, the urban lots are too small to designate areas of the land specifi-cally for shelters. As a result, the portion of your produce that goes to shelters will be primarily the vegetables that are left over after the conclusion of the farmers’ market. Historically, urban growers have donated to shelters and feeding programs that are close to their neighborhood.
Martha Boyd created a relationship with a pastor who lived on West Cottage Street and ran a Friday night soup delivery to homeless people in downtown Boston. This pastor was able to use the surplus from the Thursday night market for her programs. Community Servings, a minority-run kitchen that prepares meals for people living with AIDS, is located only a few blocks from our markets and makes delicious use of our produce – their five-green mix of collards, kale, mustards, and others, made with smoked turkey, is a prime example. Rosie’s Place, a shelter and service program for homeless women, has a Friday food pantry where women can “shop” for whatever they need; for years, our produce has been a welcome part of this “store”. Both Community Servings and Rosie’s Place have also been sites for our youth to work.
When packing up surplus from the market to take to shelters, re-member that produce that is damaged or past its peak may not be appropriate for shelter distribution. While crooked carrots or other slightly imperfect produce may be completely acceptable to shelters that are going to cook meals with the vegetables, we consider shelter clients to be customers and constituents of The Food Project in the same way that our CSA members and farm-ers’ market shoppers are. They deserve the same local organic produce, packed with the same care and attention and delivered fresh. COMMUNICATION WITH SHELTERSAt the beginning of the season, talk with your supervisor about the shelters you hope to deliver to during the summer. Evalu-ate the past season and establish a working relationship with them for the upcoming year. Make sure that The Food Project’s

138
scheduled night of the week and specific time still work for them, and ask how deliveries could be improved for the season. Call again about a week before the first distribution of the sea-son – usually, the first farmers’ market of the year – to remind them that you will be delivering that night.
Check in with the people who receive your produce each week. Talk with them about amounts and varieties of crops, and make sure that the deliveries are working for them. Communicat-ing on an ongoing basis throughout the summer will help you evaluate the distribution at the end of the season. Make sure to contact the shelters if the market sells out completely and you do not have enough produce to make a delivery.
Occasionally, there may be times during the season when a mar-ket is cancelled because of bad weather or other circumstances. On those rare occasions, contact the shelters to make sure that they can handle the volume of produce that you will be deliv-ering. You may also be able to alter the time of the delivery if necessary.
A week before the final delivery of the season, call the shelters one final time to let them know that deliveries will be ending. Ask them for final comments and feedback on the season while the year’s deliveries are still fresh in their minds.
INVOICES FOR SHELTERSKeeping records of the produce that you deliver to shelters is es-sential to accurate tracking of the percentages outlined in the an-nual plan. At the end of each market, young people will weigh out the surplus produce and record it on a sheet that is kept for the farmers’ market manager’s records. Use this information to write an invoice for the shelter, noting the name of the shelter, and make sure that the receiving person signs your invoice and keeps one copy (see Attachment 20: Bulk Produce Invoice). Keep shelter invoices on separate pads from the invoices you write for the market.
DELIVERY BOXES FOR SHELTERSFinding boxes for the produce that we distribute to shelters is a
Kevin restocks at a bustling market.
Attachment 20

139
perennial problem. You may decide to work with each shelter on an individual basis to find out what works best for them, or to standardize your distribution so that every shelter works with the same system. In 2001, Community Servings staff emptied produce from our orange produce totes directly into their own storage containers, which fit into their refrigerators and are reus-able. This system was a little more time-consuming than just dropping off produce in cardboard boxes, but seemed to be the most efficient method for this shelter. Rosie’s Place staff kept the totes for a week until our next delivery, when we would pick them up and drop off additional ones. The totes were a good display system for their Friday “store”. This system worked because we had excess totes for most of the season; it can get tricky in mid-summer when we need all the totes for harvesting in Lincoln.
Another option is asking supermarkets for waxed produce boxes (the Harvest Cooperative in Jamaica Plain has kept them aside for us in the past) and giving these boxes to shelters. This solution requires some extra work on your part to pick up boxes on a consistent basis. The farm in Lincoln has found that ask-ing shelters to provide their own boxes is an effective method, because most deal with donations on a consistent basis and already have suitable boxes on hand. This method requires going to the shelter an initial time to pick up empty boxes, and then asking the shelter to have boxes ready and empty on each subsequent delivery day.
Make sure that you have a plan in place for delivery boxes at the beginning of the season. It is a good idea to pick up some surplus boxes from a supermarket to have on hand in case one system or another breaks down during the season.
DELIVERIES TO SHELTERSAt the end of each market, pack surplus produce into the con-tainers that you have designated for shelter distribution after it has been weighed by the young people, who should make sure to separate produce that should be composted. Make sure to remind youth about the destination of the produce, and ensure that their record keeping is accurate. Using personal stories that

140
illustrate the purpose of the produce will help remind youth of the importance of this step, which can otherwise seem like a clean-up step to be hurried though at the conclusion of the mar-ket. Remember that it is up to you to advocate for the shelters.
When you drop off produce at the shelters, remember to check in with the receivers about the ongoing deliveries, make sure that they sign the invoice you have prepared, and pick up empty boxes if necessary. If the amount of produce is too large for your van, ask one of the Lincoln grower’s assistants for help. At least once during the season, preferably at the height of the growing season, require your urban agricultural intern(s) to come with you when you drop off the produce at the shelters. Meeting the people who prepare and serve the food that we bring to the shelters each week can be a powerful motivator for a young person in a challenging position at The Food Project.
Farmers’ MarketThe farmers’ market is one of the most vibrant and exciting parts of The Food Project.
Customers at the market welcome the display of a diverse array of fresh vegetables. Many visit the market as a regular part of their week, relying on it to provide a substantial portion of their diet at an affordable price throughout the season.
The young people weigh vegetables, add in their heads, juggle produce and shopping bags, and joke with customers. It is no coincidence that young people jump at the chance to run the farmers’ market, and that customers return week after week. The market allows The Food Project to distribute produce in an urban setting, among people to whom the CSA model is still unfamiliar, and opens the door to dialogue with our youth and community about food security, sustainable food production and distribution, and successful marketing and sales strategies. Your contribution to the market – in produce and assistance – will be essential throughout the season.
HISTORY OF TFP FARMERS’ MARKETSSince 1992, The Food Project has sold our produce at farmers’
Up goes the tent!

141
markets in many neighborhoods around Boston, including Cam-bridge, the South End, in Dudley Square in Roxbury, and on Dudley Street opposite Nuestra Comunidad, a local community organization. In 1996, The Food Project conducted a survey of eleven sites in the neighborhood where our produce was grown in order to locate the best home for a youth-run farmers’ market. We chose the Dudley Town Common at the intersection of Blue Hill Avenue and Dudley Street, where the market continues to be located, because it is a busy intersection with a high degree of visibility and foot traffic; it is also highly accessible by public transportation from many directions.
The market began on Thursdays, and has remained on that day. Bob Schartner, a fruit grower from Bolton, Massachusetts, joined us, lending a critical component of seasonal fruit that is much in demand at the markets. Other vegetable growers, including Drumlin Farm and Freitas Farm, have come to the market for short periods of time. The presence of neighborhood growers continues to grow at the Dudley market.
In 2000, we added a Tuesday market at Dudley Town Common, the location of our traditional Thursday market. Customers appeared to appreciate having the market in the same location twice a week, and the additional revenue that the market gener-ated indicated that having two markets was enabling us to add customers instead of simply spreading the same customers out over two days, as we had feared. At Dudley Town Common, we have the benefit of a community of people who know and anticipate the first markets of spring, and therefore offer a solid base from which to build the environmental, social and econom-ic benefits of our markets.
COMMUNICATION WITH THE FARMERS’ MARKET MANAGERMost farmers’ markets in the United States have a market man-ager, a person who coordinates space and logistics for grow-ers and sets standards for the market. Some collect fees from growers who attend the markets. At The Food Project, we have a staff member who is in charge of these tasks, as well as train-ing youth to staff the market and analyze sales throughout the

142
season. Your relationship with the farmers’ market manager is critical to the efficient functioning of the market.
Communication with the market manager is essential to this relationship. The market manager will need to know the types and quantities of the produce you will be delivering to each market, and will keep you updated on the price of produce at the market so that you can write accurate invoices. At the beginning of the season, sit down with the market manager to discuss the general list of what will be available throughout the season. Remind the market manager about the other distribu-tion streams and discuss the particulars of which crops will be prioritized for each stream. The farmers’ markets should be high on your priority list, particularly during times of the season when the flow of produce from Lincoln is lighter, and you should make sure that you communicate that to the market manager as well. During the six-month farmers’ market season, communicate with the market manager several times a week to check in about produce availability. Here is a possible schedule for this communication:
• Monday morning: Let the market manager know what you expect to harvest this week. Try to be as specific as possible. This will enable the market manager to research prices for the produce on Monday and get them to you by Tuesday morning.• Early Tuesday: Confirm types and quantities of produce with the market manager. This way, the market manager can check with the Lincoln grower and request produce that will complement what you are able to provide from the urban food lots.• Wednesday: Check with the market manager to see how the various crops sold on Tuesday, and adjust your harvest amounts accordingly for Thursday. Remember some crops will always sell out, no matter how much you bring to the market. For example, the market manager will always ask for more shell beans, okra, and hot peppers than you can provide. Good communication will help the market man- ager prepare youth to answer questions about the availabil- ity of these popular crops and make the market run more smoothly.

143
• Thursday: Confirm types and quantities of produce with the market manager so they can contact the Lincoln grower.
In the past, market managers have often helped in the fields, either with an early morning harvest or an afternoon weeding. This shared work can be an excellent time for communication and relationship building, and will help familiarize the market manager with the crops you have available.
DELIVERIES TO THE FARMERS’ MARKETSThe Dudley Town Common Farmers’ Markets are open from 4:00 to 7:00 on Tuesday and Thursday evenings. Plan your harvest and washing so that you can be at the market with your produce by 3:30 to help set up tables and display the produce. Make sure that you have a completed invoice with you for the market manager to sign, and a blank invoice to record surplus produce for the shelter delivery at the end of the market. There may be days when the market manager needs your help in man-aging the market, while on other days you may be free to return to field or office work while the market is running. Plan to be back at the market by 6:30 to help break down the market and weigh out produce. If you stay at the market, remember to set an example for the youth by constantly restocking, checking and maintaining the display of produce, answering questions and generally raising the bar for quality at the market.
EnterpriseThe newest addition to the distribution streams for which you will be growing produce, The Food Project’s enterprise pro-grams, are designed to use our vegetables in ways that will generate addition revenue for the organization. The Lincoln farm and greenhouse are also involved in growing produce and other products for enterprise projects. In 2002, three enterprise projects will include produce from the urban food lots. All of these projects are considered year-long pilot projects, but their goals and structure provide a sense of the direction of urban enterprise work at The Food Project.
HISTORY OF ENTERPRISE AT THE FOOD PROJECTEnterprise is a concept that has been discussed at The Food Proj-ect for as long as the organization has existed. Generating rev-

144
enue from high-value crops – such as salad mix, herbs, or flow-ers – or from value-added products incorporating Food Project produce – such as salsa, prepared meals, or baked goods – has been one of the organization’s goals for several years. Growers have often marketed surplus produce from the urban food lots to local restaurants and natural foods stores, but the addition of the Lincoln greenhouse and the urban kitchen helped pave the way for the organization to undertake these initiatives on a more consistent basis.
In 2001, growers used the Lincoln greenhouse to produce aru-gula, which was sold to a local natural foods store, and potted sunflowers, which were marketed at all Food Project events, at local grocery stores and flower shops, and through our news-letters. When the urban kitchen opened in the fall of 2001, it was used to prepare baked goods for our winter CSA distribu-tion as well as foods making use of our late vegetable crops for celebrations and neighborhood gatherings. In 2002, the kitchen provided baked goods and salsa for sale at our farmers’ markets and to local stores, and contracted with a local shelter to provide specialty meals for their meals-on-wheels program. The urban food lots grew some of the produce for these projects, as well as for additional sales to local restaurants.
ENTERPRISE MARKETSAlthough The Food Project did have some sales agreements with local businesses prior to 2002, most of the vegetables grown on the lots were designated for specific distribution streams. In 2002, for the first time, The Food Project began pro-ducing crops specifically for local restaurants. As mentioned in earlier sections of this manual, restaurants and grocery stores re-quire a high degree of consistency, quality, and cleanliness in the produce that they receive. Often, they are used to purchasing produce that is shelf- or table-ready, with very little preparation required. As the grower, make sure that you are able to provide enterprise customers with the appropriate quantity and quality of produce. Use all the available yield data for the crops that are designated for enterprise to estimate the quantity that you will have available. Remember, underestimating your production capacity is always preferable to overestimating.
Sorting tomatoes after a bountiful harvest.
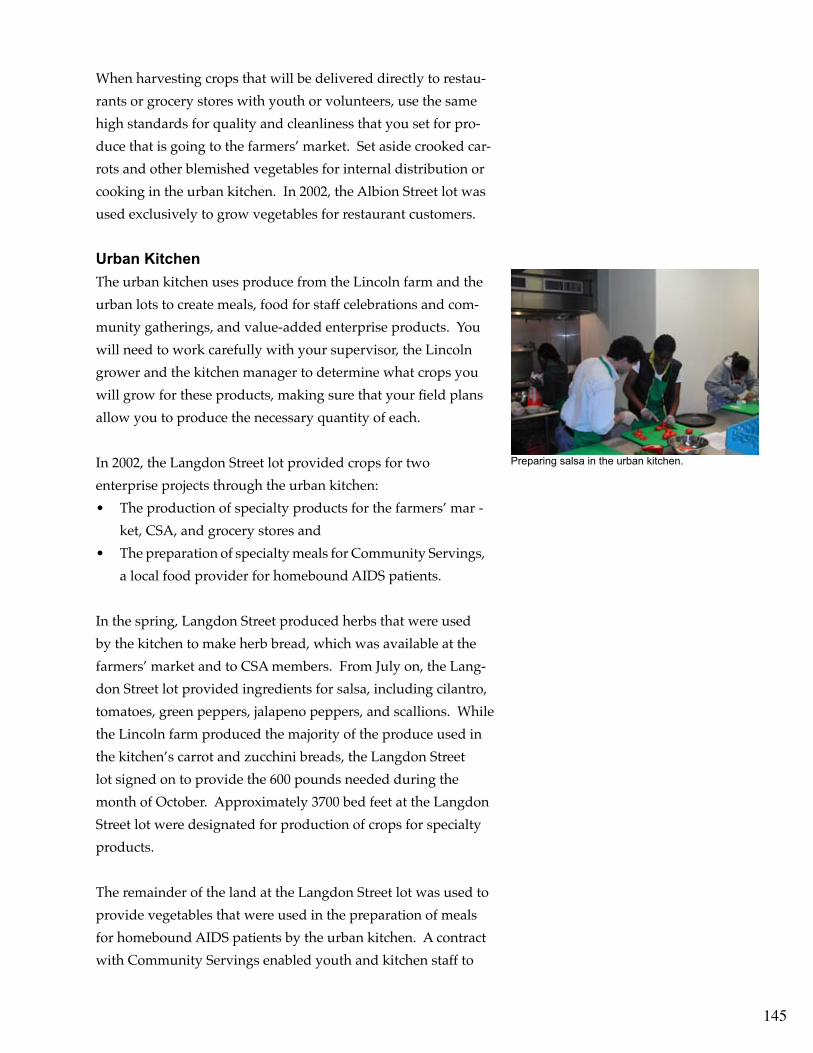
145
When harvesting crops that will be delivered directly to restau-rants or grocery stores with youth or volunteers, use the same high standards for quality and cleanliness that you set for pro-duce that is going to the farmers’ market. Set aside crooked car-rots and other blemished vegetables for internal distribution or cooking in the urban kitchen. In 2002, the Albion Street lot was used exclusively to grow vegetables for restaurant customers.
Urban KitchenThe urban kitchen uses produce from the Lincoln farm and the urban lots to create meals, food for staff celebrations and com-munity gatherings, and value-added enterprise products. You will need to work carefully with your supervisor, the Lincoln grower and the kitchen manager to determine what crops you will grow for these products, making sure that your field plans allow you to produce the necessary quantity of each.
In 2002, the Langdon Street lot provided crops for two enterprise projects through the urban kitchen: • The production of specialty products for the farmers’ mar - ket, CSA, and grocery stores and • The preparation of specialty meals for Community Servings, a local food provider for homebound AIDS patients.
In the spring, Langdon Street produced herbs that were used by the kitchen to make herb bread, which was available at the farmers’ market and to CSA members. From July on, the Lang-don Street lot provided ingredients for salsa, including cilantro, tomatoes, green peppers, jalapeno peppers, and scallions. While the Lincoln farm produced the majority of the produce used in the kitchen’s carrot and zucchini breads, the Langdon Street lot signed on to provide the 600 pounds needed during the month of October. Approximately 3700 bed feet at the Langdon Street lot were designated for production of crops for specialty products.
The remainder of the land at the Langdon Street lot was used to provide vegetables that were used in the preparation of meals for homebound AIDS patients by the urban kitchen. A contract with Community Servings enabled youth and kitchen staff to
Preparing salsa in the urban kitchen.

146
provide small quantities of meals for patients with special food needs, including vegetarians, diabetics, and others.
Communication with the kitchen manager throughout the planning, planting, and harvesting processes is essential to the success of enterprise projects in which you collaborate with the urban kitchen. Make sure that you review the manager’s estimates of how much produce is required for each enterprise and ensure that the land allotted will be sufficient to supply the produce. Also, be sure that you are in agreement on a plan for harvesting and cleaning produce that will maximize the involve-ment of youth and volunteers while ensuring that the kitchen receives the necessary produce in a timely fashion.
Internal DistributionInternal distribution of produce at The Food Project includes produce that is used for various staff functions, the community lunch program, individual staff use, and for compost. You will need to field requests for produce from all these areas, and to educate staff about how to harvest and weigh produce in order to accurately account for this distribution stream.
COMMUNITY LUNCHOnce a week during the Summer Youth Program, a chef from Boston works with one of our summer crews, using vegetables from the urban lots, to create a community feast for about sixty people. Guests at Community Lunch include neighbors, rep-resentatives from funding agencies and local organizations, friends and family of TFP youth, and other interested individu-als and groups. Communication with the Outreach Coordinator who is running the Community Lunch program will help ensure that these days run smoothly. Community Lunch happens on Mondays in the city.
During the winter, meet with the Outreach Coordinator to dis-cuss the produce that you will have available to them through-out the season. Include Community Lunch in your farm plan-ning, since it requires a significant quantity of produce at a peak time in the season. During the season, speak with the Coordina-tor at least a week in advance and share your harvest forecast, so

147
that they can help the guest chef create a menu that incorporates as much produce from the lots as possible. Also, be sure to de-termine who will be doing the harvesting for Community Lunch and when. If it is you, be sure to build the time to harvest and wash into your schedule. If it is someone else, they will need to be trained in harvesting, washing and weighing produce.
STAFF AND YOUTH CONSUMPTIONThroughout the season, there are retreats and other gatherings for staff. The person who is leading the activity will often ask you about the availability of certain crops that they would like. Be honest with them! Although the quantities that they need are usually small, because your volume of produce is also relatively small, staff consumption may have an impact on the availability of produce for other distribution streams, particularly at critical times of the year. While you do not need to adjust your farm planning to account for staff use of produce, be aware that these requests will come and be prepared to say yes or no depending on the needs of your other distribution streams. While it is won-derful to have produce from the urban lots at staff events, our commitments to our other constituents are also very important.
All staff members are invited to harvest their own produce from the lots during the season. Once again, remind them of the needs of the other distribution streams – declaring certain crops “off-limits” may be necessary during peak periods of the season – and be prepared to help staff learn to harvest and weigh pro-duce to account for staff use. Pre-harvested produce from the urban lots is only available to youth and staff at the end of the farmers’ market at 7:00 on Tuesdays and Thursdays, when the market manager may decide to allow youth and staff to “shop” for their families and personal use before weighing out produce for the shelters.
A small amount of the harvest eventually becomes farm com-post. This is a result of improper handling, poor harvest man-agement, and inadequate storage facilities. Although this is a reality for all farms, try to minimize the amount of produce that goes into the compost pile.
Community Lunch chefs are from some of Boston’s finest restaurants.

148
Farm PlanningDuring the winter, the task that will occupy most of your time is farm planning. Few things are more enjoyable than sitting in a warm office with snow falling outside while you peruse seed catalogs and plan for the upcoming season.
At The Food Project, some very specific requirements influence our planning, particularly in the city. Like any farm, we must take our distribution streams, labor, and available machinery into account while planning. These three factors both limit our planning and provide opportunities for us, as they do for other farm operations. However, the three interact in a unique way at The Food Project, and our planning must reflect the program-matic and distribution requirements of our community, as well as the parameters of our urban agriculture.
As you plan, think about the shelter clients, enterprise custom-ers and farmers’ market regulars who make up the bulk of those who receive our produce. As you become familiar with them and their needs and desires, arrange your farm plan to take each distribution stream into consideration. Tempting as it may be, for example, to simplify your planning by planting West Cot-tage in shell beans, Langdon in hot peppers, and Albion Street in okra – sending all three crops to the market in record quantities – more careful consideration will bring to your mind the needs of the urban kitchen and community lunch for culinary herbs, the enterprise markets for flowers, and the farmers’ markets for other crops, including early carrots and beets, cherry tomatoes, and cilantro. Take advantage of the opportunity to grow a wide range of crops for a diverse variety of constituents. Of course, check your plans with your supervisor both at the initial and final stages.
The seasonal ebb and flow of labor at The Food Project adds an-other interesting element to your farm planning. You can time plantings or other farm tasks to take advantage of large volun-teer groups in the spring and fall, or harvests to coincide with the bountiful supply of labor during the summer. For example, our fall clean-up in 2001 was a three-week effort in late October and early November by about six large volunteer groups, some
Winter farming in New England.

149
working with the DIRT crew. By arranging the clean-up in stages to take advantage of the groups and youth, we were able to clean up not only our own lots, but also the gardens of some of our neighbors.
The machinery and equipment that we have available on the urban lots also influences farm planning. Our beds are four feet wide, which is the equivalent of two passes with our Troybilt til-ler or broadfork. These beds are also a convenient size to reach into for people when weeding or harvesting. While we could vary our bed width in the city because we do not use tractors for cultivating, in the past we have kept our beds a standard width to facilitate crop rotation and to make our lots more logical to the many people who work on them. Our bed length, however, varies from field to field and sometimes within fields. This makes it possible for us to take advantage of more of the grow-ing space on our lots than if we tried to create beds and fields of standard sizes, but can pose a challenge for crop planning.
The following sections describe how to plan the urban lots. Each section introduces a spreadsheet that you will create. Use the spreadsheet from the previous year as a template from which you will create a new one that pertains to the conditions for the upcoming year. Take time in developing these spread-sheets so that you understand them completely. Do not let them become so complicated that they are difficult to use. In the process of filling in the spreadsheets, you will discover and understand the factors that affect what we grow on the urban lots. Use these tools to create plans in the calm of winter that will help you avoid irrational decisions in the heat of summer. The structure provided by farm planning allows you to make the quick decisions that are needed throughout the season.
Crop PlanDeveloping a crop plan is the first step towards planning what will be grown on the land. The Crop Plan spreadsheet lists the number of beds, rows, and row-feet for the various vegetables that are grown on the lots (see Attachment 21: Combined Urban Crop Plan).
Attachment 21

150
To start, look at the evaluation forms from all of the distribution points from previous years. Specifically, try to find out if we grew too much or too little of a given crop the previous season. The evaluation forms may also reveal new kinds of vegetables that people would like. Make sure you also look through evalu-ations from previous years to detect trends or even to notice if changes made due to previous evaluations were successful. Meet with the farmers’ market manager and kitchen manager to hear their opinions as well. Be careful during this stage, because this analysis only happens once a season and the ramifications last the entire year.
Meet with your supervisor to discuss the evaluations and decide how the production of various crops will be divided for the coming season. The assignment of crops should reflect the fol-lowing distribution system:• The urban lots provide the farmers’ market with most of the produce it needs, contribute to the kitchen and enterprise program, and supplement the distribution to the shelters.• The Lincoln farm provides all of the produce for the CSA, provides most of the distribution to the shelters, contributes to the kitchen and enterprise program, and supple ments the needs of the Farmers’ Market.
The assignment of crops to the urban lots or the Lincoln farm is also based on limitations imposed by space, vandalism, suitabil-ity, safety, and experimentation as follows:• Space: Because our space on the urban lots is limited, crops that require a great deal of space are grown in Lincoln (for example, winter squash).• Vandalism: It is impossible for us to grow high-value crops such as watermelons or sweet corn on the urban lots, since they are generally stolen before we harvest them.• Suitability: The urban lots are in a warmer microclimate that the land in Lincoln, so in Boston, frost ends earlier in spring and comes back later in fall, so we benefit from a longer growing season. (During the summer, it is four to eight degrees hotter in the city. This is great for crops such as tomatoes, peppers, eggplant, and okra however, crops

151
that enjoy cooler weather, such as lettuce, may not grow as well.• Safety: Although we have covered the urban lots with tons of compost, they still have deep buried layers of soil that are contaminated with varying amounts of lead. We try to grow crops in the city that do not have deep taproots that may bring up contaminants. We consistently perform tests on soil samples and plant tissue samples to monitor the safety of our product.• Experimentation: Both the urban lots and the Lincoln farm experiment to see how they can be more useful to our customers. For example, the urban lots have been growing different types of ethnic crops such as okra, specialty pep- pers, and summer squash to serve the population that comes to the Farmers’ Market.
Once you have worked with the Lincoln grower and other staff members to decide which vegetables to grow for the following season, put a list of these vegetables in the left-hand column of your Crop Plan spreadsheet and begin to determine the quanti-ties.
The first step is establishing the expected yield for each crop. Find this number by looking at yield data from the past two to three years, or more if it is available (see Attachment 22: Crop Yields). Decide on each projected crop yield by averaging the numbers from the previous years. Compare yields with those from the Lincoln farm to see if the numbers need to be adjusted if your available data is limited. Data from 2001 will enable you to calculate yields for Langdon and West Cottage individually, as well as overall yields for the urban lots. When making your original crop plan, use the overall average urban yield to guide you, since there is more data available to help you calculate this number. When you have the average urban yield per row foot, add it to your crop plan.
Next, divide the crop plan into three areas: Farmers’ Market distribution, Urban Kitchen, and Enterprise. A step-by-step procedure for filling out the crop plan for one vegetable can be found in Attachment 23: Crop Plan Worksheet; the sequence of steps is the same for all vegetables.
Attachment 22
Attachment 23

152
Don’t panic if the final total for all vegetables is larger than the total number of feet you have on the lots. Remember that you may use some beds more than once during the season. This is the type of information you can obtain from the next step, the Field Plan. If, when you have taken these things into ac-count, the amount of row feet is still too large for the land that you have available, look back through your crop plan and see what vegetables you can adjust, either in number of weeks or amounts to be distributed, to make your crop plan fit in the available space. Once your crop plan spreadsheet is set up, when you change one number – such as the number of weeks you hope to distribute a vegetable – you will be able to see the results in terms of needed yields and row feet immediately (see Attachment 21: Combined Urban Crop Plan) .
Field PlanThe field plan includes detailed maps of each field on the three urban lots. It gives information on when to prepare each bed, planting dates, names of the vegetables, and variety names (see Attachment 24: Field Plan). The field plans for the urban lots are complicated because each field and each bed have differ-ent numbers of row feet within them, unlike the Lincoln Farm, where bed length is generally standard. Create a different spreadsheet for each urban lot. Within each spreadsheet, create a new worksheet to represent each field on the lot.
Give each bed in the field a number. Make sure you will be able to remember which direction you are numbering beds in! Within each worksheet, each row represents a 25-bed foot sec-tion on that specific field. In the first column in the worksheet, write the number of each bed, making a note of how many bed feet there are in that particular bed. In the second column, give each 25-bed foot section within the bed a letter. Leave enough rows to equal the number of 25 bed foot sections in that bed. For example, a 75-foot bed would require three rows in your worksheet. In the third column of your worksheet, write the length of the section. Most sections will be 25 feet, since that is the standard unit you are using. For bed lengths that are not even multiples of 25, however (a 60-foot bed, for example), you will need to note that section C is only 10 feet long. When you
Attachment 21
Attachment 24

153
have completed filling out the field plan, each crop on the urban lots will have an “address” that will include the name of the lot, number of the field, number of the bed and letter of the bed section – for example, 3 25-bed foot sections of tomatoes might be planted in West Cottage Field 5, bed 1, sections A through C. Think of each worksheet as a map of each individual field.
You now have the total number of 25 bed foot sections that need to be assigned to each vegetable and you have a map of each field. Use Attachment 25: Vegetable Field Placement; to deter-mine how to place the vegetables into the fields.
Remember, if you find as you complete the field plan that the ur-ban lots do not have enough space for all the amounts of crops that you have determined in the crop plan, go back to the crop plan and alter it, then return to the field plan and make changes. Because of the limited space on the urban lots, creating the final crop plan and field plan is really a back-and-forth process in which you try to make the best use of your available space to grow the amount of vegetables you need – it is like working on a puzzle. You may find that visual maps of the fields, which can be found on your computer, are useful in trying to think about the available space for each crop and group of crops. If you need to make significant changes to the amounts of vegetables that you will be growing, or to the production season for each crop, make sure that you notify the staff member affected by this change.
Seed OrderThe seed order is the form that you will give to the Lincoln grower, who will send it to the seed company along with the order for the Lincoln farm. It contains the vegetable name, vari-ety name, quantity information, and prices (see Attachment 26: Seed Order). We order the majority of our seeds from Johnny’s Selected Seeds in Albion, Maine. Johnny’s Selected Seeds is an important sponsor of The Food Project. The company donates almost all of the seed that we use on the farm, and produces many varieties that are specifically bred to perform well in the Northeast.
Attachment 25
Attachment 26

154
Create a new spreadsheet, with the vegetable and variety names in the first two columns. Look in the seeding box and the large Tupperware container in the basement of the urban office for seed that is left over from last year. Make an inventory list stat-ing the vegetable, variety, and intended year of planting. Find the chart in Knott’s Vegetable and Berry Handbook that indi-cates the time period for viable seed germination. Throw out the nonviable seeds and add the information on the viable seeds to the seed order spreadsheet. Subtract thirty percent from the amount that you have to take into consideration the reduced germination rate of older seeds.
Complete your seed order spreadsheet using the following steps:1. Make sure you have entered the vegetables and variety names.2. Look in the seed catalog for the catalog number of each variety and add it to a new column in the spreadsheet.3. From the field plan, determine the number of row feet that pertain to each variety (remember to calculate row feet, not s simply bed feet).4. In the seed catalog, find information about the number of seeds for that crop that are needed to plant a specific num- ber of row feet. Using this information and the number of row feet needed, calculate the number of seeds that are needed for each variety. Enter this number into a new column on the spreadsheet.5. Subtract the quantity of old seeds on hand from the total number of seeds needed to find the amount of seeds to be ordered. Enter this number into a new column on the spreadsheet. 6. Find the package size that corresponds to the amount of seeds that are needed and enter this into the spreadsheet.7. Find the price listed per package in the seed catalog. Add this to the spreadsheet and total the prices for all of the varieties. This will be the total cost of your seed order.
Cut and paste information from this master seed order into seed orders for each of the companies from which you will be order-ing seeds. Make sure that the Lincoln grower has a copy of each

155
of your seed orders by the time the Lincoln farm seed order is prepared, usually in late December.
Greenhouse ScheduleThe greenhouse schedule gives you information on when and how to seed in the greenhouse (see Attachment 27: Greenhouse Schedule). This spreadsheet is created using information in the crop plan and the field plan. It only includes crops that need to be grown in the greenhouse.
Planting ScheduleThe planting schedule is a chronological list of the planting dates for the various crops (see Attachment 28: Planting Sched-ule). You create this on a spreadsheet by cutting and pasting information from your field plan. As you complete the seeding or transplanting, place a check by the date. Although simple, this form allows you to see at a glance if the entire farm plan is on schedule.
Equipment Purchase and MaintenanceAt just over two acres, The Food Project’s urban lots are large on the urban agriculture scale, but small for a production farm. In general, the consistent flow of youth and volunteers throughout the growing season allows us to accomplish most agricultural and site maintenance tasks by hand. This is a good thing for the land, because the damaged soil of the urban lots benefits from careful, hands-on manipulation and continual monitoring of soil structure and compaction. Manual labor on the urban lots also stimulates human interaction and decreases fossil fuel use and noise in our neighborhood, which already suffers from plenty of both. The Food Project’s hope is that working together on the land will connect people to one another, the earth, and them-selves. To this end, we design most of our agricultural work to take advantage of human interactions while responding to our actual agricultural needs.
We use a number of hand tools to enhance the efficiency and thoroughness of our volunteers’ and young people’s work. There is a natural tendency for young people and volunteers to use tools instead of their own hands in fieldwork. If given the
The Urban Grower and her interns catching up.
Attachment 28
Attachment 27
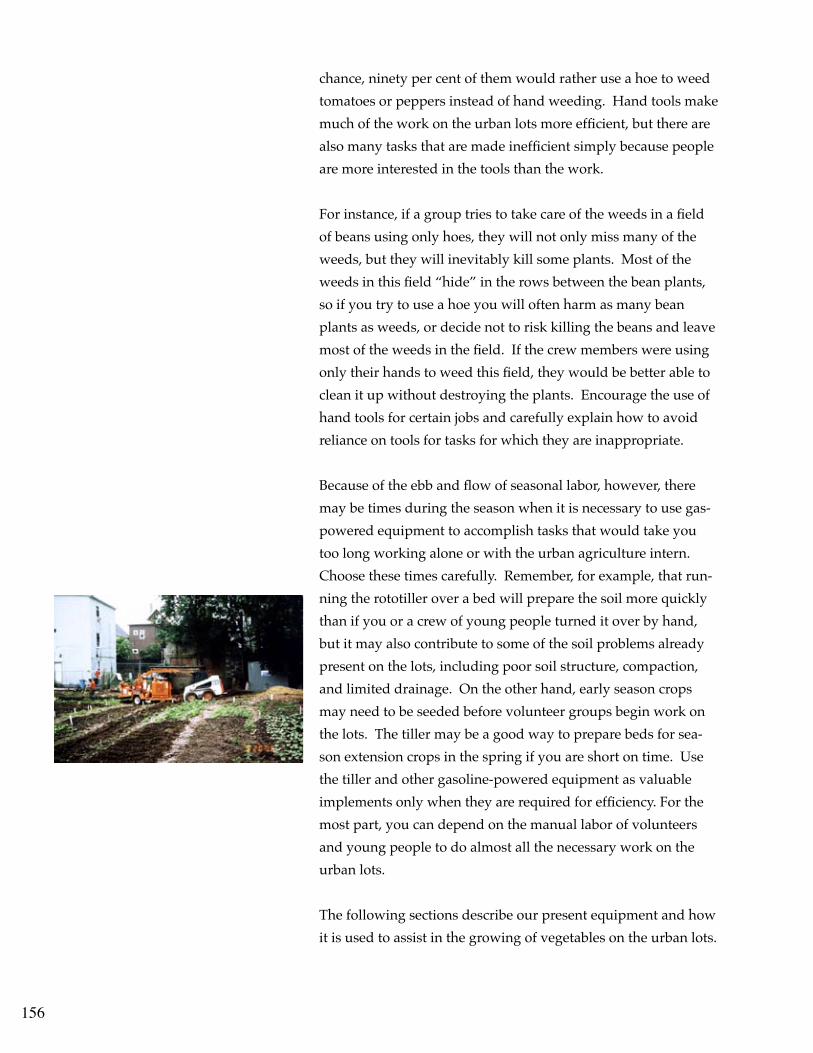
156
chance, ninety per cent of them would rather use a hoe to weed tomatoes or peppers instead of hand weeding. Hand tools make much of the work on the urban lots more efficient, but there are also many tasks that are made inefficient simply because people are more interested in the tools than the work.
For instance, if a group tries to take care of the weeds in a field of beans using only hoes, they will not only miss many of the weeds, but they will inevitably kill some plants. Most of the weeds in this field “hide” in the rows between the bean plants, so if you try to use a hoe you will often harm as many bean plants as weeds, or decide not to risk killing the beans and leave most of the weeds in the field. If the crew members were using only their hands to weed this field, they would be better able to clean it up without destroying the plants. Encourage the use of hand tools for certain jobs and carefully explain how to avoid reliance on tools for tasks for which they are inappropriate.
Because of the ebb and flow of seasonal labor, however, there may be times during the season when it is necessary to use gas-powered equipment to accomplish tasks that would take you too long working alone or with the urban agriculture intern. Choose these times carefully. Remember, for example, that run-ning the rototiller over a bed will prepare the soil more quickly than if you or a crew of young people turned it over by hand, but it may also contribute to some of the soil problems already present on the lots, including poor soil structure, compaction, and limited drainage. On the other hand, early season crops may need to be seeded before volunteer groups begin work on the lots. The tiller may be a good way to prepare beds for sea-son extension crops in the spring if you are short on time. Use the tiller and other gasoline-powered equipment as valuable implements only when they are required for efficiency. For the most part, you can depend on the manual labor of volunteers and young people to do almost all the necessary work on the urban lots.
The following sections describe our present equipment and how it is used to assist in the growing of vegetables on the urban lots.

157
8 HP Troybilt RototillerThe tiller that we currently operate on the urban lots was pur-chased in 1999. It is stored in the tool shed on the West Cottage lot. Ramps for transporting the tiller using the cargo van are kept in the van. The tiller is useful for primary tillage, weed control, and incorporation of compost or crop residues.
While we try to do most of the bed preparation on the lots by hand, the tiller can perform this function when time is short. The tiller tines are twenty-eight inches in width, so two passes over our four-foot beds are sufficient to turn over the entire growing area. While it is tempting to use the tiller to create a smooth seedbed by making several passes on each bed, the damage this does to the soil structure is not worth the extra ef-ficiency. Use the back of a rake or other implement to create a seedbed. Also, keep in mind that the tiller only prepares the soil to a depth of about eight inches at the most. Crops that require additional rooting depth may be stunted and weak if the soil beneath the tiller tines remains compacted.
Because of their long history as vacant lots, the urban lots have significant problems with perennial weeds, particularly grasses, which can be extremely difficult to eradicate. These weeds are often a problem in pathways between growing beds. In the past, we have used a combination of mulches to keep weeds down in the pathways, but using large amounts of mulch between the growing beds may tie up available nitrogen to an unacceptable extent in our fragile soils. Use hand labor as much as possible to remove weeds from pathways. The tiller can be very effective in some cases, particularly since its tines are the right width to make one pass through the pathway. Make sure, however, that the weeds you are trying to eradicate will not proliferate when the tiller chops and spreads them.
Particularly in the fall or early spring, the tiller can be a useful tool to incorporate compost or cover crop residues to provide nutrients and organic matter for the crops that will follow. Be sure that cover crops are an appropriate size for the tiller; plants that are too large will tangle in the tines and can do damage to the machine. If possible, try to incorporate cover crops in
158
advance, running the tiller over each bed only once or twice, so that they have sufficient time to break down before you need to plant a crop on the soil. This will minimize the number of times you need to use the tiller on the growing beds.
It is important to do regular maintenance on the tiller to ensure that it remains in good condition. In late winter, make sure that it gets an oil change and tune-up. Every winter, either run the gas tank dry or add fuel stabilizer to a mostly full tank so that the gas will not break down or lose octane during the period when you are not using the tiller. Remember that the tiller can be very dangerous if used improperly. The Food Project’s policy is that youth under 18 are not permitted to operate power tools of any kind. While you can train the urban agriculture intern and other interested youth in when and how to operate the til-ler, you should never allow them to operate it themselves.
Chipper-ShredderComposting on the urban lots faces two primary challenges. First, our tiller is not powerful enough to incorporate many of the large crop residues that are left after the growing season, so we need to remove them from the land instead of turning them under, as many farms do. Many of these residues have woody or high-cellulose stems that break down slowly in our compost pile unless they are chopped into smaller pieces, a labor-inten-sive and time-consuming process. Second, the small size of the lots means that we have limited space for composting, so it can be difficult to find room for all the crop residues, particularly at the end of the season when tomatoes, eggplant and peppers come out of the ground. In 2000, The Food Project purchased a chipper-shredder to help chop crop residues to appropriate sizes for composting and reduce the overall volume of crop residues.
The shredder works well for most crop residues, but is chal-lenged by even moderate-sized sticks or pieces of wood. When using the shredder, always use eye and ear protection, be sensi-tive to the time of day in the neighborhood, and make sure that there are no small children within a large radius of the machine. Keep a close eye on the shredder as you use it to make sure that it does not jam. NEVER put your hand near the chipper blades
159
unless you detach the wire from the spark plugs to make sure it will not start unexpectedly. It is a good idea to have another Food Project staff member present, if possible, whenever you use the shredder to keep you supplied with material for shred-ding and help you anticipate problems. Again, young people should never operate the chipper-shredder.
Like the tiller, change the shredder’s oil on a regular basis, and run the engine dry or add fuel stabilizer during the winter months. The shredder is kept in the market shed at West Cot-tage.
Weed WhackerThe Food Project’s weed whacker is a useful tool for keeping weeds down around the borders of the lots and for keeping grassy areas neat. Remember that if the labor is available, Sum-mer Youth program crews and volunteers can also use sickles to assist with site maintenance tasks like this. During the summer of 2001, all available labor was occupied with managing weeds in the growing beds, so weed whacking on a weekly basis was essential to maintain our standards of appearance for the lots. Again, make sure that you carry out routine maintenance on the weed whacker’s two-cycle engine, including adding the ap-propriate oil every time you fill the tank with gasoline. Run the tank dry at the end of the season and store the weed whacker in the tool shed at West Cottage. As with other power tools at The Food Project, do not allow young people to operate the weed whacker.
Hand ToolsA variety of hand tools are used on the urban lots for specific purposes. It is important to clean and sharpen the tools after each use. This prevents rust and allows the tools to be used more efficiently on the land. Young people in the Summer Youth Program learn how to clean and sharpen tools, and can teach volunteers if they become part of the Academic Year Program. Tool care should be part of the cleanup at the end of every volunteer work day.

160
EARTHWAY SEEDERSThe Food Project owns two Earthway seeders, which are stored either at West Cottage or at Langdon. These seeders can be used independently or bolted together at an appropriate width to seed two rows simultaneously. They come with seed plates for a variety of vegetables, including all the most commonly seeded crops on the urban lots.
Perfectly straight vegetable rows are not as critical on the urban lots, where cultivation is primarily manual, as they are on a more mechanized farm. Straight rows do make hoeing much more straightforward, however, especially for the inexperienced, and they are visually appealing to most of our neighbors and visitors. It is also necessary to be fairly precise when seeding, and to monitor the seeders carefully for anything that might produce a skip in the row. For these reasons, be thoughtful about who does the seeding on the lots. It is a good experience for the urban agriculture intern(s), and possibly for advanced or particularly enthusiastic volunteers. On the whole, however, you should take primary responsibility for the seeding, and you should definitely be present to guide youth or volunteers when they are using the seeders.
WHEELHOEThe wheelhoe is stored in the tool shed at the West Cottage lot. It has an eight-inch wide scuffle hoe blade, a twelve-inch wheelbarrow-like tire, and adjustable handles that make it very useful for heavy-duty weed control. Youth or volunteers can use the wheelhoe between rows of crops or in pathways as a primary cultivation tool so that others can follow behind, using hula hoes or collinear hoes or handweeding in the rows. The wheelhoe should be used with a rhythmic back-and forth mo-tion so that the forward sweep of the hoe blade slices the roots of weeds, while the backward pull turns the weeds over and exposes them to the sun. The handles can be offset so that the user avoids walking on weeds that have just been hoed and compacting the soil.
Our wheelhoe is manufactured by the Valley Oak Tool Com-pany in California (www.valleyoaktool.com). Furrower at-
161
tachments, four tine cultivators and replacement blades for the wheelhoe are also available from the company.
BROADFORKThe Food Project owns two broadforks; one is kept in the tool shed at West Cottage, and one at Langdon Street. The broadfork was developed by Eliot Coleman as a tool to aerate and loosen the soil without turning it over or disturbing soil structure. Ac-cording to Coleman, the broadfork “is a twenty-four inch wide, five-tined fork with two handles… The gardener holds a handle in each hand, presses the tool into the soil by stepping on the crossbar, pulls back on the handles to gently lift the soil, pulls out the tool, moves it six or eight inches back, and repeats the process” (from Coleman, Eliot,FourSeasonHarvest;OrganicVeg-etablesfromYourHomeGardenAllYearLong,1999). Because the growing beds at the urban lots are four feet wide, the user can easily loosen the soil in an entire bed by moving the broadfork from side to side across the bed as he or she moves backward, avoiding walking on the soil that has already been forked.
The beds at the urban lots are prepared using two main steps: tillage, using either the broadfork or the rototiller, and seedbed preparation, which is usually completed using the back of a garden rake to smooth out the top of the bed. If it is possible, the broadfork is a better choice for bed preparation than the ro-totiller because it does not mix the soil layers, protecting the soil structure while constructing pores and channels to allow water and air to flow into the soil. The tiller is a more efficient choice for incorporating compost or cover crops, but the broadfork can also be used for these purposes if the time and labor is available.
OTHER HAND TOOLSOther hand tools that are commonly used on the urban lots in-clude digging forks, which can be used for the same purpose as the broadfork but require significantly more labor for the same result. They can also be used to harvest carrots and other root crops. Hula hoes and collinear hoes are effective for weed con-trol. Hand trowels are useful for transplanting with volunteers and collecting soil samples. Spades and shovels, garden and leaf rakes, small hand cultivators, harvest knives, and a variety of other hand tools are available for use on the lots if needed.

162
InfrastructureAlthough The Food Project does not own the urban lots, we have invested in infrastructure on all three lots to enhance our work on the land. This infrastructure currently includes fences, tool sheds, meeting structures, and compost bins at both the West Cottage and Langdon Street lots, as well as a small in-formation kiosk at the West Cottage lot. We maintain a high standard of tidiness around the lots, arranging our small sheds so that there is a place for everything and that tools and other necessary items are conveniently located. Our location in the middle of the city requires that our tools and farm equipment be stored in locked sheds at the end of every work day to dis-courage theft. Maintaining our infrastructure also discourages vandalism and exemplifies our commitment to our neighbor-hood. A fence in disrepair, for example, appears neglected, is more likely to be the target of damage, and also encourages crop theft, while a well-maintained fence protects our crops while affirming the pride we take in our work and our presence in the community. The state of our infrastructure sets a high standard for all the work we do on the urban lots.
West CottageAt around one and one-half acres in size, the lot at the corner of West Cottage Street and Brook Avenue is the largest of the three lots that The Food Project manages in Boston. Its size and convenient location near The Food Project’s office mean that a good deal of infrastructure has been added on the land in the past four years. Although The Food Project does not own the land, and continues to work on a year-to-year lease with the City of Boston’s Department of Neighborhood Development, the organization has made a number of improvements to the site that increase the quality of our work and facilitate the lot’s integration into the surrounding neighborhood.
TOOL SHEDThe right-hand shed at West Cottage has traditionally been the tool shed, located next to the meeting structure and wash sta-tion. It is placed in a central location because it holds many of the materials that are needed daily for work on the land. Since many people, most unfamiliar with the farm, will enter the shed

163
to find equipment, it is essential that it be organized well. The tool shed holds hand tools, wash station equipment, organic fertilizer and cover crop seed (stored in galvanized garbage cans to protect them from mice), irrigation and pest management supplies, program materials, a first aid kit, and other assorted farm items. Maintain a clean shed so that people will be able to find the equipment they need in a timely manner. Place tools that are used often towards the front of the shed, and those that are rarely used in the back. Make cleaning and reorganizing the tool shed a priority when assigning site maintenance tasks to youth or volunteers. The tool shed should be locked at the end of every work day, since it contains hazardous materials as well as valuable tools and machinery.
MARKET SHEDAnother shed is located just to the left of the tool shed. This shed is used to store equipment and materials for the farmers’ market, as well as harvest supplies, urban education and out-reach materials, and a few pieces of farm equipment, including the chipper-shredder. This shed should also be kept locked when it is not being used.
SHELTERThe shelter at West Cottage is a post-and-beam structure that was built by Gideon Porth, The Food Project’s urban grower during the 2000 season. It is a twenty-foot square structure with a tin roof that is spacious enough to accommodate gatherings ranging from community lunches to large volunteer groups. The shelter also provides shade for the wash station on harvest days.
FENCEThe split-rail fence that surrounds the West Cottage lot is a source of ongoing conversation within the organization and with neighbors. Many neighbors would like to see a more se-cure fence around the lot, preferably a four foot chain-link fence with a locking gate. For the time being, the split rail fence that was erected in the fall of 1999 is in need of constant repair. It is easily damaged by passersby standing or leaning on it, particu-larly as the rails age in the weather. Be prepared to monitor the
Courtney, an assistant grower, harvesting on an urban lot.

164
state of the fence, and to repair and replace split rails through-out the year.
COMPOST BINThe compost bin at West Cottage is a two-bin system which is still slightly too small for the large volume of organic mat-ter produced by the lot. The bin is divided by a central set of railings. The railings on the front of the bin can be removed to facilitate adding organic materials and harvesting compost. In theory, fresh organic matter should be loaded into the left-hand bin, and should be turned into the right-hand bin when it is full and partially decomposed. After several months, the finished compost can then be harvested from the right-hand bin while new materials are added on the left. In practice, however, the bins fill up very quickly, particularly in the fall when the bulk of crop residues are removed from the lot.
Careful management on your part, along with appropriate signage at the bin, can help lessen the inclination of youth and volunteers to add organic matter to whatever side of the bin appears to have the most room. The compost bins should be turned at least once during the Summer Youth Program. If you can, harvest finished compost from the right-hand bin and spread it on empty beds in the fall while you are removing crop residues. This will provide organic matter for next season’s crop while making room in the compost bin for the end-of-season organic matter. Using the chipper/shredder to reduce the vol-ume of organic residues also helps ameliorate the compost space issue.
KIOSKUse the information kiosk at West Cottage to communicate with neighbor gardeners and visitors, share information about gar-dening techniques or Food Project events, or communicate the achievements of youth in the Summer Youth Program or DIRT crew. Often, The Food Project’s outreach coordinator will make use of the space to post announcements about upcoming events. The kiosk has been the target of some vandalism in past years, particularly during the winter months when it is rarely used. Consider decorating the kiosk with photographs and notices

165
about upcoming events at The Food Project every month during the winter to discourage vandalism and communicate with the neighborhood even when you are not on the land on a regular basis.
LangdonThe lot at the corner of Langdon and George Streets, about one-half acre in size, has been managed by The Food Project for six growing seasons. Over those six seasons, the lot has been land-scaped and the infrastructure necessary to carry out The Food Project’s work on the land has been added to the site.
SHEDThe tool and supply shed at Langdon Street is located against the slope, back from the street so that it is unobtrusive to our neighbors. It is used to store tools, organic fertilizer and soil amendments, cover crop seed, a first-aid kit, program materials, and beekeeping equipment. As with the West Cottage sheds, keeping the Langdon Street shed neat and easily accessible requires ongoing attention and effort on your part. This shed is not mouseproof, and it is therefore extremely important to store cover crop seed and fertilizers in galvanized garbage cans or other mouseproof containers. Planning carefully and order-ing only what you need for the year will minimize your need to store extra through the winter months, when mice are most active. Lock this shed, like the ones at West Cottage, at the end of every work day.
SHELTERThe shelter at Langdon Street was erected in 1998. It is a slightly smaller structure than the one at West Cottage, and it has a transparent Lexan roof instead of a tin roof. This structure is the perfect size for school groups to meet under, as well as for set-ting up a vegetable wash station.
FENCEThe fence that surrounds the Langdon Street lot was put up by the City of Boston, and is identical to other white picket fences around many vacant lots in the city. It requires yearly mainte-nance, including painting the fence and replacing any missing
An urban agriculture workshop, led by Gideon, urban grower.

166
or damaged pickets. When building the fences, the City of Bos-ton used pickets of a size that are not found in any hardware or building supply store; but Food Project volunteer Mark Hopkins has been able to reproduce the pickets perfectly in past years. We have had several requests to keep the gate at Langdon Street locked in order to discourage young people from the neighbor-hood from using the gravel in the driveway as projectiles. A Kryptonite bicycle lock is often the most appropriate method for locking the gate, but make sure that you give copies of the keys to everyone who will need them.
COMPOST BINThe three-bin compost system in use at Langdon Street was begun in 2000 by urban agriculture intern Wind-Starr Payne, and completed in 2001. Like the bin at West Cottage, it has inner railings separating the bins from one another, and removable front railings to make compost and organic materials easier to load and unload. Again, the left hand bin is intended to hold fresh organic material. When the bin is full, it should be turned into the middle bin to decompose further. When the left-hand bin is full again, turn the middle bin into the right-hand bin and the left-hand bin into the middle bin. When the left-hand bin is full a third time, check the right-hand bin for finished compost and harvest any that is ready to spread on the beds. Turn the middle bin into the right-hand bin (volumes should reduce as material decomposes, so the middle bin materials should fit into the right-hand bin), and continue the process.
AlbionInfrastructure at the Albion Street lot is currently minimal. In general, we have used tools from West Cottage and Langdon Street when working on Albion Street. A compost pile is lo-cated in the back left-hand corner of the lot, but no compost bin has been constructed. A rock pile has been located in the back right-hand corner of the lot. The chain-link fence surrounding the lot was erected by Laura Gibao. There is currently no ve-hicular access to the lot, and staff and volunteers enter through a small gate off Laura’s driveway. Compost deliveries were accomplished because Laura allowed us to use her driveway as a dumping pad for the compost, which was then moved by

167
wheelbarrow onto the lot. Any infrastructure additions to the lot, including toolsheds, wash stations, compost bins or other fences, will need to be cleared with Laura.
Soil and Fertility ManagementHealthy soil is the basis for all sustainable agriculture. Plants grown in fertile, biotically active soil are more productive and less susceptible to pests and diseases. Although it provides a needed boost at critical times in a plant’s development, no amount of supplemental fertilizer can substitute for the long-term benefits of well-managed soil. Any soil comes with its own set of advantages and challenges, and that at the urban lots is no exception. At first, the urban soil may seem fragile and easily injured; the initial approach that some urban growers take to it is one of caution, almost hesitance, lest they add to the damage that has been done to it during years of neglect or misuse. In reality, however, the soil on the urban lots is strong and resilient. Over the years, it has responded well to the vigorous use and thoughtful management it has received from Food Project staff, youth, and volunteers. You will be able to continue this tradi-tion through your attention to soil and fertility on all three lots.
HistoryBecause none of the lots have come to The Food Project with their soil in perfect condition, ready to be worked, the organiza-tion has put a good deal of effort into remediating and amend-ing the soils on all three lots in order to make them safe and productive. The history of these efforts contributes a great deal to the state of the soil that you find on the lots today. The sec-tions that follow will therefore acquaint you with the steps that Food Project staff members have taken on each lot, providing you with a basis for further action on each site.
LANGDON STREETCity Year and the Environmental Protection Agency tested the soil at Langdon Street for lead before The Food Project took over management of the site in late 1994. During the summer of 1995, The Food Project arranged for more than 300 cubic yards of compost and soil to be delivered to the site, 10 truckloads in all. The original deliveries were compost made by the city of
Youth lead a workshop for residents on the risks of pesticides.

168
Boston through its leaf waste composting program. The Food Project purchased several additional truckloads of mixed soil and compost from Greenleaf Composting. A bobcat spread the bulk of the deliveries over the lot, and youth and volunteers shaped beds by hand during the summer of 1995.
In fall 1999, Bruce Fulford’s City Soil and Greenhouse Company provided an additional blend of soil and compost that was spread over portions of Field 2 and 3, most notably over the area furthest from Langdon Street (see Attachment 29: Langdon Street Map). The current grower found that crops and cover crops grown in this area suffered from stunting and yellowing. This was also the case during the 2001 growing season, when tomatoes and potatoes planted in these beds yielded poorly, with small, stunted plants. Because soil tests in 2000 and 2001 do not indicate any deficiencies in that area, it may be that this phenomenon is the result of compaction from the trucks that delivered the soil and compost. Double digging the affected beds, along with the addition of compost, humate and supple-mental fertilizer, will hopefully alleviate this problem. Overall, the soil at Langdon Street, particularly in Field 2, performs well and retains moisture adequately. The soil in Field 1, a shady field with heavy soil lacking in organic matter, requires the addi-tion of compost to lighten the soil. Crops in all three fields will benefit from the addition of supplemental fertilizer, enhanced crop rotations that incorporate sophisticated cover crop plans, and continued soil-building through composting and nutrient recycling.
WEST COTTAGEThe Environmental Protection Agency performed initial base-line lead assessments on the West Cottage lot in spring of 1997. Lead contamination on the site ranged from 130 to 680 parts per million, in the medium range – lower than the majority of vacant land in the Dudley area. In summer of 1997, a large bulldozer spread six to nine inches of city leaf waste compost over two thirds of the lot – excluding the Victor Street ravine area, which was still to be filled. The grower sowed oats in fall of 1997, and allowed them to grow to about three feet during the spring of 1998. During the summer of 1998, youth, volunteers
Attachment 29

169
and additional machines spread a mixture of nine to twelve inches of heavy clay and leaf mulch over the site (incorporating the oats as additional organic matter).
The Food Project again worked with Bruce Fulford who pro-vided the subsoil/mulch combination, followed this with an application of powdered humate and gypsum (1500 pounds per acre) to promote drainage and soil tilth. Layered on top of this over two thirds of the site (again, excluding the Victor Street area) in fall of 1998, and never completely incorporated, is about twelve inches of compost made in Melrose by City Soil and Greenhouse. Beginning in the fall of 1998, DSNI facilitated the use of soil from the Brook Avenue Coop Project as a landfill for the ravine in the Victor Street area, extending the flat area of the lot significantly to the south. In 1999 we were able to use all the land except the Victor Street area, which was still under construction. Following the completion of the landfill project, youth, staff, and volunteers spread compost from the city of Boston over the Victor Street area. In the summer of 2000, vegetables grew on the entire site for the first time. Lead tests performed by University of Massachusetts Extension Service in 2000 and 2001 indicated that the lead levels in the soil were low, in most cases below the 300 parts per million required for accurate measurement.
The soil at West Cottage still requires the addition of large amounts of surface compost each year, along with the incor-poration of organic matter (including cover crops, as at Lang-don Street), the gradual build-up of soil micro- and macro-life, and the continual monitoring of chemical and nutrient needs through soil testing. Because large amounts of woodchips have been used since 1998 to maintain pathways in the lot, available nitrogen levels may be low. Adding nitrogen through organic fertilizers and compost will contribute to the health of the soil. Compost, in particular, will help speed the decomposition of any remaining woodchips through the addition of soil microor-ganisms. Cultivating on a regular basis, in addition to minimiz-ing weed competition with crops for available nitrogen, will also help break up the crust that tends to form on the surface of the soil here (particularly in field 1) and prevent water runoff

170
and pooling. Because of the long urban growing season and the intense demands placed on the lot for farmers’ market produc-tion each year, it is especially important to focus on managing rotation of crops at West Cottage. Also, consider incorporating quick-growing summer cover crops such as buckwheat – along with cool-season oats and peas – into your rotation.
ALBION STREETThe soil at Albion Street was tested for lead twice in 2001: once in June, before the addition of compost, and once in November, following the addition of two inches of compost over the entire lot. Tests in June indicated that lead levels were in medium to very high range, with results from 479 to 3728 parts per million. Summer Youth Program crews cleared weeds – which included broadleaf annuals and clover – loosened the existing soil with forks and removed large rocks and pieces of a house foundation, many of which were in the area of the lot closest to the street. Oats and peas were seeded on the lot in October, and estab-lished growth of about six inches during the fall of 2001.
Purchase additional compost and topsoil for the Albion Street lot if lead levels in the fall tests indicate that it is necessary. Com-post is generally sold by the cubic yard. To estimate how much compost you will need, remember that there are 27 cubic feet in a cubic yard. To cover the entire 5000 square foot lot in 1 foot of compost, you will require about 185 cubic yards of compost.
Crop RotationIn an ideal sustainable agriculture system, land is allowed to rest every so often to rejuvenate itself, storing up nutrients, improv-ing soil structure and reducing weed pressures through careful cover cropping. Currently, the land base we have available to us in the city is too small, and the need for production too great, to allow any of the land to remain fallow for a season. In fact, because space is at such a premium on the urban lots, we often grow two or three crops in the same space over the course of a season. Since we are not able to take land out of production on the urban lots, try to maximize productivity and increase the positive impact that we have on the land by rotating crops stra-tegically throughout the three lots.

171
Because different crops place different pressures on the soil for nutrients, rotating crops so that light feeders follow heavy soil feeders will help the soil revitalize itself. Rotating crops so that different families follow one another in the same space will also help reduce damage from pests and diseases, which can over winter in the soil and attack a crop in the same family the fol-lowing season. For example, flea beetles are a significant pest of brassica crops. They may attack a collard crop one season, then over winter in the soil so that even brassica crops that are covered with re-may, such as early turnips or mustard greens, will be decimated by the beetles as they emerge in the spring. Keeping careful records of your plantings will help you rotate effectively to promote soil fertility and reduce the impact of pests and diseases.
Because the lots are so small and the main crops that we grow do not change much from year to year – we always need to plant a substantial amount of brassicas and nightshades, for example – you may find that rotating crops effectively is a chal-lenge. This is particularly true if you are dedicating one lot to a specific distribution stream, which might be necessary for programmatic reasons. For example, if all three lots are grow-ing crops for all four distribution streams, it may be possible to rotate one lot out of brassicas entirely for one or two seasons. If West Cottage is designated as the farmers’ market lot, however, you will always need to grow brassicas on that lot. The fact that field size varies so much from lot to lot, and within the lots, also presents a challenge to crop rotation. Dividing crops into “blocks” that require about the same amount of space may help you develop an effective rotation (see Attachment 30: Crop Rotation).
Cover CroppingUsing cover crops to control weeds, enhance soil fertility, and improve soil health can be one of the most effective methods available to the sustainable farmer. On the urban lots, we need to choose cover crops that conform to the following criteria:• They should be annuals. Because we cannot leave any of the urban land fallow for an entire season, it is difficult to
Attachment 30

172
use perennial cover crops such as Red Clover, which re- quires two years of growth to provide its maximum benefit to the soil.• They should be easily incorporated using our available machinery and labor. Crops such as winter rye, a highly frost-tolerant cover crop, are difficult to integrate into our soil using the Troybilt tiller or volunteer hand labor, and can even have allelopathic effects on crops if they are planted too soon after the cover crop is tilled in. Annual crops that die with the frost are much easier to integrate using our available methods. Very vigorous annuals, such as Sor ghum-Sudan Grass, however, can also be challenging to integrate (although this crop has the advantage of sterility, and will not become a weed on the lots).
Taking these criteria into consideration, a number of useful cover crops can contribute significantly to the sustainability of the urban lots. The following are some of those crops:• Field peas are frost-killed legumes that will fix nitrogen to be used by the crop that follows them. They are useful in fields where you plan to plant an early spring crop that is a heavy nitrogen feeder. They are generally planted from mid-August to mid-September, but in a warm year you can plant them into October on the urban lots and still expect a significant amount of growth before the frost. Because the urban lots do not get a hard frost until late in the year, consider undersowing crops such as nightshades and collards with peas in mid-September. This will allow the cover crop to get a head start while the crop is still growing in the field. Consider using field peas on all the areas where you plant oats for several years, since available nitrogen on the urban lots is limited. • Oats are grains that are often planted as an accompaniment to field peas. They are planted at the same time (mid-August through mid-October in the city) and die with the first hard frost, which may not come until December in the warm areas of the city. Oats add organic matter to fields where you plan to plant an early spring crop. • Buckwheat is a quick-growing grain that is killed by a frost, so it can only be planted in midseason. Because we often
Loading watermelons in Lincoln for delivery to the farmers’ market.

173
grow several crops in the same space during the same season, placing additional pressure on the soil, it can some times be a good idea to choose fast-growing summer cover crops like buckwheat to plant and till in quickly between early and late plantings, adding organic matter to the soil for the second crop. Buckwheat can easily become a weed if it is allowed to flower and go to seed, however, so you will need to pay careful attention to it, even during the busiest parts of the Summer Youth Program.
One final note on cover crops: traditionally, pathways between beds on the urban lots have been defined and kept free of weeds by woodchips or straw. Both these methods bind up available nitrogen as they decompose, further limiting the fertility of the soil. Consider seeding a perennial low-growing clover in the pathways after you have defined the beds for the season. Re-member that you will need to keep this clover from spreading into the growing beds, but it will increase nitrogen instead of binding it, provide an aesthetically pleasing pathway and help control weeds between the beds.
CompostLike cover cropping, adding compost to the soil is a critical component of a sustainable soil program for any grower. While cover crops add the same nutrients to the soil each time they are used, compost adds a rich blend of organic matter and micronu-trients, along with soil microorganisms, that are critical for soil health. Plan to spread compost in the spring, before planting in the growing beds, and in the fall on beds that are not growing a cover crop, before putting beds to sleep for the winter. Spread-ing compost by hand over two acres of land is an arduous task! Plan to accomplish it with some large volunteer groups, using wheelbarrows and harvest totes, in early spring, remembering that you will need to plant on your earliest beds at the begin-ning of April. Use another energetic volunteer group to spread and integrate compost as part of your fall clean-up in October and November.
Because of the space limitations on the lots, it is challenging to create compost piles that are large enough to produce compost

174
that is sufficient to meet the needs of the land, particularly dur-ing the early soil-building stages of their development. In addi-tion, because the urban lots are in the middle of a residential city neighborhood, compost piles must be contained for aesthetic reasons, with smell kept to a minimum and food waste buried to avoid attracting rats. The West Cottage lot currently has a two-bin compost system that is very efficient in producing compost, but too small to handle all the plant residues produced by the lot, particularly during the fall clean-up when many crops are removed from the land at once. Langdon Street has a three-bin compost system that was built during the winter of 2000-2001. Albion Street currently has only a compost pile located in the rear left-hand corner of the lot. This lot will eventually require a compost bin system, both for aesthetic reasons and to increase the efficiency of compost production. Consider researching supplemental sources of inputs for our compost, which will help create a well-rounded product. The Samuel Adams Brewery in Jamaica Plain, cafes and restaurants, and local groceries may be sources for additional compost materials.
All three lots require some supplemental compost. The City of Boston delivers compost free to community gardeners in the spring (This must be ordered ahead of time). While the dates of these deliveries tend to be too late for our earliest plantings, they are appropriate for some later plantings and for distribu-tion to neighbor gardeners. You can also purchase compost from Greenleaf Composting Company in Jamaica Plain, a company that makes their own high-quality compost, or from Bruce Ful-ford at City Soil and Greenhouse Company.
Organic FertilizerSustainable agricultural systems minimize the amount of inputs that are needed from off the farm. Recycling nutrients, using compost and cover crops, and managing soil fertility effectively limit the need for supplemental fertilizers. However, the still-developing soil and high productivity demands on the urban lots may require the addition of supplemental fertilizer for each crop that you plant. Familiarize yourself with the nutri-ent needs of the crops that you are growing, and add the ap-propriate fertilizer for each crop at the planting stage. Monitor

175
your crops carefully and side-dress with additional fertilizer if necessary. In 2001, a side-dressing of organic fertilizer worked wonders for nightshades in a relatively new field that had been challenged by weeds and disease during the season.
We use two different types of bagged fertilizer blends that are named in relation to their nitrogen, phosphorus, and potassium content. The numbers in the names refer to the quantity, in pounds of that component, in a one hundred pound bag of the fertilizer. For instance, one fertilizer is called “5-4-8” and the other “7-2-4”. A fifty pound bag of “5-4-8” contains 2.5 pounds of available nitrogen, 2 pounds of available phosphorus, and 4 pounds of available potassium. Use “5-4-8” when you want to aid a vegetable’s root growth. Use “7-2-4” to assist growth that occurs above the soil in the stem and leaves.
On the urban lots, foliar-feeding crops with fish emulsion can also be an effective method of adding supplemental fertilizer. Use the 3-gallon backpack sprayer if you are doing the spraying alone, or use hand-held spray bottles when working with youth and volunteers. Spraying diluted fish emulsion every two weeks can be helpful during the weeks of peak growth, particu-larly just before and during the flowering period for fruiting crops, when plants require a large quantity of nutrients. Try to spray fish emulsion when the wind will not carry the smell to neighboring houses! Other organic fertilizers, including alfalfa and soybean meal, are expensive but may also be useful to add organic matter and nutrients to plants at critical times in their growth and decrease the need for purchasing supplemental compost.
Companion PlantingThe small scale of the urban lots, along with our desire to model a variety of different sustainable practices within our urban agri-culture work, has encouraged us to consider companion plant-ing at certain times. In 2001, for instance, we experimented with planting a single row of lettuce between widely spaced rows of collard greens in mid-summer, calculating that the collards would provide some shade for the lettuce. There are many re-sources that describe companion planting ideas to decrease pest

176
populations, create symbiotic relationships between crops grow-ing in the same bed, and increase production on limited areas. When considering companion planting plans, however, remem-ber that the urban lots need to be accessible to many people with widely varying levels of experience with agriculture. Volunteers and youth will be weeding and harvesting all the crops that you plant, many of which they might not recognize at the beginning of their time on the lots. Make sure to use clear directions or interpretive signs so that any companion planting you do does not confuse your labor force, frustrating them and decreasing the efficiency of their work on the lots.
TillageThe Troybilt 8 horsepower tiller is an excellent tool for tilling beds quickly, stale bedding, and incorporating small amounts of organic matter, including cover crop plantings that are less than one foot tall. You may also find it useful for keeping pathways clear of weeds. Using the tiller too often on the fragile soil of the urban lots, however, will destroy soil tilth, contribute to erosion and compaction, including the creation of a hardpan beneath the level of the tiller tines, and decrease the hard-won levels of or-ganic matter in the soil. When using the tiller, also consider soil moisture levels. The beating of the tiller tines will destroy the structure of soil that is too wet or too dry. To determine the ap-propriate soil moisture level for tilling, press a clump of soil in your fist. If the soil is too dry to form a ball, it is too dry to work with a tiller. If it forms a wet, sticky ball that will not crumble easily, it is too wet. Soil that is ready to be worked will form a ball that crumbles easily, like moist chocolate cake.
Make use of spring volunteer groups and DIRT crew youth for initial bed preparation in April – except on the earliest beds, which you’ll need to prepare yourself in late March. Prepare the site well and train youth and volunteers carefully to ensure that they spread compost thickly enough, work beds to an appropri-ate depth using pitchforks and the broadfork, dig out pathways and shape beds properly, and keep beds straight and consis-tently four feet wide. Consider developing a rotation in which certain beds are prepared each year using available labor to

177
double dig them (see Attachment 2: Double Digging), reducing the effects of compaction and incorporating layers of soil and compost.
Because you will not often be able to turn crop residues back into the soil when their productive life is over – spinach or salad mix may be an exception – make use of youth and volunteer labor to remove and compost these residues at the end of the season. Because the urban growing season is so long, crops are often in the fields until the end of the farmers’ markets, when days may be too short and cold to provide favorable conditions for cover crop growth. Consider undersowing cover crop in long-season crops such as tomatoes, peppers, eggplant, and col-lards instead of waiting until you pull the plants to prepare beds and seed cover crops. This will minimize the amount of time you need to work the soil and maximize the area that will ben-efit from cool-season cover crop plantings. Be aware, however, that frost-tolerant crops such as winter rye will be tremendously difficult to incorporate with the limited power of the rototiller. Cover crops that winterkill, such as oats and peas, will probably best serve the needs of the urban lots.
CultivationPlan to have sufficient time after youth and volunteers complete bed preparation to use the tiller or wheel hoe to stale bed before seeding. Stale bedding – allowing weed seeds to sprout, then running a cultivating tool over beds at a shallow depth on a sunny morning when exposed weeds will shrivel and die before they have a chance to re-root – kills weeds in the top layer of soil when they are less than an inch tall, saving you work later in the season. Youth and volunteers, however, will be your primary means of weed control once the season is underway.
Cultivating with youth and volunteers on the urban lots can be accomplished in many ways, ranging from having an entire group on their knees hand weeding a bean field to having two youth give a tomato bed a once-over with collinear hoes. In general, however, you can be successful in most situations by using the following three steps:
Attachment 2

178
1. Have one person use the wheelhoe for pathways, spaces between rows and bed edges. Make sure the user knows how to be most efficient with the wheelhoe, and that it is not necessary to get too close to the rows of crops and risk damaging them.2. Have two to four people follow behind the wheelhoe with collinear or hula hoes, taking care of all the weeds close to the rows and within the rows between the plants. Again, stress that it is not necessary to hoe too close to the plants and risk damaging them with the tools.3. Have two to four more people follow the hoes and hand weed close to the plants. These weeders should be able to move quite quickly if the people in front of them have done their job correctly.
DrainageThe subsoil/mulch mixture beneath the compost at the West Cottage lot presents significant problems with drainage and compaction. The soil hardens when dry with or without me-chanical tillage and resists hoeing, rototilling and digging. It opens naturally to rain and quickly becomes muddy. Too much water pools on the surface, particularly in Field 4 along Brook Avenue, the area most affected by compaction (see Attach-ment 31: West Cottage Map). In 2000 and 2001, growers and volunteers laid ten foot lengths of perforated pipe (wrapped in sleeves to prevent clogging) about twelve inches down in all the pathways nearest the driveway in Field 4, and ran an additional length of pipe under the driveway to route excess water into the low area behind the compost bin. While the soil at West Cot-tage requires irrigation during dry periods, particularly to assist germination, you may also find it necessary to add to or extend the drainage system in Field 4.
Soil Tests and LeadSoil lead contamination is measured in parts per million (PPM). When you perform yearly soil tests on the three urban lots – or, on some occasions, tests on neighbors’ gardens in the com-munity – the University of Massachusetts Extension service will provide you with lead levels for each of your samples (see Attachment 15: Soil Testing). Interpret these results according to the table with the attachment and the additional comments that
Attachment 31
Attachment 15

179
the University of Massachusetts will send you.Several options exist for the remediation of lead contamination in urban soils, none of them perfect. Removing contaminated soil is expensive, and its disposal can pose a challenge, particu-larly if lead levels are high enough to constitute an immediate health hazard. Phytoremediation – the removal of lead from the soil by concentrating it in the leaves and roots of fast-growing plants, often in the brassica or aster families – is a technology that is still being developed by the Environmental Protection Agency and private environmental companies.
Phytoremediation remains expensive and time-consuming, requiring that part or all of the land is out of production for at least one growing season (a significant issue for families whose access to food may be severely affected by their inability to gar-den), and the problem of disposal of plants containing lead resi-dues remains a challenge. Adding compost to contaminated soil may help “dilute” lead levels, and some evidence suggests that higher levels of soil organic matter may help prevent uptake of lead. Capping contaminated soil with “clean” topsoil and com-post proved to be the most viable option for The Food Project on our urban lots. Both Langdon Street and West Cottage have about 24 inches of added soil and compost on top of the original contaminated soil. Because most of our vegetable crops have roots that go down a maximum of about two feet, we believe that this depth is sufficient to shield our crops – and those who work on the lots – from the effects of the contaminated soil. Consider performing plant tissue tests for lead on all three lots (the EPA-Lexington Labs should be able to perform these tests).
Pest and Disease ManagementAs a grower using organic and sustainable methods, you need to be creative when it comes to dealing with pests and diseases on the farm. The following sections outline some of the most common problems that you will face with the vegetables you are growing for the season. Careful monitoring and field record keeping will help you learn to anticipate annual problems and work around them. Talking to other gardeners and local gar-dening organizations, such as Garden Futures, can also provide you with information about pests and diseases that are com-monly found in the city environment. Finally, you will probably

180
not have an issue with deer, woodchucks, raccoons, or other large animals that pose problems for many suburban and rural growers; but you will have to deal with issues of theft and van-dalism, which are ongoing problems at our lots in the city.
INSECTSMost of the insects on our urban lots are beneficial to agricul-ture, and we take some simple steps to try to encourage them – leaving some Queen Anne’s Lace in the borders, planting ad-ditional border plants that attract beneficial insects, using mini-mal sprays and other pesticides, to name only a few. In general, populations of harmful insects tend to remain low on healthy plants, particularly if you utilize appropriate crop rotation and soil-building methods. However, there may be a few occasions each year when the presence of harmful insects needs to be ad-dressed so that production will not be dramatically affected. It is essential that you are familiar with the insect population on the lots, and that you are able to distinguish between the ben-eficial and harmful insects. Some of the most common harmful insects on the urban lots are described below.• Flea beetles are small black beetles that are heavy feeders on most members of the brassica family. Flea beetles are most active in the springtime and early summer. They do not like shade. The best defense against their voracious appetites is placing a physical barrier between them and the plants. After seeding or transplanting, spread a row cover over the top of the plants and secure the edges of the row cover with soil. It is important to remember, however, that flea beetles overwinter in the soil where a brassica family member was planted the season before. If you plant another member of the brassica family there the next spring, then cover your planting with row cover, the flea beetles will arrive to a plentiful supply of brassica seedlings – just the crop you were trying to protect. Careful rotation is the only way to ensure that row cover will be effective against flea beetles.
Appropriate rotation can be challenging on the urban lots, which are so small that insect pests seem to have little trouble finding their preferred host no matter how far away you move the plant. Langdon Street, in particular, has a

181
very high population of flea beetles because brassicas were a significant crop there each year from 1996 to 2000. In 2001, a few turnips and half a bed of kale were the only brassicas planted at Langdon Street; both crops suffered high degrees of flea beetle damage even with row cover, and neither crop flourished. If at all possible, rotating Langdon Street out of brassicas completely for a year or two, while carefully controlling mustard family weeds, might help reduce the flea beetle population on this lot.
Many crops can sustain a high level of flea beetle damage before they are killed outright; kale and collards, for ex- ample, may survive ravenous flea beetles in the spring and appear to recover. For crops that you do not need to harvest right away, this can make allowing crops to outlast a flea beetle attack seem like a viable option. Remember, however, that flea beetles can carry viral diseases that can stunt the growth of these crops and lower your yields significantly, particularly when the soil health is less than optimal. Pre venting flea beetles from attacking brassica crops, either by using row cover and rotation or by planting brassicas later in the season, when flea beetles are less active, is far better than gambling that healthy plants will survive a springtime attack and flourish later in the season.• Cabbageworms are green caterpillars that turn into the white moths that flutter around brassica crops throughout the season. The worms are present on the leaves, stems, and flowers of the brassica family, and can sometimes be hard to spot because they blend in so well. In addition to eating the foliage, they leave significant amounts of excrement on the plant. When you recognize significant damage from cab- bageworms, use the backpack sprayer to apply Bacillus thuringiensis to the plants. This is an organic biological pesticide that is very successful in controlling the cabbage worms, and is very specific to that pest. Apply the pesticide once a week for two to three weeks, but never apply it less than 48 hours before harvest. There will be two to three generations of cabbageworms on the urban lots each year, so monitor them carefully and be prepared to track damage from each generation as it arrives.

182
• Striped cucumber beetles eat the foliage on all members of the cucurbit family and spread bacterial wilt, a disease that can kill an entire bed of cucumbers or squash overnight. Monitor your plants carefully for the beetles, checking inside flowers where they like to spend the night. As a first course of action, try covering the plants with row cover. Make certain that you place the row cover on the plants before there are any beetles on them. If you cover the plants with the beetles on them, they will eat all of your plants and it will defeat the purpose of the row cover. Remember that you will need to remove the row cover so that insects (which, incidentally, often include the striped cucumber beetle) can pollinate the flowers of the plants. If row cover does not help the situation, dust the plants with Rotenone. This is an organic pesticide that is short lived in the environment, but is poisonous to many species, includ- ing humans. Take safety precautions when applying this pesticide by using gloves and a mask. Allow only the agricultural intern to help you spread the Rotenone.• Cutworms arrive in May, right around the time when you are transplanting tomatoes, collards, and other seedlings into the ground. These fat, gray-and-black striped caterpil- lars curl up under the soil next to the stem of the seedling and eat right through it. You will see damage that looks as if someone had cut the seedlings off at the soil line with scissors. In general, the cutworm season lasts only a few weeks, usually until early June. You have several options in dealing with cutworms: • A paper or cardboard collar around seedlings that extends an inch or so above and below the soil line seems to discourage the worms from eating the stem. This is quite labor intensive when dealing with the amount of seedlings you need to transplant, but can be an enjoyable activity for a volunteer group. • Delay planting of seedlings vulnerable to cutworms, or have a supply of extra transplants on hand to replace damaged seedlings when the season has ended. • Handpick cutworms curled close to stems just below the soil surface.

183
• Sprinkle a mixture of bran, molasses and Bacillus thuringiensis var. kurstaki a few days before planting. This biological pesticide is specific to these caterpillars, which enjoy the taste of the bran and molasses.
• Cabbage maggots are white, tapering maggots that eat the roots of brassica family plants. The adults are small grayish flies that are extremely inconspicuous. The maggots may kill plants directly through extensive root damage, render them unsalable (particularly in the case of radish or tur- nips), create entryways for disease organisms, or stunt their growth so severely that they are unable to recover and grow properly. There are several generations of cabbage maggots each year, but the most severe one seems to occur in late May. There are several options for dealing with cabbage maggots: • Use floating row covers. The same covers you use to keep flea beetles away from brassicas may also work to keep adult flies from laying eggs at the base of brassica stems. • Set transplants out through slits in tar-paper squares. Again, this is labor-intensive, particularly if you need to combine cutworm collars with tar-paper squares. If you decide to use these methods, make sure you let the volunteer coordinator know that you will need capable volunteer groups to transplant brassica and nightshade seedlings in May. • Delay planting to avoid the first generation. • DO NOT compost roots from affected plants. Burn them or throw them away, but do not risk introducing maggots into a cool area of the compost pile where they might survive the decomposition process and become adults. • Bean beetles are significant pests of our bean crops on the urban lots. These yellow-brown, spotted beetles eat the foliage and sometimes the fruit of bean plants; most of the damage, however, is done by their fat, yellow-orange larvae. These beetles enjoy warm weather, and a very early planting of bush beans may avoid them altogether. Monitor the plants carefully. Floating row cover may help prevent
After fifteen years as a vacant lot, a sign of new times goes up.

184
beetles from attacking plants. The large labor force on the farm can also be useful in hand-picking bean beetles before they begin to reproduce on the plants. Distribute paper cups to a work crew and teach them how to find the beetles and place them in the cups. (An advanced or less squea- mish crew may also learn how to dispose of bright-orange egg clusters on the underside of leaves). After examining all the plants, consolidate the beetles from the cups into a bucket. Fill the bucket with water to dispose of the beetles. Pick the beetles off the plants once a week until their popu- lation is insignficant.
The last thing that many of the people who work with us on the urban lots want to do is pick insects off plants. Most of them have never set foot on a farm, and the idea of actually touching beetles is usually a disgusting thought. When leading this task, explain the importance of protecting the plants so that they can grow to maturity. Also describe why you are removing the in-sects in this manner as opposed to spraying a chemical. By the end of the work block, most will have enjoyed the opportunity to be an integral part of protecting the growth of the plants.
DISEASESOn the urban lots, we use a number of general practices to limit the amount of diseases that are present. For example:We move each family of vegetables to a different field on the lots every year. Ideally, there will be at least a three-year rotation so that a vegetable family will not return to a previous field for three years. This alleviates many disease problems.
When disease is present on the lots, we work with the healthiest plants first when harvesting or cultivating, and then move on to the plants that may have some form of disease. This prevents us from becoming human vectors of the disease and spreading it into the healthy plants. We try to avoid working with plants when leaves are wet, because disease organisms spread easily in wet conditions. We try to avoid damaging plants, since wounds allow disease vectors to enter.
We try to maximize air flow around the plants. Because of our
A crew hand weeding a field in Lincoln.
185
limited space on the urban lots, we often use intensive spac-ing in the growing beds. This technique is effective in conserv-ing space and water, since the leaves of the plants often grow together to form a canopy that shades the soil and slows evapo-ration, but close spacing can also lead to increased incidence of disease and a quicker spread of disease among plants once it is established. Careful attention to staking tomatoes will enhance the air flow around the plants, decreasing the incidence of diseases. Staking tomatoes may also limit the spread of disease among the plants.
We dispose of infected plants throughout the season instead of putting them in our compost bins. This is particularly impor-tant on the urban lots, where space for rotation is limited and many diseases are spread through the soil. Carefully bag and throw away infected plants to remove the disease from the lots, if possible. Prune off infected portions, if you can, and throw them away in sealed containers. Make sure that you wash and disinfect hands, feet, and tools with a bleach solution when dealing with crops affected by disease. Thorough annual fall cleanups are also very important in reducing disease problems on the lots.
Theft and VandalismGiven the vulnerability of The Food Project’s urban lots, which are highly accessible and quite visible in our neighborhood, we are very fortunate to have as few problems with theft and vandalism as we do. Neighbors of all three lots are kind enough to keep a watchful eye on the lots, and this discourages a great deal of potential vandalism and theft. The presence of neighbor gardeners, who often work on their plots in the evenings and on weekends, when Food Project staff tends to be away from the lots, also helps keep these problems to a minimum. None-theless, each season you will have to deal with at least a few incidences when plants are injured, crops are stolen, or sheds or other infrastructure is damaged. This can be extremely frustrat-ing if you see it as an assault on your work or The Food Project’s mission and vision. On the other hand, if you try to view the damage as a trade-off – you don’t have to deal with deer or woodchucks, but you do have human “pests” – the situation can

186
become easier to stomach.In 2001, we planted several short beds of squash and cucumbers very early. Growing on brown infrared mulch under wire hoops and row cover, the cucurbits survived a late frost and the early lack of pollinators and began to set fruit. Christina, the urban agriculture intern, watched the squash plants carefully so that we could begin harvesting them for the market as soon as they were ready. One Tuesday morning, she checked them as we harvested and announced that we would have a good yield for Thursday morning’s harvest. When Thursday came, however, not one squash was ready for harvest. Christina stood over the squash beds with a puzzled look on her face. “I was sure they’d be ready today,” she said. “Well, anyway, at least we’ll have a bunch next Tuesday.” Tuesday, however, brought the same sad result as Thursday – not one squash was the right size to harvest. By then, we were sure something was wrong, but we could not figure out what it was. The temperature had not been too cold, and there were plenty of pollinators visible in the many flowers that blossomed all over the plants. It seemed impossible that fifty-four linear feet of squash vines were not even yielding one pound of squash.
As we stood over the beds, scratching our heads in bewilder-ment, our neighbor Joe made his way down the driveway. “How are you, Joe?” I asked him. “Not so good,” he answered. “I’ve been watching people come here and take some vegeta-bles.” Christina and I looked at each other – the light began to dawn. “People come down here with plastic shopping bags. I see them every night out the windows of my house, but I am too nervous to do anything about it. I call the police, but by the time they get here the people are gone.” He pointed to the squash beds. “Those are what they like most of all.” I doubt that Joe understood why Christina and I began to laugh, but with his help, we had solved the mystery of the barren squash plants.
During one July and August, we had been noticing more and more consistent damage to plants, and had heard more stories from our neighbors about people gathering vegetables in the evenings. One evening as I walked back to the field from the market, I saw what looked like two people moving along the

187
tomato rows at the far edge of the West Cottage lot. As I got closer, I could see a mother, an older daughter and two young boys in the tomatoes. The children were picking up plum toma-toes that had fallen on the ground and putting them into a bag. I was sure I’d found our culprits, and spoke up indignantly. “Ma’am, those tomatoes are not just for taking.” The mother looked up. “I’m the grower here and we’ve been having quite a hard time with people taking home food from our lots.” I eyed the children and their bag.
“Well, I live on this street,” the mother said, “and I have seen lots of people come to take vegetables home. I like to walk here at night with my children. We come every week and my boys love to watch the changes in the vegetables. We’ve never taken anything before, but I didn’t think you would want these tomatoes that fell on the ground. I try to keep people out of here when I can.” A little shamefaced, I knelt down in front of one of the boys. “What do you have there?” I asked. “Tomatoes,” he replied. “And over there are peppers, and over there are car-rots, and there are beans….” Together, we walked through the lot and the boys showed me every crop they knew. I filled in the vegetables with which they were unfamiliar, and, to their great delight, we pulled up a bright orange carrot. That night was a powerful lesson for me in the ways that the community around us used the urban lots for teaching and learning, exposure to nature, and a little quiet in the middle of the city – all without leaving a mark on the land. While theft and vandalism do hap-pen from time to time, the fact that our lots remain open means that they can have purposes that we can only imagine.
Sharing our land and produce with neighbors is probably the best way to discourage theft. Many of the people who live around the lots work and are not able to get to our markets. Setting aside a basket of vegetables for some of them means that you are in contact with them on a regular basis, that they are familiar with the work we are doing on the lots, and that they have an opportunity to convey to you any concerns they have about theft or other issues on the lots. Their interest in The Food Project’s work includes keeping an eye on the property at times when we cannot be there. In addition, having as many neighbor

188
gardeners who live on the street as possible helps deter thieves and vandals, since neighbor gardeners are apt to be vigilant when their own vegetables are in jeopardy as well.Locating particularly appealing crops, such as collards and tomatoes, away from major streets can be another way to deter people who might want to pull over and grab a few tomatoes. When crop rotations demand that these crops be near the streets, a barrier of sunflowers or other tall flowers can help shield them from passers-by. Our strawberries are currently planted in a very inconspicuous spot in the very center of the West Cottage lot, where they have been relatively free from theft. We choose not to grow any corn or melons on the urban lots at all, in part due to space considerations, but also because the prospect of theft is too high to justify growing them.
There will probably always be some theft and vandalism on our urban lots. In general, Langdon Street has much less of a problem with these issues than West Cottage, possibly because it has been in the neighborhood longer and is better protected by community members. The amount of produce we lose each season is probably in the hundreds of pounds. When planning for the upcoming season, keep in mind that some of the produce you plan to grow will be lost to thieves. If possible, plant a little extra of popular and easily harvested crops such as collards, tomatoes, and summer squash. Communicate with passersby as much as possible so that they know what The Food Project is and where our produce goes. Finally, talk to as many children as you can on the street. Children and young people are respon-sible for some of the vandalism that occurs from time to time on the lots – burning the kiosk, throwing ripe tomatoes at the sheds, the occasional round of graffiti, and so on. Communicat-ing with them and letting them know about the opportunities that are available with The Food Project is often a helpful way to discourage them from using the lots as places to cause trouble.
Greenhouse WorkThe Food Project’s greenhouse in Lincoln allows the Lincoln farm and the urban lots to increase the quantity and quality of the produce that they distribute. The greenhouse demands intensive maintenance and management since it must provide an ideal early growth environment for seedlings. You will share

189
responsibility for the greenhouse with the Lincoln grower and grower’s assistants. Take advantage of the greenhouse to assist you in growing outstanding produce.
The greenhouse was constructed in the winter and spring of 2000. It is a thirty by ninety-six foot gothic-style greenhouse covered with two layers of plastic. There are two 200,000 BTU propane heaters, two cooling fans, a squirrel fan, two circulat-ing fans, three shutters for fresh air intake, and four thermostats for temperature control. The greenhouse is powered by a 4.5 kilowatt generator that stores energy in eight batteries. A Trace invertor controls the electrical system and turns the generator on when needed.
During the spring of the 2000 season, we grew over one thou-sand flats of seedlings in the greenhouse. In 2001, that number grew to one thousand two hundred. Throughout the fall, we cured winter squash, popcorn, sweet potatoes, and onions in the greenhouse. In January of 2001, we started a greenhouse enter-prise project to grow organic arugula for a local retail outlet.
Sharing the GreenhouseThe greenhouse can be considered another small farm to man-age. It has its own issues with seeding, watering, temperature, fertility, pest control, and timing. The plants within the green-house need to be monitored many times each day. Depending upon your usage, you will share the watering duties with the rural grower and the grower’s assistants. Your supervisor will create a rotation schedule for each weekend throughout the season so that no one person will have the sole job of taking care of the greenhouse.
Work with the rural grower to inventory all the supplies in the winter. Calculate the number of bags of potting soil needed and include this with the annual Northeast Organic Farming Associ-ation bulk order. Let the rural grower know how many seedling trays you will need so that he or she can include your trays with the Lincoln order from Griffin Greenhouse Supply.
During the spring, plan to spend about one day a week out at the greenhouse in addition to your “on-duty” weekends. You

190
may need to make more frequent trips to the greenhouse if your greenhouse schedule requires it. While you are there, check your seedlings carefully and monitor their growth and any potential problems. It can be a challenge to start seedlings in a greenhouse so far away from the place where you do the major-ity of your work, but you are fortunate to have the assistance of the rural grower and grower’s assistants in taking care of your seedlings. If there are seedlings that require special attention, or if you notice a potential problem, be sure to communicate this to the Lincoln grower and grower’s assistants. Unless you are very clear about the needs of your seedlings, they will treat them in the same way that they treat their own seedlings.
Also, always keep in mind that you are sharing the greenhouse space with three other people, in addition to any enterprise proj-ects that might be going on there. Make sure that you keep your supplies carefully labeled and appropriately stored so that they are not in anyone’s way. Respect the space needs of every proj-ect in the greenhouse, as well as the fact that many DIRT crew members and Food Project staff people use the greenhouse on a regular basis. A neat, well-organized greenhouse is healthier for plants and better for everyone who uses it.
Landscaping and Site MaintenanceIt is very important that The Food Project maintains not just our vegetable fields, but also the entirety of our lots in a way that is both sustainable and pleasing to the eye. The non-agricultural areas of the lots are some of the most challenging to maintain, since they are prone to infestation by weeds and invasive spe-cies and are often not our first priority during the busiest times of the summer. On the other hand, when planted in native species, plants that add winter interest, or fruit-bearing trees or bushes, these areas have the potential to be as beautiful and productive as the vegetable fields. To this end, Food Project staff and youth have worked with a professional landscape designer to develop beautiful, productive landscape plans and appropri-ate maintenance schedules for the Langdon and West Cottage lots.
LangdonThe team of youth and adults who designed the borders of the
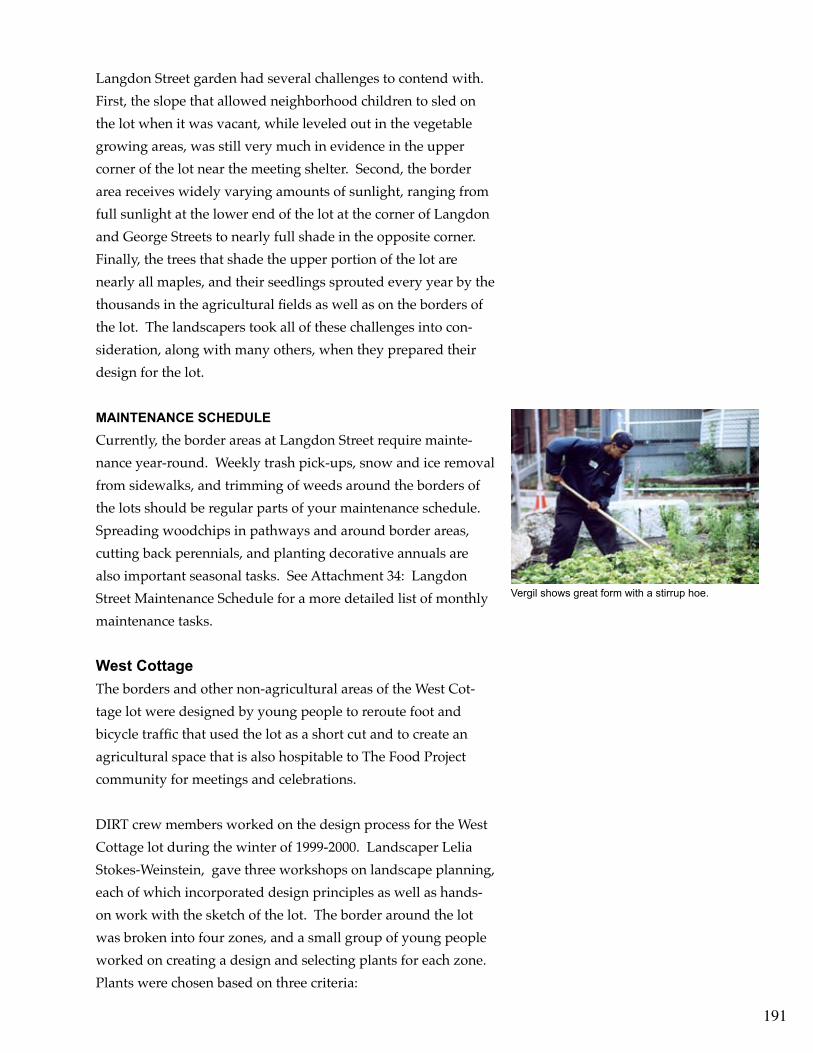
191
Langdon Street garden had several challenges to contend with. First, the slope that allowed neighborhood children to sled on the lot when it was vacant, while leveled out in the vegetable growing areas, was still very much in evidence in the upper corner of the lot near the meeting shelter. Second, the border area receives widely varying amounts of sunlight, ranging from full sunlight at the lower end of the lot at the corner of Langdon and George Streets to nearly full shade in the opposite corner. Finally, the trees that shade the upper portion of the lot are nearly all maples, and their seedlings sprouted every year by the thousands in the agricultural fields as well as on the borders of the lot. The landscapers took all of these challenges into con-sideration, along with many others, when they prepared their design for the lot.
MAINTENANCE SCHEDULECurrently, the border areas at Langdon Street require mainte-nance year-round. Weekly trash pick-ups, snow and ice removal from sidewalks, and trimming of weeds around the borders of the lots should be regular parts of your maintenance schedule. Spreading woodchips in pathways and around border areas, cutting back perennials, and planting decorative annuals are also important seasonal tasks. See Attachment 34: Langdon Street Maintenance Schedule for a more detailed list of monthly maintenance tasks.
West CottageThe borders and other non-agricultural areas of the West Cot-tage lot were designed by young people to reroute foot and bicycle traffic that used the lot as a short cut and to create an agricultural space that is also hospitable to The Food Project community for meetings and celebrations.
DIRT crew members worked on the design process for the West Cottage lot during the winter of 1999-2000. Landscaper Lelia Stokes-Weinstein, gave three workshops on landscape planning, each of which incorporated design principles as well as hands-on work with the sketch of the lot. The border around the lot was broken into four zones, and a small group of young people worked on creating a design and selecting plants for each zone. Plants were chosen based on three criteria:
Vergil shows great form with a stirrup hoe.

192
• Their suitability for the area • Their attractiveness • Their potential uses, including some crop plants – such as raspberry and blueberry bushes – as well as others that would form sight and physical barriers along some of the busier streets that border the lots
MAINTENANCE SCHEDULECurrently, the borders and grassy common areas of the West Cottage lot require similar maintenance to the border areas at Langdon Street. Trash pick-up, mowing or weed-whacking, snow removal, and planting and maintenance of border gar-dens, as well as making necessary repairs to the fence, should all be priorities at the appropriate time of year. See Attachment 32: Yearly Maintenance Schedule, for a complete list of maintenance chores.
Albion StreetThe Food Project acquired the Albion Street lot as a growing space in May 2001. Currently, a two-foot border, in which flow-ers and herbs are planted, surrounds the growing beds. Young people in the DIRT crew will design a landscaped border for the lot during the winter of 2002-2003.
The Albion Street lot has many of the same maintenance needs as the Langdon and West Cottage lots, including weekly trash pickup, weeding and mulching of pathways and border areas, and snow removal as necessary.
Season ExtensionThe climate at the urban lots is significantly warmer than it is on the farm in Lincoln, due to both the influence of your loca-tion near the coast and the absorption and retention of heat by asphalt in the city. This allows you to extend the season by several weeks in the spring and fall. The longer season is one real advantage of urban agriculture, and taking advantage of it is a great way to use the lots for education.
Early SeasonPlan your earliest crops to coincide with the first farmers’ market at the beginning of June. Two types of crops respond
Attachment 32

193
well to different extension strategies. Warm-season crops, such as tomatoes, squash, and cucumbers, can be planted on plas-tic mulches (black or red for tomatoes, brown IRT mulch for cucurbits) in mid-April and covered with wire hoops and an additional layer of clear plastic. Remember that you will need to uncover the cucurbits to enable pollination when the plants begin to bloom. Also, unless you can find slitted plastic row cover that is the right size for your warm-season crops, you will need to pay careful attention to the temperature and remove or vent the plastic whenever necessary to avoid damaging the plants. In previous years, growers have tried planting several types of warm-season crops in one bed as well as growing each in a separate bed. In general, the differences in cultural require-ments between crops seem to make growing each crop in a sepa-rate bed (or a short separate section of the same bed) a better strategy. While these warm-season crops may not be ready for the first markets in June, you will have them significantly earlier if you use these methods – and try some of your own.
Cool-season crops, including beets, carrots, turnips, broccoli, and cabbage, can be seeded or transplanted under wire hoops and floating row cover to provide a few degrees of frost protec-tion and temperature elevation. If you plant these crops around the first week of April, you should be able to harvest many of them in time for the first farmers’ markets in June. Spinach, radishes, and salad mix can also be seeded around the last week of April or the first week of May in order to harvest them for the first market. In general, these crops do not require row cover for season extension, since they respond well to the cool spring temperatures. Consider using row cover on radishes, however, to help control flea beetles.
Late SeasonThe first frost in the city of Boston often does not come until December. As a result, you will be able to maintain late crops of tomatoes, peppers, and eggplant until the end of the farmers’ markets in late October, while cool-season crops such as bras-sicas, salad greens, and roots can stay in the ground much later. During the winter, meet with the urban kitchen chef to discuss late-season crops. Find out his or her needs and preferences
Forty dumptruck loads of compost to be spread over a new acre.

194
and design a late-season plan that reflects these as well as the needs of the land. Remember that the more you extend your growing season, the less you will be able to rest the soil in cover crops. Try to keep late-season crops concentrated in one area of the lots, since this will make it simpler to design a cover crop-ping plan. Covering crops with a layer of floating row cover, or mulching them thickly with straw, may provide a few additional degrees of frost protection as the weather becomes colder.
BeesThe Langdon Street lot is home to several hives of honeybees, which are useful on the lots for pollination as well as honey pro-duction. In 2001, we harvested about 60 pounds of honey from two hives. As the urban grower, you are ultimately responsible for the bees’ continued presence on the lots, their relationship with visitors and neighbors on the street, and their use for edu-cational purposes.
The honeybees have been on the Langdon Street lot since 2000. Lea Campolo, a local beekeeper, initiated the honeybee project with the urban grower, and volunteered her time to establish and take care of the hives during the 2000 season. In 2001 the urban agriculture staff assumed a closer relationship with the bees. One hive failed to weather the winter of 2000-2001 and was replaced with another colony in spring of 2001. The second hive remained healthy and began producing honey early in the spring, quickly outgrowing the supers that we had provided for the bees.
One morning, I arrived early on a harvest day to find a mes-sage from Lea on my voice mail. “Someone from The Food Project called me about a swarm of bees,” she said, “but my car is broken and I won’t be able to get out there this week. You’ll have to take care of this one yourself, or call my friend Nancy at the beekeeping store.” When I arrived at Langdon Street with harvest crates and rubber bands ready to harvest, I found the swarm woven through the branches of a small tree by the fence at Langdon, close to the ground – and the street. The market manager had been working at the office in the late afternoon when Clarimundo called to report that the swarm was fright-
Harvesting beans at West Cottage.
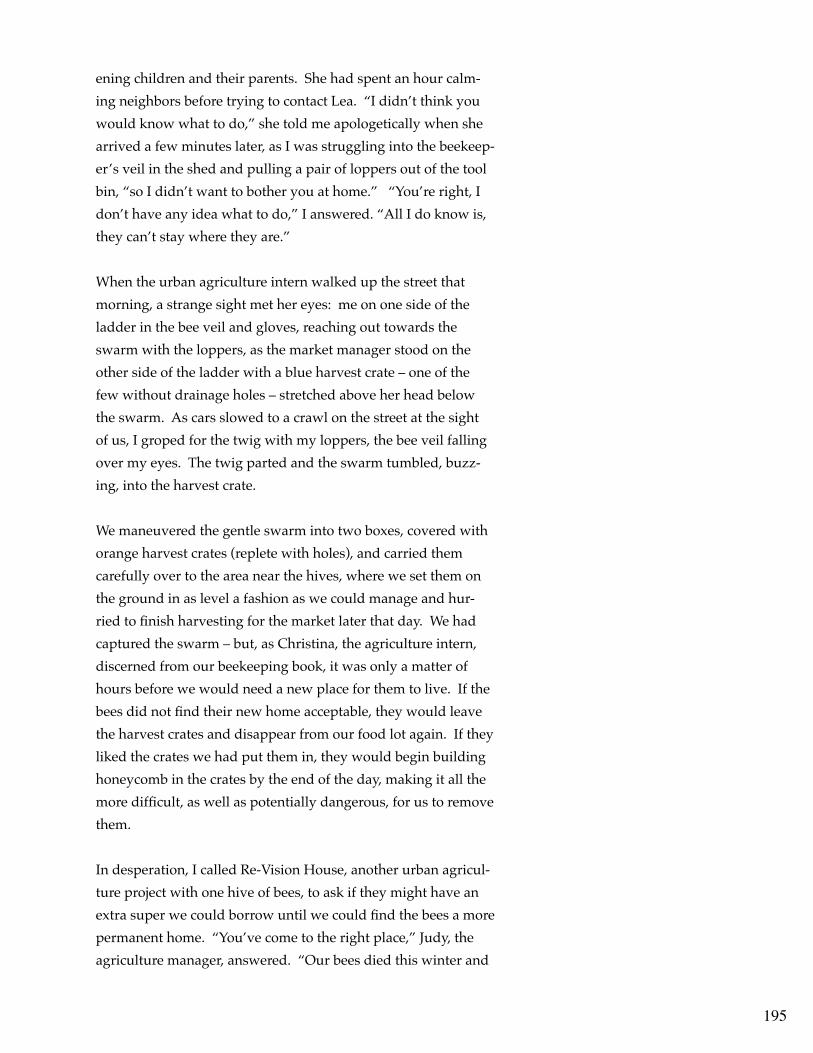
195
ening children and their parents. She had spent an hour calm-ing neighbors before trying to contact Lea. “I didn’t think you would know what to do,” she told me apologetically when she arrived a few minutes later, as I was struggling into the beekeep-er’s veil in the shed and pulling a pair of loppers out of the tool bin, “so I didn’t want to bother you at home.” “You’re right, I don’t have any idea what to do,” I answered. “All I do know is, they can’t stay where they are.”
When the urban agriculture intern walked up the street that morning, a strange sight met her eyes: me on one side of the ladder in the bee veil and gloves, reaching out towards the swarm with the loppers, as the market manager stood on the other side of the ladder with a blue harvest crate – one of the few without drainage holes – stretched above her head below the swarm. As cars slowed to a crawl on the street at the sight of us, I groped for the twig with my loppers, the bee veil falling over my eyes. The twig parted and the swarm tumbled, buzz-ing, into the harvest crate.
We maneuvered the gentle swarm into two boxes, covered with orange harvest crates (replete with holes), and carried them carefully over to the area near the hives, where we set them on the ground in as level a fashion as we could manage and hur-ried to finish harvesting for the market later that day. We had captured the swarm – but, as Christina, the agriculture intern, discerned from our beekeeping book, it was only a matter of hours before we would need a new place for them to live. If the bees did not find their new home acceptable, they would leave the harvest crates and disappear from our food lot again. If they liked the crates we had put them in, they would begin building honeycomb in the crates by the end of the day, making it all the more difficult, as well as potentially dangerous, for us to remove them.
In desperation, I called Re-Vision House, another urban agricul-ture project with one hive of bees, to ask if they might have an extra super we could borrow until we could find the bees a more permanent home. “You’ve come to the right place,” Judy, the agriculture manager, answered. “Our bees died this winter and

196
we have their old hive out back. It might even still have honey in it. You can come get it this afternoon.”
The new hive was heavy with honey, and contained none of the dead bees or honey-stealing ants that Christina and I feared might inhabit it. It looked clean and spacious – just the right size for our wayward swarm. When we had set it up next to the crates full of bees, with its top off and the honey frames visible, Christina and I looked and each other and took a deep breath. “I don’t think I can wear the bee veil this time, because I can’t see a thing in it,” I told her. “we’ll just have to put the gloves on and hope that they really are still gentle.” From the reading that Christina had done in the van on the way to Re-Vision House, we knew that the bees could choose to accept or reject their new home. If the first scouts accepted the hive, according to the book, we would see them dancing at the entrance, inviting the others to join them. Holding our breath, we lifted the first crate of bees and turned it on its side near the entrance to the hive. The scouts crawled off the branch where the swarm was still clumped and into the hive. They were followed by a disorderly stream of worker bees, who milled around the entrance in con-fusion.
After a few moments, the scouts returned from the inner realms of the hive. As we watched, they arranged themselves at the entrance, abdomens pointing towards the swarm, and began to dance. They had accepted their new home.
As of this writing, The Food Project shares management of the bees on the Langdon Street lot with Lea Campolo. We own a bee veil, two pairs of gloves, a smoker, and a hive tool, all of which are kept in a large blue container in the Langdon Street shed. In general, Lea visits the hives once a season, more often if necessary. She administers medicine, adds supers for the bees to fill with honey when it is time, prepares the hives for winter, loves to help with the honey harvest and extraction, helps us order the necessary equipment and supplies to keep the hives healthy, and makes sure that the bees are maintaining their homes properly.

197
The hives consist of two deep hive bodies. Each hive body is stocked with ten movable frames with comb foundation. The hive bodies are where the bees build their brood nests and store the honey that the hive will need for the winter. During the spring and summer, shallow supers are stacked on top of the hive bodies. These supers are where the bees store extra honey – the honey that we will harvest. A queen excluder between the hive bodies and the supers prevents the bees from building brood nests in the supers. Each season, you will need to take some time to monitor the bees and perform the tasks that are necessary for the season. The busiest seasons in beekeeping are the spring, when you need to keep the hive healthy and prevent swarming, and the fall, when honey is harvested and extracted.
Spring WorkYou can check the health of the hive after the winter by noticing whether there is activity in and out of the hive on warm, sunny, late-winter days. Do not open the hive until the temperature is over 40 degrees Farenheit. When you do open the hive, check the location of the cluster of bees. Bees start at the bottom of the hive in late fall and feed upward during the winter. They will not go down to find food even if it is present in the hive. If the cluster is near the top of the hive, you may need to provide emergency food for them in the form of sugar water, sugar candy, or, in colder weather, combs of surplus honey. Once you begin supplemental feeding, you should plan to continue it until adequate sources of nectar are available, or else the colony may starve.
In April, or when temperatures reach 60 degrees, check the colo-ny carefully for diseases and clean it well. Look carefully for the presence of brood, which will indicate the health of the colony. If the queen is producing brood in the top hive body, it will limit the growth of the colony; when the weather has stabilized, reverse the hive bodies so that the colony can continue to grow.
During the spring, numbers in the hive can reach over 80,000 bees. When the hive becomes too crowded, the bees produce new queens and tend to swarm. This weakens the existing hive, since more than half of the population can leave the hive in
Children from the neighborhood are frequent visitors and contributors to the urban lots.

198
primary or secondary swarms. Unless you want to be chasing wayward swarms around Dudley Square, keep an eye on the populations and honey flow in your hive and make sure that the bees have enough room by adding supers as necessary. Have several extra on hand for each hive. If the colony is very strong, you may need to add an extra hive body or a half hive body in order to provide sufficient room for brood storage. Reversing the brood chambers every eight to ten days may help prevent swarming. Provide colonies with maximum sunlight early in the season, but locate them so that they receive afternoon shade as temperatures begin to warm. High temperatures in the hive may contribute to swarming. Make sure that the hive has ad-equate ventilation by removing winter entrance blocks.
Monitor the hive carefully, checking for queen cells that indicate that the colony is preparing to swarm. Remove them as soon as you see them; if the queens are in an advanced state of develop-ment, you may only be able to postpone swarming by remov-ing the cells. Finally, you may need to requeen the hive every couple of years, since hives with older queens tend to be more likely to swarm.
Summer WorkDuring the summer, the majority of your contact with the bees will be to make sure that they have enough room to continue manufacturing honey. Every few weeks, check the supers to see if the bees still have unused comb. If the supers are full or nearly full, make arrangements to add additional supers to the hive. You may also want to harvest one or more supers during the summer if you have a safe, dry place to keep them where the honey will not absorb water. Make sure that you and anyone else who is present when you do the harvesting wears protec-tive clothing, and use smoke to pacify the bees when harvesting honey.
In late summer, usually around the middle of September, you will need to harvest the remaining supers, leaving the honey in the hive bodies for the bees. If possible, schedule the extraction for a Saturday when the DIRT crew will be in Roxbury. Extract-ing honey is one of the most enjoyable activities in which the DIRT crew takes part in during the fall trimester, particularly

199
when a knowledgeable beekeeper is on hand to answer their questions about the bees and honey. You can expect fifty to sixty pounds of honey from each healthy hive that is past its first year on the lot, so make sure that you have sufficient contain-ers available when you begin the extraction. You can purchase containers from a local beekeeping supplier when you rent the honey extractor. Remember to call in advance to schedule your extractor rental, since many local beekeepers will be extracting at the same time of year.
Fall WorkFall work in the beehives is focused on preparing the hives for winter: preparing hive equipment and checking hives for ad-equate ventilation and making sure that they have sufficient and high-quality supplies of honey.
Remove surplus honey and partially filled supers from the hive after a killing frost, if you have not already done so. Using an entry reducer, a small strip of wood that decreases the size of the lower entrance to 3/8” by 4”, will help block the flow of cold air into the hive and conserve the heat generated by the bees. Cre-ating an opening in the top of the hive by lifting the top cover about 3/8” will increase ventilation in the hive and prevent the bees from becoming trapped if the bottom opening is blocked by dead bees. If you do add a top opening, be sure to locate it on the same side of the hive as the bottom opening so that it will not create a draft.
Most hives in the Northeast will generate enough heat on their own to survive without additional insulation; however, wrap-ping hives in tarpaper may increase their chances of survival slightly. Elevate the rear of the hive a little to make sure that moisture will not pool at the back of the hive. Finally, check the hive to make sure that the colony is strong enough to survive the winter. Colonies with less than 15 frames covered with bees should be combined with stronger colonies. Hives with young queens are also more likely to survive the winter.
Make sure that each hive has two or three hive bodies full of honey to sustain its population through the winter. Check the location of the cluster of bees, and make sure that full hive
Gateway to The Food Project’s West Cottage food lot.

200
bodies are above the cluster, since bees will not move down to find food. If supplies are insufficient, feed heavy sugar syrup (two parts sugar to one part water) throughout September and October until the bees have made the equivalent of nine full deep frames of honey. Each gallon of syrup will increase the bees’ available stores of honey by about seven pounds. Make sure that the uppermost hive body also contains a few partially filled frames with an empty space in the center to allow the bees to cluster. Two hive bodies filled with sufficient honey to sup-port a cluster through an average winter should weigh about 100 to 110 pounds.
Finally, treat all the hives each fall for Nosema disease (an infec-tion of the bee’s gut), tracheal mites, and Varroa mites. Remem-ber that all surplus honey must be removed before any treat-ment is completed. Although medicating bees for these pests and diseases means that the honey we produce is not organic, the possibility of maintaining our hives without these treat-ments is very low.
Winter WorkDuring the winter, check the hives once or twice a month to make sure that they are still upright, that their entrances are not blocked, and that the colonies are healthy. On warm, sunny days, you should see bees making cleansing flights from the entrances of healthy hives. Healthy colonies will also clean out their own hives by removing dead bees. Try not to open the hives during cold weather, since bees spend a great deal of their energy regulating the temperature of the hive.
A great deal of information on bees and beekeeping is avail-able on the internet. The Mid-Atlantic Apiculture Research and Extension Consortium (http://maarec.cas.psu.edu) maintains an excellent website where you can find answers to many questions and concerns about beekeeping. Local beekeepers can also be very helpful in answering your questions.
Harvest and Wash Station ManagementHarvest mornings on the urban lots bring an enhanced sense of excitement and meaning to the work on the land. Whether it is two Summer Youth Program crews, a group of volunteers, or
Turning beds is hard work.

201
simply you and a few other Food Project staff, everyone loves the experience of bringing crates full of beautiful, fresh, organic produce in out of the fields, knowing that they are bound for the farmers’ market, shelters, and food pantries.
In order to have the most profound impact on the greatest num-ber of people, however, the harvest needs to be carefully man-aged. The urban lots yield small quantities of a wide variety of crops, and the entire harvest usually takes a Summer Youth Pro-gram crew no more than an hour and a half to complete, even at the peak of the season. Careful planning and explanation on your part, will help eliminate harvest mistakes – which are easy to make when moving quickly from crop to crop – and ensure that each harvester is able to enjoy his or her experience.
The day before the harvest, make a list of all the vegetables you hope to harvest the next day, along with quantities in bunches or pounds (see Attachment 33: Harvest Log). Make a separate list for each lot, and decide how many people you will designate for the harvest at each site. For example, if you have a group of twenty people you might decide that ten will work at West Cottage, with two running the wash station and eight harvest-ing. You might have two people running the wash station at Langdon Street, with five people harvesting there and three at Albion Street.
Next, create a simple list for each harvest group that includes the name of the vegetable, how much you hope to harvest (sug-gestions such as “all ripe” are useful if you explain them), and reminders about harvesting techniques. For a group as large as eight or ten, it is helpful to separate them into two groups and give each one a separate list. For any given harvest morning, therefore, you should have up to four lists of vegetables for dif-ferent harvest groups. This eliminates confusion and gives the groups a “map” of their morning in the fields. Make sure that the lists are balanced in terms of the time it will take to harvest the crops; for example, if one group’s list includes beans, straw-berries, and cherry tomatoes, they will probably take longer than a group who has the same amount of summer squash, eggplant, and lettuce.
Attachment 33

202
On the morning of the harvest, go over each group’s list with them carefully. Make sure they know the appropriate size of each crop to harvest, along with the proper harvesting tech-niques. Demonstrate as much as possible, including the proper use of tools, if necessary. Ask each group to come up with a plan for their harvest – will they all work together to harvest each crop, or will they send people out in pairs to harvest dif-ferent crops? Discourage individuals from working alone, and emphasize the combination of pace and thoroughness that is essential for bringing the harvest in well and on time. Give the groups an idea of what time they should plan to finish the harvest. During the harvest, move from group to group as you are able to check in with them, answer any questions and correct technique.
All of the vegetables that are harvested at the urban lots pass through a wash station. These wash stations are areas that can be chaotic because of their complexity and temptation (there are many hoses to spray at each other). During the Summer Youth Program, the crews working on the urban lots will manage one of the wash stations each week, with two members of each crew working there on Tuesday and Thursday. During the volunteer season, long-term volunteers often enjoy working at the wash stations, but volunteers from ages 11 to 65 have managed them successfully. Every harvest day, hundreds of pounds of vegeta-bles pass through the wash stations, and the expectation is that after going through the wash station every vegetable is ready to be distributed. Structure and efficiency are crucial in the wash station area.
The wash stations on the urban lots consist of one 75-gallon tub that is used to wash collards or other high-volume crop, between five and ten 10-gallon tubs that are used to wash other crops, and a spray station for root vegetables that includes a mesh screen placed on top of two sawhorses. The wash stations must be set up for every harvest, and taken down and stored in the tool sheds at the end of each harvest day.
During the Summer Youth Program, two young people work at each wash station. They share responsibility for setting up the wash station, and then one person takes primary respon-

203
sibility for washing the vegetables while the other is primarily responsible for weighing and record-keeping. When the harvest crew drops the crates of produce at the wash station, one of the young people places them on a scale. He or she then records the weight on a harvest log sheet (see Attachment 33: Harvest Log). All produce should be weighed before it is washed. The young person who weighed the crate hands it off to the other young person, who takes the produce out of the crate and places it into a wash basin or on the spray station to be washed.
The produce-washer is also responsible for washing the dirty crates with a high-powered nozzle. After the crates are washed, they are stacked on their sides to drain so that they are ready to be filled with clean produce. When the crates are clean, the produce-washer washes the produce that is already in a wash basin, places it in a clean crate, and hands it off to the record-keeper, who puts the crate in a shady area for distribution to the farmers’ market.
Every vegetable requires different washing techniques, and the flow of the wash station is something that often requires a little training. Because different young people will be running the wash station each time, develop a short training that you can give to the wash station crew on the morning of each harvest day. Make sure that the urban agriculture intern is familiar with the training as well, so that he or she can give it if you are work-ing at separate harvest sites. During the morning harvest, visit the wash station to check for accuracy of record keeping, cleanli-ness of produce, and overall organization.
At the end of the harvest day, Summer Youth Program crews are rated on a scale of one to ten. Wash station teams are given a separate rating. You can choose to rate volunteer groups in a similar way, or to simply give them feedback on the harvest and wash station. Make sure that you leave time for them to share their impressions of the harvest.
Irrigation NeedsWater is an important issue in any agricultural undertaking, and particularly so in an urban environment, where the demands on the water system are proportional to the density of the popula-
Teamwork is a vital part of The Food Project.
Attachment 33
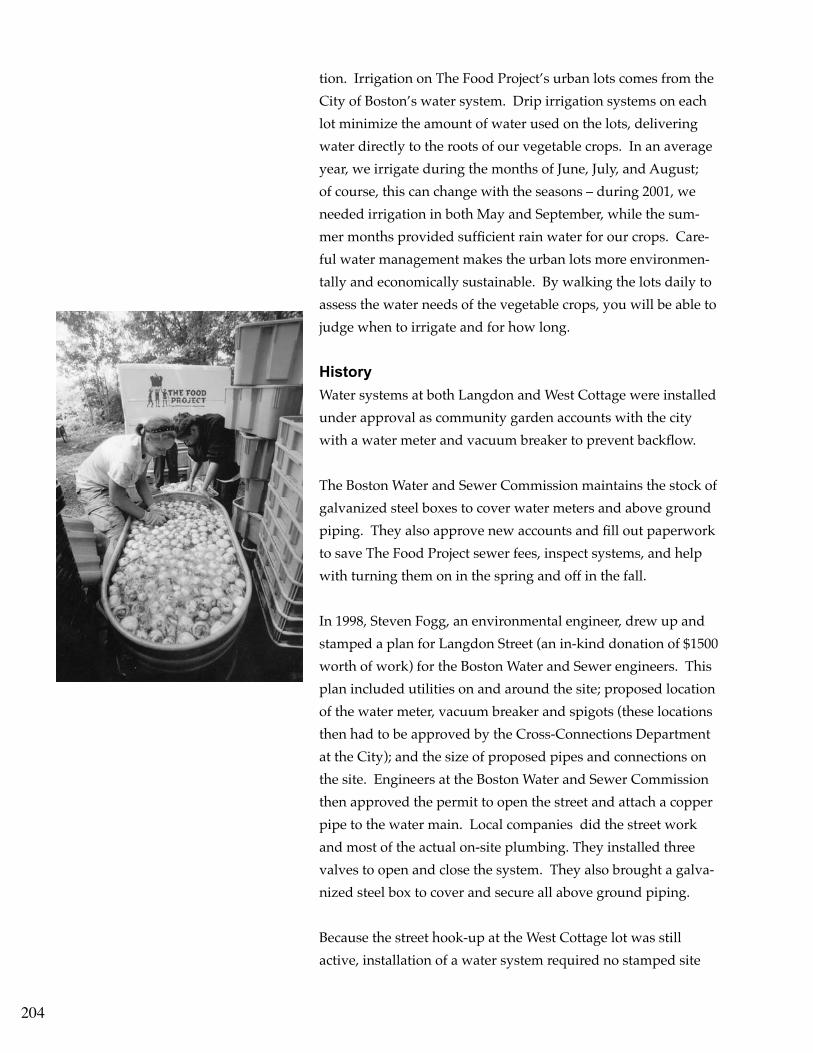
204
tion. Irrigation on The Food Project’s urban lots comes from the City of Boston’s water system. Drip irrigation systems on each lot minimize the amount of water used on the lots, delivering water directly to the roots of our vegetable crops. In an average year, we irrigate during the months of June, July, and August; of course, this can change with the seasons – during 2001, we needed irrigation in both May and September, while the sum-mer months provided sufficient rain water for our crops. Care-ful water management makes the urban lots more environmen-tally and economically sustainable. By walking the lots daily to assess the water needs of the vegetable crops, you will be able to judge when to irrigate and for how long.
HistoryWater systems at both Langdon and West Cottage were installed under approval as community garden accounts with the city with a water meter and vacuum breaker to prevent backflow.
The Boston Water and Sewer Commission maintains the stock of galvanized steel boxes to cover water meters and above ground piping. They also approve new accounts and fill out paperwork to save The Food Project sewer fees, inspect systems, and help with turning them on in the spring and off in the fall.
In 1998, Steven Fogg, an environmental engineer, drew up and stamped a plan for Langdon Street (an in-kind donation of $1500 worth of work) for the Boston Water and Sewer engineers. This plan included utilities on and around the site; proposed location of the water meter, vacuum breaker and spigots (these locations then had to be approved by the Cross-Connections Department at the City); and the size of proposed pipes and connections on the site. Engineers at the Boston Water and Sewer Commission then approved the permit to open the street and attach a copper pipe to the water main. Local companies did the street work and most of the actual on-site plumbing. They installed three valves to open and close the system. They also brought a galva-nized steel box to cover and secure all above ground piping.
Because the street hook-up at the West Cottage lot was still active, installation of a water system required no stamped site

205
plan or street work. A four-foot sidewalk pit was dug at the northwest corner of the lot (nearest to 42 West Cottage) to install a vertical pipe that connects to the original copper pipe that runs to the water main. From there, copper piping runs in a trench 2 feet beneath the beds to the meter box, where it transitions through the vacuum breaker and valves to polyethylene tubing. The tubing then ran in 18-inch trenches to front and rear plastic irrigation boxes; it was extended to the southern field in 2000. The galvanized water box and one set of spigots were located under the central tree. A second set of spigots was originally located near the intersection of the driveway and the main path through the lot, but was moved closer to the post-and-beam meeting structure when it was erected on the lot in 2000.
In spring of 2001, we installed drip irrigation in Field 3 at Lang-don Street and Field 5 at West Cottage. Neighbors at the Lang-don Street lot preferred to water their own plots using a hose from across the street at Clarimundo Silva’s house. Because of a drought in May of 2001, neighbors at West Cottage did not plant until it rained in early June. Their plots continued to be watered by the same sprinklers that serviced Field 2.
Management and Maintenance of Water SystemsIn the spring, contact the Boston Water and Sewer Commission to turn on the water to the West Cottage and Langdon Street lots. Ask them to do an inspection of the vacuum breakers at the two lots. During the season, unlock water boxes in the morn-ing and open the main gate valve to turn on the system. Close the box during the day to protect the piping and meter – the spigots and drip irrigation will operate while the system is on. At the end of the day, shut off water at the meter by closing the main gate valve, and lock the box overnight. These simple steps can prevent a great deal of potential damage to crops caused by children playing with spigots or drip irrigation valves in the evening, a common practice that can be disastrous if the main gate valve is left on.
Management of the water needs of the crops is essential to producing healthy harvests in the city. A general rule suggests that crops require one inch of water every week of the season;

206
however, different vegetable crops require different amounts of water at various stages of their development to produce op-timal harvests. During the season, keep track of the amounts and timing of rainfall in your field notebook. Use this informa-tion, combined with what you know about the requirements of various crops at different stages of development, to guide your irrigation planning.
Irrigation uprights for drip tape now exist in plastic irrigation boxes at the corner of Field 2 and the center of Field 3 at Lang-don Street, and at the corners of Fields 1, 3, 4 and 5 at West Cot-tage. Attach polyethylene tubing to the valves on the upright with hose clamps. Install plastic drip tape valves at the ends of the beds you want to irrigate, and roll the drip tape out to the end of the bed. Cut the drip tape and tie off or fold over the end furthest from the valve. Attach the drip tape to the valve.
The drip tape that we use on the urban lots is called “eight mil-limeter, 12 inch, .453 tape.” This means that the tape is 8 mm thick, with tiny holes punched into it at 12-inch intervals. Every minute, .453 gallons of water flow through the holes for every 100 feet of tape. As you irrigate, you will notice broadening circles of saturated soil radiating around each hole. When the circles touch (usually after 3-4 hours, depending on how many beds you are irrigating simultaneously), you can assume that your irrigation of that bed is complete. If you have sufficient drip tape, consider using two lines of tape per bed on crops that require a large amount of water, such as tomatoes and eggplant; this way, you will water each row with its own line. Three-row bed, such as lettuce, can also use two lines per bed.
We use drip irrigation on the lots to conserve water, since less water is lost to evaporation and runoff when the system delivers water directly to the plants and seeds. Because drip irrigation does not wet plant leaves, it may also reduce the incidence of plant diseases. Plan for the season ahead during the winter by ordering enough drip tape, valves and polytube to have what you need for the summer, as well as extra in case of an emergen-cy. You should order enough to install irrigation in all the fields that have the capacity, so that you do not need to move polytube and drip tape around the farm. Because the beds in the urban

207
lots are all different lengths, drip tape should be “custom cut” for each field and should remain there through the season.
The water flow on the urban lots is sufficient to water all beds that have drip tape capacity simultaneously. However, consider working out a watering rotation in which you combine drip with sprinkler irrigation on the fields that lack drip capacity and water each field every other day. This will make watering more efficient. Include neighbor gardeners in your water rotation, and make sure you consult with them to make sure their crops are getting sufficient water. In years with appropriate rainfall, you may not need to irrigate much at all. In 2001, we irrigated more in May and September, two very dry months, than dur-ing the summer. In more usual seasons, you will irrigate most in July and August, and can plan to remove irrigation tape and polytube in September. Save the polytube for future seasons, but don’t try to save drip tape unless you want to spend hours each season repairing it. Be careful when irrigating Field 4 at West Cottage. Watch for pooling of water in pathways and low areas, indicating that water is draining through the top layer of organic matter and collecting just above the hardpan below. The perforated pipe installed in 2000 and 2001 should help allevi-ate this problem, but you may want to consider lengthening the pipe in each pathway (currently it extends 10 feet into the pathway) if the problem continues. Also, keep the other end of the pipe (in the low area behind the compost bin, directly across the driveway from Field 4) clear of leaves and other obstructions to aid in drainage.
When cold weather arrives, above ground copper piping, valves, meter, and vacuum breaker can all freeze and crack if water remains in them. While the system is still in use, but when nights are colder, open the vacuum breaker screws and leave the spigots open after the main gate valve is shut to release extra water and relieve pressure. This is still risky if it is very cold. When the season is over, call Boston Water and Sewer and ask them to shut off the water if they have not already done so. Open all spigots and turn screws to open the vacuum breaker to drain extra water. Even though the polytube is closer to the surface, it is more flexible than copper or PVC and should not crack, even if there is some water remaining in it.

208
Record KeepingIn order to manage productive and beautiful urban lots, you need to keep impeccable records. Although it is challenging at times to constantly record and organize information during the busiest times of the year, the process forces you to be clear about the current status and needs of the lots. Also, meticulous notes will be invaluable to you in planning the lots for the following season. The more information you have about the lots, the more you will be able to plan to increase yield, minimize pest and disease outbreaks, and improve the health of the soil.
Task ListsThe first day of each week, write a task list for the jobs that you need to accomplish that week (see Attachment 34: Task List). Separate the tasks into categories and prioritize each of the jobs listed. This will help you keep track of all of your obligations and hopes as a grower. Saving these on the computer will allow you to look at the status of the farm over time. Comparing the task lists to those of previous years will give you a benchmark for when repeating tasks are performed.
Field LogBring a field notebook with you to the urban lots and write in it every day of the growing season. Document the temperature ranges of the day, precipitation, current status of crops, pest damage, first harvest days of each vegetable, and the tasks that are completed. This log will be very helpful to you because it will provide a detailed summary of the season to which you can refer in the following years.
Every week, take a field tour with your notebook, carefully making note of how specific varieties are growing and making suggestions for the following year. This is an important tool in the winter when you are creating the farm plan.
Harvest DatabaseEvery week during the season, take the harvest log sheets to the office and enter the data into the harvest database. If you wait too long, you may misplace the harvest log sheets and the data will be lost. The main harvest database layout was created to
Attachment 34

209
allow you to quickly enter harvest information. Other layouts allow you to obtain different types of information, ranging from comparing the harvests of different seasons to keeping a run-ning total of the season’s harvest.
Relationships and ServicesThere is a strong, vibrant agricultural community in the greater Boston area. Do not think that you are alone on the lots in the city without any help. Your role is enhanced by the relation-ships that The Food Project has crafted with other farms, in-dividuals, and organizations that provide valuable assistance as teachers, companions, mentors, friends, and community. As you become part of this network, you will find answers to almost any question you may have as the urban grower. Be sure to initiate and reciprocate the support you receive from others in the agricultural community.
NOFAThe Northeast Organic Farmers’ Association (NOFA) is an im-portant support for you as a grower. Each state in New England (except Maine), along with some Mid-Atlantic states, sponsors a chapter of NOFA. Each chapter hosts at least one conference each year, and the overall organization sponsors a summer conference that takes place during the first or second weekend in August. This conference is a wonderful opportunity to attend constructive workshops and exchange ideas with other grow-ers from all over the region. The winter Massachusetts NOFA conference allows you to interact with and learn from growers around the state. NOFA also distributes many publications that contain a great deal of practical information that is useful on the urban lots.
CRAFTThe Eastern Massachusetts CRAFT (Collaborative Regional Alliance for Farmer Training) program was created in 1998 to bring local farms together to share support information. Over twelve farms are a part of the program. These farms meet once every two weeks to receive a farm tour and hear talk related to a specialty of that specific farm.Conferences

210
During the winter, you will have the opportunity to be a pre-senter at various conferences relating to both agriculture and youth work. Often, you will present workshops in collabora-tion with Food Project youth. Sharing your work with others, particularly with youth, will force you to define your practices more clearly, evaluate many of your systems with a critical eye, and hone your work to new levels of quality. Contacts that you make at these conferences can also be very helpful to you throughout the year.
A team of urban farmers relaxes under the shelter.

211
Evaluation• EvaluationFormats• Implementation
In all areas of The Food Project, evaluation serves to improve our work and give us feedback about the outcome of our efforts. The urban lots have changed dramatically over the years in order to better serve our constituents. The continued vibrancy and health of both the land and our programs are dependent on continual evaluation.
Evaluation FormatsFrom the organization’s earliest days, The Food Project staff has pursued a simple and important line of inquiry after any significant activity or process. We gather in front of a flip chart and create two headings on a page: a positive, to represent things that went well, and a delta, for parts of the activity or the process that require change. With these two headings in mind, we review the activity and fill in the sheet from our recent experience. We then come to an agreement on the most impor-tant changes that have to be made to improve the work. The staff member who is in charge of the area under review takes the suggestions of the entire staff into consideration and experi-ments with the next stage of activity to create improvement. This simple method produces good results and continues to live in the organization today.
ImplementationStaff in all areas of the organization now keep track of statistics through their quarterly reports, implementing evaluation mea-sures that were created through the evaluation funded by the Kellogg Foundation. Key questions about the outcome of the agricultural work are addressed this way. The evaluator and the senior agricultural staff developed these tools. They need to be implemented consistently to give us insight and data we want on the effectiveness of the urban lots in relation to the farmers’ markets, shelters, enterprise, young people, volunteers, and other stakeholders. The future excellence of urban agriculture at The Food Project depends on responding to input from constitu-ents and creating new ways to integrate production agriculture with youth and volunteers.

Attachment 1
Lead Level Table
Lead levels: Estimated Total Lead (PPM)
Recommendations
Low: Less than 500 • Lime as necessary to keep pH around 6.5, and make sure phosphorus levels are appropriate, as low pH and available phosphorus reduce lead availability.
• Add organic matter (1/3 by volume, if possible).
Medium: 500 to 999 • Follow above practices and
avoid growing leafy vegetables and root crops in the soil. Grow these crops in raised beds or containers with lead-free soil.
High: 1000 to 3000 • DO NOT garden in this soil and
contact your local Health Department. Install raised beds or try container gardening.
Very High: Greater than 3000 • See above

Attachment 2
Double Digging 1. Mark the bed that you wish to turn with stakes and string.
2. Remove weeds and loosen the top 1’ of soil with a digging fork.
3. Begin digging, starting from one end of the marked area. With a spade, dig a 1’ wide, 1’
deep trench. Pile the topsoil from that trench onto a ground cloth or garden cart.
4. To loosen the exposed subsoil, stick your spading fork deeply in the soil and twist and wiggle the fork to loosen up the clumps. Spread a shovelful of organic matter over the surface of the exposed subsoil.
5. Slide the topsoil from the next 1’ section of the bed onto the subsoil in the first trench.
Loosen the exposed subsoil in the second trench.
6. Continue systematically down the bed, shifting the topsoil and loosening the subsoil.
7. When you reach the end of the bed, use the reserved topsoil from the first trench to fill in the last trench.
8. Spread compost or other organic matter over the entire bed, and use a spading fork to work
it into the top 4”-6” of the soil.

Attachment 3 Urban Agriculture Internship Schedule (subject to change by the whim of the grower) Spring (April-June) Tues: 4-6:30 pm Thurs: 4-6:30pm Saturday: 8am-2pm Summer (July-August) Mon: 8-4 Tuesday: 8-4 Wednesday: 9-12:30, every other week for intern meetings Thursday: 8-4 Friday: 8-4 Interns work between 30 and 35 hours/week Fall (September-October) Tues: 3:30-6pm Thurs: 3:30-6pm Saturday: 8am-2pm

Attachment 4 Produce Growth Diagram The diagram above illustrates the increasing challenge of growing reliable quantities of high-quality produce for each of the types of customers in the pyramid. Each step up the pyramid represents an increased level of
Community Supported Agriculture (CSA)
Restaurants, grocery
High-end markets
Need for quality and reliability of produce
Farmer’s markets and shelters
Contribution to hunger relief
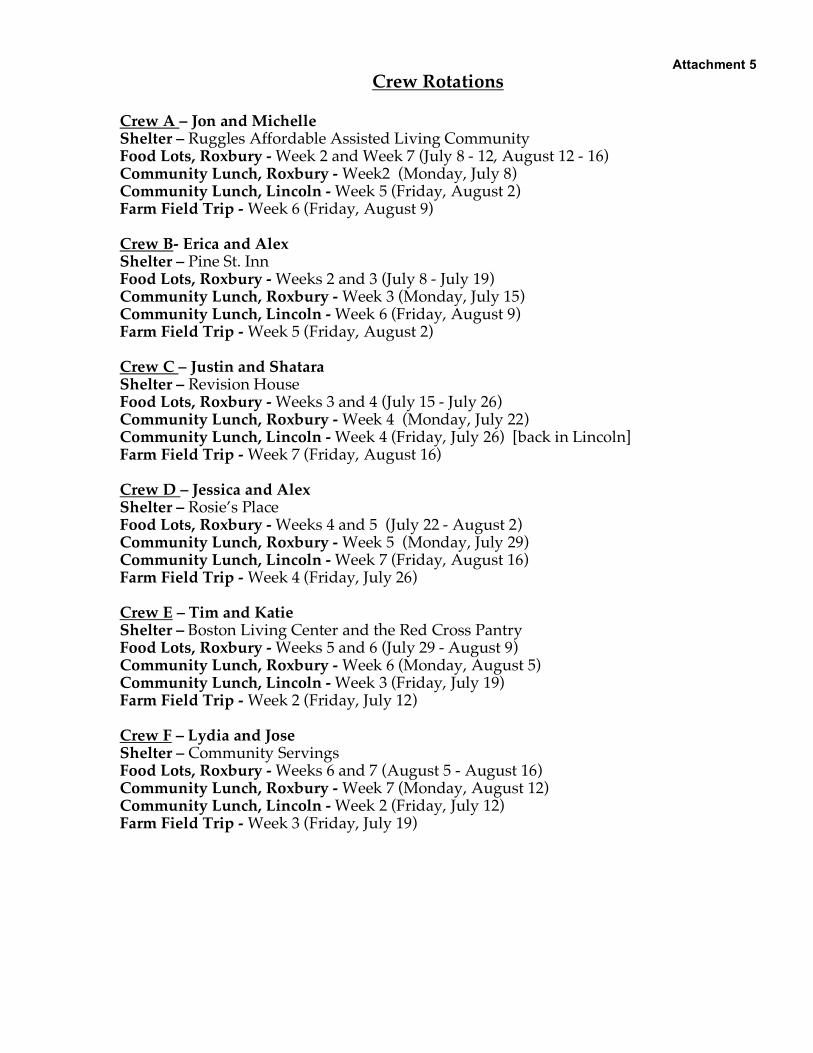
Attachment 5 Crew Rotations
Crew A – Jon and Michelle Shelter – Ruggles Affordable Assisted Living Community Food Lots, Roxbury - Week 2 and Week 7 (July 8 - 12, August 12 - 16) Community Lunch, Roxbury - Week2 (Monday, July 8) Community Lunch, Lincoln - Week 5 (Friday, August 2) Farm Field Trip - Week 6 (Friday, August 9) Crew B- Erica and Alex Shelter – Pine St. Inn Food Lots, Roxbury - Weeks 2 and 3 (July 8 - July 19) Community Lunch, Roxbury - Week 3 (Monday, July 15) Community Lunch, Lincoln - Week 6 (Friday, August 9) Farm Field Trip - Week 5 (Friday, August 2) Crew C – Justin and Shatara Shelter – Revision House Food Lots, Roxbury - Weeks 3 and 4 (July 15 - July 26) Community Lunch, Roxbury - Week 4 (Monday, July 22) Community Lunch, Lincoln - Week 4 (Friday, July 26) [back in Lincoln] Farm Field Trip - Week 7 (Friday, August 16) Crew D – Jessica and Alex Shelter – Rosie’s Place Food Lots, Roxbury - Weeks 4 and 5 (July 22 - August 2) Community Lunch, Roxbury - Week 5 (Monday, July 29) Community Lunch, Lincoln - Week 7 (Friday, August 16) Farm Field Trip - Week 4 (Friday, July 26) Crew E – Tim and Katie Shelter – Boston Living Center and the Red Cross Pantry Food Lots, Roxbury - Weeks 5 and 6 (July 29 - August 9) Community Lunch, Roxbury - Week 6 (Monday, August 5) Community Lunch, Lincoln - Week 3 (Friday, July 19) Farm Field Trip - Week 2 (Friday, July 12) Crew F – Lydia and Jose Shelter – Community Servings Food Lots, Roxbury - Weeks 6 and 7 (August 5 - August 16) Community Lunch, Roxbury - Week 7 (Monday, August 12) Community Lunch, Lincoln - Week 2 (Friday, July 12) Farm Field Trip - Week 3 (Friday, July 19)

Attachment 6 Crew B 2nd WeekMonday Tuesday Thursday Friday
8:00 AM SS/Grower Mtg. SS/Grower Mtg. SS/Grower Mtg. SS/Grower Mtg.8:15 AM CL/SS Meeting CL/SS Meeting CL/SS Meeting CL/SS Meeting8:30 AM8:45 AM Grower/CL Meeting (SS goes to Andrew) Grower/CL Meeting (SS goes to Andrew) Grower/CL Meeting (SS goes to
Andrew)Grower/CL Meeting (SS goes to Andrew)
9:00 AM Crew worker/Intern pick-up Crew worker/Intern pick-up Crew worker/Intern pick-up Crew worker/Intern pick-up9:15 AM Welcome! Weekly Schedule and Goals Morning Mtg: Logistics/Quote of the
DayMorning Mtg: Logistics/Quote of the Day
Morning Mtg: Logistics/Quote of the Day9:30 AM Field Work (1/3 Crew to cook) Harvest Harvest Market Analysis
9:45 AM10:00 AM10:15 AM10:30 AM Field Work10:45 AM11:00 AM11:15 AM11:30 AM11:45 AM12:00 PM Lunch Lunch Lunch12:15 PM12:30 PM Community Lunch12:45 PM Games: Pass theses sticks Games: Bing Bang Boom Games: River/Bank
1:00 PM Trip to Market (KB) [ss/cl contract mtg. Workshop: Rope Swing Urban Ed. Workshop1:15 PM1:30 PM1:45 PM2:00 PM Field Work Field Work Chores2:15 PM Journal Writing
2:30 PM Rec Day2:45 PM3:00 PM Prepare for Market3:15 PM3:30 PM Chores Set up Market Chores3:45 PM Announcements Announcements4:00 PM Leave for Train Run Market Leave for Train Leave for Train4:15 PM4:30 PM Elderly Pick-up6:45 PM Suburban youth to train7:00 PM Market Closes

Attachment 7-1
URBAN AGRICULTURE TRAINING WORKSHOP FOR SYP YOUTH SUMMER 2001
1. Agriculture Sit Give everyone a sheet of paper with the following questions written on it. Have each member of the group find a place to sit alone in the garden where they won’t be distracted by anyone else. Ask them to clear their minds and sit quietly for 4-5 minutes. They should take time to focus on each of the questions on the sheet and answer them. Bring them back together and write up their answers on a flip chart. Ask each person to contribute at least one response to each question. Duplication is fine since it identifies the most striking/obvious features of the experience.
a. What do you see? b. What do you hear? c. What do you smell? d. What do you feel? e. How do you think this land looked 100 years ago?
Describe it. f. How do you think this land looked 250 years ago?
Describe it.
Encourage the group to look at their answers as a whole: • As a group, talk about what the land looked like 50 years ago and when we took it over 5 years
ago. • How is our experience of agriculture in the city a unique one, and how is it similar to agriculture
in rural areas? • How might it be similar to urban agriculture in other places? • Use the answers to Urban Agriculture Sit as a way to begin to build a definition of urban
agriculture that is completed in the next section of the workshop.
2. Visualization of the Development of the Food Lots
a. Review how the land looked 250 (agricultural) and 100 (housing) years ago. Tell the group that at some point in the last 50 years the buildings on this site were burned, torn down or fell down. They left their remains on or in the soil. Ask the group what some of these remnants might have been. (ex. Lead, glass metal, wood).
b. Ask each member of the group to sit in a position that s/he can maintain for several minutes without moving or dozing off. Participants should be near enough to hear the leader’s voice but not touching.
c. Hand each person a picture of the site as it was before the Food Project began work on it. Ask everyone to study his/her picture for a moment and then shut his/her eyes.
d. Lead the group in a visualization of the site from the time the Food Project began work until the present. (see attached) At different point in the evolution of the site ask them how they feel.
e. After the visualization is finished, ask the group to open their eyes and look around them. Does the garden look different to them now? Have their feelings about the site changed? Ask each person to write down a question that they have about the change in the site from
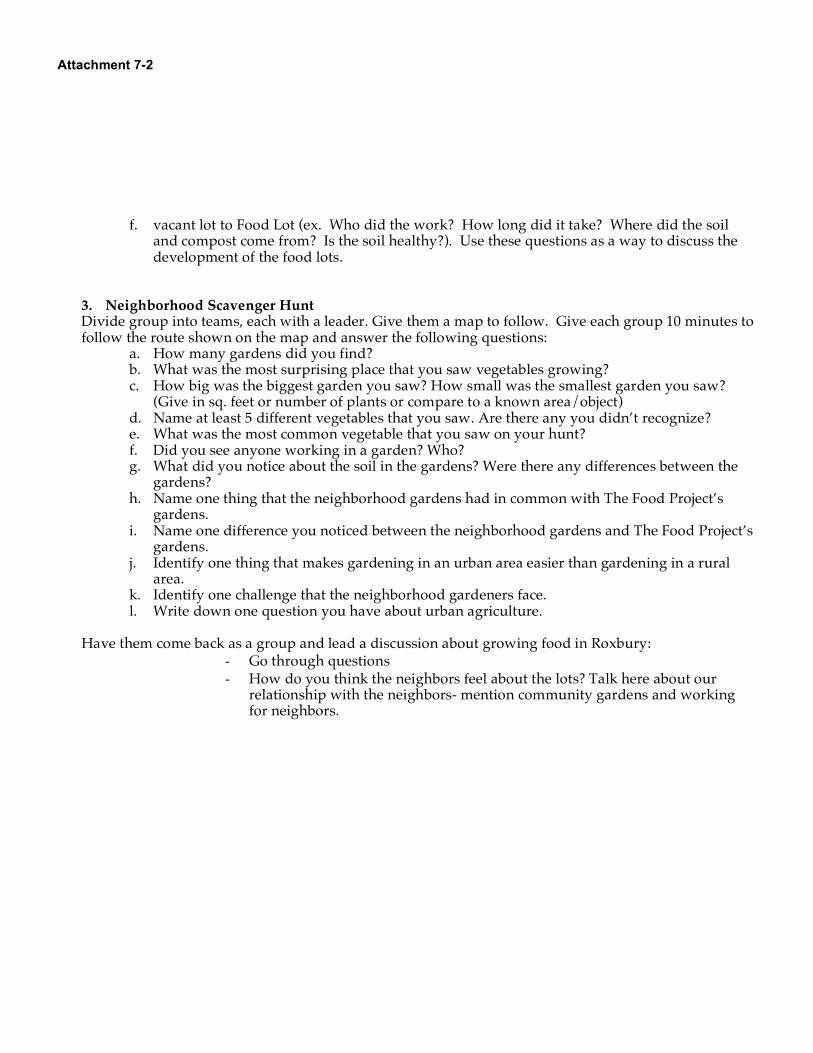
Attachment 7-2
f. vacant lot to Food Lot (ex. Who did the work? How long did it take? Where did the soil and compost come from? Is the soil healthy?). Use these questions as a way to discuss the development of the food lots.
3. Neighborhood Scavenger Hunt Divide group into teams, each with a leader. Give them a map to follow. Give each group 10 minutes to follow the route shown on the map and answer the following questions:
a. How many gardens did you find? b. What was the most surprising place that you saw vegetables growing? c. How big was the biggest garden you saw? How small was the smallest garden you saw?
(Give in sq. feet or number of plants or compare to a known area/object) d. Name at least 5 different vegetables that you saw. Are there any you didn’t recognize? e. What was the most common vegetable that you saw on your hunt? f. Did you see anyone working in a garden? Who? g. What did you notice about the soil in the gardens? Were there any differences between the
gardens? h. Name one thing that the neighborhood gardens had in common with The Food Project’s
gardens. i. Name one difference you noticed between the neighborhood gardens and The Food Project’s
gardens. j. Identify one thing that makes gardening in an urban area easier than gardening in a rural
area. k. Identify one challenge that the neighborhood gardeners face. l. Write down one question you have about urban agriculture.
Have them come back as a group and lead a discussion about growing food in Roxbury:
- Go through questions - How do you think the neighbors feel about the lots? Talk here about our
relationship with the neighbors- mention community gardens and working for neighbors.

Attachment 8
Everybody can be great. Because everybody can serve. You don't have to have a
college degree to serve. You don't have to make your subject and verb agree to serve.
You don't have to know about Plato and Aristotle to serve. You don't have to know
Einstein's theory of relativity to serve. You don't have to know the second law of
thermodynamics in physics to serve. You only need a heart full of grace. A soul
generated by love.
Martin Luther King, Jr.

Attachment 9
THE FOOD PROJECT INTERNSHIP JOB DESCRIPTION
Internship Title: Urban Agriculture Internship Mentor: Urban Agriculture Manager Dates of Internship: April 2 to October 26 Hours: Part-time in spring and fall (hours to be arranged with mentor);
Full-time in summer Job Description: Do you like to work hard, and want to learn more about intensive urban agriculture while increasing your leadership skills? Work closely with The Food Project's urban agriculture manager in all aspects of crop production from seed to market, including seeding, transplanting, cultivating, harvesting, record-keeping, and small building projects. Lead volunteers and Food Project youth workers on the land. Help complete the design process on our urban lots, be part of the first year of growing vegetables for our urban cafe, and learn about sustainable agriculture, reclaiming urban land, extending the growing season, honeybees and our new perennial crops. Qualifications: You should have the ability and desire to work hard physically and be part of The Food Project's agricultural team; be interested in learning more about sustainable urban agriculture; and be flexible, self-motivated and interested in developing your leadership and communication skills. You will have the opportunity to explore future opportunities in the agricultural field through this internship.

Questions? Call (781) 259-8621 x23 NO FAXES PLEASE
alumni applicationfor Summer Youth program positions
and alumni internships
Full Name: ________________________________________________________________________________________ last first middle initial
Nickname / Name you like to be called: ____________________________________________________________
Home Address: __________________________________________________________________________________
City: ______________________________________________ State : ___________ ZIP: _____________________
Home Telephone: ( ) _____________________________
Sex: FEMALE MALE Date of Birth: ________________ / ________________ / ______________ month day year
Current Age: _____________ Social Security Number: _______________ — ___________ — _______________
Parent/Guardian Name: __________________________________________________________________________
Parent/Guardian Work Telephone: ( ) _____________________________
This person is my: Legal Guardian Mother Father Relative: ____________________________
Other Parent/Guardian Name: ____________________________________________________________________
Other Parent/Guardian Work Telephone: ( ) _____________________________
This person is my: Case Worker Mother Father Relative: _______________________________
Current School/Work Name: ________________________________________________________________________
School/Work Telephone: ( ) _____________________________
Current/Highest Completed Grade Level: 8 9 10 11 12 college grad school other: _______
STAFF USE ONLY
APPLICATION INTERVIEW INTERVIEW RECEIVED DATE ATTENDED REFERENCE INTERVIEW FINAL RECEIVED TIME DECISION
Attachment 10-1
mail to: PO Box 705Lincoln, MA 01773

Page 2 NO FAXES PLEASE
application QuEStionS
Think carefully about your personal answers to these questions. Write as completely as you can, and try to use all of the space provided. You may attach a separate
sheet if you need more room, or if you are applying for more than one job. You must answer questions 1, 2, and 3 for each job to which you apply.
1. Why do you want to work for The Food Project in the position you have cho-sen? What interests you about the job?
2. Why do you think you would be good at this job? What talents will you bring to The Food Project working in this particular position?
Attachment 10-2
Questions? Call (781) 259-8621 x23 NO FAXES PLEASE
3. What do you think would be challenging about this job? What do you want to learn from this job? What might some of your goals be?
4. How has your involvement with The Food Project affected you? Tell us about a recent event or accomplishment; how you think being a part of The Food Project shaped your actions, attitudes, or responses.
Thank you! If there is anything else you would like us to know, feel free to attach another sheet of paper.
APPLICATION DIRECTIONS ARE ON THE BACK OF THIS PAGE
Attachment 10-3

Page 4 NO FAXES PLEASE
application DiREctionSPlease note that the dates for each job are not the sameFor full job descriptions, please read the insertRemember, applications for all jobs are due _____________
MAIL COMPLETED APPLICATIONS TO: The Food Project, ATTN: Intern Coordinator P.O. Box 705, Lincoln, MA 01773
After we receive your application, we will call you to let you know that we have received your application.
Read the Job Description sheet.
Fill out the front page of the applica-tion.
Answer the questions on pages 2 & 3.
Attach a resume to the application if you have one.
Read the Interview Information sheet. Don’t lose it — keep it at home or somewhere safe.
Get you application to The Food Proj-ect as soon as possible. You can mail or hand deliver it to us, but we must have it by March 2, 2001.
Keep the afternoon and evening of March 8, from 5:00-8:00 PM, open. Your interview will be scheduled dur-ing that time period. If you are apply-ing for more than one position, you may be scheduled for more than one interview. All interviews will happen on the evening of March 8.
If you are applying for more than one position, please rank them, with “1” being your highest preference.
Assistant Crew Leaders: Ages 15-17 June 23–August 24, 2001
Crew Leaders: Ages 18-28 June 23–August 24, 2001
Office/Development Intern: Ages 18 & older; June 23–August 2001 (option to begin earlier)
Pollution Prevention Interns: Ages 15-17; June 25–October 2001 (op-tion to continue)
Rural Agriculture Interns: Ages 15-17; April 7–November
Summer Program Interns: Ages 18 & older; June 18–August 24, 2001 (option to begin earlier)
Urban Agriculture Intern: Ages 15-17; April 7–November
Volunteer Program Interns: Ages 15-17; April 7–November
For Which Job(s) are You applying? application checklist
Attachment 10-4

Questions? Call (781) 259-8621 x23 NO FAXES PLEASE
If you have any questions, call (781) 259-8621
intERviEW inFoRmationRead this information carefully — it’s important!Don’t lose this sheet! Keep it at home or somewhere safe
WHEN WILL THE INTERVIEW BE?• Interviews for alumni summer jobs will be on March 8. • You should plan on being at the interview session from 5:00 to 8:00 PM. Bring your homework
or a book to read — there will be quiet space for doing work while you wait to interview.
WHERE WILL THE INTERVIEW BE? • All interviews will be held at the offices of City Year.• The offices of City Year are located in Back Bay, Boston.• The address of the offices is 285 Columbus Avenue. • City Year is a quick walk from Back Bay Station on the Orange Line.
HOW DO I GET THERE?• We strongly encourage you to take the MBTA to the interviews, as on-street parking is dif-
ficult.• If you are driving from the western suburbs, we encourage you to park at Alewife and take
the T to Back Bay Station (transfer to the Orange Line at Downtown Crossing).• There are several public parking lots in the neighborhood, but they are quite expensive.• Refer to the maps on the back of this page to plan your travel route.
WHAT WILL THE INTERVIEW BE LIKE?• You will meet with staff from The Food Project, in both group and one-on-one settings.• For each job you apply for, you will interview with the staff person who will supervise that
job.
WHY DO I NEED TO INTERVIEW?• We want to make sure that you understand the job for which you are applying, and have
thought seriously about why you want that job.• We want to have a conversation with you about how you could succeed in that job.• We want to see you again and catch up with you!
Please plan your travel route at least TWO DAYS before your interview. Call us if you need help. Do not wait until the day of the interview to call us!
Attachment 10-5
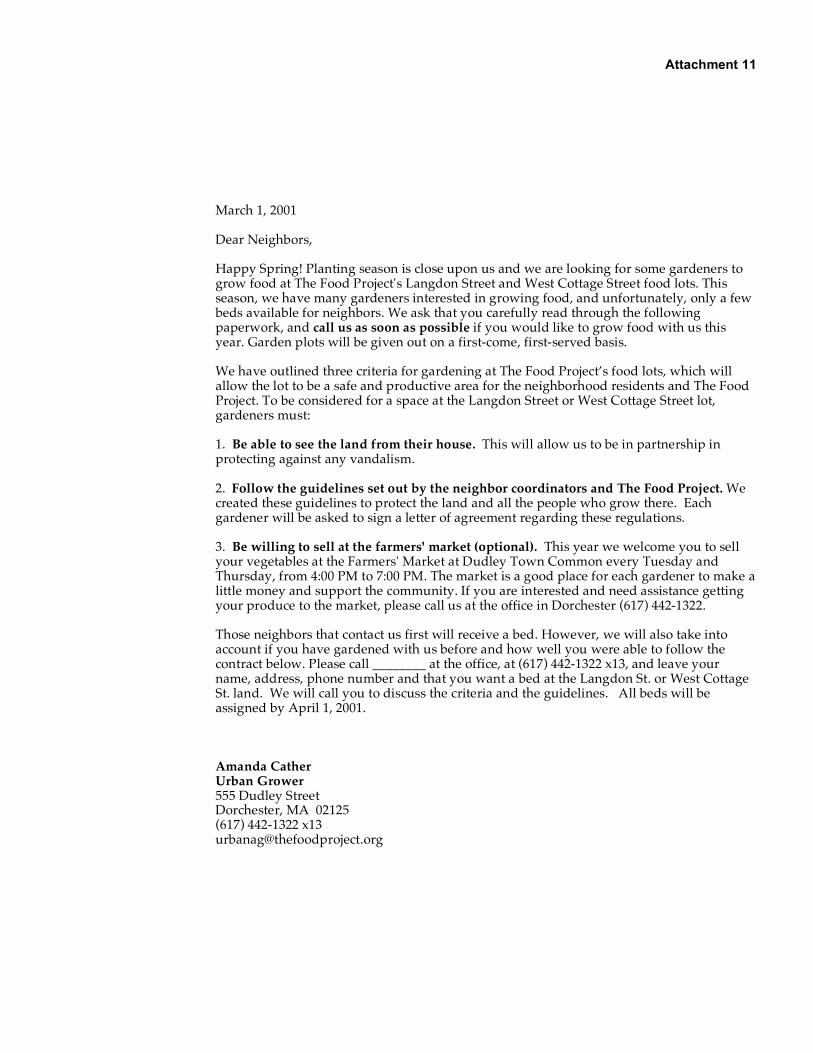
Attachment 11 March 1, 2001 Dear Neighbors, Happy Spring! Planting season is close upon us and we are looking for some gardeners to grow food at The Food Project's Langdon Street and West Cottage Street food lots. This season, we have many gardeners interested in growing food, and unfortunately, only a few beds available for neighbors. We ask that you carefully read through the following paperwork, and call us as soon as possible if you would like to grow food with us this year. Garden plots will be given out on a first-come, first-served basis. We have outlined three criteria for gardening at The Food Project’s food lots, which will allow the lot to be a safe and productive area for the neighborhood residents and The Food Project. To be considered for a space at the Langdon Street or West Cottage Street lot, gardeners must: 1. Be able to see the land from their house. This will allow us to be in partnership in protecting against any vandalism. 2. Follow the guidelines set out by the neighbor coordinators and The Food Project. We created these guidelines to protect the land and all the people who grow there. Each gardener will be asked to sign a letter of agreement regarding these regulations. 3. Be willing to sell at the farmers' market (optional). This year we welcome you to sell your vegetables at the Farmers' Market at Dudley Town Common every Tuesday and Thursday, from 4:00 PM to 7:00 PM. The market is a good place for each gardener to make a little money and support the community. If you are interested and need assistance getting your produce to the market, please call us at the office in Dorchester (617) 442-1322. Those neighbors that contact us first will receive a bed. However, we will also take into account if you have gardened with us before and how well you were able to follow the contract below. Please call ________ at the office, at (617) 442-1322 x13, and leave your name, address, phone number and that you want a bed at the Langdon St. or West Cottage St. land. We will call you to discuss the criteria and the guidelines. All beds will be assigned by April 1, 2001.
Amanda Cather Urban Grower 555 Dudley Street Dorchester, MA 02125 (617) 442-1322 x13 [email protected]

Attachment 12
Name Address City, State Zip Dear Name, We have received your application for a garden plot at The Food Project's lots in Dorchester and Roxbury, and are pleased to be able to offer you a garden plot at our ____________lot for the 2001 season. Please call us at (617) 442-1322 to confirm that you are still interested in your garden plot. By April 1, 2001, we will have labeled each bed with a gardener's name. Please come to the garden, find your name and feel free to begin work on your plot. If you would like to begin work prior to April 1, visit us at the office at 555 Dudley Street, to find out where your plot is located. Please wait until you find out which plot is yours before starting work! You might be interested in attending the Gardeners' Gathering at Northeastern University on March 24, 2001. There will be free seeds and other resources available for gardeners. For more information, call Garden Futures at 369-1996. Again, welcome to the lot! We look forward to helping you in any way we can. Thank you, and we'll see you in April! Sincerely, Amanda Cather Urban Grower

Attachment 14-1
2001 Gardener Guidelines and Plot Agreement The Food Project Langdon St. and West Cottage St. Gardens
Questions • Please call Amanda Cather at The Food Project if you have any questions regarding
your garden space. English and Spanish spoken. Amanda can be reached at (617) 442-1322, or at 555 Dudley Street.
Preparation, Planting, and Clean-up • The Food Project will prepare beds for neighbor gardeners by April 1st and will
assign an area to each gardener. Your area must be planted by June 1st and should be maintained (weeded, etc.) throughout the summer. A stake with your name will be placed at the end of your assigned bed.
• Each gardener is responsible for planting and caring for his or her own space. The
Food Project staff and youth will be responsible for The Food Project’s food lots only. • All gardeners must take out their dying or dead plants at the end of the season.
When these plants are left in the soil, they can become homes for insects and diseases. Clean-up is VERY IMPORTANT and MANDATORY. In October, Food Project staff will be cleaning up our garden and welcome you to clean up your beds as well. Please feel free to put these dead plants in the red compost bins at the upper end of the lots. Failure to clean your area WILL result in the loss of your garden space in 2002.
Pesticides, Insects, Diseases • NO SYNTHETIC PESTICIDES (For example - no products such as Round-up) can be
used in the garden. These chemicals threaten the health of you, your family, and the environment. Amanda Cather at The Food Project is on staff to help gardeners explore safer methods of dealing with problems in the garden. Please ask for help with insects or diseases. Any use of these chemicals WILL result in the loss of your garden space next year.
Water • Food Project staff are responsible for irrigation and will include you in our watering
cycle each week. The water is to be used only by Food Project staff. If you have particular concerns about watering, please talk to Amanda at The Food Project.
Fun • We encourage you join us for a community lunch on Mondays at 12:00 PM at our
West Cottage garden on the corner of Brook Ave. and West Cottage. We are glad to have you part of our community. Reservations are mandatory however, so let us know if you would like to attend a lunch.

Attachment 14-2
Gardeners Letter of Agreement
Yes, I agree to follow the gardening guidelines for The Food Project’s West Cottage Street/Langdon Street food lots. I have read these guidelines and understand the commitment that I am making to The Food Project. Name: ___________________________________ Address: ___________________________________ City, State Zip: __________________________________ Phone #: ___________________________________ Person to contact (name and phone number) in case of emergency: Your primary language: Signature: _______________________________________ Signature of Food Project Coordinator: _________________________________ Date: __________________ Please return this form to Amanda Cather at The Food Project as soon as possible. Thank you.

UMASS Extension offers educational programs, materials and employment without regard to race, color, religion, creed, sex, age, national origin, and mental or physical handicap. Issued in furtherance of Cooperative Extension work, Acts of May 8 and June 30, 1914, in cooperation with the United States Department of Agriculture.
UMass Extension Newsletters Garden Clippings… for home gardeners; Provides a checklist of monthly gardening activities; Monthly March through October; $10.00/year, check payable to UMass; Send to: Garden Clippings, French Hall, 230 Stockbridge Road, UMass, Amherst, MA 01003. Hort Notes… for professional landscapers and grounds managers; Alerts reader to emerging landscape pests and timely plant health care problems; Bi-weekly from March through October; $20.00/year, check payable to UMass; Send to: Hort Notes, French Hall, 230 Stockbridge Road, UMass, Amherst, MA 01003.
Soil Testing
Where to Send Order Please return the completed order form with your soil sample(s) and a check made payable to University of Massachusetts to:
Soil Testing Laboratory West Experiment Station University of Massachusetts Amherst, MA 01003-8020
For more information, call the Soil Testing Lab at (413) 545-2311. Web: http://www.umass.edu/plsoils/soiltest
Crop List Use the following list to tell us what you plan to grow in each soil submitted. Please limit your choices to one or two. 1. Vegetables 2. Annual & Perennial Herbs and Flowers 3. Roses 4. New Lawn (pre-construction) 5. Established Lawn (post-construction) 6. Small Fruit (specify type, ex. strawberries) 7. Tree Fruit 8. Needleleaf Evergreens 9. Deciduous Shrubs, Trees, and Vines 10. Ericaceous Shrubs and Groundcovers 11. Commercial Crops (give crop, and site details) 12. Other reasons for testing (specify details) If more than one sample is submitted, please la-bel each sample on the outside of bag.
Soil Testing Why Test? • to optimize crop production. • to protect the environment from contamination
by runoff and leaching of excess fertilizers. • to aid in the diagnosis of plant culture problems. • to improve the soil’s nutritional balance. • to save money and conserve energy by applying
only the amount of fertilizer needed. • to identify soils contaminated with lead or other
heavy metals. A soil test can be a valuable tool in assessing and preventing horticultural, agronomic, and some environmental problems. The tests listed above do not identify plant growth problems associated with soil drainage, insects, plant dis-eases (whether soil-borne or not), weeds, winter injury and the misuse of pesticides. Pesticide residues and petroleum contaminants are not identified by these tests. Analyses for these are expensive, but may be obtained through the private sector.
West Experiment Station
UMassAmherstUMassAmherstUMassAmherst

Soil Test Price List Test
A. Soil pH Provides a simple soil pH test and an esti-mate of how much lime , sulfur, or other additive is needed to correct soil pH.
$4.00
B. Standard Soil Test Provides pH, Buffer pH, Extractable Nutri-ents, Extractable Heavy Metals (e.g. Lead), Cation Exchange Capacity, and Percent Base Saturation . Recommendations for nutrient and pH adjustment are included with results.
$9.00
C. Standard Soil Test w/ Organic Matter Same as Standard Soil Test plus a determi-nation and interpretation of the Percent Organic Matter in the soil sample.
$13.00
D. Soil Texture (only) Provides a determination of the USDA Tex-tural Classification by combined Hydrome-ter Analysis of silts and clays and Dry Siev-ing of sands. Results presented in tabular format. This test does not include the Stan-dard Soil Test.
$50.00
E. Soluble Salts Provides a measure of Electrical Conductiv-ity of a 1:2 (soil:water) extract.
$3.00
♦ For a complete listing of Testing Services for Soils, as well as those for Plant Tissue, Composts, and Fertilizers, visit the Soil Lab’s Web Site or call us.
Soil Sampling Instructions
When to Sample • Sampling can be done at any time; but if pH
adjustments are necessary, test as early as pos-sible prior to planting.
• Avoid sampling soils that have very recently been fertilized.
Soil Sampling Procedure 1. Soils that are distinctly different as judged by appearance, crop growth or past treatment should be sampled separately. 2. Each sample submitted for testing should be a composite or mixture of approximately 12 sepa-rate scattered samplings taken over a well-defined area. 3. Look your field or property over. Define a sam-ple area based on uniformity of texture, slope, drainage, color, and past pest and fertility manage-ment. 4. Avoid sampling very wet soils. In soils where fertilizer has been placed in bands (rows), do not sample directly in a band. It is best not to obtain samples very near the edge of the field or plot. 5. Using a clean spade, auger, or sampling tube obtain soil from the surface through the pri-mary rooting zone of the crop. Rooting depth will vary with crop type. For most plants the top 6-8 inches is appropriate. For established grasses sample the top 3-4 inches. 6. Place each of the 12 randomly spaced sam-plings in a clean container (pail or bag) and mix thoroughly. Spread the mixture out on a clean pa-per to air-dry (do not place soil in an oven). 7. Mix the soil again. Obtain a one cup measure of the soil mixture and place it in a zip-lock type bag. 8. Label the outside of the bag clearly with your name, address, and your name for the sample (ID).
Soil Test Order Form
Order total:
Sample ID Crop Code Test Type Fee (your designation) (see list reverse side) (A,B, etc.)
Name
Address
Phone
City/ State
Zip Code Date
Comments:
UMassAmherstUMassAmherstUMassAmherst

No compost pickup without demonstration tour attendanceNo compost delivery will be provided: Bring bags/buckets!
Delicious Barbecue $1.00
Date: Saturday, May 12, 2001
Time: 1:00 PM - 3:00 PM Lunch @ 1:00 PM Workshop @ 2:00-2:30
Where: The Food Project Lot, at the corner of West Cottage Street and Brook Avenue in Dorchester
**Call with Any Questions**
Tammy at The Food Project 442-1322Sara Galvao at DSNI
The Food Project • 555 Dudley Street Dorchester, MA 02125 • (617) 442-1322
Let’s Celebrate Spring!
The Food Project invites the neighborhood to attend a demonstration tour, barbecue, and receive free compost.
Get gardening tips from farmers and learn about the history of the Dudley community.
FREE, FREE, FREE Compost!!!
Garden Supplies Neighborhood Gathering Music
Attachment 17

Attachment 18
WHAT IS THE FOOD PROJECT? Urban Tour HISTORY:
The Food Project began in 1991 with the idea of bringing youth and adults together, from the city and suburbs, to grow food for Boston's low-income residents and homeless individuals, who have little or no access to affordable, healthy, or locally grown vegetables and fruits.
Vission: Creating personal and social change through sustainable agriculture. Mission: The Food Project’s Mission is to create a thoughtful and productive community of
youth and adults from diverse backgrounds who work together to build a sustainable food system. Our community produces healthy food for residents of the city and suburbs, provides youth leadership opportunities, and inspires and supports others to create change in their own communities.
Over the years, we have expanded our programming from a summer program
with 25 teens, 2 acres of land in Lincoln, and 25,000 pounds of food. TO DATE: • hiring 100 teens each year for programs and internships • stewarding 23 acres of land in Lincoln and Roxbury • growing 175,000 pounds of vegetables each year • leading over 1,000 volunteers each year in the spring and fall to plant and harvest • delivering 90,000 pounds of vegetables to homeless shelters • serving Food Project vegetables in shelters such as Rosie's Place and Pine Street
Inn • selling vegetables at Roxbury farmers' markets • facilitating public workshops and conferences around the United States • piloting food enterprise This work on the land, in urban and suburban neighborhoods, and in Boston-area
homeless shelters, encourages youth to develop the confidence, insights, skills, and knowledge they need, to contribute to the improvement of their own communities and to society as a whole.
Distribution: 92% Lincoln 55% Shelters 12% Market 38% CSA 8% Roxbury 70% Market 30% Kitchen/Enterprise

Attachment 18
• The Farmers Market is an outlet for The Food Project’s fresh, locally grown, organic produce to members of these communities at local farmers' markets to address issues of food insecurity, nutrition, and hunger. We serve over 2,000 customers each year at our Roxbury Farmers' Market. The money we make at the market supports youth stipends, the market manager salary, and local growers from the neighborhood who sell their own produce at the market. Residents of lower-income communities like Dorchester and Roxbury experience limited food security for many economic reasons. A low-income family can spend up to 50% of their monthly budget on food. The farmers' market provides an alternative to high-priced conventional supermarket produce. Each year youth survey market customers to find out where they live, what
kinds of foods they like to eat, and why they come to the farmers market.
PROGRAMS: SYP: Through the core program, the Summer Youth Program, The Food Project
hires 60 youth from the city and suburbs (with a ration of 60-40 respectively) to work for 8 weeks. Throughout this time, they learn basic agricultural techniques, workplace skills, work in shelters/food pantries, run a farmers market, as well as participate in workshops concerning a range of topics such as gender, homophobia, race, class, etc.
AYP: Continuing into the Academic Year Program, twenty youth from the summer continue their work leading volunteers on the farms in the fall and spring, and working in area shelters during the winter. These youth build on their summer experience, learning public speaking skills, planning the layout of a garden, and participating in a hunger and homelessness curriculum.
AI: Through The Food Project’s Alumni internships, youth continue their involvement in the organization. They are able explore in depth, fields such a rural or urban agriculture, culinary arts, urban outreach, enterprise, etc.
Lot History: Part of The Food Project vision was to use land and food as a way to connect
people and communities and also increase awareness of the importance of growing food in metropolitan areas. During the growing seasons of 1992, 1993, and 1994, The Food Project raised food solely on 2.5 acres of land at Drumlin Farm in Lincoln. In 1994 the staff started discussing the possibility o growing food in the city as a way to complete our “land bridge” thereby increasing our ability to connect communities and model for youth the possibilities of growing high quality food in both urban and rural conditions.
• The Food Project expanded onto the 1.5 acre West Cottage St. lot in1998.
Similarly to the Langdon St. lot, this lot once held 16 houses, later to be abandoned and destroyed. By the 90’s, this land had become a dangerous and

Attachment 18
ugly centerpiece to the neighborhood. This lot, now fully productive, is used to supply our farmers market with strawberries, jalepeño peppers, jabeñero peppers, cherry tomatoes, plum tomatoes, carrots, okra, collard greens, and many more. Before remediation, all three lots had lead contents from 280 to 690 ppm. In Langdon and West Cottage, respectively, 300 and 1500yd3 of new soil was added to the sites. Using over 10 truckloads at the West Cottage lot, for example, youth and volunteers spread a mixture of mineral soil and composted leaves uniformly, raising the entire lot up two feet. Currently the two plots register a lead content of 11-70 ppm
________________________West Cottage Tour________________________________
Neighborhood History: • This area of Dorchester and Roxbury has deep agricultural roots, dating back to
the late 18th century, when local residents grew apples and pears. Over time the area developed into a vibrant urban community.
• Over time, a significant Cape Verdean population had established themselves
within the Dudley community. Coming from a strong agrarian cultural tradition, they emerged as a cultural presence in the predominantly African and Caribbean neighborhood.
• By the end of World War II, as residents moved to communities outside of
Boston, policy makers ignored illegal dumping practices in the neighborhood, and property owners burned homes and businesses to collect insurance. The once vibrant community of Dudley fell into a state of devastation, which lasted for over 40 years. As a result, over 1,300 vacant lots (totaling 30 acres) existed in 1984.
• In the min-80s, neighborhood residents formed the Dudley Street Neighborhood
Initiative (DSNI) to respond to the social, environmental, and economic despair in their neighborhood and to redevelop the vacant lots.
• After many internal and external struggles the organization gained respect and
power within the neighborhood. Using their power of eminent domain over a 3 mile radius, to date, 300 vacant lots have been redeveloped into affordable housing, community centers, businesses, and open space, such as this agriculture site here.
In 2001, a local resident, living on Albion St., donated a small garden plot to The Food Project. Since its remediation, this lot is being used a site for salsa ingredients to be used in our salsa production enterprise out of our urban kitchen. Meanwhile, on Albion St., after double digging and composting, a lead presence in the soil remained. So, The Food Project selectively grows lead resistant plants, such as peppers and tomatoes that do not retain the lead in their fruit.

Attachment 18
____________________Albion Tour…….Bees/Eustis House___________________ The Food Project began work in the neighborhood in 1995 on a 1/2 acre site on Langdon St. Previous to the 60’s and 70’s, four houses occupied this land. Over the next decades, they were all burnt down, and the lot was used as an illegal dumping site for construction debris. In 1994, when City Year began an initial restoration of the site, it was filled with ruble, trash, car parts, and a single garage used for auto repair. In 1995 The Food Project took control of the lot, and after remediation, began to actively grow produce there. Currently the lot is filled with a variety of vegetables, such a zucchini, green cabbage, basil, tomatoes, etc. all used in our urban kitchen. ______________________Langdon Tour/Butterfly Garden___________________ • The Food Project’s Urban Education and Outreach team has worked since
1998 to spread awareness on the topics of soil contamination, and the alternatives of organic gardening in the city. Through direct work with community gardeners, movements to create legislative policies, and workshops put on at conferences nationwide and for the summer program youth, these goals are achieved. Workshops on seed saving, season extension, composting and pesticide intake are given in the off-season.
Since 1998 they have worked with ten local gardeners; cleaning and remediating their soil to transition into totally organic practices. By 2000, the team started working with local businesses, encouraging them to carry more organic produce and supplies and to do so multilingually. This year they begin their work lobbying legislators to create new policies and a greater awareness and respect for agriculture work in urban areas.

Attachment 19
Urban Agriculture (2 acres at two urban food lots in Roxbury, MA) • Grow at least 18,000 pounds of a variety of organic vegetables. • Grow 18,000 pounds of produce for our Farmers' Market, Enterprise Initiative and Hunger Relief Program • Grow 10,000 pounds for the Farmers’ Market and hunger • Grow 8,000 pounds for the Enterprise Initiative • Manage 3 urban food lots to maximize neighborhood access, productivity, and a esthetic value •Improve our land through sustainable farming practices • Profile food lots as demonstration sites for sustainable urban agriculture. • Provide agriculture training to youth apprentices and program participants • Youth and neighbors implement site renovations (fruit trees, etc) • Implement a comprehensive management plan for three lots, including new enterprise plans • Survey neighbors to find out ways our grower/Urban Ed, can provide more training to neighbors; workshops, etc.

DATE:
Produce from: Received by:
MKT1 MKT2 MKT1 MKT2
BB LANG W.COTT CSA HR
OTHER:_________________________ OTHER: ________________________
________________________________ ________________________________
Bulk Produce Invoice
Qty Unit # Item Unit Value Price / Value
1
2
3
4
5
6
7
8
9
Delivery Person Signature or Initials Recipient Signature or Initials
<-- SUBTOTAL -->
<-- DISCOUNT or DONATION -->
SALE TOTAL PRICE -->
Attachment 20

Attachment 24
Market Lbs/Week Total# Row Ft 25' Beds Bed Ft Rows/ Total 25' Estimated Vegetable Weeks 01 Needed 01 Needed 01 Needed 01 Needed 01 from FP Bed Row Ft Beds Harvest
Beans, Bush Snap 17 10 170 242.86 3 75 3 225 3 158Beans, Shell 11 4 44 220.00 3 75 3 225 3 45Beets 20 16 320 569.73 5 112 5 560 4.48 315Carrot 22 20 440 880.00 7 183 5 915 7.32 458Celeriac 4 10 40 80.00 1 25 3 75 1 38Celery 4 4 16 30.77 0 10 3 30 0.4 16Chard, Swiss 18 4 72 144.00 2 50 3 150 2 75Cucumber, Slicing 11 30 330 396.40 8 195 2 390 7.8 325Greens,Spicy 22 2.5 55 110.00 1 125 5 625 5 313Herbs, Basil 17 2 34 113.33 1 25 5 125 1 38Herbs, Cilantro 10 2 20 121.21 1 25 5 125 1 21Herbs, Dill 14 1 14 67.42 1 13 5 65 0.52 13Herbs, Fennel 16 1 16 32.00 0 20 3 60 0.8 30Herbs, Oregano 5 1 5 20.00 0 0 5 0 0Herbs, Parsley 15 4 60 120.00 1 25 5 125 1 63Herbs, Sage 5 1 5 20.00 0 0 5 0 0Herbs, Thyme 5 1 5 20.00 0 0 5 0 0Kale 10 5 50 100.00 2 50 2 100 2 50Leeks 9 12 108 144.00 2 50 3 150 2 113Lettuce 22 6 132 250.58 3 403 3 1210 16.12 637Okra 15 6 90 195.65 3 65 3 195 2.6 90Onions, Bulb 12 15 180 288.00 4 100 3 300 4 188Onions, Bunching 7 9 63 252.00 2 100 5 500 4 125Peas, Snow 6 8 48 192.00 4 100 2 200 4 50Pepper, Bell 16 15 240 192.00 4 115 2 230 4.6 288Pepper, Hot 17 2.5 42.5 26.56 1 15 2 30 0.6 48Pepper, Multi 16 8 128 128.00 3 65 2 130 2.6 130Potatoes 7 15 105 210.00 4 100 2 200 4 100Radish 8 2 16 104.58 1 20 5 100 0.8 15Rutabaga 5 10 50 66.67 1 25 3 75 1 56Salad Mix 22 10 220 440.00 4 300 5 1500 12 750Spinach 15 8 120 600.00 5 120 5 600 4.8 120Squash, S (MidEast) 15 20 300 132.13 3 65 2 130 2.6 295Squash, S (Yellow) 15 20 300 132.13 3 65 2 130 2.6 295Squash, S (Zuc) 15 20 300 132.13 3 65 2 130 2.6 295Tomato, Cherry 16 9 144 72.00 1 37.5 2 75 1.5 150Tomato, Plum 15 25 375 125.00 3 65 2 130 2.6 390Tomato, Slicing 15 70 1050 300.00 6 157.5 2 315 6.3 1103Turnip 15 15 225 450.00 4 100 5 500 4 250TOTAL: 5932.5 7721.15 7441
Page 1

Attachment 22
Crop West Cottage Total 2000 Averagebed rows/ yield average yield average yield yield yieldfeet bed (pounds) (pounds/row ft) (pounds/row ft) (pounds/row ft) (pounds/row ft)
Beans, Bush Snap 437 3 485.5 0.37 0.2 0.7 0.5Beans, Shell 465 3 253.5 0.18 0.3 0.1 0.2Beets 186 5 301.5 0.32 0.3 0.4 0.4Blueberries 0.5 0.50 0.3 0.3Broccoli 255 2 97 0.19 0.2 0.2 0.2Cabbage 112 2 280 1.25 1.3 1.2 1.2Carrots 268 5 480 0.36 0.3 0.3 0.3Cauliflower 48 2 18 0.19 0.2 0.3 0.3Collards 415 2 1553 1.87 1.9 1.0 1.4Celery 25 3 122.75 1.64 0.8 0.5 0.7Celeriac 0.6 0.6Chard, Swiss 0.6 0.6Cucumber, slicing 54 1 77.5 1.44 1.2 0.4 0.8Eggplant 88 2 364.5 2.07 2.1 5.8 3.9Herbs, basil 100 3 140 0.47 0.5 0.3 0.4Herbs, cilantro 50 3 46 0.31 0.2 0.1 0.2Herbs, dill 10 3 7.5 0.25 0.2 0.2 0.2Herbs, parsley 10 3 8.5 0.28 0.3 0.2 0.2Kale 27 2 142 2.63 1.4 1.4Leeks 0.8 0.8Lettuce 174 3 288 0.55 0.5 0.4 0.5Mustard greens 77 5 27.5 0.07 0.1 0.1Okra 0.2 0.5 0.3Onions, bulb 55 3 64.5 0.39 0.6 0.6Onions, bunching 35 3 21.5 0.20 0.2 0.2Peas, shell 35 2 8.5 0.12 0.1 0.1Peas, snap 75 2 21.5 0.14 0.1 0.3 0.2Peas, snow 40 2 7 0.09 0.1 0.2 0.1Peppers, bell 230 2 427 0.93 1.0 1.3 1.2Peppers, hot 65 2 14.5 0.11 0.7 1.6 1.1Peppers, multi 30 2 38.5 0.64 0.6 1.4 1.0Potato, red 0.4 0.4Potato, white 0.5 0.5Radish 20 5 4 0.04 0.2 0.1 0.1Salad mix 278 4 74 0.07 0.1 0.4 0.2Spinach 160 4 34.25 0.05 0.2 0.0 0.1Squash, Magda 90 1 479 5.32 5.3 2.0 3.7Squash, S (Patty pan) 15 1 32.5 2.17 2.5 2.5Squash, S (yellow) 12 1 47 3.92 3.9 2.0 3.0Squash, S (Zucchini) 27 1 90.75 3.36 2.0 2.0 2.0Strawberries 136 1 285 2.10 2.1 0.4 1.2Tomatoes, cherry 90 2 348.9 1.94 1.7 2.5 2.1Tomatoes, green 122 122.00 61.0 61.0Tomates, plum 55 2 294 2.67 2.8 3.8 3.3Tomatoes, slicing 200 2 924 2.31 1.9 4.0 2.9Turnip 25 5 168 1.34 0.9 0.1 0.5Turnip greens 77 5 5 0.01 0.0 0.5 0.3
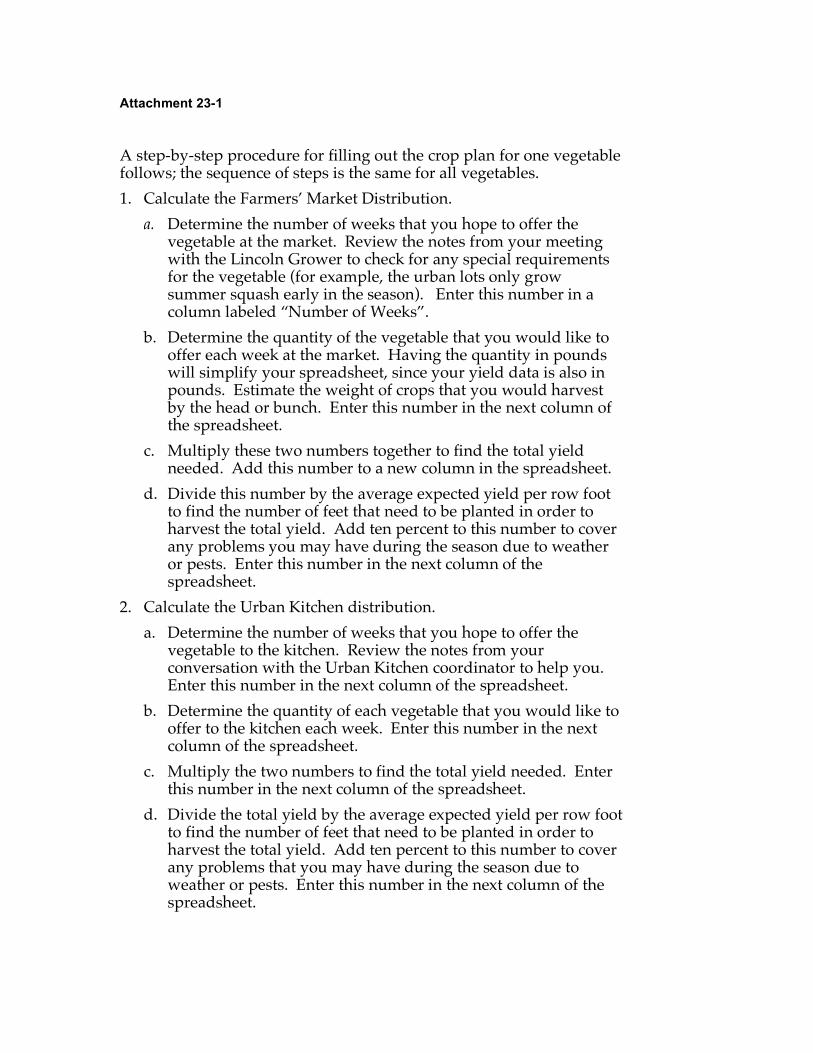
Attachment 23-1 A step-by-step procedure for filling out the crop plan for one vegetable follows; the sequence of steps is the same for all vegetables. 1. Calculate the Farmers’ Market Distribution.
a. Determine the number of weeks that you hope to offer the vegetable at the market. Review the notes from your meeting with the Lincoln Grower to check for any special requirements for the vegetable (for example, the urban lots only grow summer squash early in the season). Enter this number in a column labeled “Number of Weeks”.
b. Determine the quantity of the vegetable that you would like to offer each week at the market. Having the quantity in pounds will simplify your spreadsheet, since your yield data is also in pounds. Estimate the weight of crops that you would harvest by the head or bunch. Enter this number in the next column of the spreadsheet.
c. Multiply these two numbers together to find the total yield needed. Add this number to a new column in the spreadsheet.
d. Divide this number by the average expected yield per row foot to find the number of feet that need to be planted in order to harvest the total yield. Add ten percent to this number to cover any problems you may have during the season due to weather or pests. Enter this number in the next column of the spreadsheet.
2. Calculate the Urban Kitchen distribution. a. Determine the number of weeks that you hope to offer the
vegetable to the kitchen. Review the notes from your conversation with the Urban Kitchen coordinator to help you. Enter this number in the next column of the spreadsheet.
b. Determine the quantity of each vegetable that you would like to offer to the kitchen each week. Enter this number in the next column of the spreadsheet.
c. Multiply the two numbers to find the total yield needed. Enter this number in the next column of the spreadsheet.
d. Divide the total yield by the average expected yield per row foot to find the number of feet that need to be planted in order to harvest the total yield. Add ten percent to this number to cover any problems that you may have during the season due to weather or pests. Enter this number in the next column of the spreadsheet.

Attachment 23-2
3. Calculate the Enterprise distribution
a. Determine the number of weeks that you hope to offer the vegetable to the Enterprise programs. Review the notes from your conversations with the chef and other enterprise staff members to help you. Enter this number in the next column of the spreadsheet.
b. Determine the quantity of the vegetable that you would like to offer each week. Enter this number in the next column of the spreadsheet.
c. Multiply the two numbers to find the total yield needed. Enter this number in the next column of the spreadsheet.
d. Divide the total yield by the average expected yield per row foot to find the number of feet that need to be planted in order to harvest the total yield. Add ten percent to this number to cover any problems you may have during the season due to weather or pests. Enter this number in the next column of the spreadsheet.
4. Calculate the Total Distribution a. Finally, add up all the row feet from the Farmers’ Market
Distribution, Urban Kitchen, and Enterprise Distributions. This is the total number of row feet you need to plant for that vegetable. Enter this number in the next column of the spreadsheet. Although all the data in this spreadsheet is interesting for you, the total number of row feet per crop is essential for being able to develop the farm plan.
5. Calculate Bed Feet and 25 Bed Foot Sections of Vegetables a. Divide the total number of row feet from the previous step by
the number of rows per bed to arrive at the number of bed feet that will be planted for the vegetable. Enter this number in the next column of the spreadsheet.
b. Divide the bed feet by 25 to arrive at the number of 25 bed foot sections of that vegetable that you will need to plant. Enter this number in the final column of the spreadsheet. This number will help you as you create your field plan in the next step.

Attachment 24
Langdon Field 3 -- Nightshades and Cucurbits
25-Apr 8-May 15-May 19-May
Bed # Linear Crop Variety Row Rows/ Bed Crop Variety Row Rows/ Bed Crop Variety Row Rows/ Bed Crop Variety Row Rows/ Bed CropFt Feet Bed Feet Feet Bed Feet Feet Bed Feet Feet Bed Feet
1 A 25 Cucumber Supersett 50 2 25B 25 Supersett/Marketmore 50 2 25C 15 Marketmore 20 2 10
2 A 25 Squash S Revenue/Sunburst 50 2 25B 25 Sunburst/Magda 50 2 25C 15 Magda 20 2 10
3 A 25 Lettuce Sierra 75 3 25B 25 Sierra/Nevada 75 3 25C 15 Nevada 45 3 15
4 A 25 Lettuce Mikola 75 3 25B 25 Mikola/Ermosa 75 3 25C 15 Ermosa 45 3 15
5 A 25 Lettuce Sierra 75 3 25B 25 Sierra/Nevada 75 3 25C 15 Nevada 45 3 15
6 A 25 Mikola 75 3 25B 25 Mikola/Ermosa 75 3 25C 15 Ermosa 45 3 15
7 A 25 PepperB 25C 15
8 A 25 PepperB 25C 15
9 A 25 PepperB 25C 15
10 A 25 Okra Burgundy 75 3 25B 25 Burgundy 75 3 25C 15 Burgundy 45 3 15
11 A 25 Tomato, Cherry Red Pear/Yellow Pear 50 2 25B 25 Red Agate 50 2 25C 15 Red Agate/ Early Cascade 30 2 15
12 A 25B 25 Tomato, Slicing Daybreak 20 2 10 Tomato, Slicing Early Cascade 30 2 15C 15 Daybreak 30 2 15
13 A 25 Tomato, Cherry Sun Gold/Green Zebra 50 2 25B 25 Potato Chieftain 40 2 20 Tomato Sun Gold/Green Zebra 10 2 5C 15 Potato Chieftain 30 2 15
14 A 25 Potato Elba 50 2 25B 25 Elba 50 2 25C 15 Chieftain 30 2 15 15
TOTAL: 910 Total for Planting: 230 Total for Planting: 155 Total for Planting: 185 Total for Planting: 12536 Running Field Total: 230 Running Field Total: 155 Running Field Total: 340 Running Field Total: 465

Attachment 24
26-May 1-Jun 12-Jun 4-Jul 1-Aug
Variety Row Rows/ Bed Crop Variety Row Rows/ Bed Crop Variety Row Rows/ Bed Crop Variety Row Rows/ Bed Crop Variety Row Rows/ BedFeet Bed Feet Feet Bed Feet Feet Bed Feet Feet Bed Feet Feet Bed Feet
Lettuce Sierra 3 25Sierra/Nevada 3 25Nevada 3 15
Lettuce Ermosa 3 25Ermosa/Mikola 3 25Mikola 3 15
Cucumber Supersett 50 2 25Supersett/Marketmore 50 2 25Marketmore 20 2 10
Squash S Revenue/Sunburst 50 2 25Sunburst/Magda 50 2 25Magda 20 2 10
Cucumber Supersett 50 2 25Supersett/Marketmore 50 2 25Marketmore 20 2 10
Squash S Revenue/Sunburst 50 2 25Sunburst/Magda 50 2 25Magda 20 2 10
Italia 50 2 25Italia 50 2 25Italia 30 2 15Ace 50 2 25Ace 50 2 25Ace 30 2 15Ace 50 2 25Ace 50 2 25Ancho/Andy/Giant Jalapeno 30 2 15
Tomato, Slicing Paragon 30 2 15Paragon 20 2 10
Total for Planting: 195 Total for Planting: 25 Total for Planting: 120 Total for Planting: 120 Total for Planting: 130Running Field Total: 660 Running Field Total: 685 Running Field Total: 805 Running Field Total: 925 Running Field Total: 1055

Attachment 25-1 At this time, you can start placing the vegetables into the fields, as follows: Make sure you have entered the number of the bed and total number of bed feet in the first column in your worksheet, the letter name of the section within the bed in the second column of your worksheet, and the number of feet in that section in the third column (again, most of these should equal 25, since you are working with 25-foot units). In the next column, write the name of the vegetable you would like to plant in that section of the bed. If you need to plant thirty 25-foot sections of broccoli, plant them all in consecutive rows on the worksheet. Try to place vegetables of the same family in the same field. Sometimes there is enough space to plant two or three families in the same field, whereas sometimes you will need to spread a family out over several fields. In the past, the urban lots have divided the vegetables into the following groups: Season Extension Cool-Season Crops (includes roots, brassicas, greens grown under cover) Season Extension Warm-Season Crops (includes cucurbits, nightshades and beans grown under cover) Early Brassicas Late Brassicas Early Season Roots and Greens (includes carrots, beets, scallions, peas, lettuce, herbs, etc.) Mid Season Roots and Greens (includes carrots, beets, lettuce, celery, herbs, etc.) Late Season Roots and Greens (includes scallions, peas, lettuce, herbs, roots, celery, etc.) Mid Season Cucurbits Late Cucurbits Legumes (includes several plantings of beans, which may be spread across fields to take advantage of empty beds) Nightshades and Okra Annual Flowers Remember that some of these groups need a bed for an entire season, while others require only part of a season. Because you will need to plant some beds twice and even three times to achieve your desired yields, try to write two or three columns of vegetables in each bed if you need to, estimating the time that each will need in the bed. Nightshades, for example, will need an entire season in their bed. Late roots and greens or a late planting of legumes, however, can follow early cool-season crops. Try to take good crop rotation practices into account as you place your crops on the worksheets. Determine which varieties of the vegetables to plant. This is dependent on a number of factors including the varietyís physical and taste characteristics, expected days to maturity and style of plant growth. Use seed catalogs to research the varieties offered. Look at past field notebooks to find information on the past performance of specific varieties on the urban lots. Enter the variety in the column next to the vegetable names on the worksheet.

Attachment 25-2
The next task is deciding when each bed will be planted. Think about how to plan for a continuous supply of that vegetable throughout its appropriate growing season. Look specifically at the expected dates of maturity for each variety to make sure there will not be gaps in your harvest. There are certain times of the year when you need to have either smaller or larger harvests due to organizational reasons. For instance, you may need to supply the Farmersí Market solely with crops from the urban lots during the month of June. Plant a substantial portion of early-season crops to ensure that you can achieve this goal. Also, keep in mind that the lightest months for volunteers helping to harvest are usually June and September, as seasons and schedules are changing. Add the date of planting in a new column to the right of the variety name. For beds with two or more crops, insert columns so that the planting date for each crop is next to that crop. Add the bed preparation date for each planting. Most beds need to be tilled or otherwise prepared a month before the planting date, particularly if they had a fall cover crop on them. This allows enough time for the organic matter on the surface of the bed to break down before seeding or transplanting. Enter this date in another column to the left of each planting date. For second and third crops on the same bed, remember to take into account when the harvest of a previous crop will end. Finally, give some thought to cover crops. If you see a bed that might have room for a midseason planting of buckwheat between early and late crops, for example, insert columns in the field plan between those crops. If you plan to undersow nightshades and late brassicas with field peas and oats, add columns at the end of the field plan for this planting. Do the same for any beds in which harvest will end in time to plant the whole bed in oats and peas. Remember to keep the number of columns to a minimum since the objective is to maintain a simple spreadsheet that is easy to read. Remember, if you find as you complete the field plan that the urban lots do not have enough space for all the amounts of crops that you have determined in the crop plan, go back to the crop plan and alter it, then return to the field plan and make changes. Because of the limited space on the urban lots, creating the final crop plan and field plan is really a back-and-forth process in which you try to make the best use of your available space to grow the amount of vegetables you need ñ it is like working on a puzzle. You may find that visual maps of the fields, which can be found on your computer, are useful in trying to think about the available space for each crop and group of crops. If you need to make significant changes to the amounts of vegetables that you will be growing, or to the production season for each crop, make sure that you notify the staff member affected by this change.

Attachment 26
Price TotalVegetable Variety Cat. # Pkg Size Qty Per Pkg Price
Turnips Hakurei 706 oz 1 $15.20 $15.20Purple Top White Globe 705 1/4 lb 1 $2.50 $2.50
Spinach Coho 2050 10,000 seeds 1 $5.10 $5.10Tyee 646 10,000 seeds 1 $5.00 $5.00
Radishes Cabernet 2072 5,000 seeds 1 $4.65 $4.65Cherriette 2145 5,000 seeds 1 $4.30 $4.30
Greens, Mustard Southern Giant 341 1/4 lb 1 $4.55 $4.55
TOTAL: $41.30

Attachment 27-1 Create a spreadsheet titled Greenhouse Schedule.
1. Enter the vegetable and variety names in the first two columns.
2. Enter the date that the crop needs to be transplanted into the field. You will find this information in the field plan. Remember that you may have more than one transplant date for certain varieties. If so, create a separate row on the spreadsheet for each transplant date. For example, if you want to transplant Arcadia broccoli on May 12 and June 8, create a separate row for each of these dates with the appropriate information in each row.
3. Each kind of seed takes a certain number of days to grow to a size appropriate for transplanting. This number depends on the time of year that the seed is started. Look at past greenhouse schedules to determine this information. Add these numbers to the spreadsheet.
4. Subtract the number of days from seed to transplant from the expected transplant date to find out the date to seed in the greenhouse. Enter this into the spreadsheet.
5. Enter the number of row feet to be planted and the number of transplants per foot.
6. Multiply the number of row feet by the number of transplants per foot. Add ten percent to this amount to insure against any problems that occur in the greenhouse. This is the total number of transplants needed for that variety in that planting.
7. Different types of greenhouse growing trays are used for different crops (see Attachment XX: Greenhouse Cell Numbers). Determine the type of tray that is appropriate for that vegetable and add it to the spreadsheet.
8. Divide the number of transplants needed by the number of cells per tray to calculate the number of trays needed. Round up to insure that you have sufficient transplants.
While you can organize the spreadsheet in whatever way is easiest for you to read, it is often most efficient to put the greenhouse seeding date in the lefthand column of the spreadsheet and place the vegetables in chronological order by their seeding dates. This way, you can look at the spreadsheet on any given day and see a list of the vegetables that need to be seeded that day. Keep this spreadsheet in your notebook and make sure you have it each time you go to the greenhouse to seed. After you complete a seeding, cross of the date on the sheet so that you will know if your greenhouse work is up to date.

Attachment 27-2
Row TP/ TP Cells/ # of # of 10 Row Days from Seeding Dates Done? Crop Variety Feet Foot Needed Tray Trays Trays Flats Seed toTP TP Date Done?
25-Feb Beets Early Wonder 125 2 250 162 1.54 2.00 35 1-AprRed Ace 100 2 200 162 1.23 2.00 35 1-Apr
Tomato, Slicing Paragon 54 0.67 36.18 50 0.72 1.00 * 56 19-AprMoskvich 54 0.67 36.18 50 0.72 1.00 * 56 19-Apr
8-Mar Broccoli Windsor 50 1 50 72 0.69 1.00 35 15-AprArcadia 56 1 56 72 0.78 1.00 35 15-Apr
Cabbage, Green Rocket 50 1 50 72 0.69 1.00 35 15-AprColumbia 54 1 54 72 0.75 1.00 35 15-Apr
Celeriac Brilliant 75 1.00 75 72 1.04 2.00 75 10-MayCelery Ventura 90 1 90 72 1.25 2.00 84 1-JunHerbs (Parsley) Forest Green 30 2 60 162 0.37 0.50 32 15-Apr
Italian Dark Green 20 2 40 162 0.25 0.50 32 15-AprLeeks Pancho 75 2.00 150 275 0.55 1.00 60 10-MayLeeks King Richard 75 2.00 150 275 0.55 1.00 60 10-MayOnions, White Ailsa Craig 75 3.00 225 275 0.82 1.00 60 10-MayOnions, Yellow Prince 75 3.00 225 275 0.82 2.00 60 10-MayOnions, Red Redwing 75 3.00 225 275 0.82 1.00 60 10-MayPepper, Hot Habanero 25 1 25 50 0.50 0.50 * 81 26-May
Caribbean Red Habanero 25 1 25 50 0.50 0.50 * 81 26-MayPepper, Multi Aji Dulce 50 1 50 50 1.00 1.00 * 81 26-May
20-Mar Lettuce Ermosa 116 2.00 232 72 3.22 0.50 32 25-AprMikola 100 2.00 200 72 2.78 0.50 32 25-AprSierra 101 2.00 202 72 2.81 0.50 32 25-AprNevada 115 2.00 230 72 3.19 0.50 32 25-Apr
Tomatoes, Slicing Daybreak 50 0.67 33.5 50 0.67 1.00 * 45 8-May24-Mar Eggplant Nadia 96 0.67 64.32 50 1.29 1.50 * 65 26-May
Black Bell 96 0.67 64.32 50 1.29 1.50 * 65 26-MayPepper, Bell King Arthur 160 0.67 107.2 50 2.14 2.50 * 65 26-May
Camelot 150 0.67 100.5 50 2.01 2.50 * 65 26-MayAce 360 0.67 241.2 50 4.82 5.00 * 65 26-May
Pepper, Hot Andy 20 0.67 13.4 50 0.27 0.50 * 65 26-MayConchos 10 0.67 6.7 50 0.13 0.50 * 65 26-MayAncho 10 0.67 6.7 50 0.13 0.50 * 65 26-MayGiant Jalapeno 10 0.67 6.7 50 0.13 0.50 * 65 26-May
Pepper, Multi Biscayne 50 0.67 33.5 50 0.67 1.00 * 65 26-MayItalia 150 0.67 100.5 50 2.01 2.00 * 65 26-May
27-Mar Broccoli Arcadia 78 1 78 72 1.08 1.50 35 1-MaySan Miguel 100 1 100 72 1.39 1.50 35 1-May
Cabbage, Green Rocket 50 1 50 72 0.69 1.00 35 1-MayColumbia 70 1 70 72 0.97 1.00 35 1-May
Collards Flash 830 1 830 72 11.53 12.00 35 1-MayHerbs (Cilantro) Jantar 50 2 100 162 0.62 1.00 35 1-May
Santo 50 2 100 162 0.62 1.00 35 1-MayKale Winterbor 50 1 50 72 0.69 0.75 35 1-May
Judy's 80 1 80 72 1.11 1.25 35 1-MayKale Red Russian 50 1.00 50 72 0.69 1.00 35 1-May
Toscano 50 1.00 50 72 0.69 1.00 35 1-MayOkra Cajun Delight 315 1 315 50 6.30 7.00 45 15-May
Burgundy 195 1 195 50 3.90 4.00 45 15-MayTomato, Cherry Sun Gold 70 0.67 46.9 50 0.94 1.00 * 45 19-May
Sweet Olive 50 0.67 33.5 50 0.67 1.00 * 45 19-MayRed Pear 25 0.67 16.75 50 0.34 0.50 * 45 19-MayYellow Pear 25 0.67 16.75 50 0.34 0.50 * 45 19-May
Tomato, Plum La Rossa 50 0.67 33.5 50 0.67 1.00 * 45 19-MayJuliet 120 0.67 80.4 50 1.61 2.00 * 45 19-MayRed Agate 60 0.67 40.2 50 0.80 1.00 * 45 19-May
Tomato, Slicing Daybreak 150 0.67 100.5 50 2.01 2.00 * 45 19-MayBig Beef 150 0.67 100.5 50 2.01 2.50 * 45 19-MayRed Sun 230 0.67 154.1 50 3.08 3.50 * 45 19-MayEarly Cascade 50 0.67 33.5 50 0.67 1.00 * 45 19-MayGreen Zebra 30 0.67 20.1 50 0.40 1.00 * 45 19-May
7-Apr Lettuce Ermosa 114 2.00 228 72 3.17 0.25 32 10-MayMikola 99 2.00 198 72 2.75 0.25 32 10-MaySierra 99 2.00 198 72 2.75 0.25 32 10-MayNevada 114 2.00 228 72 3.17 0.25 32 10-May

Master Planting Schedule
Bed Prep Date Crop Variety DS/TP Location Bed Ft Rows/Bed Row Spacing Plant Spacing Done?15-Mar 1-Apr Beets Early Wonder TP WC1 15A 25 5 12" 2"
Red Ace TP WC1 15B 20 5 12" 2"Carrots Mokum DS WC1 14A 25 5 12" 2"
Ithaca DS WC1 14B 23 5 12" 2"Peas, Shell Dakota DS WC4 2A,B 40 2 36" 2"Peas, Snap Sugar Snap DS WC4 1B,C 50 2 36" 2"Peas, Snow Snow Green DS WC4 1A 25 2 36" 2"Peas, Snow Oregon Snow DS LD2 11C,D 50 2 36" 2"Lettuce Mix Allstar DS LD2 2A 25 5 12" 2"Salad Mix Spicy Greens Mix DS LD2 9A 25 5 12" 2"Spinach Coho DS WC4 2B,C 35 5 12" 1.5"
6-Apr Onions, Bunching Evergreen Hardy White DS LD1 1A 25 5 12" 1/2"Onions, Bunching Purplette DS LD1 1B 25 5 12" 1/2"
10-Apr Beets Chioggia DS LD2 4B 10 5 12" 2"Red Ace DS LD2 5C 12 5 12" 2"
Carrots Nelson DS LD2 6C 37 5 12" 2"1-Apr 15-Apr Beans, Bush Provider DS WC3 2 63 3 18" 2"
Beets Red Ace DS WC1 10A 25 5 12" 2"Broccoli Windsor TP WC1 12A 25 2 36" 12"
Arcadia TP WC1 12B 28 2 36" 12"Cabbage, Green Columbia TP WC1 13A 25 2 36" 12"
Rocket TP WC1 13B 27 2 36" 12"Cucumbers Jazzer DS WC5 16 27 2 36" 8"
Marketmore DS WC5 17 27 1 36" 8"Supersett DS WC5 17 27 1 36" 8"
Greens, Beet Early Wonder DS WC4 6C 25 5 12" 2"Greens, Mustard Southern Giant DS WC4 6A 25 5 12" 2"Greens, Turnip Purple Top DS WC4 6B 25 5 12" 2"Herbs, Parsley Forest Green TP WC3 9 10 3 12" 6"
Italian Dark Green TP WC3 9 10 2 12" 6"Lettuce Mix Allstar DS WC4 3C 75 5 12" double seedSpinach Coho DS WC4 7A 25 5 12" double seedSpinach Coho DS LD1 4A 10 5 12" 1.5"Squash, S (Yellow) Seneca DS WC5 18 27 2 36" 4"Squash, S (Zucchini) Revenue DS WC5 19 27 2 36" 4"Turnip Hakurei DS WC2 7A 25 5 12" 2"
Purple Top White Globe DS WC2 7B 5 5 12" 2"Turnip Hakurei DS LD2 8D 25 3 12" 2"
Purple Top White Globe DS LD2 8D 25 2 12" 2"14-Apr 19-Apr Tomato Moskvich TP WC5 14 27 2 36" 18"
Paragon TP WC5 15 27 2 36" 18"20-Apr Spinach Coho DS LD1 4A,B 25 5 12" 1.5"25-Apr Lettuce Mix Allstar DS LD2 10D 125 5 12" double seed
Lettuce Sierra TP LD2 11A 3 3 18" 6"Nevada TP LD2 11A 4 3 18" 6"Ermosa TP LD2 11B 4 3 18" 6"Mikola TP LD2 11B 3 3 18" 6"
Lettuce Sierra TP LD3 3A,B 30 3 18" 6"Nevada TP LD3 3B,C 35 3 18" 6"Mikola TP LD3 4A,B 30 3 18" 6"Ermosa TP LD3 4B,C 35 3 18" 6"
Potatoes Elba TP lD3 14A,B 50 2 36" 12"Chieftain TP LD3 13B,C, 14C 50 2 36" 12"
27-Apr Chard, Swiss Fordhook Giant DS LD1 3A 25 3 18" 6"Chard, Swiss Bright Lights DS LD1 3B 25 3 18" 6"Spinach Coho DS LD1 4B,C 25 5 12" 1.5"
21-Apr 1-May Beans, Bush Jade DS WC3 4,8 69 3 18" 2"Provider DS WC3 2,6 36 3 18" 2"
Beans, Shell Vermont Cranberry DS WC3 3,7 86 3 18" 2"Tongue of Fire DS WC3 1,5 111 3 18" 2"
Beets Red Ace DS WC1 10B,C 41 5 12" 2"Beets Chioggia DS LD2 4B 10 5 12" 2"
Red Ace DS LD2 5B 10 5 12" 2"Broccoli San Miguel TP WC1 6A,B 50 2 36" 12"
Arcadia TP WC1 6C,D 39 2 36" 12"Cabbage, Green Rocket TP WC1 11A 25 2 36" 12"
Columbia TP WC1 11B 35 2 36" 12"Carrots Ithaca DS WC1 8 75 5 12" 2"Collards Flash TP WC1 2,3,4,5 415 2 36" 12"Cucumbers, Slicing Marketmore DS WC2 5A,B 30 2 36" 8"Flowers Sunrich Orange DS WC1 1A,B 50 1 36" 1"
Sunrich Yellow DS WC1 1C,D,E 68 1 36" 1"Herbs, Cilantro Jantar TP WC4 9B,C 10 5 12" 2"
Santo TP WC4 9C 10 5 12" 2"Kale Winterbor TP WC1 7A 25 2 36" 12"
Page 1

Attachment 29
LANGDON ST. FOOD LOT -- 1/2000
shed
I
I
24 ft. ea.
100'
100'
100'
100'
100'
100'
96'
87'
82'
78'
75'
75'
75'
60'
60'
60'
60'
240 linear ft. = 9.5 beds
1168 lin. ft.=
46.5 beds
65 ft. ea. 910 lin. ft.=36 beds
Community Gardeners3
2
1
TOTAL LINEAR BED FEET(MINUS COMMUNITY GDN. AREA) = 2318' TOTAL 100 SQ.FT. BEDS = 92.72

Attachment 29

Attachment 30
Crop Family
Field 1Bed feet 1998 1999 2000 2001 2002
Bed 1 118 flowers flowers flowersBed 2 112 nightshade brassica asterBed 3 107 nightshade brassica asterBed 4 102 nightshade brassica asterBed 5 94 nightshade brassica umbelBed 6 89 nightshade brassica/aster umbelBed 7 84 nightshade brassica/aster umbelBed 8 75 nightshade umbel/aster chenopodBed 9 70 nightshade umbel chenopodBed 10 66 nightshade chenopod alliumBed 11 60 nightshade brassica nightshadeBed 12 54 malvaceae brassica/aster cucurbitBed 13 52 malvaceae brassica cucurbitBed 14 48 malvaceae umbel/brassica nightshadeBed 15 45 herbs chenopod nightshade
Field 21998 1999 2000 2001 2002
Bed 1 27 strawberries strawberries strawberriesBed 2 27 strawberries strawberries strawberriesBed 3 27 strawberries strawberries strawberriesBed 4 45 strawberries strawberries strawberriesBed 5 45 artichoke cucurbit herbsBed 6 45 artichoke brassica/cucurbit herbsBed 7 45 artichoke neighbor garden herbsBed 8 45 artichoke neighbor garden herbs
Field 31998 1999 2000 2001 2002
Bed 1 66 nightshade legume nightshadeBed 2 63 allium legume malvaceaeBed 3 54 allium legume nightshadeBed 4 48 herbs legume malvaceaeBed 5 45 herbs/umbel legume nightshadeBed 6 36 umbel legume malvaceaeBed 7 32 umbel legume nightshadeBed 8 21 umbel legume malvaceaeBed 9 10 umbel umbel umbel
Field 41998 1999 2000 2001 2002
Bed 1 75 flowers legume/umbel nightshadeBed 2 75 cucurbits legume nightshadeBed 3 75 cucurbits aster/legume nightshadeBed 4 75 cucurbits chenopod nightshadeBed 5 75 cucurbits aster nightshadeBed 6 75 cucurbits/legumes brassica nightshadeBed 7 75 legumes chenopod/allium nightshadeBed 8 75 chenopods/umbels brassica nightshadeBed 9 75 nightshades/legumes herbs nightshade
Field 51998 1999 2000 2001 2002
Bed 1 100 flowers flowers flowersBed 2 100 asparagus legume brassicaBed 3 100 asparagus nightshade brassicaBed 4 95 legumes nightshade brassicaBed 5 85 legumes nightshade brassicaBed 6 80 legumes nightshade brassicaBed 7 75 legumes nightshade brassicaBed 8 70 legumes nightshade brassicaBed 9 60 legumes nightshade brassicaBed 10 55 legumes nightshade brassicaBed 11 50 legumes allium brassicaBed 12 48 legumes nightshade brassicaBed 13 48 legumes nightshade brassicaBed 14 27 legumes nightshade chenopodBed 15 27 legumes nightshade chenopodBed 16 27 legumes cucurbit/brassica umbelBed 17 27 legumes cucurbit/brassica umbelBed 18 27 legumes cucurbit/brassica brassicaBed 19 27 legumes cucurbit/brassica brassica

Attachment 31 WEST COTTAGE ST. FOOD LOT -- 1/2000
48'52'
70'
84'
94'102'
107'
118'
I
West Cottage St.
Brook
Ave.
shed
shed
10'
21'
32'
36'
45'
89'
112'
75'54'
63'
66'
48'
45' ea.
27'27'
27'
45'
45'45'
45'
54'60'
66'
100'
100'
100'
95'
85'
80'
75'
70'
60'
55'
50'
48'
48'
Victor
St.
Community
Gardeners
1
2
3
4
5
75' ea.
1176 lin.ft. = 47 beds
306 lin.
ft. =
12 beds
375 lin. ft.=
15 beds
675 lin. ft.=
27 beds
1128 lin.ft.=
45 beds
27'
27'27'
27'27'
27'
45'
45'
TOTAL LINEAR BED FEET (MINUS COMMUNITY GDN. AREA) = 3660' TOTAL 100 SQ. FT. BEDS = 146.4

Attachment 32 YEARLY MAINTENANCE SCHEDULE January:
• Snow removal from sidewalks surrounding lots, as necessary • Weekly Trash pick-up on lots • Order forms: Seeds, Season Extension Materials, NOFA bulk order, irrigation
materials • Renew lease on West Cottage St. Lot and Langdon St. Lot
February:
• Snow removal from sidewalks surrounding lots, as necessary • Weekly Trash pick-up on lots • Sort seeds • Order compost through BNAF ( they should send you an order form- if not, call
them) March:
• Make necessary fencing repairs on lots • Clean out, organize sheds on land • Bi-Weekly Trash pick-up on lots • Finish any reparations on lots • Have oil changed on vehicle • Clean out van
April:
• Bi-weekly trash pick-up on lots • Weekly trimming of weeds around fencing, unmulched areas • Clean out van/sheds 1x/month
May:
• Bi-weekly trash pick-up on lots • Weekly trimming of weeds around fencing, unmulched areas • Assist neigborhood gardeners with rototilling of their gardens (according to your
schedule! The neighbors we always help, in order of need are: Laura (owner of Albion street lot, we turn and plant her land for her in exchange of using her land), Honario, Joe (next to West Cottage lot). Other gardeners will ask-you can decide how much time you have to assist with this. Train Urban Education Outreach person into this task and have them assist with neighbors)
• Be prepared to spread compost as soon as it is dropped off- compost is a hot commodity in the neighborhood and will be taken quickly by neighborhood gardeners.
• Call landscape companies, looking for mulch- have them deliver before summer program starts
• When planning compost and mulch deliveries, keep in mind that area in front of shelter should be kept clear for events such as city farm festival etc..
• Clean out van/sheds 1x/month June:
• Bi-weekly trash pick-up on lots • Weekly trimming of weeds around fencing, unmulched areas

Attachment 32 • Lay irrigation system at this point- it is difficult to do once the summer program
commences • Plan any projects that might be undertaken during the summer program- have all
details figured out, materials collected- there will be no time to do this once the program commences.
• Clean out van/sheds 1x/month July:
• Bi-weekly trash pick-up on lots • Weekly trimming of weeds around fencing, unmulched areas (good task for
interns) • Thorough clean up of site prior to community lunch (each Monday) • Ensure that site, van (including Farmer’s market, Site Supervisor and Farm
Vehicle) and shed clean up happens every Friday by crews August
• Bi-weekly trash pick-up on lots • Weekly trimming of weeds around fencing, unmulched areas • Thorough clean up of site prior to community lunch • Plan any special fall projects (last week of August good time to do this, right after
summer program ends) • Ensure that site, van (including Farmer’s market, Site Supervisor and Farm
Vehicle) and shed clean up happens every Friday by crews September
• Bi-weekly trash pick-up of lots • Weekly trimming of weeds around fencing, unmulched areas • Clean out van/shed 1x/month
October
• Bi-weekly trash pick-up on lots • Weekly trimming of weeds around fencing, unmulched areas • Take apart irrigation system (in first part of month) • Inventory of fence repairs • Clean out and organize van and shed at end of season
November
• Weekly trash pick-up on lots • Complete any fence repairs necessary (replacing posts, painting etc…) • Take rototiller, chipper in for repairs as necessary • If no repairs are necessary, winterize rototiller, put gas anti-freeze in tiller • Ensure shrubs are well-watered for winter • 1995 van is due for inspection by the end of this month • Have oil changed/ winterize vehicle
December
• Weekly trash pick-up on lots • Snow removal as necessary • Organize order forms for January orders

Attachment 33
THE FOOD PROJECT COMBINED - HARVEST LOG - DISTRIBUTION LOG
CIRCLE HARVEST SITE: Baker Bridge W.Cottage Langdon DATE:
CIRCLE HARVEST DAY: Mon. Tues. Wed. Thurs. Fri. Sat. Sun.
PERSON:
Distribution OutletsHarvest
Total Harvest Quantities(In from Previous
Harvest)(Held for future
distribution)
BasilBeans, Bush Snap
Beans, Shell
Beets
Broccoli
Cabbage, Green
Cabbage, Red
Cantaloupe
Carrot
Cauliflower
Celeriac
Chard, Swiss
Cilantro
Collards
Corn, Sweet
Cucumber, Pickling
Cucumber,Slicing
Daikon
Dill
Eggplant
Fennel
Kale
Leeks
Lettuce (Head)
Lettuce(Loose Leaf)
Melons, Water(large)
Melons, Water(small)

Attachment 35 Task List
Administrative 1 Do budget variance for 1st quarter1 Finish individual matrices for 20021 Staff meeting in Dorchester 5/23 9:151 Urban staff meeting in Dorchester 5/22 9 AM1 Meeting with Don 5/23 7:30 AM
Buildings and Grounds 1 Finish spreading straw where needed at both sites1 Weed whack perimeter1 Rebuild bulletin board at West Cottage2 Build shelf in back of shed at West Cottage2 Read up on perennial herbs and flowers; inventory/map at Langdon, WC3 Extend drainpipe under driveway
Distribution and Marketing 1 Check in with City Fresh re: Langdon veggies1 Check in with Kristen re: 1st market June 7
Education 2 Continue work on Urban Ag Orientation workshop for SYP1 CRAFT visit and potluck 5/23 @ Meadowbrook Farmw/Christina1 Mason School at Langdon 12:30 Tuesday
Equipment and Supplies 1 Sharpen hoe blades1 Oil change on generator and weed whacker1 Fix weed whacker1 Investigate wheel hoe possibility2 Wash out and air-dry all harvest crates and buckets
Fertility/Compost 1 Shred/manage compost at WC; investigate new sources of raw materials to supplement our own2 Continue spreading loam in newly cleared are near shelter at WC
Urban Land 1 Check with Jeremy re: JJD1 Check with Greg/Laura re: her lot
Vegetable Crops 1 Plant turnips, salad mix, beets at LD1 Plant eggplant and peppers at WC & LD1 Finish planting tomatoes at LD1 Plant flowers in beds @WC1 Transplant lettuce, basil and celeriac at LD & WC1 Finish WC pea trellis1 Make up weeding rotation
Volunteers/Visitors
Page 1


![[Psilocybin]Magic Mushroom Grower's Guide-Oss,Oeric,1976,1986](https://img.pdfslide.us/doc/110x75/553d763f550346bf358b46cc/psilocybinmagic-mushroom-growers-guide-ossoeric19761986.jpg)