Embed Size (px)
Citation preview
Tutorial: iOS Application Development
Sybase Unwired Platform 2.0
DOCUMENT ID: DC01213-01-0200-02LAST REVISED: May 2011Copyright © 2011 by Sybase, Inc. All rights reserved.This publication pertains to Sybase software and to any subsequent release until otherwise indicated in new editions ortechnical notes. Information in this document is subject to change without notice. The software described herein is furnishedunder a license agreement, and it may be used or copied only in accordance with the terms of that agreement.To order additional documents, U.S. and Canadian customers should call Customer Fulfillment at (800) 685-8225, fax (617)229-9845.Customers in other countries with a U.S. license agreement may contact Customer Fulfillment via the above fax number. Allother international customers should contact their Sybase subsidiary or local distributor. Upgrades are provided only atregularly scheduled software release dates. No part of this publication may be reproduced, transmitted, or translated in anyform or by any means, electronic, mechanical, manual, optical, or otherwise, without the prior written permission of Sybase,Inc.Sybase trademarks can be viewed at the Sybase trademarks page at http://www.sybase.com/detail?id=1011207. Sybase andthe marks listed are trademarks of Sybase, Inc. ® indicates registration in the United States of America.SAP and other SAP products and services mentioned herein as well as their respective logos are trademarks or registeredtrademarks of SAP AG in Germany and in several other countries all over the world.Java and all Java-based marks are trademarks or registered trademarks of Sun Microsystems, Inc. in the U.S. and othercountries.Unicode and the Unicode Logo are registered trademarks of Unicode, Inc.All other company and product names mentioned may be trademarks of the respective companies with which they areassociated.Use, duplication, or disclosure by the government is subject to the restrictions set forth in subparagraph (c)(1)(ii) of DFARS52.227-7013 for the DOD and as set forth in FAR 52.227-19(a)-(d) for civilian agencies.Sybase, Inc., One Sybase Drive, Dublin, CA 94568.
Contents
Sybase Unwired Platform Tutorials ......................................1Task Flow ................................................................................3Getting Started .......................................................................5
Installing Sybase Unwired Platform ................................5Starting Unwired Platform Services ................................5Starting Sybase Unwired WorkSpace ............................6Connecting to Sybase Control Center ............................6Learning the Basics ........................................................7
Developing an iOS Application ..........................................11Generating Object API Code ........................................12Setting Up an iOS Client Application in Xcode .............13Registering the iPhone Simulator in Sybase Control
Center .......................................................................16Creating the SUP101CallbackHandler File ...................17Creating the User Interface ...........................................20
Adding the SubscribeController View Controller.........................................................................20
Adding the CustomerListController ......................29Adding the DetailController ..................................33
Deploying the Device Application .................................38Learn More about Sybase Unwired Platform ....................41Index ..................................................................................43
Tutorial: iOS Application Development iii

Contents
iv Sybase Unwired Platform
Sybase Unwired Platform Tutorials
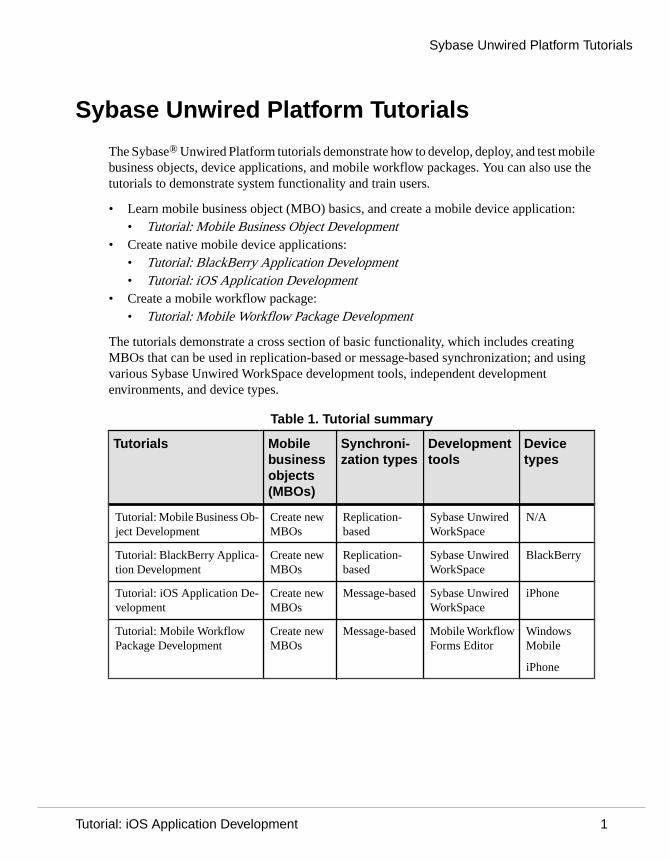
The Sybase® Unwired Platform tutorials demonstrate how to develop, deploy, and test mobilebusiness objects, device applications, and mobile workflow packages. You can also use thetutorials to demonstrate system functionality and train users.
• Learn mobile business object (MBO) basics, and create a mobile device application:• Tutorial: Mobile Business Object Development
• Create native mobile device applications:• Tutorial: BlackBerry Application Development• Tutorial: iOS Application Development
• Create a mobile workflow package:• Tutorial: Mobile Workflow Package Development
The tutorials demonstrate a cross section of basic functionality, which includes creatingMBOs that can be used in replication-based or message-based synchronization; and usingvarious Sybase Unwired WorkSpace development tools, independent developmentenvironments, and device types.
Table 1. Tutorial summary
Tutorials Mobilebusinessobjects(MBOs)
Synchroni-zation types
Developmenttools
Devicetypes
Tutorial: Mobile Business Ob-ject Development
Create newMBOs
Replication-based
Sybase UnwiredWorkSpace
N/A
Tutorial: BlackBerry Applica-tion Development
Create newMBOs
Replication-based
Sybase UnwiredWorkSpace
BlackBerry
Tutorial: iOS Application De-velopment
Create newMBOs
Message-based Sybase UnwiredWorkSpace
iPhone
Tutorial: Mobile WorkflowPackage Development
Create newMBOs
Message-based Mobile WorkflowForms Editor
WindowsMobile
iPhone
Sybase Unwired Platform Tutorials
Tutorial: iOS Application Development 1

Sybase Unwired Platform Tutorials
2 Sybase Unwired Platform
Task Flow
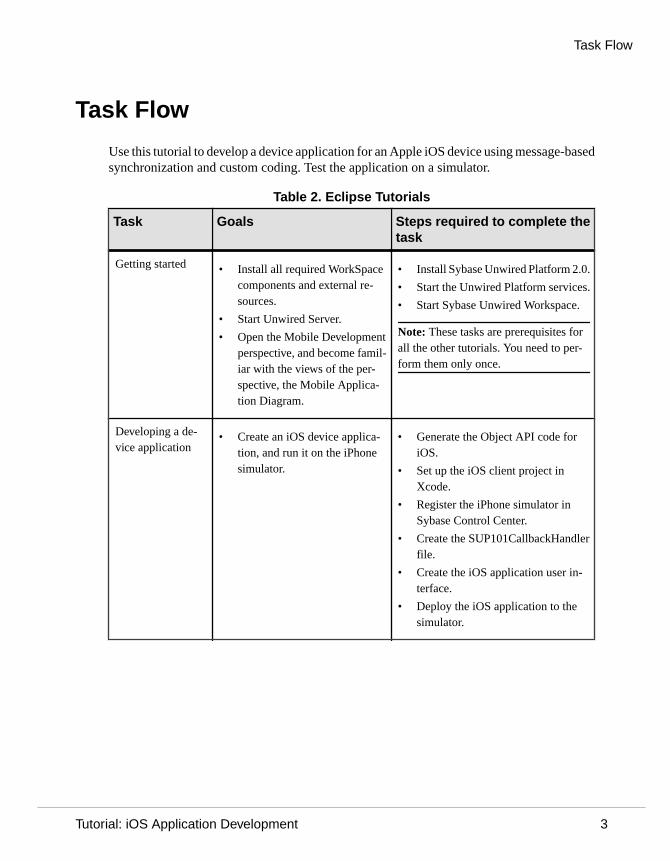
Use this tutorial to develop a device application for an Apple iOS device using message-basedsynchronization and custom coding. Test the application on a simulator.
Table 2. Eclipse Tutorials
Task Goals Steps required to complete thetask
Getting started • Install all required WorkSpacecomponents and external re-sources.
• Start Unwired Server.
• Open the Mobile Developmentperspective, and become famil-iar with the views of the per-spective, the Mobile Applica-tion Diagram.
• Install Sybase Unwired Platform 2.0.
• Start the Unwired Platform services.
• Start Sybase Unwired Workspace.
Note: These tasks are prerequisites forall the other tutorials. You need to per-form them only once.
Developing a de-vice application
• Create an iOS device applica-tion, and run it on the iPhonesimulator.
• Generate the Object API code foriOS.
• Set up the iOS client project inXcode.
• Register the iPhone simulator inSybase Control Center.
• Create the SUP101CallbackHandlerfile.
• Create the iOS application user in-terface.
• Deploy the iOS application to thesimulator.
Task Flow
Tutorial: iOS Application Development 3

Task Flow
4 Sybase Unwired Platform
Getting Started
Goal: Install and learn about Sybase Unwired Platform and its associated components.
The following tasks are required, unless otherwise noted, for all tutorials, but you need toperform them only once.
1. Installing Sybase Unwired Platform on page 5
2. Starting Unwired Platform Services on page 5
3. Starting Sybase Unwired WorkSpace on page 6
4. Connecting to Sybase Control Center on page 6
5. (optional) Learning the Basics on page 7
Installing Sybase Unwired PlatformGoal: Install Sybase Unwired Platform.
Install these Sybase Unwired Platform components:
• Data Tier• Unwired Server• Unwired WorkSpace
If Unwired Platform is already installed and any of these components are missing:
1. Start the Sybase Unwired Platform installer.2. Follow the instructions in the installation wizard.3. Select the required components, and complete the installation.
For complete installation instructions, see the Sybase Unwired Platform Installation Guideand Release Bulletin.
Starting Unwired Platform ServicesGoal: Start Unwired Server and the sample database.
Select Start > Programs > Sybase > Unwired Platform > Start Unwired PlatformServices.
Getting Started
Tutorial: iOS Application Development 5
Starting Sybase Unwired WorkSpaceGoal: Start Unwired WorkSpace.
1. Select Start > Programs > Sybase > Unwired Platform > Unwired WorkSpace.
The Welcome page displays links to product information, and to the product.
2. To read more about Sybase Unwired WorkSpace concepts and tasks, select Help > HelpContents from the main menu.
Connecting to Sybase Control CenterGoal: Open the Web-based Sybase Control Center administration console to manageUnwired Server and its components.
From Sybase Control Center, you can:
• View servers and their status• Start and stop a server• View server logs• Deploy a mobile application package• Register devices• Set role mappings
For information on configuring, managing, and monitoring Unwired Server, select Help >Online Documentation.
1. Select Start > Programs > Sybase > Sybase Control Center.
Note: If Sybase Control Center does not launch, make sure that the Sybase Unified Agentservice is started. See the Installation Guide for details.
2. Log in using the default login:
• User name – supAdmin
• Password – s3pAdmin
Logging in to Sybase Control Center allows you access to Unwired Platformadministration features that you are authorized to use.
Getting Started
6 Sybase Unwired Platform
Learning the BasicsGoal: Learn about Sybase Unwired WorkSpace and how to access help.
PrerequisitesStart Unwired WorkSpace.
Task
1. From the Welcome page, select any of the links to familiarize yourself with the UnwiredWorkSpace environment.
To close this page, click the X. You can reopen this page by selecting Help > Welcome.
2. Select Start Development to access the Sybase Unwired WorkSpace developmentenvironment.
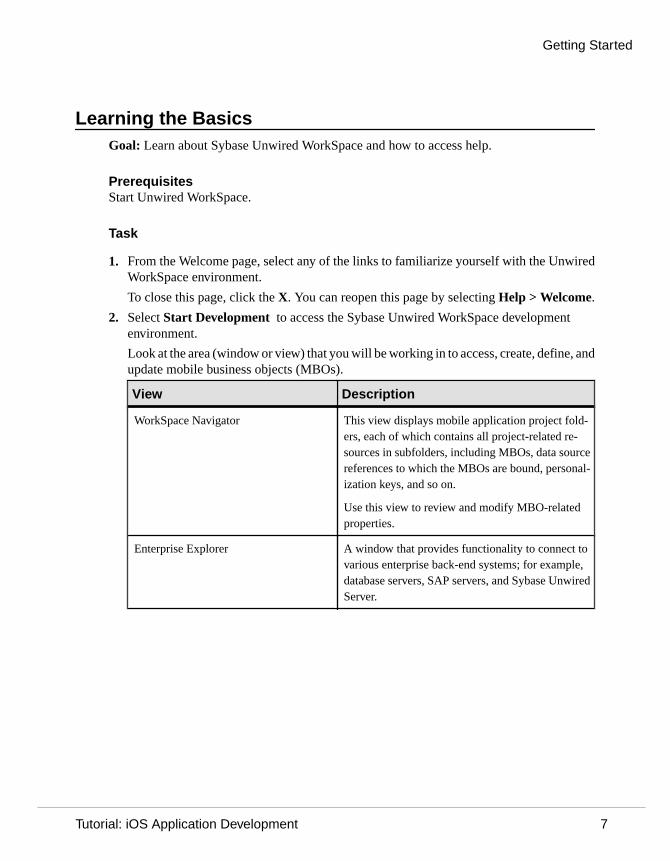
Look at the area (window or view) that you will be working in to access, create, define, andupdate mobile business objects (MBOs).
View Description
WorkSpace Navigator This view displays mobile application project fold-ers, each of which contains all project-related re-sources in subfolders, including MBOs, data sourcereferences to which the MBOs are bound, personal-ization keys, and so on.
Use this view to review and modify MBO-relatedproperties.
Enterprise Explorer A window that provides functionality to connect tovarious enterprise back-end systems; for example,database servers, SAP servers, and Sybase UnwiredServer.
Getting Started
Tutorial: iOS Application Development 7
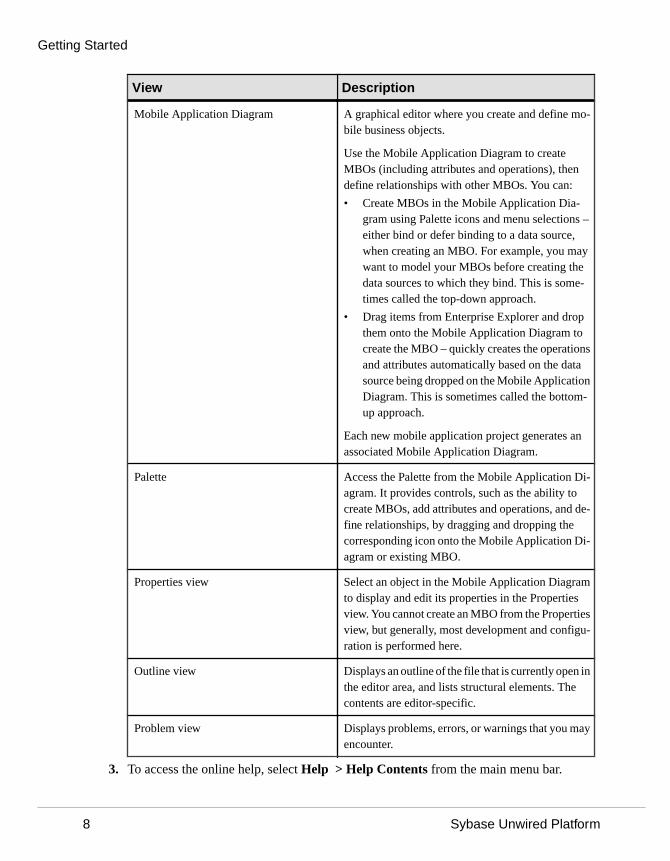
View Description
Mobile Application Diagram A graphical editor where you create and define mo-bile business objects.
Use the Mobile Application Diagram to createMBOs (including attributes and operations), thendefine relationships with other MBOs. You can:
• Create MBOs in the Mobile Application Dia-gram using Palette icons and menu selections –either bind or defer binding to a data source,when creating an MBO. For example, you maywant to model your MBOs before creating thedata sources to which they bind. This is some-times called the top-down approach.
• Drag items from Enterprise Explorer and dropthem onto the Mobile Application Diagram tocreate the MBO – quickly creates the operationsand attributes automatically based on the datasource being dropped on the Mobile ApplicationDiagram. This is sometimes called the bottom-up approach.
Each new mobile application project generates anassociated Mobile Application Diagram.
Palette Access the Palette from the Mobile Application Di-agram. It provides controls, such as the ability tocreate MBOs, add attributes and operations, and de-fine relationships, by dragging and dropping thecorresponding icon onto the Mobile Application Di-agram or existing MBO.
Properties view Select an object in the Mobile Application Diagramto display and edit its properties in the Propertiesview. You cannot create an MBO from the Propertiesview, but generally, most development and configu-ration is performed here.
Outline view Displays an outline of the file that is currently open inthe editor area, and lists structural elements. Thecontents are editor-specific.
Problem view Displays problems, errors, or warnings that you mayencounter.
3. To access the online help, select Help > Help Contents from the main menu bar.
Getting Started
8 Sybase Unwired Platform
4. Expand any of the documents that appear in the left pane.
Some documents are for Sybase Unwired Platform, while others are for the Eclipsedevelopment environment.
Getting Started
Tutorial: iOS Application Development 9

Getting Started
10 Sybase Unwired Platform
Developing an iOS Application
Goal: Generate Object API code for the iOS platform, develop a universal iOS deviceapplication with code, and test its functionality.
PrerequisitesComplete these tasks:
• Getting Started on page 5.• Tutorial: Mobile Business Object Development, which provides the foundation tasks for
this tutorial:1. Create a mobile application project.2. Create the database mobile business objects (MBOs).3. Deploy the database MBOs.
Task
The device application communicates with the database MBOs that are deployed to UnwiredServer.
Supported platforms include:
• For development, MacOS 10.6 (Snow Leopard) and Xcode 4.0• For deployment, iOS SDK 4.2 and 4.3
1. Open the SUP101 mobile application project.
In WorkSpace Navigator, right-click the SUP101 folder and select Open in DiagramEditor.
Note: If you do not see the SUP101 folder, make sure that you have successfullycompleted Tutorial: Mobile Business Object Development, which is a prerequisite for thistutorial.
2. Generate the object API code for iOS on page 12.
3. Set up the universal iOS client application in Xcode on page 13.
4. Register the iPhone simulator in Sybase Control Center on page 16.
5. Create the SUP101 CallbackHandler file on page 17.
6. Add the SubscribeController View controller on page 20.
7. Add the CustomerListController on page 29.
8. Add the DetailController on page 33.
9. Deploy the application to the simulator on page 38.
Developing an iOS Application
Tutorial: iOS Application Development 11
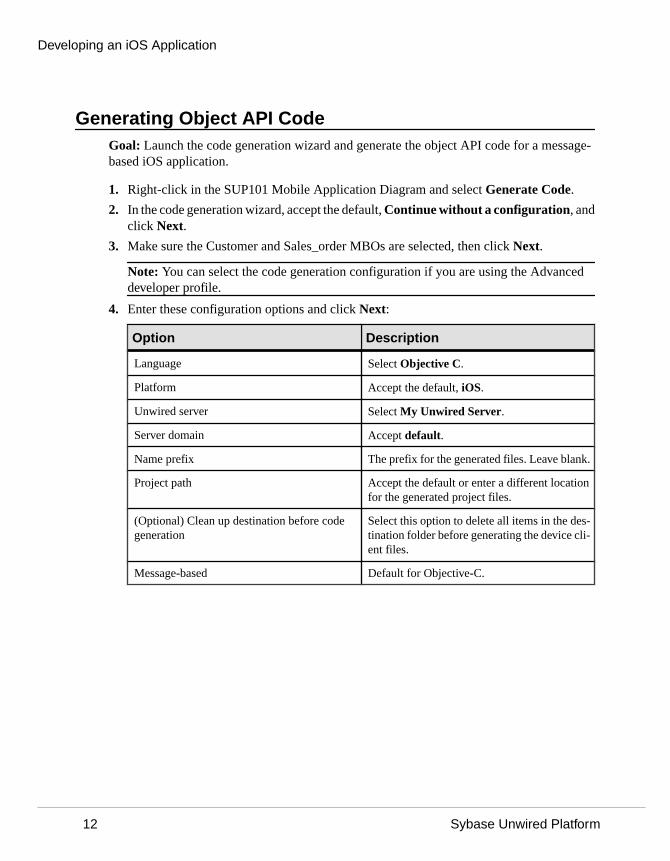
Generating Object API CodeGoal: Launch the code generation wizard and generate the object API code for a message-based iOS application.
1. Right-click in the SUP101 Mobile Application Diagram and select Generate Code.
2. In the code generation wizard, accept the default, Continue without a configuration, andclick Next.
3. Make sure the Customer and Sales_order MBOs are selected, then click Next.
Note: You can select the code generation configuration if you are using the Advanceddeveloper profile.
4. Enter these configuration options and click Next:
Option Description
Language Select Objective C.
Platform Accept the default, iOS.
Unwired server Select My Unwired Server.
Server domain Accept default.
Name prefix The prefix for the generated files. Leave blank.
Project path Accept the default or enter a different locationfor the generated project files.
(Optional) Clean up destination before codegeneration
Select this option to delete all items in the des-tination folder before generating the device cli-ent files.
Message-based Default for Objective-C.
Developing an iOS Application
12 Sybase Unwired Platform
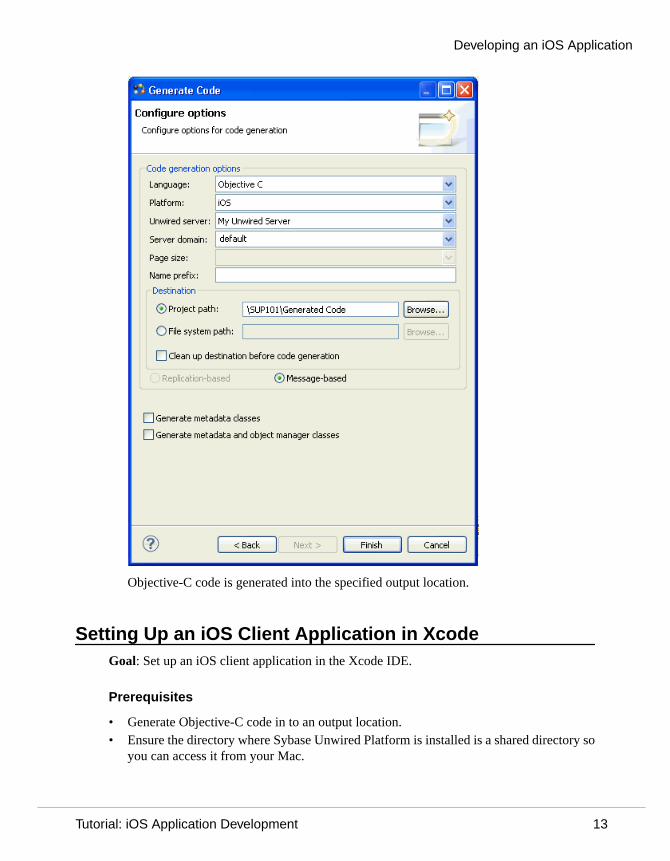
Objective-C code is generated into the specified output location.
Setting Up an iOS Client Application in XcodeGoal: Set up an iOS client application in the Xcode IDE.
Prerequisites
• Generate Objective-C code in to an output location.• Ensure the directory where Sybase Unwired Platform is installed is a shared directory so
you can access it from your Mac.
Developing an iOS Application
Tutorial: iOS Application Development 13
• Obtain the header and Objective-C source code files you need to build the user interfacefrom the SUP_iOS_Custom_Dev_Tutorial_code.zip file. This way, you caneasily copy and paste the code into the corresponding files that are created in Xcode.• If you are viewing this guide as a PDF, you can obtain the files from the Sybase Product
Documentation Web site at http://sybooks.sybase.com/nav/summary.do?prod=1289&lang=en&submit=%A0Go%A0&prodName=Sybase+Unwired+Platform&archive=0. Navigate to this topic in the tutorial, then click the link for thezip file to access the provided source code files.
• If you are viewing this guide online from the Sybase Product Documention web site,click SUP_iOS_Custom_Dev_Tutorial_code.zip to access the source code files.
Task
Note: This tutorial was developed using Xcode 4.0 and iOS SDK 4.3. If you use a differentversion of Xcode, some steps may vary. For more information on Xcode, refer to the AppleDeveloper Connection: http://developer.apple.com/technologies/tools/xcode.html.
1. Start Xcode and select Create a new Xcode project.
2. Select iOS Application and Window-based Application as the project template, andthen click Next.
3. Enter SUP101 as the Product Name, MyCorp as the Company Identifier, selectUniversal as the Device Family product, and then click Next.
4. Select a location to save the project and click Create to open it.
Xcode creates a folder, SUP101, to contain the project file, SUP101.xcodeproj andanother SUP101 folder, which contains a number of automatically generated files.
Copy the files from your Windows machine in to the SUP101 folder that Xcode created tocontain the generated source code.
5. Connect to the Microsoft Windows machine where Sybase Unwired Platform is installed:
a) From the Apple Finder menu, select Go > Connect to Server.b) Enter the name or IP address of the machine, for example, smb://<machine DNS
name> or smb://<IP Address>.
You see the shared directory.
6. Navigate to the \UnwiredPlatform\ClientAPI\MBS\ObjectiveC directoryin the Unwired Platform installation directory, and copy the includes and libs foldersto the SUP101/SUP101 directory on your Mac.
7. Navigate to the SUP101 mobile application project (for example, C:\Documents andSettings\administrator\workspace\SUP101), and copy the GeneratedCode folder to the SUP101/SUP101 directory on your Mac.
When you have finished copying the files to your Xcode project, it should look like this:
Developing an iOS Application
14 Sybase Unwired Platform
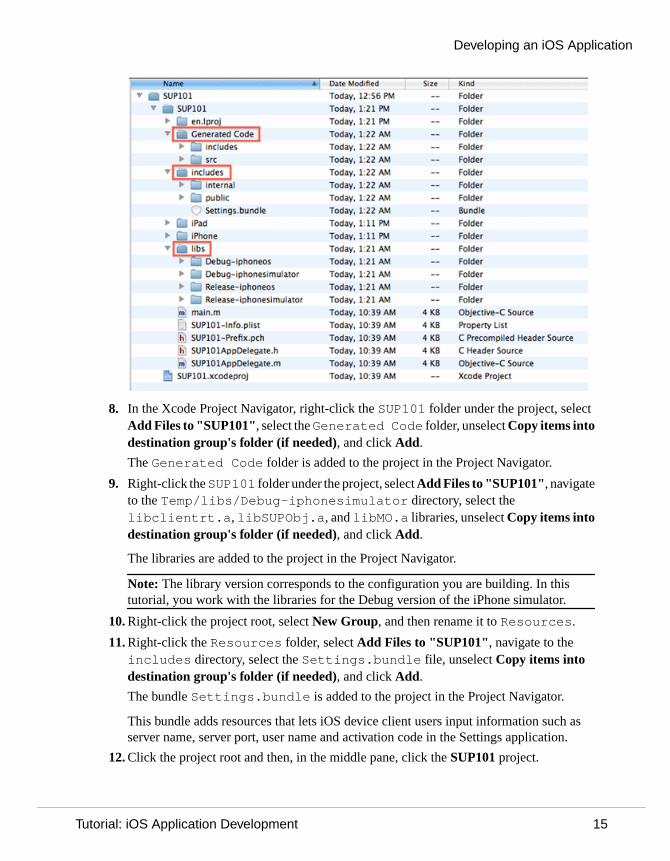
8. In the Xcode Project Navigator, right-click the SUP101 folder under the project, selectAdd Files to "SUP101", select the Generated Code folder, unselect Copy items intodestination group's folder (if needed), and click Add.
The Generated Code folder is added to the project in the Project Navigator.
9. Right-click the SUP101 folder under the project, select Add Files to "SUP101", navigateto the Temp/libs/Debug-iphonesimulator directory, select thelibclientrt.a, libSUPObj.a, and libMO.a libraries, unselect Copy items intodestination group's folder (if needed), and click Add.
The libraries are added to the project in the Project Navigator.
Note: The library version corresponds to the configuration you are building. In thistutorial, you work with the libraries for the Debug version of the iPhone simulator.
10. Right-click the project root, select New Group, and then rename it to Resources.
11. Right-click the Resources folder, select Add Files to "SUP101", navigate to theincludes directory, select the Settings.bundle file, unselect Copy items intodestination group's folder (if needed), and click Add.
The bundle Settings.bundle is added to the project in the Project Navigator.
This bundle adds resources that lets iOS device client users input information such asserver name, server port, user name and activation code in the Settings application.
12. Click the project root and then, in the middle pane, click the SUP101 project.
Developing an iOS Application
Tutorial: iOS Application Development 15
a) In the right pane, click the Build Settings tab, then scroll down to the Search Pathssection.
b) Enter the location of your includes folder ("$SRCROOT/SUP101/includes/**") in the Header Search Paths field.
$SRCROOT is a macro that expands to the directory where the Xcode project fileresides.
13. In the middle pane select the SUP101 target.
a) In the right pane, select the Build Phases tab, then expand the Link Binary withLibraries section.
b) Click the + icon below the list, select the following libraries, and then click Add to addthem from the SDK to the project:
• AddressBook.framework
• CoreFoundation.framework
• QuartzCore.framework
• Security.framework
• libicucore.A.dylib
• libstdc++6.dylib
• libz.1.2.3.dylib
14. Select Product > Clean, then Product > Build to test the initial set up of the project. If youcorrectly followed this procedure, you see a Build Succeeded message.
Registering the iPhone Simulator in Sybase Control CenterGoal: Register the iPhone Simulator in Sybase Control Center.
PrerequisitesConnect to Sybase Control Center.
Task
1. Log in to Sybase Control Center using the supAdmin/s3pAdmin user name and password.
2. In Sybase Control Center, select View > Select > Unwired Server Cluster ManagementView.
3. In the left pane, select Device Users.
4. In the right pane, click Devices.
5. Click Register.
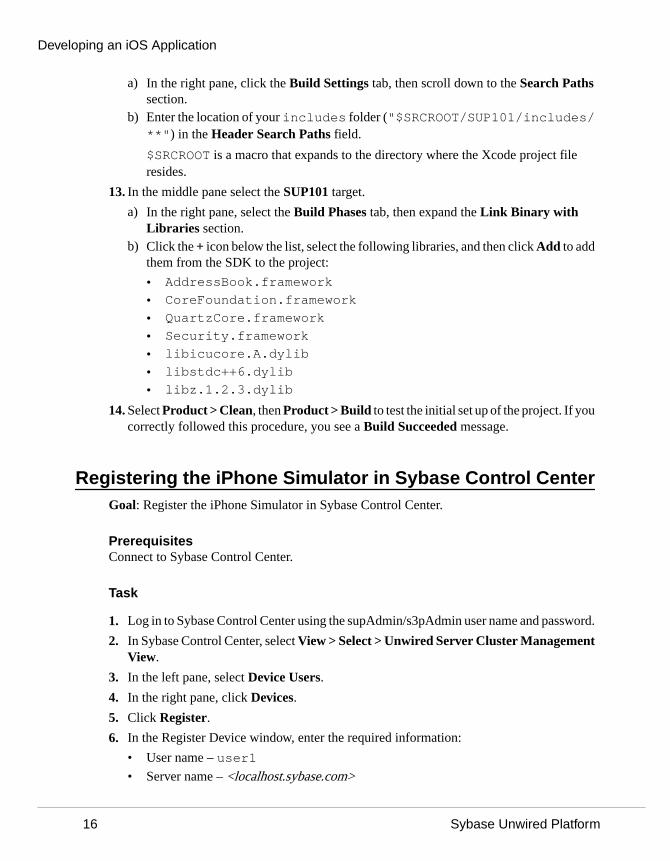
6. In the Register Device window, enter the required information:
• User name – user1
• Server name – <localhost.sybase.com>
Developing an iOS Application
16 Sybase Unwired Platform
Note: The information should match the input on the client and"localhost.sybase.com" should be the actual name of your machine and domain.
• Port – the Unwired Server port, 5001.
• Farm ID – 0
• Activation code – 123
Creating the SUP101CallbackHandler FileGoal: Configure the SUP101CallBackHandler file.
Prerequisites
SUP101CallbackHandler is a subclass of SUPCallbackHandler, and is used tolisten for events sent from the server. The header, SUP101CallbackHandler.h, isreferenced in a number of classes in this application, so you create it first.
There are two threads involved in the SUP101 application — the main thread, which is drivenby the client application user interface controller, and the mobile object client access thread,which takes charge of message transportation with the server and synchronization with theapplication through the mobile object. In iOS, all code that updates the user interface must becalled on the main thread, so it is a good idea to send notifications that might trigger changes tothe interface from the main thread.
Tip: Be sure you saved the SUP_iOS_Custom_Dev_Tutorial_code.zip file to yourdevelopment machine so you can easily copy and paste the provided code into thecorresponding .h and .m files in Xcode.
Task
1. In the SUP101 Xcode project, select File > New > New File.
2. Select Objective-C Class and click Next.
3. Enter SUPDefaultCallbackHandler in the Subclass of field and click Next.
4. Enter SUP101CallbackHandler in the Save as field and click Save.The files SUP101CallbackHandler.h and SUP101CallbackHandler.m arecreated in the Project Navigator.
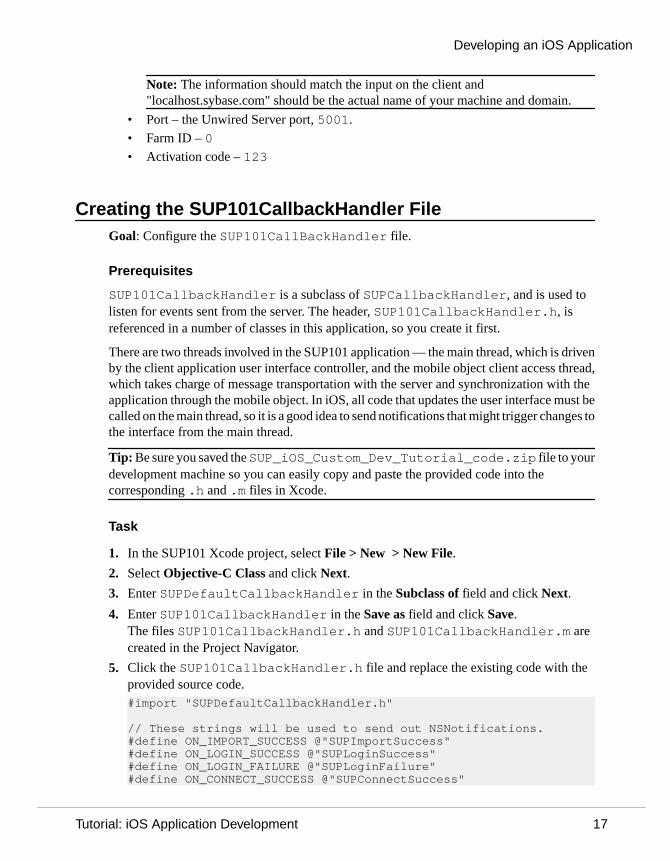
5. Click the SUP101CallbackHandler.h file and replace the existing code with theprovided source code.#import "SUPDefaultCallbackHandler.h"
// These strings will be used to send out NSNotifications.#define ON_IMPORT_SUCCESS @"SUPImportSuccess"#define ON_LOGIN_SUCCESS @"SUPLoginSuccess"#define ON_LOGIN_FAILURE @"SUPLoginFailure"#define ON_CONNECT_SUCCESS @"SUPConnectSuccess"
Developing an iOS Application
Tutorial: iOS Application Development 17
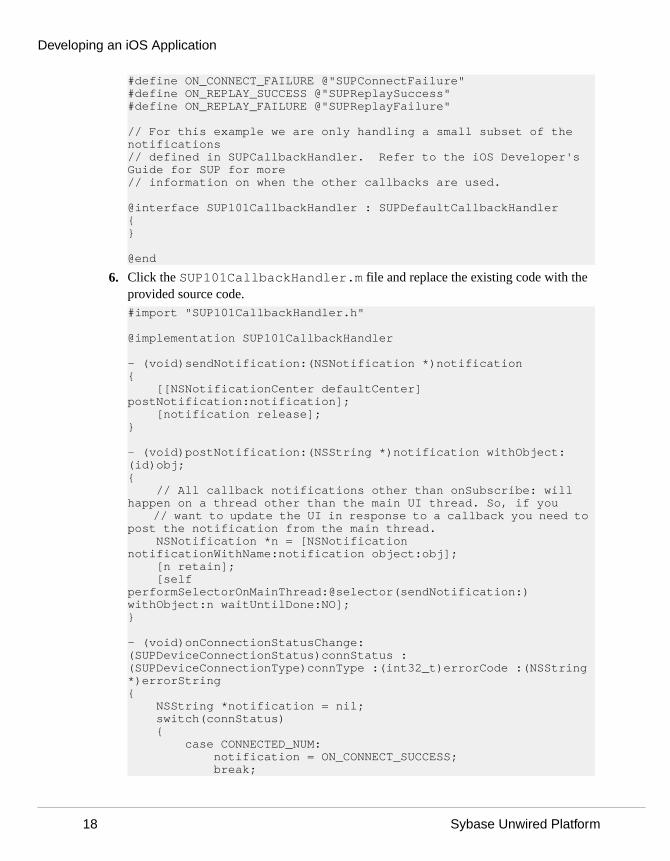
#define ON_CONNECT_FAILURE @"SUPConnectFailure"#define ON_REPLAY_SUCCESS @"SUPReplaySuccess"#define ON_REPLAY_FAILURE @"SUPReplayFailure"
// For this example we are only handling a small subset of the notifications// defined in SUPCallbackHandler. Refer to the iOS Developer's Guide for SUP for more// information on when the other callbacks are used.
@interface SUP101CallbackHandler : SUPDefaultCallbackHandler{}
@end
6. Click the SUP101CallbackHandler.m file and replace the existing code with theprovided source code.#import "SUP101CallbackHandler.h"
@implementation SUP101CallbackHandler
- (void)sendNotification:(NSNotification *)notification{ [[NSNotificationCenter defaultCenter] postNotification:notification]; [notification release];}
- (void)postNotification:(NSString *)notification withObject:(id)obj;{ // All callback notifications other than onSubscribe: will happen on a thread other than the main UI thread. So, if you // want to update the UI in response to a callback you need to post the notification from the main thread. NSNotification *n = [NSNotification notificationWithName:notification object:obj]; [n retain]; [self performSelectorOnMainThread:@selector(sendNotification:) withObject:n waitUntilDone:NO];}
- (void)onConnectionStatusChange:(SUPDeviceConnectionStatus)connStatus :(SUPDeviceConnectionType)connType :(int32_t)errorCode :(NSString *)errorString{ NSString *notification = nil; switch(connStatus) { case CONNECTED_NUM: notification = ON_CONNECT_SUCCESS; break;
Developing an iOS Application
18 Sybase Unwired Platform
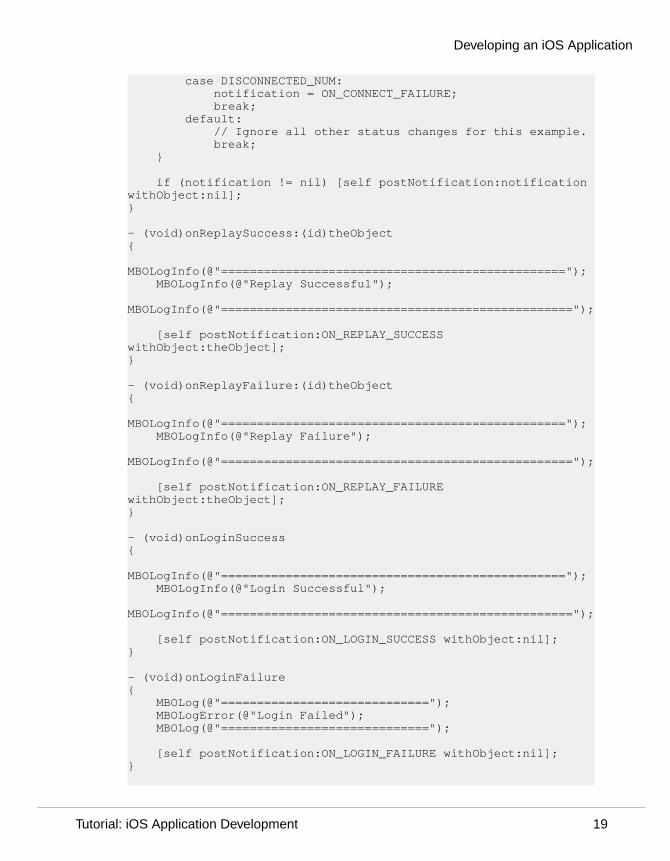
case DISCONNECTED_NUM: notification = ON_CONNECT_FAILURE; break; default: // Ignore all other status changes for this example. break; } if (notification != nil) [self postNotification:notification withObject:nil];}
- (void)onReplaySuccess:(id)theObject{ MBOLogInfo(@"================================================"); MBOLogInfo(@"Replay Successful"); MBOLogInfo(@"================================================="); [self postNotification:ON_REPLAY_SUCCESS withObject:theObject];}
- (void)onReplayFailure:(id)theObject{ MBOLogInfo(@"================================================"); MBOLogInfo(@"Replay Failure"); MBOLogInfo(@"================================================="); [self postNotification:ON_REPLAY_FAILURE withObject:theObject];}
- (void)onLoginSuccess{ MBOLogInfo(@"================================================"); MBOLogInfo(@"Login Successful"); MBOLogInfo(@"================================================="); [self postNotification:ON_LOGIN_SUCCESS withObject:nil];}
- (void)onLoginFailure{ MBOLog(@"============================="); MBOLogError(@"Login Failed"); MBOLog(@"============================="); [self postNotification:ON_LOGIN_FAILURE withObject:nil];}
Developing an iOS Application
Tutorial: iOS Application Development 19
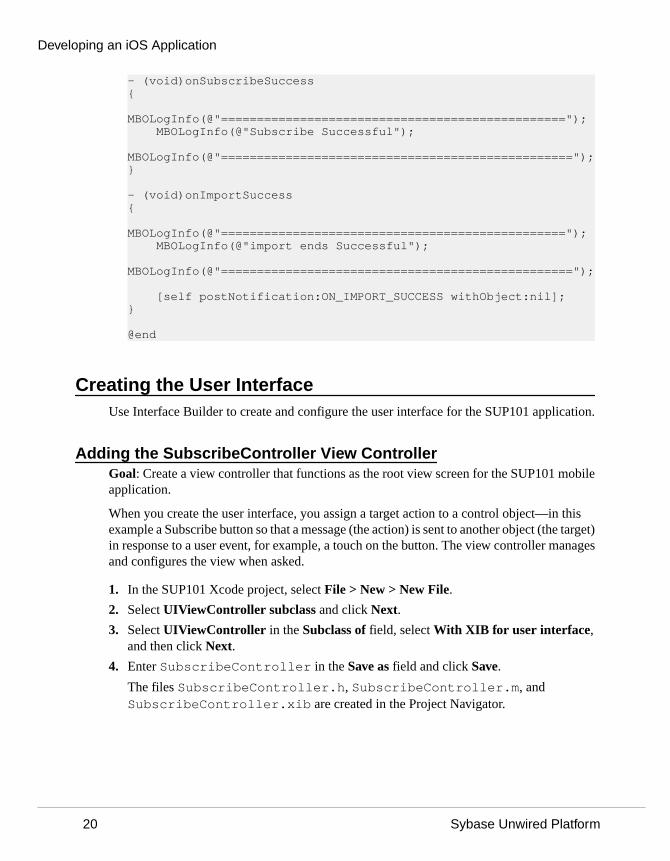
- (void)onSubscribeSuccess{ MBOLogInfo(@"================================================"); MBOLogInfo(@"Subscribe Successful"); MBOLogInfo(@"=================================================");}
- (void)onImportSuccess{ MBOLogInfo(@"================================================"); MBOLogInfo(@"import ends Successful"); MBOLogInfo(@"================================================="); [self postNotification:ON_IMPORT_SUCCESS withObject:nil];}
@end
Creating the User InterfaceUse Interface Builder to create and configure the user interface for the SUP101 application.
Adding the SubscribeController View ControllerGoal: Create a view controller that functions as the root view screen for the SUP101 mobileapplication.
When you create the user interface, you assign a target action to a control object—in thisexample a Subscribe button so that a message (the action) is sent to another object (the target)in response to a user event, for example, a touch on the button. The view controller managesand configures the view when asked.
1. In the SUP101 Xcode project, select File > New > New File.
2. Select UIViewController subclass and click Next.
3. Select UIViewController in the Subclass of field, select With XIB for user interface,and then click Next.
4. Enter SubscribeController in the Save as field and click Save.
The files SubscribeController.h, SubscribeController.m, andSubscribeController.xib are created in the Project Navigator.
Developing an iOS Application
20 Sybase Unwired Platform
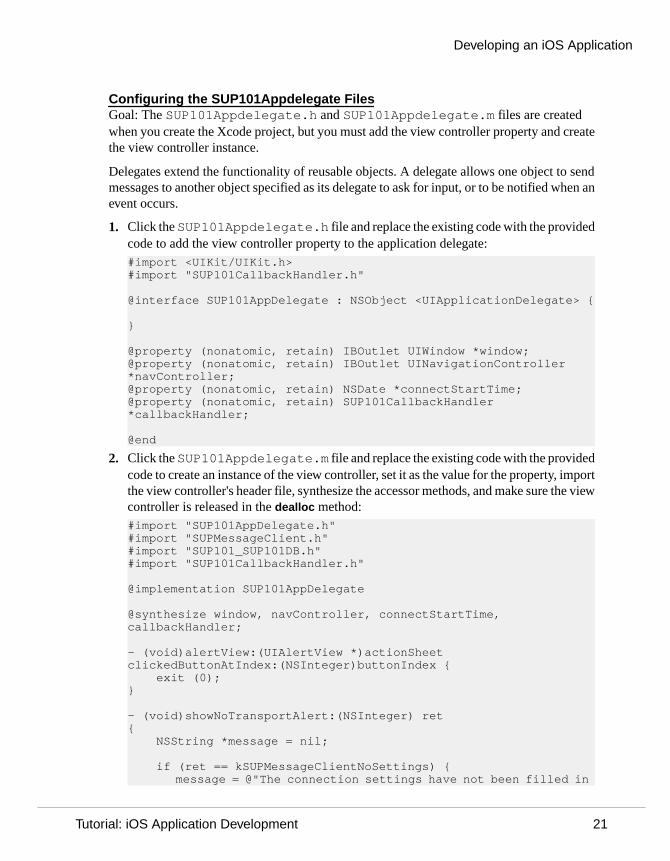
Configuring the SUP101Appdelegate FilesGoal: The SUP101Appdelegate.h and SUP101Appdelegate.m files are createdwhen you create the Xcode project, but you must add the view controller property and createthe view controller instance.
Delegates extend the functionality of reusable objects. A delegate allows one object to sendmessages to another object specified as its delegate to ask for input, or to be notified when anevent occurs.
1. Click the SUP101Appdelegate.h file and replace the existing code with the providedcode to add the view controller property to the application delegate:#import <UIKit/UIKit.h>#import "SUP101CallbackHandler.h"
@interface SUP101AppDelegate : NSObject <UIApplicationDelegate> {
}
@property (nonatomic, retain) IBOutlet UIWindow *window;@property (nonatomic, retain) IBOutlet UINavigationController *navController;@property (nonatomic, retain) NSDate *connectStartTime;@property (nonatomic, retain) SUP101CallbackHandler *callbackHandler;
@end
2. Click the SUP101Appdelegate.m file and replace the existing code with the providedcode to create an instance of the view controller, set it as the value for the property, importthe view controller's header file, synthesize the accessor methods, and make sure the viewcontroller is released in the dealloc method:#import "SUP101AppDelegate.h"#import "SUPMessageClient.h"#import "SUP101_SUP101DB.h"#import "SUP101CallbackHandler.h"
@implementation SUP101AppDelegate
@synthesize window, navController, connectStartTime, callbackHandler;
- (void)alertView:(UIAlertView *)actionSheet clickedButtonAtIndex:(NSInteger)buttonIndex { exit (0);}
- (void)showNoTransportAlert:(NSInteger) ret{ NSString *message = nil; if (ret == kSUPMessageClientNoSettings) { message = @"The connection settings have not been filled in
Developing an iOS Application
Tutorial: iOS Application Development 21
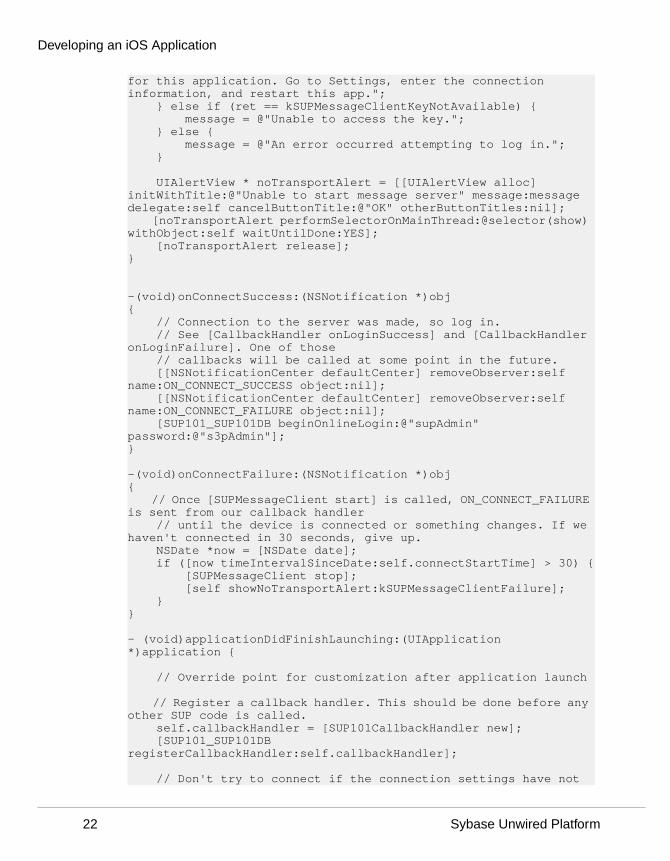
for this application. Go to Settings, enter the connection information, and restart this app."; } else if (ret == kSUPMessageClientKeyNotAvailable) { message = @"Unable to access the key."; } else { message = @"An error occurred attempting to log in."; } UIAlertView * noTransportAlert = [[UIAlertView alloc] initWithTitle:@"Unable to start message server" message:message delegate:self cancelButtonTitle:@"OK" otherButtonTitles:nil]; [noTransportAlert performSelectorOnMainThread:@selector(show) withObject:self waitUntilDone:YES]; [noTransportAlert release];}
-(void)onConnectSuccess:(NSNotification *)obj{ // Connection to the server was made, so log in. // See [CallbackHandler onLoginSuccess] and [CallbackHandler onLoginFailure]. One of those // callbacks will be called at some point in the future. [[NSNotificationCenter defaultCenter] removeObserver:self name:ON_CONNECT_SUCCESS object:nil]; [[NSNotificationCenter defaultCenter] removeObserver:self name:ON_CONNECT_FAILURE object:nil]; [SUP101_SUP101DB beginOnlineLogin:@"supAdmin" password:@"s3pAdmin"];}
-(void)onConnectFailure:(NSNotification *)obj{ // Once [SUPMessageClient start] is called, ON_CONNECT_FAILURE is sent from our callback handler // until the device is connected or something changes. If we haven't connected in 30 seconds, give up. NSDate *now = [NSDate date]; if ([now timeIntervalSinceDate:self.connectStartTime] > 30) { [SUPMessageClient stop]; [self showNoTransportAlert:kSUPMessageClientFailure]; }}
- (void)applicationDidFinishLaunching:(UIApplication *)application { // Override point for customization after application launch // Register a callback handler. This should be done before any other SUP code is called. self.callbackHandler = [SUP101CallbackHandler new]; [SUP101_SUP101DB registerCallbackHandler:self.callbackHandler]; // Don't try to connect if the connection settings have not
Developing an iOS Application
22 Sybase Unwired Platform
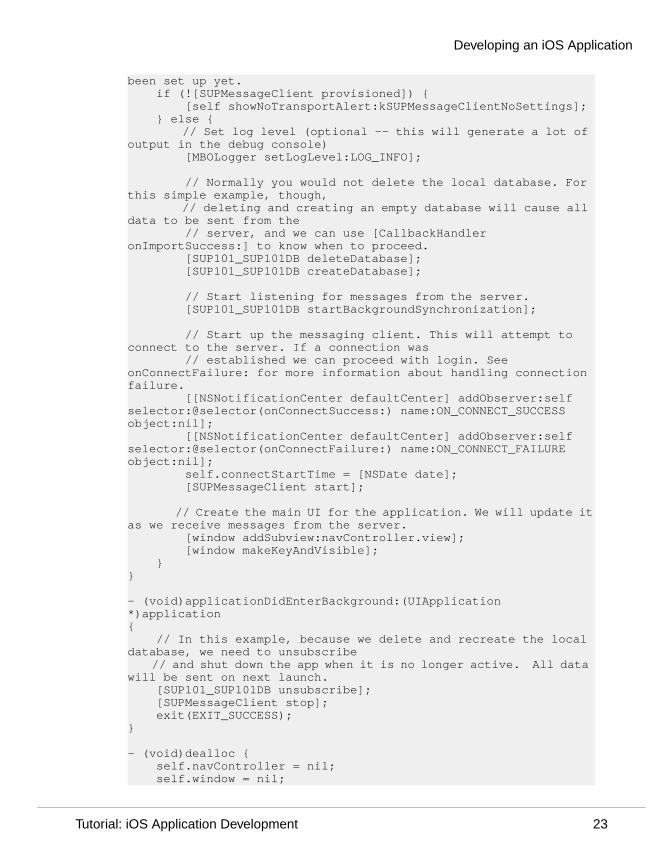
been set up yet. if (![SUPMessageClient provisioned]) { [self showNoTransportAlert:kSUPMessageClientNoSettings]; } else { // Set log level (optional -- this will generate a lot of output in the debug console) [MBOLogger setLogLevel:LOG_INFO]; // Normally you would not delete the local database. For this simple example, though, // deleting and creating an empty database will cause all data to be sent from the // server, and we can use [CallbackHandler onImportSuccess:] to know when to proceed. [SUP101_SUP101DB deleteDatabase]; [SUP101_SUP101DB createDatabase]; // Start listening for messages from the server. [SUP101_SUP101DB startBackgroundSynchronization]; // Start up the messaging client. This will attempt to connect to the server. If a connection was // established we can proceed with login. See onConnectFailure: for more information about handling connection failure. [[NSNotificationCenter defaultCenter] addObserver:self selector:@selector(onConnectSuccess:) name:ON_CONNECT_SUCCESS object:nil]; [[NSNotificationCenter defaultCenter] addObserver:self selector:@selector(onConnectFailure:) name:ON_CONNECT_FAILURE object:nil]; self.connectStartTime = [NSDate date]; [SUPMessageClient start]; // Create the main UI for the application. We will update it as we receive messages from the server. [window addSubview:navController.view]; [window makeKeyAndVisible]; } }
- (void)applicationDidEnterBackground:(UIApplication *)application{ // In this example, because we delete and recreate the local database, we need to unsubscribe // and shut down the app when it is no longer active. All data will be sent on next launch. [SUP101_SUP101DB unsubscribe]; [SUPMessageClient stop]; exit(EXIT_SUCCESS);}
- (void)dealloc { self.navController = nil; self.window = nil;
Developing an iOS Application
Tutorial: iOS Application Development 23
self.callbackHandler = nil; self.connectStartTime = nil; [super dealloc];}
@end
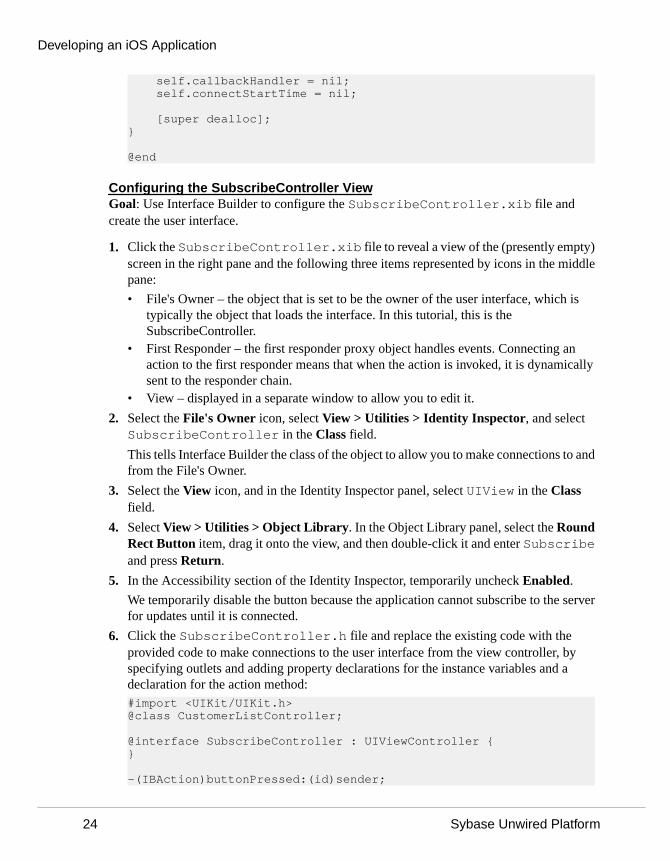
Configuring the SubscribeController ViewGoal: Use Interface Builder to configure the SubscribeController.xib file andcreate the user interface.
1. Click the SubscribeController.xib file to reveal a view of the (presently empty)screen in the right pane and the following three items represented by icons in the middlepane:
• File's Owner – the object that is set to be the owner of the user interface, which istypically the object that loads the interface. In this tutorial, this is theSubscribeController.
• First Responder – the first responder proxy object handles events. Connecting anaction to the first responder means that when the action is invoked, it is dynamicallysent to the responder chain.
• View – displayed in a separate window to allow you to edit it.
2. Select the File's Owner icon, select View > Utilities > Identity Inspector, and selectSubscribeController in the Class field.
This tells Interface Builder the class of the object to allow you to make connections to andfrom the File's Owner.
3. Select the View icon, and in the Identity Inspector panel, select UIView in the Classfield.
4. Select View > Utilities > Object Library. In the Object Library panel, select the RoundRect Button item, drag it onto the view, and then double-click it and enter Subscribeand press Return.
5. In the Accessibility section of the Identity Inspector, temporarily uncheck Enabled.
We temporarily disable the button because the application cannot subscribe to the serverfor updates until it is connected.
6. Click the SubscribeController.h file and replace the existing code with theprovided code to make connections to the user interface from the view controller, byspecifying outlets and adding property declarations for the instance variables and adeclaration for the action method:#import <UIKit/UIKit.h>@class CustomerListController;
@interface SubscribeController : UIViewController {}
-(IBAction)buttonPressed:(id)sender;
Developing an iOS Application
24 Sybase Unwired Platform
@property (nonatomic, retain) IBOutlet UIButton *button;@property (nonatomic, retain) CustomerListController *listController;
@end
Note: This code references a view controller (CustomerListController) you will createlater in this tutorial. This code says that when the user touches the Subscribe button, theCustomerList view opens.
7. Click the SubscribeController.m file and replace the existing code with theprovided code.#import "SubscribeController.h"#import "SUP101_SUP101DB.h"#import "SUP101CallbackHandler.h"#import "Sup101AppDelegate.h"#import "CustomerListController.h"
@implementation SubscribeController
@synthesize button, listController;
- (void) showListController { SUP101AppDelegate *delegate = [[UIApplication sharedApplication] delegate]; [delegate.navController pushViewController:self.listController animated:YES];}
- (void) onImportSuccess:(NSNotification *)object { // We have data, so present the view that will display it. self.listController = [[CustomerListController alloc] initWithStyle:UITableViewStylePlain]; [self showListController]; [[NSNotificationCenter defaultCenter] removeObserver:self name:ON_IMPORT_SUCCESS object:nil];}
- (IBAction)buttonPressed:(id)sender{ if (self.listController != nil) { [self showListController]; } else { // Although there is an onSubscribeSuccess notification, data has not arrived on the device until the server sends // onImportSuccess. Don't block the UI thread while waiting -- always listen for a notification. [[NSNotificationCenter defaultCenter] addObserver:self selector:@selector(onImportSuccess:) name:ON_IMPORT_SUCCESS object:nil]; [SUP101_SUP101DB subscribe]; }}
Developing an iOS Application
Tutorial: iOS Application Development 25
/* // The designated initializer. Override if you create the controller programmatically and want to perform customization that is not appropriate for viewDidLoad. - (id)initWithNibName:(NSString *)nibNameOrNil bundle:(NSBundle *)nibBundleOrNil { if (self = [super initWithNibName:nibNameOrNil bundle:nibBundleOrNil]) { // Custom initialization } return self; } */
- (void)onLoginSuccess:(NSNotification *)notification { self.button.enabled = YES; [[NSNotificationCenter defaultCenter] removeObserver:self name:ON_LOGIN_SUCCESS object:nil];}
- (void)viewDidAppear:(BOOL)animated { [super viewDidAppear:animated]; if (self.listController == nil) { // The application cannot subscribe to data updates until login has completed. Wait for an ON_LOGIN_SUCCESS notification // to arrive before enabling the 'Subscribe' button [[NSNotificationCenter defaultCenter] addObserver:self selector:@selector(onLoginSuccess:) name:ON_LOGIN_SUCCESS object:nil]; } else { // Already subscribed, and a list controller has been created. Just show it again. [self.button setTitle:@"Show List" forState:UIControlStateNormal]; }}
- (void)viewDidDisappear:(BOOL)animated { [super viewDidDisappear:animated]; [[NSNotificationCenter defaultCenter] removeObserver:self];}
// Implement viewDidLoad to do additional setup after loading the view, typically from a nib.- (void)viewDidLoad { self.title = @"Subscribe"; [super viewDidLoad];}
/* // Override to allow orientations other than the default portrait orientation. - (BOOL)shouldAutorotateToInterfaceOrientation:
Developing an iOS Application
26 Sybase Unwired Platform
(UIInterfaceOrientation)interfaceOrientation { // Return YES for supported orientations return (interfaceOrientation == UIInterfaceOrientationPortrait); } */
- (void)didReceiveMemoryWarning { // Releases the view if it doesn't have a superview. [super didReceiveMemoryWarning]; // Release any cached data, images, etc that aren't in use.}
- (void)viewDidUnload { // Release any retained subviews of the main view. // e.g. self.myOutlet = nil;}
- (void)dealloc { self.listController = nil; [super dealloc];}
@end
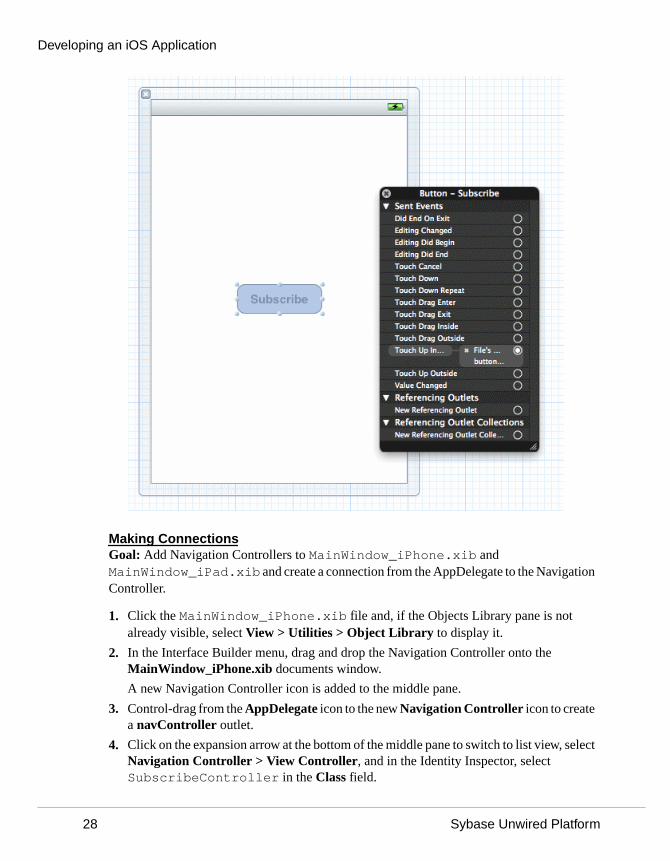
8. Click the SubscribeController.xib file and control-click the Subscribe buttonto show the inspector.
9. Drag from the circle to the right of Touch Up Inside to the File's Owner icon and release,then click on buttonPressed to establish a connection between the Subscribe button andthe button's action method:
Developing an iOS Application
Tutorial: iOS Application Development 27
Making ConnectionsGoal: Add Navigation Controllers to MainWindow_iPhone.xib andMainWindow_iPad.xib and create a connection from the AppDelegate to the NavigationController.
1. Click the MainWindow_iPhone.xib file and, if the Objects Library pane is notalready visible, select View > Utilities > Object Library to display it.
2. In the Interface Builder menu, drag and drop the Navigation Controller onto theMainWindow_iPhone.xib documents window.
A new Navigation Controller icon is added to the middle pane.
3. Control-drag from the AppDelegate icon to the new Navigation Controller icon to createa navController outlet.
4. Click on the expansion arrow at the bottom of the middle pane to switch to list view, selectNavigation Controller > View Controller, and in the Identity Inspector, selectSubscribeController in the Class field.
Developing an iOS Application
28 Sybase Unwired Platform
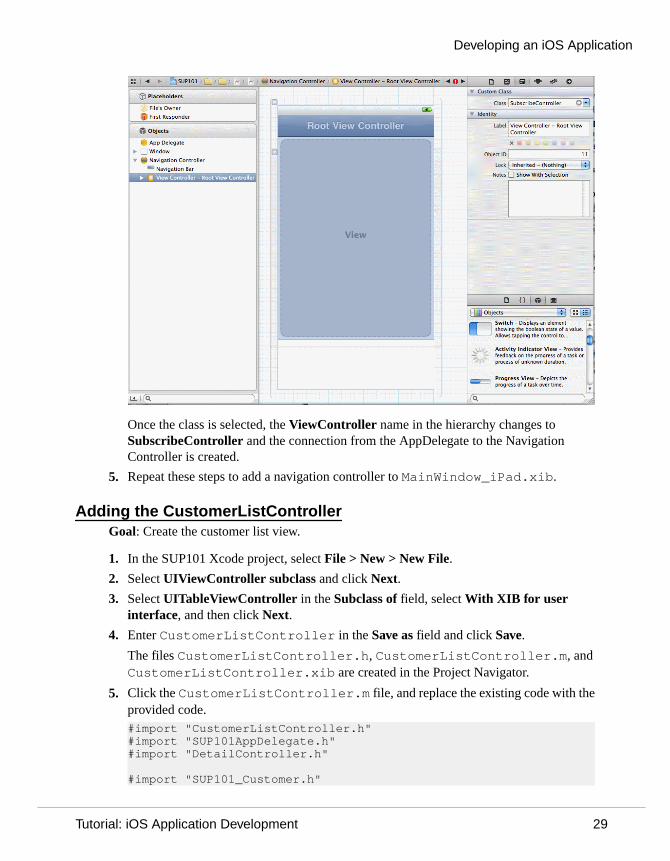
Once the class is selected, the ViewController name in the hierarchy changes toSubscribeController and the connection from the AppDelegate to the NavigationController is created.
5. Repeat these steps to add a navigation controller to MainWindow_iPad.xib.
Adding the CustomerListControllerGoal: Create the customer list view.
1. In the SUP101 Xcode project, select File > New > New File.
2. Select UIViewController subclass and click Next.
3. Select UITableViewController in the Subclass of field, select With XIB for userinterface, and then click Next.
4. Enter CustomerListController in the Save as field and click Save.
The files CustomerListController.h, CustomerListController.m, andCustomerListController.xib are created in the Project Navigator.
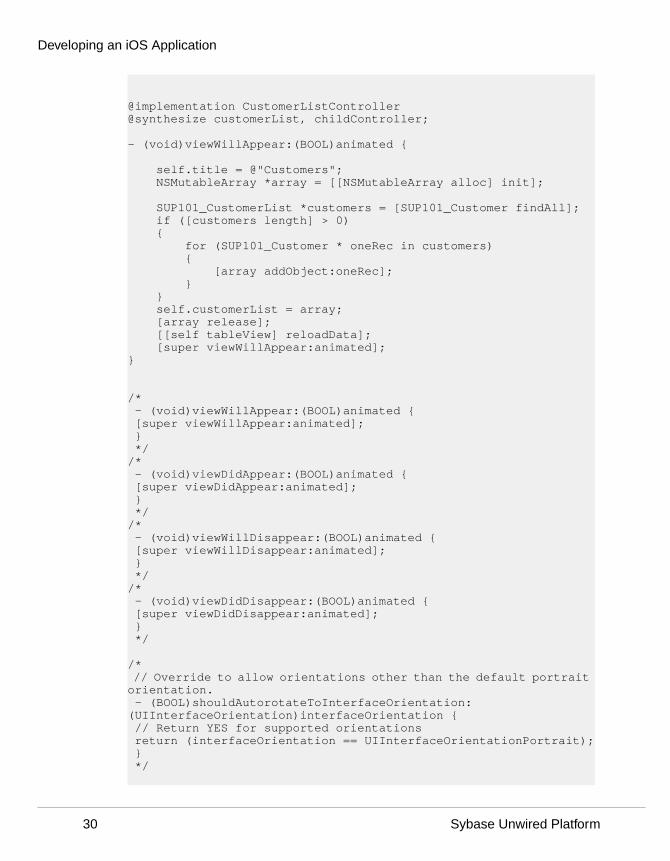
5. Click the CustomerListController.m file, and replace the existing code with theprovided code.#import "CustomerListController.h"#import "SUP101AppDelegate.h"#import "DetailController.h"
#import "SUP101_Customer.h"
Developing an iOS Application
Tutorial: iOS Application Development 29
@implementation CustomerListController@synthesize customerList, childController;
- (void)viewWillAppear:(BOOL)animated { self.title = @"Customers"; NSMutableArray *array = [[NSMutableArray alloc] init]; SUP101_CustomerList *customers = [SUP101_Customer findAll]; if ([customers length] > 0) { for (SUP101_Customer * oneRec in customers) { [array addObject:oneRec]; } } self.customerList = array; [array release]; [[self tableView] reloadData]; [super viewWillAppear:animated]; }
/* - (void)viewWillAppear:(BOOL)animated { [super viewWillAppear:animated]; } *//* - (void)viewDidAppear:(BOOL)animated { [super viewDidAppear:animated]; } *//* - (void)viewWillDisappear:(BOOL)animated { [super viewWillDisappear:animated]; } *//* - (void)viewDidDisappear:(BOOL)animated { [super viewDidDisappear:animated]; } */
/* // Override to allow orientations other than the default portrait orientation. - (BOOL)shouldAutorotateToInterfaceOrientation:(UIInterfaceOrientation)interfaceOrientation { // Return YES for supported orientations return (interfaceOrientation == UIInterfaceOrientationPortrait); } */
Developing an iOS Application
30 Sybase Unwired Platform
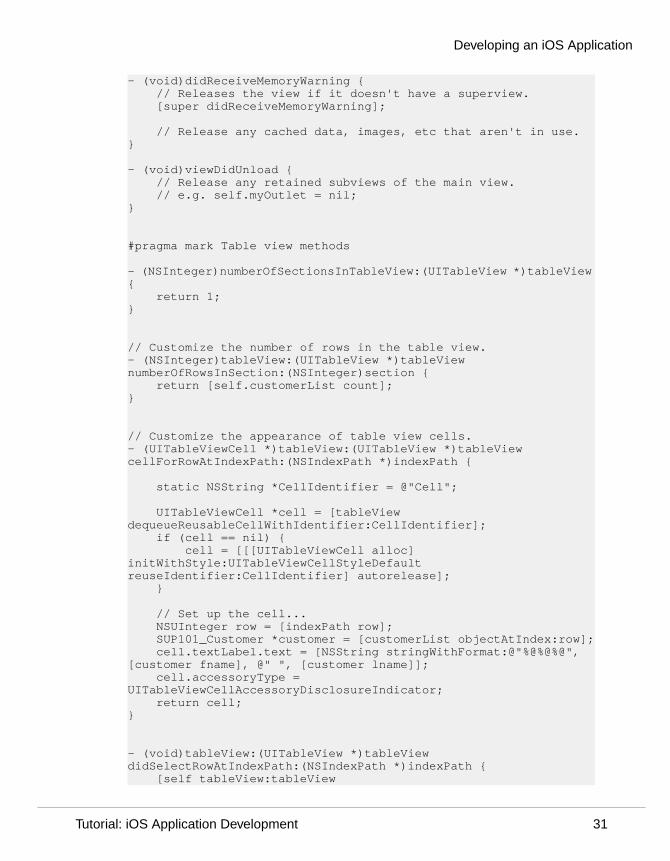
- (void)didReceiveMemoryWarning { // Releases the view if it doesn't have a superview. [super didReceiveMemoryWarning]; // Release any cached data, images, etc that aren't in use.}
- (void)viewDidUnload { // Release any retained subviews of the main view. // e.g. self.myOutlet = nil;}
#pragma mark Table view methods
- (NSInteger)numberOfSectionsInTableView:(UITableView *)tableView { return 1;}
// Customize the number of rows in the table view.- (NSInteger)tableView:(UITableView *)tableView numberOfRowsInSection:(NSInteger)section { return [self.customerList count];}
// Customize the appearance of table view cells.- (UITableViewCell *)tableView:(UITableView *)tableView cellForRowAtIndexPath:(NSIndexPath *)indexPath { static NSString *CellIdentifier = @"Cell"; UITableViewCell *cell = [tableView dequeueReusableCellWithIdentifier:CellIdentifier]; if (cell == nil) { cell = [[[UITableViewCell alloc] initWithStyle:UITableViewCellStyleDefault reuseIdentifier:CellIdentifier] autorelease]; } // Set up the cell... NSUInteger row = [indexPath row]; SUP101_Customer *customer = [customerList objectAtIndex:row]; cell.textLabel.text = [NSString stringWithFormat:@"%@%@%@", [customer fname], @" ", [customer lname]]; cell.accessoryType = UITableViewCellAccessoryDisclosureIndicator; return cell;}
- (void)tableView:(UITableView *)tableView didSelectRowAtIndexPath:(NSIndexPath *)indexPath { [self tableView:tableView
Developing an iOS Application
Tutorial: iOS Application Development 31
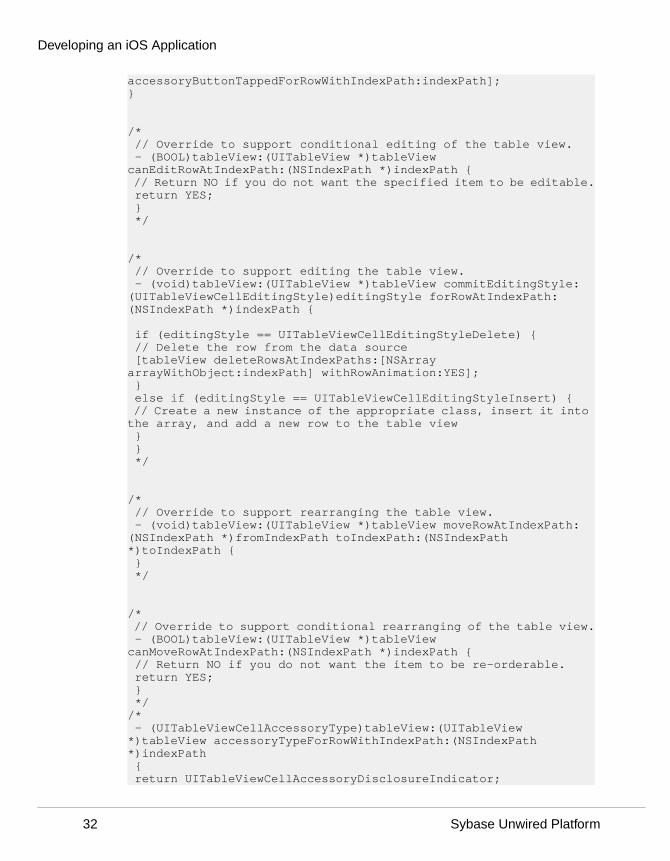
accessoryButtonTappedForRowWithIndexPath:indexPath]; }
/* // Override to support conditional editing of the table view. - (BOOL)tableView:(UITableView *)tableView canEditRowAtIndexPath:(NSIndexPath *)indexPath { // Return NO if you do not want the specified item to be editable. return YES; } */
/* // Override to support editing the table view. - (void)tableView:(UITableView *)tableView commitEditingStyle:(UITableViewCellEditingStyle)editingStyle forRowAtIndexPath:(NSIndexPath *)indexPath { if (editingStyle == UITableViewCellEditingStyleDelete) { // Delete the row from the data source [tableView deleteRowsAtIndexPaths:[NSArray arrayWithObject:indexPath] withRowAnimation:YES]; } else if (editingStyle == UITableViewCellEditingStyleInsert) { // Create a new instance of the appropriate class, insert it into the array, and add a new row to the table view } } */
/* // Override to support rearranging the table view. - (void)tableView:(UITableView *)tableView moveRowAtIndexPath:(NSIndexPath *)fromIndexPath toIndexPath:(NSIndexPath *)toIndexPath { } */
/* // Override to support conditional rearranging of the table view. - (BOOL)tableView:(UITableView *)tableView canMoveRowAtIndexPath:(NSIndexPath *)indexPath { // Return NO if you do not want the item to be re-orderable. return YES; } *//* - (UITableViewCellAccessoryType)tableView:(UITableView *)tableView accessoryTypeForRowWithIndexPath:(NSIndexPath *)indexPath { return UITableViewCellAccessoryDisclosureIndicator;
Developing an iOS Application
32 Sybase Unwired Platform
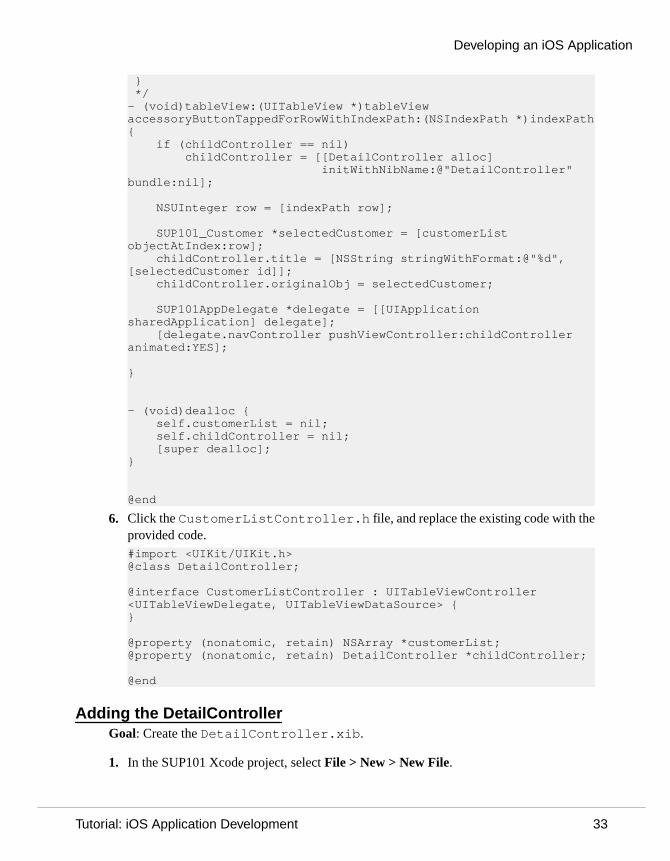
} */- (void)tableView:(UITableView *)tableView accessoryButtonTappedForRowWithIndexPath:(NSIndexPath *)indexPath{ if (childController == nil) childController = [[DetailController alloc] initWithNibName:@"DetailController" bundle:nil]; NSUInteger row = [indexPath row]; SUP101_Customer *selectedCustomer = [customerList objectAtIndex:row]; childController.title = [NSString stringWithFormat:@"%d", [selectedCustomer id]]; childController.originalObj = selectedCustomer; SUP101AppDelegate *delegate = [[UIApplication sharedApplication] delegate]; [delegate.navController pushViewController:childController animated:YES]; }
- (void)dealloc { self.customerList = nil; self.childController = nil; [super dealloc];}
@end
6. Click the CustomerListController.h file, and replace the existing code with theprovided code.#import <UIKit/UIKit.h>@class DetailController;
@interface CustomerListController : UITableViewController <UITableViewDelegate, UITableViewDataSource> { }
@property (nonatomic, retain) NSArray *customerList;@property (nonatomic, retain) DetailController *childController;
@end
Adding the DetailControllerGoal: Create the DetailController.xib.
1. In the SUP101 Xcode project, select File > New > New File.
Developing an iOS Application
Tutorial: iOS Application Development 33
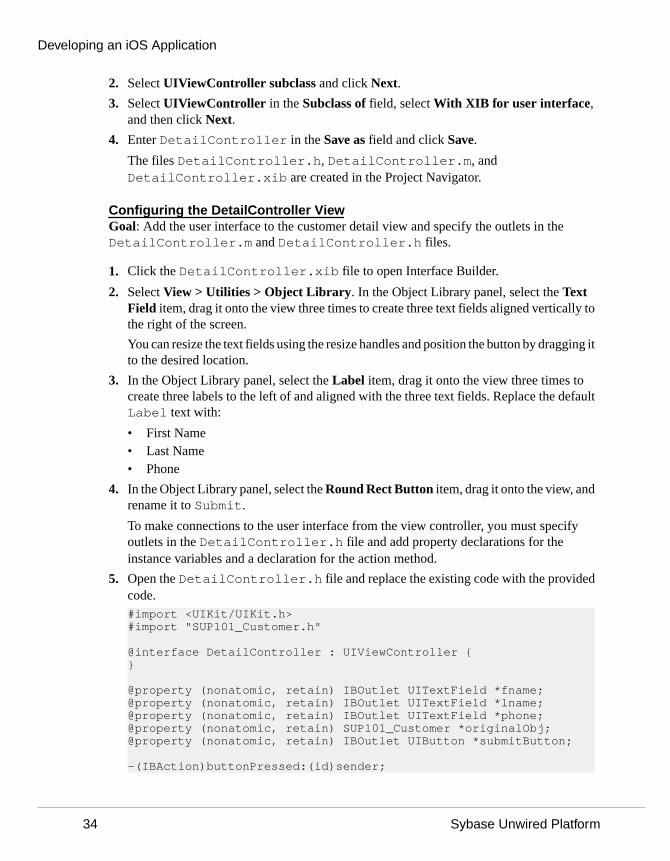
2. Select UIViewController subclass and click Next.
3. Select UIViewController in the Subclass of field, select With XIB for user interface,and then click Next.
4. Enter DetailController in the Save as field and click Save.
The files DetailController.h, DetailController.m, andDetailController.xib are created in the Project Navigator.
Configuring the DetailController ViewGoal: Add the user interface to the customer detail view and specify the outlets in theDetailController.m and DetailController.h files.
1. Click the DetailController.xib file to open Interface Builder.
2. Select View > Utilities > Object Library. In the Object Library panel, select the TextField item, drag it onto the view three times to create three text fields aligned vertically tothe right of the screen.
You can resize the text fields using the resize handles and position the button by dragging itto the desired location.
3. In the Object Library panel, select the Label item, drag it onto the view three times tocreate three labels to the left of and aligned with the three text fields. Replace the defaultLabel text with:
• First Name• Last Name• Phone
4. In the Object Library panel, select the Round Rect Button item, drag it onto the view, andrename it to Submit.
To make connections to the user interface from the view controller, you must specifyoutlets in the DetailController.h file and add property declarations for theinstance variables and a declaration for the action method.
5. Open the DetailController.h file and replace the existing code with the providedcode.#import <UIKit/UIKit.h>#import "SUP101_Customer.h"
@interface DetailController : UIViewController {}
@property (nonatomic, retain) IBOutlet UITextField *fname;@property (nonatomic, retain) IBOutlet UITextField *lname;@property (nonatomic, retain) IBOutlet UITextField *phone;@property (nonatomic, retain) SUP101_Customer *originalObj;@property (nonatomic, retain) IBOutlet UIButton *submitButton;
-(IBAction)buttonPressed:(id)sender;
Developing an iOS Application
34 Sybase Unwired Platform
@end
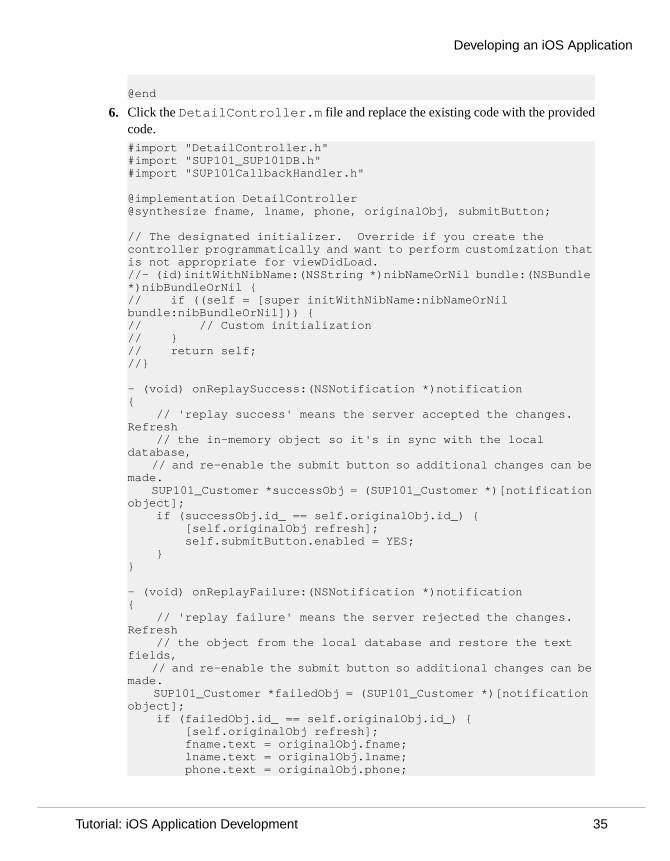
6. Click the DetailController.m file and replace the existing code with the providedcode.#import "DetailController.h"#import "SUP101_SUP101DB.h"#import "SUP101CallbackHandler.h"
@implementation DetailController@synthesize fname, lname, phone, originalObj, submitButton;
// The designated initializer. Override if you create the controller programmatically and want to perform customization that is not appropriate for viewDidLoad.//- (id)initWithNibName:(NSString *)nibNameOrNil bundle:(NSBundle *)nibBundleOrNil {// if ((self = [super initWithNibName:nibNameOrNil bundle:nibBundleOrNil])) {// // Custom initialization// }// return self;//}
- (void) onReplaySuccess:(NSNotification *)notification{ // 'replay success' means the server accepted the changes. Refresh // the in-memory object so it's in sync with the local database, // and re-enable the submit button so additional changes can be made. SUP101_Customer *successObj = (SUP101_Customer *)[notification object]; if (successObj.id_ == self.originalObj.id_) { [self.originalObj refresh]; self.submitButton.enabled = YES; }}
- (void) onReplayFailure:(NSNotification *)notification{ // 'replay failure' means the server rejected the changes. Refresh // the object from the local database and restore the text fields, // and re-enable the submit button so additional changes can be made. SUP101_Customer *failedObj = (SUP101_Customer *)[notification object]; if (failedObj.id_ == self.originalObj.id_) { [self.originalObj refresh]; fname.text = originalObj.fname; lname.text = originalObj.lname; phone.text = originalObj.phone;
Developing an iOS Application
Tutorial: iOS Application Development 35
self.submitButton.enabled = YES; }}
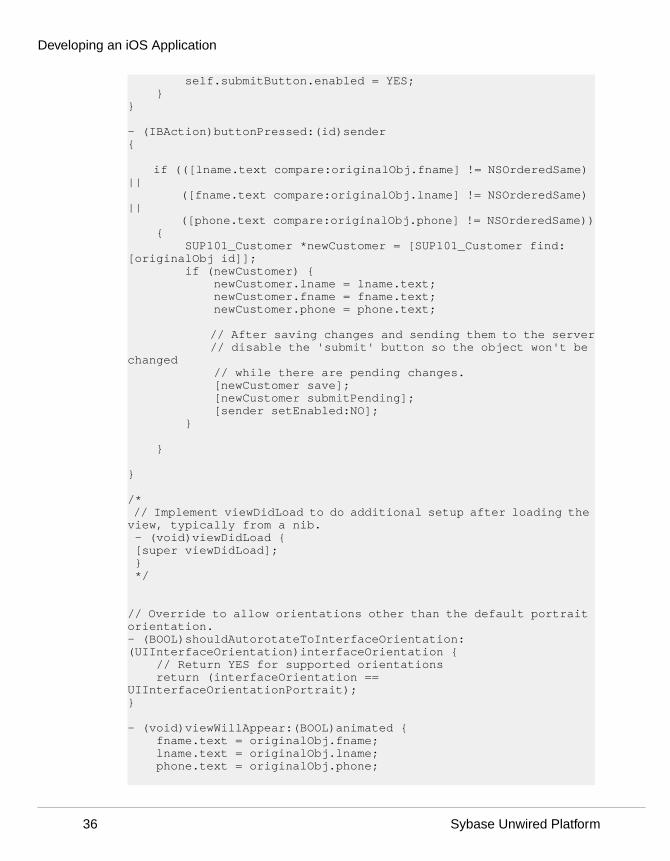
- (IBAction)buttonPressed:(id)sender{ if (([lname.text compare:originalObj.fname] != NSOrderedSame) || ([fname.text compare:originalObj.lname] != NSOrderedSame) || ([phone.text compare:originalObj.phone] != NSOrderedSame)) { SUP101_Customer *newCustomer = [SUP101_Customer find:[originalObj id]]; if (newCustomer) { newCustomer.lname = lname.text; newCustomer.fname = fname.text; newCustomer.phone = phone.text; // After saving changes and sending them to the server // disable the 'submit' button so the object won't be changed // while there are pending changes. [newCustomer save]; [newCustomer submitPending]; [sender setEnabled:NO]; } } }
/* // Implement viewDidLoad to do additional setup after loading the view, typically from a nib. - (void)viewDidLoad { [super viewDidLoad]; } */
// Override to allow orientations other than the default portrait orientation.- (BOOL)shouldAutorotateToInterfaceOrientation:(UIInterfaceOrientation)interfaceOrientation { // Return YES for supported orientations return (interfaceOrientation == UIInterfaceOrientationPortrait);}
- (void)viewWillAppear:(BOOL)animated { fname.text = originalObj.fname; lname.text = originalObj.lname; phone.text = originalObj.phone;
Developing an iOS Application
36 Sybase Unwired Platform
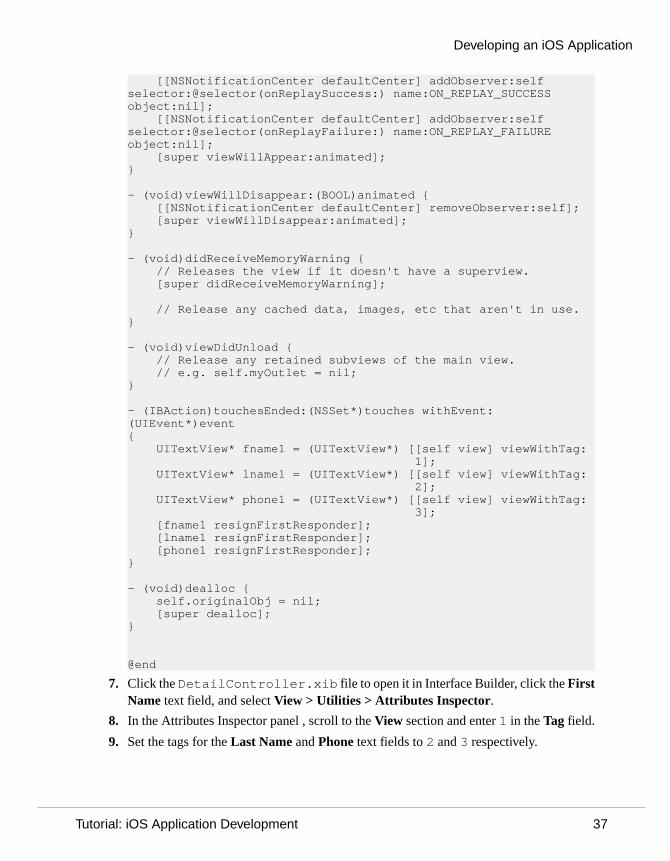
[[NSNotificationCenter defaultCenter] addObserver:self selector:@selector(onReplaySuccess:) name:ON_REPLAY_SUCCESS object:nil]; [[NSNotificationCenter defaultCenter] addObserver:self selector:@selector(onReplayFailure:) name:ON_REPLAY_FAILURE object:nil]; [super viewWillAppear:animated];}
- (void)viewWillDisappear:(BOOL)animated { [[NSNotificationCenter defaultCenter] removeObserver:self]; [super viewWillDisappear:animated];}
- (void)didReceiveMemoryWarning { // Releases the view if it doesn't have a superview. [super didReceiveMemoryWarning]; // Release any cached data, images, etc that aren't in use.}
- (void)viewDidUnload { // Release any retained subviews of the main view. // e.g. self.myOutlet = nil;}
- (IBAction)touchesEnded:(NSSet*)touches withEvent:(UIEvent*)event{ UITextView* fname1 = (UITextView*) [[self view] viewWithTag: 1]; UITextView* lname1 = (UITextView*) [[self view] viewWithTag: 2]; UITextView* phone1 = (UITextView*) [[self view] viewWithTag: 3]; [fname1 resignFirstResponder]; [lname1 resignFirstResponder]; [phone1 resignFirstResponder];}
- (void)dealloc { self.originalObj = nil; [super dealloc];}
@end
7. Click the DetailController.xib file to open it in Interface Builder, click the FirstName text field, and select View > Utilities > Attributes Inspector.
8. In the Attributes Inspector panel , scroll to the View section and enter 1 in the Tag field.
9. Set the tags for the Last Name and Phone text fields to 2 and 3 respectively.
Developing an iOS Application
Tutorial: iOS Application Development 37
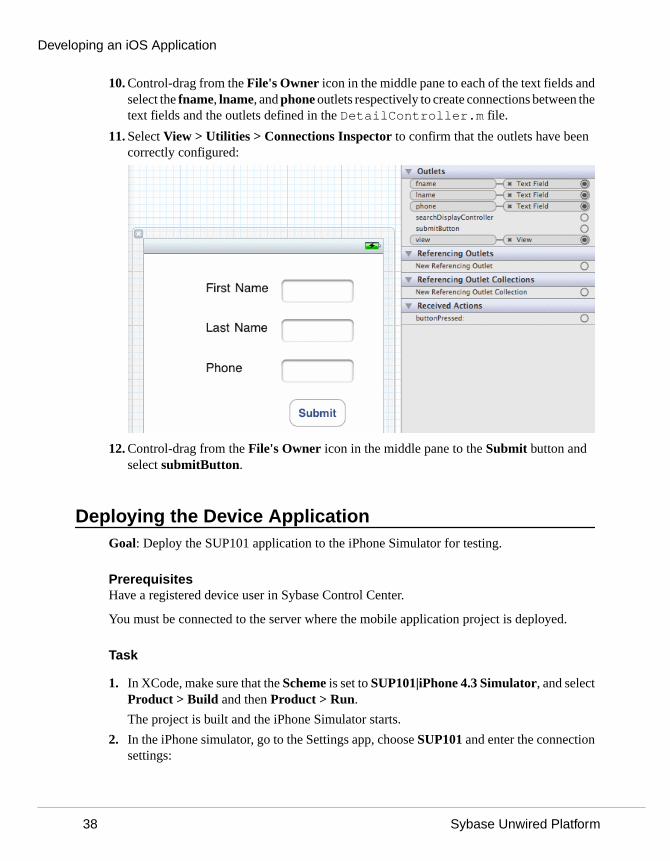
10. Control-drag from the File's Owner icon in the middle pane to each of the text fields andselect the fname, lname, and phone outlets respectively to create connections between thetext fields and the outlets defined in the DetailController.m file.
11. Select View > Utilities > Connections Inspector to confirm that the outlets have beencorrectly configured:
12. Control-drag from the File's Owner icon in the middle pane to the Submit button andselect submitButton.
Deploying the Device ApplicationGoal: Deploy the SUP101 application to the iPhone Simulator for testing.
PrerequisitesHave a registered device user in Sybase Control Center.
You must be connected to the server where the mobile application project is deployed.
Task
1. In XCode, make sure that the Scheme is set to SUP101|iPhone 4.3 Simulator, and selectProduct > Build and then Product > Run.
The project is built and the iPhone Simulator starts.
2. In the iPhone simulator, go to the Settings app, choose SUP101 and enter the connectionsettings:
Developing an iOS Application
38 Sybase Unwired Platform
• ServerNameSetting – the machine that hosts the server where the SUP101 mobileapplication project is deployed.
• ServerPortSetting – Unwired Server port number. The default is 5001.• CompanyIDSetting – the company ID you entered when you registered the device in
Sybase Control Center, in this case, 0.
• UserNameSetting – the user you registered in Sybase Control Center, user1.
• ActivationCodeSetting – the activation code for the user, 123.
3. In the iPhone applications screen, open the SUP101 application.
4. Click Subscribe.The customer list appears.
5. Select a customer record from the customer list and double-click to open the detail view.The customer detail shows the fields: First Name, Last Name, and Phone.
6. Change the First Name to something else, and click Submit.
Developing an iOS Application
Tutorial: iOS Application Development 39
Developing an iOS Application
40 Sybase Unwired Platform
Learn More about Sybase Unwired Platform
Once you have finished, try some of the other samples or tutorials, or refer to otherdevelopment documents in the Sybase Unwired Platform documentation set.
Check the Sybase Product Documentation Web site regularly for updates: http://infocenter.sybase.com/help/index.jsp?topic=/com.sybase.infocenter.pubs.docset-SUP-2.0.0/doc/html/title.html.
TutorialsTry out some of the other getting started tutorials to get a broad view of the development toolsavailable to you.
SamplesSample applications are fully developed, working applications that demonstrate the featuresand capabilities of Sybase Unwired Platform.
Check the SAP Development Network (SDN) Web site regularly for updates: http://www.sdn.sap.com/irj/sdn/mobile. Click on Sybase Unwired Platform and navigate toSamples.
Online HelpSee the online help that is installed with the product, or the Product Documentation Web site.
Developer GuidesLearn about using the API to create device applications:
• Developer Guide for BlackBerry• Developer Guide for iOS• Developer Guide for Mobile Workflow Packages• Developer Guide for Windows and Windows Mobile
Customize and automate:
• Developer Guide for Unwired Server Management API – customize and automate systemadministration features.
• Developer Guide for Unwired Server – customize and automate server-sideimplementations for device applications, and administration, such as data handling.
Javadoc and HeaderDoc are also available in the installation directory.
Learn More about Sybase Unwired Platform
Tutorial: iOS Application Development 41

Learn More about Sybase Unwired Platform
42 Sybase Unwired Platform
IndexBbasics, learning 7
Ccallback handler 17connecting to Sybase Control Center 6connection, creating 28customer list view 29CustomerListController 29
Ddelegate file 21deploying 38DetailController view 34DetailController.xib 33developing
device application 11device application, developing 11
EEclipse Studio Edition
Sybase Unwired WorkSpace 6Enterprise Explorer, defined 7
FFile's Owner 24First Responder 24
Ggenerating object API code 12getting started
developing a device application 11Sybase Unwired Platform 5Sybase Unwired WorkSpace 7tutorials 1
Hhelp, online 7
I
installingSybase Unwired Platform 5
Interface Builder 24iPhone Simulator 38
L
linking outlets 34
M
MainWindow_iPad.xib 28MainWindow_iPhone.xib 28Mobile Application Diagram, defined 7
N
navigation controllers 28
O
Objective-C code, generating 12online help, accessing 7outlets, linking 34
P
Palette, defined 7Properties view, defined 7
R
registering the iPhone simulator 16
S
serversUnwired Server, starting 5
startingSybase Control Center 6
Index
Tutorial: iOS Application Development 43
Sybase Unwired WorkSpace 6Unwired Server 5
SubscribeController view 24SUP_iOS_Custom_Dev_Tutorial_code.zip 13, 17SUP101Appdelegate files, configuring 21SUP101CallbackHandler file 17Sybase Control Center 6, 16
connecting to 6Sybase Unwired Platform
getting started 5installing 5
Sybase Unwired WorkSpacegetting started 7starting 6
UUIViewController subclass 20
Unwired Server 5
V
View 24view controller, adding 20
W
WorkSpace Navigator, defined 7
X
Xcode, build project 13
Index
44 Sybase Unwired Platform