Embed Size (px)
Citation preview
8/11/2019 Tryout Installation 2011 en 002
http://slidepdf.com/reader/full/tryout-installation-2011-en-002 1/17
ManualTryout Installation
8/11/2019 Tryout Installation 2011 en 002
http://slidepdf.com/reader/full/tryout-installation-2011-en-002 2/17
Scia Engineer
All information in this document is subject to modification without prior notice.No part or this manual may be reproduced, stored in a database or retrievalsystem or published, in any form or in any way, electronically, mechanically,by print, photo print, microfilm or any other means without prior writtenpermission from the publisher. Scia is not responsible for any direct or indirectdamage because of imperfections in the documentation and/or the software.
© Copyright 2011 Nemetschek Scia nv. All rights reserved.
8/11/2019 Tryout Installation 2011 en 002
http://slidepdf.com/reader/full/tryout-installation-2011-en-002 3/17
8/11/2019 Tryout Installation 2011 en 002
http://slidepdf.com/reader/full/tryout-installation-2011-en-002 4/17
Scia Engineer
Table of contents
Table of contents ............................................................................................ 4
1. Introduction ............................................................................................. 1
1.1 Welcome ......................................................................................... 1
1.2 System Requirements ................................................................... 1
1.2.1 Hardware............................................................................... 1
1.2.2 Software ................................................................................ 2
2. Installation of Scia Engineer .................................................................. 3
2.1
Installation of new FlexNET Network Tryout protection ............ 3
2.1.1 Installation of the FlexNET Network protection ..................... 3
2.1.2 Activation of licences ............................................................. 3
2.1.3 Deactivating the license file ................................................... 5
2.2 Installation of Scia Engineer ......................................................... 6
3. De-installation of Scia Engineer .......................................................... 12

8/11/2019 Tryout Installation 2011 en 002
http://slidepdf.com/reader/full/tryout-installation-2011-en-002 5/17
Scia Engineer
1
1. Introduction
1.1 Welcome
Welcome to the Scia Engineer Installation Guide. Scia Engineer is acalculation program running under Windows XP/Vista/Windows 7 with alarge range of application: from the check of simple frames to the advanceddesign of complex projects in steel, concrete, wood…
The program treats the calculation of 2D/3D frames, including the profilecheck and the connection check for steel constructions. Apart from frames,it is also possible to dimension plate structures, including advancedconcrete calculations.
This manual describes the procedures for a correct installation of theapplication.
1.2 System Requirements
To install Scia Engineer your system needs to qualify to the followingrequirements:
1.2.1 Hardware
Processor Pentium IV - 3Ghz(Advised: CoreDuo2 3 Ghz and higher)
RAM 2 GB (Advised: > 4 GB)
Graphics Controller 256 MB, supporting OpenGL
Disk space for installation,
projects and temporary files
5GB
Minimum resolution 1280 x 800
8/11/2019 Tryout Installation 2011 en 002
http://slidepdf.com/reader/full/tryout-installation-2011-en-002 6/17
Scia Engineer
2
1.2.2 Software
Standalone protection
Windows 2003 serverWindows XP 32/64 bit
Vista 32/64 bitWindows 7 32/64 bit
It is advised to install the latest ServicePack for these Operating Systems except
SP3 for Windows XP.
Floating protection
A FlexNET service will run on:Windows XP 32 bitWindows Vista 32/64 bitWindows 2008 server 64 bitWindows 7 - 32/64 bit
It is advised to install the latest ServicePack for these Operating Systems except
SP3 for Windows XP.
Allplan Scia Engineer 2011 is compatible only with:
Allplan 2009.0Allplan 2011.0Allplan precast 2010.0
However one should first install Allplan and thenScia Engineer, otherwise the proper installation
for the Allplan patch won't be recognised.
Revit Scia Engineer 2011 is compatible only withRevit 2009Revit 2010
The Revit link is available onwww.scia-online.com/revit
Etabs Scia Engineer 2011 is compatible withEtabs 9.2
IFC Scia Engineer 2011 is compatible only withIFC version 2x3
SDNF Scia Engineer 2010.1 is compatible only withVersion 2.0 and Version 3.0
Tekla Scia Engineer 2011 is compatible only with:Tekla version 15, 16 and 17 – 32bit
On 32bit OS as well as on a 64bit OS.
API link does not yet support v17
8/11/2019 Tryout Installation 2011 en 002
http://slidepdf.com/reader/full/tryout-installation-2011-en-002 7/17
Scia Engineer
3
2. Installation of Scia Engineer
This chapter describes the procedure to install a Tryout version of SciaEngineer.
The installation procedure consists of the following steps:
• Installation of the FlexNET Network Tryout protection
• Installation of Scia Engineer
2.1 Installation of new FlexNET Network Tryoutprotection
The installation procedure for the protection on the server consists of thefollowing steps:
• Installation of the FlexNET Network protection on the server
• Activation of the license file
2.1.1 Installation of the FlexNET Network protection
1. Unzip the file SciaFlexNet.zip
2. Execute the file Setup.exe
3. Install FlexNET by following the instructions on the screen.
4. By default FlexNET is installed in the folder C:\ProgramFiles\SCIA\FlexNET.
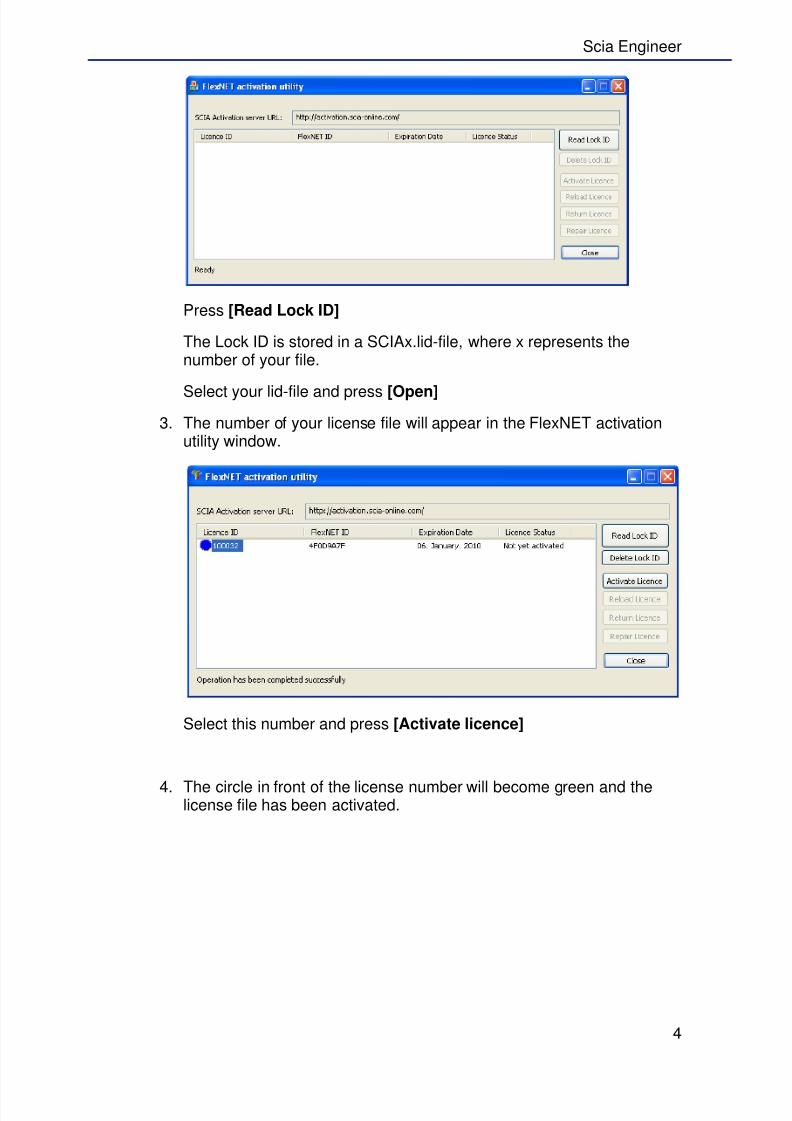
2.1.2 Activation of licences
1. The Lock ID is stored in a .lid-file, which will be send by email. In this
file the authorization code used by FlexNET is stored.2. Execute the file C:\Program
Files\SCIA\FlexNET\ActivationUtility\ActivationUtility.exe
A shortcut to this application can be found on your desktop asActivation manager.
8/11/2019 Tryout Installation 2011 en 002
http://slidepdf.com/reader/full/tryout-installation-2011-en-002 8/17
Scia Engineer
4
Press [Read Lock ID]
The Lock ID is stored in a SCIAx.lid-file, where x represents thenumber of your file.
Select your lid-file and press [Open]
3. The number of your license file will appear in the FlexNET activationutility window.
Select this number and press [Activate licence]
4. The circle in front of the license number will become green and thelicense file has been activated.
8/11/2019 Tryout Installation 2011 en 002
http://slidepdf.com/reader/full/tryout-installation-2011-en-002 9/17
Scia Engineer
5
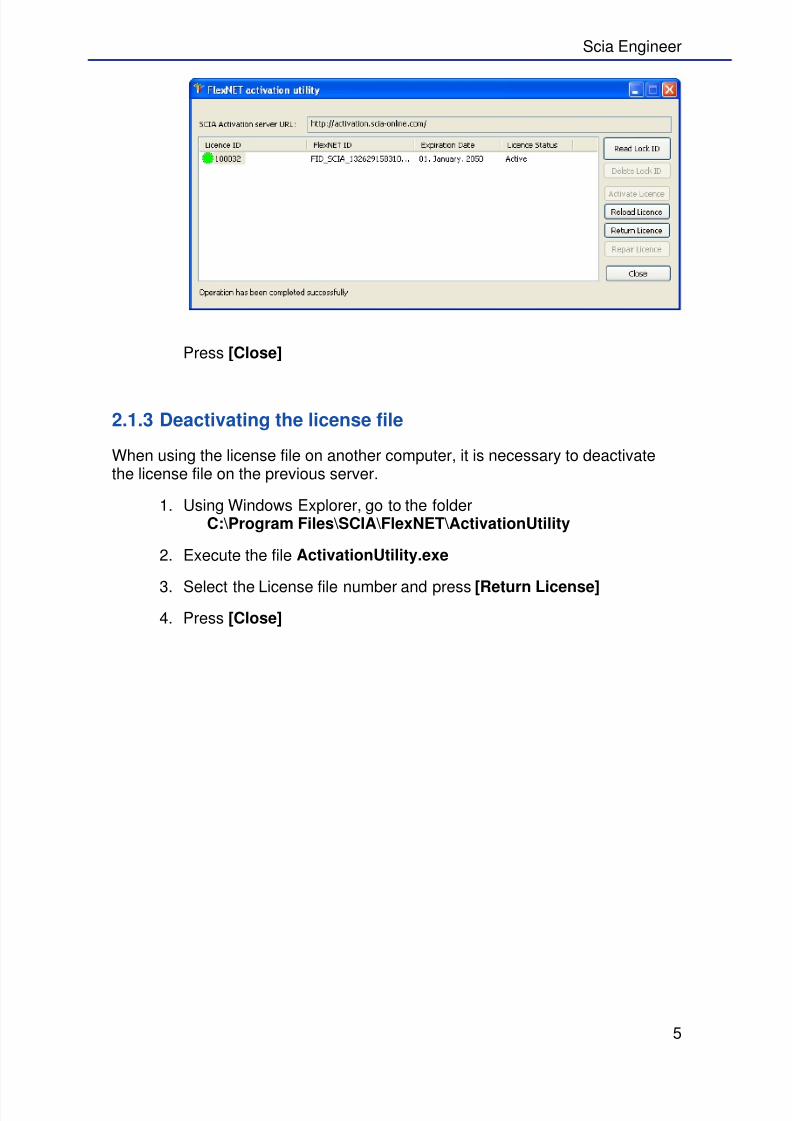
Press [Close]
2.1.3 Deactivating the license file
When using the license file on another computer, it is necessary to deactivatethe license file on the previous server.
1. Using Windows Explorer, go to the folderC:\Program Files\SCIA\FlexNET\ActivationUtility
2. Execute the file ActivationUtility.exe
3. Select the License file number and press [Return License] 4. Press [Close]
8/11/2019 Tryout Installation 2011 en 002
http://slidepdf.com/reader/full/tryout-installation-2011-en-002 10/17
Scia Engineer
6
2.2 Installation of Scia Engineer
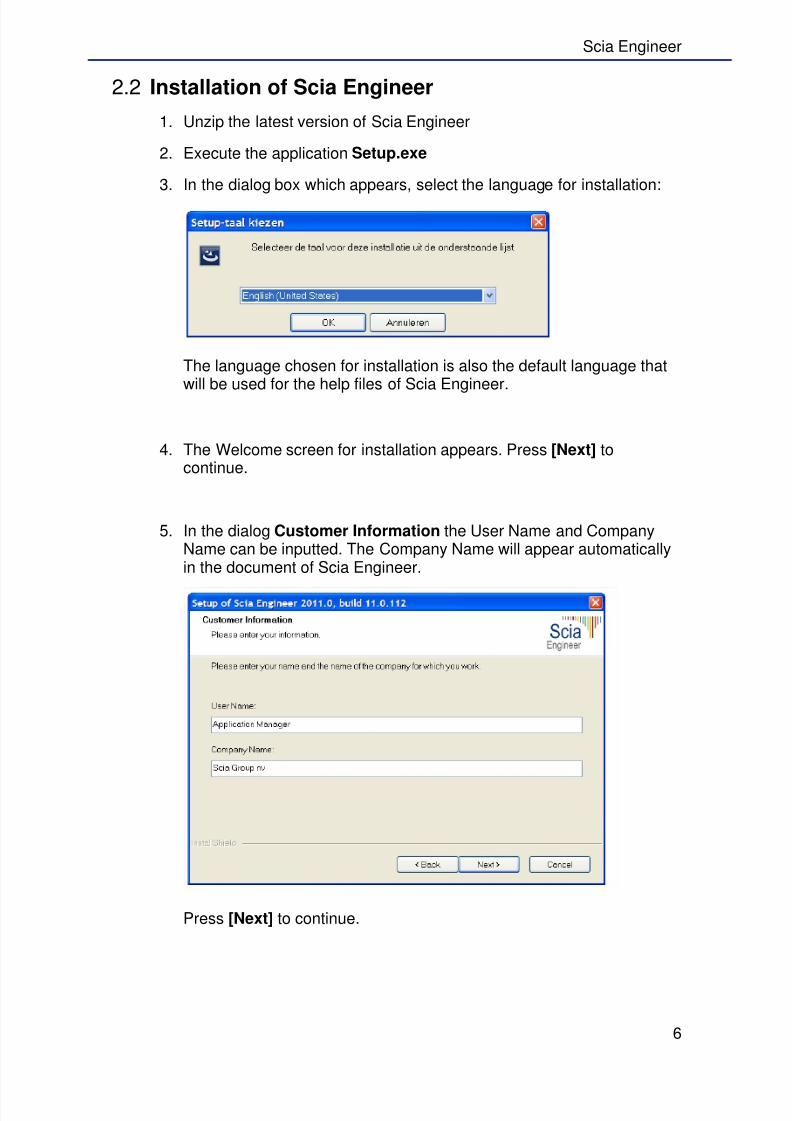
1. Unzip the latest version of Scia Engineer
2. Execute the application Setup.exe
3. In the dialog box which appears, select the language for installation:
The language chosen for installation is also the default language thatwill be used for the help files of Scia Engineer.
4. The Welcome screen for installation appears. Press [Next] tocontinue.
5. In the dialog Customer Information the User Name and CompanyName can be inputted. The Company Name will appear automaticallyin the document of Scia Engineer.
Press [Next] to continue.
8/11/2019 Tryout Installation 2011 en 002
http://slidepdf.com/reader/full/tryout-installation-2011-en-002 11/17
Scia Engineer
7
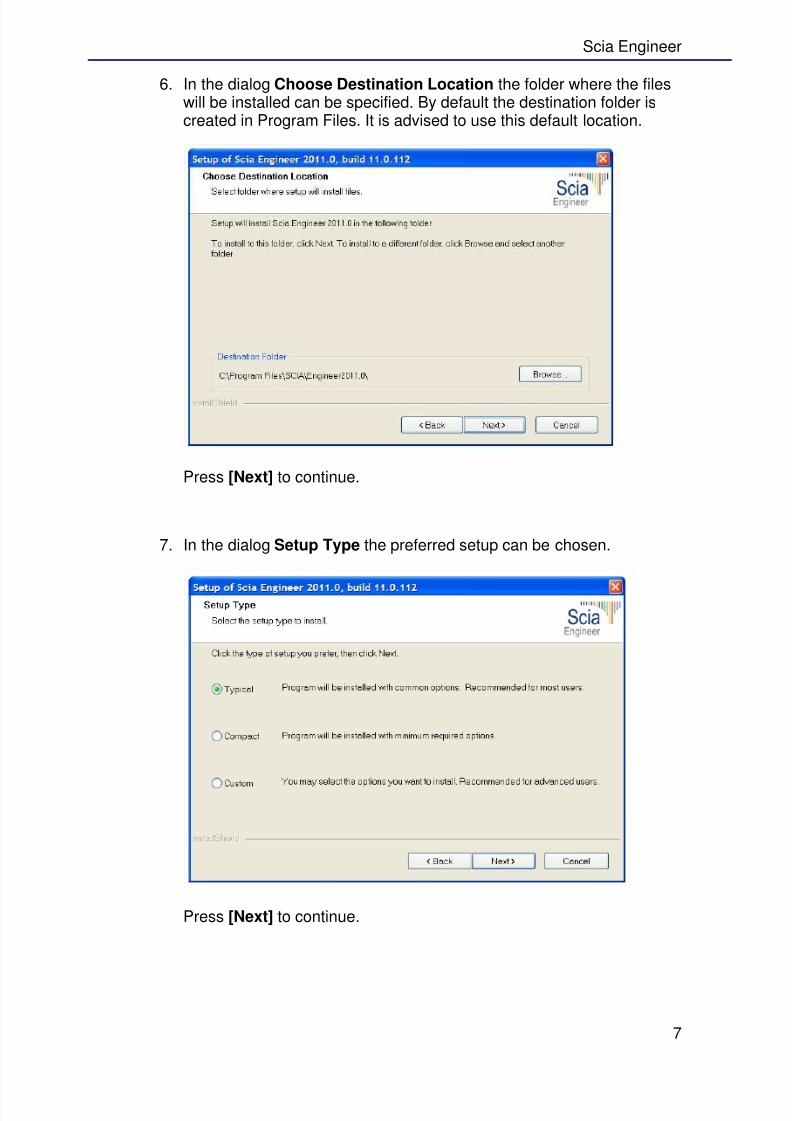
6. In the dialog Choose Destination Location the folder where the fileswill be installed can be specified. By default the destination folder iscreated in Program Files. It is advised to use this default location.
Press [Next] to continue.
7. In the dialog Setup Type the preferred setup can be chosen.
Press [Next] to continue.
8/11/2019 Tryout Installation 2011 en 002
http://slidepdf.com/reader/full/tryout-installation-2011-en-002 12/17
Scia Engineer
8
Note
When choosing a Typical installation, NOT all language modules will beinstalled, only the English language and the language chosen forinstallation. If you wish to install other languages, it is needed to choose aCustom install where multiple languages can be selected.
To be able to choose another language for the environment of SciaEngineer two requirements need to be met:
- The preferred language needs to be installed
- The necessary language module needs to be active in thedongle or on the server
If you want to install one of the Scia Engineer Plug-ins, then you need toselect the plug-in in the Custom installation.The following plug-ins are available: Tekla Structures plug-in, Revit
Structure plug-in, CADS RC Link Designer, BS2000, Pipeline Wizard,Composite Beam, Composite Column, Arcelor Mittal-Cellular beams.
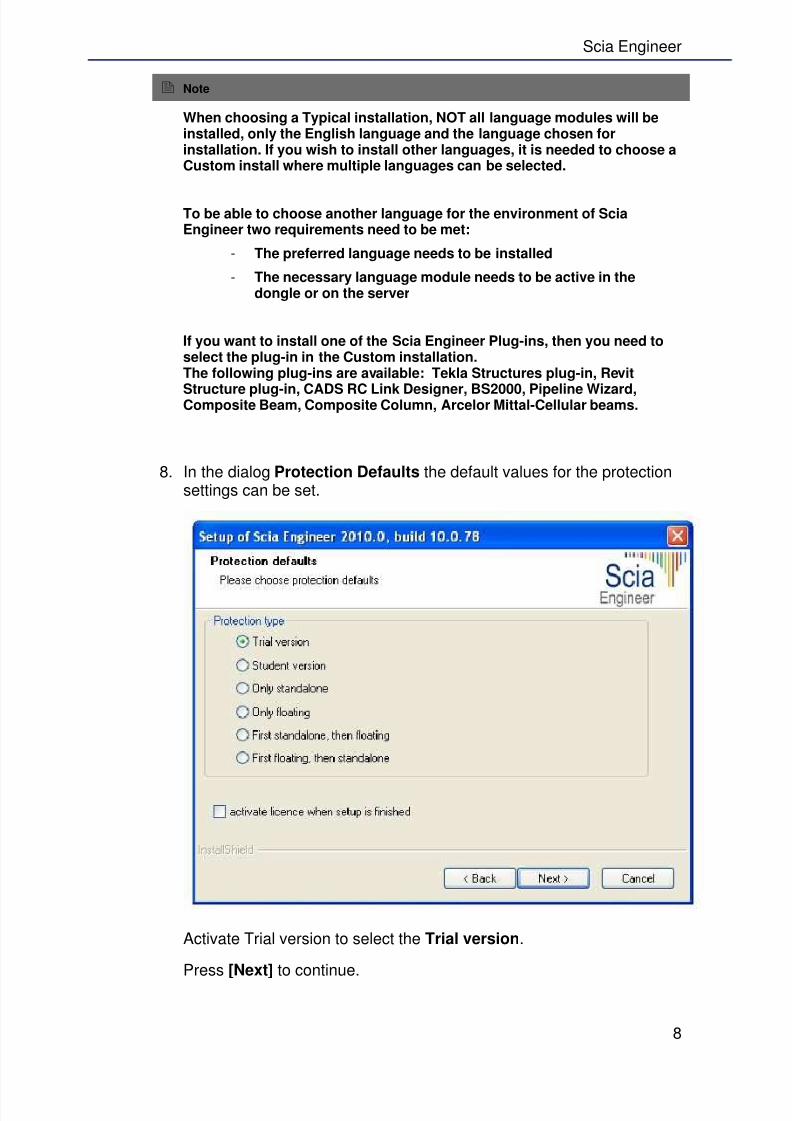
8. In the dialog Protection Defaults the default values for the protectionsettings can be set.
Activate Trial version to select the Trial version.
Press [Next] to continue.
8/11/2019 Tryout Installation 2011 en 002
http://slidepdf.com/reader/full/tryout-installation-2011-en-002 13/17
Scia Engineer
9
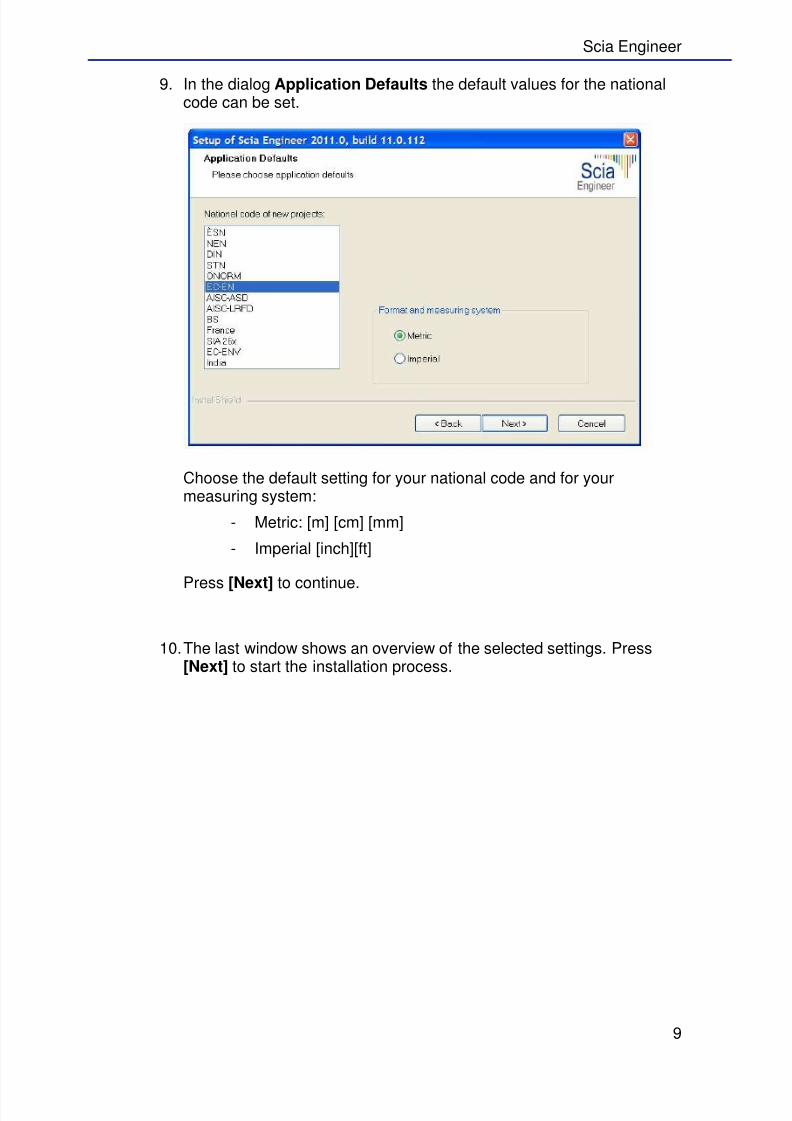
9. In the dialog Application Defaults the default values for the nationalcode can be set.
Choose the default setting for your national code and for yourmeasuring system:
- Metric: [m] [cm] [mm]
- Imperial [inch][ft]
Press [Next] to continue.
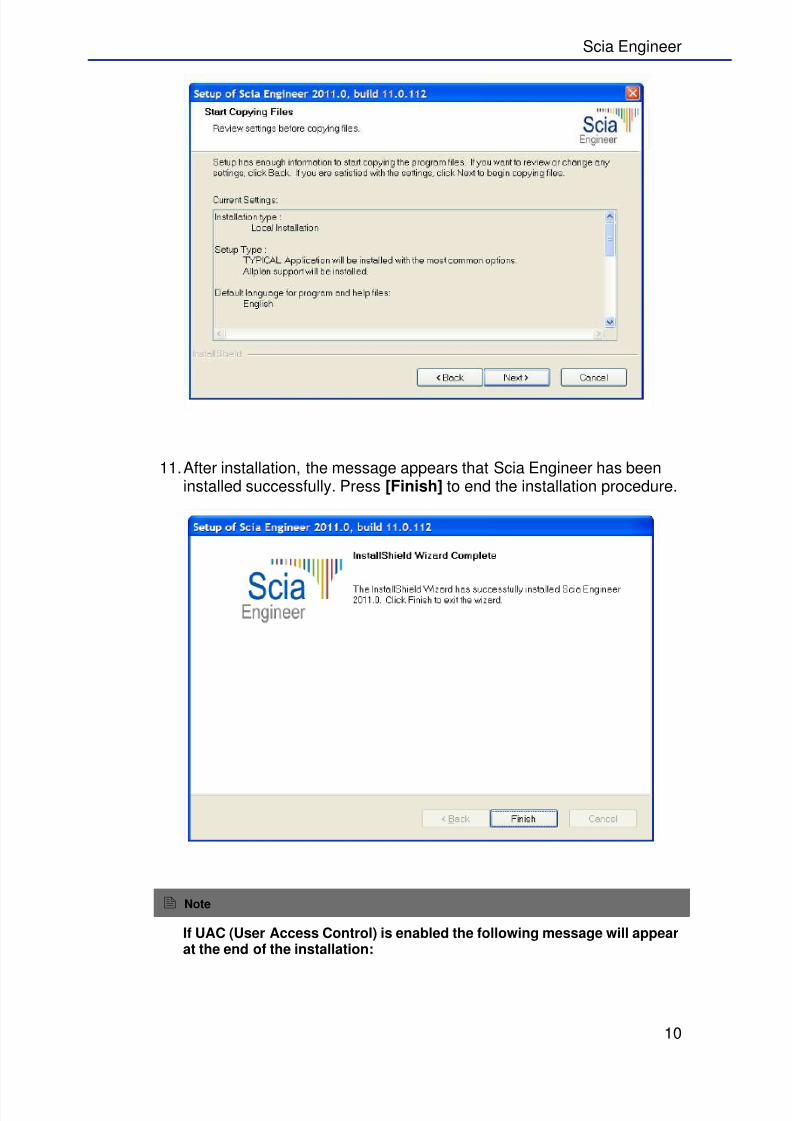
10. The last window shows an overview of the selected settings. Press[Next] to start the installation process.
8/11/2019 Tryout Installation 2011 en 002
http://slidepdf.com/reader/full/tryout-installation-2011-en-002 14/17
Scia Engineer
10
11. After installation, the message appears that Scia Engineer has beeninstalled successfully. Press [Finish] to end the installation procedure.
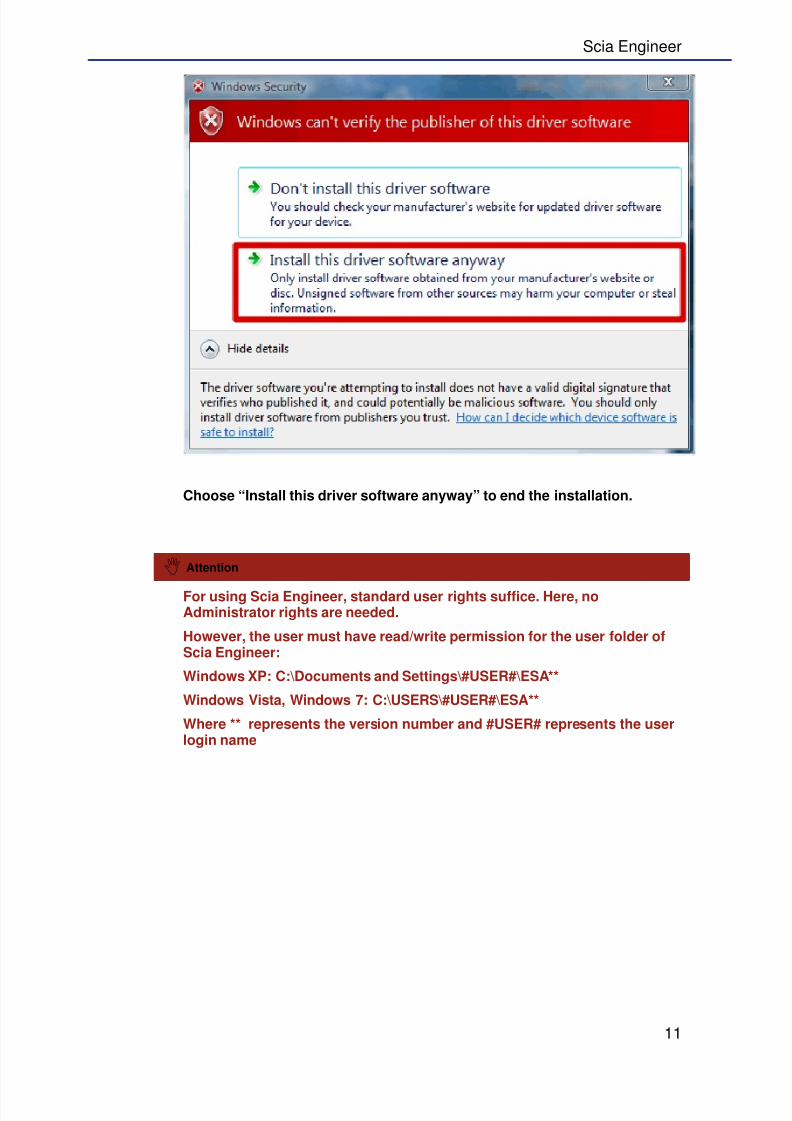
Note
If UAC (User Access Control) is enabled the following message will appearat the end of the installation:
8/11/2019 Tryout Installation 2011 en 002
http://slidepdf.com/reader/full/tryout-installation-2011-en-002 15/17
Scia Engineer
11
Choose “Install this driver software anyway” to end the installation.
Attention
For using Scia Engineer, standard user rights suffice. Here, noAdministrator rights are needed.
However, the user must have read/write permission for the user folder ofScia Engineer:
Windows XP: C:\Documents and Settings\#USER#\ESA**
Windows Vista, Windows 7: C:\USERS\#USER#\ESA**
Where ** represents the version number and #USER# represents the userlogin name
8/11/2019 Tryout Installation 2011 en 002
http://slidepdf.com/reader/full/tryout-installation-2011-en-002 16/17
Scia Engineer
12
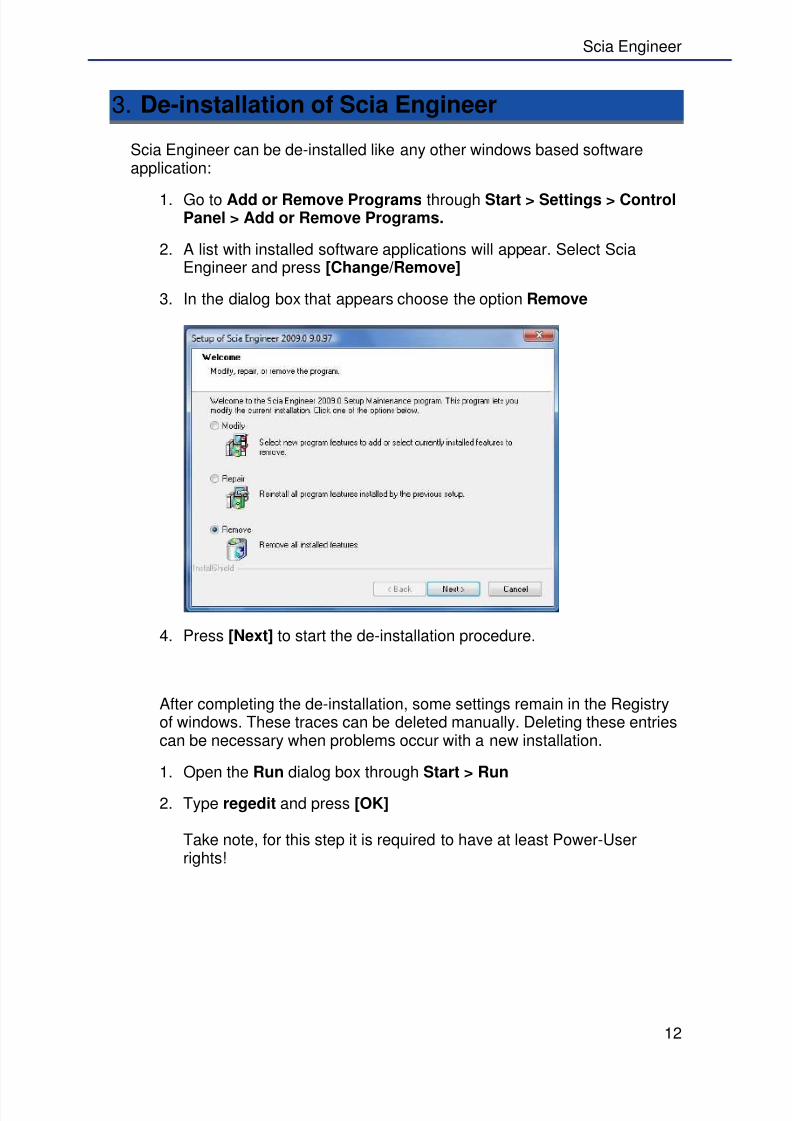
3. De-installation of Scia Engineer
Scia Engineer can be de-installed like any other windows based softwareapplication:
1. Go to Add or Remove Programs through Start > Settings > ControlPanel > Add or Remove Programs.
2. A list with installed software applications will appear. Select SciaEngineer and press [Change/Remove]
3. In the dialog box that appears choose the option Remove
4. Press [Next] to start the de-installation procedure.
After completing the de-installation, some settings remain in the Registryof windows. These traces can be deleted manually. Deleting these entriescan be necessary when problems occur with a new installation.
1. Open the Run dialog box through Start > Run
2. Type regedit and press [OK]
Take note, for this step it is required to have at least Power-Userrights!
8/11/2019 Tryout Installation 2011 en 002
http://slidepdf.com/reader/full/tryout-installation-2011-en-002 17/17
Scia Engineer
13
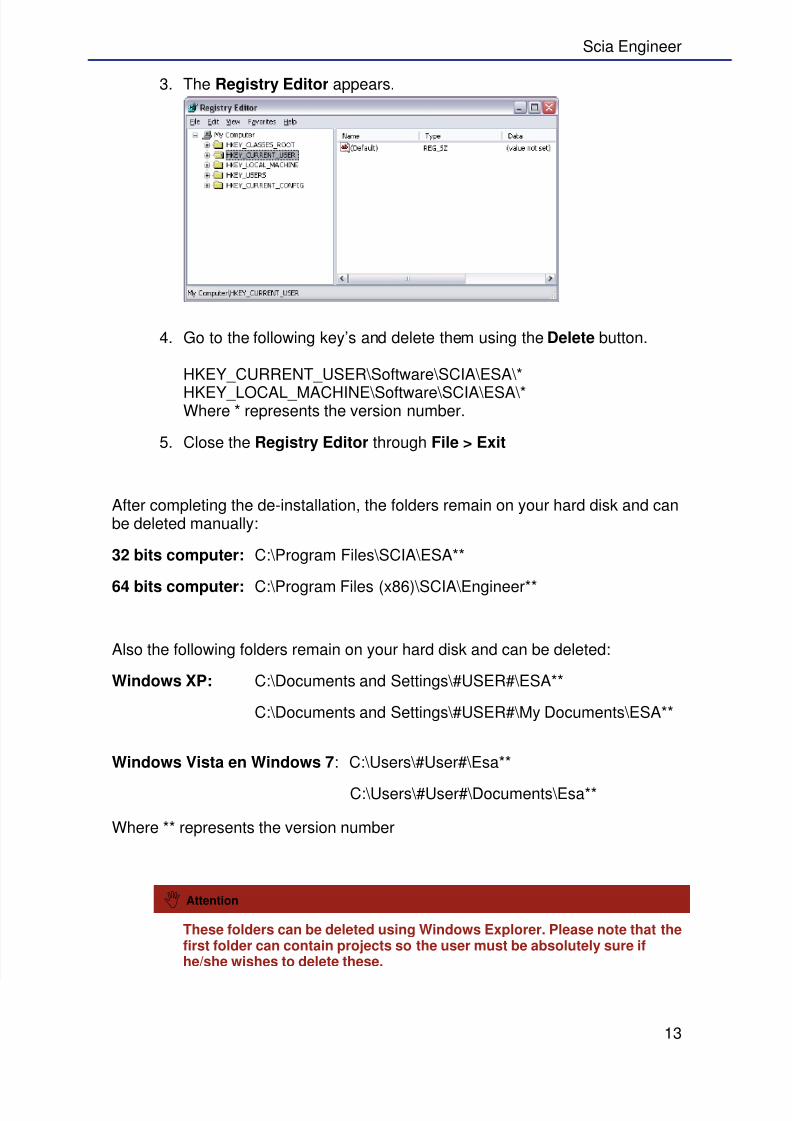
3. The Registry Editor appears.
4. Go to the following key’s and delete them using the Delete button.
HKEY_CURRENT_USER\Software\SCIA\ESA\*
HKEY_LOCAL_MACHINE\Software\SCIA\ESA\*Where * represents the version number.
5. Close the Registry Editor through File > Exit
After completing the de-installation, the folders remain on your hard disk and canbe deleted manually:
32 bits computer: C:\Program Files\SCIA\ESA**
64 bits computer: C:\Program Files (x86)\SCIA\Engineer**
Also the following folders remain on your hard disk and can be deleted:
Windows XP: C:\Documents and Settings\#USER#\ESA**
C:\Documents and Settings\#USER#\My Documents\ESA**
Windows Vista en Windows 7: C:\Users\#User#\Esa**
C:\Users\#User#\Documents\Esa**
Where ** represents the version number
Attention
These folders can be deleted using Windows Explorer. Please note that thefirst folder can contain projects so the user must be absolutely sure ifhe/she wishes to delete these.