Embed Size (px)
Citation preview

TREADMILL OWNER’S MANUAL
Read the TREADMILL gUIDE before using this OWNER’S MANUAL.
LS9.9TLS12.9T

2
LIVESTRONG™ is a registered trademark of the Lance Armstrong Foundation.
The Lance Armstrong Foundation fights for the more than 25 million people around the world living with cancer today. There can be – and should be – life after cancer for more people. They kick in at the moment of diagnosis, giving people the resources and support they need to fight cancer head-on. They find innovative ways to raise awareness, fund research and end the stigma about cancer that many survivors face. They connect people and communities to drive social change, and call for state, national and world leaders to help fight this disease. Anyone, anywhere can join the fight against cancer. Join them at LIVESTRONG.org.
INTRODUCTION
Congratulations and thank you for your purchase of this LIVESTRONG™ treadmill!
Purchases of this product ensure that a minimum of $4M will go to the Lance Armstrong Foundation and the fight against cancer.
Whether your goal is to win races or simply enjoy a fuller, healthier lifestyle, a LIVESTRONG™ treadmill can help you attain it – adding club-quality performance to your at-home workouts, with the ergonomics and innovative features you need to get stronger and healthier, faster. Because we’re committed to designing fitness equipment from the inside out, we use only the highest quality components. It’s a commitment we back with one of the strongest frame-to-motor warranty packages in the industry.
You want exercise equipment that offers the most comfort, the best reliability and the highest quality in its class.
LIVESTRONG™ treadmills deliver.

3
ASSEMBLY
There are several areas during the assembly process that special attention must be paid. It is very important to follow the assembly instructions correctly and to make sure all parts are firmly tightened. If the assembly instructions are not followed correctly, the treadmill could have parts that are not tightened and will seem loose and may cause irritating noises. To prevent damage to the treadmill, the assembly instructions must be reviewed and corrective actions should be taken.
Before proceeding, find your treadmill’s serial number located near the on/off power switch and power cord and enter it in the space provided below.
ENTER YOUR SERIAL NUMBER AND MODLE NAME IN THE BOXES BELOW:
» Refer to the SERIAL NUMBER and MODEL NAME when calling for service.» Be sure to enter both the SERIAL NUMBER and MODEL NAME on your warranty card.
SERIAL NUMBER:
MODEL NAME: LIVESTRONG TREADMILL
WARNING

4
SPEAKERS
WATER BOTTLE HOLDER
GRIP PULSE HANDRAILS
SPEED/INCLINE TOGGLES
CONSOLE
ON/OFF SWITCH
CIRCUIT BREAKER
TRANSPORT WHEEL
POWER CORD
READING RACK
CONSOLE FAN
IPOD/MP3 PLAYER POCKET
TOUCH PAD PANEL AND DISPLAY WINDOWS
SAFETY KEY PLACEMENT
MOTOR COVER
WHEEL LOCK
SIDE RAIL
ROLLER END CAP
REAR ROLLERADJUSTMENT BOLTS
CONSOLE MAST
FOOT LOCK LATCH (UNDERNEATH DECK)
RUNNING BELT / RUNNING DECK
CAUTION AVERTISSEMENT PRECAUCIÓNKEEP HANDS AND FEET AWAY FROM THIS AREA.HIGH-PRESSURE SHOCKS COULD CAUSE BODILY INJURY.
GARDER LES MAINS ET LES PIEDS LOIN DE CETTE REGION. LES AMORTISSEURS À HAUTE PRESSION PEUVENT CAUSER DES BLESSURES.
MANTENGA LAS MANOS Y LOS PIES LEJOS DE ESTA AREA. IMPACTOS DE ALTA PRESIÓN PUEDEN CAUSAR DAÑO CORPORAL.
CAUTION AVERTISSEMENT PRECAUCIÓNKEEP HANDS AND FEET AWAY FROM THIS AREA.
GARDER LES MAINS ET LES PIEDS LOIN DE CETTE REGION.
MANTENGA LAS MANOS Y LOS PIES LEJOS DE ESTA AREA.
1 2
ABOVE FOOT LATCH
1
2

5
TOOLSINCLUDED:
F 6 mm T-Wrench F 5 mm T-Wrench F Screwdriver
PARTSINCLUDED:
F 1 Console Assembly F 2 Console Masts F 2 Console Mast Caps F 2 Console Mast Boots F 2 Main Frame Boots F 4 Hardware Bags F 1 Safety Key F 1 Power Cord F 1 Audio Adapter Cable F 1 Bottle of Silicone Lubricant (for 2 applications)
If you have questions or if there are any missing parts,
contact Customer Tech Support. Contact information is located on the back panel
of this manual.
DO NOT ATTEMPT TO LIFT THE TREADMILL! Do not move or lift treadmill from packaging until specified to do so in the assembly instructions. You may remove the plastic wrap from console masts.
WARNING
UNPACKING
Place the treadmill carton on a level flat surface. It is recommended that you place a protective covering on your floor. Take CAUTION when handling and transporting this unit. Never open box when it is on its side. Once the banding straps have been removed, do not lift or transport this unit unless it is fully assembled and in the upright folded position, with the lock latch secure. Unpack the unit where it will be used. The enclosed treadmill is equipped with high-pressure shocks and may spring open if mishandled. Never grab hold of any portion of the incline frame and attempt to lift or move the treadmill.
FAILURE TO FOLLOW THESE INSTRUCTIONS COULD RESULT IN INJURY!
WARNING
NEEDHELP?
NOTE: During each assembly step, ensure that ALL nuts and bolts are in place and partially threaded in before completely tightening any ONE bolt.
NOTE: A light application of grease may aid in the installation of hardware. Any grease, such as lithium bike grease is recommended.
PREASSEMBLY

6
BOLT (A)20 mmQty: 6
SPRING WASHER (B)8.2 mmQty: 6
ARC WASHER (C)8.2 mmQty: 6
HARDWAREBAG1 CONTENTS :
BOLTS (A)
MAINFRAMEBOOT
CONSOLE MAST
SPRINGWASHERS (B)
ARC WASHERS (C)
MAIN FRAME BRACKET
CONSOLE CABLE
LEAD WIRE
ASSEMBLY STEP1
A Cut the yellow banding straps and lift the running deck upward to remove all contents from underneath the running deck.
B Open hardware bag 1.
C Slide main frame boot up console mast. Place right console mast over main frame bracket.
D Pull lead wire through right console mast. After pulling the lead wire through the mast, the top of the console cable should be located at the top of the mast. Detach and discard lead wire. NOTE: Do not pinch console cable when placing the mast onto the main frame bracket.
E Attach console mast to main frame bracket using 3 bolts (a), 3 spring washers (b) and 3 arc washers (c).
F Slide main frame boot down over main frame bracket.
g Repeat steps D–F on other side.

7
ASSEMBLY STEP2
A Open hardware bag 2.
B With the console upside down, attach the console mast caps to the console using 4 bolts (e) and 4 spring washers (b).
BOLT (E)15 mmQty: 4
SPRING WASHER (B)8.2 mmQty: 4
HARDWAREBAG2 CONTENTS :
BOLTS (E)
SPRING WASHERS (B)
CONSOLE (UPSIDE DOWN)
CONSOLE MAST CAP
NOTE: The console mast caps are marked with an L if they are to be used on the left-hand side of the treadmill or an R if they are to be used on the right-hand side of the treadmill. If the console mast caps are assembled on the incorrect side of the treadmill, the unit will not assemble correctly.

8
ASSEMBLY STEP3
A Open HARDWAREBAG3.
B Slide CONSOLE through the CONSOLEMASTBOOTS. NOTE: Make sure the arrows on the mast rings are pointing upward towards the console when sliding into place.
C Connect CONSOLECABLES.
D Connect CONSOLEto RIGHTCONSOLEMAST using 2 BOLTS(A), 2 SPRINGWASHERS(B) and 2 ARCWASHERS(C).
E Repeat on other side.
NOTE: Be careful not to pinch any wires while assembling the right console mast.
BOLT (A)20 mmQty: 4
SPRING WASHER (B)8.2 mmQty: 4
ARC WASHER (C)8.2 mmQty: 4
HARDWAREBAG3 CONTENTS :
BOLTS (A)
CONSOLE MAST
SPRING WASHERS (B)
CONSOLE MAST BOOT
CONSOLE CABLES
CONSOLE
ARC WASHERS (C)

9
YOU ARE FINISHED!
ASSEMBLY STEP4
A Open HARDWAREBAG4.
B Attach MAINfRAMEBOOTS using 4 SCREWS(D).
C Before the first use, lubricate the treadmill deck by following the instructions in the MAINTENANCE section in the TREADMILL gUIDE.
SCREW (D)20 mmQty: 4
HARDWAREBAG4 CONTENTS :
SCREWS (D)
MAIN FRAME BOOT

10

11
TREADMILL OPERATIONThis section explains how to use your treadmill’s console and programming. The BASIC OPERATION section in the TREADMILL gUIDE has instructions for the following:
• LOCATIONOfTHETREADMILL
• USINGTHESAfETYKEY
• fOLDINGTHETREADMILL
• MOVINGTHETREADMILL
• LEVELINGTHETREADMILL
• TENSIONINGTHERUNNINGBELT
• CENTERINGTHERUNNINGBELT
• USINGTHEHEARTRATEfUNCTION

12
S TOPHOLD TO RESET
S TARTQUICK START
CHANGEDISPLAY
SETINCLINE
SETSPEED1 2 3 4 5 6 7 8 9 10 11 12
PERSONALBEST
LAST 5WORKOUTS
WORKOUTTOTALS
WORKOUTSTATS
H O L D T O R E S E T
DISTANCE
F I T N E S S J O U R N A L S Y S T E M
Attach safety key clip to clothing before starting. To avoid injury, stand on the side rails before starting treadmill. Read and follow all instructions before operating. Keep children away from this equipment. Remove safety key when not in use and store out of reach of children.
WARNING! CAUTION!Consult a physician before using this equipment. Stop exercising if you feel pain, faint, dizzy or short of breath. For Consumer Use only.
TIME DISTANCE
INCLINE SPEED
CALORIES HEART RATE
OO
A PB C
IGJMN D E F H K L T
R
SS
U Q
LS12.9TSHOWN
13
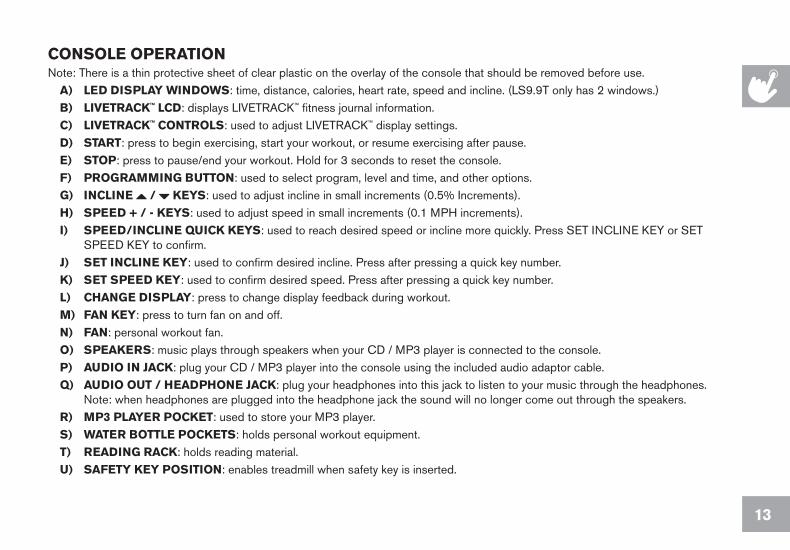
CONSOLEOPERATIONNote: There is a thin protective sheet of clear plastic on the overlay of the console that should be removed before use.
A) LEDDISPLAYWINDOWS: time, distance, calories, heart rate, speed and incline. (LS9.9T only has 2 windows.)B) LIVETRACK™LCD: displays LIVETRACK™ fitness journal information. C) LIVETRACK™CONTROLS: used to adjust LIVETRACK™ display settings. D) START: press to begin exercising, start your workout, or resume exercising after pause.E) STOP: press to pause/end your workout. Hold for 3 seconds to reset the console.f) PROGRAMMINGBUTTON: used to select program, level and time, and other options.G) INCLINE / KEYS: used to adjust incline in small increments (0.5% Increments). H) SPEED+/-KEYS: used to adjust speed in small increments (0.1 MPH increments). I) SPEED/INCLINEQUICKKEYS: used to reach desired speed or incline more quickly. Press SET INCLINE KEY or SET
SPEED KEY to confirm.J) SETINCLINEKEY: used to confirm desired incline. Press after pressing a quick key number.K) SETSPEEDKEY: used to confirm desired speed. Press after pressing a quick key number.L) CHANGEDISPLAY: press to change display feedback during workout.M) fANKEY: press to turn fan on and off.N) fAN: personal workout fan.O) SPEAKERS: music plays through speakers when your CD / MP3 player is connected to the console. P) AUDIOINJACK: plug your CD / MP3 player into the console using the included audio adaptor cable.Q) AUDIOOUT/HEADPHONEJACK: plug your headphones into this jack to listen to your music through the headphones.
Note: when headphones are plugged into the headphone jack the sound will no longer come out through the speakers.R) MP3PLAYERPOCKET: used to store your MP3 player.S) WATERBOTTLEPOCKETS: holds personal workout equipment.T) READINGRACK: holds reading material.U) SAfETYKEYPOSITION: enables treadmill when safety key is inserted.
14
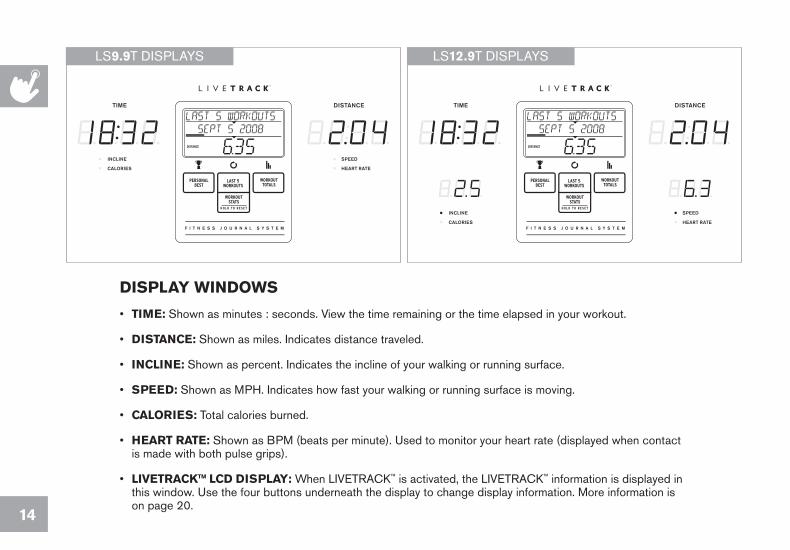
DISPLAYWINDOWS
• TIME: Shown as minutes : seconds. View the time remaining or the time elapsed in your workout.
• DISTANCE: Shown as miles. Indicates distance traveled.
• INCLINE: Shown as percent. Indicates the incline of your walking or running surface.
• SPEED: Shown as MPH. Indicates how fast your walking or running surface is moving.
• CALORIES: Total calories burned.
• HEARTRATE: Shown as BPM (beats per minute). Used to monitor your heart rate (displayed when contact is made with both pulse grips).
• LIVETRACK™LCDDISPLAY:When LIVETRACK™ is activated, the LIVETRACK™ information is displayed in this window. Use the four buttons underneath the display to change display information. More information is on page 20.
PERSONALBEST
LAST 5WORKOUTS
WORKOUTTOTALS
WORKOUTSTATS
H O L D T O R E S E T
DISTANCE
F I T N E S S J O U R N A L S Y S T E M
TIME DISTANCE
INCLINE SPEED
CALORIES HEART RATE
PERSONALBEST
LAST 5WORKOUTS
WORKOUTTOTALS
WORKOUTSTATS
H O L D T O R E S E T
DISTANCE
F I T N E S S J O U R N A L S Y S T E M
TIME DISTANCE
INCLINE SPEED
CALORIES HEART RATE
LS9.9T DISPLAYS LS12.9T DISPLAYS

15
GETTINGSTARTED1) Check to make sure no objects are placed on the belt that will
hinder the movement of the treadmill.
2) Plug in the power cord and turn the treadmill ON.
3) Stand on the side rails of the treadmill.
4) Attach the safety key clip to part of your clothing making sure that it is secure and will not become detached during operation.
5) Insert the safety key into the safety keyhole in the console.
6) You have two options to start your workout:
A)QUICKSTARTUP
Simply press the START key to begin working out.Time, distance, and calories will all count up from zero. OR...
B)SELECTAUSER
Use the PROgRAMMINg BUTTON to select USER 1, USER 2 or gUEST and press ENTER.
C)SELECTAPROGRAM
1) Use the PROgRAMMINg BUTTON, ARROW KEYS or NUMBER KEYS until you reach your desired program and press ENTER to confirm.
2) Use the PROgRAMMINg BUTTON or ARROW KEYS to complete the program setup by pressing UP and DOWN and ENTER to confirm.
3) When setup is complete, press START to begin your workout.
fINISHINGYOURWORKOUTWhen your workout is complete, the console will display “WORKOUT COMPLETE” and beep. Your workout information will stay displayed on the console for 30-45 seconds and then reset.
DATEANDCLOCKSETUP
1) Enter Setup mode: Press and hold the 1 and 2 buttons for 3-5 seconds.
2) Use the ARROW KEYS to change settings and press ENTER to confirm.
3) Settings include: Month, day, year, hour, minute, and am/pm.
4) Review settings: You can review your settings at any time while in setup mode. Press ENTER to scroll through settings.
5) Exit setup mode: To confirm the date and time, press and hold ENTER for 3 seconds.
6) To reset: simply re-enter setup mode and adjust date and time to the correct setting.
TORESETTHECONSOLEHold STOP key for 3 seconds.

16
PROGRAMINfORMATION
1) MANUAL: Allows ‘on the fly’ manual speed and incline changes.
2) SPEEDINTERVALS: Improves your strength, speed and endurance by increasing and decreasing the speed throughout your workout to involve your heart and other muscles. Speed changes and segments repeat 90 seconds and 30 seconds.
3) PEAKINTERVALS: Improves your strength, speed and endurance by increasing and decreasing the speed and incline throughout your workout to involve your heart and other muscles. Speed and Incline changes, segments repeat 90 seconds and 30 seconds.
Segment Warm Up 1 2 Cool DownTime 4:00 min 90 sec 30 sec 4:00 min
Level 1 1.0 1.5 2.0 4.0 1.5 1.0Level 2 1.0 1.5 2.0 4.5 1.5 1.0Level 3 1.3 1.9 2.5 5.0 1.9 1.3Level 4 1.3 1.9 2.5 5.5 1.9 1.3Level 5 1.5 2.3 3.0 6.0 2.3 1.5Level 6 1.5 2.3 3.0 6.5 2.3 1.5Level 7 1.8 2.6 3.5 7.0 2.6 1.8Level 8 1.8 2.6 3.5 7.5 2.6 1.8Level 9 2.0 3.0 4.0 8.0 3.0 2.0
Level 10 2.0 3.0 4.0 8.5 3.0 2.0
Segment Warm Up 1 2 Cool DownTime 4:00 min 90 sec 30 sec 4:00 min
Level 1 Speed 1.0 1.5 2.0 4.0 1.5 1.0Incline 1.0 1.5 0.5 1.5 1.5 0.0
Level 2 Speed 1.0 1.5 2.0 4.5 1.5 1.0Incline 1.5 2.5 3.0 6.5 2.5 1.5
Level 3 Speed 1.3 1.9 2.5 5.0 1.9 1.3Incline 2.0 3.0 4.0 7.5 3.0 2.0
Level 4 Speed 1.3 1.9 2.5 5.5 1.9 1.3Incline 2.0 3.0 4.0 8.0 3.0 2.0
Level 5 Speed 1.5 2.3 3.0 6.0 2.3 1.5Incline 2.5 3.5 4.5 8.5 3.5 2.5
Level 6 Speed 1.5 2.3 3.0 6.5 2.3 1.5Incline 2.5 3.5 4.5 9.0 3.5 2.5
Level 7 Speed 1.8 2.6 3.5 7.0 2.6 1.8Incline 2.5 4.0 5.5 9.5 4.0 3.0
Level 8 Speed 1.8 2.6 3.5 7.5 2.6 1.8Incline 3.0 4.0 5.5 9.5 4.0 3.0
Level 9 Speed 2.0 3.0 4.0 8.0 3.0 2.0Incline 3.0 4.5 6.0 10.0 5.0 3.0
Level 10 Speed 2.0 3.0 4.0 8.5 3.0 2.0Incline 3.0 4.5 6.0 10.0 5.0 3.0

17
4) WEIGHTLOSS: Promotes weight loss by increasing and decreasing the speed and incline, while keeping you in your fat burning zone. Speed and Incline changes, segments repeat every 30 seconds.
5) ROLLINGHILLS: Simulates running up and down hills to improve stamina, muscle tone, and promote weight loss. Speed changes and segments repeat every 30 seconds.
Segment Warm Up 1 2 3 4 5 6 7 8 Cool DownTime 4:00 min Each segment is 30 seconds 4:00 min
Level 1 Incline 0.0 0.5 1.5 1.5 1.0 0.5 0.5 0.5 1.0 1.5 0.5 0.0Speed 1.0 1.5 2.0 2.5 3.0 3.5 4.0 3.5 3.0 2.5 2.3 1.5
Level 2 Incline 0.0 0.5 1.5 1.5 1.0 0.5 1.0 0.5 1.0 1.5 0.5 0.0Speed 1.3 1.9 2.5 3.0 3.5 4.0 4.5 4.0 3.5 3.0 2.6 1.8
Level 3 Incline 0.5 1.0 2.0 2.0 1.5 1.0 1.0 1.0 1.5 2.0 1.0 0.5Speed 1.5 2.3 3.0 3.5 4.0 4.5 5.0 4.5 4.0 3.5 3.0 2.0
Level 4 Incline 0.5 1.0 2.0 2.0 1.5 1.0 1.0 1.0 1.5 2.0 1.0 0.5Speed 1.8 2.6 3.5 4.0 4.5 5.0 5.5 5.0 4.5 4.0 3.4 2.3
Level 5 Incline 1.0 1.5 2.5 2.5 2.0 1.5 1.5 1.5 2.0 2.5 1.5 1.0Speed 2.0 3.0 4.0 4.5 5.0 5.5 6.0 5.5 5.0 4.5 3.8 2.5
Level 6 Incline 1.0 1.5 2.5 2.5 2.0 1.5 1.5 1.5 2.0 2.5 1.5 1.0Speed 2.3 3.4 4.5 5.0 5.5 6.0 6.5 6.0 5.5 5.0 4.1 2.8
Level 7 Incline 1.5 2.0 3.0 3.0 2.5 2.0 2.0 2.0 2.5 3.0 2.0 1.5Speed 2.5 3.8 5.0 5.5 6.0 6.5 7.0 6.5 6.0 5.5 4.5 3.0
Level 8 Incline 1.5 2.0 3.0 3.0 2.5 2.0 2.0 2.0 2.5 3.0 2.0 1.5Speed 2.8 4.1 5.5 6.0 6.5 7.0 7.5 7.0 6.5 6.0 4.9 3.3
Level 9 Incline 2.0 2.5 3.5 3.5 3.0 2.5 2.5 2.5 3.0 3.5 2.5 2.0Speed 3.0 4.5 6.0 6.5 7.0 7.5 8.0 7.5 7.0 6.5 5.3 3.5
Level 10 Incline 2.0 2.5 3.5 3.5 3.0 2.5 2.5 2.5 3.0 3.5 2.5 2.0Speed 3.3 4.9 6.5 7.0 7.5 8.0 8.5 8.0 7.5 7.0 5.6 3.8
Segment Warm Up 1 2 3 4 5 6 7 8 Cool DownTime 4:00 min Each segment is 30 seconds 4:00 min
Level 1 1.0 1.5 2.0 2.5 3.0 3.5 4.0 3.5 3.0 2.5 2.3 1.5Level 2 1.3 1.9 2.5 3.0 3.5 4.0 4.5 4.0 3.5 3.0 2.6 1.8Level 3 1.5 2.3 3.0 3.5 4.0 4.5 5.0 4.5 4.0 3.5 3.0 2.0Level 4 1.8 2.6 3.5 4.0 4.5 5.0 5.5 5.0 4.5 4.0 3.4 2.3Level 5 2.0 3.0 4.0 4.5 5.0 5.5 6.0 5.5 5.0 4.5 3.8 2.5Level 6 2.3 3.4 4.5 5.0 5.5 6.0 6.5 6.0 5.5 5.0 4.1 2.8Level 7 2.5 3.8 5.0 5.5 6.0 6.5 7.0 6.5 6.0 5.5 4.5 3.0Level 8 2.8 4.1 5.5 6.0 6.5 7.0 7.5 7.0 6.5 6.0 4.9 3.3Level 9 3.0 4.5 6.0 6.5 7.0 7.5 8.0 7.5 7.0 6.5 5.3 3.5
Level 10 3.3 4.9 6.5 7.0 7.5 8.0 8.5 8.0 7.5 7.0 5.6 3.8

18
6) fOOTHILLS: Simulates a hill ascent and descent. This program helps tone muscle and improve cardiovascular ability. Incline changes and segments repeat every 30 seconds.
7) MOUNTAINCLIMB: A more-intense version of FOOT HILLS. Simulates a mountain ascent and descent. This program helps tone muscle and improve cardiovascular ability. Incline changes and segments repeat every 30 seconds.
8-9)5K/10K: Programs that allow you to set and work toward a distance goal. Treadmill automatically adjusts incline to simulate running on an actual course. Incline changes and all segments are 0.16 Km.
Segment Warm Up 1 2 3 4 5 6 7 8 9 10 11 12 13 14 15 Cool DownTime 4:00 min Each segment is 30 seconds 4:00 min
Level 1 0.0 0.5 0.0 0.5 1.0 3.0 1.0 3.0 2.0 3.0 2.0 3.5 2.0 3.0 2.0 3.0 1.0 3.0 1.0 0.5 0.0Level 2 0.0 0.5 0.0 0.5 1.0 3.0 2.0 3.0 2.0 3.0 2.5 3.5 2.5 3.0 2.0 3.0 2.0 3.0 1.0 0.5 0.0Level 3 0.5 1.0 0.5 1.0 1.5 3.5 1.5 3.5 2.5 3.5 2.5 4.0 2.5 3.5 2.5 3.5 1.5 3.5 1.5 1.0 0.5Level 4 0.5 1.0 0.5 1.0 1.5 3.5 2.5 3.5 2.5 3.5 3.0 4.0 3.0 3.5 2.5 3.5 2.5 3.5 1.5 1.0 0.5Level 5 1.0 1.5 1.0 1.5 2.0 4.0 2.0 4.0 3.0 4.0 3.0 4.5 3.0 4.0 3.0 4.0 2.0 4.0 2.0 1.5 1.0Level 6 1.0 1.5 1.0 1.5 2.0 4.0 3.0 4.0 3.0 4.0 3.5 4.5 3.5 4.0 3.0 4.0 3.0 4.0 2.0 1.5 1.0Level 7 1.5 2.0 1.5 2.0 2.5 4.5 2.5 4.5 3.5 4.5 3.5 5.0 3.5 4.5 3.5 4.5 2.5 4.5 2.5 2.0 1.5Level 8 1.5 2.0 1.5 2.0 2.5 4.5 3.5 4.5 3.5 4.5 4.0 5.0 4.0 4.5 3.5 4.5 3.5 4.5 2.5 2.0 1.5Level 9 2.0 2.5 2.0 2.5 3.0 5.0 3.0 5.0 4.0 5.0 4.0 5.5 4.0 5.0 4.0 5.0 3.0 5.0 3.0 2.5 2.0
Level 10 2.0 2.5 2.0 2.5 3.0 5.0 4.0 5.0 4.0 5.0 4.5 5.5 4.5 5.0 4.0 5.0 4.0 5.0 3.0 2.5 2.0
Segment Warm Up 1 2 3 4 5 6 7 8 9 10 Cool DownTime 4:00 min Each segment is 30 seconds 4:00 min
Level 1 0.0 0.0 1.0 1.5 2.0 2.5 3.0 3.0 2.5 2.0 1.5 1.0 0.0 0.0Level 2 0.0 0.0 1.5 2.0 2.5 3.0 3.5 3.5 3.0 2.5 2.0 1.5 0.0 0.0Level 3 0.0 1.0 2.0 2.5 3.0 3.5 4.0 4.0 3.5 3.0 2.5 2.0 1.0 0.0Level 4 0.0 1.5 2.5 3.0 3.5 4.0 4.5 4.5 4.0 3.5 3.0 2.5 1.5 0.0Level 5 0.0 1.5 3.0 3.5 4.0 4.5 5.0 5.0 4.5 4.0 3.5 3.0 1.5 0.0Level 6 0.0 1.5 3.5 4.0 4.5 5.0 5.5 5.5 5.0 4.5 4.0 3.5 1.5 0.0Level 7 0.0 1.5 4.0 4.5 5.0 5.5 6.0 6.0 5.5 5.0 4.5 4.0 1.5 0.0Level 8 0.0 2.0 4.5 5.0 5.5 6.0 6.5 6.5 6.0 5.5 5.0 4.5 2.0 0.0Level 9 0.0 2.0 5.0 5.5 6.0 6.5 7.0 7.0 6.5 6.0 5.5 5.0 2.0 0.0
Level 10 0.0 2.0 5.5 6.0 6.5 7.0 7.5 7.5 7.0 6.5 6.0 5.5 2.0 0.0
Segment Warm Up 1 2 3 4 5 6 7 8 9 10 11 12 13 14 15 Cool DownDistance 4:00 min Each segment is 0.16 Km 4:00 min
Level 1 0.0 0.5 1.0 3.0 1.0 3.0 2.0 3.0 2.0 3.5 2.0 3.0 2.0 3.0 1.0 3.0 1.0 0.5 0.0Level 2 0.0 0.5 1.0 3.0 2.0 3.0 2.0 3.0 2.5 3.5 2.5 3.0 2.0 3.0 2.0 3.0 1.0 0.5 0.0Level 3 0.5 1.0 1.5 3.5 1.5 3.5 2.5 3.5 2.5 4.0 2.5 3.5 2.5 3.5 1.5 3.5 1.5 1.0 0.5Level 4 0.5 1.0 1.5 3.5 2.5 3.5 2.5 3.5 3.0 4.0 3.0 3.5 2.5 3.5 2.5 3.5 1.5 1.0 0.5Level 5 1.0 1.5 2.0 4.0 2.0 4.0 3.0 4.0 3.0 4.5 3.0 4.0 3.0 4.0 2.0 4.0 2.0 1.5 1.0Level 6 1.0 1.5 2.0 4.0 3.0 4.0 3.0 4.0 3.5 4.5 3.5 4.0 3.0 4.0 3.0 4.0 2.0 1.5 1.0Level 7 1.5 2.0 2.5 4.5 2.5 4.5 3.5 4.5 3.5 5.0 3.5 4.5 3.5 4.5 2.5 4.5 2.5 2.0 1.5Level 8 1.5 2.0 2.5 4.5 3.5 4.5 3.5 4.5 4.0 5.0 4.0 4.5 3.5 4.5 3.5 4.5 2.5 2.0 1.5Level 9 2.0 2.5 3.0 5.0 3.0 5.0 4.0 5.0 4.0 5.5 4.0 5.0 4.0 5.0 3.0 5.0 3.0 2.5 2.0
Level 10 2.0 2.5 3.0 5.0 4.0 5.0 4.0 5.0 4.5 5.5 4.5 5.0 4.0 5.0 4.0 5.0 3.0 2.5 2.0

19
10) PACER: Trains you to run at a steady “race pace”. Enter in the distance plus the time limit, and the program calculates a steady pace.
11-12)CUSTOM1/CUSTOM2: Lets you create and reuse a perfect workout for you with specific speed, incline and time combination. The ultimate in personal programming. Time-based goal.1) Select CUSTOM 1 or 2 using ARROW KEYS. Press ENTER.2) Select WEIgHT using ARROW KEY. Press ENTER.3) Select TIME using ARROW KEYS. Press ENTER.4) Select SPEED for segments 1 through 15 using ARROW KEYS. Press ENTER to set each segment.5) Select INCLINE for segments 1 through 15 using ARROW KEYS. Press ENTER to set each segment.6) Press START to begin exercising. At this time, your program
has been successfully saved into memory, and can be used for future workouts.• While using your saved program, you are able to adjust the
speed or incline, but any changes will not be saved.
13) THRzONE(LS12.9TONLY): Automatically adjusts incline to maintain your Target Heart Rate. Perfect for simulating the intensity of your favorite sport or everyday activity. Time-based goal. Use this chart to select your Target Heart Rate.
14) HRINTERVALS(LS12.9TONLY): Automatically adjusts peak and valley incline levels to put you in your target heart rate work and rest intervals. Perfect for providing an intense workout with recovery bursts. Time based goal. NOTE: The heart rate function on this product is not a medical device.
100%
75%
60%
BE
ATS
PE
R M
INU
TE20 25 30 35 40 45 50 55 60 65AGE
T A R GE T Z O
NE
120117
114111
108105
10299
9793
150146
143139
135131
128124
120116

20
LIVETRACK™fITNESSJOURNALSYSTEM
Congratulations! Research shows that those who journal their fitness routines or workouts, on average, achieve greater success than those who do not. Because your new treadmill is equipped with the exclusive LIVETRACK™ Fitness Journal System, you’ve taken an important step towards achieving your fitness goals.
LIVETRACK™ is an innovative new software program, integrated into your treadmill console, that will allow you to track your fitness progress over time, without the need for paper journals or logs. LIVETRACK™ allows you to easily compare your current workout to your personal bests or your last five workouts. With quick access to feedback like duration of workout, distance traveled, calories burned or your overall pace, you’ll be able to quickly and easily see the progress you’ve made. You can also track your workout totals. By following your total number of workouts, distance, and calories, you’ll be able to see just how far you have come. Read further to see how LIVETRACK™ can help motivate you to enhance your performance.
SETUPTo activate LIVETRACK™ fitness journal system a user MUST be chosen before the program begins. To select a USER 1 or 2, use the ARROWKEYS and press ENTER to confirm. All workout data will accumulate only for the user that is chosen. NOTE: If no user is selected data will not be tracked.
RESETReset all recorded information for User 1 or User 2 by selecting the user and then holding down the WORKOUTSTATS/HOLDTORESET key for 10 seconds. NOTE: This step is permanent and will delete ALL previously accumulated data for the chosen user.
PERSONALBEST
LAST 5WORKOUTS
WORKOUTTOTALS
WORKOUTSTATS
H O L D T O R E S E T
DISTANCE
F I T N E S S J O U R N A L S Y S T E M
TIME DISTANCE
INCLINE SPEED
CALORIES HEART RATE

21
ACCUMULATEDDATA
With the LIVETRACK™ fitness journal system, you can scroll through your accumulated data in multiple formats by pressing the LIVETRACK™ buttons. A workout is saved when: the program ends, the console is paused and not resumed within 10 minutes, or the STOP button is held to reset the console.
1) PERSONALBEST: allows user to scroll through and view 5 personal bests for all previous workouts. They are:• Best Mile – fastest time in which the user has run a mile • Best 5K – fastest time in which the user has run a 5K • Longest Workout – (time) • Longest Workout – (distance) • Calories Burned – most calories user has burned in one workout
2) LAST5WORKOUTS: allows you to view data from your previous 5 workouts. The following data from these 5 workouts can be scrolled through and viewed by pressing the WORKOUTSTATS key:• Time – total time of selected workout • Distance – total distance of selected workout • Calories – total calories burned during selected workout • Pace (average) – average pace during selected workout • Elevation gain (feet) – total elevation climbed, in feet, during selected workout
3) WORKOUTTOTALS: allows you to view the total accumulated workout data. Pressing the WORKOUTTOTAL key will allow you to scroll through the following totals: • Total Workouts • Total Distance • Total Calories • Total Time • Elevation gain – total elevation climbed in feet

22
USINGYOURCD/MP3PLAYER
1) Connect the included AUDIO ADAPTOR CABLE to the AUDIO IN JACK on the top right of the console and the headphone jack on your CD / MP3 player.
2) Use your CD / MP3 player buttons to adjust song settings.
3) Remove the AUDIO ADAPTOR CABLE when not in use.
4) If you don’t want to use the SPEAKERS, you can plug your headphones into the AUDIO OUT JACK at the bottom of the console.

23
LIMITED HOME-USE WARRANTY

24
WEIGHTCAPACITY
LS9.9T=325lbs(147kilograms)LS12.9T=350lbs(159kilograms)
fRAME=LIfETIME
Warranty on the frame against defects in workmanship and materials for a lifetime period of the buyer from the date of purchase, so long as the device remains in the possession of the original owner. (The frame is defined as the welded metal base of the unit and does not included any parts that can be removed.)
DRIVEMOTOR/ELEVATIONMOTOR=LIfETIME
Warranty on the drive/elevation motors against defects in workmanship and materials for a lifetime period of the buyer from the date of purchase, so long as the device remains in the possession of the original owner.
ELECTRONICS&PARTSLS9.9T=3YEARS/LS12.9T=5YEARS
Warranty on the electronic components, finish and all original parts for the period specified above from the date of original purchase, so long as the device remains in the possession of the original owner.
LABORLS9.9T=1YEAR/LS12.9T=2YEARS
Warranty shall cover the labor cost for the repair of the device for the period specified above from the date of the original purchase, so long as the device remains in the possession of the original owner.
EXCLUSIONSANDLIMITATIONS
Who IS covered:
• The original owner and is not transferable.
What IS covered:
• Repair or replacement of a defective motor, electronic component, or defective part and is the sole remedy of the warranty.
What IS NOT covered:
• Normal wear and tear, improper assembly or maintenance, or installation of parts or accessories not originally intended or compatible with the equipment as sold.
• Damage or failure due to accident, abuse, corrosion, discoloration of paint or plastic, neglect, theft, vandalism, fire, flood, wind, lightning, freezing, or other natural disasters of any kind, power reduction, fluctuation or failure from whatever cause, unusual atmospheric conditions, collision, introduction of foreign objects into the covered unit, or modifications that are unauthorized or not recommended.
• Incidental or consequential damages. Manufacturer is not responsible or liable for indirect, special or consequential damages, economic loss, loss of property, or profits, loss of enjoyment or use, or other consequential damages of whatsoever nature in connection with the purchase, use, repair or maintenance of the equipment.

25
• Equipment used for commercial purposes or any use other than a single family or Household, unless endorsed by Manufacturer for coverage.
• Equipment owned or operated outside the US and Canada.
• Delivery, assembly, installation, setup for original or replacement units or labor or other costs associated with removal or replacement of the covered unit.
• Any attempt to repair this equipment creates a risk of injury. Manufacturer is not responsible or liable for any damage, loss or liability arising from any personal injury incurred during the course of, or as a result of any repair or attempted repair of your fitness equipment by other than an authorized service technician. All repairs attempted by you on your fitness equipment are undertaken AT YOUR OWN RISK and Manufacturer shall have no liability for any injury to the person or property arising from such repairs.
SERVICE/RETURNS
• In-home service is available within 150 miles of the nearest authorized repair center (Mileage beyond 150 miles from an authorized service center is the responsibility of the consumer).
• All returns must be pre-authorized.
• Manufacturer’s obligation under this warranty is limited to replacing or repairing, at Manufacturer’s option, the same or comparable model at one of its authorized service centers.
• An authorized service center must receive all equipment for which a warranty claim is made. This equipment must be received with all freight and other transportation charges prepaid, accompanied by sufficient proof of purchase.
• Replacement units, parts and electronic components reconditioned to as-new condition by Manufacturer or its vendors may sometimes be supplied as warranty replacement parts and constitute fulfillment of warranty terms.
• This warranty gives you specific legal rights, and your rights may vary from state to state.

1-877-LIV-STNGcomments@livestrongfitness.comwww.livestrongfitness.com
LS9.9T, LS12.09T Rev. 1.3 | © 2009 Johnson Health Tech North America, Inc. | Designed & Engineered in the U.S.A. | Made in China
MAY BE COVERED BY ONE OR MORE PATENTS OR PATENTS PENDING
US 6273843TW 494765CN 03206094.7US 6682460
TW 586429US 7104930CN 01230904.4
DONOTRETURNTOTHERETAILERif you have any problems during assembly or if parts are missing.
NOTE: Please read the TROUBLESHOOTINg section in the TREADMILL gUIDE before contacting Customer Tech Support.
CUSTOMER TECH SUPPORT