Embed Size (px)
Citation preview
Training/User
Manual –
General
Navigation

1
Table of Contents
General Navigation ................................................................................................................... 2
Logging In ............................................................................................................................. 2
MMX Dashboard ................................................................................................................... 4
Icon Review ........................................................................................................................... 5
Additional Icons ..................................................................................................................... 5
Overview of Entering Data .................................................................................................... 7
Naming Assets ...................................................................................................................... 8
Creating, Copying, Modifying and Saving Records ............................................................... 8
Records ................................................................................................................................. 8
Creating Records ............................................................................................................... 9 Copying Records ............................................................................................................. 10 Modifying Records ........................................................................................................... 10 Deleting Records ............................................................................................................. 10 Selecting Multiple Records .............................................................................................. 11 Using Lists ....................................................................................................................... 11 Lists ................................................................................................................................. 11
Adding Items to a List ................................................................................................... 11 Removing Items from a List ......................................................................................... 11
Querying Records (Filter Row) ............................................................................................ 12
Filtering Records .............................................................................................................. 12 Default Filter .................................................................................................................... 12 Filter Types ...................................................................................................................... 12
Using the Assets Record Navigator .................................................................................... 13
Record Navigator ............................................................................................................. 13 Selecting a record ............................................................................................................ 14 Sorting Columns .............................................................................................................. 14 Reordering Columns ........................................................................................................ 15 Resizing Columns ............................................................................................................ 16 Icon List ........................................................................................................................... 16 The Grid ........................................................................................................................... 17 Navigation Tree ............................................................................................................... 17 Detail Rows...................................................................................................................... 18
Utilizing Drop-Down Lists and Pop-ups ............................................................................... 18
Drop-Downs/Lookup Lists ................................................................................................ 18 To add an item to a drop-down: ................................................................................... 18 To remove an item from a drop-down: ......................................................................... 19 To edit an item in a drop-down: .................................................................................... 19 To use a drop-down: .................................................................................................... 19
Pop-ups ........................................................................................................................... 20 Currency Drop-Downs ..................................................................................................... 20 Record Notes ................................................................................................................... 21
2
General Navigation
Logging In
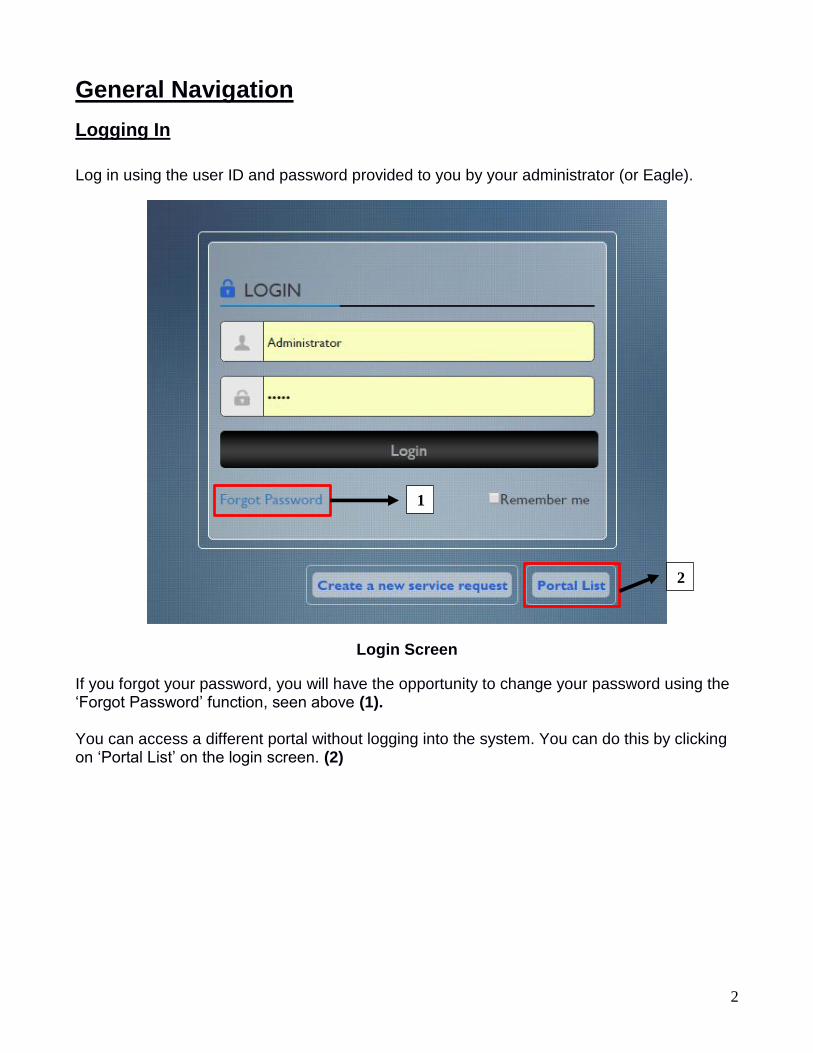
Log in using the user ID and password provided to you by your administrator (or Eagle).
Login Screen
If you forgot your password, you will have the opportunity to change your password using the ‘Forgot Password’ function, seen above (1). You can access a different portal without logging into the system. You can do this by clicking on ‘Portal List’ on the login screen. (2)
1
2

3
Forgot Password
Once prompted, you will be led to the ‘Forgot Password’ screen. You’ll be instructed to enter
your username or the email you used to register the account (1). When you click submit, a
link will be sent to your email, where you can recover your account (2).
1
2

4
MMX Dashboard
After logging in, the Proteus MMX dashboard will display. The administrator dashboard is
pictured below. Worker views can vary based on the specific rights assigned to specific users
or roles. Remember that all field names can be customized. The graphics on the dashboard
are dynamic. For example, if a specific employee or contractor is selected, the graphic will
update to reflect their work status.
Dashboard
Select the arrow to the right of the screen to bring up additional information, such as Message
Board and My Work Orders. The Message Board allows you to send messages to other users
of Proteus MMX. My Work Orders will show all active work orders assigned to the person
logged into Proteus MMX.
Message Board & My Work Orders
5
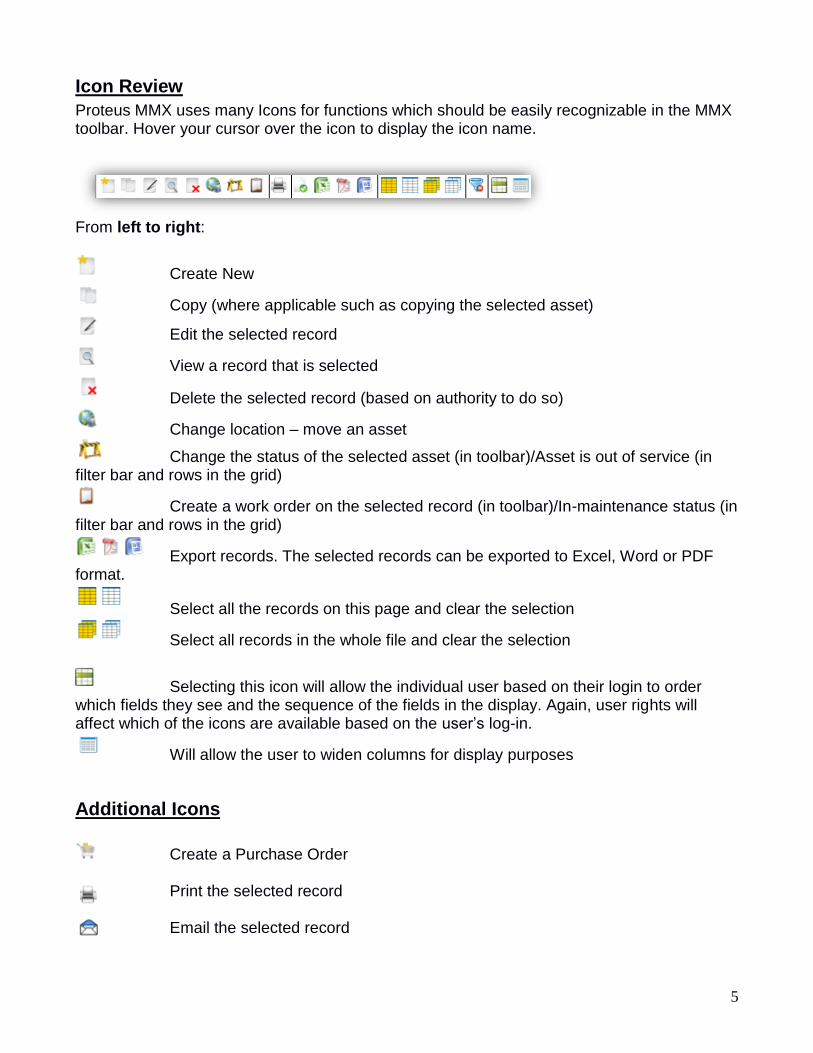
Icon Review
Proteus MMX uses many Icons for functions which should be easily recognizable in the MMX toolbar. Hover your cursor over the icon to display the icon name.
From left to right:
Create New
Copy (where applicable such as copying the selected asset)
Edit the selected record
View a record that is selected
Delete the selected record (based on authority to do so)
Change location – move an asset
Change the status of the selected asset (in toolbar)/Asset is out of service (in filter bar and rows in the grid)
Create a work order on the selected record (in toolbar)/In-maintenance status (in filter bar and rows in the grid)
Export records. The selected records can be exported to Excel, Word or PDF format.
Select all the records on this page and clear the selection
Select all records in the whole file and clear the selection
Selecting this icon will allow the individual user based on their login to order which fields they see and the sequence of the fields in the display. Again, user rights will affect which of the icons are available based on the user’s log-in.
Will allow the user to widen columns for display purposes
Additional Icons
Create a Purchase Order Print the selected record Email the selected record
6
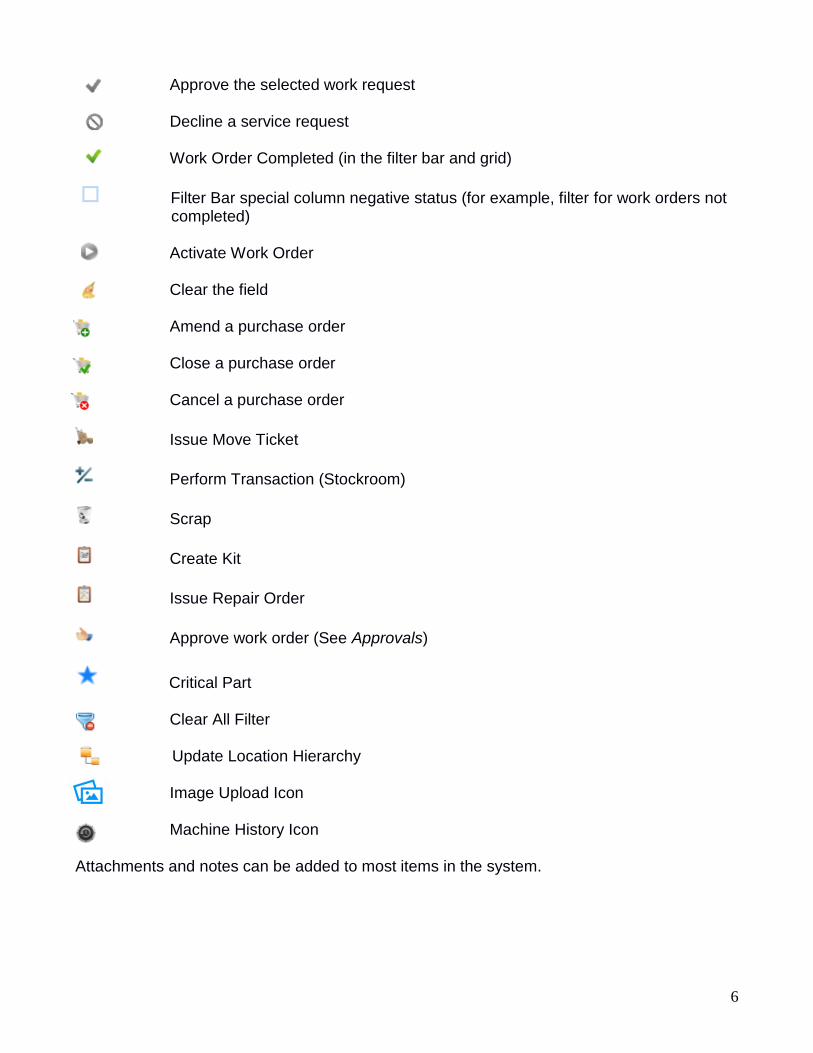
Approve the selected work request Decline a service request Work Order Completed (in the filter bar and grid)
Filter Bar special column negative status (for example, filter for work orders not completed)
Activate Work Order Clear the field Amend a purchase order Close a purchase order Cancel a purchase order
Issue Move Ticket
Perform Transaction (Stockroom)
Scrap
Create Kit
Issue Repair Order
Approve work order (See Approvals)
Critical Part Clear All Filter
Update Location Hierarchy Image Upload Icon Machine History Icon Attachments and notes can be added to most items in the system.
7
Overview of Entering Data
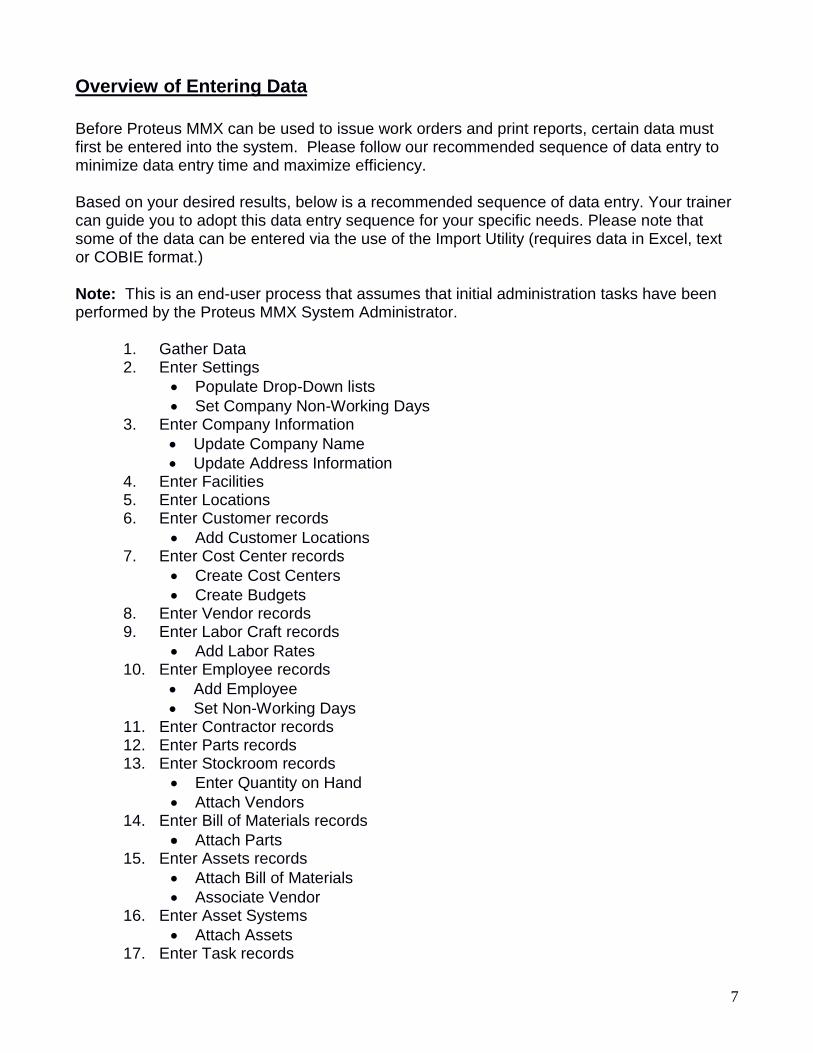
Before Proteus MMX can be used to issue work orders and print reports, certain data must first be entered into the system. Please follow our recommended sequence of data entry to minimize data entry time and maximize efficiency. Based on your desired results, below is a recommended sequence of data entry. Your trainer can guide you to adopt this data entry sequence for your specific needs. Please note that some of the data can be entered via the use of the Import Utility (requires data in Excel, text or COBIE format.) Note: This is an end-user process that assumes that initial administration tasks have been performed by the Proteus MMX System Administrator.
1. Gather Data 2. Enter Settings
• Populate Drop-Down lists
• Set Company Non-Working Days 3. Enter Company Information
• Update Company Name
• Update Address Information 4. Enter Facilities 5. Enter Locations 6. Enter Customer records
• Add Customer Locations 7. Enter Cost Center records
• Create Cost Centers
• Create Budgets 8. Enter Vendor records 9. Enter Labor Craft records
• Add Labor Rates 10. Enter Employee records
• Add Employee
• Set Non-Working Days 11. Enter Contractor records 12. Enter Parts records 13. Enter Stockroom records
• Enter Quantity on Hand
• Attach Vendors 14. Enter Bill of Materials records
• Attach Parts 15. Enter Assets records
• Attach Bill of Materials
• Associate Vendor 16. Enter Asset Systems
• Attach Assets 17. Enter Task records
8
• Attach Labor Crafts 18. Enter Tools 19. Enter Work Order Master records
• Attach Assets, Tasks, and Parts as necessary
• Schedule Work Orders as necessary 20. Enter Work Order records
• Attach Assets, Tasks, and Parts as necessary 21. Enter Purchasing Requisition records
• Assign Purchase Order Numbers
• Attach Blanket Purchase Orders
Note: Keep in mind that Eagle Technology offers data collection and data entry services to assist in the gathering and entering of data. MMX’s Import Templates can also be used to populate most tabs.
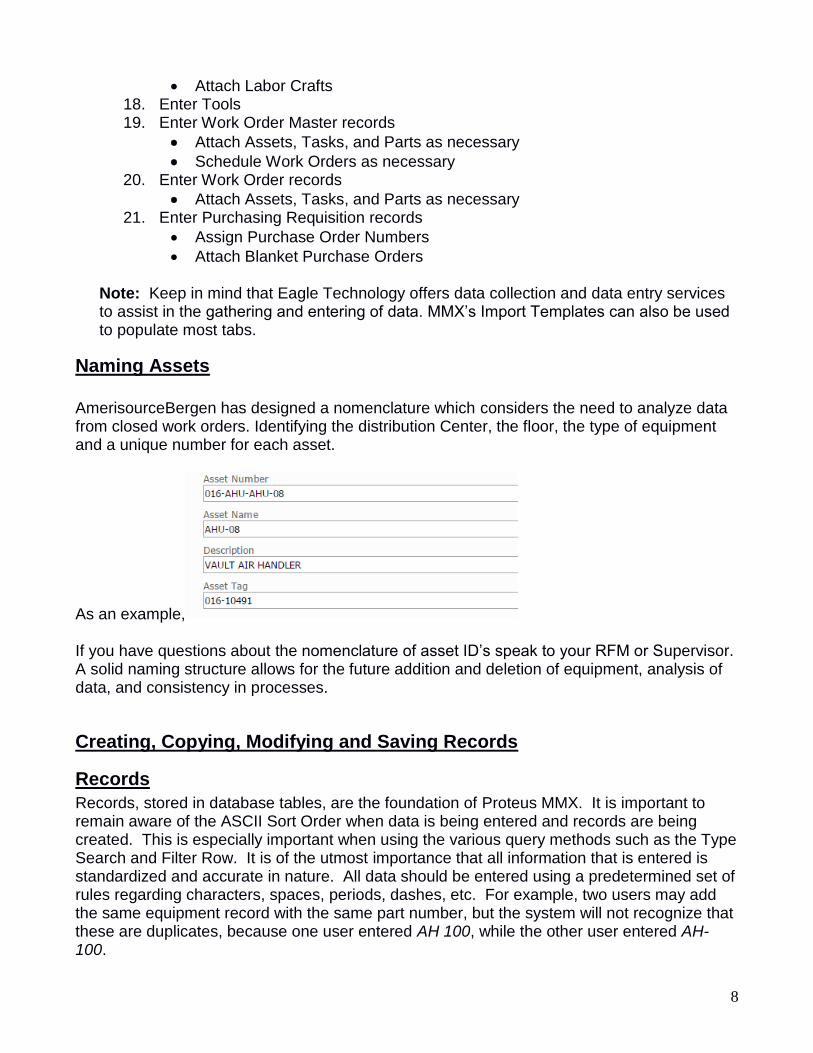
Naming Assets
AmerisourceBergen has designed a nomenclature which considers the need to analyze data from closed work orders. Identifying the distribution Center, the floor, the type of equipment and a unique number for each asset.
As an example, If you have questions about the nomenclature of asset ID’s speak to your RFM or Supervisor. A solid naming structure allows for the future addition and deletion of equipment, analysis of data, and consistency in processes.
Creating, Copying, Modifying and Saving Records
Records
Records, stored in database tables, are the foundation of Proteus MMX. It is important to remain aware of the ASCII Sort Order when data is being entered and records are being created. This is especially important when using the various query methods such as the Type Search and Filter Row. It is of the utmost importance that all information that is entered is standardized and accurate in nature. All data should be entered using a predetermined set of rules regarding characters, spaces, periods, dashes, etc. For example, two users may add the same equipment record with the same part number, but the system will not recognize that these are duplicates, because one user entered AH 100, while the other user entered AH-100.
9
Creating Records
The creation of a new record is the first step to unlocking the features of Proteus MMX. Records may be created from scratch from within the following Pages:
Functional Area Pages
Assets Assets, Asset Systems
Inventory Parts, Stockrooms, Bill of Materials, Tools
Personnel Employees, Labor Crafts
Providers Contractors, Vendors
Purchasing Requisitions, Purchase Orders, Blanket Purchase Orders
Work Orders Work Orders, Work Order Masters, Tasks
Company Company Information, Cost Centers, Customers, Facilities, Locations
Rights Users, Roles
To create new records:
1. Select a menu and open the page in which to add a new record.
2. Select the New icon in the Record Navigator. Depending on the current page, the user will see either a popup or the user will be brought to the Details screen. All tabs will be displayed and the user may enter data for the new record. When moving among fields during the data entry process, use the Tab key rather than the Enter key.
3. Once all data is entered throughout the screen, the user may save the record in the database by selecting the Save icon.
4. The user will be returned to the Record Navigator and the newly created record will be displayed in the grid per the currently sorted column.
Note: Typically the Number and Name fields (e.g. Asset Number and Asset Name) are required fields that need to be populated before you can save a record.
10
Copying Records
A quick way to create a new record that is like an existing record is to use the Copy feature.
To copy records:
1. Select a menu and open the page in which to copy a new record. 2. Select a record that you wish to copy from the Record Navigator and select the Copy
icon. 3. Modify the record data as needed, remaining aware of fields that are required or must
be unique.
4. Select the Save icon. 5. The modified record will be copied and displayed in the grid per the currently sorted
column.
Note: There are certain fields that are both required to be present and required to be unique. Please see the Reference section of the selected page for further information.
Modifying Records
The modification of records in Proteus MMX can be done by modifying the record details.
To modify records:
1. Select a menu and open the page in which to modify a record. 2. Select a record that you wish to modify from the Record Navigator.
3. Select the Edit icon. 4. Modify the record data as needed, remaining aware of fields that are required or must
be unique.
5. Select the Save icon. 6. The record will be modified and displayed in the grid per the currently sorted column.
Deleting Records
The deletion of records in Proteus MMX can be completed quickly through the Record Navigator. Regarding incorrect or obsolete records, the user has the option to delete one record at a time as well as the option to delete multiple records at the same time. To delete records:
1. Select a menu and open the page in which to delete a record. 2. Select a record from the Record Navigator.
3. Select the Delete icon. 4. If an error message is displayed upon attempt to delete a record, this means that the
record cannot be deleted due to its current use elsewhere in Proteus MMX. For example, a part cannot be deleted from Parts Master if it is currently associated to a Work Order. Please contact the System Administrator for more information.

11
Selecting Multiple Records
To select multiple records in a grid, you can use “Ctrl” and “Shift” keys in a similar manner as Windows Explorer. Keep “Ctrl” key pressed, and select multiple records to select them. Or highlight a record, press “Shift” key and select another record to select all records between the two.
Using Lists
Lists
In Proteus MMX, lists can be thought of as a group of records grouped together for a specific purpose. Lists are usually listed as tabs in the Details section of a specific page. For example, in Work Order Master we have lists for Assets, Tasks, and Parts. The user can compile a listing of all assets, tasks, and parts that are associated with that specific Work Order Master.
Note: Certain lists are read-only, and thus, the user does not can add or remove from them.
Adding Items to a List
1. Select the Add icon. 2. Select a record from the pop-up 3. Fill in all data/required fields. 4. Confirm your selection. 5. The record will now be added to the list.
Removing Items from a List
1. Select a record from the grid.
2. Select the Remove icon. 3. Confirm your selection. 4. The record will now be removed from the list.

12
Querying Records (Filter Row)
Filtering Records
Databases can become extremely large due to file size and record population/complexity. The user can considerably cut down the time it takes to locate records by utilizing the Filter Row that is a part of Proteus MMX. The Filter Row is always displayed in the grid, directly under the column headers.
Filter Row (Work Order Tasks) To filter records:
1. Select the menu of the relevant Functional Area and open the page in which to use the Filter Row.
2. Choose the field by which to filter and enter the search string.
Note: The filter process might take a moment depending on the complexity of the filter as well as the number of records in the database Note: To clear a filter, the user can delete the text in the Filter Row. The Clear All Filter icon can be used to remove the filters from all fields at once and to ensure no filtering is in in a field off-screen to the left or the right.
Default Filter
Proteus MMX contains functionality to automatically open a page with a preset filter. Once a filter is placed on a filter row, the filter will remain in place until the user clears it. This can be extremely beneficial for users who continually filter/sort by predetermined criteria.
Filter Types
By default, the Filter Row utilizes the Starts With method of filtering. Proteus MMX will display only those records which start with the requested text when this is selected in the drop-down next to the field in the Filter Row. Example: The user wants to view all assets that begin with: FAN. Result: Only assets in which the Asset Number begins with FAN will be shown.

13
The other filter types are shown here:
Additional Filter Types
Date fields have the following filter types:
Date Field Filter Types Clear All Filter The Record Navigator allows you to quickly clear any filters you’ve selected. Once prompted, the Clear All Filter will revert the Record Navigator view back to its default view settings.
Using the Assets Record Navigator
Record Navigator
The Record Navigator allows you to navigate through data displays. The Record Navigator is generally comprised of two main sections:
1. A Navigation Tree/browser pane. 2. A Grid containing every record in the database with columns that can be sorted
(ascending/descending) as well as positioned (horizontal column ordering). These preferences are saved on a per-user basis.
Note: The records displayed in the grid will be displayed based on the currently selected node in the Navigation Tree. If the topmost node is selected, all records will be displayed. Otherwise, they will be shown only for the currently selected node. Note: In some instances, there is no navigation tree/browser.

14
Record Navigator (Assets)
Selecting a record
To select a record, select the row of the record.
Record Selected
Sorting Columns
Columns in the Record Navigator can be sorted in either ascending or descending order. To sort a column, select the Sort By drop-down to choose the column and then select from the Sort Order drop-down menu.
Record Navigator Sorted in Descending Order

15
Reordering Columns Columns in the Record Navigator can be reordered in any order as well as hidden. To reorder the columns, simply select the Column Setting icon above the Record Navigator.
Column Setting Icon
From the Grid Column Setting dialog box, you can select column names on the right and move them to the left side if want them removed from the Record Navigator view. You can also change the ordering of the Record Navigator by selecting a column name on the right and using the up and down arrows to change the position of those column headers.
Arrows Changing the Position of Columns

16
Resizing Columns
Columns in the Record Navigator can be resized. To resize the columns, simply select the Column Width Setting icon above the Record Navigator.
Column Width Setting Icon
Select the + or – signs to expand or shrink the column widths.
Record Navigator Column Width Setting
Icon List
The Icon List, located above the Record Navigator, contains all tasks and actions that are relevant to and can be performed on the current page. The tasks will refresh based on the currently selected record. For example, if there are no records on the screen, the only option active will be New.
Icon List
17
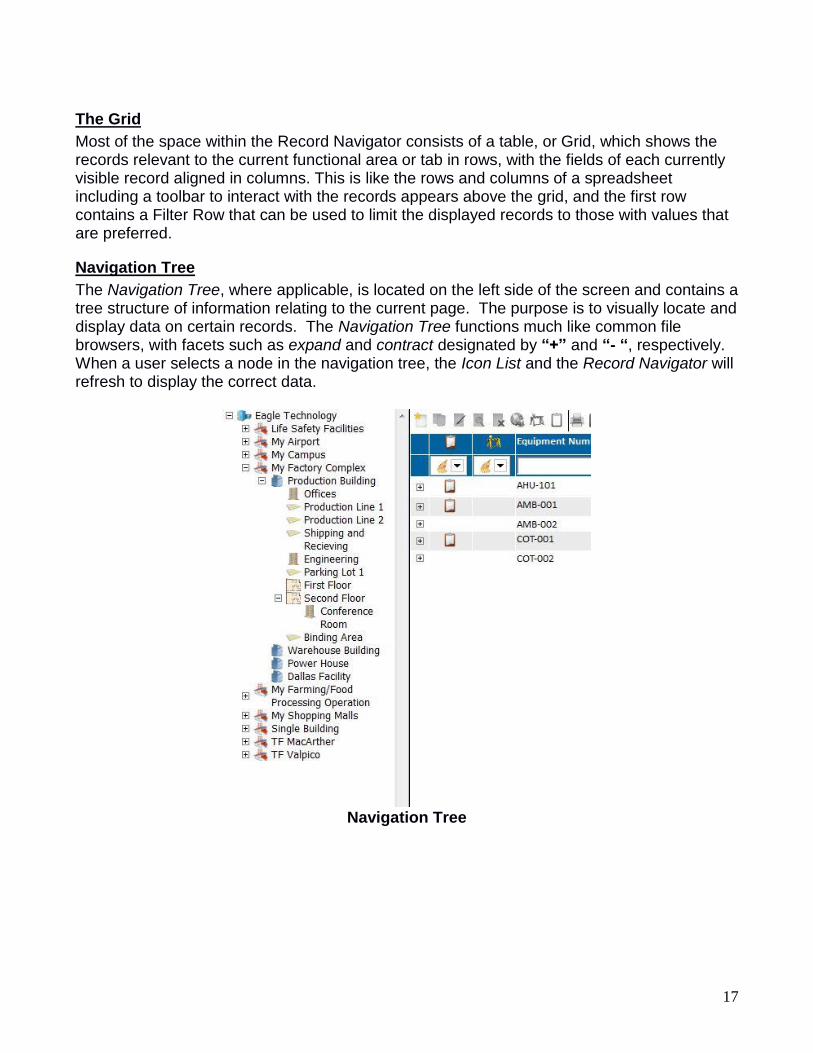
The Grid
Most of the space within the Record Navigator consists of a table, or Grid, which shows the records relevant to the current functional area or tab in rows, with the fields of each currently visible record aligned in columns. This is like the rows and columns of a spreadsheet including a toolbar to interact with the records appears above the grid, and the first row contains a Filter Row that can be used to limit the displayed records to those with values that are preferred.
Navigation Tree
The Navigation Tree, where applicable, is located on the left side of the screen and contains a tree structure of information relating to the current page. The purpose is to visually locate and display data on certain records. The Navigation Tree functions much like common file browsers, with facets such as expand and contract designated by “+” and “- “, respectively. When a user selects a node in the navigation tree, the Icon List and the Record Navigator will refresh to display the correct data.
Navigation Tree

18
Detail Rows
Detail Rows are rows in the record list that can be expanded to show related data. Detail rows have a “+” icon next to each record indicating there is more information.
Detail Rows
Utilizing Drop-Down Lists and Pop-ups
Drop-Downs/Lookup Lists
Drop-downs, sometimes referred to as lookup/reference lists are selection panels containing a list of choices for the corresponding field. They are accessed by selecting on the drop-down arrow on the right side of the field entry box. These lists are read-only and assist the user in selecting and adding data into the appropriate fields.
Note: Drop-Down Lists are populated through the Settings Functional Area. These will be system wide. All population of drop-down lists will be done from this single area.
To add an item to a drop-down:
1. Go to the Settings menu > Company > States (for example).
2. Select New. 3. Enter your selection.
4. Select Save. 5. Repeat as necessary.

19
To remove an item from a drop-down:
1. Go to the Settings menu. 2. Select a page and a setting. 3. Select on your selection.
4. Select Delete. 5. Repeat as necessary.
To edit an item in a drop-down:
1. Go to the Settings. 2. Select a page and a setting. 3. Select on your selection.
4. Select Edit. 5. Edit your information 6. Repeat as necessary.
Note: If you edit an item in a dropdown, it will be changed system-wide. However, history records will not be changed, as they have already been closed.
To use a drop-down:
1. Select the arrow to the right of a field providing a drop-down list. 2. Select the record from the list. 3. The piece of data you selected will be inserted into the field.
Note: Typing a letter or series of letters in the dropdown will filter the list to items beginning with that letter or series of letters. Items not matching the type-search characters will not be visible again until the field is cleared by deleting the text that was previously entered.
Drop-Down (Priority)
20
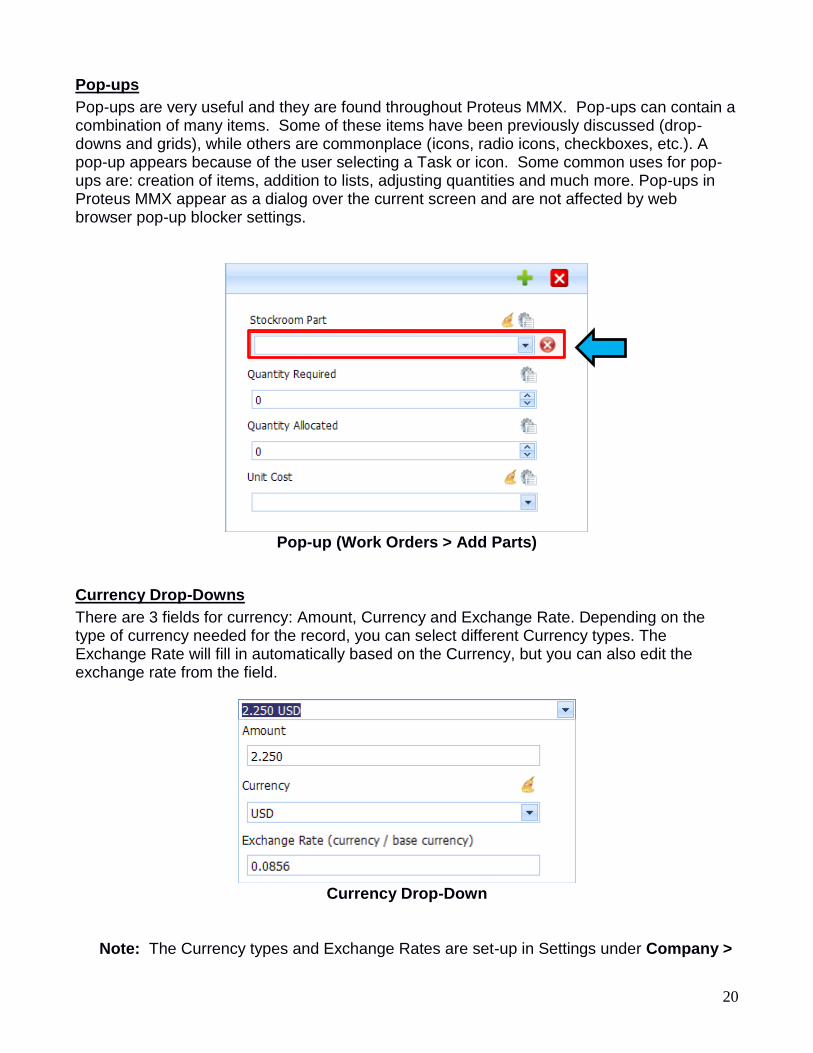
Pop-ups
Pop-ups are very useful and they are found throughout Proteus MMX. Pop-ups can contain a combination of many items. Some of these items have been previously discussed (drop-downs and grids), while others are commonplace (icons, radio icons, checkboxes, etc.). A pop-up appears because of the user selecting a Task or icon. Some common uses for pop-ups are: creation of items, addition to lists, adjusting quantities and much more. Pop-ups in Proteus MMX appear as a dialog over the current screen and are not affected by web browser pop-up blocker settings.
Pop-up (Work Orders > Add Parts)
Currency Drop-Downs
There are 3 fields for currency: Amount, Currency and Exchange Rate. Depending on the type of currency needed for the record, you can select different Currency types. The Exchange Rate will fill in automatically based on the Currency, but you can also edit the exchange rate from the field.
Currency Drop-Down
Note: The Currency types and Exchange Rates are set-up in Settings under Company >

21
Currencies.
Record Notes
The Notes section houses a document editor on which any miscellaneous information associated with the record can be entered. Think of it as a “notepad” with which any relevant information, such as vendor performance, purchasing details, equipment breakdown history, etc., can be recorded. Data can be typed directly into the editor or copied and pasted using the common keyboard shortcuts for these features, Ctrl+C and Ctrl+V, respectively. The Notes section has many of the basic functions that are contained in many of today’s standard word processing software packages. Some of these functions are: copy, cut, paste, undo, redo, and bullet/list. The Notes section is in the details tab of a record.
Details Tab
Notes Section