Embed Size (px)
Citation preview

Child and Adolescent Community Health Community Health Manual
Page 1 of 13
PROCEDURE
Tracheostomy management Scope (Staff): Community Health Nurses
Scope (Area): CACH, WACHS
This document should be read in conjunction with this DISCLAIMER
Contents Aim....................................................................................................................................... 1
Risk ...................................................................................................................................... 1
Background .......................................................................................................................... 1
Key points ............................................................................................................................ 2
Part A: Emergency tube change or reinsertion .................................................................... 3
Respiratory distress management flowchart ........................................................................ 4
Part B: Tube Suction ............................................................................................................ 9
Related policies, procedures and guidelines ...................................................................... 13
References ........................................................................................................................ 13
Aim To provide guidance on the emergency reinsertion of a tracheostomy tube and tracheostomy tube suction to ensure optimal management when caring for a child with a tracheostomy in the school setting.
Risk Client care and safety may be compromised if correct tracheostomy procedures are not followed. Suctioning performed improperly can cause complications such as hypoxia, atelectasis, bradycardia, trauma and infection. Airway impairment can be life threatening.
Background A tracheostomy is a surgical opening into the trachea below the larynx through which an indwelling tube is placed to overcome upper airway obstruction, facilitate mechanical ventilator support and/or the removal of tracheo-bronchial secretions.1
Airway Profile
All children in Western Australia with a tracheostomy will have an Airway Profile which is accessible via a folder on the PCH W drive W: Respiratory/PCH/Tracheostomy. Completion of a HFN030 form is required to obtain access to the folder.
Tracheostomy management
Page 2 of 13 Community Health Manual
The Airway Profile will outline:
• the child’s tracheostomy tube type (cuffed /uncuffed), size and the appropriate smaller size tube.
• suction depth
• ventilator settings, if applicable
• If patient has a speaking valve, whether it is drilled / undrilled and if used throughout the day.2
Key points • All staff must work within their scope of practice.
• Procedures to be performed only by staff with appropriate training.
• Check care plan and Airway Profile to guide clinical care.
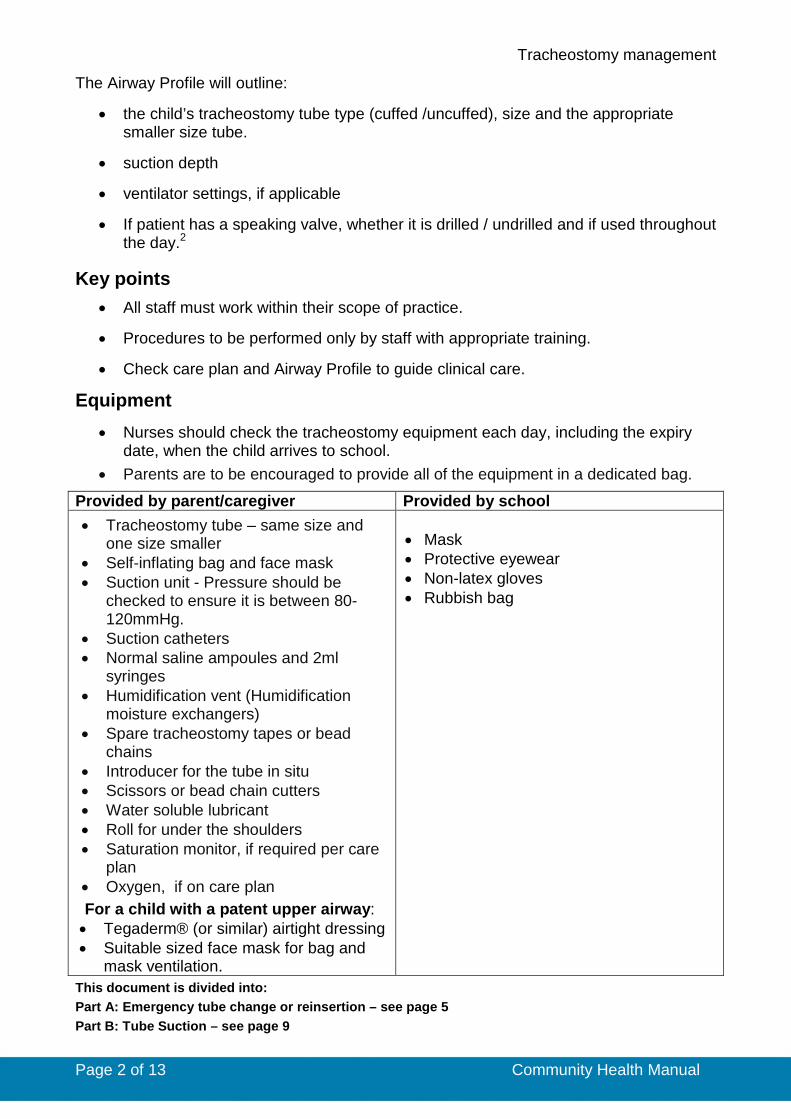
Equipment • Nurses should check the tracheostomy equipment each day, including the expiry
date, when the child arrives to school. • Parents are to be encouraged to provide all of the equipment in a dedicated bag.
Provided by parent/caregiver Provided by school • Tracheostomy tube – same size and
one size smaller • Self-inflating bag and face mask • Suction unit - Pressure should be
checked to ensure it is between 80- 120mmHg.
• Suction catheters • Normal saline ampoules and 2ml
syringes • Humidification vent (Humidification
moisture exchangers) • Spare tracheostomy tapes or bead
chains • Introducer for the tube in situ • Scissors or bead chain cutters • Water soluble lubricant • Roll for under the shoulders • Saturation monitor, if required per care
plan • Oxygen, if on care plan For a child with a patent upper airway: • Tegaderm® (or similar) airtight dressing • Suitable sized face mask for bag and
mask ventilation.
• Mask • Protective eyewear • Non-latex gloves • Rubbish bag
This document is divided into: Part A: Emergency tube change or reinsertion – see page 5 Part B: Tube Suction – see page 9
Tracheostomy management
Page 3 of 13 Community Health Manual
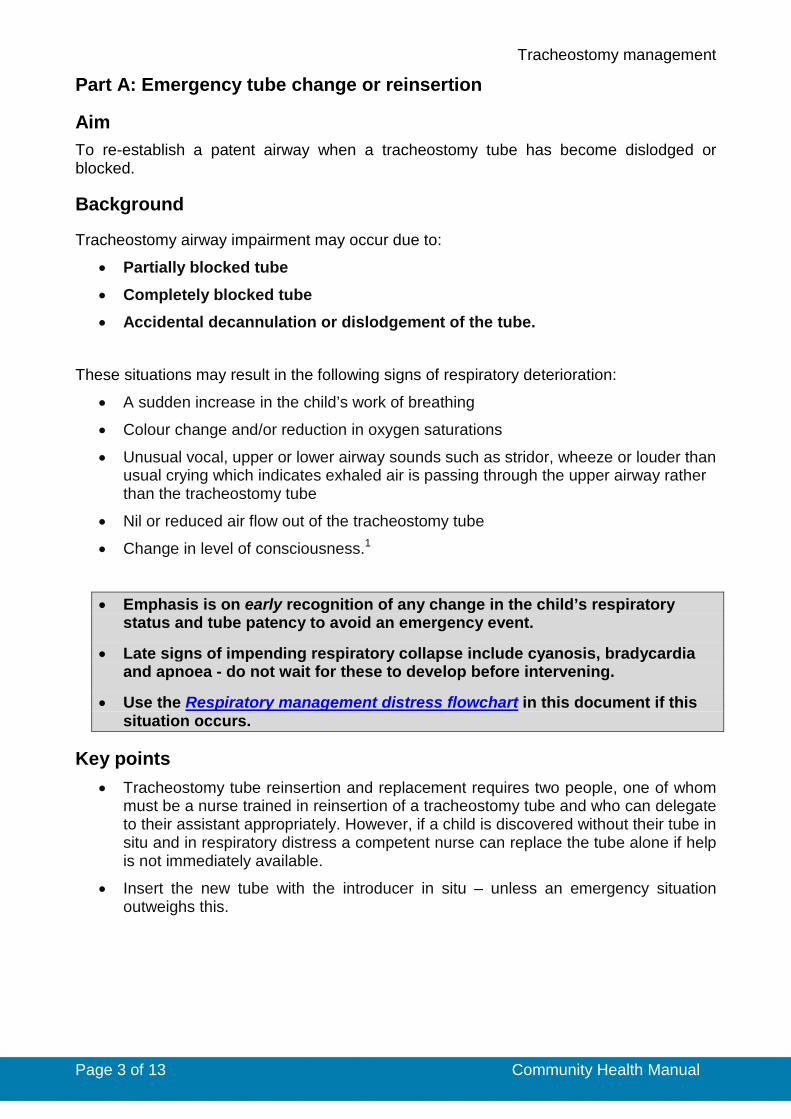
Part A: Emergency tube change or reinsertion
Aim To re-establish a patent airway when a tracheostomy tube has become dislodged or blocked.
Background
Tracheostomy airway impairment may occur due to: • Partially blocked tube
• Completely blocked tube
• Accidental decannulation or dislodgement of the tube.
These situations may result in the following signs of respiratory deterioration:
• A sudden increase in the child’s work of breathing
• Colour change and/or reduction in oxygen saturations
• Unusual vocal, upper or lower airway sounds such as stridor, wheeze or louder than usual crying which indicates exhaled air is passing through the upper airway rather than the tracheostomy tube
• Nil or reduced air flow out of the tracheostomy tube
• Change in level of consciousness.1
• Emphasis is on early recognition of any change in the child’s respiratory status and tube patency to avoid an emergency event.
• Late signs of impending respiratory collapse include cyanosis, bradycardia and apnoea - do not wait for these to develop before intervening.
• Use the Respiratory management distress flowchart in this document if this situation occurs.
Key points • Tracheostomy tube reinsertion and replacement requires two people, one of whom
must be a nurse trained in reinsertion of a tracheostomy tube and who can delegate to their assistant appropriately. However, if a child is discovered without their tube in situ and in respiratory distress a competent nurse can replace the tube alone if help is not immediately available.
• Insert the new tube with the introducer in situ – unless an emergency situation outweighs this.
Tracheostomy management
Page 4 of 13 Community Health Manual
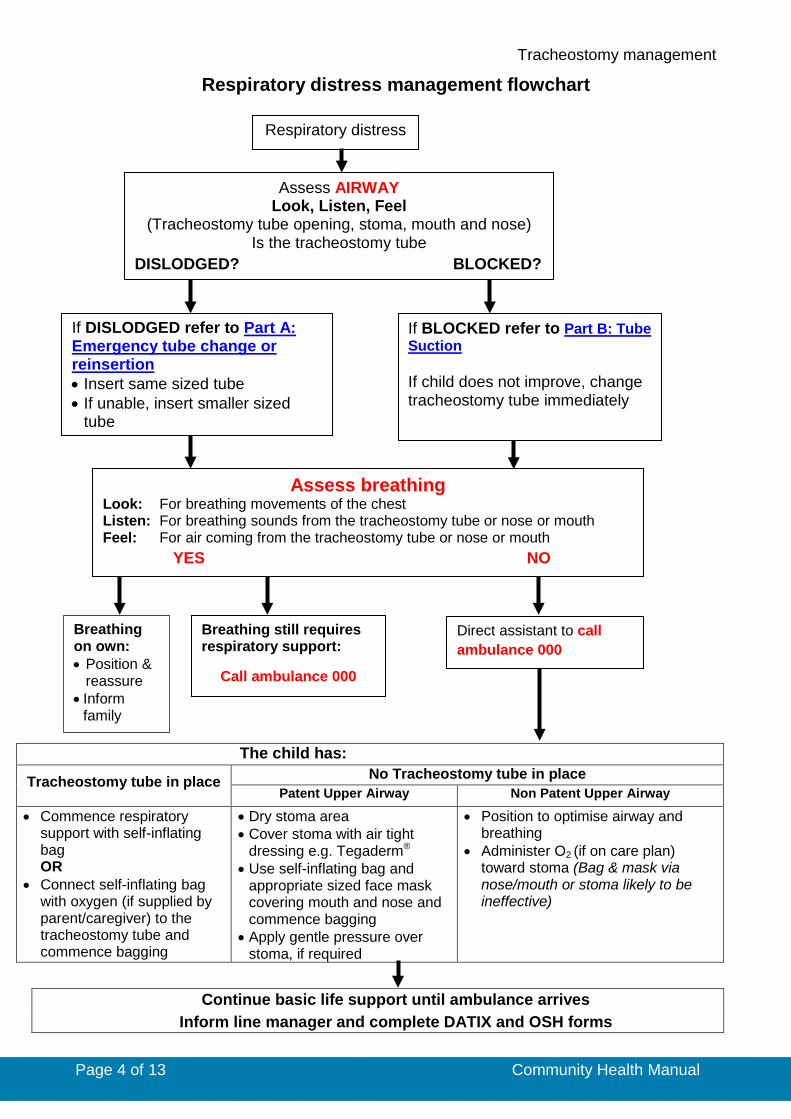
Respiratory distress management flowchart
Respiratory distress
Assess AIRWAY Look, Listen, Feel
(Tracheostomy tube opening, stoma, mouth and nose) Is the tracheostomy tube
DISLODGED? BLOCKED?
If DISLODGED refer to Part A: Emergency tube change or reinsertion • Insert same sized tube • If unable, insert smaller sized
tube
If BLOCKED refer to Part B: Tube Suction If child does not improve, change tracheostomy tube immediately
Assess breathing Look: For breathing movements of the chest Listen: For breathing sounds from the tracheostomy tube or nose or mouth Feel: For air coming from the tracheostomy tube or nose or mouth YES NO
Breathing on own: • Position &
reassure • Inform
family
Breathing still requires respiratory support:
Call ambulance 000
Direct assistant to call ambulance 000
The child has:
Tracheostomy tube in place No Tracheostomy tube in place Patent Upper Airway Non Patent Upper Airway
• Commence respiratory support with self-inflating bag OR
• Connect self-inflating bag with oxygen (if supplied by parent/caregiver) to the tracheostomy tube and commence bagging
• Dry stoma area • Cover stoma with air tight
dressing e.g. Tegaderm® • Use self-inflating bag and
appropriate sized face mask covering mouth and nose and commence bagging
• Apply gentle pressure over stoma, if required
• Position to optimise airway and breathing
• Administer O2 (if on care plan) toward stoma (Bag & mask via nose/mouth or stoma likely to be ineffective)
Continue basic life support until ambulance arrives Inform line manager and complete DATIX and OSH forms

Tracheostomy management
Page 5 of 13 Community Health Manual
Part A: Emergency tube change or reinsertion
Steps Additional Information
1. Before commencing intervention undertake the following. • Check care plan and Airway Profile
to guide clinical care.
• A signed care plan complies with
consent
2. Employ infection control principles, perform hand hygiene and don gloves and other personal protective equipment (PPE) if time allows.
• Addressing the emergency takes precedence over infection control procedures.
3. Position the child.
• Position the child in the most developmentally appropriate position, taking into consideration their clinical status and usual position.
• Maintain the child’s head in midline position.
• A young child may be placed in a semi-recumbent position exposing the tracheostomy tube.
• Older children may prefer to sit with the neck extended.
• Open/remove the child’s shirt to ensure good visibility of the chest and stoma.
• If child is unwell or desaturation is a concern, child can remain in wheelchair in a reclined position with shoulder roll.
• A rolled up towel placed under the shoulders assists to extend the neck and expose the stoma and tube.
4. Prepare the equipment using the non-touch technique.
• Maintain the sterility of the catheter. • See airway profile, care plan or
check size on tube in situ. • Open a replacement tube the same
size as the one in situ. • Place the unopened smaller tube
within easy reach. • Avoid touching the inner cannula of
the tube. • The same tracheostomy tube can be
reinserted if a replacement is not readily available.
5. Lubricant
• A small amount of water soluble lubricant can be used to aid
• Coat the outside of the tube with a small amount of water soluble lubricant if required.
• It is advisable to use single use

Tracheostomy management
Page 6 of 13 Community Health Manual
Steps Additional Information
tracheostomy tube insertion. This is only required if: o the tube does not insert easily o there is a history of difficult tube
changes.
sachets of lubricant to enhance infection control.
• Ensure that the lumen of the tube does not become obstructed with lubricant.
6. Insert and remove the introducer several times to ensure it can be easily removed and leave in situ.
• Introducer in new tubes can often be tight to remove.
• Inserting the introducer avoids tissue damage to the trachea during insertion and stiffens some tubes.
7. Remove excess secretions/vomit present.
• If necessary, suction the tracheostomy tube. See Part B: Tube Suction
• Do not insert a suction catheter directly into the stoma.
8. Removal of tracheostomy tube a) Uncuffed tube • Remove the tube gently with a smooth
continuous motion of the hand away from child’s chest.
• Check the stoma for redness, granulation, bleeding, and abrasions.
• Wipe away excessive secretions with a cloth.
It is a normal reflex for the child to cough on removal.
b) Cuffed tube • Deflate the cuff with a syringe just
before removing the tracheostomy tube.
• Suction the tracheostomy tube to remove secretions released from above the cuff.
• Ensure the cuff pilot balloon is completely deflated.
• If the cuff is inflated and/or manual inflation occurs this can compress the trachea and cause emphysema.
• It is essential to remove oropharyngeal secretions to prevent these moving into the trachea.
9. In an emergency cut the tapes and/or chains.
• Always remove the tracheostomy tapes/chain prior to reinserting a tracheostomy tube.
• When sizing the chains identify the
link (space between balls) to be cut and only use the bead chain cutters on that link.
• Do not press the bead chain cutters onto a link you do not intend to cut as this may weaken the link.
• A tube inserted under tension is more likely to enter a false passage.
10. Insert the tracheostomy tube. • Wait for the child to stop coughing if
• Trying to insert the tube whilst the child is coughing may be difficult.

Tracheostomy management
Page 7 of 13 Community Health Manual
Steps Additional Information
possible. • Ensure child’s head is in a midline
position. • Insert the tube with an introducer. • Approach stoma from the chest and
insert using a curving motion.
The airway profile/care plan will indicate how long a child may manage without tube inserted.
11. If any stomal granulation present, use the tip of the tube to gently sweep to the side.
• Trauma to stomal granulation may cause excessive bleeding.
• Advise parent/caregiver to seek follow up with respiratory team.
12. Remove the introducer immediately and hold the new tube in place.
• Velcro tapes should be trimmed to form a point (as shown below).
• Place your finger under the tape at the
back of the neck. • Ensure device is firm but not tight. • Check the tapes after 15 minutes to 1
hour and readjust if necessary.
• Do not shorten the length of the Velcro – less Velcro means the airway is less secure.
• For foam and Velcro tapes it may be necessary to secure using adhesive tapes.
• It should only be possible to slip
one finger comfortably between the ties and the child’s neck.
• If tapes/beads are too tight, pressure areas will develop.
13. Following insertion of a cuffed tube: • Inflate the cuff with air/water as soon
as the tube is in place.
• Inflate cuff to the desired volume as stipulated on the airway protocol.
• The cuff should only be inflated with the smallest volume possible to reduce leakage around the tracheostomy tube. Pressure should always be less than 25cm H2O.
• Over inflation of the cuff can cause trauma to the tracheal wall.
• Refer to Perth Children’s Hospital (PCH) Tracheostomy Management procedure listed at the end for further information.
14. Check breathing. • Look, listen and feel
• An ungloved finger over the connector will allow assessment of airflow from the tracheostomy tube.

Tracheostomy management
Page 8 of 13 Community Health Manual
Steps Additional Information
o Chest rise o Breath sounds, o Airflow from the tube, o Assess colour.
• If airflow is not present (child may be distressed +/- cyanosed) remove the tube and insert smaller size tube.
• Reassess breathing.
• Very rarely the tracheostomy tube may be inserted into a false passage. Airflow will not be felt from the tracheostomy tube if this occurs.
• If bronchospasm/tracheomalacia occurs allow child time to settle, if possible, before assessing air entry and attempting to reinsert.1
15. If the child vomits during a tube change:
• Continue to insert tube and secure • Position on to side • Assess breathing • Suction tracheostomy tube • If concerned, or there is respiratory
distress following the tube change, assess for aspiration.
Call ambulance if required.
The Clinical handover/Referral form (CHS 663- CACH only) should be completed. WACHS nurses should follow local processes as required.
16. Report any difficulties in tube reinsertion to the parents/caregivers.
• Contact parents to inform them of treatment.
• Document in progress notes. • Inform line manager and complete
DATIX and OSH forms. • Complete a Clinical
handover/Referral form (CHS 663- CACH only), if required.
17. Document actions according to local
processes.
Tracheostomy management
Page 9 of 13 Community Health Manual
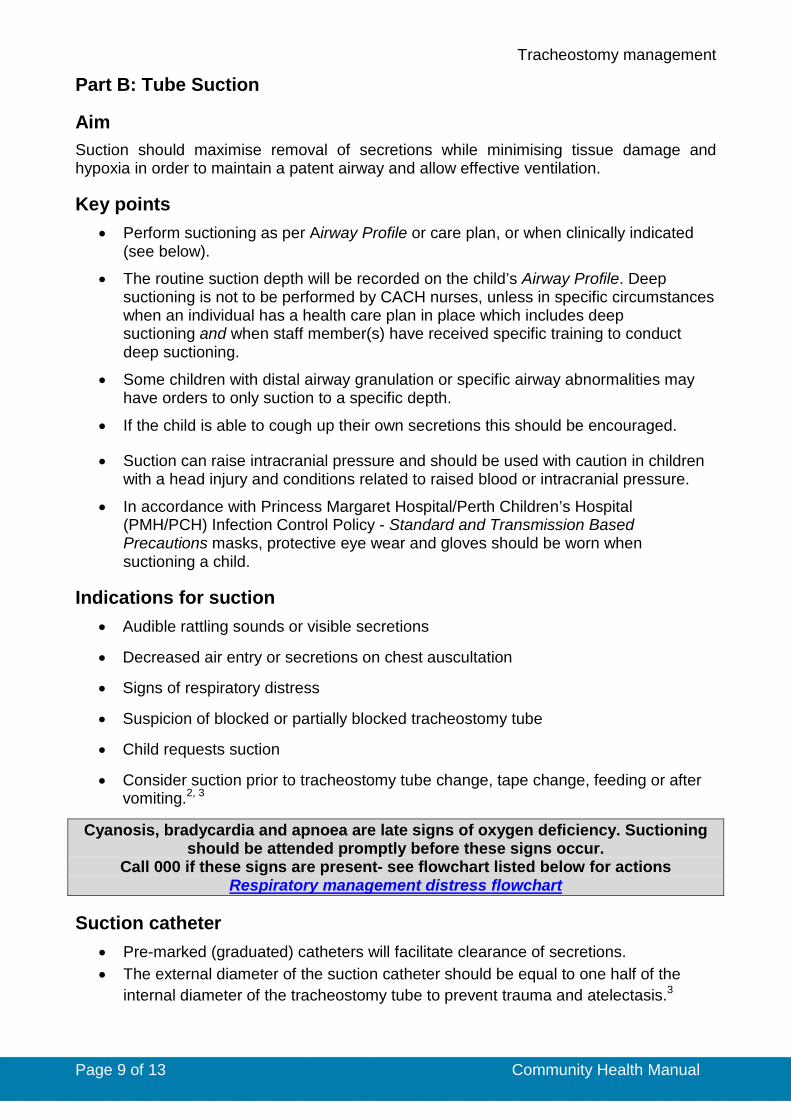
Part B: Tube Suction
Aim Suction should maximise removal of secretions while minimising tissue damage and hypoxia in order to maintain a patent airway and allow effective ventilation.
Key points • Perform suctioning as per Airway Profile or care plan, or when clinically indicated
(see below).
• The routine suction depth will be recorded on the child’s Airway Profile. Deep suctioning is not to be performed by CACH nurses, unless in specific circumstances when an individual has a health care plan in place which includes deep suctioning and when staff member(s) have received specific training to conduct deep suctioning.
• Some children with distal airway granulation or specific airway abnormalities may have orders to only suction to a specific depth.
• If the child is able to cough up their own secretions this should be encouraged.
• Suction can raise intracranial pressure and should be used with caution in children with a head injury and conditions related to raised blood or intracranial pressure.
• In accordance with Princess Margaret Hospital/Perth Children’s Hospital (PMH/PCH) Infection Control Policy - Standard and Transmission Based Precautions masks, protective eye wear and gloves should be worn when suctioning a child.
Indications for suction • Audible rattling sounds or visible secretions
• Decreased air entry or secretions on chest auscultation
• Signs of respiratory distress
• Suspicion of blocked or partially blocked tracheostomy tube
• Child requests suction
• Consider suction prior to tracheostomy tube change, tape change, feeding or after vomiting.2, 3
Cyanosis, bradycardia and apnoea are late signs of oxygen deficiency. Suctioning should be attended promptly before these signs occur.
Call 000 if these signs are present- see flowchart listed below for actions Respiratory management distress flowchart
Suction catheter • Pre-marked (graduated) catheters will facilitate clearance of secretions. • The external diameter of the suction catheter should be equal to one half of the
internal diameter of the tracheostomy tube to prevent trauma and atelectasis.3
Tracheostomy management
Page 10 of 13 Community Health Manual
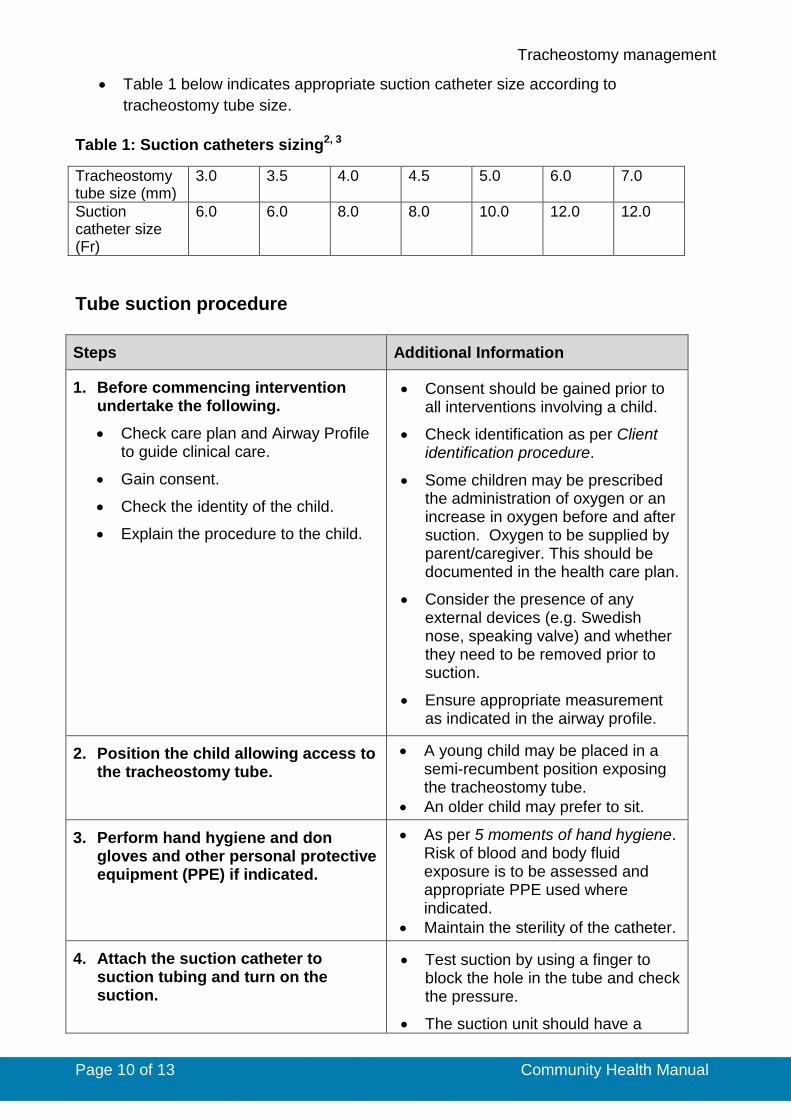
• Table 1 below indicates appropriate suction catheter size according to tracheostomy tube size.
Table 1: Suction catheters sizing2, 3
Tracheostomy tube size (mm)
3.0 3.5 4.0 4.5 5.0 6.0 7.0
Suction catheter size (Fr)
6.0 6.0 8.0 8.0 10.0 12.0 12.0
Tube suction procedure
Steps Additional Information
1. Before commencing intervention undertake the following. • Check care plan and Airway Profile
to guide clinical care.
• Gain consent.
• Check the identity of the child.
• Explain the procedure to the child.
• Consent should be gained prior to all interventions involving a child.
• Check identification as per Client identification procedure.
• Some children may be prescribed the administration of oxygen or an increase in oxygen before and after suction. Oxygen to be supplied by parent/caregiver. This should be documented in the health care plan.
• Consider the presence of any external devices (e.g. Swedish nose, speaking valve) and whether they need to be removed prior to suction.
• Ensure appropriate measurement as indicated in the airway profile.
2. Position the child allowing access to the tracheostomy tube.
• A young child may be placed in a semi-recumbent position exposing the tracheostomy tube.
• An older child may prefer to sit.
3. Perform hand hygiene and don gloves and other personal protective equipment (PPE) if indicated.
• As per 5 moments of hand hygiene. Risk of blood and body fluid exposure is to be assessed and appropriate PPE used where indicated.
• Maintain the sterility of the catheter.
4. Attach the suction catheter to suction tubing and turn on the suction.
• Test suction by using a finger to block the hole in the tube and check the pressure.
• The suction unit should have a

Tracheostomy management
Page 11 of 13 Community Health Manual
Steps Additional Information pressure gauge. Pressure should be between 80- 120mmHg/10-16kpa.2
5. Check suction pressure. Place a thumb over the port and kink the flexible catheter just below the port.
• Higher pressure may cause alveolar collapse, mucosal damage or catheter collapse.
• Inadequate suction pressure may not remove enough secretions resulting in increased number of catheter passes.
6. Determine the depth • Routine suction depth is 5mm below
the end of the tracheostomy tube. This will be recorded on the child’s Airway Profile or care plan.
• Suctioning secretions from the tracheostomy tube or wiping with a tissue may be all that is required for a child with an adequate cough.
7. The child should be observed during the procedure for signs of respiratory and cardiovascular instability and discomfort.
• If this occurs suction will need to be discontinued.
8. Routine suction, as per care plan. • Measure the length of the suction
catheter.
• Maintain sterility of the catheter tip.2
9. Insert catheter into tracheostomy tube.
• Each pass of the suction catheter should last no longer than 5-10 seconds.
• If the catheter does not pass easily into the tracheostomy tube, suspect a blocked or partially obstructed tube.
• Refer to Respiratory distress management flowchart. Call for assistance.
• Children will tolerate different durations of suctioning.
10. Assess the amount, colour and
Tracheostomy management
Page 12 of 13 Community Health Manual
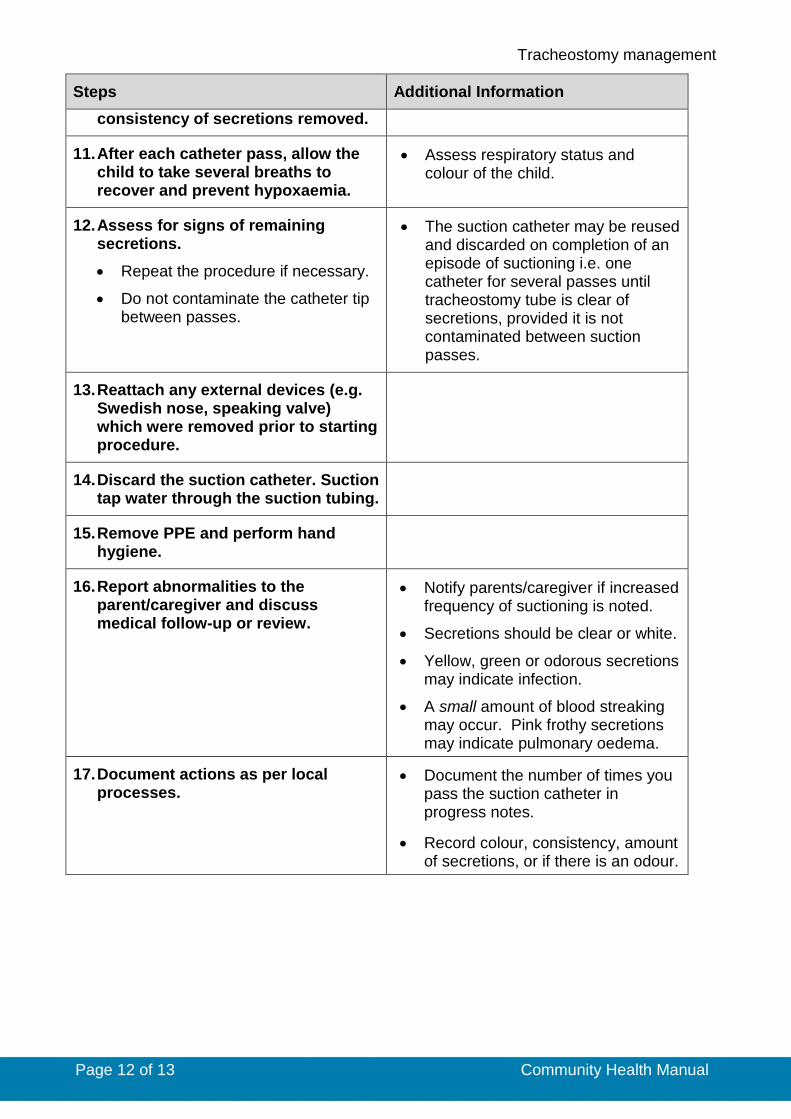
Steps Additional Information consistency of secretions removed.
11. After each catheter pass, allow the child to take several breaths to recover and prevent hypoxaemia.
• Assess respiratory status and colour of the child.
12. Assess for signs of remaining secretions. • Repeat the procedure if necessary.
• Do not contaminate the catheter tip between passes.
• The suction catheter may be reused and discarded on completion of an episode of suctioning i.e. one catheter for several passes until tracheostomy tube is clear of secretions, provided it is not contaminated between suction passes.
13. Reattach any external devices (e.g. Swedish nose, speaking valve) which were removed prior to starting procedure.
14. Discard the suction catheter. Suction tap water through the suction tubing.
15. Remove PPE and perform hand hygiene.
16. Report abnormalities to the parent/caregiver and discuss medical follow-up or review.
• Notify parents/caregiver if increased frequency of suctioning is noted.
• Secretions should be clear or white.
• Yellow, green or odorous secretions may indicate infection.
• A small amount of blood streaking may occur. Pink frothy secretions may indicate pulmonary oedema.
17. Document actions as per local processes.
• Document the number of times you pass the suction catheter in progress notes.
• Record colour, consistency, amount of secretions, or if there is an odour.
Tracheostomy management
Page 13 of 13 Community Health Manual
Related policies, procedures and guidelines
Clinical handover
Hand hygiene
Tracheostomy Management - Princess Margaret Hospital/Perth Children’s Hospital
Standard and Transmission Based Precautions
Related internal resources and forms
Clinical handover form (CHS 663 – CACH only)
References 1. Royal Children’s Hospital. Tracheostomy Management: Clinical Guidelines
(Nursing). Melbourne:2015 [cited 2018 June 01]. Available from:http://www.rch.org.au/rchcpg/hospital_clinical_guideline_index/Tracheostomy_Management_Guidelines/
2. Perth Childrens Hospital. Tracheostomy management. In: Clinical Practice Manual,editor. Perth: Child and Adolesent Health Services; 2018.
3. Credland N. How to perform open tracheal suction via an endotracheal tube.Nursing standard (Royal College of Nursing). 2016;30(35):36-8.
This document can be made available in alternative formats on request for a person
with a disability.
Document Owner: Director Clinical Services Community Health
Reviewer / Team: Clinical Nursing Policy Team
Date First Issued: 13 July 2018 Scheduled Review Date: 13 July 2021
Last Reviewed: 13 July 2018 Amended 19 October 2018
Approved by: CACH/WACHS Community Health Clinical Nursing Policy Governance Group
Endorsed by: Executive Director CACH Date: 13 July 2018
Standards Applicable: NSQHS Standards: 1.7
Printed or personally saved electronic copies of this document are considered uncontrolled