Embed Size (px)
Citation preview

Topic 1: Beginnings: Introduction to Human Development
Topic 2: Beginnings: Theories of Development
Topic 3: Beginnings: Heredity and Environment
Topic 4: Beginnings: Prenatal Development and Birth
Topic 5: Infancy: Physical Development
Topic 6: Infancy: Cognitive Development
Topic 7: Infancy: Socioemotional Development
Topic 8: Early Childhood: Physical Development
Topic 9: Early Childhood: Cognitive Development
Topic 10: Early Childhood: Socioemotional Development
Topic 11: Middle Childhood: Physical Development
Topic 12: Middle Childhood: Cognitive Development
Topic 13: Middle Childhood: Socioemotional Development
Topic 14: Adolescence: Physical Development
Topic 15: Adolescence: Cognitive Development
Topic 16: Adolescence: Socioemotional Development
Topic 17: Early Adulthood: Physical Development
Topic 18: Early Adulthood: Cognitive Development
Topic 19: Early Adulthood: Socioemotional Development
Topic 20: Middle Adulthood: Physical Development
Topic 21: Middle Adulthood: Cognitive Development
Topic 22: Middle Adulthood: Socioemotional Development
Topic 23: Late Adulthood: Physical Development
Topic 24: Late Adulthood: Cognitive Development
Topic 25: Late Adulthood: Socioemotional Development
Topic 26: Death and Dying
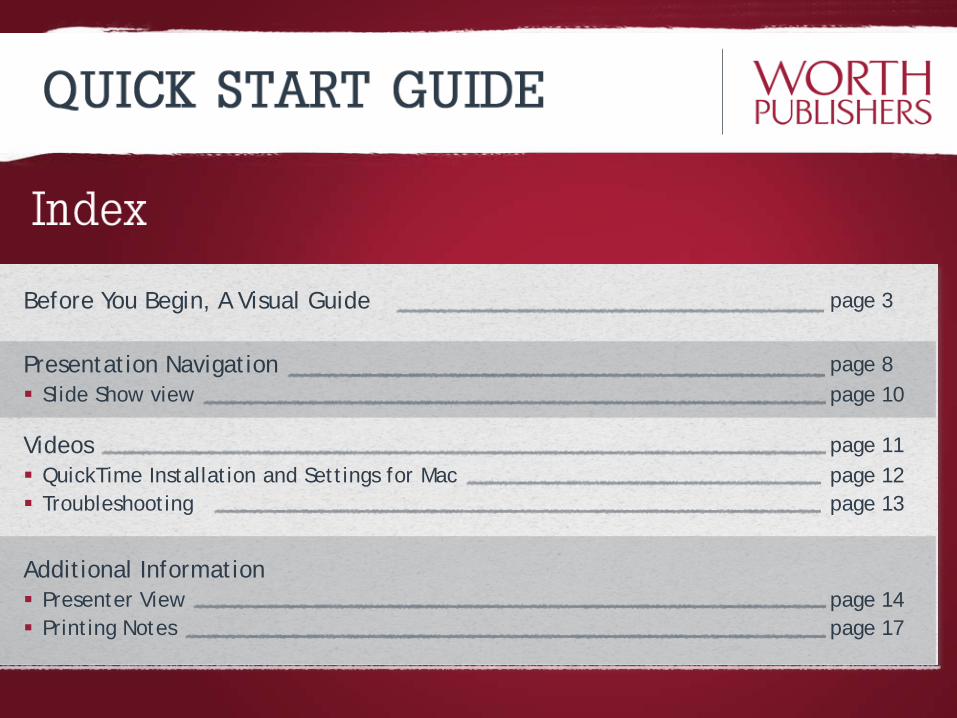
Before You Begin, A Visual Guide page 3
Presentation Navigation page 8 Slide Show view page 10
Videos page 11 QuickTime Installation and Settings for Mac page 12 Troubleshooting page 13
Additional Information Presenter View page 14 Printing Notes page 17
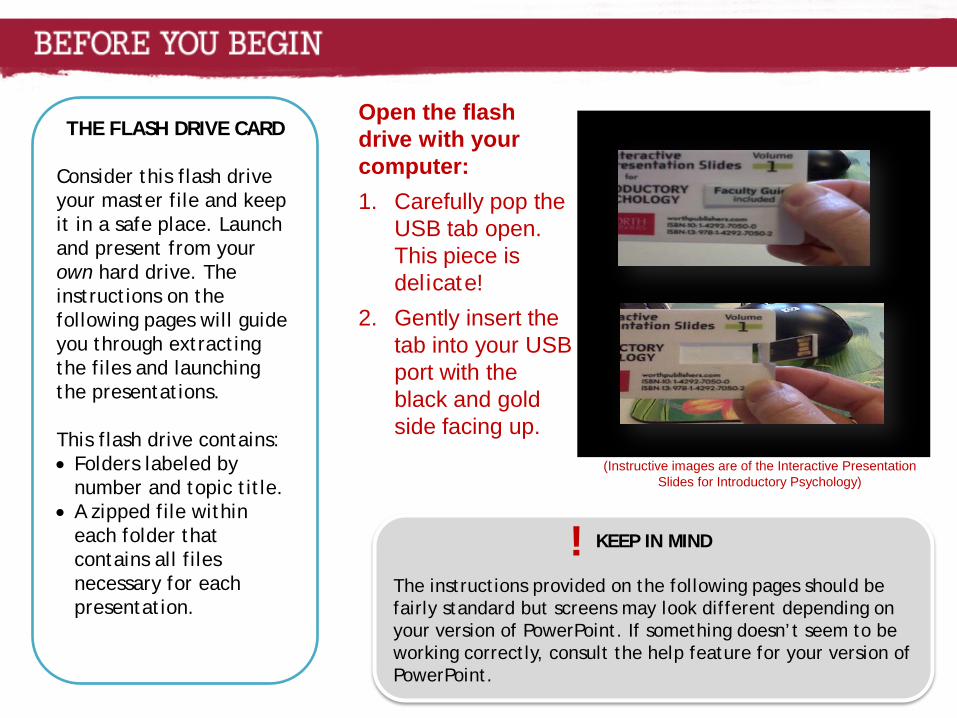
Open the flash drive with your computer:1. Carefully pop the
USB tab open. This piece is delicate!
2. Gently insert the tab into your USB port with the black and gold side facing up.
KEEP IN MIND
The instructions provided on the following pages should be fairly standard but screens may look different depending on your version of PowerPoint. If something doesn’t seem to be working correctly, consult the help feature for your version of PowerPoint.
!
THE FLASH DRIVE CARD
Consider this flash drive your master file and keep it in a safe place. Launch and present from your own hard drive. The instructions on the following pages will guide you through extracting the files and launching the presentations.
This flash drive contains:• Folders labeled by
number and topic title.• A zipped file within
each folder that contains all files necessary for each presentation.
(Instructive images are of the Interactive Presentation Slides for Introductory Psychology)
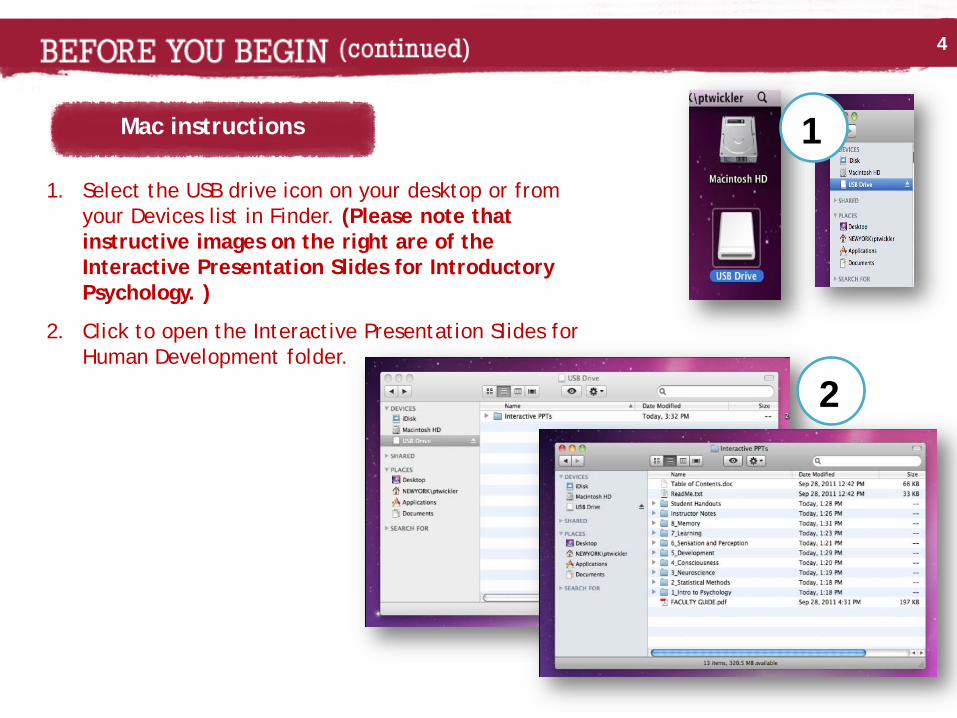
1. Select the USB drive icon on your desktop or from your Devices list in Finder. (Please note that instructive images on the right are of the Interactive Presentation Slides for Introductory Psychology. )
2. Click to open the Interactive Presentation Slides for Human Development folder.
Mac instructions
4
1
2
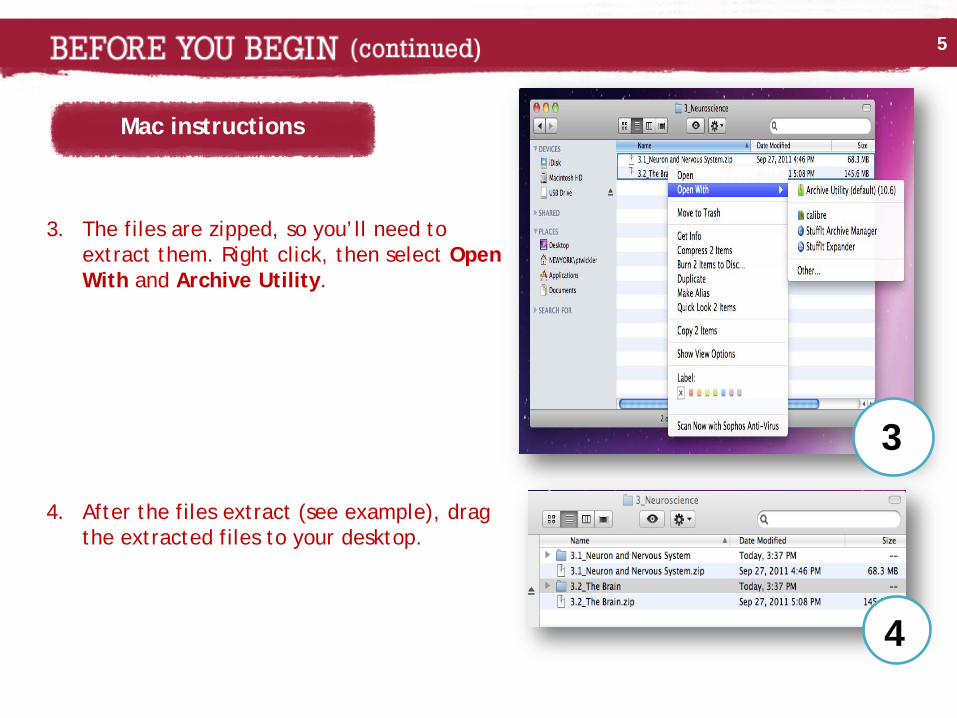
3. The files are zipped, so you’ll need to extract them. Right click, then select Open With and Archive Utility.
4. After the files extract (see example), drag the extracted files to your desktop.
Mac instructions
5
4
3
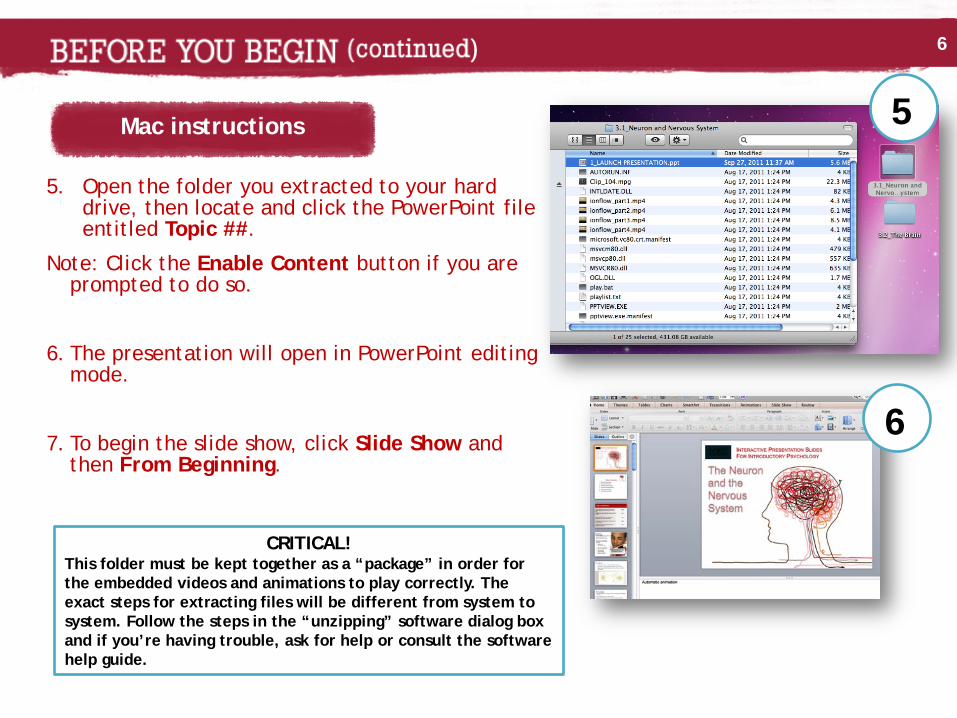
5. Open the folder you extracted to your hard drive, then locate and click the PowerPoint file entitled Topic ##.
Note: Click the Enable Content button if you are prompted to do so.
6. The presentation will open in PowerPoint editing mode.
7. To begin the slide show, click Slide Show and then From Beginning.
Mac instructions
6
5
6
CRITICAL!This folder must be kept together as a “package” in order for the embedded videos and animations to play correctly. The exact steps for extracting files will be different from system to system. Follow the steps in the “unzipping” software dialog box and if you’re having trouble, ask for help or consult the software help guide.
Mac instructions
7
Note: For a smooth presentation in your classroom, we advise that you run through the full presentation, including videos, at least once prior to class. This ensures that your computer will have fully mapped and tested the videos.
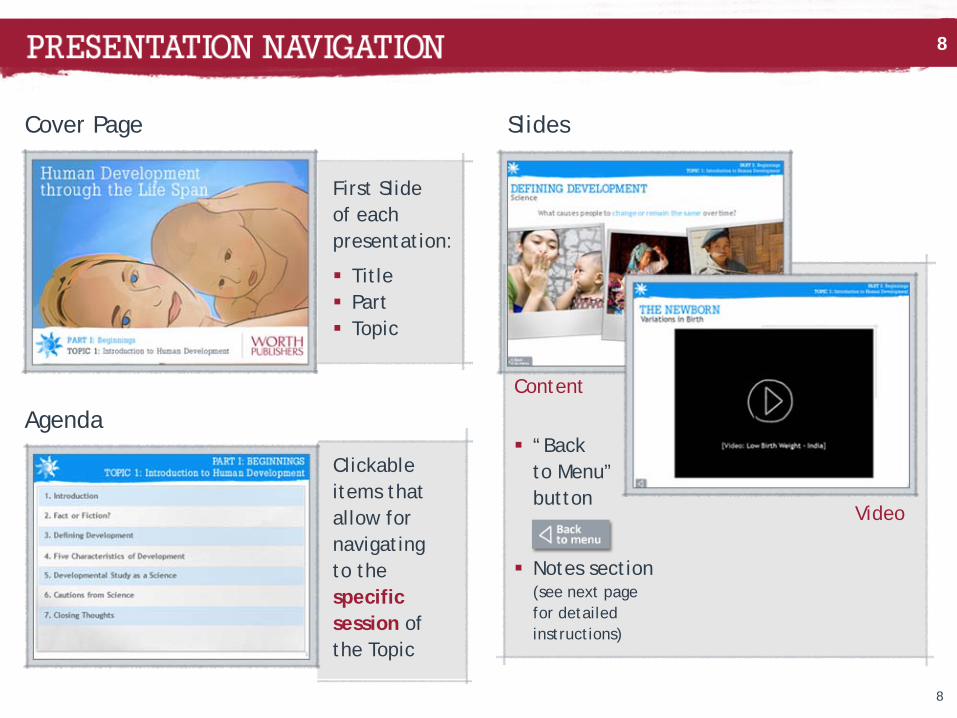
Cover Page
Title Part Topic
Slides
Agenda
Clickable items that allow for navigatingto the specific session of the Topic
“Back to Menu”button
Notes section (see next page for detailed instructions)
Content
Video
First Slide of each presentation:
8
8
9
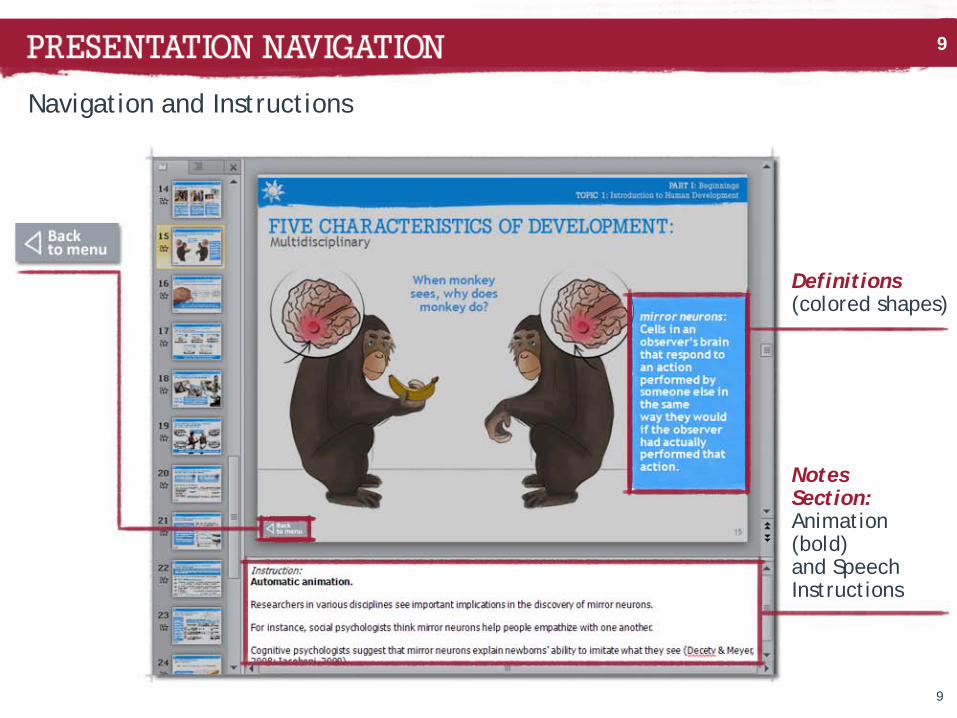
Navigation and Instructions
Notes Section:Animation (bold) and Speech Instructions
Definitions(colored shapes)
9

10
Use Slide Show view to deliver your presentation to your audience. Slide Show view occupies the full computer screen, exactly the way your presentation will look on a big screen when your audience sees it. You can see how your graphics, timings, movies, animated effects, and transition effects will look during the actual presentation.
Click here forSlide Show view
Slide Show view
10
11
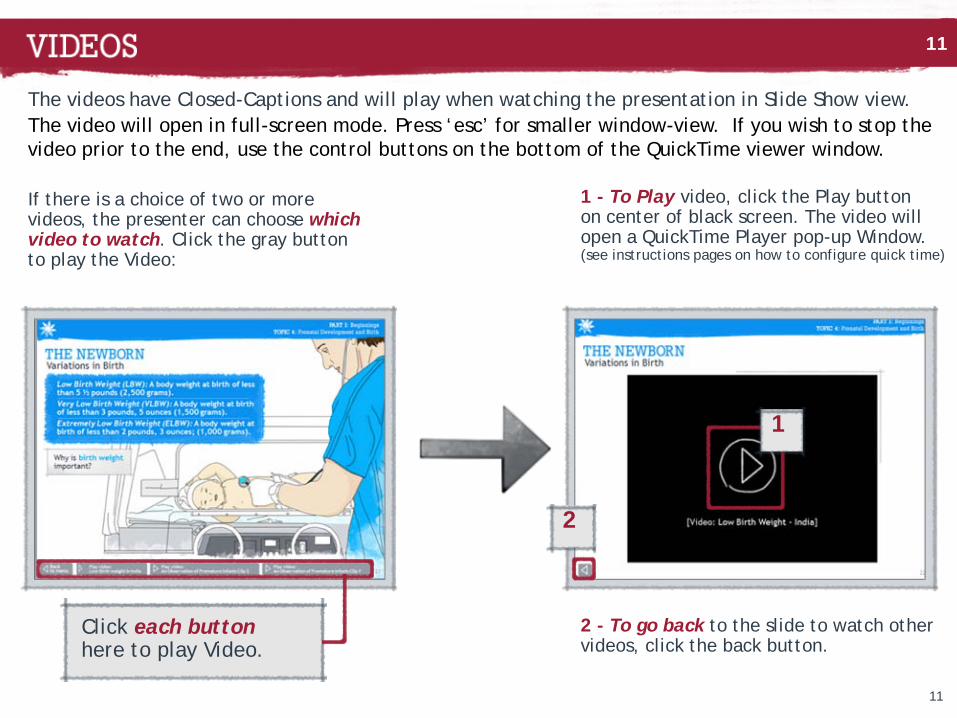
The videos have Closed-Captions and will play when watching the presentation in Slide Show view.The video will open in full-screen mode. Press ‘esc’ for smaller window-view. If you wish to stop the video prior to the end, use the control buttons on the bottom of the QuickTime viewer window.
If there is a choice of two or more videos, the presenter can choose which video to watch. Click the gray button to play the Video:
1 - To Play video, click the Play button on center of black screen. The video will open a QuickTime Player pop-up Window. (see instructions pages on how to configure quick time)
2
2 - To go back to the slide to watch other videos, click the back button.
Click each button here to play Video.
1
11
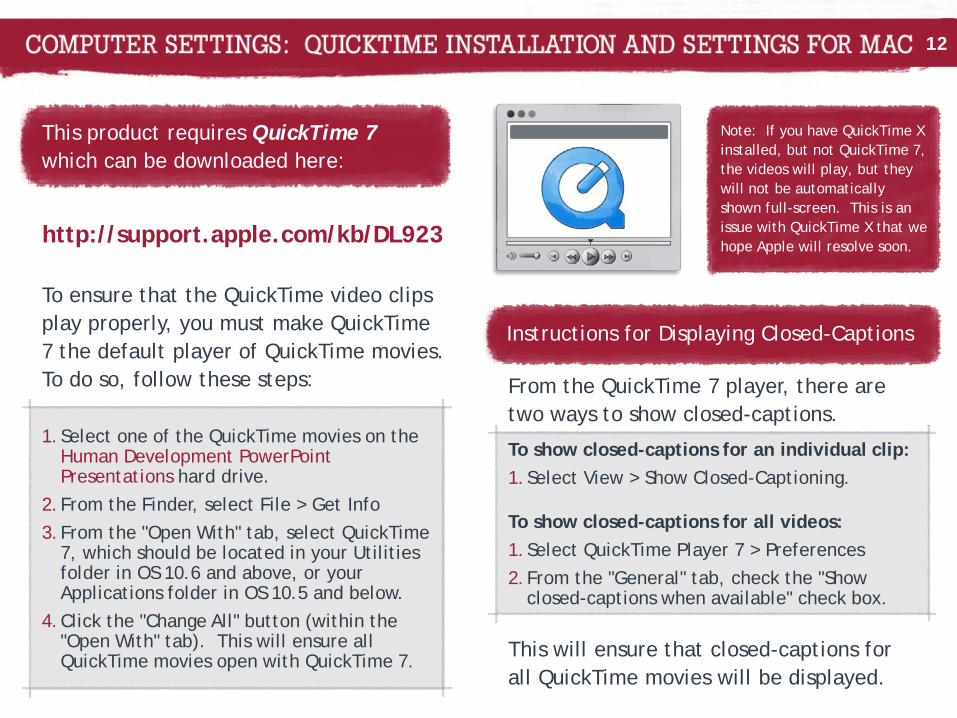
Note: If you have QuickTime X installed, but not QuickTime 7, the videos will play, but they will not be automatically shown full-screen. This is an issue with QuickTime X that we hope Apple will resolve soon.
This product requires QuickTime 7 which can be downloaded here:
http://support.apple.com/kb/DL923
To ensure that the QuickTime video clips play properly, you must make QuickTime 7 the default player of QuickTime movies. To do so, follow these steps:
1.Select one of the QuickTime movies on the Human Development PowerPoint Presentations hard drive.
2.From the Finder, select File > Get Info3.From the "Open With" tab, select QuickTime
7, which should be located in your Utilities folder in OS 10.6 and above, or your Applications folder in OS 10.5 and below.
4.Click the "Change All" button (within the "Open With" tab). This will ensure all QuickTime movies open with QuickTime 7.
From the QuickTime 7 player, there are two ways to show closed-captions.
To show closed-captions for an individual clip:1.Select View > Show Closed-Captioning.
To show closed-captions for all videos:1.Select QuickTime Player 7 > Preferences2.From the "General" tab, check the "Show
closed-captions when available" check box.
Instructions for Displaying Closed-Captions
This will ensure that closed-captions for all QuickTime movies will be displayed.
12

13
13
If you have problems playing the videos within these slides, you should be able to find detailed instructions in one or both of the following:• PowerPoint’s “help” menu for your version of PowerPoint• Microsoft's PowerPoint support site:
http://office.microsoft.com/en-us/powerpoint/
If the help instructions don’t help, you have two options:
The easiest method: If you haven’t made any of your own edits to the presentation, you can revert back to the master file on the flash drive. Delete the affected folder from your hard drive and then re-extract the presentation from the flash drive.
Advanced method: If you’ve made edits to the presentation file on your hard drive and you’d like to keep them when a video suddenly stops working, you can try to re-insert it.1. In PowerPoint editing mode, delete the video that doesn’t play from the slide.2. On the PowerPoint tool bar (or menu bar) select Insert>Movie.3. In the dialog box, navigate to the same folder you’re working in (the one that’s
holding that presentation) and open the video you just deleted.4. Resize the video as appropriate. (Click and drag the edges of the video.)
Optional: To make the style match the other videos in the presentation, click on one of those videos and click the format painter button, then click on the video you just inserted.
Troubleshooting
14
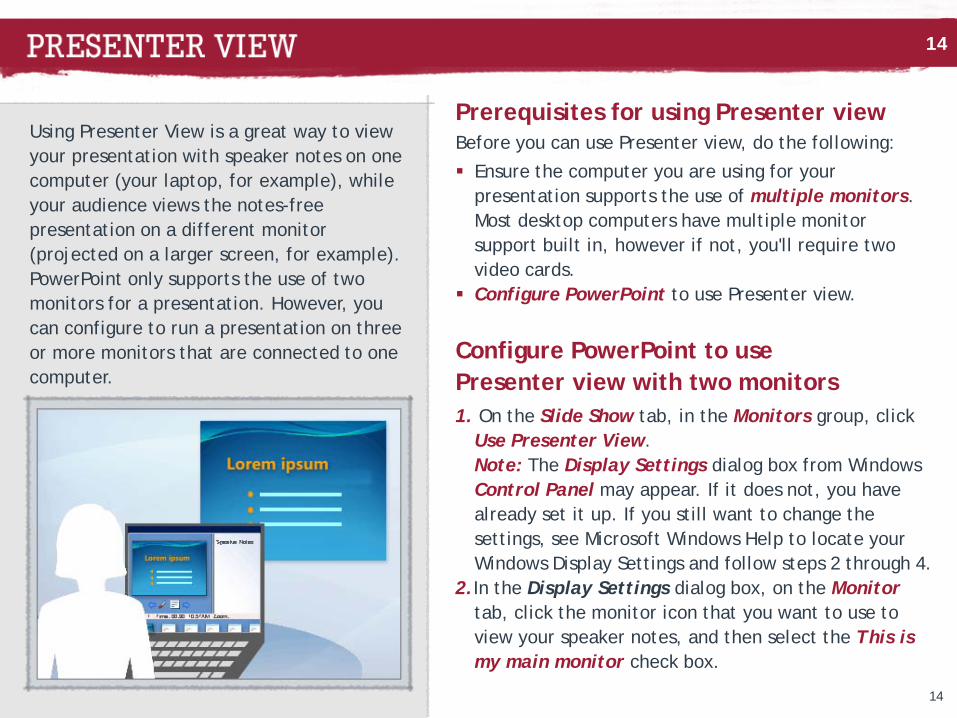
Using Presenter View is a great way to view your presentation with speaker notes on one computer (your laptop, for example), while your audience views the notes-free presentation on a different monitor (projected on a larger screen, for example). PowerPoint only supports the use of two monitors for a presentation. However, you can configure to run a presentation on three or more monitors that are connected to one computer.
Prerequisites for using Presenter view
Ensure the computer you are using for your presentation supports the use of multiple monitors. Most desktop computers have multiple monitor support built in, however if not, you'll require two video cards.
Configure PowerPoint to use Presenter view.
Before you can use Presenter view, do the following:
Configure PowerPoint to use Presenter view with two monitors1. On the Slide Show tab, in the Monitors group, click
Use Presenter View.Note: The Display Settings dialog box from Windows Control Panel may appear. If it does not, you have already set it up. If you still want to change the settings, see Microsoft Windows Help to locate your Windows Display Settings and follow steps 2 through 4.
2.In the Display Settings dialog box, on the Monitor tab, click the monitor icon that you want to use to view your speaker notes, and then select the This is my main monitor check box.
14
15
If the This is my main monitor check box is selected and unavailable, the monitor is already designated as the primary monitor. You can select only one primary monitor at a time. If you click a different monitor icon, the This is my main monitor check box is cleared and made available again.
3. Click the monitor icon for the second monitor that the audience will view, select the Extend my Windows Desktop onto this monitor check box, and then click OK.
1. On the Slide Show tab, in the Set Up group, click Set Up Slide Show.
2. In the Set Up Show dialog box, choose the optionsthat you want, and then click OK.
3. To begin delivering your presentation, on the View tab, in the Presentation Views group, click Slide Show.
Deliver your presentation on two monitors
4. On the Slide Show tab, in the Monitors group, ensure that the monitor on which you want the audience to view your presentation appears in the Show On list.
15

16
Before you can deliver a presentation on a computer that has three or more monitors, you must turn on multiple monitor support.
1. On the Slide Show tab, in the Monitors group, click Use Presenter View.Tip: The Display Settings dialog box from Windows Control Panel may appear. If it does not, see Microsoft Windows Help to locate your Windows Display Settings.
2. In the Display Settings dialog box, on the Monitor tab, click the monitor icon for the presenter's monitor, and then select the This is my main monitor check box.Tip: If the This is my main monitor check box is selected and unavailable, the monitor is already designated as the primary monitor. You can select only one primary monitor at a time. If you click a different monitor icon, the This is my main monitor check box is cleared and made available again.
3. For each additional monitor that the audience will view, click the monitor icon, select the Extend my Windows Desktop onto this monitor check box, and then click OK.
Turn ON multiple monitor support (for three or more monitors)
To turn off multiple monitor support, in the Display Settings dialog box, on the Monitor tab, select the second monitor, and then clear the Extend my Windows Desktop onto this monitor check box.
Notes
16
17
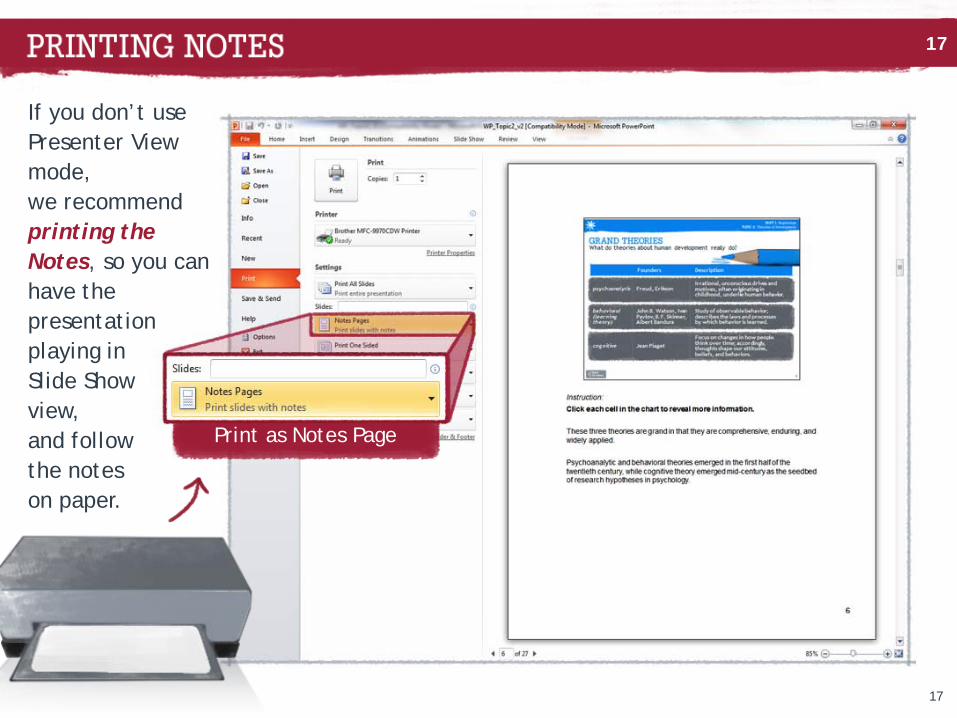
If you don’t use Presenter View mode, we recommend printing the Notes, so you can have the presentation playing in Slide Show view, and follow the notes on paper.
Print as Notes Page
17