Embed Size (px)
Citation preview

1 BCC 103 Supplementary Handout| Tradewinds Sailing School and Club.
www.tradewindssailing.com
Basic Coastal Cruising Review
This document summarizes the points
and concepts you will need to know to
successfully complete your American
Sailing Association Basic Coastal
Cruising 103 class here at Tradewinds
Sailing School and Club.
More Experience, More Time on the Water, MORE FUN!
Disclaimer: This document was composed using sources including public reference material. Graphics were obtained from commonly available websites including manufacturer information, Government Entities, and common
search engines. No copyrighted material protected by any entity have been knowingly used in this document – any use of identified copyrighted material will have been purely unintentional and due to unclear identification of the
protection. References to organizations such as ASA are for reference only.

2 BCC 103 Supplementary Handout| Tradewinds Sailing School and Club.
www.tradewindssailing.com
Section 1: Marine Toilets Marine toilets can take many forms, but the basic components are all very similar. Although appearing
different than your more traditional porcelain appliance you probably have at home, the lid and bowl
are similar enough for you to easily identify any type used in the marine environment. While you may
not give much consideration to the land-based appliances we are all used to; the function, water supply,
and waste storage capacity in the marine environment require complete understanding. As your ASA
Manual for BCC 103 states, there are few things more uncomfortable than a malfunctioning marine
head.
Figure 1: Mounted self-contained marine sanitation device.
Figure 2: Electronic Sanitation Device - identified by the motor behind the bowl.
Figure 3: Manual Sanitation Device - identified by the pump handle.
Figure 4: Foot-operated sanitation device
All of the units above have this in common: They have a limited source of clear water, a limited storage
capacity, and due to their complexity, are prone to some kind of fault. Please refer to your manual,
United States Coast Guard regulations, or manufacturer specifications for the detailed use of your
unique device. The high level material presented here are for your high-level conceptual understanding
and example only. We recommend special Marine or RV type sanitary tissue (it will say on the package)
rather than the common variety. Household tissue will eventually clog the system, as will nearly
anything else. Also have a supply of deodorizer or treatment chemicals recommended by the
manufacturer and appropriate for your cruising area.
Figure 5: Lever pump device

3 BCC 103 Supplementary Handout| Tradewinds Sailing School and Club.
www.tradewindssailing.com
The self-contained unit in Figure 1 contains the clear water (commonly about 2 gallons), waste holding
tank (commonly about 2 ½ gallons). It may or may not have a macerator connected – if not, you have
to carry the holding tank to the nearest appropriate dumping area for disposal.
A “macerator”, is an electronic pump commonly used to both chop up waste and pump it overboard.
All other permanently-installed units will have some similar variant of the plumbing shown in Figure 6.
Let’s work our way from the left to the right side of the graphic.
Many marine systems pull their clear water
in through a seacock as shown here, while
others from the freshwater tank – please
check your configuration as the impact on
your water supply will be affected. The
seacock/through-hull must be opened in
order to operate. Check with the Captain as
to whether they prefer the seacock closed
immediately after use, or if you can
remember to close it at the end of the day
when returning to your slip.
While many systems have a raw-water strainer, some do not. Likewise, most systems do not
have a container for deodorant. In many cases, manufacturers will suggest you add deodorant
or chemicals directly to the holding tank.
The plumbing for clear water now enters the Marine Toilet. Although your through-hull may be
opened and you checked the strainer, the lever or a valve on or near the toilet may still need to
be turned before pumping clear water into the bowl immediately prior to use. We of course do
not recommend leaving any water or waste in the bowl, as boat action (especially heeling) may
result in a mess. It is also worth suggesting that you should plan on using the head during calm
weather, as rough weather can present a challenge! Men, while you may stand at home, we
suggest you make a habit out of being seated when using the head at sea.
With waste in the bowl, there may be another valve to turn in order to pump the bowl dry – this
is commonly identified simply as “dry”.
To the right of the bowl, the “Vented Loop” identifies a common waste-fume ventilation
arrangement. The vent is normally somewhere topsides. Whether you have used deodorizing
chemicals or not, all you have to do is follow your nose to locate it. There is usually no valve
and it remains open all the time for the purpose of ventilating methane gasses that build up in
the holding tank as a natural part of the process.
In Figure 6, you will notice a Y Valve to the right of the toilet identified as “Secured Y-Valve”.
Some older systems are probably equipped with one, while newer systems may not be. This
valve is capable of routing the waste directly overboard pumped through a macerator. This
action is illegal in US Waters (consult the regulations for your cruising area). This valve should
remain in the position of routing waste to the Holding Tank until it can be properly disposed of.
Figure 6: Typical Marine Head Plumbing layout
Macerator
4 BCC 103 Supplementary Handout| Tradewinds Sailing School and Club.
www.tradewindssailing.com
Finally, the deck pumpout tube allows for dock-mounted sanitation pumps to pull waste from
the tank for proper disposition. You will do this in class – we’ve all been there. Don’t forget
your gloves….
Pump Detail: In the case where your marine head is equipped with a manual handle or lever pump, it
probably functions as a “double-action-pump” and this function is illustrated in the
graphic here.
In the double-action-pump graphic to the left, the center cylinder is called the
“Chamber”. When the handle is pulled up, the piston also moves up causing
pressure on the top of the chamber and a vacuum on the bottom. The chamber
has automatic one-way valves at each of the four ports.
On the right side, these valves permit material to enter only.
When the handle is pulled up, pressure causes the top valve to close, while
the bottom valve opens to pull material in.
Conversely (we are still on the right-side), as the handle is pushed down,
also pushing the piston down, a vacuum is created above the piston and the
top valve opens pulling material into the chamber, while the bottom valve
closes.
On the left side, these valves permit material to exit only.
When the handle is pulled up, pressure above the piston causes the top valve to open forcing
material out. While this is going on, the vacuum causes the bottom valve to close.
When the handle is pushed down, the vacuum above the piston causes the top valve to close,
and pressure below the piston causes the bottom valve to open, forcing material out.
Engineering is a wonderful thing, but this complex mechanism depending on pistons, vacuum, pressure,
and perfectly working valves gives you some sense of why you don’t want “hard material” fouling up the
works. One piece of paper stuck in just one of these valves or the top or bottom of the chamber or
piston will cause the whole thing to malfunction. Take our advice; do not put any hard material in the
bowl.
Finally once you understand the double-action of this pump, it is necessary to further understand the
action of the Wet/Dry valve. With the manual valve set to “Wet” pump action will pull clear water into
the bowl. With the manual valve set to “Dry”, pump action will pull material out of the bowl and into
the holding tank.
Many boat Captains will go so far as to ask that all paper, including Marine Toilet Paper, be placed in a
wastebasket. Although embarrassing for some, comfortable cruising sometimes requires a detailed
lesson in the function and ships policies regarding the head. Your Captain will exercise patience and
professionalism in explaining the unique operation to you, and you are responsible for carrying out
those directions in order to maintain a high level of comfort for all passengers aboard ship.

5 BCC 103 Supplementary Handout| Tradewinds Sailing School and Club.
www.tradewindssailing.com
Section 2: Through-Hulls and Seacocks As with most appliances on a boat, the age and manufacturer of your vessel will determine the type of
seacock used. It is your responsibility to check them all for proper function prior to leaving the dock.
Most modern boats use through-hull arrangements similar to that shown
in this graphic. A simple lever opens the valve when turned parallel to
the pipe, and closes the valve when turned sideways. The materials
used may be brass, but black PVC type plastic is very common. In the
case of a Tapered Plug, Rubber Plug, or Ball valve (it is not necessary to
know the detail of each), there is simply a hole in the center of the plug
that rotates in line with the tube with the turn of the handle. These
valves are best at simply opening or closing the flow of water, but now
controlling the volume of flow.
Less common in newer boats, but commonly found in older ones, are
Gate valves (similar to the type of residential valve used with a garden hose).
These valves are better at controlling the flow of water by sliding the plug (or
gate) in-or-out of the way of the opening in small increments, thereby
controlling how much water comes through the opening.
6 BCC 103 Supplementary Handout| Tradewinds Sailing School and Club.
www.tradewindssailing.com
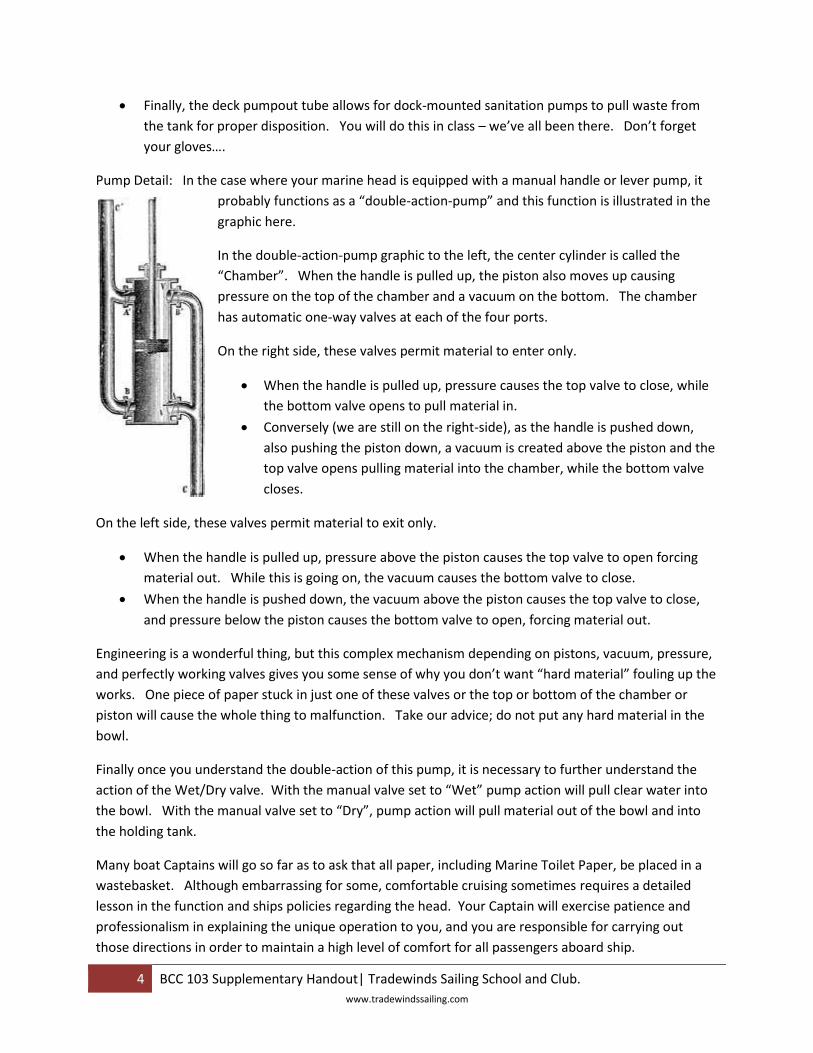
Section 3: Flags The famed red flag with the white stripe from the (staff-side) upper left to the
lower right is well known in North America as being a Divers flag. This “Diver
Down Flag” is to be flown from a boat or surface marker buoy to indicate the
presence of divers, and thereby warn above-surface to stay clear. The laws
concerning use and approach of this flag vary state to state, so be aware of the
local laws in your area.
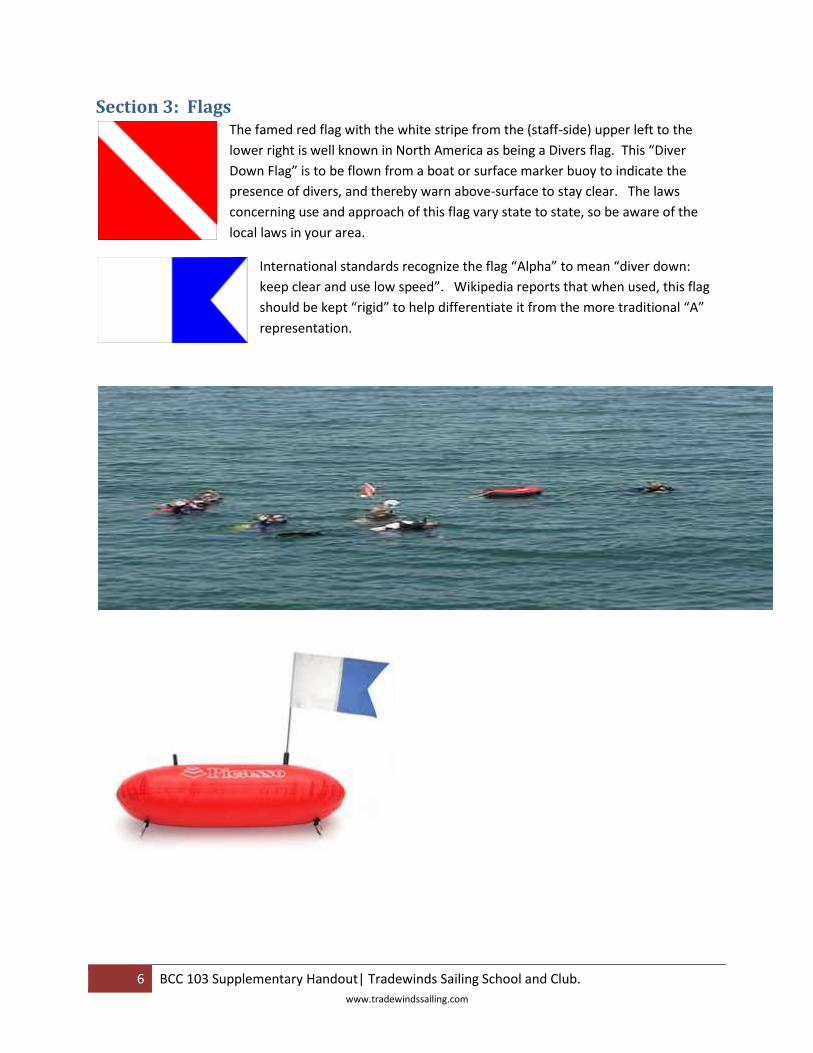
International standards recognize the flag “Alpha” to mean “diver down:
keep clear and use low speed”. Wikipedia reports that when used, this flag
should be kept “rigid” to help differentiate it from the more traditional “A”
representation.
7 BCC 103 Supplementary Handout| Tradewinds Sailing School and Club.
www.tradewindssailing.com
Section 4: Steerage Tiller: On smaller crafts, the familiar tiller and rudder combination sets the standard for steering. In
larger craft, use of the tiller is probably considered a backup to be used only
in an emergency situation. Before setting out, know the location and use of
the emergency tiller. There is little time to go hunting for it if your
traditional steering mechanism fails.
Worm Gear: Some traditional steering mechanisms will be discussed
here, starting off with the worm-gear mechanism. Worm gears are
popular in modern household garage door openers because of their
high reliability, quiet operation, and resistance to stretching and
“give” common to other types. The wheel is connected to a
horizontal shaft on the binnacle – a worm-gear is on the other end of
the shaft and this converts the steering force to another vertical shaft going down from the binnacle
connecting to the rudder itself. This mechanism is simple, easy to maintain and perform scheduled
maintenance on.
Geared Quadrant: Geared Quadrant steerage is rare, but still certainly
found on some vintage craft. The wheel is connected to a smaller
sprocket, which turns a pie-shaped quadrant gear at the binnacle. A shaft
is connected directly from the quadrant gear to the rudder. While some
configurations have a worm-gear at the binnacle with a solid shaft
connecting to a quadrant-gear and that shaft connected to the rudder,
others may be the opposite. This configuration provides better leverage
when on larger vessels with large rudders.

8 BCC 103 Supplementary Handout| Tradewinds Sailing School and Club.
www.tradewindssailing.com
Cable and Sheave: Many boats here at Tradewinds use the Cable
and Sheave system for steerage. In this system, the wheel,
connects to a shaft with a gear affixed inside the binnacle, and a
chain (much like a bicycle chain) is looped around the gear. The
chain can be routed down the binnacle, and inside the engine
room as needed by using turning gears (much like we use fairleads
or turning blocks to ease friction on running rigging topsides). The
graphic here shows this cable-and-sheave system allows for the
rudder to be located behind the binnacle, where the previously
discussed systems using solid shafts, must locate the rudder
directly below. This method is also useful when a berth or cabin is
located below the binnacle. Keep in mind, that although this
graphic also shows the emergency tiller installed, there may be
cases where the tiller has to be attached in a much more
inconvenient location.
Disk Drive: in the graphic immediately to the left
the gear attached to the rudder is labeled
“quadrant” – we were unable to find a graphic, but
it could just as easily be labeled “disk” (not the disk
drive associated with a computer, mind you). Disk
Drive refers to the chain being connected to a fully
round gear, instead of the quadrant gear shown
here. The concept is similar, in that it provides some extra leverage to the driver to make steering a bit
easier.
9 BCC 103 Supplementary Handout| Tradewinds Sailing School and Club.
www.tradewindssailing.com
Section 5: Basic Costal Cruising Course Overview and Expectations
DAY ONE:
This is an overview of the material the students will face on the written exam. The material may be split
between the three days of class, keeping lecture time at an hour or less each day.
I. Introduction
a. Welcome
b. Review Course Materials
c. Instructor Introduction and Credentials
d. Student Introductions and Expectations
e. Collect and review liability release forms
f. Student Handouts: Anchoring Technique and Handbook Corrections
II. Water Sessions Overview
a. Directions (see map)
b. Timetable – 9AM to 5PM with a half hour lunch
c. Food – bring lunch and hydrating drinks.
d. Clothing – layers. No running shoes. Hat, Sunscreen, Sunglasses.
e. Contingency Plan if weather is bad / exchange cellular telephone numbers
III. Instructional Techniques to be used
a. Lecture and Demonstration
b. Each Student will repeat the demonstration
c. Mistakes are OK – they lead to learning
IV. Our Contract with You
a. What are your own personal goals for this class?
b. These are our goals for you:
1) Strengthening your sailing and skippering skills.
2) Introduction to the Inboard Engine
3) Plumbing and Toilet Systems
4) The VHF Radio
5) Departing and Docking Under Sail
6) Anchoring Techniques
10 BCC 103 Supplementary Handout| Tradewinds Sailing School and Club.
www.tradewindssailing.com
V. Terminology Review
a. Memorize the following:
Gudgeon
Stem Fitting
Binnacle
Through-Hull Fitting
Pintle
Tangs
Transom
Turnbuckle
Self Bailing Cockpit
Life lines
Chainplates
Rudderpost
VI. Gear and Equipment
a. Federal Equipment Carriage Requirements for a 24 foot sailboat with an onboard motor
and portable fuel tank:
1) One PFD (Type 1, 2, or 3) per person plus one type IV throwable
2) One type B-I fire extinguisher. Note: Type B fire extinguishers are capable of
fighting gasoline, oil, electrical, and combustible materials fires
3) Have State Registration numbers on the hull
4) Navigation lights if sailed anytime at night or in restricted visability
5) Day and Night visual distress signals (what is the requirement? What are
Tradewinds standards?).
6) Sound making device (horn)
b. Additional ASA recommended equipment for heavy weather
1) Two anchors with 200 feet of rode each
2) First Aid Kit
3) Navigation equipment and nautical charts
4) Bilge pump or bailer
5) Compass
6) VHF marine radio
7) Flashlights with extra batteries
8) Tool kit including spare parts

11 BCC 103 Supplementary Handout| Tradewinds Sailing School and Club.
www.tradewindssailing.com
c. SAFE-TO-GO and C-O-O-L review
S
A
F
E
T
O
G
O
C
O
O
L
d. Stowage of gear and equipment
1) If stowed properly, equipment can be found quickly in an emergency and utilized
with efficiency.
2) Loose gear can be damaged or injure someone with the boats motion
e. Roller versus slab / jiffy reefing

12 BCC 103 Supplementary Handout| Tradewinds Sailing School and Club.
www.tradewindssailing.com
VII. Safety
a. The Safety Harness
1) Helps keep persons on the deck of the boat.
2) Harness lanyard should be attached to a “safety line” or “jack wire” which is a
secure line running from the bow to the cockpit.
b. Bow and Stern Pulpits
1) Helps keep persons on the deck.
c. Navigation Lights – between sunset and sunrise or restricted visibility
1) Definitions
a) Sidelight: Red or green light shining from dead ahead to 22.5
degrees abaft either beam, green light on starboard, red light
on port. Remember: Port wine is red.
b) Stern light: White light shining aft with 135 degrees arc
centered on the stern.
c) Masthead light: White light shining forward with 225 degree
arc from 22.5 degrees abaft the port beam to 22.5 degrees
abaft the starboard beam. On a sailboat, this is often referred
to as the “steaming light” for use when under power.
d) Anchor light: All-around white light used only when anchored
outside a designated anchorage area.
2) Light usage table
Side Lights Stern Light
Masthead Light
Anchor Light
Under sail no motor
Yes No No
Under sail with motor
Yes Yes No
Motoring Only
Yes Yes No
At Anchor No No Yes

13 BCC 103 Supplementary Handout| Tradewinds Sailing School and Club.
www.tradewindssailing.com
d. Hypothermia
a) Three Stages
a. Mild: Feeling cold, violent shivering slurred speech.
b. Medium: loss of muscular control, incoherence, drowsiness, exhaustion.
c. Severe: Unconsciousness, cardiac arrest.
b) Treatment for mild hypothermia
a. Warm clothes.
b. Direct body contact (do NOT message).
c. Warm milk or water (only if coherent).
d. No coffee /alcohol / tobacco / medication of any kind.
e. Reducing heat loss in the water
a) One person HELP position (Heat Escape Lessening Posture).
a. Stay still, movement dissipates body heat.
b. Clothing acts as an insulator.
b) Group huddle.
f. Preventing compass error due to magnetic influence
a) Keep compass as far away as possible from the following:
a. Iron and some types of stainless steel.
b. Electric fields – radio /radar equipment, motors, speakers
c. Large magnets
g. Sources of fire / explosion
a) Fuel tanks – gasoline or diesel fuel – clean up spillage, check bilge for fumes and
ventilate.
b) Cooking stoves – alcohol, propane, compressed natural gas (CNG), check for leaks
(listen and smell), ventilate.
c) Heating / lighting fixtures – kerosene – clean up spillage, keep combustible materials
away.
d) Batteries – hydrogen gas – ventilate
e) Holding tank – methane gas – ventilate
h. Refueling precautions
a) Fill portable tanks on the dock with the boat hatches closed to prevent fuel vapors
from entering the bilge, crew should not stay aboard, all engines and motors should
be off.
b) Open fuel tank vent and hold the nozzle firmly against the filler pipe to prevent the
possibility of a spark.
c) Wipe up or wash off spilled fuel.
d) Ventilate the bilge before starting the engine, sniff the bilge for fuel vapors if it is a
gasoline operated inboard.
i. Warning flags for divers – diver’s flag and alpha flag.

14 BCC 103 Supplementary Handout| Tradewinds Sailing School and Club.
www.tradewindssailing.com
j. Dangers with re-charging batteries – ventilate hydrogen gas
k. Safety when setting off flares
1) Remove the tab to expose the striker, reverse the top and bring striker into contact
with ignition button (on the leeward side), hold away from face, body, and boat.
2) Never strike the ignition button against a hard surface on the boat; never attach a
flare to the boat itself.
l. Review of navigation rules
1) Post a lookout – continuously look for traffic.
2) Overtaking rule – overtaking vessel gives way – power or sail.
3) Power vessels – head on: alter course to starboard.
4) Power vessels – vessels approaching from starboard have right of way (stand-on), if
you see the red light, you must give way. If you see the green light, you have the
right of way.
5) Power versus sail = Power vessels give way.
6) Opposite tack rule = Port tack must give way.
7) Same tack rule = windward boat must give way.
8) Take EARLY AND SUBSTANTIAL positive action to avoid collision.
m. Precautions when operating in reduced visibility
1) Reduce speed to a minimum.
2) Post a lookout and listen for traffic.
3) Turn on running lights.
4) Sound appropriate sound signals.
5) Hoist a radar reflector.
6) Keep track of your course and distance run and plot your position on a local chart.
7) Stay out of shipping lanes.

15 BCC 103 Supplementary Handout| Tradewinds Sailing School and Club.
www.tradewindssailing.com
VIII. Weather
a. Local (San Francisco Bay) Weather Patterns
1) Tradewinds advises that the highest windspeed (from any direction) in which to go
sailing is 25 miles per hour for Basic Costal Cruisers.
2) Wave heights that can be expected for these winds are 3 feet for a north wind (wind
coming from the north) and 4 feet for south, east, or west winds.
3) On San Francisco Bay, lee shores exist for any wind direction.
4) Local weather hazards include:
a) Fog approaching from the west (Angel Island) can occur in minutes.
b) High winds from the West or North indicated by white caps can kick up over a
period of 15 to 30 minutes.
c) High currents due to extreme tides or rain runoff may occur coincident with tidal
flows; check the tide book or observe the weather that might cause excessive
runoff.
b. Interpretation of marine weather forecasts for San Francisco Bay
1) Summer: Westerly winds from 15 to 30 MPH following morning fog.
2) Winter: Light westerly winds to 15 MPH … or… Heavy winds from the South or
southeast accompanying a storm.
16 BCC 103 Supplementary Handout| Tradewinds Sailing School and Club.
www.tradewindssailing.com
IX. Duties of the Skipper and Crew
a. Skipper:
1) Safety of the vessel and crew.
2) Instructions to the crew before departing.
a) Operating procedures
b) Location of all lifesaving and safety equipment
3) Assignment of duties with clear instructions
4) Ensure proper/safe use of equipment (head, stove, etc.)
5) Pay attention to the well-being of the crew, including:
a) Seasickness
b) Minimize excessive heeling
c) Discuss float plan
b. Crew:
1) Obey the Skipper
2) Assist in the safe operation of the vessel
3) Keep a lookout and immediately report any possible dangers seen on the water or
vessel
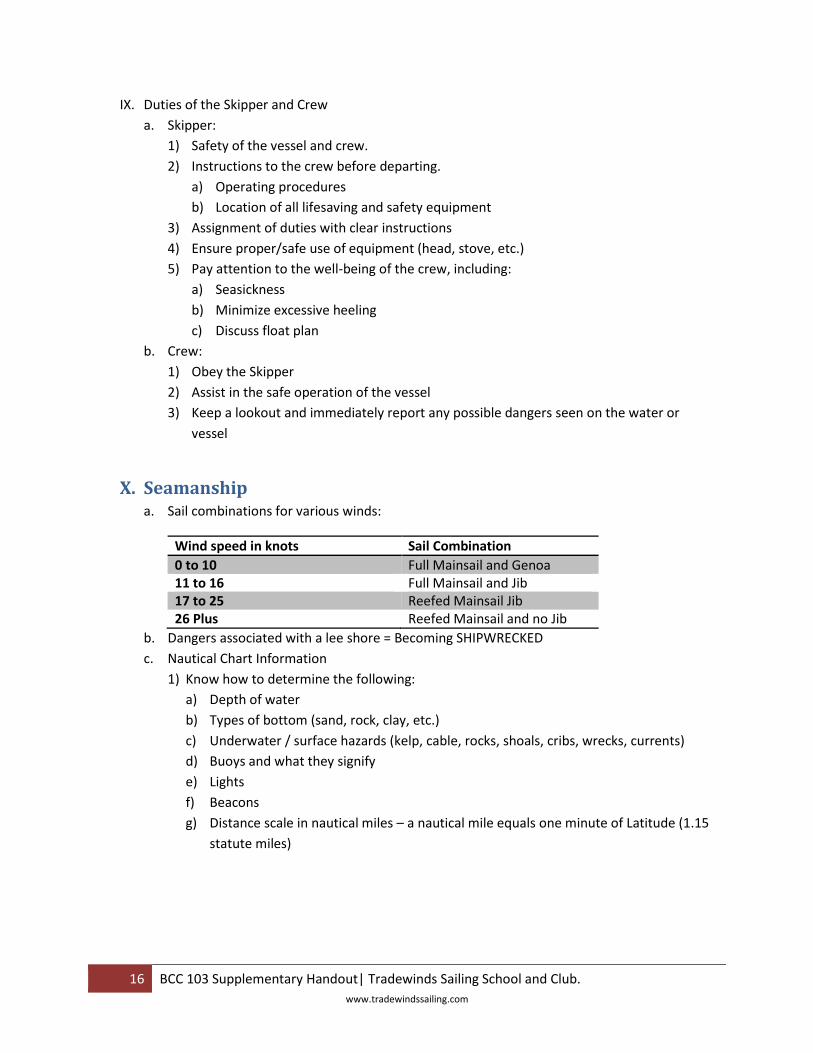
X. Seamanship a. Sail combinations for various winds:
Wind speed in knots Sail Combination
0 to 10 Full Mainsail and Genoa 11 to 16 Full Mainsail and Jib 17 to 25 Reefed Mainsail Jib 26 Plus Reefed Mainsail and no Jib
b. Dangers associated with a lee shore = Becoming SHIPWRECKED
c. Nautical Chart Information
1) Know how to determine the following:
a) Depth of water
b) Types of bottom (sand, rock, clay, etc.)
c) Underwater / surface hazards (kelp, cable, rocks, shoals, cribs, wrecks, currents)
d) Buoys and what they signify
e) Lights
f) Beacons
g) Distance scale in nautical miles – a nautical mile equals one minute of Latitude (1.15
statute miles)

17 BCC 103 Supplementary Handout| Tradewinds Sailing School and Club.
www.tradewindssailing.com
1. What are these symbols as they appear on a typical map??
Rock awash at or near the level of the chart sounding datum.
Wreck always partially submerged
Seaweed or Kelp
Restricted Areas
Shallow areas – General danger line
Starboard hand buoy (entering from seaward US Waters)
International Boundary
18 BCC 103 Supplementary Handout| Tradewinds Sailing School and Club.
www.tradewindssailing.com
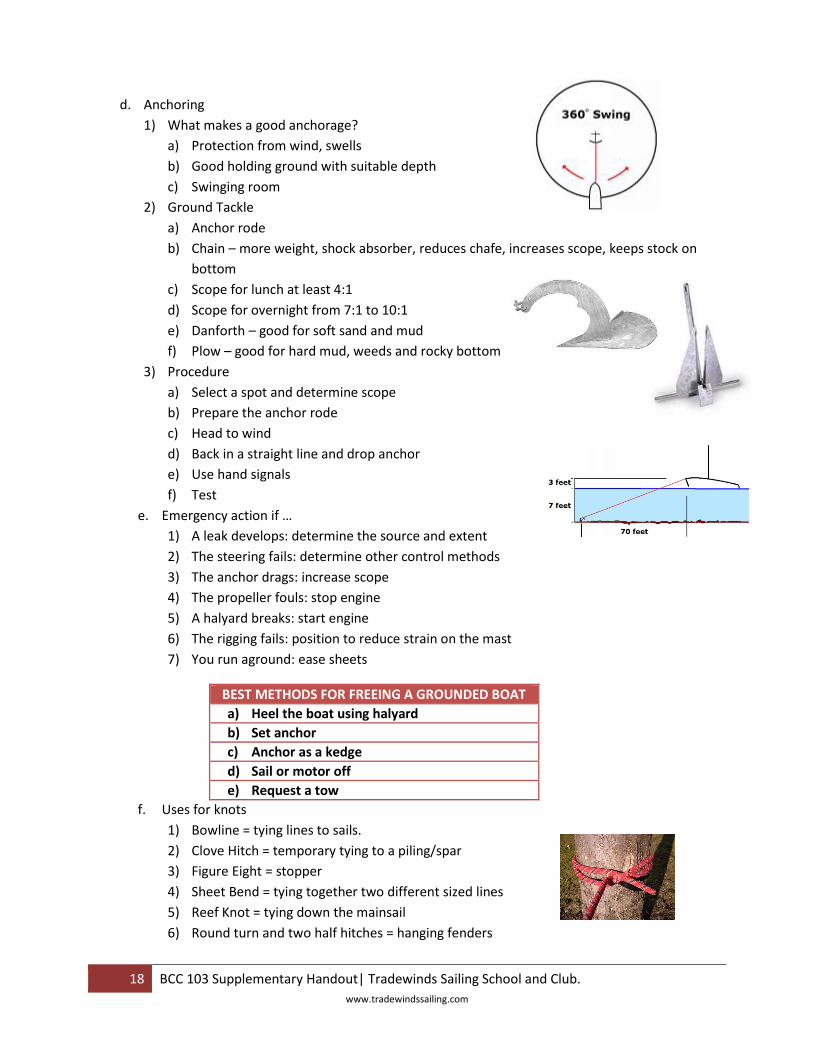
d. Anchoring
1) What makes a good anchorage?
a) Protection from wind, swells
b) Good holding ground with suitable depth
c) Swinging room
2) Ground Tackle
a) Anchor rode
b) Chain – more weight, shock absorber, reduces chafe, increases scope, keeps stock on
bottom
c) Scope for lunch at least 4:1
d) Scope for overnight from 7:1 to 10:1
e) Danforth – good for soft sand and mud
f) Plow – good for hard mud, weeds and rocky bottom
3) Procedure
a) Select a spot and determine scope
b) Prepare the anchor rode
c) Head to wind
d) Back in a straight line and drop anchor
e) Use hand signals
f) Test
e. Emergency action if …
1) A leak develops: determine the source and extent
2) The steering fails: determine other control methods
3) The anchor drags: increase scope
4) The propeller fouls: stop engine
5) A halyard breaks: start engine
6) The rigging fails: position to reduce strain on the mast
7) You run aground: ease sheets
BEST METHODS FOR FREEING A GROUNDED BOAT
a) Heel the boat using halyard
b) Set anchor
c) Anchor as a kedge
d) Sail or motor off
e) Request a tow
f. Uses for knots
1) Bowline = tying lines to sails.
2) Clove Hitch = temporary tying to a piling/spar
3) Figure Eight = stopper
4) Sheet Bend = tying together two different sized lines
5) Reef Knot = tying down the mainsail
6) Round turn and two half hitches = hanging fenders

19 BCC 103 Supplementary Handout| Tradewinds Sailing School and Club.
www.tradewindssailing.com
On the Water Overview XI. Sailing Skills
a. General Maneuvers
1) Heading up, Tacking, Falling off, Jibing
2) Points of sail
3) Man-Overboard drill – START back
4) Getting out of irons
b. Reefing
c. Heaving-To
XII. Upwind, Downwind & Crosswind Docking using LOT
Location (on the fairway)
Orientation (w.r.t. the wind)
Transition (from reverse to forward)
XIII. Emergency Turn
XIV. Parallel Docking Under Power
a. Choice of docking side should consider departure
b. Use motor position (in reverse) to advantage
XV. Departures Under Sail
a. Not recommended, less control in narrow fairway
b. Upwind slip preferred
XVI. Docking Under Sail
a. Different strategy for different wind direction
b. Upwind is easiest: Reach with main alone and turn into wind
c. Downwind: douse or furl sail before turning into slip
d. Crosswind with downwind approach: douse or furl sail before turning into slip. If wind is
strong enough, sail may not be needed.
e. Crosswind with upwind approach: most difficult because you may have to tack to work
toward the slip.
20 BCC 103 Supplementary Handout| Tradewinds Sailing School and Club.
www.tradewindssailing.com
XVII. Anchoring
The Importance of Good Anchoring Technique
Few sailing experiences are as scary as waking in the middle of the night with the wind blowing hard
and your boat dragging anchor toward rocks, the shore, or another boat. And one of the most
irritating things for most cruising sailors is finding another boat dragging down upon them or getting
tangled in their own anchor line.
Good anchoring technique is crucial for safety. Yet all too often even some experienced sailors are in
too much of a hurry and skip one of the important steps for anchoring securely. Some new sailors
never learn the essentials and just toss the anchor overboard and assume they’ll be fine.
But it is not difficult to anchor correctly and securely in most conditions. Follow these guidelines to
help ensure your boat is safely anchored so you can get a good night’s sleep.
1. Prepare in Advance
Pick your anchorage carefully using an updated chart and paying attention to conditions, including
wind direction and speed, likely tidal or other currents, and the forecast. Pay special attention to the
chances for a shift in wind direction or speed. If your boat is pulled in the opposite direction during
the night because of a reversing tidal current or wind, the anchor may be pulled out.
The ideal anchorage area should have some protection from the wind and waves and not be against
a lee shore in case the anchor drags. The ideal bottom is sand or mud, not rock or heavy seaweed
or grass. Most cruising guides and some charts show good anchorages that are protected and have
good holding ground. Charts also show bottom characteristics when known.
Get the anchor ready before making your approach. Whether on a bow roller or lowered by hand
from the bow, make sure the anchor rode is free to run. If the anchor rode is not marked at
progressive depths with tags or color codes, stretch it out back and forth on deck so that you know
how much rode you are letting out when anchoring. To be safe, plan to put out a rode about 7 times
the water depth (counting the height of your bow over the water) at high tide.

21 BCC 103 Supplementary Handout| Tradewinds Sailing School and Club.
www.tradewindssailing.com
2. Pick Your Spot Carefully
After studying the chart and choosing a general protected area, look for a spot with the right depth:
from a few feet deeper than the draft of your boat (at low tide) to as deep as 30-40 feet if
necessary—if you have at least 200-300 feet of anchor rode.
Make sure you are well clear of any channel regardless of how the boat swings with wind shifts, and
that there are no hazards if your boat were to swing in a full circle around the anchor.
When other boats are already anchored nearby, follow good anchoring etiquette to stay safe
without risking collision or entanglement. The general rule is that the first boat in an anchorage can
choose its spot at will and each subsequent boat must stay clear of others already present.
Calculate how much swinging room you may need if the wind changes, based on how much anchor
rode you will pay out according to the water depth. If possible, make sure your swinging circle does
not overlap with any other boat’s swinging room.
In a crowded anchorage where your swinging room may have to overlap another boat’s, choose a
spot among similar boats. Most cruising sailboats with a keel will swing in the same direction at the
same time and therefore should not collide if not positioned too close together. But a shallow-draft
powerboat will swing on the wind differently from a keel sailboat, increasing the risk of collision if
their swinging circles overlap.
3. Approach Slowly
Although you can learn to anchor under sail, most cruising boats lower or furl the sails before
making the approach into the anchorage, and anchor under power. Using the engine also gives you
more control if a last-minute maneuver is needed.
Approach your planned spot into the wind, keeping an eye on your depthfinder or chartplotter to
ensure you are where you want to be on the chart. If there is a strong current in the area that
affects the boat more than the wind, approach into the current instead.
As you near the spot, slow down to allow the boat to coast to a stop. If you come in fast and have to
use the engine in reverse to stop, there’s a good chance the boat may pivot or turn during the
reversing, and the boat then will not at first pull directly back on the anchor. There’s seldom any
reason to be in a hurry at this point.
Double-check to make sure you are not too close to another boat and are at the intended depth. If
you decide you need to move to either side, circle back around to make your approach again to the
new spot upwind or current.
4. Lower, Don’t Drop, the Anchor
Wait until the person at the helm says the boat has stopped completely and is starting to move
backward on the wind or current before lowering the anchor. (Watch your GPS speed if you’re not

22 BCC 103 Supplementary Handout| Tradewinds Sailing School and Club.
www.tradewindssailing.com
sure.) If the boat is still moving ahead, you may accidentally set the anchor in the wrong direction by
pulling it ahead instead of drifting back to set it.
It is important to lower the anchor gradually to prevent the anchor rode from falling down on the
anchor flukes and possibly fouling the anchor. In that case you may not realize the anchor has not
set well, and if the wind comes up later the anchor can easily drag if fouled. Never just toss the
anchor over hoping for the best!
You can tell when the anchor reaches the bottom because of the reduced strain on the rode. Pause
a moment to let the boat move back and pull the rode tight. If the boat is floating motionless in the
absence of wind and current, tell the person at the helm to put the engine in reverse to start the
boat backward. Your goal here is to align the anchor correctly on the bottom, with its shank pulled
back in the direction in which the boat will lie at anchor. Otherwise, the anchor chain may foul the
shank or flukes and prevent the anchor from setting well.
XVIII. Navigational Lighting - Under Sail at night
a. “Port Wine is Red”. Port and Left each have four letters.
b. Red and green lights each span 112.5 degrees from the bow center line
c. Stern white light span 135 degrees from stern
XIX. Navigational Lighting – At Anchor at night.

23 BCC 103 Supplementary Handout| Tradewinds Sailing School and Club.
www.tradewindssailing.com
XX. Navigational Lighting - Vessels at night under power
a. Mast white-light may be mounted at the spreaders.
b. Mast white-light spans 225 degrees.

24 BCC 103 Supplementary Handout| Tradewinds Sailing School and Club.
www.tradewindssailing.com
XXI. Dead (Ded, deduced) Reckoning Calculations
Dead Reckoning (DR) allows you to:
1. Determine your current position from a known past position.
2. Plot Course and speed actually traveled.
3. Determine a vessels future position from a current position.
4. Plot ahead course and speed you expect to travel.
DR position is approximate; it does not account for leeway, current, steering error, or variations
in speed.
DR Calculations take one of three forms:
1. How long will it take to get there? Distance/speed.
2. How far will I go in a certain amount of time? Speed x time.
3. How fast shall I go to get there on time? Distance/speed.
Skipper needs to know two pieces of information to calculate the third.
To measure Courses:
Use nearest compass rose.
Compass rose has true and magnetic bearings.
Transfer courses using parallel rulers, rolling rulers, and triangles.
To measure Distances:
Use dividers and the latitude scales to measure distance.
Use latitude scale closest to the center of the course you are measuring.
Time:
Record time in military format.
Speed:
Always use the boat speed through the water. Do not use SOG (Speed Over Ground)
Dead Reckoning:
In order to calculate (reckon) your location you need time, speed, course.
1 knot = one nautical mile per hour (do not refer to “knots per hour”)
Where D = Distance, S = Speed and T = Time:
60D=ST

25 BCC 103 Supplementary Handout| Tradewinds Sailing School and Club.
www.tradewindssailing.com
Distance = S X T
60
Speed = 60 X D
T
Time = 60 X D
S
Draw line from each DR Position:
1. Above course line put a capital C in degrees (3 digits) followed by MC. C = designates
Course. MC = designates Magnetic Course.
2. Below the course line, place a capital S (to identify Speed), followed by the actual speed
through the water (nearest accurate knot).
Fix:
1. Enclose a fix (two or more LOP’s or a GPS, or known location) with a circle and label it
with the time to the nearest minute (using military format).
2. Mark a DR position with a semicircle and the time (using military format).
3. Label the fix time horizontally.
4. Label the DR time diagonally.
The rules of Dead Reckoning: You should plot position:
At least every hour
After every change of course
After every change of speed
After every fix or running fix
After plotting any line of position

26 BCC 103 Supplementary Handout| Tradewinds Sailing School and Club.
www.tradewindssailing.com
24. First Aid: Hypothermia
Hypothermia results from the loss of body heat.
Chances of developing hypothermia on deck are
decreased by staying out of the wind, keeping dry,
wearing layers of wool or synthetic clothing such as
polypropylene, keeping active but not to the point of
perspiration, and by not consuming alcoholic
beverages. In the water, activity and maintaining the
Heat Escape Lessening Posture (HELP) with the head
out of the water, arms curled around the personal flotation device, legs crossed, bent at the knees and
drawn up to the chest will help maintain body heat. Huddling with others in the water will slow heat
loss as well. Early symptoms of hypothermia include: Shivering, muscle stiffness, and lethargy which
progresses to muscle rigidity, slow heart rate, confusion and later, loss of consciousness.
Once the victim is removed from the water, their Airway, Breathing, and Circulation (ABC) should be
assessed. If neither pulse nor respiration is present, CPR should begin immediately. Medical
consultation should be obtained to guide continued resuscitative efforts and for all unconscious victims
of hypothermia. Victims should be brought into the vessel cabin while rescue breathing or CPR is
continued, wet clothing removed, and their body wrapped in dry blankets. The only reliable method of
determining their core body temperature is with a rectal hypodermic thermometer placed appropriately
one inch (2 cm) into the rectum. Since re-warming with a core temperature below 90.5 F (32 C) is
extremely difficult and risky, medical consultation is recommended. If a thermometer is unavailable and
they are alert, or if the rectal core temperature is above 90.5 F, actively warming by skin-to-skin contact
with another crew member, wrapping both individuals in blankets, administering sips of warm liquid,
and encouraging the victim to gently exercise is reasonable. Medical consultation for further
recommendations is appropriate.
27 BCC 103 Supplementary Handout| Tradewinds Sailing School and Club.
www.tradewindssailing.com
25. Using your VHF
There are four primary uses for the marine VHF radio:
Safety
That is essentially the handling of three different types of messages: Distress, Urgency,
and Safety.
Operations
This is contacting the necessary agents to get your boat from one place to another.
Such as: lock masters, bridge tenders, gas docks, marinas for docking, and harbor pilots.
Commerce
This is the actual conduct of business on the water and usually means base stations
talking with the vessels.
Public correspondence
This is normally with a marine operator.
Maintaining a Watch on Channel 16 and 13:
All vessels must guard, maintain a watch on, and listen to Channel 16.
You should also be aware that tankers don’t necessarily monitor Channel 16. They do
monitor channel 13 however.
Channel 16 is a calling and emergency channel. DO NOT HAVE CONVERSATIONS ON THIS
CHANNEL. The only exception is the coast Guard when working a MAYDAY.
Channel 16 is very busy, so don’t use it unless there is an emergency. ALWAYS listen before
you key your microphone. After you are sure you’re not going to “step” (speak at the same
time as someone else) on anyone, you can make your call. Do not blow into the microphone
– just make your call. Your initial call to a boat cannot exceed 30 seconds.
Typical “Hail” from a boat named “Pink Slip”, to another boat named “Orion”:
Orion, Orion, Orion.
This is Pink Slip. Over.
Of Orion does not answer, wait two minutes and hail them again. If they still do not
respond, hail them again after another two minutes. If still no response, you must wait 15
minutes before you hail the same boat again. Saying “negative contact” is incorrect and
wastes air time. If you are successful in contacting Orion, switch to a working
correspondence channel.

28 BCC 103 Supplementary Handout| Tradewinds Sailing School and Club.
www.tradewindssailing.com
Your radio must have Channels 16 and 06, as well as one additional working channel. You
should also have 22A (pronounced “twenty two alpha”), which is used by the coast Guard as
their working channel with the public. Channel 06 is used for SAR’s (Safety Messages
between Ships).
Working Channels
The working channels for non-commercial use are: 68, 69, 71, 72, and 78. However, if you
listen to the marine radio for a while, you will notice that certain commercial interests use
certain channels. This is because base stations must be FCC licensed. The license is for a
specific frequency or channel. For example, while towing and salvage companies do not
own the working channels they switch you too, they do use them to help boaters in trouble.
If you could use channels they don’t use as first choice for your working channel, it would be
appreciated. After you switch to a working channel, FCC rules state you must limit your
conversation to three minutes.
False Signaling
Transmitting a false MAYDAY is a dangerous violation of FCC rules that could net you a
$5,000 fine. If search and rescue units are sent out, the perpetrator is responsible for their
costs in addition to the fine. Obscenity, profanity, or indecent language is also a direct FCC
violation. If found in violation, you would be subject to a $10,000 fine and/or two years in
jail. Isn’t it interesting that a false MAYDAY, which is more dangerous than someone cursing
on the air is roughly half the fine and no mention of jail time?
Procedure Words
You are strongly urged to user “procedure” words – usually referred to as “prowords”.
These help to shorten the length of the message and eliminate confusion. It is not just
effective to use “over”, “out”, “roger”, and “wilco”; it’s also very practical. The same way
using the phonetic alphabet helps when there may be confusion understanding the letters B
and D, C and E, M, and N for example. Take a look at your phonetic chart.
Remember to use OVER when you complete your sentence and expect a reply. Use the
word OUT when you complete your sentence and do not expect a reply. ROGER means
“yes, I understand”, while WILCO means “yes I understand, and I will also do that or
comply”. AFIRMATIVE is “yes”, and NEGATIVE is “no”.
Safety
Now, let’s talk about the prime purpose of the marine radio – SAFETY.
There are three main yet different safety messages:
o MAYDAY
29 BCC 103 Supplementary Handout| Tradewinds Sailing School and Club.
www.tradewindssailing.com
o PAN PAN
o SECURITY
MAYDAY is always broadcasted on channel 16. MAYDAY means a vessel and/or person Is
threatened by grave or imminent danger and requires immediate assistance. A MAYDAY has
priority over all other signals, as this could be fire, sinking, or person lost overboard.
A copy of a typical Marine Distress Communications Form can be accessed by searching the
Internet, or by following the URL below. Know the information on the form. Print and fill it out
before getting underway, or perhaps laminate and post it near your radio to make sure
everyone aboard ship knows how to call for help – in stressful situations, this document can
make the difference between a panic indecipherable call or a well articulated one. http://www.signalelectronics.com/uploads/MARINE_DISTRESS_COMMUNICATIONS_FORM[1].pdf
Below is an example of a well articulated MAYDAY call on Channel 16:
MAYDAY, MAYDAY, MAYDAY.
This is Orion, Orion, Orion.
MAYDAY
We are at position 27 57 North by 82 53 West. About three miles west of
Clearwater pass. We are rapidly taking on water from a hole in our bow.
There are three people on board. Orion is a twenty foot yellow Bertram with
white trim. We have lots of antennas and a radar dome. We are going to lose
radio contact when the batteries go underwater.
We will be listening on Channel 16. This is Orion – OUT.
Make sure to let go of the transmit buttion…
PAN PAN (pronounced “pahn pahn”) is also transimitted on Channel 16. It is used when the
safety of a vessel or person is in jeopardy. Man overboard is sent as PAN PAN. This is also used
by the Coast Guard to alert other boaters about an overdue boat. This signal has priority over
all others except MAYDAY.
Below is an example of a typical PAN PAN call on Channel 16:
PAN PAN PAN PAN PAN PAN
This is the United States Coast Guard San Francisco Group.

30 BCC 103 Supplementary Handout| Tradewinds Sailing School and Club.
www.tradewindssailing.com
There is a report of an overturned vessel at position 28 00 North – 092
50 West with three people in the water.
All Mariners are requested to keep a sharp lookout, report all findings
to the United States Coast Guard and assist where possible.
This is the United States Coast Guard San Francisco Group out.
SECURITY (pronounced “say cure a tay”) is also transmitted on Channel 16 and then switched to
Channel 22A (pronounced “twenty-two-alpha”). It is used for messages concerning the safety of
navigation or giving important weather warnings.
Examples: Casino Cruise Ship traveling in/out of Clearwater Pass, Daily Local Notice to Mariners,
something wrong with Clearwater Memorial Bridge, missing or damaged Aid to Navigation. If
the message is short, do not change it to Channel 22A as it will take up more air time.
Below is an example of a typical SECURITY call on Channel 16:
SECURITY, SECURITY, SECURITY.
This is the United States Coast Guard, Station Sand Key. For
important Coast Guard Marine Information Broadcast, listen to
Channel 22A.
Out
SEELONCE MAYDAY or SEELONCE DISTRESS are used to impose silence upon any radio station
interfering with these distress calls. Use SEELONCE FINEE when distress or urgent traffic is
terminated.
DO NOT use a Citizen Band (CB) radio or language.
Passwords are important, but there is appropriate language that should be used. If you want to
be seen as a rank amateur:
Use OVER and OUT together.
Ask the Coast Guard for a radio check.
Better still, call a towing company of your choice directly on their working channel –
don’t even use Channel 16 unless you don’t get a response on their channel. If you
don’t know which channels they are on, just listen to the radio for a few minutes and
you’ll hear less informed boaters being told to switch to the individual company’s
working channel.
Kidding aside, CB or street language is never acceptable. Keep your radio on and tuned to
Channel 16 unless you are actively using another channel for communications with a boat or
base station.

31 BCC 103 Supplementary Handout| Tradewinds Sailing School and Club.
www.tradewindssailing.com

32 BCC 103 Supplementary Handout| Tradewinds Sailing School and Club.
www.tradewindssailing.com
Study Suggestions for the Basic Costal Cruising (T-103)
There are no secrets in ASA. Go to the ASA Official International Log Book that you should have gotten
in your prior class (ASA-L101) and look at pages 13 through 17 and they will tell you everything you need
to know for the test.
Answer all of the review questions at the end of each section in Sailing Fundamentals and Cruising
Fundamentals.
Learn the knots

33 BCC 103 Supplementary Handout| Tradewinds Sailing School and Club.
www.tradewindssailing.com
Sources:
Bing Images Library (www.bing.com) upon searching for “Marine Toilet Diagram”.
Bing Images Library (www.bing.com) upon searching for “Seacock”.
Wikipedia (www.wikipedia.com) upon searching for “Diver Down Flag”.
Bing Images Library (www.bing.com) upon searching for “sailboat tiller”.
Bing Images Library upon searching for “Sailboat Tiller”, “Sailboat Worm Gear”,
“Sailboat Steering”, “Sailboat Quadrant”, and “Sailboat Disk Steering”.
Bing images library upon searching for “boat sidelight” and “sailboat lights”.
United States Coast Guard Aids to Navigation Brochure online
(http://www.uscgboating.org/ATON/index.html)
Navigation Chart symbols were sourced from Maptech
(http://mapserver.mytopo.com/mapserver/nautical_symbols/Contents.html#N)
Anchoring swing and depth graphic were sourced from gosailing.info
(http://www.gosailing.info/Anchoring.htm)
Wikipedia (http://en.wikipedia.org/wiki/Bowline) upon searching for “bowline knot”.
Wikipedia (http://en.wikipedia.org/wiki/Clove_hitch_knot) upon searching for “clove
hitch knot”.
About.com (http://sailing.about.com/od/learntosail/a/howtoanchor.htm) upon
searching for “anchoring”.

![[PPT]Decision Points - IACCAC - Leaders in community ... · Web viewDecision Points Program Cognitive-behavioral intervention Teaches 2 concepts and 4 steps to increase participants’](https://img.pdfslide.us/doc/110x75/5b2f66c17f8b9ad1238c2f9f/pptdecision-points-iaccac-leaders-in-community-web-viewdecision-points.jpg)