Embed Size (px)
Citation preview

The
Bookfor SILE version v0.12.0
Simon Cozens


Table of ContentsWhat is SILE? . . . . . . . . . . . . . . . . . . . . . . . . . . . . . . . . . 2SILE versus Word . . . . . . . . . . . . . . . . . . . . . . . . . . . . . . . . . . . . . . . . . . . 2
SILE versus TeX . . . . . . . . . . . . . . . . . . . . . . . . . . . . . . . . . . . . . . . . . . . . 3
SILE versus InDesign . . . . . . . . . . . . . . . . . . . . . . . . . . . . . . . . . . . . . . . . . 4
Conclusion . . . . . . . . . . . . . . . . . . . . . . . . . . . . . . . . . . . . . . . . . . . . . . . 5
Getting Started . . . . . . . . . . . . . . . . . . . . . . . . . . . . . . . 6A Basic SILE Document . . . . . . . . . . . . . . . . . . . . . . . . . . . . . . . . . . . . . . . . 6
Installing . . . . . . . . . . . . . . . . . . . . . . . . . . . . . . . . . . . . . . . . . . . . . . . . 7
macOS . . . . . . . . . . . . . . . . . . . . . . . . . . . . . . . . . . . . . . . . . . . . . . . . . . . . . . . . . . 7
Arch Linux . . . . . . . . . . . . . . . . . . . . . . . . . . . . . . . . . . . . . . . . . . . . . . . . . . . . . . . 7
Ubuntu . . . . . . . . . . . . . . . . . . . . . . . . . . . . . . . . . . . . . . . . . . . . . . . . . . . . . . . . . 7
NetBSD . . . . . . . . . . . . . . . . . . . . . . . . . . . . . . . . . . . . . . . . . . . . . . . . . . . . . . . . . 8
NixOS . . . . . . . . . . . . . . . . . . . . . . . . . . . . . . . . . . . . . . . . . . . . . . . . . . . . . . . . . . 8
Void Linux . . . . . . . . . . . . . . . . . . . . . . . . . . . . . . . . . . . . . . . . . . . . . . . . . . . . . . . 8
Running via Docker . . . . . . . . . . . . . . . . . . . . . . . . . . . . . . . . . . . . . . . . . . . . . . . . . . 8
Installing From Source . . . . . . . . . . . . . . . . . . . . . . . . . . . . . . . . . . . . . . . . . . . . . . . . 9
Notes for Windows users . . . . . . . . . . . . . . . . . . . . . . . . . . . . . . . . . . . . . . . . . . . . . . 11
Running SILE . . . . . . . . . . . . . . . . . . . . . . . . . . . . . . . . . . . . . . . . . . . . . 11
Let’s Do Something Cool . . . . . . . . . . . . . . . . . . . . . . . . . . . . . . . . . . . . . . 12
Running SILE remotely as a CI job . . . . . . . . . . . . . . . . . . . . . . . . . . . . . . . . . 12
SILE’s Input Language . . . . . . . . . . . . . . . . . . . . . . . . . . . 14Defining the paper size . . . . . . . . . . . . . . . . . . . . . . . . . . . . . . . . . . . . . . . 14
Ordinary text . . . . . . . . . . . . . . . . . . . . . . . . . . . . . . . . . . . . . . . . . . . . . 15
Commands . . . . . . . . . . . . . . . . . . . . . . . . . . . . . . . . . . . . . . . . . . . . . . 17
Environments . . . . . . . . . . . . . . . . . . . . . . . . . . . . . . . . . . . . . . . . . . . . . 18
The XML Flavour . . . . . . . . . . . . . . . . . . . . . . . . . . . . . . . . . . . . . . . . . . . 18

Some Useful SILE Commands . . . . . . . . . . . . . . . . . . . . . . . 20Fonts . . . . . . . . . . . . . . . . . . . . . . . . . . . . . . . . . . . . . . . . . . . . . . . . . . 20
Document Structure . . . . . . . . . . . . . . . . . . . . . . . . . . . . . . . . . . . . . . . . . 21
Chapters and Sections . . . . . . . . . . . . . . . . . . . . . . . . . . . . . . . . . . . . . . . . . . . . . . . . 22
Footnotes . . . . . . . . . . . . . . . . . . . . . . . . . . . . . . . . . . . . . . . . . . . . . . . . . . . . . . . 22
Indentation and Spacing . . . . . . . . . . . . . . . . . . . . . . . . . . . . . . . . . . . . . . 22
Breaks . . . . . . . . . . . . . . . . . . . . . . . . . . . . . . . . . . . . . . . . . . . . . . . . . 23
Including Other Files and Code . . . . . . . . . . . . . . . . . . . . . . . . . . . . . . . . . . 24
SILE Packages . . . . . . . . . . . . . . . . . . . . . . . . . . . . . . . . 28image . . . . . . . . . . . . . . . . . . . . . . . . . . . . . . . . . . . . . . . . . . . . . . . . . 28
folio . . . . . . . . . . . . . . . . . . . . . . . . . . . . . . . . . . . . . . . . . . . . . . . . . . 30
rules . . . . . . . . . . . . . . . . . . . . . . . . . . . . . . . . . . . . . . . . . . . . . . . . . . 30
color . . . . . . . . . . . . . . . . . . . . . . . . . . . . . . . . . . . . . . . . . . . . . . . . . . 31
background . . . . . . . . . . . . . . . . . . . . . . . . . . . . . . . . . . . . . . . . . . . . . . 31
rotate . . . . . . . . . . . . . . . . . . . . . . . . . . . . . . . . . . . . . . . . . . . . . . . . . 31
features . . . . . . . . . . . . . . . . . . . . . . . . . . . . . . . . . . . . . . . . . . . . . . . . 32
unichar . . . . . . . . . . . . . . . . . . . . . . . . . . . . . . . . . . . . . . . . . . . . . . . . 32
bidi . . . . . . . . . . . . . . . . . . . . . . . . . . . . . . . . . . . . . . . . . . . . . . . . . . . 33
pullquote . . . . . . . . . . . . . . . . . . . . . . . . . . . . . . . . . . . . . . . . . . . . . . . 33
raiselower . . . . . . . . . . . . . . . . . . . . . . . . . . . . . . . . . . . . . . . . . . . . . . . 34
grid . . . . . . . . . . . . . . . . . . . . . . . . . . . . . . . . . . . . . . . . . . . . . . . . . . . 34
linespacing . . . . . . . . . . . . . . . . . . . . . . . . . . . . . . . . . . . . . . . . . . . . . . 36
verbatim . . . . . . . . . . . . . . . . . . . . . . . . . . . . . . . . . . . . . . . . . . . . . . . . 37
font-fallback . . . . . . . . . . . . . . . . . . . . . . . . . . . . . . . . . . . . . . . . . . . . . 37
boustrophedon . . . . . . . . . . . . . . . . . . . . . . . . . . . . . . . . . . . . . . . . . . . . 38
chordmode . . . . . . . . . . . . . . . . . . . . . . . . . . . . . . . . . . . . . . . . . . . . . . 38
converters . . . . . . . . . . . . . . . . . . . . . . . . . . . . . . . . . . . . . . . . . . . . . . . 39
cropmarks . . . . . . . . . . . . . . . . . . . . . . . . . . . . . . . . . . . . . . . . . . . . . . . 39

date . . . . . . . . . . . . . . . . . . . . . . . . . . . . . . . . . . . . . . . . . . . . . . . . . . 40debug . . . . . . . . . . . . . . . . . . . . . . . . . . . . . . . . . . . . . . . . . . . . . . . . . 40leaders . . . . . . . . . . . . . . . . . . . . . . . . . . . . . . . . . . . . . . . . . . . . . . . . . 40lorem . . . . . . . . . . . . . . . . . . . . . . . . . . . . . . . . . . . . . . . . . . . . . . . . . 41specimen . . . . . . . . . . . . . . . . . . . . . . . . . . . . . . . . . . . . . . . . . . . . . . . 41textcase . . . . . . . . . . . . . . . . . . . . . . . . . . . . . . . . . . . . . . . . . . . . . . . . 41url . . . . . . . . . . . . . . . . . . . . . . . . . . . . . . . . . . . . . . . . . . . . . . . . . . . 42Packages usually used by other packages . . . . . . . . . . . . . . . . . . . . . . . . . . . . 42
footnotes . . . . . . . . . . . . . . . . . . . . . . . . . . . . . . . . . . . . . . . . . . . . . . . . . . . . . . . 42
color-fonts . . . . . . . . . . . . . . . . . . . . . . . . . . . . . . . . . . . . . . . . . . . . . . 42counters . . . . . . . . . . . . . . . . . . . . . . . . . . . . . . . . . . . . . . . . . . . . . . . . . . . . . . . . 42
pdf . . . . . . . . . . . . . . . . . . . . . . . . . . . . . . . . . . . . . . . . . . . . . . . . . . . . . . . . . . . 44
ifattop . . . . . . . . . . . . . . . . . . . . . . . . . . . . . . . . . . . . . . . . . . . . . . . . . . . . . . . . . 44
frametricks . . . . . . . . . . . . . . . . . . . . . . . . . . . . . . . . . . . . . . . . . . . . . . . . . . . . . . 44
insertions . . . . . . . . . . . . . . . . . . . . . . . . . . . . . . . . . . . . . . . . . . . . . . . . . . . . . . . 45
twoside . . . . . . . . . . . . . . . . . . . . . . . . . . . . . . . . . . . . . . . . . . . . . . . . . . . . . . . . 45
masters . . . . . . . . . . . . . . . . . . . . . . . . . . . . . . . . . . . . . . . . . . . . . . . . . . . . . . . . 46
infonode . . . . . . . . . . . . . . . . . . . . . . . . . . . . . . . . . . . . . . . . . . . . . . . . . . . . . . . . 46
inputfilter . . . . . . . . . . . . . . . . . . . . . . . . . . . . . . . . . . . . . . . . . . . . . . . . . . . . . . . 47
break-firstfit . . . . . . . . . . . . . . . . . . . . . . . . . . . . . . . . . . . . . . . . . . . . . . . . . . . . . 47
chapterverse . . . . . . . . . . . . . . . . . . . . . . . . . . . . . . . . . . . . . . . . . . . . . . . . . . . . . 47
parallel . . . . . . . . . . . . . . . . . . . . . . . . . . . . . . . . . . . . . . . . . . . . . . . . . . . . . . . . . 47
rebox . . . . . . . . . . . . . . . . . . . . . . . . . . . . . . . . . . . . . . . . . . . . . . . . . . . . . . . . . . 48
tableofcontents . . . . . . . . . . . . . . . . . . . . . . . . . . . . . . . . . . . . . . . . . . . . . . . . . . . . 48
xmltricks . . . . . . . . . . . . . . . . . . . . . . . . . . . . . . . . . . . . . . . . . . . . . . . . . . . . . . . 49
Experimental packages . . . . . . . . . . . . . . . . . . . . . . . . . . . . . . . . . . . . . . . 49balanced-frames . . . . . . . . . . . . . . . . . . . . . . . . . . . . . . . . . . . . . . . . . . . . . . . . . . . 49
bibtex . . . . . . . . . . . . . . . . . . . . . . . . . . . . . . . . . . . . . . . . . . . . . . . . . . . . . . . . . 49
gutenberg . . . . . . . . . . . . . . . . . . . . . . . . . . . . . . . . . . . . . . . . . . . . . . . . . . . . . . . 50
indexer . . . . . . . . . . . . . . . . . . . . . . . . . . . . . . . . . . . . . . . . . . . . . . . . . . . . . . . . . 50
math . . . . . . . . . . . . . . . . . . . . . . . . . . . . . . . . . . . . . . . . . . . . . . . . . . . . . . . . . . 50
pdfstructure . . . . . . . . . . . . . . . . . . . . . . . . . . . . . . . . . . . . . . . . . . . . . . . . . . . . . . 55

svg . . . . . . . . . . . . . . . . . . . . . . . . . . . . . . . . . . . . . . . . . . . . . . . . . . . . . . . . . . . 55
The Package Manager . . . . . . . . . . . . . . . . . . . . . . . . . . . . . . . . . . . . . . . . 56
SILE Macros and Commands . . . . . . . . . . . . . . . . . . . . . . . . 58A simple macro . . . . . . . . . . . . . . . . . . . . . . . . . . . . . . . . . . . . . . . . . . . . 58Macro with content . . . . . . . . . . . . . . . . . . . . . . . . . . . . . . . . . . . . . . . . . 59Nesting macros . . . . . . . . . . . . . . . . . . . . . . . . . . . . . . . . . . . . . . . . . . . . 60
SILE Settings . . . . . . . . . . . . . . . . . . . . . . . . . . . . . . . . 62Spacing Settings . . . . . . . . . . . . . . . . . . . . . . . . . . . . . . . . . . . . . . . . . . . 63
Line spacing settings . . . . . . . . . . . . . . . . . . . . . . . . . . . . . . . . . . . . . . . . . . . . . . . . . 64
Word spacing settings . . . . . . . . . . . . . . . . . . . . . . . . . . . . . . . . . . . . . . . . . . . . . . . . 65
Letter spacing settings . . . . . . . . . . . . . . . . . . . . . . . . . . . . . . . . . . . . . . . . . . . . . . . 65
Typesetter settings . . . . . . . . . . . . . . . . . . . . . . . . . . . . . . . . . . . . . . . . . 66Linebreaking settings . . . . . . . . . . . . . . . . . . . . . . . . . . . . . . . . . . . . . . . . 66Shaper settings . . . . . . . . . . . . . . . . . . . . . . . . . . . . . . . . . . . . . . . . . . . . 67Settings from Lua . . . . . . . . . . . . . . . . . . . . . . . . . . . . . . . . . . . . . . . . . . 68
Multilingual Typesetting . . . . . . . . . . . . . . . . . . . . . . . . . . 70Selecting languages . . . . . . . . . . . . . . . . . . . . . . . . . . . . . . . . . . . . . . . . . 70Direction . . . . . . . . . . . . . . . . . . . . . . . . . . . . . . . . . . . . . . . . . . . . . . . 71Hyphenation . . . . . . . . . . . . . . . . . . . . . . . . . . . . . . . . . . . . . . . . . . . . . 71Support for specific languages . . . . . . . . . . . . . . . . . . . . . . . . . . . . . . . . . . . 72
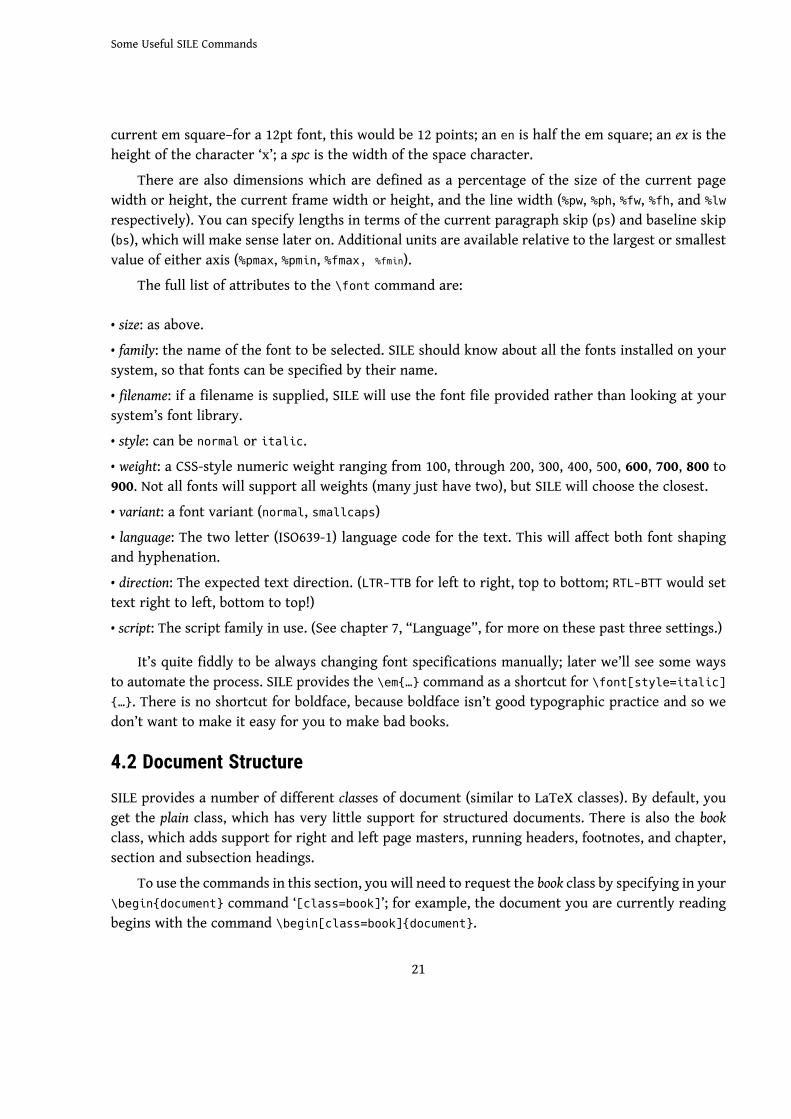
Amharic . . . . . . . . . . . . . . . . . . . . . . . . . . . . . . . . . . . . . . . . . . . . . . . . . . . . . . . . 72
French . . . . . . . . . . . . . . . . . . . . . . . . . . . . . . . . . . . . . . . . . . . . . . . . . . . . . . . . . 72
Japanese / Chinese . . . . . . . . . . . . . . . . . . . . . . . . . . . . . . . . . . . . . . . . . . . . . . . . . . 72
Syllabic languages . . . . . . . . . . . . . . . . . . . . . . . . . . . . . . . . . . . . . . . . . . . . . . . . . . 73
Uyghur . . . . . . . . . . . . . . . . . . . . . . . . . . . . . . . . . . . . . . . . . . . . . . . . . . . . . . . . . 73
The Nitty Gritty . . . . . . . . . . . . . . . . . . . . . . . . . . . . . . . 74Boxes, Glue and Penalties . . . . . . . . . . . . . . . . . . . . . . . . . . . . . . . . . . . . . . 74
From Lua . . . . . . . . . . . . . . . . . . . . . . . . . . . . . . . . . . . . . . . . . . . . . . . . . . . . . . . 75

Kerns . . . . . . . . . . . . . . . . . . . . . . . . . . . . . . . . . . . . . . . . . . . . . . . . . . . . . . . . . . 76
Frames . . . . . . . . . . . . . . . . . . . . . . . . . . . . . . . . . . . . . . . . . . . . . . . . . 77
Designing Basic Class Files . . . . . . . . . . . . . . . . . . . . . . . . 82Defining Commands . . . . . . . . . . . . . . . . . . . . . . . . . . . . . . . . . . . . . . . . . 85Output Routines . . . . . . . . . . . . . . . . . . . . . . . . . . . . . . . . . . . . . . . . . . . 86Exports . . . . . . . . . . . . . . . . . . . . . . . . . . . . . . . . . . . . . . . . . . . . . . . . 89
Advanced Class Files 1: SILE As An XML Processor . . . . . . . . . . . 92Handling Titles . . . . . . . . . . . . . . . . . . . . . . . . . . . . . . . . . . . . . . . . . . . . 93Sectioning . . . . . . . . . . . . . . . . . . . . . . . . . . . . . . . . . . . . . . . . . . . . . . . 94Other Features . . . . . . . . . . . . . . . . . . . . . . . . . . . . . . . . . . . . . . . . . . . . 95
Further Tricks . . . . . . . . . . . . . . . . . . . . . . . . . . . . . . . 98Parallel Text . . . . . . . . . . . . . . . . . . . . . . . . . . . . . . . . . . . . . . . . . . . . . 98Sidenotes . . . . . . . . . . . . . . . . . . . . . . . . . . . . . . . . . . . . . . . . . . . . . . . 101SILE As A Library . . . . . . . . . . . . . . . . . . . . . . . . . . . . . . . . . . . . . . . . . . 105Debugging . . . . . . . . . . . . . . . . . . . . . . . . . . . . . . . . . . . . . . . . . . . . . . 106Conclusion . . . . . . . . . . . . . . . . . . . . . . . . . . . . . . . . . . . . . . . . . . . . . . 108


Chapter 1What is SILE?SILE is a typesetting system. Its job is to produce beautiful printed documents from raw content.The best way to understand what SILE is and what it does is to compare it to other systems whichyou may have heard of.
1.1 SILE versus Word
When most people produce printed documents using a computer, they usually use desktop orientedword processing software such as Microsoft Word, iWork Pages, or LibreOffice Writer. SILE is not aword processor; it is a typesetting system. There are several important differences.
The job of a word processor is to produce a document that looks exactly like what you type onthe screen. By contrast, the job of a typesetting system is to take raw content and produce a docu-ment that looks as good as possible. The input for SILE is a text document that includes instructionsabout how the content should be laid out on a page. In order to obtain the typeset result, the inputfile must be processed to render the desired output.
Word processors often describe themselves as WYSIWYG: What You See Is What You Get. SILE ischeerfully not WYSIWYG. In fact, you don’t see what you get until you get it. Rather, SILE documentsare prepared initially in a text editor—a piece of software which focuses on the text itself and notwhat it looks like—and then run through SILE in order to produce a PDF document.
For instance, most word processors are built roughly around the concept of a page with a centralcontent area into which you type and style your content. The overall page layout is controlled bythe page size and margins and more fine tuning is done by styling the content itself. You typicallytype continuously and when you hit the right margin, your cursor will automatically jump to thenext line. In this way, the user interface shows you where the lines on the printed page will break.
In SILE the overall page layout is defined with a paper size and a series of one or more contentframes. These frame descriptions provide the containers where content will later be typeset, includ-ing information about how it might flow from one frame to the next. Content is written separately,and SILE works out automatically how it best flows from frame to frame and from page to page. Sowhen you are preparing content for SILE, you don't know where the lines will break until after it hasbeen processed. You may use your text editor to type and type and type as long a line as you like,and when SILE comes to process your instructions, it will consider your input (up to) three timesover in order to work out how to best to break the lines to form a paragraph. For example, if afterone pass it finds that it has ended two successive lines with a hyphenated word, it will go back andtry again and see if it can find better layout.

The same idea applies to page breaks. When you type into a word processor, at some point youwill spill over onto a new page. When preparing content for SILE, you keep typing, because the pagebreaks are determined after considering the layout of the whole document.
In other words, SILE is a language for describing what you want to happen, and an interpreterthat will make certain formatting decisions about the best way for those instructions to be turnedinto print.
1.2 SILE versus TeX
“Ah,” some people will say, “that sounds very much like TeX!”1 If you don’t know much about TeXor don’t care, you can probably skip this section.
And it’s true. SILE owes an awful lot of its heritage to TeX. It would be terribly immodest toclaim that a little project like SILE was a worthy successor to the ancient and venerable creation ofthe Professor of the Art of Computer Programming, but… really, SILE is basically a modern rewriteof TeX.
TeX was one of the earliest typesetting systems, and had to make a lot of design decisions some-what in a vacuum. Some of those design decisions have stood the test of time—TeX is still an ex-tremely well-used typesetting systemmore than thirty years after its inception, which is a testamentto its design and performance—but many others have not. In fact, most of the development of TeXsince Knuth’s era has involved removing his early decisions and replacing them with technologieswhich have become the industry standard: we use TrueType fonts, not METAFONTs (xetex); PDFs,not DVIs (pstex, pdftex); Unicode, not 7-bit ASCII (xetex again); markup languages and embeddedprogramming languages, not macro languages (xmltex, luatex). At this point, the parts of TeX thatpeople actually use are 1) the box-and-glue model, 2) the hyphenation algorithm, and 3) the line-breaking algorithm.
SILE follows exactly in TeX's footsteps for each of these three areas that have stood the test oftime; it contains a slavish port of the TeX line-breaking algorithm which has been tested to produceexactly the same output as TeX given equivalent input. But as SILE is itself written in an interpretedlanguage,2 it is very easy to extend or alter the behaviour of the SILE typesetter.
For instance, one of the things that TeX can’t do particularly well is typesetting on a grid. Thisis something of a must-have feature for anyone typesetting bibles. Typesetting on a grid means thateach line of text will line up between the front and back of each piece of paper producing much lessvisual bleed-through when printed on thin paper. This is virtually impossible to accomplish in TeX.There are various hacks to try to make it happen, but they’re all horrible. In SILE, you can alter thebehaviour of the typesetter and write a very short add-on package to enable grid typesetting.
1. Except that, being TeX users, they will say “Ah, that sounds very much like TEX!”2. And if the phrase TeX capacity exceeded is familiar to you, you should already be getting excited.
What is SILE?
3

Of course, nobody uses plain TeX—they all use LaTeX equivalents plus a huge repository of pack-ages available from the CTAN. SILE does not benefit from the large ecosystem and community thathas grown up around TeX; in that sense, TeX will remain streets ahead of SILE for some time tocome. But in terms of core capabilities, SILE is already certainly equivalent to, if not somewhat moreadvanced than, TeX.
1.3 SILE versus InDesign
The other tool that people reach for when designing printed material on a computer is InDesign (orsimilar Desktop Publishing software, such as Scribus).
DTP software is similar to Word Processing Software in thatthey are both graphical and largely WYSIWYG, but the paradigmis different. The focus is usually less on preparing the contentthan on laying it out on the page--you click and drag to moveareas of text and images around the screen.
InDesign is a complex, expensive, commercial publishingtool. SILE is a free, open source typesetting tool which is entirelytext-based; you enter commands in a separate editing tool, savethose commands into a file, and hand it to SILE for typesetting.And yet the two systems do have a number of common features.
In InDesign, text is flowed into frames on the page. On theleft, you can see an example of what a fairly typical InDesignlayout might look like. SILE also uses the concept of frames to
determine where text should appear on the page, and so it’s possible to use SILE to generate pagelayouts which are more flexible and more complex than that afforded by TeX.
Another thing which people use InDesign for is to turn structured data in XML format—cata-logues, directories and the like—into print. The way you do this in InDesign is to declare what stylingshould apply to each XML element, and as the data is read in, InDesign formats the content accord-ing to the rules that you have declared.
You can do exactly the same thing in SILE, except you have a lot more control over how the XMLelements get styled, because you can run any SILE command you like for a given element, includingcalling out to Lua code to style a piece of XML. Since SILE is a command-line filter, armed withappropriate styling instructions you can go from an XML file to a PDF in one shot. Which is quitenice.
In the final chapters of this book, we’ll look at some extended examples of creating a class filefor styling a complex XML document into a PDF with SILE.
1.4 Conclusion
4

1.4 ConclusionSILE3 takes some textual instructions and turns them into PDF output. It has features inspired byTeX and InDesign, but seeks to be more flexible, extensible and programmable than either of them.It’s useful both for typesetting documents (such as this very documentation) written in the SILElanguage, and as a processing system for styling and outputting structured data.
3. In case you’re wondering, the author pronounces it /saɪəl/, to rhyme with “trial”.
What is SILE?
5

Chapter 2Getting StartedNow that we understand some of what SILE is about and what it seeks to do, let’s dive into SILEitself.
2.1 A Basic SILE Document
Before we show you how to use SILE, let’s have a look at an example of what SILE documents looklike. This is the input that we’re going to feed to SILE, which it is going to process and turn into aPDF file. Each of the examples can be saved as a text file and then use them as input to SILE.
These documents are plain text files; when you create your own SILE files, you will need to create them in a plaintext editor. Trying to create these files in a word processor such as Word will not work as they will be saved with theword processor’s formatting rather than in a plain text format. Examples of good text editors include cross platformeditors such as Atom and Sublime Text which are GUI oriented or Vim and Emacs which are more keyboard com-mand oriented. Depending on your operating system there are other good choices such as Notepad++ on Windowsor TextMate on OS X. You can also get started more simply with one of the basic editors built into your desktopenvironment such as Notepad on Windows, TextEdit on OS X, Gedit on Gnome, Kate on KDE, etc. For comparisonsof text editors see http://alternativeto.net/tag/text-editor/ and select your platform.
To begin with, here’s the most basic SILE file of all:
\begin{document}
Hello SILE!\end{document}
We’ll pick apart this document in the next chapter, but for now take it on trust that this is whata SILE document looks like.
At the risk of belabouring the obvious, this is going to produce an A4-sized PDF document, withthe text Hello SILE at the top left, and the page number (1) centered at the bottom. How are wegoing to get to that PDF?

2.2 Installing
First of all, we need to get ahold of SILE and get it running on our computer. Ready to use packagesare available for macOS and many Linux distributions. Details for those we know about are listedin the sections below. Many other Linux distros without native packages can also take advantageof either Linuxbrew or Nix packaging. For all other systems you will need to follow the steps todownload and compile the source yourself. Alternatively Docker containers are also available foruse on any system that can run them.
2.2.1 macOSFor macOS the recommended way to install SILE is through the Homebrew package manager. Onceyou have Homebrew running (see http://brew.sh), installing SILE is as easy as running:
$ brew install sile
The formula also has an option that can compile SILE from the current Git HEAD version. Totest the latest unreleased code you can install using:
$ brew install sile --HEAD
The brew package manager is also available as Linuxbrew for many Linux distributions. As analternative, the nix package manager is also available for macOS, see below.
2.2.2 Arch LinuxArch Linux (and derivatives such as Manjaro, Parabola, and others) have prebuilt packages in theofficial package repository:
$ pacman -S sile
The official package builds use Lua 5.4. Alternatively, a package that uses LuaJIT may be builtmanually from the Arch User Repository using sile-luajit. See the note about LuaJIT in the sectionInstalling From Source for applicable caveats. A VCS package is also available as sile-git to buildfrom the latest Git commit. These may be built and installed like any other AUR1 package.
2.2.3 UbuntuFor Ubuntu an official PPA is available with precompiled packages for all currently supported re-leases since 18.04 (currently Bionic, Focal, Hirsute):
sudo add-apt-repository ppa:sile-typesetter/sile
sudo apt-get update
1. https://wiki.archlinux.org/title/Arch_User_Repository
Getting Started
7

sudo apt-get install sile
2.2.4 NetBSDFor NetBSD, package sources are available in print/sile. Use the usual command bmake install tobuild and install. A binary package can be installed using pkgin
pkgin install sile
2.2.5 NixOSPackages are available for NixOS:
$ nix-env -i sile
The Nix package manager is also available on many other Linux distributions, as well as formacOS.
If you have flakes support2 enabled, you can run sile with:
nix run github:sile-typesetter/sile <sile arguments>
2.2.6 Void LinuxVoid Linux packages are available in the default package manager.
$ xbps-install sile
2.2.7 Running via DockerAnother way of getting SILE up and running in a pre-compiled state is to use prebuilt Docker con-tainers. If your system has Docker installed already, you can run SILE simply by issuing a run com-mand. The first time it is used Docker will fetch the necessary layers and assemble the image foryou. Thereafter only a small amount of CPU time and memory overhead goes into running the con-tainer compared to a regular system install.
The catch is that because SILE is running inside the container, in order to do anything usefulwith it you must first pass your sources (including things like fonts) in and give it a way to writefiles back out. The easiest way to do that is by mounting your entire project inside the container.This makes the actual invocation command quite a mouthful. For most shells, a single alias can becreated to hide that complexity and make it pretty simple to run:
$ alias sile='docker run -it --volume "$(pwd):/data" --user "$(id -u):$(id-g)" siletypesetter/sile:latest'
2. https://nixos.wiki/wiki/Flakes#Installing_flakes
8

Docker images are tagged to match releases (e.g. v0.10.0). Additionally the latest release willbe tagged latest, and a master tag is also available with the freshest development build. You cansubstitute latest in the alias above to run a specific version.
One notable issue with using SILE from a Docker container is that it will not have access toyour system’s fonts by default. You can map a folder of fonts (any tree usable by fontconfig) intothe container. This could be your system’s default font directory, your user one, a project specificfolder, or anything of your choosing. You can see where fonts are found on your system using fc-
list. The path of your choosing from the host system should be passed as a volume mounted on /
fonts inside the container like this:
$ docker run -it --volume "/usr/share/fonts:/fonts" --volume "$(pwd):/data" --user "$(id -u):$(id -g)" siletypesetter/sile:latest
Armed with commands (or aliases) like these to take care of the actual invocation, you shouldbe able to use all other aspects of SILE as documented in the rest of the manual. Just be aware whenit comes to things like fonts, images, or other resources about where your files are relative to thecontainer.
2.2.8 Installing From Source
Downloads of SILE can be obtained from the home page at http://www.sile-typesetter.org/.
SILE requires a number of other software packages to be installed on the computer before it canwork—the Lua programming language, and the Harfbuzz text shaping library. SILE provides its ownPDF creation library, which has its own requirements: freetype, fontconfig, zlib and libpng.
We suggest you use your distributions’s package manager to install as many of the dependenciesas possible. On DEB-based Linux machines such as Debian and Ubuntu, you should be able to installall of the needed dependencies by issuing the command:
$ apt-get install lua5.2 liblua5.2-dev lua-sec libharfbuzz-dev
libfreetype6-dev libfontconfig1-dev libpng-dev libicu-dev
Here’s an incantation that will work on most Redhat-based Linux distros:
$ yum install harfbuzz-devel make automake libtool gcc
freetype-devel fontconfig-devel lua-devel lua-sec libng-gevel libicu-devel
If you are on another system you will have to come up with the correct equivalent packagesyourself.
There are a large number of lua dependencies required to run SILE. You may either install themto your system using your system’s package manager or luarocks, or let the SILE build process fetchand bundle them for you (this is the default unless you specify otherwise). You cannot mix andmatch these two methods; either the system path has to have all the dependencies, or all of themwill be bundled with SILE.
Getting Started
9

If you choose to install the lua dependencies to your system, you may use any combination ofyour system’s packages and installing them via luarocks install. The easiest way is to let Luarocksfigure it out based on the included Rockspec:
$ luarocks install --deps-only sile-dev-1.rockspec
Note that the luasec package requires OpenSSL libraries on your system in order to compile. Onsome systems such as macOS you may need to configure the location of the header files manually itinstall it:
$ luarocks install luasec OPENSSL_DIR=...
Once you have these requirements in place, you should then be able to unpack the file that youdownloaded from SILE’s home page, change to that directory,3 and configure the build envirenment.
If you supplied all the Lua dependencies yourself, run:
$ ./configure --with-system-luarocks
Otherwise to go with default of bundling them, just run:
$ ./configure
SILE can be built to run using LuaJIT under which it runs almost exactly twice as fast! Because SILE lets yourdocuments, classes, and packages use Lua code from your system –and because the ecosystem for Lua software ismore developed around the regular Lua versions– we default to using the newest plain Lua installation found. Ifyour system has LuaJIT and you prefer to use it you can ask the configure process to use it like this:
$ ./configure --with-luajit
Keep in mind that any Lua code you write will need to be JIT compatible. The vast majority of Lua code willbe fine, but there are a few limitations. See the documentation for your version of LuaJIT for details.
If that comand was successful, you can build SILE itself:
3. If you downloaded a copy of the SILE source by cloning the git repository rather than downloading oneof the release packages, you will also need to run ./bootstrap.sh to setup the configure script at this pointbefore continuing to the next step.
10

$ make
Most users of SILE will want to install the sile command and SILE’s library files onto theirsystem; this can be done with:
$ make install
Now the sile command is available from any directory.
If you wish you can skip the install step and use the compiled SILE executable diretly from the source directory.As configured above this will only work from a shell with the CWD set to the SILE source. To make it usable fromanywhere, you can configure it with the source directory baked in as the installation location.
$ ./configure --datarootdir=$(cd ..;pwd)
$ make
Now to run SILE from anywhere you just need to supply the full path to the source directory.
$ /full/path/to/sile/sile
2.2.9 Notes for Windows usersSILE may be built on Windows using CMake and Visual Studio. There is not an installer (yet), butWindows executables are generated using Azure for every commit. You may download these exe-cutables by selecting the latest build from https://simoncozens-github.visualstudio.com/sile/_
build and downloading the "sile" artifact from the Artifacts drop down.
2.3 Running SILE
Let’s move to a new directory, and in a text editor, create the file hello.sil. Copy in the contentabove and save the file. Now at your command line run:
$ sile hello.sil
Once again, this should produce an output file hello.pdf. Congratulations—you have just type-set your first document with SILE!
SILE output filenames are generated by filing off the extension from the first input filename and adding .pdf. Ifyou want to write to a different filename altogether, use the -o file.pdf command line option to SILE. You canuse -o - to write the PDF to standard output, if you wish to use SILE as part of a pipeline.
Getting Started
11

2.4 Let’s Do Something Cool
In https://sile-typesetter.org/examples/docbook.xml, you will find a typical DocBook 5.0 arti-cle. Normally turning DocBook to print involves a curious dance of XSLT processors, format objectprocessors and/or strange LaTeX packages. But SILE can read XML files and it also comes with adocbook class, which tells SILE how to render (admittedly, a subset of) the DocBook tags onto a page.
Turning dockbook.xml into docbook.pdf is now as simple as:
$ ./sile -I docbook.sil docbook.xmlSILE v0.12.0 (Lua 5.3)Loading docbook
<classes/docbook.sil><docbook.xml>[1] [2] [3]
The -I flag adds a preamble, which is to say that it loads up a class before reading the input file;the docbook preamble provides processing expectations for DocBook tags, which means that oncethis is loaded, DocBook files can be processed directly as SILE documents.
In Chapter 9, we’ll look at how the docbook class works, and how you can define processingexpectations for other XML formats.
2.5 Running SILE remotely as a CI job
It may be useful for some work flows to run SILE remotely on a CI server as part of a job that rendersdocuments automatically from sources. This comes with the caveats mentioned in the section Run-ning via Docker above, but if you plan ahead and arrange your projects right it can be quite useful.
There are actually many ways to run SILE remotely as part of a CI work flow. Because packagesare available for many platforms, one way would be to just use your platforms native package in-stallation system to pull them into whatever CI runner environment you already use. Another wayis to pull in the prebuilt Docker container and run that.
As a case study, here is how a work flow could be setup in GitHub Actions:
name: SILEon: [push, pull_request]
jobs:
sile:runs-on: ubuntu-20.04
2.5 Running SILE remotely as a CI job
12

name: SILEsteps:
- name: Checkoutuses: actions/checkout@v2
- name: SILEid: sileuses: docker://siletypesetter/sile:latest
with:args: my-document.sil
Add to your repository as .github/workflows/sile.yaml. This work flow assumes your projecthas a source file my-document.sil and will leave behind a my-document.pdf. Note that this Actionswork flow explicitly uses a container fetched from Docker Hub because this is the fastest way to getrolling, and the comments in the section about Docker regarding tagged versions besides latest
apply equally here.Because this repository is itself a GitHub Action you can also use the standard uses syntax like
this:
uses: sile-typesetter/sile@latest
But be warned that since GitHub rebuilds containers from scratch on every such invocation,this syntax is not recommended for regular use. Pulling the prebuilt Docker images is recommendedinstead.
With these ideas in mind, other CI systems should be easy to support as well.
Getting Started
13

Chapter 3SILE’s Input LanguageLet’s now go back and reconsider the first SILE file we saw:
\begin{document}
Hello SILE!\end{document}
3.1 Defining the paper size
A document starts with a \begin{document} command and ends with \end{document}. In between,SILE documents are made up of two elements: text to be typeset on the page, such as “Hello SILE!”in our example, and commands.
The default paper size is A4, although each class may override this value. To manually changethe paper size, an optional argument may be added to the document declaration:
\begin[papersize=letter]{document}
SILE knows about the ISO standard A, B and C series paper sizes using names a4, b5, etc. Alsoavailable are the traditional sizes letter, note, legal, executive, halfletter, halfexecutive, statement,folio, quarto, ledger, tabloid, the series archA through archE, as well as DL, Comm10, Monarch, flsa,flse, csheet, dsheet, and esheet.
If you need a paper size for your document which is not one of the standards, then you canspecify it by dimensions:
papersize=<basic length> x <basic length>.
SILE knows a number of ways of specifying lengths. A <basic length> as mentioned above canbe specified as a floating-point number followed by a dimension abbreviation. Acceptable dimen-sions are printer’s points (pt), millimeters (mm), centimeters (cm) or inches. (in) (You can even use ftand m for feet and meters if you are typesetting particularly large documents.) For instance, a stan-dard B-format book can be specified by papersize=198mm x 129mm.
Once some of the basic document properties have been setup using these fixed size units, otherdimensions may be specified relative to them, using relative units. In chapter 4 we will meet some of

these relative units, and in chapter 7 we will meet some other ways of specifying lengths to makethem stretchable or shrinkable.
3.2 Ordinary text
On the whole, ordinary text isn’t particularly interesting—it’s just typeset.
TeX users may have an expectation that SILE will do certain things with ordinary text as well. For instance, if youplace two straight-backquotes into a TeX document (like this: ``) then TeX will magically turn that into a doubleopening quote (“). SILE won’t do this. If you want a double opening quote, you have to ask for one. Similarly, en- andem-dashes have to be input as actual Unicode characters for en- and em-dashes, rather than the pseudo-ligaturessuch as -- or --- that TeX later transforms to the Unicode characters.
There are only a few bits of cleverness that happen around ordinary text.The first is that space is not particularly significant. If you write Hello SILE! with three
spaces, you get the same output as if you write Hello SILE! with just one. Space at the beginningof a line will be ignored.
Similarly, you can place a line break anywhere you like in the input file, and it won’t affect theoutput because SILE considers each paragraph at a time and computes the appropriate line breaksfor the paragraph based on the width of the line available. In other words, if your input file says
Lorem ipsum dolor sit amet, consectetur adipisicing elit, sed do eiusmod tempor
incididunt ut labore et dolore magna aliqua. Ut enim ad minim veniam, quis
nostrud exercitation ullamco laboris nisi ut aliquip ex ea commodo consequat.
Duis aute irure dolor in reprehenderit in voluptate velit esse cillum dolore eu
fugiat nulla pariatur. Excepteur sint occaecat cupidatat non proident, sunt in
culpa qui officia deserunt mollit anim id est laborum.
…you might not necessarily get a line break after ‘tempor’; you’ll get a line break wherever is mostappropriate. In the context of this document, you’ll get:
Lorem ipsum dolor sit amet, consectetur adipisicing elit, sed do eiusmod tempor incididuntut labore et dolore magna ali ua. Ut enim ad minim veniam, uis nostrud exercitation ullamcolaboris nisi ut ali uip ex ea commodo conse uat. Duis aute irure dolor in reprehenderit in
SILE’s Input Language
15

voluptate velit esse cillum dolore eu fugiat nulla pariatur. Excepteur sint occaecat cupidatat nonproident, sunt in culpa ui o cia deserunt mollit anim id est laborum.
In other words, a line break is converted to a space.
Sometimes this conversion is not what you want. If you don’t want single line breaks to be converted to a space,use a comment character % at the end of a line to suppress the additional whitespace.
When you want to end a paragraph, you need to input two line breaks in a row, like this:
Paragraph one.
Paragraph two.
This is not paragraph three.
This is paragraph three.
The second clever thing that happens around ordinary text is that a few—four, in fact—charac-ters have a special meaning to SILE. All of these will be familiar to TeX users.
We’ve seen that a backslash is used to start a command, and we’ll look into commands in moredetail soon. Left and right curly braces ({, }) are used for grouping, particularly in command argu-ments. Finally, a percent sign is used as a comment character, meaning that everything from thepercent to the end of the line is ignored by SILE. If you want to actually typeset these characters,prepend a backslash to them: \\ produces ‘\’, \{ produces ‘{’, \} produces ‘}’, and \% produces ‘%’.
The third clever thing is SILE will automatically hyphenate text at the end of a line if it feels thiswill make the paragraph shape look better. Text is hyphenated according to the current languageoptions in place. By default, text is assumed to be in English unless SILE is told otherwise. In theLatin text above, we turned hyphenation off.
The final clever thing is that, where fonts declare ligatures (where two or more letters aremerged into one in order to make them visually more attractive), SILE automatically applies theligature. So if you type affluent fishing then, (depending on your font), your output might looklike: ‘a uent shing.’ If you specifically want to break up the ligatures, then insert empty groups(using the grouping characters { and }) in the middle of the possible ligatures: af{}f{}luent f{}
ishing: affluent fishing. See the section on the features package for more information on how tocontrol the display of ligatures and other font features.
3.3 Commands
16

3.3 Commands
Typically (and we’ll unpack that statement later), SILE commands are made up of a backslash fol-lowed by a command name, and a document starts with a \begin{document} command and endswith \end{document}.
A command may also take two other optional components: some parameters, and an argument.The \begin command at the start of the document is an example of this.1
\begin{document}
The parameters to a command are enclosed in square brackets and take the form key=value;multiple parameters are separated by commas or semicolons, as in [key1=value1,key2=value2,…]
Spaces around the keys are not significant; we could equally write that as [key1 = value1; key2
= value2; …]. If you need to include a comma or semicolon within the value to a parameter, youcan enclose the value in quotes: [key1 = "value1, still value 1", key2 = value2; …].
The optional argument (of which there can only be at most one) is enclosed in curly braces.2Because the argument is optional, there is a difference between this: \command{args} (which is in-terpreted as a command with argument args) and \command {args} (which is interpreted as a com-mand with no arguments, followed by the word args in a new group).
Here are a few more examples of SILE commands:
\eject % A command with no parameters or argument
\font[family=Times,size=10pt] % Parameters, but no argument
\chapter{Introducing SILE} % Argument but no parameters
1. Strictly speaking \begin isn’t actually a command but we’ll pretend that it is for now and get to thedetails in a moment.2. TeX users may forget this and try adding a command argument “bare”, without the braces. This won’twork; in SILE, the braces are always mandatory.
SILE’s Input Language
17

\font[family=Times,size=10pt]{Hi there!} % Parameters and argument
3.4 Environments
Commands like \chapter and \em (emphasises text by making it italic) are normally used to enclosea relatively small piece of text; a few lines at most. Where you want to enclose a larger piece ofthe document, you can use an environment; an environment begins with \begin{name} and enclosesall the text up until the corresponding \end{name}. We’ve already seen an example, the document
environment, which must enclose the entire document.Here is a secret: there is absolutely no difference between a command and an environment. In
other words, the following two forms are equivalent:
\font[family=Times,size=10pt]{Hi there!}
\begin[family=Times,size=10pt]{font}
Hi there!\end{font}
However, in some cases the environment form of the command will be easier to read and willhelp you to be clearer on where the command begins and ends.
3.5 The XML Flavour
While we’re on the subject of alternative forms, SILE can actually process its input in a completelydifferent file format. What we’ve seen so far has been SILE’s “TeX-like flavor”, but if the first char-acter of the input file is an angle bracket (<) then SILE will interpret its input as an XML file. (If itisn’t well-formed XML, then SILE will get very upset.)
Any XML tags within the input file will then be regarded as SILE commands, and tag attributesare interpreted as command parameters; from then on, the two file formats are exactly equivalent,with one exception: instead of a <document> tag, SILE documents can be enclosed in any tag. (Al-though <sile> is conventional for SILE documents.)
In other words, the XML form of the above document would be:
<sile>Hello SILE!</sile>
3.5 The XML Flavour
18

Commands without an argument need to be well-formed self-closing XML tags (for instance,<break/>), and commands with parameters should have well-formed attributes. The example above,in XML flavor, would look like this:
<font family="Times" size="10pt">Hi there!</font>
We don’t expect humans to write their documents in SILE’s XML flavor—the TeX-like flavor ismuch better for that—but having an XML flavor allows for computers to deal with SILE a lot moreeasily. One could create graphical user interfaces to edit SILE documents, or convert other XMLformats to SILE.
However, there is an even smarter way of processing XML with SILE. For this, you need to knowthat you can define your own SILE commands, which can range from very simple formatting tofundamentally changing the way that SILE operates. If you have a file in some particular XML format—let’s say it’s a DocBook file—and you define SILE commands for each possible DocBook tag, thenthe DocBook file becomes a valid SILE input file, as-is.
In the final two chapters, we’ll provide some examples of defining SILE commands and process-ing XML documents.
SILE’s Input Language
19

Chapter 4Some Useful SILE CommandsWe’re going to organise our tour of SILE by usage; we’ll start by giving you the most useful com-mands that you’ll need to get started typesetting documents using SILE, and then we’ll graduallymove into more and more obscure corners as the documentation progresses.
4.1 Fonts
The most basic command for altering the look of the text is the \font command; it takes two forms:
• \font[parameters…]{argument}
• \font[parameters…]
The first form sets the given argument text in the specified font; the second form changes thefont used to typeset text from this point on.
So, for instance:
Small text
\font[size=15pt]Big text!
\font[size=30pt]{Bigger text}
Still big text!
produces
Small text
Big text!
Bi er textStill big text!
As you can see, one possible attribute is size, which can be specified as a SILE <dimension>. A<dimension> is like a <basic length> (described above) but with a few extra possible dimensions.There are dimensions which are relative to the size of the current font: an em is the size of the font’s
current em square–for a 12pt font, this would be 12 points; an en is half the em square; an ex is theheight of the character ‘x’; a spc is the width of the space character.
There are also dimensions which are defined as a percentage of the size of the current pagewidth or height, the current frame width or height, and the line width (%pw, %ph, %fw, %fh, and %lw
respectively). You can specify lengths in terms of the current paragraph skip (ps) and baseline skip(bs), which will make sense later on. Additional units are available relative to the largest or smallestvalue of either axis (%pmax, %pmin, %fmax, %fmin).
The full list of attributes to the \font command are:
• size: as above.• family: the name of the font to be selected. SILE should know about all the fonts installed on yoursystem, so that fonts can be specified by their name.• filename: if a filename is supplied, SILE will use the font file provided rather than looking at yoursystem’s font library.• style: can be normal or italic.• weight: a CSS-style numeric weight ranging from 100, through 200, 300, 400, 500, 600, 700, 800 to900. Not all fonts will support all weights (many just have two), but SILE will choose the closest.• variant: a font variant (normal, smallcaps)• language: The two letter (ISO639-1) language code for the text. This will affect both font shapingand hyphenation.• direction: The expected text direction. (LTR-TTB for left to right, top to bottom; RTL-BTT would settext right to left, bottom to top!)• script: The script family in use. (See chapter 7, “Language”, for more on these past three settings.)
It’s quite fiddly to be always changing font specifications manually; later we’ll see some waysto automate the process. SILE provides the \em{…} command as a shortcut for \font[style=italic]{…}. There is no shortcut for boldface, because boldface isn’t good typographic practice and so wedon’t want to make it easy for you to make bad books.
4.2 Document Structure
SILE provides a number of different classes of document (similar to LaTeX classes). By default, youget the plain class, which has very little support for structured documents. There is also the bookclass, which adds support for right and left page masters, running headers, footnotes, and chapter,section and subsection headings.
To use the commands in this section, you will need to request the book class by specifying in your\begin{document} command ‘[class=book]’; for example, the document you are currently readingbegins with the command \begin[class=book]{document}.
Some Useful SILE Commands
21

4.2.1 Chapters and Sections
If you choose the book class, you can divide your document into different sections using the com-mands \chapter{…}, \section{…} and \subsection{…}. The argument to each command is the nameof the chapter or section respectively; chapters will be opened on a new right-hand page, and thechapter name will form the left running header. Additionally, the section name and number willform the right running header.
Chapters, sections and subsections will be automatically numbered starting from 1; to alter the numbering, see thedocumentation for the counters package in the next chapter. To produce an unnumbered chapter, provide theparameter [numbering=false].
This subsection begins with the command \subsection{Chapters and Sections}.
4.2.2 FootnotesFootnotes can be added to a book with the \footnote{…} command.1 The argument to the commandwill be set as a footnote at the bottom of the page; footnotes are automatically numbered from 1 atthe start of each chapter.
4.3 Indentation and Spacing
Paragraphs in SILE normally begin with an indentation (by default, 20 points in width). To turn thisoff, you can use the \noindent command at the start of a paragraph. (This current paragraph doesn’tneed to call \noindent because \section and \chapter automatically call it for the text followingthe heading.) A \noindent can be cancelled by following it with an \indent. You can completelyturn off indentation for the whole of the document by changing its size to zero; we’ll see how to dochange the size of the indentation in the settings chapter, but the easiest way to set it to zero for thewhole of the document (rather than for just one paragraph) is to issue the command \neverindent.
To increase the vertical space between paragraphs or other elements, the commands \smallskip,\medskip and \bigskip are available to add a 3pt, 6pt and 12pt gap respectively. There will be a\bigskip after this paragraph.
1. Like this: \footnote{Like this.}
4.3 Indentation and Spacing
22

There are also some commands to increase the horizontal space in a line; from the smallest tothe largest, \thinspace (1/6th of an em), \enspace (1 en), \quad (1 em), and \qquad (2em).
You can center a paragraph of text by wrapping it in the center environment. (\begin{center} …
\end{center}). This paragraph is centered on the page.
If you want to add a very long stretchy space, you can use the command \hfill. Doing this inconjunction with a line break will cause the line before the break to be flush left, like this.The command \cr is a shortcut for \hfill\break.
4.4 Breaks
SILE automatically determines line and page breaks; in later chapters we will introduce some settingswhich can be used to tweak this process. However, SILE’s plain class also provides some commandsto help the process on its way.
Between paragraphs, the \break command requests a frame break at the given location. (Thecommands \framebreak and \eject are also available as synonyms.) Where there are multipleframes on a page—for instance, in a document with multiple columns—the current frame will beended and typesetting will recommence at the top of the next frame. \pagebreak (also known as\supereject) is a more forceful variant, and ensures that a new page is opened even if there areremaining frames on the page. A less forceful variant is \goodbreak, which suggests to SILE that thisis a good point to break a frame. The opposite is \nobreak which requests that, if at all possible, SILEdoes not break at the given point. A neutral variant is \allowbreak, which allows SILE to break at apoint that it would otherwise not consider as suitable for breaking.
Within a paragraph, these commands have a different meaning. The \break command requests aline break at the given location, and, mutatis mutandis, so do \goodbreak, \nobreak and \allowbreak.If you want to be absolutely sure that you are inhibiting a page break, you can say \novbreak.
SILE normally fully-justifies text—that is, it tries to alter the spacing between words so that thetext stretches across the full width of the column.2 An alternative to full justification is ragged
2. This does not mean that text will always exactly fill the width of the column. SILE will choose line breaksand alter the spacing between words up to a certain extent, but when it has done its best, it will typeset theleast bad solution; this may involve some of the words jutting slightly out into the margin.
Some Useful SILE Commands
23

right margin formatting, where the spacing between words is constant but the right hand side ofthe paragraph may not line up. Ragged right is often used for children’s books and for frames withnarrow columns such as newspapers. To use ragged right formatting, enclose your text in a \begin
{raggedright} environment. This paragraph is set ragged right.Similarly, there is a raggedleft environment, in which the right-hand margin of the paragraph is
fixed, but the left-hand margin is allowed to vary. This paragraph is set ragged left.
4.5 Including Other Files and Code
To make it easier for you to author a large document, you can break your SILE document up intomultiple files. For instance, you may wish to put each chapter into a separate file; you may wish todevelop a file of user-defined commands (see chapter 6) and keep this separate from the main bodyof the document. You will then need the ability to include one SILE file from another.
This ability is provided by the \include command. It takes one mandatory parameter, src=<path>,which represents the path to the file. So for instance, you may wish to write a thesis like this:
\begin[class=thesis]{document}
\include[src=macros.xml]
\include[src=chap1.sil]
\include[src=chap2.sil]
\include[src=chap3.sil]…
\include[src=endmatter.sil]
\end{document}
\includes may be nested, in that file A can include file B which includes file C.The contents of an included file should be put in a \sile tag (or <sile> if the file is in XML
flavour), like so:
\begin{sile}
\chapter{A Scandal In Bohemia}
To Sherlock Holmes she is always {the woman}.
\end{sile}
This is because every file is required to contain a valid XML tree, which wouldn't be the casewithout a common root.
4.5 Including Other Files and Code
24

SILE is written in the Lua programming language, and the Lua interpreter is available at run-time. Just as one can run Javascript code from within a HTML document using a <script> tag,one can run Lua code from within a SILE document using a \script command. (It looks better inXML-flavor.) This command has two forms: \script[src=<filename>] which includes a Lua file, and\script{…} which runs Lua code inline.
Doing anything interesting inline requires knowledge of the internals of SILE, (thankfully thecode is not that hard to read) but to get you started, the Lua function SILE.typesetter:typeset(…)
will add text to a page, SILE.call("…")will call a SILE command, and SILE.typesetter:leaveHmode()
ends the current paragraph and outputs the text. So, for example:
\begin{script}
for i=1,10 do
SILE.typesetter:typeset(i .. " x " .. i .. " = " .. i*i .. ". ")
SILE.typesetter:leaveHmode()
SILE.call("smallskip")
end\end{script}
produces the following output:
1 x 1 = 1.2 x 2 = 4.3 x 3 = 9.4 x 4 = 16.5 x 5 = 25.6 x 6 = 36.7 x 7 = 49.8 x 8 = 64.9 x 9 = 81.10 x 10 = 100.
There is one notable caveat when embedding Lua code documents written with the TeX-fla-vor markup. Since SILE has to first parse the TeX markup to find the start and end of such scriptcommands without understanding what's in between, it is strictly necessary that no end tags appearinside the Lua code. This means that for the environment block version (\begin{script}) there must
Some Useful SILE Commands
25

be no instances of \end{script} inside the Lua code block, even inside a string that would otherwisebe valid Lua code, (e.g. if it was inside a quoted string or Lua comment). The first instance of suchan end tag terminates the block, and there is currently no way to escape it. For the inline comandform (\script) an exact matching number of open and closing braces may appear in the Lua code —the next closing brace at the same level as the opening brace will close the tag, even if it happens tobe inside some quoted string in the Lua code. Including any number of nested opening and closingbraces is possible as long as they are balanced.
4.5 Including Other Files and Code
26

Some Useful SILE Commands
27

Chapter 5SILE PackagesSILE comes with a number of packages which provide additional functionality. In fact, the actual“core” of SILE’s functionality is very small and very extensible, with most of the interesting featuresbeing provided by add-on packages. SILE packages are written in the Lua programming language,and can define new commands, change the way that the SILE system operates, or indeed do anythingthat it’s possible to do in Lua.
As mentioned above, loading a package is done through the \script command, which runs Luacode. By convention packages live in the packages/ subdirectory of either your input file's location,your current working directory or SILE’s installation directory. For instance, we’ll soon be talkingabout the grid package, which normally can be found as /usr/local/lib/sile/packages/grid.lua.To load this, we’d say:
\script[src=packages/grid]
How SILE locates files
SILE searches for paths in a variety of directories: first, in the directory in which your input file is located, then thecurrent wording directory; next, if the environment variable SILE_PATH is set, it will look in that directory; then itwill look in the standard installation directories /usr/lib/sile and /usr/local/lib/sile. Unlike TeX, it doesnot descend into subdirectories when looking for a file, and so if you have arranged your personal macro, class orpackage files into subdirectories, you will need to provide a full relative path to them.
5.1 image
As well as processing text, SILE can also include images.
Loading the image package gives you the \img command, fashioned after the HTML equivalent.\img takes the following parameters: src=… must be the path to an image file; you may also giveheight=… and/or width=… parameters to specify the output size of the image on the paper. If the sizeparameters are not given, then the image will be output at its ‘natural’ pixel size.

With the libtexpdf backend (the default), the images can be in JPEG, PNG, EPS or PDF formats.
Here is a 200x243 pixel image output with \img[src=documentation/gutenberg.png]:
Here it is with (respectively) \img[src=documentation/gutenberg.png,width=120px],\img[src=documentation/gutenberg.png,height=200px], and \img[src=documentation/
gutenberg.png,width=120px,height=200px]:
Notice that images are typeset on the baseline of a line of text, rather like a very big letter.
SILE Packages
29

5.2 folioThe folio package (which is automatically loaded by the plain class, and therefore by nearly everySILE class) controls the output of folios - the old-time typesetter word for page numbers.
It provides four commands to users:• \nofolios: turns page numbers off.• \nofoliothispage: turns page numbers off for one page, then on again afterward.• \folios: turns page numbers back on.• \foliostyle: a command you can override to style the page numbers. By default, they are centeredon the page.
If, for instance, you want to set page numbers in a different font you can redefine the commandlike so:
\define[command=foliostyle]{\center{\font[family=Albertus]{\process}}}
If you want to put page numbers on the left side of even pages and the right side of odd pages,there are a couple of ways you can do that. The complicated way is to define a command in Luawhich inspects the page number and then sets the number ragged left or ragged right appropriately.The easy way is just to put your folio frame where you want it on the master page...
5.3 rulesThe rules package draws lines. It provides three commands.
The first command is \hrule, which draws a line of a given length and thickness, although itcalls these width and height. (A box is just a square line.)
Lines are treated just like other text to be output, and so can appear in the middle of a para-graph, like this: (that one was generated with \hrule[width=20pt, height=0.5pt].)
Like images, rules are placed along the baseline of a line of text.The second command provided by rules is \underline, which underlines its contents.
Underlining is horrible typographic practice, and you should never do it.
(That was produced with \underline{never}.)Finally, fullrule draws a thin line across the width of the current frame.
5.4 color
30

5.4 colorThe color package allows you to temporarily change the color of the (virtual) ink that SILE usesto output text and rules. The package provides a \color command which takes one parameter,color=<color specification>, and typesets its argument in that color. The color specification isthe same as HTML: it can be a RGB color value in #xxx or #xxxxxx format, where x represents a hex-adecimal digit (#000 is black, #fff is white, #f00 is red and so on), or it can be one of the HTML andCSS named colors.
The HTML and CSS named colors can be found at http://dev.w3.org/csswg/css-color/#named-colors.
So, for example, this text is typeset with \color[color=red]{…}.Here is a rule typeset with \color[color=#22dd33]:
5.5 backgroundThe background package allows you to set the color of the canvas background (by drawing a solidcolor block the full size of the page on page initialization). The package provides a \background com-mand which requires at least one parameter, color=<color specification, and sets the backgoundof the current and all following pages to that color. If setting only the current page backgrounddifferent from the default is desired, an extra parameter allpages=false can be passed. The colorspecification in the same as specified in the color package.
So, for example, \background[color=#e9d8ba,allpages=false]will set a sepia tone backgroundon the current page.
5.6 rotateThe rotate package allows you to rotate things. You can rotate entire frames, by adding therotate=<angle> declaration to your frame declaration, and you can rotate any content by issuingthe command \rotate[angle=<angle>]{...}, where <angle> is measured in degrees.
Content which is rotated is placed in a box and rotated. The height and width of the rotatedbox is measured, and then put into the normal horizontal list for typesetting. The effect of this isthat space is reserved around the rotated content. The best way to understand this is by example:
here is some text rotated by ten, twenty and forty degrees.The previous line was produced by the following code:
SILE Packages
31

here is some text rotated by
\rotate[angle=10]{ten}, \rotate[angle=20]{twenty} and \rotate[angle=40]{forty}degrees.
5.7 featuresAs mentioned in Chapter 3, SILE automatically applies ligatures defined by the fonts that you use.These ligatures are defined by tables of features within the font file. As well as ligatures (multipleglyphs displayed as a single glyph), the features tables also declare other glyph substitutions.
The features package provides an interface to selecting the features that you want SILE to applyto a font. The features available will be specific to the font file; some fonts come with documentationexplaining their supported features. Discussion of OpenType features is beyond the scope of thismanual.
These features can be turned on and off by passing ‘raw’ feature names to the \font commandlike so:
\font[features="+dlig,+hlig"]... % turn on discretionary and historic ligatures
However, this is unwieldy and requires memorizing the feature codes. features provides twocommands, \add-font-feature and \remove-font-feature, which make it easier to access Open-Type features. The interface is patterned on the TeX package fontspec; for full documentation ofthe OpenType features supported, see the documentation for that package.1
Here is how you would turn on discretionary and historic ligatures with the features package:
\add-font-feature[Ligatures=Rare]\add-font-feature[Ligatures=Discretionary]...\remove-font-feature[Ligatures=Rare]\remove-font-feature[Ligatures=Discretionary]
5.8 unicharSILE is Unicode compatible, and expects its input files to be in the UTF-8 encoding. (The actual rangeof Unicode characters supported will depend on the supported ranges of the fonts that SILE is usingto typeset.) Some Unicode characters are hard to locate on a standard keyboard, and so are difficult
1. http://texdoc.net/texmf-dist/doc/latex/fontspec/fontspec.pdf
5.8 unichar
32

to enter into SILE documents. The unichar package helps with this problem by providing a commandto enter Unicode codepoints. After loading unichar, the \unichar command becomes available:
\unichar{U+263A} % produces �
If the argument to \unichar begins U+, u+, 0x or 0X, then it is assumed to be a hexadecimal value.Otherwise it is assumed to be a decimal codepoint.
5.9 bidi
Scripts like the Latin alphabet you are currently reading are normally written left to right; however,some scripts, such as Arabic and Hebrew, are written right to left. The bidi package, which is loadedby default, provides SILE with the ability to correctly typeset right-to-left text and also documentswhich mix right-to-left and left-to-right typesetting. Because it is loaded by default, you can useboth LTR and RTL text within a paragraph and SILE will ensure that the output characters appearin the correct order.
The bidi package provides two commands, \thisframeLTR and \thisframeRTL, which set thedefault text direction for the current frame. That is, if you tell SILE that a frame is RTL, the textwill start in the right margin and proceed leftward. It also provides the commands \bidi-off and\bidi-on, which allow you to trade off bidirectional support for a dubious increase in speed.
5.10 pullquote
The pullquote command formats longer quotations in an indented blockquote block with decorativequotation marks in the margins.
Here is some text set in a pullquote environment:
“ “ An education is not how much you have committed to memory, or even how muchyou know. It is being able to differentiate between what you do know and what you do notknow. ””— Anatole France
Optional values are available for:
• author to add an attribution line
• setback to set the bilateral margins around the block
• color to change the color of the quote marks
• scale to change the relative size of the quote marks
SILE Packages
33

If you want to specify what font the pullquote environment should use, you can redefine thepullquote:font command. By default it will be the same as the surrounding document. The fontstyle used for the attribution line can likewise be set using pullquote:author-font and the fontused for the quote marks can be set using pullquote:mark-font.
5.11 raiselower
If you don’t want your images, rules or text to be placed along the baseline, you can use theraiselower package to move them up and down. (The footnote package uses this to superscript thefootnote reference numbers.)
It provides two simple commands, \raise and \lower which both take a height=<dimension>
parameter. They will respectively raise or lower their argument by the given height. The raised orlowered content will not alter the height or depth of the line.
Here is some text raised by three points; here is some text lowered by four points.The previous paragraph was generated by:
Here is some text raised by \raise[height=3pt]{three points}; here is
some text lowered by \lower[height=4pt]{four points}.
5.12 grid
In normal typesetting, SILE determines the spacing between lines of type according to the followingtwo rules:
• SILE tries to insert space between two successive lines so that their baselines are separated by afixed distance called the baselineskip.
• If this first rule would mean that the bottom and the top of the lines are less than two points apart,then they are forced to be two points apart. (This distance is configurable, and called the lineskip)
The second rule is designed to avoid the situation where the first line has a long descender(letters such as g, q, j, p, etc.) which abuts a high ascender on the second line. (k, l, capitals, etc.)
In addition, the baselineskip contains a certain amount of ‘stretch’, so that the lines can expandif this would help with producing a page break at an optimal location, and similarly spacing betweenparagraphs can stretch or shrink.
The combination of all of these rules means that a line may begin at practically any point onthe page.
5.12 grid
34

An alternative way of typesetting is to require that lines begin at fixed points on a regular grid.Some people prefer the ‘color’ of pages produced by grid typesetting, and the method is often usedwhen typesetting on very thin paper as lining up the lines of type on both sides of a page ensuresthat ink does not bleed through from the back to the front. Compare the following examples: on theleft, the lines are guaranteed to fall in the same places on the recto (front) and the verso (back) ofthe paper; on the right, no such guarantee is made.
The grid package alters the way that the SILE’s typesetter operates so that the two rulesabove do not apply; lines are always aligned on a fixed grid, and spaces between paragraphsetc. are adjusted to conform to the grid. Loading the package adds two new commands to SILE:\grid[spacing=<dimension>] and \no-grid. The first turns on grid typesetting for the remainderof the document; the second turns it off again.
At the start of this section, we issued the command \grid[spacing=15pt] to set up a regular15-point grid. Here is some text typeset with the grid set up:
Lorem ipsum dolor sit amet, consectetur adipisicing elit, sed do eiusmod tempor incididunt utlabore et dolore magna aliqua. Ut enim ad minim veniam, quis nostrud exercitation ullamco laborisnisi ut aliquip ex ea commodo consequat. Duis aute irure dolor in reprehenderit in voluptate velitesse cillum dolore eu fugiat nulla pariatur. Excepteur sint occaecat cupidatat non proident, sunt inculpa qui officia deserunt mollit anim id est laborum.
And here is the same text after we issue \no-grid:
Lorem ipsum dolor sit amet, consectetur adipisicing elit, sed do eiusmod tempor incididunt utlabore et dolore magna aliqua. Ut enim ad minim veniam, quis nostrud exercitation ullamco laborisnisi ut aliquip ex ea commodo consequat. Duis aute irure dolor in reprehenderit in voluptate velitesse cillum dolore eu fugiat nulla pariatur. Excepteur sint occaecat cupidatat non proident, sunt in
SILE Packages
35

culpa qui officia deserunt mollit anim id est laborum.
5.13 linespacing
SILE’s default method of inserting leading between lines should be familiar to users of TeX, but it isnot the most friendly system for book designers. The linespacing package provides a better choiceof leading systems.
After loading the package (with \script[src=packages/linespacing]), you are able to choosethe linespacing mode by setting the linespacing.method parameter. The following examples havefunny sized words in them so that you can see how the different methods interact.
By default, this is set to tex. The other options available are:
• fixed. This set the lines at a fixed baseline-to-baseline distance, determined by the linespacing.
fixed.baselinedistance parameter. You can specify this parameter either relative to the type size(e.g. 1.2em) or as a absolute distance (15pt). This paragraph is set with a fixed 1.5em baseline-to-baseline distance.
• fit-glyph. This sets the lines solid; that is, the lowest point on line 1 (either a descender like qor, if there are no descenders, the baseline) will touch the highest point of line 2, as in thisparagraph. You generally don’t want to use this as is.
What you probably want to do is insert a constant (relative or absolute) space between the
lines by setting the linespacing.fit-glyph.extra-space parameter.This paragraph is set with 5points of space between the descenders and the ascenders.
• fit-font. This inspects each hbox on the line, and asks the fonts it finds for their bounding boxes -the highest ascender and the lower descender. It then sets the lines solid. Essentially each characteris treated as if it is the same height, rather like composing a slug of metal type. If there are thingsother than text on your line, or the text is buried inside other boxes, this may not work so well.
As with fit-glyph, you can insert extra space between the lines with the linespacing.fit-
font.extra-space parameter.
• css. This is similar to the method used in browsers; the baseline distance is set with the linespacing.
css.line-height parameter, and the excessspace between this parameter and the actual height
of the line is distributed between the top and bottom of the line.
5.14 verbatim
36

5.14 verbatim
The verbatim package is useful when quoting pieces of computer code and other text for which for-matting is significant. It changes SILE’s settings so that text is set ragged right, with no hyphenation,no indentation and regular spacing. It tells SILE to honor multiple spaces, and sets a monospacedfont.
Despite the name, verbatim does not alter the way that SILE sees special characters. You still need to escapebackslashes and braces: to produce a backslash, you need to write \\.
Here is some text set in the verbatim environment:
function SILE.repl()
if not SILE._repl then SILE.initRepl() end
SILE._repl:run()
end
If you want to specify what font the verbatim environment should use, you can redefine theverbatim:font command. For example you could change it from XML like this:
<define command="verbatim:font"><font family="DejaVu Sans Mono" size="9pt"/>
</define>
5.15 font-fallback
What happens when SILE is asked to typeset a character which is not in the current font? For in-stance, we are currently using the “Gentium” font, which covers a wide range of European scripts;however, it doesn’t contain any Japanese character. So what if I ask SILE to typeset abc あ?
Many applications will find another font on the system containing the appropriate characterand use that font instead. But which font should be chosen? SILE is designed for typesetting situa-tions where the document or class author wants complete control over the typographic appearanceof the output, so it’s not appropriate for it to make a guess - besides, you asked for Gentium. Sowhere the glyph is not defined, SILE will give you the current font’s “glyph not defined” symbol (aglyph called .notdef) instead.
But there are times when this is just too strict. If you’re typesetting a document in English andJapanese, you should be able to choose your English font and choose your Japanese font, and if the
SILE Packages
37

glyph isn’t available in one, SILE should try the other. The font-fallback package gives you a wayto specify a list of font specifications, and it will try each one in turn if glyphs cannot be found.
It provides two commands, \font:add-fallback and \font:clear-fallbacks. The parametersto \font:add-fallback are the same as the parameters to \font. So this code:
\font:add-fallback[family=Symbola]
\font:add-fallback[family=Noto Sans CJK JP]
will add two fonts to try if characters are not found in the current font. Now we can say:
あば x 😼 Hello world. あ
and SILE will produce:あば x 😼 Hello world.あ
\font:clear-fallbacks removes all font fallbacks from the list of fonts to try.\font:remove-fallback removes the last added fallback from the list of fonts to try.
5.16 boustrophedon
Partly designed to show off SILE’s extensibility, and partly designed for real use by classicists, theboustrophedon package allows you to typeset ancient Greek texts in the ‘ox-turning’ layout - thefirst line is written left to right as normal, but the next is set right to left, then left to right, andso on. To use it, you will need to set the font's language to ancient Greek (grc) and wrap text in aboustrophedon environment:
ΧΑΙΡΕΔΕΜΟΤΟΔΕΣΕΜΑΠΑΤΕΡΕΣΤΕΣΕΘΑΝΟΝΤΟΣΑΝΦΙΧΑΡΕΣΑΓΑΘΟΝΠΑΙΔΑΟΛΟΦΘΡΟΜΕΝΟΣΦΑΙΔΙ
ΜΟΣΕΠΟΙΕ (Under normal circumstances, that line would appear as ΧΑΙΡΕΔΕΜΟΤΟΔΕΣΕΜΑΠΑΤΕΡΕΣΤΕΣΕ
ΘΑΝΟΝΤΟΣΑΝΦΙΧΑΡΕΣΑΓΑΘΟΝΠΑΙΔΑΟΛΟΦΘΡΟΜΕΝΟΣΦΑΙΔΙΜΟΣΕΠΟΙΕ .)
5.17 chordmode
This package provides the chordmode environment, which transforms lines like:
5.17 chordmode
38

I've be<G>en a wild rover for many's a <C>year
into:I've be
Gen a wild rover for many's a
Cyear
The chords can be styled by redefining the chordmode:chordfont command, and the offset be-tween the chord name and text set with the chordmode:offset parameter.
5.18 convertersThe converters package allows you to register additional handlers to process included files andimages. That sounds a bit abstract, so it’s best explained by example. Suppose you have a GIF imagethat you would like to include in your document. You read the documentation for the image packageand you discover that sadly GIF images are not supported. What converters does is allow you toteach SILE how to get the GIF format into something that is supported. We can use the ImageMagicktoolkit to turn a GIF into a JPG, and JPGs are supported.
We do this by registering a converter with the converters:register command:
\script[src=packages/converters]
\converters:register[from=.gif,to=.jpg,command=convert $SOURCE $TARGET]
And now it just magically works:
\img[src=hello.gif, width=50px]
This will execute the command convert hello.gif hello.jpg and include the convertedhello.jpg file.
This trick also works for text file:
\converters:register[from=.md, to=.sil, command=pandoc -o $TARGET $SOURCE]
\include[src=document.md]
5.19 cropmarks
When preparing a document for printing, you may be asked by the printer to add crop marks. This
SILE Packages
39

means that you need to output the document on a slightly larger page size than your target paperand add printers crop marks to show where the paper should be trimmed down to the correct size.(This is to ensure that pages where the content “bleeds” off the side of the page are correctly cut.)
This package provides the crop:setup command which should be run early in your documentfile. It takes one argument, papersize, which is the true target paper size. It place cropmarks aroundthe true page content.
It also adds a header at the top of the page with the filename, date and output sheet number.You can customize this header by redefining crop:header.
5.20 dateThe date package provides the date command, which simply outputs the date using the system'sdate function. You can customize the format by passing the format parameter, following the for-matting codes in the Lua manual. (https://www.lua.org/pil/22.1.html)
5.21 debug
This package provides two commands: debug, which turns on and off SILE’s internal debugging flags(similar to using --debug=... on the command line); and disable-pushback which is used by SILE’sdevelopers to turn off the typesetter’s pushback routine, because we don’t really trust it very much.
5.22 leadersThe leaders package allows you to create repeating patterns which fill a given space. It provides the\dotfill command, which does this:
A \dotfill B
A B It also provides the \leaders[width=...]{content} command which allow you to defineyour own leaders. For example:
A \leaders[width=40pt]{/\\} B
A /\/\ /\ /\ B
5.23 lorem
40

5.23 loremSometimes you just need some dummy text. The command \lorem produces fifty words of “loremipsum”; you can choose a different number of words with the [words=...] parameter. Here’s\lorem[words=20]:
lorem ipsum dolor sit amet consetetur sadipscing elitr sed diam nonumy eirmod tempor in-vidunt ut labore et dolore magna ali uyam
5.24 specimen
SILE has found itself becoming well used by type designers, who often want to create specimendocuments to show off their new fonts. This package provides a few commands to help create testdocuments. (The fontproof class, available from the package manager, contains many more toolsfor creating specimens.) The \repertoire command prints out every glyph in the font, in a simpletable. The \pangrams command prints out a few pangrams for the Latin script. Finally, \set-to-width[width=...]{...} will process each line of content, changing the font size so that the outputis a constant width.
\begin[width=4cm]{set-to-width}
CAPERCAILLIELAMMERGEYERCASSOWARYACCENTOR DOWITCHER DOTTEREL\end{set-to-width}
CAPERCAILLIELAMMERGEYER
CASSOWARYACCENTOR DOWITCHER DO EREL
5.25 textcaseThe textcase package provides commands for language-aware case conversion of input text. Forexample, when language is set to English, then \uppercase{hij} will return HI . However, whenlanguage is set to Turkish, it will return Hİ .
As well as \uppercase, the package provides the commands \lowercase and \titlecase.
SILE Packages
41

5.26 urlThis package enhances the typesetting of URLs in two ways. First, the \url command will auto-matically insert breakpoints into unwieldy URLs like https://github.com/sile-typesetter/sile-
typesetter.github.io/tree/master/examples so that they can be broken up over multiple lines.It also provides the \href[src=...]{} command which inserts PDF hyperlinks, like this.The \href command accepts the same borderwidth, bordercolor, borderstyle and borderoffset
styling options as the \pdf:link command from the pdf package, for instance like this. ||||||| 190683a8This package enhances the typesetting of URLs in two ways. First, the \url command will auto-matically insert breakpoints into unwieldy URLs like https://github.com/sile-typesetter/sile-
typesetter.github.io/tree/master/examples so that they can be broken up over multiple lines.It also provides the \href[src=...]{} command which inserts PDF hyperlinks, like this.The \href command accepts the same borderwidth, bordercolor, borderstyle and borderoffset
styling options as the \pdf:link command from the pdf package, for instance like this.
5.27 Packages usually used by other packages
In addition, there are certain packages that you probably don’t need to use directly, as their main jobis to provide more basic functionality to other packages and classes. Classes such as the book classcompose functionality from different auxiliary packages.
5.27.1 footnotesWe’ve seen that the book class allows you to add footnotes to text with the \footnote command.This command is actually provided by the footnotes package. The book class loads up the packageand tells it where to put the footnotes that are typeset, and the footnotes package takes care offormatting the footnotes. It does this by using a number of other packages that we will describebelow.
5.28 color-fontsThe color-fonts package adds support for fonts with a COLR OpenType table. This package is auto-matically loaded when such a font is detected.
5.28.1 countersVarious parts of SILE such as the footnotes package and the sectioning commands keep a counter ofthings going on: the current footnote number, the chapter number, and so on. The counters packageallows you to set up, increment and typeset named counters. It provides the following commands:
• \set-counter[id=<counter-name>,value=<value>] — sets the counter called <counter-name>
to the <value> given.
5.28 color-fonts
42

• \increment-counter[id=<counter-name>] — does the same as \set-counter except that whenno value parameter is given, the counter is incremented by one.
• \show-counter[id=<counter-name>] — this typesets the value of the counter according to thecounter’s declared display type.
All of the commands in the counters package take an optional display=<display-type> parameter to set thedisplay type of the counter.
The available built-in display types are:
• arabic, the default;
• alpha, for lower-case alphabetic counting;
• Alpha, for upper-case alphabetic counting;
• roman, for lower-case Roman numerals; and,
• Roman for upper-case Roman numerals.
The ICU library also provides ways of formatting numbers in global (non-Latin) scripts. You can use anyof the display types in this list: http://www.unicode.org/repos/cldr/tags/latest/common/bcp47/number.xml. For example, display=beng will format your numbers in Bengali digits.
So, for example, the following SILE code:
\set-counter[id=mycounter, value=2]
\show-counter[id=mycounter]
\increment-counter[id=mycounter]
\show-counter[id=mycounter, display=roman]
produces:
2
iii
SILE Packages
43

5.28.2 pdfThe pdf package enables (basic) support for PDF links and table-of-contents entries. It provides thefour commands \pdf:destination, \pdf:link, \pdf:bookmark, and \pdf:metadata.
The \pdf:destination parameter creates a link target; it expects a parameter called name touniquely identify the target. To create a link to that location in the document, use \pdf:link[dest=name]{link content}.
The \pdf:link command accepts several options defining its border style: a borderwidth lengthsetting the border width (defaults to 0, meaning no border), a borderstyle string (can be set to"underline" or "dashed", otherwise a solid box), a bordercolor color specification for this border(defaults to blue), and finally a borderoffset length for adjusting the border with some verticalspace above the content and below the baseline (defaults to 1pt). Note that PDF renderers may varyon how they honor these border styling features on link annotations.
It also has an external option for URL links, which is not intended to be used directly - refer tothe url package for more flexibility typesetting external links.
To set arbitrary key-value metadata, use something like \pdf:metadata[key=Author, value=J.
Smith]. The PDF metadata field names are case-sensitive. Common keys include Title, Author,Subject, Keywords, CreationDate, and ModDate.
5.28.3 ifattopThis package provides two commands: \ifattop and \ifnotattop. The argument of the command isprocessed only if the typesetter is at the top of a frame or is not at the top of a frame respectively.
5.28.4 frametricksAs we mentioned in the first chapter, SILE uses frames as an indication of where to put text ontothe page. The frametricks package assists package authors by providing a number of commands tomanipulate frames.
The most immediately useful is \showframe. This asks the output engine to draw a box and labelaround a particular frame. It takes an optional parameter id=<frame id>; if this is not supplied, thecurrent frame is used. If the ID is all, then all frames declared by the current class are displayed.
It’s possible to define frames such as sidebars which are not connected to the main text flow ofa page. We’ll see how to do that in a later chapter, but this raises the obvious question: if they’renot part of the text flow, how do we get stuff into them? frametricks provides the \typeset-into
command, which allows you to write text into a specified frame:
\typeset-into[frame=sidebar]{ ... frame content here ... }
frametricks also provides a number of commands which, to be perfectly honest, we thoughtwere going to be useful, but haven’t quite ended up being as useful as all that.content_
The command \breakframevertical breaks the current frame in two at the specified location
5.28 color-fonts
44

into an upper and lower frame. If the frame initially had the ID main, then main becomes the upperframe (before the command) and the lower frame (after the command) is called main_. We just issueda \breakframevertical command at the start of this paragraph, and now we will issue the command\showframe. As you can see, the current frame is called content_ and now begins at the start of theparagraph.
Similarly, the \breakframehorizontal command breaks the frame in two into a left and a rightframe. The command takes an optional argument offset=<dimension>, specifying where on the linethe frame should be split. If it is not supplied, the frame is split at the current position in the line.
The command \shiftframeedge allows you to reposition the current frame left or right. It takesleft= and/or right= parameters, which can be positive or negative dimensions. It should only beused at the top of a frame, as it reinitializes the typesetter object.
Combining all of these commands, the \float command breaks the current frame, createsa small frame to hold a floating object (like the dropcap at the start of this sentence),flows text into the surrounding frame, and then, once text has descended past the float-ing object, moves the frame back into place again. It takes two optional parameters,
bottomboundary=<dimension> and/or rightboundary=<dimension>, which open up additional spacearound the frame. At the start of this paragraph, I issued the command
\float[bottomboundary=5pt]{\font[size=60pt]{C}}.
To reiterate: we started playing around with frames like this in the early days of SILE and theyhave not really proved a good solution to the things we wanted to do with them. They’re greatfor arranging where content should live on the page, but messing about with them dynamicallyseems to create more problems than it solves. There’s probably a reason why InDesign and similarapplications handle floats, drop caps, tables and so on inside the context of a content frame ratherthan by messing with the frames themselves. If you feel tempted to play with frametricks, there’salmost always a better way to achieve what you want without it.
5.28.5 insertionsThe footnotes package works by taking auxiliary material (the footnote content), shrinking thecurrent frame and inserting it into the footnote frame. This is powered by the insertions package;it doesn’t provide any user-visible SILE commands, but provides Lua functionality to other packages.TeX wizards may be interested to realise that insertions are implemented by an external add-onpackage, rather than being part of the SILE core.
5.28.6 twosideThe book class described in chapter 4 sets up left and right mirrored page masters; the twoside
package is responsible for swapping between the two left and right frames, running headers and soon. It has no user-serviceable parts.
SILE Packages
45

5.28.7 mastersThe masters functionality is also itself an add-on package. It allows a class to define sets of framesand switch between them either temporarily or permanently. It defines the commands \define-
master-template (which is pattern on the \pagetemplate function we will meet in chapter 8),\switch-master and \switch-master-one-page. See tests/masters.sil for more about this pack-age.
5.28.8 infonode
This package is only for class designers.
While typesetting a document, SILE first breaks a paragraph into lines, then arranges lines intoa page, and later outputs the page. In other words, while it is looking at the text of a paragraph, itis not clear what page the text will eventually end up on. This makes it difficult to produce indexes,tables of contents and so on where one needs to know the page number for a particular element.
To get around this problem, the infonode allows you to insert information nodes into the textstream; when a page is outputted, these nodes are collected into a list, and a class’s output routinecan examine this list to determine which nodes fell on a particular page. infonode provides the\info command to put an information node into the text stream; it has two required parameters,category= and value=. Categories are used to group similar sets of node together.
As an example, when typesetting a Bible, you may wish to display which range of verses are oneach page as a running header. During the command which starts a new verse, you would insert aninformation node with the verse reference:
SILE.call("info", category = "references", value = ref , )
During the endPage method which is called at the end of every page, we look at the list of “ref-erences” information nodes:
local refs = SILE.scratch.info.thispage.references
local runningHead = SILE.shaper.shape(refs[1] .. " - " .. refs[#refs])
SILE.typesetNaturally(rhFrame, runningHead);
5.28 color-fonts
46

5.28.9 inputfilterThe inputfilter package provides ways for class authors to transform the input of a SILE documentafter it is parsed but before it is processed. It does this by allowing you to rewrite the abstract syntaxtree representing the document.
Loading inputfilter into your class with class:loadPackage("inputfilter") provides youwith two new Lua functions: transformContent and createCommand. transformContent takes a con-tent tree and applies a transformation function to the text within it. See https://sile-typesetter.org/examples/inputfilter.sil for a simple example, and packages/chordmode.sil for a more com-plete one.
5.28.10 break-firstfitSILE’s normal page breaking algorithm is based on the Knuth-Plass “best-fit” method, which tests avariety of possible paragraph constructions before deciding on the visually optimal one. That guar-antees great results for texts which require full justification, but some languages don’t need thatdegree of complexity. In particular, Japanese is traditionally typeset on a grid system with charac-ters being essentially monospaced. You don’t need to do anything clever to break that into lines: juststop when you get to the end of the line and start a new one (the “first-fit” method). This packageimplements the first-fit technique. It’s currently designed to be used by other packages so it doesn’tcurrently provide any user-facing commands.
5.28.11 chapterverseThe chapterverse package is designed as a helper package for book classes which deal with versi-fied content such as scriptures. It provides commands which will generally be called by the higher-level \verse and \chapter (or moral equivalent) commands of the classes which handle this kind ofcontent:• \save-book-title takes its argument and squirrels it away as the current book name.• \save-chapter-number and \save-verse-number does the same but for the chapter and verse ref-erence respectively.• \format-reference is expected to be called from Lua code with a content table of {book = ...,
chapter = ..., verse = ...} and typesets the reference in the form cc:vv. If the parameter[showbook=true] is given then the book name is also output. (You can override this command tooutput your references in a different format.)• \first-reference and \last-reference typeset (using \format-reference) the first reference onthe page and the last reference on the page respectively. This is helpful for running headers.
5.28.12 parallelThe parallel package provides the mechanism for typesetting diglot or other parallel documents.When used by a class such as classes/diglot.lua, it registers a command for each parallel frame,
SILE Packages
47

to allow you to select which frame you’re typesetting into. It also defines the \sync command, whichadds vertical spacing to each frame such that the next set of text is vertically aligned. See https://
sile-typesetter.org/examples/parallel.sil and the source of classes/diglot.lua for exampleswhich makes the operation clear.
5.28.13 reboxThis package provides the \rebox command, which allows you to lie to SILE about the size of content.You can change the width, height, or depth of your content with the respective parameters, or makeit invisible by using the phantom parameter.
For example:
Hello \rebox[width=0pt]{world}overprint.
Look I’m not \rebox[phantom=true]{here}!
Hello worldworldoverprint.
Look I’m not !
5.28.14 tableofcontentsThe tableofcontents package provides tools for class authors to create tables of contents. Whenyou are writing sectioning commands such as \chapter or \section, your classes should call the\tocentry[level=...]{Entry} command to register a table of contents entry. At the end of eachpage, the exported Lua function moveTocNodes should be called to collate the table of contents en-tries and store which page they're on. At the end of the document, the writeToc Lua function writesthe table of contents data to a file. This is because the table of contents (written out with the\tableofcontents command) is usually found at the start of a document, before the entries havebeen processed. Because of this, documents with a table of contents need to be processed at leasttwice—once to collect the entries and work out which pages they’re on, then to write the table ofcontents.
The \tableofcontents command accepts a depth option to control the depth of the contentadded to the table.
If the pdf package is loaded before using sectioning commands, then a PDF document outlinewill be generated. Moreover, entries in the table of contents will be active links to the relevantsections. To disable the latter behavior, pass linking=false to the \tableofcontents command.
Class designers can also style the table of contents by overriding the following commands:• \tableofcontents:title - the text at the top of the TOC.• \tableofcontents:headerfont - the font used for the header.
5.28 color-fonts
48

• \tableofcontents:level1item, \tableofcontents:level2item, etc. - styling for entries.• \tableofcontents:level1number, \tableofcontents:level2number, etc. - deciding what to do withentry section number, if defined: by default, nothing (so they do not show up in the table of con-tents).
5.28.15 xmltricksIn chapter 9, we’re going to use SILE to typeset existing XML documents. Most of the work of type-setting XML with SILE is creating processing expectations for particular XML tags. xmltricks makesthe process somewhat easier by providing commands to handle two common cases.
\xmltricks:ignore{tag1 tag2 tag3} instructs SILE not to bother investigating the given tags.For instance, when processing a HTML document, you probably don’t need to typeset the head tagor anything inside it.
Similarly, some tags are just wrappers; you want to process their content, but there’s nothingspecific about the tag itself that needs any styling. List those tags in a \xmltricks:passthru{...}
command, and SILE will descend into the content without requiring a specific command for the tagitself.
5.29 Experimental packages
5.29.1 balanced-framesThis package attempts to ensure that the main content frames on a page are balanced; that is, thatthey have the same height. In your frame definitions for the columns, you will need to ensure thatthey have the parameter balanced set to a true value. See the example in tests/balanced.sil.
The current algorithm does not work particularly well, and a better solution to the columnproblem is being developed.
5.29.2 bibtexBibTeX is a citation management system. It was originally designed for TeX but has since been in-tegrated into a variety of situations.
This experimental package allows SILE to read and process BibTeX .bib files and output cita-tions and full text references. (It doesn’t currently produce full bibliography listings.)
To load a BibTeX file, issue the command \loadbibliography[file=whatever.bib]
To produce an inline citation, call \cite{key}, which will typeset something like “Jones 1982”.If you want to cite a particular page number, use \cite[page=22]{key}.
To produce a full reference, use \reference{key}.
SILE Packages
49

Currently, the only supported bibliography style is Chicago referencing, but other styles shouldbe easy to implement if there is interest. Check out packages/bibstyles/chicago.lua and adapt asnecessary.
5.29.3 gutenbergOne of the reasons why Johann Gutenberg’s 42 line Bible is considered a masterpiece of early print-ing is due to the quality of justification of every line. To achieve perfect justification color, Gutenbergused a number of ligatures, abbreviations, substitutions and so on. As an experiment in extendingSILE’s justification engine, the gutenberg package allows SILE to choose between a number of dif-ferent options for a particular piece of text, depending on what would improve the line fitting.
For instance, issuing the command \alternative{{and}{&}} would insert either the text andor an ampersand, depending on what best fits the current line.
5.29.4 indexerAn index is essentially the same thing as a table of contents, but sorted. This package provides theindexentry command, which can be called as either \indexentry[label=...] or \indexentry{...}(so that it can be called from a macro). Index entries are collated at the end of each page, and thecommand \printindex will deposit them in a list. The entry can be styled using the \index:item
command.Multiple indexes are available and an index can be selected by passing the index=... parameter
to \indexentry and \printindex.Classes using the indexer will need to call its exported function buildIndex as part of the end
page routine.
5.29.5 math
This package provides typesetting of formulas directly in a SILE document.
Mathematical typesetting in SILE is still in its infancy. As such, it lacks some features and may contain bugs. Feed-back and contributions are always welcome.
To typeset mathematics, you will need an OpenType math font installed on your system2. By default,
2. A list of freely available math fonts can be found at https://www.ctan.org/pkg/unicode-math
5.29 Experimental packages
50

this package uses Libertinus Math, so it will fail if Libertinus Math can’t be found. Another font maybe specified via the setting math.font.family.
The first way to typeset math formulas is to enter them in the MathML format. MathML is astandard for encoding mathematical notation for the Web and for other types of digital documents.It is supported by a wide range of tools and represents the most promising format for unifying theencoding of mathematical notation, as well as improving its accessibility (e.g. to blind users).
To render an equation encoded in MathML, one simply has to put it in a mathml command. Forexample, the formula 𝑎2 + 𝑏2 = 𝑐2 was typeset by the following command:
\mathml{\mrow{
\msup{\mi{a}\mn{2}}
\mo{+}\msup{\mi{b}\mn{2}}
\mo{=}\msup{\mi{c}\mn{2}}
}}
In an XML document, we would have used the more classical XML syntax:
<mathml><mrow>
<msup> <mi>a</mi> <mn>2</mn> </msup><mo>+</mo><msup> <mi>b</mi> <mn>2</mn> </msup><mo>=</mo><msup> <mi>c</mi> <mn>2</mn> </msup>
</mrow></mathml>
By default, formulas are integrated into the flow of text. To typeset them on their own line, one mayuse the [mode=display] option:
𝑎2 + 𝑏2 = 𝑐2
As this example code illustrates, MathML is not really intended to be written by humans and
SILE Packages
51

quickly becomes very verbose. That is why this package also provides a math command, which un-derstands a syntax similar to the math syntax of TeX. To typeset the above equation, one only hasto type \math{a^2 + b^2 = c^2}.
Here is a slightly more involved equation:
\begin[mode=display]{math}
\sum_{n=1}^\infty \frac{1}{n^2} = \frac{\pi^2}{6}
\end{math}
This renders as:
∞
𝑛=11𝑛2 =
π26
The general philosophy of the TeX-like syntax is to be a simple layer on top of MathML, andnot to mimic perfectly the syntax of the LaTeX tool. Its main difference from the SILE syntax isthat \mycommand{arg1}{arg2}{arg3} is translated into MathML as <mycommand> arg1 arg2 arg3
</mycommand> whereas in normal SILE syntax, the XML equivalent would be <mycommand>arg1</
mycommand> arg2 arg3.\sum, \infty and \pi are only shorthands for the Unicode characters∑,∞ and π. If it’s more conve-
nient, you can use these Unicode characters directly. The symbol shorthands are the same as in theTeX package unicode-math.
{formula} is a shorthand for \mrow{formula}. Since parentheses — among other glyphs — stretchvertically to the size of their englobing mrow, this is useful to typeset parentheses of different sizeson the same line:
\Gamma (\frac{\zeta}{2}) + x^2(x+1)
renders as
Γ ζ2 + 𝑥2 𝑥 + 1
which is ugly. To keep parentheses around 𝑥 +1 small, you should put braces around the expression:
\Gamma (\frac{\zeta}{2}) + x^2{(x+1)}
5.29 Experimental packages
52

Γ ζ2 + 𝑥2(𝑥 + 1)
To print a brace in a formula, you need to escape it with a backslash.In the math syntax, every individual letter is an identifier (MathML tag mi), every number is
a… number (tag mn) and all other characters are operators (tag mo). If it does not suit you, you canexplicitly use the \mi, \mn or \mo tags. For instance, sin(x)will be rendered as 𝑠𝑖𝑛(𝑥), because SILE con-siders the letters s, i and n to be individual identifiers, and identifiers made of one character areitalicized by default. To avoid that, you can specify that sin is an identifier by writing \mi{sin}(x)
and get: sin(𝑥). If you prefer it in “double struck” style, this is permitted by the mathvariant attribute:\mi[mathvariant=double-struck]{sin}(x) renders as 𝕤𝕚𝕟(𝑥).
To save you some typing, the math syntax lets you define macros with the following syntax:
\def{macro-name}{macro-body}
where in the macro’s body #1, #2, etc. will be replaced by the macro’s arguments. For instance:
\begin[mode=display]{math}
\def{diff}{\mfrac{\mo{d}#1}{\mo{d}#2}}\def{bi}{\mi[mathvariant=bold-italic]{#1}}
\diff{\bi{p}}{t} = ∑_i \bi{F}_i
\end{math}
results in:
d𝒑d𝑡 = 𝑖
𝑭 𝑖
Finally, tabular math can be typeset using the table command (or equivalently the mtable
MathML tag). For instance, to typeset a matrix:
\begin[mode=display]{math}
(\table{
SILE Packages
53

1 & 2 & 7 \\0 & 5 & 3 \\8 & 2 & 1 \\
})
\end{math}
will yield:
1 2 70 5 38 2 1
Tables may also be used to control the alignment of formulas:
\begin[mode=display]{math}
\{\table[columnalign=right center left]{
u_0 &=& 1 \\u_1 &=& 1 \\
u_n &=& u_{n−1} + u_n−2, \forall n ⩾ 2 \\
}\end{math}
𝑢0 = 1𝑢1 = 1𝑢𝑛 = 𝑢𝑛−1 + 𝑢𝑛−2, ∀𝑛 ⩾ 2
Tables currently do not support all attributes required by the MathML standard, but they do allowto control spacing using the rowspacing and columnspacing options.
Finally, here is a little secret. This notation:
\table{1 & 2 & 7 \\0 & 5 & 3 \\8 & 2 & 1 \\
}
5.29 Experimental packages
54

is strictly equivalent to this one:
\table{{1} {2} {7}
}{{0} {5} {3}
}{{8} {2} {1}
}}
In other words, the notation using & and \\ is only a syntactic sugar for a two-dimensional arrayconstructed with braces.
When macros are not enough, creating new mathematical elements is quite simple: one onlyneeds to create a new class deriving from mbox (defined in packages/math/base-elements.lua) anddefine the shape and output methods. shape must define the width, height and depth attributes ofthe element, while output must draw the actual output. An mbox may have one or more children(for instance, a fraction has two children — its numerator and denominator). The shape and output
methods of the children are called automatically.This package still lacks support for some mathematical constructs, but hopefully we’ll get there.
Among unsupported constructs are: decorating symbols with so-called accents, such as arrows orhats, “over” or “under” braces, and line breaking inside a formula.
5.29.6 pdfstructureFor PDF documents to be considered accessible, they must contain a description of the PDF’s docu-ment structure. This package allows structure trees to be created and saved to the PDF file. Currentlythis provides a low-level interface to creating nodes in the tree; classes which require PDF accessi-bility should use the \pdf:structure command in their sectioning implementation to declare thedocument structure.
See tests/pdf.sil for an example of using the pdfstructure package to create a PDF/UA com-patible document.
5.29.7 svgThis package provides two commands.
The first is \svg[src=...,[width=...,][height=...,][density=...]]. This loads and parsesan SVG file and attempts to render it in the current document. Optional width or height options
SILE Packages
55

will scale the SVG canvas to the given size calculated at a given density option (which defaults to 72ppi). For example, the command \svg[src=packages/svg/smiley.svg,height=12pt] produces thefollowing:
The second is a more experimental \svg-glyph. When the current font is set to an SVG font,SILE does not currently render the SVG glyphs automatically. This command is intended to be usedas a means of eventually implementing SVG fonts; it retrieves the SVG glyph provided and rendersit.
In both cases the rendering is done with our own SVG drawing library; it is currently very min-imal, only handling lines, curves, strokes and fills. For a fuller implementation, consider using aconverters registration to render your SVG file to PDF and include it on the fly.
5.30 The Package Manager
While your SILE installation will include a comprehensive collection of SILE packages, there’s moreout there! SILE comes with a simple package manager which can help you to download and installnew packages. The package manager is accessed from the SILE REPL, like so:
$ sileSILE v0.12.0 (Lua 5.3)> installPackage("endnotes")
Loading catalogue from https://raw.githubusercontent.com/simoncozens/sile-packages/master/packages.lua
There will then follow a load of information which should end up with the endnotes packageand all its dependencies being installed. SILE will also ensure that downloaded packages are addedto the package search path. There’s currently no way to list or search the available packages. We’llget there.
5.30 The Package Manager
56

SILE Packages
57

Chapter 6SILE Macros and CommandsOne of the reasons that we use computers is that they are very good at doing repetitive jobs for us,so that we don’t have to. Perhaps the most important skill in operating computers, and particularlyin programming computers, is noticing areas where an action is being repeated, and allowing thecomputer to do the work instead of the human. In other words, Don’t Repeat Yourself.
The same is true in operating SILE. After you have been using the system for a while, you willdiscover that there are patterns of input that you need to keep entering again and again.
6.1 A simple macroFor instance, let’s suppose that we want to design a nice little “bumpy road” logo for SILE. (Affi-cionados of TEX and friends will be familar with the concept of bumpy road logos.) Our logo will looklike this: SIL . It’s not a great logo, but we’ll use it as SIL ’s logo for the purposes of this section.
To typeset this logo, we need to ask SIL to: typeset an ‘S’; typeset an ‘I’ lowered by a certainamount (half an ex, as it happens); typeset an ‘L’; walk backwards along the line a tiny bit; typeseta smaller-sized ‘E’ raised by a certain amount, using the features package to choose a small capital‘E’.
In SIL code, that looks like:
S%\lower[height=0.5ex]{I}%
L%\kern[width=-.2em]\raise[height=0.6ex]{\font[features=+smcp]{e}}%
(Don’t worry about the \kern command for the moment; we’ll come back to that later. The %’sprevent newlines from becoming spaces.)
We’ve used our logo four times already in this chapter, and we don‘t want to have to input thatwhole monstrosity each time we do so. What we would like to do is tell the computer “this is SIL ’slogo; each time I enter \SILE, I want you to interpret that as S\lower[height=0.5ex]{I}L\kern[
width=-.2em]\raise[height=0.6ex]{\font[features=+smcp]{e}}”.In other words, we want to define our own commands.SILE1 allows you to define your own commands in two ways. The simplest commands of all are
1. Let’s give up on the logo at this point.

those like \SILE above: “when I write \x, I want SILE to pretend that I had written X \Y Z instead.”These are called macros, and the process of pretending is called macro expansion.
You can define these kinds of macros within a SILE file itself. In this very file, we entered:
\define[command=SILE]{%S%\lower[height=0.5ex]{I}%
L%\kern[width=-.2em]\raise[height=0.6ex]{\font[features=+smcp]{e}}%
}
We're using the built-in SILE command \define. \define takes an option called command; itsvalue is the name of the command we are defining. The content of the \define command is a seriesof SILE instructions to be executed when the command is used.
At this point it’s worth knowing the precise rules for allowable names of SILE commands.
Commands in XML-flavor input files must be allowable XML tag names or else your input files will not be wellformed. Command names in TeX-flavor input files may consist of any number of alphanumeric characters, hyphensor colons. Additionally, any single character is a valid TeX-flavor command name. (Hence \\ for typesetting abackslash.)
When it comes to defining commands, commands defined by an XML-flavor file can actually have any namethat you like—even if they are not accessible from XML-flavor! (You may define oddly-named commands in a XML-flavor SILE file and then use them in a TeX-flavor SILE file.) Commands defined in TeX-flavor obviously have tohave names which are valid parameter values, or else they will not parse correctly either; parameter values happento consist of any text up until the nearest comma, semicolon or closing square bracket.
6.2 Macro with content
Now let’s move on to the next level; sometimes you will want to create commands which are notsimply replacements, but which have arguments of their own. As an example, let’s say we use thecolor package to turn a bit of text red like this. The usual way to do that is to say
\color[color=red]{like this}
SILE Macros and Commands
59

However, we‘re not always going to want to be highlighting the words ‘like this’. We mightwant to be able to highlight other text instead. We need the ability to wrap the command \color
[color=red]{ ... } around our chosen content. In other words, we want to be able to define ourown commands which take arguments.
The way we express this in SILE is with the \process command. \process is only valid withinthe context of a \define command (you’ll mess everything up if you try using it somewhere else),and it basically means ‘do whatever you were planning to do with the arguments to this command.’So if we want to a command which makes things red, we can say:
\define[command=red]{\color[color=red]{\process}}…
Making things red is a \red{silly} way to emphasise text.
You can’t call \process more than once within the same macro.
In the definition of the \chapter command, we want to 1) display the chapter name in a big bold font, and 2)use the chapter name as the left running header. If you try writing the \chapter command as a macro, you willget stuck—once you’ve \processed the chapter name to display it in bold, you won’t be able to process it again toset the running header.
So the \chapter command cannot be written as a simple macro. The other way to implement your own com-mands is to write them in the Lua programming language, which is what happens for \chapter. This is deliberate:the \define command really is meant to be used just for simple things, because we believe that programming tasksshould be done in a programming language. So don’t be afraid to write your own commands in Lua–it’s not toodifficult, and if you’re creating any serious document format yourself (rather than processing a document using aclass that someone else has written or adding minor formatting tweaks through customization hooks that classesgive you) you’re should expect to write it in Lua, as you’re almost certainly going to need to do so. We will see howto do this in later chapters.
6.3 Nesting macros
That said, one thing you can do is to call a macro within a macro. This should be obvious, becausea macro is just a replacement for the current processing step—when SILE reads a macro command,it behaves as if you had entered the definition of the macro instead, and of course such a definitioncan contain other commands.
6.3 Nesting macros
60

So it is possible even within the simple scope of macro processing to achieve quite a lot ofautomation.
For instance, within this book, there have been a number of notes—italicized paragraphs be-tween two heavy lines with a left margin. These have been typeset with the \note command; this isnot a built-in command but a macro specified within the documentation/macros.sil file includedby this document. Here is one way to define \note, in XML flavour:
<define command="line"><par/><smallskip/><noindent/>
<hrule width="450pt" height="0.3pt"/><par/>
<novbreak/><smallskip/><novbreak/>
</define>
<define command="narrower"><set parameter="document.lskip" value="24pt"/><process/>
<set parameter="document.lskip" value="0pt"/>
</end>
<define command="notefont"><font style="italic" size="10pt"><process/></font></notefont>
<define command="note"><narrower><line/><notefont><process/></notefont>
<line/></narrower>
</define>
The only command we have not yet met here is \set, which we will now investigate.
SILE Macros and Commands
61

Chapter 7SILE SettingsAs well as commands, SILE offers a variety of knobs and levers which affect how it does its job.Changing these parameters can have anything from a subtle to a dramatic effect on the eventualdocument. External packages may declare their own settings, which are documented accordingly.Here we will run through the settings which are built into the SILE system itself.
Settings in SILE are namespaced so that 1) the name of the setting gives you some kind of clueas to what area of the system it will affect, and 2) packages can define their own settings withoutworrying that they will be interfering with other packages or the SILE internals. Namespacing ofsettings takes the form area.name—so for instance, typesetter.orphanpenalty is the setting whichchanges how the typesetter penalizes orphan (end-of-paragraph) lines.
The interface to changing settings from within a SILE document is the \set commmand. It takesseveral options, the most basic one being parameter, which expresses which setting is being changed.The value option expresses the value to which the setting is being changed. As an example:
\set[parameter=typesetter.orphanpenalty, value=250]
Two additional options are accepted. The makedefault option can added so that whatever valueyou set sticks as the new default. The reset can be used without a value option to reset whatever thecurrent value is back to the default Note these two options are mutually exclusive.
\set[parameter=typesetter.orphanpenalty, value=250, makedefault=true]
or:
\set[parameter=typesetter.orphanpenalty, reset=true]
If the \set command is provided with any content, then the change of setting is localised to thecontent of the argument. In other words, this code:
\set[parameter=typesetter.orphanpenalty, value=250]{\lorem}

will change the orphan penalty to 250, typeset 50 words of dummy text, and then return theorphan penalty to its previous value.
If you are working in Lua, you have two choices to work with. As with any registered commandyou can call it using SILE.call(). For example:
SILE.call("set", parameter = "typesetter.orphanpenalty", value = 250 )
There is nothing wrong with this and it allows you to optionally pass content that is wrappedin those settings. However there is also a slightly lower level function that is more ideomatic of Luacode than SILE that uses positional arguments instead of named options:
SILE.settings.set("typesetter.orphanpenalty", 250)
The 3rd and 4th optional arguments are for makedefault and reset respectively.Now, let’s begin looking at what each of the built-in settings does, starting from the most obvi-
ous and moving towards the most subtle.
7.1 Spacing Settings
In our \note example, we saw the setting document.lskip. This is a glue parameter which is addedto the left side of every line. Setting this to a positive length effectively increases the left margin ofthe text. Similarly, document.rskip adds some space to the right side of every line.
Note that these skip settings are not the same as page margins. The document.lskip anddocument.rskip values are applied inside of the current frame and are relative to the edge of theframe, not to the edge of the page. They are best used for temporary adjustments to the marginsrelative to the normal margins, such as to indent a pull-quote. They can also be negative, pullingthe effective margin outside of the current frame.
Glue
A glue parameter is slightly different from an ordinary dimensioned length. Glue basically means ‘space,’ but as wellas signifying a length, it also has two additional optional components: stretch and shrink, specified as <dimension>plus <dimension> minus <dimension>. The first dimension is the basic length; the stretch is the maximumlength that can be added to it, and the shrink is some length that can be taken away from it. For instance, 12pt
SILE Settings
63

plus 6pt minus 3pt specifies a space that would ideally by 12 points, but can expand or contract from a minimumof 9 points to a maximum of 18 points.
Let’s think about how the centering environment is implemented. First, we will add incrediblystretchable glue to the left and right margins, like so:
\set[parameter=document.lskip,value=0pt plus 100000pt]
\set[parameter=document.rskip,value=0pt plus 100000pt]
This produces the following:
Here is some text which is almost centered. However, there are three problems: rst, thenormal paragraph indentation is applied, meaning the rst line of text is indented. Second, thespace between words is stretchable, meaning that the lines are stretched out so they almostseem justi ed. Finally, by default SILE adds very large glue at the end of each paragraph sothat when the text is justi ed, the spacing of the last line is not stretched out of proportion.is makes the centering of the last line look a bit odd. We will deal with these three issues inthe following paragraphs.
The indentation at the start of each paragraph is controlled by the setting document.parindent;this is a glue parameter, and by default it’s set to 20pt with no stretch and shrink. Actually, theamount added to the start of the paragraph is current.parindent. After each paragraph, current.paridentis reset to the value of document.parindent. The \noindent command works by setting current.parindentto zero.
How would youmake a paragraph like this with a ‘hanging’ indentation? We’ve set the document.lskipto 20 points, and the current.parindent to minus 20 points. (In other words, we called:\set[parameter=document.lskip,value=20pt] and \set[parameter=current.parindent,
value=-20pt].)
The space between paragraphs is set with the glue parameter document.parskip. It’s normallyset to five points with one point of stretchability.
7.1.1 Line spacing settings
As we mentioned in the section on grid typesetting, the rules for spacing between lines within aparagraph is determined by two rules. Let’s reiterate those rules now in terms of settings:• SILE tries to insert space between two successive lines to make their baselines exactly document.baselineskipapart.
7.1 Spacing Settings
64

• If this first rule would mean that the bottom and the top of the lines are less than document.lineskip
apart, then they are forced to be document.lineskip apart.
This linebreaking method is fiddly, and book designers may prefer to work with the tools provided by the linespacingpackage.
7.1.2 Word spacing settings
There are multiple ways of defining the space between words. By default, the space between words isdetermined by the width of the space character in the current font. To help with justifying the text,the spaces are shrinkable and stretchable. Specifically, if the width of a space in the current fontsettings is <space>, then the width of the space between words is <shaper.spaceenlargementfactor>* <space> plus <shaper.spacestretchfactor> * <space> minus <shaper.spaceshrinkfactor> *
<space>. The default values of these settings make the space width 1.2 <space> plus 0.5 <space>
minus 0.333 <space>.If you want to set the word space width explicitly, you can set the document.spaceskip setting.
You will also need to turn off the setting shaper.variablespaces, which allows the width of a spaceto vary based on context (otherwise known as “space kerning”). If you want to go back to the default(measuring the space character of the font), then you need to turn on shaper.variablespaces (setit to a true value) and also unset the setting document.spaceskip. To unset it, just call \set with novalue parameter: \set[parameter=document.spaceskip].
7.1.3 Letter spacing settings
You can also put spaces in between letters with the document.letterspaceglue setting.
This paragraph is set with document.letterspaceglue set to 0pt plus 4pt, which allows thetypesetter to insert tiny bits of spacing between the letters to improve the fitting of the paragraph,even though it would prefer to keep the letterspacing at zero points if possible. (Letter spacing isnot considered a preferable way to solve justification problems.)
This paragraph is set with document.letterspaceglue set to 0.3pt, which forces the typesetterto insert tiny bits of spacing between the letters. Frederic Goudy is credited with saying thatanyone who would letterspace lowercase would steal sheep.1
1. He was probably talking about blackletter, but it’s still true.
SILE Settings
65

7.2 Typesetter settings
The settings which affect SILE’s spacing controls have the most obvious effect on a document; thetypesetter itself has some knobs that can be twiddled:
typesetter.widowpenalty and typesetter.orphanpenalty2 affect how strongly SILE is averseto leaving stray lines at the start and end of pages. A widow happens when a page is broken leavingone line at the bottom of a page; an orphan line is the last line in a paragraph broken off at the top ofthe page. By default, the penalty attached to breaking the page at one of these places is 150 penaltypoints. This value can be any number up to 10000, which means “never break at this point.”
SILE automatically inserts a piece of massively stretchable glue at the end of each paragraph;without this, the justification algorithm would apply justification to the entire paragraph, includingthe last line, and produce a fully justified paragraph. (Normally we want the last line of a justifiedparagraph to be left-aligned.) The size of this glue is defined in the setting typesetter.parfillskip.Its default value is 0pt plus 10000pt but for this current paragraph, we have unset it.
Now we can finally complete our implementation of centering:
\set[parameter=document.lskip,value=0pt plus 100000pt]
\set[parameter=document.rskip,value=0pt plus 100000pt]
\set[parameter=document.spaceskip,value=0.5en]
\set[parameter=current.parindent,value=0pt]
\set[parameter=document.parindent,value=0pt]
\set[parameter=typesetter.parfillskip,value=0pt]
And this is (more or less) how the center environment is de ned in the plain class: we make themargins able to expand but the spaces not able to expand; we turn o indenting at the start of
the paragraph, and we turn o the lling glue at the end of the paragraph.
7.3 Linebreaking settings
SILE’s linebreaking algorithm is lifted entirely from TeX, and so maintains the same level of cus-tomizability as TeX. Here is a quick run-down of the settings applicable to the line-breaking algo-
2. TeX users, please notice the renaming.
7.3 Linebreaking settings
66

rithm. You are expected to know what you are doing with these.• linebreak.tolerance: How bad a breakpoint is before it is rejected by the algorithm. (Default: 500)• linebreak.pretolerance: If there are no breakpoints better than this, the paragraph is consideredfor hyphenation. (Default: 100)• linebreak.adjdemerits: Additional demerits which are accumulated in the course of paragraphbuilding when two consecutive lines are visually incompatible. In these cases, one line is built withmuch space for justification, and the other one with little space. (Default: 10000)• linebreak.looseness: How many lines the current paragraph should be made longer than normal.(Default: 0)• linebreak.prevGraf: The number of lines in the paragraph last added to the vertical list.• linebreak.emergencyStretch: Assumed extra stretchability in lines of a paragraph. (Default: 0)• linebreak.linePenalty: Penalty value associated with each line break. (Default: 10)• linebreak.hyphenPenalty: Penalty associated with break at a hyphen. (Default: 50)• linebreak.doubleHyphenDemerits: Penalty for consecutive lines ending with a hyphen. (Default:10000)
7.4 Shaper settings
As well as the settings for varying word space (see above), there is one additional option which af-fects the shaping of text.3 The default shaping engine, Harfbuzz, can actually call out to other shap-ing engines instead of doing the shaping itself. SILE provides an interface (through the harfbuzz.subshaperssetting) to select the shaping engine in use. To get a list of the subshapers enabled in your build ofHarfbuzz, run sile --debug=versions on any file:
% $ ./sile --debug=versions hello.sil...Harfbuzz version: 2.4.0Shapers enabled: graphite2, ot, coretext, coretext_aat, fallback...
If I wanted to test out the OS X’s CoreText shaper instead of using Graphite and Harfbuzz’s ownOpenType shaper, I could set:
3. Shaping is the process of selecting and positioning the glyphs from a font–turning the text that we typeinto the boxes that SILE puts together on a line.
SILE Settings
67

\set[parameter=harfbuzz.subshapers,value=coretext]
This is one of those situations where for 99% of people it isn’t useful at all but the other 1%of people will really appreciate it: specifically, if you are designing fonts with complex text layoutand you want to check how they will appear on different rendering systems. If that’s not you, don’tworry about this setting; if it is, you’re welcome.
7.5 Settings from Lua
Most of the time you will not be fiddling with these settings at the SILE layer, because complexlayout commands are expected to be implemented in Lua. The following SILE functions access thesettings system from inside Lua:• SILE.settings.set(<parameter>, value): sets a setting.
You should note that, while in the SILE layer, the \set command does its best to turn the textual description of atype into the appropriate Lua type for the value. SILE.settings.set does not do that; it expects the value to beof the appropriate type: lengths need to be a SILE.Length object, glue must be SILE.Glue and so on.
• SILE.settings.get(<parameter>): retrieves the current setting of the parameter.• SILE.settings.temporarily(function): Saves all settings, runs the function and then restores allsettings afterwards.• SILE.settings.declare(<specification>): Declares a new setting. See the base settings in settings.lua
for examples of how to call this. A class or package should namespace its settings with <package>.<setting>.
7.5 Settings from Lua
68

SILE Settings
69

Chapter 8Multilingual TypesettingOne thing we’re pretty proud of is SILE’s language support. Typesetting conventions differ bothfrom script to script and from language to language, and SILE aims to support quality typesettingacross script and language families. As an open source typesetting engine, we can implement thetypographic conventions of scripts that the commercial systems would not consider worthwhile,and we want to make it easy for minority languages and scripts to implement their own typographicconventions.
8.1 Selecting languages
For SILE to know how to typeset text in your language, you will need to tell it what language yourtext is in! There are two ways to do this: as part of the \font[language=...] command, as detailed inchapter 4, or by use of the \language[main=...] command. Both of these take a ISO639-1 languagecode such as en for English, ar for Arabic, and so on.
Selecting a language loads up the language support file for that language and turns on processingof typesetting conventions. This can change the hyphenation patterns, line breaking and justifica-tion schemes, spacing, choice of glyphs within a font, and more.
For example, Sindhi and Urdu users will expect the Arabic letter heh to combine with otherletters in different ways to standard Arabic shaping. In those cases, you should ensure that youselect the appropriate language before processing the text:
Standard Arabic:\font[family=LateefGR,language=ar]{};
then in Sindi:\font[family=LateefGR,language=snd]{};
then in Urdu:\font[family=LateefGR,language=urd]{}.
Standard Arabic: ; then in Sindi: ; then in Urdu: .

8.2 Direction
SILE is written to be direction-agnostic, which means that it has no fixed idea about which way textshould flow on a page: Latin scripts are generally written left-to-right with individual lines startingfrom the top of the page and advancing towards the bottom. Japanese can be written in the sameway, but traditionally is typeset down the page with lines of text moving from the right of the pageto the left.
To describe this, SILE uses the concept of a writing direction, which denotes the way each indi-vidual line appears on the page - left to right for Latin scripts, right to left for Arabic, Hebrew andso on, top to bottom for traditional Japanese - and a page advance direction, which denotes the waythe lines “stack up”. Each of these directions can take one of four values: LTR, RTL, TTB and BTT. Adirection specification is made up of either a writing direction (LTR or RTL), in which case the page ad-vance direction is understood to be TTB, or a writing direction and a page advance direction joinedby a hyphen.
Each frame has its own writing direction. By default, this is LTR-TTB. Normally you would set thewriting direction once, in the master frames of your document class. One easy way to do this in theplain document class is to pass the direction=... parameter to the \begin{document} command.For example, Mongolian is written top to bottom with text lines moving from the left to the rightof the page, so to create a Mongolian document, use:
\begin[direction=TTB-LTR]{document}
\font[language=mo,family=Noto Sans Mongolian]...\end{document}
To change the writing direction for a single frame, use \thisframedirection[direction=...].SILE uses the Unicode bidirectional algorithm to handle texts written in mixed directionalities.
See https://sile-typesetter.org/examples/i18n.sil for an example which brings together mul-tiple scripts and directionalities.
8.3 Hyphenation
SILE hyphenates words based on its current language. (Language is set using the \font commandabove.) SILE comes with support for hyphenating a wide variety of languages, and also aims to en-code specific typesetting knowledge about languages.
The default hyphen character is “-”, which can be tweaked by the \font parameter hyphenchar.It accepts a Unicode character or Unicode codepoint in [Uu]+<code> or Hexadecimal 0[Xx]<code>format – for instance \font[family=Rachana,language=ml,hyphenchar=U+200C].
Multilingual Typesetting
71
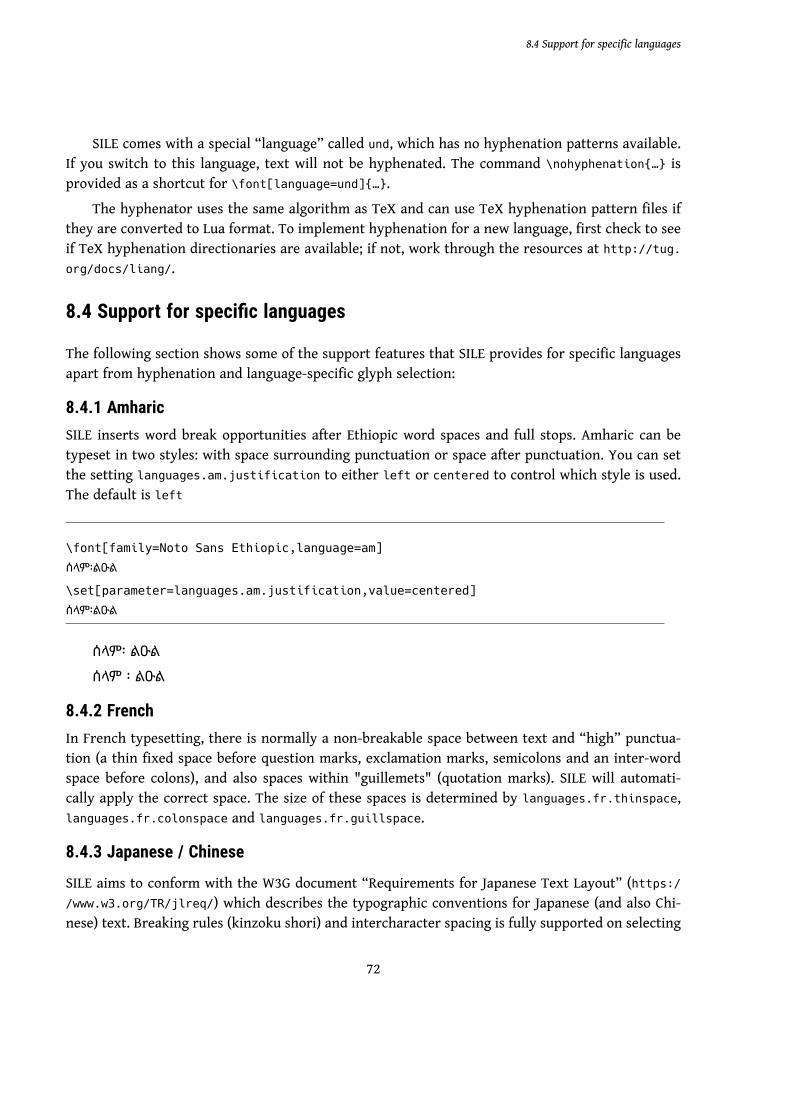
SILE comes with a special “language” called und, which has no hyphenation patterns available.If you switch to this language, text will not be hyphenated. The command \nohyphenation{…} isprovided as a shortcut for \font[language=und]{…}.
The hyphenator uses the same algorithm as TeX and can use TeX hyphenation pattern files ifthey are converted to Lua format. To implement hyphenation for a new language, first check to seeif TeX hyphenation directionaries are available; if not, work through the resources at http://tug.org/docs/liang/.
8.4 Support for specific languages
The following section shows some of the support features that SILE provides for specific languagesapart from hyphenation and language-specific glyph selection:
8.4.1 AmharicSILE inserts word break opportunities after Ethiopic word spaces and full stops. Amharic can betypeset in two styles: with space surrounding punctuation or space after punctuation. You can setthe setting languages.am.justification to either left or centered to control which style is used.The default is left
\font[family=Noto Sans Ethiopic,language=am]
ሰላም፡ልዑል
\set[parameter=languages.am.justification,value=centered]
ሰላም፡ልዑል
ሰላም፡ ልዑል
ሰላም ፡ ልዑል
8.4.2 FrenchIn French typesetting, there is normally a non-breakable space between text and “high” punctua-tion (a thin fixed space before question marks, exclamation marks, semicolons and an inter-wordspace before colons), and also spaces within "guillemets" (quotation marks). SILE will automati-cally apply the correct space. The size of these spaces is determined by languages.fr.thinspace,languages.fr.colonspace and languages.fr.guillspace.
8.4.3 Japanese / Chinese
SILE aims to conform with the W3G document “Requirements for Japanese Text Layout” (https://www.w3.org/TR/jlreq/) which describes the typographic conventions for Japanese (and also Chi-nese) text. Breaking rules (kinzoku shori) and intercharacter spacing is fully supported on selecting
8.4 Support for specific languages
72

the Japanese language. The easiest way to set up the other elements of Japanese typesetting such asthe hanmen grid and optional vertical typesetting support is by using the jplain class.
Japanese documents are traditionally typeset on a grid layout called a hanmen, with each char-acter essentially monospaced inside the grid. (It’s like writing on graph paper.) The hanmenkyoshi
package provides tools to Japanese class designers for creating hanmen frames with correctly spacedgrids. It also provides the \show-hanmen command for debugging the grid.
The name hanmenkyoshi is a terrible pun.The tate package provides support for Japanese vertical typesetting. It allows for the definition
of vertical-oriented frames, as well as for two specific typesetting techniques required in verticaldocuments: latin-in-tate typesets its content as Latin text rotated 90 degrees, and tate-chu-yoko
places (Latin) text horizontally within a single grid-square of the vertical hanmen.Japanese texts often contain pronunciation hints (called furigana) for difficult kanji or foreign
words. These hints are traditionally placed either above (in horizontal typesetting) or beside (invertical typesetting) the word that they explain. The typesetting term for these glosses is ruby.
The ruby package provides the \ruby[reading=...]{...} command which sets a piece of rubyabove or beside the base text. For example:
\ruby[reading=れいわ]{令和}
Produces:れいわ令和
8.4.4 Syllabic languagesSILE implements syllable-based line breaking for Burmese and Javanese text.
8.4.5 UyghurUyghur is the only Arabic script based language which uses hyphenation, and SILE supports hyphen-ation. Because Arabic fonts aren’t normally designed with hyphenation in mind, you may need totweak some settings to ensure that Uyghur is typeset correctly. As well as choosing the hyphenchar
(see the hyphenation section above), the setting languages.ug.hyphenoffset inserts a space be-tween the text and the hyphen.
Multilingual Typesetting
73

Chapter 9The Nitty GrittyWe are finally at the bottom of our delve into SILE’s commands and settings. Here are the basicbuilding blocks out of which all of the other operations in SILE are created.
At this point, it is expected that you are a class designer, and will be able to follow the details of how SILE implementsthese commands and features; we will also explain how to interact with these components at the Lua level.
9.1 Boxes, Glue and Penalties
SILE’s job is, looking at it in very abstract terms, all about arranging little boxes on a page. Some ofthose boxes have letters in them, and those letters are such-and-such a number of points wide andsuch-and-such a number of points high; some of the boxes are empty but are there just to take upspace; when a horizontal row of boxes has been decided (i.e. when a line break is determined) thenthe whole row of boxes is put into another box and the vertical list of boxes are then arranged toform a page.
Conceptually, then, SILE knows about a few different basic components: horizontal boxes (suchas a letter); horizontal glue (the stretchable, shrinkable space between words); vertical boxes (a lineof text); vertical glue (the space between lines and paragraphs); and penalties (information aboutwhere and when not to break lines and pages).1
The most immediately useful of these are horizontal and vertical glue. It is possible to explicitlyadd horizontal and vertical glue into SILE‘s processing stream using the \glue and \skip commands.These take a width and a height parameter respectively, both of which are glue dimensions. So, forinstance, the \smallskip command is the equivalent of \skip[height=3pt plus 1pt minus 1pt];\thinspace is defined as being \glue[width=0.16667em].
1. Additionally there are three more types of box that SILE cares about: N-nodes, unshaped nodes, anddiscretionaries.

Similarly, there is a \penalty command for inserting penalty nodes; \break is defined as \penalty[penalty=-10000]and \nobreak is \penalty[penalty=10000].
You can also create horizontal and vertical boxes from within SILE. One obvious reason for doingso would be to explicitly avoid material being broken up by a page or line break; another reason fordoing so would be that once you box some material up, you then know how wide or tall it is. The\hbox and \vbox commands put their contents into a box; when called from Lua, they also return thenew box.
9.1.1 From LuaSILE’s Lua interface contains a nodefactory for creating boxes and glue. Before we get into that,however, you need to know that glue measurements in SILE should always be specified in terms ofSILE.length objects; these are “three-dimensional” lengths, in that they consist of a base lengthplus stretch and shrink. To construct a SILE.length:
local l = SILE.length.new({ length = x, stretch = y, shrink = z})
Now we can construct horizontal and vertical glue:
local glue = SILE.nodefactory.newGlue ({ width = l})
local vglue = SILE.nodefactory.newVglue({ height = l})
SILE’s typesetting is organised by the SILE.typesetter object; it maintains two queues of ma-terial that it is working on—the node queues (SILE.typesetter.state.nodes) contains new hor-izontal boxes and glue that are going to be broken up into lines soon; and the output queue(SILE.typesetter.state.outputQueue) which consists of vertical material (lines) which are go-ing to be broken up into pages. Line breaking and page breaking happens when the typesettermoves between horizontal and vertical mode; you can force this to happen by calling the functionSILE.typesetter:leaveHmode(). The SILE-level command for forcing a paragraph end is \par.
So, if you want to manually add a vertical space to the output, first ensure that material inthe current paragraph has been all properly boxed-up and moved onto the output queue by callingSILE.typesetter:leaveHmode(); then add your desired glue to the output queue.
Adding boxes and glue to the typesetter’s queues is such a common operation that the typesetterhas some utility methods to construct the nodes and add them for you:
SILE.typesetter:leaveHmode()
The Nitty Gritty
75

SILE.typesetter:pushVglue({ height = l })
Adding boxes yourself is a little more complicated, because boxes need to know how to dis-play themselves on the page. To facilitate this, they normally store a value and an outputYourself
member function. For instance, the image package actually does something very simple; it adds ahorizontal box to the node queue which knows the width and height of the image, the source, andinstructions to the output engine to display the image:
SILE.typesetter:pushHbox({
width= …,
height= …,
depth= 0,
value= options.src,
outputYourself= function (this, typesetter, line)
SILE.outputter.drawImage(this.value,
typesetter.frame.state.cursorX, typesetter.frame.state.cursorY-this.height,
this.width,this.height
);
typesetter.frame:advanceWritingDirection(this.width)
end});
Adding horizontal and vertical penalties to the typesetter’s queues is similarly done with theSILE.typesetter:pushPenalty({penalty = x}) and SILE.typesetter:pushVpenalty({penalty =
y}) methods.
9.1.2 Kerns\kern’s are a type of \glue. The difference between the two is that, while a \glue can be brokenat the end of a line, a \kern can’t be. Hearkening back to our SIL example from the Macros andCommands chapter, consider that example, repeated enough times to cause a linebreak, but with\glue’s everywhere \kern’s are used instead:
SIL SIL SIL SIL SIL SIL SIL SIL SIL SIL SIL SIL SIL SIL SIL SIL SIL SIL SIL SIL SIL SIL SIL SIL SIL SIL SILSIL SIL SIL SIL SIL SIL SIL SIL SIL SIL SIL SIL SIL SIL SIL SIL SIL SIL SIL SIL SIL SIL SIL SIL SIL SIL SIL SILSIL SIL SIL SIL SIL
The 27th of the 60 SIL ’s, in red, is broken between its ‘L’ and ‘ ’. Meanwhile, if we typeset the
76
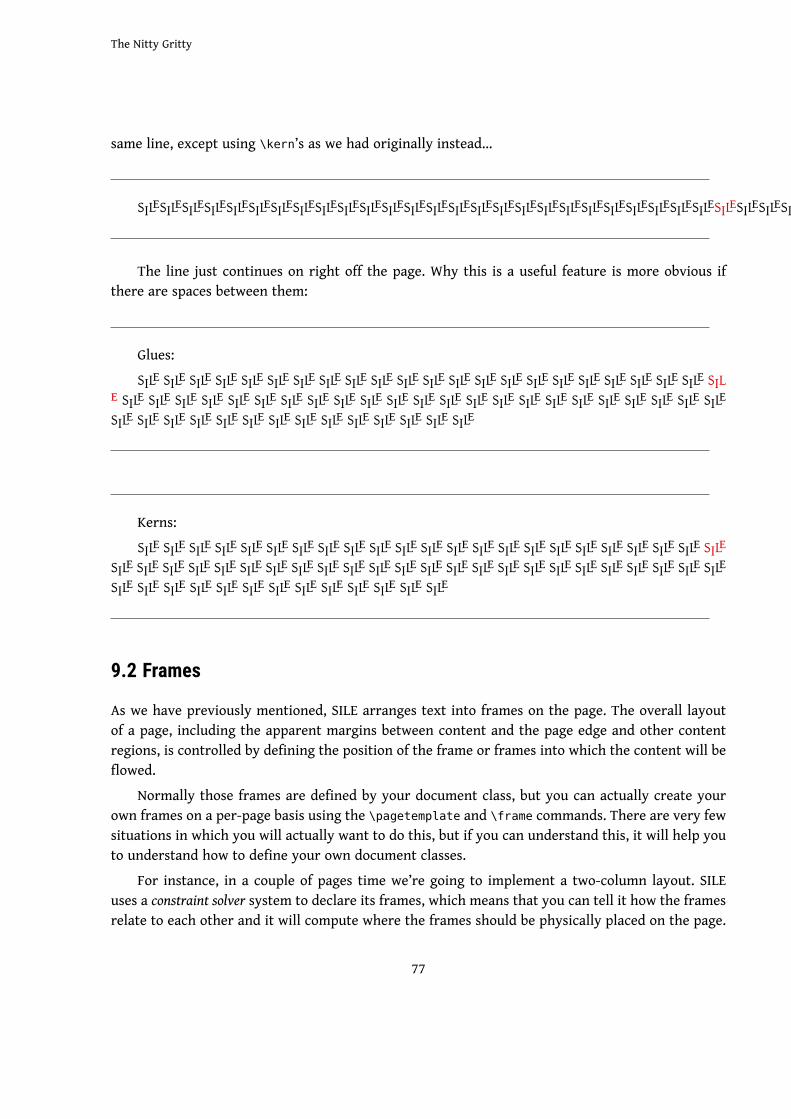
same line, except using \kern’s as we had originally instead…
SIL SIL SIL SIL SIL SIL SIL SIL SIL SIL SIL SIL SIL SIL SIL SIL SIL SIL SIL SIL SIL SIL SIL SIL SIL SIL SIL SIL SIL SIL SIL SIL SIL SIL SIL SIL SIL SIL SIL SIL SIL SIL SIL SIL SIL SIL SIL SIL SIL SIL SIL SIL SIL SIL SIL SIL SIL SIL SIL SIL
The line just continues on right off the page. Why this is a useful feature is more obvious ifthere are spaces between them:
Glues:SIL SIL SIL SIL SIL SIL SIL SIL SIL SIL SIL SIL SIL SIL SIL SIL SIL SIL SIL SIL SIL SIL SIL
SIL SIL SIL SIL SIL SIL SIL SIL SIL SIL SIL SIL SIL SIL SIL SIL SIL SIL SIL SIL SIL SIL SILSIL SIL SIL SIL SIL SIL SIL SIL SIL SIL SIL SIL SIL SIL
Kerns:SIL SIL SIL SIL SIL SIL SIL SIL SIL SIL SIL SIL SIL SIL SIL SIL SIL SIL SIL SIL SIL SIL SIL
SIL SIL SIL SIL SIL SIL SIL SIL SIL SIL SIL SIL SIL SIL SIL SIL SIL SIL SIL SIL SIL SIL SIL SILSIL SIL SIL SIL SIL SIL SIL SIL SIL SIL SIL SIL SIL
9.2 Frames
As we have previously mentioned, SILE arranges text into frames on the page. The overall layoutof a page, including the apparent margins between content and the page edge and other contentregions, is controlled by defining the position of the frame or frames into which the content will beflowed.
Normally those frames are defined by your document class, but you can actually create yourown frames on a per-page basis using the \pagetemplate and \frame commands. There are very fewsituations in which you will actually want to do this, but if you can understand this, it will help youto understand how to define your own document classes.
For instance, in a couple of pages time we’re going to implement a two-column layout. SILEuses a constraint solver system to declare its frames, which means that you can tell it how the framesrelate to each other and it will compute where the frames should be physically placed on the page.
The Nitty Gritty
77

Here is how we will go about it. We need to start with a page break, because SILE will not appre-ciate you changing the page layout after it’s started to determine how to put text onto that page.2How do we get to the start of a new page? Remember that the \eject (another word for \break invertical mode) only adds a penalty to the end of the output queue; page breaking is triggered whenwe leave horizontal mode, and the way to do that is \par. So we start with \eject\par and then wewill begin a \pagetemplate. Within \pagetemplate we need to tell SILE which frame to begin type-setting onto.
\eject\par
\begin[first-content-frame=leftCol]{pagetemplate}
Now we will declare our columns. But we’re actually going to start by declaring the gutter first,because that’s something that we know and can define; we’re going to stipulate that the gutter widthwill be 3% of the page width:
\frame[id=gutter,width=3%pw]
Declarations of frame dimensions are like ordinary SILE <dimension>s, except with three additional features:
• You can refer to properties of other frames using the top(), bottom(), left(), right(), height() and width()functions. These functions take a frame ID. SILE magically pre-defines the frame page to allow you to access thedimensions of the whole page.
• You can use arithmetic functions: plus, minus, divide, multiply, and parenthesis have their ordinary arithmeticmeaning. To declare that frame b should be half the height of frame a plus 5 millimeters, you can say height=5mm+ (height(b) / 2). However, as we will see later, it is usually better to structure your declarations to let SILEmake those kind of computations for you.
• Since book design is often specified in terms of proportion of a page, you can use the shortcut width=5%pw insteadof width=0.05 * width(page) and height=50%ph instead of height=0.5 * height(page).
2. Of course you can use the frametricks package to get around this limitation—split the current frameand start fiddling around with the positions of the new frames that frametricks created for you.
9.2 Frames
78
Next we declare the left and right column frames. The book class gives us some frames already,one of which, content, defines a typeblock with a decent size and positioning on the page. We willuse the boundaries of this frame to declare our columns: the left margin of the left column is the leftmargin of the typeblock; the right margin of the right column is the right margin of the typeblock.But we also want a few other parameters to ensure that:• the gutter is placed between our two columns• the two columns have the same width (We don’t know what that width is, but SILE will work it outfor us.)• after the left column is full, typesetting should move to the right column.
\frame[id=leftCol, left=left(content), right=left(gutter),
top=top(content), bottom=bottom(content),
next=rightCol]
\frame[id=rightCol, left=right(gutter), right=right(content),
top=top(content), bottom=bottom(content),
width=width(leftCol)]
And now finally we can end our pagetemplate.
\end{pagetemplate}
Let’s do it.
The Nitty Gritty
79

leftCol rightCol
So there we have it: a two-column page lay-out.
In the next chapter we’ll use the knowledgeof how to declare frames to help us to createour own document class files. In the meantime,here is some dummy text to demonstrate thefact that text does indeed flow between the twocolumns naturally:
lorem ipsum dolor sit amet consetetur sa-dipscing elitr sed diam nonumy eirmod temporinvidunt ut labore et dolore magna aliquyamerat sed diam voluptua at vero eos et accusamet justo duo dolores et ea rebum stet clita kasdgubergren no sea takimata sanctus est lorem ip-sum dolor sit amet lorem ipsum dolor sit ametconsetetur sadipscing elitr sed diam nonumy eir-mod tempor invidunt ut labore et dolore magnaaliquyam erat sed diam voluptua at vero eos etaccusam et justo duo dolores et ea rebum stetclita kasd gubergren no sea takimata sanctus estlorem ipsum dolor sit amet lorem ipsum dolorsit amet consetetur sadipscing elitr sed diam no-numy eirmod tempor invidunt ut labore et do-lore magna aliquyam erat sed diam voluptua atvero eos et accusam et justo duo dolores et earebum stet clita kasd gubergren no sea takimatasanctus est lorem ipsum dolor sit amet
duis autem vel eum iriure dolor in hendre-rit in vulputate velit esse molestie consequatvel illum dolore eu feugiat nulla facilisis at veroeros et accumsan et iusto odio dignissim qui blan-dit praesent luptatum zzril delenit augue duisdolore te feugait nulla facilisi lorem ipsum dolorsit amet consectetuer adipiscing elit sed diamnonummy nibh euismod tincidunt ut laoreet do-lore magna aliquam erat volutpat
ut wisi enim ad minim veniam quis nostrudexerci tation ullamcorper suscipit lobortis nislut aliquip ex ea commodo consequat duis autem
vel eum iriure dolor in hendrerit in vulputatevelit esse molestie consequat vel illum dolore eufeugiat nulla facilisis at vero eros et accumsanet iusto odio dignissim qui blandit praesent lup-tatum zzril delenit augue duis dolore te feugaitnulla facilisi
nam liber tempor cum soluta nobis eleifendoption congue nihil imperdiet doming id quodmazim placerat facer possim assum lorem ip-sum dolor sit amet consectetuer adipiscing elitsed diam nonummy nibh euismod tincidunt utlaoreet dolore magna aliquam erat volutpat utwisi enim ad minim veniam quis nostrud exercitation ullamcorper suscipit lobortis nisl ut ali-quip ex ea commodo consequat
duis autem vel eum iriure dolor in hendre-rit in vulputate velit esse molestie consequat velillum dolore eu feugiat nulla facilisis
at vero eos et accusam et justo duo doloreset ea rebum stet clita kasd gubergren no sea ta-kimata sanctus est lorem ipsum dolor sit ametlorem ipsum dolor sit amet consetetur sadip-scing elitr sed diam nonumy eirmod tempor in-vidunt ut labore et dolore magna aliquyam eratsed diam voluptua at vero eos et accusam et ju-sto duo dolores et ea rebum stet clita kasd gu-bergren no sea takimata sanctus est lorem ip-sum dolor sit amet lorem ipsum dolor sit ametconsetetur sadipscing elitr at accusam aliquyamdiam diam dolore dolores duo eirmod eos erat etnonumy sed tempor et et invidunt justo laborestet clita ea et gubergren kasd magna no rebumsanctus sea sed takimata ut vero voluptua estlorem ipsum dolor sit amet lorem ipsum dolorsit amet consetetur sadipscing elitr sed diam no-numy eirmod tempor invidunt ut labore
9.2 Frames
80

The Nitty Gritty
81

Chapter 10Designing Basic Class FilesNow we know how to define a frame layout for a single page, let’s try to define one for an entiredocument.
Document classes are Lua files, and live somewhere in the classes/ subdirectory of either whereyour input file is located, your current working directory or your SILE path (typically /usr/local/
share/sile). We’re going to create a simple class file which merely changes the size of the marginsand the typeblock. We’ll call it bringhurst.lua, because it replicates the layout of the Hartley &Marks edition of Robert Bringhurst’s The Elements of Typographical Style.
We are designing a book-like class, and so we will inherit from SILE’s standard book class foundin classes/book.lua. Let’s briefly have a look at book.lua to see how it works. First, a table is pop-ulated with a description of the default frameset.
book.defaultFrameset = {content = {
left = "8.3%pw",
right = "86%pw",
top = "11.6%ph",
bottom = "top(footnotes)"
},
folio = {left = "left(content)",
right = "right(content)",
top = "bottom(footnotes)+3%ph",
bottom = "bottom(footnotes)+5%ph"
},
runningHead = {
left = "left(content)",
right = "right(content)",
top = "top(content)-8%ph",
bottom = "top(content)-3%ph"
},
footnotes = {left = "left(content)",
right = "right(content)",

height = "0",
bottom = "83.3%ph"
}}
So there are four frames directly declared. The first is the content frame, which by SILE con-vention is called content. Directly abutting the content frame at the bottom is the footnotes frame.The top of the typeblock and the bottom of the footnote frame have fixed positions, but the bound-ary between typeblock and footnote is variable. Initially the height of the footnotes is zero (and sothe typeblock takes up the full height of the page) but as footnotes are inserted into the footnoteframe its height will be adjusted; its bottom is fixed and therefore its top will be adjusted, and thebottom of the main typeblock frame will also be correspondingly adjusted. The folio frame (whichholds the page number) lives below the footnotes, and the running headers live above the content
frame.Normally, as in the plain class and anything inheriting from it, this would be enough to popu-
late the pages’ frameset. Instead the book class includes its own extension to the class with a callbackinit function. We see that it loads the masters package and generates a master frameset using theabove defined default frameset.
function book:init ()self:loadPackage("masters")
self:defineMaster({id = "right",
firstContentFrame = self.firstContentFrame,
frames = self.defaultFrameset})
...return plain.init(self)
end
Next, we use the twoside package to mirror our right-page master into a left-page master:
self:loadPackage("twoside", { oddPageMaster = "right", evenPageMaster = "left" })
self:mirrorMaster("right", "left")
The book class also loads the table of contents package which sets up commands for sectioning,and declares various things that need to be done at the start and end of each page. Since we will be
Designing Basic Class Files
83

inheriting from the book class, we will have all these definitions already available to us. All we needto do is set up our new class, and then define what is different about it. Here is how we set up theinheritance:
local book = SILE.require("book", "classes")
local bringhurst = book { id = "bringhurst" }...return bringhurst
Now we need to define our frame masters.The LaTeX memoir class’ A Few Notes On Book Design tells us that Bringhurst’s book has a spine
margin one thirteenth of the page width; a top margin eight-fifths of the spine margin; a frontmargin and bottom margin both sixteen-fifths of the spine margin. We can define this in SILE termslike so:
bringhurst.defaultFrameset = {
content = {left = "width(page)/13",
top = "left(content) * 8 / 5",
right = "100%pw - 2*top(content)",
bottom = "top(footnotes)"
},
folio = book.defaultFrameset.folio,
runningHead = {
left = "left(content)",
right = "right(content)",
top = "top(content) - 4%ph",
bottom = "top(content)-2%ph"
},
footnotes = book.defaultFrameset.footnotes}
Note that we’ve deliberately copied the frame definitions for the folio and footnote frames fromthe book class, but if we had tried to reuse the runningHead frame definition it would have beentoo high because the typeblock is higher on the page than the standard book class, and the runningheads are defined relative to them. So, we needed to change the definition the running header frameto bring them down a bit lower.
If all we want to do in our new class is to create a different page shape, this is all we need. The
84

init function inherited from the book class will take care of setting these frames up with mirroredmasters.
If we had wanted to load additionall packages into our class as, say, the bible class does, wewould need to define out own init function and call our parent class’s init function as well. Forexample to load the infonode package into our class, we could add this init function:
function bringhurst:init()
self:loadPackage("infonode")
return book.init(self)end
10.1 Defining Commands
However, it’s usually the case that a class will want to do more than just change the page shape;a class will typically want to do some other things as well: define additional commands, alter theoutput routine, store and investigate bits of state information, and so on. We’ll look briefly at someof the principles involved in those things here, and in the next chapters will run through someworked examples.
To define your own command at the Lua level, you use the SILE.registerCommand function. Ittakes three parameters: a command name, a function to implement the command, and some helptext. The signature of a function representing a SILE command is fixed: you need to take two pa-rameters, options and content (of course you can name your parameters whatever you like, butthese are the most common names). Both of these parameters are Lua tables. The options parame-ter contains the command’s parameters or XML attributes as a key-value table, and the content isan abstract syntax tree reflecting the input being currently processed.
So in the case of \mycommand[size=12pt]{Hello \break world}, the first parameter will containthe table {size = "12pt"} and the second parameter will contain the table
{"Hello ",
{attr = {},
id = "command",pos = 8,
tag = "break"
},
Designing Basic Class Files
85

" world"}
Most commands will find themselves doing something with the options and/or callingSILE.process(content) to recursively process the argument. Here’s a very simple example; an XML<link> tag may take an XLink xl:href attribute1 We want to render <link xl:href="http://...">
Hello</link> as Hello (http://...). So, first we need to render the content, and then we need todo something with the attribute:
SILE.registerCommand("link", function(options, content)
SILE.process(content)
if (options["xl:href"]) then
SILE.typesetter:typeset(" (")
SILE.call("code", {}, {options["xl:href"]})
SILE.typesetter:typeset(")")
endend)
We use the usual SILE.typesetter:typeset and SILE.call functions to output text and callother commands.
If you do need to do something with a dimension, you can use SILE.toPoints to parse a basic length andSILE.parseComplexFrameDimension to parse a frame dimension, and turn them into points.
10.2 Output Routines
As well as defining frames and packages, different classes also alter the way that SILE performs itsoutput—what it should do at the start or end of a page, for instance, which controls things like
1. Yes, I know the document author might choose a different XML namespace to refer to XLink. Let’s keepthings simple.
10.2 Output Routines
86

swapping between different master frames, displaying page numbers, and so on.The key methods for defining the output routine are:
• newPar and endPar are called at the start and end of each paragraph.• newPage and endPage are called at the start and each of each page.• init and finish are called at the start and end of the document.
Once again this is done in an object-oriented way, with derived classes overriding their super-class’ methods where necessary.
When you are loading packages which affect the output routine, the composition of such pack-ages into a class is not completely automatic2; in other words, loading the package will not neces-sarily by itself change the output routines. You need to explicitly plug the various features providedby those packages into the output routine yourself.
So, for instance, the footnote or insertions packages provide a outputInsertions methodwhich needs to be called at the end of each page. If you want to build a document class that inheritsfrom plain but also has footnote functionality, you will want your endPage method to look like this:
myClass.endPage = function(self)
myClass:outputInsertions()
plain.endPage(self)
end
Let’s demonstrate roughly how the tableofcontents package works. We’ll be using the infonodespackage to collect the information about which pages contain table of content items.
First, we set up our infonodes by creating a command that can be called by sectioning com-mands. In other words, \chapter, \section, etc. should call \tocentry to store the page referencefor this section.
SILE.registerCommand("tocentry", function (options, content)
SILE.call("info", {category = "toc",
value = {label = content, level = (options.level or 1)
}})
2. Because the order of events is sometimes significant.
Designing Basic Class Files
87

end)
Infonodes work on a per-page basis, so if we want to save them throughout the whole document,at the end of each page we need to move them from the per-page table to our own table. We alsoneed to make sure we store their page numbers!
SILE provides the SILE.scratch variable for you to store global information in; you should use a portion of thistable namespaced to your class or package.
So, here is a routine we can call at the end of each page to move the TOC nodes.
SILE.scratch.tableofcontents = { }
-- Gather the tocentries into a big document-wide TOC
local moveNodes = function(self)local n = SILE.scratch.info.thispage.toc
for i=1,#n do
n[i].pageno = SILE.formatCounter(SILE.scratch.counters.folio)
table.insert(SILE.scratch.tableofcontents, n[i])
endend
We’re going to take the LaTeX approach of storing these items out as a separate file, then load-ing them back in again when typesetting the TOC. So at the end of the document, we serialize theSILE.scratch.tableofcontents table to disk. Here is a function to be called by the finish outputroutine.
local writeToc = function (self)local t = pl.pretty.write(SILE.scratch.tableofcontents)
saveFile(t, SILE.masterFilename .. '.toc')
end
And then the \tableofcontents command reads that file if it is present, and typesets the TOCnodes appropriately:
10.2 Output Routines
88
SILE.registerCommand("tableofcontents", function (options, content)
local toc = loadFile(SILE.masterFilename .. '.toc')if not toc thenSILE.call("tableofcontents:notocmessage")
returnendSILE.call("tableofcontents:header")for i = 1,#toc do
local item = toc[i]SILE.call("tableofcontents:item", {level = item.level, pageno = item.pageno},
item.label)end
end)
And the job is done. Well, nearly. The tableofcontents package now contains a couple of func-tions—moveNodes and writeToc—that need to be called at various points in the output routine of aclass which uses this package. How do we do that?
10.3 Exports
Packages which are primarily used for providing functionality to other classes and packages need away of supplying these composible bits of functionality to the code which is going to use them. Thisis called the export mechanism.
As well as defining commands, each package may also return a Lua table consisting of two en-tries, init and exports.
init allows you to perform some initialization actions, optionally based on arguments suppliedby the loading class. When the package is loaded with class:loadPackage(package, args), theinitializer is called with two arguments, class and args. For instance, the twoside package receivesinformation about the IDs of the main right and left master frames so that it can set up the codeto switch masters on page change. In our case, we will want to ensure that the infonode package isloaded into our caller:
return {init = function (caller)caller:loadPackage("infonode")
end,
The other entry to be returned from the package is exports, which contains names and func-tions to be mixed into the caller’s namespace. In other words, after:
Designing Basic Class Files
89

exports = {writeToc = writeToc, moveTocNodes = moveNodes}
}
any class which loads tableofcontents can call self:writeToc() and self:moveTocNodes() (notethat we renamed this function when exporting it). It is the class’s responsibility for calling thesemethods at the appropriate point into the output routine.
10.3 Exports
90

Designing Basic Class Files
91

Chapter 11Advanced Class Files 1: SILE As An XML ProcessorNowwe are ready to look at a worked example of writing a class to turn an arbitrary XML format intoa PDF file. We’ll be looking at the DocBook processor that ships with SILE. DocBook is an XML formatfor structured technical documentation. DocBook itself doesn’t encode any presentation informationabout how its various tags should be rendered on a page, and so we shall have to make all thepresentation decisions for ourself.
The first thing you should know is that it makes your life significantly easier if you considerwriting the class file in two files; the first being a SILE file in TeX format, and the second as Lua code.This allows you to dispose of all the easy jobs in a convenient format, and then deal with the hardjobs in Lua. When you use the -I classname.sil command line option to SILE, SILE first looks forclassname.sil and uses that as a wrapper around your file to be processed. If that then begins
\begin[class=classname]{document}
then SILE will also load up classes/classname.lua as normal.Now we can start defining SILE commands to render XML elements. Most of these are fairly
straightforward so we will not dwell on them too much. For instance, DocBook has a tags like <code>,<filename>, <guimenu> which should all be rendered in a monospaced typewriter font. To make iteasier to customize the class, we abstract out the font change into a single command:
\define[command=docbook-ttfont]{\font[family=Inconsolata,size=2ex]{\process}}
Now we can define our <code> (etc.) tags:
\define[command=code]{\docbook-ttfont{\process}}
\define[command=filename]{\docbook-ttfont{\process}}
\define[command=guimenu]{\docbook-ttfont{\process}}
\define[command=guilabel]{\docbook-ttfont{\process}}
\define[command=guibutton]{\docbook-ttfont{\process}}
\define[command=computeroutput]{\docbook-ttfont{\process}}
If an end user wants things to look different, they can redefine the docbook-ttfont commandand get a different font.

11.1 Handling Titles
So much for simple tags. Things get interesting when there is a mismatch between the simple formatof SILE macros and the complexity of DocBook markup.
We have already seen an example of the <link> tag where we also need to process XML at-tributes, so we will not repeat that here. Let’s look at another area of complexity: the apparently-simple <title> tag. The reason this is complex is that it occurs in different contexts, sometimesmore than once within a context; it should often be rendered differently in different contexts. Sofor instance <article><title>... will look different to <section><title>.... Inside an <example>
tag, the title will be preferenced by an example number; inside a <bibliomixed> bibliography entrythe title should not be set off as a new block but should be part of the running text, and so on.
What we will do to deal with this situation is provide a very simple definition of <title>, butwhen processing the containing elements of <title> (such as <article>, <example>), we will processthe title ourselves.
For instance, let’s look at <example>, which has the added complexity of needed to keep trackof an article number.
SILE.registerCommand("example", function(options,content)
SILE.call("increment-counter", {id="Example"})
SILE.call("bigskip")
SILE.call("docbook-line")SILE.call("docbook-titling", {}, function()
SILE.typesetter:typeset("Example".." "..SILE.formatCounter(SILE.scratch.counters.Example]))
\docbook-line is a command that we’ve defined in the docbook.sil macros file to draw a lineacross the width of the page to set off examples and so on. \docbook-titling is a command simi-larly defined in docbook.sil which sets the default font for titling and headers; once again, if peoplewant to customize the look of the output we make it easier for them by giving them simple, com-partmentalized commands to override.
So far so good, but how do we extract the <title> tag from the content abstract syntax tree?SILE does not provide XPath or CSS-style selectors to locate content form within the DOM tree;1instead there is a simple one-level function called SILE.findInTree which looks for a particular tagor command name within the immediate children of the current tree:
1. Patches, as they say, are welcome.
Advanced Class Files 1: SILE As An XML Processor
93

local t = SILE.findInTree(content, "title")
if t thenSILE.typesetter:typeset(": ")
SILE.process(t)
We’ve output Example 123 so far, and now we need to say : Title. But we also need to ensurethat the <title> tag doesn’t get processed again when we process the content of the example:
docbook.wipe(t)
docbook.wipe is a little helper function which nullifies all the content of a Lua table:
function docbook.wipe(tbl)
while((#tbl) > 0) do tbl[#tbl] = nil endend
Let’s finish off the <example> example by skipping a bit between the title and the content, pro-cessing the content and drawing a final line across the page:
endend)SILE.call("smallskip")
SILE.process(content)
SILE.call("docbook-line")SILE.call("bigskip")
Now it happens that the <example>, <table> and <figure> tags are pretty equivalent: they pro-duce numbered titles and then go on to process their content. So in reality we actually define anabstract countedThing method and define these commands in terms of that.
11.2 Sectioning
DocBook sectioning is a little different to the SILE book class. <section> tags can be nested; to starta subsection, you place another <section> tag inside the current <section>. So in order to knowwhat level we are currently on, we need a stack; we also need to keep track of what section numberwe are on at each level. For instance:
<section><title>A</title> : 1. A<section><title>B</title>: 1.1 B</section><section><title>C</title>: 1.2 C
<section><title>D</title>: 1.2.1 D</section>
</section>
11.2 Sectioning
94

<section><title>E</title>: 1.3 E</section>
<section><title>F</title>: 2. F
So, we will keep two variables: the current level, and the counters for all of the levels so far.Each time we enter a section, we increase the current level counter:
SILE.registerCommand("section", function (options, content)
SILE.scratch.docbook.seclevel = SILE.scratch.docbook.seclevel + 1
We also increment the count at the current level, while at the same time wiping out any countswe have for levels above the current level (if we didn’t do that, then E in our example above wouldbe marked 1.3.1):
SILE.scratch.docbook.seccount[SILE.scratch.docbook.seclevel] =(SILE.scratch.docbook.seccount[SILE.scratch.docbook.seclevel] or 0) + 1
while #(SILE.scratch.docbook.seccount) > SILE.scratch.docbook.seclevel doSILE.scratch.docbook.seccount[#(SILE.scratch.docbook.seccount)] = nil
end
Now we find the title, and prefix it by the concatenation of all the seccounts:
local title = SILE.findInTree(content, "title")
local number = table.concat(SILE.scratch.docbook.seccount, '.')
if title thenSILE.call("docbook-section-"..SILE.scratch.docbook.seclevel.."-title",
{},function()
SILE.typesetter:typeset(number.." ")
SILE.process(title)
end)docbook.wipe(title)
end
Finally we can process the content of the tag, and decrease the level count as we leave the </
section> tag:
SILE.process(content)
SILE.scratch.docbook.seclevel = SILE.scratch.docbook.seclevel - 1end)
11.3 Other Features
SILE’s DocBook implementation is a work in progress, and there is more that can be done. For in-
Advanced Class Files 1: SILE As An XML Processor
95

stance, there is a basic implementation of lists, which equally need to be able to handle nesting; weimplement another stack to take care of the type of list and list counter at each level of nesting.
How would you handle a tag like <xref> which renders a cross-reference to another part of thedocument? For instance, <xref linkend="ch02"/> should generate something like Chapter 2, “ eSecond Chapter”. This is another problem which can be handled using the infonode package tocollect and store cross-reference information about chapter numbers and titles.
11.3 Other Features
96

Advanced Class Files 1: SILE As An XML Processor
97
Chapter 12Further TricksWe’ll conclude our tour of SILE by looking at some tricky situations which require further program-ming.
12.1 Parallel Text
The example https://sile-typesetter.org/examples/parallel.sil contains a rendering of chap-ter 1 of Matthew’s Gospel in English and Greek. It uses the diglot class to align the two texts side-by-side. diglot provides the \left and \right commands to start entering text on the left columnor the right column respectively, and the \sync command to ensure that the two columns are insync with each other. It’s an instructive example of what can be done in a SILE class, so we will takeit apart and see how it works.
The key thing to note is that the SILE typesetter is an object (in the object-oriented program-ming sense). Normally, it’s a singleton object—i.e. one typesetter is used for typesetting everythingin a document. But there’s no reason why we can’t have more than one. In fact, for typesetting par-allel texts, the simplest way to do things is to have two typesetters, one for each column, and havethem communicate with each other at various points in the operation.
Let’s begin diglot.lua as usual by setting up the class and declaring our frames:
local plain = SILE.require("plain", "classes");
local diglot = plain { id = "diglot" }
SILE.require("packages/counters");
SILE.scratch.counters.folio = { value = 1, display = "arabic" };
SILE.scratch.diglot = {}
diglot:declareFrame("a", {left = "8.3%pw", right = "48%pw",
top = "11.6%ph", bottom = "80%ph" });
diglot:declareFrame("b", {left = "52%pw", right = "100% - left(a)",
top = "top(a)", bottom = "bottom(a)" });
diglot:declareFrame("folio",{left = "left(a)", right = "right(b)",
top = "bottom(a)+3%ph",bottom = "bottom(a)+8%ph" });
Now we create two new typesetters, one for each column, and we tell each one how to find theother:
diglot.leftTypesetter = SILE.defaultTypesetter {}

diglot.rightTypesetter = SILE.defaultTypesetter {}
diglot.rightTypesetter.other = diglot.leftTypesetter
diglot.leftTypesetter.other = diglot.rightTypesetter
Each column needs its own font, so we provide commands to store this information. The\leftfont and \rightfont macros simply store their options to be passed to the \font commandevery time \left and \right are called. (Because the fonts are controlled by global settings ratherthan being typesetter-specific.)
SILE.registerCommand("leftfont", function(options, content)
SILE.scratch.diglot.leftfont = options
end, "Set the font for the left side")
SILE.registerCommand("rightfont", function(options, content)
SILE.scratch.diglot.rightfont = options
end, "Set the font for the right side")
Next come the commands for sending text to the appropriate typesetter. The current typesetterobject used by the system is stored in the variable SILE.typesetter; many commands and packagescall methods on this variable, so we need to ensure that this is set to the typesetter object that wewant to use. We also want to turn off paragraph detection, as we will be handling the paragraphingmanually using the \sync command:
SILE.registerCommand("left", function(options, content)
SILE.settings.set("typesetter.parseppattern", -1)
SILE.typesetter = diglot.leftTypesetter;
SILE.call("font", SILE.scratch.diglot.leftfont, {})
end, "Begin entering text on the left side")
SILE.registerCommand("right", function(options, content)
SILE.settings.set("typesetter.parseppattern", -1)
SILE.typesetter = diglot.rightTypesetter;
SILE.call("font", SILE.scratch.diglot.rightfont, {})
end, "Begin entering text on the right side")
The meat of the diglot package comes in the sync command, which ensures that the two type-setters are aligned. Every time we call sync, we want to ensure that they are both at the same po-sition on the page. In other words, if the left typesetter has gone further down the page than theright one, we need to insert some blank space onto the right typesetter’s output queue to get themback in sync, and vice versa.
SILE’s page builder has a method called SILE.pagebuilder:collateVboxes which bundles abunch of vertical boxes into one; we can use this to bundle up each typesetter’s output queue andmeasure the height of the combined vbox. (Of course it’s possible to sum the heights of each box onthe output queue by hand, but this achieves the same goal a bit more cleanly.)
SILE.registerCommand("sync", function()
Further Tricks
99
local lVbox =SILE.pagebuilder:collateVboxes(diglot.leftTypesetter.state.outputQueue)
local rVbox =SILE.pagebuilder:collateVboxes(diglot.rightTypesetter.state.outputQueue)
if (rVbox.height > lVbox.height) then
diglot.leftTypesetter:pushVglue({ height = rVbox.height - lVbox.height })
elseif (rVbox.height < lVbox.height) then
diglot.rightTypesetter:pushVglue({ height = lVbox.height - rVbox.height })
end
Next we end each paragraph (we do this after adding the glue so that parskips do not get inthe way), and go back to handling paragraphing as normal:
diglot.rightTypesetter:leaveHmode();
diglot.leftTypesetter:leaveHmode();
SILE.settings.set("typesetter.parseppattern", "\n\n+")
end)
Now everything is ready apart from the output routine. In the output routine we need to en-sure, at the start of each document and the start of each page, that each typesetter is linked to theappropriate frame:
diglot.init = function(self)
diglot.leftTypesetter:init(SILE.getFrame("a"))
diglot.rightTypesetter:init(SILE.getFrame("b"))
return SILE.baseClass.init(self)end
(SILE.getFrame retrieves a frame that we have declared.)The default newPage routine will do this for one typesetter every time we open a new page, but
it doesn’t know that we have another typesetter object to set up as well; so we need to to make surethat, no matter which typesetter causes an new-page event, the other typesetter also gets correctlyinitialised:
diglot.newPage = function(self)
plain.newPage(self)
if SILE.typesetter == diglot.leftTypesetter then
SILE.typesetter.other:initFrame(SILE.getFrame("b"))
return SILE.getFrame("a")
elseSILE.typesetter.other:initFrame(SILE.getFrame("a"))
return SILE.getFrame("b")
endend
And finally, when one typesetter causes an end-of-page event, we need to ensure that the other
100

typesetter is given the opportunity to output its queue to the page as well:
diglot.endPage = function(self)
SILE.typesetter.other:leaveHmode(1)
plain.endPage(self)
end
Similarly for the end of the document, but in this case we will use the emergency chuckmethod;whereas leaveHmode means “call the page builder and see there’s enough material to build a page”,chuck means “you must get rid of everything on your queue now.” We add some infinitely tall glueto the other typesetter’s queue to help the process along:
diglot.finish = function(self)
table.insert(SILE.typesetter.other.state.outputQueue, SILE.nodefactory.vfillGlue)
SILE.typesetter.other:chuck()
plain.finish(self)
end
And there you have it; a class which produces balanced parallel texts using two typesetters atonce.
12.2 Sidenotes
One SILE project needed two different kinds of sidenotes, margin notes and gutter notes.
Sidenotes can be seen as a simplified form of parallel text. With a true parallel, neither theleft or the right typesetter is “in charge”—either can fill up the page and then inform the othertypesetter that they need to catch up. In the case of sidenotes, there’s a well-defined main flow oftext, with annotations having to work around the pagination of the typeblock.
There are a variety of ways that we could implement these sidenotes; as it happened, I chosea different strategy for the margin notes and the gutter notes. Cross-references in the gutter could
Further Tricks
101
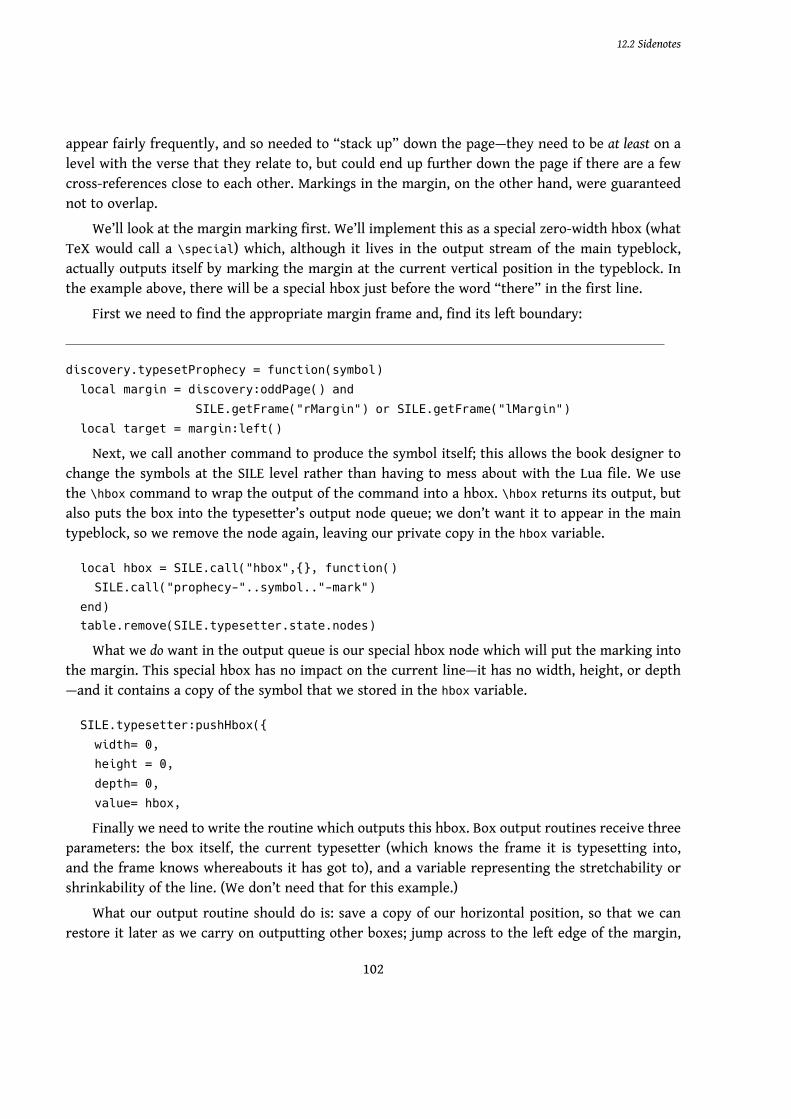
appear fairly frequently, and so needed to “stack up” down the page—they need to be at least on alevel with the verse that they relate to, but could end up further down the page if there are a fewcross-references close to each other. Markings in the margin, on the other hand, were guaranteednot to overlap.
We’ll look at the margin marking first. We’ll implement this as a special zero-width hbox (whatTeX would call a \special) which, although it lives in the output stream of the main typeblock,actually outputs itself by marking the margin at the current vertical position in the typeblock. Inthe example above, there will be a special hbox just before the word “there” in the first line.
First we need to find the appropriate margin frame and, find its left boundary:
discovery.typesetProphecy = function(symbol)
local margin = discovery:oddPage() and
SILE.getFrame("rMargin") or SILE.getFrame("lMargin")
local target = margin:left()
Next, we call another command to produce the symbol itself; this allows the book designer tochange the symbols at the SILE level rather than having to mess about with the Lua file. We usethe \hbox command to wrap the output of the command into a hbox. \hbox returns its output, butalso puts the box into the typesetter’s output node queue; we don’t want it to appear in the maintypeblock, so we remove the node again, leaving our private copy in the hbox variable.
local hbox = SILE.call("hbox",{}, function()
SILE.call("prophecy-"..symbol.."-mark")
end)table.remove(SILE.typesetter.state.nodes)
What we do want in the output queue is our special hbox node which will put the marking intothe margin. This special hbox has no impact on the current line—it has no width, height, or depth—and it contains a copy of the symbol that we stored in the hbox variable.
SILE.typesetter:pushHbox({
width= 0,
height = 0,
depth= 0,
value= hbox,
Finally we need to write the routine which outputs this hbox. Box output routines receive threeparameters: the box itself, the current typesetter (which knows the frame it is typesetting into,and the frame knows whereabouts it has got to), and a variable representing the stretchability orshrinkability of the line. (We don’t need that for this example.)
What our output routine should do is: save a copy of our horizontal position, so that we canrestore it later as we carry on outputting other boxes; jump across to the left edge of the margin,
12.2 Sidenotes
102

which we computed previously; tell the symbol that we’re carrying with us to output itself; and thenjump back to where we were:
outputYourself= function (self, typesetter, line)
local saveX = typesetter.frame.state.cursorX;
typesetter.frame.state.cursorX = target
self.value:outputYourself(typesetter,line)
typesetter.frame.state.cursorX = saveX
end})
This was a quick-and-dirty version of sidenotes (in twenty lines of code!) which works reason-ably well for individual symbols which are guaranteed not to overlap. For the gutter notes, whichare closer to true sidenotes, we need to do something a bit more intelligent. We’ll take a similarapproach to when we made the parallel texts, by employing a separate typesetter object.
As before we’ll create the object, and ensure that at the start of the document and at the startof each page it is populated correctly with the appropriate frame:
discovery.innerTypesetter = SILE.defaultTypesetter {}
discovery.init = function()
local gutter = discovery:oddPage() and
SILE.getFrame("rGutter") or SILE.getFrame("lGutter")
discovery.innerTypesetter:init(gutter)...return SILE.baseClass:init()
end
discovery.newPage = function ()...discovery.innerTypesetter:leaveHmode(1)
local gutter = discovery:oddPage() and
SILE.getFrame("rGutter") or SILE.getFrame("lGutter")
discovery.innerTypesetter:init(gutter)...return SILE.baseClass.newPage(discovery);
end
Now for the function which actually handles a cross-reference. As with the parallels example,we start by totting up the height of the material processed on the current page by both the maintypesetter and the cross-reference typesetter.
Further Tricks
103

discovery.typesetCrossReference = function(xref)
discovery.innerTypesetter:leaveHmode(1)
local innerVbox =SILE.pagebuilder:collateVboxes(discovery.innerTypesetter.state.outputQueue)
local mainVbox = SILE.pagebuilder:collateVboxes(SILE.typesetter.state.outputQueue)
This deals with the material which has already been put into the output queue: in other words,completed paragraphs. The problem here is that we do not want to end a paragraph between twoverses; if we are mid-paragraph while typesetting a cross-reference, we need to work out what theheight of the material would have been if we were to put it onto the output queue at this point. So,we take the SILE.typesetter object on a little excursion.
First we take a copy of the current node queue, and then we call the typesetter’s pushState
method. This initializes the typesetter anew, while saving its existing state for later. Since we havea new typesetter, its node queue is empty, and so we feed it the nodes that represent our paragraphso far. Then we tell the typesetter to leave horizontal mode, which will cause it to go away andcalculate line breaks, leading, paragraph height and so on. We box up its output queue, and thenreturn to where we were before. Now we have a box which represents what would happen if we setthe current paragraph up to the point that our cross-reference is inserted; the height of this box isthe distance we need to add to mainVbox to get the vertical position of the cross-reference mark.
local unprocessedNodes = pl.tablex.deepcopy(SILE.typesetter.state.nodes)
SILE.typesetter:pushState()
SILE.typesetter.state.nodes = unprocessedNodes
SILE.typesetter:leaveHmode(1)
local subsidiary =SILE.pagebuilder:collateVboxes(SILE.typesetter.state.outputQueue)
SILE.typesetter:popState()
mainVbox.height = mainVbox.height + subsidiary.height
The 1 argument to leaveHmode means “you may not create a new page here.”
In most cases, the cross-reference typesetter hasn’t got as far down the page as the body texttypesetter, so we tell the cross-reference typesetter to shift itself down the page by the difference.Unlike the parallel example, where either typesetter could tell the other to open up additional ver-tical space, in this case it’s OK if the cross-reference appears a bit lower than the verse it refers to.
if (innerVbox.height < mainVbox.height) then
12.2 Sidenotes
104

discovery.innerTypesetter:pushVglue({ height = mainVbox.height - innerVbox.height})
end
At this point the two typesetters are now either aligned, or the cross-reference typesetter hasgone further down the page than the verse it refers to. Now we can output the cross-reference itself.
SILE.settings.temporarily(function()
SILE.settings.set("document.baselineskip", SILE.nodefactory.newVglue("7pt"))
SILE.call("font", {size = "6pt", family="Helvetica", weight="800"}, {})
discovery.innerTypesetter:typeset(SILE.scratch.chapter..":"..SILE.scratch.verse.." ")
SILE.call("font", {size = "6pt", family="Helvetica", weight="200"}, {})
discovery.innerTypesetter:typeset(xref)
discovery.innerTypesetter:leaveHmode()
discovery.innerTypesetter:pushVglue({ height = SILE.length.new({length = 4}) })
end)end
We haven’t used SILE.call here because it performs all its operations on the default typesetter. If we wanted tomake things cleaner, we could swap typesetters by assigning discovery.innerTypesetter to SILE.typesetterand then calling ordinary commands, rather than doing the settings and glue insertion “by hand.”
In the future it may make sense for there to be a standard sidenotes package in SILE, but it hasbeen instructive to see a couple of ‘non-standard’ examples to understand how the internals of SILEcan be leveraged to create such a package. Your homework is to create one!
12.3 SILE As A Library
So far we’ve been assuming that you would want to run SILE as a processor for an existing document.But what if you have a program which produces or munges data, and you would like to producePDFs from within your application? In that case, it may be easier and provide more flexibility to useSILE as a library.
At https://sile-typesetter.org/examples/byhand.lua, you will find an example of a Luascript which produces a PDF from SILE. It’s actually fairly simple to use SILE from within Lua; thedifficult part is setting things up. Here’s how to do it.
Further Tricks
105

require("core/sile")
SILE.outputFilename = "byhand.pdf"
local plain = require("plain", "classes")
SILE.documentState.documentClass = plain;
local firstFrame = plain:init()
SILE.typesetter:init(firstFrame)
Loading the SILE core library also loads up all the other parts of SILE. We need to set the outputfile name and load the class that we want to use to typeset the document with. We then need to tellSILE what class we are actually using, call init on the class to get the first frame for typesetting, andthen initialize the typesetter with this frame. This is all that SILE does to get itself ready to typeset.
After this, all the usual API calls will work: SILE.call, SILE.typesetter:typeset and so on.
SILE.typesetter:typeset(data)
The only thing to be careful is the need to call the finish method on your document class atthe end of processing to finish off the final page:
plain:finish()
12.4 Debugging
When you are experimenting with SILE and its API, you may find it necessary to get further infor-mation about what SILE is up to. SILE has a variety of debugging switches that can be turned on bythe command line or by Lua code.
Running SILE with the --debug facility switch will turn on debugging for a particular area orareas of SILE’s operation:• ast provides information about how SILE parsed the document into an abstract syntax tree.• break provides (copious) information about the line breaking algorithm.• fonts shows what font families and attributes were attempted and what font files were used tosupply them.• frames draws red boxes around the frames on the page.• hboxes draws red boxes around all the hboxes on the page.• pagebuilder helps to debug problems when determining page breaks.• macros notes when new functions are defined from TeXlike macro syntax.• makedeps lists resources that were determined to be dependencies (use with -m).
12.4 Debugging
106
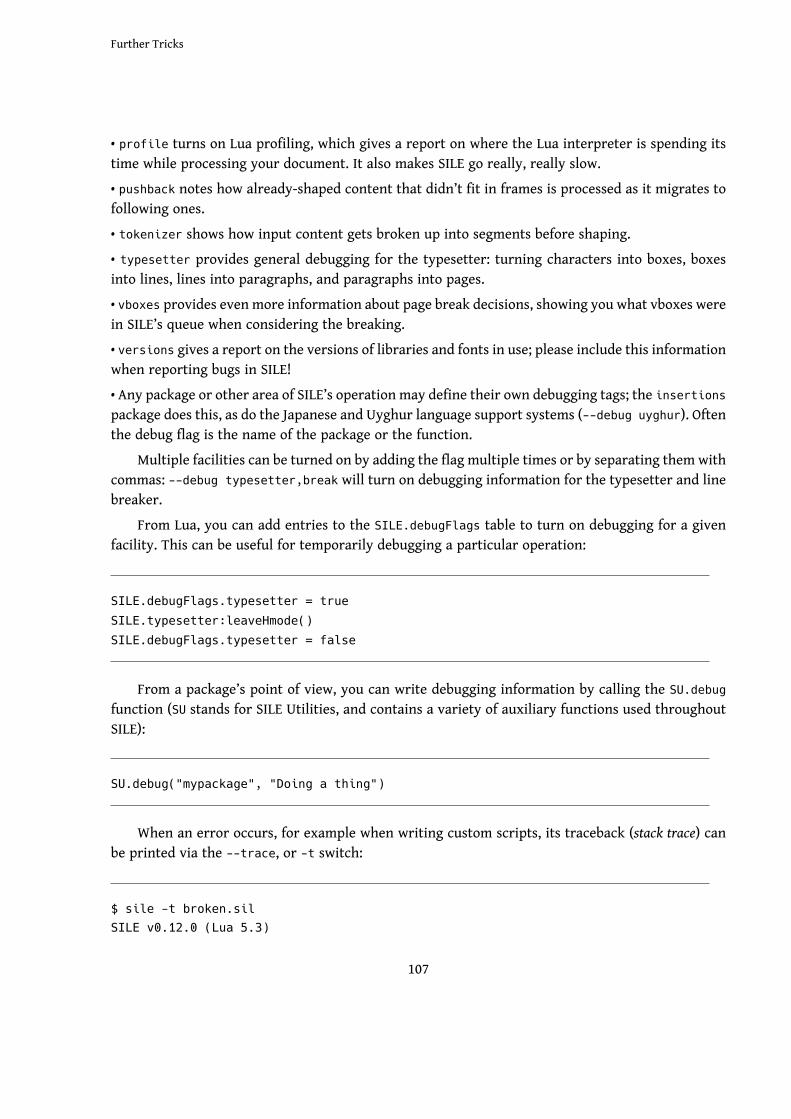
• profile turns on Lua profiling, which gives a report on where the Lua interpreter is spending itstime while processing your document. It also makes SILE go really, really slow.• pushback notes how already-shaped content that didn’t fit in frames is processed as it migrates tofollowing ones.• tokenizer shows how input content gets broken up into segments before shaping.• typesetter provides general debugging for the typesetter: turning characters into boxes, boxesinto lines, lines into paragraphs, and paragraphs into pages.• vboxes provides even more information about page break decisions, showing you what vboxes werein SILE’s queue when considering the breaking.• versions gives a report on the versions of libraries and fonts in use; please include this informationwhen reporting bugs in SILE!• Any package or other area of SILE’s operation may define their own debugging tags; the insertionspackage does this, as do the Japanese and Uyghur language support systems (--debug uyghur). Oftenthe debug flag is the name of the package or the function.
Multiple facilities can be turned on by adding the flag multiple times or by separating them withcommas: --debug typesetter,break will turn on debugging information for the typesetter and linebreaker.
From Lua, you can add entries to the SILE.debugFlags table to turn on debugging for a givenfacility. This can be useful for temporarily debugging a particular operation:
SILE.debugFlags.typesetter = true
SILE.typesetter:leaveHmode()
SILE.debugFlags.typesetter = false
From a package’s point of view, you can write debugging information by calling the SU.debug
function (SU stands for SILE Utilities, and contains a variety of auxiliary functions used throughoutSILE):
SU.debug("mypackage", "Doing a thing")
When an error occurs, for example when writing custom scripts, its traceback (stack trace) canbe printed via the --trace, or -t switch:
$ sile -t broken.silSILE v0.12.0 (Lua 5.3)
Further Tricks
107

<broken.sil>
Error detected:packages/inline-footnotes.lua:9: attempt to call a nil value (global'thisPageInsertionBoxForClass')
stack traceback:packages/inline-footnotes.lua:9: in upvalue 'func'
core/utilities.lua:398: in field '?'core/inputs-common.lua:66: in function 'core/sile.process'
core/inputs-texlike.lua:149: in field 'process'
core/sile.lua:196: in function 'core/sile.readFile'./sile:56: in function <./sile:56>[C]: in function 'xpcall'
./sile:56: in main chunk[C]: in ?
Sometimes it’s useful for you to try out Lua code within the SILE environment; SILE contains aREPL (read-evaluate-print loop) for you to enter Lua code and print the results back to you. If youcall SILE with no input file name, it enters the REPL:
SILE v0.12.0 (Lua 5.3)> l = SILE.length.parse("22mm")
> l.length
62.3622054
At any point during the evaluation of Lua commands, you can call SILE.repl() to enter theREPL and poke around; hitting Ctrl-D will end the REPL and return to processing the document.
Two alternative backends are also useful for debugging. Both use the same shaping engine as thedefault libtexpdf backend, but instead of actually generating a PDF they only output some textualinformation about what’s going on. The debug backend (activated by calling sile -b debug <input>)will generate a log file with a .debug extension detailing each string and it’s exact output loction. Asimpler text backend (sile -b text <input>) will output a .txt file with just the text strings withrough approximations of line breaks. Either may be sent to STDOUT instead of files using -o /dev/
stdout.
12.5 ConclusionWe’ve seen not just the basic functionality of SILE but also given you some examples of how toextend it in new directions; how to use the SILE API to solve difficult problems in typesetting. Goforth and create your own SILE packages!
12.5 Conclusion
108