Embed Size (px)
Citation preview
© 2014 Oldcastle Inc. BI03v01
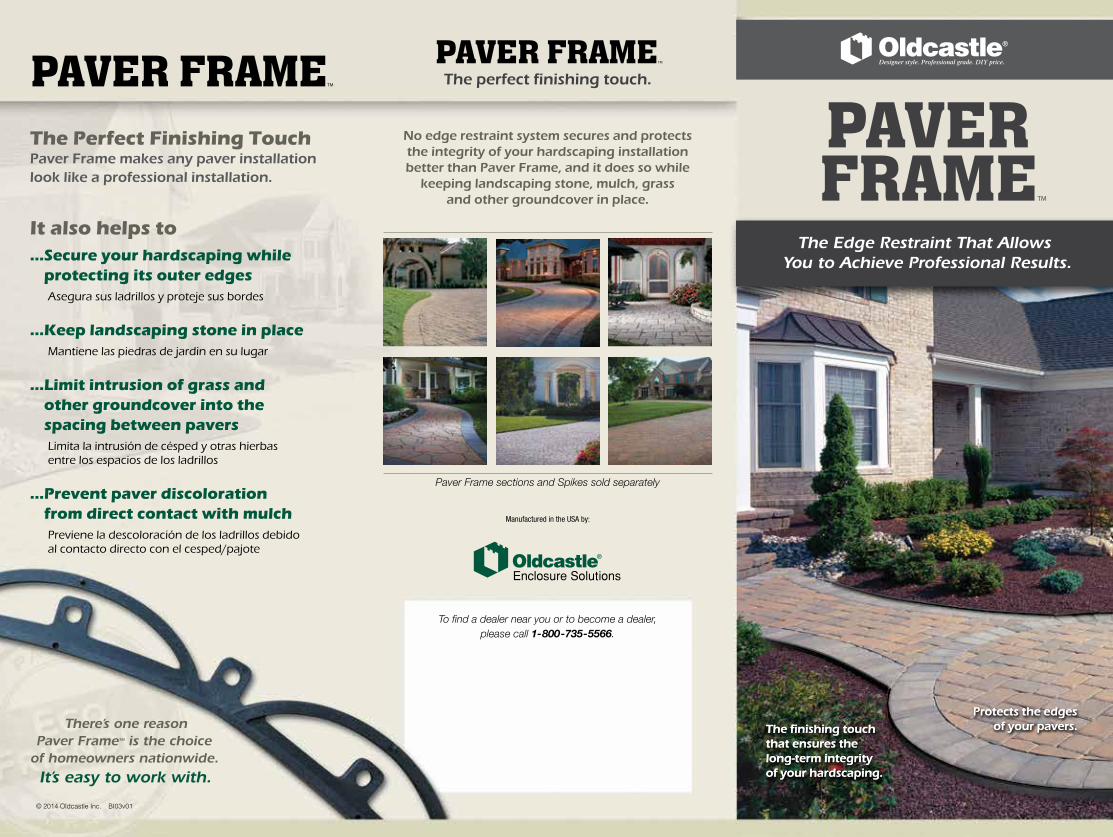
Paver Frame sections and Spikes sold separately
To find a dealer near you or to become a dealer, please call 1-800-735-5566.
No edge restraint system secures and protects the integrity of your hardscaping installation better than Paver Frame, and it does so while
keeping landscaping stone, mulch, grass and other groundcover in place.
Manufactured in the USA by:
The perfect finishing touch.
The finishing touch that ensures the long-term integrity of your hardscaping.
The finishing touch that ensures the long-term integrity of your hardscaping.
Protects the edges of your pavers.
Protects the edges of your pavers.
The Perfect Finishing TouchPaver Frame makes any paver installation look like a professional installation.
It also helps to... Secure your hardscaping while
protecting its outer edgesAsegura sus ladrillos y proteje sus bordes
...Keep landscaping stone in placeMantiene las piedras de jardin en su lugar
... Limit intrusion of grass and other groundcover into the spacing between paversLimita la intrusión de césped y otras hierbas entre los espacios de los ladrillos
... Prevent paver discoloration from direct contact with mulchPreviene la descoloración de los ladrillos debido al contacto directo con el cesped/pajote
Unlike treated timbers or metal edging, Paver FrameTM will not harm your plants, shrubs or lawn.
Unlike treated timbers or metal edging, Paver FrameTM will not harm your plants, shrubs or lawn.
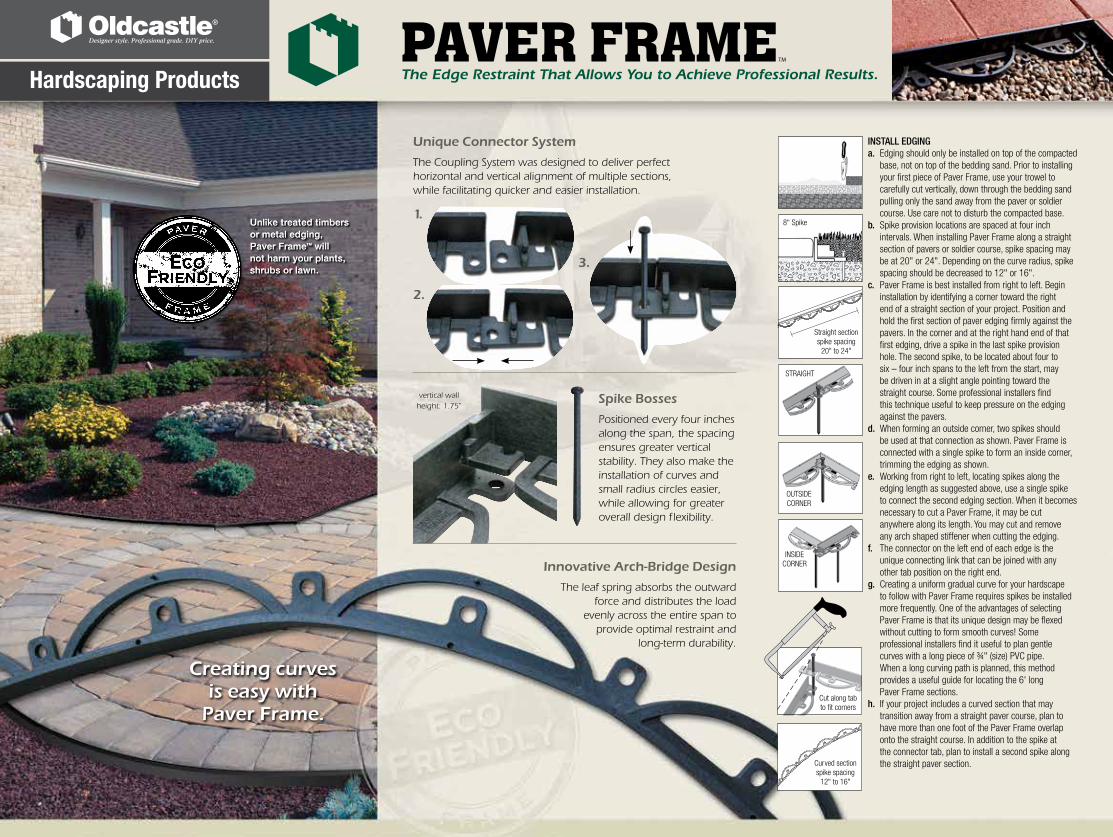
Spike Bosses
Positioned every four inches along the span, the spacing ensures greater vertical stability. They also make the installation of curves and small radius circles easier, while allowing for greater overall design f lexibility.
3.
1.
2.
Unique Connector System
The Coupling System was designed to deliver perfect horizontal and vertical alignment of multiple sections, while facilitating quicker and easier installation.
vertical wall height: 1.75"
Innovative Arch-Bridge Design
The leaf spring absorbs the outward force and distributes the load
evenly across the entire span to provide optimal restraint and
long-term durability.
Creating curves is easy with
Paver Frame.
INSTALL EDGINGa. Edging should only be installed on top of the compacted
base, not on top of the bedding sand. Prior to installing your first piece of Paver Frame, use your trowel to carefully cut vertically, down through the bedding sand pulling only the sand away from the paver or soldier course. Use care not to disturb the compacted base.
b. Spike provision locations are spaced at four inch intervals. When installing Paver Frame along a straight section of pavers or soldier course, spike spacing may be at 20" or 24". Depending on the curve radius, spike spacing should be decreased to 12" or 16".
c. Paver Frame is best installed from right to left. Begin installation by identifying a corner toward the right end of a straight section of your project. Position and hold the first section of paver edging firmly against the pavers. In the corner and at the right hand end of that first edging, drive a spike in the last spike provision hole. The second spike, to be located about four to six – four inch spans to the left from the start, may be driven in at a slight angle pointing toward the straight course. Some professional installers find this technique useful to keep pressure on the edging against the pavers.
d. When forming an outside corner, two spikes should be used at that connection as shown. Paver Frame is connected with a single spike to form an inside corner, trimming the edging as shown.
e. Working from right to left, locating spikes along the edging length as suggested above, use a single spike to connect the second edging section. When it becomes necessary to cut a Paver Frame, it may be cut anywhere along its length. You may cut and remove any arch shaped stiffener when cutting the edging.
f. The connector on the left end of each edge is the unique connecting link that can be joined with any other tab position on the right end.
g. Creating a uniform gradual curve for your hardscape to follow with Paver Frame requires spikes be installed more frequently. One of the advantages of selecting Paver Frame is that its unique design may be flexed without cutting to form smooth curves! Some professional installers find it useful to plan gentle curves with a long piece of ¾" (size) PVC pipe. When a long curving path is planned, this method provides a useful guide for locating the 6' long Paver Frame sections.
h. If your project includes a curved section that may transition away from a straight paver course, plan to have more than one foot of the Paver Frame overlap onto the straight course. In addition to the spike at the connector tab, plan to install a second spike along the straight paver section.
8" Spike
Cut along tab to fit corners
Straight section spike spacing
20" to 24"
Curved section spike spacing
12" to 16"
STRAIGHT
OUTSIDE CORNER
INSIDE CORNER
Hardscaping Products