Embed Size (px)
Citation preview
2
©2016 Christi Friesen All rights reserved. Please do not reprint/distribute this document without written per-mission from the CF Originals Creative Team. Absolutely DO feel free to create and sell your own work as
influenced by this project (please include an “inspired by Christi Friesen” because it’s the polite thing to do). www.ChristisCreativeNeighborhood
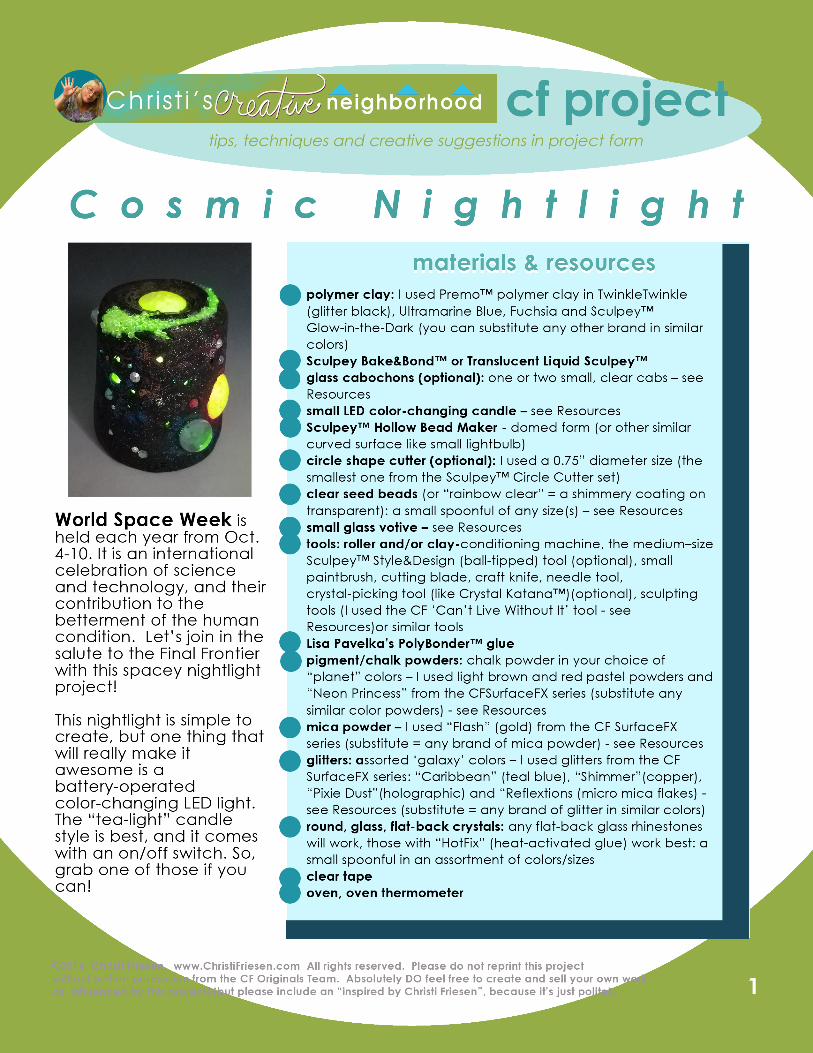
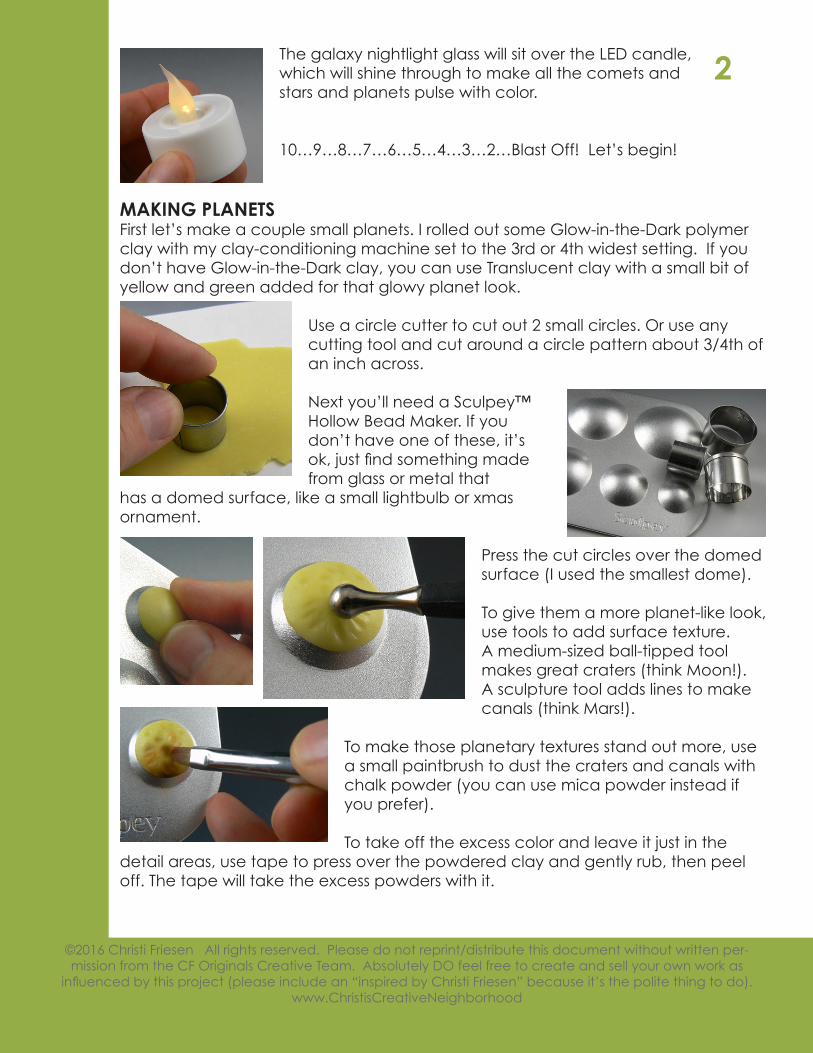
The galaxy nightlight glass will sit over the LED candle, which will shine through to make all the comets and stars and planets pulse with color.
10…9…8…7…6…5…4…3…2…Blast Off! Let’s begin!
MAKING PLANETSFirst let’s make a couple small planets. I rolled out some Glow-in-the-Dark polymer clay with my clay-conditioning machine set to the 3rd or 4th widest setting. If you don’t have Glow-in-the-Dark clay, you can use Translucent clay with a small bit of yellow and green added for that glowy planet look.
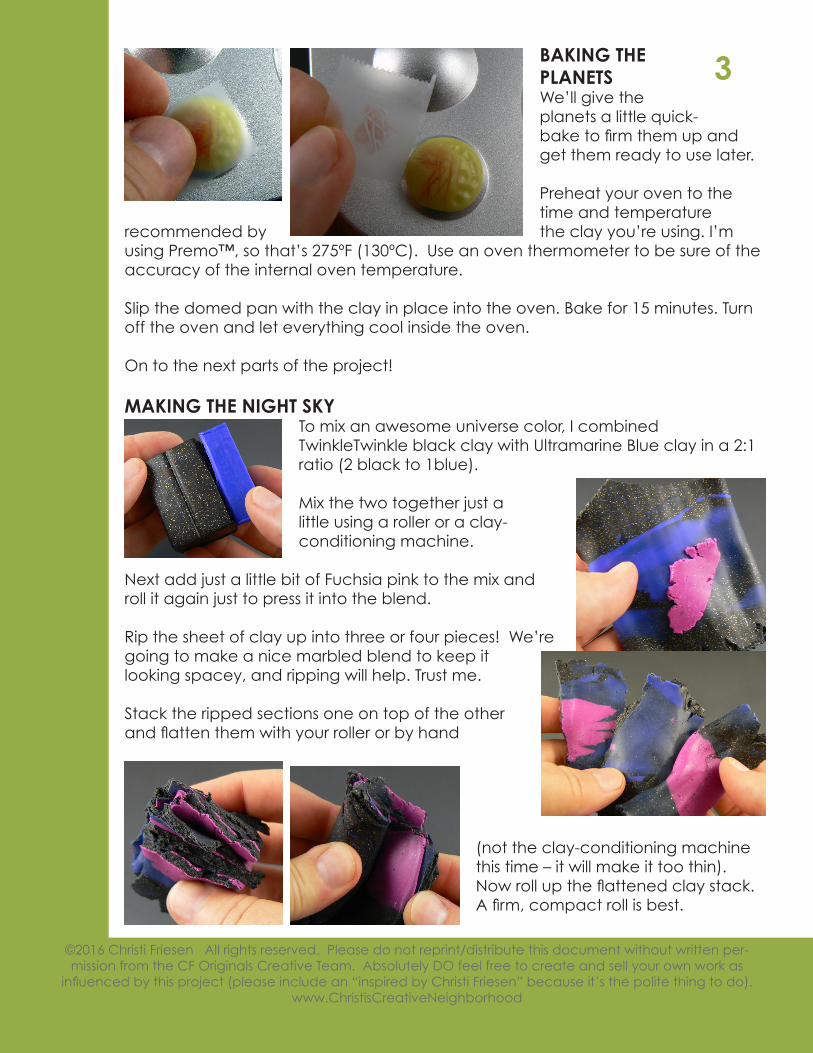
Use a circle cutter to cut out 2 small circles. Or use any cutting tool and cut around a circle pattern about 3/4th of an inch across.
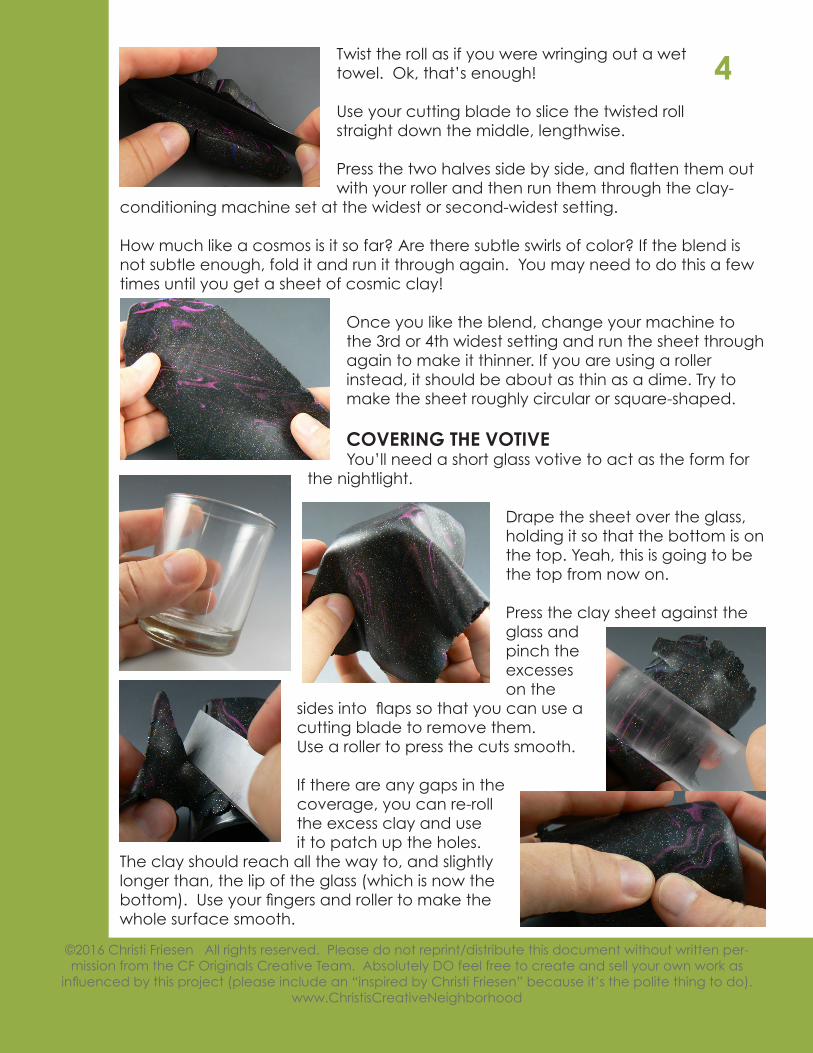
Next you’ll need a Sculpey™ Hollow Bead Maker. If you don’t have one of these, it’s ok, just find something made from glass or metal that
has a domed surface, like a small lightbulb or xmas ornament.
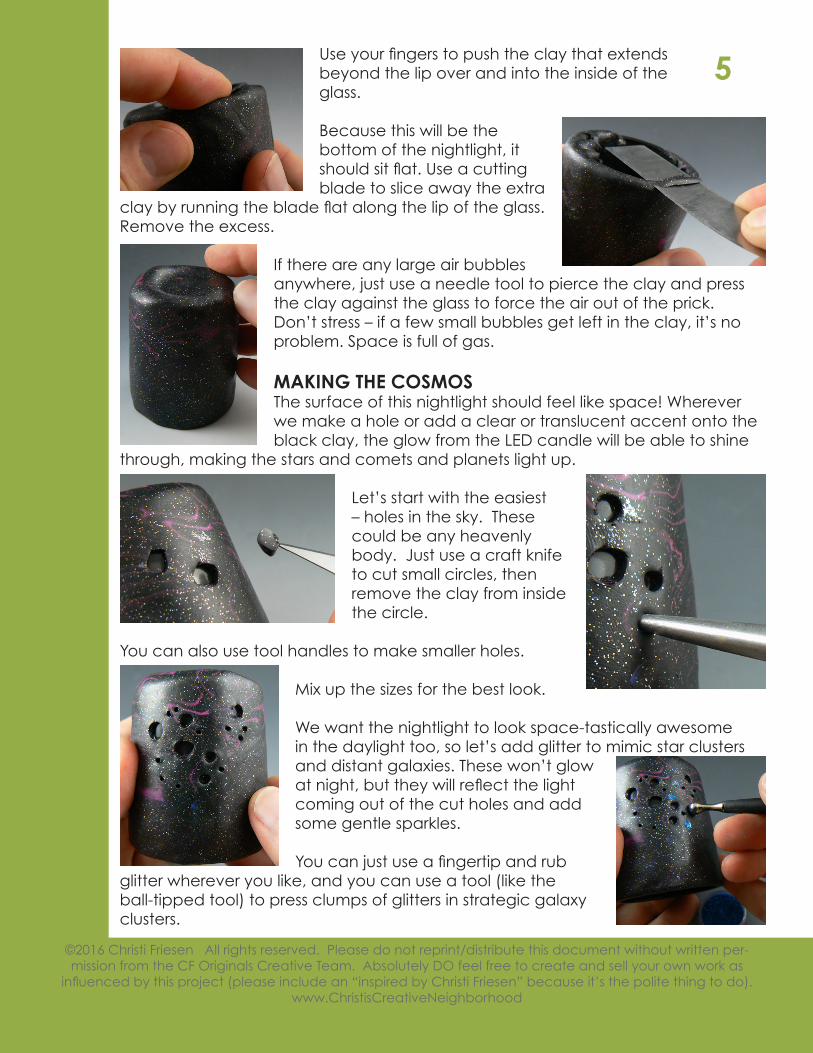
Press the cut circles over the domed surface (I used the smallest dome).
To give them a more planet-like look, use tools to add surface texture. A medium-sized ball-tipped tool makes great craters (think Moon!). A sculpture tool adds lines to make canals (think Mars!).
To make those planetary textures stand out more, use a small paintbrush to dust the craters and canals with chalk powder (you can use mica powder instead if you prefer).
To take off the excess color and leave it just in the detail areas, use tape to press over the powdered clay and gently rub, then peel off. The tape will take the excess powders with it.
3
©2016 Christi Friesen All rights reserved. Please do not reprint/distribute this document without written per-mission from the CF Originals Creative Team. Absolutely DO feel free to create and sell your own work as
influenced by this project (please include an “inspired by Christi Friesen” because it’s the polite thing to do). www.ChristisCreativeNeighborhood
BAKING THE PLANETSWe’ll give the planets a little quick-bake to firm them up and get them ready to use later.
Preheat your oven to the time and temperature
recommended by the clay you’re using. I’m using Premo™, so that’s 275ºF (130ºC). Use an oven thermometer to be sure of the accuracy of the internal oven temperature.
Slip the domed pan with the clay in place into the oven. Bake for 15 minutes. Turn off the oven and let everything cool inside the oven.
On to the next parts of the project!
MAKING THE NIGHT SKY To mix an awesome universe color, I combined TwinkleTwinkle black clay with Ultramarine Blue clay in a 2:1 ratio (2 black to 1blue).
Mix the two together just a little using a roller or a clay-conditioning machine.
Next add just a little bit of Fuchsia pink to the mix and roll it again just to press it into the blend.
Rip the sheet of clay up into three or four pieces! We’re going to make a nice marbled blend to keep it looking spacey, and ripping will help. Trust me.
Stack the ripped sections one on top of the other and flatten them with your roller or by hand
(not the clay-conditioning machine this time – it will make it too thin). Now roll up the flattened clay stack. A firm, compact roll is best.
4
©2016 Christi Friesen All rights reserved. Please do not reprint/distribute this document without written per-mission from the CF Originals Creative Team. Absolutely DO feel free to create and sell your own work as
influenced by this project (please include an “inspired by Christi Friesen” because it’s the polite thing to do). www.ChristisCreativeNeighborhood
Twist the roll as if you were wringing out a wet towel. Ok, that’s enough!
Use your cutting blade to slice the twisted roll straight down the middle, lengthwise.
Press the two halves side by side, and flatten them out with your roller and then run them through the clay-
conditioning machine set at the widest or second-widest setting.
How much like a cosmos is it so far? Are there subtle swirls of color? If the blend is not subtle enough, fold it and run it through again. You may need to do this a few times until you get a sheet of cosmic clay!
Once you like the blend, change your machine to the 3rd or 4th widest setting and run the sheet through again to make it thinner. If you are using a roller instead, it should be about as thin as a dime. Try to make the sheet roughly circular or square-shaped.
COVERING THE VOTIVEYou’ll need a short glass votive to act as the form for
the nightlight.
Drape the sheet over the glass, holding it so that the bottom is on the top. Yeah, this is going to be the top from now on.
Press the clay sheet against the glass and pinch the excesses on the
sides into flaps so that you can use a cutting blade to remove them. Use a roller to press the cuts smooth.
If there are any gaps in the coverage, you can re-roll the excess clay and use it to patch up the holes.
The clay should reach all the way to, and slightly longer than, the lip of the glass (which is now the bottom). Use your fingers and roller to make the whole surface smooth.
5
©2016 Christi Friesen All rights reserved. Please do not reprint/distribute this document without written per-mission from the CF Originals Creative Team. Absolutely DO feel free to create and sell your own work as
influenced by this project (please include an “inspired by Christi Friesen” because it’s the polite thing to do). www.ChristisCreativeNeighborhood
Use your fingers to push the clay that extends beyond the lip over and into the inside of the glass.
Because this will be the bottom of the nightlight, it should sit flat. Use a cutting blade to slice away the extra
clay by running the blade flat along the lip of the glass. Remove the excess.
If there are any large air bubbles anywhere, just use a needle tool to pierce the clay and press the clay against the glass to force the air out of the prick. Don’t stress – if a few small bubbles get left in the clay, it’s no problem. Space is full of gas.
MAKING THE COSMOSThe surface of this nightlight should feel like space! Wherever we make a hole or add a clear or translucent accent onto the black clay, the glow from the LED candle will be able to shine
through, making the stars and comets and planets light up.
Let’s start with the easiest – holes in the sky. These could be any heavenly body. Just use a craft knife to cut small circles, then remove the clay from inside the circle.
You can also use tool handles to make smaller holes.
Mix up the sizes for the best look.
We want the nightlight to look space-tastically awesome in the daylight too, so let’s add glitter to mimic star clusters and distant galaxies. These won’t glow at night, but they will reflect the light coming out of the cut holes and add some gentle sparkles.
You can just use a fingertip and rub glitter wherever you like, and you can use a tool (like the ball-tipped tool) to press clumps of glitters in strategic galaxy clusters.
6
©2016 Christi Friesen All rights reserved. Please do not reprint/distribute this document without written per-mission from the CF Originals Creative Team. Absolutely DO feel free to create and sell your own work as
influenced by this project (please include an “inspired by Christi Friesen” because it’s the polite thing to do). www.ChristisCreativeNeighborhood
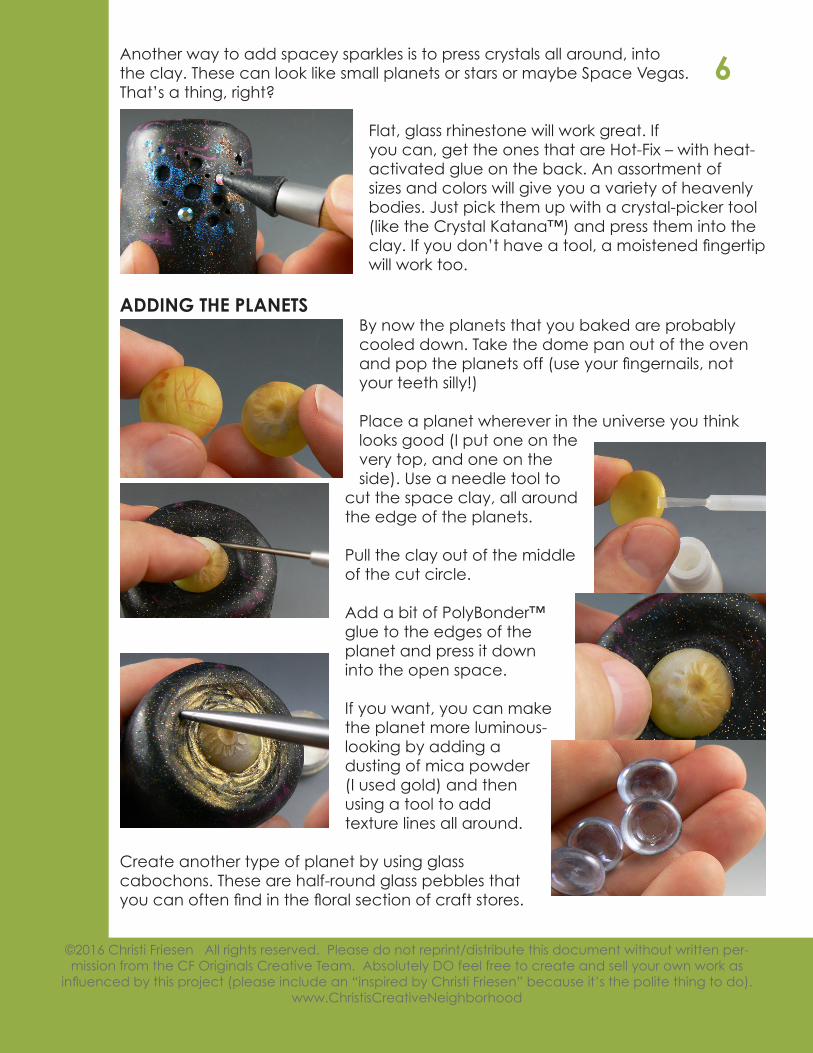
Another way to add spacey sparkles is to press crystals all around, into the clay. These can look like small planets or stars or maybe Space Vegas. That’s a thing, right?
Flat, glass rhinestone will work great. If you can, get the ones that are Hot-Fix – with heat-activated glue on the back. An assortment of sizes and colors will give you a variety of heavenly bodies. Just pick them up with a crystal-picker tool (like the Crystal Katana™) and press them into the clay. If you don’t have a tool, a moistened fingertip will work too.
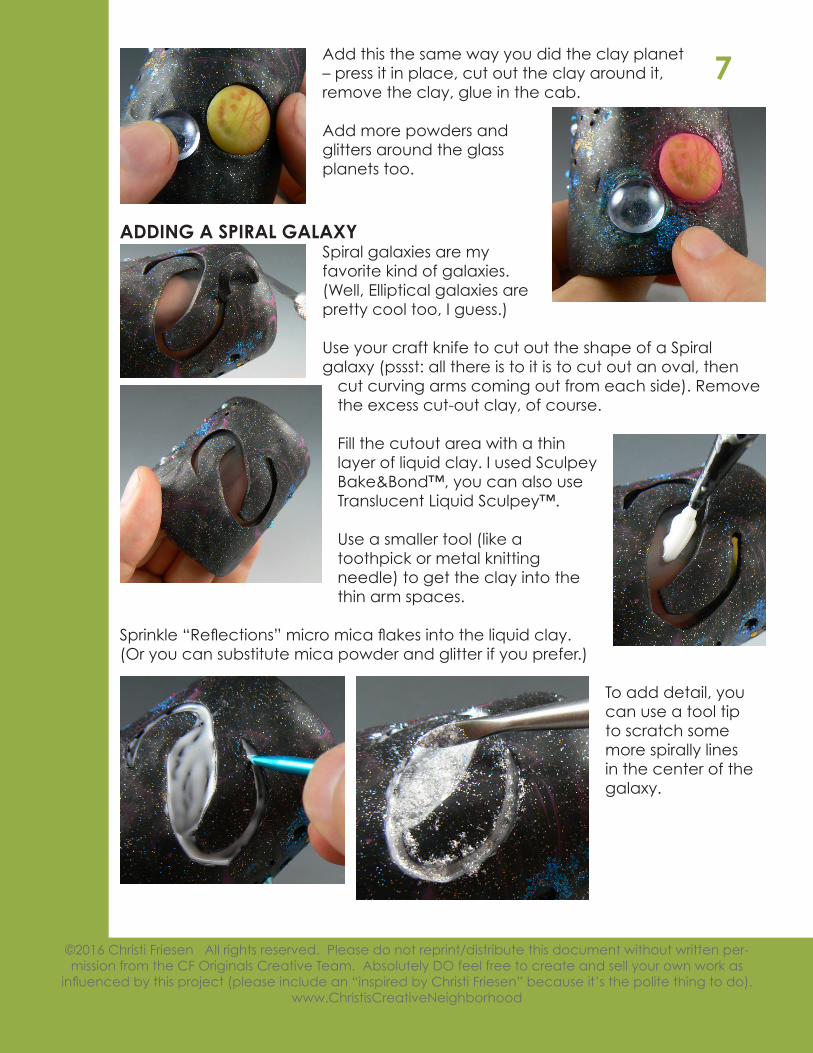
ADDING THE PLANETSBy now the planets that you baked are probably cooled down. Take the dome pan out of the oven and pop the planets off (use your fingernails, not your teeth silly!)
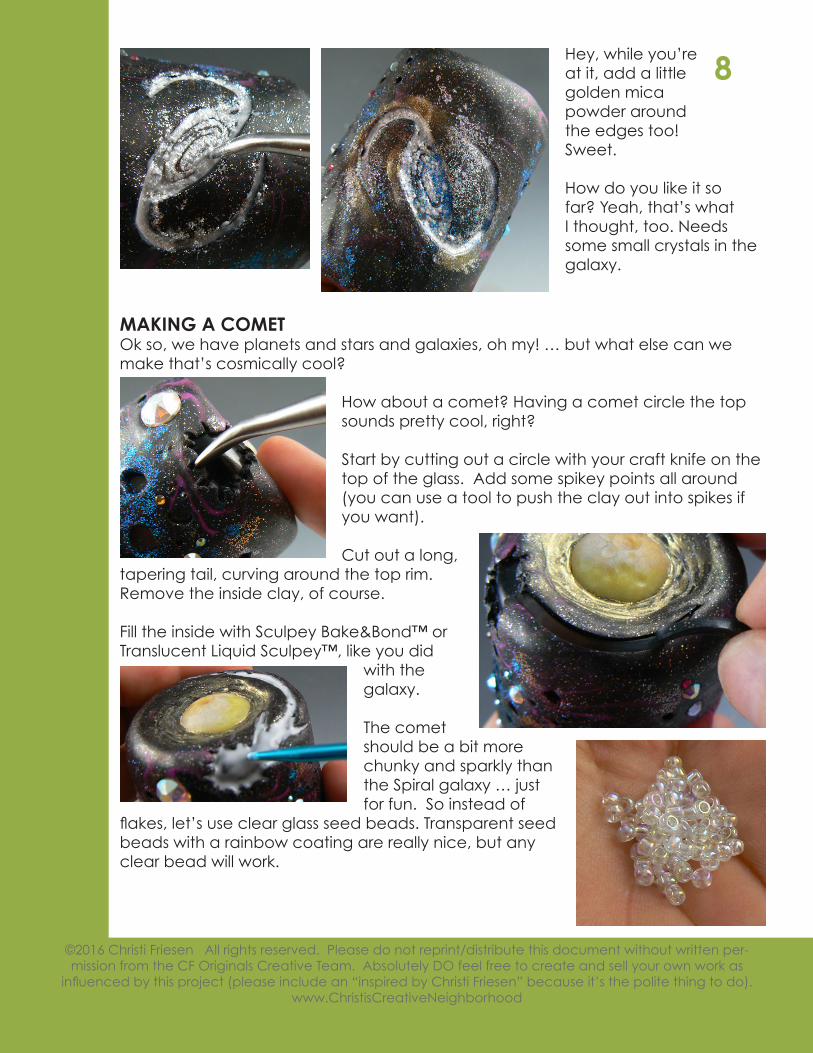
Place a planet wherever in the universe you think looks good (I put one on the very top, and one on the side). Use a needle tool to
cut the space clay, all around the edge of the planets.
Pull the clay out of the middle of the cut circle.
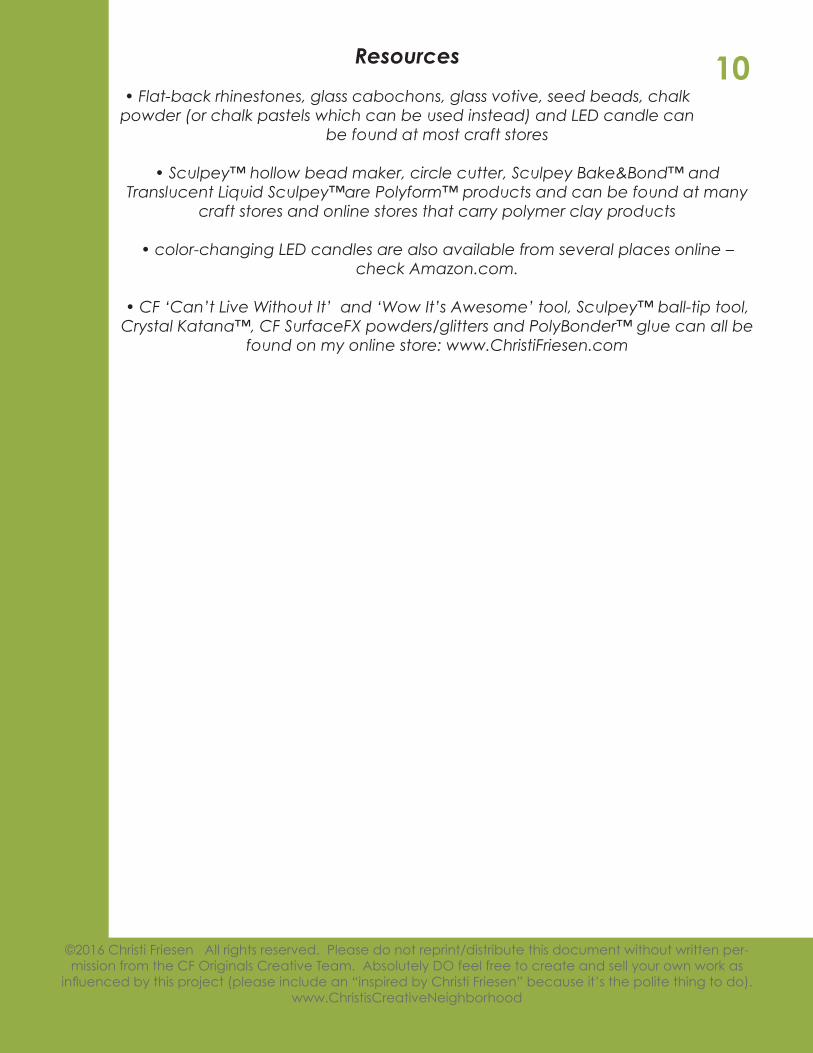
Add a bit of PolyBonder™ glue to the edges of the planet and press it down into the open space.
If you want, you can make the planet more luminous-looking by adding a dusting of mica powder (I used gold) and then using a tool to add texture lines all around.
Create another type of planet by using glass cabochons. These are half-round glass pebbles that you can often find in the floral section of craft stores.
7
©2016 Christi Friesen All rights reserved. Please do not reprint/distribute this document without written per-mission from the CF Originals Creative Team. Absolutely DO feel free to create and sell your own work as
influenced by this project (please include an “inspired by Christi Friesen” because it’s the polite thing to do). www.ChristisCreativeNeighborhood
Add this the same way you did the clay planet – press it in place, cut out the clay around it, remove the clay, glue in the cab.
Add more powders and glitters around the glass planets too.
ADDING A SPIRAL GALAXYSpiral galaxies are my favorite kind of galaxies. (Well, Elliptical galaxies are pretty cool too, I guess.)
Use your craft knife to cut out the shape of a Spiral galaxy (pssst: all there is to it is to cut out an oval, then
cut curving arms coming out from each side). Remove the excess cut-out clay, of course.
Fill the cutout area with a thin layer of liquid clay. I used Sculpey Bake&Bond™, you can also use Translucent Liquid Sculpey™.
Use a smaller tool (like a toothpick or metal knitting needle) to get the clay into the thin arm spaces.
Sprinkle “Reflections” micro mica flakes into the liquid clay. (Or you can substitute mica powder and glitter if you prefer.)
To add detail, you can use a tool tip to scratch some more spirally lines in the center of the galaxy.
8
©2016 Christi Friesen All rights reserved. Please do not reprint/distribute this document without written per-mission from the CF Originals Creative Team. Absolutely DO feel free to create and sell your own work as
influenced by this project (please include an “inspired by Christi Friesen” because it’s the polite thing to do). www.ChristisCreativeNeighborhood
Hey, while you’re at it, add a little golden mica powder around the edges too! Sweet.
How do you like it so far? Yeah, that’s what I thought, too. Needs some small crystals in the galaxy.
MAKING A COMETOk so, we have planets and stars and galaxies, oh my! … but what else can we make that’s cosmically cool?
How about a comet? Having a comet circle the top sounds pretty cool, right?
Start by cutting out a circle with your craft knife on the top of the glass. Add some spikey points all around (you can use a tool to push the clay out into spikes if you want).
Cut out a long, tapering tail, curving around the top rim. Remove the inside clay, of course.
Fill the inside with Sculpey Bake&Bond™ or Translucent Liquid Sculpey™, like you did
with the galaxy.
The comet should be a bit more chunky and sparkly than the Spiral galaxy … just for fun. So instead of
flakes, let’s use clear glass seed beads. Transparent seed beads with a rainbow coating are really nice, but any clear bead will work.

9
©2016 Christi Friesen All rights reserved. Please do not reprint/distribute this document without written per-mission from the CF Originals Creative Team. Absolutely DO feel free to create and sell your own work as
influenced by this project (please include an “inspired by Christi Friesen” because it’s the polite thing to do). www.ChristisCreativeNeighborhood
Just pick them up with a moistened fingertip and press them into the Bake&Bond/TLS.
Now, if you want to fill in the gaps, add powders and flakes, like “Reflections” flakes and a little golden mica powder.
The Bake&Bond/TLS in the comet and the galaxy will turn translucent during baking, so it will really let light out later!
How do you like it? Now is the time to add anything you want or fix anything that needs it.
BAKINGNow for the final baking. Just like before, preheat your oven to same temperature. Use an oven thermometer to be sure of the accuracy of the internal oven temperature.
Place the cosmic nightlight on a pan or tile and bake for the recommended time (for Premo, 30-45 minutes will be perfect). Let it cool completely.
Of course your cosmic nightlight looks great in the light.
But turn out the lights and see how it really shines!
10
©2016 Christi Friesen All rights reserved. Please do not reprint/distribute this document without written per-mission from the CF Originals Creative Team. Absolutely DO feel free to create and sell your own work as
influenced by this project (please include an “inspired by Christi Friesen” because it’s the polite thing to do). www.ChristisCreativeNeighborhood
Resources
• Flat-back rhinestones, glass cabochons, glass votive, seed beads, chalk powder (or chalk pastels which can be used instead) and LED candle can
be found at most craft stores
• Sculpey™ hollow bead maker, circle cutter, Sculpey Bake&Bond™ and Translucent Liquid Sculpey™are Polyform™ products and can be found at many
craft stores and online stores that carry polymer clay products
• color-changing LED candles are also available from several places online – check Amazon.com.
• CF ‘Can’t Live Without It’ and ‘Wow It’s Awesome’ tool, Sculpey™ ball-tip tool, Crystal Katana™, CF SurfaceFX powders/glitters and PolyBonder™ glue can all be
found on my online store: www.ChristiFriesen.com