Embed Size (px)
Citation preview
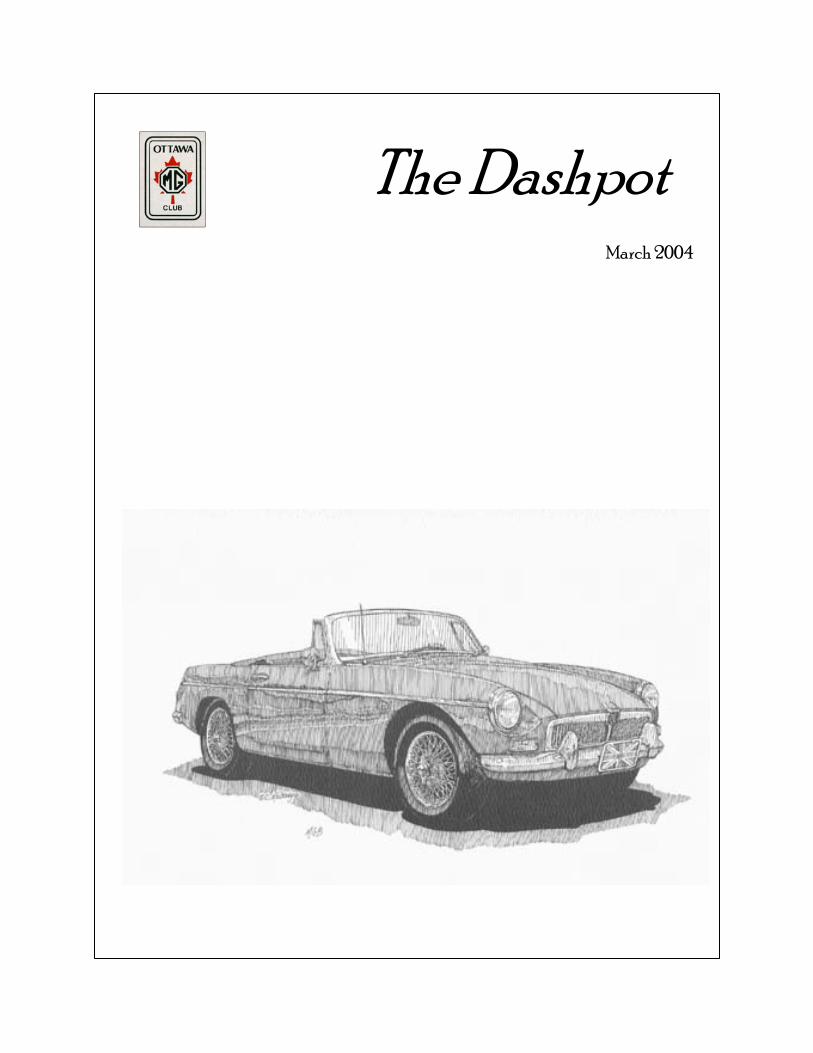
The Dashpot
March 2004
2
Executive Members
President Len Fortin [email protected] 258-9655 Vice President Open Newsletter Frank Rizzuti [email protected] 225-4240 Treasurer Mike Daniels [email protected] 592-5408 Club Regalia Doug McClure [email protected] 824-0168 Webmaster Ken Duff [email protected] 729-6976 Events Director Mary Attwell [email protected] 836-3133 Technical Director Dave Moore [email protected] 836-1381 Member at Large Rob Grapes [email protected] 839-6500 Past President Jordan Jones [email protected] 839-1821 Past President Mark Evenchick [email protected] 521-3097 Past President Debi Fortin [email protected] 258-9655
President’s Message When I was preparing for, and attended, the 'All Car Club Event Meeting' in mid-January and the 'OMGC Executive Meeting' in early February, I was reminded of just how many events there are planned for automotive folks in this part of the country. Driving events. Cruise-Ins. Display events. Charity events. Flea market events. Skills events. Show and Shines. Auto Jumbles. Rallies and Runs of all kinds. Holy smokes, you'd have a hard time keeping up if you tried to attend just half of them. Many of the events on the vari-ous club lists are organized by people who took on the responsibility once, and did such a good job they are almost pre-committed to continuing their work annually. I'm pretty sure you'll agree there is a sense of real satisfaction when one does a good job of an event and participants look forward to "doing it again next year". Of course, I have also heard of situations where participants grump and complain about small, insignificant things at an event and to those I usually say, "Well, I'm sure you'll do much better when you organize the next one!". Certainly here I am not trying to discourage event organi-zation and people participation. In fact, just the opposite. I am committed to making the OMGC events, fun events for the OMGC people. Driving. Learning. Trying. Seeing. Doing. Sharing. You don't have to have a real serious passion for doing these kinds of things - just a willingness to give it a try. And I can assure you, there is help close by. So when the OMGC 2004 Event Calendar gets to you (and it should be on its way to you very soon), take a look at the line-up of things that are listed for your enjoyment and see me if you would like to help out. Plan a route. Gather at a Cruise-In. Lend a hand. Set up a tent. Demo a vehicle. Chat about a repair job. Show a photo. Tell a story. You can do it! We can help. Len.
Ottawa MG Club
The Dashpot is the official publication of the Ottawa MG Club. Submissions for consideration should be sent to: [email protected].
www.omgc.net
3
Letters To The Editor
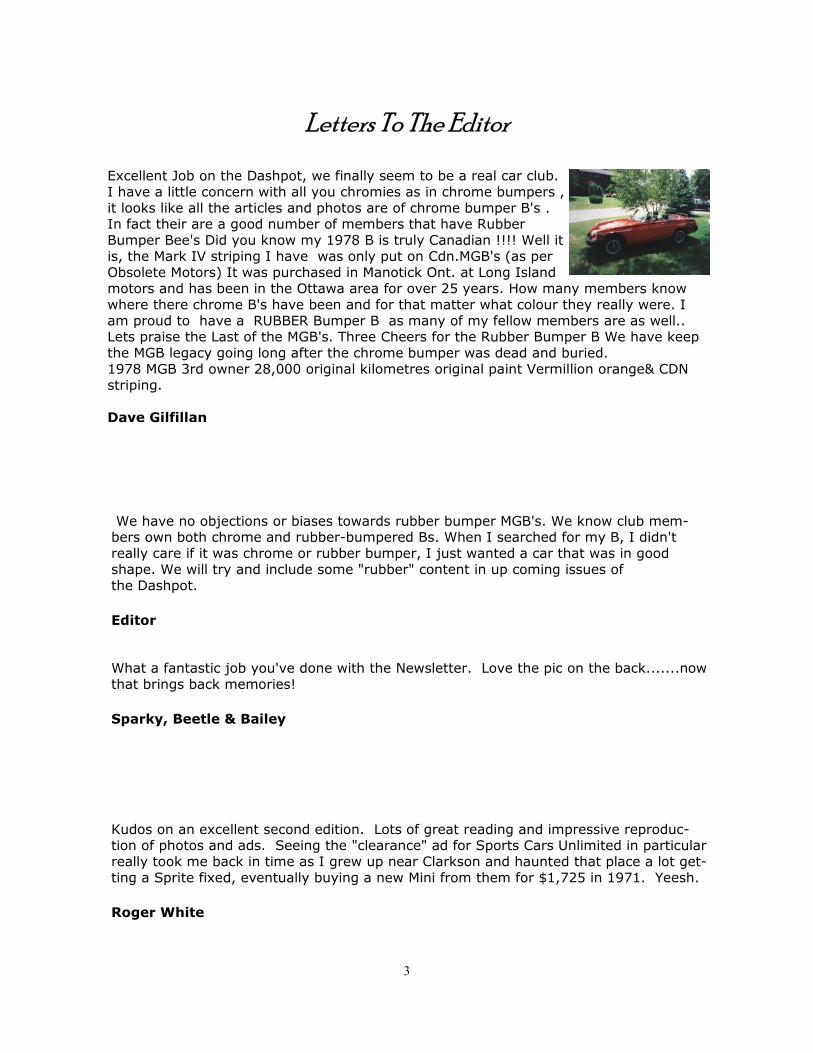
Excellent Job on the Dashpot, we finally seem to be a real car club. I have a little concern with all you chromies as in chrome bumpers , it looks like all the articles and photos are of chrome bumper B's . In fact their are a good number of members that have Rubber Bumper Bee's Did you know my 1978 B is truly Canadian !!!! Well it is, the Mark IV striping I have was only put on Cdn.MGB's (as per Obsolete Motors) It was purchased in Manotick Ont. at Long Island motors and has been in the Ottawa area for over 25 years. How many members know where there chrome B's have been and for that matter what colour they really were. I am proud to have a RUBBER Bumper B as many of my fellow members are as well.. Lets praise the Last of the MGB's. Three Cheers for the Rubber Bumper B We have keep the MGB legacy going long after the chrome bumper was dead and buried. 1978 MGB 3rd owner 28,000 original kilometres original paint Vermillion orange& CDN striping. Dave Gilfillan
We have no objections or biases towards rubber bumper MGB's. We know club mem-bers own both chrome and rubber-bumpered Bs. When I searched for my B, I didn't really care if it was chrome or rubber bumper, I just wanted a car that was in good shape. We will try and include some "rubber" content in up coming issues of the Dashpot.
Editor
What a fantastic job you've done with the Newsletter. Love the pic on the back.......now that brings back memories!
Sparky, Beetle & Bailey
Kudos on an excellent second edition. Lots of great reading and impressive reproduc-tion of photos and ads. Seeing the "clearance" ad for Sports Cars Unlimited in particular really took me back in time as I grew up near Clarkson and haunted that place a lot get-ting a Sprite fixed, eventually buying a new Mini from them for $1,725 in 1971. Yeesh.
Roger White
4
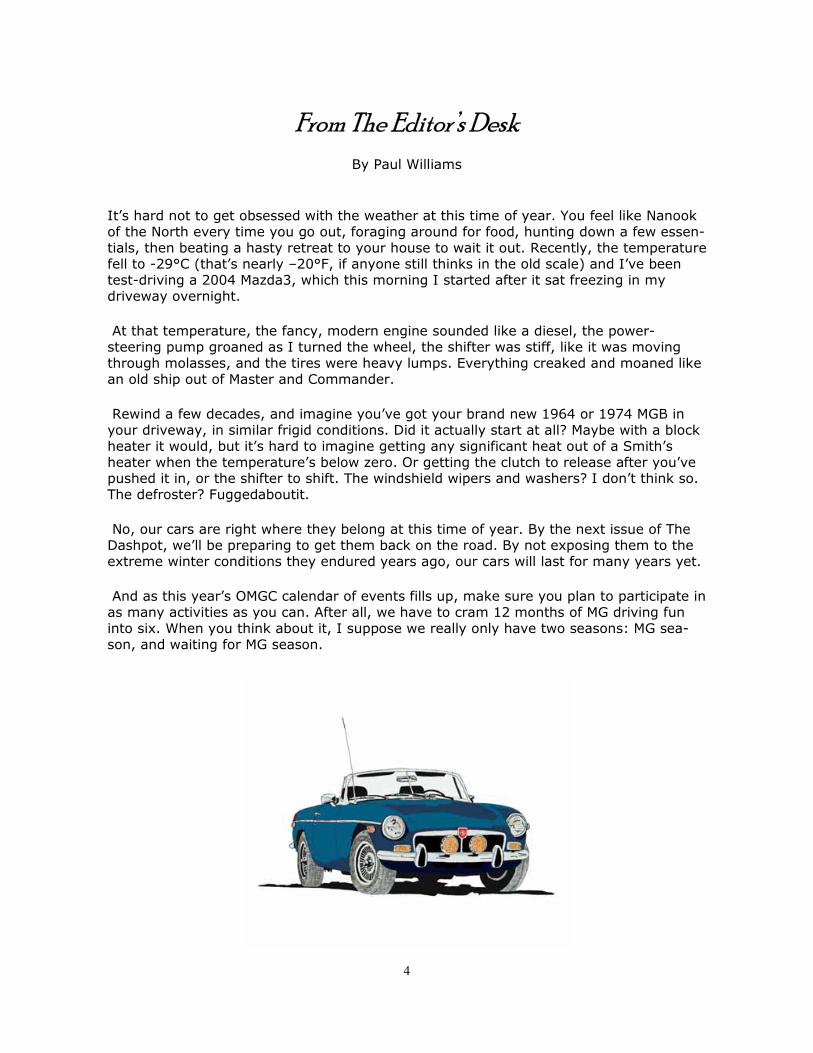
From The Editor’s Desk By Paul Williams
It’s hard not to get obsessed with the weather at this time of year. You feel like Nanook of the North every time you go out, foraging around for food, hunting down a few essen-tials, then beating a hasty retreat to your house to wait it out. Recently, the temperature fell to -29°C (that’s nearly –20°F, if anyone still thinks in the old scale) and I’ve been test-driving a 2004 Mazda3, which this morning I started after it sat freezing in my driveway overnight.
At that temperature, the fancy, modern engine sounded like a diesel, the power-steering pump groaned as I turned the wheel, the shifter was stiff, like it was moving through molasses, and the tires were heavy lumps. Everything creaked and moaned like an old ship out of Master and Commander.
Rewind a few decades, and imagine you’ve got your brand new 1964 or 1974 MGB in your driveway, in similar frigid conditions. Did it actually start at all? Maybe with a block heater it would, but it’s hard to imagine getting any significant heat out of a Smith’s heater when the temperature’s below zero. Or getting the clutch to release after you’ve pushed it in, or the shifter to shift. The windshield wipers and washers? I don’t think so. The defroster? Fuggedaboutit.
No, our cars are right where they belong at this time of year. By the next issue of The Dashpot, we’ll be preparing to get them back on the road. By not exposing them to the extreme winter conditions they endured years ago, our cars will last for many years yet.
And as this year’s OMGC calendar of events fills up, make sure you plan to participate in as many activities as you can. After all, we have to cram 12 months of MG driving fun into six. When you think about it, I suppose we really only have two seasons: MG sea-son, and waiting for MG season.

5
MGB-1963 Part Two
(contributed by Berton G. Grapes, former MGB owner…forever a keeper of the Marque) After a great night’s sleep we awoke to the sounds of the Paris traffic. Since a continen-tal breakfast was included in the “eight dollars per night”, we enjoyed café au lait and deliciously warm croissants with marmalade while sitting on the small balcony attached to our room. Across the street we could see our MGB parked alongside a large post office building. She was decorated with a small Canadian flag adhering to the back window of the canvas top as well as a stick on CDN sign on the rear bumper. It was comforting to know that we could keep a close eye on her during our stay in Paris. Over the next three days we visited the usual tourist spots – the Louvre, Jardin de Tuillerie (the spring flow-ers were in full bloom!), Place de Concorde, Champs d’Elysse, Arc de Triomphe. We picked up some francs in the American Express office on the Rue St. Honore along with some tax- free gas coupons (for tourists only – a nice touch we thought!) We found an incredible little family restaurant (L’Incroyable) for suppers and took a tour of some of the nightspots including the “Pigalle” and the “Lido”. Shopping at the “Au Printemps” on the Rue de Pays, exploring the Eiffel tower, St. Michel, the left bank, Notre Dame Cathe-dral, filled our last day in Paris with fascinating memories. Now it was time to move on. We packed up our car and noticed that the other cars parked in front and behind her were ticketed - we had been parked in a “no parking zone” for three days and the Parisian police had refrained from ticketing us! Perhaps they thought we would move on without trying to pay the fine but we prefer to think that in 1963 they were still friendly and forgiving towards Canadians. We headed south on #7 to Fontainbleau (stopping long enough to see the Palais Royale) through Nevers and into the mountainous south of France, stopping overnight in Cler-mont-Ferrand – a pretty little city with a square surrounded by poled trees and shops specializing in candied fruit. However Clermont –Ferrand will always be remembered as the seat of the infamous Vichy government during WW2. Putting up at the “Grande ho-tel” (50 francs/night), we went up the street a bit to dine on a splendid “canard a l’orange”. About two in the morning I awoke with crampy pain in the lower right side of my abdomen and immediately thought of appendicitis. I was very relieved to have it turn into simple diarrhoea – “food poisoning”! The next day we stopped in Le Puy to gaze at the monastery built high on a volcanic lava cone then pressed on toward Valence. Here we were in mountainous country with narrow, switchback roads – the MGB just ate them up! At noon, we stopped alongside the road, had a lunch of cheese, rolls and wine, sitting on the passenger side step of the open door, looking into the distance at two snow covered mountains in the foothills of the Alps. We motored on, past mountainsides laced with vines and small patches of ar-able land. On through Avignon to Aix-en Provence, stopping once to have a sandwich and buy a couple of bottles of wine (at 50 cents Canadian a bottle). We stopped for the night at a motel just outside Aix and lying in a bathtub full of hot water I opened one of the bottles and tipped it up to my lips. Little did I know that the wine I was so casually drinking was from a famous vineyard –It was “Chateauneuf-du-Pape”. Since that day it has been our favourite wine. The following day we reached Cannes and spent the afternoon on the sand gazing at the Mediterranean and the bikinis. Overnighted in Cannes, then pushed on, entered
6
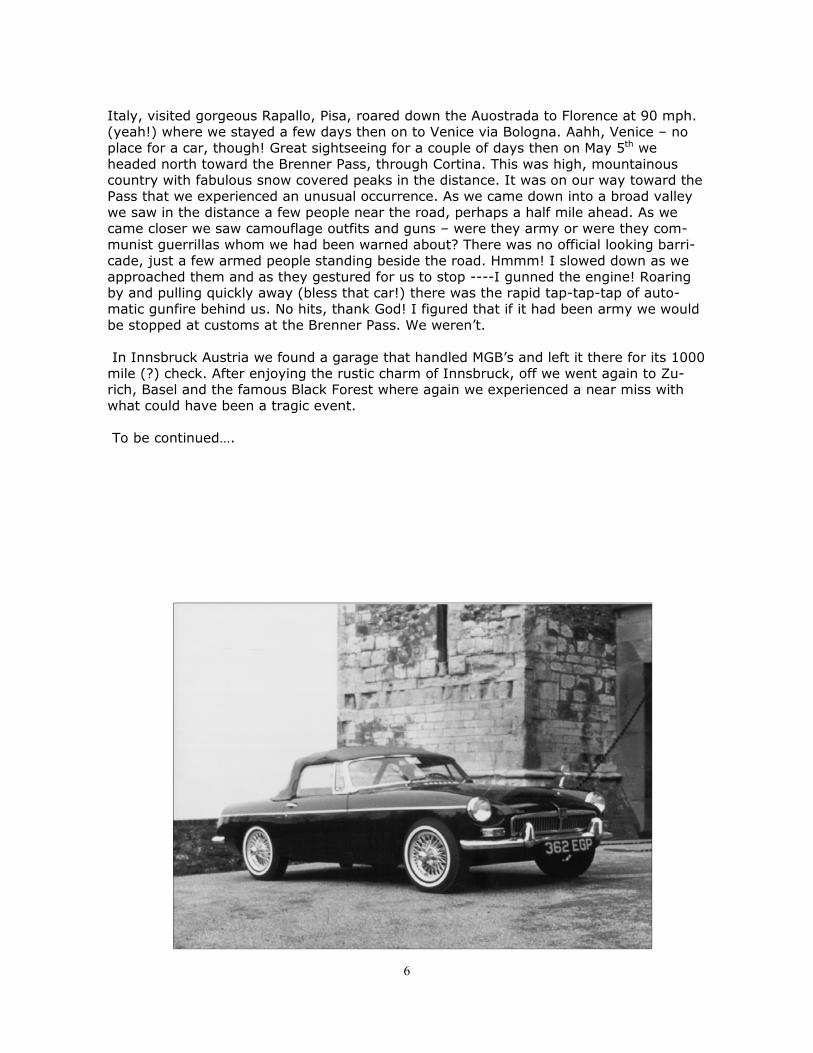
Italy, visited gorgeous Rapallo, Pisa, roared down the Auostrada to Florence at 90 mph. (yeah!) where we stayed a few days then on to Venice via Bologna. Aahh, Venice – no place for a car, though! Great sightseeing for a couple of days then on May 5th we headed north toward the Brenner Pass, through Cortina. This was high, mountainous country with fabulous snow covered peaks in the distance. It was on our way toward the Pass that we experienced an unusual occurrence. As we came down into a broad valley we saw in the distance a few people near the road, perhaps a half mile ahead. As we came closer we saw camouflage outfits and guns – were they army or were they com-munist guerrillas whom we had been warned about? There was no official looking barri-cade, just a few armed people standing beside the road. Hmmm! I slowed down as we approached them and as they gestured for us to stop ----I gunned the engine! Roaring by and pulling quickly away (bless that car!) there was the rapid tap-tap-tap of auto-matic gunfire behind us. No hits, thank God! I figured that if it had been army we would be stopped at customs at the Brenner Pass. We weren’t. In Innsbruck Austria we found a garage that handled MGB’s and left it there for its 1000 mile (?) check. After enjoying the rustic charm of Innsbruck, off we went again to Zu-rich, Basel and the famous Black Forest where again we experienced a near miss with what could have been a tragic event. To be continued….
7
8
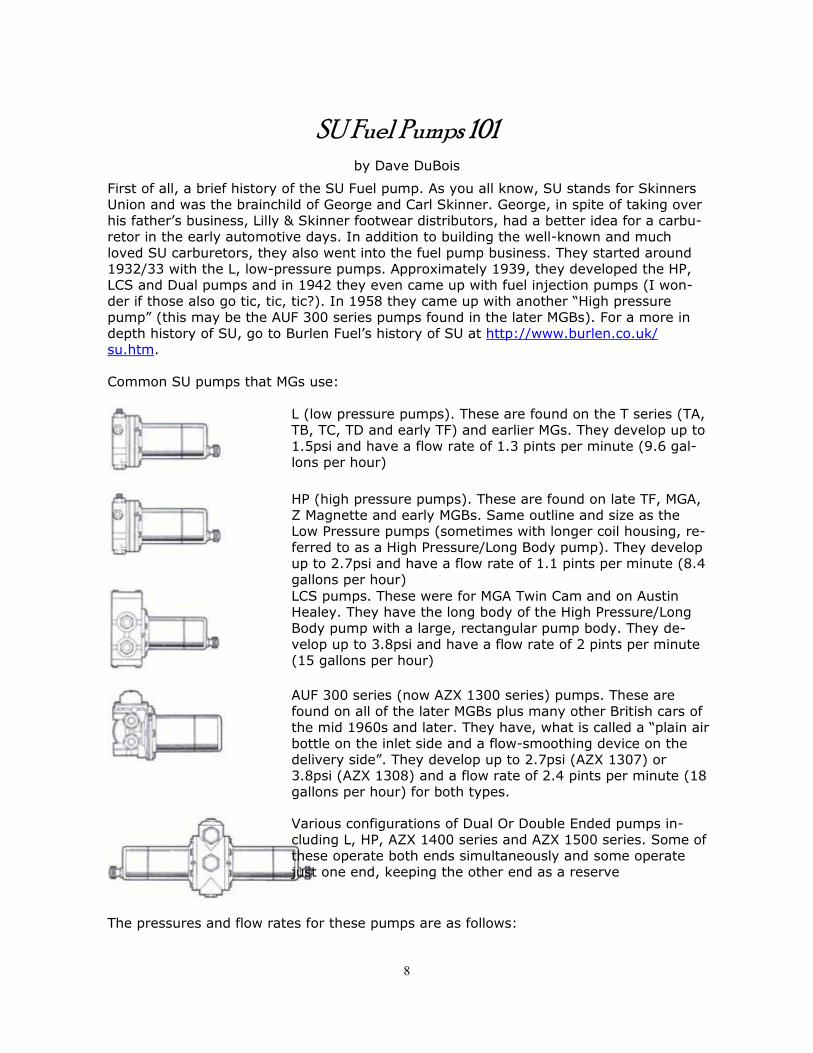
SU Fuel Pumps 101
by Dave DuBois
First of all, a brief history of the SU Fuel pump. As you all know, SU stands for Skinners Union and was the brainchild of George and Carl Skinner. George, in spite of taking over his father’s business, Lilly & Skinner footwear distributors, had a better idea for a carbu-retor in the early automotive days. In addition to building the well-known and much loved SU carburetors, they also went into the fuel pump business. They started around 1932/33 with the L, low-pressure pumps. Approximately 1939, they developed the HP, LCS and Dual pumps and in 1942 they even came up with fuel injection pumps (I won-der if those also go tic, tic, tic?). In 1958 they came up with another “High pressure pump” (this may be the AUF 300 series pumps found in the later MGBs). For a more in depth history of SU, go to Burlen Fuel’s history of SU at http://www.burlen.co.uk/su.htm. Common SU pumps that MGs use:
The pressures and flow rates for these pumps are as follows:
L (low pressure pumps). These are found on the T series (TA, TB, TC, TD and early TF) and earlier MGs. They develop up to 1.5psi and have a flow rate of 1.3 pints per minute (9.6 gal-lons per hour)
HP (high pressure pumps). These are found on late TF, MGA, Z Magnette and early MGBs. Same outline and size as the Low Pressure pumps (sometimes with longer coil housing, re-ferred to as a High Pressure/Long Body pump). They develop up to 2.7psi and have a flow rate of 1.1 pints per minute (8.4 gallons per hour)
LCS pumps. These were for MGA Twin Cam and on Austin Healey. They have the long body of the High Pressure/Long Body pump with a large, rectangular pump body. They de-velop up to 3.8psi and have a flow rate of 2 pints per minute (15 gallons per hour)
AUF 300 series (now AZX 1300 series) pumps. These are found on all of the later MGBs plus many other British cars of the mid 1960s and later. They have, what is called a “plain air bottle on the inlet side and a flow-smoothing device on the delivery side”. They develop up to 2.7psi (AZX 1307) or 3.8psi (AZX 1308) and a flow rate of 2.4 pints per minute (18 gallons per hour) for both types.
Various configurations of Dual Or Double Ended pumps in-cluding L, HP, AZX 1400 series and AZX 1500 series. Some of these operate both ends simultaneously and some operate just one end, keeping the other end as a reserve

9
• L (both ends work simultaneously) 1.5psi, 3.2 pints per/min (24 gallons per hour) • HP (both ends work simultaneously) 2.7psi, 2.6 pints per/min (19.2 gallons per hour) • AZX 1400 series (both ends work simultaneously) 2.7 or 3.8psi, 4.8 pints per minute
(36 gallons per hour) • AZX 1500 series (one end working at a time) 3.8psi, 2 pints per minute (15 gallons
per hour) The SU fuel pump is an impulse type of pump. That is, when power is supplied to the pump, current flows through the points and the solenoid coil. The energized coil acts on the iron disk attached to the diaphragm, pulling it and the diaphragm toward the coil. This movement of the diaphragm develops a vacuum in the pump body, which pulls fuel from the tank, through a check valve and into the body. The movement of the dia-phragm also causes a shaft that is attached between it and the lower points bridge or carrier to push the carrier up, making the carrier to “throw over” and open the points. Once the points open, the flow of current through the coil is interrupted, allowing the diaphragm to be pushed back to its original position by the volute spring, which in turn pushes the fuel in the pump body out through another check valve to the carburetors. Once the diaphragm reaches it’s original position, the points carrier “throws over” to the points closed position and the whole action is repeated – thus the familiar tic, tic, tic sound of the pump. The pump pressure is established by the strength of the volute spring, which resides between the iron disk on top of the diaphragm and the bottom of the coil. The check valves can be either a simple brass disk that held against the valve seat by combination of gravity and back pressure in the system in the case of the L, HP and LCS pumps or a plastic sheet in a valve assembly that closes against the assembly’s valve seat and is held against the seat by system pressure in the case of the later AUF 300 and AZX 1300 series pumps. The system pressure is developed on the carburetor or outlet side of the pump, so the valves act as check valves to keep fuel from flowing back to the tank.
As with anything that uses a set of points opening and closing, there is point wear, both mechanical (slight) and electrical arching (major) that eventually causes operation to deteriorate and eventually stop all together. Over the years, various methods were em-ployed to suppress the electrical arching at the points. Originally, on the L type pumps, the only suppressor used was a swamping resistor, in the form of resistance wire wrapped around the coil and attached in parallel with it. As stronger coils that draw more current were employed, a 0.47 microfarad capacitor was added to assist the swamping resistor suppress the arching (by the way, even though it looks like an elec-trolytic capacitor, it is not and therefore is not polarity sensitive). With the introduction of the AUF 300 and AZX series pumps, the capacitor was replaced with a diode to work in conjunction the swamping resistor. This arrangement made the pumps polarity sensi-tive. All of the systems of arch suppression worked fairly well with the series of pumps they were designed for, giving the pumps a reasonable life expectancy (except the ex-pectancy of the owners). Finally, the all-electronic pumps were introduced, which re-placed the points with a Hall effect circuit to control the current flow in the coil. These pumps look and operate the same as the points style pumps, complete with the familiar tic, tic, tic sound, but no longer any problems with point wear and the life expectancy of the pumps is now established by the life of the diaphragm and check valves. The following are some of the more common problems with SU fuel pumps: Burned and/or sticking points – usually causes intermittent fuel starvation and stalling. When this happens, the silence is deafening with the normal tic, tic, tic
10
• sound missing. A sharp rap on the side of the coil housing will sometimes bring the pump back to life, but the long-term solution is replacement of the points.
• Diaphragm stiffens with age – this will usually cause the pump to run slowly or er-
ratically. The only solution for this is to replace the diaphragm.
• Leakage past valves – pump will seem to run at normal or faster rate, but no fuel
is pumped, a vacuum gauge on the input to the pump will bounce up and down in time with fuel pump clicking. On the L or HP pumps, this will necessitate new valve disks and/or re-facing the valve seats. On the AUF 300 or AZX 1300 series, one or both of the valve assemblies will have to be replaced.
• Broken pedestal (bakelite platform under the end cap where the points mount) –
this is usually a problem only on the L and HP type pumps where the pedestal is not supported around the mounting screws, and then usually a owner induced fail-ure by over tightening the mounting screws. This condition will stop the pump completely and is corrected with a new pedestal.
• Fuel leaks – caused by loose coil housing to body screws, loose inlet/outlet fittings,
split diaphragm or cracked pump body. A cracked pump body is a very unusual situation and with the price of new bodies, the best solution is a new pump. A split diaphragm requires replacement of the diaphragm while loose screws or fittings just require tightening. Use some sealing compound on fitting threads and lock washers on screws.
• Air leak – This will usually show up as fuel starvation at higher speeds. To check
for this situation, disconnect the fuel line from the last carburetor in line and route it into a jar. Turn on the ignition and as the jar fills above the end of the line, watch for a stream of bubbles. The fix is the same as the above, plus checking the lines and fittings between the pump and the fuel tank.
Clogged lines – this can happen before or after the pump. Disconnect the line from the pump to the carburetors and replace it with a line into a jar or can, then turn on the ig-nition and see if fuel is pumped out of the pump. If so, the output line is clogged. If no fuel is pumped out, disconnect the line from the tank at the pump and turn on the igni-tion. If the pump runs, the line from the tank is clogged. Note: since a clogged input line will cause the pump to fail in a current on condition, leaving the ignition on for a long period of time in this condition will cause the swamping resistor wire to burn out, which will, in turn, cause excessive arching at the points and a reduced points life. If the pump is an all-electronic pump this situation can result in a burned out circuit board
11
Tuning S.U. Carbs by Roger Garnett Well, it's not really that hard to set up SU's, just different. Of course it always gets more interesting when you have more than one...There is a very good Haynes SU carb manual available, recommended reading. The basic syncing process also applies to Zenith-Stromberg's, but the adjustment mechanisms are different. Here is a layman's guide to adjusting SU's. Step 1- Tune up the rest of the engine- REALLY! clean or replace, and set the points, set the timing, plugs, valve lash, and remove the air filters. All of these things can affect the setting of the carbs, which should be done LAST, (if at all). The carbs rarely need to be adjusted, once set. Also replace/install the gas filter. Of course, it helps if the carbs are in good mechanical condition as well. But you can consider a rebuild once you have gotten things working first! Step 2- clean the carbs! use gum-out or similar stuff, clean all external linkages, shafts, and stuff. Step 3- Remove the float bowl covers, clean the float bowls, remove old sediment, and check/adjust the float setting. (turn the cover upside down, and get a *1/8" in drill bit, set the drill bit across the cover, the float tab should just touch the bit.) Make sure the needle is moving and seating properly. This is just like *most* floats. Replace the cover. * This is for HS4 SU's- (1/8-3/16") if you are dealing with 1", H's, HS2's HS6's, HIF's, etc.- check the spec for your carb. Note: You can check for matching float settings, after setting the mixture, by removing the pistons, and peering down at the jets. The fuel level should be about the same on both carbs, a little below the top surface of the jet. (After car has been run only) Step 4- Go get a pint of ale, or something close, and set it nearby. Step 5- Remove the piston covers. CAREFULLY remove the piston, DO NOTBEND THE NEEDLE. Set the piston down on a clean wadded rag to prevent rolling. Clean the inside of the carb. Check operation of the throttle. Check the throttle shaft slop- this is the most common place for wear on an SU, and is often where air/vacuum leaks occur. The bushings and shafts can be replaced, but it requires some machining. A small amount of leakage can be tolerated, the car just won't idle as evenly. Clean the piston. Stare in awe at the odd carburetor design, simple and effective, (constant velocity). Dump the old oil out of the damper if you haven't already spilled it. clean. Reassemble, check pis-ton movement, raise it, then let go, it should fall freely. If not, check assembly again, make sure the piston isn't binding against the carb body, it should ride only on the damper shaft. Do not stretch the spring. When all is operating properly, fill the damper with Marvel Mystery Oil for light damping, or use motor oil for heavier damping. (I use MMO) If you get "flutter" on, acceleration, you might try the heavier oil. Step 6- Start the car and warm it up, then turn off/disconnect/otherwise disable the choke mechanism. (Loosen the nuts on the clamps so that the choke stuff isn't doing anything) This will get set later. (Later Zenith-Stromberg's have a thermostatic choke, not a cable.)
12
Step 7- Check coarse throttle adjustments- make sure the throttle cable pulls on both carbs equally, and returns completely when released. This is adjusted by loosening the set screws on the throttle shaft and matching the two sides. You can also adjust the ca-ble length at this time, using the cable set screw/retainer at the end of the cable. You can check the float adjustments now by removing the piston & cover, and looking at the fuel level in the needle seats. Both carbs should be about even, a little below the top surface of the jet. If not, readjust one or both floats to match the level. Step 8- Synchronize the throttles- if you have a uni-syn, here's your chance to use it, (or other air flow gauge), if not use a tube and listen to the airflow. The Uni-Syn is much easier to use, and can result in better balance. Alternately adjust the idle screw on each carb, attempt to set the idle as low as possible (~800-1000 RPM). Adjust until the air-flow is *close* to the same at each carb. The engine may now be running rough, just keep the idle speed high enough to keep running. Give the throttle a quick snap to make sure everything is settled, then check sync again. Periodically snap the throttle to make sure everything is seated. Large differences in where you can adjust the two carbs may indicate air/vacuum leaks, or other problems, such as a bad valve) Step 9- Adjust the mixture- this is done with the spring-loaded hex fitting under the carb, where the fuel supply tube enters from the float. Turning the fitting raises and low-ers the needle seat. Pick a carb, and turn the fitting 3 flats (1/2 turn), first in one direc-tion, then back 3, then 3 in the other direction. Note where the engine runs better, idle speed should increase. Turn to the best setting. Repeat this procedure until you get the best operation you can, (highest idle speed), keeping track of flats turned will help you remember where you were. If you get lost, turn all of the way in, then back out 12 flats and start again. Periodically snap the throttle and push up on the fitting to make sure everything is seated. Note: Type HIF carbs (With integrated float bowl) no longer have the hex nut to adjust the mixture. Instead, there is a screw to twiddle, on front of the front carb, and behind the rear. The screw is connected to the needle seat through a temperature compensated gizmo, which is said to make the carbs more stable. Adjust-ment can be done in much the same way, by counting turns/flats of your screwdriver. There is less adjustment range than with the basic models. When you think you're close, stop, uncramp your fingers, breath deep, and do the same to the other carb. Then re-tune the first carb, and then the second again. This serves to match the mixture of the 2 carbs, and prepare you for the beer sitting over there in the sun. (why do you think the British drink warm beer?) Step 10- repeat step 8, setting the idle speed as low as possible, and re-syncing the idles. Now go back and readjust the mixtures. After a couple of iterations, the engine should be running smoothly (controlled by mixture) and at a low idle. Repeat as neces-sary. Set the final idle to 800-1000 RPM,depending on the condition of the rest of the engine. This is a standard mixture test, performed AT IDLE: Under operation, (air filter off) lift the carb piston by 1/16" with the lifting pin or a screwdriver, which leans the mix a tad. If:
� RPM's rise and stay up, that carb is rich. � RPM's rise briefly, then drop, mix is about right. � RPM's fall, engine gets rougher- mix is lean.
Step 11- Adjusting the choke- I won't get into the temperature compensation in the type
13
HIF, or the Thermostatic choke in the later Stromberg's. Check the manual for more info. The choke is supposed to do two things; the first half of travel moves a cam on each carb which opens the throttle, for warm up. The second half pulls down on the needle seat to enrichen the mixture, for starting. Start with the choke in the off position (knob in). Adjust so that the cam only starts moving the throttle after you start pulling out on the cable (adjust with shafts and ad-justing screws). Try to get both carbs adjusted the same, so that both screws begin to hit the cam at the same time. This is not real critical, but you can use your Uni-Syn to match air-flow on both sides, with the choke partly engaged. After the cable is about halfway out, it should start engaging the lever which pulls down on the needle seats. Adjust the linkages so both carbs are acted on equally. You can do this by adjusting for even running of the engine. Of course, for a warm engine, the rich-ness of this mixture will cause some roughness. Make sure the needle seats return freely when you release the choke. Step 12- Drink that warm beer (only one, no DWI now...) it will taste great at this point!, go wash up, and go for a ride. Notes: These procedures assume that your engine/carbs are in reasonable operating condition. If something is malfunctioning/leaking, etc, this should still help, but the re-sults may vary. For instance, if you have leaky carbs, worn needles, engine modifica-tions, etc, you may find things work better if you tune for optimum performance at open throttle rather than idle. The first time through carb adjustments can be confusing, once you've done it, all of the stuff in the manuals makes sense. Go back and read them again-As always, I recom-mend Bentleys, which is a repro of the original factory manuals, and then Haynes, and throw out the Chilton's. (original factory manuals are to be read in a clean environment, repros are for smearing grease all over, except, if that's all you got, use it!) Haynes has an excellent manual just for SU carbs, it covers operation, theory, rebuild of all models, and has needle charts for hundreds of car/engine/carb setups. They also have a manual for Zenith-Stromberg's, which, while similar, are a whole other beast.
14
15
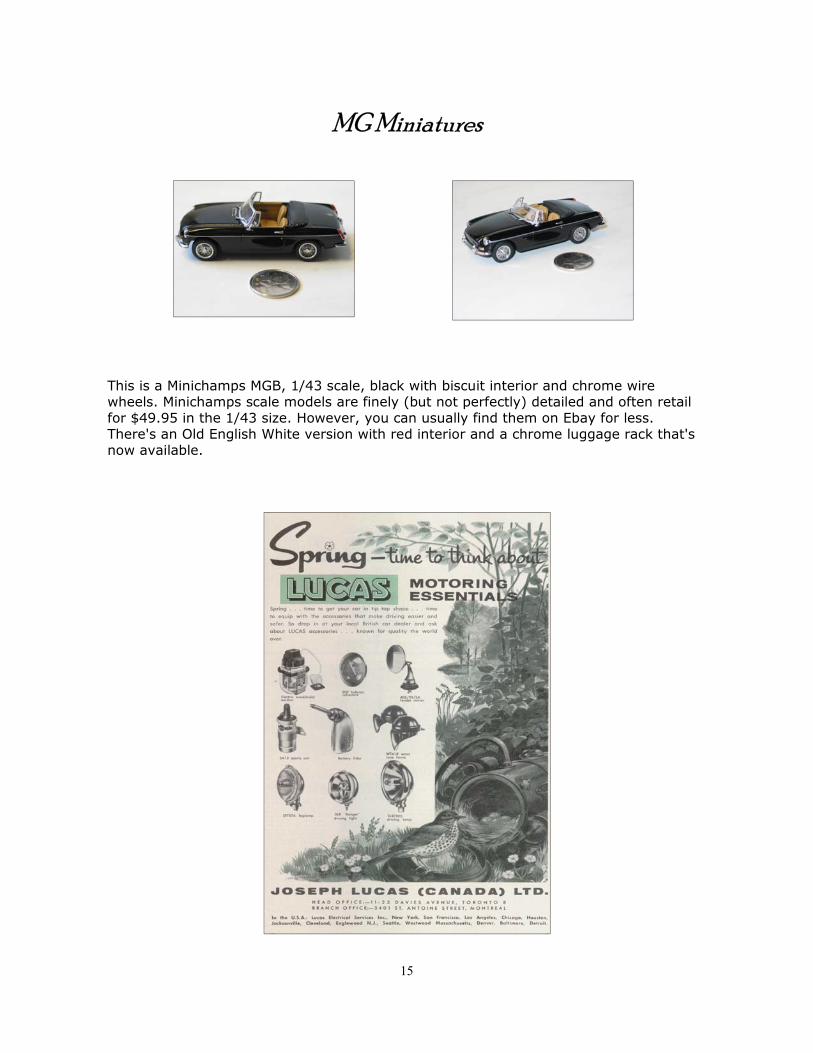
MG Miniatures
This is a Minichamps MGB, 1/43 scale, black with biscuit interior and chrome wire wheels. Minichamps scale models are finely (but not perfectly) detailed and often retail for $49.95 in the 1/43 size. However, you can usually find them on Ebay for less. There's an Old English White version with red interior and a chrome luggage rack that's now available.

16
Book Review by Roger White
Original MGB (with MGC and MGB-V8)
by Anders Ditlev Clausager
Given the production run and popularity of the MGB, there’s no shortage of illustrated books available about the model and its variants. Many club members may be familiar already with this book, one of a series published by Bay View Books that provides a de-tailed guide to specifications on various marques. Newcomers to the B, however, would find this book particularly useful in seeing how the model altered in detail through the 18-year course of production. And since many of the cars will have been changed by various owners, often amateurishly, this book is essen-tial to those wishing to return their cars to original spec, whether fitting the “right” grill at the front to the correct number plate lamps at the rear, and everything in between. The author, Anders Ditlev Clausager, is archivist at the Heritage Motor Centre and joined Austin Rover at Longbridge, England as a stylist and has certainly provided what must be the definitive guide to originality for the model, drawing on factory records, parts lists and catalogues. The 152-page book contains 265 excellent colour photographs showing the smallest details of engine bays, interior trim, wheels and tires, bodyshells, facia and instruments plus many complete cars ranging from the earliest chrome bumper models to the last of the rubber bumper special editions. The GT, C and V8 variants are also covered and considerable space is given to North American – US and Canadian – specifi-cations. While of necessity quite technical, the book is written generally in clear language and you don’t have to be an engineer to understand most of it. There are chapters covering what to look for when buying, plus optional equipment, some history, and even a listing of the major clubs and magazines. A chapter on Identification allows you to determine the month your car was built, very detailed production changes are itemized, and paint codes for all standard body colours are listed, allowing you to get touch-up paint as needed from local specialists. All in all, it’s a must-have book whether your ultimate objective is winning concours competitions or just improving the look of your B to the right specifications for the model and year. The author has also written the Original MG T Series and the Original MGA, and a guide to Sprites and Midgets is also available in the series. Original MGB – With MGC and MGB GT V8 Bay View Books Limited, published by MBI Publishing Company, 729 Prospect Avenue, PO Box 1, Osceola, WI 54020-0001 USA ISBN 1-870979-48-6 Cost: $59.95 from Autophile, 850 Eglinton Ave. E. Toronto. Tel: (416) 425-1555 $38.50 from Amazon.ca
17
MGB Tire Talk By Paul Williams
When selecting tires for your MGB, there’s no shortage of brands and types from which to choose. Most modern tires will do a fine job, and for many “B” owners, simply getting a good deal on a set is reason enough to buy them. Tire size is another thing to consider when buying new rubber. Some owners prefer a modern, lower profile tire as opposed to the original sizes. Others want the tire to be “correct” for the car. It’s all personal preference, really. But historically, some tire brands are more closely connected to the B than others, and that may influence an owner’s purchase. Dunlop is arguably the brand most associated with the MGB. It was the brand fitted to the earliest cars, and various Dunlop tires were used right through to the Limited Edi-tions of 1980. Other companies used by MG at various times were Michelin, Pirelli and Goodyear. Uniroyals were also seen on late versions of the car. From a practical standpoint, the size of the tire is probably more important than the brand. But over the years, MGBs were fitted with many sizes of tire, depending on the year of manufacture. When calculating modern equivalents, it doesn’t help that from 1962-1980, when MGBs were on the market, there were four different systems used to describe tire size. So let’s look at brands and sizes throughout the years, as they relate to the “B.” MGBs were introduced in 1962, and those early cars were fitted with 4”-wide pressed steel wheels and Dunlop Gold Seal 5.60x14 tires. The number “5.60” is the section width of these crossply tires in inches, and if you change that to metric, you’ll find it’s a very narrow tire indeed (about 145 mm). The “14” is, of course, the wheel size in inches. That remained constant throughout MGB production. Wire wheels were always an option with Bs, and in contrast to the early 4” wide pressed steel rim, the 60-spoke wires were 4½”, and took a different model tire – the Dunlop Road Speed (also optional on the pressed steel rims) – but with the same 5.60x14 size. Notice that the aspect ratio of the tire is not given when using this early 5.60-14 no-menclature. By today’s standards it’s approximately a 90 (90% of the tire’s width), giv-ing an effective modern size of 145/90-14. (Yokohama’s information page on its website points out that with the old form of measurement, tire sizes ending in zero, like 5.60, had an aspect ratio of 92, and those ending with five, like 8.25, had an aspect ratio of 82). In 1965, the standard Gold Seal crossply tire was changed to a Dunlop C41, but radials became available for the first time. These Dunlop SP radials were also very narrow. A modern equivalent would be 155/85-14. The GTs got 165-14 tires, giving them a mod-ern size of 165/80-14 if they were to retain the same wheel and tire diameter as those on the roadster. In modern use, this is a very tall tire.
18
We didn’t get the MGB-GT V8 in Canada, but in the U.K. it arrived with 175HR-14 tires (from Goodyear, Michelin and Pirelli) on a 5” wide rim. Note that with this nomenclature, the aspect ratio is still not given, but to be consistent with other wheel/tire combina-tions, this equates to a 175/75-14 size. Rubber-bumpered cars used 165SR-14 tires and the LE cars received 185/70SR-14 tires (Dunlop SP4 or Uniroyal Rallye). According to A.D. Clausager’s Original MGB, all tires up to 1973 came with inner tubes. Only with the introduction of the GT-V8 were tubeless tires specified. What does all this mean to you? If you’re running a rubber-bumper B or an early 70’s chrome bumper car, the “correct” tire is a 165-series. Pirelli makes one, called the Pirelli P1000, in the 165SR-14 size, and Michelin makes an XAS that will also fit. Many other companies make a 165-14 tire, but check the aspect ratio. If it’s a 165/60-14, for in-stance, this will be useless on a B, being way too small, and making the wheels turn nearly 11% too fast. The advantages of a narrow tire like the 165SR-14 is that less steering effort is required to turn the car at slow speeds, and the steering is lighter at road speeds. The car will also have the “correct” factory look. A 185-series tire as used on the LE was originally fitted to a 5” rim, but they’ll fit on the 4½” Rostyle (first introduced in 1970) without trouble. However, if your springs are sag-ging a bit, you may get some rubbing against the inner fender at the front when turning the wheels, or at the rear when going over speed bumps. Also, a wider tire requires more work to turn at slow speeds. If you’re considering a 185-series tire, find other peo-ple in the club using them, and get their comments. There are some really nice 185s out there, though (the Yokohama Avid T4, for instance, even though you would never have found a Yokohama on any original MGB). The 175/75-14 size, as originally fitted to the GT-V8 seems a nice compromise. A bit wider and more modern-looking than the 165s, not requiring the steering effort (especially with 72-spoke wires, if you have them) of the 185s. But not common, unfortunately. If you have a really early car, and want the look of the skinny 5.60 tires (perhaps on a spare set of rims, for show), these tires are available from the Michelin vintage series, and other manufacturers, although Dunlop doesn’t seem to be one of them. Wheel and tire trivia: Dunlop Gold Seal tires were used on the MG Magnette in 5.90-15 size, and on the Sunbeam Alpine in 5.60-13 and 6.00-13 sizes. Dunlop tires were also used on the MGA in 5.60-15, with Dunlop Road Speed tires in 5.90-15 as an option. The name “Rostyle” as in Rostyle wheels, comes from the initials of the maker of the wheel, the Rubery Owen company (hence RO-style wheel). Rubery Owen was a leading manufacturer of light steel products and at one time owned the BRM racing team that

19
A factory chrome Rostyle wheel was available from 1970-1972. The standard wire wheel on the MGB had 60-spokes. A competition wire wheel was available with 70 spokes. Dunlop and Dayton make wire wheels for MGs in both painted and chrome plated styles. Dunlops are made in India. Until recently, their chrome plated wheels had chrome spokes, but Moss now supplies new ones with stainless steel spokes. Daytons are made in the US, and their chrome plated wheels have stainless steel spokes. Both brands sell 60 and 72-spoke versions. The “Minilite” style wheel is very popular on MGs and other British sports cars. It was designed by the John Cooper company for use on Cooper racing cars in the 1950s and 60s. They called it the “petal” wheel, because the spokes kind of looked like the petals of a flower. It was very light, being made of magnesium. According to Mike Cooper (son of John), the Minilite company simply copied the wheel and marketed it as their own. Coo-per never patented or licensed the design, and likely lost significant revenue by neglect-ing to do so. The wheel remains popular, and is still copied by Panasport and other com-panies. If you’d like to check the equivalency of various wheel and tire sizes, go to www.canadiandriver.com, and click on Calculators in the left column. Then click on the tire comparator. Note that you can turn the wheels sideways or straight on to check di-ameter and width. The wheel/tire diameter in imperial or metric is also given, as is the effect of different sizes on your speedometer reading. Frisby Tire is a sponsor of the OMGC. They offer club members a 10% discount. (Maybe call first and speak to the manager, rather than just turning up and expecting that the guy behind the counter knows this).
20
21
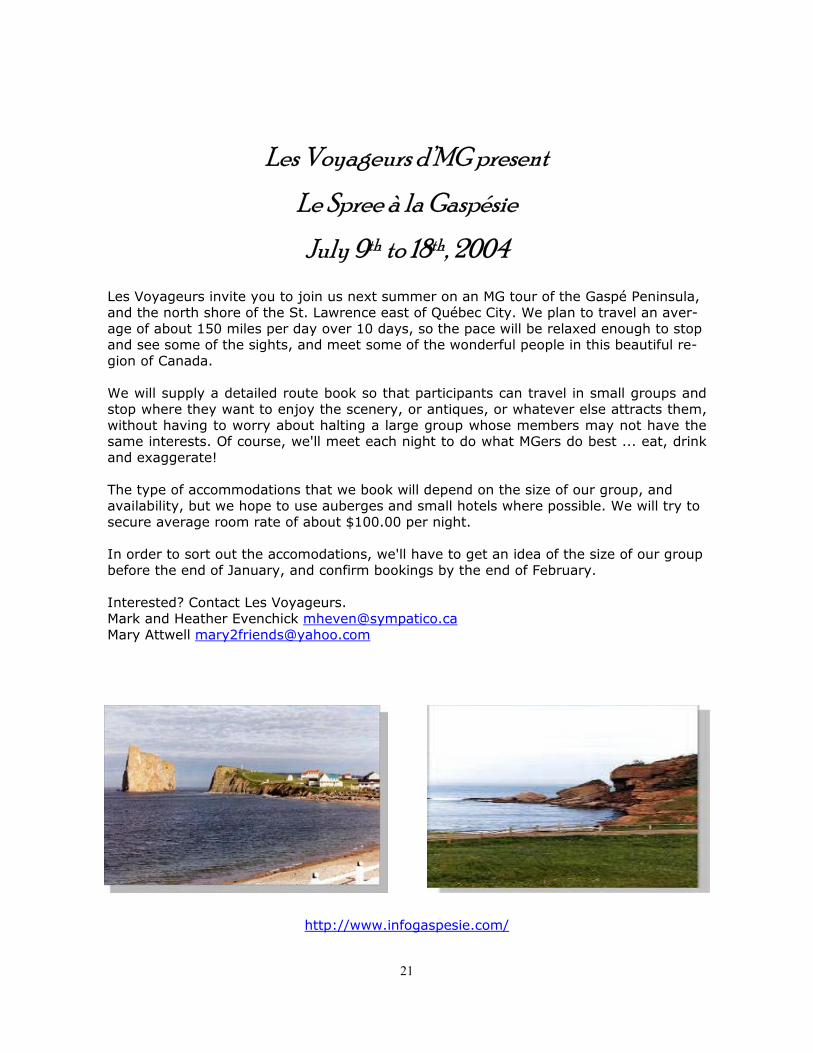
Les Voyageurs d’MG present
Le Spree à la Gaspésie
July 9th to 18th, 2004 Les Voyageurs invite you to join us next summer on an MG tour of the Gaspé Peninsula, and the north shore of the St. Lawrence east of Québec City. We plan to travel an aver-age of about 150 miles per day over 10 days, so the pace will be relaxed enough to stop and see some of the sights, and meet some of the wonderful people in this beautiful re-gion of Canada. We will supply a detailed route book so that participants can travel in small groups and stop where they want to enjoy the scenery, or antiques, or whatever else attracts them, without having to worry about halting a large group whose members may not have the same interests. Of course, we'll meet each night to do what MGers do best ... eat, drink and exaggerate! The type of accommodations that we book will depend on the size of our group, and availability, but we hope to use auberges and small hotels where possible. We will try to secure average room rate of about $100.00 per night. In order to sort out the accomodations, we'll have to get an idea of the size of our group before the end of January, and confirm bookings by the end of February. Interested? Contact Les Voyageurs. Mark and Heather Evenchick [email protected] Mary Attwell [email protected]
http://www.infogaspesie.com/
22
Cheepo Cheepo 04 “LFTR”
Look For The Rocks When: June 5, 2004 Where: Best Western Sword Motor Inn, Bancroft Ontario How Much: $169.92 per couple $125.80 single All taxes and gratuity are included in the above. If you have not registered for Cheepo Cheepo and still wish to do so, contact Bob Stark at 258-4636 ( if this is long distance from your area try 567-3000 wait for a dial tone then dial 258-4636) or via Email at “[email protected]” and I will contact you for the required information. I have a limited number of spaces left in our reservation block of twenty couples . All additional reservations beyond our original twenty will be on a space available request. All bookings must be received no later than April 1st. The planned departure time is 9:30 AM from the Tim Hortons in Kanata with a picnic stop on the shores of Calabogie Lake and arrival in Bancroft at approximately 4:00 PM. Looking forward to a spring drive and enjoyable weekend.
23
Ottawa MG Club Event Calendar
March 18 Special Dinner RCAF Officers 6pm Ivan Wood 692-2404 Mess March 31 Tech Session Location TBA 6pm Robert Grapes 839-6500 April 4 AutoJumble BootnBonnet 10am Richard Woodley(613) British Car Club Kingston 967-0267 April 15 Club Meeting Swan on Rideau 7pm Len Fortin 258-9655 April 24 Spring TuneUp British Automotive 9am Len Fortin 258-9655 April 28 Tech Session British Automotive 6pm Robert Grapes 839-6500 Topic TBA
Please refer to the club website for any updates or changes. www.omgc.net
MG Club Regalia Item Price Long sleeve shirt $44 Short sleeve shirt $40 Hooded sweat shirt (heavy weight) $40 Sweat shirt (heavy weight) $36 Golf shirt $31 T shirt $18 Sign (magnetic) $18 Socks $16 Toque $16 Hat $15 Pins $10 Crests $8 Club jackets (available in a variety of colors and sizes) $170 Your favourite item of clothing can be embroidered by special order. For all your regalia needs see Doug McClure, [email protected] or 824-0168.
24
Ottawa MG Club SPECIAL DINNER MEETING
THURSDAY MARCH 18th 2004, RCAF OFFICER'S MESS, 158 GLOUCESTER STREET, OTTAWA (between O'Connor Street
and Bank Street). This note is to remind you of the event. You must let the folks at the RCAF Mess know in advance if you will be attending. Please make a meal selection from the three options below and then call the RCAF Mess Special Events Coordinator, Kim Whelan, with your selection and payment method details. Listed here are the three choices from the RCAF Officer's Mess Banquet Menu (a vege-tarian option is available) For the entree, please select one of these: 1) Chicken Cordon Blue with Swiss Cheese and Ham 2) Fillet of Sole Marinara sautéed in Butter and Lemon 3) Marinated Strip Loin of Beef with Peppercorn and Cassis Sauce [The appetizer selection can be made at the event.] Each dinner selection costs $35 for OMGC club members. Dinner includes an appetizer and entree of your choice above, potatoes, a sautee of mixed winter vegetables, as-sorted pastries, tea or coffee, rolls and butter. Payment for the meals MUST be made with a credit card or cash/cheque BEFORE March 15th. Therefore meal selection and credit card information must be supplied as soon as possi-ble. Please call Kim Whelan, the Special Events Coordinator, at the RCAF Mess 233-4610 ext 22 and provide your meal selection and credit card details. Lets meet around 6 pm for cocktails / cash bar / and we'll have dinner at 7 pm (you can purchase wine with your meal at the event if you wish) Parking is available in the local area and is usually a reasonable flat rate for the evening. Let me also remind you there is a dress regulation at the RCAF Officer's Mess. At this special meeting and meal, MG gentlemen should wear a nice long sleeved shirt and a tie or a jacket and tie. For the MG ladies, similar, nice daywear is expected. Jeans of any type and tee shirts are not permitted. A cloakroom is available at the main entrance to store your outerwear during the meeting / meal, should the weather be inclement. Looking forward to seeing you at this special event. You can chat with Ivan Wood about the event if you have questions. Ivan can be reached at 998-9753 or 692-2404 or [email protected]
25
Many Thanks to our Sponsors
www.precisionsportscar.com
26
OTTAWA MG CLUB 2004 / 2005 MEMBERSHIP & RENEWAL FORM Membership Number____________ Please bring this membership form along with payment to the next meeting ($35 New Members, $30 Renewals, cheques payable to The Ottawa MG Club) Or mail to: Treasurer, 57 Tiffany Place, Kanata, Ontario, K2K 1W5. Name:____________________________ Navigator: _______________________ Address:_________________________ Phone (home): ___________________ City / Prov:_____________________ Phone (work): ____________ Postal Code:_____________________ Fax:_____________________ MG Model:_________ Year:_________ E-Mail:__________________________ To help the club meet your MG needs, kindly complete the survey below: Which of the following events would you be interested in attending? 1) Social/Fun Events _____ Club Meetings _____ Inter-Club Events (Croquet, Darts, etc) _____ Get-Togethers (Christmas, Beach, etc) _____ Car Shows 2) Driving Events _____ Short One Day Run _____ Longer Two Day Run _____ Non-Competitive Fun Rally _____ Competitive Rally 3) Technical Events _____ Speakers at Meetings, Videos, etc _____ Hands On Technical Seminars _____ Garage Tours Would you like to be called / e-mailed about events? Yes No Comments: _______________________________________________________________________ _______________________________________________________________________
27
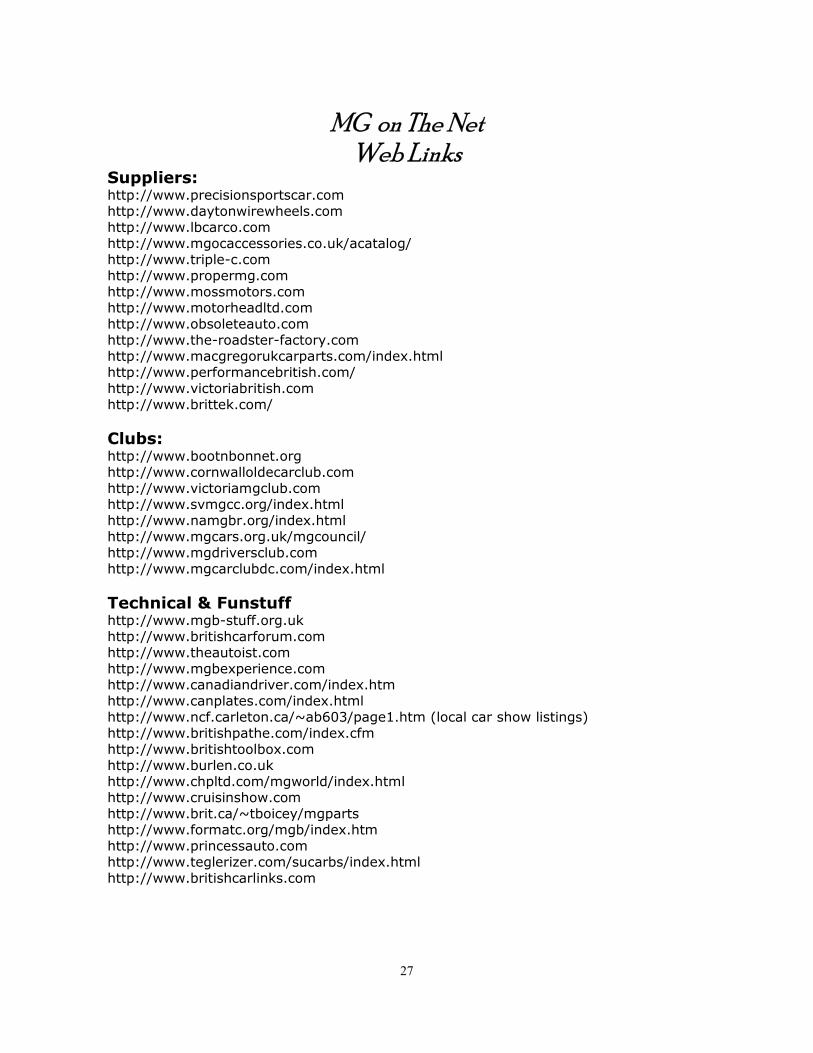
MG on The Net Web Links
Suppliers: http://www.precisionsportscar.com http://www.daytonwirewheels.com http://www.lbcarco.com http://www.mgocaccessories.co.uk/acatalog/ http://www.triple-c.com http://www.propermg.com http://www.mossmotors.com http://www.motorheadltd.com http://www.obsoleteauto.com http://www.the-roadster-factory.com http://www.macgregorukcarparts.com/index.html http://www.performancebritish.com/ http://www.victoriabritish.com http://www.brittek.com/ Clubs: http://www.bootnbonnet.org http://www.cornwalloldecarclub.com http://www.victoriamgclub.com http://www.svmgcc.org/index.html http://www.namgbr.org/index.html http://www.mgcars.org.uk/mgcouncil/ http://www.mgdriversclub.com http://www.mgcarclubdc.com/index.html Technical & Funstuff http://www.mgb-stuff.org.uk http://www.britishcarforum.com http://www.theautoist.com http://www.mgbexperience.com http://www.canadiandriver.com/index.htm http://www.canplates.com/index.html http://www.ncf.carleton.ca/~ab603/page1.htm (local car show listings) http://www.britishpathe.com/index.cfm http://www.britishtoolbox.com http://www.burlen.co.uk http://www.chpltd.com/mgworld/index.html http://www.cruisinshow.com http://www.brit.ca/~tboicey/mgparts http://www.formatc.org/mgb/index.htm http://www.princessauto.com http://www.teglerizer.com/sucarbs/index.html http://www.britishcarlinks.com

28


![Huet & Sayegh Model [memo] · 2. Huet & Sayegh (H&S) Model 2.1 The variable dashpot 2.2 The general H&S model 3. Application of the H&S Model (Examples) 3.1 Porous Asphalt (ZOAB;](https://img.pdfslide.us/doc/110x75/5f031d777e708231d4079c54/huet-sayegh-model-memo-2-huet-sayegh-hs-model-21-the-variable.jpg)