Embed Size (px)
Citation preview
6/15/2016
1
Ten Steps to Effective Myofascial Release
David R. Beatty, DO, C-SPOMM
WVSOM Summer Seminar 2016
Objectives
At the completion of this workshop the physician should be able to:
Explain the similarities and differences between myofascial release, facilitated positional release, and ligamentous articular strain techniques
Safely apply myofascial release techniques for somatic dysfunctions of the spine, ribs, and extremities
6/15/2016
2
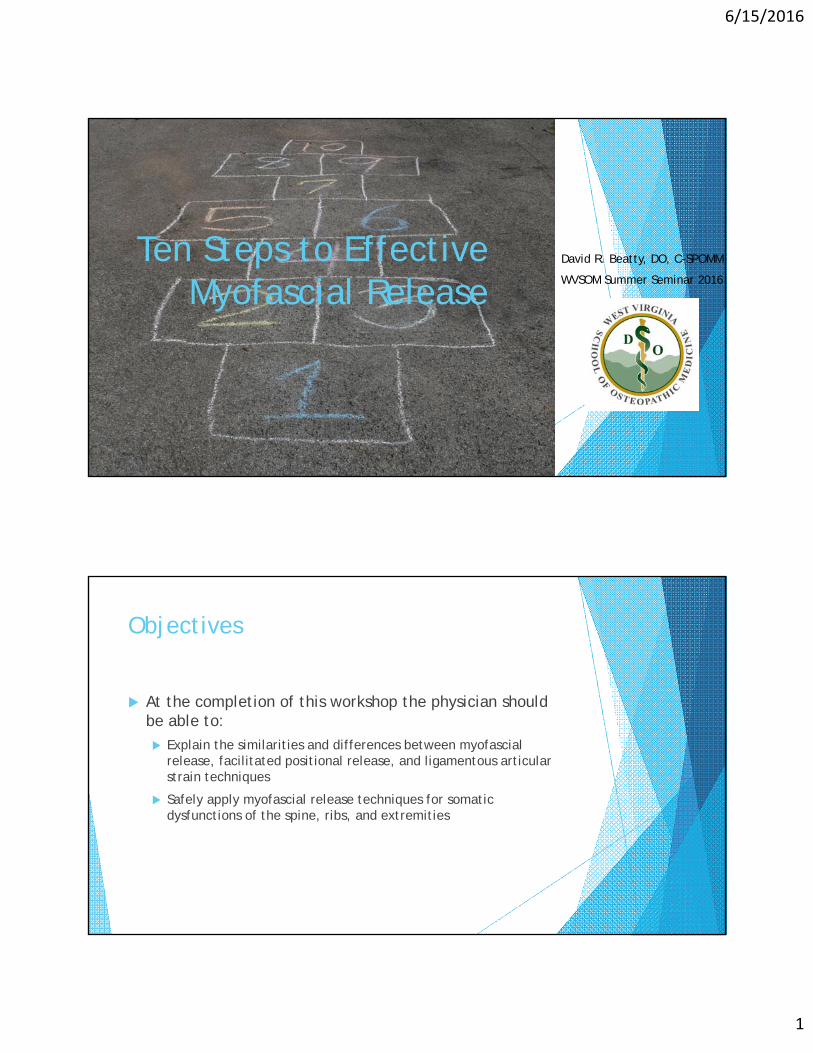
Step 1: Know the Variations
Facilitated positional release (Schiowitz/NYITCOM)
Ligamentous articular strain (Lippincott/Speece)
Balanced ligamentous tension
Myofascial release(ECOP)
Lumbar soft tissue FPR(Pocket Manual of OMT 2nd Ed, LWW 2011)
Facilitated Positional Release (FPR)
A system of indirect myofascialrelease treatment. The component region of the body is placed into a neutral position, diminishing tissue and joint tension in all planes, and an activating force (compression or torsion) is added.(Glossary of Osteopathic Terminology 2011)
Developed by Stanley Schiowitz, DO and published in An Osteopathic Approach to Diagnosis and Treatment
(book cover by permission of purchase)
6/15/2016
3
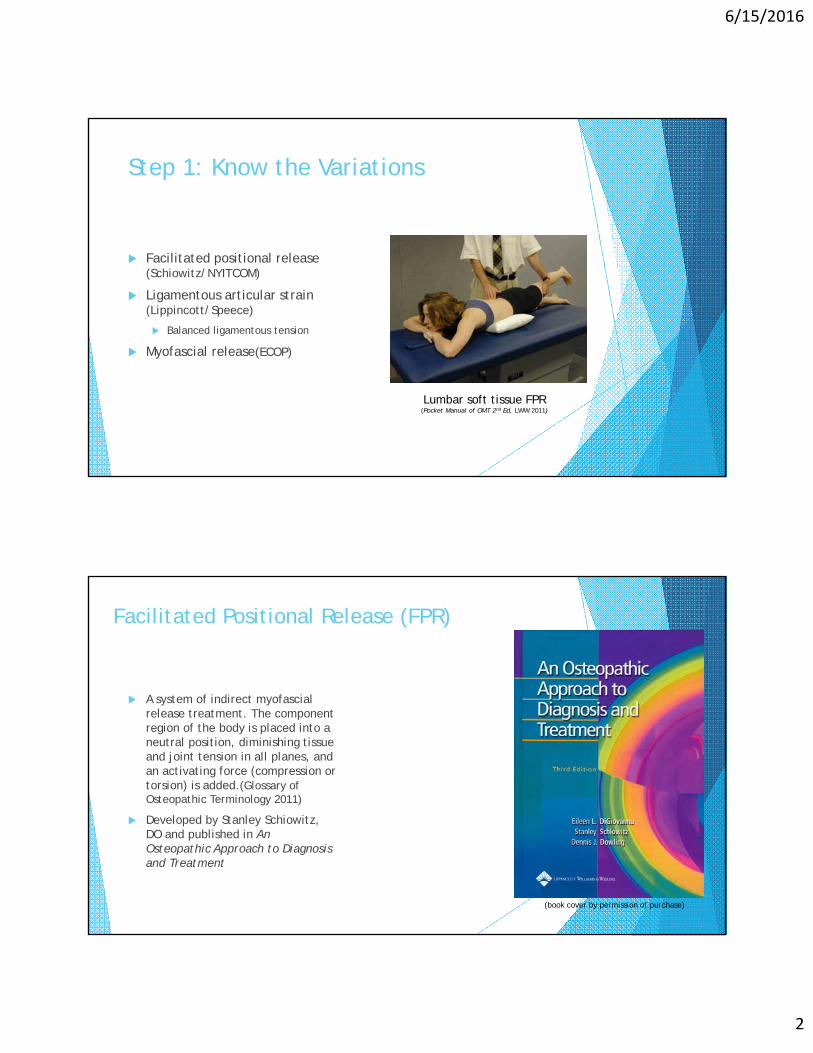
Principles of FPR
1. Identify tension related to restricted motion
2. Place the joint or region in its easy neutral position (reduce spinal curve with pillow or position)
3. Add compression or torsion to facilitate tissue laxity
4. Hold the position of laxity for 5 seconds and then slowly return to neutral
5. If needed, oscillate the joint or region to complete treatment
6. Retest for tension or motion Lumbar soft tissue FPR positions in easy neutral with a pillow and adds compression
by lifting the contralateral leg (image from The Pocket Manual of OMT 2nd Edition, LWW 2011)
Ligamentous Articular Strain (LAS)
A manipulative technique in which the goal of treatment is to balance the tension in opposing ligaments where there is abnormal tension present. (Glossary of Osteopathic Terminology 2011)
First described by Rebecca and Howard Lippincott, DO and published in Ligamentous Articular Strain
Similar to balanced ligamentous tension
(book cover by permission of purchase)

6/15/2016
4
Principles of LAS
1. Identify ligament or myofascialtension
2. Slowly move the part of the body into its position of laxity for all planes (disengagement)
3. Press into or apply traction to the tense area to engage the tissues (exaggeration)
4. Maintain the position of laxity using balanced pressure and follow any tissue release until completed or inherent motion is palpated
5. Retest for tension Interosseous membrane LAS disengages by flexing the wrist and elbow and exaggerates
by compressing the tight membrane(image from The Pocket Manual of OMT 2nd Edition, LWW 2011)
Myofascial Release Technique (MFR)
System of diagnosis and treatment first described by Andrew Taylor Still and his early students, which engages continual palpatory feedback to achieve release of myofascial tissues
Indirect MFR – dysfunctional tissues are guided along the path of least resistance until free movement is achieved
Direct MFR – a restrictive abbier is engaged for the myofascial tissues; the tissue is loaded with a constant force until tissue release occurs
(Glossary of Osteopathic Terminology, Foundations of Osteopathic Medicine 3rd Ed, LWW 2011)
Indirect myofascial release for forefoot eversion restriction
(image from The Pocket Manual of OMT 2nd Edition, LWW 2011)
6/15/2016
5
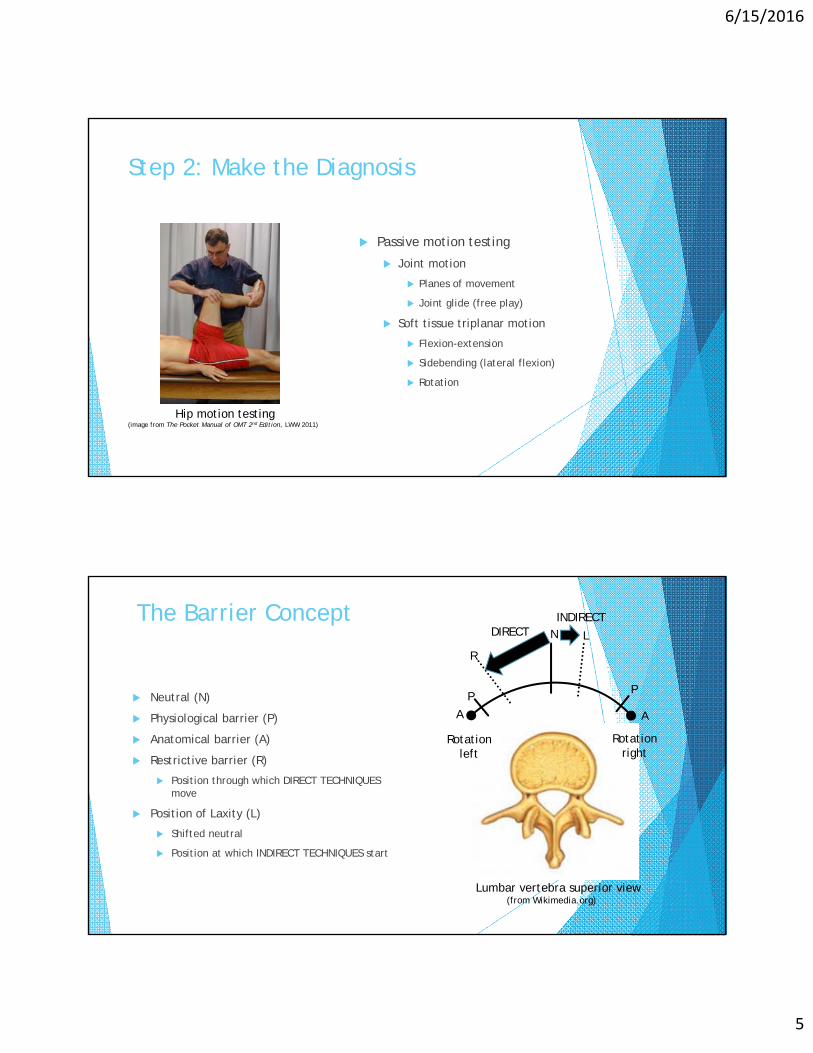
Step 2: Make the Diagnosis
Passive motion testing
Joint motion
Planes of movement
Joint glide (free play)
Soft tissue triplanar motion
Flexion-extension
Sidebending (lateral flexion)
Rotation
Hip motion testing(image from The Pocket Manual of OMT 2nd Edition, LWW 2011)
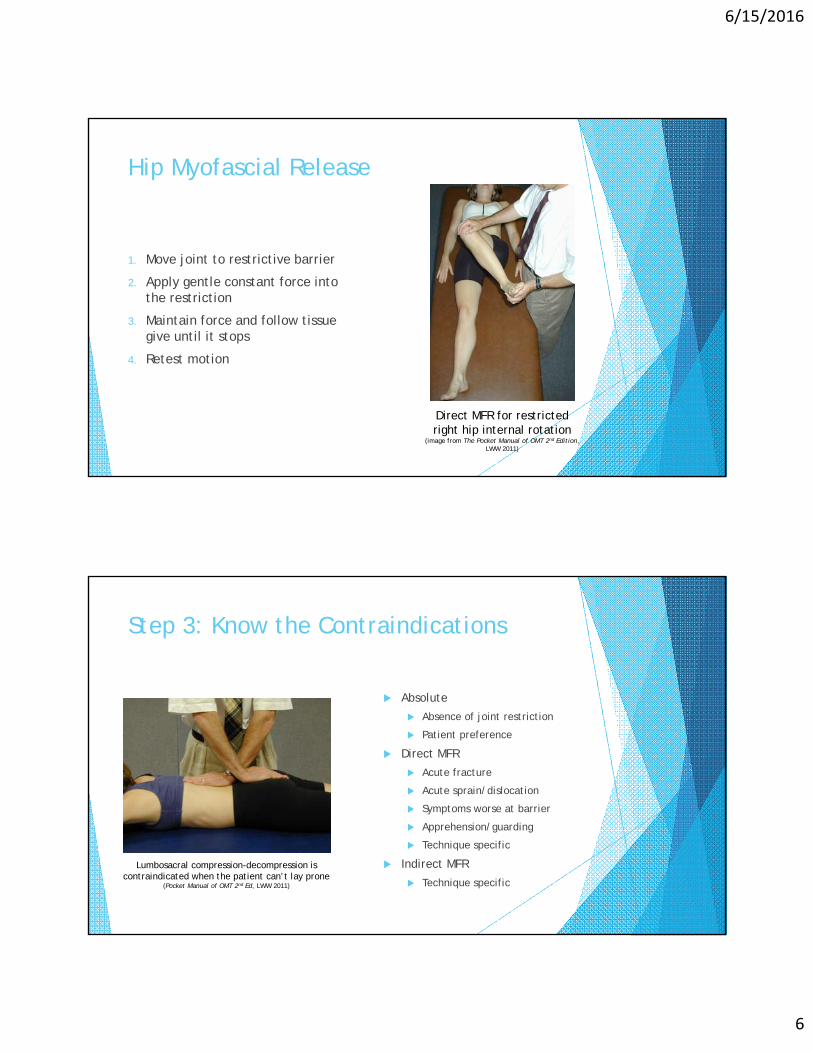
The Barrier Concept
Neutral (N)
Physiological barrier (P)
Anatomical barrier (A)
Restrictive barrier (R)
Position through which DIRECT TECHNIQUES move
Position of Laxity (L)
Shifted neutral
Position at which INDIRECT TECHNIQUES start
Lumbar vertebra superior view(from Wikimedia.org)
N
A A
PP
R
L
Rotationleft
Rotation right
DIRECTINDIRECT
6/15/2016
6
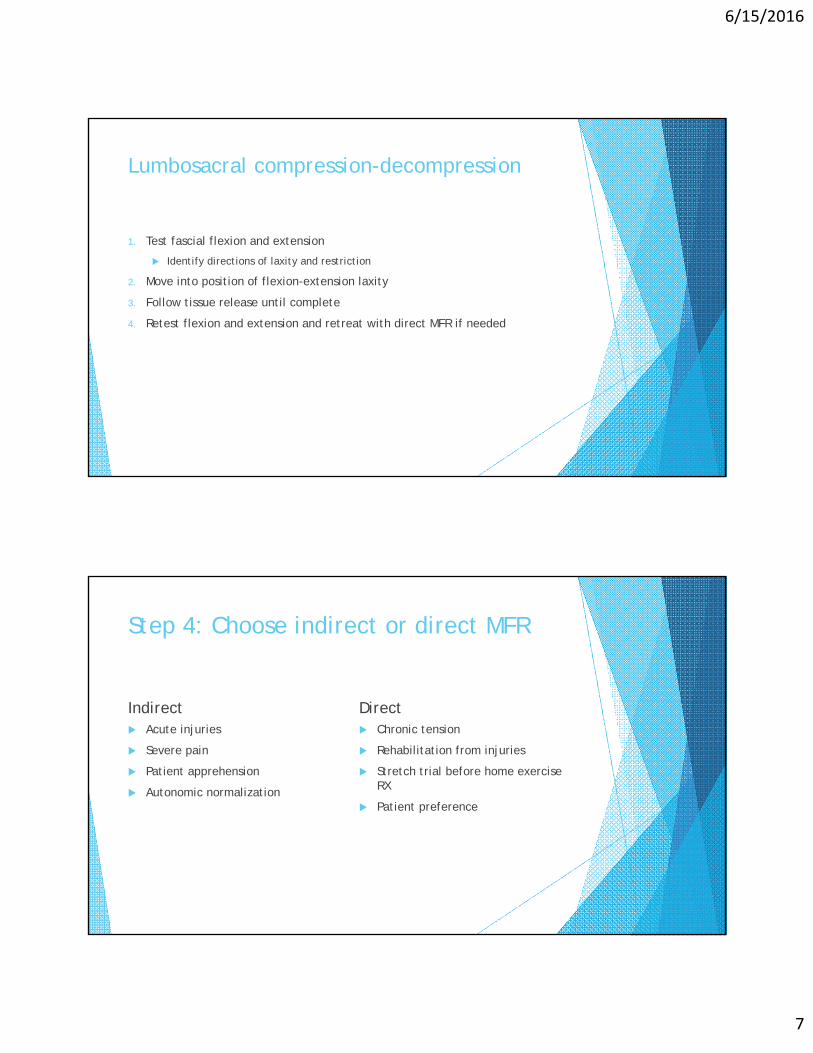
Hip Myofascial Release
1. Move joint to restrictive barrier
2. Apply gentle constant force into the restriction
3. Maintain force and follow tissue give until it stops
4. Retest motion
Direct MFR for restricted right hip internal rotation
(image from The Pocket Manual of OMT 2nd Edition, LWW 2011)
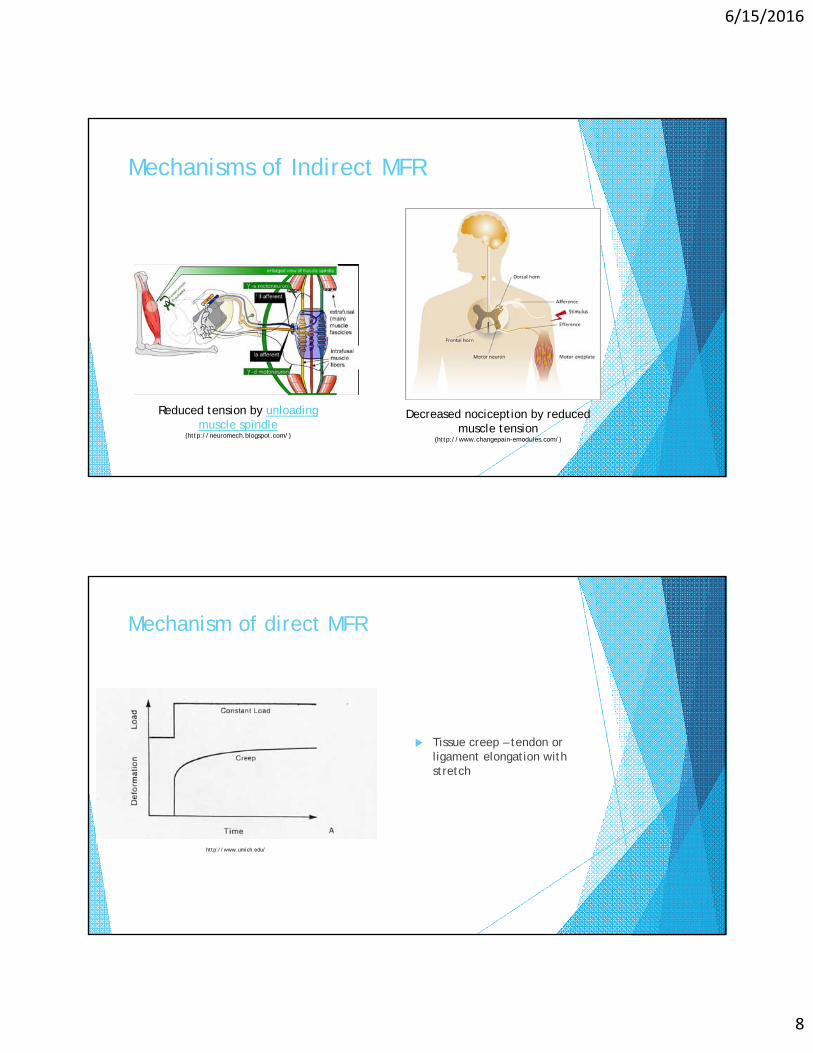
Step 3: Know the Contraindications
Absolute
Absence of joint restriction
Patient preference
Direct MFR
Acute fracture
Acute sprain/dislocation
Symptoms worse at barrier
Apprehension/guarding
Technique specific
Indirect MFR
Technique specific
Lumbosacral compression-decompression is contraindicated when the patient can’t lay prone
(Pocket Manual of OMT 2nd Ed, LWW 2011)
6/15/2016
7
Lumbosacral compression-decompression
1. Test fascial flexion and extension
Identify directions of laxity and restriction
2. Move into position of flexion-extension laxity
3. Follow tissue release until complete
4. Retest flexion and extension and retreat with direct MFR if needed
Step 4: Choose indirect or direct MFR
Indirect Acute injuries
Severe pain
Patient apprehension
Autonomic normalization
Direct Chronic tension
Rehabilitation from injuries
Stretch trial before home exercise RX
Patient preference
6/15/2016
8
Mechanisms of Indirect MFR
Reduced tension by unloading muscle spindle
(http://neuromech.blogspot.com/)
Decreased nociception by reduced muscle tension
(http://www.changepain-emodules.com/)
Mechanism of direct MFR
Tissue creep – tendon or ligament elongation with stretch
http://www.umich.edu/
6/15/2016
9
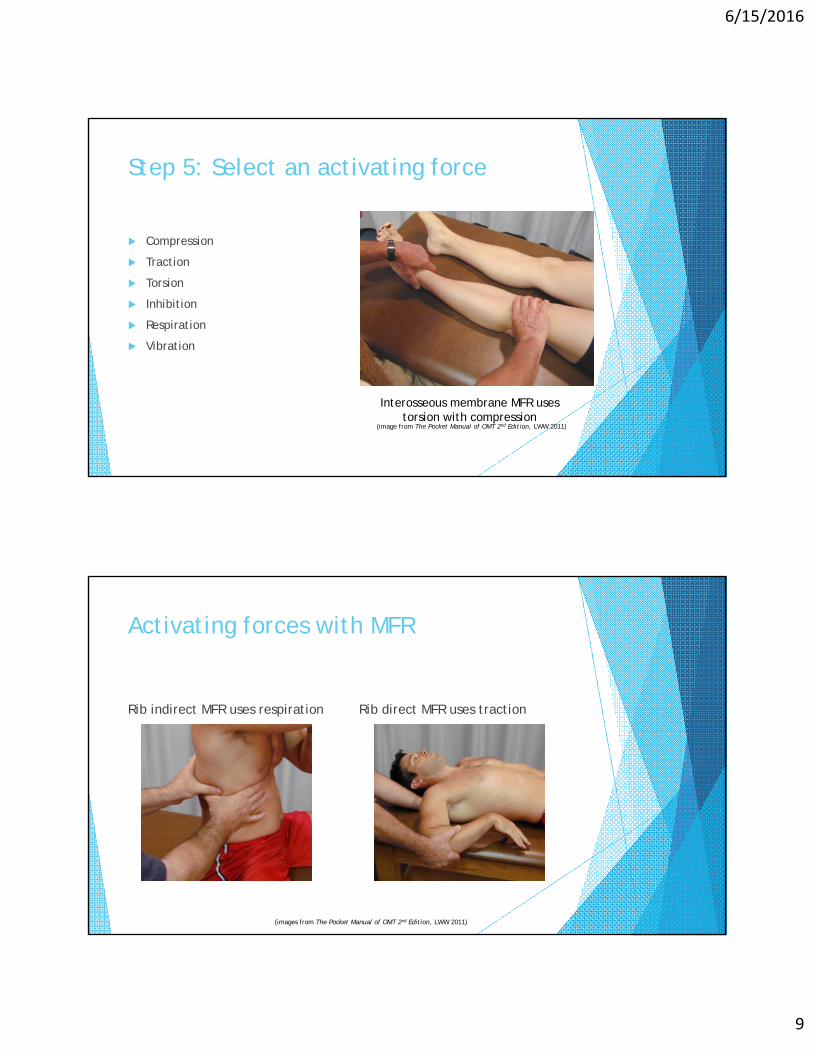
Step 5: Select an activating force
Compression
Traction
Torsion
Inhibition
Respiration
Vibration
Interosseous membrane MFR uses torsion with compression
(image from The Pocket Manual of OMT 2nd Edition, LWW 2011)
Activating forces with MFR
Rib indirect MFR uses respiration Rib direct MFR uses traction
(images from The Pocket Manual of OMT 2nd Edition, LWW 2011)
6/15/2016
10
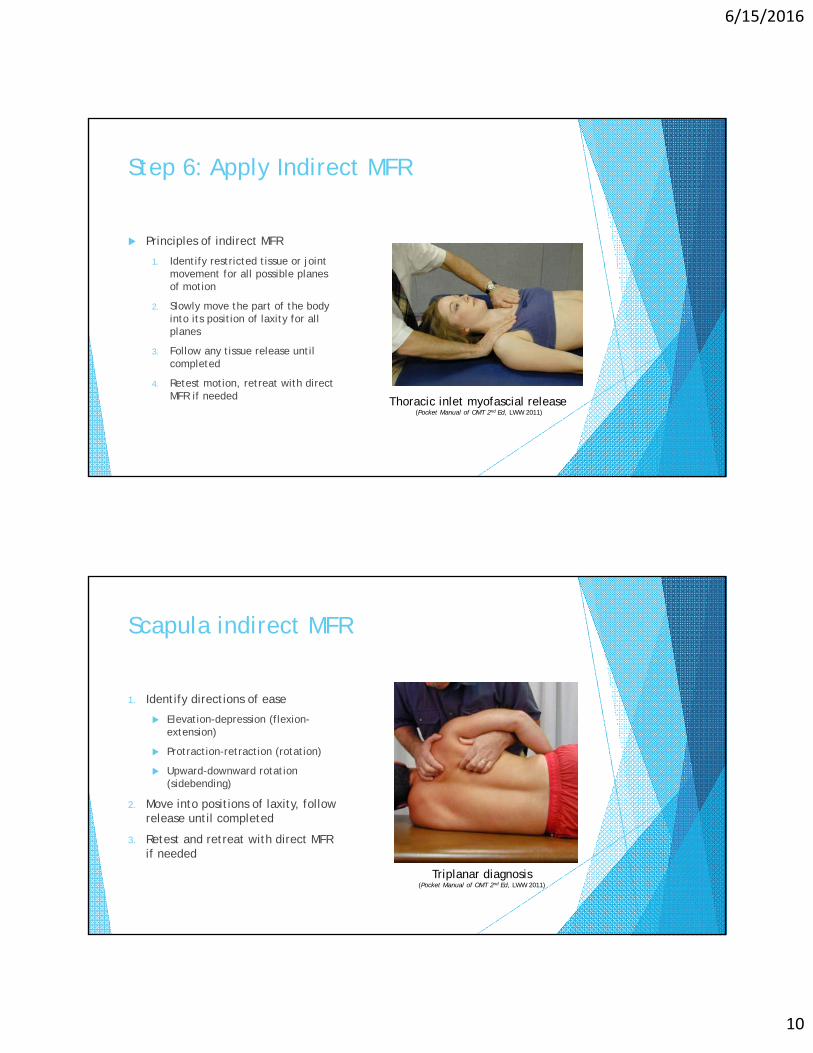
Step 6: Apply Indirect MFR
Principles of indirect MFR
1. Identify restricted tissue or joint movement for all possible planes of motion
2. Slowly move the part of the body into its position of laxity for all planes
3. Follow any tissue release until completed
4. Retest motion, retreat with direct MFR if needed Thoracic inlet myofascial release
(Pocket Manual of OMT 2nd Ed, LWW 2011)
Scapula indirect MFR
1. Identify directions of ease
Elevation-depression (flexion-extension)
Protraction-retraction (rotation)
Upward-downward rotation (sidebending)
2. Move into positions of laxity, follow release until completed
3. Retest and retreat with direct MFR if needed
Triplanar diagnosis(Pocket Manual of OMT 2nd Ed, LWW 2011)
6/15/2016
11
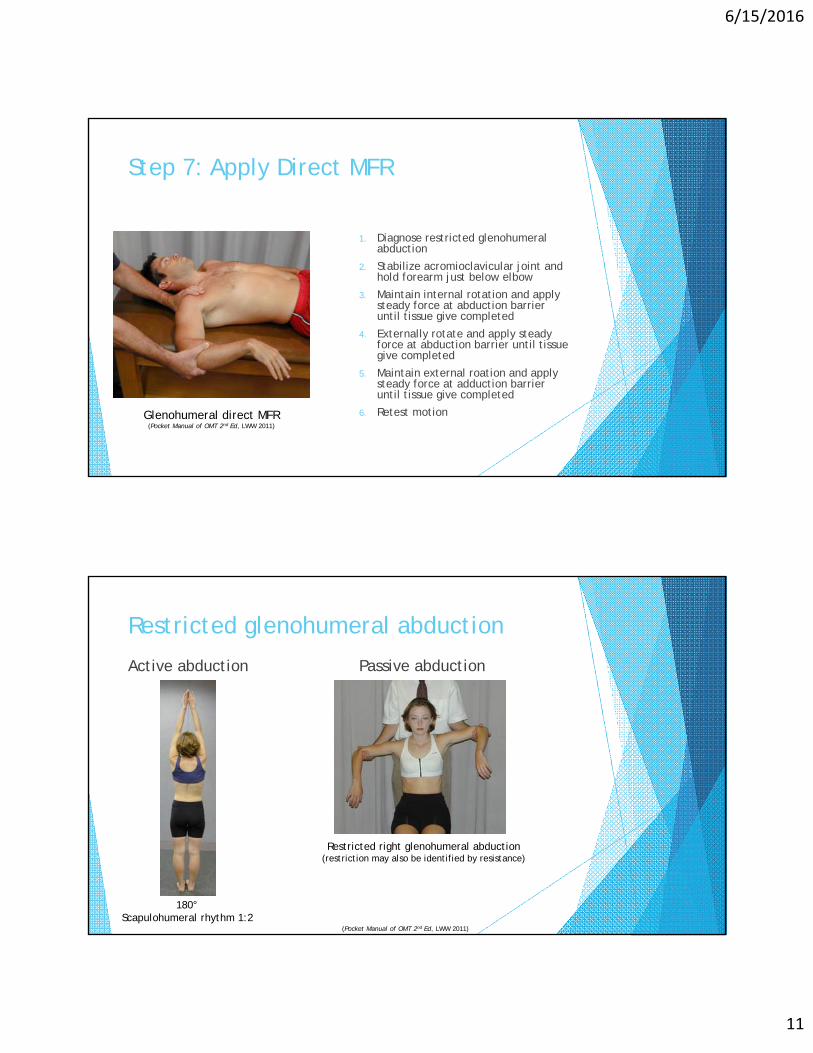
Step 7: Apply Direct MFR
1. Diagnose restricted glenohumeralabduction
2. Stabilize acromioclavicular joint and hold forearm just below elbow
3. Maintain internal rotation and apply steady force at abduction barrier until tissue give completed
4. Externally rotate and apply steady force at abduction barrier until tissue give completed
5. Maintain external roation and apply steady force at adduction barrier until tissue give completed
6. Retest motionGlenohumeral direct MFR(Pocket Manual of OMT 2nd Ed, LWW 2011)
Restricted glenohumeral abduction
Active abduction Passive abduction
180°Scapulohumeral rhythm 1:2
Restricted right glenohumeral abduction(restriction may also be identified by resistance)
(Pocket Manual of OMT 2nd Ed, LWW 2011)
6/15/2016
12
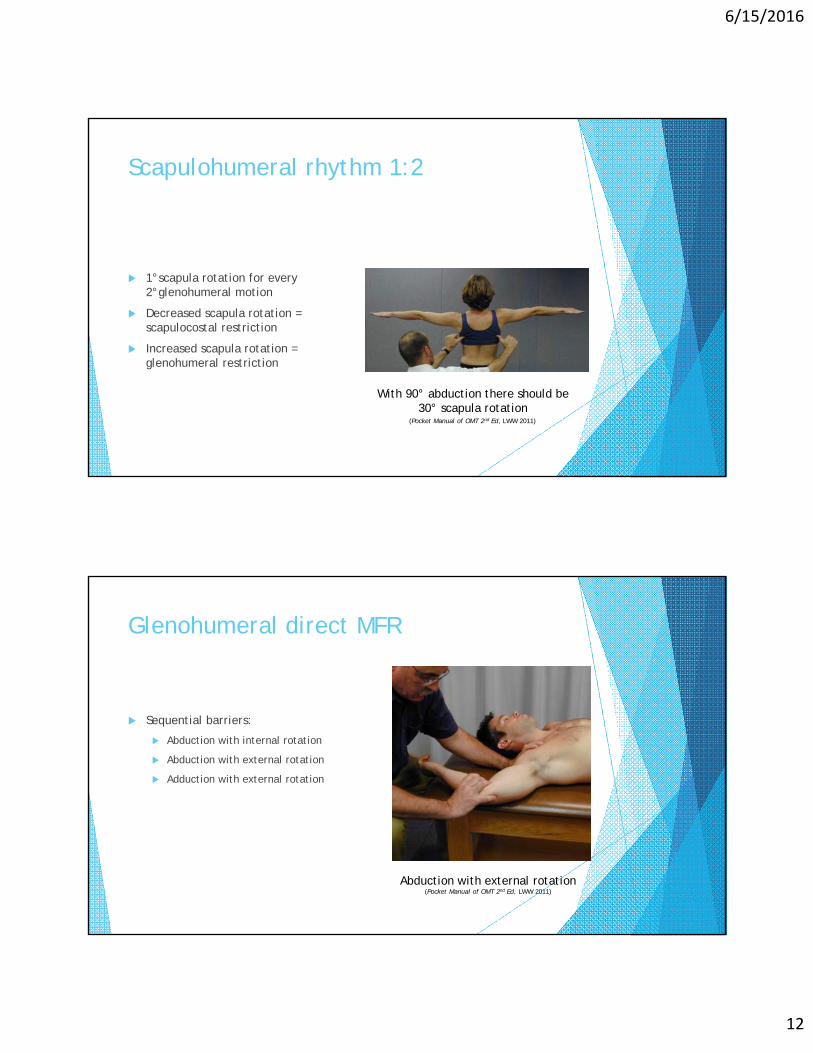
Scapulohumeral rhythm 1:2
1°scapula rotation for every 2°glenohumeral motion
Decreased scapula rotation = scapulocostal restriction
Increased scapula rotation = glenohumeral restriction
With 90° abduction there should be 30° scapula rotation
(Pocket Manual of OMT 2nd Ed, LWW 2011)
Glenohumeral direct MFR
Sequential barriers:
Abduction with internal rotation
Abduction with external rotation
Adduction with external rotation
Abduction with external rotation(Pocket Manual of OMT 2nd Ed, LWW 2011)
6/15/2016
13
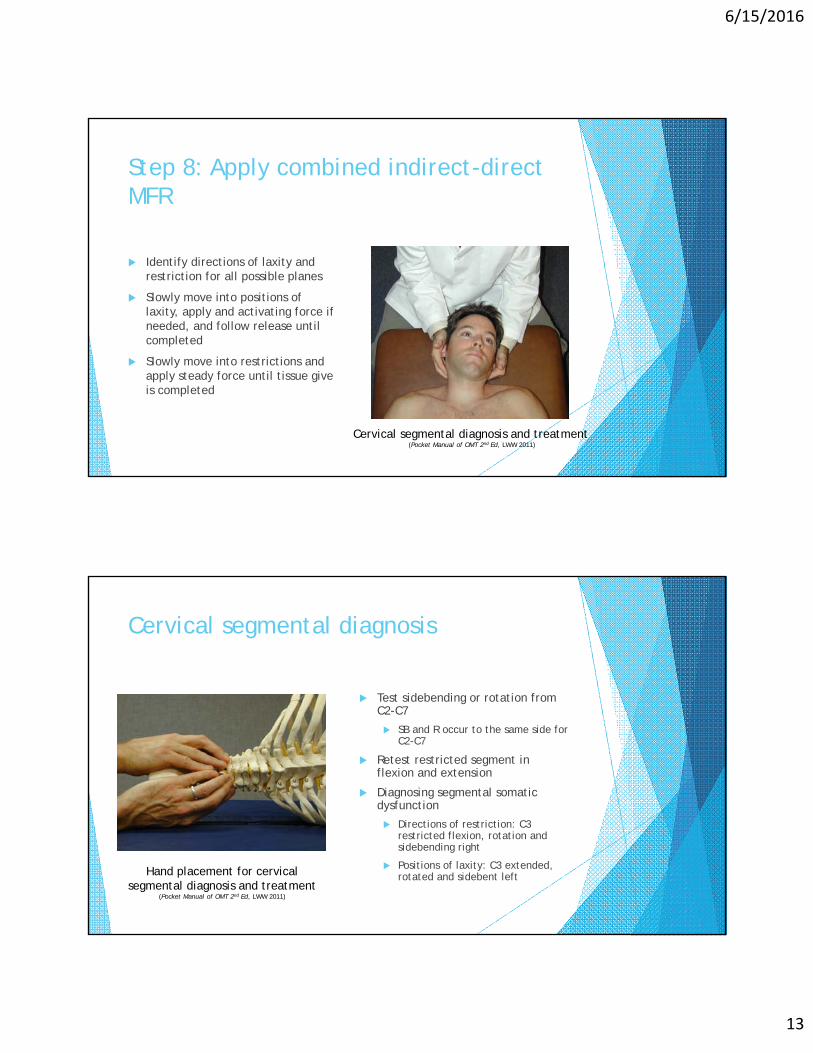
Step 8: Apply combined indirect-direct MFR
Identify directions of laxity and restriction for all possible planes
Slowly move into positions of laxity, apply and activating force if needed, and follow release until completed
Slowly move into restrictions and apply steady force until tissue give is completed
Cervical segmental diagnosis and treatment(Pocket Manual of OMT 2nd Ed, LWW 2011)
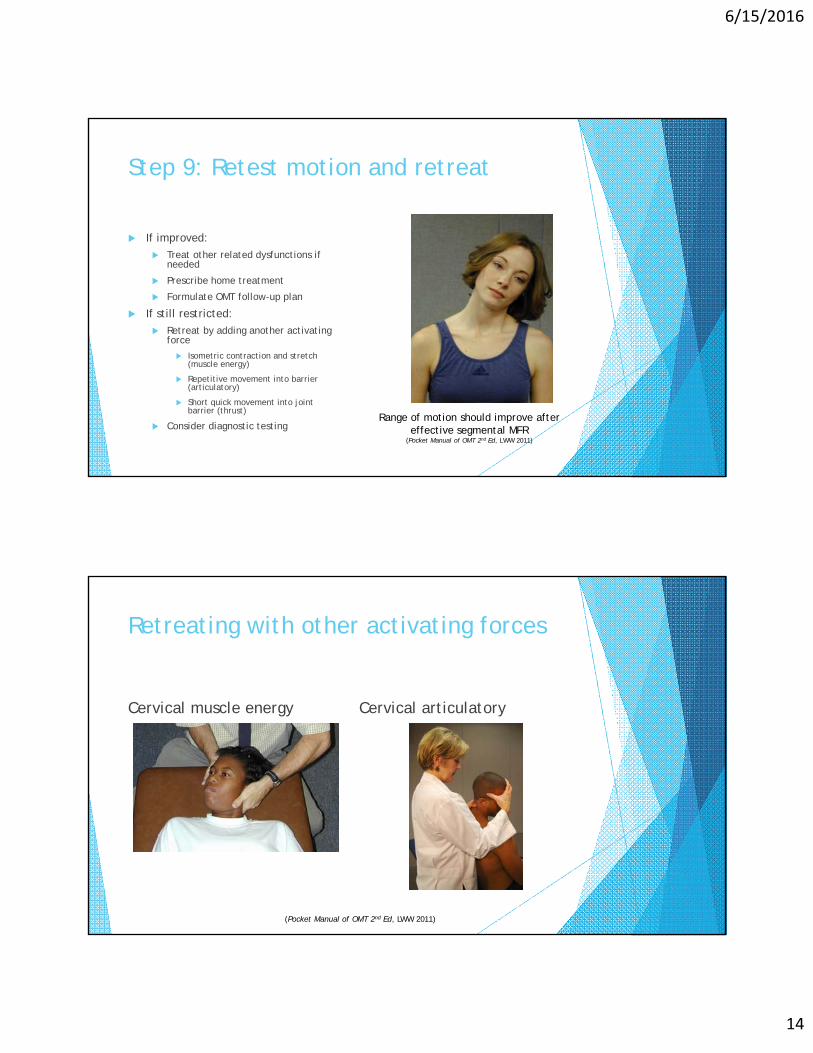
Cervical segmental diagnosis
Test sidebending or rotation from C2-C7
SB and R occur to the same side for C2-C7
Retest restricted segment in flexion and extension
Diagnosing segmental somatic dysfunction
Directions of restriction: C3 restricted flexion, rotation and sidebending right
Positions of laxity: C3 extended, rotated and sidebent leftHand placement for cervical
segmental diagnosis and treatment(Pocket Manual of OMT 2nd Ed, LWW 2011)
6/15/2016
14
Step 9: Retest motion and retreat
If improved:
Treat other related dysfunctions if needed
Prescribe home treatment
Formulate OMT follow-up plan
If still restricted:
Retreat by adding another activating force
Isometric contraction and stretch (muscle energy)
Repetitive movement into barrier (articulatory)
Short quick movement into joint barrier (thrust)
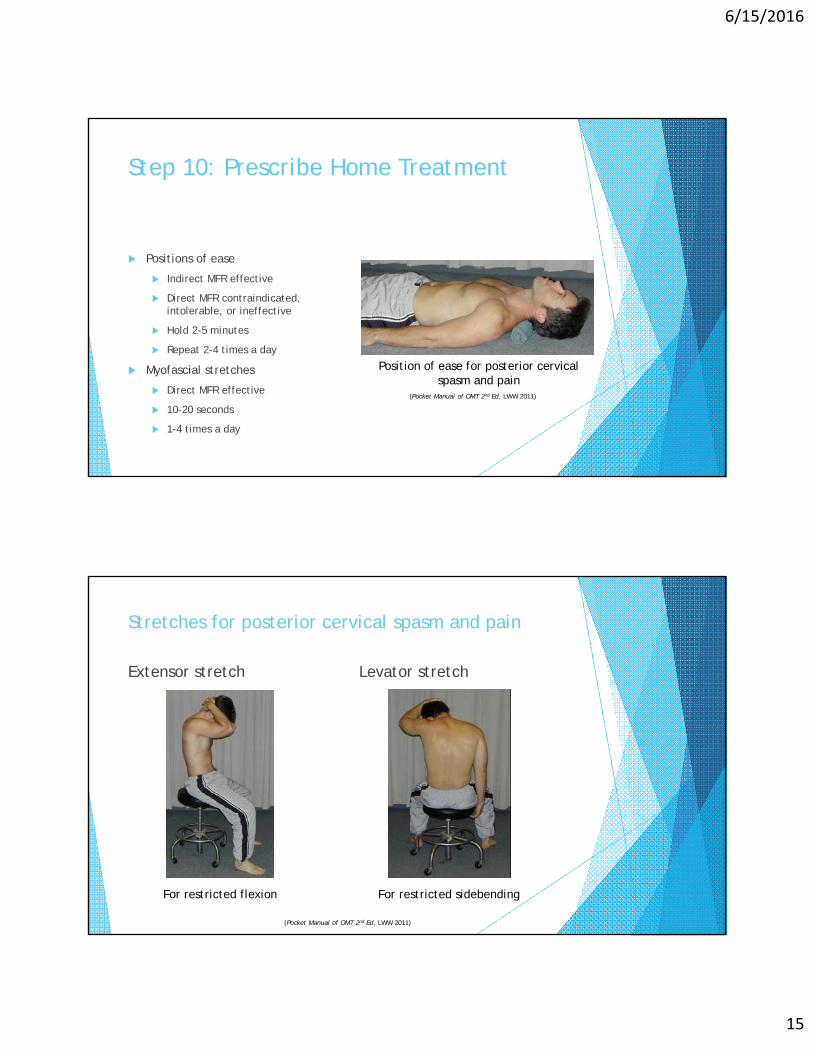
Consider diagnostic testingRange of motion should improve after
effective segmental MFR(Pocket Manual of OMT 2nd Ed, LWW 2011)
Retreating with other activating forces
Cervical muscle energy Cervical articulatory
(Pocket Manual of OMT 2nd Ed, LWW 2011)
6/15/2016
15
Step 10: Prescribe Home Treatment
(Pocket Manual of OMT 2nd Ed, LWW 2011)
Positions of ease
Indirect MFR effective
Direct MFR contraindicated, intolerable, or ineffective
Hold 2-5 minutes
Repeat 2-4 times a day
Myofascial stretches
Direct MFR effective
10-20 seconds
1-4 times a day
Position of ease for posterior cervical spasm and pain
Stretches for posterior cervical spasm and pain
Extensor stretch Levator stretch
For restricted flexion For restricted sidebending
(Pocket Manual of OMT 2nd Ed, LWW 2011)
6/15/2016
16
Summary
Myofascial release technique (MFR) is also called facilitated positional release, ligamentous articular strain, and balanced ligamentous tension
Accurate motion testing with diagnosis of restriction is essential for treatment selection and determination of response to treatment
Indirect MFR moves into the position of laxity and follows tissue release in all planes until completed
Acute injuries, severe pain, patient apprehension, autonomic normalization
Direct MFR applies steady force into the restriction(s) until tissue give is completed
Chronic tension, rehabilitation, stretch trial before exercise RX
Indirect followed by direct MFR is a powerful treatment sequence for relieving pain and restoring motion
References
Beatty DR, Li TS, Steele KM et al. The Pocket Manual of OMT: Osteopathic Manipulative Treatment for Physicians 2nd Ed. Lippincott Williams & Wilkins, Philadelphia 2011.
Chila AG. Foundations of Osteopathic Medicine 3rd Ed. Lippincott Williams & Wilkins, Philadelphia 2011.
DiGiovanna EL, Schiowitz S, Dowling DJ. An Osteopathic Approach to Diagnosis and Treatment 3rd Ed. Lippincott Williams & Wilkins, Philadelphia 2005.
Essig-Beatty DR, Pyle DN, Li TS et al. Manipulation in Motion. WVSOM 2008.
Speece CR, Crow WT. Ligamentous Articular Strain. Eastland Press, Seattle 2001.
6/15/2016
17
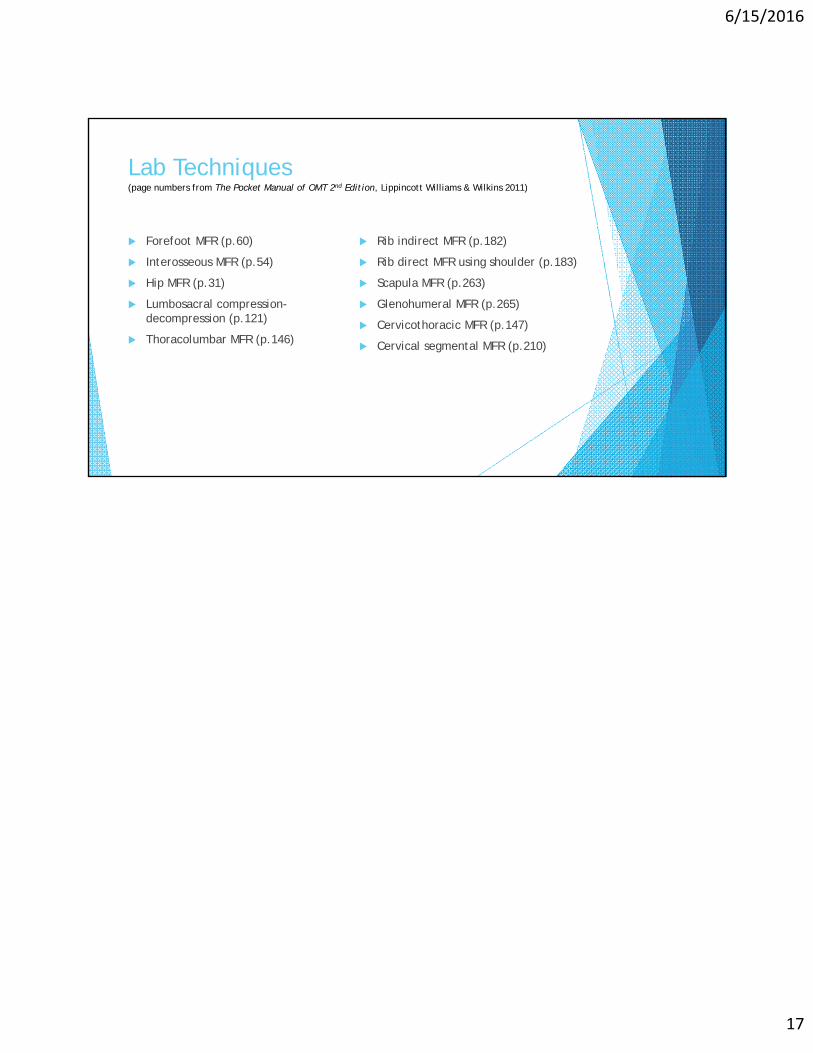
Lab Techniques
Forefoot MFR (p.60)
Interosseous MFR (p.54)
Hip MFR (p.31)
Lumbosacral compression-decompression (p.121)
Thoracolumbar MFR (p.146)
Rib indirect MFR (p.182)
Rib direct MFR using shoulder (p.183)
Scapula MFR (p.263)
Glenohumeral MFR (p.265)
Cervicothoracic MFR (p.147)
Cervical segmental MFR (p.210)
(page numbers from The Pocket Manual of OMT 2nd Edition, Lippincott Williams & Wilkins 2011)