Embed Size (px)
Citation preview

Technology
ICTCore: Word-processing
Word-processing
Microsoft Office Word Microsoft Office Word 2007 is the latest version of the program and it is radically different from the previous versionsThe Drop-Down menus and Toolbars are are replaced by the RibbonAbove the ribbon you will find the TabsThese are the equivalent of the old Menu Bar
Double-clicking one of the tabs or pressing Ctrl+F1 toggles the ribbon on and off
Double-clicking one of the tabs or pressing Ctrl+F1 toggles the ribbon on and off

Word-processing
When a tab is chosen, Groups of commands associated with the tab are shown in the ribbonThe groups associated with the Home, Page Layout and Insert tabs are shown below

Word-processing
A Dialog Launcher is included with most groupsThis is an arrow at the bottom of the group and is used to launch the
dialog box associated with the group

Word-processing
The Quick Access Toolbar (QAT) is the only toolbar in Word This toolbar gives quick access to frequently used tools
It can be customised to display any group of commands by clicking More Commands in the drop down list and selecting the required commands

Word-processing
• The available command categories:
Word-processing
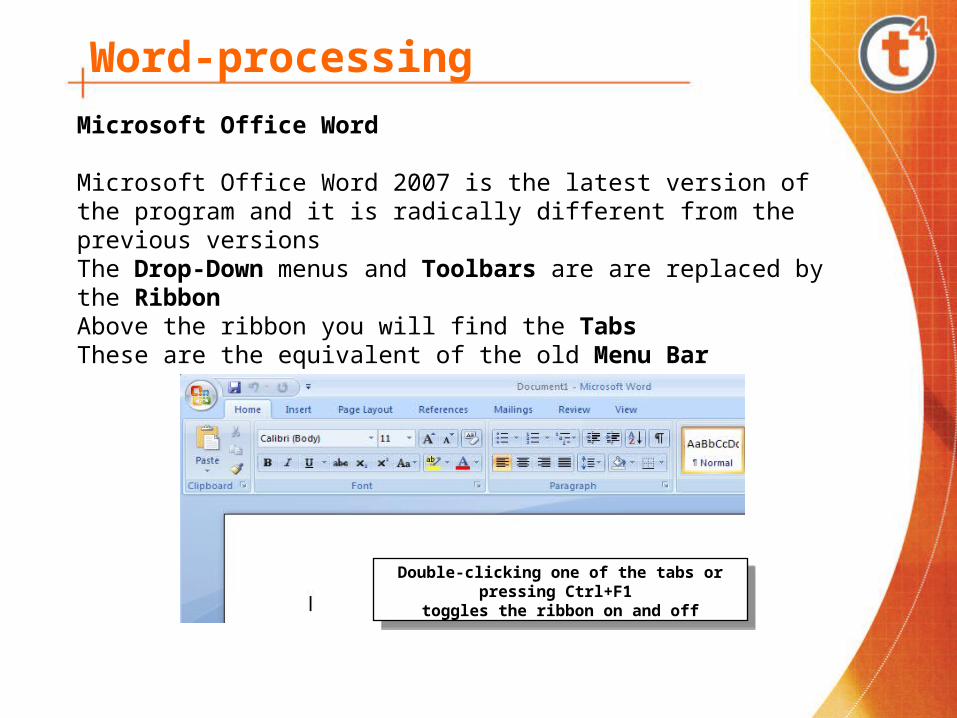
The Office Button contains most of the old File Menu commands Each of the commands shows the available options when clicked

Word-processing
Tabs The Home tab is the group you will use most when using Word 2007 Most of the old Format Menu commands are here
Here you can set :
• Font size, Font type, Paragraph alignment, Line spacing, Bullets and numbering Borders and highlighting etc
The Blinking Cursor indicates where text will be entered.
The Blinking Cursor indicates where text will be entered.
Word-processing
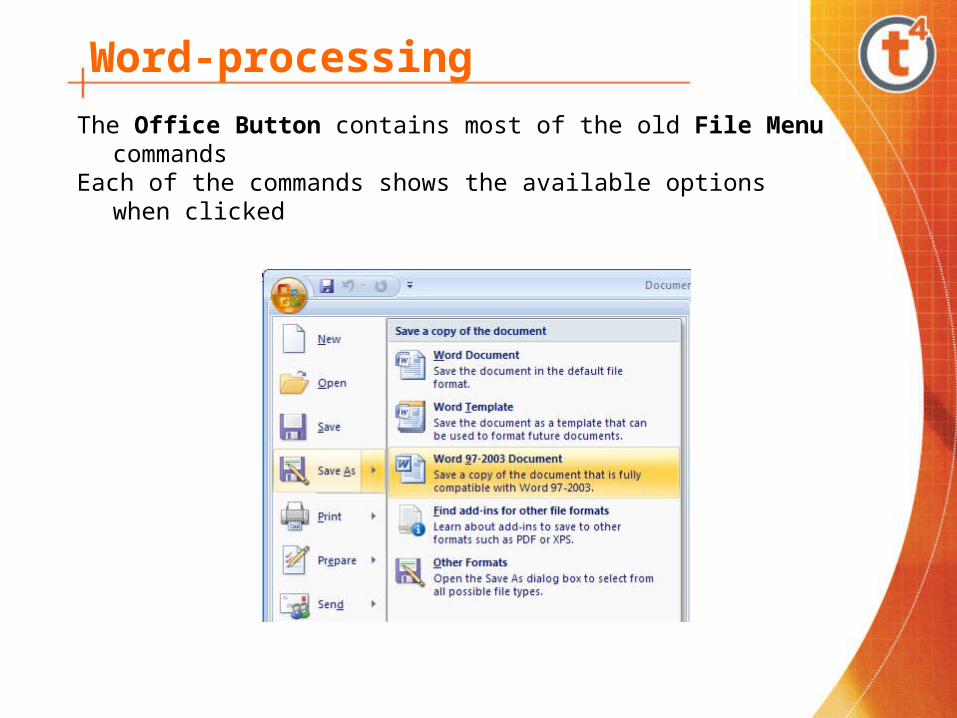
The Insert tab is used to insert objects into a documentObjects such as Tables, Pictures, Symbols, WordArt, Shapes, Headers and footers etc. can be added
The Page Layout tab is used to set Margins, Columns, Borders, Page breaks, etc
The View tab is used to set Page layout, Page zoom, Show rulers etc

Word-processing
Selecting Before text can be formatted (edited), it must be selectedThis is achieved by dragging the mouse over the textBy dragging across, words are selected in turn and by dragging down, lines of text are selected in turn
A more precise method is available to select set amounts of text:
• A single word - double-click the word
• A paragraph - triple-click the paragraph

Word-processing
• A single line - click to the left of the line (cursor is an arrow)
• A sentence - Ctrl-click anywhere in the sentence
• Entire document - Ctrl-click to the left of the document (cursor is an arrow)

Word-processing
Graphics Pictures, Clip Art, Shapes and Smart Art can be added to a document.
To insert a picture:
• Click Picture on the Illustrations group on the Insert tab • Browse to the folder containing the required image • Select the image and click the Insert button• The image is inserted at the curser position

Word-processing
To insert Clip Art:
• Click Clip Art on the Illustrations group in the Insert tab • The Clip art menu appears.• Type your requirement in the Search for field and click Go• Select the image and click the Insert button• The image is inserted at the curser position

Word-processing
To insert a Shape:
• Click Shapes on the Illustrations group in the Insert tab • Select a shape from the drop-down and drag it’s size out on
the slide• The image is inserted at the curser position

Word-processing
Controlling Graphics Graphic Position and Text Wrapping are used to control graphics in a word processing document
• Position - this is used to lock a graphic in a fixed position on a document. Positions such as top-left, bottom-centre can be chosen. The text always flows around the graphic

Word-processing
• Text Wrapping - this controls how the text and graphic interact. The graphic can be set to be behind the text and the text will flow over it. It can be in front of the text or it can be set to flow through the borders to hug the graphic as shown below
Word-processing
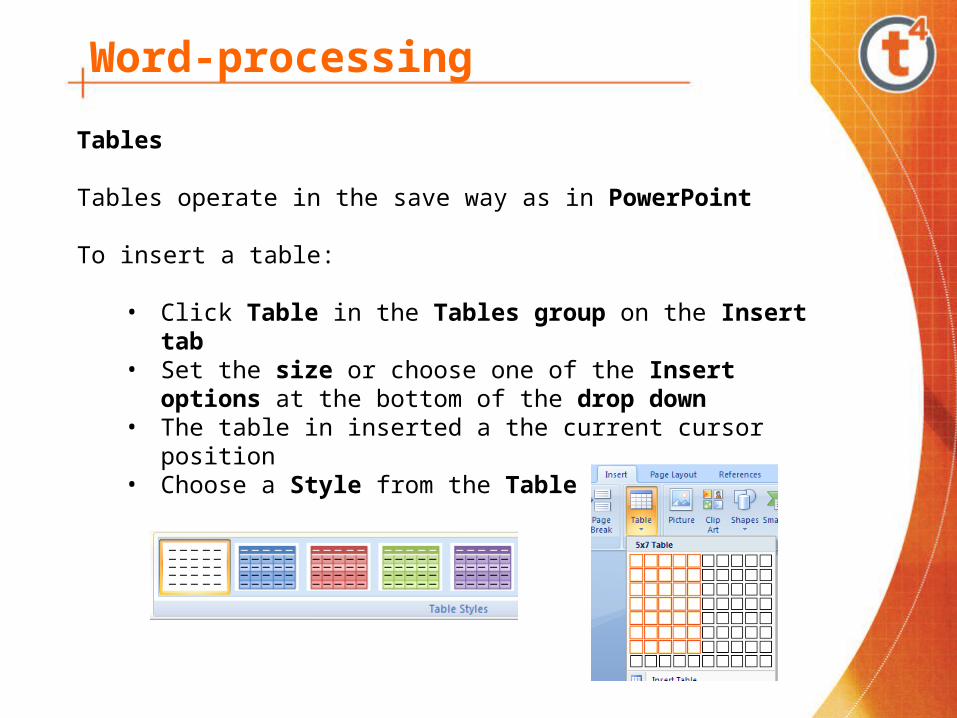
Tables Tables operate in the save way as in PowerPoint To insert a table:
• Click Table in the Tables group on the Insert tab• Set the size or choose one of the Insert options at the bottom
of the drop down• The table in inserted a the current cursor position• Choose a Style from the Table styles group