Embed Size (px)
Citation preview
Watch the Insta-Snow Video No other snow-like material
can do this! Listen to the host scream
when the snow erupts!Get your own erupting magic snow!
MAGIC + TEACHING = JOLT OF EXCITEMENT!There are as many kinds of great teachers as there are stars in the skies. The great ones reached us and make
us feel the joys of our soul. They electrified us. There was a sense of excitement - sudden and intense. They star-tled us and surprised us into learning. They made us look forward to every lesson, pull out all the stops and thirst
for more. Magic tricks can be a step in that direction.
Winter LessonsThe mercury’s dramatic moves with its snowy and icy residues - an opportu-
nity for extremes, great story lines and fantastic magic. Water FREEZES on command and SNOW erupts right in the classroom! Climb a target mountain for weather experiences. Connect to Standards! Snow stories, lessons and links from your peers! New Year’s “calendar math magic!” Valentine and Chocolate Magic!
In this issue ...•Winter science magic including Making Snow and Ice & Ice Cream Magic!
•Calendar Math Magic, Valentine Magic and Chocolate Magic
•Color Switcheroos
•Links to Weather Worm Magic & Skiing and Snowboarding Stories
•Zippered Change Bag & Double Change Bag Tricks
•Wand in Bottle Trick
•Currency Exchange
[1]
Learn how to make your own magical pictures like the one above!
(You didn’t really think Judi had two heads and 17 fingers, did you?)
TIPSto “electrify”
any winter lesson!Easy as 1-2-3 for ANY
language teacher
MAGIC Language Teacher
who wish to amaze!
Winter 2007, Vol. 1 No. 2
The latest and most offbeat pointers for teachers of all languages
Easy Math Magic: A quirky calendar trick! •Give student a previously prepared folded piece of paper, or seal in an envelope for
added drama (read further to see what’s on it)! •Then, ask a student to name any month. Have student find that month on any handy calendar and have him/her select any one column of numerals from that month. •Ask the student to add the numbers in that column - or put the num-bers on the board so the class may add it together. •Then, the student opens the folded piece of paper, and finds that the total matches the number that you had predicted on the paper! Click on the title link above to find out the extremely simple solution!
And don’t stop there. Continue to amaze your students with other feats of stunning cal-endar expertise (but not all on the same day) - Read on!
Another Guaranteed-to-Amaze Calendar Trick
All you need is a normal calendar with the dates lined up under the days of the week. Ask a student to open the calendar to any month. Ask him/her to draw a square around ANY three-by-three square of dates on the page. They can copy them onto the board while you are turned away. Glance over and instantly tell them the sum of those 9 numbers!The Secret!To do the trick, you take the middle number of the square and multiply it by 9 and there you are! (To multiply by 9 quickly, multiply first by 10 and then subtract the secret middle calendar number from the total you got.) So, if you draw a 3-by-3 square starting on Sunday, January 1, 2007, the sum of the dates is 1 + 2 + 3 + 8 + 9 + 10 + 15 + 16 + 17, which equals 81. The middle square is January 9, and 9 x 9 indeed equals 81! Below is a website that explains this trick in de-tail with extensions and variations! http://www.murderousmaths.co.uk/games/calendar.htm
The link below details yet another magical Calendar Trick! These tricks give students contexts for healthy number review while holding all their attention neatly in the palm of your hand:
http://mathforum.org/library/drmath/view/56830.html
-------------------Algebra - Fun with CalendarsTake any calendar. Tell a student to choose 4 days that form a square. Your friend should tell you only the sum of the four days, and you can tell her what the four days are. Click on the title to learn how to do this one. It involves alge-bra and I admit that I’ve never done it. Let me know if any of you try it and have success!
Free French calendar http://french.about.com/cs/culture/a/calendar.htm

Double Change Bag, More Tricks!There are tons of things you can do with this great prop. For many ideas see FL Magic Newslet-ter Fall 2006. Here are just a few more, submitted by magic novice, Sue Fredericks:
Color Mixing:Teach the colors, review the primary colors and how they combine to make secondary and/or tertiary colors. Use the changing bag to make orange out of yellow and red, purple out of blue and red [put a yellow and red scarf in and take out an orange one - red and yellow scarves are now gone!]
Flag Song and Trick:The class recently learned a poem about the American flag. I don't remember where I got it, but it goes like this:
> Red, white and blue> how pretty is my flag. > I love and adore you.> Symbol of my land> (roja, blanca y azul> Que bonita es mi bandera> Yo te amo y te adoro> Simbolo de mi tierra.)
Before they arrived in my room, I photocopied a clip art flag in two sizes. I cut red, white and blue construc-tion paper into grande (big) squares and pequeno (small) squares. Put the big flag in one pocket, the smaller in the other. Then I held up the small squares, reviewed the colors, used "put", bag","big" and "small" as new words, had a student put the squares in, etc., etc., and pulled out a small flag from the small squares. Of course, a big flag then appeared with the big squares. They went nuts! They loved it!!! They were yelling "Encore! Encore!", and I took a bow. I got so energized, I never turned on the movie! Of course, when I was asked if I could do it in reverse, I ran into some technical difficulty: the small flag went in, and I realized I was about to pull out the big squares (instead of the small one). OOps! I stopped, said I was a new magician, and just like when Harry Potter was learning his magic, I needed to do more practicing. They were fine with it.
Forming Interrogatives:I also used the Changing Bag to demonstrate how to make questions. In Spanish, one of the ways to make a yes/no question is to reverse the subject and predicate. To make an interrogative ques-tion, switch the subject and predicate as before, and add who, what, etc. to the front of it.
El elefante vive en Mexico. ¿ Vive en Mexico el elefante ?¿ Por qué vive en Mexico el elefante?I demonstrated it using the changing bag, cutting up different colors of those trusty sentence strips. I had kids put the subject in the bag, then the predicate, then an interrogative, and presto! Out came a perfectly written interrogative question.

What I do with the questions is have the kids make up questions based on the story and then I roll a six sided large die with one of the questions on each side and someone rolls it and I choose one of their questions. If someone answers it more or less in a full question in the TL, then I add a marble to the jar. When we reach 50, I make them a fiesta. Also, I cut up the stories into paragraphs and they have to read it and put it in order in small groups. The above Double Change Bag Tricks were submitted by Sue FredericksYou can order a double change bag and lots more at my WEBSITE.
Unity Scarf Trick in Change Bag1. Find some silk scarves (borrow your grandmother’s). You show the bag empty by showing the second chamber only. If you have the new ZIPPER bottom bag - stick your arm right through it! Put scarves one by one into the bag - show it filling up. (See it below!)
2. If you happen to have doubles of the same two or three scarves, even better and this is why... create some magic words about coming together (peace? unity?) at the end you can pull the du-plicate set of scarves out from the other secret chamber, all tied together - end to end (while leav-ing the individual scarves hidden in the second chamber)! A story about different peoples coming together in the end. What a climax!
3. Variation of #2: switch chambers and pull out about half of the last single color scarf tossed in as an ‘afterthought,’ using that half-scarf to cover the open top of your change bag. Wave your hand over the top. Ask a student to come up, put hand in and pull... up and out comes the knotted duo or trio!
4. The Double Change Bag is also great for switches. Not only for dropping in one thing, and then pulling out something else, but also for forcing. Forcing means you “force” a student to pull out a particular object, number or word. In so doing, you are able to predict the outcome ahead of time, either by announcing it, or even more fun, by opening a sealed envelope containing your ‘prediction’ at the end of the trick. See Fall “Language Teacher Magic” Newsletter for more.
5. NEW ZIPPER change bag! Produce! Vanish! Change! Silk scarves, ribbons (switch colors, knot them as above, cut & restore them), toys, candy, secret messages, streamers, playing cards. The bag can be turned inside out at any time. Useful for many incredible effects. Beautiful, glittering, VELVETY red with gold fringe. This change bag has a zip-per across the bottom, which can be opened and your hand passes right through; class looks right through bag to see it - empty! Then pull out anything that fits - even a live bird - if you dare! This is a fantastic prop of 101 uses, see fall issue magic newsletter for lesson ideas to fit a myriad of themes!
Three New Valentines Day Change Bag Tricks:
1. Wave a prediction sealed in an envelope in front of the class and an-nounce that you have made a prediction without telling what it is. Show a
handful of paper cards (cut into triangles or circles or, hearts for Valentine’s Day!) with with different numbers or words on them. Place them in chamber one.
Then, secretly pre-load chamber two of the bag with the same size, color and shaped cards - but all of them with the same identical word/phrase or number on them - the one in your sealed envelope. When the student reaches in to choose one, out will come the one you want him/her to choose, your prediction - the very number or word that was in the sealed envelope, to be opened for verification at the end! Good for words, phrases or numbers!
2. Another Valentine’s Trick? Use two half-hearts with the two halves of a riddle on them. The answer to the riddle will be sealed in the envelope as well as duplicated in the hearts loaded in the secret chamber ahead of time.
3. Yet Another ‘Change Bag Gem’ for Valentine’s Day? Pluck “D'Lite” lights from the air, or anywhere, throw them into the bag, and (from the other chamber) pull out red candies for every-one!
U-Make-It Color Magic
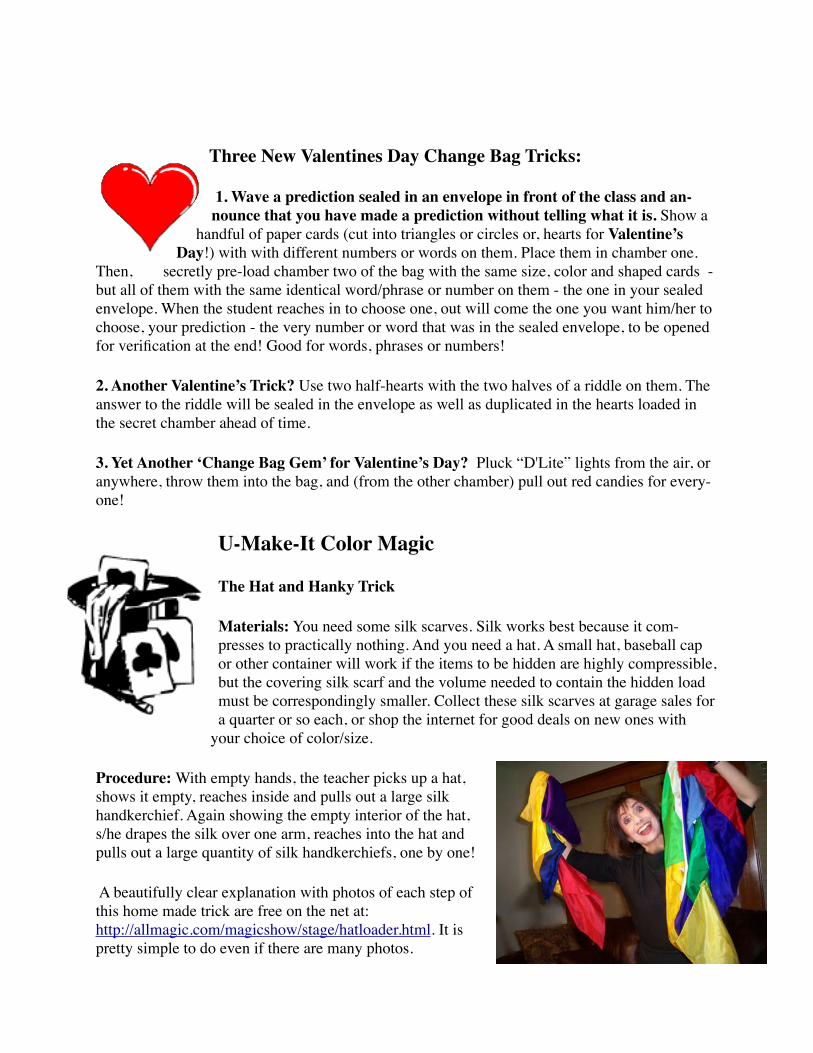
The Hat and Hanky Trick
Materials: You need some silk scarves. Silk works best because it com-presses to practically nothing. And you need a hat. A small hat, baseball cap or other container will work if the items to be hidden are highly compressible, but the covering silk scarf and the volume needed to contain the hidden load must be correspondingly smaller. Collect these silk scarves at garage sales for a quarter or so each, or shop the internet for good deals on new ones with
your choice of color/size.
Procedure: With empty hands, the teacher picks up a hat, shows it empty, reaches inside and pulls out a large silk handkerchief. Again showing the empty interior of the hat, s/he drapes the silk over one arm, reaches into the hat and pulls out a large quantity of silk handkerchiefs, one by one!
A beautifully clear explanation with photos of each step of this home made trick are free on the net at: http://allmagic.com/magicshow/stage/hatloader.html. It is pretty simple to do even if there are many photos.
Ice Cream Magic
It is cold as ice outside but we are in the mood for something sweet around Val-entine’s Day. It looks like magic since you start with a liquid and end up with ice cream, but it’s science! Relevant to Chinese, Italians and French cul-tures, and maybe others.
Option: perform ice cream magic by hand - in individual plastic baggies (one large and one small) for an entire class following the detailed directions below:http://www.microsoft.com/education/icecreamscience.mspx , or for the secondary classroom at: http://www.foodsci.uoguelph.ca/dairyedu/icecream.html. Simpler, but entails an expense: the “Brainy Ice Cream Maker” ($12.50) at http://www.discoverthis.com/freeze.html or elsewhere on the web. Making your own ice cream is a tasty lesson in thermodynamics and heat transfer. With a simple mixture of ice and salt in the outer container, the temperature drops below zero degrees and creates a perfect environ-ment for freezing ice cream mixtures in the inner container. Everyone gets to taste a spoonful! Students learn how salt lowers the temperature of ice: high and low temperatures, warmer and colder, etc. Read about the origin and history of ice cream. Conduct experiments to learn about the unique properties of water. This “Brainy” kit includes a 16-page color experiment manual with science, history, facts and recipes.
http://www.sciencenewsforkids.org/articles/20050810/Feature1.asp as many interesting facts about ice cream including a chart of the most popular flavors. Make your own - good review of fruits! It also has Ice Cream related Science, Math, Language Arts and Social Studies questions.
A New U-Make-It “Wand and Bottle Trick” Effect: a wand remains in bottle even though it is turned upside down.Vocabulary: wand, bottle, goes into, comes out ofVocabulary Extensions: remains/stays there; can/can’t get it out; other tensesHousehold Materials:
~a magic wand (could use a pencil instead) that is taller than the bottle (when you drop the wand into the bottle, part of it should still be sticking up through the opening.)~a bottle that has an opening large enough to fit the wand in (but not too big). The bottle cannot be see-through this time. Idea: you can put some dark paint inside the bottle and shake it around so the inside is painted.~an eraser
Preparation:Cut a piece off the eraser, just large enough to wedge the wand into the opening of the bottle. The eraser is what makes the trick work! Find further details at: http://www.kidzone.ws/magic/magic_bottle_trick.htm
Performing the Trick: 1. The teacher asks for student volunteer who checks inside a bottle to make sure it's normal and perfectly empty. 2. The volunteer returns the bottle and then examines a magic wand to ensure it is normal. 3. The teacher drops the wand into the bottle (marveling at how easily it falls in).4. He/she turns bottle over and lets go of the wand. 5. Oh, wow, the wand magically remains suspended in the bottle! This trick uses many similar words/ structures as previous “Wand in the Bottle Trick.” Same words, new context - plenty of reps - just what the doctor ordered! The original “ Wand in the Bottle Trick” is explained, and can be seen in action on my FL Magic 101 DVD.
Comprehensible Magic ... huh???
Magic Tricks, when properly simplified from a linguistic point of view, qualify beautifully as comprehensible input even though no one can figure them out! Magic tricks are the epitome of the entertaining story, right? Their magic props and streamlined gestures help make the content plain to all! Magicians are known to travel the world and achieve success precisely because of the ease of comprehension of their tricks. If the language is pared down by choosing a very minimal number of new structures and by translating the few other odd words that pop up, the conscious repeating while asking questions using those new focus words will bring students to full comprehension, cementing the meanings in their long term memories for years to come.
After all, contextual comprehensible input is how we learn to speak, read, write and understand language. Listening while watching the speaker move, and seeing pictures while being read to are examples of input that is understood even before one can speak or read. "C.C.I." focuses on these input -based activities rather than on output -based activities. As Carol Gaab at http://www.tprstorytelling.com explains: " ...the learner is exposed to planned, sequential and repetitive language structures ...students focus on listening to and reading memorable, entertain-ing stories, rather than on consciously learning or memorizing language." Magic tricks in con-junction with story telling indeed provide a captivating context for the input a language learner needs to succeed.
How to know if you've achieved your aims? Watch students' eyes for engagement. When in question, ask for a translation into English of what you just said. In a classroom of differing na-tive languages, ask for a gestured or sketched confirmation. Ask for written summaries of the trick they have just observed. Oral summaries may be practiced with a partner, in small group, simultaneously facing the classroom wall, or even to their pencil (as if a mic!). Asking for a retell in front of the class is great for those who are ready and willing. Share the story in the target lan-guage with a family member for homework. Watch and see how many will be speaking!
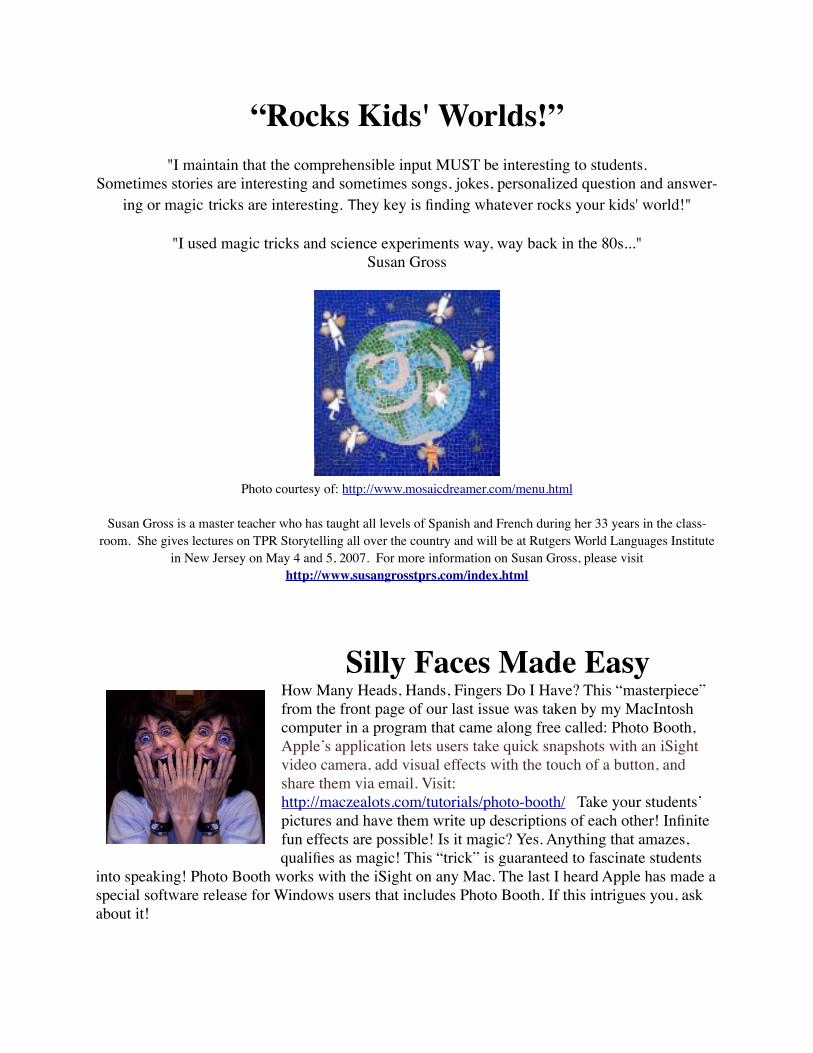
“Rocks Kids' Worlds!” "I maintain that the comprehensible input MUST be interesting to students.
Sometimes stories are interesting and sometimes songs, jokes, personalized question and answer-ing or magic tricks are interesting. They key is finding whatever rocks your kids' world!"
"I used magic tricks and science experiments way, way back in the 80s..." Susan Gross
Photo courtesy of: http://www.mosaicdreamer.com/menu.html
Susan Gross is a master teacher who has taught all levels of Spanish and French during her 33 years in the class-room. She gives lectures on TPR Storytelling all over the country and will be at Rutgers World Languages Institute
in New Jersey on May 4 and 5, 2007. For more information on Susan Gross, please visit http://www.susangrosstprs.com/index.html
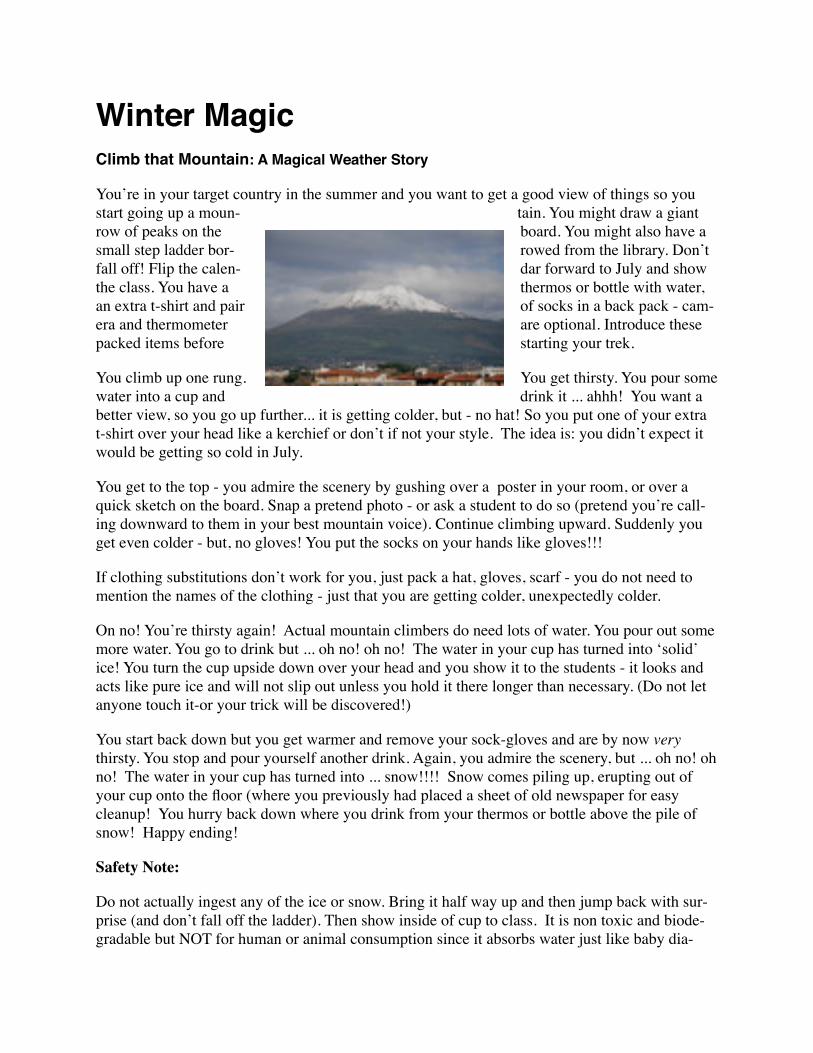
Silly Faces Made EasyHow Many Heads, Hands, Fingers Do I Have? This “masterpiece” from the front page of our last issue was taken by my MacIntosh computer in a program that came along free called: Photo Booth, Apple’s application lets users take quick snapshots with an iSight video camera, add visual effects with the touch of a button, and share them via email. Visit: http://maczealots.com/tutorials/photo-booth/ Take your students’ pictures and have them write up descriptions of each other! Infinite fun effects are possible! Is it magic? Yes. Anything that amazes, qualifies as magic! This “trick” is guaranteed to fascinate students
into speaking! Photo Booth works with the iSight on any Mac. The last I heard Apple has made a special software release for Windows users that includes Photo Booth. If this intrigues you, ask about it!
Winter MagicClimb that Mountain: A Magical Weather Story
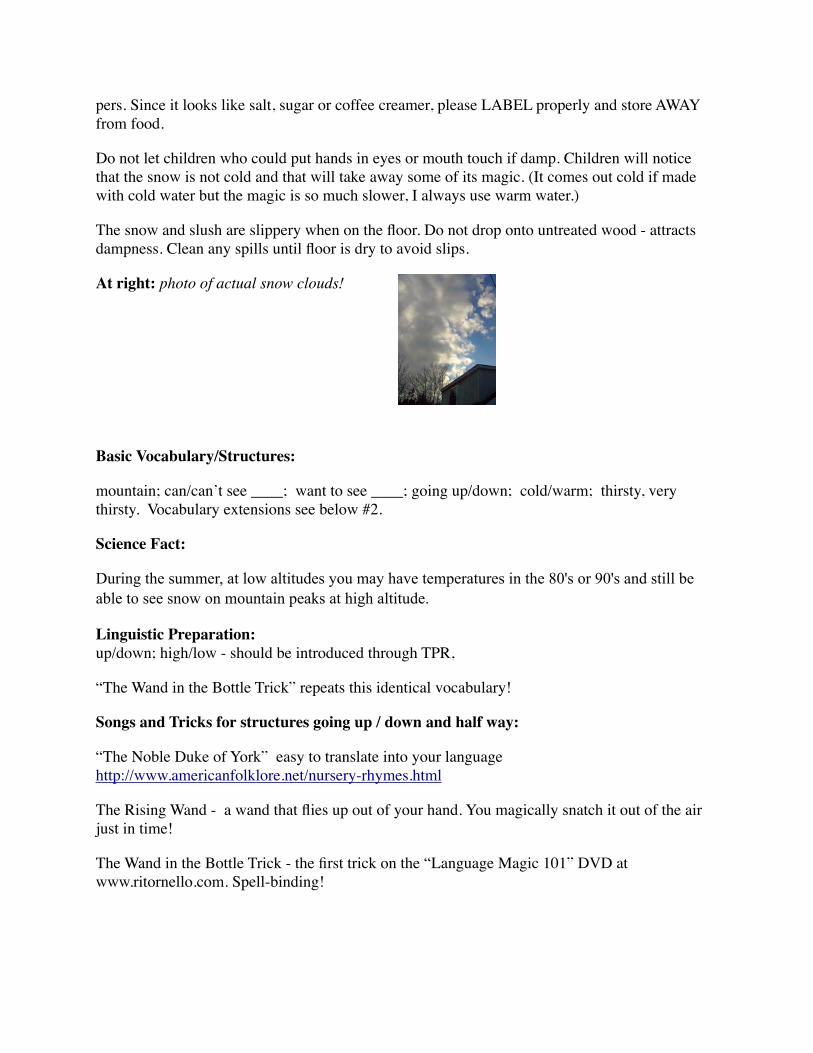
You’re in your target country in the summer and you want to get a good view of things so you start going up a moun- tain. You might draw a giant row of peaks on the board. You might also have a small step ladder bor- rowed from the library. Don’t fall off! Flip the calen- dar forward to July and show the class. You have a thermos or bottle with water, an extra t-shirt and pair of socks in a back pack - cam-era and thermometer are optional. Introduce these packed items before starting your trek.
You climb up one rung. You get thirsty. You pour some water into a cup and drink it ... ahhh! You want a better view, so you go up further... it is getting colder, but - no hat! So you put one of your extra t-shirt over your head like a kerchief or don’t if not your style. The idea is: you didn’t expect it would be getting so cold in July.
You get to the top - you admire the scenery by gushing over a poster in your room, or over a quick sketch on the board. Snap a pretend photo - or ask a student to do so (pretend you’re call-ing downward to them in your best mountain voice). Continue climbing upward. Suddenly you get even colder - but, no gloves! You put the socks on your hands like gloves!!!
If clothing substitutions don’t work for you, just pack a hat, gloves, scarf - you do not need to mention the names of the clothing - just that you are getting colder, unexpectedly colder.
On no! You’re thirsty again! Actual mountain climbers do need lots of water. You pour out some more water. You go to drink but ... oh no! oh no! The water in your cup has turned into ‘solid’ ice! You turn the cup upside down over your head and you show it to the students - it looks and acts like pure ice and will not slip out unless you hold it there longer than necessary. (Do not let anyone touch it-or your trick will be discovered!)
You start back down but you get warmer and remove your sock-gloves and are by now very thirsty. You stop and pour yourself another drink. Again, you admire the scenery, but ... oh no! oh no! The water in your cup has turned into ... snow!!!! Snow comes piling up, erupting out of your cup onto the floor (where you previously had placed a sheet of old newspaper for easy cleanup! You hurry back down where you drink from your thermos or bottle above the pile of snow! Happy ending!
Safety Note:
Do not actually ingest any of the ice or snow. Bring it half way up and then jump back with sur-prise (and don’t fall off the ladder). Then show inside of cup to class. It is non toxic and biode-gradable but NOT for human or animal consumption since it absorbs water just like baby dia-
pers. Since it looks like salt, sugar or coffee creamer, please LABEL properly and store AWAY from food.
Do not let children who could put hands in eyes or mouth touch if damp. Children will notice that the snow is not cold and that will take away some of its magic. (It comes out cold if made with cold water but the magic is so much slower, I always use warm water.)
The snow and slush are slippery when on the floor. Do not drop onto untreated wood - attracts dampness. Clean any spills until floor is dry to avoid slips.
At right: photo of actual snow clouds!
Basic Vocabulary/Structures:
mountain; can/can’t see ____; want to see ____; going up/down; cold/warm; thirsty, very thirsty. Vocabulary extensions see below #2.
Science Fact:
During the summer, at low altitudes you may have temperatures in the 80's or 90's and still be able to see snow on mountain peaks at high altitude.
Linguistic Preparation:up/down; high/low - should be introduced through TPR,
“The Wand in the Bottle Trick” repeats this identical vocabulary!
Songs and Tricks for structures going up / down and half way:
“The Noble Duke of York” easy to translate into your language http://www.americanfolklore.net/nursery-rhymes.html
The Rising Wand - a wand that flies up out of your hand. You magically snatch it out of the air just in time!
The Wand in the Bottle Trick - the first trick on the “Language Magic 101” DVD at www.ritornello.com. Spell-binding!
Making Snow and Ice:The powders used to make the realistic looking ice and snow both come with easy directions! To prepare for this trick I recommend the following simple procedure:
1. Trim three plastic/paper cups down to about 2 1/2 inches high, or use 2 oz. Dixie Cups - trans-parent cups are even more dramatic.
2. Code the them: “E” for Empty, “I” for Ice and “S” for Snow, in some inconspicuous spot.
3. You can get both magical snow and magical ice powders for about $5.00 each (shipping only $3. on any size order) at www.ritornello.com. Put a half teaspoon of the ice powder (also called Lightning Gel or Slush) in the cup marked “I.” Then, put one level teaspoon into the cup marked “S” for Snow. Put NOTHING into the cup marked “E” for Empty.
4. Nest them with the empty cup on top, then the ice powder and, on the bottom, the snow pow-der. Don’t let them spill out during your ‘climb.’ If they do, you’ll just have a good story, and a good story is great too. Use the magic another time, in that case.
5. Have a bottle of warm water handy. Pour it nearly to the top into appropriate cup not deeper than 2 oz. or 2 1/2 in. high - for the most dramatic effect. If your cup is larger, pour only part way. Be careful to pour into empty cup first - that’s the one you’ll be drinking from and does not need to be full!!! It’s important to show that you are drinking that first cupful and that it is real
water. Wait a few seconds before drinking and you’ll see it remaining as water and not jell-ing. While you wait... circle your chosen structures.
6. So all you do is pour the water quickly onto the crystals in the cup, wait a bit and turn upside down - first the ice (a.k.a. Lightning Gel) and then the Snow (a.k.a. Insta-Sno) I
like to do the ice effect first in order to let the drama of the snow effect come at the end! Freezing to ice would most likely happen at the top of the mountain, and the snow - midway down - and so use the snow effect on the way DOWN.
Re-use the snow after it dries back to its powdered form! Spread out on a clean dry surface for a day or two. Gather and save for next time!
Easy Variations:
Just tell the story without any acting. Or, chose student actor. The class creates and describes the character who climbs the mountain. Class or you may chose the target mountain. The magic tricks (water turning into ice and then into snow) are not strictly necessary either but are very powerful and easy to do! The tricks could be used at another time, or not at all.
Fun Extensions:
1. Thermometer- You just happen to have a big thermometer in your backpack (make it from 12 or 14” cardboard with clear black number calibrations and a 2 ft. strip of white elastic band in-serted through two slits - one at the top and one at the bottom and sewed/taped/knotted into one

loop in the back for maneuvering the ‘mercury’ up and down) - I then inked-in one foot of my elastic strip with red marker. Take thermometer out and check it every so often to show it getting colder as you go up and and then warmer as you go down, by pulling the elastic up or down (reps of ‘going up’ and ‘going down’ the mountain). Or, a student stands by, moving the mercury up or down, showing the class. Or, just pull out a real thermometer and ‘read’ the temperature out loud to class from time to time, faking it appropriately. If you prefer, sketch a thermometer on board from your perch on the mountain. Color the mercury red and make the numerical temperature prominent. Make several markings at different elevations. A white board would work well for this.
2. Other weather props: Make a big yellow sunshine, and also take a flat piece (1 foot square) of fiber fluff (pillow stuffing similar to cotton) painted blackish gray on one side and left white on the other to mimic a normal cloud and when held backwards, a snow cloud. Students could hold these up at the appropriate times during the story. Words for sun and cloud colors/types might be added if they are cognates, or for review. These props could be used in other stories.
See below under Teacher Resources for other prop ideas.
3. Linguistic Extensions: Remark on your relative feelings of warmth, cold and thirst using comparatives (colder/ warmer, thirstier), or relative views from various heights (beautiful, very beautiful, the most beautiful); higher and higher, lower and lower; half-way up/down; warmer and warmer, colder and colder; thirstier and thirstier; need to drink; drinking. If the word ‘climb-ing’ is important you may introduce it as well; obviously changing into past or future is fine. See also, vocabulary for #’s 5-10 below.
4. Taking a photo: The word for camera and the language involved in ‘taking a picture.’ You could have a real digital camera handy and students could actually get shots of you at various stages of your ascent and descent for class web page.
5. Culture: Remark on the cultural sights you see with appropriate exclamations, relative to tar-get mountain range chosen.
6. Connections to other Core Subjects: comment on Scientific processes of condensation, evaporation, precipitation which are cognates in some languages; reading of temperatures, also see 1l. d, e, j. and k. below; for weather and climate see in 1l.b, c and l. For Math connections see 8. and 11.g; for Geography connections, see 8.h and for History connections, see 11.a.
7. Clean up the Snow magically: For about $30 on up you can get a magic broom that appears out of a lunch bag (not from me, though. Google: “appearing broom”). So, for the climax, you sweep up the snowy mess. Fun!
8. Math: Review numbers (counting by 10’s.); compare the Fahrenheit to Celsius temperatures.
9. Clothing: Review of winter clothing: hat, gloves, proper attire for mountain climbing.
10. Winter Scene in Classroom: Dress a Barbie doll or a puppet for the mountain trek and have it start out in summer attire when at the base of the mountain and progressively add hat, coat and

scarf as it gets colder and colder and then remove them on the way down. Use the snow that is made (if kept hydrated) for a day or two as a snow scene to decorate classroom- the Barbie could ski or snowboard if student brings in the Barbie props!
11. Related Winter Project ideas:
a. history of Alpinism - Wikipedia.org/wiki/Alpinism#Snow has a rich and highly recommended timeline of Alpine feats by many, many varied cultures!!!
b. global warming affecting mountain ecosystems in your target countries.
c. target mountain’s effect on global weather patterns
d. beneficial effects of mountain air on various ailments
e. why it gets colder as we climb closer to the sun even though heated air rises.
(see: Yahoo!Answers)
f. flora and fauna in target country mountains
g. compare the heights of various mountains in target countries or in the world - students make graphic; may compare meters to feet
h. make a clay or dough mountain and label with mountain target language nomenclature (peak, slope, foot, etc.). My FL dictionary has a labeled photo.
i. winter mountain sports in target culture/s, skiing, mountain biking, snow boarding, etc. (http://en.wikipedia.org/wiki/Winter_sport)
a. Italian snowboard-themed games on net in Italian: http://www.snowboard-italia.com/extra/giochi-snowboard-online.htm
j. Discuss how snow is often man-made at Olympic and resort venues.
k. Discuss the use of super absorbent polymers in oil spill disasters (and in baby diapers) - the science behind the “magic” Insta-Snow.
l. Demonstrate how Insta-Sno absorbs vast quantities of water. Discuss the use of polymers to minimize draught conditions.
l. Show and discuss how avalanches hinder climbers on treks to the top of the world.
12. Teacher Resources:
Elementary:
Winter Teaching Theme with songs, lesson plans, art and music in English:
http://teachers.teach-nology.com/themes/holidays/winter/
Weather Gestures:http://www.anacleta.com/weatherpointers.html
FL Teacher Weather Pointers http://www.anacleta.com/LAweather.html
http://www.anacleta.com/weather.html
Famous Buildings Made of Snow World-Wide: http://www.niksula.hut.fi/~mnikkane/linnat/famous.html
CLICK HERE FOR: Complete Weather Worm Activity with Parent Letters and Accompanying Activities:
Listed with kind permission of www.anacleta.com
Check www.eNasco.com/earlylearning for giant inflatable weather set $25.95 (five total: sun, snowflake, cloud, lightning bolt and raindrop)
Simple Snow Facts: http://www.farmersalmanactv.com/weather_center/224.html
Weather photos free for teachers for non-commercial use: http://www.weatherunderground.com/wximage/viewimages.html
Secondary: See above free weather photo source for teachers.

weather and climate – these links will take you to an annotated list of sites with helpful back-ground information.
Snow Hydrology: Snow formation in the atmosphere:
http://snobear.colorado.edu/Markw/SnowHydro/Atmosphere/atmos.html#Precipitation
Avalanche awareness: http://nsidc.org/snow/avalanche/
For Italian teachers: stunning photo of St. Mary of the Snow Basilica in Rome - http://www.panoramas.dk/fullscreen/fullscreen46.html . Research this fascinating legend re.the church with the highest bell tower in Rome where it snowed miraculously on August 5, 358 BC.
13. Winter Stories from Teachers For You! • Wonderful Snow Stories reprinted with kind permission of Sue Kranz, in English and Spanish:
PLEASE CLICK HERE
14. SnowBoarding Questions ... an example of a circling technique to entrench and review par-ticular linguistic structures for you courtesy of Teri Wiechart.
PLEASE CLICK HERE
More Teacher Tricks UsingMagic Ice Gel(a.k.a. Slush)
Extra Fantastic “Valentine Chocolate Trick” using Magic Ice (a.k.a. Slush)!
Procedure:
1. Announce that a special holiday is coming, point to the calendar and write on board “Valen-tine’s Day” in your TL. You’re in the mood for something sweet (or you want something deli-cious to give to someone special).
2. Pour a dozen chocolate chips into a opaque cup - plastic or paper.
3. Next, add 1/2 tsp. “sugar” (actually “Magic Ice” crystals that resemble sugar).
4. Add some water, wait a minute and turn cup upside down briefly. Out comes a mini chocolate bar! Perfect!
Magic: The unwrapped mini bar was behind some things on your desk - (bag of sugar or pile of books). You palm it (pick up with palm and not with fingers. Then you drop it onto the top of the solidified gel in the cup. Tip the cup over and all that comes out is the candy bar - wow!
Heart-shaped magic: add a small paper heart shape to the mix (chips and slush powdered ‘sugar’). Use a chocolate heart as the grand finale. Empty and discard the cup, hiding it well in the trash can so prying fingers don’t detect a thing!
Powerful “Ice-Making” Powder Works for 25 Tricks:
One More For Teachers ... Change Coins into Bills!
Pop four quarters into a glass. Pour in some water. Wait a few seconds. Turn cup upside down and out pops the equivalent amount of money in paper form - dry as a bone!
The trick? A bit of “Slush” powder in bottom of glass before pouring the water. It will turn the water into a magic gel trapping the coins in the cup for a short time. Palm a folded bill in hand that picks up and reverses the cup. Out pops the bill! Find this and 25 more language teacher tricks described in easy detail in book: Slush! for just $3.00 at www.ritornello.com. Get a bottle of Powerful Slush Powder for $4.99 and you will enthrall your students all year long!
Watch the Insta-Snow Video No other snow-like material can do this!
Listen to the host scream when the snow erupts!Get your own erupting magic snow at: http://ritorn.fatcow.com/store/page1.html


![IMW581L Boomjacket Jolt QSG OL[3] - Altec Lansingalteclansing.com/wp-content/uploads/2019/05/IMW581L-Boomjacket-Jolt-QSG.pdfBoomJacket JOLT To toggle between the different light modes:](https://img.pdfslide.us/doc/110x75/5e9692a08b64700e797d821c/imw581l-boomjacket-jolt-qsg-ol3-altec-boomjacket-jolt-to-toggle-between-the.jpg)