Embed Size (px)
Citation preview
4/11/2014 Gentoo Linux Documentation -- Gentoo Linux x86 Handbook
https://www.gentoo.org/doc/en/handbook/handbook-x86.xml?style=printable&full=1 1/105
Gentoo Linux x86 HandbookSven Vermeulen AuthorGrant Goodyear AuthorRoy Marples AuthorDaniel Robbins AuthorChris Houser AuthorJerry Alexandratos AuthorSeemant Kulleen Gentoo x86 DeveloperTavis Ormandy Gentoo Alpha DeveloperJason Huebel Gentoo AMD64 DeveloperGuy Martin Gentoo HPPA developerPieter Van den Abeele Gentoo PPC developerJoe Kallar Gentoo SPARC developerJohn P. Davis EditorPierre-Henri Jondot EditorEric Stockbridge EditorRajiv Manglani EditorJungmin Seo EditorStoyan Zhekov EditorJared Hudson EditorColin Morey EditorJorge Paulo EditorCarl Anderson EditorJon Portnoy EditorZack Gilburd EditorJack Morgan EditorBenny Chuang EditorErwin EditorJoshua Kinard EditorTobias Scherbaum EditorXavier Neys EditorJoshua Saddler EditorGerald J. Normandin Jr. ReviewerDonnie Berkholz ReviewerKen Nowack ReviewerLars Weiler Contributor
Page updated September 25, 2014
Content:
Installing GentooIn this part you learn how to install Gentoo on your system.
1. About the Gentoo Linux InstallationThis chapter introduces you to the installation approach documented in this handbook.
2. Choosing the Right Installation MediumYou can install Gentoo in many ways. This chapter explains how to install Gentoo using the minimalInstallation CD.
3. Configuring your NetworkTo be able to download the latest source code, you will need to setup networking.
4. Preparing the DisksTo be able to install Gentoo, you must create the necessary partitions. This chapter describes how topartition a disk for future usage.
5. Installing the Gentoo Installation FilesGentoo installs work through a stage3 archive. In this chapter we describe how you extract the stage3archive and configure Portage.
4/11/2014 Gentoo Linux Documentation -- Gentoo Linux x86 Handbook
https://www.gentoo.org/doc/en/handbook/handbook-x86.xml?style=printable&full=1 2/105
6. Installing the Gentoo Base SystemAfter installing and configuring a stage3, the eventual result is that you have a Gentoo base system atyour disposal. This chapter describes how to progress to that state.
7. Configuring the KernelThe Linux kernel is the core of every distribution. This chapter explains how to configure your kernel.
8. Configuring your SystemYou need to edit some important configuration files. In this chapter you receive an overview of these filesand an explanation on how to proceed.
9. Installing Necessary System ToolsIn this chapter we help you choose and install some important tools.
10. Configuring the BootloaderSeveral bootloaders exist for the x86 architecture. Each one of them has its own way of configuration.We step you through the process of configuring a bootloader to your needs.
11. Finalizing your Gentoo InstallationYou're almost done. We'll just create one (or more) users for your system.
12. Where to go from here?Now you have your Gentoo system, but what's next?
Working with GentooLearn how to work with Gentoo: installing software, altering variables, changing Portage behaviour etc.
1. A Portage IntroductionThis chapter explains the "simple" steps a user definitely needs to know to maintain the software on hissystem.
2. USE flagsUSE flags are a very important aspect of Gentoo. In this chapter, you learn to work with USE flags andunderstand how USE flags interact with your system.
3. Portage FeaturesDiscover the features Portage has, such as support for distributed compiling, ccache and more.
4. InitscriptsGentoo uses a special initscript format which, amongst other features, allows dependency-drivendecisions and virtual initscripts. This chapter explains all these aspects and explains how to deal withthese scripts.
5. Environment VariablesWith Gentoo you can easily manage the environment variables for your system. This chapter explainshow you do that, and also describes frequently used variables.
Working with Portage"Working with Portage" provides an in-depth coverage of Portage, Gentoo's Software Management Tool.
1. Files and DirectoriesOnce you want to know Portage in-depth you need to know where it stores its files and data.
2. Configuring through VariablesPortage is completely configurable through various variables you can set in the configuration file or asenvironment variable.
3. Mixing Software BranchesGentoo provides software separated in several branches, depending on stability and architecturalsupport. "Mixing Software Branches" inform you how these branches can be configured and how you canoverride this separation individually.
4. Additional Portage ToolsPortage comes with a few extra tools that might make your Gentoo experience even better. Read on todiscover how to use dispatch-conf and other tools.
5. Diverting from the Official Tree"Diverting from the Official Tree" gives you some tips and tricks on how to use your own Portage tree,how to synchronise only the categories you want, inject packages and more.
6. Advanced Portage FeaturesAs times goes by, Portage evolves and matures further and further. Additional features are continuouslybeing put in - many of these are only of use by more advanced users. This chapter will go into more
4/11/2014 Gentoo Linux Documentation -- Gentoo Linux x86 Handbook
https://www.gentoo.org/doc/en/handbook/handbook-x86.xml?style=printable&full=1 3/105
detail of these specific features.Gentoo Network ConfigurationA comprehensive guide to Networking in Gentoo.
1. Getting StartedA guide to quickly get your network interface up and running in most common environments.
2. Advanced ConfigurationHere we learn about how the configuration works - you need to know this before we learn about modularnetworking.
3. Modular NetworkingGentoo provides you flexible networking - here you are told about choosing different DHCP clients,setting up bonding, bridging, VLANs and more.
4. Wireless NetworkingWireless configuration can be tricky. Hopefully we'll get you working!
5. Adding FunctionalityIf you're feeling adventurous, you can add your own functions to networking.
6. Network ManagementFor laptop users or people who move their computer around different networks.
A. Installing Gentoo
1. About the Gentoo Linux Installation
1.a. Introduction
Welcome!
First of all, welcome to Gentoo. You are about to enter the world of choices and performance. Gentoo is all aboutchoices. When installing Gentoo, this is made clear to you several times -- you can choose how much you want tocompile yourself, how to install Gentoo, what system logger you want, etc.
Gentoo is a fast, modern metadistribution with a clean and flexible design. Gentoo is built around free software anddoesn't hide from its users what is beneath the hood. Portage, the package maintenance system which Gentoo uses, iswritten in Python, meaning you can easily view and modify the source code. Gentoo's packaging system uses sourcecode (although support for precompiled packages is included too) and configuring Gentoo happens through regulartextfiles. In other words, openness everywhere.
It is very important that you understand that choices are what makes Gentoo run. We try not to force you onto anythingyou don't like. If you feel like we do, please bugreport it.
How is the Installation Structured?
The Gentoo Installation can be seen as a 10-step procedure, corresponding to chapters 2 - 11. Every step results in acertain state:
After step 1, you are in a working environment ready to install GentooAfter step 2, your internet connection is ready to install GentooAfter step 3, your hard disks are initialized to house your Gentoo installationAfter step 4, your installation environment is prepared and you are ready to chroot into the new environmentAfter step 5, core packages, which are the same on all Gentoo installations, are installedAfter step 6, you have compiled your Linux kernelAfter step 7, you have written most of your Gentoo system configuration filesAfter step 8, necessary system tools (which you can choose from a nice list) are installedAfter step 9, your choice of bootloader has been installed and configured and you are logged in into your newGentoo installationAfter step 10, your Gentoo Linux environment is ready to be explored
4/11/2014 Gentoo Linux Documentation -- Gentoo Linux x86 Handbook
https://www.gentoo.org/doc/en/handbook/handbook-x86.xml?style=printable&full=1 4/105
When you are given a certain choice, we try our best to explain what the pros and cons are. We will continue then witha default choice, identified by "Default: " in the title. The other possibilities are marked by "Alternative: ". Do not thinkthat the default is what we recommend. It is however what we believe most users will use.
Sometimes you can pursue an optional step. Such steps are marked as "Optional: " and are therefore not needed toinstall Gentoo. However, some optional steps are dependent on a previous decision you made. We will inform youwhen this happens, both when you make the decision, and right before the optional step is described.
What are my Options?
You can install Gentoo in many different ways. You can download and install from one of our Installation CDs, from adistribution already installed, from a non-Gentoo bootable CD (such as Knoppix), from a netbooted environment, froma rescue floppy, etc.
This document covers the installation using a Gentoo Installation CD or, in certain cases, netbooting. This installationassumes that you want to install the latest available version of each package.
Note: For help on the other installation approaches, including using non-Gentoo CDs, please read our Alternative Installation Guide.
We also provide a Gentoo Installation Tips & Tricks document that might be useful to read as well.
Troubles?
If you find a problem in the installation (or in the installation documentation), please visit our bugtracking system andcheck if the bug is known. If not, please create a bugreport for it so we can take care of it. Do not be afraid of thedevelopers who are assigned to (your) bugs -- they generally don't eat people.
Note though that, although the document you are now reading is architecture-specific, it might contain references toother architectures as well. This is due to the fact that large parts of the Gentoo Handbook use source code that iscommon for all architectures (to avoid duplication of efforts and starvation of development resources). We will try tokeep this to a minimum to avoid confusion.
If you are uncertain if the problem is a user-problem (some error you made despite having read the documentationcarefully) or a software-problem (some error we made despite having tested the installation/documentation carefully)you are welcome to join #gentoo on irc.freenode.net. Of course, you are welcome otherwise too as our chat channelcovers the broad Gentoo spectrum :)
Speaking of which, if you have a question regarding Gentoo, check out our Frequently Asked Questions, available fromthe Gentoo Wiki. You can also view the FAQs on our forums.
2. Choosing the Right Installation Medium
2.a. Hardware Requirements
Introduction
Before we start, we first list what hardware requirements you need to successfully install Gentoo on your box.
Hardware Requirements
Minimal CD LiveDVDCPU i486 or later i686 or later
Memory 256 MB 512 MB
Diskspace 2.5 GB (excluding swap space)
Swap space At least 256 MB
2.b. The Gentoo Installation CD
Gentoo Minimal Installation CD
4/11/2014 Gentoo Linux Documentation -- Gentoo Linux x86 Handbook
https://www.gentoo.org/doc/en/handbook/handbook-x86.xml?style=printable&full=1 5/105
The Minimal Installation CD is a bootable CD which contains a self-sustained Gentoo environment. It allows you toboot Linux from the CD. During the boot process your hardware is detected and the appropriate drivers are loaded. TheCD is maintained by Gentoo developers and allows you to install Gentoo with an active Internet connection.
The Minimal Installation CD is called install-x86-minimal-<release>.iso and takes up around 140 MB ofdiskspace.
Gentoo Linux LiveDVDs
Occasionally, a special DVD is crafted by the Gentoo Ten project which can be used to install Gentoo with too. Theinstructions further down this chapter target the Minimal Installation CD so might be a bit different. However, theLiveDVD (or any other bootable Linux environment) supports getting a root prompt by just invoking sudo su - or sudo-i on a terminal.
The Stage3 Tarball
A stage3 tarball is an archive containing a minimal Gentoo environment, suitable to continue the Gentoo installationusing the instructions in this manual. Previously, the Gentoo Handbook described the installation using one of threestage tarballs. While Gentoo still offers stage1 and stage2 tarballs, the official installation method uses the stage3tarball. If you are interested in performing a Gentoo installation using a stage1 or stage2 tarball, please read theGentoo FAQ on How do I Install Gentoo Using a Stage1 or Stage2 Tarball?
Stage3 tarballs can be downloaded from releases/x86/autobuilds/current-stage3/ on any of the OfficialGentoo Mirrors and are not provided on the LiveDVD.
2.c. Download, Burn and Boot a Gentoo Installation CD
Downloading and Burning the Installation CD
You have chosen to use a Gentoo Installation CD. We'll first start by downloading and burning the chosen InstallationCD. We previously discussed the Installation CD, but where can you find it?
You can download any of the Installation CD from one of our mirrors. The Installation CD is located in thereleases/x86/autobuilds/current-iso/ directory.
Inside that directory you'll find the ISO file. This is a full CD image which you can write on a CD-R.
In case you wonder if your downloaded file is corrupted or not, you can check its SHA-2 checksum and compare it withthe SHA-2 checksum we provide (such as install-x86-minimal-<release>.iso.DIGESTS). You can check theSHA-2 checksum with the sha512sum tool under Linux/Unix or Checksums calculator for Windows.
Note: The tool will attempt to verify the checksums in the list, even if the checksum is made with a different algorithm. Therefore, theoutput of the command might give both success (for SHA checksums) and failures (for other checksums). At least one OK needs tobe provided for each file.
Code Listing 3.1: Verifying the SHA-2 checksum
$ sha512sum -c <downloaded iso.DIGESTS>
Note: If you get the message that no properly formatted SHA checksum was found, take a look at the DIGESTS file yourself to seewhat the supported checksums are.
Another way to check the validity of the downloaded file is to use GnuPG to verify the cryptographic signature that weprovide (the file ending with .asc). Download the signature file and obtain the public keys whose key ids can be foundon the release engineering project site.
Code Listing 3.2: Obtaining the public key
(... Substitute the key ids with those mentioned on the release engineering site ...)$ gpg --keyserver subkeys.pgp.net --recv-keys 96D8BF6D 2D182910 17072058
Now verify the signature:
4/11/2014 Gentoo Linux Documentation -- Gentoo Linux x86 Handbook
https://www.gentoo.org/doc/en/handbook/handbook-x86.xml?style=printable&full=1 6/105
Code Listing 3.3: Verify the files
$ gpg --verify <downloaded iso.DIGESTS.asc>$ sha512sum -c <downloaded iso.DIGESTS.asc>
To burn the downloaded ISO(s), you have to select raw-burning. How you do this is highly program-dependent. We willdiscuss cdrecord and K3B here; more information can be found in our Gentoo FAQ.
With cdrecord, you simply type cdrecord dev=/dev/sr0 <downloaded iso file> (replace /dev/sr0 withyour CD-RW drive's device path).With K3B, select Tools > Burn CD Image. Then you can locate your ISO file within the 'Image to Burn' area.Finally click Start.
Booting the Installation CD
Once you have burnt your installation CD, it is time to boot it. Remove all CDs from your CD drives, reboot yoursystem and enter the BIOS. This is usually done by hitting DEL, F1 or ESC, depending on your BIOS. Inside theBIOS, change the boot order so that the CD-ROM is tried before the hard disk. This is often found under "CMOSSetup". If you don't do this, your system will just reboot from the hard disk, ignoring the CD-ROM.
Now place the installation CD in the CD-ROM drive and reboot. You should see a boot prompt. At this screen, you canhit Enter to begin the boot process with the default boot options, or boot the Installation CD with custom boot optionsby specifying a kernel followed by boot options and then hitting Enter.
When the boot prompt is shown, you get the option of displaying the available kernels (F1) and boot options (F2). Ifyou make no selection within 15 seconds (either displaying information or using a kernel) then the LiveDVD will fallback to booting from disk. This allows installations to reboot and try out their installed environment without the need toremove the CD from the tray (something well appreciated for remote installations).
Now we mentioned specifying a kernel. On our Installation CD, we provide several kernels. The default one is gentoo.Other kernels are for specific hardware needs and the -nofb variants which disable framebuffer.
Below you'll find a short overview on the available kernels:
Kernel Descriptiongentoo Default 2.6 kernel with support for multiple CPUsgentoo-nofb Same as gentoo but without framebuffer supportmemtest86 Test your local RAM for errors
You can also provide kernel options. They represent optional settings you can (de)activate at will.
Hardware options:
acpi=onThis loads support for ACPI and also causes the acpid daemon to be started by the CD on boot. This is onlyneeded if your system requires ACPI to function properly. This is not required for Hyperthreading support.
acpi=offCompletely disables ACPI. This is useful on some older systems and is also a requirement for using APM. Thiswill disable any Hyperthreading support of your processor.
console=XThis sets up serial console access for the CD. The first option is the device, usually ttyS0 on x86, followed byany connection options, which are comma separated. The default options are 9600,8,n,1.
dmraid=XThis allows for passing options to the device-mapper RAID subsystem. Options should be encapsulated inquotes.
doapmThis loads APM driver support. This requires you to also use acpi=off.
dopcmciaThis loads support for PCMCIA and Cardbus hardware and also causes the pcmcia cardmgr to be started by theCD on boot. This is only required when booting from PCMCIA/Cardbus devices.
doscsiThis loads support for most SCSI controllers. This is also a requirement for booting most USB devices, as they

4/11/2014 Gentoo Linux Documentation -- Gentoo Linux x86 Handbook
https://www.gentoo.org/doc/en/handbook/handbook-x86.xml?style=printable&full=1 7/105
use the SCSI subsystem of the kernel.sda=stroke
This allows you to partition the whole hard disk even when your BIOS is unable to handle large disks. Thisoption is only used on machines with an older BIOS. Replace sda with the device that requires this option.
ide=nodmaThis forces the disabling of DMA in the kernel and is required by some IDE chipsets and also by some CDROMdrives. If your system is having trouble reading from your IDE CDROM, try this option. This also disables thedefault hdparm settings from being executed.
noapicThis disables the Advanced Programmable Interrupt Controller that is present on newer motherboards. It hasbeen known to cause some problems on older hardware.
nodetectThis disables all of the autodetection done by the CD, including device autodetection and DHCP probing. This isuseful for doing debugging of a failing CD or driver.
nodhcpThis disables DHCP probing on detected network cards. This is useful on networks with only static addresses.
nodmraidDisables support for device-mapper RAID, such as that used for on-board IDE/SATA RAID controllers.
nofirewireThis disables the loading of Firewire modules. This should only be necessary if your Firewire hardware iscausing a problem with booting the CD.
nogpmThis disables gpm console mouse support.
nohotplugThis disables the loading of the hotplug and coldplug init scripts at boot. This is useful for doing debugging of afailing CD or driver.
nokeymapThis disables the keymap selection used to select non-US keyboard layouts.
nolapicThis disables the local APIC on Uniprocessor kernels.
nosataThis disables the loading of Serial ATA modules. This is used if your system is having problems with the SATAsubsystem.
nosmpThis disables SMP, or Symmetric Multiprocessing, on SMP-enabled kernels. This is useful for debugging SMP-related issues with certain drivers and motherboards.
nosoundThis disables sound support and volume setting. This is useful for systems where sound support causesproblems.
nousbThis disables the autoloading of USB modules. This is useful for debugging USB issues.
slowusbThis adds some extra pauses into the boot process for slow USB CDROMs, like in the IBM BladeCenter.
Volume/Device Management:
dolvmThis enables support for Linux's Logical Volume Management.
Other options:
debugEnables debugging code. This might get messy, as it displays a lot of data to the screen.
docacheThis caches the entire runtime portion of the CD into RAM, which allows you to umount /mnt/cdrom and mountanother CDROM. This option requires that you have at least twice as much available RAM as the size of theCD.
doload=XThis causes the initial ramdisk to load any module listed, as well as dependencies. Replace X with the modulename. Multiple modules can be specified by a comma-separated list.
4/11/2014 Gentoo Linux Documentation -- Gentoo Linux x86 Handbook
https://www.gentoo.org/doc/en/handbook/handbook-x86.xml?style=printable&full=1 8/105
dosshdStarts sshd on boot, which is useful for unattended installs.
passwd=fooSets whatever follows the equals as the root password, which is required for dosshd since we scramble the rootpassword.
noload=XThis causes the initial ramdisk to skip the loading of a specific module that may be causing a problem. Syntaxmatches that of doload.
nonfsDisables the starting of portmap/nfsmount on boot.
noxThis causes an X-enabled LiveCD to not automatically start X, but rather, to drop to the command line instead.
scandelayThis causes the CD to pause for 10 seconds during certain portions the boot process to allow for devices thatare slow to initialize to be ready for use.
scandelay=XThis allows you to specify a given delay, in seconds, to be added to certain portions of the boot process to allowfor devices that are slow to initialize to be ready for use. Replace X with the number of seconds to pause.
Note: The CD will check for "no*" options before "do*" options, so that you can override any option in the exact order you specify.
Now boot your CD, select a kernel (if you are not happy with the default gentoo kernel) and boot options. As anexample, we show you how to boot the gentoo kernel, with dopcmcia as kernel parameters:
Code Listing 3.4: Booting an Installation CD
boot: gentoo dopcmcia
You will then be greeted with a boot screen and progress bar. If you are installing Gentoo on a system with a non-USkeyboard, make sure you immediately press Alt-F1 to switch to verbose mode and follow the prompt. If no selection ismade in 10 seconds the default (US keyboard) will be accepted and the boot process will continue. Once the bootprocess completes, you will be automatically logged in to the "Live" Gentoo Linux as "root", the super user. You shouldhave a root ("#") prompt on the current console and can also switch to other consoles by pressing Alt-F2, Alt-F3 andAlt-F4. Get back to the one you started on by pressing Alt-F1.
Now continue with Extra Hardware Configuration.
Extra Hardware Configuration
When the Installation CD boots, it tries to detect all your hardware devices and loads the appropriate kernel modules tosupport your hardware. In the vast majority of cases, it does a very good job. However, in some cases it may not auto-load the kernel modules you need. If the PCI auto-detection missed some of your system's hardware, you will have toload the appropriate kernel modules manually.
In the next example we try to load the 8139too module (support for certain kinds of network interfaces):
Code Listing 3.5: Loading kernel modules
# modprobe 8139too
Optional: User Accounts
If you plan on giving other people access to your installation environment or you want to chat using irssi without rootprivileges (for security reasons), you need to create the necessary user accounts and change the root password.
To change the root password, use the passwd utility:
Code Listing 3.6: Changing the root password
# passwdNew password: (Enter your new password)Re-enter password: (Re-enter your password)

4/11/2014 Gentoo Linux Documentation -- Gentoo Linux x86 Handbook
https://www.gentoo.org/doc/en/handbook/handbook-x86.xml?style=printable&full=1 9/105
To create a user account, we first enter their credentials, followed by its password. We use useradd and passwd forthese tasks. In the next example, we create a user called "john".
Code Listing 3.7: Creating a user account
# useradd -m -G users john# passwd johnNew password: (Enter john's password)Re-enter password: (Re-enter john's password)
You can change your user id from root to the newly created user by using su:
Code Listing 3.8: Changing user id
# su - john
Optional: Viewing Documentation while Installing
If you want to view the Gentoo Handbook during the installation, make sure you have created a user account (seeOptional: User Accounts). Then press Alt-F2 to go to a new terminal.
You can view the handbook using links, once you have completed the Configuring your Network chapter (otherwiseyou won't be able to go on the Internet to view the document):
Code Listing 3.9: Viewing the Online Documentation
# links http://www.gentoo.org/doc/en/handbook/handbook-x86.xml
You can go back to your original terminal by pressing Alt-F1.
Optional: Starting the SSH Daemon
If you want to allow other users to access your computer during the Gentoo installation (perhaps because those usersare going to help you install Gentoo, or even do it for you), you need to create a user account for them and perhapseven provide them with your root password (only do that if you fully trust that user).
To fire up the SSH daemon, execute the following command:
Code Listing 3.10: Starting the SSH daemon
# /etc/init.d/sshd start
Note: If you (or other users) log on to the system, they will get a message that the host key for this system needs to be confirmed(through what is called a fingerprint). This is to be expected as it is the first time people log on to the system. However, later when yoursystem is set up and you log on to the newly created system, your SSH client will warn you that the host key has been changed. Thisis because you now log on to - for SSH - a different server (namely your freshly installed Gentoo system rather than the liveenvironment you are on right now). When you hit that warning, follow the instructions given on the screen then to replace the host keyon the client system.
To be able to use sshd, you first need to set up your networking. Continue with the chapter on Configuring yourNetwork.
3. Configuring your Network
3.a. Automatic Network Detection
Maybe it just works?
If your system is plugged into an Ethernet network with a DHCP server, it is very likely that your networkingconfiguration has already been set up automatically for you. If so, you should be able to take advantage of the manyincluded network-aware commands on the Installation CD such as ssh, scp, ping, irssi, wget and links, amongothers.
4/11/2014 Gentoo Linux Documentation -- Gentoo Linux x86 Handbook
https://www.gentoo.org/doc/en/handbook/handbook-x86.xml?style=printable&full=1 10/105
If networking has been configured for you, the ifconfig command should list some network interfaces besides lo,such as eth0:
Code Listing 1.1: ifconfig for a working network configuration
# ifconfig(...)eth0 Link encap:Ethernet HWaddr 00:50:BA:8F:61:7A inet addr:192.168.0.2 Bcast:192.168.0.255 Mask:255.255.255.0 inet6 addr: fe80::50:ba8f:617a/10 Scope:Link UP BROADCAST RUNNING MULTICAST MTU:1500 Metric:1 RX packets:1498792 errors:0 dropped:0 overruns:0 frame:0 TX packets:1284980 errors:0 dropped:0 overruns:0 carrier:0 collisions:1984 txqueuelen:100 RX bytes:485691215 (463.1 Mb) TX bytes:123951388 (118.2 Mb) Interrupt:11 Base address:0xe800
The interface name on your system can be quite different from eth0. Recent installation media might show regularnetwork interfaces names like eno0, ens1 or enp5s0. Just seek the interface in the ifconfig output that has an IPaddress related to your local network.
In the remainder of this document, we will assume that the interface is called eth0.
Optional: Configure any Proxies
If you access the Internet through a proxy, you might need to set up proxy information during the installation. It is veryeasy to define a proxy: you just need to define a variable which contains the proxy server information.
In most cases, you can just define the variables using the server hostname. As an example, we assume the proxy iscalled proxy.gentoo.org and the port is 8080.
Code Listing 1.2: Defining proxy servers
(If the proxy filters HTTP traffic)# export http_proxy="http://proxy.gentoo.org:8080"(If the proxy filters FTP traffic)# export ftp_proxy="ftp://proxy.gentoo.org:8080"(If the proxy filters RSYNC traffic)# export RSYNC_PROXY="proxy.gentoo.org:8080"
If your proxy requires a username and password, you should use the following syntax for the variable:
Code Listing 1.3: Adding username/password to the proxy variable
http://username:[email protected]:8080
Testing the Network
You may want to try pinging your ISP's DNS server (found in /etc/resolv.conf) and a Web site of your choice, justto make sure that your packets are reaching the net, DNS name resolution is working correctly, etc.
Code Listing 1.4: Further network testing
# ping -c 3 www.gentoo.org
If you are now able to use your network, you can skip the rest of this section and continue with Preparing the Disks. Ifnot, read on.
3.b. Automatic Network Configuration
If the network doesn't work immediately, some installation media allow you to use net-setup (for regular or wirelessnetworks), pppoe-setup (for ADSL-users) or pptp (for PPTP-users - available on x86, amd64, alpha, ppc and ppc64).
4/11/2014 Gentoo Linux Documentation -- Gentoo Linux x86 Handbook
https://www.gentoo.org/doc/en/handbook/handbook-x86.xml?style=printable&full=1 11/105
If your installation medium does not contain any of these tools or your network doesn't function yet, continue withManual Network Configuration.
Regular Ethernet users should continue with Default: Using net-setupADSL users should continue with Alternative: Using PPPPPTP users should continue with Alternative: Using PPTP
Default: Using net-setup
The simplest way to set up networking if it didn't get configured automatically is to run the net-setup script:
Code Listing 2.1: Running the net-setup script
# net-setup eth0
net-setup will ask you some questions about your network environment. When all is done, you should have a workingnetwork connection. Test your network connection as stated before. If the tests are positive, congratulations! You arenow ready to install Gentoo. Skip the rest of this section and continue with Preparing the Disks.
If your network still doesn't work, continue with Manual Network Configuration.
Alternative: Using PPP
Assuming you need PPPoE to connect to the internet, the Installation CD (any version) has made things easy for youby including ppp. Use the provided pppoe-setup script to configure your connection. You will be prompted for theethernet device that is connected to your adsl modem, your username and password, the IPs of your DNS servers andif you need a basic firewall or not.
Code Listing 2.2: Using ppp
# pppoe-setup# pppoe-start
If something goes wrong, double-check that you correctly typed your username and password by looking at/etc/ppp/pap-secrets or /etc/ppp/chap-secrets and make sure you are using the right ethernet device. If yourethernet device doesn't exist, you will have to load the appropriate network modules. In that case you should continuewith Manual Network Configuration as we explain how to load the appropriate network modules there.
If everything worked, continue with Preparing the Disks.
Alternative: Using PPTP
If you need PPTP support, you can use pptpclient which is provided by our Installation CDs. But first you need tomake sure that your configuration is correct. Edit /etc/ppp/pap-secrets or /etc/ppp/chap-secrets so it containsthe correct username/password combination:
Code Listing 2.3: Editing /etc/ppp/chap-secrets
# nano -w /etc/ppp/chap-secrets
Then adjust /etc/ppp/options.pptp if necessary:
Code Listing 2.4: Editing /etc/ppp/options.pptp
# nano -w /etc/ppp/options.pptp
When all that is done, just run pptp (along with the options you couldn't set in options.pptp) to connect the server:
Code Listing 2.5: Connection to a dial-in server
# pptp <server ip>
4/11/2014 Gentoo Linux Documentation -- Gentoo Linux x86 Handbook
https://www.gentoo.org/doc/en/handbook/handbook-x86.xml?style=printable&full=1 12/105
Now continue with Preparing the Disks.
3.c. Manual Network Configuration
Loading the Appropriate Network Modules
When the Installation CD boots, it tries to detect all your hardware devices and loads the appropriate kernel modules(drivers) to support your hardware. In the vast majority of cases, it does a very good job. However, in some cases, itmay not auto-load the kernel modules you need.
If net-setup or pppoe-setup failed, then it is possible that your network card wasn't found immediately. This meansyou may have to load the appropriate kernel modules manually.
To find out what kernel modules we provide for networking, use ls:
Code Listing 3.1: Searching for provided modules
# ls /lib/modules/`uname -r`/kernel/drivers/net
If you find a driver for your network card, use modprobe to load the kernel module:
Code Listing 3.2: Using modprobe to load a kernel module
(As an example, we load the pcnet32 module)# modprobe pcnet32
To check if your network card is now detected, use ifconfig. A detected network card would result in something likethis (again, eth0 here is just an example):
Code Listing 3.3: Testing availability of your network card, successful
# ifconfig eth0eth0 Link encap:Ethernet HWaddr FE:FD:00:00:00:00 BROADCAST NOARP MULTICAST MTU:1500 Metric:1 RX packets:0 errors:0 dropped:0 overruns:0 frame:0 TX packets:0 errors:0 dropped:0 overruns:0 carrier:0 collisions:0 txqueuelen:0 RX bytes:0 (0.0 b) TX bytes:0 (0.0 b)
If however you receive the following error, the network card is not detected:
Code Listing 3.4: Testing availability of your network card, failed
# ifconfig eth0eth0: error fetching interface information: Device not found
The available network interface names on your system can be listed through the /sys file system:
Code Listing 3.5: Viewing the available network interfaces
# ls /sys/class/netdummy0 eth0 lo sit0 tap0 wlan0
In the above example, 6 interfaces are found. The eth0 one is most likely the (wired) Ethernet adapter whereas wlan0is the wireless one.
Assuming that you now have a detected network card, you can retry net-setup or pppoe-setup again (which shouldwork now), but for the hardcore people amongst you we explain how to configure your network manually.
Select one of the following sections based on your network setup:
Using DHCP for automatic IP retrievalPreparing for Wireless Access if you have a wireless card
4/11/2014 Gentoo Linux Documentation -- Gentoo Linux x86 Handbook
https://www.gentoo.org/doc/en/handbook/handbook-x86.xml?style=printable&full=1 13/105
Understanding Network Terminology explains what you need to know about networkingUsing ifconfig and route explains how to set up your networking manually
Using DHCP
DHCP (Dynamic Host Configuration Protocol) makes it possible to automatically receive networking information (IPaddress, netmask, broadcast address, gateway, nameservers etc.). This only works if you have a DHCP server in yournetwork (or if your provider provides a DHCP service). To have a network interface receive this informationautomatically, use dhcpcd:
Code Listing 3.6: Using dhcpcd
# dhcpcd eth0Some network admins require that you use thehostname and domainname provided by the DHCP server.In that case, use# dhcpcd -HD eth0
If this works (try pinging some internet server, like Google), then you are all set and ready to continue. Skip the rest ofthis section and continue with Preparing the Disks.
Preparing for Wireless Access
Note: Support for the iwconfig command is only available on x86, amd64 and ppc Installation CDs. You can still get the extensionsworking otherwise by following the instructions of the linux-wlan-ng project.
If you are using a wireless (802.11) card, you may need to configure your wireless settings before going any further. Tosee the current wireless settings on your card, you can use iwconfig. Running iwconfig might show something like:
Code Listing 3.7: Showing the current wireless settings
# iwconfig eth0eth0 IEEE 802.11-DS ESSID:"GentooNode" Mode:Managed Frequency:2.442GHz Access Point: 00:09:5B:11:CC:F2 Bit Rate:11Mb/s Tx-Power=20 dBm Sensitivity=0/65535 Retry limit:16 RTS thr:off Fragment thr:off Power Management:off Link Quality:25/10 Signal level:-51 dBm Noise level:-102 dBm Rx invalid nwid:5901 Rx invalid crypt:0 Rx invalid frag:0 Tx excessive retries:237 Invalid misc:350282 Missed beacon:84
Note: Some wireless cards may have a device name of wlan0 or ra0 instead of eth0. Run iwconfig without any command-lineparameters to determine the correct device name.
For most users, there are only two settings that might be important to change, the ESSID (aka wireless network name)or the WEP key. If the ESSID and Access Point address listed are already that of your access point and you are notusing WEP, then your wireless is working. If you need to change your ESSID, or add a WEP key, you can issue thefollowing commands:
Note: If your wireless network is set up with WPA or WPA2, you will need to use wpa_supplicant. For more information onconfiguring wireless networking in Gentoo Linux, please read the Wireless Networking chapter in the Gentoo Handbook.
Code Listing 3.8: Changing ESSID and/or adding WEP key
(This sets the network name to "GentooNode")# iwconfig eth0 essid GentooNode
(This sets a hex WEP key)# iwconfig eth0 key 1234123412341234abcd
(This sets an ASCII key - prefix it with "s:")# iwconfig eth0 key s:some-password
4/11/2014 Gentoo Linux Documentation -- Gentoo Linux x86 Handbook
https://www.gentoo.org/doc/en/handbook/handbook-x86.xml?style=printable&full=1 14/105
You can then confirm your wireless settings again by using iwconfig. Once you have wireless working, you cancontinue configuring the IP level networking options as described in the next section (Understanding NetworkTerminology) or use the net-setup tool as described previously.
Understanding Network Terminology
Note: If you know your IP address, broadcast address, netmask and nameservers, then you can skip this subsection and continuewith Using ifconfig and route.
If all of the above fails, you will have to configure your network manually. This is not difficult at all. However, you needto be familiar with some network terminology, as you will need it to be able to configure your network to yoursatisfaction. After reading this, you will know what a gateway is, what a netmask serves for, how a broadcast addressis formed and why you need nameservers.
In a network, hosts are identified by their IP address (Internet Protocol address). Such an address is a combination offour numbers between 0 and 255. Well, at least that is how we perceive it. In reality, such an IP address consists of 32bits (ones and zeros). Let's view an example:
Code Listing 3.9: Example of an IP address
IP Address (numbers): 192.168.0.2IP Address (bits): 11000000 10101000 00000000 00000010 -------- -------- -------- -------- 192 168 0 2
Such an IP address is unique to a host as far as all accessible networks are concerned (i.e. every host that you areable to reach must have a unique IP address). In order to distinguish between hosts inside and outside a network, theIP address is divided in two parts: the network part and the host part.
The separation is written down with the netmask, a collection of ones followed by a collection of zeros. The part of theIP that can be mapped on the ones is the network-part, the other one is the host-part. As usual, the netmask can bewritten down as an IP-address.
Code Listing 3.10: Example of network/host separation
IP-address: 192 168 0 2 11000000 10101000 00000000 00000010Netmask: 11111111 11111111 11111111 00000000 255 255 255 0 +--------------------------+--------+ Network Host
In other words, 192.168.0.14 is still part of our example network, but 192.168.1.2 is not.
The broadcast address is an IP-address with the same network-part as your network, but with only ones as host-part.Every host on your network listens to this IP address. It is truly meant for broadcasting packets.
Code Listing 3.11: Broadcast address
IP-address: 192 168 0 2 11000000 10101000 00000000 00000010Broadcast: 11000000 10101000 00000000 11111111 192 168 0 255 +--------------------------+--------+ Network Host
To be able to surf on the internet, you must know which host shares the Internet connection. This host is called thegateway. Since it is a regular host, it has a regular IP address (for instance 192.168.0.1).
We previously stated that every host has its own IP address. To be able to reach this host by a name (instead of an IPaddress) you need a service that translates a name (such as dev.gentoo.org) to an IP address (such as 64.5.62.82).Such a service is called a name service. To use such a service, you must define the necessary name servers in/etc/resolv.conf.
4/11/2014 Gentoo Linux Documentation -- Gentoo Linux x86 Handbook
https://www.gentoo.org/doc/en/handbook/handbook-x86.xml?style=printable&full=1 15/105
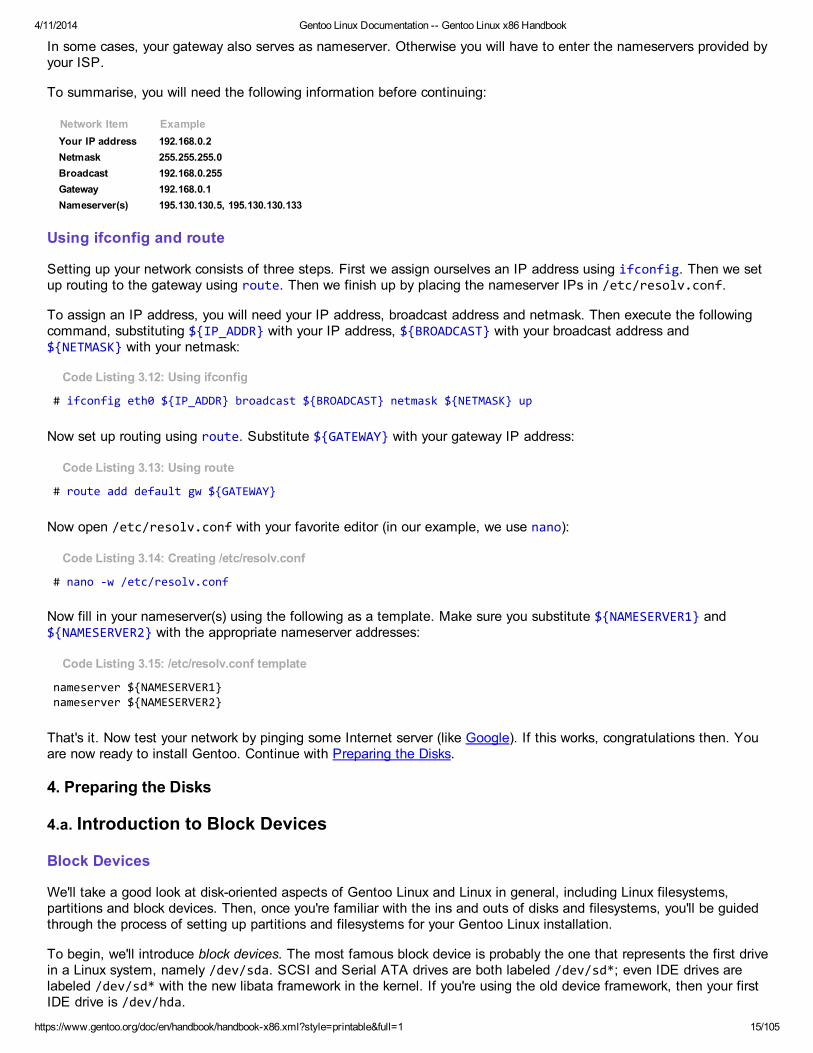
In some cases, your gateway also serves as nameserver. Otherwise you will have to enter the nameservers provided byyour ISP.
To summarise, you will need the following information before continuing:
Network Item ExampleYour IP address 192.168.0.2Netmask 255.255.255.0Broadcast 192.168.0.255Gateway 192.168.0.1Nameserver(s) 195.130.130.5, 195.130.130.133
Using ifconfig and route
Setting up your network consists of three steps. First we assign ourselves an IP address using ifconfig. Then we setup routing to the gateway using route. Then we finish up by placing the nameserver IPs in /etc/resolv.conf.
To assign an IP address, you will need your IP address, broadcast address and netmask. Then execute the followingcommand, substituting ${IP_ADDR} with your IP address, ${BROADCAST} with your broadcast address and${NETMASK} with your netmask:
Code Listing 3.12: Using ifconfig
# ifconfig eth0 ${IP_ADDR} broadcast ${BROADCAST} netmask ${NETMASK} up
Now set up routing using route. Substitute ${GATEWAY} with your gateway IP address:
Code Listing 3.13: Using route
# route add default gw ${GATEWAY}
Now open /etc/resolv.conf with your favorite editor (in our example, we use nano):
Code Listing 3.14: Creating /etc/resolv.conf
# nano -w /etc/resolv.conf
Now fill in your nameserver(s) using the following as a template. Make sure you substitute ${NAMESERVER1} and${NAMESERVER2} with the appropriate nameserver addresses:
Code Listing 3.15: /etc/resolv.conf template
nameserver ${NAMESERVER1}nameserver ${NAMESERVER2}
That's it. Now test your network by pinging some Internet server (like Google). If this works, congratulations then. Youare now ready to install Gentoo. Continue with Preparing the Disks.
4. Preparing the Disks
4.a. Introduction to Block Devices
Block Devices
We'll take a good look at disk-oriented aspects of Gentoo Linux and Linux in general, including Linux filesystems,partitions and block devices. Then, once you're familiar with the ins and outs of disks and filesystems, you'll be guidedthrough the process of setting up partitions and filesystems for your Gentoo Linux installation.
To begin, we'll introduce block devices. The most famous block device is probably the one that represents the first drivein a Linux system, namely /dev/sda. SCSI and Serial ATA drives are both labeled /dev/sd*; even IDE drives arelabeled /dev/sd* with the new libata framework in the kernel. If you're using the old device framework, then your firstIDE drive is /dev/hda.
4/11/2014 Gentoo Linux Documentation -- Gentoo Linux x86 Handbook
https://www.gentoo.org/doc/en/handbook/handbook-x86.xml?style=printable&full=1 16/105
The block devices above represent an abstract interface to the disk. User programs can use these block devices tointeract with your disk without worrying about whether your drives are IDE, SCSI or something else. The program cansimply address the storage on the disk as a bunch of contiguous, randomly-accessible 512-byte blocks.
Partitions
Although it is theoretically possible to use a full disk to house your Linux system, this is almost never done in practice.Instead, full disk block devices are split up in smaller, more manageable block devices. On x86 systems, these arecalled partitions. There are currently two standard partitioning technologies in use: MBR and GPT.
The MBR (Master Boot Record) setup uses 32-bit identifiers for the start sector and length of the partitions, andsupports three partition types: primary, extended and logical. Primary partitions have their information stored in themaster boot record itself - a very small (usually 512 bytes) location at the very beginning of a disk. Due to this smallspace, only four primary partitions are supported (for instance, /dev/sda1 to /dev/sda4).
To support more partitions, one of the primary partitions can be marked as an extended partition. This partition canthen contain logical partitions (partitions within a partition).
Each partition is limited to 2 TB in size (due to the 32-bit identifiers). Also, the MBR setup does not provide anybackup-MBR, so if an application or user overwrites the MBR, all partition information is lost.
The GPT (GUID Partition table) setup uses 64-bit identifiers for the partitions. The location in which it stores thepartition information is also much bigger than the 512 bytes of an MBR, and there is no limit on the amount ofpartitions. Also the size of a partition is bounded by a much greater limit (almost 8 ZB - yes, zettabytes).
When a system's software interface between the operating system and firmware is UEFI (instead of BIOS), GPT isalmost mandatory as compatibility issues will arise with MBR here.
GPT also has the advantage that it has a backup GPT at the end of the disk, which can be used to recover damage ofthe primary GPT at the beginning. GPT also carries CRC32 checksums to detect errors in the header and partitiontables.
So, GPT or MBR?
From the description above, one might think that using GPT should always be the recommended approach. But thereare a few caveats with this.
Using GPT on a BIOS-based computer works, but you cannot dual-boot then with a Microsoft Windows operatingsystem. The reason is that Microsoft Windows will boot in EFI mode if it detects a GPT partition label.
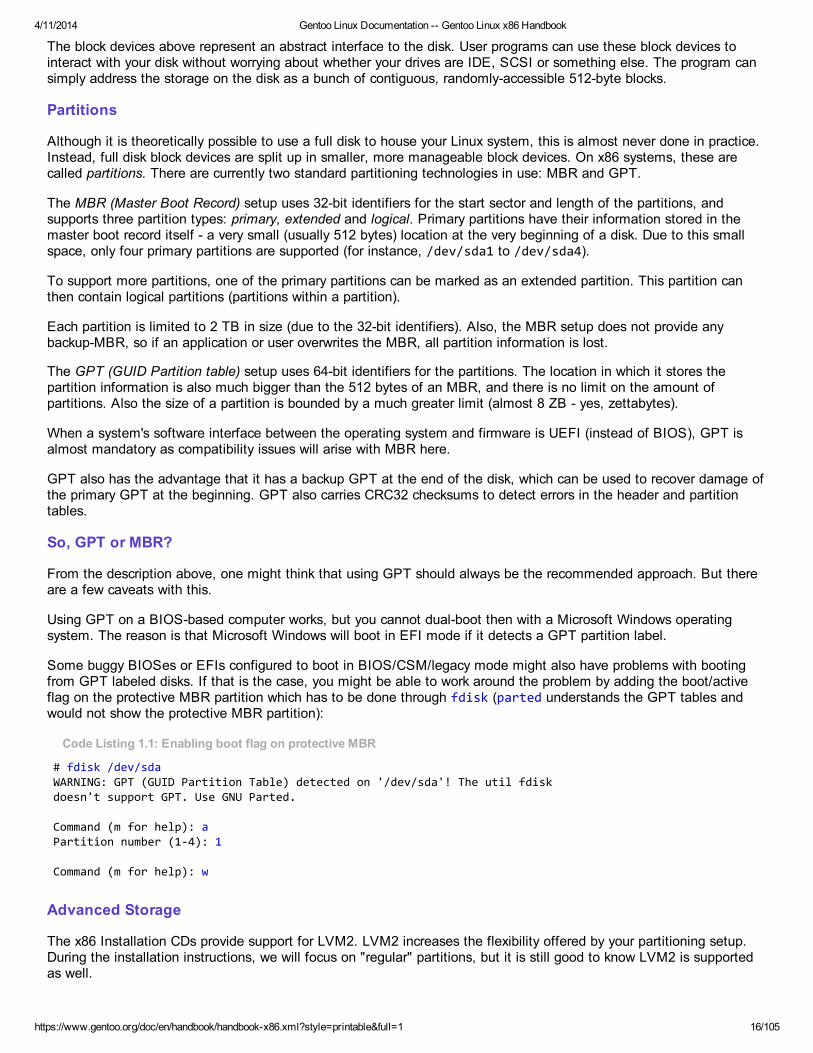
Some buggy BIOSes or EFIs configured to boot in BIOS/CSM/legacy mode might also have problems with bootingfrom GPT labeled disks. If that is the case, you might be able to work around the problem by adding the boot/activeflag on the protective MBR partition which has to be done through fdisk (parted understands the GPT tables andwould not show the protective MBR partition):
Code Listing 1.1: Enabling boot flag on protective MBR
# fdisk /dev/sdaWARNING: GPT (GUID Partition Table) detected on '/dev/sda'! The util fdiskdoesn't support GPT. Use GNU Parted.
Command (m for help): aPartition number (1-4): 1
Command (m for help): w
Advanced Storage
The x86 Installation CDs provide support for LVM2. LVM2 increases the flexibility offered by your partitioning setup.During the installation instructions, we will focus on "regular" partitions, but it is still good to know LVM2 is supportedas well.
4/11/2014 Gentoo Linux Documentation -- Gentoo Linux x86 Handbook
https://www.gentoo.org/doc/en/handbook/handbook-x86.xml?style=printable&full=1 17/105
4.b. Designing a Partitioning Scheme
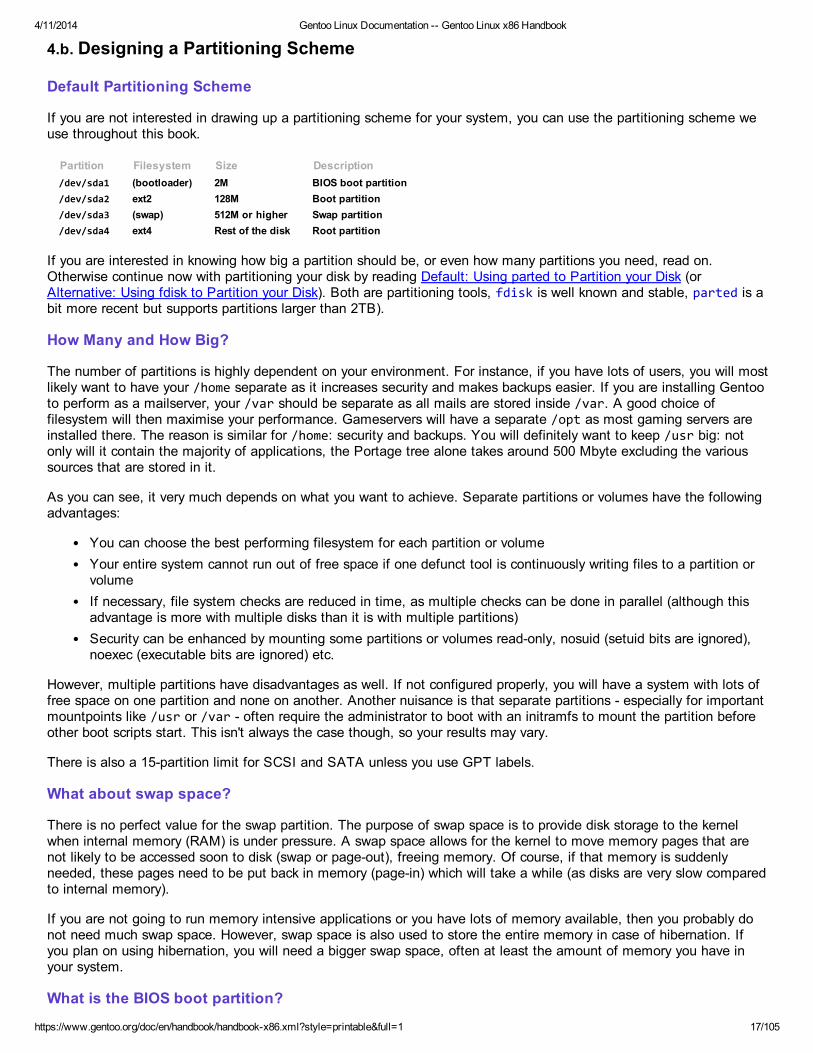
Default Partitioning Scheme
If you are not interested in drawing up a partitioning scheme for your system, you can use the partitioning scheme weuse throughout this book.
Partition Filesystem Size Description/dev/sda1 (bootloader) 2M BIOS boot partition/dev/sda2 ext2 128M Boot partition/dev/sda3 (swap) 512M or higher Swap partition/dev/sda4 ext4 Rest of the disk Root partition
If you are interested in knowing how big a partition should be, or even how many partitions you need, read on.Otherwise continue now with partitioning your disk by reading Default: Using parted to Partition your Disk (orAlternative: Using fdisk to Partition your Disk). Both are partitioning tools, fdisk is well known and stable, parted is abit more recent but supports partitions larger than 2TB).
How Many and How Big?
The number of partitions is highly dependent on your environment. For instance, if you have lots of users, you will mostlikely want to have your /home separate as it increases security and makes backups easier. If you are installing Gentooto perform as a mailserver, your /var should be separate as all mails are stored inside /var. A good choice offilesystem will then maximise your performance. Gameservers will have a separate /opt as most gaming servers areinstalled there. The reason is similar for /home: security and backups. You will definitely want to keep /usr big: notonly will it contain the majority of applications, the Portage tree alone takes around 500 Mbyte excluding the varioussources that are stored in it.
As you can see, it very much depends on what you want to achieve. Separate partitions or volumes have the followingadvantages:
You can choose the best performing filesystem for each partition or volumeYour entire system cannot run out of free space if one defunct tool is continuously writing files to a partition orvolumeIf necessary, file system checks are reduced in time, as multiple checks can be done in parallel (although thisadvantage is more with multiple disks than it is with multiple partitions)Security can be enhanced by mounting some partitions or volumes read-only, nosuid (setuid bits are ignored),noexec (executable bits are ignored) etc.
However, multiple partitions have disadvantages as well. If not configured properly, you will have a system with lots offree space on one partition and none on another. Another nuisance is that separate partitions - especially for importantmountpoints like /usr or /var - often require the administrator to boot with an initramfs to mount the partition beforeother boot scripts start. This isn't always the case though, so your results may vary.
There is also a 15-partition limit for SCSI and SATA unless you use GPT labels.
What about swap space?
There is no perfect value for the swap partition. The purpose of swap space is to provide disk storage to the kernelwhen internal memory (RAM) is under pressure. A swap space allows for the kernel to move memory pages that arenot likely to be accessed soon to disk (swap or page-out), freeing memory. Of course, if that memory is suddenlyneeded, these pages need to be put back in memory (page-in) which will take a while (as disks are very slow comparedto internal memory).
If you are not going to run memory intensive applications or you have lots of memory available, then you probably donot need much swap space. However, swap space is also used to store the entire memory in case of hibernation. Ifyou plan on using hibernation, you will need a bigger swap space, often at least the amount of memory you have inyour system.
What is the BIOS boot partition?
4/11/2014 Gentoo Linux Documentation -- Gentoo Linux x86 Handbook
https://www.gentoo.org/doc/en/handbook/handbook-x86.xml?style=printable&full=1 18/105
A BIOS boot partition is a very small (1 to 2 MB) partition in which bootloaders like GRUB2 can put additional datathat doesn't fit in the allocated storage (a few hundred bytes in case of MBR) and cannot place elsewhere.
Such partitions are not always necessary, but considering the low space consumption and the difficulties we wouldhave with documenting the plethora of partitioning differences otherwise, it is recommended to create it in either case.
For completeness, we can say that the BIOS boot partition is needed when GPT partition layout is used with GRUB2,or when the MBR partition layout is used with GRUB2 when the first partition starts earlier than the 1 MB location onthe disk.
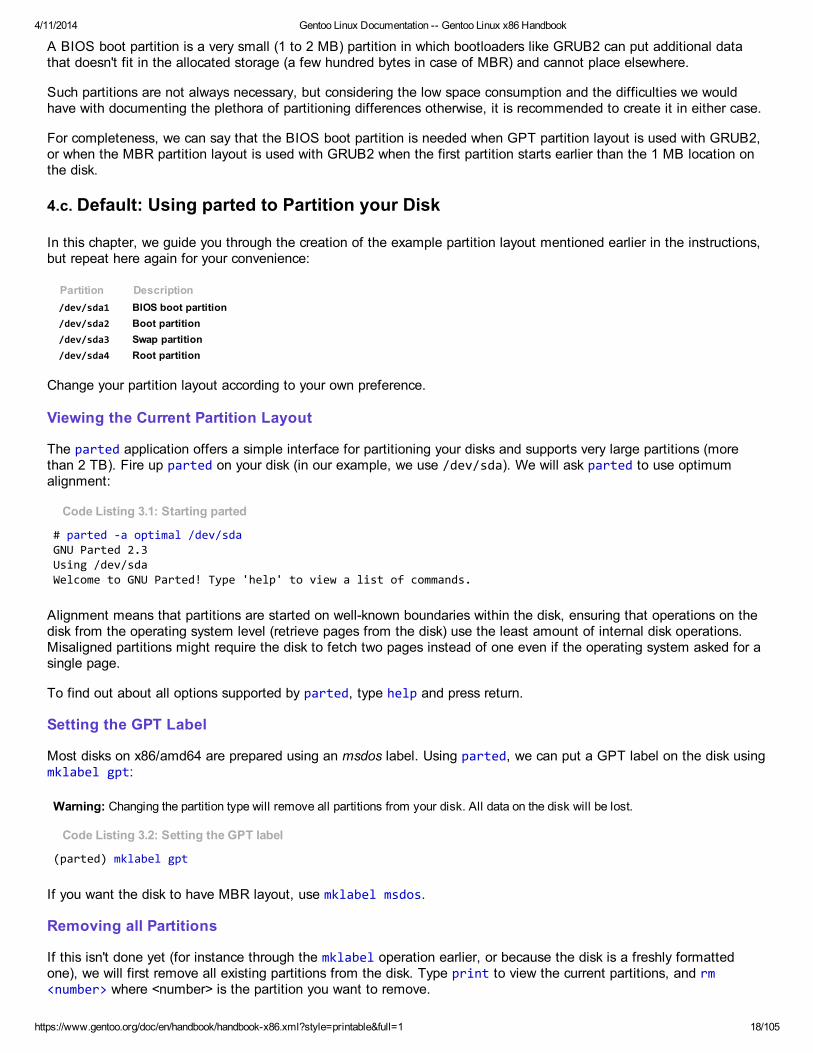
4.c. Default: Using parted to Partition your Disk
In this chapter, we guide you through the creation of the example partition layout mentioned earlier in the instructions,but repeat here again for your convenience:
Partition Description/dev/sda1 BIOS boot partition/dev/sda2 Boot partition/dev/sda3 Swap partition/dev/sda4 Root partition
Change your partition layout according to your own preference.
Viewing the Current Partition Layout
The parted application offers a simple interface for partitioning your disks and supports very large partitions (morethan 2 TB). Fire up parted on your disk (in our example, we use /dev/sda). We will ask parted to use optimumalignment:
Code Listing 3.1: Starting parted
# parted -a optimal /dev/sdaGNU Parted 2.3Using /dev/sdaWelcome to GNU Parted! Type 'help' to view a list of commands.
Alignment means that partitions are started on well-known boundaries within the disk, ensuring that operations on thedisk from the operating system level (retrieve pages from the disk) use the least amount of internal disk operations.Misaligned partitions might require the disk to fetch two pages instead of one even if the operating system asked for asingle page.
To find out about all options supported by parted, type help and press return.
Setting the GPT Label
Most disks on x86/amd64 are prepared using an msdos label. Using parted, we can put a GPT label on the disk usingmklabel gpt:
Warning: Changing the partition type will remove all partitions from your disk. All data on the disk will be lost.
Code Listing 3.2: Setting the GPT label
(parted) mklabel gpt
If you want the disk to have MBR layout, use mklabel msdos.
Removing all Partitions
If this isn't done yet (for instance through the mklabel operation earlier, or because the disk is a freshly formattedone), we will first remove all existing partitions from the disk. Type print to view the current partitions, and rm<number> where <number> is the partition you want to remove.
4/11/2014 Gentoo Linux Documentation -- Gentoo Linux x86 Handbook
https://www.gentoo.org/doc/en/handbook/handbook-x86.xml?style=printable&full=1 19/105
Code Listing 3.3: Removing a partition from the disk
(parted) rm 2
Do the same for all other partitions that you don't need. However, make sure you do not make any mistakes here -parted executes the changes immediately (unlike fdisk which stages them, allowing a user to "undo" his changesbefore saving or exiting fdisk).
Creating the Partitions
Now let's create the partitions we mentioned earlier. Creating partitions with parted isn't very difficult - all we need todo is inform parted about the following settings:
The partition type to use. This usually is primary. If you use the msdos partition label, keep in mind that you canhave no more than 4 primary partitions. If you need more than 4 partitions, make a partition extended andcreate logical partitions inside it.The start location of a partition (which can be expressed in MB, GB, ...)The end location of the partition (which can be expressed in MB, GB, ...)
First, we tell parted that the size unit we work with is megabytes (actually mebibytes, abbreviated as MiB which is the"standard" notation, but we will use MB in the text throughout as it is much more common):
Code Listing 3.4: Using MiB units
(parted) unit mib
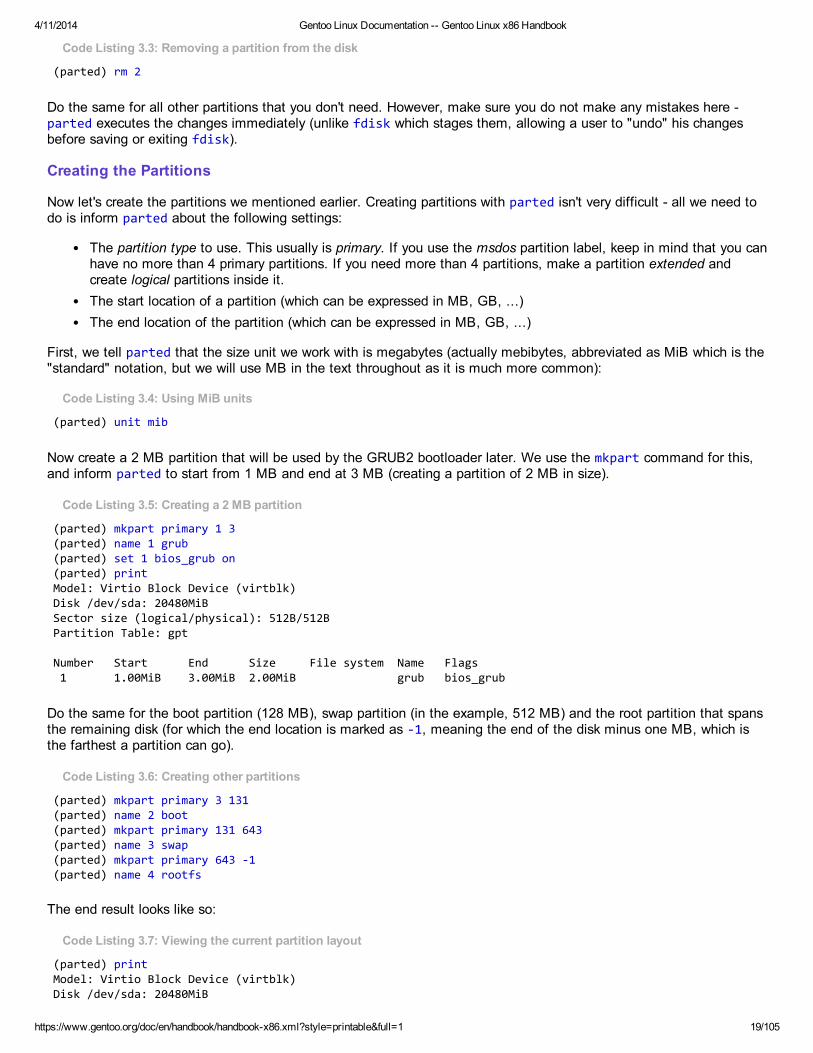
Now create a 2 MB partition that will be used by the GRUB2 bootloader later. We use the mkpart command for this,and inform parted to start from 1 MB and end at 3 MB (creating a partition of 2 MB in size).
Code Listing 3.5: Creating a 2 MB partition
(parted) mkpart primary 1 3(parted) name 1 grub(parted) set 1 bios_grub on(parted) printModel: Virtio Block Device (virtblk)Disk /dev/sda: 20480MiBSector size (logical/physical): 512B/512BPartition Table: gpt
Number Start End Size File system Name Flags 1 1.00MiB 3.00MiB 2.00MiB grub bios_grub
Do the same for the boot partition (128 MB), swap partition (in the example, 512 MB) and the root partition that spansthe remaining disk (for which the end location is marked as -1, meaning the end of the disk minus one MB, which isthe farthest a partition can go).
Code Listing 3.6: Creating other partitions
(parted) mkpart primary 3 131(parted) name 2 boot(parted) mkpart primary 131 643(parted) name 3 swap(parted) mkpart primary 643 -1(parted) name 4 rootfs
The end result looks like so:
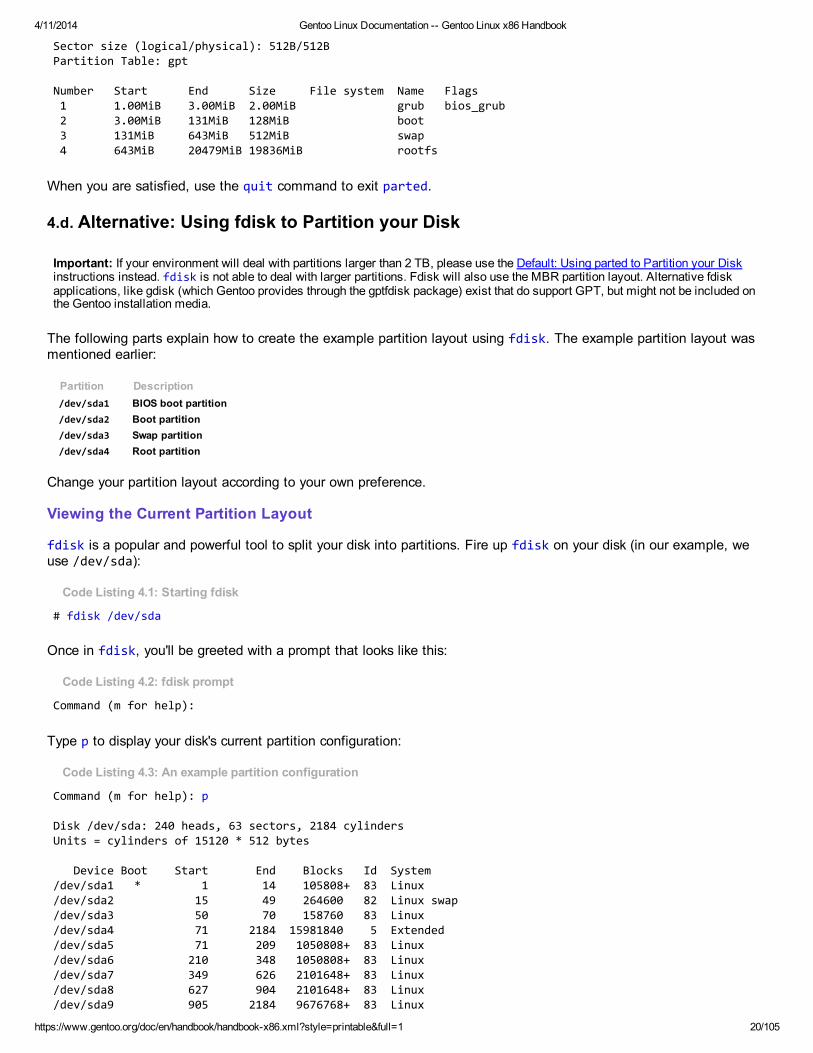
Code Listing 3.7: Viewing the current partition layout
(parted) printModel: Virtio Block Device (virtblk)Disk /dev/sda: 20480MiB
4/11/2014 Gentoo Linux Documentation -- Gentoo Linux x86 Handbook
https://www.gentoo.org/doc/en/handbook/handbook-x86.xml?style=printable&full=1 20/105
Sector size (logical/physical): 512B/512BPartition Table: gpt
Number Start End Size File system Name Flags 1 1.00MiB 3.00MiB 2.00MiB grub bios_grub 2 3.00MiB 131MiB 128MiB boot 3 131MiB 643MiB 512MiB swap 4 643MiB 20479MiB 19836MiB rootfs
When you are satisfied, use the quit command to exit parted.
4.d. Alternative: Using fdisk to Partition your Disk
Important: If your environment will deal with partitions larger than 2 TB, please use the Default: Using parted to Partition your Diskinstructions instead. fdisk is not able to deal with larger partitions. Fdisk will also use the MBR partition layout. Alternative fdiskapplications, like gdisk (which Gentoo provides through the gptfdisk package) exist that do support GPT, but might not be included onthe Gentoo installation media.
The following parts explain how to create the example partition layout using fdisk. The example partition layout wasmentioned earlier:
Partition Description/dev/sda1 BIOS boot partition/dev/sda2 Boot partition/dev/sda3 Swap partition/dev/sda4 Root partition
Change your partition layout according to your own preference.
Viewing the Current Partition Layout
fdisk is a popular and powerful tool to split your disk into partitions. Fire up fdisk on your disk (in our example, weuse /dev/sda):
Code Listing 4.1: Starting fdisk
# fdisk /dev/sda
Once in fdisk, you'll be greeted with a prompt that looks like this:
Code Listing 4.2: fdisk prompt
Command (m for help):
Type p to display your disk's current partition configuration:
Code Listing 4.3: An example partition configuration
Command (m for help): p
Disk /dev/sda: 240 heads, 63 sectors, 2184 cylindersUnits = cylinders of 15120 * 512 bytes
Device Boot Start End Blocks Id System/dev/sda1 * 1 14 105808+ 83 Linux/dev/sda2 15 49 264600 82 Linux swap/dev/sda3 50 70 158760 83 Linux/dev/sda4 71 2184 15981840 5 Extended/dev/sda5 71 209 1050808+ 83 Linux/dev/sda6 210 348 1050808+ 83 Linux/dev/sda7 349 626 2101648+ 83 Linux/dev/sda8 627 904 2101648+ 83 Linux/dev/sda9 905 2184 9676768+ 83 Linux
4/11/2014 Gentoo Linux Documentation -- Gentoo Linux x86 Handbook
https://www.gentoo.org/doc/en/handbook/handbook-x86.xml?style=printable&full=1 21/105
Command (m for help):
This particular disk is configured to house seven Linux filesystems (each with a corresponding partition listed as"Linux") as well as a swap partition (listed as "Linux swap").
Removing all Partitions
We will first remove all existing partitions from the disk. Type d to delete a partition. For instance, to delete an existing/dev/sda1:
Code Listing 4.4: Deleting a partition
Command (m for help): dPartition number (1-4): 1
The partition has been scheduled for deletion. It will no longer show up if you type p, but it will not be erased until yourchanges have been saved. If you made a mistake and want to abort without saving your changes, type q immediatelyand hit enter and your partition will not be deleted.
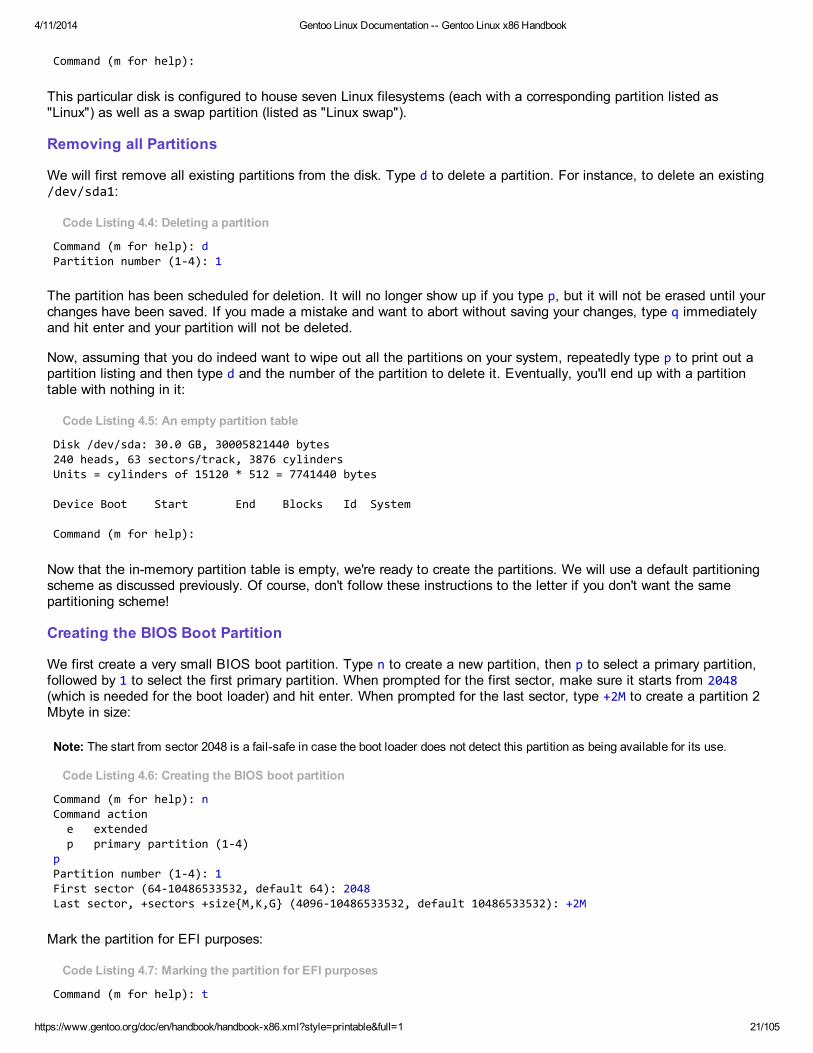
Now, assuming that you do indeed want to wipe out all the partitions on your system, repeatedly type p to print out apartition listing and then type d and the number of the partition to delete it. Eventually, you'll end up with a partitiontable with nothing in it:
Code Listing 4.5: An empty partition table
Disk /dev/sda: 30.0 GB, 30005821440 bytes240 heads, 63 sectors/track, 3876 cylindersUnits = cylinders of 15120 * 512 = 7741440 bytes
Device Boot Start End Blocks Id System
Command (m for help):
Now that the in-memory partition table is empty, we're ready to create the partitions. We will use a default partitioningscheme as discussed previously. Of course, don't follow these instructions to the letter if you don't want the samepartitioning scheme!
Creating the BIOS Boot Partition
We first create a very small BIOS boot partition. Type n to create a new partition, then p to select a primary partition,followed by 1 to select the first primary partition. When prompted for the first sector, make sure it starts from 2048(which is needed for the boot loader) and hit enter. When prompted for the last sector, type +2M to create a partition 2Mbyte in size:
Note: The start from sector 2048 is a fail-safe in case the boot loader does not detect this partition as being available for its use.
Code Listing 4.6: Creating the BIOS boot partition
Command (m for help): nCommand action e extended p primary partition (1-4)pPartition number (1-4): 1First sector (64-10486533532, default 64): 2048Last sector, +sectors +size{M,K,G} (4096-10486533532, default 10486533532): +2M
Mark the partition for EFI purposes:
Code Listing 4.7: Marking the partition for EFI purposes
Command (m for help): t
4/11/2014 Gentoo Linux Documentation -- Gentoo Linux x86 Handbook
https://www.gentoo.org/doc/en/handbook/handbook-x86.xml?style=printable&full=1 22/105
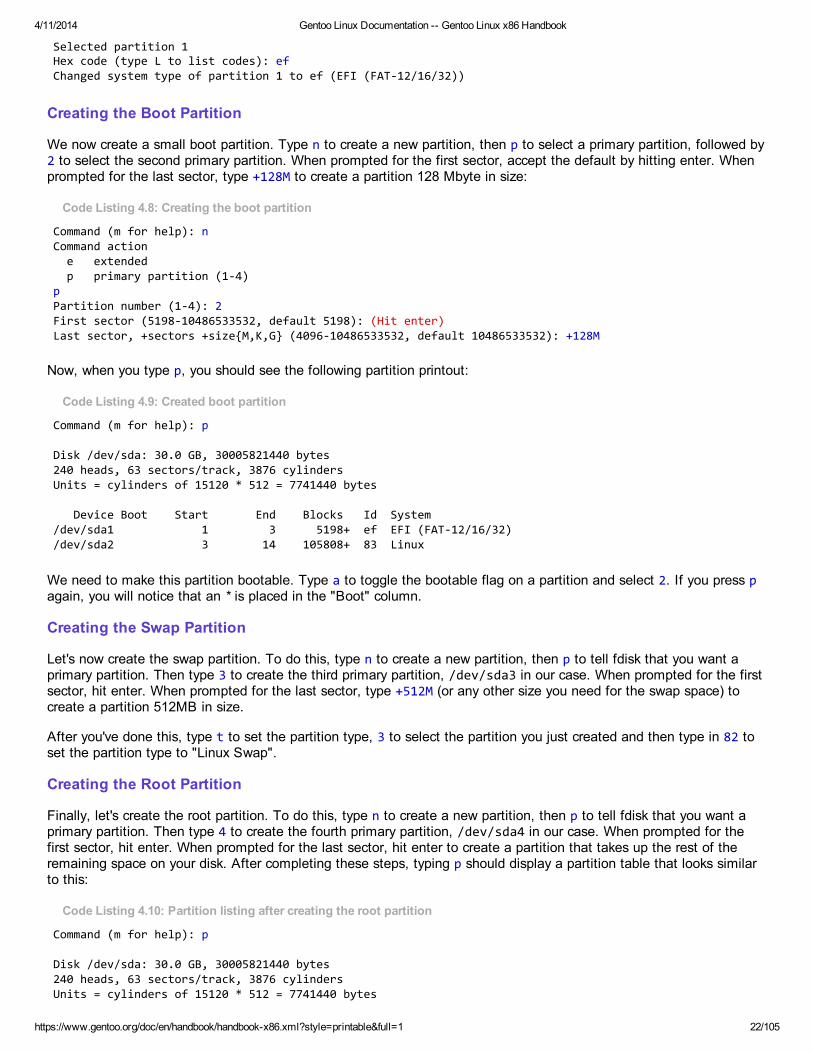
Selected partition 1Hex code (type L to list codes): efChanged system type of partition 1 to ef (EFI (FAT-12/16/32))
Creating the Boot Partition
We now create a small boot partition. Type n to create a new partition, then p to select a primary partition, followed by2 to select the second primary partition. When prompted for the first sector, accept the default by hitting enter. Whenprompted for the last sector, type +128M to create a partition 128 Mbyte in size:
Code Listing 4.8: Creating the boot partition
Command (m for help): nCommand action e extended p primary partition (1-4)pPartition number (1-4): 2First sector (5198-10486533532, default 5198): (Hit enter)Last sector, +sectors +size{M,K,G} (4096-10486533532, default 10486533532): +128M
Now, when you type p, you should see the following partition printout:
Code Listing 4.9: Created boot partition
Command (m for help): p
Disk /dev/sda: 30.0 GB, 30005821440 bytes240 heads, 63 sectors/track, 3876 cylindersUnits = cylinders of 15120 * 512 = 7741440 bytes
Device Boot Start End Blocks Id System/dev/sda1 1 3 5198+ ef EFI (FAT-12/16/32)/dev/sda2 3 14 105808+ 83 Linux
We need to make this partition bootable. Type a to toggle the bootable flag on a partition and select 2. If you press pagain, you will notice that an * is placed in the "Boot" column.
Creating the Swap Partition
Let's now create the swap partition. To do this, type n to create a new partition, then p to tell fdisk that you want aprimary partition. Then type 3 to create the third primary partition, /dev/sda3 in our case. When prompted for the firstsector, hit enter. When prompted for the last sector, type +512M (or any other size you need for the swap space) tocreate a partition 512MB in size.
After you've done this, type t to set the partition type, 3 to select the partition you just created and then type in 82 toset the partition type to "Linux Swap".
Creating the Root Partition
Finally, let's create the root partition. To do this, type n to create a new partition, then p to tell fdisk that you want aprimary partition. Then type 4 to create the fourth primary partition, /dev/sda4 in our case. When prompted for thefirst sector, hit enter. When prompted for the last sector, hit enter to create a partition that takes up the rest of theremaining space on your disk. After completing these steps, typing p should display a partition table that looks similarto this:
Code Listing 4.10: Partition listing after creating the root partition
Command (m for help): p
Disk /dev/sda: 30.0 GB, 30005821440 bytes240 heads, 63 sectors/track, 3876 cylindersUnits = cylinders of 15120 * 512 = 7741440 bytes
4/11/2014 Gentoo Linux Documentation -- Gentoo Linux x86 Handbook
https://www.gentoo.org/doc/en/handbook/handbook-x86.xml?style=printable&full=1 23/105
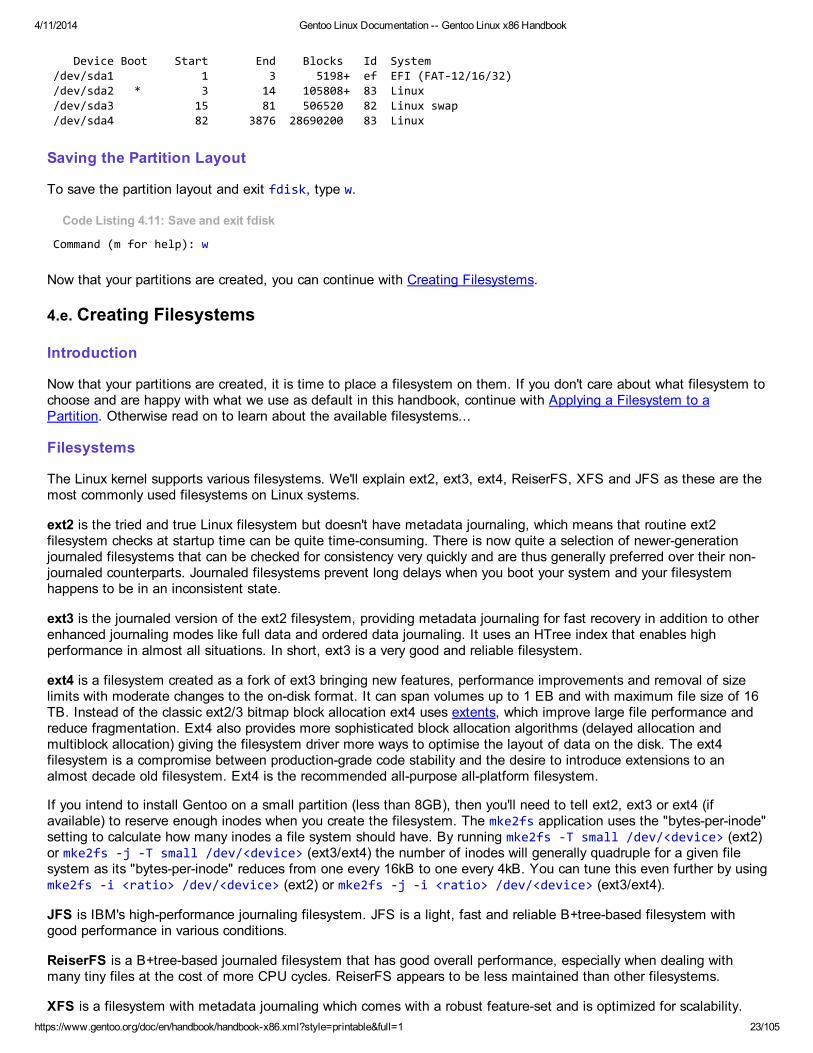
Device Boot Start End Blocks Id System/dev/sda1 1 3 5198+ ef EFI (FAT-12/16/32)/dev/sda2 * 3 14 105808+ 83 Linux/dev/sda3 15 81 506520 82 Linux swap/dev/sda4 82 3876 28690200 83 Linux
Saving the Partition Layout
To save the partition layout and exit fdisk, type w.
Code Listing 4.11: Save and exit fdisk
Command (m for help): w
Now that your partitions are created, you can continue with Creating Filesystems.
4.e. Creating Filesystems
Introduction
Now that your partitions are created, it is time to place a filesystem on them. If you don't care about what filesystem tochoose and are happy with what we use as default in this handbook, continue with Applying a Filesystem to aPartition. Otherwise read on to learn about the available filesystems...
Filesystems
The Linux kernel supports various filesystems. We'll explain ext2, ext3, ext4, ReiserFS, XFS and JFS as these are themost commonly used filesystems on Linux systems.
ext2 is the tried and true Linux filesystem but doesn't have metadata journaling, which means that routine ext2filesystem checks at startup time can be quite time-consuming. There is now quite a selection of newer-generationjournaled filesystems that can be checked for consistency very quickly and are thus generally preferred over their non-journaled counterparts. Journaled filesystems prevent long delays when you boot your system and your filesystemhappens to be in an inconsistent state.
ext3 is the journaled version of the ext2 filesystem, providing metadata journaling for fast recovery in addition to otherenhanced journaling modes like full data and ordered data journaling. It uses an HTree index that enables highperformance in almost all situations. In short, ext3 is a very good and reliable filesystem.
ext4 is a filesystem created as a fork of ext3 bringing new features, performance improvements and removal of sizelimits with moderate changes to the on-disk format. It can span volumes up to 1 EB and with maximum file size of 16TB. Instead of the classic ext2/3 bitmap block allocation ext4 uses extents, which improve large file performance andreduce fragmentation. Ext4 also provides more sophisticated block allocation algorithms (delayed allocation andmultiblock allocation) giving the filesystem driver more ways to optimise the layout of data on the disk. The ext4filesystem is a compromise between production-grade code stability and the desire to introduce extensions to analmost decade old filesystem. Ext4 is the recommended all-purpose all-platform filesystem.
If you intend to install Gentoo on a small partition (less than 8GB), then you'll need to tell ext2, ext3 or ext4 (ifavailable) to reserve enough inodes when you create the filesystem. The mke2fs application uses the "bytes-per-inode"setting to calculate how many inodes a file system should have. By running mke2fs -T small /dev/<device> (ext2)or mke2fs -j -T small /dev/<device> (ext3/ext4) the number of inodes will generally quadruple for a given filesystem as its "bytes-per-inode" reduces from one every 16kB to one every 4kB. You can tune this even further by usingmke2fs -i <ratio> /dev/<device> (ext2) or mke2fs -j -i <ratio> /dev/<device> (ext3/ext4).
JFS is IBM's high-performance journaling filesystem. JFS is a light, fast and reliable B+tree-based filesystem withgood performance in various conditions.
ReiserFS is a B+tree-based journaled filesystem that has good overall performance, especially when dealing withmany tiny files at the cost of more CPU cycles. ReiserFS appears to be less maintained than other filesystems.
XFS is a filesystem with metadata journaling which comes with a robust feature-set and is optimized for scalability.
4/11/2014 Gentoo Linux Documentation -- Gentoo Linux x86 Handbook
https://www.gentoo.org/doc/en/handbook/handbook-x86.xml?style=printable&full=1 24/105
XFS seems to be less forgiving to various hardware problems.
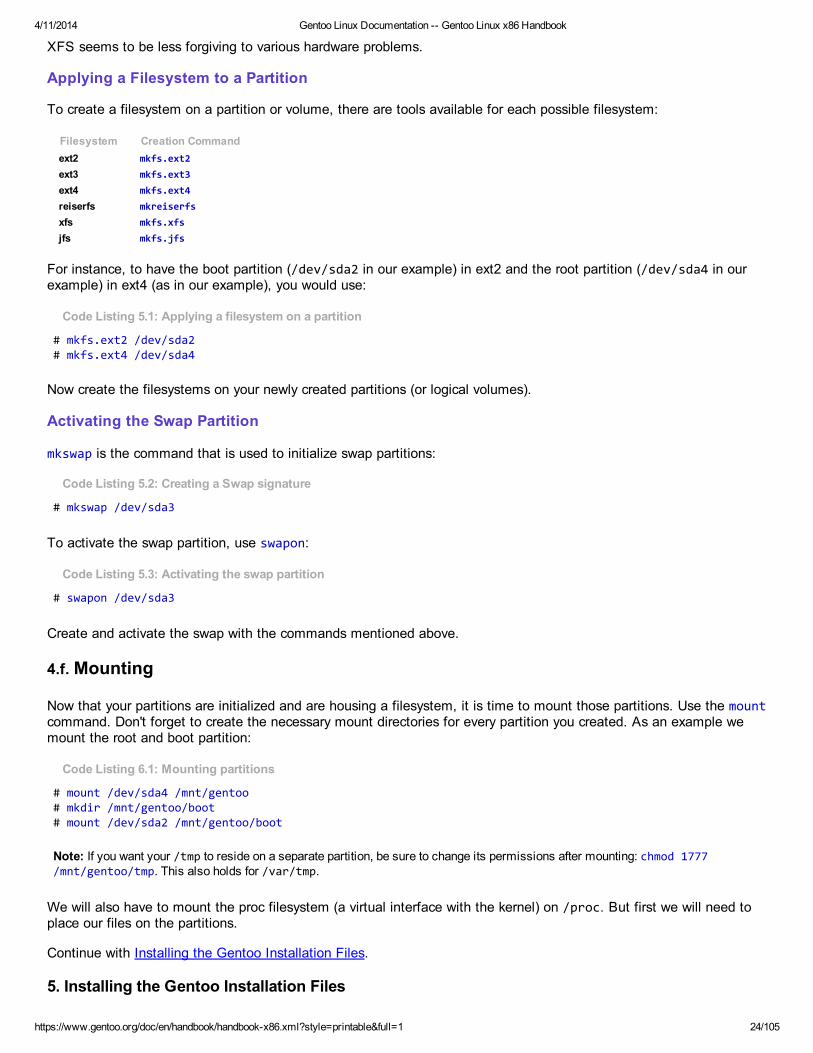
Applying a Filesystem to a Partition
To create a filesystem on a partition or volume, there are tools available for each possible filesystem:
Filesystem Creation Commandext2 mkfs.ext2ext3 mkfs.ext3ext4 mkfs.ext4reiserfs mkreiserfsxfs mkfs.xfsjfs mkfs.jfs
For instance, to have the boot partition (/dev/sda2 in our example) in ext2 and the root partition (/dev/sda4 in ourexample) in ext4 (as in our example), you would use:
Code Listing 5.1: Applying a filesystem on a partition
# mkfs.ext2 /dev/sda2# mkfs.ext4 /dev/sda4
Now create the filesystems on your newly created partitions (or logical volumes).
Activating the Swap Partition
mkswap is the command that is used to initialize swap partitions:
Code Listing 5.2: Creating a Swap signature
# mkswap /dev/sda3
To activate the swap partition, use swapon:
Code Listing 5.3: Activating the swap partition
# swapon /dev/sda3
Create and activate the swap with the commands mentioned above.
4.f. Mounting
Now that your partitions are initialized and are housing a filesystem, it is time to mount those partitions. Use the mountcommand. Don't forget to create the necessary mount directories for every partition you created. As an example wemount the root and boot partition:
Code Listing 6.1: Mounting partitions
# mount /dev/sda4 /mnt/gentoo# mkdir /mnt/gentoo/boot# mount /dev/sda2 /mnt/gentoo/boot
Note: If you want your /tmp to reside on a separate partition, be sure to change its permissions after mounting: chmod 1777/mnt/gentoo/tmp. This also holds for /var/tmp.
We will also have to mount the proc filesystem (a virtual interface with the kernel) on /proc. But first we will need toplace our files on the partitions.
Continue with Installing the Gentoo Installation Files.
5. Installing the Gentoo Installation Files
4/11/2014 Gentoo Linux Documentation -- Gentoo Linux x86 Handbook
https://www.gentoo.org/doc/en/handbook/handbook-x86.xml?style=printable&full=1 25/105
5.a. Installing a Stage Tarball
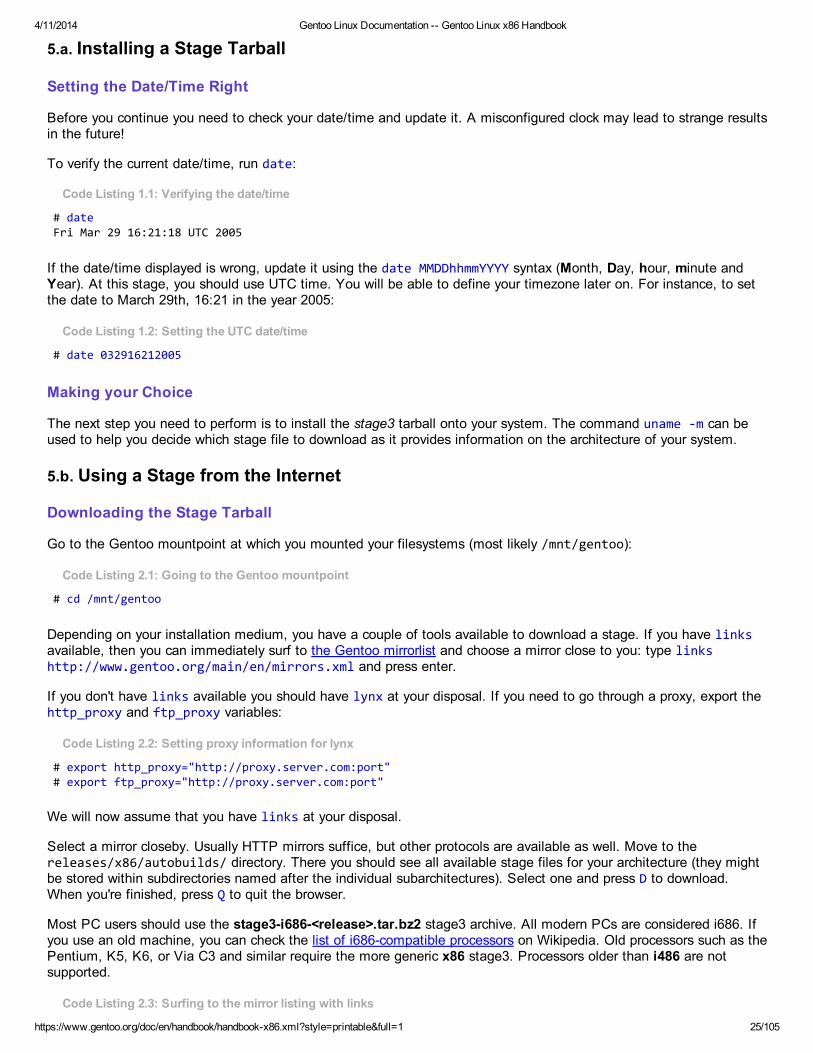
Setting the Date/Time Right
Before you continue you need to check your date/time and update it. A misconfigured clock may lead to strange resultsin the future!
To verify the current date/time, run date:
Code Listing 1.1: Verifying the date/time
# dateFri Mar 29 16:21:18 UTC 2005
If the date/time displayed is wrong, update it using the date MMDDhhmmYYYY syntax (Month, Day, hour, minute andYear). At this stage, you should use UTC time. You will be able to define your timezone later on. For instance, to setthe date to March 29th, 16:21 in the year 2005:
Code Listing 1.2: Setting the UTC date/time
# date 032916212005
Making your Choice
The next step you need to perform is to install the stage3 tarball onto your system. The command uname -m can beused to help you decide which stage file to download as it provides information on the architecture of your system.
5.b. Using a Stage from the Internet
Downloading the Stage Tarball
Go to the Gentoo mountpoint at which you mounted your filesystems (most likely /mnt/gentoo):
Code Listing 2.1: Going to the Gentoo mountpoint
# cd /mnt/gentoo
Depending on your installation medium, you have a couple of tools available to download a stage. If you have linksavailable, then you can immediately surf to the Gentoo mirrorlist and choose a mirror close to you: type linkshttp://www.gentoo.org/main/en/mirrors.xml and press enter.
If you don't have links available you should have lynx at your disposal. If you need to go through a proxy, export thehttp_proxy and ftp_proxy variables:
Code Listing 2.2: Setting proxy information for lynx
# export http_proxy="http://proxy.server.com:port"# export ftp_proxy="http://proxy.server.com:port"
We will now assume that you have links at your disposal.
Select a mirror closeby. Usually HTTP mirrors suffice, but other protocols are available as well. Move to thereleases/x86/autobuilds/ directory. There you should see all available stage files for your architecture (they mightbe stored within subdirectories named after the individual subarchitectures). Select one and press D to download.When you're finished, press Q to quit the browser.
Most PC users should use the stage3-i686-<release>.tar.bz2 stage3 archive. All modern PCs are considered i686. Ifyou use an old machine, you can check the list of i686-compatible processors on Wikipedia. Old processors such as thePentium, K5, K6, or Via C3 and similar require the more generic x86 stage3. Processors older than i486 are notsupported.
Code Listing 2.3: Surfing to the mirror listing with links
4/11/2014 Gentoo Linux Documentation -- Gentoo Linux x86 Handbook
https://www.gentoo.org/doc/en/handbook/handbook-x86.xml?style=printable&full=1 26/105
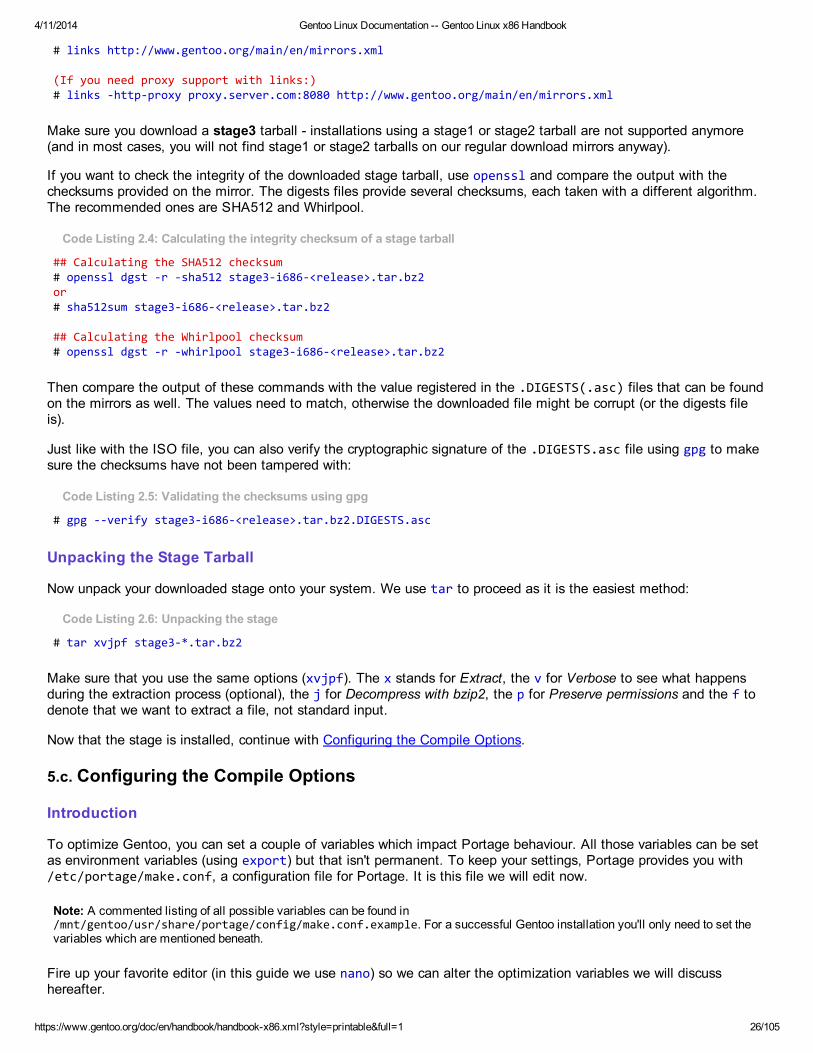
# links http://www.gentoo.org/main/en/mirrors.xml
(If you need proxy support with links:)# links -http-proxy proxy.server.com:8080 http://www.gentoo.org/main/en/mirrors.xml
Make sure you download a stage3 tarball - installations using a stage1 or stage2 tarball are not supported anymore(and in most cases, you will not find stage1 or stage2 tarballs on our regular download mirrors anyway).
If you want to check the integrity of the downloaded stage tarball, use openssl and compare the output with thechecksums provided on the mirror. The digests files provide several checksums, each taken with a different algorithm.The recommended ones are SHA512 and Whirlpool.
Code Listing 2.4: Calculating the integrity checksum of a stage tarball
## Calculating the SHA512 checksum# openssl dgst -r -sha512 stage3-i686-<release>.tar.bz2or# sha512sum stage3-i686-<release>.tar.bz2
## Calculating the Whirlpool checksum# openssl dgst -r -whirlpool stage3-i686-<release>.tar.bz2
Then compare the output of these commands with the value registered in the .DIGESTS(.asc) files that can be foundon the mirrors as well. The values need to match, otherwise the downloaded file might be corrupt (or the digests fileis).
Just like with the ISO file, you can also verify the cryptographic signature of the .DIGESTS.asc file using gpg to makesure the checksums have not been tampered with:
Code Listing 2.5: Validating the checksums using gpg
# gpg --verify stage3-i686-<release>.tar.bz2.DIGESTS.asc
Unpacking the Stage Tarball
Now unpack your downloaded stage onto your system. We use tar to proceed as it is the easiest method:
Code Listing 2.6: Unpacking the stage
# tar xvjpf stage3-*.tar.bz2
Make sure that you use the same options (xvjpf). The x stands for Extract, the v for Verbose to see what happensduring the extraction process (optional), the j for Decompress with bzip2, the p for Preserve permissions and the f todenote that we want to extract a file, not standard input.
Now that the stage is installed, continue with Configuring the Compile Options.
5.c. Configuring the Compile Options
Introduction
To optimize Gentoo, you can set a couple of variables which impact Portage behaviour. All those variables can be setas environment variables (using export) but that isn't permanent. To keep your settings, Portage provides you with/etc/portage/make.conf, a configuration file for Portage. It is this file we will edit now.
Note: A commented listing of all possible variables can be found in/mnt/gentoo/usr/share/portage/config/make.conf.example. For a successful Gentoo installation you'll only need to set thevariables which are mentioned beneath.
Fire up your favorite editor (in this guide we use nano) so we can alter the optimization variables we will discusshereafter.
4/11/2014 Gentoo Linux Documentation -- Gentoo Linux x86 Handbook
https://www.gentoo.org/doc/en/handbook/handbook-x86.xml?style=printable&full=1 27/105
Code Listing 3.1: Opening /etc/portage/make.conf
# nano -w /mnt/gentoo/etc/portage/make.conf
As you probably noticed, the make.conf.example file is structured in a generic way: commented lines start with "#",other lines define variables using the VARIABLE="content" syntax. The make.conf file uses the same syntax. Severalof those variables are discussed next.
CFLAGS and CXXFLAGS
The CFLAGS and CXXFLAGS variables define the optimization flags for the gcc C and C++ compiler respectively.Although we define those generally here, you will only have maximum performance if you optimize these flags for eachprogram separately. The reason for this is because every program is different.
In make.conf you should define the optimization flags you think will make your system the most responsive generally.Don't place experimental settings in this variable; too much optimization can make programs behave bad (crash, oreven worse, malfunction).
We will not explain all possible optimization options. If you want to know them all, read the GNU Online Manual(s) orthe gcc info page (info gcc -- only works on a working Linux system). The make.conf.example file itself alsocontains lots of examples and information; don't forget to read it too.
A first setting is the -march= or -mtune= flag, which specifies the name of the target architecture. Possible options aredescribed in the make.conf.example file (as comments). A commonly used value is native as that tells the compiler toselect the target architecture of the current system (the one you are installing on).
A second one is the -O flag (that is a capital O, not a zero), which specifies the gcc optimization class flag. Possibleclasses are s (for size-optimized), 0 (zero - for no optimizations), 1, 2 or even 3 for more speed-optimization flags(every class has the same flags as the one before, plus some extras). -O2 is the recommended default. -O3 is knownto cause problems when used system-wide, so we recommend that you stick to -O2.
Another popular optimization flag is -pipe (use pipes rather than temporary files for communication between thevarious stages of compilation). It has no impact on the generated code, but uses more memory. On systems with lowmemory, gcc might get killed. In that case, do not use this flag.
Using -fomit-frame-pointer (which doesn't keep the frame pointer in a register for functions that don't need one)might have serious repercussions on the debugging of applications.
When you define the CFLAGS and CXXFLAGS, you should combine several optimization flags. The default valuescontained in the stage3 archive you unpacked should be good enough. The following one is just an example:
Code Listing 3.2: Defining the CFLAGS and CXXFLAGS variable
CFLAGS="-O2 -march=i686 -pipe"# Use the same settings for both variablesCXXFLAGS="${CFLAGS}"
Note: You may also want to view the Compilation Optimization Guide for more information on how the various compilation optionscan affect your system.
MAKEOPTS
With MAKEOPTS you define how many parallel compilations should occur when you install a package. A good choice isthe number of CPUs (or CPU cores) in your system plus one, but this guideline isn't always perfect.
Code Listing 3.3: MAKEOPTS for a regular, 1-CPU system
MAKEOPTS="-j2"
Ready, Set, Go!
Update your /mnt/gentoo/etc/portage/make.conf to your own preference and save (nano users would hit Ctrl-X).You are now ready to continue with Installing the Gentoo Base System.
4/11/2014 Gentoo Linux Documentation -- Gentoo Linux x86 Handbook
https://www.gentoo.org/doc/en/handbook/handbook-x86.xml?style=printable&full=1 28/105
6. Installing the Gentoo Base System
6.a. Chrooting
Optional: Selecting Mirrors
In order to download source code quickly it is recommended to select a fast mirror. Portage will look in your make.conffile for the GENTOO_MIRRORS variable and use the mirrors listed therein. You can surf to our mirror list and searchfor a mirror (or mirrors) close to you (as those are most frequently the fastest ones), but we provide a nice tool calledmirrorselect which provides you with a nice interface to select the mirrors you want. Just navigate to the mirrors ofchoice and press spacebar to select one or more mirrors.
Code Listing 1.1: Using mirrorselect for the GENTOO_MIRRORS variable
# mirrorselect -i -o >> /mnt/gentoo/etc/portage/make.conf
A second important setting is the SYNC setting in make.conf. This variable contains the rsync server you want to usewhen updating your Portage tree (the collection of ebuilds, scripts containing all the information Portage needs todownload and install software). Although you can manually enter a SYNC server for yourself, mirrorselect can easethat operation for you:
Code Listing 1.2: Selecting an rsync mirror using mirrorselect
# mirrorselect -i -r -o >> /mnt/gentoo/etc/portage/make.conf
After running mirrorselect it is adviseable to double-check the settings in /mnt/gentoo/etc/portage/make.conf !
Note: If you want to manually set a SYNC server in make.conf, you should check out the community mirrors list for the mirrorsclosest to you. We recommend choosing a rotation, such as rsync.us.gentoo.org, rather than choosing a single mirror. This helpsspread out the load and provides a failsafe in case a specific mirror is offline.
Copy DNS Info
One thing still remains to be done before we enter the new environment and that is copying over the DNS informationin /etc/resolv.conf. You need to do this to ensure that networking still works even after entering the newenvironment. /etc/resolv.conf contains the nameservers for your network.
Code Listing 1.3: Copy over DNS information
(The "-L" option is needed to make sure we don't copy a symbolic link)# cp -L /etc/resolv.conf /mnt/gentoo/etc/
Mounting the necessary Filesystems
In a few moments, we will change the Linux root towards the new location. To make sure that the new environmentworks properly, we need to make certain file systems available there as well.
Mount the /proc filesystem on /mnt/gentoo/proc to allow the installation to use the kernel-provided informationwithin the chrooted environment, and then mount-bind the /dev and /sys filesystems.
Code Listing 1.4: Mounting /proc and /dev
# mount -t proc proc /mnt/gentoo/proc# mount --rbind /sys /mnt/gentoo/sys# mount --rbind /dev /mnt/gentoo/dev
Warning: When using non-Gentoo installation media, this might not be sufficient. Some distributions make /dev/shm a symbolic linkto /run/shm which, after the chroot, becomes invalid. Making /dev/shm a proper tmpfs-mount up front can fix this.
Entering the new Environment
4/11/2014 Gentoo Linux Documentation -- Gentoo Linux x86 Handbook
https://www.gentoo.org/doc/en/handbook/handbook-x86.xml?style=printable&full=1 29/105
Now that all partitions are initialized and the base environment installed, it is time to enter our new installationenvironment by chrooting into it. This means that we change from the current installation environment (Installation CDor other installation medium) to your installation system (namely the initialized partitions).
This chrooting is done in three steps. First we will change the root from / (on the installation medium) to /mnt/gentoo(on your partitions) using chroot. Then we will reload some settings, as provided by /etc/profile, in memory usingsource. The last step is to redefine the primary prompt to help us remember that we are inside a chroot environment.
Code Listing 1.5: Chrooting into the new environment
# chroot /mnt/gentoo /bin/bash# source /etc/profile# export PS1="(chroot) $PS1"
Congratulations! You are now inside your own Gentoo Linux environment. Of course it is far from finished, which iswhy the installation still has some sections left :-)
If you at any time would need another terminal or console to access the chroot environment, all you need to do is toexecute the above steps again.
6.b. Configuring Portage
Installing a Portage Snapshot
You now have to install a Portage snapshot, a collection of files that inform Portage what software titles you caninstall, which profiles are available, etc.
We recommend the use of emerge-webrsync. This will fetch the latest portage snapshot (which Gentoo releases on adaily basis) from one of our mirrors and install it onto your system.
Code Listing 2.1: Running emerge-webrsync to install a Portage snapshot
# emerge-webrsync
Note: During this operation, emerge-webrsync might complain about a missing /usr/portage location. This is to be expected andnothing to worry about - the tool will create the location for us.
From this point onward, Portage might mention that certain updates are recommended to be executed. This isbecause certain system packages installed through the stage3 file might have newer versions available, and Portage isnow aware of this because a new Portage snapshot is installed. You can safely ignore this for now and update afterthe Gentoo installation has finished.
Optional: Updating the Portage tree
You can now update your Portage tree to the latest version. emerge --sync will use the rsync protocol to update thePortage tree (which you fetched earlier on through emerge-webrsync) to the latest state.
Code Listing 2.2: Updating the Portage tree
# emerge --sync(If you're using a slow terminal like some framebuffers or a serialconsole, you can add the --quiet option to speed up this process:)# emerge --sync --quiet
If you are behind a firewall that blocks rsync traffic, you safely ignore this step as you already have a quite up-to-datePortage tree.
If you are warned that a new Portage version is available and that you should update Portage, you should do it nowusing emerge --oneshot portage. You might also be notified that "news items need reading". More on that next.
Reading News Items
4/11/2014 Gentoo Linux Documentation -- Gentoo Linux x86 Handbook
https://www.gentoo.org/doc/en/handbook/handbook-x86.xml?style=printable&full=1 30/105
When a Portage tree is synchronized to your system, Portage might warn you with the following:
Code Listing 2.3: Portage informing that news items are available
* IMPORTANT: 2 news items need reading for repository 'gentoo'. * Use eselect news to read news items.
Portage news items were created to provide a communication medium to push critical messages to users via the rsynctree. To manage them you will need to use eselect news. With the read subcommand, you can read all news items.With list you can get an overview of the available news items, and with purge you can remove them once you haveread them and have no further need for the item(s) anymore.
Code Listing 2.4: Handling Portage news
# eselect news list# eselect news read
More information about the newsreader is available through its manual page: man news.eselect.
Choosing the Right Profile
First, a small definition is in place.
A profile is a building block for any Gentoo system. Not only does it specify default values for USE, CFLAGS and otherimportant variables, it also locks the system to a certain range of package versions. This is all maintained by theGentoo developers.
Previously, such a profile was untouched by the users. However, there may be certain situations in which you maydecide a profile change is necessary.
You can see what profile you are currently using with the following command:
Note: The output of the command below is just an example and evolves over time.
Code Listing 2.5: Verifying system profile
# eselect profile listAvailable profile symlink targets: [1] default/linux/x86/13.0 * [2] default/linux/x86/13.0/desktop [3] default/linux/x86/13.0/desktop/gnome [4] default/linux/x86/13.0/desktop/kde
As you can see, there are also desktop subprofiles available for some architectures. Running eselect profile listwill show all available profiles.
After viewing the available profiles for your architecture, you can use a different one if you wish:
Code Listing 2.6: Changing profiles
# eselect profile set 2
Note: The developer subprofile is specifically for Gentoo Linux development tasks. It is not meant to help set up generaldevelopment environments.
Configuring the USE variable
USE is one of the most powerful variables Gentoo provides to its users. Several programs can be compiled with orwithout optional support for certain items. For instance, some programs can be compiled with gtk-support, or with qt-support. Others can be compiled with or without SSL support. Some programs can even be compiled with framebuffersupport (svgalib) instead of X11 support (X-server).
Most distributions compile their packages with support for as much as possible, increasing the size of the programs and
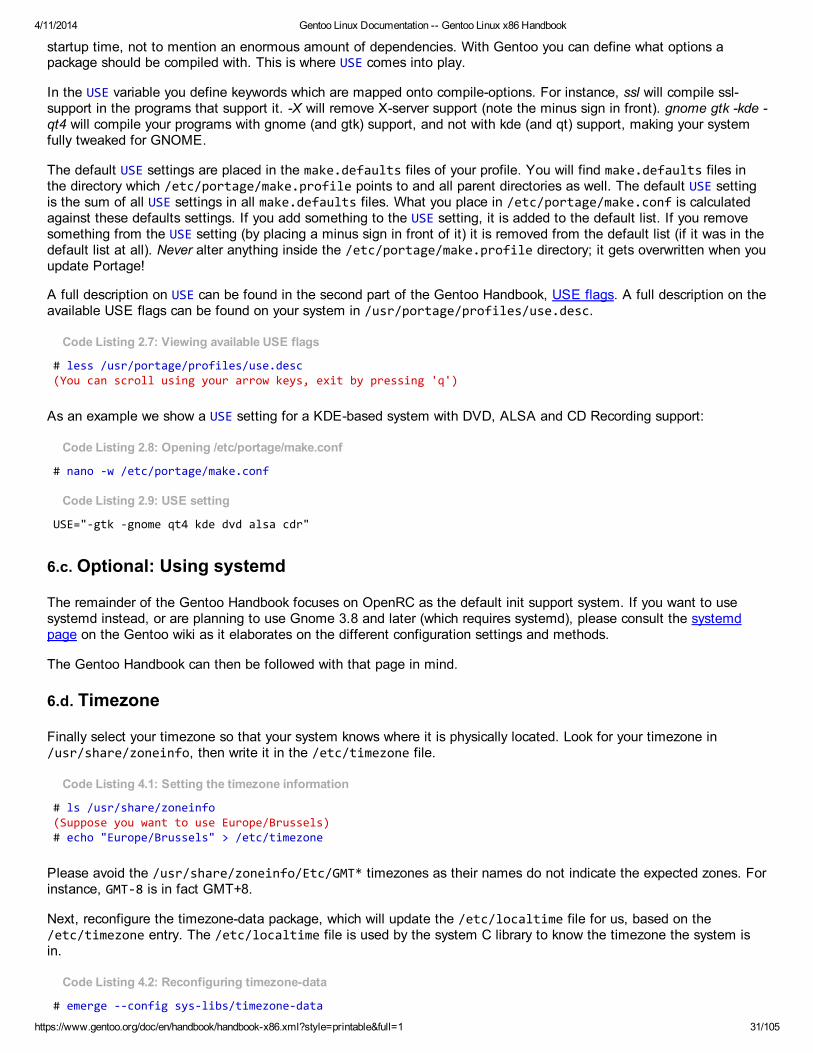
4/11/2014 Gentoo Linux Documentation -- Gentoo Linux x86 Handbook
https://www.gentoo.org/doc/en/handbook/handbook-x86.xml?style=printable&full=1 31/105
startup time, not to mention an enormous amount of dependencies. With Gentoo you can define what options apackage should be compiled with. This is where USE comes into play.
In the USE variable you define keywords which are mapped onto compile-options. For instance, ssl will compile ssl-support in the programs that support it. -X will remove X-server support (note the minus sign in front). gnome gtk -kde -qt4 will compile your programs with gnome (and gtk) support, and not with kde (and qt) support, making your systemfully tweaked for GNOME.
The default USE settings are placed in the make.defaults files of your profile. You will find make.defaults files inthe directory which /etc/portage/make.profile points to and all parent directories as well. The default USE settingis the sum of all USE settings in all make.defaults files. What you place in /etc/portage/make.conf is calculatedagainst these defaults settings. If you add something to the USE setting, it is added to the default list. If you removesomething from the USE setting (by placing a minus sign in front of it) it is removed from the default list (if it was in thedefault list at all). Never alter anything inside the /etc/portage/make.profile directory; it gets overwritten when youupdate Portage!
A full description on USE can be found in the second part of the Gentoo Handbook, USE flags. A full description on theavailable USE flags can be found on your system in /usr/portage/profiles/use.desc.
Code Listing 2.7: Viewing available USE flags
# less /usr/portage/profiles/use.desc(You can scroll using your arrow keys, exit by pressing 'q')
As an example we show a USE setting for a KDE-based system with DVD, ALSA and CD Recording support:
Code Listing 2.8: Opening /etc/portage/make.conf
# nano -w /etc/portage/make.conf
Code Listing 2.9: USE setting
USE="-gtk -gnome qt4 kde dvd alsa cdr"
6.c. Optional: Using systemd
The remainder of the Gentoo Handbook focuses on OpenRC as the default init support system. If you want to usesystemd instead, or are planning to use Gnome 3.8 and later (which requires systemd), please consult the systemdpage on the Gentoo wiki as it elaborates on the different configuration settings and methods.
The Gentoo Handbook can then be followed with that page in mind.
6.d. Timezone
Finally select your timezone so that your system knows where it is physically located. Look for your timezone in/usr/share/zoneinfo, then write it in the /etc/timezone file.
Code Listing 4.1: Setting the timezone information
# ls /usr/share/zoneinfo(Suppose you want to use Europe/Brussels)# echo "Europe/Brussels" > /etc/timezone
Please avoid the /usr/share/zoneinfo/Etc/GMT* timezones as their names do not indicate the expected zones. Forinstance, GMT-8 is in fact GMT+8.
Next, reconfigure the timezone-data package, which will update the /etc/localtime file for us, based on the/etc/timezone entry. The /etc/localtime file is used by the system C library to know the timezone the system isin.
Code Listing 4.2: Reconfiguring timezone-data
# emerge --config sys-libs/timezone-data
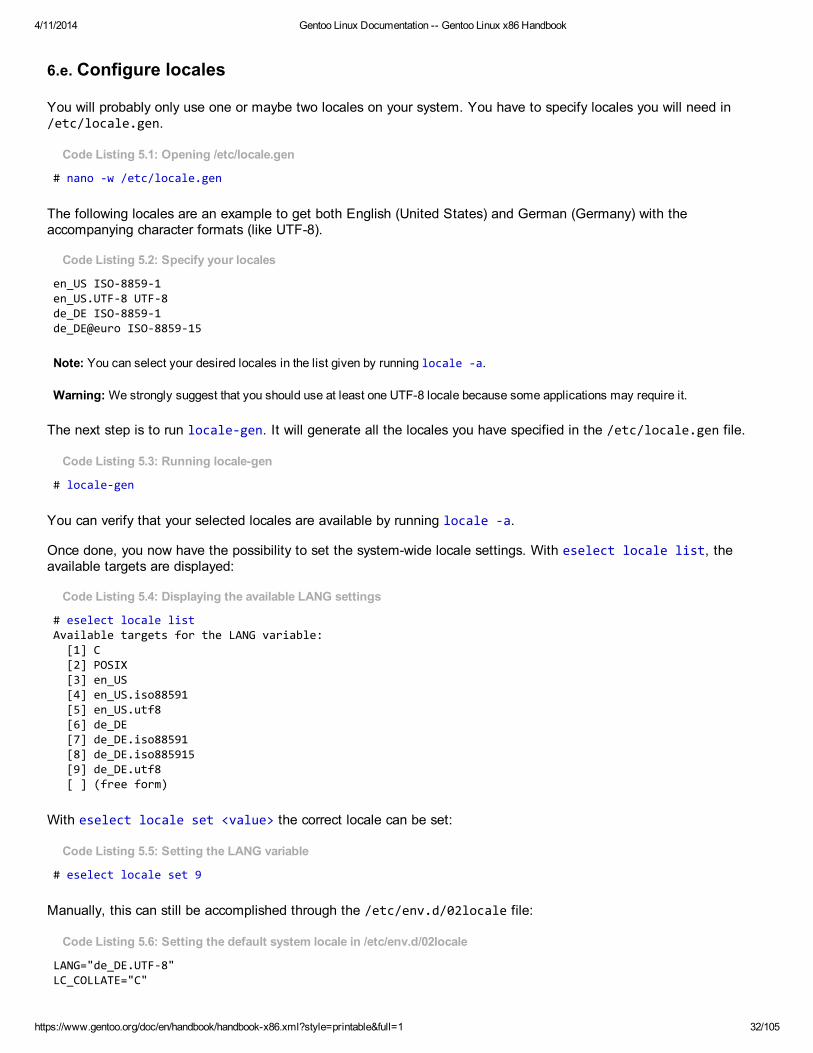
4/11/2014 Gentoo Linux Documentation -- Gentoo Linux x86 Handbook
https://www.gentoo.org/doc/en/handbook/handbook-x86.xml?style=printable&full=1 32/105
6.e. Configure locales
You will probably only use one or maybe two locales on your system. You have to specify locales you will need in/etc/locale.gen.
Code Listing 5.1: Opening /etc/locale.gen
# nano -w /etc/locale.gen
The following locales are an example to get both English (United States) and German (Germany) with theaccompanying character formats (like UTF-8).
Code Listing 5.2: Specify your locales
en_US ISO-8859-1en_US.UTF-8 UTF-8de_DE ISO-8859-1de_DE@euro ISO-8859-15
Note: You can select your desired locales in the list given by running locale -a.
Warning: We strongly suggest that you should use at least one UTF-8 locale because some applications may require it.
The next step is to run locale-gen. It will generate all the locales you have specified in the /etc/locale.gen file.
Code Listing 5.3: Running locale-gen
# locale-gen
You can verify that your selected locales are available by running locale -a.
Once done, you now have the possibility to set the system-wide locale settings. With eselect locale list, theavailable targets are displayed:
Code Listing 5.4: Displaying the available LANG settings
# eselect locale listAvailable targets for the LANG variable: [1] C [2] POSIX [3] en_US [4] en_US.iso88591 [5] en_US.utf8 [6] de_DE [7] de_DE.iso88591 [8] de_DE.iso885915 [9] de_DE.utf8 [ ] (free form)
With eselect locale set <value> the correct locale can be set:
Code Listing 5.5: Setting the LANG variable
# eselect locale set 9
Manually, this can still be accomplished through the /etc/env.d/02locale file:
Code Listing 5.6: Setting the default system locale in /etc/env.d/02locale
LANG="de_DE.UTF-8"LC_COLLATE="C"
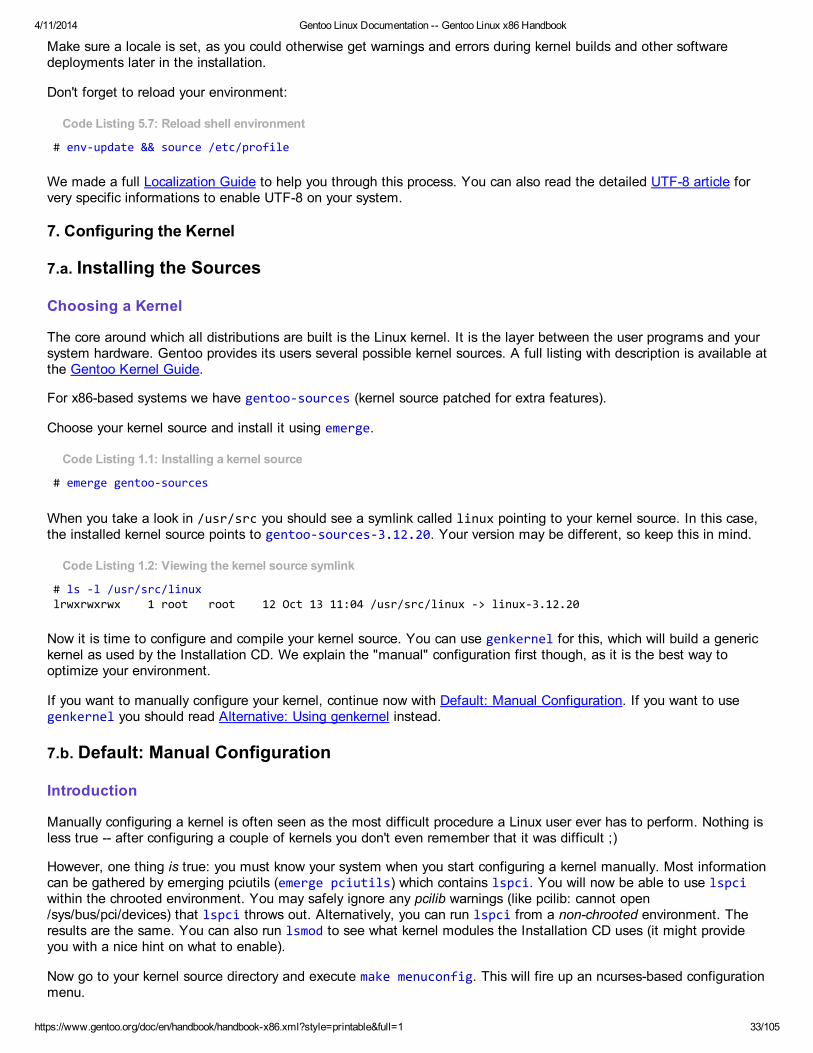
4/11/2014 Gentoo Linux Documentation -- Gentoo Linux x86 Handbook
https://www.gentoo.org/doc/en/handbook/handbook-x86.xml?style=printable&full=1 33/105
Make sure a locale is set, as you could otherwise get warnings and errors during kernel builds and other softwaredeployments later in the installation.
Don't forget to reload your environment:
Code Listing 5.7: Reload shell environment
# env-update && source /etc/profile
We made a full Localization Guide to help you through this process. You can also read the detailed UTF-8 article forvery specific informations to enable UTF-8 on your system.
7. Configuring the Kernel
7.a. Installing the Sources
Choosing a Kernel
The core around which all distributions are built is the Linux kernel. It is the layer between the user programs and yoursystem hardware. Gentoo provides its users several possible kernel sources. A full listing with description is available atthe Gentoo Kernel Guide.
For x86-based systems we have gentoo-sources (kernel source patched for extra features).
Choose your kernel source and install it using emerge.
Code Listing 1.1: Installing a kernel source
# emerge gentoo-sources
When you take a look in /usr/src you should see a symlink called linux pointing to your kernel source. In this case,the installed kernel source points to gentoo-sources-3.12.20. Your version may be different, so keep this in mind.
Code Listing 1.2: Viewing the kernel source symlink
# ls -l /usr/src/linuxlrwxrwxrwx 1 root root 12 Oct 13 11:04 /usr/src/linux -> linux-3.12.20
Now it is time to configure and compile your kernel source. You can use genkernel for this, which will build a generickernel as used by the Installation CD. We explain the "manual" configuration first though, as it is the best way tooptimize your environment.
If you want to manually configure your kernel, continue now with Default: Manual Configuration. If you want to usegenkernel you should read Alternative: Using genkernel instead.
7.b. Default: Manual Configuration
Introduction
Manually configuring a kernel is often seen as the most difficult procedure a Linux user ever has to perform. Nothing isless true -- after configuring a couple of kernels you don't even remember that it was difficult ;)
However, one thing is true: you must know your system when you start configuring a kernel manually. Most informationcan be gathered by emerging pciutils (emerge pciutils) which contains lspci. You will now be able to use lspciwithin the chrooted environment. You may safely ignore any pcilib warnings (like pcilib: cannot open/sys/bus/pci/devices) that lspci throws out. Alternatively, you can run lspci from a non-chrooted environment. Theresults are the same. You can also run lsmod to see what kernel modules the Installation CD uses (it might provideyou with a nice hint on what to enable).
Now go to your kernel source directory and execute make menuconfig. This will fire up an ncurses-based configurationmenu.
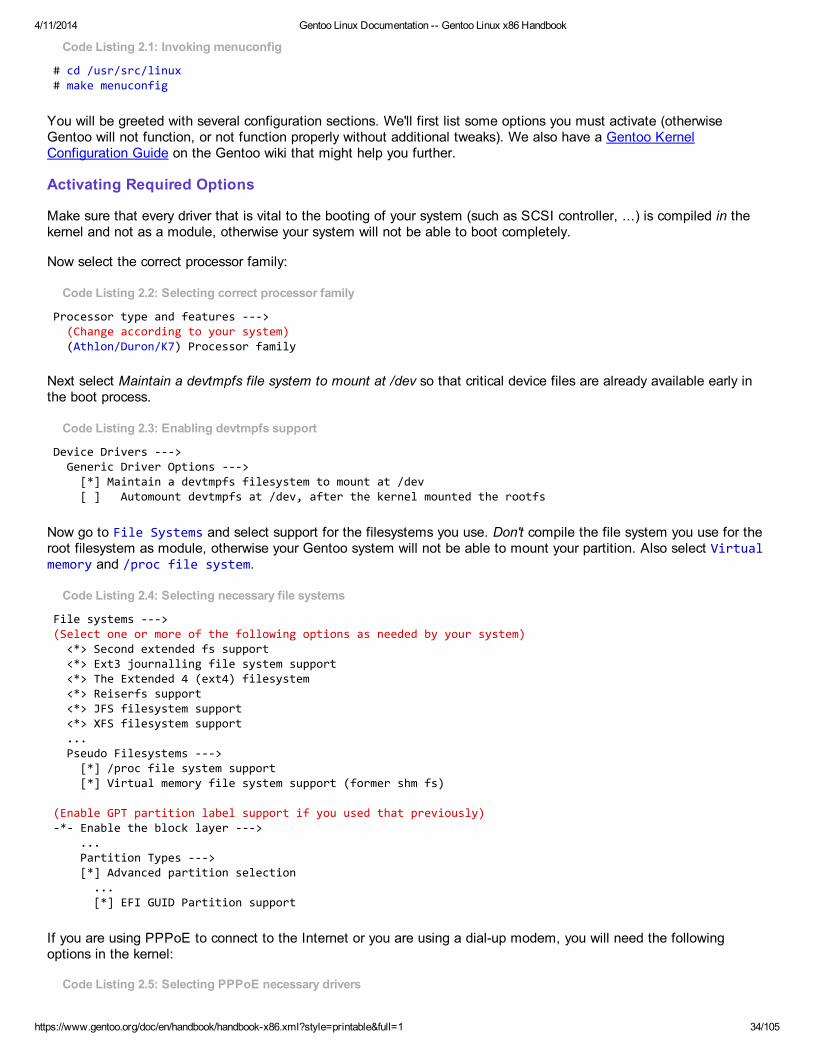
4/11/2014 Gentoo Linux Documentation -- Gentoo Linux x86 Handbook
https://www.gentoo.org/doc/en/handbook/handbook-x86.xml?style=printable&full=1 34/105
Code Listing 2.1: Invoking menuconfig
# cd /usr/src/linux# make menuconfig
You will be greeted with several configuration sections. We'll first list some options you must activate (otherwiseGentoo will not function, or not function properly without additional tweaks). We also have a Gentoo KernelConfiguration Guide on the Gentoo wiki that might help you further.
Activating Required Options
Make sure that every driver that is vital to the booting of your system (such as SCSI controller, ...) is compiled in thekernel and not as a module, otherwise your system will not be able to boot completely.
Now select the correct processor family:
Code Listing 2.2: Selecting correct processor family
Processor type and features ---> (Change according to your system) (Athlon/Duron/K7) Processor family
Next select Maintain a devtmpfs file system to mount at /dev so that critical device files are already available early inthe boot process.
Code Listing 2.3: Enabling devtmpfs support
Device Drivers ---> Generic Driver Options ---> [*] Maintain a devtmpfs filesystem to mount at /dev [ ] Automount devtmpfs at /dev, after the kernel mounted the rootfs
Now go to File Systems and select support for the filesystems you use. Don't compile the file system you use for theroot filesystem as module, otherwise your Gentoo system will not be able to mount your partition. Also select Virtualmemory and /proc file system.
Code Listing 2.4: Selecting necessary file systems
File systems --->(Select one or more of the following options as needed by your system) <*> Second extended fs support <*> Ext3 journalling file system support <*> The Extended 4 (ext4) filesystem <*> Reiserfs support <*> JFS filesystem support <*> XFS filesystem support ... Pseudo Filesystems ---> [*] /proc file system support [*] Virtual memory file system support (former shm fs)
(Enable GPT partition label support if you used that previously)-*- Enable the block layer ---> ... Partition Types ---> [*] Advanced partition selection ... [*] EFI GUID Partition support
If you are using PPPoE to connect to the Internet or you are using a dial-up modem, you will need the followingoptions in the kernel:
Code Listing 2.5: Selecting PPPoE necessary drivers
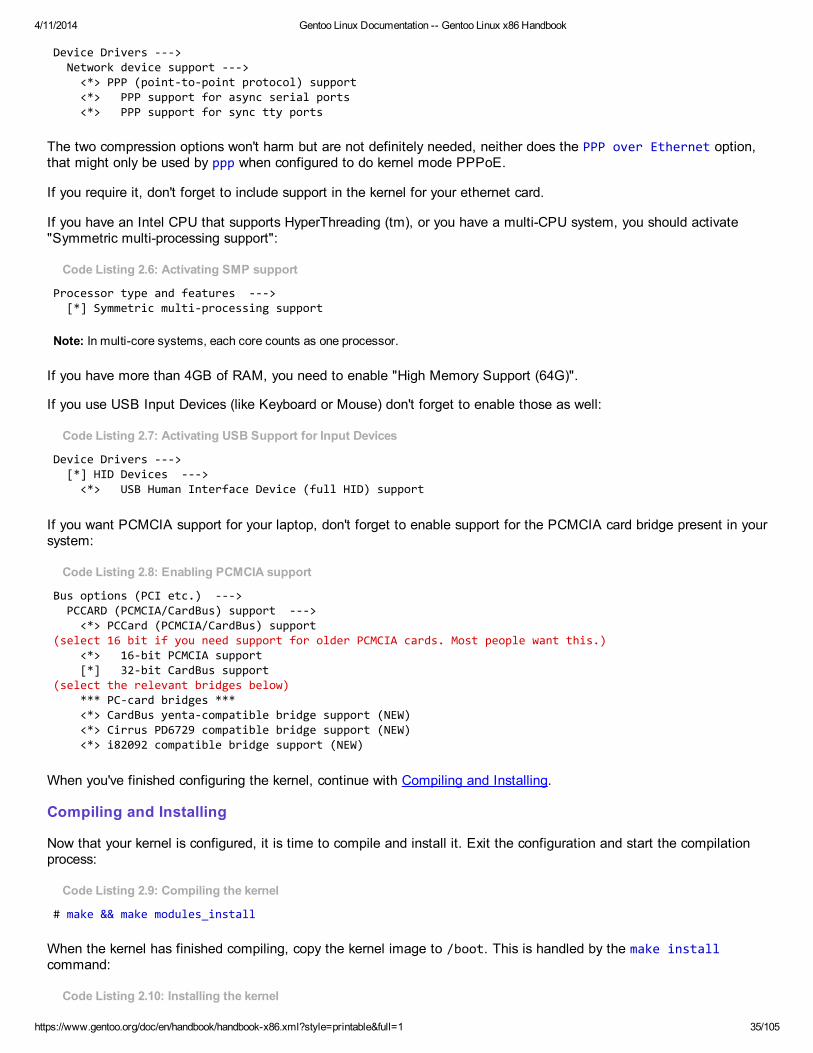
4/11/2014 Gentoo Linux Documentation -- Gentoo Linux x86 Handbook
https://www.gentoo.org/doc/en/handbook/handbook-x86.xml?style=printable&full=1 35/105
Device Drivers ---> Network device support ---> <*> PPP (point-to-point protocol) support <*> PPP support for async serial ports <*> PPP support for sync tty ports
The two compression options won't harm but are not definitely needed, neither does the PPP over Ethernet option,that might only be used by ppp when configured to do kernel mode PPPoE.
If you require it, don't forget to include support in the kernel for your ethernet card.
If you have an Intel CPU that supports HyperThreading (tm), or you have a multi-CPU system, you should activate"Symmetric multi-processing support":
Code Listing 2.6: Activating SMP support
Processor type and features ---> [*] Symmetric multi-processing support
Note: In multi-core systems, each core counts as one processor.
If you have more than 4GB of RAM, you need to enable "High Memory Support (64G)".
If you use USB Input Devices (like Keyboard or Mouse) don't forget to enable those as well:
Code Listing 2.7: Activating USB Support for Input Devices
Device Drivers ---> [*] HID Devices ---> <*> USB Human Interface Device (full HID) support
If you want PCMCIA support for your laptop, don't forget to enable support for the PCMCIA card bridge present in yoursystem:
Code Listing 2.8: Enabling PCMCIA support
Bus options (PCI etc.) ---> PCCARD (PCMCIA/CardBus) support ---> <*> PCCard (PCMCIA/CardBus) support(select 16 bit if you need support for older PCMCIA cards. Most people want this.) <*> 16-bit PCMCIA support [*] 32-bit CardBus support(select the relevant bridges below) *** PC-card bridges *** <*> CardBus yenta-compatible bridge support (NEW) <*> Cirrus PD6729 compatible bridge support (NEW) <*> i82092 compatible bridge support (NEW)
When you've finished configuring the kernel, continue with Compiling and Installing.
Compiling and Installing
Now that your kernel is configured, it is time to compile and install it. Exit the configuration and start the compilationprocess:
Code Listing 2.9: Compiling the kernel
# make && make modules_install
When the kernel has finished compiling, copy the kernel image to /boot. This is handled by the make installcommand:
Code Listing 2.10: Installing the kernel
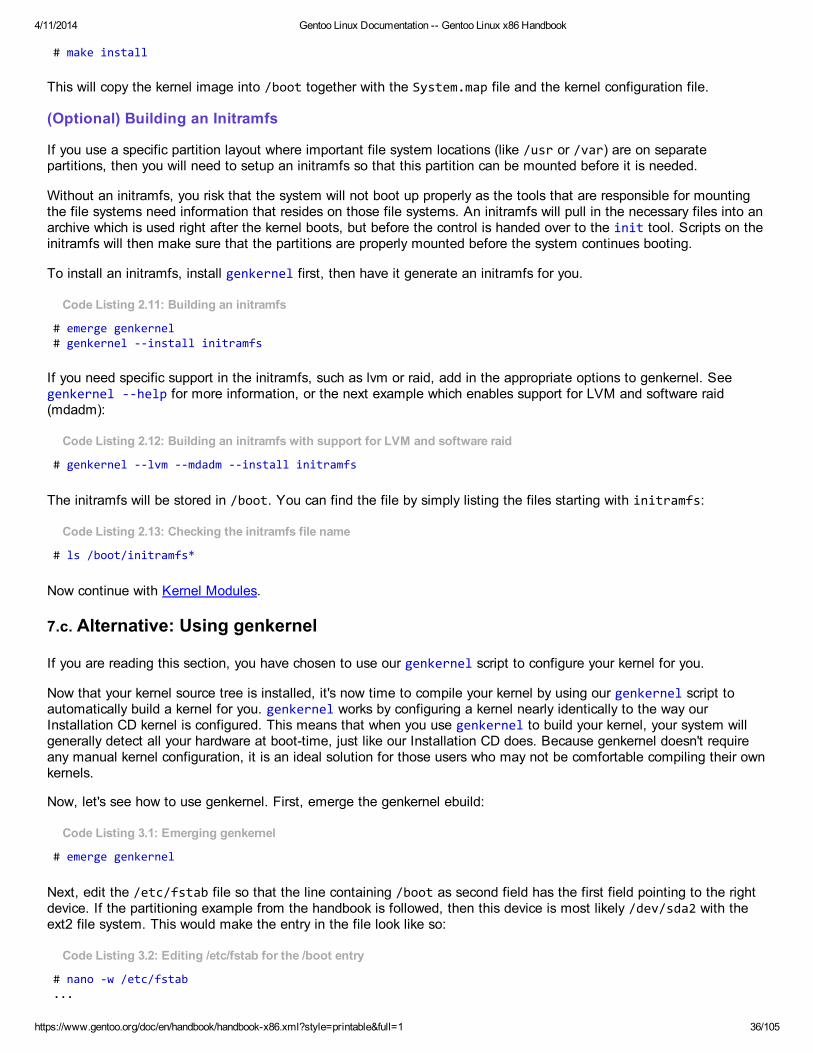
4/11/2014 Gentoo Linux Documentation -- Gentoo Linux x86 Handbook
https://www.gentoo.org/doc/en/handbook/handbook-x86.xml?style=printable&full=1 36/105
# make install
This will copy the kernel image into /boot together with the System.map file and the kernel configuration file.
(Optional) Building an Initramfs
If you use a specific partition layout where important file system locations (like /usr or /var) are on separatepartitions, then you will need to setup an initramfs so that this partition can be mounted before it is needed.
Without an initramfs, you risk that the system will not boot up properly as the tools that are responsible for mountingthe file systems need information that resides on those file systems. An initramfs will pull in the necessary files into anarchive which is used right after the kernel boots, but before the control is handed over to the init tool. Scripts on theinitramfs will then make sure that the partitions are properly mounted before the system continues booting.
To install an initramfs, install genkernel first, then have it generate an initramfs for you.
Code Listing 2.11: Building an initramfs
# emerge genkernel# genkernel --install initramfs
If you need specific support in the initramfs, such as lvm or raid, add in the appropriate options to genkernel. Seegenkernel --help for more information, or the next example which enables support for LVM and software raid(mdadm):
Code Listing 2.12: Building an initramfs with support for LVM and software raid
# genkernel --lvm --mdadm --install initramfs
The initramfs will be stored in /boot. You can find the file by simply listing the files starting with initramfs:
Code Listing 2.13: Checking the initramfs file name
# ls /boot/initramfs*
Now continue with Kernel Modules.
7.c. Alternative: Using genkernel
If you are reading this section, you have chosen to use our genkernel script to configure your kernel for you.
Now that your kernel source tree is installed, it's now time to compile your kernel by using our genkernel script toautomatically build a kernel for you. genkernel works by configuring a kernel nearly identically to the way ourInstallation CD kernel is configured. This means that when you use genkernel to build your kernel, your system willgenerally detect all your hardware at boot-time, just like our Installation CD does. Because genkernel doesn't requireany manual kernel configuration, it is an ideal solution for those users who may not be comfortable compiling their ownkernels.
Now, let's see how to use genkernel. First, emerge the genkernel ebuild:
Code Listing 3.1: Emerging genkernel
# emerge genkernel
Next, edit the /etc/fstab file so that the line containing /boot as second field has the first field pointing to the rightdevice. If the partitioning example from the handbook is followed, then this device is most likely /dev/sda2 with theext2 file system. This would make the entry in the file look like so:
Code Listing 3.2: Editing /etc/fstab for the /boot entry
# nano -w /etc/fstab...
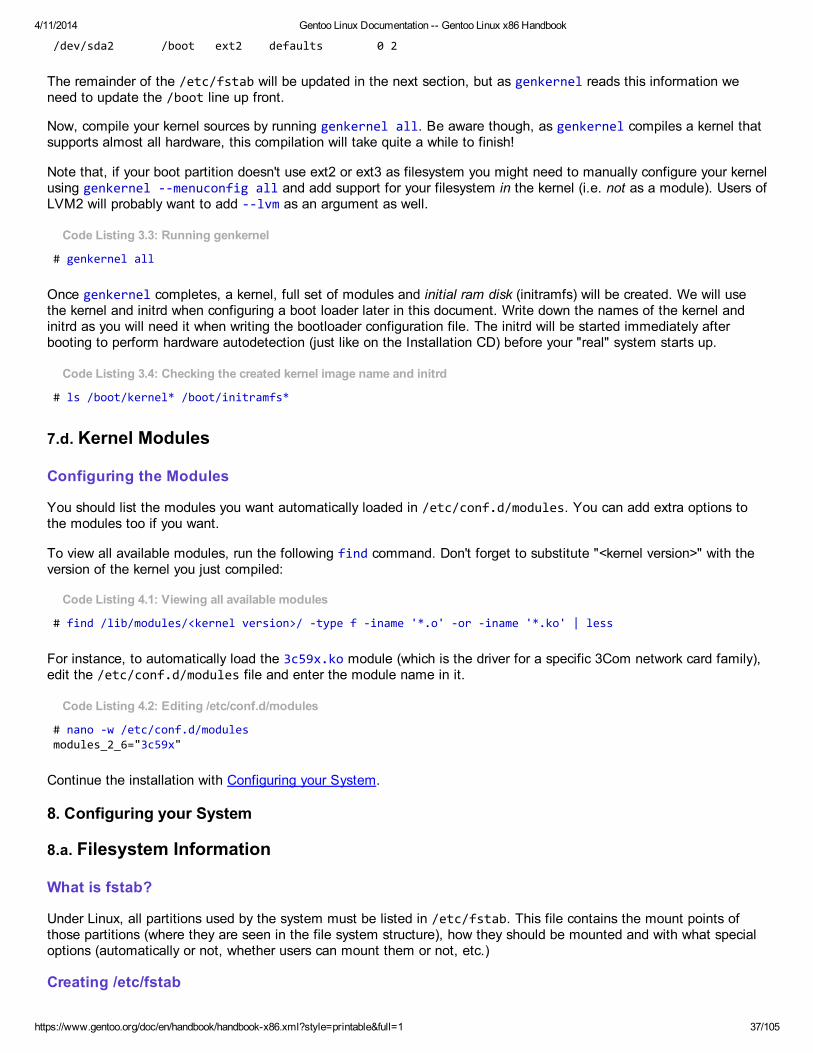
4/11/2014 Gentoo Linux Documentation -- Gentoo Linux x86 Handbook
https://www.gentoo.org/doc/en/handbook/handbook-x86.xml?style=printable&full=1 37/105
/dev/sda2 /boot ext2 defaults 0 2
The remainder of the /etc/fstab will be updated in the next section, but as genkernel reads this information weneed to update the /boot line up front.
Now, compile your kernel sources by running genkernel all. Be aware though, as genkernel compiles a kernel thatsupports almost all hardware, this compilation will take quite a while to finish!
Note that, if your boot partition doesn't use ext2 or ext3 as filesystem you might need to manually configure your kernelusing genkernel --menuconfig all and add support for your filesystem in the kernel (i.e. not as a module). Users ofLVM2 will probably want to add --lvm as an argument as well.
Code Listing 3.3: Running genkernel
# genkernel all
Once genkernel completes, a kernel, full set of modules and initial ram disk (initramfs) will be created. We will usethe kernel and initrd when configuring a boot loader later in this document. Write down the names of the kernel andinitrd as you will need it when writing the bootloader configuration file. The initrd will be started immediately afterbooting to perform hardware autodetection (just like on the Installation CD) before your "real" system starts up.
Code Listing 3.4: Checking the created kernel image name and initrd
# ls /boot/kernel* /boot/initramfs*
7.d. Kernel Modules
Configuring the Modules
You should list the modules you want automatically loaded in /etc/conf.d/modules. You can add extra options tothe modules too if you want.
To view all available modules, run the following find command. Don't forget to substitute "<kernel version>" with theversion of the kernel you just compiled:
Code Listing 4.1: Viewing all available modules
# find /lib/modules/<kernel version>/ -type f -iname '*.o' -or -iname '*.ko' | less
For instance, to automatically load the 3c59x.ko module (which is the driver for a specific 3Com network card family),edit the /etc/conf.d/modules file and enter the module name in it.
Code Listing 4.2: Editing /etc/conf.d/modules
# nano -w /etc/conf.d/modulesmodules_2_6="3c59x"
Continue the installation with Configuring your System.
8. Configuring your System
8.a. Filesystem Information
What is fstab?
Under Linux, all partitions used by the system must be listed in /etc/fstab. This file contains the mount points ofthose partitions (where they are seen in the file system structure), how they should be mounted and with what specialoptions (automatically or not, whether users can mount them or not, etc.)
Creating /etc/fstab
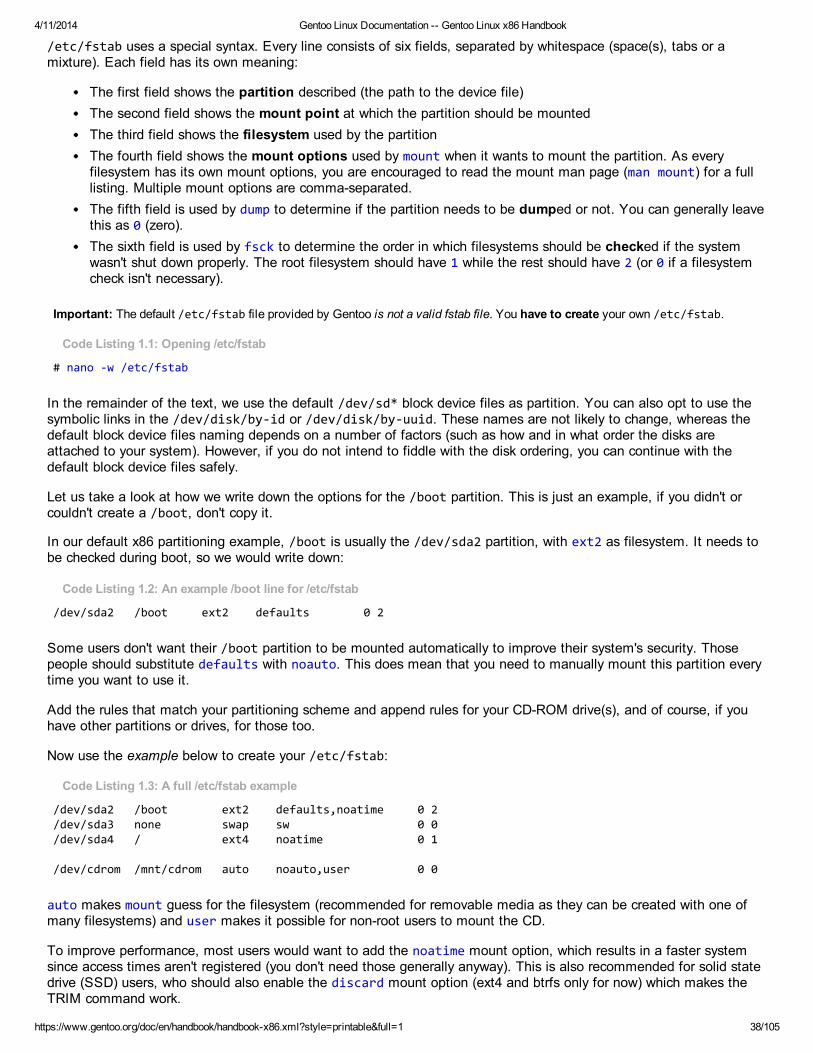
4/11/2014 Gentoo Linux Documentation -- Gentoo Linux x86 Handbook
https://www.gentoo.org/doc/en/handbook/handbook-x86.xml?style=printable&full=1 38/105
/etc/fstab uses a special syntax. Every line consists of six fields, separated by whitespace (space(s), tabs or amixture). Each field has its own meaning:
The first field shows the partition described (the path to the device file)The second field shows the mount point at which the partition should be mountedThe third field shows the filesystem used by the partitionThe fourth field shows the mount options used by mount when it wants to mount the partition. As everyfilesystem has its own mount options, you are encouraged to read the mount man page (man mount) for a fulllisting. Multiple mount options are comma-separated.The fifth field is used by dump to determine if the partition needs to be dumped or not. You can generally leavethis as 0 (zero).The sixth field is used by fsck to determine the order in which filesystems should be checked if the systemwasn't shut down properly. The root filesystem should have 1 while the rest should have 2 (or 0 if a filesystemcheck isn't necessary).
Important: The default /etc/fstab file provided by Gentoo is not a valid fstab file. You have to create your own /etc/fstab.
Code Listing 1.1: Opening /etc/fstab
# nano -w /etc/fstab
In the remainder of the text, we use the default /dev/sd* block device files as partition. You can also opt to use thesymbolic links in the /dev/disk/by-id or /dev/disk/by-uuid. These names are not likely to change, whereas thedefault block device files naming depends on a number of factors (such as how and in what order the disks areattached to your system). However, if you do not intend to fiddle with the disk ordering, you can continue with thedefault block device files safely.
Let us take a look at how we write down the options for the /boot partition. This is just an example, if you didn't orcouldn't create a /boot, don't copy it.
In our default x86 partitioning example, /boot is usually the /dev/sda2 partition, with ext2 as filesystem. It needs tobe checked during boot, so we would write down:
Code Listing 1.2: An example /boot line for /etc/fstab
/dev/sda2 /boot ext2 defaults 0 2
Some users don't want their /boot partition to be mounted automatically to improve their system's security. Thosepeople should substitute defaults with noauto. This does mean that you need to manually mount this partition everytime you want to use it.
Add the rules that match your partitioning scheme and append rules for your CD-ROM drive(s), and of course, if youhave other partitions or drives, for those too.
Now use the example below to create your /etc/fstab:
Code Listing 1.3: A full /etc/fstab example
/dev/sda2 /boot ext2 defaults,noatime 0 2/dev/sda3 none swap sw 0 0/dev/sda4 / ext4 noatime 0 1
/dev/cdrom /mnt/cdrom auto noauto,user 0 0
auto makes mount guess for the filesystem (recommended for removable media as they can be created with one ofmany filesystems) and user makes it possible for non-root users to mount the CD.
To improve performance, most users would want to add the noatime mount option, which results in a faster systemsince access times aren't registered (you don't need those generally anyway). This is also recommended for solid statedrive (SSD) users, who should also enable the discard mount option (ext4 and btrfs only for now) which makes theTRIM command work.
4/11/2014 Gentoo Linux Documentation -- Gentoo Linux x86 Handbook
https://www.gentoo.org/doc/en/handbook/handbook-x86.xml?style=printable&full=1 39/105
Double-check your /etc/fstab, save and quit to continue.
8.b. Networking Information
Host name, Domainname, etc
One of the choices the user has to make is name his/her PC. This seems to be quite easy, but lots of users are havingdifficulties finding the appropriate name for their Linux-pc. To speed things up, know that any name you choose can bechanged afterwards. For all we care, you can just call your system tux and domain homenetwork.
Code Listing 2.1: Setting the host name
# nano -w /etc/conf.d/hostname
(Set the hostname variable to your host name)hostname="tux"
Second, if you need a domainname, set it in /etc/conf.d/net. You only need a domain if your ISP or networkadministrator says so, or if you have a DNS server but not a DHCP server. You don't need to worry about DNS ordomainnames if your networking is setup for DHCP.
Note: The /etc/conf.d/net file does not exist by default, so you might need to create it.
Code Listing 2.2: Setting the domainname
# nano -w /etc/conf.d/net
(Set the dns_domain variable to your domain name)dns_domain_lo="homenetwork"
Note: If you choose not to set a domainname, you can get rid of the "This is hostname.(none)" messages at your login screen byediting /etc/issue. Just delete the string .\O from that file.
If you have a NIS domain (if you don't know what that is, then you don't have one), you need to define that one too:
Code Listing 2.3: Setting the NIS domainname
# nano -w /etc/conf.d/net
(Set the nis_domain variable to your NIS domain name)nis_domain_lo="my-nisdomain"
Note: For more information on configuring DNS and NIS, please read the examples provided in /usr/share/doc/netifrc-*/net.example.bz2 which can be read using bzless. Also, you may want to emerge openresolv to help manage your DNS/NISsetup.
Configuring your Network
Before you get that "Hey, we've had that already"-feeling, you should remember that the networking you set up in thebeginning of the Gentoo installation was just for the installation. Right now you are going to configure networking foryour Gentoo system permanently.
Note: More detailed information about networking, including advanced topics like bonding, bridging, 802.1Q VLANs or wirelessnetworking is covered in the Gentoo Network Configuration section.
All networking information is gathered in /etc/conf.d/net. It uses a straightforward yet not intuitive syntax if youdon't know how to set up networking manually. But don't fear, we'll explain everything. A fully commented example thatcovers many different configurations is available in /usr/share/doc/netifrc-*/net.example.bz2.
Let's first install netifrc:
Code Listing 2.4: Installing netifrc
4/11/2014 Gentoo Linux Documentation -- Gentoo Linux x86 Handbook
https://www.gentoo.org/doc/en/handbook/handbook-x86.xml?style=printable&full=1 40/105
# emerge --noreplace netifrc
DHCP is used by default. For DHCP to work, you will need to install a DHCP client. This is described later in InstallingNecessary System Tools. Do not forget to install a DHCP client.
If you need to configure your network connection either because you need specific DHCP options or because you donot use DHCP at all, open /etc/conf.d/net with your favorite editor (nano is used in this example):
Code Listing 2.5: Opening /etc/conf.d/net for editing
# nano -w /etc/conf.d/net
To enter your own IP address, netmask and gateway, you need to set both config_eth0 and routes_eth0:
Note: This assumes that your network interface will be called eth0. This is, however, very system dependent. It is recommended toassume that the interface is named the same as the interface name when booted from the installation media if the installation media issufficiently recent. More information can be found in Network Interface Naming.
Code Listing 2.6: Manually setting IP information for eth0
config_eth0="192.168.0.2 netmask 255.255.255.0 brd 192.168.0.255"routes_eth0="default via 192.168.0.1"
To use DHCP, define config_eth0:
Code Listing 2.7: Automatically obtaining an IP address for eth0
config_eth0="dhcp"
Please read /usr/share/doc/netifrc-*/net.example.bz2 for a list of all available options. Be sure to also readyour DHCP client manpage if you need to set specific DHCP options.
If you have several network interfaces repeat the above steps for config_eth1, config_eth2, etc.
Now save the configuration and exit to continue.
Automatically Start Networking at Boot
To have your network interfaces activated at boot, you need to add them to the default runlevel.
Code Listing 2.8: Adding net.eth0 to the default runlevel
# cd /etc/init.d# ln -s net.lo net.eth0# rc-update add net.eth0 default
If you have several network interfaces, you need to create the appropriate net.* files just like you did with net.eth0.
If you later find out the assumption about the network interface name (which we currently document as eth0) waswrong, then
1. update the /etc/conf.d/net file with the correct interface name (like enp3s0 instead of eth0),2. create new symbolic link (like /etc/init.d/net.enp3s0),3. remove the old symbolic link (rm /etc/init.d/net.eth0),4. add the new one to the default runlevel, and5. remove the old one using rc-update del net.eth0 default.
Writing Down Network Information
You now need to inform Linux about your network. This is defined in /etc/hosts and helps in resolving host names toIP addresses for hosts that aren't resolved by your nameserver. You need to define your system. You may also want todefine other systems on your network if you don't want to set up your own internal DNS system.
4/11/2014 Gentoo Linux Documentation -- Gentoo Linux x86 Handbook
https://www.gentoo.org/doc/en/handbook/handbook-x86.xml?style=printable&full=1 41/105
Code Listing 2.9: Opening /etc/hosts
# nano -w /etc/hosts
Code Listing 2.10: Filling in the networking information
(This defines the current system)127.0.0.1 tux.homenetwork tux localhost
(Define extra systems on your network,they need to have a static IP to be defined this way.)192.168.0.5 jenny.homenetwork jenny192.168.0.6 benny.homenetwork benny
Save and exit the editor to continue.
If you don't have PCMCIA, you can now continue with System Information. PCMCIA-users should read the followingtopic on PCMCIA.
Optional: Get PCMCIA Working
PCMCIA users should first install the pcmciautils package.
Code Listing 2.11: Installing pcmciautils
# emerge pcmciautils
8.c. System Information
Root Password
First we set the root password by typing:
Code Listing 3.1: Setting the root password
# passwd
System Information
Gentoo uses /etc/rc.conf to configure the services, startup, and shutdown of your system. Open up /etc/rc.confand enjoy all the comments in the file.
Code Listing 3.2: Configuring services
# nano -w /etc/rc.conf
When you're finished configuring these two files, save them and exit.
Gentoo uses /etc/conf.d/keymaps to handle keyboard configuration. Edit it to configure your keyboard.
Code Listing 3.3: Opening /etc/conf.d/keymaps
# nano -w /etc/conf.d/keymaps
Take special care with the keymap variable. If you select the wrong keymap, you will get weird results when typing onyour keyboard.
When you're finished configuring /etc/conf.d/keymaps, save and exit.
Gentoo uses /etc/conf.d/hwclock to set clock options. Edit it according to your needs.
Code Listing 3.4: Opening /etc/conf.d/hwclock
# nano -w /etc/conf.d/hwclock
4/11/2014 Gentoo Linux Documentation -- Gentoo Linux x86 Handbook
https://www.gentoo.org/doc/en/handbook/handbook-x86.xml?style=printable&full=1 42/105
If your hardware clock is not using UTC, you need to add clock="local" to the file. Otherwise you will notice someclock skew.
When you're finished configuring /etc/conf.d/hwclock, save and exit.
9. Installing Necessary System Tools
9.a. System Logger
Some tools are missing from the stage3 archive because several packages provide the same functionality. It is now upto you to choose which ones you want to install.
The first tool you need to decide on has to provide logging facilities for your system. Unix and Linux have an excellenthistory of logging capabilities -- if you want you can log everything that happens on your system in logfiles. Thishappens through the system logger.
Gentoo offers several system loggers to choose from. There are sysklogd, which is the traditional set of systemlogging daemons, syslog-ng, an advanced system logger, and metalog which is a highly-configurable system logger.Others might be available through Portage as well - our number of available packages increases on a daily basis.
If you plan on using sysklogd or syslog-ng you might want to install logrotate afterwards as those system loggersdon't provide any rotation mechanism for the log files.
To install the system logger of your choice, emerge it and have it added to the default runlevel using rc-update. Thefollowing example installs syslog-ng. Of course substitute with your system logger:
Code Listing 1.1: Installing a system logger
# emerge syslog-ng# rc-update add syslog-ng default
9.b. Optional: Cron Daemon
Next is the cron daemon. Although it is optional and not required for your system, it is wise to install one. But what is acron daemon? A cron daemon executes scheduled commands. It is very handy if you need to execute some commandregularly (for instance daily, weekly or monthly).
Gentoo offers several possible cron daemons, including bcron, dcron, fcron and cronie. Installing one of them issimilar to installing a system logger. However, dcron and fcron require an extra configuration command, namelycrontab /etc/crontab. If you don't know what to choose, use cronie.
Code Listing 2.1: Installing a cron daemon
# emerge cronie# rc-update add cronie default(Only if you have chosen dcron or fcron) # crontab /etc/crontab
9.c. Optional: File Indexing
If you want to index your system's files so you are able to quickly locate them using the locate tool, you need toinstall sys-apps/mlocate.
Code Listing 3.1: Installing mlocate
# emerge mlocate
9.d. Optional: Remote Access
If you need to access your system remotely after installation, don't forget to add sshd to the default runlevel:
4/11/2014 Gentoo Linux Documentation -- Gentoo Linux x86 Handbook
https://www.gentoo.org/doc/en/handbook/handbook-x86.xml?style=printable&full=1 43/105
Code Listing 4.1: Adding sshd to the default runlevel
# rc-update add sshd default
If you need serial console access (which is possible in case of remote servers), you might need to uncomment theserial console section in /etc/inittab if it has not been done already automatically.
Code Listing 4.2: Editing /etc/inittab
# nano -w /etc/inittab
The following excerpt shows the uncommented section:
Code Listing 4.3: Uncommenting serial consoles in inittab
# SERIAL CONSOLESs0:12345:respawn:/sbin/agetty 9600 ttyS0 vt100s1:12345:respawn:/sbin/agetty 9600 ttyS1 vt100
9.e. File System Tools
Depending on what file systems you are using, you need to install the necessary file system utilities (for checking thefilesystem integrity, creating additional file systems etc.). Please note that tools for managing ext2, ext3 or ext4filesystems (e2fsprogs) are already installed as a part of the system.
The following table lists the tools you need to install if you use a certain file system:
File System Tool Install CommandXFS xfsprogs emerge xfsprogsReiserFS reiserfsprogs emerge reiserfsprogsJFS jfsutils emerge jfsutils
9.f. Networking Tools
If you don't require any additional networking-related tools (such as ppp or a dhcp client) continue with Configuring theBootloader.
Optional: Installing a DHCP Client
If you require Gentoo to automatically obtain an IP address for your network interface(s), you need to install dhcpcd (orany other DHCP client -- see Modular Networking for a list of available DHCP clients). If you don't do this now, youmight not be able to connect to the internet after the installation.
Code Listing 6.1: Installing dhcpcd
# emerge dhcpcd
Optional: Installing a PPPoE Client
If you need ppp to connect to the net, you need to install it.
Code Listing 6.2: Installing ppp
# emerge ppp
Now continue with Configuring the Bootloader.
10. Configuring the Bootloader
10.a. Making your Choice
4/11/2014 Gentoo Linux Documentation -- Gentoo Linux x86 Handbook
https://www.gentoo.org/doc/en/handbook/handbook-x86.xml?style=printable&full=1 44/105
Introduction
Now that your kernel is configured and compiled and the necessary system configuration files are filled in correctly, it istime to install a program that will fire up your kernel when you start the system. Such a program is called a bootloader.
For x86, Gentoo Linux provides GRUB2, LILO and GRUB Legacy.
10.b. Default: Using GRUB2
Installing GRUB2
GRUB2 is provided through the sys-boot/grub package.
Code Listing 2.1: Installing GRUB2
# emerge sys-boot/grub
The GRUB2 software is now installed on the system, but not activated yet.
Configuring GRUB2
First, let us install the necessary GRUB2 files in /boot/grub. Assuming the first disk (the one where the system bootsfrom) is /dev/sda, the following command will do this for us:
Code Listing 2.2: Installing the GRUB2 files in /boot/grub
# grub2-install /dev/sda
Next, we can generate the GRUB2 configuration based on the user configuration specified in the /etc/default/grubfile and /etc/grub.d scripts. In most cases, no configuration is needed by users as GRUB2 will automatically detectwhich kernel to boot (the highest one available in /boot) and what the root file system is.
To generate the final GRUB2 configuration, run the grub2-mkconfig command:
Code Listing 2.3: Generating GRUB2 configuration
# grub2-mkconfig -o /boot/grub/grub.cfgGenerating grub.cfg ...Found linux image: /boot/vmlinuz-3.12.20-gentooFound initrd image: /boot/initramfs-genkernel-x86-3.12.20-gentoodone
The output of the command must mention that at least one Linux image is found, as those are needed to boot thesystem. If you use initramfs or used genkernel to build the kernel, the correct initrd image should be detected as well.If this is not the case, go to /boot and check the contents using the ls command. If the files are indeed missing, goback to the kernel configuration and installation instructions.
10.c. Alternative: Using LILO
Installing LILO
LILO, the LInuxLOader, is the tried and true workhorse of Linux bootloaders. However, it lacks some features thatGRUB has (which is also the reason why GRUB is currently gaining popularity). The reason why LILO is still used isthat, on some systems, GRUB doesn't work and LILO does. Of course, it is also used because some people knowLILO and want to stick with it. Either way, Gentoo supports both, and apparently you have chosen to use LILO.
Installing LILO is a breeze; just use emerge.
Code Listing 3.1: Installing LILO
# emerge lilo
4/11/2014 Gentoo Linux Documentation -- Gentoo Linux x86 Handbook
https://www.gentoo.org/doc/en/handbook/handbook-x86.xml?style=printable&full=1 45/105
Configuring LILO
To configure LILO, you must create /etc/lilo.conf. Fire up your favorite editor (in this handbook we use nano forconsistency) and create the file.
Code Listing 3.2: Creating /etc/lilo.conf
# nano -w /etc/lilo.conf
Some sections ago we have asked you to remember the kernel-image name you have created. In the next examplelilo.conf we use the example partitioning scheme.
Make sure you use your kernel image filename and, if appropriate, your initrd image filename.
Note: If your root filesystem is JFS, you must add a append="ro" line after each boot item since JFS needs to replay its log before itallows read-write mounting.
Code Listing 3.3: Example /etc/lilo.conf
boot=/dev/sda # Install LILO in the MBRprompt # Give the user the chance to select another sectiontimeout=50 # Wait 5 (five) seconds before booting the default sectiondefault=gentoo # When the timeout has passed, boot the "gentoo" section
image=/boot/vmlinuz-3.12.20-gentoo label=gentoo # Name we give to this section read-only # Start with a read-only root. Do not alter! root=/dev/sda4 # Location of the root filesystem
image=/boot/vmlinuz-3.12.20-gentoo label=gentoo.rescue # Name we give to this section read-only # Start with a read-only root. Do not alter! root=/dev/sda4 # Location of the root filesystem append="init=/bin/bb" # Launch the Gentoo static rescue shell
# The next two lines are only if you dualboot with a Windows system.# In this example, Windows is hosted on /dev/sda6.other=/dev/sda6 label=windows
Note: If you use a different partitioning scheme and/or kernel image, adjust accordingly.
If, while building the Linux kernel, you opted to include an initramfs to boot from, then you will need to change theconfiguration by referring to this initramfs file and telling the initramfs where your real root device is at:
Code Listing 3.4: LILO snippet for initramfs-enabled kernel builds
image=/boot/vmlinuz-3.12.20-gentoo label=gentoo read-only append="real_root=/dev/sda4" initrd=/boot/initramfs-genkernel-x86-3.12.20-gentoo
If you need to pass any additional options to the kernel, add an append statement to the section. As an example, weadd the video statement to enable framebuffer:
Code Listing 3.5: Using append to add kernel options
image=/boot/vmlinuz-3.12.20-gentoo label=gentoo read-only root=/dev/sda4 append="video=uvesafb:mtrr,ywrap,1024x768-32@85"
4/11/2014 Gentoo Linux Documentation -- Gentoo Linux x86 Handbook
https://www.gentoo.org/doc/en/handbook/handbook-x86.xml?style=printable&full=1 46/105
If you're using a 2.6.7 or higher kernel and you jumpered your harddrive because the BIOS can't handle largeharddrives you'll need to append sda=stroke. Replace sda with the device that requires this option.
genkernel users should know that their kernels use the same boot options as is used for the Installation CD. Forinstance, if you have SCSI devices, you should add doscsi as kernel option.
Now save the file and exit. To finish up, you have to run /sbin/lilo so LILO can apply the /etc/lilo.conf to yoursystem (i.e. install itself on the disk). Keep in mind that you'll also have to run /sbin/lilo every time you install anew kernel or make any changes to the menu.
Code Listing 3.6: Finishing the LILO installation
# /sbin/lilo
If you have more questions regarding LILO, please consult its wikipedia page.
You can now continue with Rebooting the System.
10.d. Alternative: Using GRUB Legacy
What is Legacy?
GRUB has been reworked and a new release dubbed GRUB2 is made available. The new GRUB2 codebase is quitedifferent from the current GRUB, which is why this GRUB version is now dubbed as "GRUB Legacy".
Understanding GRUB's terminology
The most critical part of understanding GRUB is getting comfortable with how GRUB refers to hard drives andpartitions. Your Linux partition /dev/sda2 will most likely be called (hd0,1) under GRUB. Notice the parenthesesaround the hd0,1 - they are required.
Hard drives count from zero rather than "a" and partitions start at zero rather than one. Be aware too that with the hddevices, only hard drives are counted, not atapi-ide devices such as cdrom players and burners. Also, the sameconstruct is used with SCSI drives. (Normally they get higher numbers than IDE drives except when the BIOS isconfigured to boot from SCSI devices.) When you ask the BIOS to boot from a different hard disk (for instance yourprimary slave), that harddisk is seen as hd0.
Assuming you have a hard drive on /dev/sda and two more on /dev/sdb and /dev/sdc, /dev/sdb7 gets translatedto (hd1,6). It might sound tricky and tricky it is indeed, but as we will see, GRUB offers a tab completion mechanismthat comes handy for those of you having a lot of hard drives and partitions and who are a little lost in the GRUBnumbering scheme.
Having gotten the feel for that, it is time to install GRUB.
Installing GRUB
To install GRUB Legacy, let's first emerge it:
Code Listing 4.1: Installing GRUB
# emerge sys-boot/grub:0
Although GRUB is now installed, we still need to write up a configuration file for it and place GRUB in our MBR so thatGRUB automatically boots your newly created kernel. Create /boot/grub/grub.conf with nano (or, if applicable,another editor):
Code Listing 4.2: Creating /boot/grub/grub.conf
# nano -w /boot/grub/grub.conf
Now we are going to write up a grub.conf. Make sure you use your kernel image filename and, if appropriate, yourinitrd image filename.
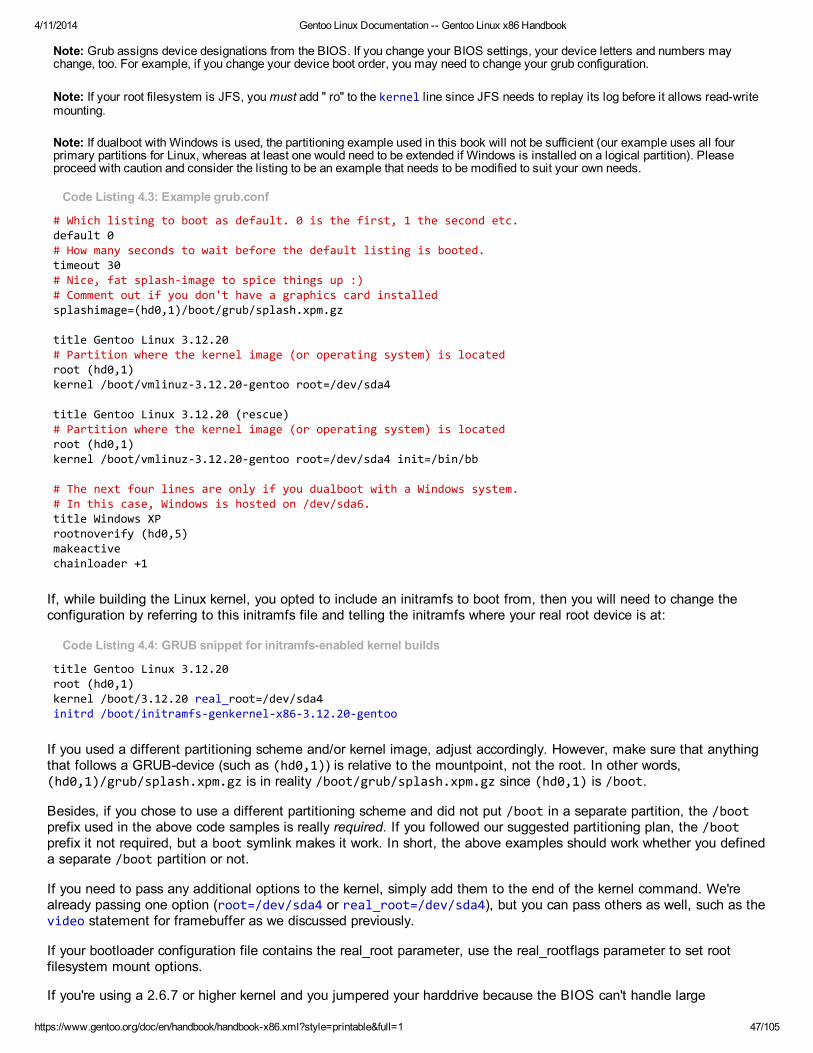
4/11/2014 Gentoo Linux Documentation -- Gentoo Linux x86 Handbook
https://www.gentoo.org/doc/en/handbook/handbook-x86.xml?style=printable&full=1 47/105
Note: Grub assigns device designations from the BIOS. If you change your BIOS settings, your device letters and numbers maychange, too. For example, if you change your device boot order, you may need to change your grub configuration.
Note: If your root filesystem is JFS, you must add " ro" to the kernel line since JFS needs to replay its log before it allows read-writemounting.
Note: If dualboot with Windows is used, the partitioning example used in this book will not be sufficient (our example uses all fourprimary partitions for Linux, whereas at least one would need to be extended if Windows is installed on a logical partition). Pleaseproceed with caution and consider the listing to be an example that needs to be modified to suit your own needs.
Code Listing 4.3: Example grub.conf
# Which listing to boot as default. 0 is the first, 1 the second etc.default 0# How many seconds to wait before the default listing is booted.timeout 30# Nice, fat splash-image to spice things up :)# Comment out if you don't have a graphics card installedsplashimage=(hd0,1)/boot/grub/splash.xpm.gz
title Gentoo Linux 3.12.20# Partition where the kernel image (or operating system) is locatedroot (hd0,1)kernel /boot/vmlinuz-3.12.20-gentoo root=/dev/sda4
title Gentoo Linux 3.12.20 (rescue)# Partition where the kernel image (or operating system) is locatedroot (hd0,1)kernel /boot/vmlinuz-3.12.20-gentoo root=/dev/sda4 init=/bin/bb
# The next four lines are only if you dualboot with a Windows system.# In this case, Windows is hosted on /dev/sda6.title Windows XProotnoverify (hd0,5)makeactivechainloader +1
If, while building the Linux kernel, you opted to include an initramfs to boot from, then you will need to change theconfiguration by referring to this initramfs file and telling the initramfs where your real root device is at:
Code Listing 4.4: GRUB snippet for initramfs-enabled kernel builds
title Gentoo Linux 3.12.20root (hd0,1)kernel /boot/3.12.20 real_root=/dev/sda4initrd /boot/initramfs-genkernel-x86-3.12.20-gentoo
If you used a different partitioning scheme and/or kernel image, adjust accordingly. However, make sure that anythingthat follows a GRUB-device (such as (hd0,1)) is relative to the mountpoint, not the root. In other words,(hd0,1)/grub/splash.xpm.gz is in reality /boot/grub/splash.xpm.gz since (hd0,1) is /boot.
Besides, if you chose to use a different partitioning scheme and did not put /boot in a separate partition, the /bootprefix used in the above code samples is really required. If you followed our suggested partitioning plan, the /bootprefix it not required, but a boot symlink makes it work. In short, the above examples should work whether you defineda separate /boot partition or not.
If you need to pass any additional options to the kernel, simply add them to the end of the kernel command. We'realready passing one option (root=/dev/sda4 or real_root=/dev/sda4), but you can pass others as well, such as thevideo statement for framebuffer as we discussed previously.
If your bootloader configuration file contains the real_root parameter, use the real_rootflags parameter to set rootfilesystem mount options.
If you're using a 2.6.7 or higher kernel and you jumpered your harddrive because the BIOS can't handle large
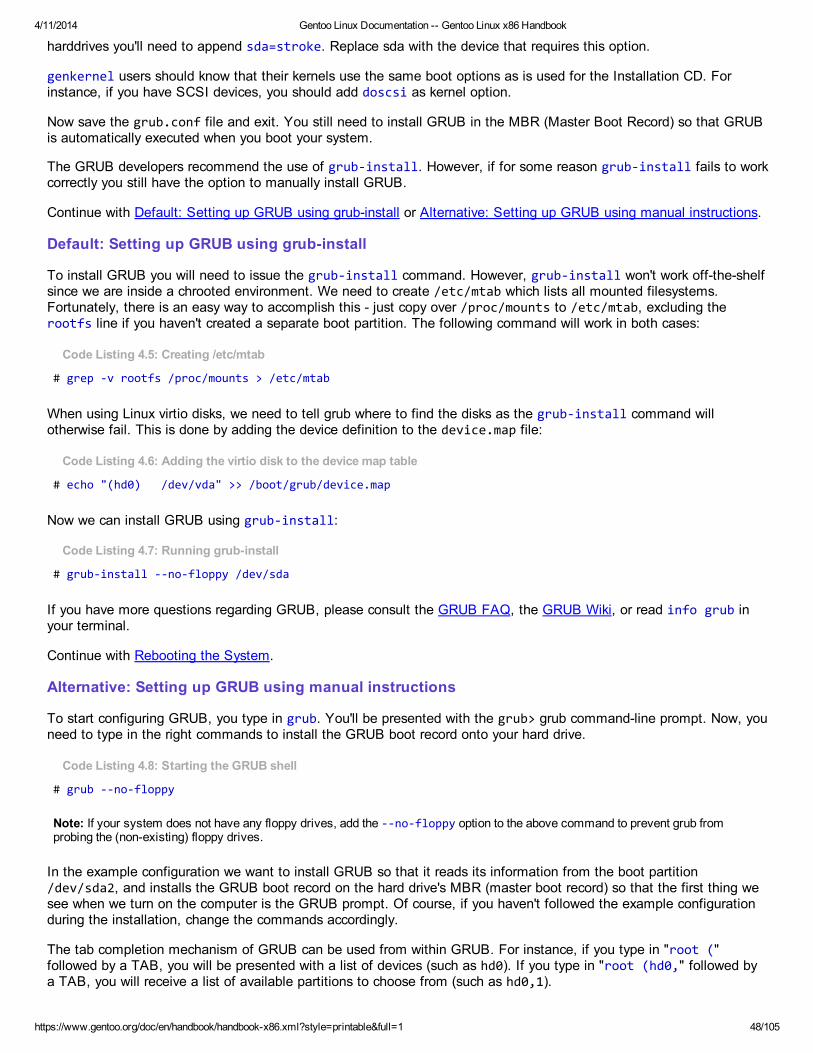
4/11/2014 Gentoo Linux Documentation -- Gentoo Linux x86 Handbook
https://www.gentoo.org/doc/en/handbook/handbook-x86.xml?style=printable&full=1 48/105
harddrives you'll need to append sda=stroke. Replace sda with the device that requires this option.
genkernel users should know that their kernels use the same boot options as is used for the Installation CD. Forinstance, if you have SCSI devices, you should add doscsi as kernel option.
Now save the grub.conf file and exit. You still need to install GRUB in the MBR (Master Boot Record) so that GRUBis automatically executed when you boot your system.
The GRUB developers recommend the use of grub-install. However, if for some reason grub-install fails to workcorrectly you still have the option to manually install GRUB.
Continue with Default: Setting up GRUB using grub-install or Alternative: Setting up GRUB using manual instructions.
Default: Setting up GRUB using grub-install
To install GRUB you will need to issue the grub-install command. However, grub-install won't work off-the-shelfsince we are inside a chrooted environment. We need to create /etc/mtab which lists all mounted filesystems.Fortunately, there is an easy way to accomplish this - just copy over /proc/mounts to /etc/mtab, excluding therootfs line if you haven't created a separate boot partition. The following command will work in both cases:
Code Listing 4.5: Creating /etc/mtab
# grep -v rootfs /proc/mounts > /etc/mtab
When using Linux virtio disks, we need to tell grub where to find the disks as the grub-install command willotherwise fail. This is done by adding the device definition to the device.map file:
Code Listing 4.6: Adding the virtio disk to the device map table
# echo "(hd0) /dev/vda" >> /boot/grub/device.map
Now we can install GRUB using grub-install:
Code Listing 4.7: Running grub-install
# grub-install --no-floppy /dev/sda
If you have more questions regarding GRUB, please consult the GRUB FAQ, the GRUB Wiki, or read info grub inyour terminal.
Continue with Rebooting the System.
Alternative: Setting up GRUB using manual instructions
To start configuring GRUB, you type in grub. You'll be presented with the grub> grub command-line prompt. Now, youneed to type in the right commands to install the GRUB boot record onto your hard drive.
Code Listing 4.8: Starting the GRUB shell
# grub --no-floppy
Note: If your system does not have any floppy drives, add the --no-floppy option to the above command to prevent grub fromprobing the (non-existing) floppy drives.
In the example configuration we want to install GRUB so that it reads its information from the boot partition/dev/sda2, and installs the GRUB boot record on the hard drive's MBR (master boot record) so that the first thing wesee when we turn on the computer is the GRUB prompt. Of course, if you haven't followed the example configurationduring the installation, change the commands accordingly.
The tab completion mechanism of GRUB can be used from within GRUB. For instance, if you type in "root ("followed by a TAB, you will be presented with a list of devices (such as hd0). If you type in "root (hd0," followed bya TAB, you will receive a list of available partitions to choose from (such as hd0,1).
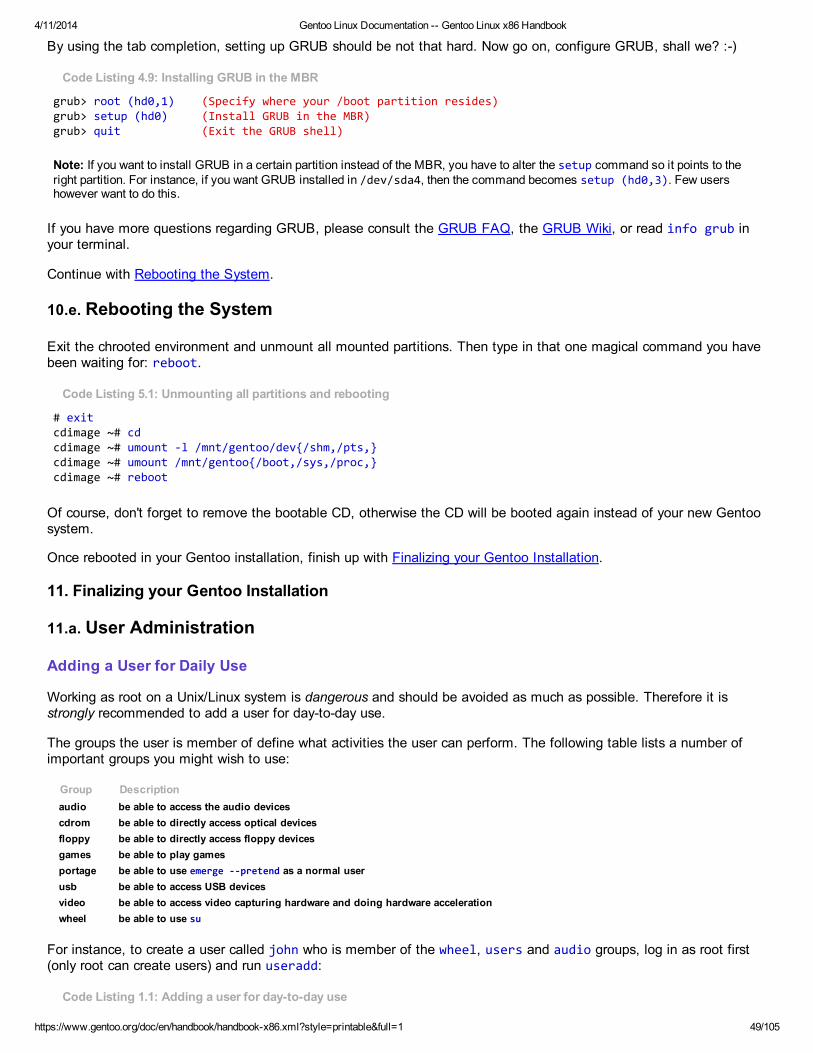
4/11/2014 Gentoo Linux Documentation -- Gentoo Linux x86 Handbook
https://www.gentoo.org/doc/en/handbook/handbook-x86.xml?style=printable&full=1 49/105
By using the tab completion, setting up GRUB should be not that hard. Now go on, configure GRUB, shall we? :-)
Code Listing 4.9: Installing GRUB in the MBR
grub> root (hd0,1) (Specify where your /boot partition resides)grub> setup (hd0) (Install GRUB in the MBR)grub> quit (Exit the GRUB shell)
Note: If you want to install GRUB in a certain partition instead of the MBR, you have to alter the setup command so it points to theright partition. For instance, if you want GRUB installed in /dev/sda4, then the command becomes setup (hd0,3). Few usershowever want to do this.
If you have more questions regarding GRUB, please consult the GRUB FAQ, the GRUB Wiki, or read info grub inyour terminal.
Continue with Rebooting the System.
10.e. Rebooting the System
Exit the chrooted environment and unmount all mounted partitions. Then type in that one magical command you havebeen waiting for: reboot.
Code Listing 5.1: Unmounting all partitions and rebooting
# exitcdimage ~# cdcdimage ~# umount -l /mnt/gentoo/dev{/shm,/pts,}cdimage ~# umount /mnt/gentoo{/boot,/sys,/proc,}cdimage ~# reboot
Of course, don't forget to remove the bootable CD, otherwise the CD will be booted again instead of your new Gentoosystem.
Once rebooted in your Gentoo installation, finish up with Finalizing your Gentoo Installation.
11. Finalizing your Gentoo Installation
11.a. User Administration
Adding a User for Daily Use
Working as root on a Unix/Linux system is dangerous and should be avoided as much as possible. Therefore it isstrongly recommended to add a user for day-to-day use.
The groups the user is member of define what activities the user can perform. The following table lists a number ofimportant groups you might wish to use:
Group Descriptionaudio be able to access the audio devicescdrom be able to directly access optical devicesfloppy be able to directly access floppy devicesgames be able to play gamesportage be able to use emerge --pretend as a normal userusb be able to access USB devicesvideo be able to access video capturing hardware and doing hardware accelerationwheel be able to use su
For instance, to create a user called john who is member of the wheel, users and audio groups, log in as root first(only root can create users) and run useradd:
Code Listing 1.1: Adding a user for day-to-day use
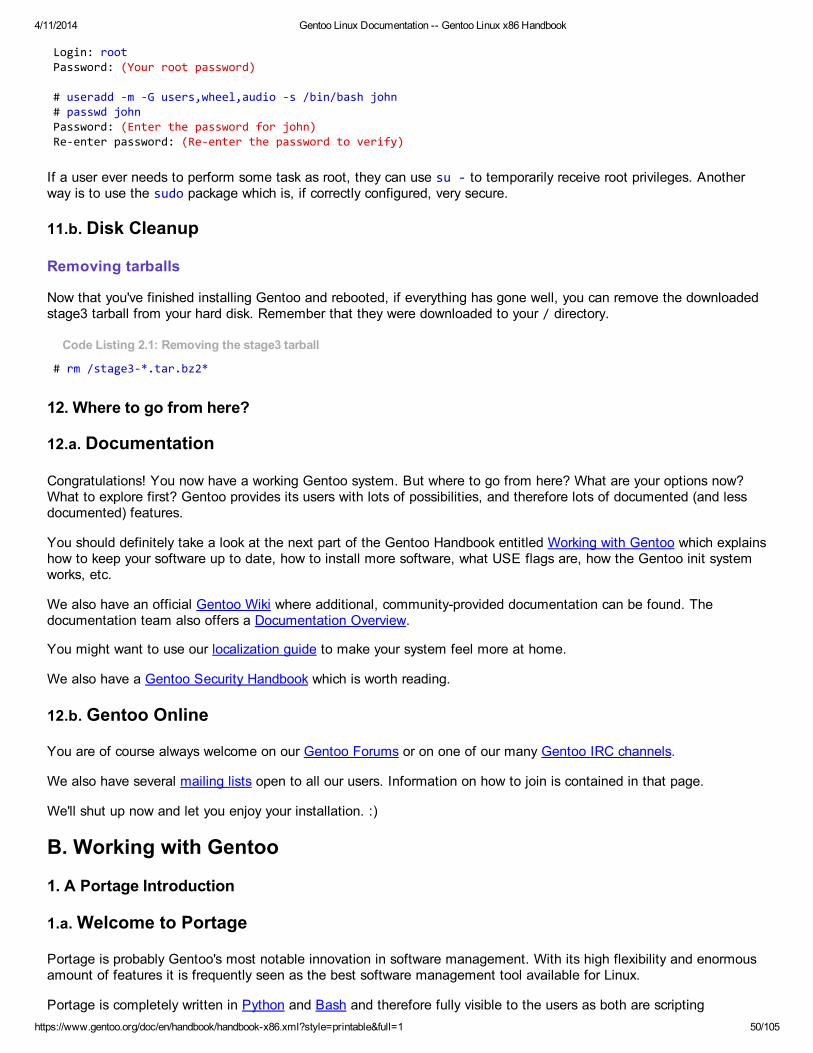
4/11/2014 Gentoo Linux Documentation -- Gentoo Linux x86 Handbook
https://www.gentoo.org/doc/en/handbook/handbook-x86.xml?style=printable&full=1 50/105
Login: rootPassword: (Your root password)
# useradd -m -G users,wheel,audio -s /bin/bash john# passwd johnPassword: (Enter the password for john)Re-enter password: (Re-enter the password to verify)
If a user ever needs to perform some task as root, they can use su - to temporarily receive root privileges. Anotherway is to use the sudo package which is, if correctly configured, very secure.
11.b. Disk Cleanup
Removing tarballs
Now that you've finished installing Gentoo and rebooted, if everything has gone well, you can remove the downloadedstage3 tarball from your hard disk. Remember that they were downloaded to your / directory.
Code Listing 2.1: Removing the stage3 tarball
# rm /stage3-*.tar.bz2*
12. Where to go from here?
12.a. Documentation
Congratulations! You now have a working Gentoo system. But where to go from here? What are your options now?What to explore first? Gentoo provides its users with lots of possibilities, and therefore lots of documented (and lessdocumented) features.
You should definitely take a look at the next part of the Gentoo Handbook entitled Working with Gentoo which explainshow to keep your software up to date, how to install more software, what USE flags are, how the Gentoo init systemworks, etc.
We also have an official Gentoo Wiki where additional, community-provided documentation can be found. Thedocumentation team also offers a Documentation Overview.
You might want to use our localization guide to make your system feel more at home.
We also have a Gentoo Security Handbook which is worth reading.
12.b. Gentoo Online
You are of course always welcome on our Gentoo Forums or on one of our many Gentoo IRC channels.
We also have several mailing lists open to all our users. Information on how to join is contained in that page.
We'll shut up now and let you enjoy your installation. :)
B. Working with Gentoo
1. A Portage Introduction
1.a. Welcome to Portage
Portage is probably Gentoo's most notable innovation in software management. With its high flexibility and enormousamount of features it is frequently seen as the best software management tool available for Linux.
Portage is completely written in Python and Bash and therefore fully visible to the users as both are scripting
4/11/2014 Gentoo Linux Documentation -- Gentoo Linux x86 Handbook
https://www.gentoo.org/doc/en/handbook/handbook-x86.xml?style=printable&full=1 51/105
languages.
Most users will work with Portage through the emerge tool. This chapter is not meant to duplicate the informationavailable from the emerge man page. For a complete rundown of emerge's options, please consult the man page:
Code Listing 1.1: Reading the emerge man page
$ man emerge
1.b. The Portage Tree
Ebuilds
When we talk about packages, we often mean software titles that are available to the Gentoo users through thePortage tree. The Portage tree is a collection of ebuilds, files that contain all information Portage needs to maintainsoftware (install, search, query, ...). These ebuilds reside in /usr/portage by default.
Whenever you ask Portage to perform some action regarding software titles, it will use the ebuilds on your system as abase. It is therefore important that you regularly update the ebuilds on your system so Portage knows about newsoftware, security updates, etc.
Updating the Portage Tree
The Portage tree is usually updated with rsync, a fast incremental file transfer utility. Updating is fairly simple as theemerge command provides a front-end for rsync:
Code Listing 2.1: Updating the Portage tree
# emerge --sync
If you are unable to rsync due to firewall restrictions you can still update your Portage tree by using our daily generatedPortage tree snapshots. The emerge-webrsync tool automatically fetches and installs the latest snapshot on yoursystem:
Code Listing 2.2: Running emerge-webrsync
# emerge-webrsync
An additional advantage of using emerge-webrsync is that it allows the administrator to only pull in portage treesnapshots that are signed by the Gentoo release engineering GPG key. More information on this can be found in thePortage Features section on Fetching Validated Portage Tree Snapshots.
1.c. Maintaining Software
Searching for Software
To search through the Portage tree after software titles, you can use emerge built-in search capabilities. By default,emerge --search returns the names of packages whose title matches (either fully or partially) the given search term.
For instance, to search for all packages who have "pdf" in their name:
Code Listing 3.1: Searching for pdf-named packages
$ emerge --search pdf
If you want to search through the descriptions as well you can use the --searchdesc (or -S) switch:
Code Listing 3.2: Searching for pdf-related packages
$ emerge --searchdesc pdf
When you take a look at the output, you'll notice that it gives you a lot of information. The fields are clearly labelled so
4/11/2014 Gentoo Linux Documentation -- Gentoo Linux x86 Handbook
https://www.gentoo.org/doc/en/handbook/handbook-x86.xml?style=printable&full=1 52/105
we won't go further into their meanings:
Code Listing 3.3: Example 'emerge --search' output
* net-print/cups-pdf Latest version available: 1.5.2 Latest version installed: [ Not Installed ] Size of downloaded files: 15 kB Homepage: http://cip.physik.uni-wuerzburg.de/~vrbehr/cups-pdf/ Description: Provides a virtual printer for CUPS to produce PDF files. License: GPL-2
Installing Software
Once you've found a software title to your liking, you can easily install it with emerge: just add the package name. Forinstance, to install gnumeric:
Code Listing 3.4: Installing gnumeric
# emerge gnumeric
Since many applications depend on each other, any attempt to install a certain software package might result in theinstallation of several dependencies as well. Don't worry, Portage handles dependencies well. If you want to find outwhat Portage would install when you ask it to install a certain package, add the --pretend switch. For instance:
Code Listing 3.5: Pretend to install gnumeric
# emerge --pretend gnumeric
When you ask Portage to install a package, it will download the necessary source code from the internet (if necessary)and store it by default in /usr/portage/distfiles. After this it will unpack, compile and install the package. If youwant Portage to only download the sources without installing them, add the --fetchonly option to the emergecommand:
Code Listing 3.6: Download the sourcecode for gnumeric
# emerge --fetchonly gnumeric
Finding Installed Package Documentation
Many packages come with their own documentation. Sometimes, the doc USE flag determines whether the packagedocumentation should be installed or not. You can check the existence of a doc USE flag with the emerge -vp<package name> command.
Code Listing 3.7: Checking the existence of a doc USE flag
(alsa-lib is just an example, of course.)# emerge -vp alsa-lib[ebuild N ] media-libs/alsa-lib-1.0.14_rc1 -debug +doc 698 kB
The best way of enabling the doc USE flag is doing it on a per-package basis via /etc/portage/package.use, sothat you get documentation only for packages that you are interested in. Enabling this flag globally is known to causeproblems with circular dependencies. For more information, please read the USE Flags chapter.
Once the package installed, its documentation is generally found in a subdirectory named after the package under the/usr/share/doc directory. You can also list all installed files with the equery tool which is part of the app-portage/gentoolkit package.
Code Listing 3.8: Locating package documentation
# ls -l /usr/share/doc/alsa-lib-1.0.14_rc1total 28-rw-r--r-- 1 root root 669 May 17 21:54 ChangeLog.gz-rw-r--r-- 1 root root 9373 May 17 21:54 COPYING.gz
4/11/2014 Gentoo Linux Documentation -- Gentoo Linux x86 Handbook
https://www.gentoo.org/doc/en/handbook/handbook-x86.xml?style=printable&full=1 53/105
drwxr-xr-x 2 root root 8560 May 17 21:54 html-rw-r--r-- 1 root root 196 May 17 21:54 TODO.gz
(Alternatively, use equery to locate interesting files:)# equery files alsa-lib | lessmedia-libs/alsa-lib-1.0.14_rc1* Contents of media-libs/alsa-lib-1.0.14_rc1:/usr/usr/bin/usr/bin/alsalisp(Output truncated)
Removing Software
When you want to remove a software package from your system, use emerge --unmerge. This will tell Portage toremove all files installed by that package from your system except the configuration files of that application if you havealtered those after the installation. Leaving the configuration files allows you to continue working with the package ifyou ever decide to install it again.
However, a big warning applies: Portage will not check if the package you want to remove is required by anotherpackage. It will however warn you when you want to remove an important package that breaks your system if youunmerge it.
Code Listing 3.9: Removing gnumeric from the system
# emerge --unmerge gnumeric
When you remove a package from your system, the dependencies of that package that were installed automaticallywhen you installed the software are left. To have Portage locate all dependencies that can now be removed, useemerge's --depclean functionality. We will talk about this later on.
Updating your System
To keep your system in perfect shape (and not to mention install the latest security updates) you need to update yoursystem regularly. Since Portage only checks the ebuilds in your Portage tree you first have to update your Portagetree. When your Portage tree is updated, you can update your system with emerge --update @world. In the nextexample, we'll also use the --ask switch which will tell Portage to display the list of packages it wants to upgrade andask you if you want to continue:
Code Listing 3.10: Updating your system
# emerge --update --ask @world
Portage will then search for newer version of the applications you have installed. However, it will only verify theversions for the applications you have explicitly installed (the applications listed in /var/lib/portage/world) - it doesnot thoroughly check their dependencies. If you want to update the dependencies of those packages as well, add the --deep argument:
Code Listing 3.11: Updating your system with dependencies
# emerge --update --deep @world
Still, this doesn't mean all packages: some packages on your system are needed during the compile and build processof packages, but once that package is installed, these dependencies are no longer required. Portage calls those builddependencies. To include those in an update cycle, add --with-bdeps=y:
Code Listing 3.12: Updating your entire system
# emerge --update --deep --with-bdeps=y @world
Since security updates also happen in packages you have not explicitly installed on your system (but that are pulled inas dependencies of other programs), it is recommended to run this command once in a while.
4/11/2014 Gentoo Linux Documentation -- Gentoo Linux x86 Handbook
https://www.gentoo.org/doc/en/handbook/handbook-x86.xml?style=printable&full=1 54/105
If you have altered any of your USE flags lately you might want to add --newuse as well. Portage will then verify if thechange requires the installation of new packages or recompilation of existing ones:
Code Listing 3.13: Performing a full update
# emerge --update --deep --with-bdeps=y --newuse @world
Metapackages
Some packages in the Portage tree don't have any real content but are used to install a collection of packages. Forinstance, the kde-meta package will install a complete KDE environment on your system by pulling in various KDE-related packages as dependencies.
If you ever want to remove such a package from your system, running emerge --unmerge on the package won't havemuch effect as the dependencies remain on the system.
Portage has the functionality to remove orphaned dependencies as well, but since the availability of software isdynamically dependent you first need to update your entire system fully, including the new changes you applied whenchanging USE flags. After this you can run emerge --depclean to remove the orphaned dependencies. When this isdone, you need to rebuild the applications that were dynamically linked to the now-removed software titles but don'trequire them anymore.
All this is handled with the following three commands:
Code Listing 3.14: Removing orphaned dependencies
# emerge --update --deep --newuse @world# emerge --depclean# revdep-rebuild
revdep-rebuild is provided by the gentoolkit package; don't forget to emerge it first:
Code Listing 3.15: Installing the gentoolkit package
# emerge gentoolkit
1.d. Licenses
Beginning with Portage version 2.1.7, you can accept or reject software installation based on its license. All packagesin the tree contain a LICENSE entry in their ebuilds. Running emerge --search packagename will tell you thepackage's license.
By default, Portage permits all licenses, except End User License Agreements (EULAs) that require reading andsigning an acceptance agreement.
The variable that controls permitted licenses is ACCEPT_LICENSE, which can be set in /etc/portage/make.conf. Inthe next example, this default value is shown:
Code Listing 4.1: Setting ACCEPT_LICENSE in /etc/portage/make.conf
ACCEPT_LICENSE="* -@EULA"
With this configuration, packages that require interaction during installation to approve their EULA will not beinstallable. Packages without an EULA will be installable.
You can set ACCEPT_LICENSE globally in /etc/portage/make.conf , or you can specify it on a per-package basis in/etc/portage/package.license.
For example, if you want to allow the truecrypt-2.7 license for app-crypt/truecrypt, add the following to/etc/portage/package.license:
Code Listing 4.2: Specifying a truecrypt license in package.license
4/11/2014 Gentoo Linux Documentation -- Gentoo Linux x86 Handbook
https://www.gentoo.org/doc/en/handbook/handbook-x86.xml?style=printable&full=1 55/105
app-crypt/truecrypt truecrypt-2.7
This permits installation of truecrypt versions that have the truecrypt-2.7 license, but not versions with thetruecrypt-2.8 license.
Important: Licenses are stored in /usr/portage/licenses, and license groups are kept in/usr/portage/profiles/license_groups. The first entry of each line in CAPITAL letters is the name of the license group, andevery entry after that is an individual license.
License groups defined in ACCEPT_LICENSE are prefixed with an @ sign. A commonly requested setting is to only allowthe installation of free software and documentation. To accomplish this, we can remove all currently accepted licenses(using -*) and then only allow the licenses in the FREE group as follows:
Code Listing 4.3: Only allowing free software and documentation licenses in /etc/portage/make.conf
ACCEPT_LICENSE="-* @FREE"
In this case, "free" is mostly defined by the FSF and OSI. Any package whose license does not meet theserequirements will not be installable on your system.
1.e. When Portage is Complaining...
About SLOTs, Virtuals, Branches, Architectures and Profiles
As we stated before, Portage is extremely powerful and supports many features that other software management toolslack. To understand this, we explain a few aspects of Portage without going into too much detail.
With Portage different versions of a single package can coexist on a system. While other distributions tend to nametheir package to those versions (like freetype and freetype2) Portage uses a technology called SLOTs. An ebuilddeclares a certain SLOT for its version. Ebuilds with different SLOTs can coexist on the same system. For instance,the freetype package has ebuilds with SLOT="1" and SLOT="2".
There are also packages that provide the same functionality but are implemented differently. For instance, metalogd,sysklogd and syslog-ng are all system loggers. Applications that rely on the availability of "a system logger" cannotdepend on, for instance, metalogd, as the other system loggers are as good a choice as any. Portage allows forvirtuals: each system logger is listed as an "exclusive" dependency of the logging service in the logger virtual packageof the virtual category, so that applications can depend on the virtual/logger package. When installed, thepackage will pull in the first logging package mentioned in the package, unless a logging package was already installed(in which case the virtual is satisfied).
Software in the Portage tree can reside in different branches. By default your system only accepts packages thatGentoo deems stable. Most new software titles, when committed, are added to the testing branch, meaning moretesting needs to be done before it is marked as stable. Although you will see the ebuilds for those software in thePortage tree, Portage will not update them before they are placed in the stable branch.
Some software is only available for a few architectures. Or the software doesn't work on the other architectures, or itneeds more testing, or the developer that committed the software to the Portage tree is unable to verify if the packageworks on different architectures.
Each Gentoo installation adheres to a certain profile which contains, amongst other information, the list of packagesthat are required for a system to function normally.
Blocked Packages
Code Listing 5.1: Portage warning about blocked packages (with --pretend)
[blocks B ] mail-mta/ssmtp (is blocking mail-mta/postfix-2.2.2-r1)
Code Listing 5.2: Portage warning about blocked packages (without --pretend)
!!! Error: the mail-mta/postfix package conflicts with another package.!!! both can't be installed on the same system together.
4/11/2014 Gentoo Linux Documentation -- Gentoo Linux x86 Handbook
https://www.gentoo.org/doc/en/handbook/handbook-x86.xml?style=printable&full=1 56/105
!!! Please use 'emerge --pretend' to determine blockers.
Ebuilds contain specific fields that inform Portage about its dependencies. There are two possible dependencies: builddependencies, declared in DEPEND and run-time dependencies, declared in RDEPEND. When one of these dependenciesexplicitly marks a package or virtual as being not compatible, it triggers a blockage.
While recent versions of Portage are smart enough to work around minor blockages without user intervention,occasionally you will need to fix it yourself, as explained below.
To fix a blockage, you can choose to not install the package or unmerge the conflicting package first. In the givenexample, you can opt not to install postfix or to remove ssmtp first.
You may also see blocking packages with specific atoms, such as <media-video/mplayer-1.0_rc1-r2. In this case,updating to a more recent version of the blocking package would remove the block.
It is also possible that two packages that are yet to be installed are blocking each other. In this rare case, you shouldfind out why you need to install both. In most cases you can do with one of the packages alone. If not, please file abug on Gentoo's bugtracking system.
Masked Packages
Code Listing 5.3: Portage warning about masked packages
!!! all ebuilds that could satisfy "bootsplash" have been masked.
Code Listing 5.4: Portage warning about masked packages - reason
!!! possible candidates are:
- gnome-base/gnome-2.8.0_pre1 (masked by: ~x86 keyword)- lm-sensors/lm-sensors-2.8.7 (masked by: -sparc keyword)- sys-libs/glibc-2.3.4.20040808 (masked by: -* keyword)- dev-util/cvsd-1.0.2 (masked by: missing keyword)- games-fps/unreal-tournament-451 (masked by: package.mask)- sys-libs/glibc-2.3.2-r11 (masked by: profile)- net-im/skype-2.1.0.81 (masked by: skype-eula license(s))
When you want to install a package that isn't available for your system, you will receive this masking error. You shouldtry installing a different application that is available for your system or wait until the package is put available. There isalways a reason why a package is masked:
~arch keyword means that the application is not tested sufficiently to be put in the stable branch. Wait a fewdays or weeks and try again.-arch keyword or -* keyword means that the application does not work on your architecture. If you believe thepackage does work file a bug at our bugzilla website.missing keyword means that the application has not been tested on your architecture yet. Ask the architectureporting team to test the package or test it for them and report your findings on our bugzilla website.package.mask means that the package has been found corrupt, unstable or worse and has been deliberatelymarked as do-not-use.profile means that the package has been found not suitable for your profile. The application might break yoursystem if you installed it or is just not compatible with the profile you use.license means that the package's license is not compatible with your ACCEPT_LICENSE setting. You mustexplicitly permit its license or license group by setting it in /etc/portage/make.conf or in/etc/portage/package.license. Refer to Licenses to learn how licenses work.
Necessary USE Flag Changes
Code Listing 5.5: Portage warning about USE flag change requirement
The following USE changes are necessary to proceed:#required by app-text/happypackage-2.0, required by happypackage (argument)>=app-text/feelings-1.0.0 test
4/11/2014 Gentoo Linux Documentation -- Gentoo Linux x86 Handbook
https://www.gentoo.org/doc/en/handbook/handbook-x86.xml?style=printable&full=1 57/105
The error message might also be displayed as follows, if --autounmask isn't set:
Code Listing 5.6: Portage error about USE flag change requirement
emerge: there are no ebuilds built with USE flags to satisfy "app-text/feelings[test]".!!! One of the following packages is required to complete your request:- app-text/feelings-1.0.0 (Change USE: +test)(dependency required by "app-text/happypackage-2.0" [ebuild])(dependency required by "happypackage" [argument])
Such warning or error occurs when you want to install a package which not only depends on another package, but alsorequires that that package is built with a particular USE flag (or set of USE flags). In the given example, the packageapp-text/feelings needs to be built with USE="test", but this USE flag is not set on the system.
To resolve this, either add the requested USE flag to your global USE flags in /etc/portage/make.conf, or set it forthe specific package in /etc/portage/package.use.
Missing Dependencies
Code Listing 5.7: Portage warning about missing dependency
emerge: there are no ebuilds to satisfy ">=sys-devel/gcc-3.4.2-r4".
!!! Problem with ebuild sys-devel/gcc-3.4.2-r2!!! Possibly a DEPEND/*DEPEND problem.
The application you are trying to install depends on another package that is not available for your system. Please checkbugzilla if the issue is known and if not, please report it. Unless you are mixing branches this should not occur and istherefore a bug.
Ambiguous Ebuild Name
Code Listing 5.8: Portage warning about ambiguous ebuild names
[ Results for search key : listen ][ Applications found : 2 ]
* dev-tinyos/listen [ Masked ] Latest version available: 1.1.15 Latest version installed: [ Not Installed ] Size of files: 10,032 kB Homepage: http://www.tinyos.net/ Description: Raw listen for TinyOS License: BSD
* media-sound/listen [ Masked ] Latest version available: 0.6.3 Latest version installed: [ Not Installed ] Size of files: 859 kB Homepage: http://www.listen-project.org Description: A Music player and management for GNOME License: GPL-2
!!! The short ebuild name "listen" is ambiguous. Please specify!!! one of the above fully-qualified ebuild names instead.
The application you want to install has a name that corresponds with more than one package. You need to supply thecategory name as well. Portage will inform you of possible matches to choose from.
Circular Dependencies
Code Listing 5.9: Portage warning about circular dependencies
4/11/2014 Gentoo Linux Documentation -- Gentoo Linux x86 Handbook
https://www.gentoo.org/doc/en/handbook/handbook-x86.xml?style=printable&full=1 58/105
!!! Error: circular dependencies:
ebuild / net-print/cups-1.1.15-r2 depends on ebuild / app-text/ghostscript-7.05.3-r1ebuild / app-text/ghostscript-7.05.3-r1 depends on ebuild / net-print/cups-1.1.15-r2
Two (or more) packages you want to install depend on each other and can therefore not be installed. This is most likelya bug in the Portage tree. Please resync after a while and try again. You can also check bugzilla if the issue is knownand if not, report it.
Fetch failed
Code Listing 5.10: Portage warning about fetch failed
!!! Fetch failed for sys-libs/ncurses-5.4-r5, continuing...(...)!!! Some fetch errors were encountered. Please see above for details.
Portage was unable to download the sources for the given application and will try to continue installing the otherapplications (if applicable). This failure can be due to a mirror that has not synchronised correctly or because the ebuildpoints to an incorrect location. The server where the sources reside can also be down for some reason.
Retry after one hour to see if the issue still persists.
System Profile Protection
Code Listing 5.11: Portage warning about profile-protected package
!!! Trying to unmerge package(s) in system profile. 'sys-apps/portage'!!! This could be damaging to your system.
You have asked to remove a package that is part of your system's core packages. It is listed in your profile as requiredand should therefore not be removed from the system.
Digest Verification Failures
Sometimes, when you attempt to emerge a package, it will fail with the message:
Code Listing 5.12: Digest verification failure
>>> checking ebuild checksums!!! Digest verification failed:
This is a sign that something is wrong with the Portage tree -- often, it is because a developer may have made amistake when committing a package to the tree.
When the digest verification fails, do not try to re-digest the package yourself. Running ebuild foo manifest will notfix the problem; it will almost certainly make it worse!
Instead, wait an hour or two for the tree to settle down. It's likely that the error was noticed right away, but it can take alittle time for the fix to trickle down the Portage tree. While you're waiting, check Bugzilla and see if anyone hasreported the problem yet. If not, go ahead and file a bug for the broken package.
Once you see that the bug has been fixed, you may want to re-sync to pick up the fixed digest.
Important: This does not mean that you can re-sync your tree multiple times! As stated in the rsync policy (when you run emerge --sync), users who sync too often will be banned! In fact, it's better to just wait until your next scheduled sync, so that you don't overloadthe rsync servers.
2. USE flags
2.a. What are USE flags?
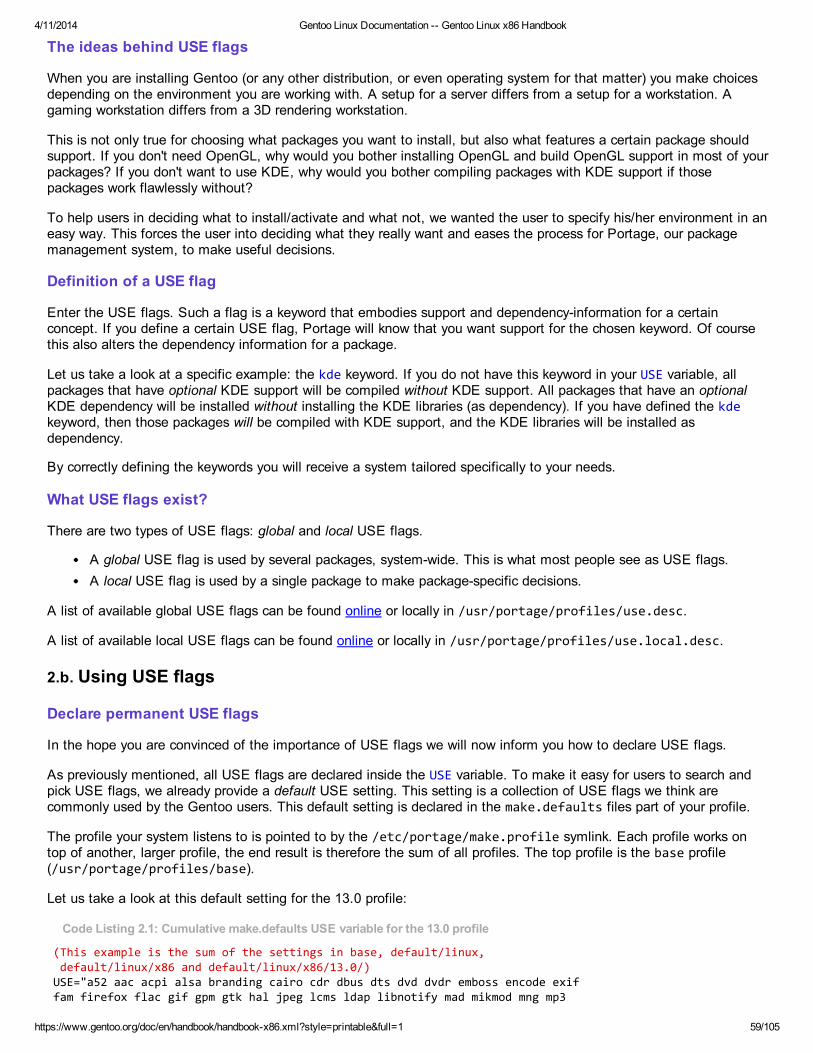
4/11/2014 Gentoo Linux Documentation -- Gentoo Linux x86 Handbook
https://www.gentoo.org/doc/en/handbook/handbook-x86.xml?style=printable&full=1 59/105
The ideas behind USE flags
When you are installing Gentoo (or any other distribution, or even operating system for that matter) you make choicesdepending on the environment you are working with. A setup for a server differs from a setup for a workstation. Agaming workstation differs from a 3D rendering workstation.
This is not only true for choosing what packages you want to install, but also what features a certain package shouldsupport. If you don't need OpenGL, why would you bother installing OpenGL and build OpenGL support in most of yourpackages? If you don't want to use KDE, why would you bother compiling packages with KDE support if thosepackages work flawlessly without?
To help users in deciding what to install/activate and what not, we wanted the user to specify his/her environment in aneasy way. This forces the user into deciding what they really want and eases the process for Portage, our packagemanagement system, to make useful decisions.
Definition of a USE flag
Enter the USE flags. Such a flag is a keyword that embodies support and dependency-information for a certainconcept. If you define a certain USE flag, Portage will know that you want support for the chosen keyword. Of coursethis also alters the dependency information for a package.
Let us take a look at a specific example: the kde keyword. If you do not have this keyword in your USE variable, allpackages that have optional KDE support will be compiled without KDE support. All packages that have an optionalKDE dependency will be installed without installing the KDE libraries (as dependency). If you have defined the kdekeyword, then those packages will be compiled with KDE support, and the KDE libraries will be installed asdependency.
By correctly defining the keywords you will receive a system tailored specifically to your needs.
What USE flags exist?
There are two types of USE flags: global and local USE flags.
A global USE flag is used by several packages, system-wide. This is what most people see as USE flags.A local USE flag is used by a single package to make package-specific decisions.
A list of available global USE flags can be found online or locally in /usr/portage/profiles/use.desc.
A list of available local USE flags can be found online or locally in /usr/portage/profiles/use.local.desc.
2.b. Using USE flags
Declare permanent USE flags
In the hope you are convinced of the importance of USE flags we will now inform you how to declare USE flags.
As previously mentioned, all USE flags are declared inside the USE variable. To make it easy for users to search andpick USE flags, we already provide a default USE setting. This setting is a collection of USE flags we think arecommonly used by the Gentoo users. This default setting is declared in the make.defaults files part of your profile.
The profile your system listens to is pointed to by the /etc/portage/make.profile symlink. Each profile works ontop of another, larger profile, the end result is therefore the sum of all profiles. The top profile is the base profile(/usr/portage/profiles/base).
Let us take a look at this default setting for the 13.0 profile:
Code Listing 2.1: Cumulative make.defaults USE variable for the 13.0 profile
(This example is the sum of the settings in base, default/linux, default/linux/x86 and default/linux/x86/13.0/)USE="a52 aac acpi alsa branding cairo cdr dbus dts dvd dvdr emboss encode exiffam firefox flac gif gpm gtk hal jpeg lcms ldap libnotify mad mikmod mng mp3
4/11/2014 Gentoo Linux Documentation -- Gentoo Linux x86 Handbook
https://www.gentoo.org/doc/en/handbook/handbook-x86.xml?style=printable&full=1 60/105
mp4 mpeg ogg opengl pango pdf png ppds qt3support qt4 sdl spellstartup-notification svg tiff truetype vorbis unicode usb X xcb x264 xml xvxvid"
As you can see, this variable already contains quite a lot of keywords. Do not alter any make.defaults file to tailorthe USE variable to your needs: changes in this file will be undone when you update Portage!
To change this default setting, you need to add or remove keywords to the USE variable. This is done globally bydefining the USE variable in /etc/portage/make.conf. In this variable you add the extra USE flags you require, orremove the USE flags you don't want. This latter is done by prefixing the keyword with the minus-sign ("-").
For instance, to remove support for KDE and QT but add support for ldap, the following USE can be defined in/etc/portage/make.conf:
Code Listing 2.2: An example USE setting in /etc/portage/make.conf
USE="-kde -qt4 ldap"
Declaring USE flags for individual packages
Sometimes you want to declare a certain USE flag for one (or a couple) of applications but not system-wide. Toaccomplish this, you will need to create the /etc/portage directory (if it doesn't exist yet) and edit/etc/portage/package.use. This is usually a single file, but can also be a directory; see man portage for moreinformation. The following examples assume package.use is a single file.
For instance, if you don't want berkdb support globally but you do want it for mysql, you would add:
Code Listing 2.3: /etc/portage/package.use example
dev-db/mysql berkdb
You can of course also explicitly disable USE flags for a certain application. For instance, if you don't want javasupport in PHP:
Code Listing 2.4: /etc/portage/package.use 2nd example
dev-php/php -java
Declare temporary USE flags
Sometimes you want to set a certain USE setting only once. Instead of editing /etc/portage/make.conf twice (to doand undo the USE changes) you can just declare the USE variable as environment variable. Remember that, when youre-emerge or update this application (either explicitly or as part of a system update) your changes will be lost!
As an example we will temporarily remove java from the USE setting during the installation of seamonkey.
Code Listing 2.5: Using USE as environment variable
# USE="-java" emerge seamonkey
Precedence
Of course there is a certain precedence on what setting has priority over the USE setting. You don't want to declareUSE="-java" only to see that java is still used due to a setting that has a higher priority. The precedence for the USEsetting is, ordered by priority (first has lowest priority):
1. Default USE setting declared in the make.defaults files part of your profile2. User-defined USE setting in /etc/portage/make.conf3. User-defined USE setting in /etc/portage/package.use4. User-defined USE setting as environment variable
To view the final USE setting as seen by Portage, run emerge --info. This will list all relevant variables (including the
4/11/2014 Gentoo Linux Documentation -- Gentoo Linux x86 Handbook
https://www.gentoo.org/doc/en/handbook/handbook-x86.xml?style=printable&full=1 61/105
USE variable) with the content used by Portage.
Code Listing 2.6: Running emerge --info
# emerge --info
Adapting your Entire System to New USE Flags
If you have altered your USE flags and you wish to update your entire system to use the new USE flags, use emerge's--newuse option:
Code Listing 2.7: Rebuilding your entire system
# emerge --update --deep --newuse @world
Next, run Portage's depclean to remove the conditional dependencies that were emerged on your "old" system but thathave been obsoleted by the new USE flags.
Warning: Running emerge --depclean is a dangerous operation and should be handled with care. Double-check the provided list of"obsoleted" packages to make sure it doesn't remove packages you need. In the following example we add the -p switch to havedepclean only list the packages without removing them.
Code Listing 2.8: Removing obsoleted packages
# emerge -p --depclean
When depclean has finished, run revdep-rebuild to rebuild the applications that are dynamically linked againstshared objects provided by possibly removed packages. revdep-rebuild is part of the gentoolkit package; don'tforget to emerge it first.
Code Listing 2.9: Running revdep-rebuild
# revdep-rebuild
When all this is accomplished, your system is using the new USE flag settings.
2.c. Package specific USE flags
Viewing available USE flags
Let us take the example of seamonkey: what USE flags does it listen to? To find out, we use emerge with the --pretend and --verbose options:
Code Listing 3.1: Viewing the used USE flags
# emerge --pretend --verbose seamonkeyThese are the packages that I would merge, in order:
Calculating dependencies ...done![ebuild R ] www-client/seamonkey-1.0.7 USE="crypt gnome java -debug -ipv6-ldap -mozcalendar -mozdevelop -moznocompose -moznoirc -moznomail -moznopango-moznoroaming -postgres -xinerama -xprint" 0 kB
emerge isn't the only tool for this job. In fact, we have a tool dedicated to package information called equery whichresides in the gentoolkit package. First, install gentoolkit:
Code Listing 3.2: Installing gentoolkit
# emerge gentoolkit
Now run equery with the uses argument to view the USE flags of a certain package. For instance, for the gnumericpackage:
4/11/2014 Gentoo Linux Documentation -- Gentoo Linux x86 Handbook
https://www.gentoo.org/doc/en/handbook/handbook-x86.xml?style=printable&full=1 62/105
Code Listing 3.3: Using equery to view used USE flags
# equery --nocolor uses =gnumeric-1.6.3 -a[ Searching for packages matching =gnumeric-1.6.3... ][ Colour Code : set unset ][ Legend : Left column (U) - USE flags from make.conf ][ : Right column (I) - USE flags packages was installed with ][ Found these USE variables for app-office/gnumeric-1.6.3 ] U I - - debug : Enable extra debug codepaths, like asserts and extra output. If you want to get meaningful backtraces see http://www.gentoo.org/proj/en/qa/backtraces.xml . + + gnome : Adds GNOME support + + python : Adds support/bindings for the Python language - - static : !!do not set this during bootstrap!! Causes binaries to be statically linked instead of dynamically
3. Portage Features
3.a. Portage Features
Portage has several additional features that makes your Gentoo experience even better. Many of these features rely oncertain software tools that improve performance, reliability, security, ...
To enable or disable certain Portage features you need to edit /etc/portage/make.conf's FEATURES variable whichcontains the various feature keywords, separated by white space. In several cases you will also need to install theadditional tool on which the feature relies.
Not all features that Portage supports are listed here. For a full overview, please consult the make.conf man page:
Code Listing 1.1: Consulting the make.conf man page
$ man make.conf
To find out what FEATURES are default set, run emerge --info and search for the FEATURES variable or grep itout:
Code Listing 1.2: Finding out the FEATURES that are already set
$ emerge --info | grep ^FEATURES=
3.b. Distributed Compiling
Using distcc
distcc is a program to distribute compilations across several, not necessarily identical, machines on a network. Thedistcc client sends all necessary information to the available distcc servers (running distccd) so they can compilepieces of source code for the client. The net result is a faster compilation time.
You can find more information about distcc (and how to have it work with Gentoo) in our Gentoo DistccDocumentation.
Installing distcc
Distcc ships with a graphical monitor to monitor tasks that your computer is sending away for compilation. If you useGnome then put 'gnome' in your USE variable. However, if you don't use Gnome and would still like to have themonitor then you should put 'gtk' in your USE variable.
Code Listing 2.1: Installing distcc
# emerge distcc
4/11/2014 Gentoo Linux Documentation -- Gentoo Linux x86 Handbook
https://www.gentoo.org/doc/en/handbook/handbook-x86.xml?style=printable&full=1 63/105
Activating Portage Support
Add distcc to the FEATURES variable inside /etc/portage/make.conf. Next, edit the MAKEOPTS variable toyour liking. A known guideline is to fill in "-jX" with X the number of CPUs that run distccd (including the current host)plus one, but you might have better results with other numbers.
Now run distcc-config and enter the list of available distcc servers. For a simple example we assume that theavailable DistCC servers are 192.168.1.102 (the current host), 192.168.1.103 and 192.168.1.104 (two "remote" hosts):
Code Listing 2.2: Configuring distcc to use three available distcc servers
# distcc-config --set-hosts "192.168.1.102 192.168.1.103 192.168.1.104"
Don't forget to run the distccd daemon as well:
Code Listing 2.3: Starting the distccd daemons
# rc-update add distccd default# /etc/init.d/distccd start
3.c. Caching Compilation
About ccache
ccache is a fast compiler cache. When you compile a program, it will cache intermediate results so that, whenever yourecompile the same program, the compilation time is greatly reduced. The first time you run ccache, it will be muchslower than a normal compilation. Subsequent recompiles should be faster. ccache is only helpful if you will berecompiling the same application many times; thus it's mostly only useful for software developers.
If you are interested in the ins and outs of ccache, please visit the ccache homepage.
Warning: ccache is known to cause numerous compilation failures. Sometimes ccache will retain stale code objects or corruptedfiles, which can lead to packages that cannot be emerged. If this happens (if you receive errors like "File not recognized: Filetruncated"), try recompiling the application with ccache disabled (FEATURES="-ccache" in /etc/portage/make.conf) beforereporting a bug. Unless you are doing development work, do not enable ccache.
Installing ccache
To install ccache, run emerge ccache:
Code Listing 3.1: Installing ccache
# emerge ccache
Activating Portage Support
Open /etc/portage/make.conf and add ccache to the FEATURES variable. Next, add a new variable calledCCACHE_SIZE and set it to "2G":
Code Listing 3.2: Editing CCACHE_SIZE in /etc/portage/make.conf
CCACHE_SIZE="2G"
To check if ccache functions, ask ccache to provide you with its statistics. Because Portage uses a different ccachehome directory, you need to set the CCACHE_DIR variable as well:
Code Listing 3.3: Viewing ccache statistics
# CCACHE_DIR="/var/tmp/ccache" ccache -s
The /var/tmp/ccache location is Portage' default ccache home directory; if you want to alter this setting you can setthe CCACHE_DIR variable in /etc/portage/make.conf.
4/11/2014 Gentoo Linux Documentation -- Gentoo Linux x86 Handbook
https://www.gentoo.org/doc/en/handbook/handbook-x86.xml?style=printable&full=1 64/105
However, if you would run ccache, it would use the default location of ${HOME}/.ccache, which is why you needed toset the CCACHE_DIR variable when asking for the (Portage) ccache statistics.
Using ccache for non-Portage C Compiling
If you would like to use ccache for non-Portage compilations, add /usr/lib/ccache/bin to the beginning of yourPATH variable (before /usr/bin). This can be accomplished by editing .bash_profile in your user's home directory.Using .bash_profile is one way to define PATH variables.
Code Listing 3.4: Editing .bash_profile
PATH="/usr/lib/ccache/bin:/opt/bin:${PATH}"
3.d. Binary Package Support
Creating Prebuilt Packages
Portage supports the installation of prebuilt packages. Even though Gentoo does not provide prebuilt packages by itselfPortage can be made fully aware of prebuilt packages.
To create a prebuilt package you can use quickpkg if the package is already installed on your system, or emerge withthe --buildpkg or --buildpkgonly options.
If you want Portage to create prebuilt packages of every single package you install, add buildpkg to the FEATURESvariable.
More extended support for creating prebuilt package sets can be obtained with catalyst. For more information oncatalyst please read the Catalyst Frequently Asked Questions.
Installing Prebuilt Packages
Although Gentoo doesn't provide one, you can create a central repository where you store prebuilt packages. If youwant to use this repository, you need to make Portage aware of it by having the PORTAGE_BINHOST variable pointto it. For instance, if the prebuilt packages are on ftp://buildhost/gentoo:
Code Listing 4.1: Setting PORTAGE_BINHOST in /etc/portage/make.conf
PORTAGE_BINHOST="ftp://buildhost/gentoo"
When you want to install a prebuilt package, add the --getbinpkg option to the emerge command alongside of the --usepkg option. The former tells emerge to download the prebuilt package from the previously defined server while thelatter asks emerge to try to install the prebuilt package first before fetching the sources and compiling it.
For instance, to install gnumeric with prebuilt packages:
Code Listing 4.2: Installing the gnumeric prebuilt package
# emerge --usepkg --getbinpkg gnumeric
More information about emerge's prebuilt package options can be found in the emerge man page:
Code Listing 4.3: Reading the emerge man page
$ man emerge
3.e. Fetching Files
Parallel fetch
When you are emerging a series of packages, Portage can fetch the source files for the next package in the list evenwhile it is compiling another package, thus shortening compile times. To make use of this capability, add "parallel-
4/11/2014 Gentoo Linux Documentation -- Gentoo Linux x86 Handbook
https://www.gentoo.org/doc/en/handbook/handbook-x86.xml?style=printable&full=1 65/105
fetch" to your FEATURES. Note that this is on by default, so you shouldn't need to specifically enable it.
Userfetch
When Portage is run as root, FEATURES="userfetch" will allow Portage to drop root privileges while fetching packagesources. This is a small security improvement.
3.f. Pulling Validated Portage Tree Snapshots
As an administrator, you can opt to only update your local Portage tree with a cryptographically validated Portage treesnapshot as released by the Gentoo infrastructure. This ensures that no rogue rsync mirror is adding unwanted code orpackages in the tree you are downloading.
To configure Portage, first create a truststore in which you download and accept the keys of the Gentoo Infrastructureresponsible for signing the Portage tree snapshots. Of course, if you want to, you can validate this GPG key as per theproper guidelines (like checking the key fingerprint). You can find the list of GPG keys used by the release engineeringteam on their project page.
Code Listing 6.1: Creating a truststore for Portage
# mkdir -p /etc/portage/gpg# chmod 0700 /etc/portage/gpg(... Substitute the keys with those mentioned on the release engineering site ...)# gpg --homedir /etc/portage/gpg --keyserver subkeys.pgp.net --recv-keys 0xDB6B8C1F96D8BF6D# gpg --homedir /etc/portage/gpg --edit-key 0xDB6B8C1F96D8BF6D trust
Next, edit /etc/portage/make.conf and enable support for validating the signed Portage tree snapshots (usingFEATURES="webrsync-gpg") and disabling updating the Portage tree using the regular emerge --sync method.
Code Listing 6.2: Updating make.conf
FEATURES="webrsync-gpg"PORTAGE_GPG_DIR="/etc/portage/gpg"
Code Listing 6.3: Updating repos.conf
# Make sure sync-type and sync-uri are commented out# sync-type = rsync# sync-uri = ...
That's it. Next time you run emerge-webrsync, only the snapshots with a valid signature will be expanded on your filesystem.
4. Initscripts
4.a. Runlevels
Booting your System
When you boot your system, you will notice lots of text floating by. If you pay close attention, you will notice this text isthe same every time you reboot your system. The sequence of all these actions is called the boot sequence and is(more or less) statically defined.
First, your boot loader will load the kernel image you have defined in the boot loader configuration into memory afterwhich it tells the CPU to run the kernel. When the kernel is loaded and run, it initializes all kernel-specific structuresand tasks and starts the init process.
This process then makes sure that all filesystems (defined in /etc/fstab) are mounted and ready to be used. Then itexecutes several scripts located in /etc/init.d, which will start the services you need in order to have a successfullybooted system.
Finally, when all scripts are executed, init activates the terminals (in most cases just the virtual consoles which are
4/11/2014 Gentoo Linux Documentation -- Gentoo Linux x86 Handbook
https://www.gentoo.org/doc/en/handbook/handbook-x86.xml?style=printable&full=1 66/105
hidden beneath Alt-F1, Alt-F2, etc.) attaching a special process called agetty to it. This process will then make sureyou are able to log on through these terminals by running login.
Init Scripts
Now init doesn't just execute the scripts in /etc/init.d randomly. Even more, it doesn't run all scripts in/etc/init.d, only the scripts it is told to execute. It decides which scripts to execute by looking into /etc/runlevels.
First, init runs all scripts from /etc/init.d that have symbolic links inside /etc/runlevels/boot. Usually, it willstart the scripts in alphabetical order, but some scripts have dependency information in them, telling the system thatanother script must be run before they can be started.
When all /etc/runlevels/boot referenced scripts are executed, init continues with running the scripts that have asymbolic link to them in /etc/runlevels/default. Again, it will use the alphabetical order to decide what script torun first, unless a script has dependency information in it, in which case the order is changed to provide a valid start-upsequence.
How Init Works
Of course init doesn't decide all that by itself. It needs a configuration file that specifies what actions need to betaken. This configuration file is /etc/inittab.
If you remember the boot sequence we have just described, you will remember that init's first action is to mount allfilesystems. This is defined in the following line from /etc/inittab:
Code Listing 1.1: The system initialisation line in /etc/inittab
si::sysinit:/sbin/rc sysinit
This line tells init that it must run /sbin/rc sysinit to initialize the system. The /sbin/rc script takes care of theinitialisation, so you might say that init doesn't do much -- it delegates the task of initialising the system to anotherprocess.
Second, init executed all scripts that had symbolic links in /etc/runlevels/boot. This is defined in the followingline:
Code Listing 1.2: The system initialisation, continued
rc::bootwait:/sbin/rc boot
Again the rc script performs the necessary tasks. Note that the option given to rc (boot) is the same as thesubdirectory of /etc/runlevels that is used.
Now init checks its configuration file to see what runlevel it should run. To decide this, it reads the following line from/etc/inittab:
Code Listing 1.3: The initdefault line
id:3:initdefault:
In this case (which the majority of Gentoo users will use), the runlevel id is 3. Using this information, init checks whatit must run to start runlevel 3:
Code Listing 1.4: The runlevel definitions
l0:0:wait:/sbin/rc shutdownl1:S1:wait:/sbin/rc singlel2:2:wait:/sbin/rc nonetworkl3:3:wait:/sbin/rc defaultl4:4:wait:/sbin/rc defaultl5:5:wait:/sbin/rc defaultl6:6:wait:/sbin/rc reboot
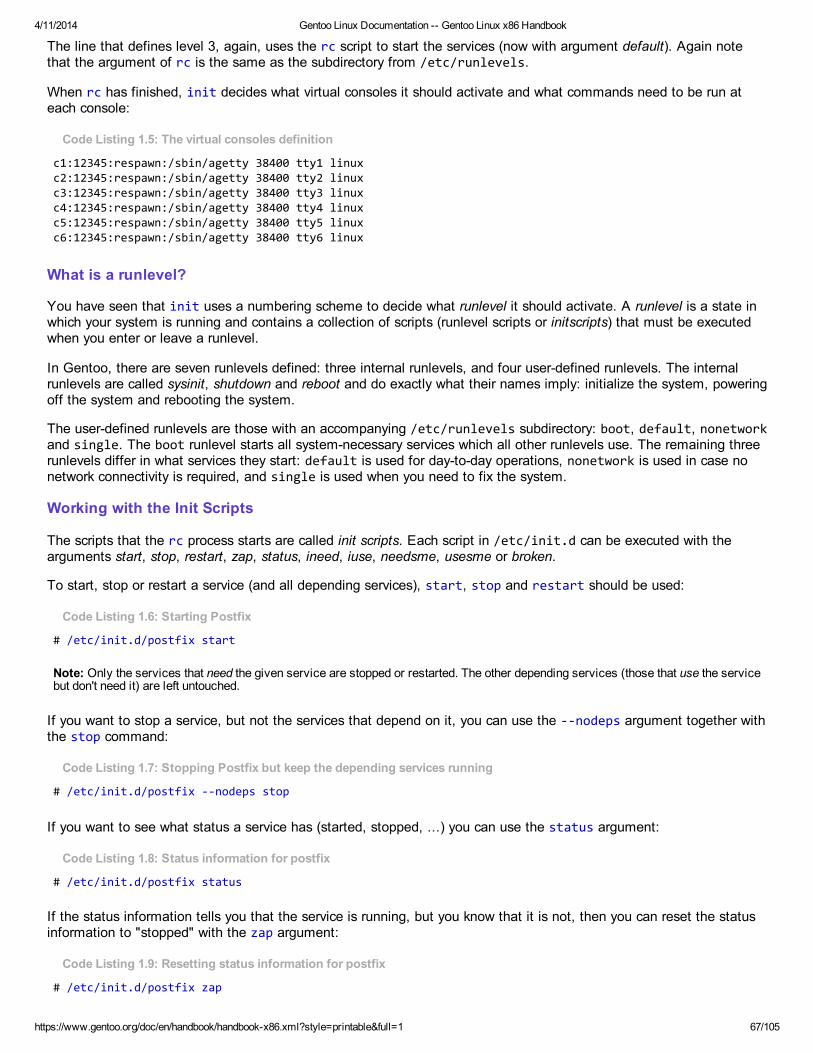
4/11/2014 Gentoo Linux Documentation -- Gentoo Linux x86 Handbook
https://www.gentoo.org/doc/en/handbook/handbook-x86.xml?style=printable&full=1 67/105
The line that defines level 3, again, uses the rc script to start the services (now with argument default). Again notethat the argument of rc is the same as the subdirectory from /etc/runlevels.
When rc has finished, init decides what virtual consoles it should activate and what commands need to be run ateach console:
Code Listing 1.5: The virtual consoles definition
c1:12345:respawn:/sbin/agetty 38400 tty1 linuxc2:12345:respawn:/sbin/agetty 38400 tty2 linuxc3:12345:respawn:/sbin/agetty 38400 tty3 linuxc4:12345:respawn:/sbin/agetty 38400 tty4 linuxc5:12345:respawn:/sbin/agetty 38400 tty5 linuxc6:12345:respawn:/sbin/agetty 38400 tty6 linux
What is a runlevel?
You have seen that init uses a numbering scheme to decide what runlevel it should activate. A runlevel is a state inwhich your system is running and contains a collection of scripts (runlevel scripts or initscripts) that must be executedwhen you enter or leave a runlevel.
In Gentoo, there are seven runlevels defined: three internal runlevels, and four user-defined runlevels. The internalrunlevels are called sysinit, shutdown and reboot and do exactly what their names imply: initialize the system, poweringoff the system and rebooting the system.
The user-defined runlevels are those with an accompanying /etc/runlevels subdirectory: boot, default, nonetworkand single. The boot runlevel starts all system-necessary services which all other runlevels use. The remaining threerunlevels differ in what services they start: default is used for day-to-day operations, nonetwork is used in case nonetwork connectivity is required, and single is used when you need to fix the system.
Working with the Init Scripts
The scripts that the rc process starts are called init scripts. Each script in /etc/init.d can be executed with thearguments start, stop, restart, zap, status, ineed, iuse, needsme, usesme or broken.
To start, stop or restart a service (and all depending services), start, stop and restart should be used:
Code Listing 1.6: Starting Postfix
# /etc/init.d/postfix start
Note: Only the services that need the given service are stopped or restarted. The other depending services (those that use the servicebut don't need it) are left untouched.
If you want to stop a service, but not the services that depend on it, you can use the --nodeps argument together withthe stop command:
Code Listing 1.7: Stopping Postfix but keep the depending services running
# /etc/init.d/postfix --nodeps stop
If you want to see what status a service has (started, stopped, ...) you can use the status argument:
Code Listing 1.8: Status information for postfix
# /etc/init.d/postfix status
If the status information tells you that the service is running, but you know that it is not, then you can reset the statusinformation to "stopped" with the zap argument:
Code Listing 1.9: Resetting status information for postfix
# /etc/init.d/postfix zap
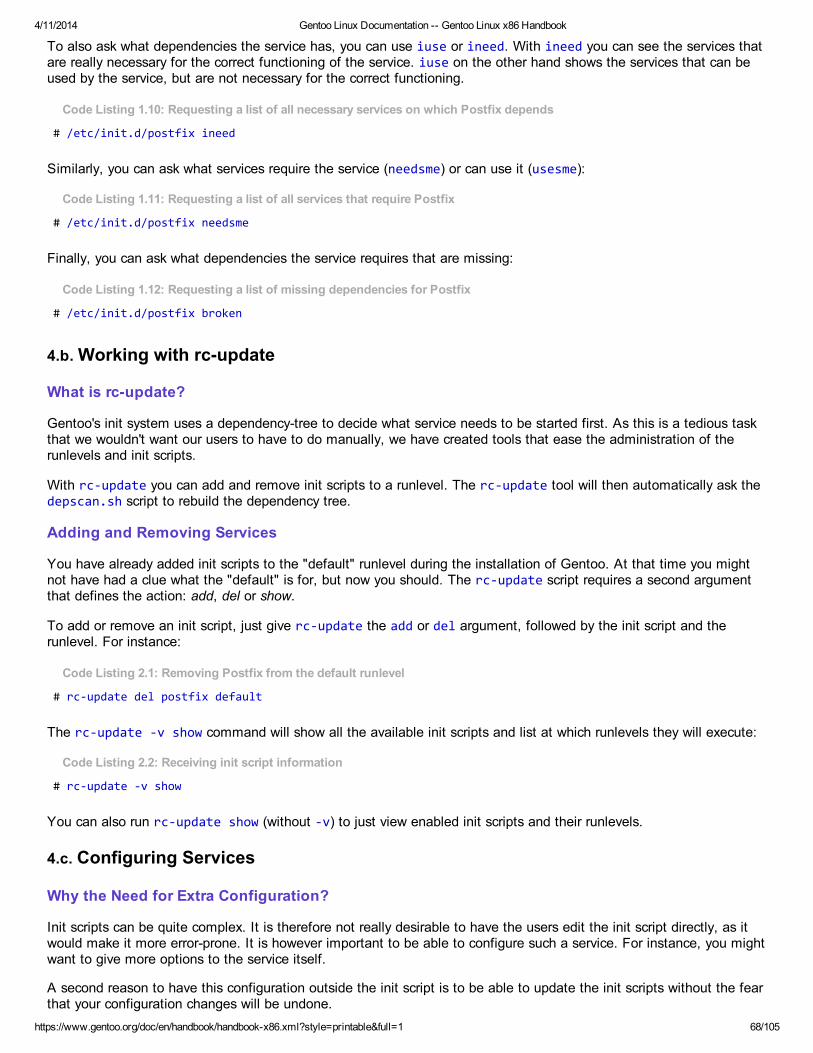
4/11/2014 Gentoo Linux Documentation -- Gentoo Linux x86 Handbook
https://www.gentoo.org/doc/en/handbook/handbook-x86.xml?style=printable&full=1 68/105
To also ask what dependencies the service has, you can use iuse or ineed. With ineed you can see the services thatare really necessary for the correct functioning of the service. iuse on the other hand shows the services that can beused by the service, but are not necessary for the correct functioning.
Code Listing 1.10: Requesting a list of all necessary services on which Postfix depends
# /etc/init.d/postfix ineed
Similarly, you can ask what services require the service (needsme) or can use it (usesme):
Code Listing 1.11: Requesting a list of all services that require Postfix
# /etc/init.d/postfix needsme
Finally, you can ask what dependencies the service requires that are missing:
Code Listing 1.12: Requesting a list of missing dependencies for Postfix
# /etc/init.d/postfix broken
4.b. Working with rc-update
What is rc-update?
Gentoo's init system uses a dependency-tree to decide what service needs to be started first. As this is a tedious taskthat we wouldn't want our users to have to do manually, we have created tools that ease the administration of therunlevels and init scripts.
With rc-update you can add and remove init scripts to a runlevel. The rc-update tool will then automatically ask thedepscan.sh script to rebuild the dependency tree.
Adding and Removing Services
You have already added init scripts to the "default" runlevel during the installation of Gentoo. At that time you mightnot have had a clue what the "default" is for, but now you should. The rc-update script requires a second argumentthat defines the action: add, del or show.
To add or remove an init script, just give rc-update the add or del argument, followed by the init script and therunlevel. For instance:
Code Listing 2.1: Removing Postfix from the default runlevel
# rc-update del postfix default
The rc-update -v show command will show all the available init scripts and list at which runlevels they will execute:
Code Listing 2.2: Receiving init script information
# rc-update -v show
You can also run rc-update show (without -v) to just view enabled init scripts and their runlevels.
4.c. Configuring Services
Why the Need for Extra Configuration?
Init scripts can be quite complex. It is therefore not really desirable to have the users edit the init script directly, as itwould make it more error-prone. It is however important to be able to configure such a service. For instance, you mightwant to give more options to the service itself.
A second reason to have this configuration outside the init script is to be able to update the init scripts without the fearthat your configuration changes will be undone.
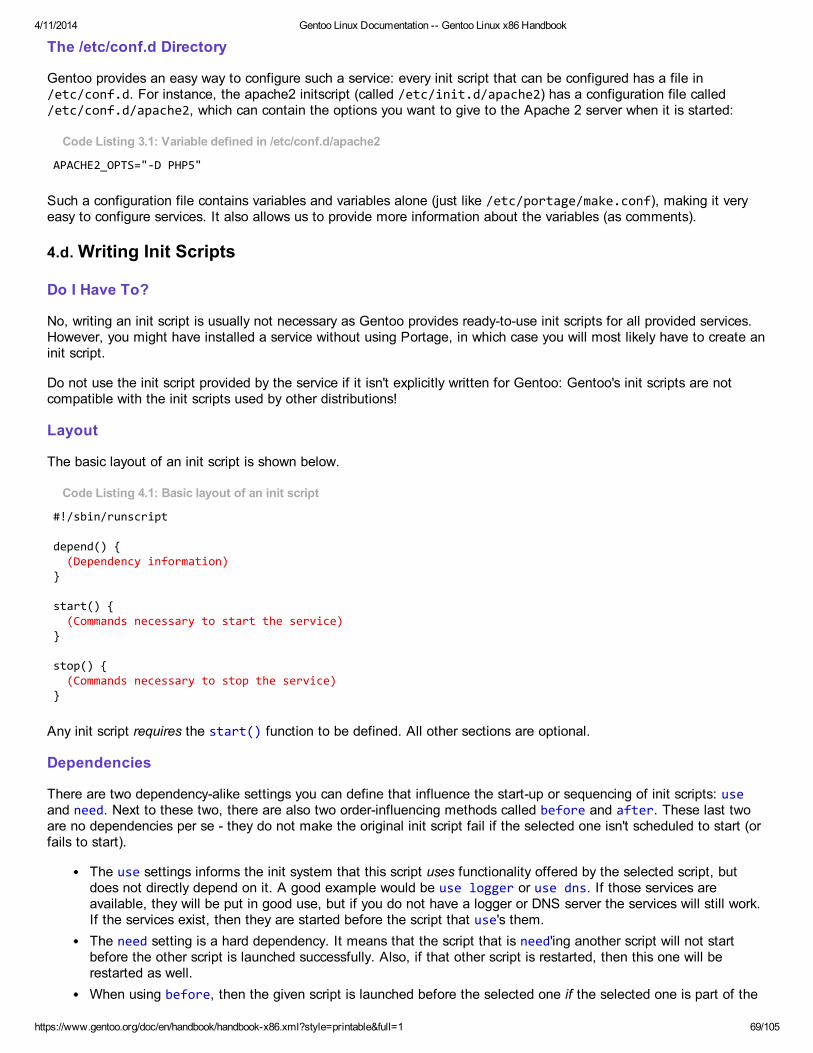
4/11/2014 Gentoo Linux Documentation -- Gentoo Linux x86 Handbook
https://www.gentoo.org/doc/en/handbook/handbook-x86.xml?style=printable&full=1 69/105
The /etc/conf.d Directory
Gentoo provides an easy way to configure such a service: every init script that can be configured has a file in/etc/conf.d. For instance, the apache2 initscript (called /etc/init.d/apache2) has a configuration file called/etc/conf.d/apache2, which can contain the options you want to give to the Apache 2 server when it is started:
Code Listing 3.1: Variable defined in /etc/conf.d/apache2
APACHE2_OPTS="-D PHP5"
Such a configuration file contains variables and variables alone (just like /etc/portage/make.conf), making it veryeasy to configure services. It also allows us to provide more information about the variables (as comments).
4.d. Writing Init Scripts
Do I Have To?
No, writing an init script is usually not necessary as Gentoo provides ready-to-use init scripts for all provided services.However, you might have installed a service without using Portage, in which case you will most likely have to create aninit script.
Do not use the init script provided by the service if it isn't explicitly written for Gentoo: Gentoo's init scripts are notcompatible with the init scripts used by other distributions!
Layout
The basic layout of an init script is shown below.
Code Listing 4.1: Basic layout of an init script
#!/sbin/runscript
depend() { (Dependency information)}
start() { (Commands necessary to start the service)}
stop() { (Commands necessary to stop the service)}
Any init script requires the start() function to be defined. All other sections are optional.
Dependencies
There are two dependency-alike settings you can define that influence the start-up or sequencing of init scripts: useand need. Next to these two, there are also two order-influencing methods called before and after. These last twoare no dependencies per se - they do not make the original init script fail if the selected one isn't scheduled to start (orfails to start).
The use settings informs the init system that this script uses functionality offered by the selected script, butdoes not directly depend on it. A good example would be use logger or use dns. If those services areavailable, they will be put in good use, but if you do not have a logger or DNS server the services will still work.If the services exist, then they are started before the script that use's them.The need setting is a hard dependency. It means that the script that is need'ing another script will not startbefore the other script is launched successfully. Also, if that other script is restarted, then this one will berestarted as well.When using before, then the given script is launched before the selected one if the selected one is part of the
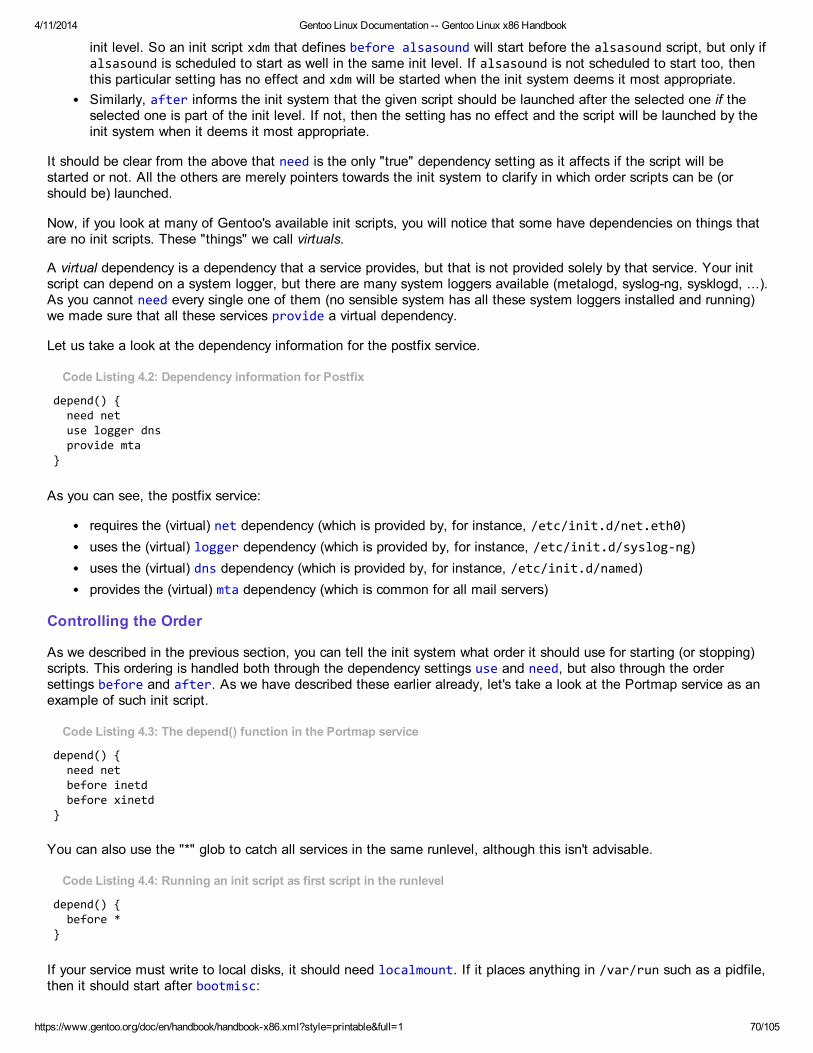
4/11/2014 Gentoo Linux Documentation -- Gentoo Linux x86 Handbook
https://www.gentoo.org/doc/en/handbook/handbook-x86.xml?style=printable&full=1 70/105
init level. So an init script xdm that defines before alsasound will start before the alsasound script, but only ifalsasound is scheduled to start as well in the same init level. If alsasound is not scheduled to start too, thenthis particular setting has no effect and xdm will be started when the init system deems it most appropriate.Similarly, after informs the init system that the given script should be launched after the selected one if theselected one is part of the init level. If not, then the setting has no effect and the script will be launched by theinit system when it deems it most appropriate.
It should be clear from the above that need is the only "true" dependency setting as it affects if the script will bestarted or not. All the others are merely pointers towards the init system to clarify in which order scripts can be (orshould be) launched.
Now, if you look at many of Gentoo's available init scripts, you will notice that some have dependencies on things thatare no init scripts. These "things" we call virtuals.
A virtual dependency is a dependency that a service provides, but that is not provided solely by that service. Your initscript can depend on a system logger, but there are many system loggers available (metalogd, syslog-ng, sysklogd, ...).As you cannot need every single one of them (no sensible system has all these system loggers installed and running)we made sure that all these services provide a virtual dependency.
Let us take a look at the dependency information for the postfix service.
Code Listing 4.2: Dependency information for Postfix
depend() { need net use logger dns provide mta}
As you can see, the postfix service:
requires the (virtual) net dependency (which is provided by, for instance, /etc/init.d/net.eth0)uses the (virtual) logger dependency (which is provided by, for instance, /etc/init.d/syslog-ng)uses the (virtual) dns dependency (which is provided by, for instance, /etc/init.d/named)provides the (virtual) mta dependency (which is common for all mail servers)
Controlling the Order
As we described in the previous section, you can tell the init system what order it should use for starting (or stopping)scripts. This ordering is handled both through the dependency settings use and need, but also through the ordersettings before and after. As we have described these earlier already, let's take a look at the Portmap service as anexample of such init script.
Code Listing 4.3: The depend() function in the Portmap service
depend() { need net before inetd before xinetd}
You can also use the "*" glob to catch all services in the same runlevel, although this isn't advisable.
Code Listing 4.4: Running an init script as first script in the runlevel
depend() { before *}
If your service must write to local disks, it should need localmount. If it places anything in /var/run such as a pidfile,then it should start after bootmisc:
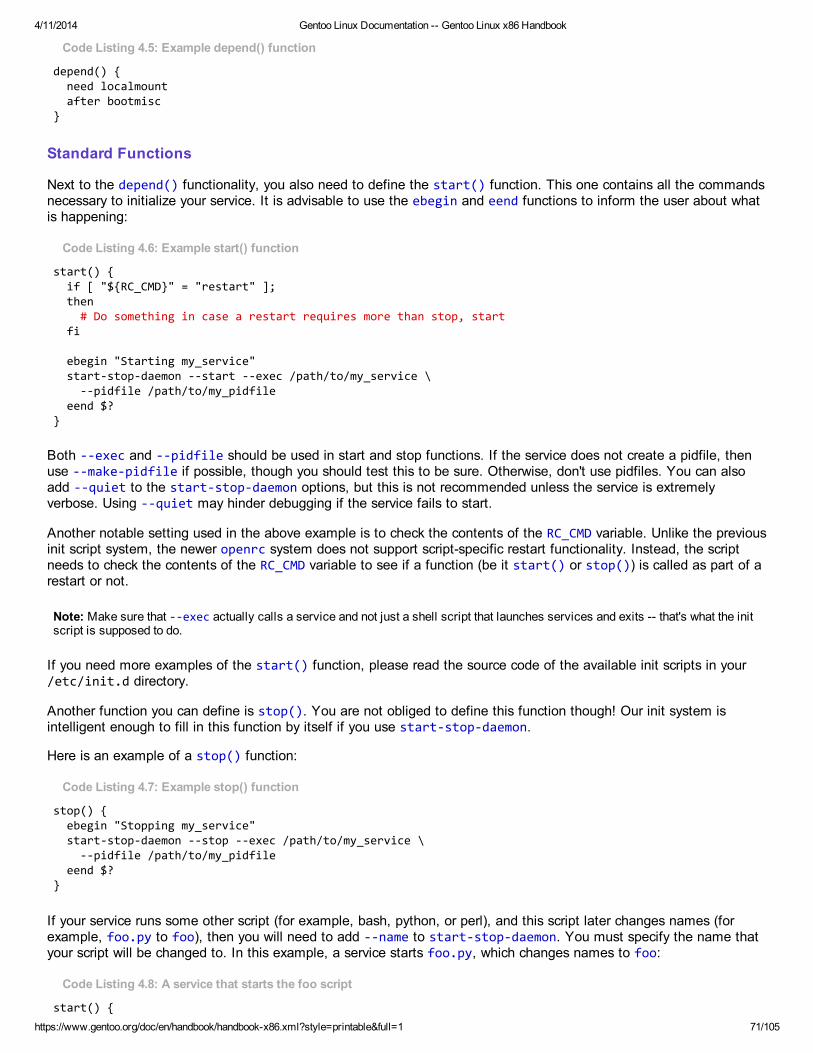
4/11/2014 Gentoo Linux Documentation -- Gentoo Linux x86 Handbook
https://www.gentoo.org/doc/en/handbook/handbook-x86.xml?style=printable&full=1 71/105
Code Listing 4.5: Example depend() function
depend() { need localmount after bootmisc}
Standard Functions
Next to the depend() functionality, you also need to define the start() function. This one contains all the commandsnecessary to initialize your service. It is advisable to use the ebegin and eend functions to inform the user about whatis happening:
Code Listing 4.6: Example start() function
start() { if [ "${RC_CMD}" = "restart" ]; then # Do something in case a restart requires more than stop, start fi
ebegin "Starting my_service" start-stop-daemon --start --exec /path/to/my_service \ --pidfile /path/to/my_pidfile eend $?}
Both --exec and --pidfile should be used in start and stop functions. If the service does not create a pidfile, thenuse --make-pidfile if possible, though you should test this to be sure. Otherwise, don't use pidfiles. You can alsoadd --quiet to the start-stop-daemon options, but this is not recommended unless the service is extremelyverbose. Using --quiet may hinder debugging if the service fails to start.
Another notable setting used in the above example is to check the contents of the RC_CMD variable. Unlike the previousinit script system, the newer openrc system does not support script-specific restart functionality. Instead, the scriptneeds to check the contents of the RC_CMD variable to see if a function (be it start() or stop()) is called as part of arestart or not.
Note: Make sure that --exec actually calls a service and not just a shell script that launches services and exits -- that's what the initscript is supposed to do.
If you need more examples of the start() function, please read the source code of the available init scripts in your/etc/init.d directory.
Another function you can define is stop(). You are not obliged to define this function though! Our init system isintelligent enough to fill in this function by itself if you use start-stop-daemon.
Here is an example of a stop() function:
Code Listing 4.7: Example stop() function
stop() { ebegin "Stopping my_service" start-stop-daemon --stop --exec /path/to/my_service \ --pidfile /path/to/my_pidfile eend $?}
If your service runs some other script (for example, bash, python, or perl), and this script later changes names (forexample, foo.py to foo), then you will need to add --name to start-stop-daemon. You must specify the name thatyour script will be changed to. In this example, a service starts foo.py, which changes names to foo:
Code Listing 4.8: A service that starts the foo script
start() {
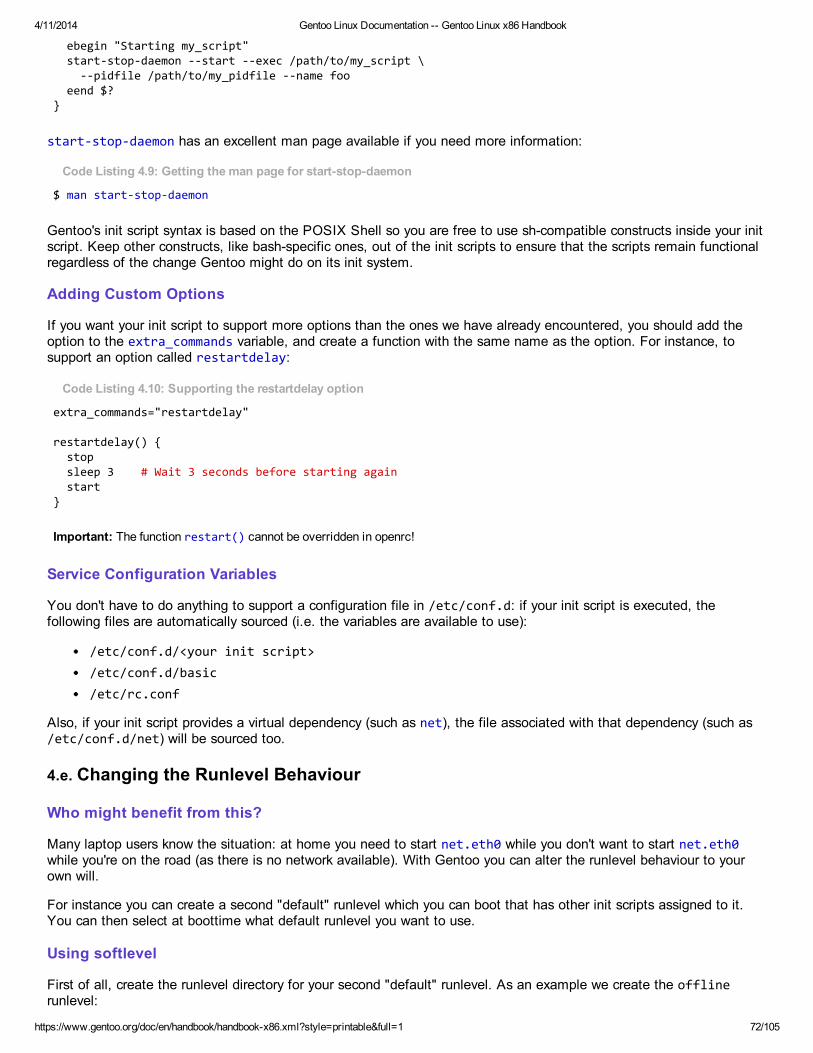
4/11/2014 Gentoo Linux Documentation -- Gentoo Linux x86 Handbook
https://www.gentoo.org/doc/en/handbook/handbook-x86.xml?style=printable&full=1 72/105
ebegin "Starting my_script" start-stop-daemon --start --exec /path/to/my_script \ --pidfile /path/to/my_pidfile --name foo eend $?}
start-stop-daemon has an excellent man page available if you need more information:
Code Listing 4.9: Getting the man page for start-stop-daemon
$ man start-stop-daemon
Gentoo's init script syntax is based on the POSIX Shell so you are free to use sh-compatible constructs inside your initscript. Keep other constructs, like bash-specific ones, out of the init scripts to ensure that the scripts remain functionalregardless of the change Gentoo might do on its init system.
Adding Custom Options
If you want your init script to support more options than the ones we have already encountered, you should add theoption to the extra_commands variable, and create a function with the same name as the option. For instance, tosupport an option called restartdelay:
Code Listing 4.10: Supporting the restartdelay option
extra_commands="restartdelay"
restartdelay() { stop sleep 3 # Wait 3 seconds before starting again start}
Important: The function restart() cannot be overridden in openrc!
Service Configuration Variables
You don't have to do anything to support a configuration file in /etc/conf.d: if your init script is executed, thefollowing files are automatically sourced (i.e. the variables are available to use):
/etc/conf.d/<your init script>/etc/conf.d/basic/etc/rc.conf
Also, if your init script provides a virtual dependency (such as net), the file associated with that dependency (such as/etc/conf.d/net) will be sourced too.
4.e. Changing the Runlevel Behaviour
Who might benefit from this?
Many laptop users know the situation: at home you need to start net.eth0 while you don't want to start net.eth0while you're on the road (as there is no network available). With Gentoo you can alter the runlevel behaviour to yourown will.
For instance you can create a second "default" runlevel which you can boot that has other init scripts assigned to it.You can then select at boottime what default runlevel you want to use.
Using softlevel
First of all, create the runlevel directory for your second "default" runlevel. As an example we create the offlinerunlevel:
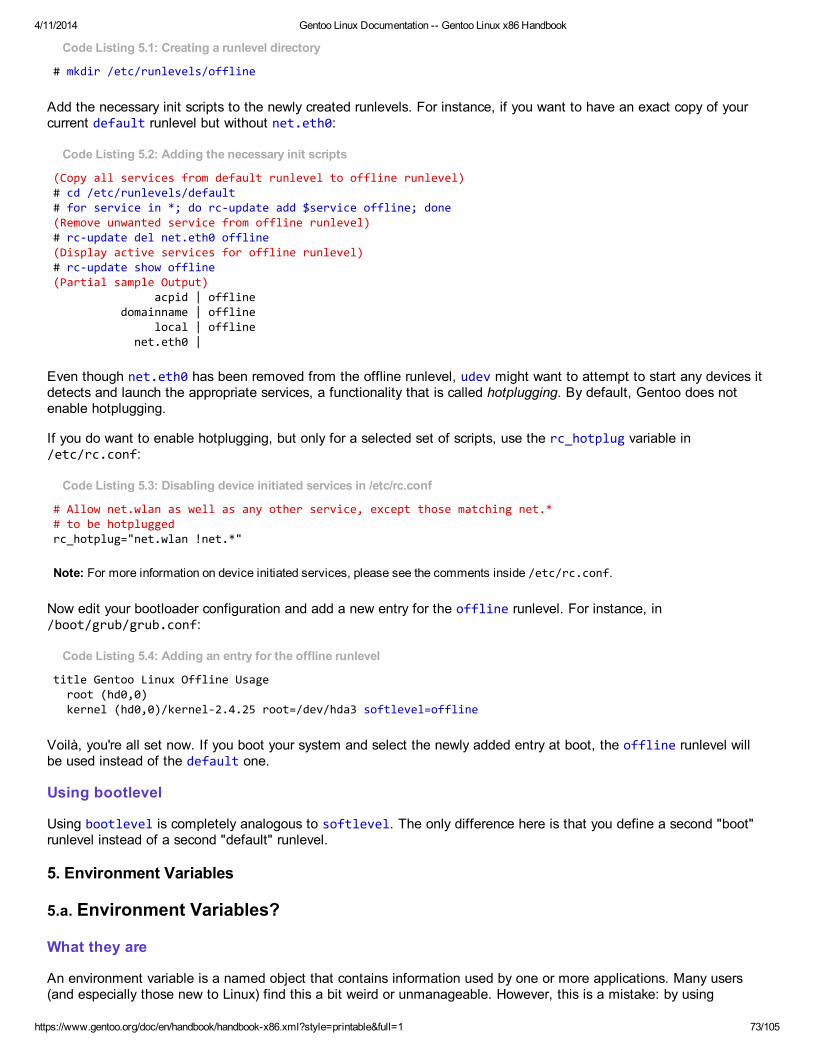
4/11/2014 Gentoo Linux Documentation -- Gentoo Linux x86 Handbook
https://www.gentoo.org/doc/en/handbook/handbook-x86.xml?style=printable&full=1 73/105
Code Listing 5.1: Creating a runlevel directory
# mkdir /etc/runlevels/offline
Add the necessary init scripts to the newly created runlevels. For instance, if you want to have an exact copy of yourcurrent default runlevel but without net.eth0:
Code Listing 5.2: Adding the necessary init scripts
(Copy all services from default runlevel to offline runlevel)# cd /etc/runlevels/default# for service in *; do rc-update add $service offline; done(Remove unwanted service from offline runlevel)# rc-update del net.eth0 offline(Display active services for offline runlevel)# rc-update show offline(Partial sample Output) acpid | offline domainname | offline local | offline net.eth0 |
Even though net.eth0 has been removed from the offline runlevel, udev might want to attempt to start any devices itdetects and launch the appropriate services, a functionality that is called hotplugging. By default, Gentoo does notenable hotplugging.
If you do want to enable hotplugging, but only for a selected set of scripts, use the rc_hotplug variable in/etc/rc.conf:
Code Listing 5.3: Disabling device initiated services in /etc/rc.conf
# Allow net.wlan as well as any other service, except those matching net.*# to be hotpluggedrc_hotplug="net.wlan !net.*"
Note: For more information on device initiated services, please see the comments inside /etc/rc.conf.
Now edit your bootloader configuration and add a new entry for the offline runlevel. For instance, in/boot/grub/grub.conf:
Code Listing 5.4: Adding an entry for the offline runlevel
title Gentoo Linux Offline Usage root (hd0,0) kernel (hd0,0)/kernel-2.4.25 root=/dev/hda3 softlevel=offline
Voilà, you're all set now. If you boot your system and select the newly added entry at boot, the offline runlevel willbe used instead of the default one.
Using bootlevel
Using bootlevel is completely analogous to softlevel. The only difference here is that you define a second "boot"runlevel instead of a second "default" runlevel.
5. Environment Variables
5.a. Environment Variables?
What they are
An environment variable is a named object that contains information used by one or more applications. Many users(and especially those new to Linux) find this a bit weird or unmanageable. However, this is a mistake: by using
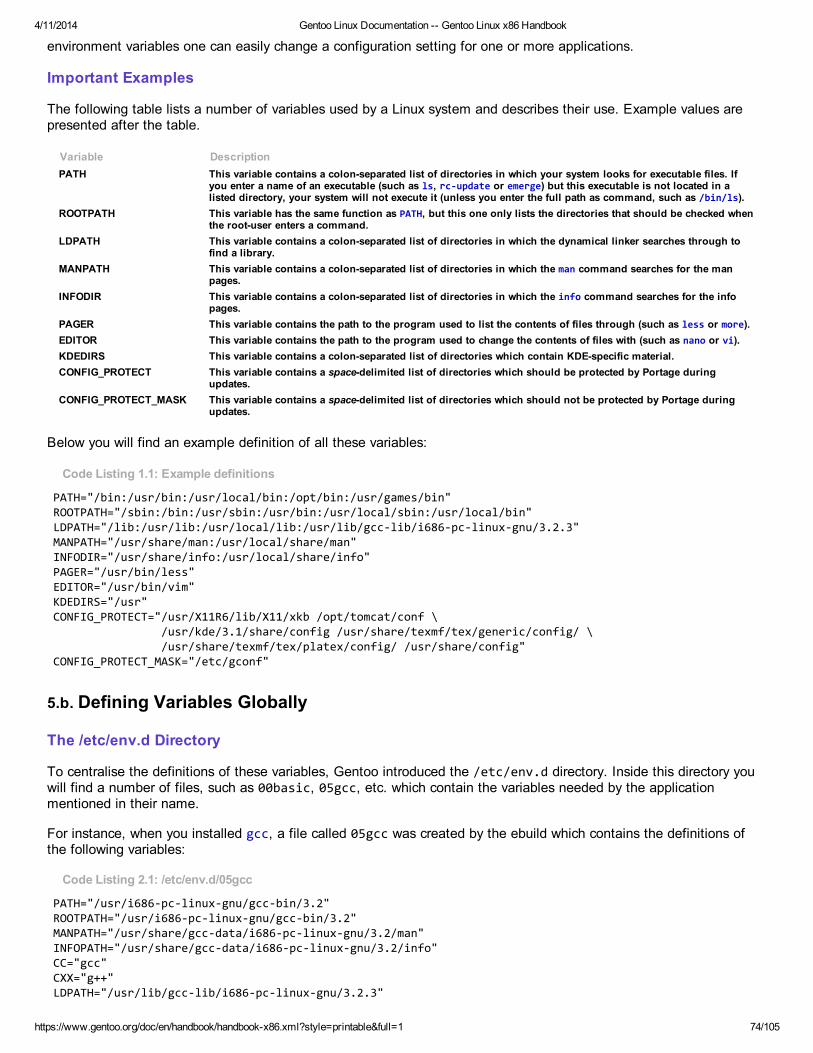
4/11/2014 Gentoo Linux Documentation -- Gentoo Linux x86 Handbook
https://www.gentoo.org/doc/en/handbook/handbook-x86.xml?style=printable&full=1 74/105
environment variables one can easily change a configuration setting for one or more applications.
Important Examples
The following table lists a number of variables used by a Linux system and describes their use. Example values arepresented after the table.
Variable DescriptionPATH This variable contains a colon-separated list of directories in which your system looks for executable files. If
you enter a name of an executable (such as ls, rc-update or emerge) but this executable is not located in alisted directory, your system will not execute it (unless you enter the full path as command, such as /bin/ls).
ROOTPATH This variable has the same function as PATH, but this one only lists the directories that should be checked whenthe root-user enters a command.
LDPATH This variable contains a colon-separated list of directories in which the dynamical linker searches through tofind a library.
MANPATH This variable contains a colon-separated list of directories in which the man command searches for the manpages.
INFODIR This variable contains a colon-separated list of directories in which the info command searches for the infopages.
PAGER This variable contains the path to the program used to list the contents of files through (such as less or more).EDITOR This variable contains the path to the program used to change the contents of files with (such as nano or vi).KDEDIRS This variable contains a colon-separated list of directories which contain KDE-specific material.CONFIG_PROTECT This variable contains a space-delimited list of directories which should be protected by Portage during
updates.CONFIG_PROTECT_MASK This variable contains a space-delimited list of directories which should not be protected by Portage during
updates.
Below you will find an example definition of all these variables:
Code Listing 1.1: Example definitions
PATH="/bin:/usr/bin:/usr/local/bin:/opt/bin:/usr/games/bin"ROOTPATH="/sbin:/bin:/usr/sbin:/usr/bin:/usr/local/sbin:/usr/local/bin"LDPATH="/lib:/usr/lib:/usr/local/lib:/usr/lib/gcc-lib/i686-pc-linux-gnu/3.2.3"MANPATH="/usr/share/man:/usr/local/share/man"INFODIR="/usr/share/info:/usr/local/share/info"PAGER="/usr/bin/less"EDITOR="/usr/bin/vim"KDEDIRS="/usr"CONFIG_PROTECT="/usr/X11R6/lib/X11/xkb /opt/tomcat/conf \ /usr/kde/3.1/share/config /usr/share/texmf/tex/generic/config/ \ /usr/share/texmf/tex/platex/config/ /usr/share/config"CONFIG_PROTECT_MASK="/etc/gconf"
5.b. Defining Variables Globally
The /etc/env.d Directory
To centralise the definitions of these variables, Gentoo introduced the /etc/env.d directory. Inside this directory youwill find a number of files, such as 00basic, 05gcc, etc. which contain the variables needed by the applicationmentioned in their name.
For instance, when you installed gcc, a file called 05gcc was created by the ebuild which contains the definitions ofthe following variables:
Code Listing 2.1: /etc/env.d/05gcc
PATH="/usr/i686-pc-linux-gnu/gcc-bin/3.2"ROOTPATH="/usr/i686-pc-linux-gnu/gcc-bin/3.2"MANPATH="/usr/share/gcc-data/i686-pc-linux-gnu/3.2/man"INFOPATH="/usr/share/gcc-data/i686-pc-linux-gnu/3.2/info"CC="gcc"CXX="g++"LDPATH="/usr/lib/gcc-lib/i686-pc-linux-gnu/3.2.3"
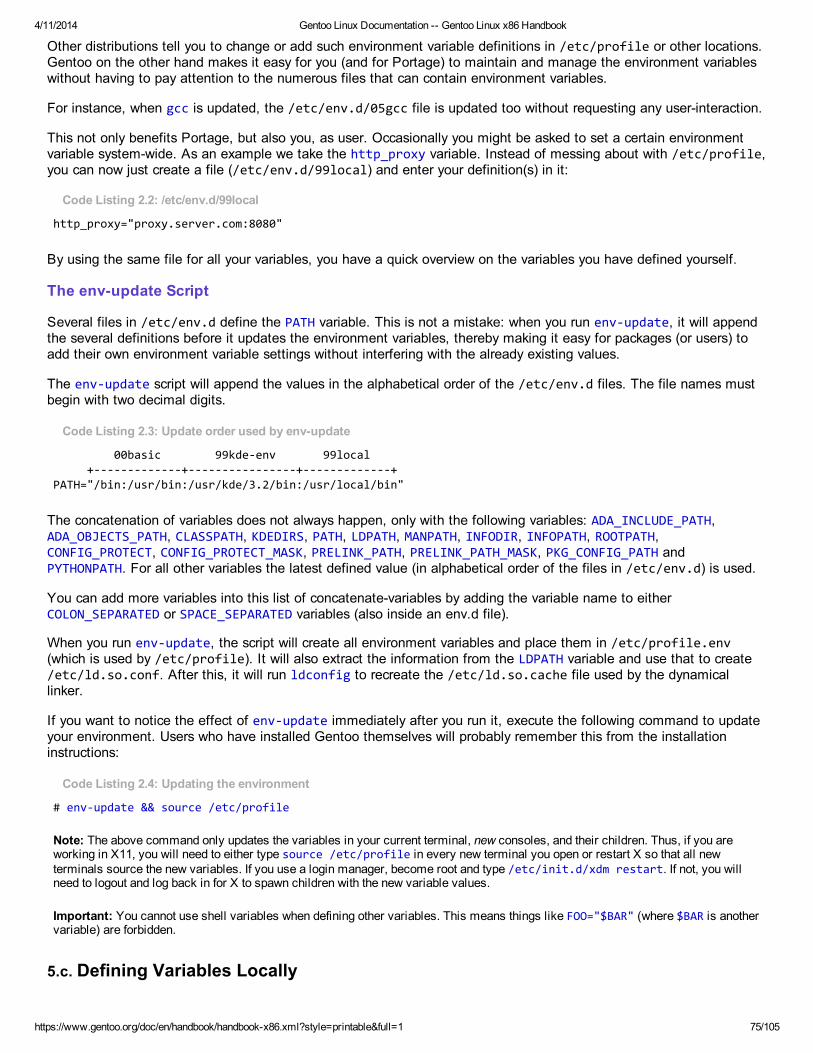
4/11/2014 Gentoo Linux Documentation -- Gentoo Linux x86 Handbook
https://www.gentoo.org/doc/en/handbook/handbook-x86.xml?style=printable&full=1 75/105
Other distributions tell you to change or add such environment variable definitions in /etc/profile or other locations.Gentoo on the other hand makes it easy for you (and for Portage) to maintain and manage the environment variableswithout having to pay attention to the numerous files that can contain environment variables.
For instance, when gcc is updated, the /etc/env.d/05gcc file is updated too without requesting any user-interaction.
This not only benefits Portage, but also you, as user. Occasionally you might be asked to set a certain environmentvariable system-wide. As an example we take the http_proxy variable. Instead of messing about with /etc/profile,you can now just create a file (/etc/env.d/99local) and enter your definition(s) in it:
Code Listing 2.2: /etc/env.d/99local
http_proxy="proxy.server.com:8080"
By using the same file for all your variables, you have a quick overview on the variables you have defined yourself.
The env-update Script
Several files in /etc/env.d define the PATH variable. This is not a mistake: when you run env-update, it will appendthe several definitions before it updates the environment variables, thereby making it easy for packages (or users) toadd their own environment variable settings without interfering with the already existing values.
The env-update script will append the values in the alphabetical order of the /etc/env.d files. The file names mustbegin with two decimal digits.
Code Listing 2.3: Update order used by env-update
00basic 99kde-env 99local +-------------+----------------+-------------+PATH="/bin:/usr/bin:/usr/kde/3.2/bin:/usr/local/bin"
The concatenation of variables does not always happen, only with the following variables: ADA_INCLUDE_PATH,ADA_OBJECTS_PATH, CLASSPATH, KDEDIRS, PATH, LDPATH, MANPATH, INFODIR, INFOPATH, ROOTPATH,CONFIG_PROTECT, CONFIG_PROTECT_MASK, PRELINK_PATH, PRELINK_PATH_MASK, PKG_CONFIG_PATH andPYTHONPATH. For all other variables the latest defined value (in alphabetical order of the files in /etc/env.d) is used.
You can add more variables into this list of concatenate-variables by adding the variable name to eitherCOLON_SEPARATED or SPACE_SEPARATED variables (also inside an env.d file).
When you run env-update, the script will create all environment variables and place them in /etc/profile.env(which is used by /etc/profile). It will also extract the information from the LDPATH variable and use that to create/etc/ld.so.conf. After this, it will run ldconfig to recreate the /etc/ld.so.cache file used by the dynamicallinker.
If you want to notice the effect of env-update immediately after you run it, execute the following command to updateyour environment. Users who have installed Gentoo themselves will probably remember this from the installationinstructions:
Code Listing 2.4: Updating the environment
# env-update && source /etc/profile
Note: The above command only updates the variables in your current terminal, new consoles, and their children. Thus, if you areworking in X11, you will need to either type source /etc/profile in every new terminal you open or restart X so that all newterminals source the new variables. If you use a login manager, become root and type /etc/init.d/xdm restart. If not, you willneed to logout and log back in for X to spawn children with the new variable values.
Important: You cannot use shell variables when defining other variables. This means things like FOO="$BAR" (where $BAR is anothervariable) are forbidden.
5.c. Defining Variables Locally
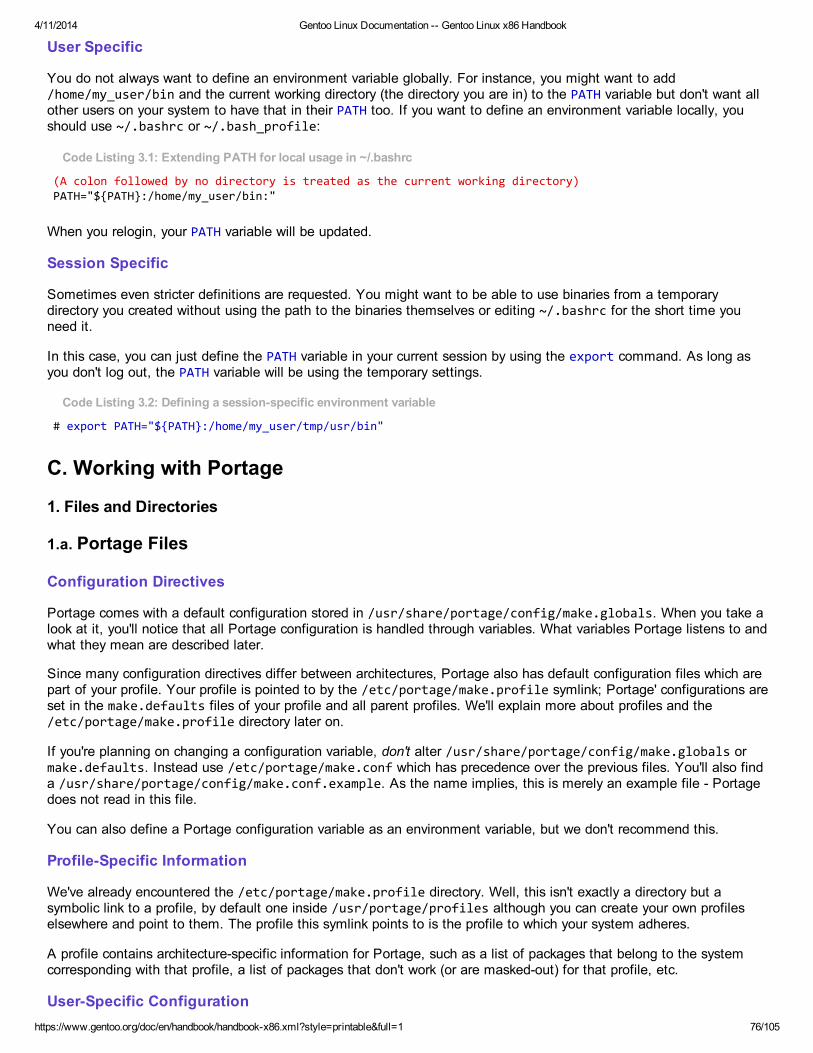
4/11/2014 Gentoo Linux Documentation -- Gentoo Linux x86 Handbook
https://www.gentoo.org/doc/en/handbook/handbook-x86.xml?style=printable&full=1 76/105
User Specific
You do not always want to define an environment variable globally. For instance, you might want to add/home/my_user/bin and the current working directory (the directory you are in) to the PATH variable but don't want allother users on your system to have that in their PATH too. If you want to define an environment variable locally, youshould use ~/.bashrc or ~/.bash_profile:
Code Listing 3.1: Extending PATH for local usage in ~/.bashrc
(A colon followed by no directory is treated as the current working directory)PATH="${PATH}:/home/my_user/bin:"
When you relogin, your PATH variable will be updated.
Session Specific
Sometimes even stricter definitions are requested. You might want to be able to use binaries from a temporarydirectory you created without using the path to the binaries themselves or editing ~/.bashrc for the short time youneed it.
In this case, you can just define the PATH variable in your current session by using the export command. As long asyou don't log out, the PATH variable will be using the temporary settings.
Code Listing 3.2: Defining a session-specific environment variable
# export PATH="${PATH}:/home/my_user/tmp/usr/bin"
C. Working with Portage
1. Files and Directories
1.a. Portage Files
Configuration Directives
Portage comes with a default configuration stored in /usr/share/portage/config/make.globals. When you take alook at it, you'll notice that all Portage configuration is handled through variables. What variables Portage listens to andwhat they mean are described later.
Since many configuration directives differ between architectures, Portage also has default configuration files which arepart of your profile. Your profile is pointed to by the /etc/portage/make.profile symlink; Portage' configurations areset in the make.defaults files of your profile and all parent profiles. We'll explain more about profiles and the/etc/portage/make.profile directory later on.
If you're planning on changing a configuration variable, don't alter /usr/share/portage/config/make.globals ormake.defaults. Instead use /etc/portage/make.conf which has precedence over the previous files. You'll also finda /usr/share/portage/config/make.conf.example. As the name implies, this is merely an example file - Portagedoes not read in this file.
You can also define a Portage configuration variable as an environment variable, but we don't recommend this.
Profile-Specific Information
We've already encountered the /etc/portage/make.profile directory. Well, this isn't exactly a directory but asymbolic link to a profile, by default one inside /usr/portage/profiles although you can create your own profileselsewhere and point to them. The profile this symlink points to is the profile to which your system adheres.
A profile contains architecture-specific information for Portage, such as a list of packages that belong to the systemcorresponding with that profile, a list of packages that don't work (or are masked-out) for that profile, etc.
User-Specific Configuration
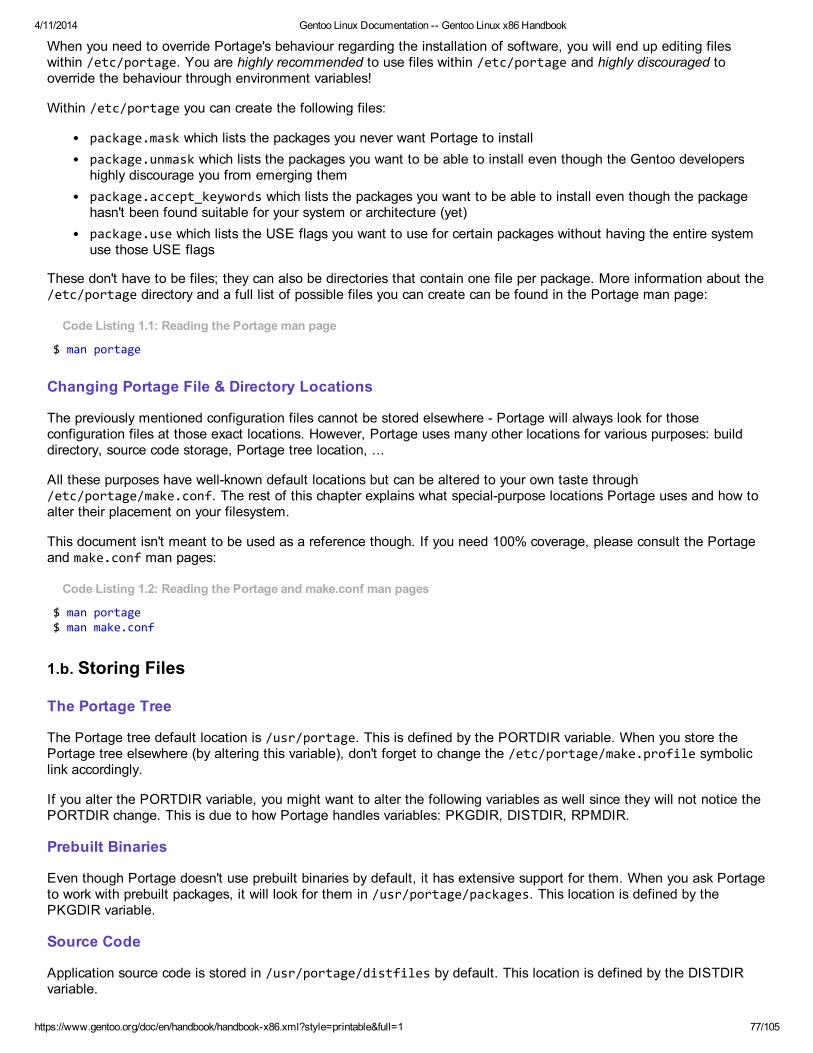
4/11/2014 Gentoo Linux Documentation -- Gentoo Linux x86 Handbook
https://www.gentoo.org/doc/en/handbook/handbook-x86.xml?style=printable&full=1 77/105
When you need to override Portage's behaviour regarding the installation of software, you will end up editing fileswithin /etc/portage. You are highly recommended to use files within /etc/portage and highly discouraged tooverride the behaviour through environment variables!
Within /etc/portage you can create the following files:
package.mask which lists the packages you never want Portage to installpackage.unmask which lists the packages you want to be able to install even though the Gentoo developershighly discourage you from emerging thempackage.accept_keywords which lists the packages you want to be able to install even though the packagehasn't been found suitable for your system or architecture (yet)package.use which lists the USE flags you want to use for certain packages without having the entire systemuse those USE flags
These don't have to be files; they can also be directories that contain one file per package. More information about the/etc/portage directory and a full list of possible files you can create can be found in the Portage man page:
Code Listing 1.1: Reading the Portage man page
$ man portage
Changing Portage File & Directory Locations
The previously mentioned configuration files cannot be stored elsewhere - Portage will always look for thoseconfiguration files at those exact locations. However, Portage uses many other locations for various purposes: builddirectory, source code storage, Portage tree location, ...
All these purposes have well-known default locations but can be altered to your own taste through/etc/portage/make.conf. The rest of this chapter explains what special-purpose locations Portage uses and how toalter their placement on your filesystem.
This document isn't meant to be used as a reference though. If you need 100% coverage, please consult the Portageand make.conf man pages:
Code Listing 1.2: Reading the Portage and make.conf man pages
$ man portage$ man make.conf
1.b. Storing Files
The Portage Tree
The Portage tree default location is /usr/portage. This is defined by the PORTDIR variable. When you store thePortage tree elsewhere (by altering this variable), don't forget to change the /etc/portage/make.profile symboliclink accordingly.
If you alter the PORTDIR variable, you might want to alter the following variables as well since they will not notice thePORTDIR change. This is due to how Portage handles variables: PKGDIR, DISTDIR, RPMDIR.
Prebuilt Binaries
Even though Portage doesn't use prebuilt binaries by default, it has extensive support for them. When you ask Portageto work with prebuilt packages, it will look for them in /usr/portage/packages. This location is defined by thePKGDIR variable.
Source Code
Application source code is stored in /usr/portage/distfiles by default. This location is defined by the DISTDIRvariable.
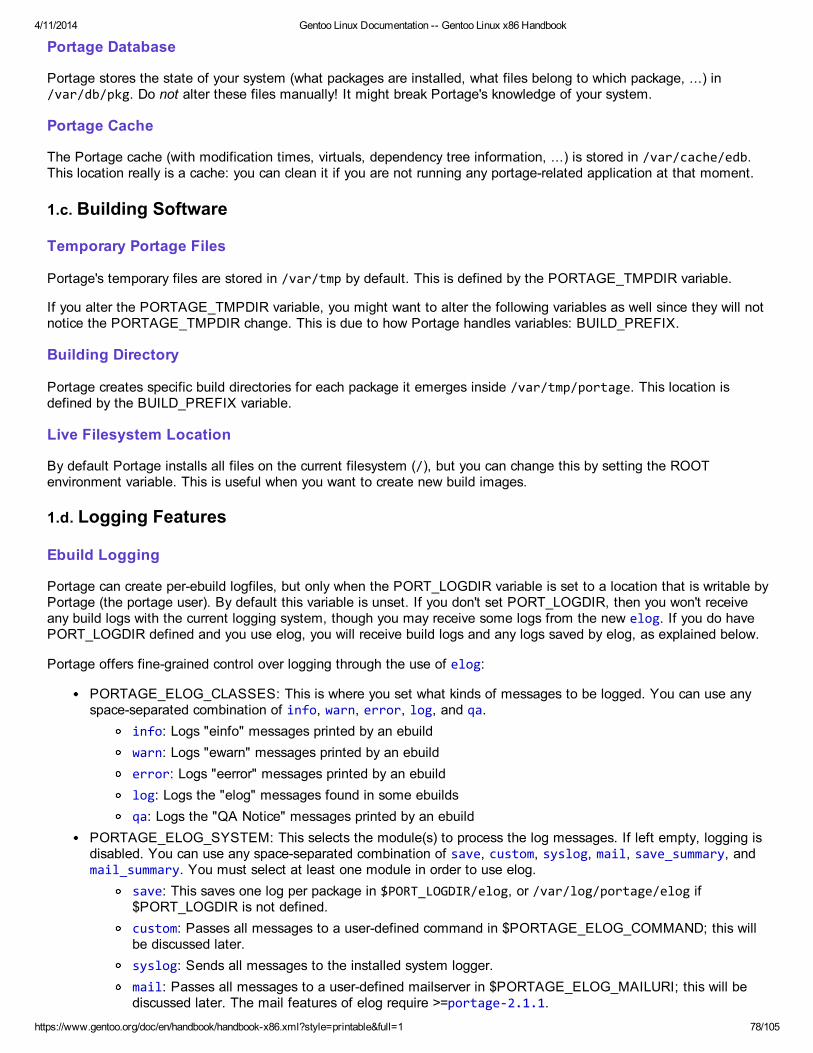
4/11/2014 Gentoo Linux Documentation -- Gentoo Linux x86 Handbook
https://www.gentoo.org/doc/en/handbook/handbook-x86.xml?style=printable&full=1 78/105
Portage Database
Portage stores the state of your system (what packages are installed, what files belong to which package, ...) in/var/db/pkg. Do not alter these files manually! It might break Portage's knowledge of your system.
Portage Cache
The Portage cache (with modification times, virtuals, dependency tree information, ...) is stored in /var/cache/edb.This location really is a cache: you can clean it if you are not running any portage-related application at that moment.
1.c. Building Software
Temporary Portage Files
Portage's temporary files are stored in /var/tmp by default. This is defined by the PORTAGE_TMPDIR variable.
If you alter the PORTAGE_TMPDIR variable, you might want to alter the following variables as well since they will notnotice the PORTAGE_TMPDIR change. This is due to how Portage handles variables: BUILD_PREFIX.
Building Directory
Portage creates specific build directories for each package it emerges inside /var/tmp/portage. This location isdefined by the BUILD_PREFIX variable.
Live Filesystem Location
By default Portage installs all files on the current filesystem (/), but you can change this by setting the ROOTenvironment variable. This is useful when you want to create new build images.
1.d. Logging Features
Ebuild Logging
Portage can create per-ebuild logfiles, but only when the PORT_LOGDIR variable is set to a location that is writable byPortage (the portage user). By default this variable is unset. If you don't set PORT_LOGDIR, then you won't receiveany build logs with the current logging system, though you may receive some logs from the new elog. If you do havePORT_LOGDIR defined and you use elog, you will receive build logs and any logs saved by elog, as explained below.
Portage offers fine-grained control over logging through the use of elog:
PORTAGE_ELOG_CLASSES: This is where you set what kinds of messages to be logged. You can use anyspace-separated combination of info, warn, error, log, and qa.
info: Logs "einfo" messages printed by an ebuildwarn: Logs "ewarn" messages printed by an ebuilderror: Logs "eerror" messages printed by an ebuildlog: Logs the "elog" messages found in some ebuildsqa: Logs the "QA Notice" messages printed by an ebuild
PORTAGE_ELOG_SYSTEM: This selects the module(s) to process the log messages. If left empty, logging isdisabled. You can use any space-separated combination of save, custom, syslog, mail, save_summary, andmail_summary. You must select at least one module in order to use elog.
save: This saves one log per package in $PORT_LOGDIR/elog, or /var/log/portage/elog if$PORT_LOGDIR is not defined.custom: Passes all messages to a user-defined command in $PORTAGE_ELOG_COMMAND; this willbe discussed later.syslog: Sends all messages to the installed system logger.mail: Passes all messages to a user-defined mailserver in $PORTAGE_ELOG_MAILURI; this will bediscussed later. The mail features of elog require >=portage-2.1.1.

4/11/2014 Gentoo Linux Documentation -- Gentoo Linux x86 Handbook
https://www.gentoo.org/doc/en/handbook/handbook-x86.xml?style=printable&full=1 79/105
save_summary: Similar to save, but it merges all messages in $PORT_LOGDIR/elog/summary.log, or/var/log/portage/elog/summary.log if $PORT_LOGDIR is not defined.mail_summary: Similar to mail, but it sends all messages in a single mail when emerge exits.
PORTAGE_ELOG_COMMAND: This is only used when the custom module is enabled. Here is where youspecify a command to process log messages. Note that you can make use of two variables: ${PACKAGE} is thepackage name and version, while ${LOGFILE} is the absolute path to the logfile. Here's one possible usage:
PORTAGE_ELOG_COMMAND="/path/to/logger -p '\${PACKAGE}' -f '\${LOGFILE}'"PORTAGE_ELOG_MAILURI: This contains settings for the mail module such as address, user, password,mailserver, and port number. The default setting is "root@localhost localhost".Here's an example for an smtp server that requires username and password-based authentication on a particularport (the default is port 25):
PORTAGE_ELOG_MAILURI="[email protected] username:[email protected]:995"PORTAGE_ELOG_MAILFROM: Allows you to set the "from" address of log mails; defaults to "portage" ifunset.PORTAGE_ELOG_MAILSUBJECT: Allows you to create a subject line for log mails. Note that you can makeuse of two variables: ${PACKAGE} will display the package name and version, while ${HOST} is the fullyqualified domain name of the host Portage is running on.Here's one possible use:
PORTAGE_ELOG_MAILSUBJECT="package \${PACKAGE} was merged on \${HOST} with somemessages"
Important: If you used enotice with Portage-2.0.*, you must completely remove enotice, as it is incompatible with elog.
2. Configuring through Variables
2.a. Portage Configuration
As noted previously, Portage is configurable through many variables which you should define in/etc/portage/make.conf or one of the subdirectories of /etc/portage. Please refer to the make.conf and portageman pages for more and complete information:
Code Listing 1.1: Reading the man pages
$ man make.conf$ man portage
2.b. Build-specific Options
Configure and Compiler Options
When Portage builds applications, it passes the contents of the following variables to the compiler and configure script:
CFLAGS & CXXFLAGS define the desired compiler flags for C and C++ compiling.CHOST defines the build host information for the application's configure scriptMAKEOPTS is passed to the make command and is usually set to define the amount of parallelism used duringthe compilation. More information about the make options can be found in the make man page.
The USE variable is also used during configure and compilations but has been explained in great detail in previouschapters.
Merge Options
When Portage has merged a newer version of a certain software title, it will remove the obsoleted files of the olderversion from your system. Portage gives the user a 5 second delay before unmerging the older version. These 5seconds are defined by the CLEAN_DELAY variable.
4/11/2014 Gentoo Linux Documentation -- Gentoo Linux x86 Handbook
https://www.gentoo.org/doc/en/handbook/handbook-x86.xml?style=printable&full=1 80/105
You can tell emerge to use certain options every time it is run by setting EMERGE_DEFAULT_OPTS. Some usefuloptions would be --ask, --verbose, --tree, and so on.
2.c. Configuration File Protection
Portage's Protected Locations
Portage overwrites files provided by newer versions of a software title if the files aren't stored in a protected location.These protected locations are defined by the CONFIG_PROTECT variable and are generally configuration filelocations. The directory listing is space-delimited.
A file that would be written in such a protected location is renamed and the user is warned about the presence of anewer version of the (presumable) configuration file.
You can find out about the current CONFIG_PROTECT setting from the emerge --info output:
Code Listing 3.1: Getting the CONFIG_PROTECT setting
$ emerge --info | grep 'CONFIG_PROTECT='
More information about Portage's Configuration File Protection is available in the CONFIGURATION FILES section ofthe emerge manpage:
Code Listing 3.2: More information about Configuration File Protection
$ man emerge
Excluding Directories
To 'unprotect' certain subdirectories of protected locations you can use the CONFIG_PROTECT_MASK variable.
2.d. Download Options
Server Locations
When the requested information or data is not available on your system, Portage will retrieve it from the Internet. Theserver locations for the various information and data channels are defined by the following variables:
GENTOO_MIRRORS defines a list of server locations which contain source code (distfiles)PORTAGE_BINHOST defines a particular server location containing prebuilt packages for your system
A third setting involves the location of the rsync server which you use when you update your Portage tree. This isdefined in the /etc/portage/repos.conf file (or a file inside that directory if it is defined as a directory):
sync-type defines the type of server and defaults to "rsync"sync-uri defines a particular server which Portage uses to fetch the Portage tree from
The GENTOO_MIRRORS, sync-type and sync-uri variables can be set automatically through the mirrorselectapplication. You need to emerge mirrorselect first before you can use it. For more information, see mirrorselect'sonline help:
Code Listing 4.1: More information about mirrorselect
# mirrorselect --help
If your environment requires you to use a proxy server, you can use the http_proxy, ftp_proxy and RSYNC_PROXYvariables to declare a proxy server.
Fetch Commands
When Portage needs to fetch source code, it uses wget by default. You can change this through the
4/11/2014 Gentoo Linux Documentation -- Gentoo Linux x86 Handbook
https://www.gentoo.org/doc/en/handbook/handbook-x86.xml?style=printable&full=1 81/105
FETCHCOMMAND variable.
Portage is able to resume partially downloaded source code. It uses wget by default, but this can be altered throughthe RESUMECOMMAND variable.
Make sure that your FETCHCOMMAND and RESUMECOMMAND stores the source code in the correct location.Inside the variables you should use \${URI} and \${DISTDIR} to point to the source code location and distfiles locationrespectively.
You can also define protocol-specific handlers with FETCHCOMMAND_HTTP, FETCHCOMMAND_FTP,RESUMECOMMAND_HTTP, RESUMECOMMAND_FTP, and so on.
Rsync Settings
You cannot alter the rsync command used by Portage to update the Portage tree, but you can set some variablesrelated to the rsync command:
PORTAGE_RSYNC_OPTS sets a number of default variables used during sync, each space-separated. Theseshouldn't be changed unless you know exactly what you're doing. Note that certain absolutely required optionswill always be used even if PORTAGE_RSYNC_OPTS is empty.PORTAGE_RSYNC_EXTRA_OPTS can be used to set additional options when syncing. Each option shouldbe space separated.
--timeout=<number>: This defines the number of seconds an rsync connection can idle before rsync seesthe connection as timed-out. This variable defaults to 180 but dialup users or individuals with slowcomputers might want to set this to 300 or higher.--exclude-from=/etc/portage/rsync_excludes: This points to a file listing the packages and/or categoriesrsync should ignore during the update process. In this case, it points to/etc/portage/rsync_excludes. Please read Using a Portage Tree Subset for the syntax of this file.--quiet: Reduces output to the screen--verbose: Prints a complete filelist--progress: Displays a progress meter for each file
PORTAGE_RSYNC_RETRIES defines how many times rsync should try connecting to the mirror pointed to bythe SYNC variable before bailing out. This variable defaults to 3.
For more information on these options and others, please read man rsync.
2.e. Gentoo Configuration
Branch Selection
You can change your default branch with the ACCEPT_KEYWORDS variable. It defaults to your architecture's stablebranch. More information on Gentoo's branches can be found in the next chapter.
Portage Features
You can activate certain Portage features through the FEATURES variable. The Portage Features have beendiscussed in previous chapters, such as Portage Features.
2.f. Portage Behaviour
Resource Management
With the PORTAGE_NICENESS variable you can augment or reduce the nice value Portage runs with. ThePORTAGE_NICENESS value is added to the current nice value.
For more information about nice values, see the nice man page:
Code Listing 6.1: More information about nice

4/11/2014 Gentoo Linux Documentation -- Gentoo Linux x86 Handbook
https://www.gentoo.org/doc/en/handbook/handbook-x86.xml?style=printable&full=1 82/105
$ man nice
Output Behaviour
The NOCOLOR, which defaults to "false", defines if Portage should disable the use of coloured output.
3. Mixing Software Branches
3.a. Using One Branch
The Stable Branch
The ACCEPT_KEYWORDS variable defines what software branch you use on your system. It defaults to the stablesoftware branch for your architecture, for instance x86.
We recommend that you only use the stable branch. However, if you don't care about stability this much and you wantto help out Gentoo by submitting bugreports to https://bugs.gentoo.org, read on.
The Testing Branch
If you want to use more recent software, you can consider using the testing branch instead. To have Portage use thetesting branch, add a ~ in front of your architecture.
The testing branch is exactly what it says - Testing. If a package is in testing, it means that the developers feel that itis functional but has not been thoroughly tested. You could very well be the first to discover a bug in the package inwhich case you could file a bugreport to let the developers know about it.
Beware though, you might notice stability issues, imperfect package handling (for instance wrong/missingdependencies), too frequent updates (resulting in lots of building) or broken packages. If you do not know how Gentooworks and how to solve problems, we recommend that you stick with the stable and tested branch.
For example, to select the testing branch for the x86 architecture, edit /etc/portage/make.conf and set:
Code Listing 1.1: Setting the ACCEPT_KEYWORDS variable
ACCEPT_KEYWORDS="~x86"
If you update your system now, you will find out that lots of packages will be updated. Mind you though: when youhave updated your system to use the testing branch there is usually no easy way back to the stable, official branch(except for using backups of course).
3.b. Mixing Stable with Testing
The package.accept_keywords location
You can ask Portage to allow the testing branch for particular packages but use the stable branch for the rest of thesystem. To achieve this, add the package category and name you want to use the testing branch of in/etc/portage/package.accept_keywords. You can also create a directory (with the same name) and list thepackage in the files under that directory. For instance, to use the testing branch for gnumeric:
Code Listing 2.1: /etc/portage/package.accept_keywords setting for gnumeric
app-office/gnumeric
Test Particular Versions
If you want to use a specific software version from the testing branch but you don't want Portage to use the testingbranch for subsequent versions, you can add in the version in the package.accept_keywords location. In this caseyou must use the = operator. You can also enter a version range using the <=, <, > or >= operators.

4/11/2014 Gentoo Linux Documentation -- Gentoo Linux x86 Handbook
https://www.gentoo.org/doc/en/handbook/handbook-x86.xml?style=printable&full=1 83/105
In any case, if you add version information, you must use an operator. If you leave out version information, you cannotuse an operator.
In the following example we ask Portage to accept gnumeric-1.2.13:
Code Listing 2.2: Enabling a particular gnumeric test version
=app-office/gnumeric-1.2.13
3.c. Using Masked Packages
The package.unmask location
Important: The Gentoo developers do not support the use of this location. Please exercise due caution when doing so. Supportrequests related to package.unmask and/or package.mask will not be answered. You have been warned.
When a package has been masked by the Gentoo developers and you still want to use it despite the reason mentionedin the package.mask file (situated in /usr/portage/profiles by default), add the desired version (usually this will bethe exact same line from profiles) in the /etc/portage/package.unmask file (or in a file in that directory if it is adirectory).
For instance, if =net-mail/hotwayd-0.8 is masked, you can unmask it by adding the exact same line in thepackage.unmask location:
Code Listing 3.1: /etc/portage/package.unmask
=net-mail/hotwayd-0.8
Note: If an entry in /usr/portage/profiles/package.mask contains a range of package versions, you will need to unmask onlythe version(s) you actually want. Please read the previous section to learn how to specify versions in package.unmask.
The package.mask location
When you don't want Portage to take a certain package or a specific version of a package into account you can mask ityourself by adding an appropriate line to the /etc/portage/package.mask location (either in that file or in a file inthis directory).
For instance, if you don't want Portage to install newer kernel sources than gentoo-sources-2.6.8.1, you add thefollowing line at the package.mask location:
Code Listing 3.2: /etc/portage/package.mask example
>sys-kernel/gentoo-sources-2.6.8.1
4. Additional Portage Tools
4.a. dispatch-conf
dispatch-conf is a tool that aids in merging the ._cfg0000_<name> files. ._cfg0000_<name> files are generated byPortage when it wants to overwrite a file in a directory protected by the CONFIG_PROTECT variable.
With dispatch-conf, you are able to merge updates to your configuration files while keeping track of all changes.dispatch-conf stores the differences between the configuration files as patches or by using the RCS revision system.This means that if you make a mistake when updating a config file, you can revert to the previous version of yourconfig file at any time.
When using dispatch-conf, you can ask to keep the configuration file as-is, use the new configuration file, edit thecurrent one or merge the changes interactively. dispatch-conf also has some nice additional features:
Automatically merge configuration file updates that only contain updates to comments
4/11/2014 Gentoo Linux Documentation -- Gentoo Linux x86 Handbook
https://www.gentoo.org/doc/en/handbook/handbook-x86.xml?style=printable&full=1 84/105
Automatically merge configuration files which only differ in the amount of whitespace
Make certain you edit /etc/dispatch-conf.conf first and create the directory referenced by the archive-dir variable.
Code Listing 1.1: Running dispatch-conf
# dispatch-conf
When running dispatch-conf, you'll be taken through each changed config file, one at a time. Press u to update(replace) the current config file with the new one and continue to the next file. Press z to zap (delete) the new configfile and continue to the next file. Once all config files have been taken care of, dispatch-conf will exit. You can alsopress q to exit any time.
For more information, check out the dispatch-conf man page. It tells you how to interactively merge current and newconfig files, edit new config files, examine differences between files, and more.
Code Listing 1.2: Reading the dispatch-conf man page
$ man dispatch-conf
4.b. etc-update
You can also use etc-update to merge config files. It's not as simple to use as dispatch-conf, nor as featureful, butit does provide an interactive merging setup and can also auto-merge trivial changes.
However, unlike dispatch-conf, etc-update does not preserve the old versions of your config files. Once you updatethe file, the old version is gone forever! So be very careful, as using etc-update is significantly less safe than usingdispatch-conf.
Code Listing 2.1: Running etc-update
# etc-update
After merging the straightforward changes, you will be prompted with a list of protected files that have an updatewaiting. At the bottom you are greeted by the possible options:
Code Listing 2.2: etc-update options
Please select a file to edit by entering the corresponding number. (-1 to exit) (-3 to auto merge all remaining files) (-5 to auto-merge AND not use 'mv -i'):
If you enter -1, etc-update will exit and discontinue any further changes. If you enter -3 or -5, all listed configurationfiles will be overwritten with the newer versions. It is therefore very important to first select the configuration files thatshould not be automatically updated. This is simply a matter of entering the number listed to the left of thatconfiguration file.
As an example, we select the configuration file /etc/pear.conf:
Code Listing 2.3: Updating a specific configuration file
Beginning of differences between /etc/pear.conf and /etc/._cfg0000_pear.conf[...]End of differences between /etc/pear.conf and /etc/._cfg0000_pear.conf1) Replace original with update2) Delete update, keeping original as is3) Interactively merge original with update4) Show differences again
You can now see the differences between the two files. If you believe that the updated configuration file can be usedwithout problems, enter 1. If you believe that the updated configuration file isn't necessary, or doesn't provide any newor useful information, enter 2. If you want to interactively update your current configuration file, enter 3.
4/11/2014 Gentoo Linux Documentation -- Gentoo Linux x86 Handbook
https://www.gentoo.org/doc/en/handbook/handbook-x86.xml?style=printable&full=1 85/105
There is no point in further elaborating the interactive merging here. For completeness sake, we will list the possiblecommands you can use while you are interactively merging the two files. You are greeted with two lines (the originalone, and the proposed new one) and a prompt at which you can enter one of the following commands:
Code Listing 2.4: Commands available for the interactive merging
ed: Edit then use both versions, each decorated with a header.eb: Edit then use both versions.el: Edit then use the left version.er: Edit then use the right version.e: Edit a new version.l: Use the left version.r: Use the right version.s: Silently include common lines.v: Verbosely include common lines.q: Quit.
When you have finished updating the important configuration files, you can now automatically update all the otherconfiguration files. etc-update will exit if it doesn't find any more updateable configuration files.
4.c. quickpkg
With quickpkg you can create archives of the packages that are already merged on your system. These archives canbe used as prebuilt packages. Running quickpkg is straightforward: just add the names of the packages you want toarchive.
For instance, to archive curl, orage, and procps:
Code Listing 3.1: Example quickpkg usage
# quickpkg curl orage procps
The prebuilt packages will be stored in $PKGDIR (/usr/portage/packages/ by default). These packages are placed in$PKGDIR/<category>.
5. Diverting from the Official Tree
5.a. Using a Portage Tree Subset
Excluding Packages/Categories
You can selectively update certain categories/packages and ignore the other categories/packages. We achieve this byhaving rsync exclude categories/packages during the emerge --sync step.
You need to define the name of the file that contains the exclude patterns in the PORTAGE_RSYNC_EXTRA_OPTSvariable in your /etc/portage/make.conf.
Code Listing 1.1: Defining the exclude file in /etc/portage/make.conf
PORTAGE_RSYNC_EXTRA_OPTS="--exclude-from=/etc/portage/rsync_excludes"
Code Listing 1.2: Excluding all games in /etc/portage/rsync_excludes
games-*/*
Note however that this may lead to dependency issues since new, allowed packages might depend on new butexcluded packages.
5.b. Adding Unofficial Ebuilds
Defining a Portage Overlay Directory
4/11/2014 Gentoo Linux Documentation -- Gentoo Linux x86 Handbook
https://www.gentoo.org/doc/en/handbook/handbook-x86.xml?style=printable&full=1 86/105
You can ask Portage to use ebuilds that are not officially available through the Portage tree. Create a new directory(for instance /usr/local/portage) in which you store the 3rd-party ebuilds. Use the same directory structure as theofficial Portage tree!
Then define PORTDIR_OVERLAY in /etc/portage/make.conf and have it point to the previously defined directory.When you use Portage now, it will take those ebuilds into account as well without removing/overwriting those ebuildsthe next time you run emerge --sync.
Working with Several Overlays
For the powerusers who develop on several overlays, test packages before they hit the Portage tree or just want to useunofficial ebuilds from various sources, the app-portage/layman package brings you layman, a tool to help you keepthe overlay repositories up to date.
First install and configure layman as shown in the Overlays Users' Guide, and add your desired repositories withlayman -a <overlay-name>.
Suppose you have two repositories called java (for the in-development java ebuilds) and entapps (for the applicationsdeveloped in-house for your enterprise). You can update those repositories with the following command:
Code Listing 2.1: Using layman to update all repositories
# layman -S
For more information on working with overlays, please read man layman and the layman/overlay users' guide.
5.c. Non-Portage Maintained Software
Using Portage with Self-Maintained Software
In some cases you want to configure, install and maintain software yourself without having Portage automate theprocess for you, even though Portage can provide the software titles. Known cases are kernel sources and nvidiadrivers. You can configure Portage so it knows that a certain package is manually installed on your system. Thisprocess is called injecting and supported by Portage through the /etc/portage/profile/package.provided file.
For instance, if you want to inform Portage about gentoo-sources-2.6.11.6 which you've installed manually, addthe following line to /etc/portage/profile/package.provided:
Code Listing 3.1: Example line for package.provided
sys-kernel/gentoo-sources-2.6.11.6
6. Advanced Portage Features
6.a. Introduction
For most users, the information received thus far is sufficient for all their Linux operations. But Portage is capable ofmuch more; many of its features are for advanced users or only applicable in specific corner cases. Still, that would notbe an excuse not to document them.
Of course, with lots of flexibility comes a huge list of potential cases. It will not be possible to document them all here.Instead, we hope to focus on some generic issues which you can then bend to fit your own needs. If you have need formore specific tweaks and tips, you might find them on the Gentoo Wiki instead.
Most, if not all of these additional features can be easily found by digging through the manual pages that portageprovides:
Code Listing 1.1: Reading up on portage man pages
$ man portage$ man make.conf
4/11/2014 Gentoo Linux Documentation -- Gentoo Linux x86 Handbook
https://www.gentoo.org/doc/en/handbook/handbook-x86.xml?style=printable&full=1 87/105
Finally, know that these are advanced features which, if not worked with correctly, can make debugging andtroubleshooting very difficult. Make sure you mention these if you think you hit a bug and want to open a bugreport.
6.b. Per-Package Environment Variables
Using /etc/portage/env
By default, package builds will use the environment variables defined in /etc/portage/make.conf, such as CFLAGS,MAKEOPTS and more. In some cases though, you might want to provide different variables for specific packages. To doso, Portage supports the use of /etc/portage/env and /etc/portage/package.env.
The /etc/portage/package.env file contains the list of packages for which you want deviating variables as well as aspecific identifier that tells Portage which changes you want. The identifier name you pick yourself, Portage will look forthe variables in the /etc/portage/env/<identifier> file.
Example: Using debugging for specific packages
As an example, we enable debugging for the media-video/mplayer package.
First of all, we set the debugging variables in a file called /etc/portage/env/debug-cflags. The name is arbitrarilychosen, but of course reflects the reason of the deviation to make it more obvious later why a deviation was put in.
Code Listing 2.1: /etc/portage/env/debug-cflags content
CFLAGS="-O2 -ggdb -pipe"FEATURES="${FEATURES} nostrip"
Next, we tag the media-video/mplayer package to use this content:
Code Listing 2.2: /etc/portage/package.env content
media-video/mplayer debug-cflags
6.c. Hooking In the Emerge Process
Using /etc/portage/bashrc and affiliated files
When Portage works with ebuilds, it uses a bash environment in which it calls the various build functions (likesrc_prepare, src_configure, pkg_postinst, etc.). But Portage also allows you to set up a bash environment yourself.
The advantage of using your own bash environment is that you can hook in the emerge process during each step itperforms. This can be done for every emerge (through /etc/portage/bashrc) or by using per-package environments(through /etc/portage/env as discussed earlier).
To hook in the process, the bash environment can listen to the variables EBUILD_PHASE, CATEGORY as well as thevariables that are always available during ebuild development (such as P, PF, ...). Based on the values of thesevariables, you can then execute additional steps.
Example: Updating File Databases
In this example, we'll use /etc/portage/bashrc to call some file database applications to ensure their databases areup to date with the system. The applications used in the example are aide (an intrusion detection tool) and updatedb(to use with locate), but these are meant as examples. Do not consider this as a HOWTO for AIDE ;-)
To use /etc/portage/bashrc for this case, we need to "hook" in the postrm (after removal of files) and postinst(after installation of files) functions, because that is when the files on the file system have been changed.
Code Listing 3.1: Example /etc/portage/bashrc
if [ "${EBUILD_PHASE}" == "postinst" ] || [ "${EBUILD_PHASE}" == "postrm" ];then echo ":: Calling aide --update to update its database";
4/11/2014 Gentoo Linux Documentation -- Gentoo Linux x86 Handbook
https://www.gentoo.org/doc/en/handbook/handbook-x86.xml?style=printable&full=1 88/105
aide --update; echo ":: Calling updatedb to update its database"; updatedb;fi
6.d. Executing Tasks After --sync
The /etc/portage/postsync.d location
Until now we've talked about hooking into the ebuild processes. However, Portage also has another important function:updating the Portage tree. In order to run tasks after updating the Portage tree, put a script inside/etc/portage/postsync.d and make sure it is marked as executable.
Example: Running eix-update
If you didn't use eix-sync to update the tree, you can still have its database updated after running emerge --sync (oremerge-webrsync) by putting a symlink to /usr/bin/eix called eix-update in /etc/portage/postsync.d.
Code Listing 4.1: Running eix-update after a sync operation
# ln -s /usr/bin/eix /etc/portage/postsync.d/eix-update
Note: If you rather use a different name, you will need to make a script that calls /usr/bin/eix-update instead. The eix binarylooks at how it has been called to find out which function it has to execute. If you put in a symlink to eix that isn't called eix-update, itwill not run correctly.
6.e. Overriding Profile Settings
The /etc/portage/profile location
By default, Gentoo uses the settings contained in the profile pointed to by /etc/portage/make.profile (a symboliclink to the right profile directory). These profiles define both specific settings as well as inherit settings from otherprofiles (through their parent file).
By using /etc/portage/profile, you can override profile settings such as packages (what packages are consideredto be part of the system set), forced use flags and more.
Example: Adding nfs-utils to the System Set
If you use NFS-based file systems for rather critical file systems, you might want to have net-fs/nfs-utils"protected" as a system package, causing Portage to heavily warn you if it would be deleted.
To accomplish that, we add the package to /etc/portage/profile/packages, prepended with a *:
Code Listing 5.1: /etc/portage/profile/packages content
*net-fs/nfs-utils
6.f. Applying Non-Standard Patches
Using epatch_user
To manage several ebuilds in a similar manner, ebuild developers use eclasses (sort-of shell libraries) that definecommonly used functions. One of these eclasses is eutils.eclass which offers an interesting function calledepatch_user.
The epatch_user function applies source code patches that are found in/etc/portage/patches/<category>/<package>[-<version>[-<revision>]], whatever directory is found first.Sadly, not all ebuilds automatically call this function so just putting your patch in this location might not always work.
4/11/2014 Gentoo Linux Documentation -- Gentoo Linux x86 Handbook
https://www.gentoo.org/doc/en/handbook/handbook-x86.xml?style=printable&full=1 89/105
Luckily, with the information provided above, you can call this function by hooking into, for instance, the preparephase. The function can be called as many times as you like - it will only apply the patches once.
Example: Applying Patches to Firefox
The www-client/firefox package is one of the few that already call epatch_user from within the ebuild, so you donot need to override anything specific.
If you need to patch firefox (for instance because a developer provided you with a patch and asked you to check if itfixes the bug you reported), put the patch in /etc/portage/patches/www-client/firefox (probably best to use thefull name, including version so that the patch does not interfere with later versions) and rebuild firefox.
D. Gentoo Network Configuration
1. Getting Started
1.a. Getting started
Note: This document assumes that you have correctly configured your kernel, its modules for your hardware and you know theinterface name of your hardware. We also assume that you are configuring eth0, but it could also be eno0, ens1, wlan0, enp1s0 etc.
To get started configuring your network card, you need to tell the Gentoo RC system about it. This is done by creatinga symbolic link from net.lo to net.eth0 (or whatever the network interface name is on your system) in /etc/init.d.
Code Listing 1.1: Symlinking net.eth0 to net.lo
# cd /etc/init.d# ln -s net.lo net.eth0
Gentoo's RC system now knows about that interface. It also needs to know how to configure the new interface. All thenetwork interfaces are configured in /etc/conf.d/net. Below is a sample configuration for DHCP and staticaddresses.
Code Listing 1.2: Examples for /etc/conf.d/net
# For DHCPconfig_eth0="dhcp"
# For static IP using CIDR notationconfig_eth0="192.168.0.7/24"routes_eth0="default via 192.168.0.1"dns_servers_eth0="192.168.0.1 8.8.8.8"
# For static IP using netmask notationconfig_eth0="192.168.0.7 netmask 255.255.255.0"routes_eth0="default via 192.168.0.1"dns_servers_eth0="192.168.0.1 8.8.8.8"
Note: If you do not specify a configuration for your interface then DHCP is assumed.
Note: CIDR stands for Classless InterDomain Routing. Originally, IPv4 addresses were classified as A, B, or C. The earlyclassification system did not envision the massive popularity of the Internet, and is in danger of running out of new unique addresses.CIDR is an addressing scheme that allows one IP address to designate many IP addresses. A CIDR IP address looks like a normal IPaddress except that it ends with a slash followed by a number; for example, 192.168.0.0/16. CIDR is described in RFC 1519.
Now that we have configured our interface, we can start and stop it using the following commands:
Code Listing 1.3: Starting and stopping network scripts
# /etc/init.d/net.eth0 start# /etc/init.d/net.eth0 stop
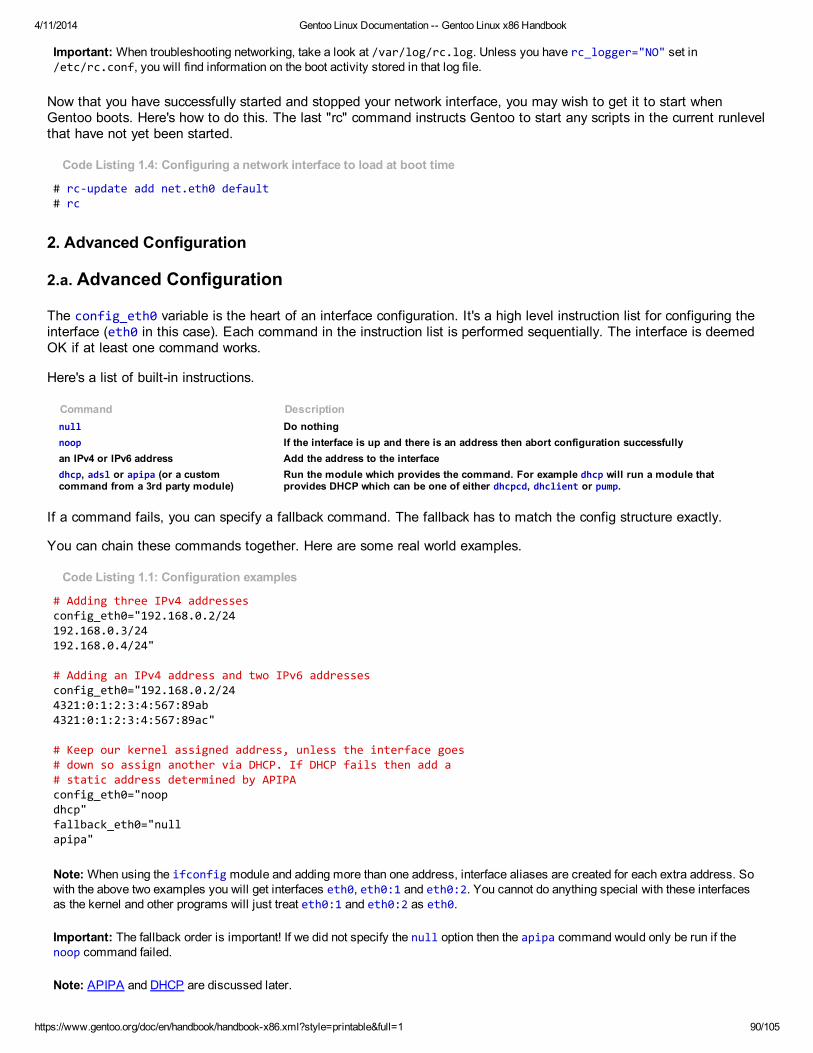
4/11/2014 Gentoo Linux Documentation -- Gentoo Linux x86 Handbook
https://www.gentoo.org/doc/en/handbook/handbook-x86.xml?style=printable&full=1 90/105
Important: When troubleshooting networking, take a look at /var/log/rc.log. Unless you have rc_logger="NO" set in/etc/rc.conf, you will find information on the boot activity stored in that log file.
Now that you have successfully started and stopped your network interface, you may wish to get it to start whenGentoo boots. Here's how to do this. The last "rc" command instructs Gentoo to start any scripts in the current runlevelthat have not yet been started.
Code Listing 1.4: Configuring a network interface to load at boot time
# rc-update add net.eth0 default# rc
2. Advanced Configuration
2.a. Advanced Configuration
The config_eth0 variable is the heart of an interface configuration. It's a high level instruction list for configuring theinterface (eth0 in this case). Each command in the instruction list is performed sequentially. The interface is deemedOK if at least one command works.
Here's a list of built-in instructions.
Command Descriptionnull Do nothingnoop If the interface is up and there is an address then abort configuration successfullyan IPv4 or IPv6 address Add the address to the interfacedhcp, adsl or apipa (or a customcommand from a 3rd party module)
Run the module which provides the command. For example dhcp will run a module thatprovides DHCP which can be one of either dhcpcd, dhclient or pump.
If a command fails, you can specify a fallback command. The fallback has to match the config structure exactly.
You can chain these commands together. Here are some real world examples.
Code Listing 1.1: Configuration examples
# Adding three IPv4 addressesconfig_eth0="192.168.0.2/24192.168.0.3/24192.168.0.4/24"
# Adding an IPv4 address and two IPv6 addressesconfig_eth0="192.168.0.2/244321:0:1:2:3:4:567:89ab4321:0:1:2:3:4:567:89ac"
# Keep our kernel assigned address, unless the interface goes# down so assign another via DHCP. If DHCP fails then add a# static address determined by APIPAconfig_eth0="noopdhcp"fallback_eth0="nullapipa"
Note: When using the ifconfig module and adding more than one address, interface aliases are created for each extra address. Sowith the above two examples you will get interfaces eth0, eth0:1 and eth0:2. You cannot do anything special with these interfacesas the kernel and other programs will just treat eth0:1 and eth0:2 as eth0.
Important: The fallback order is important! If we did not specify the null option then the apipa command would only be run if thenoop command failed.
Note: APIPA and DHCP are discussed later.
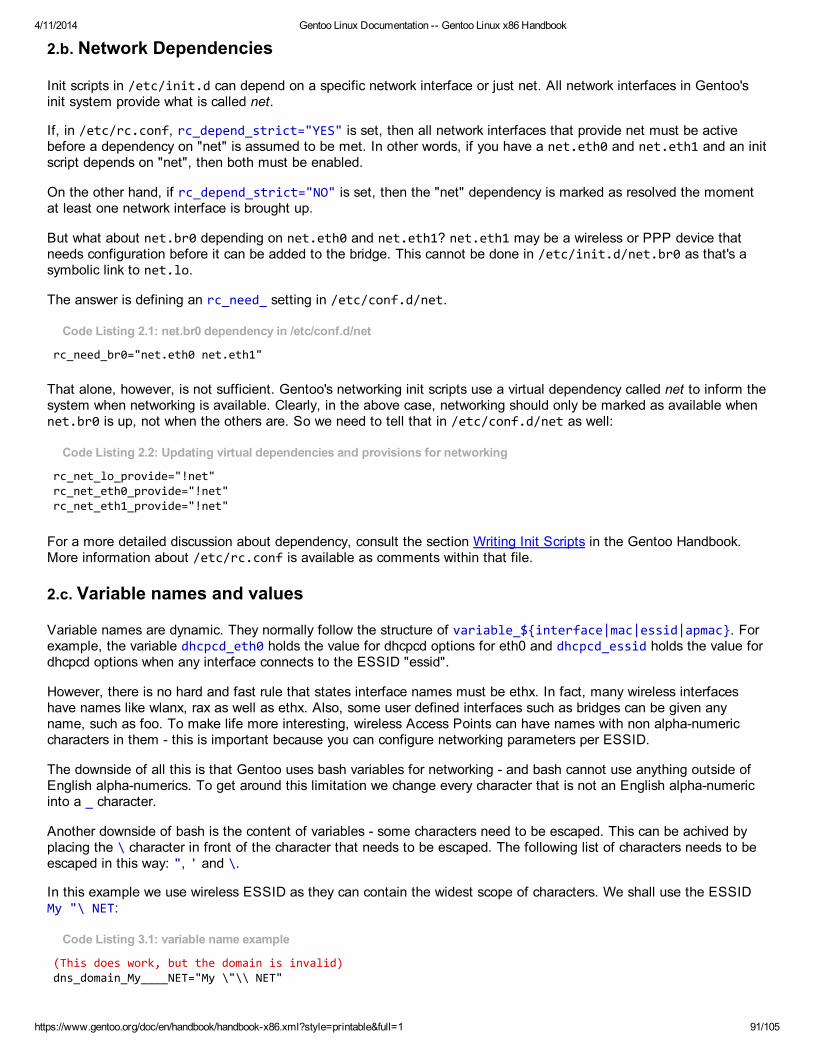
4/11/2014 Gentoo Linux Documentation -- Gentoo Linux x86 Handbook
https://www.gentoo.org/doc/en/handbook/handbook-x86.xml?style=printable&full=1 91/105
2.b. Network Dependencies
Init scripts in /etc/init.d can depend on a specific network interface or just net. All network interfaces in Gentoo'sinit system provide what is called net.
If, in /etc/rc.conf, rc_depend_strict="YES" is set, then all network interfaces that provide net must be activebefore a dependency on "net" is assumed to be met. In other words, if you have a net.eth0 and net.eth1 and an initscript depends on "net", then both must be enabled.
On the other hand, if rc_depend_strict="NO" is set, then the "net" dependency is marked as resolved the momentat least one network interface is brought up.
But what about net.br0 depending on net.eth0 and net.eth1? net.eth1 may be a wireless or PPP device thatneeds configuration before it can be added to the bridge. This cannot be done in /etc/init.d/net.br0 as that's asymbolic link to net.lo.
The answer is defining an rc_need_ setting in /etc/conf.d/net.
Code Listing 2.1: net.br0 dependency in /etc/conf.d/net
rc_need_br0="net.eth0 net.eth1"
That alone, however, is not sufficient. Gentoo's networking init scripts use a virtual dependency called net to inform thesystem when networking is available. Clearly, in the above case, networking should only be marked as available whennet.br0 is up, not when the others are. So we need to tell that in /etc/conf.d/net as well:
Code Listing 2.2: Updating virtual dependencies and provisions for networking
rc_net_lo_provide="!net"rc_net_eth0_provide="!net"rc_net_eth1_provide="!net"
For a more detailed discussion about dependency, consult the section Writing Init Scripts in the Gentoo Handbook.More information about /etc/rc.conf is available as comments within that file.
2.c. Variable names and values
Variable names are dynamic. They normally follow the structure of variable_${interface|mac|essid|apmac}. Forexample, the variable dhcpcd_eth0 holds the value for dhcpcd options for eth0 and dhcpcd_essid holds the value fordhcpcd options when any interface connects to the ESSID "essid".
However, there is no hard and fast rule that states interface names must be ethx. In fact, many wireless interfaceshave names like wlanx, rax as well as ethx. Also, some user defined interfaces such as bridges can be given anyname, such as foo. To make life more interesting, wireless Access Points can have names with non alpha-numericcharacters in them - this is important because you can configure networking parameters per ESSID.
The downside of all this is that Gentoo uses bash variables for networking - and bash cannot use anything outside ofEnglish alpha-numerics. To get around this limitation we change every character that is not an English alpha-numericinto a _ character.
Another downside of bash is the content of variables - some characters need to be escaped. This can be achived byplacing the \ character in front of the character that needs to be escaped. The following list of characters needs to beescaped in this way: ", ' and \.
In this example we use wireless ESSID as they can contain the widest scope of characters. We shall use the ESSIDMy "\ NET:
Code Listing 3.1: variable name example
(This does work, but the domain is invalid)dns_domain_My____NET="My \"\\ NET"
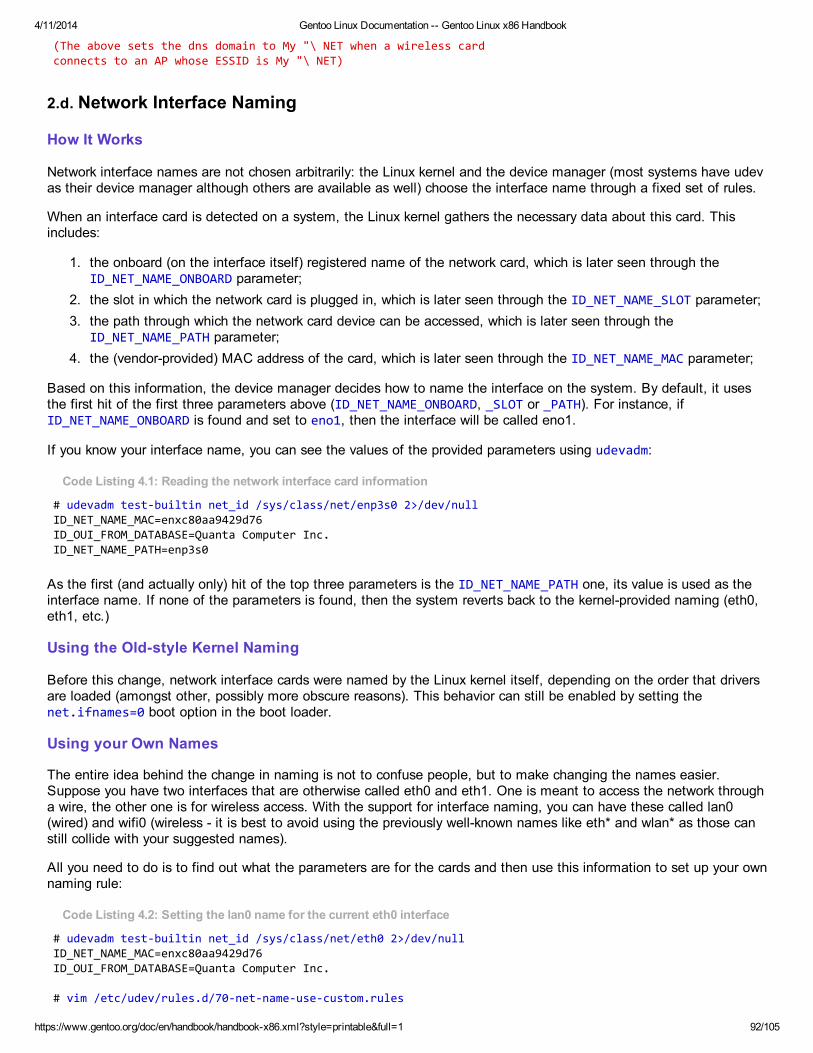
4/11/2014 Gentoo Linux Documentation -- Gentoo Linux x86 Handbook
https://www.gentoo.org/doc/en/handbook/handbook-x86.xml?style=printable&full=1 92/105
(The above sets the dns domain to My "\ NET when a wireless cardconnects to an AP whose ESSID is My "\ NET)
2.d. Network Interface Naming
How It Works
Network interface names are not chosen arbitrarily: the Linux kernel and the device manager (most systems have udevas their device manager although others are available as well) choose the interface name through a fixed set of rules.
When an interface card is detected on a system, the Linux kernel gathers the necessary data about this card. Thisincludes:
1. the onboard (on the interface itself) registered name of the network card, which is later seen through theID_NET_NAME_ONBOARD parameter;
2. the slot in which the network card is plugged in, which is later seen through the ID_NET_NAME_SLOT parameter;3. the path through which the network card device can be accessed, which is later seen through the
ID_NET_NAME_PATH parameter;4. the (vendor-provided) MAC address of the card, which is later seen through the ID_NET_NAME_MAC parameter;
Based on this information, the device manager decides how to name the interface on the system. By default, it usesthe first hit of the first three parameters above (ID_NET_NAME_ONBOARD, _SLOT or _PATH). For instance, ifID_NET_NAME_ONBOARD is found and set to eno1, then the interface will be called eno1.
If you know your interface name, you can see the values of the provided parameters using udevadm:
Code Listing 4.1: Reading the network interface card information
# udevadm test-builtin net_id /sys/class/net/enp3s0 2>/dev/nullID_NET_NAME_MAC=enxc80aa9429d76ID_OUI_FROM_DATABASE=Quanta Computer Inc.ID_NET_NAME_PATH=enp3s0
As the first (and actually only) hit of the top three parameters is the ID_NET_NAME_PATH one, its value is used as theinterface name. If none of the parameters is found, then the system reverts back to the kernel-provided naming (eth0,eth1, etc.)
Using the Old-style Kernel Naming
Before this change, network interface cards were named by the Linux kernel itself, depending on the order that driversare loaded (amongst other, possibly more obscure reasons). This behavior can still be enabled by setting thenet.ifnames=0 boot option in the boot loader.
Using your Own Names
The entire idea behind the change in naming is not to confuse people, but to make changing the names easier.Suppose you have two interfaces that are otherwise called eth0 and eth1. One is meant to access the network througha wire, the other one is for wireless access. With the support for interface naming, you can have these called lan0(wired) and wifi0 (wireless - it is best to avoid using the previously well-known names like eth* and wlan* as those canstill collide with your suggested names).
All you need to do is to find out what the parameters are for the cards and then use this information to set up your ownnaming rule:
Code Listing 4.2: Setting the lan0 name for the current eth0 interface
# udevadm test-builtin net_id /sys/class/net/eth0 2>/dev/nullID_NET_NAME_MAC=enxc80aa9429d76ID_OUI_FROM_DATABASE=Quanta Computer Inc.
# vim /etc/udev/rules.d/70-net-name-use-custom.rules
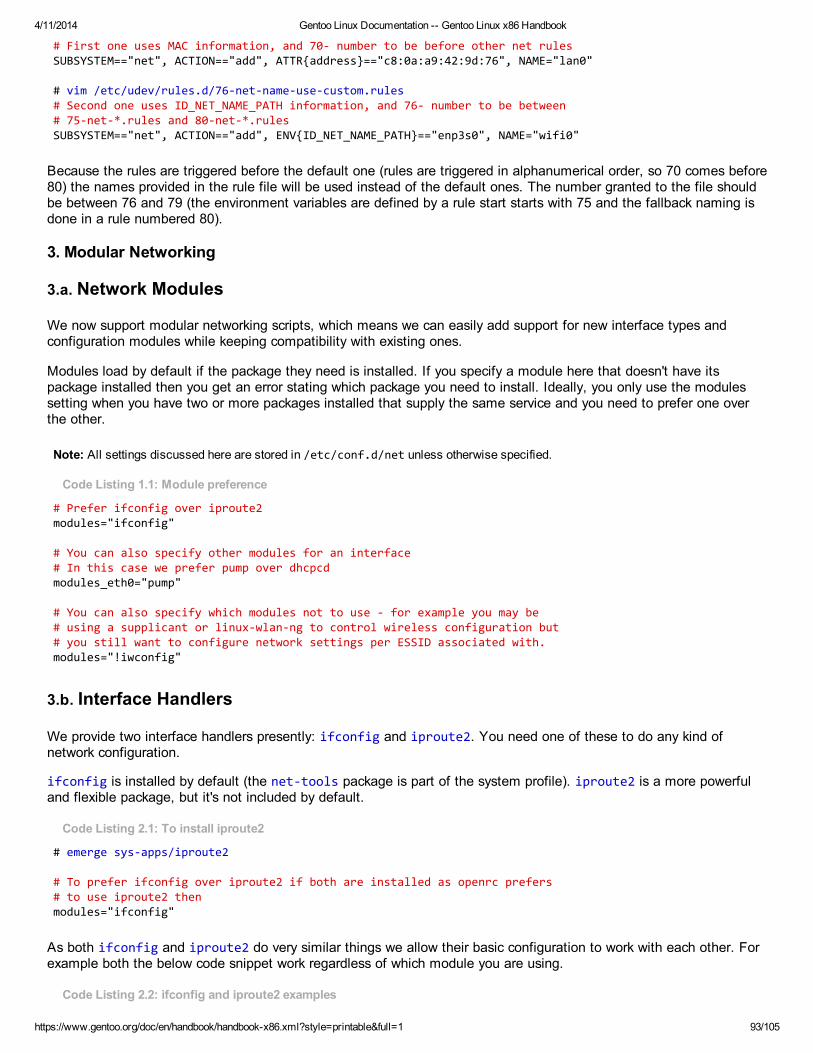
4/11/2014 Gentoo Linux Documentation -- Gentoo Linux x86 Handbook
https://www.gentoo.org/doc/en/handbook/handbook-x86.xml?style=printable&full=1 93/105
# First one uses MAC information, and 70- number to be before other net rulesSUBSYSTEM=="net", ACTION=="add", ATTR{address}=="c8:0a:a9:42:9d:76", NAME="lan0"
# vim /etc/udev/rules.d/76-net-name-use-custom.rules# Second one uses ID_NET_NAME_PATH information, and 76- number to be between# 75-net-*.rules and 80-net-*.rulesSUBSYSTEM=="net", ACTION=="add", ENV{ID_NET_NAME_PATH}=="enp3s0", NAME="wifi0"
Because the rules are triggered before the default one (rules are triggered in alphanumerical order, so 70 comes before80) the names provided in the rule file will be used instead of the default ones. The number granted to the file shouldbe between 76 and 79 (the environment variables are defined by a rule start starts with 75 and the fallback naming isdone in a rule numbered 80).
3. Modular Networking
3.a. Network Modules
We now support modular networking scripts, which means we can easily add support for new interface types andconfiguration modules while keeping compatibility with existing ones.
Modules load by default if the package they need is installed. If you specify a module here that doesn't have itspackage installed then you get an error stating which package you need to install. Ideally, you only use the modulessetting when you have two or more packages installed that supply the same service and you need to prefer one overthe other.
Note: All settings discussed here are stored in /etc/conf.d/net unless otherwise specified.
Code Listing 1.1: Module preference
# Prefer ifconfig over iproute2modules="ifconfig"
# You can also specify other modules for an interface# In this case we prefer pump over dhcpcdmodules_eth0="pump"
# You can also specify which modules not to use - for example you may be# using a supplicant or linux-wlan-ng to control wireless configuration but# you still want to configure network settings per ESSID associated with.modules="!iwconfig"
3.b. Interface Handlers
We provide two interface handlers presently: ifconfig and iproute2. You need one of these to do any kind ofnetwork configuration.
ifconfig is installed by default (the net-tools package is part of the system profile). iproute2 is a more powerfuland flexible package, but it's not included by default.
Code Listing 2.1: To install iproute2
# emerge sys-apps/iproute2
# To prefer ifconfig over iproute2 if both are installed as openrc prefers# to use iproute2 thenmodules="ifconfig"
As both ifconfig and iproute2 do very similar things we allow their basic configuration to work with each other. Forexample both the below code snippet work regardless of which module you are using.
Code Listing 2.2: ifconfig and iproute2 examples
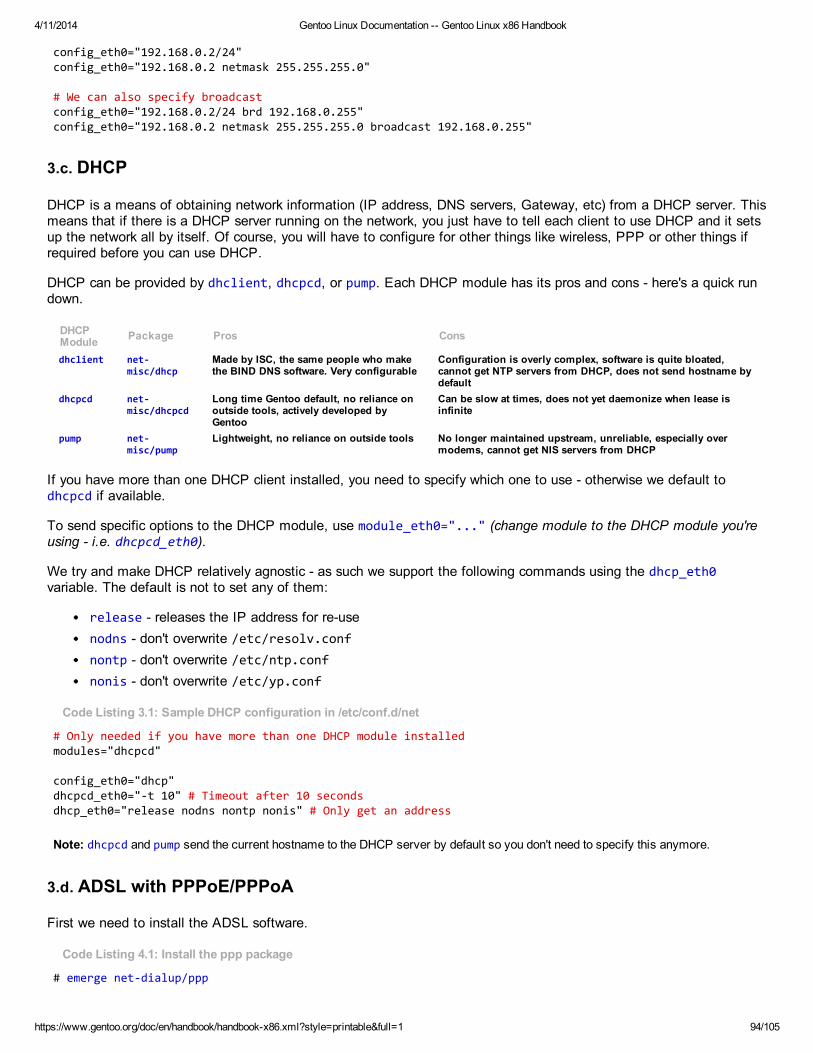
4/11/2014 Gentoo Linux Documentation -- Gentoo Linux x86 Handbook
https://www.gentoo.org/doc/en/handbook/handbook-x86.xml?style=printable&full=1 94/105
config_eth0="192.168.0.2/24"config_eth0="192.168.0.2 netmask 255.255.255.0"
# We can also specify broadcastconfig_eth0="192.168.0.2/24 brd 192.168.0.255"config_eth0="192.168.0.2 netmask 255.255.255.0 broadcast 192.168.0.255"
3.c. DHCP
DHCP is a means of obtaining network information (IP address, DNS servers, Gateway, etc) from a DHCP server. Thismeans that if there is a DHCP server running on the network, you just have to tell each client to use DHCP and it setsup the network all by itself. Of course, you will have to configure for other things like wireless, PPP or other things ifrequired before you can use DHCP.
DHCP can be provided by dhclient, dhcpcd, or pump. Each DHCP module has its pros and cons - here's a quick rundown.
DHCPModule Package Pros Cons
dhclient net-misc/dhcp
Made by ISC, the same people who makethe BIND DNS software. Very configurable
Configuration is overly complex, software is quite bloated,cannot get NTP servers from DHCP, does not send hostname bydefault
dhcpcd net-misc/dhcpcd
Long time Gentoo default, no reliance onoutside tools, actively developed byGentoo
Can be slow at times, does not yet daemonize when lease isinfinite
pump net-misc/pump
Lightweight, no reliance on outside tools No longer maintained upstream, unreliable, especially overmodems, cannot get NIS servers from DHCP
If you have more than one DHCP client installed, you need to specify which one to use - otherwise we default todhcpcd if available.
To send specific options to the DHCP module, use module_eth0="..." (change module to the DHCP module you'reusing - i.e. dhcpcd_eth0).
We try and make DHCP relatively agnostic - as such we support the following commands using the dhcp_eth0variable. The default is not to set any of them:
release - releases the IP address for re-usenodns - don't overwrite /etc/resolv.confnontp - don't overwrite /etc/ntp.confnonis - don't overwrite /etc/yp.conf
Code Listing 3.1: Sample DHCP configuration in /etc/conf.d/net
# Only needed if you have more than one DHCP module installedmodules="dhcpcd"
config_eth0="dhcp"dhcpcd_eth0="-t 10" # Timeout after 10 secondsdhcp_eth0="release nodns nontp nonis" # Only get an address
Note: dhcpcd and pump send the current hostname to the DHCP server by default so you don't need to specify this anymore.
3.d. ADSL with PPPoE/PPPoA
First we need to install the ADSL software.
Code Listing 4.1: Install the ppp package
# emerge net-dialup/ppp
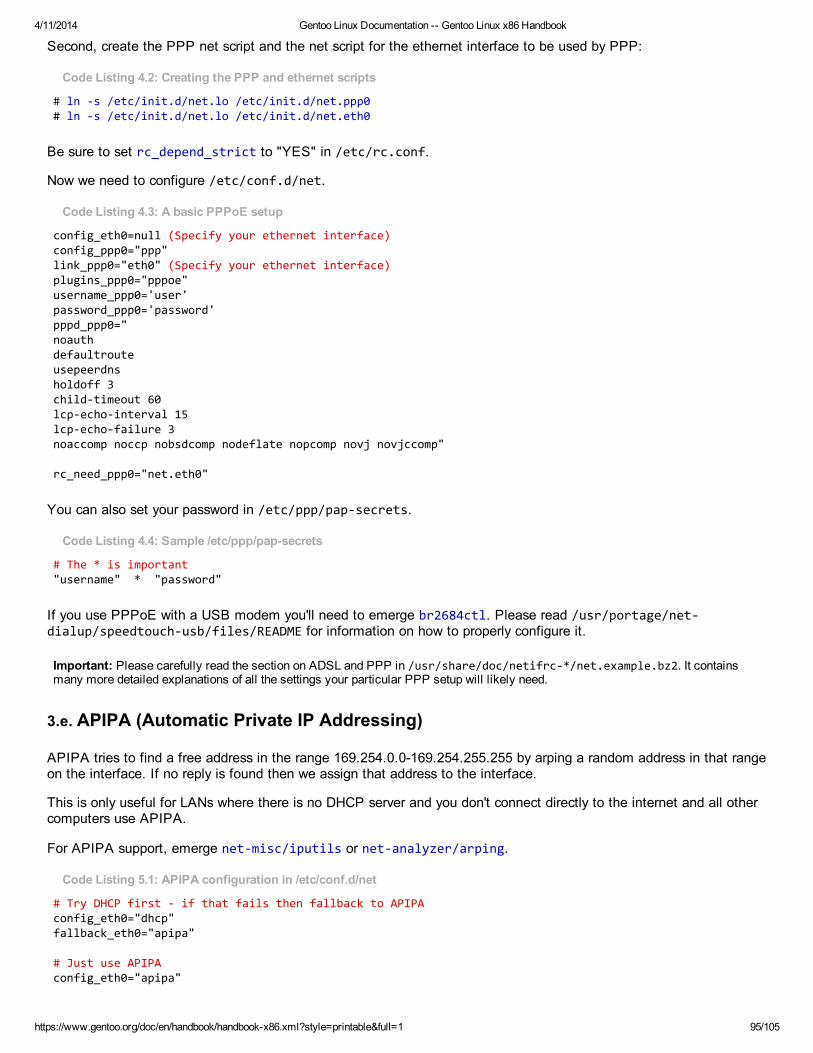
4/11/2014 Gentoo Linux Documentation -- Gentoo Linux x86 Handbook
https://www.gentoo.org/doc/en/handbook/handbook-x86.xml?style=printable&full=1 95/105
Second, create the PPP net script and the net script for the ethernet interface to be used by PPP:
Code Listing 4.2: Creating the PPP and ethernet scripts
# ln -s /etc/init.d/net.lo /etc/init.d/net.ppp0# ln -s /etc/init.d/net.lo /etc/init.d/net.eth0
Be sure to set rc_depend_strict to "YES" in /etc/rc.conf.
Now we need to configure /etc/conf.d/net.
Code Listing 4.3: A basic PPPoE setup
config_eth0=null (Specify your ethernet interface)config_ppp0="ppp"link_ppp0="eth0" (Specify your ethernet interface)plugins_ppp0="pppoe"username_ppp0='user'password_ppp0='password'pppd_ppp0="noauthdefaultrouteusepeerdnsholdoff 3child-timeout 60lcp-echo-interval 15lcp-echo-failure 3noaccomp noccp nobsdcomp nodeflate nopcomp novj novjccomp"
rc_need_ppp0="net.eth0"
You can also set your password in /etc/ppp/pap-secrets.
Code Listing 4.4: Sample /etc/ppp/pap-secrets
# The * is important"username" * "password"
If you use PPPoE with a USB modem you'll need to emerge br2684ctl. Please read /usr/portage/net-dialup/speedtouch-usb/files/README for information on how to properly configure it.
Important: Please carefully read the section on ADSL and PPP in /usr/share/doc/netifrc-*/net.example.bz2. It containsmany more detailed explanations of all the settings your particular PPP setup will likely need.
3.e. APIPA (Automatic Private IP Addressing)
APIPA tries to find a free address in the range 169.254.0.0-169.254.255.255 by arping a random address in that rangeon the interface. If no reply is found then we assign that address to the interface.
This is only useful for LANs where there is no DHCP server and you don't connect directly to the internet and all othercomputers use APIPA.
For APIPA support, emerge net-misc/iputils or net-analyzer/arping.
Code Listing 5.1: APIPA configuration in /etc/conf.d/net
# Try DHCP first - if that fails then fallback to APIPAconfig_eth0="dhcp"fallback_eth0="apipa"
# Just use APIPAconfig_eth0="apipa"
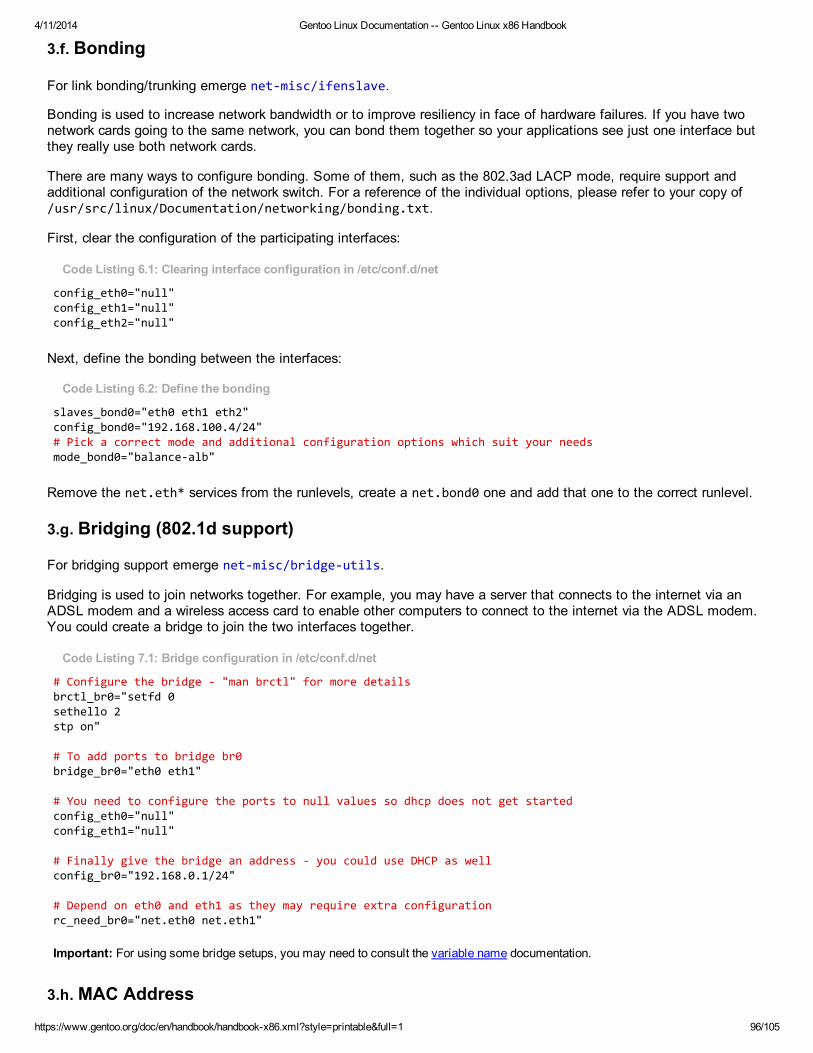
4/11/2014 Gentoo Linux Documentation -- Gentoo Linux x86 Handbook
https://www.gentoo.org/doc/en/handbook/handbook-x86.xml?style=printable&full=1 96/105
3.f. Bonding
For link bonding/trunking emerge net-misc/ifenslave.
Bonding is used to increase network bandwidth or to improve resiliency in face of hardware failures. If you have twonetwork cards going to the same network, you can bond them together so your applications see just one interface butthey really use both network cards.
There are many ways to configure bonding. Some of them, such as the 802.3ad LACP mode, require support andadditional configuration of the network switch. For a reference of the individual options, please refer to your copy of/usr/src/linux/Documentation/networking/bonding.txt.
First, clear the configuration of the participating interfaces:
Code Listing 6.1: Clearing interface configuration in /etc/conf.d/net
config_eth0="null"config_eth1="null"config_eth2="null"
Next, define the bonding between the interfaces:
Code Listing 6.2: Define the bonding
slaves_bond0="eth0 eth1 eth2"config_bond0="192.168.100.4/24"# Pick a correct mode and additional configuration options which suit your needsmode_bond0="balance-alb"
Remove the net.eth* services from the runlevels, create a net.bond0 one and add that one to the correct runlevel.
3.g. Bridging (802.1d support)
For bridging support emerge net-misc/bridge-utils.
Bridging is used to join networks together. For example, you may have a server that connects to the internet via anADSL modem and a wireless access card to enable other computers to connect to the internet via the ADSL modem.You could create a bridge to join the two interfaces together.
Code Listing 7.1: Bridge configuration in /etc/conf.d/net
# Configure the bridge - "man brctl" for more detailsbrctl_br0="setfd 0sethello 2stp on"
# To add ports to bridge br0bridge_br0="eth0 eth1"
# You need to configure the ports to null values so dhcp does not get startedconfig_eth0="null"config_eth1="null"
# Finally give the bridge an address - you could use DHCP as wellconfig_br0="192.168.0.1/24"
# Depend on eth0 and eth1 as they may require extra configurationrc_need_br0="net.eth0 net.eth1"
Important: For using some bridge setups, you may need to consult the variable name documentation.
3.h. MAC Address
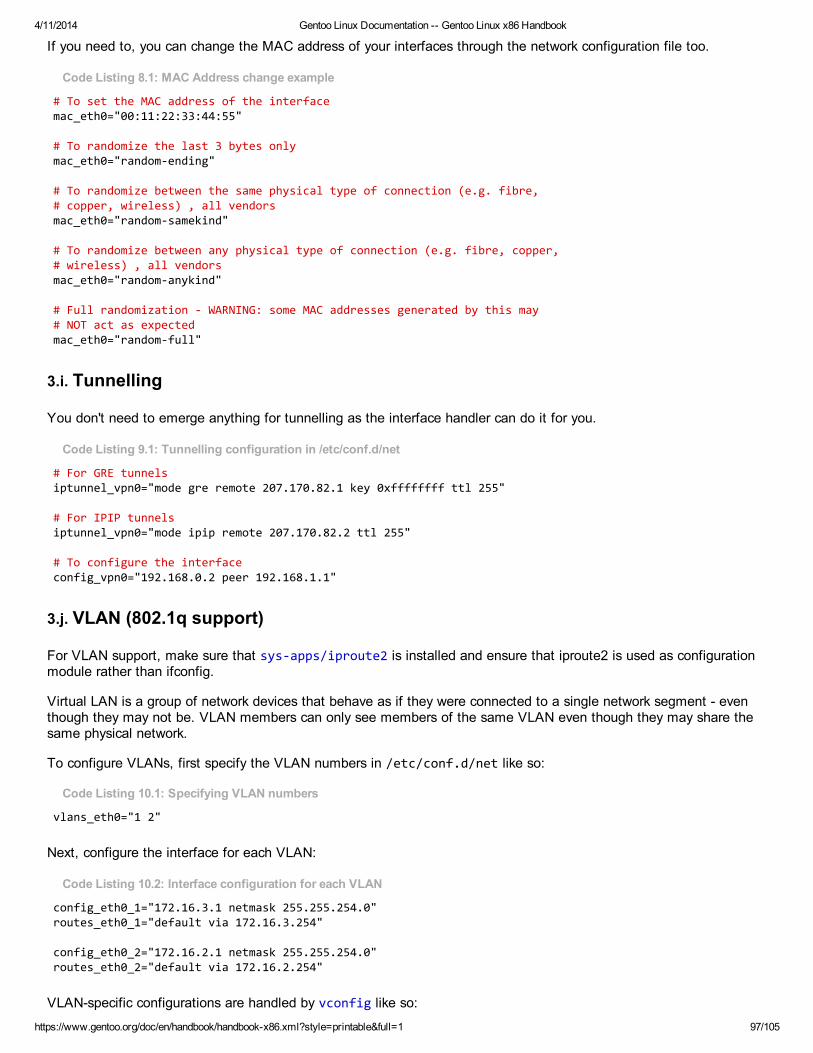
4/11/2014 Gentoo Linux Documentation -- Gentoo Linux x86 Handbook
https://www.gentoo.org/doc/en/handbook/handbook-x86.xml?style=printable&full=1 97/105
If you need to, you can change the MAC address of your interfaces through the network configuration file too.
Code Listing 8.1: MAC Address change example
# To set the MAC address of the interfacemac_eth0="00:11:22:33:44:55"
# To randomize the last 3 bytes onlymac_eth0="random-ending"
# To randomize between the same physical type of connection (e.g. fibre,# copper, wireless) , all vendorsmac_eth0="random-samekind"
# To randomize between any physical type of connection (e.g. fibre, copper,# wireless) , all vendorsmac_eth0="random-anykind"
# Full randomization - WARNING: some MAC addresses generated by this may# NOT act as expectedmac_eth0="random-full"
3.i. Tunnelling
You don't need to emerge anything for tunnelling as the interface handler can do it for you.
Code Listing 9.1: Tunnelling configuration in /etc/conf.d/net
# For GRE tunnelsiptunnel_vpn0="mode gre remote 207.170.82.1 key 0xffffffff ttl 255"
# For IPIP tunnelsiptunnel_vpn0="mode ipip remote 207.170.82.2 ttl 255"
# To configure the interfaceconfig_vpn0="192.168.0.2 peer 192.168.1.1"
3.j. VLAN (802.1q support)
For VLAN support, make sure that sys-apps/iproute2 is installed and ensure that iproute2 is used as configurationmodule rather than ifconfig.
Virtual LAN is a group of network devices that behave as if they were connected to a single network segment - eventhough they may not be. VLAN members can only see members of the same VLAN even though they may share thesame physical network.
To configure VLANs, first specify the VLAN numbers in /etc/conf.d/net like so:
Code Listing 10.1: Specifying VLAN numbers
vlans_eth0="1 2"
Next, configure the interface for each VLAN:
Code Listing 10.2: Interface configuration for each VLAN
config_eth0_1="172.16.3.1 netmask 255.255.254.0"routes_eth0_1="default via 172.16.3.254"
config_eth0_2="172.16.2.1 netmask 255.255.254.0"routes_eth0_2="default via 172.16.2.254"
VLAN-specific configurations are handled by vconfig like so:
4/11/2014 Gentoo Linux Documentation -- Gentoo Linux x86 Handbook
https://www.gentoo.org/doc/en/handbook/handbook-x86.xml?style=printable&full=1 98/105
Code Listing 10.3: Configuring the VLANs
vlan1_name="vlan1"vlan1_ingress="2:6 3:5"eth0_vlan1_egress="1:2"
Important: For using some VLAN setups, you may need to consult the variable name documentation.
4. Wireless Networking
4.a. Introduction
Wireless networking on Linux is usually pretty straightforward. There are two ways of configuring wifi: graphical clients,or the command line.
The easiest way is to use a graphical client once you've installed a desktop environment. Most graphical clients, suchas wicd and NetworkManager, are pretty self-explanatory. They offer a handy point-and-click interface that gets you ona network in just a few seconds.
Note: wicd offers a command line utility in addition to the main graphical interface. You can get it by emerging wicd with the ncursesUSE flag set. This wicd-curses utility is particularly useful for folks who don't use a gtk-based desktop environment, but still want aneasy command line tool that doesn't require hand-editing configuration files.
However, if you don't want to use a graphical client, then you can configure wifi on the command line by editing a fewconfiguration files. This takes a bit more time to setup, but it also requires the fewest packages to download andinstall. Since the graphical clients are mostly self-explanatory (with helpful screenshots at their homepages), we'll focuson the command line alternatives.
You can setup wireless networking on the command line by installing wireless-tools or wpa_supplicant. Theimportant thing to remember is that you configure wireless networks on a global basis and not an interface basis.
wpa_supplicant is the best choice. For a list of supported drivers, read the wpa_supplicant site.
wireless-tools supports nearly all cards and drivers, but it cannot connect to WPA-only Access Points. If yournetworks only offer WEP encryption or are completely open, you may prefer the simplicity of wireless-tools.
Warning: The linux-wlan-ng driver is not supported by baselayout at this time. This is because linux-wlan-ng have its ownsetup and configuration which is completely different to everyone else's. The linux-wlan-ng developers are rumoured to bechanging their setup over to wireless-tools, so when this happens you may use linux-wlan-ng with baselayout.
Some wireless cards are deactivated by default. To activate them, please consult your hardware documentation. Someof these cards can be unblocked using the rfkill application. If that is the case, use "rfkill list" to see the available cardsand "rfkill unblock <index>" to activate the wireless functionality. If not, you might need to unblock the wireless cardthrough a button, switch or special key combination on your laptop.
4.b. WPA Supplicant
WPA Supplicant is a package that allows you to connect to WPA enabled access points.
Code Listing 2.1: Install wpa_supplicant
# emerge net-wireless/wpa_supplicant
Important: You have to have CONFIG_PACKET enabled in your kernel for wpa_supplicant to work. Try running grepCONFIG_PACKET /usr/src/linux/.config to see if you have it enabled in your kernel.
Note: Depending on your USE flags, wpa_supplicant can install a graphical interface written in Qt4, which will integrate nicely withKDE. To get it, run echo "net-wireless/wpa_supplicant qt4" >> /etc/portage/package.use as root before emergingwpa_supplicant.
4/11/2014 Gentoo Linux Documentation -- Gentoo Linux x86 Handbook
https://www.gentoo.org/doc/en/handbook/handbook-x86.xml?style=printable&full=1 99/105
Now we have to configure /etc/conf.d/net to so that we prefer wpa_supplicant over wireless-tools (if both areinstalled, wireless-tools is the default).
Code Listing 2.2: configure /etc/conf.d/net for wpa_supplicant
# Prefer wpa_supplicant over wireless-toolsmodules="wpa_supplicant"
# It's important that we tell wpa_supplicant which driver we should# be using as it's not very good at guessing yetwpa_supplicant_eth0="-Dmadwifi"
Note: If you're using the host-ap driver you will need to put the card in Managed mode before it can be used with wpa_supplicantcorrectly. You can use iwconfig_eth0="mode managed" to achieve this in /etc/conf.d/net.
That was simple, wasn't it? However, we still have to configure wpa_supplicant itself which is a bit more trickydepending on how secure the Access Points are that you are trying to connect to. The below example is taken andsimplified from /usr/share/doc/wpa_supplicant-<version>/wpa_supplicant.conf.gz which ships withwpa_supplicant.
Code Listing 2.3: An example /etc/wpa_supplicant/wpa_supplicant.conf
# The below line not be changed otherwise we refuse to workctrl_interface=/var/run/wpa_supplicant
# Ensure that only root can read the WPA configurationctrl_interface_group=0
# Let wpa_supplicant take care of scanning and AP selectionap_scan=1
# Simple case: WPA-PSK, PSK as an ASCII passphrase, allow all valid ciphersnetwork={ ssid="simple" psk="very secret passphrase" # The higher the priority the sooner we are matched priority=5}
# Same as previous, but request SSID-specific scanning (for APs that reject# broadcast SSID)network={ ssid="second ssid" scan_ssid=1 psk="very secret passphrase" priority=2}
# Only WPA-PSK is used. Any valid cipher combination is acceptednetwork={ ssid="example" proto=WPA key_mgmt=WPA-PSK pairwise=CCMP TKIP group=CCMP TKIP WEP104 WEP40 psk=06b4be19da289f475aa46a33cb793029d4ab3db7a23ee92382eb0106c72ac7bb priority=2}
# Plaintext connection (no WPA, no IEEE 802.1X)network={ ssid="plaintext-test" key_mgmt=NONE}

4/11/2014 Gentoo Linux Documentation -- Gentoo Linux x86 Handbook
https://www.gentoo.org/doc/en/handbook/handbook-x86.xml?style=printable&full=1 100/105
# Shared WEP key connection (no WPA, no IEEE 802.1X)network={ ssid="static-wep-test" key_mgmt=NONE # Keys in quotes are ASCII keys wep_key0="abcde" # Keys specified without quotes are hex keys wep_key1=0102030405 wep_key2="1234567890123" wep_tx_keyidx=0 priority=5}
# Shared WEP key connection (no WPA, no IEEE 802.1X) using Shared Key# IEEE 802.11 authenticationnetwork={ ssid="static-wep-test2" key_mgmt=NONE wep_key0="abcde" wep_key1=0102030405 wep_key2="1234567890123" wep_tx_keyidx=0 priority=5 auth_alg=SHARED}
# IBSS/ad-hoc network with WPA-None/TKIPnetwork={ ssid="test adhoc" mode=1 proto=WPA key_mgmt=WPA-NONE pairwise=NONE group=TKIP psk="secret passphrase"}
4.c. Wireless Tools
Initial setup and Managed Mode
Wireless Tools provide a generic way to configure basic wireless interfaces up to the WEP security level. While WEP isa weak security method it's also the most prevalent.
Wireless Tools configuration is controlled by a few main variables. The sample configuration file below should describeall you need. One thing to bear in mind is that no configuration means "connect to the strongest unencrypted AccessPoint" - we will always try and connect you to something.
Code Listing 3.1: Install wireless-tools
# emerge net-wireless/wireless-tools
Note: Although you can store your wireless settings in /etc/conf.d/wireless this guide recommends you store them in/etc/conf.d/net.
Important: You will need to consult the variable name documentation.
Code Listing 3.2: sample iwconfig setup in /etc/conf.d/net
# Prefer iwconfig over wpa_supplicantmodules="iwconfig"
# Configure WEP keys for Access Points called ESSID1 and ESSID2# You may configure up to 4 WEP keys, but only 1 can be active at
4/11/2014 Gentoo Linux Documentation -- Gentoo Linux x86 Handbook
https://www.gentoo.org/doc/en/handbook/handbook-x86.xml?style=printable&full=1 101/105
# any time so we supply a default index of [1] to set key [1] and then# again afterwards to change the active key to [1]# We do this incase you define other ESSID's to use WEP keys other than 1## Prefixing the key with s: means it's an ASCII key, otherwise a HEX key## enc open specified open security (most secure)# enc restricted specified restricted security (least secure)key_ESSID1="[1] s:yourkeyhere key [1] enc open"key_ESSID2="[1] aaaa-bbbb-cccc-dd key [1] enc restricted"
# The below only work when we scan for available Access Points
# Sometimes more than one Access Point is visible so we need to# define a preferred order to connect inpreferred_aps="'ESSID1' 'ESSID2'"
Fine tune Access Point Selection
You can add some extra options to fine-tune your Access Point selection, but these are not normally required.
You can decide whether we only connect to preferred Access Points or not. By default if everything configured hasfailed and we can connect to an unencrypted Access Point then we will. This can be controlled by theassociate_order variable. Here's a table of values and how they control this.
Value Descriptionany Default behaviourpreferredonly We will only connect to visible APs in the preferred listforcepreferred We will forceably connect to APs in the preferred order if they are not found in a scanforcepreferredonly Do not scan for APs - instead just try to connect to each one in orderforceany Same as forcepreferred + connect to any other available AP
Finally we have some blacklist_aps and unique_ap selection. blacklist_aps works in a similar way topreferred_aps. unique_ap is a yes or no value that says if a second wireless interface can connect to the sameAccess Point as the first interface.
Code Listing 3.3: blacklist_aps and unique_ap example
# Sometimes you never want to connect to certain access pointsblacklist_aps="'ESSID3' 'ESSID4'"
# If you have more than one wireless card, you can say if you want# to allow each card to associate with the same Access Point or not# Values are "yes" and "no"# Default is "yes"unique_ap="yes"
Ad-Hoc and Master Modes
If you want to set yourself up as an Ad-Hoc node if you fail to connect to any Access Point in managed mode, you cando that too.
Code Listing 3.4: fallback to ad-hoc mode
adhoc_essid_eth0="This Adhoc Node"
What about connecting to Ad-Hoc networks or running in Master mode to become an Access Point? Here's aconfiguration just for that! You may need to specify WEP keys as shown above.
Code Listing 3.5: sample ad-hoc/master configuration
# Set the mode - can be managed (default), ad-hoc or master# Not all drivers support all modes
4/11/2014 Gentoo Linux Documentation -- Gentoo Linux x86 Handbook
https://www.gentoo.org/doc/en/handbook/handbook-x86.xml?style=printable&full=1 102/105
mode_eth0="ad-hoc"
# Set the ESSID of the interface# In managed mode, this forces the interface to try and connect to the# specified ESSID and nothing elseessid_eth0="This Adhoc Node"
# We use channel 3 if you don't specify onechannel_eth0="9"
Important: The below is taken verbatim from the BSD wavelan documentation found at the NetBSD documentation. There are 14channels possible; We are told that channels 1-11 are legal for North America, channels 1-13 for most of Europe, channels 10-13 forFrance, and only channel 14 for Japan. If in doubt, please refer to the documentation that came with your card or access point. Makesure that the channel you select is the same channel your access point (or the other card in an ad-hoc network) is on. The default forcards sold in North America and most of Europe is 3; the default for cards sold in France is 11, and the default for cards sold in Japanis 14.
Troubleshooting Wireless Tools
There are some more variables you can use to help get your wireless up and running due to driver or environmentproblems. Here's a table of other things you can try.
Variable DefaultValue Description
iwconfig_eth0 See the iwconfig man page for details on what to send iwconfigiwpriv_eth0 See the iwpriv man page for details on what to send iwprivsleep_scan_eth0 0 The number of seconds to sleep before attempting to scan. This is needed when the driver/firmware
needs more time to active before it can be used.sleep_associate_eth0 5 The number of seconds to wait for the interface to associate with the Access Point before moving
onto the next oneassociate_test_eth0 MAC Some drivers do not reset the MAC address associated with an invalid one when they lose or attempt
association. Some drivers do not reset the quality level when they lose or attempt association. Validsettings are MAC, quality and all.
scan_mode_eth0 Some drivers have to scan in ad-hoc mode, so if scanning fails try setting ad-hoc hereiwpriv_scan_pre_eth0 Sends some iwpriv commands to the interface before scanning. See the iwpriv man page for more
details.iwpriv_scan_post_eth0 Sends some iwpriv commands to the interface after scanning. See the iwpriv man page for more
details.
4.d. Defining network configuration per ESSID
Sometimes, you need a static IP when you connect to ESSID1 and you need DHCP when you connect to ESSID2. Infact, most module variables can be defined per ESSID. Here's how we do this.
Note: These work if you're using WPA Supplicant or Wireless Tools.
Important: You will need to consult the variable name documentation.
Code Listing 4.1: override network settings per ESSID
config_ESSID1="192.168.0.3/24 brd 192.168.0.255"routes_ESSID1="default via 192.168.0.1"
config_ESSID2="dhcp"fallback_ESSID2="192.168.3.4/24"fallback_route_ESSID2="default via 192.168.3.1"
# We can define nameservers and other things too# NOTE: DHCP will override these unless it's told not todns_servers_ESSID1="192.168.0.1 192.168.0.2"dns_domain_ESSID1="some.domain"dns_search_domains_ESSID1="search.this.domain search.that.domain"
# You override by the MAC address of the Access Point# This handy if you goto different locations that have the same ESSID
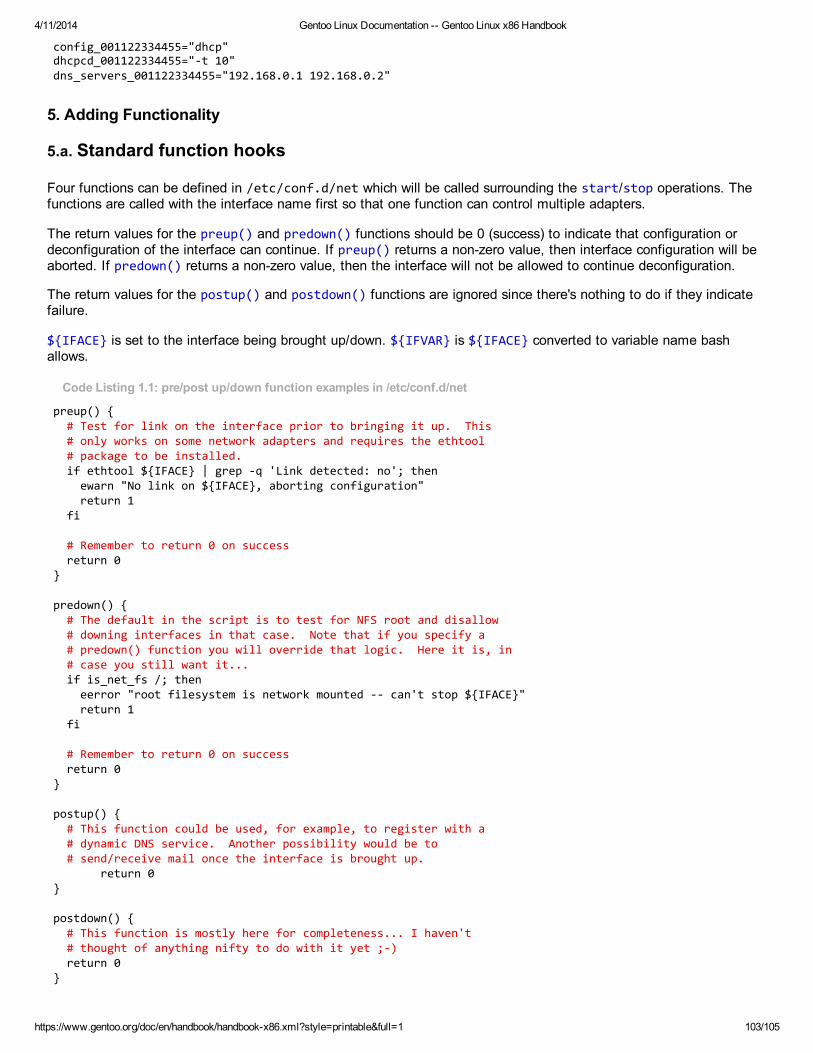
4/11/2014 Gentoo Linux Documentation -- Gentoo Linux x86 Handbook
https://www.gentoo.org/doc/en/handbook/handbook-x86.xml?style=printable&full=1 103/105
config_001122334455="dhcp"dhcpcd_001122334455="-t 10"dns_servers_001122334455="192.168.0.1 192.168.0.2"
5. Adding Functionality
5.a. Standard function hooks
Four functions can be defined in /etc/conf.d/net which will be called surrounding the start/stop operations. Thefunctions are called with the interface name first so that one function can control multiple adapters.
The return values for the preup() and predown() functions should be 0 (success) to indicate that configuration ordeconfiguration of the interface can continue. If preup() returns a non-zero value, then interface configuration will beaborted. If predown() returns a non-zero value, then the interface will not be allowed to continue deconfiguration.
The return values for the postup() and postdown() functions are ignored since there's nothing to do if they indicatefailure.
${IFACE} is set to the interface being brought up/down. ${IFVAR} is ${IFACE} converted to variable name bashallows.
Code Listing 1.1: pre/post up/down function examples in /etc/conf.d/net
preup() { # Test for link on the interface prior to bringing it up. This # only works on some network adapters and requires the ethtool # package to be installed. if ethtool ${IFACE} | grep -q 'Link detected: no'; then ewarn "No link on ${IFACE}, aborting configuration" return 1 fi
# Remember to return 0 on success return 0}
predown() { # The default in the script is to test for NFS root and disallow # downing interfaces in that case. Note that if you specify a # predown() function you will override that logic. Here it is, in # case you still want it... if is_net_fs /; then eerror "root filesystem is network mounted -- can't stop ${IFACE}" return 1 fi
# Remember to return 0 on success return 0}
postup() { # This function could be used, for example, to register with a # dynamic DNS service. Another possibility would be to # send/receive mail once the interface is brought up. return 0}
postdown() { # This function is mostly here for completeness... I haven't # thought of anything nifty to do with it yet ;-) return 0}
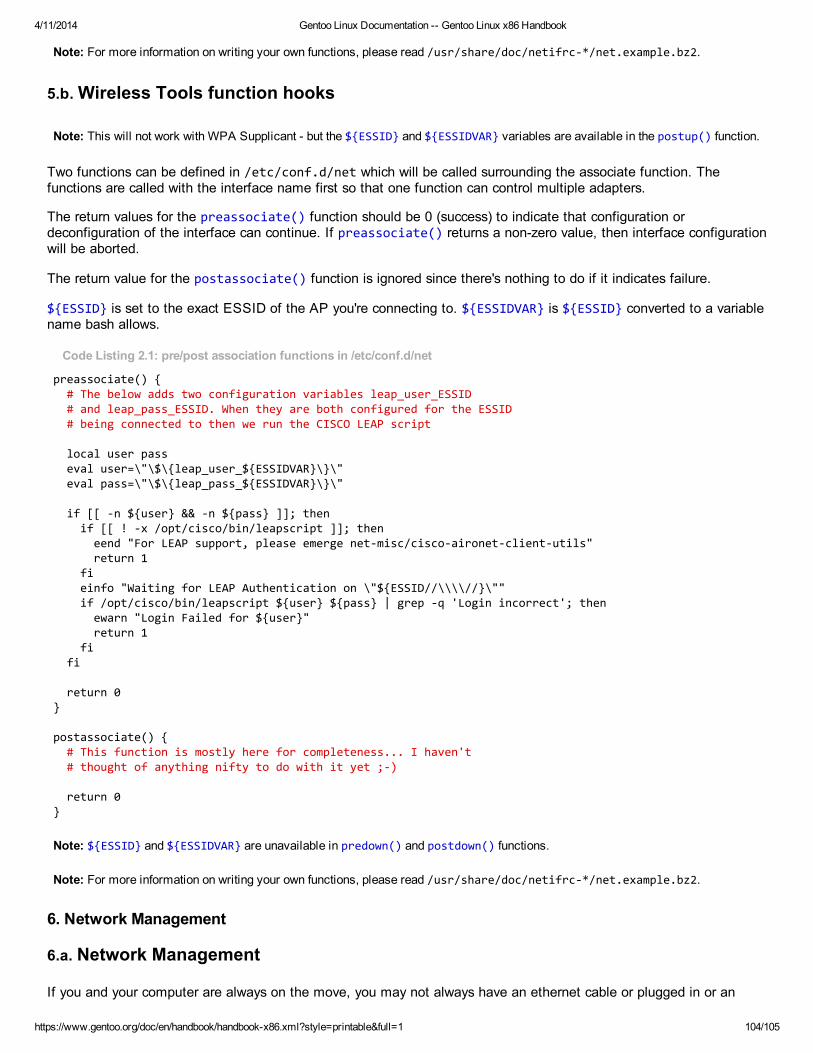
4/11/2014 Gentoo Linux Documentation -- Gentoo Linux x86 Handbook
https://www.gentoo.org/doc/en/handbook/handbook-x86.xml?style=printable&full=1 104/105
Note: For more information on writing your own functions, please read /usr/share/doc/netifrc-*/net.example.bz2.
5.b. Wireless Tools function hooks
Note: This will not work with WPA Supplicant - but the ${ESSID} and ${ESSIDVAR} variables are available in the postup() function.
Two functions can be defined in /etc/conf.d/net which will be called surrounding the associate function. Thefunctions are called with the interface name first so that one function can control multiple adapters.
The return values for the preassociate() function should be 0 (success) to indicate that configuration ordeconfiguration of the interface can continue. If preassociate() returns a non-zero value, then interface configurationwill be aborted.
The return value for the postassociate() function is ignored since there's nothing to do if it indicates failure.
${ESSID} is set to the exact ESSID of the AP you're connecting to. ${ESSIDVAR} is ${ESSID} converted to a variablename bash allows.
Code Listing 2.1: pre/post association functions in /etc/conf.d/net
preassociate() { # The below adds two configuration variables leap_user_ESSID # and leap_pass_ESSID. When they are both configured for the ESSID # being connected to then we run the CISCO LEAP script
local user pass eval user=\"\$\{leap_user_${ESSIDVAR}\}\" eval pass=\"\$\{leap_pass_${ESSIDVAR}\}\"
if [[ -n ${user} && -n ${pass} ]]; then if [[ ! -x /opt/cisco/bin/leapscript ]]; then eend "For LEAP support, please emerge net-misc/cisco-aironet-client-utils" return 1 fi einfo "Waiting for LEAP Authentication on \"${ESSID//\\\\//}\"" if /opt/cisco/bin/leapscript ${user} ${pass} | grep -q 'Login incorrect'; then ewarn "Login Failed for ${user}" return 1 fi fi
return 0}
postassociate() { # This function is mostly here for completeness... I haven't # thought of anything nifty to do with it yet ;-)
return 0}
Note: ${ESSID} and ${ESSIDVAR} are unavailable in predown() and postdown() functions.
Note: For more information on writing your own functions, please read /usr/share/doc/netifrc-*/net.example.bz2.
6. Network Management
6.a. Network Management
If you and your computer are always on the move, you may not always have an ethernet cable or plugged in or an
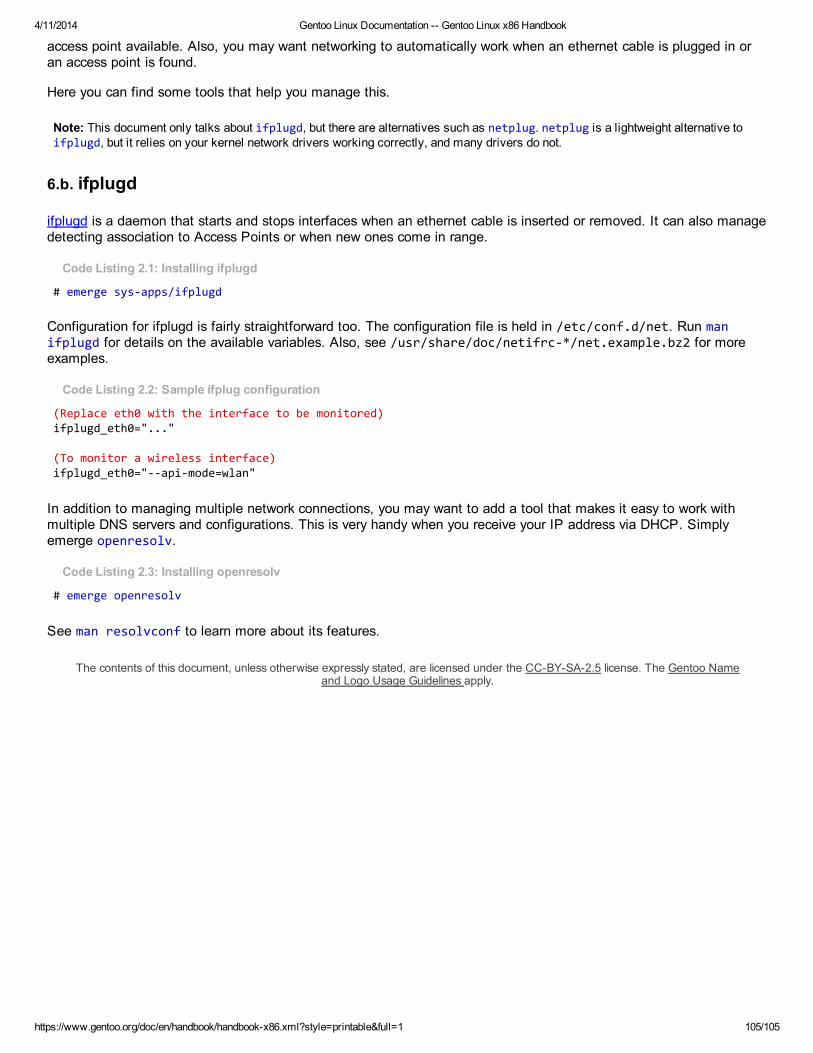
4/11/2014 Gentoo Linux Documentation -- Gentoo Linux x86 Handbook
https://www.gentoo.org/doc/en/handbook/handbook-x86.xml?style=printable&full=1 105/105
access point available. Also, you may want networking to automatically work when an ethernet cable is plugged in oran access point is found.
Here you can find some tools that help you manage this.
Note: This document only talks about ifplugd, but there are alternatives such as netplug. netplug is a lightweight alternative toifplugd, but it relies on your kernel network drivers working correctly, and many drivers do not.
6.b. ifplugd
ifplugd is a daemon that starts and stops interfaces when an ethernet cable is inserted or removed. It can also managedetecting association to Access Points or when new ones come in range.
Code Listing 2.1: Installing ifplugd
# emerge sys-apps/ifplugd
Configuration for ifplugd is fairly straightforward too. The configuration file is held in /etc/conf.d/net. Run manifplugd for details on the available variables. Also, see /usr/share/doc/netifrc-*/net.example.bz2 for moreexamples.
Code Listing 2.2: Sample ifplug configuration
(Replace eth0 with the interface to be monitored)ifplugd_eth0="..."
(To monitor a wireless interface)ifplugd_eth0="--api-mode=wlan"
In addition to managing multiple network connections, you may want to add a tool that makes it easy to work withmultiple DNS servers and configurations. This is very handy when you receive your IP address via DHCP. Simplyemerge openresolv.
Code Listing 2.3: Installing openresolv
# emerge openresolv
See man resolvconf to learn more about its features.
The contents of this document, unless otherwise expressly stated, are licensed under the CC-BY-SA-2.5 license. The Gentoo Nameand Logo Usage Guidelines apply.