Embed Size (px)
Citation preview
SSUUPPPPLLIIEERR UUSSEERR GGUUIIDDEE
Supplier User Guide
October 17, 2013
Version 1.0
Supplier User Guide Page 2
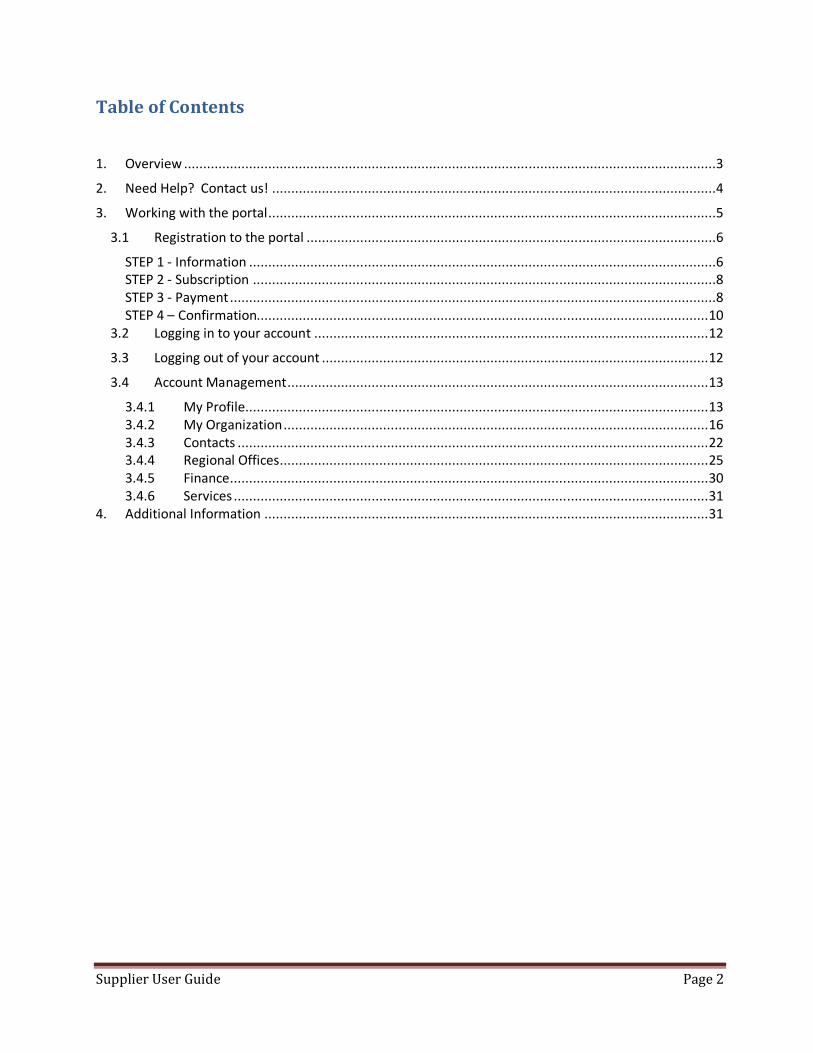
Table of Contents
1. Overview ...........................................................................................................................................3
2. Need Help? Contact us! ....................................................................................................................4
3. Working with the portal .....................................................................................................................5
3.1 Registration to the portal ...........................................................................................................6
STEP 1 - Information ..........................................................................................................................6
STEP 2 - Subscription .........................................................................................................................8
STEP 3 - Payment ...............................................................................................................................8
STEP 4 – Confirmation...................................................................................................................... 10
3.2 Logging in to your account ....................................................................................................... 12
3.3 Logging out of your account ..................................................................................................... 12
3.4 Account Management .............................................................................................................. 13
3.4.1 My Profile ......................................................................................................................... 13
3.4.2 My Organization ............................................................................................................... 16
3.4.3 Contacts ........................................................................................................................... 22
3.4.4 Regional Offices ................................................................................................................ 25
3.4.5 Finance ............................................................................................................................. 30
3.4.6 Services ............................................................................................................................ 31
4. Additional Information .................................................................................................................... 31
Supplier User Guide Page 3
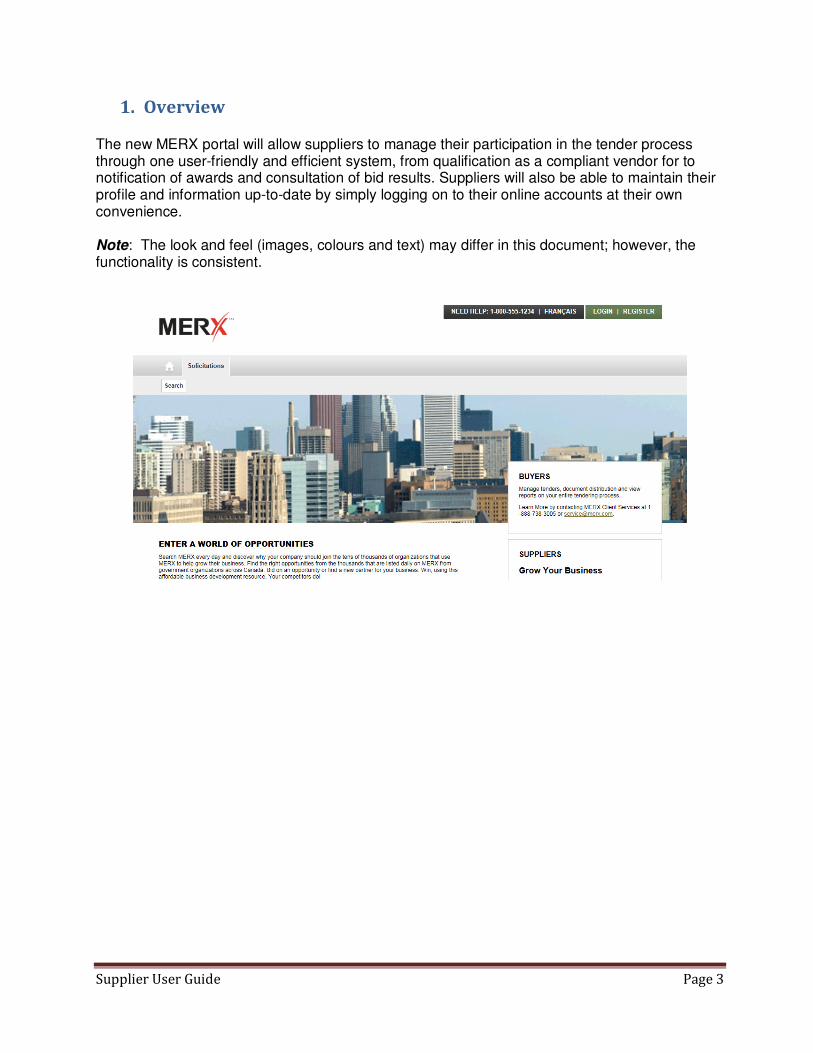
1. Overview The new MERX portal will allow suppliers to manage their participation in the tender process through one user-friendly and efficient system, from qualification as a compliant vendor for to notification of awards and consultation of bid results. Suppliers will also be able to maintain their profile and information up-to-date by simply logging on to their online accounts at their own convenience. Note: The look and feel (images, colours and text) may differ in this document; however, the functionality is consistent.
Supplier User Guide Page 4
Functionalities of the portal � Supplier Qualification Management (when applicable)
Online self application for suppliers Paperless, quick and easy to complete
� Project Supplier Rotation Management (when applicable) Fair automatic process, time and cost effective
� Tender Process Management Invitations, transmission of documentation, addendums and notifications
� Electronic Bid Submission and Opening Time and cost effective for the suppliers Paperless
� Award Management (when applicable) Notifications and publication of results
� Dashboard Reporting and Business Intelligence
� Performance Management
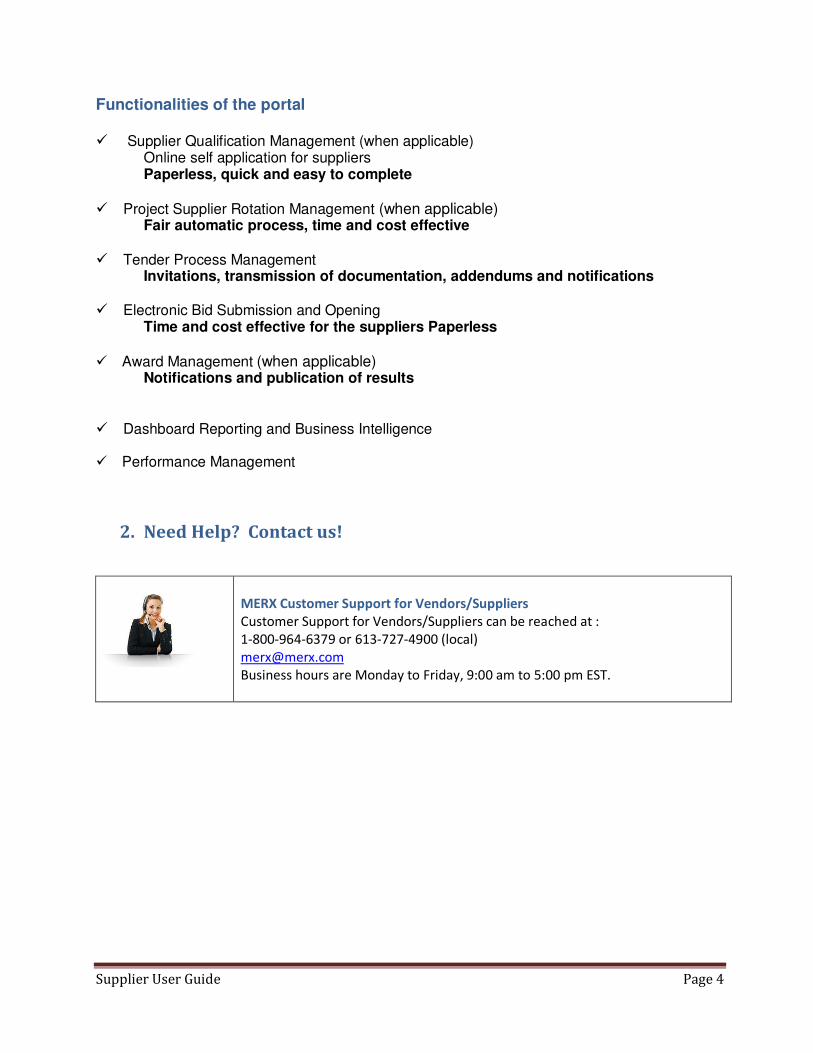
2. Need Help? Contact us!
MERX Customer Support for Vendors/Suppliers
Customer Support for Vendors/Suppliers can be reached at :
1-800-964-6379 or 613-727-4900 (local)
Business hours are Monday to Friday, 9:00 am to 5:00 pm EST.
Supplier User Guide Page 5
3. Working with the portal
Learn how to perform common functions with the MERX portal by following the quick and simple steps detailed below. You can review instructions for the following:
• Registration to the portal
• Logging on to MERX
• Modifying your organization and contact profile information
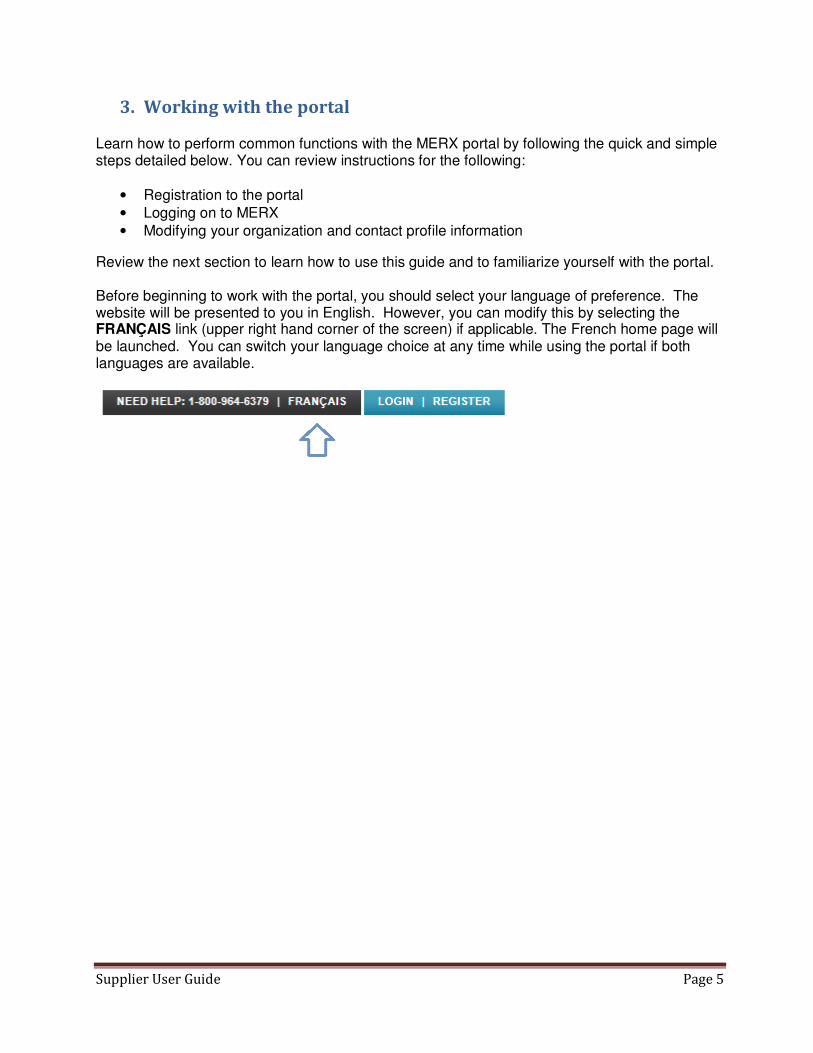
Review the next section to learn how to use this guide and to familiarize yourself with the portal. Before beginning to work with the portal, you should select your language of preference. The website will be presented to you in English. However, you can modify this by selecting the FRANÇAIS link (upper right hand corner of the screen) if applicable. The French home page will be launched. You can switch your language choice at any time while using the portal if both languages are available.

Supplier User Guide Page 6
3.1 Registration to the portal
To register to the portal, simply select the button (upper right hand corner of the screen).
The Registration page will be presented to you. There are 4 steps to the registration wizard; each step must be completed prior to moving on to the next step. The 4 steps are:
Note: all fields prefixed with a red star * are mandatory fields and must be completed. If you did not enter any information in one of the mandatory fields, you will be presented with a message at the top of the screen.
Each error will be identified in red and will display an exclamation mark to the right of the field.
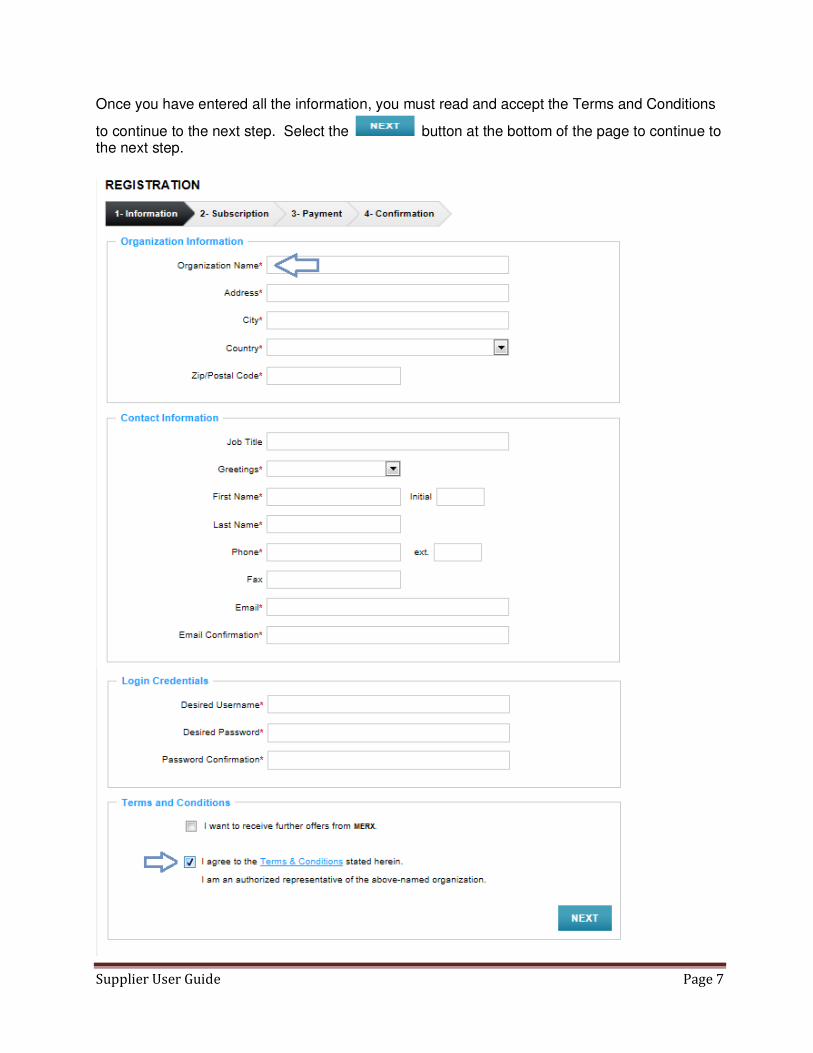
STEP 1 - Information There are 4 sections in STEP 1 to complete: � Organization Information � Contact Information � Login Credentials � Terms and Conditions
Supplier User Guide Page 7
Once you have entered all the information, you must read and accept the Terms and Conditions
to continue to the next step. Select the button at the bottom of the page to continue to the next step.
Supplier User Guide Page 8
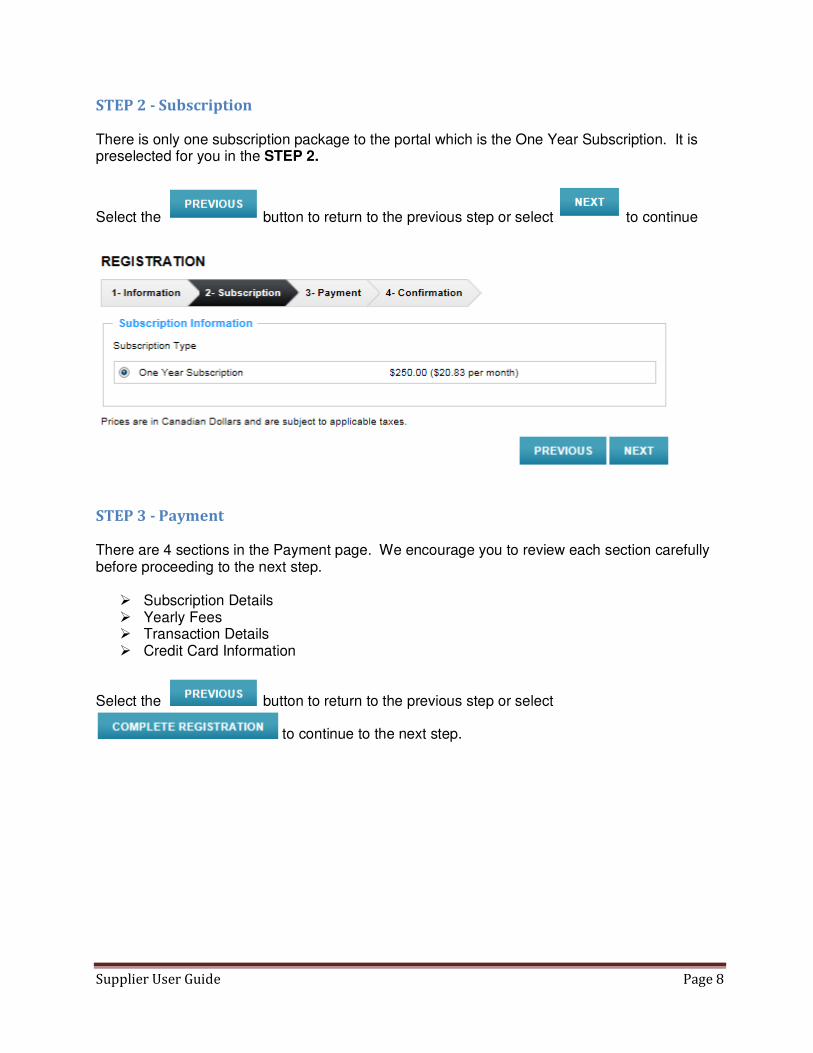
STEP 2 - Subscription
There is only one subscription package to the portal which is the One Year Subscription. It is preselected for you in the STEP 2.
Select the button to return to the previous step or select to continue
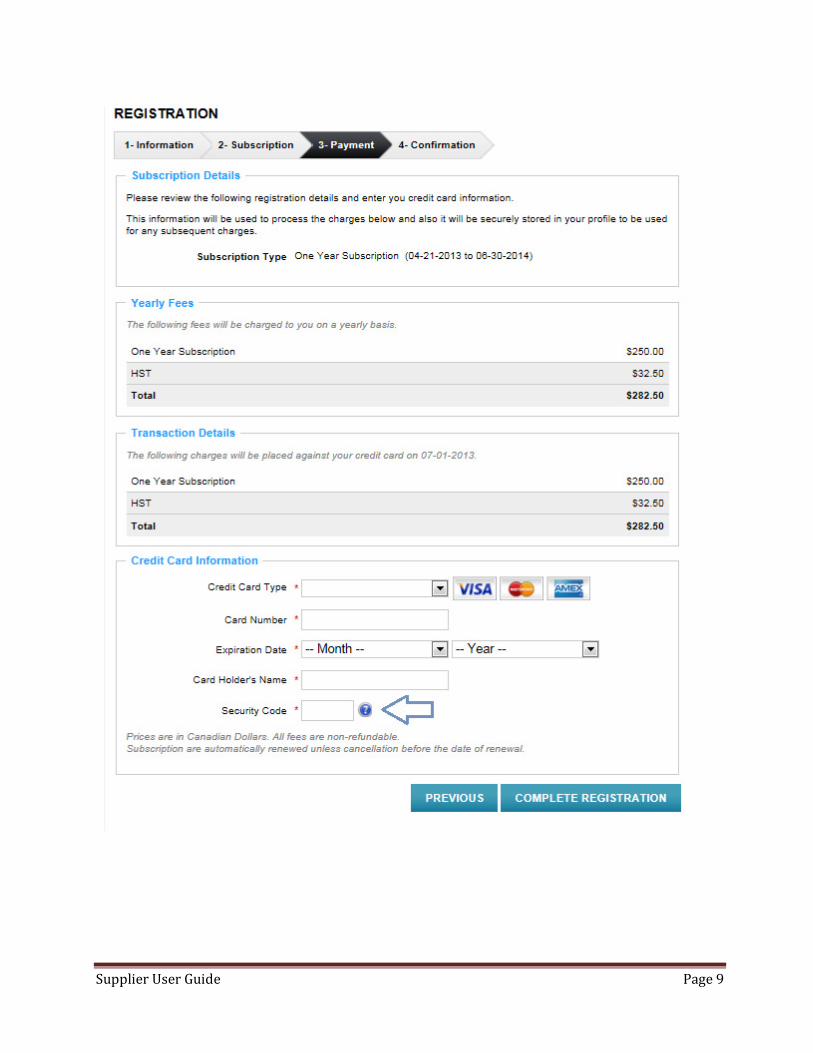
STEP 3 - Payment There are 4 sections in the Payment page. We encourage you to review each section carefully before proceeding to the next step. � Subscription Details � Yearly Fees � Transaction Details � Credit Card Information
Select the button to return to the previous step or select
to continue to the next step.
Supplier User Guide Page 9
Supplier User Guide Page 10
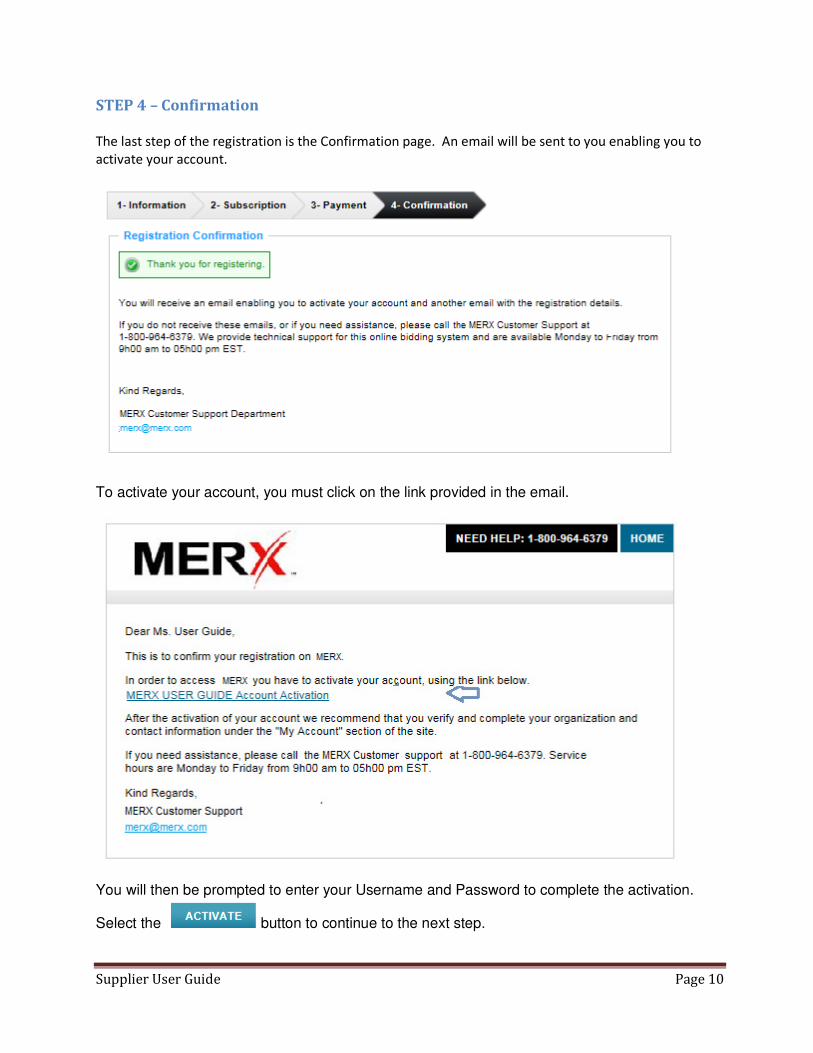
STEP 4 – Confirmation
The last step of the registration is the Confirmation page. An email will be sent to you enabling you to
activate your account.
To activate your account, you must click on the link provided in the email.
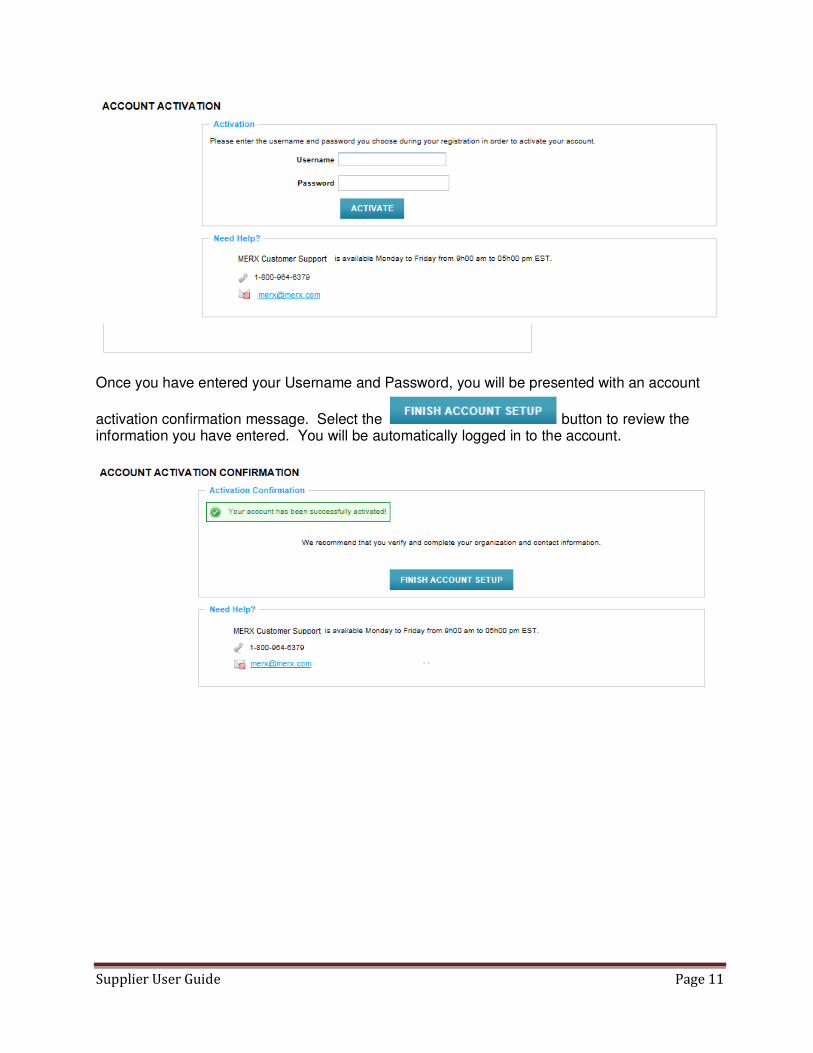
You will then be prompted to enter your Username and Password to complete the activation.
Select the button to continue to the next step.
Supplier User Guide Page 11
Once you have entered your Username and Password, you will be presented with an account
activation confirmation message. Select the button to review the information you have entered. You will be automatically logged in to the account.

Supplier User Guide Page 12
3.2 Logging in to your account
In order to login to your account, select the button located in the upper right-hand corner.
You will be prompted to enter your Username and Password. Once entered, select the
button.
3.3 Logging out of your account
When logged in to your account, you can logout at any time by selecting the button.
The link will be available on each page post login.
Supplier User Guide Page 13
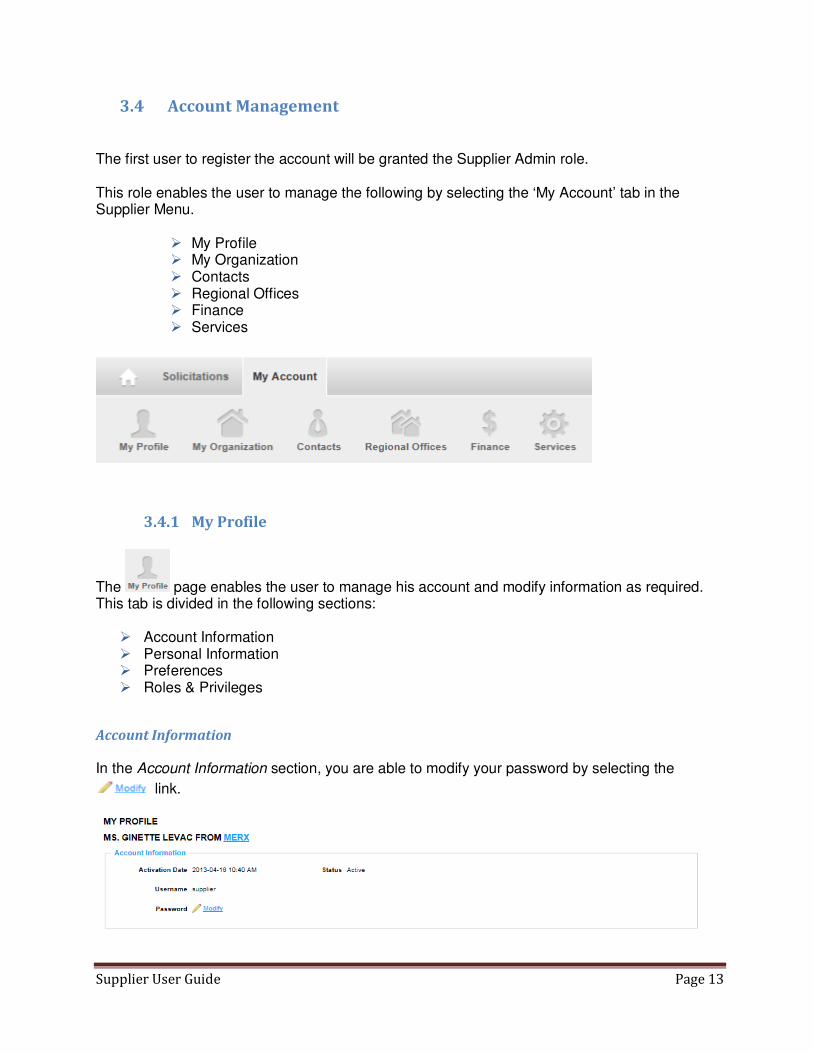
3.4 Account Management
The first user to register the account will be granted the Supplier Admin role. This role enables the user to manage the following by selecting the ‘My Account’ tab in the Supplier Menu.
� My Profile � My Organization � Contacts � Regional Offices � Finance � Services
3.4.1 My Profile
The page enables the user to manage his account and modify information as required. This tab is divided in the following sections: � Account Information � Personal Information � Preferences � Roles & Privileges
Account Information
In the Account Information section, you are able to modify your password by selecting the
link.

Supplier User Guide Page 14
You will be prompted to enter your old password and to enter a new password. You will be required to re-enter the password for confirmation.
Select the button to return to the previous page.
Select the button to modify your password.
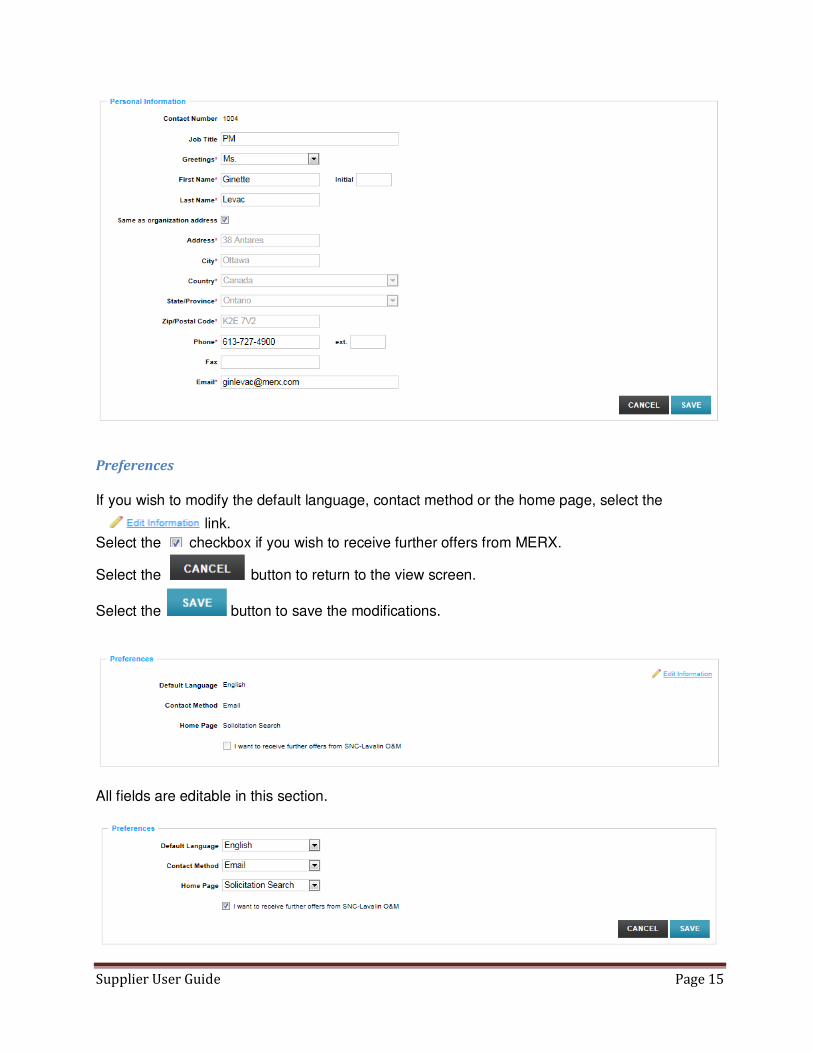
Personal Information
In the Personal Information section, select the link to make some modifications to your personal contact information.
The editable fields will be available in an editable text box.
Select the button to return to the view screen.
Select the button to save the modifications.
Supplier User Guide Page 15
Preferences
If you wish to modify the default language, contact method or the home page, select the
link.
Select the checkbox if you wish to receive further offers from MERX.
Select the button to return to the view screen.
Select the button to save the modifications.
All fields are editable in this section.
Supplier User Guide Page 16
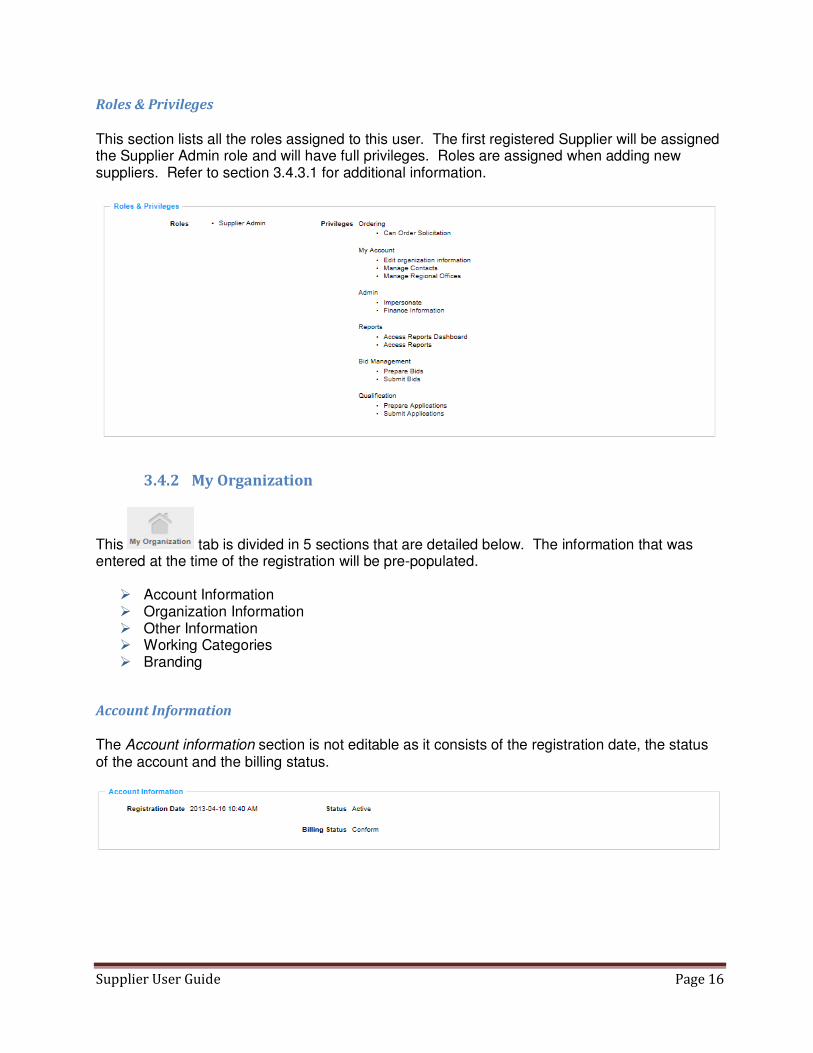
Roles & Privileges
This section lists all the roles assigned to this user. The first registered Supplier will be assigned the Supplier Admin role and will have full privileges. Roles are assigned when adding new suppliers. Refer to section 3.4.3.1 for additional information.
3.4.2 My Organization
This tab is divided in 5 sections that are detailed below. The information that was entered at the time of the registration will be pre-populated. � Account Information � Organization Information � Other Information � Working Categories � Branding
Account Information
The Account information section is not editable as it consists of the registration date, the status of the account and the billing status.

Supplier User Guide Page 17
Organization Information
This section contains the basic organization information. Some of the fields will be empty and can be filled out.
Select the link to edit the information.
All fields except for the type will be editable in this section. Most fields will be pre-populated.
Select the button to return to the view screen.
Select the button to save the modifications.
Supplier User Guide Page 18
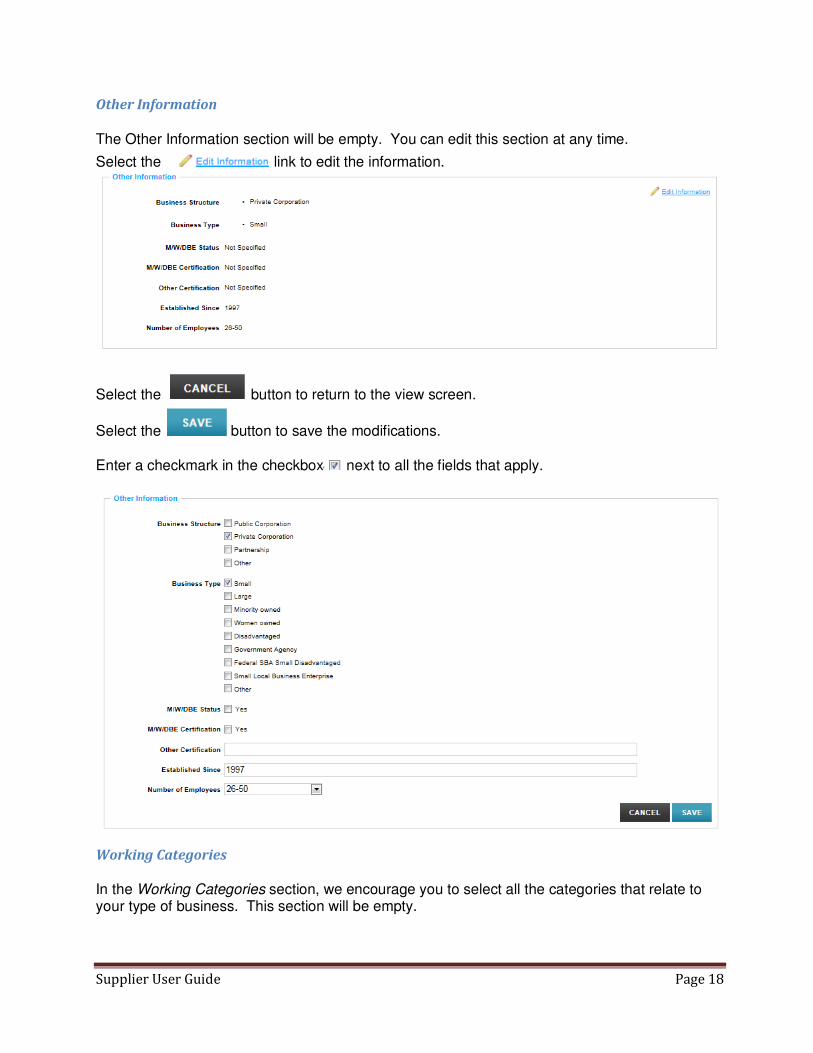
Other Information
The Other Information section will be empty. You can edit this section at any time.
Select the link to edit the information.
Select the button to return to the view screen.
Select the button to save the modifications.
Enter a checkmark in the checkbox next to all the fields that apply.
Working Categories
In the Working Categories section, we encourage you to select all the categories that relate to your type of business. This section will be empty.
Supplier User Guide Page 19
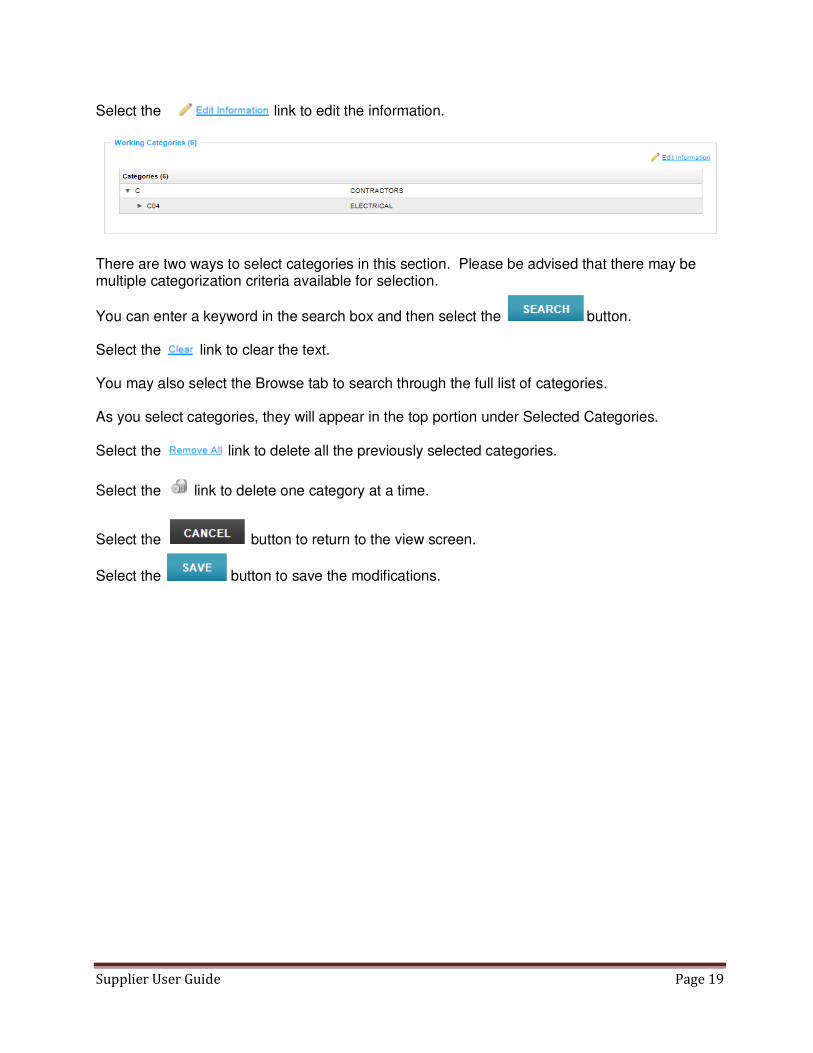
Select the link to edit the information.
There are two ways to select categories in this section. Please be advised that there may be multiple categorization criteria available for selection.
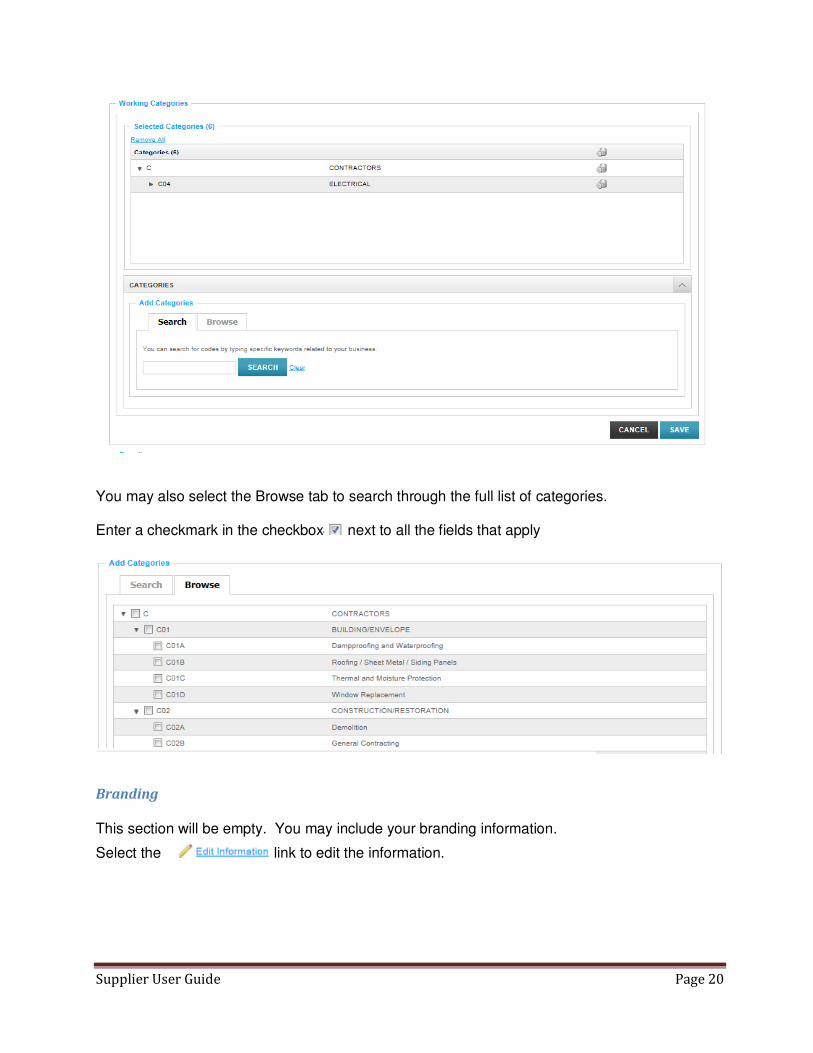
You can enter a keyword in the search box and then select the button. Select the link to clear the text. You may also select the Browse tab to search through the full list of categories. As you select categories, they will appear in the top portion under Selected Categories. Select the link to delete all the previously selected categories.
Select the link to delete one category at a time.
Select the button to return to the view screen.
Select the button to save the modifications.
Supplier User Guide Page 20
You may also select the Browse tab to search through the full list of categories. Enter a checkmark in the checkbox next to all the fields that apply
Branding
This section will be empty. You may include your branding information.
Select the link to edit the information.

Supplier User Guide Page 21
This is an optional section.
Select the button to upload your organization’s logo. Follow the same steps as Error! Reference source not found. to upload your logo. Enter the text you wish in each of the text boxes.
Select the link to upload your organization’s promotional material. Follow the same steps as Error! Reference source not found. to upload your logo.
Select the button to return to the view screen.
Select the button to save the modifications.

Supplier User Guide Page 22
3.4.3 Contacts
The tab will enable users to view contacts, search for contacts or add new contacts.
The top portion of the contacts tab allows users to search for contacts within the organization. Multiple search criteria may be entered to refine the search.
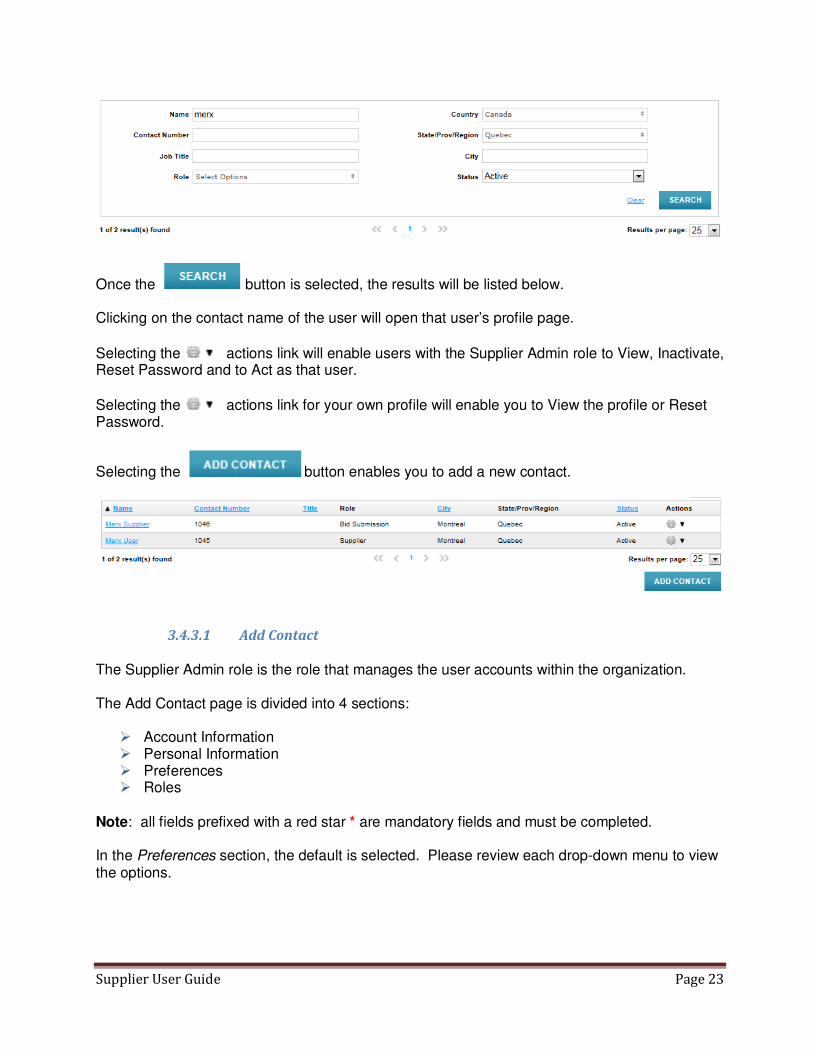
Once you’ve entered the search criteria, select the button. Select the link to clear the search criteria in the search boxes.
The drop-down enables the user to display 25, 50 or 100 results at a time.
Supplier User Guide Page 23
Once the button is selected, the results will be listed below. Clicking on the contact name of the user will open that user’s profile page.
Selecting the actions link will enable users with the Supplier Admin role to View, Inactivate, Reset Password and to Act as that user.
Selecting the actions link for your own profile will enable you to View the profile or Reset Password.
Selecting the button enables you to add a new contact.
3.4.3.1 Add Contact
The Supplier Admin role is the role that manages the user accounts within the organization. The Add Contact page is divided into 4 sections: � Account Information � Personal Information � Preferences � Roles
Note: all fields prefixed with a red star * are mandatory fields and must be completed. In the Preferences section, the default is selected. Please review each drop-down menu to view the options.

Supplier User Guide Page 24
Roles
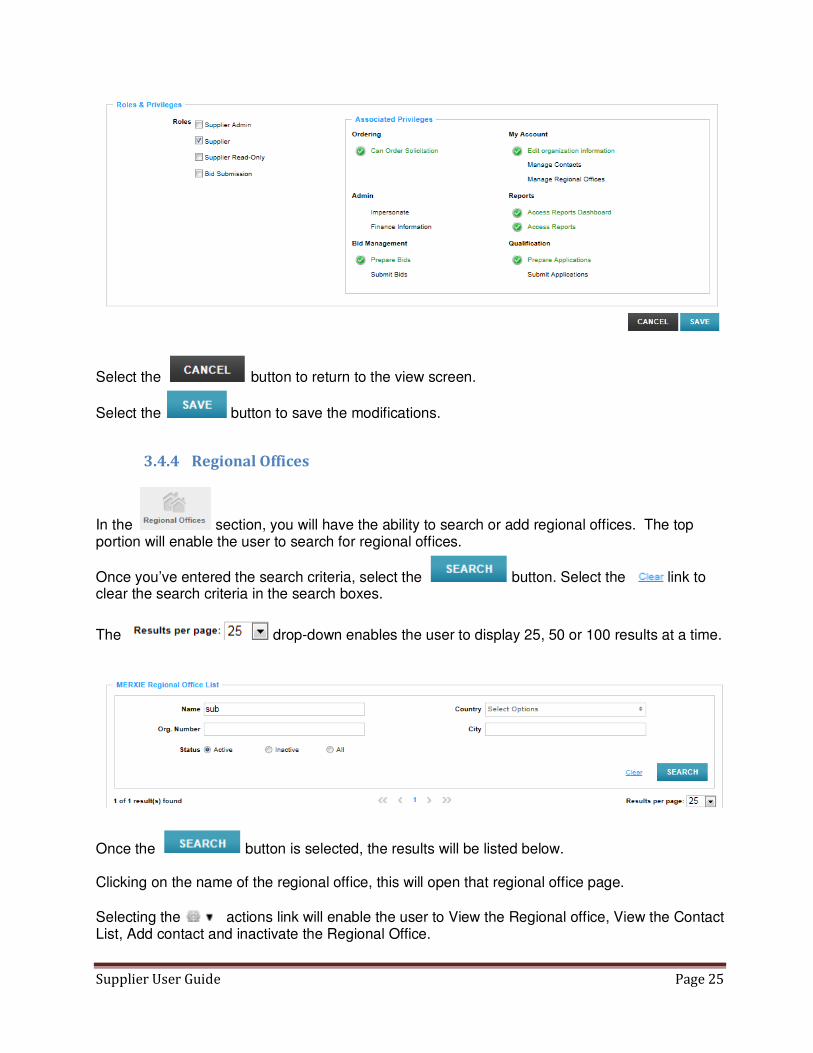
In the Roles section of the screen, the Supplier Admin can select the role(s) applicable to this user. By clicking in the checkbox next to each role, this will highlight the associated privileges in green. Select one of the following 4 roles to view the associated privileges. � Supplier Admin � Supplier � Supplier Read-only � Bid Submission
The Supplier Admin role provides full access to the system. The other roles limit the access to information.
Supplier User Guide Page 25
Select the button to return to the view screen.
Select the button to save the modifications.
3.4.4 Regional Offices
In the section, you will have the ability to search or add regional offices. The top portion will enable the user to search for regional offices.
Once you’ve entered the search criteria, select the button. Select the link to clear the search criteria in the search boxes.
The drop-down enables the user to display 25, 50 or 100 results at a time.
Once the button is selected, the results will be listed below. Clicking on the name of the regional office, this will open that regional office page.
Selecting the actions link will enable the user to View the Regional office, View the Contact List, Add contact and inactivate the Regional Office.

Supplier User Guide Page 26
Select the button to add a regional office.
Add Regional Office
There are 5 steps to adding a regional office.
STEP 1 – Organization Information
Note: all fields prefixed with a red star * are mandatory fields and must be completed.
Select the button to return to the view screen.
Select the button to continue to the next step.
Supplier User Guide Page 27
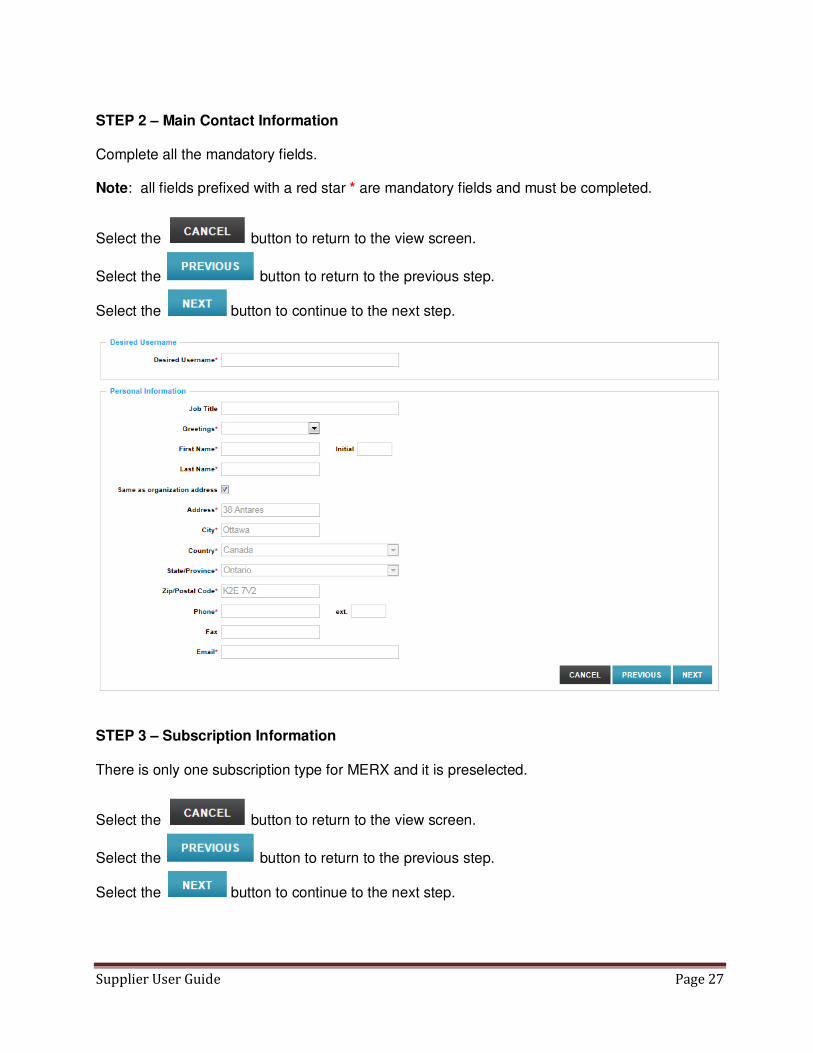
STEP 2 – Main Contact Information Complete all the mandatory fields. Note: all fields prefixed with a red star * are mandatory fields and must be completed.
Select the button to return to the view screen.
Select the button to return to the previous step.
Select the button to continue to the next step.
STEP 3 – Subscription Information There is only one subscription type for MERX and it is preselected.
Select the button to return to the view screen.
Select the button to return to the previous step.
Select the button to continue to the next step.

Supplier User Guide Page 28
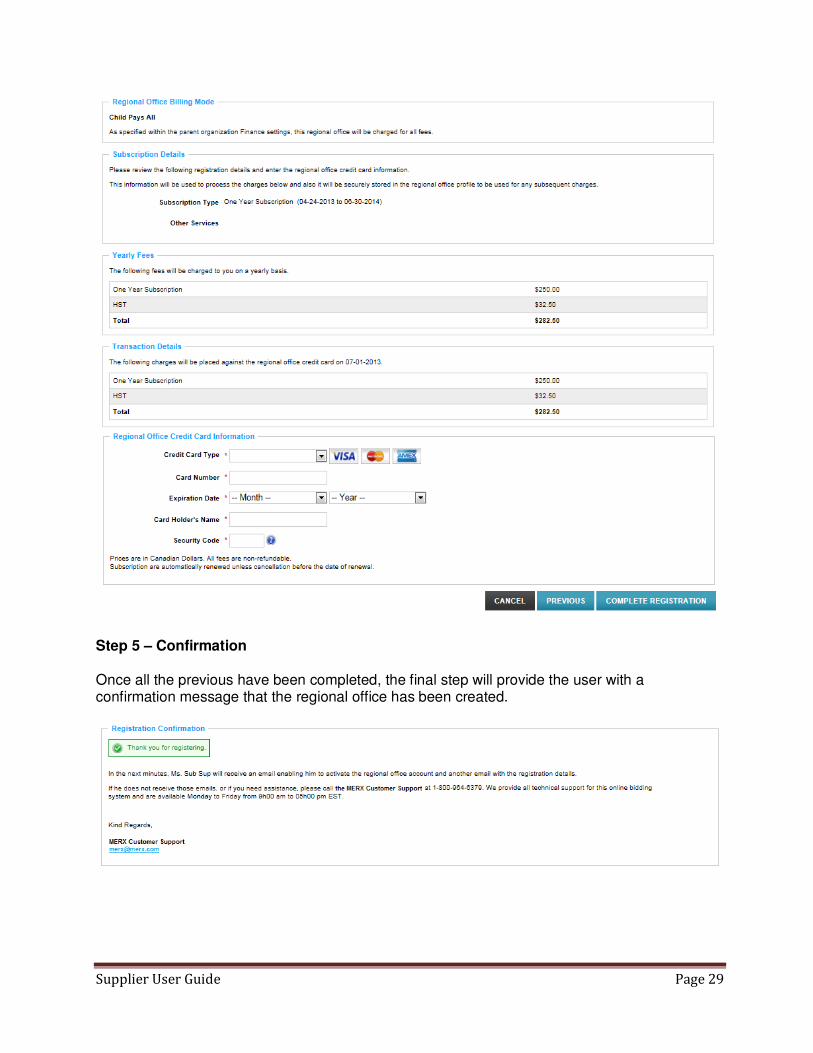
STEP 4 – Payment Review the subscription details and transaction details section. Note: all fields prefixed with a red star * are mandatory fields and must be completed.
Select the button to return to the view screen.
Select the button to return to the previous step.
Select the button to complete the registration. .
Supplier User Guide Page 29
Step 5 – Confirmation Once all the previous have been completed, the final step will provide the user with a confirmation message that the regional office has been created.

Supplier User Guide Page 30
3.4.5 Finance
The tab enables the user to edit the credit card information and to view the invoices.
In the Credit Card Information section, the user can select the link to modify the credit card information.
Selecting the link will present the user with the following screen. Note: all fields prefixed with a red star * are mandatory fields and must be completed.
Select the button to return to the view screen.
Select the button to save the modifications.
The Invoicing section will remain empty until the month of July 2013 when the registration fees will be applicable.

Supplier User Guide Page 31
3.4.6 Services
The section provides the user with a quick view of the services. This page will detail the
subscription term.
4. Additional Information
For additional information on how use the functionality available in the portal, please refer to the
Supplier Training Videos accessible from the in the top right hand corner of the page.