Embed Size (px)
Citation preview

Thank you for purchasing the Superior Axle and Gear Super Truss (TM). This product is designed to alle-viate many of the troublesome issues associated with stock Dana 35 axle assemblies. While these axles are designed for stock vehicles, they are not designed to be used with larger tires, heavier wheels and aggres-sive off-road driving. The Super Truss(TM), provides a fast and cost effective way of strengthening the axle assembly to prevent bending and the damage that results in broken differentials, and axle shafts.
Here are the steps required to easily install the Super Truss (TM) and get you and your rig forti-fied for the trails.
3 Carefully remove left and right lower shock absorber bolts. (If you have gas charged shocks you may want to remove them completely.
4 Locate brake line clamp on right side (passenger side) of axle assembly and remove it.
1 Secure the vehicle in a safe manner with the rear axle on suitable jack stands and the front tires chocked to prevent the vehicle from rolling. (Jack stands should be placed on the frame not under the axle) Remove rear wheels.
2 Remove the differential cover and catch the gear oil in a drain pan so it can be disposed of properly. Tip: Loosen the cover bolt in the 12 O’clock position while all others are removed. This will help eliminate a mess.
5 Remove breather tube box from left side (driver side) of axle assembly Note: Removal of breather box does not require bleeding brakes afterward)
6 Use a second set of jack stands to support axle housing on left and right side.
7 Remove track bar (Torx) bolt on left side of axle assembly.
8 Locate the following components from the Super Truss™ kit:Left Truss Section, 6 Nuts, 6 washers, 3 Flattened U-bolts
9 Loosely assemble the Left Tube Brace onto axle assembly using the 3 flattened U-Bolts, nuts and washers. Note: The Left Tube Brace is slightly longer than the Right Tube Brace.
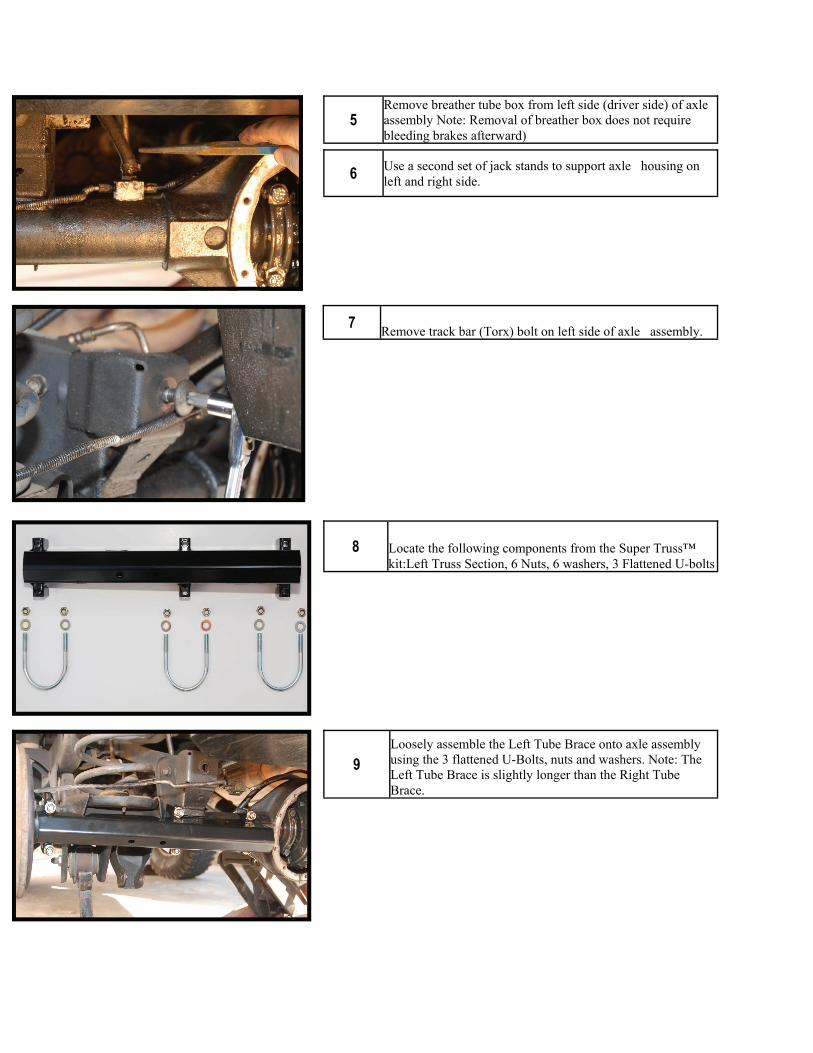
10 Locate the following components from the Super Truss™ kit:Right Tube Brace , 6 Nuts, 6 washers, 3 Flattened U-bolts
11 Loosely assemble the Right Tube Brace onto axle assembly using the 3 flattened U-Bolts, nuts and washers. Note: The Left Tube Brace is slightly longer than the Right Tube Brace.
12 Locate the following components from the Super Truss™ kit: 2 Long Nut extenders, 4 shock brackets, 2 spacers, 4 short bolts, 2 long bolts, 4 small washers, 4 large washers, and 2 nuts.
13 Insert nut end of the Long Nut Extender into opening on Right Tube Brace.
14 Line up nuts from Nut Extender to match holes in Tube Brace.
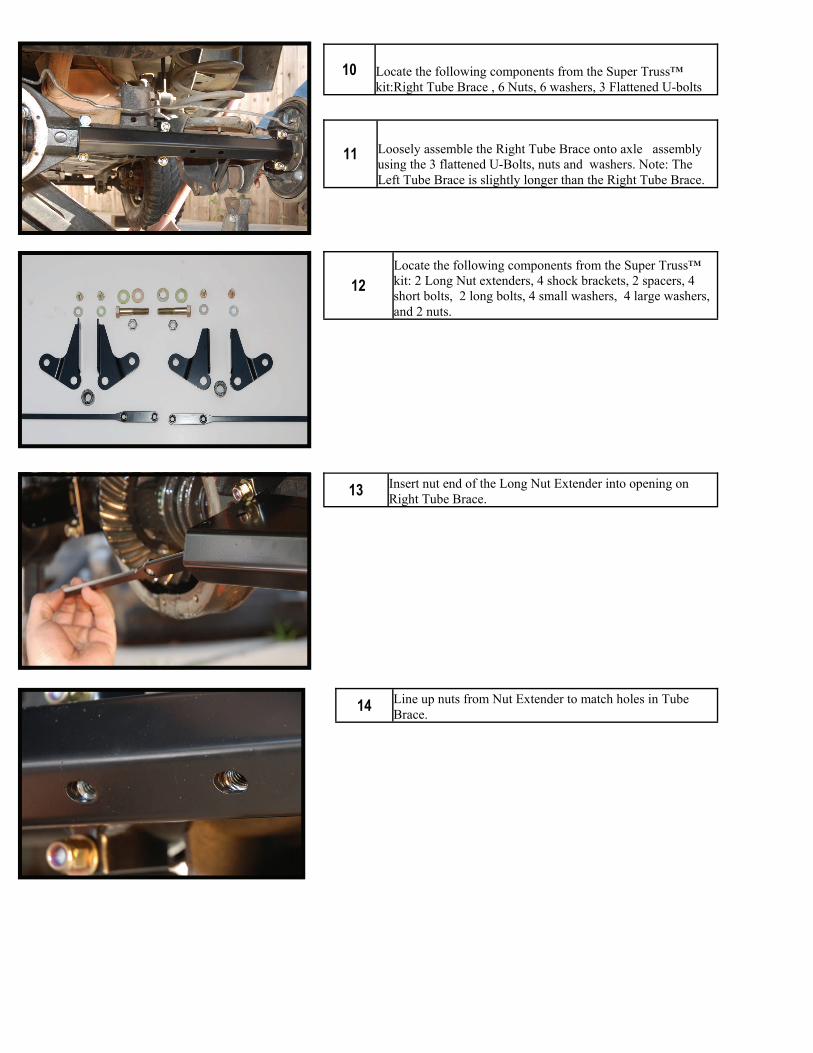
15 Loosely assemble two Shock Brackets to Right side of Tube Brace using 2 short bolts, and 2 small washers.
17 Repeat steps 13—16 to complete left side of shock bracket assembly.
16 Loosely assemble long bolt, spacer, large washer and nut on end of shock brackets.
18 Locate the following components from the Super Truss™ kit: 1 Short Nut Extender, 1 Track Bar Brace, 2 short bolts, 2 nuts, and 2 washers
20 Loosely assemble the Track Bar Brace to the Left Tube Brace using the Short Nut Extender. Ensure that Track Bar Bolt hole is properly aligned. Note: Elongated holes are provided to aid in alignment.
19 Insert Short Nut Extender into the Left Tube Brace open-ing and line up holes.
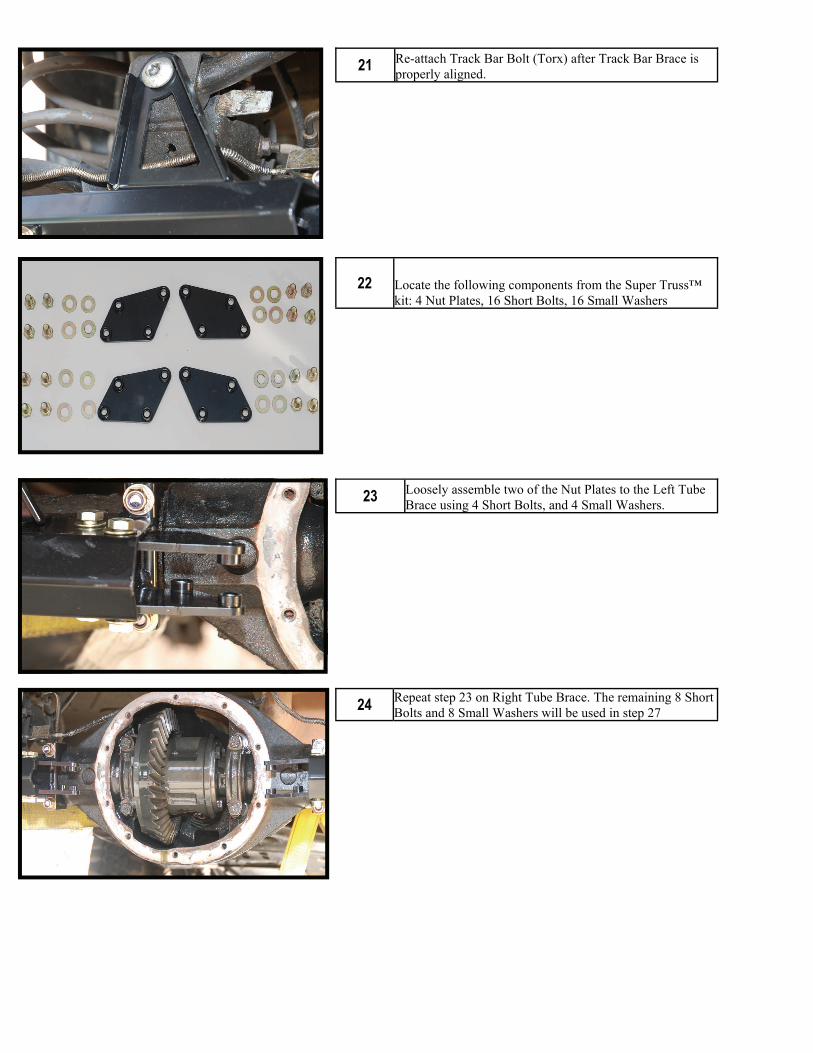
21 Re-attach Track Bar Bolt (Torx) after Track Bar Brace is properly aligned.
22 Locate the following components from the Super Truss™ kit: 4 Nut Plates, 16 Short Bolts, 16 Small Washers
23 Loosely assemble two of the Nut Plates to the Left Tube Brace using 4 Short Bolts, and 4 Small Washers.
24 Repeat step 23 on Right Tube Brace. The remaining 8 Short Bolts and 8 Small Washers will be used in step 27
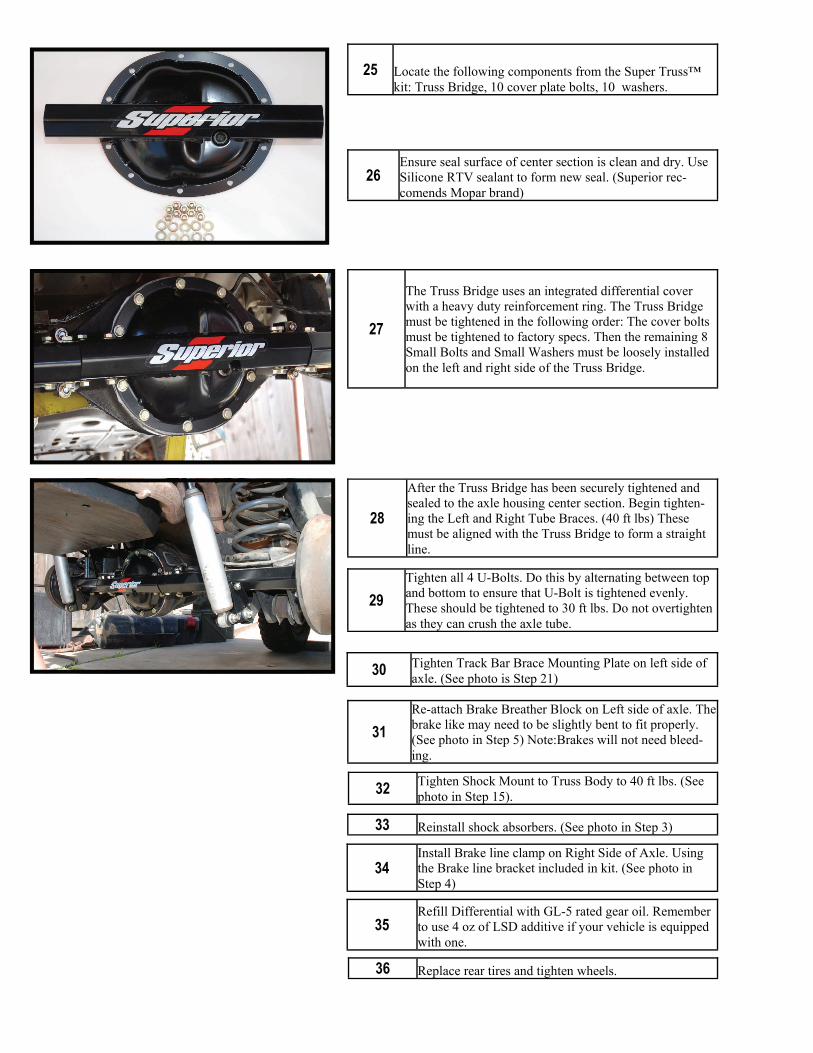
25 Locate the following components from the Super Truss™ kit: Truss Bridge, 10 cover plate bolts, 10 washers.
26 Ensure seal surface of center section is clean and dry. Use Silicone RTV sealant to form new seal. (Superior rec-comends Mopar brand)
27
The Truss Bridge uses an integrated differential cover with a heavy duty reinforcement ring. The Truss Bridge must be tightened in the following order: The cover bolts must be tightened to factory specs. Then the remaining 8 Small Bolts and Small Washers must be loosely installed on the left and right side of the Truss Bridge.
28
After the Truss Bridge has been securely tightened and sealed to the axle housing center section. Begin tighten-ing the Left and Right Tube Braces. (40 ft lbs) These must be aligned with the Truss Bridge to form a straight line.
29 Tighten all 4 U-Bolts. Do this by alternating between top and bottom to ensure that U-Bolt is tightened evenly. These should be tightened to 30 ft lbs. Do not overtighten as they can crush the axle tube.
30 Tighten Track Bar Brace Mounting Plate on left side of axle. (See photo is Step 21)
31 Re-attach Brake Breather Block on Left side of axle. The brake like may need to be slightly bent to fit properly. (See photo in Step 5) Note:Brakes will not need bleed-ing.
32 Tighten Shock Mount to Truss Body to 40 ft lbs. (See photo in Step 15).
33 Reinstall shock absorbers. (See photo in Step 3)
34 Install Brake line clamp on Right Side of Axle. Using the Brake line bracket included in kit. (See photo in Step 4)
35 Refill Differential with GL-5 rated gear oil. Remember to use 4 oz of LSD additive if your vehicle is equipped with one.
36 Replace rear tires and tighten wheels.