Embed Size (px)
Citation preview
Sun Studio 12 Update 1 Installation Guide
Part No: 820–7601August 2009
Copyright © 2009, 2010, Oracle and/or its affiliates. All rights reserved.
This software and related documentation are provided under a license agreement containing restrictions on use and disclosure and are protected by intellectualproperty laws. Except as expressly permitted in your license agreement or allowed by law, you may not use, copy, reproduce, translate, broadcast, modify, license,transmit, distribute, exhibit, perform, publish, or display any part, in any form, or by any means. Reverse engineering, disassembly, or decompilation of this software,unless required by law for interoperability, is prohibited.
The information contained herein is subject to change without notice and is not warranted to be error-free. If you find any errors, please report them to us in writing.
If this is software or related software documentation that is delivered to the U.S. Government or anyone licensing it on behalf of the U.S. Government, the followingnotice is applicable:
U.S. GOVERNMENT RIGHTS Programs, software, databases, and related documentation and technical data delivered to U.S. Government customers are“commercial computer software” or “commercial technical data” pursuant to the applicable Federal Acquisition Regulation and agency-specific supplementalregulations. As such, the use, duplication, disclosure, modification, and adaptation shall be subject to the restrictions and license terms set forth in the applicableGovernment contract, and, to the extent applicable by the terms of the Government contract, the additional rights set forth in FAR 52.227-19, CommercialComputer Software License (December 2007). Oracle America, Inc., 500 Oracle Parkway, Redwood City, CA 94065.
This software or hardware is developed for general use in a variety of information management applications. It is not developed or intended for use in any inherentlydangerous applications, including applications which may create a risk of personal injury. If you use this software or hardware in dangerous applications, then youshall be responsible to take all appropriate fail-safe, backup, redundancy, and other measures to ensure its safe use. Oracle Corporation and its affiliates disclaim anyliability for any damages caused by use of this software or hardware in dangerous applications.
Oracle and Java are registered trademarks of Oracle and/or its affiliates. Other names may be trademarks of their respective owners.
AMD, Opteron, the AMD logo, and the AMD Opteron logo are trademarks or registered trademarks of Advanced Micro Devices. Intel and Intel Xeon aretrademarks or registered trademarks of Intel Corporation. All SPARC trademarks are used under license and are trademarks or registered trademarks of SPARCInternational, Inc. UNIX is a registered trademark licensed through X/Open Company, Ltd.
This software or hardware and documentation may provide access to or information on content, products, and services from third parties. Oracle Corporation andits affiliates are not responsible for and expressly disclaim all warranties of any kind with respect to third-party content, products, and services. Oracle Corporationand its affiliates will not be responsible for any loss, costs, or damages incurred due to your access to or use of third-party content, products, or services.
100630@24378
Contents
Preface .....................................................................................................................................................7
1 Preparing for Installation ...................................................................................................................11Software Installation Overview .......................................................................................................... 11System Requirements .......................................................................................................................... 12Choosing Local or Remote Display of the Installer ......................................................................... 13
▼ Preparing for Installation Using a Remote Display ................................................................. 13Installing to an NFS-Mounted Filesystem ........................................................................................ 14
▼ To Prepare for Installing the Sun Studio Software on an NFS-mounted Filesystem ........... 15Supporting Previous Sun Studio Releases ........................................................................................ 15Choosing an Installation Method ...................................................................................................... 16
2 Installing the Sun Studio 12 Update 1 Software ............................................................................ 17Installing the Sun Studio Software ..................................................................................................... 17
Determining Which Installer You Have ................................................................................... 17Installing in a Zone ...................................................................................................................... 18Installing in an Alternate Root Directory .................................................................................. 18Installing on Multiple Systems ................................................................................................... 18Installing With the Graphical User Interface Installer ............................................................ 18Installing With the Non-GUI Installer ...................................................................................... 20
Installing the Required Solaris OS Patches ....................................................................................... 22Setting Up Access to the Developer Tools and Man Pages ............................................................. 22Starting the Sun Studio 12 Update 1 IDE .......................................................................................... 23
3 Uninstalling the Sun Studio 12 Update 1 Software ....................................................................... 25Uninstalling When Previous Releases of Sun Studio Software Are Installed ............................... 25Choosing Local Display or Remote Display of the Uninstaller ..................................................... 25
3
▼ Preparing for Uninstallation Using a Remote Display ............................................................ 25Uninstalling the Software ................................................................................................................... 26
▼ Using the Graphical User Interface Uninstaller ....................................................................... 26▼ Using the Non-GUI Uninstaller ................................................................................................. 27
4 Troubleshooting ..................................................................................................................................29GUI Installer Will Fail If TMPDIR Points to Non World-Writable Directory ................................ 29GNOME Errors Might Occur When Starting GUI Installer .......................................................... 30Installer Lock File Might Prevent Installer From Starting .............................................................. 30Fixing a Failed Installation or Uninstallation ................................................................................... 30
▼ Using the Uninstallation Workaround Script to Fix a Failed Installation orUninstallation ............................................................................................................................... 31
▼ Manually Fixing a Failed Installation or Uninstallation on Solaris Platforms ...................... 31▼ Manually Fixing a Failed Installation or Uninstallation on Linux Platforms ....................... 32
Installation Will Fail on an NFS-Mounted Filesystem If Write Permission is Not Set ............... 33Viewing the Installation Log File ....................................................................................................... 33
A Command-Line Options for the Installer,Uninstaller,and install_patchesUtility ............... 35Command-Line Options for the GUI Installer ................................................................................ 35Command-Line Options for the Non-GUI Installer ...................................................................... 36Command-Line Options for the Uninstaller ................................................................................... 37Command-Line Options for the install_patches.sh Utility ..................................................... 37
B Adding Swap Space .............................................................................................................................39Adding Swap Space ............................................................................................................................. 39
▼ Adding Swap Space on a Solaris System .................................................................................... 39▼ Adding Swap Space on a Linux System ..................................................................................... 40
Contents
Sun Studio 12 Update 1 Installation Guide • August 20094
C Sun Studio 12 Update 1 Components and Packages ..................................................................... 43
D Patch Identification Numbers and Descriptions ............................................................................ 53
E Version Numbers of the Sun Studio 12 Update 1 Components ....................................................55
Index ......................................................................................................................................................57
Contents
5

6
Preface
The Sun Studio 12 Update 1 Installation Guide guide gives instructions on how to perform thefollowing tasks:
■ Use the English-only package installer to install the English-only release of the Sun Studio12 Update 1 software
■ Use the multi-language package installer to install the multi-language release of the SunStudio 12 Update 1 software
■ Install the required Solaris 10 OS patches■ Run the Integrated Development Environment (IDE)■ Uninstall the Sun Studio 12 Update 1 software
Who Should Use This BookThis book is designed for system administrators who install software and for developers whouse software development applications. Experience with the Solaris Operating System (SolarisOS) and UNIX commands is required.
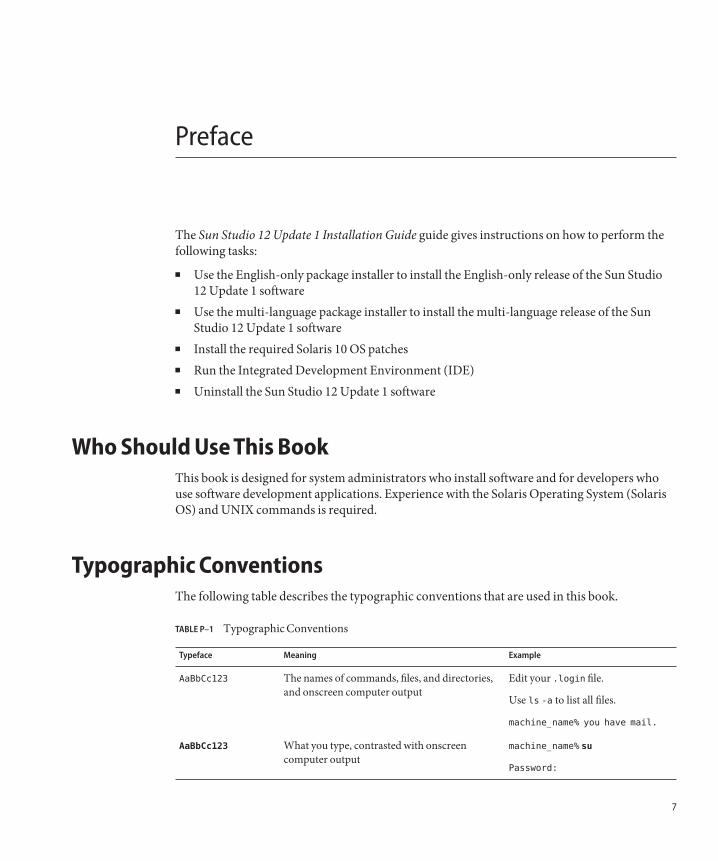
Typographic ConventionsThe following table describes the typographic conventions that are used in this book.
TABLE P–1 Typographic Conventions
Typeface Meaning Example
AaBbCc123 The names of commands, files, and directories,and onscreen computer output
Edit your .login file.
Use ls -a to list all files.
machine_name% you have mail.
AaBbCc123 What you type, contrasted with onscreencomputer output
machine_name% su
Password:
7
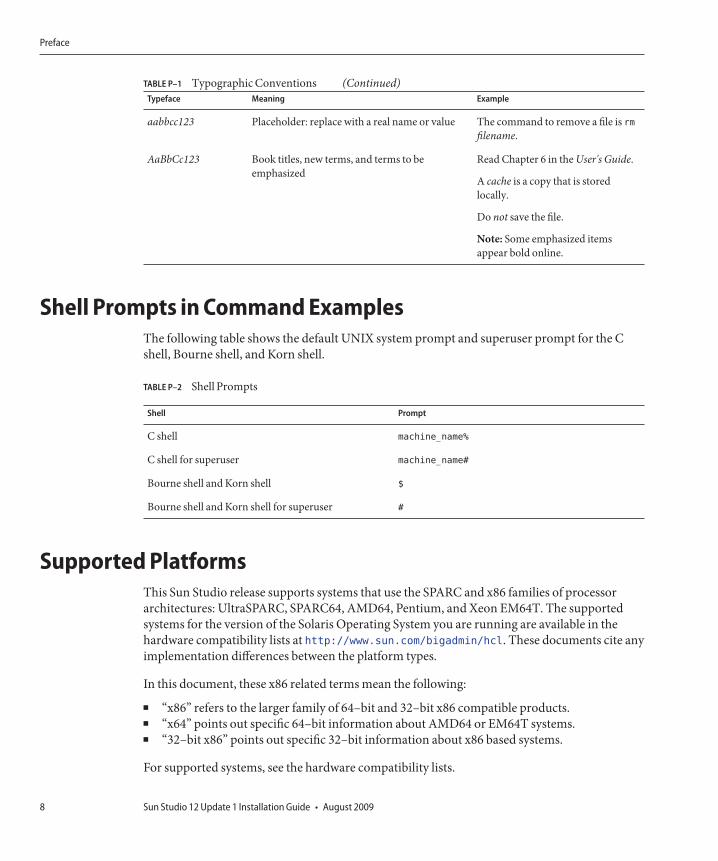
TABLE P–1 Typographic Conventions (Continued)Typeface Meaning Example
aabbcc123 Placeholder: replace with a real name or value The command to remove a file is rmfilename.
AaBbCc123 Book titles, new terms, and terms to beemphasized
Read Chapter 6 in the User's Guide.
A cache is a copy that is storedlocally.
Do not save the file.
Note: Some emphasized itemsappear bold online.
Shell Prompts in Command ExamplesThe following table shows the default UNIX system prompt and superuser prompt for the Cshell, Bourne shell, and Korn shell.
TABLE P–2 Shell Prompts
Shell Prompt
C shell machine_name%
C shell for superuser machine_name#
Bourne shell and Korn shell $
Bourne shell and Korn shell for superuser #
Supported PlatformsThis Sun Studio release supports systems that use the SPARC and x86 families of processorarchitectures: UltraSPARC, SPARC64, AMD64, Pentium, and Xeon EM64T. The supportedsystems for the version of the Solaris Operating System you are running are available in thehardware compatibility lists at http://www.sun.com/bigadmin/hcl. These documents cite anyimplementation differences between the platform types.
In this document, these x86 related terms mean the following:
■ “x86” refers to the larger family of 64–bit and 32–bit x86 compatible products.■ “x64” points out specific 64–bit information about AMD64 or EM64T systems.■ “32–bit x86” points out specific 32–bit information about x86 based systems.
For supported systems, see the hardware compatibility lists.
Preface
Sun Studio 12 Update 1 Installation Guide • August 20098
Accessing Sun Studio DocumentationYou can access the documentation at the following locations:
■ The documentation is available from the documentation index page athttp://developers.sun.com/sunstudio/documentation/ss12u1.
■ Online help for all components of the IDE is available through the Help menu, as well asthrough Help buttons on many windows and dialog boxes, in the IDE.
■ Online help for the Performance Analyzer is available through the Help menu, as well asthrough Help buttons on many windows and dialog boxes, in the Performance Analyzer.
The docs.sun.com web site (http://docs.sun.com) enables you to read, print, and buy SunMicrosystems manuals through the Internet.
Note – Sun is not responsible for the availability of third-party Web sites mentioned in thisdocument. Sun does not endorse and is not responsible or liable for any content, advertising,products, or other materials that are available on or through such sites or resources. Sun will notbe responsible or liable for any actual or alleged damage or loss caused by or in connection withthe use of or reliance on any such content, goods, or services that are available on or throughsuch sites or resources.
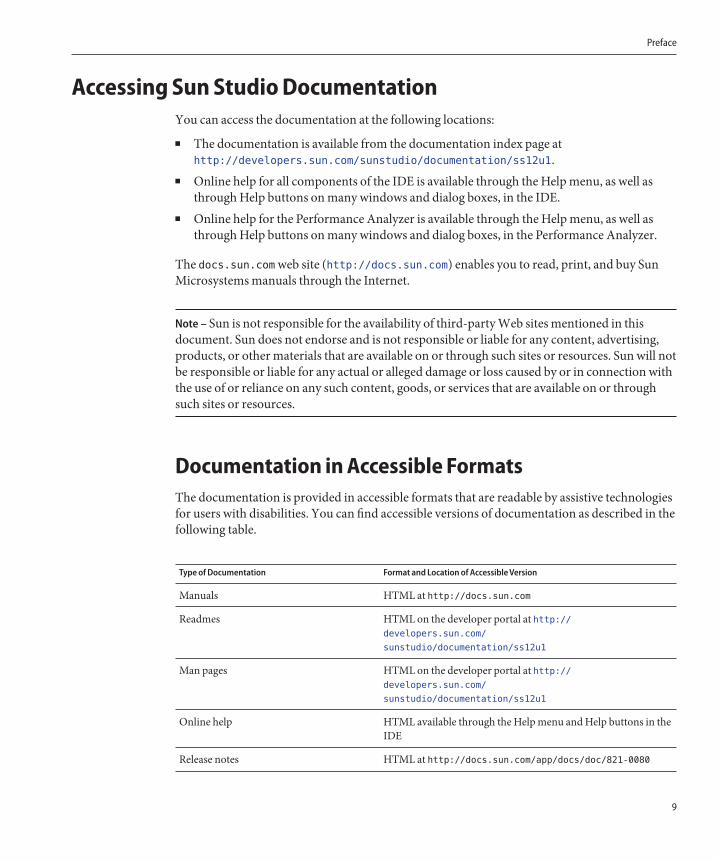
Documentation in Accessible FormatsThe documentation is provided in accessible formats that are readable by assistive technologiesfor users with disabilities. You can find accessible versions of documentation as described in thefollowing table.
Type of Documentation Format and Location of Accessible Version
Manuals HTML at http://docs.sun.com
Readmes HTML on the developer portal at http://developers.sun.com/
sunstudio/documentation/ss12u1
Man pages HTML on the developer portal at http://developers.sun.com/
sunstudio/documentation/ss12u1
Online help HTML available through the Help menu and Help buttons in theIDE
Release notes HTML at http://docs.sun.com/app/docs/doc/821-0080
Preface
9
Resources for DevelopersVisit http://developers.sun.com/sunstudio to find these frequently updated resources:
■ Articles on programming techniques and best practices■ Documentation of the software, as well as corrections to the documentation that is installed
with your software■ Tutorials that take you step-by-step through development tasks using Sun Studio tools■ Information on support levels■ User forums■ Downloadable code samples■ New technology previews
The Sun Studio portal is one of a number of additional resources for developers at the SunDeveloper Network web site, http://developers.sun.com.
Contacting Technical SupportIf you have technical questions about this product that are not answered in this document, go tohttp://www.sun.com/service/contacting
Sun Welcomes Your CommentsSun is interested in improving its documentation and welcomes your comments andsuggestions. Submit your comments to Sun at this URL: http://www.sun.com/hwdocs/feedback.
Please include the part number of the document in the subject line of your email. For example,the part number for this document is 820-7601–10.
Preface
Sun Studio 12 Update 1 Installation Guide • August 200910
Preparing for Installation
This chapter includes information about the following:
■ “Software Installation Overview” on page 11■ “System Requirements” on page 12■ “Choosing Local or Remote Display of the Installer” on page 13■ “Installing to an NFS-Mounted Filesystem” on page 14■ “Supporting Previous Sun Studio Releases” on page 15■ “Choosing an Installation Method” on page 16
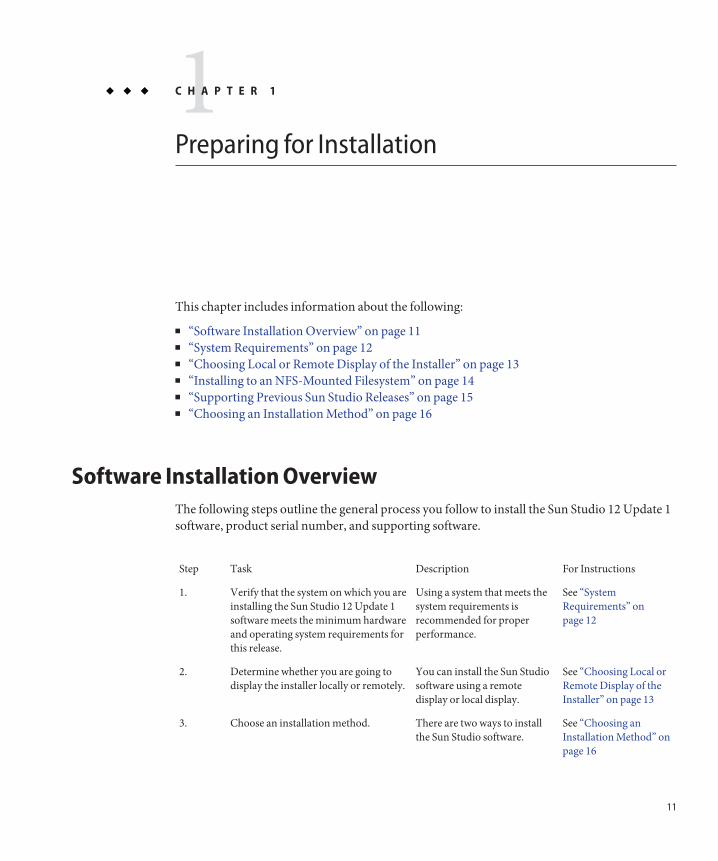
Software Installation OverviewThe following steps outline the general process you follow to install the Sun Studio 12 Update 1software, product serial number, and supporting software.
Step Task Description For Instructions
1. Verify that the system on which you areinstalling the Sun Studio 12 Update 1software meets the minimum hardwareand operating system requirements forthis release.
Using a system that meets thesystem requirements isrecommended for properperformance.
See “SystemRequirements” onpage 12
2. Determine whether you are going todisplay the installer locally or remotely.
You can install the Sun Studiosoftware using a remotedisplay or local display.
See “Choosing Local orRemote Display of theInstaller” on page 13
3. Choose an installation method. There are two ways to installthe Sun Studio software.
See “Choosing anInstallation Method” onpage 16
1C H A P T E R 1
11
4. Install the Sun Studio 12 Update 1software and the required OS patches.
Step through the installationinformation.
See “Installing the SunStudio Software” onpage 17
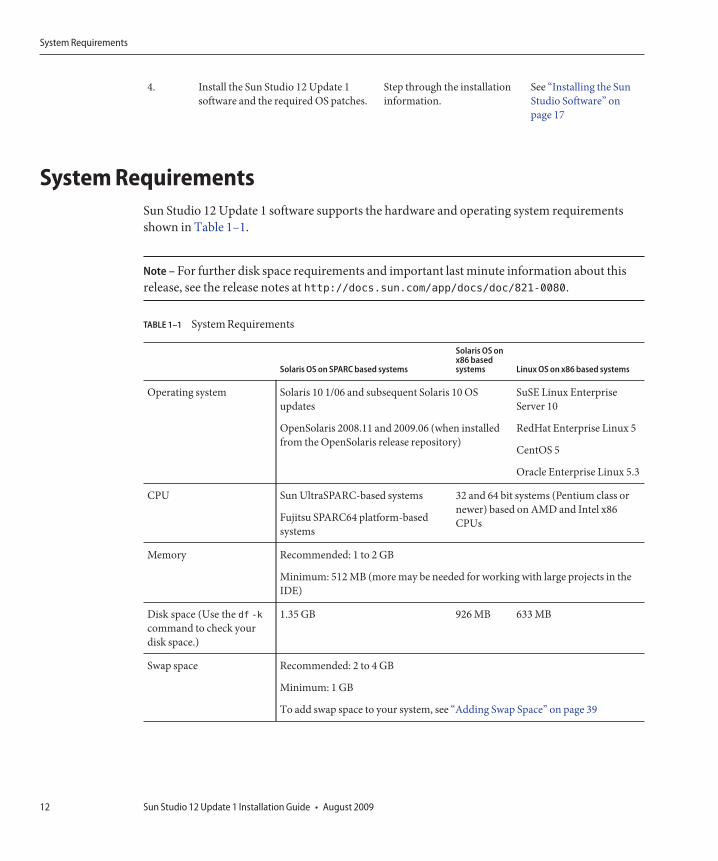
System RequirementsSun Studio 12 Update 1 software supports the hardware and operating system requirementsshown in Table 1–1.
Note – For further disk space requirements and important last minute information about thisrelease, see the release notes at http://docs.sun.com/app/docs/doc/821-0080.
TABLE 1–1 System Requirements
Solaris OS on SPARC based systems
Solaris OS onx86 basedsystems Linux OS on x86 based systems
Operating system Solaris 10 1/06 and subsequent Solaris 10 OSupdates
OpenSolaris 2008.11 and 2009.06 (when installedfrom the OpenSolaris release repository)
SuSE Linux EnterpriseServer 10
RedHat Enterprise Linux 5
CentOS 5
Oracle Enterprise Linux 5.3
CPU Sun UltraSPARC-based systems
Fujitsu SPARC64 platform-basedsystems
32 and 64 bit systems (Pentium class ornewer) based on AMD and Intel x86CPUs
Memory Recommended: 1 to 2 GB
Minimum: 512 MB (more may be needed for working with large projects in theIDE)
Disk space (Use the df -kcommand to check yourdisk space.)
1.35 GB 926 MB 633 MB
Swap space Recommended: 2 to 4 GB
Minimum: 1 GB
To add swap space to your system, see “Adding Swap Space” on page 39
System Requirements
Sun Studio 12 Update 1 Installation Guide • August 200912
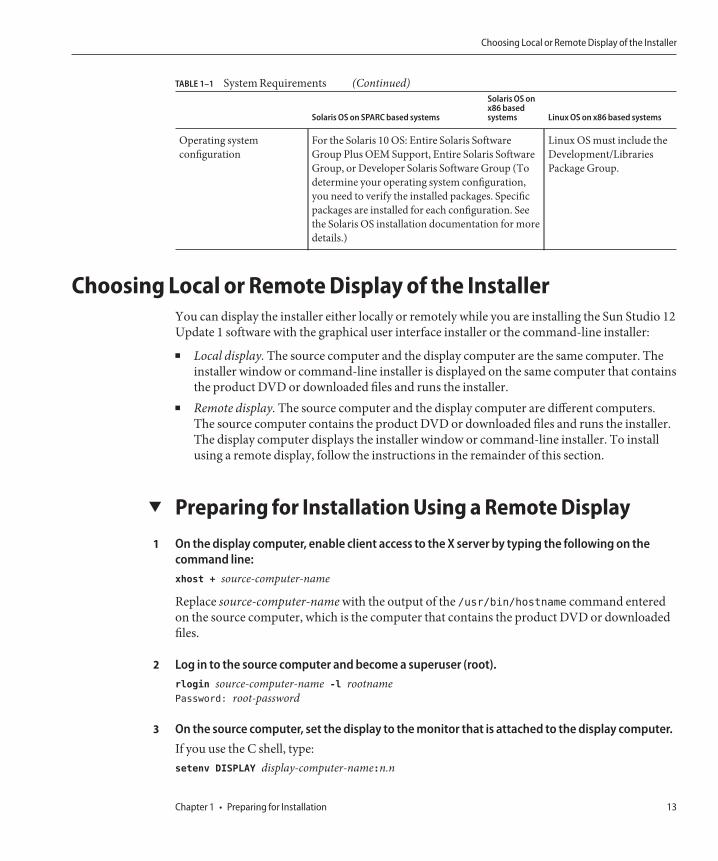
TABLE 1–1 System Requirements (Continued)
Solaris OS on SPARC based systems
Solaris OS onx86 basedsystems Linux OS on x86 based systems
Operating systemconfiguration
For the Solaris 10 OS: Entire Solaris SoftwareGroup Plus OEM Support, Entire Solaris SoftwareGroup, or Developer Solaris Software Group (Todetermine your operating system configuration,you need to verify the installed packages. Specificpackages are installed for each configuration. Seethe Solaris OS installation documentation for moredetails.)
Linux OS must include theDevelopment/LibrariesPackage Group.
Choosing Local or Remote Display of the InstallerYou can display the installer either locally or remotely while you are installing the Sun Studio 12Update 1 software with the graphical user interface installer or the command-line installer:■ Local display. The source computer and the display computer are the same computer. The
installer window or command-line installer is displayed on the same computer that containsthe product DVD or downloaded files and runs the installer.
■ Remote display. The source computer and the display computer are different computers.The source computer contains the product DVD or downloaded files and runs the installer.The display computer displays the installer window or command-line installer. To installusing a remote display, follow the instructions in the remainder of this section.
▼ Preparing for Installation Using a Remote DisplayOn the display computer, enable client access to the X server by typing the following on thecommand line:xhost + source-computer-name
Replace source-computer-name with the output of the /usr/bin/hostname command enteredon the source computer, which is the computer that contains the product DVD or downloadedfiles.
Log in to the source computer and become a superuser (root).rlogin source-computer-name -l rootnamePassword: root-password
On the source computer, set the display to the monitor that is attached to the display computer.If you use the C shell, type:setenv DISPLAY display-computer-name:n.n
1
2
3
Choosing Local or Remote Display of the Installer
Chapter 1 • Preparing for Installation 13
If you use the Bourne shell, type:
DISPLAY=display-computer-name:n.nexport DISPLAY
If you use the Korn shell, type:
export DISPLAY=display-computer-name:n.n
Replace display-computer-name with the output of the /usr/bin/hostname entered on thedisplay computer.
Installing to an NFS-Mounted FilesystemTo install the Sun Studio software on an NFS-mounted filesystem, you must run the installer ona supported system regardless of where the NFS partition is mounted. In the followingprocedure, the server is the machine with the physical disk on which the installed software willreside, and the client is the machine on which you run the installer and which NFS-mounts thefilesystem from the server.
Note – The best way to share the product image as an NFS-mounted filesystem is to export itfrom a supported system. Run the installer on the server and share the directory in which thesoftware is installed. Use the following NFS install procedure only if your NFS server is not asupported platform for the product.
After mounting the filesystem you can install the Sun Studio product on the server by runningthe graphical user interface (GUI) installer or non-GUI installer on the client machine . Youwould specify the directory on which you mounted the filesystem as the installation directoryfor the Sun Studio 12 Update 1 software.
After you have installed the software, any machine that is running the Solaris 10 OS can mountthe filesystem from the server on which you installed the software, and run the software. Eachclient machine that runs the software must have the required OS patches installed (seeAppendix D, “Patch Identification Numbers and Descriptions”). You can install the patchesusing the install_patches utility (see “Installing the Required Solaris OS Patches” onpage 22.
To uninstall Sun Studio software installed on an NFS-mounted filesystem, you must run theuninstaller on the same client machine you used to install the software, and you must mount thefilesystem prior to running the uninstaller.
Installing to an NFS-Mounted Filesystem
Sun Studio 12 Update 1 Installation Guide • August 200914
▼ To Prepare for Installing the Sun Studio Software onan NFS-mounted Filesystem
On the server machine, share the filesystem with the appropriate options. It is essential thatroot on the client machine on which the installer will be run have full access to the NFSfilesystem:share -F nfs -o root=client-machine,rw filesystem
On the client machine, mount the shared filesystem with read/write access:mount server-machine:filesystem installation-directory
Supporting Previous Sun Studio ReleasesIf you installed any previous release of Sun Studio software (Sun Studio 12 software or an earlierrelease) on your system, then you must uninstall it, or install the Sun Studio 12 Update 1software in a different directory.
If you used the English-only installer to install some components of the English-only release ofthe Sun Studio 12 Update 1 software, you can use the multi-language installer to installadditional components for the English locale. However, before using the multi-languageinstaller to install Sun Studio 12 Update 1 software for additional locales, uninstall allEnglish-only Sun Studio 12 Update 1 software installed with the English-only installer.
If you installed Sun Studio 10 software, Sun Studio 11 software, or Sun Studio 12 software on aSolaris 10 system, you can install the Sun Studio 12 Update 1 software on that system only if yourun the installer from the correct zone.
■ On a Solaris 10 system that has Sun Studio 10 software installed, you must run the installerin the global zone, which will install the Sun Studio 12 Update 1 software in all zones.
■ On a Solaris 10 system that has Sun Studio 11 software or Sun Studio 12 software installed,you can run the installer in either the global zone or a local zone, but the installer will installthe Sun Studio 12 Update 1 only in the zone where you are running the installer.
■ On a Solaris 10 system that has no previous releases of Sun Studio software installed, youcan run the installer in the global zone to install the Sun Studio 12 Update 1 software in allzones, or in a local zone to install the software in that zone only.
1
2
Supporting Previous Sun Studio Releases
Chapter 1 • Preparing for Installation 15
Choosing an Installation MethodThere are two ways to install the Sun Studio 12 Update 1 software:
Package installer, graphical user interface (GUI)mode
The graphical user interface installer is an installationwizard that displays pages for a series of installation steps.On each page, you can quit, go back to the previous step, orgo on to the next step. You can choose the installationdirectory and which components of the Sun Studio 12Update 1 software you want to install.
Package installer, non-GUI mode The non-GUI mode of the package installer installs allcomponents of the Sun Studio 12 Update 1 silently.
Choosing an Installation Method
Sun Studio 12 Update 1 Installation Guide • August 200916
Installing the Sun Studio 12 Update 1 Software
This chapter includes information about the following:
■ “Installing the Sun Studio Software” on page 17■ “Installing the Required Solaris OS Patches” on page 22■ “Setting Up Access to the Developer Tools and Man Pages” on page 22■ “Starting the Sun Studio 12 Update 1 IDE” on page 23
Installing the Sun Studio SoftwareYou can install the Sun Studio 12 Update 1 software and the required OS patches on asingle-user system. Or you can install the software and OS patches on a server for use by clientsystems with the same architecture, and then install the OS patches on each client system thatwill access the Sun Studio software on the server.
Determining Which Installer You HaveBefore running the package installer, it is important to know which version of the installer youhave. The English-only version of the installer installs the English-only release of the Sun Studio12 Update 1 software. The multi-language version installs the multi-language release of thesoftware. The two versions provide slightly different options, so be sure that you know whichone you have before you start it from the command line.
To determine which installer you have, in the directory that contains the installer, type:
./SunStudio12u1-OS-platform-packages.sh --help
If you have the multi-language installer, the first line of the help output is:
Sun Studio 12 Update 1 multi-language installer
If you have the English-only installer, the line above is not included in the help output.
2C H A P T E R 2
17
Installing in a ZoneTo install the software in a zone on a Solaris 10 system, run the installer in that zone. If you areinstalling in the global zone and want the software to be available in that zone only, specify the--current-zone-only when starting the installer.
If you install the software in the global zone and want to be able to run the IDE from non-globalzones, you must copy the /installation_directory/netbeans directory from the global zone toeach non-global zone.
Installing in an Alternate Root DirectoryTo install the English-only software using an alternate root directory (the default root directoryis /), use the GUI installer with the --use-alternate-root directory option.
To install the multi-language software using an alternate root directory, use either the GUIinstaller or the non-GUI installer with the --use-alternate-root directory option.
Installing on Multiple SystemsTo install the software on multiple systems, you can use the --record state_file.xml optionwhen starting the GUI installer to record an installation that you can repeat using the --statestate_file.xml option with the non-GUI installer.
Installing With the Graphical User Interface InstallerThe graphical user interface (GUI) installer lets you choose the installation directory and selectwhich components of the Sun Studio 12 Update 1 software you want to install. For a completelist of the valid command-line options when starting the GUI installer, see “Command-LineOptions for the GUI Installer” on page 35.
The GUI installer requires the Java 2 Software Development Kit (JDK) 5, Update 16.
▼ Using the Graphical User Interface Installer
If you are not currently superuser (root), become superuser by typing:su
Password: root-password
In the directory that contains the installer, start the installer by typing:./SunStudio12u1-OS-platform-packages.sh
1
2
Installing the Sun Studio Software
Sun Studio 12 Update 1 Installation Guide • August 200918
On the License Agreement page, review the license agreement and then select the checkbox toaccept the terms in the license agreement. Click Next.
If you are running the multi-language installer, the Locales page offers you the opportunity toselect additional locales for which to install the software. Click the checkboxes for anyadditional locales for which you want to install. Then click Next.
The System Analysis page tells you if your system is missing any of the required OS patches.If you are running the multi-language installer, click More info, and then click Executeinstall_patches.sh now. The install_patches.sh utility runs in your terminal window. Whenit displays Execution finished, press Enter to exit the utility.
If you are running the English-only installer and you need to install these patches, you can do solater by running the install_patches.sh utility from the command line.
For a complete list of the valid command-line options when starting the install_patches.shutility, see “Command-Line Options for the install_patches.sh Utility” on page 37
The required OS patches must also be installed with the install_patches.sh utility on clientsystems that will use the Sun Studio 12 Update 1 software on a server. For more information, see“Installing the Required Solaris OS Patches” on page 22.
The Sun Studio Installer page gives you the option of selecting which components of the SunStudio software to install:
a. Click Next if you want to install all components of the software.
b. Click Customize if you want to select which components of the software to install. TheCustomize Installation dialog box lists the components and indicates which, if any,components are already installed. Click the checkbox for any component you do not want toinstall to remove the checkmark. Click OK, then click Next.
On the Sun Studio Installation page:
a. Specify a different installation directory if you do not want to install the software in thedefault installation directory /opt. If you already have some components of Sun Studio 12Update 1 software installed, the installer will install additional components only in the samedirectory.
b. By default, the installer creates symbolic links in the /usr/bindirectory and the/usr/share/mandirectory to the Sun Studio 12 Update 1 software and man pages. If youalready have symbolic links in /usr/bin and /usr/share/man to a previous Sun Studiorelease, the links to Sun Studio 12 Update 1 will replace them. If you do not want thesymbolic links created, or you do not want links to a previous release replaced, click thecheckbox to remove the checkmark. (If you already have the links to Sun Studio 12 Update 1installed, the checkbox is not displayed.)
3
4
5
6
7
Installing the Sun Studio Software
Chapter 2 • Installing the Sun Studio 12 Update 1 Software 19
On the Summary page, verify that the list of components to be installed is correct and that youhave adequate space on your system for installation. Then click Install to start the installation.
When the installation is complete, the Setup Complete page is displayed. Click Finish to exit theinstaller.
After installation, the installer opens a web browser and asks you to use your Sun OnlineAccount to register your copy of Sun Studio with the Sun Inventory. Registration is not required,but it allows you to organize your products in the Sun Inventory and receive timely informationfrom Sun. The installer also registers this copy of Sun Studio in your local Service Tags database(if this service is available).
If the Sun Studio 12 Update 1 is going to be used from client systems, then on each clientsystem, set the PATH and MANPATH to access the Sun Studio 12 Update 1 software and man pageson the server (see “Setting Up Access to the Developer Tools and Man Pages”on page 22).
If you installed the Sun Studio 12 Update 1 software on a single-user system, type the followingto determine whether you need to set up your access to the Sun Studio 12 Update 1 softwaretools and man pages:/usr/bin/version
a. If you receive the message /usr/bin/version: not found or the command reports anearlier version of Sun Studio software, see “Setting Up Access to the Developer Tools andMan Pages”on page 22 for information on setting your PATH and MANPATH to point to theSun Studio 12 Update 1 software.
b. If the command reports Sun Studio 12 Update 1 software, you do not need to set yourPATHand MANPATH.
Installing With the Non-GUI InstallerThe non-GUI installer installs all components of the Sun Studio 12 Update 1 software silently.For a complete list of the valid command-line options when starting the non-GUI installer, see“Command-Line Options for the Non-GUI Installer” on page 36.
▼ Using the Non-GUI Installer
If you are not currently superuser (root), become superuser by typing:su
Password: root-password
8
9
10
11
12
1
Installing the Sun Studio Software
Sun Studio 12 Update 1 Installation Guide • August 200920
In the directory that contains the installer, print the license agreement.
a. If you are using the multi-language installer, type:./SunStudio12u1-OS-platform-packages.sh --print-license
b. If you are using the English-only installer, do one of the following:If you are using the Bourne shell or Korn shell, type:./SunStudio12u1-OS-platform-packages.sh --print-license 2>&1 | more
If you are using the C shell, type:
./SunStudio12u1-OS-platform-packages.sh --print-license |& more
The installer displays startup messages and then prints the license agreement. Review thelicense agreement.
Accept the terms of the license agreement and start the installer by typing:./SunStudio12u1-OS-platform-packages.sh --non-interactive-accept-license
The installer runs silently and returns your prompt when installation is complete. It writes a logfile in the /root/.nbi/logs directory.
If the Sun Studio 12 Update 1 is going to be used from client systems, then on each clientsystem, set the PATH and MANPATH to access the Sun Studio 12 Update 1 software and man pageson the server (see “Setting Up Access to the Developer Tools and Man Pages”on page 22).
If you installed the Sun Studio 12 Update 1 software on a single-user system, type the followingto determine whether you need to set up your access to the Sun Studio 12 Update 1 softwaretools and man pages:/usr/bin/version
a. If you receive the message /usr/bin/version: not found or the command reports anearlier version of Sun Studio software, see “Setting Up Access to the Developer Tools andMan Pages”on page 22 for information on setting your PATH and MANPATH to point to theSun Studio 12 Update 1 software.
b. If the command reports Sun Studio 12 Update 1 software, you do not need to set your PATHand MANPATH.
2
3
4
5
6
Installing the Sun Studio Software
Chapter 2 • Installing the Sun Studio 12 Update 1 Software 21

Installing the Required Solaris OS PatchesSeveral operating system patches are required for the proper operation of the compilers andtools in the Sun Studio 12 Update 1 release on the Solaris OS. To install the required Solaris OSpatches, you can run the install_patches.sh utility that is included in the product download.
If you are running the GUI installer, the System Analysis page informs you if your system doesnot have the required OS patches. If you are running the multi-language GUI installer, you canrun the utility by clicking More info, and then clicking Execute install_patches.sh now. If youare running the English-only GUI installer, you can run the utility from the command line afteryou have finished installing the Sun Studio software and exited the installer.
If you are running the non-GUI installer, run the install_patches.sh utility after installationto ensure that your system has the required OS patches.
If you have installed the Sun Studio 12 Update 1 software on a server and it is going to be usedfrom client systems, then do the following:
1. On each client system, mount the directory on the server into which you downloaded thepackage installer.
mount server:filesystem download_directory
2. On each client system, run the install_patches.sh utility to install the required Solaris OSpatches.
Setting Up Access to the Developer Tools and Man PagesBecause the Sun Studio 12 Update 1 software product components and man pages are notinstalled into the system directories /usr/bin/ and /usr/share/man, you might need to changeyour PATH and MANPATH environment variables to enable use of the Sun Studio 12 Update 1software.
You do not need to change your paths if:■ You did not previously install Sun Studio 11 software or Sun Studio 12 software on your
system.■ The response to the command/usr/bin/version is Sun Studio 12 Update 1 software.
On Solaris platforms, add the path /installation_directory/sunstudio12.1/bin to your PATHenvironment variable. On Linux platforms, add the path/installation_directory/sun/sunstudio12.1/bin to your PATH environment variable. If youhave previous versions of Sun Studio, Sun ONE Studio, or Forte Developer software installed,add the path before the paths of the previous installations.
On Solaris platforms, add the path /installation_directory/sunstudio12.1/man/ to yourMANPATH environment variable. On Linux platforms, add the path/installation_directory/sun/sunstudio12.1/man/ to your MANPATH environment variable.
Installing the Required Solaris OS Patches
Sun Studio 12 Update 1 Installation Guide • August 200922
Starting the Sun Studio 12 Update 1 IDEOnce you have the Sun Studio 12 Update 1 software and the required OS patches installed, andhave added the software installation directory to your path, you can start using the software. Tostart the IDE, type the following:
sunstudio &
Note – The full path to the command is /installation_directory/sunstudio12.1/bin/sunstudioon Solaris systems, and /installation_directory/sun/sunstudio12.1/bin/sunstudio on Linuxplatforms.
Starting the Sun Studio 12 Update 1 IDE
Chapter 2 • Installing the Sun Studio 12 Update 1 Software 23

24
Uninstalling the Sun Studio 12 Update 1Software
This chapter includes information about the following:
■ “Uninstalling When Previous Releases of Sun Studio Software Are Installed” on page 25■ “Choosing Local Display or Remote Display of the Uninstaller” on page 25■ “Uninstalling the Software” on page 26
Uninstalling When Previous Releases of Sun Studio SoftwareAre Installed
I f you installed the Sun Studio 12 Update 1 software on a system that has previous Sun Studiosoftware installations, then only the Sun Studio 12 Update 1 is removed when you run theuninstaller. The uninstaller removes all of the installed product components.
Choosing Local Display or Remote Display of the UninstallerYou can display an uninstaller either locally or remotely while you are uninstalling Sun Studio12 Update 1 software.
▼ Preparing for Uninstallation Using a Remote DisplayOn the display computer, enable client access to the X server by typing the following on thecommand line:xhost + source-computer-name
Replace source-computer-name with the output of the /usr/bin/hostname command enteredon the source computer, which is the computer that contains the product CD-ROM ordownloaded files.
3C H A P T E R 3
1
25
Log in to the source computer and become a superuser (root).rlogin source-computer-name -l rootnamePassword: root-password
On the source computer, set the display to the monitor that is attached to the display computer.
If you use the C shell, type:setenv DISPLAY display-computer-name:n.n
If you use the Bourne shell, type:
DISPLAY=display-computer-name:n.nexport DISPLAY
If you use the Korn shell, type:
export DISPLAY=display-computer-name:n.n
Replace display-computer-name with the output of the /usr/bin/hostname entered on thedisplay computer.
Uninstalling the SoftwareYou can uninstall all of the installed components of the Sun Studio 12 Update 1 software usingthe graphical user interface uninstaller or the non-GUI uninstaller.
▼ Using the Graphical User Interface UninstallerIf you are not currently superuser (root), become superuser by typing:su
Password: root-password
Go to the installation directory, for example, /opt/sunstudio12.1.
Start the GUI uninstaller by typing:./uninstall.sh &
On the Summary page, click Uninstall to start the uninstallation.
When the uninstallation is complete, the Setup Complete page is displayed. Click Finish to exitthe uninstaller.
2
3
1
2
3
4
5
Uninstalling the Software
Sun Studio 12 Update 1 Installation Guide • August 200926
▼ Using the Non-GUI UninstallerIf you are not currently superuser (root), become superuser by typing:su
Password: root-password
Go to the installation directory, for example, /opt/sunstudio12.1.
Start the non-GUI uninstaller by typing:./uninstall.sh --non-interactive
The uninstaller runs silently and returns your prompt when uninstallation is complete.
1
2
3
4
Uninstalling the Software
Chapter 3 • Uninstalling the Sun Studio 12 Update 1 Software 27

28
Troubleshooting
This chapter describes how to fix problems that can occur during Sun Studio 12 Update 1installation and uninstallation.
The chapter includes information about the following:
■ “GUI Installer Will Fail If TMPDIR Points to Non World-Writable Directory” on page 29■ “GNOME Errors Might Occur When Starting GUI Installer” on page 30■ “Installer Lock File Might Prevent Installer From Starting” on page 30■ “Fixing a Failed Installation or Uninstallation” on page 30■ “Installation Will Fail on an NFS-Mounted Filesystem If Write Permission is Not Set” on
page 33■ “Viewing the Installation Log File” on page 33
GUI Installer Will Fail If TMPDIRPoints to Non World-WritableDirectory
If you choose to install the symbolic links to Sun Studio software in the /usr/bin and/usr/man/share directories, and your TMPDIR environment variable is pointing to a directorythat is not world-writable, then the GUI installer will fail to complete installation. To ensurethat this situation does not occur, unset your TMPDIR environment variable or set it to aworld-writable directory before starting the installer.
4C H A P T E R 4
29
GNOME Errors Might Occur When Starting GUI InstallerOn some systems, GNOME errors might occur when you start the GUI installer. If such errorsprevent the GUI installer from starting, use the non-GUI installer.
Installer Lock File Might Prevent Installer From StartingIf the installer is interrupted or quits without completing the installation, a lock file mightprevent you from restarting the installer. If you receive a message that an instance of theinstaller is already running when you try to start the installer, you might need to remove a lockfile from the /root/.nbi directory.
Fixing a Failed Installation or UninstallationOn Solaris platforms, the installer stores information on which Sun Studio 12 Update 1packages it has installed in two places:
■ The productregistry file, the Solaris Product Registry database■ The /root/.nbi directory
On Linux platforms, the installer stores information on which Sun Studio 12 Update 1 packagesit has installed in two places:
■ The database of installed packages■ The /root/.nbi directory
If some packages were not properly installed, you will have problems using the Sun Studiosoftware, and you might have problems installing additional components or uninstalling thesoftware.
For example, if the installer quit before installation was complete, the uninstaller(uninstall.sh) might not be present in your installation directory. Or if you used the pkgaddcommand to install any of the packages, the productregistry file or the product-cachedirectory in the /root/.nbi directory might be corrupted. In such cases, the uninstaller cannotuninstall the packages and you need to remove them in the correct way in order to be able torerun the installer.
If the uninstaller quits before all the product files are deleted, rerunning the uninstaller will notdelete the remaining files and you need to remove them in the correct way to complete theuninstallation of the product.
Do not uninstall the product by removing the installation directory. Packages will still beregistered in the productregistry database and the /root/.nbi directory, and the installerwill not run.
GNOME Errors Might Occur When Starting GUI Installer
Sun Studio 12 Update 1 Installation Guide • August 200930
▼ Using the Uninstallation Workaround Script to Fix aFailed Installation or UninstallationDownload the uninstallation workaround script tar file from the Sun Download Center into adirectory of your choice.
Unpack the file by typing:bzcat download_directory/sunstudio12u1_uninstaller.bash.tar.bz2 | /bin/tar -zf -
If you are not currently superuser (root), become superuser by typing:su
Password: root-password
Start the script by typing:./sunstudio12u1_uninstaller.bash
If the Sun Studio software you want to uninstall was installed in an alternate root location, startthe script with the -R option to specify the alternate root directory.
The script analyzes your system and locates all complete or partial installations of Sun Studio 12Update 1 software. For example, it might tell you that it has found the software in/opt/sunstudio12.1 because it finds package entries in the product registry even though youdo not see a sunstudio12.1directory in /opt.
The script asks you to confirm that you want to install the software it has located. If the script haslocated one installation, type yes to indicate that you want it to remove that installation. If it haslocated multiple installations, type the pathname of the installation you want it to remove.
The script executes pkgrm commands for all of the packages in the selected installation. Itautomatically interacts with pkgrm, answering yeswhen pkgrm asks for confirmation that apackage should be removed, so do not type ywhen you see questions from pkgrm.
The script informs you when all of the packages have been removed. Your Sun Studio 12 Update1 software has been successfully uninstalled and you can reinstall it if you wish.
▼ Manually Fixing a Failed Installation or Uninstallationon Solaris PlatformsBecome superuser by typing:su
Password: root-password
1
2
3
4
5
6
7
8
1
Fixing a Failed Installation or Uninstallation
Chapter 4 • Troubleshooting 31
Open the Solaris Product Registry tool by typing:/usr/bin/prodreg &
In the left pane of the tool, expand the Unclassified Software node.
Select all of the package names containing Sun Studio 12 Update 1 and click Uninstall. Followthe instructions to remove the packages.
Click Exit to exit the tool.
Remove the /root/.nbidirectory by typing:rm -r /.nbi
If you installed the Sun Studio 12 Update 1 IDE component, remove the NetBeans IDE 6.5.1 bygoing to the installation directory (by default, /opt/sunstudio12.1) and typing:rm -r netbeans
▼ Manually Fixing a Failed Installation or Uninstallationon Linux Platforms
Become superuser by typing:su
Password: root-password
Find all of the Sun Studio packages by typing:rpm -q -a | grep sun
Remove each Sun Studio 12 Update 1 rpm package by typing:rpm -e package-name
Sun Studio 12 Update 1 rpm packages have the suffix 12.1–1, for example, sun-cpl-12.1–1. Becareful not to remove packages from other Sun Studio releases, which have different suffixes.
Remove the /root/.nbidirectory by typing:rm -r /.nbi
If you installed the Sun Studio 12 Update 1 IDE component, remove the NetBeans IDE 6.5.1 bygoing to the installation directory (by default, /opt/sun/sunstudio12.1) and typing:rm -r netbeans
2
3
4
5
6
7
1
2
3
4
5
Fixing a Failed Installation or Uninstallation
Sun Studio 12 Update 1 Installation Guide • August 200932
Installation Will Fail on an NFS-Mounted Filesystem If WritePermission is Not Set
If installation fails on an NFS-mounted filesystem, ensure that you have write permission onthat filesystem. You can check for write permission by following these instructions. Forinformation about installing on an NFS-mounted filesystem, see “Installing to anNFS-Mounted Filesystem” on page 14.
1. Check for write permission by typing:
touch /net/remote-system/opt/testfile
If you receive an error message, then you do not have write permission. For example:
touch /net/harker/opt/testfile
touch: /net/harker/opt/testfile cannot create
2. Choose another installation directory on which you have write permission, or contact yoursystem administrator to change the filesystem permissions.
Viewing the Installation Log FileWhen you install the Sun Studio 12 Update 1 software, a log file that contains a record of theinstallation session is automatically generated. Log files are stored in the /root/.nbi/logsdirectory.
Viewing the Installation Log File
Chapter 4 • Troubleshooting 33

34
Command-Line Options for theInstaller,Uninstaller,and install_patches
Utility
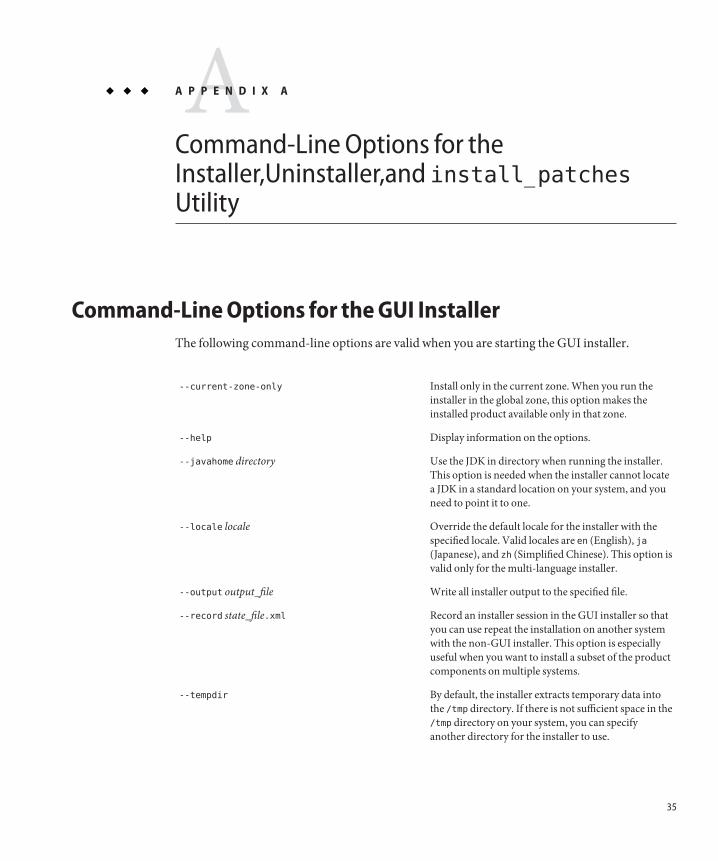
Command-Line Options for the GUI InstallerThe following command-line options are valid when you are starting the GUI installer.
--current-zone-only Install only in the current zone. When you run theinstaller in the global zone, this option makes theinstalled product available only in that zone.
--help Display information on the options.
--javahome directory Use the JDK in directory when running the installer.This option is needed when the installer cannot locatea JDK in a standard location on your system, and youneed to point it to one.
--locale locale Override the default locale for the installer with thespecified locale. Valid locales are en (English), ja(Japanese), and zh (Simplified Chinese). This option isvalid only for the multi-language installer.
--output output_file Write all installer output to the specified file.
--record state_file.xml Record an installer session in the GUI installer so thatyou can use repeat the installation on another systemwith the non-GUI installer. This option is especiallyuseful when you want to install a subset of the productcomponents on multiple systems.
--tempdir By default, the installer extracts temporary data intothe /tmp directory. If there is not sufficient space in the/tmp directory on your system, you can specifyanother directory for the installer to use.
AA P P E N D I X A
35
--use-alternate-root directory Install in the specified root directory instead of thedefault root directory /. Specify the full path of thedirectory to use as the alternate root. This option isvalid only on systems running the Solaris OS.
--verbose Write verbose output to the console.
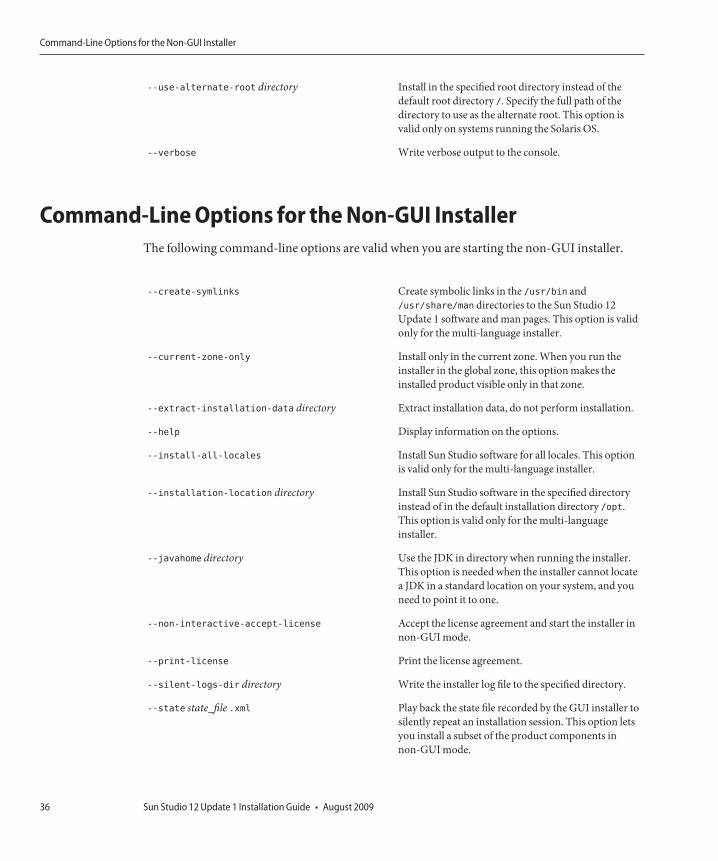
Command-Line Options for the Non-GUI InstallerThe following command-line options are valid when you are starting the non-GUI installer.
--create-symlinks Create symbolic links in the /usr/bin and/usr/share/man directories to the Sun Studio 12Update 1 software and man pages. This option is validonly for the multi-language installer.
--current-zone-only Install only in the current zone. When you run theinstaller in the global zone, this option makes theinstalled product visible only in that zone.
--extract-installation-data directory Extract installation data, do not perform installation.
--help Display information on the options.
--install-all-locales Install Sun Studio software for all locales. This optionis valid only for the multi-language installer.
--installation-location directory Install Sun Studio software in the specified directoryinstead of in the default installation directory /opt.This option is valid only for the multi-languageinstaller.
--javahome directory Use the JDK in directory when running the installer.This option is needed when the installer cannot locatea JDK in a standard location on your system, and youneed to point it to one.
--non-interactive-accept-license Accept the license agreement and start the installer innon-GUI mode.
--print-license Print the license agreement.
--silent-logs-dir directory Write the installer log file to the specified directory.
--state state_file .xml Play back the state file recorded by the GUI installer tosilently repeat an installation session. This option letsyou install a subset of the product components innon-GUI mode.
Command-Line Options for the Non-GUI Installer
Sun Studio 12 Update 1 Installation Guide • August 200936
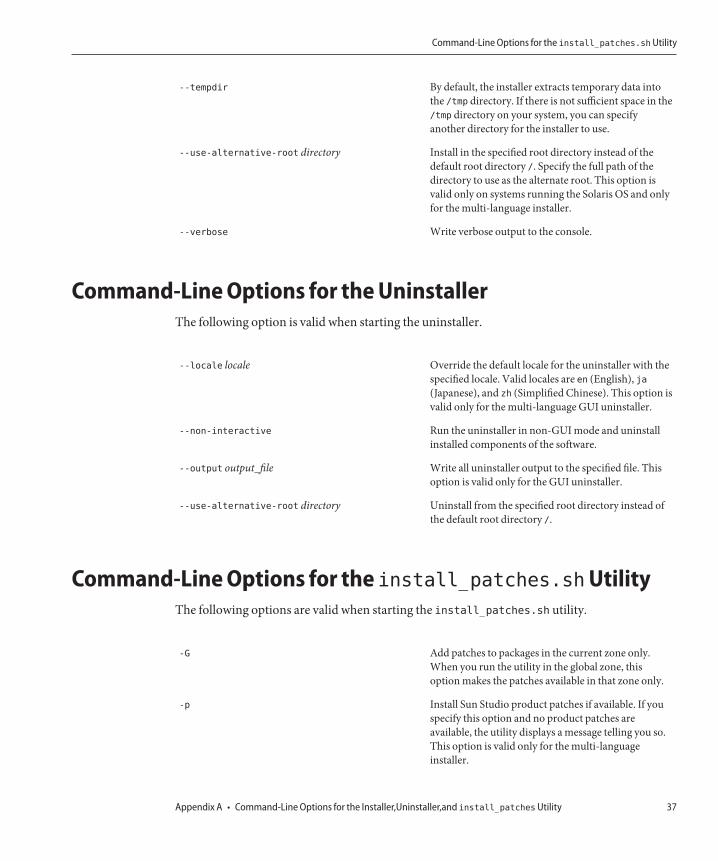
--tempdir By default, the installer extracts temporary data intothe /tmp directory. If there is not sufficient space in the/tmp directory on your system, you can specifyanother directory for the installer to use.
--use-alternative-root directory Install in the specified root directory instead of thedefault root directory /. Specify the full path of thedirectory to use as the alternate root. This option isvalid only on systems running the Solaris OS and onlyfor the multi-language installer.
--verbose Write verbose output to the console.
Command-Line Options for the UninstallerThe following option is valid when starting the uninstaller.
--locale locale Override the default locale for the uninstaller with thespecified locale. Valid locales are en (English), ja(Japanese), and zh (Simplified Chinese). This option isvalid only for the multi-language GUI uninstaller.
--non-interactive Run the uninstaller in non-GUI mode and uninstallinstalled components of the software.
--output output_file Write all uninstaller output to the specified file. Thisoption is valid only for the GUI uninstaller.
--use-alternative-root directory Uninstall from the specified root directory instead ofthe default root directory /.
Command-Line Options for the install_patches.shUtilityThe following options are valid when starting the install_patches.sh utility.
-G Add patches to packages in the current zone only.When you run the utility in the global zone, thisoption makes the patches available in that zone only.
-p Install Sun Studio product patches if available. If youspecify this option and no product patches areavailable, the utility displays a message telling you so.This option is valid only for the multi-languageinstaller.
Command-Line Options for the install_patches.shUtility
Appendix A • Command-Line Options for the Installer,Uninstaller,and install_patchesUtility 37
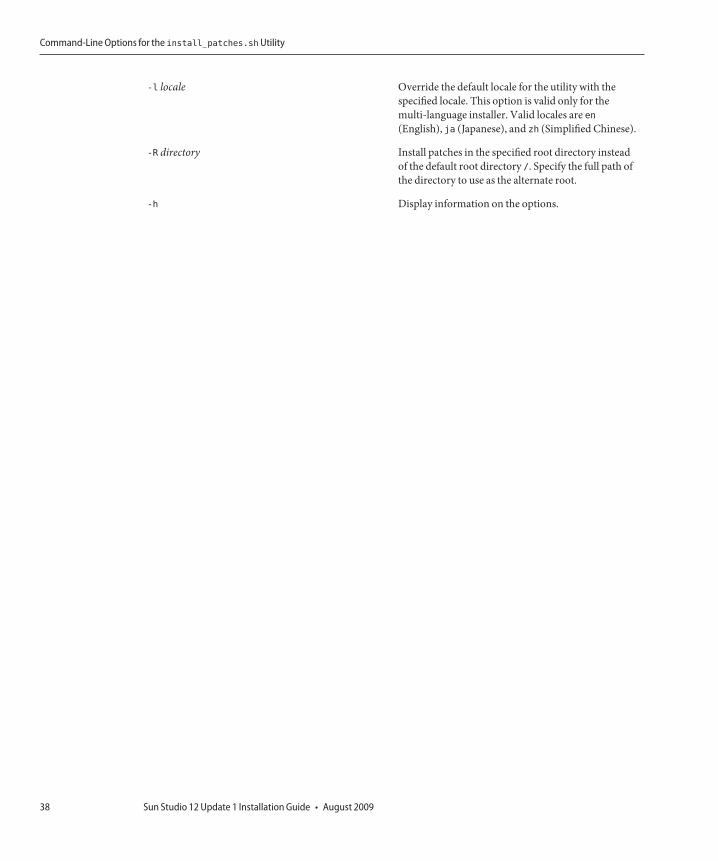
-l locale Override the default locale for the utility with thespecified locale. This option is valid only for themulti-language installer. Valid locales are en(English), ja (Japanese), and zh (Simplified Chinese).
-R directory Install patches in the specified root directory insteadof the default root directory /. Specify the full path ofthe directory to use as the alternate root.
-h Display information on the options.
Command-Line Options for the install_patches.shUtility
Sun Studio 12 Update 1 Installation Guide • August 200938
Adding Swap Space
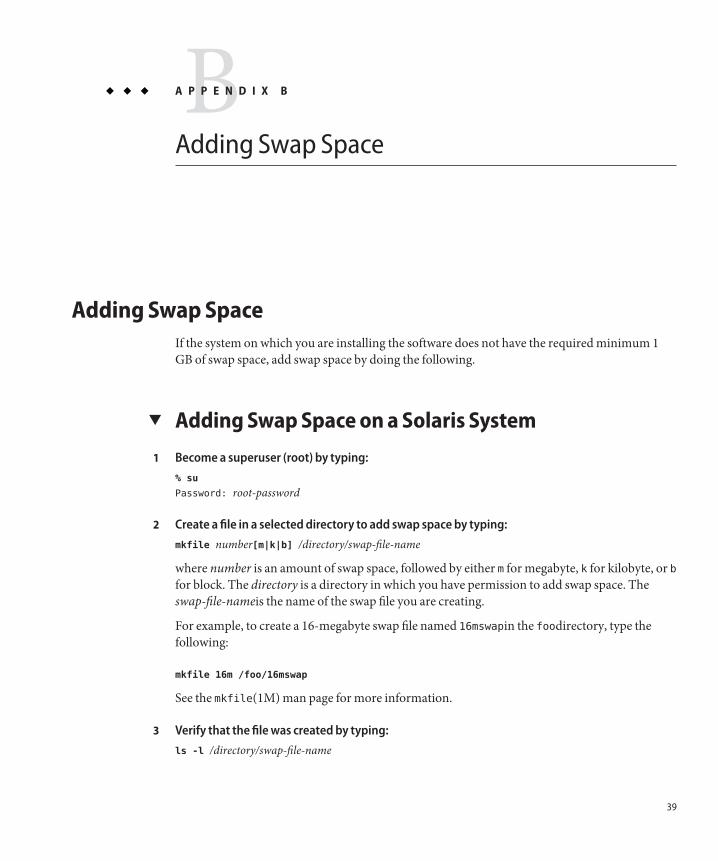
Adding Swap SpaceIf the system on which you are installing the software does not have the required minimum 1GB of swap space, add swap space by doing the following.
▼ Adding Swap Space on a Solaris SystemBecome a superuser (root) by typing:% su
Password: root-password
Create a file in a selected directory to add swap space by typing:mkfile number[m|k|b] /directory/swap-file-name
where number is an amount of swap space, followed by either m for megabyte, k for kilobyte, or bfor block. The directory is a directory in which you have permission to add swap space. Theswap-file-nameis the name of the swap file you are creating.
For example, to create a 16-megabyte swap file named 16mswapin the foodirectory, type thefollowing:
mkfile 16m /foo/16mswap
See the mkfile(1M) man page for more information.
Verify that the file was created by typing:ls -l /directory/swap-file-name
BA P P E N D I X B
1
2
3
39
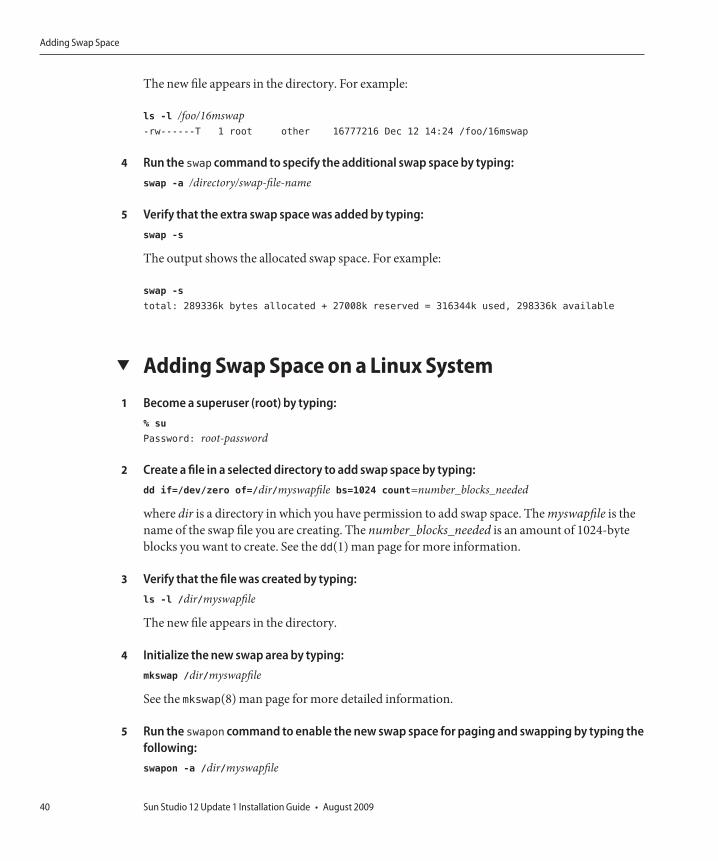
The new file appears in the directory. For example:
ls -l /foo/16mswap-rw------T 1 root other 16777216 Dec 12 14:24 /foo/16mswap
Run the swap command to specify the additional swap space by typing:swap -a /directory/swap-file-name
Verify that the extra swap space was added by typing:swap -s
The output shows the allocated swap space. For example:
swap -s
total: 289336k bytes allocated + 27008k reserved = 316344k used, 298336k available
▼ Adding Swap Space on a Linux SystemBecome a superuser (root) by typing:% su
Password: root-password
Create a file in a selected directory to add swap space by typing:dd if=/dev/zero of=/dir/myswapfile bs=1024 count=number_blocks_needed
where dir is a directory in which you have permission to add swap space. The myswapfile is thename of the swap file you are creating. The number_blocks_needed is an amount of 1024-byteblocks you want to create. See the dd(1) man page for more information.
Verify that the file was created by typing:ls -l /dir/myswapfile
The new file appears in the directory.
Initialize the new swap area by typing:mkswap /dir/myswapfile
See the mkswap(8) man page for more detailed information.
Run the swapon command to enable the new swap space for paging and swapping by typing thefollowing:swapon -a /dir/myswapfile
4
5
1
2
3
4
5
Adding Swap Space
Sun Studio 12 Update 1 Installation Guide • August 200940
Verify that the extra swap space was added by typing:swapon -s
The output shows the allocated swap space.
6
Adding Swap Space
Appendix B • Adding Swap Space 41

42
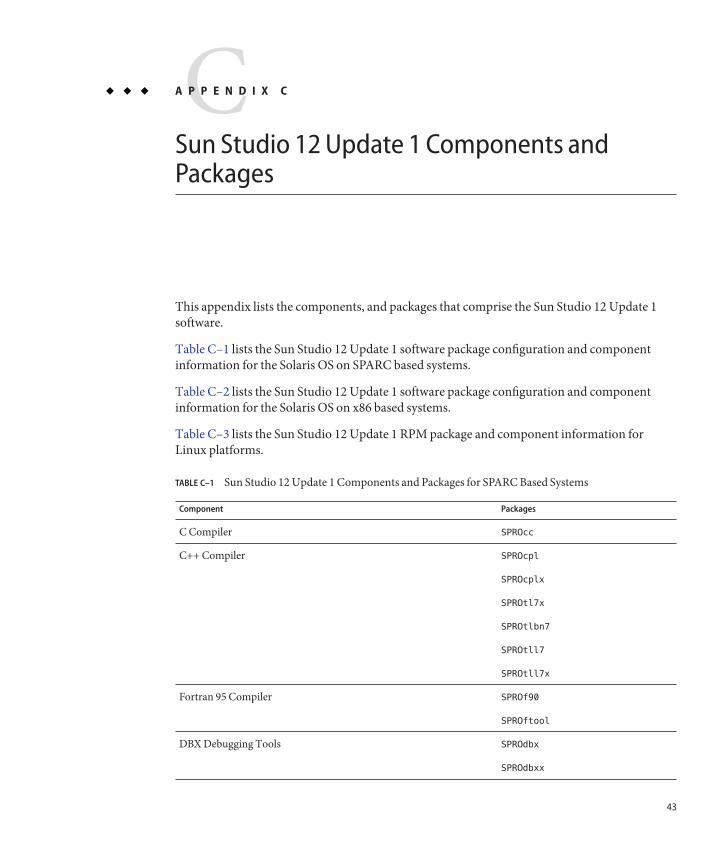
Sun Studio 12 Update 1 Components andPackages
This appendix lists the components, and packages that comprise the Sun Studio 12 Update 1software.
Table C–1 lists the Sun Studio 12 Update 1 software package configuration and componentinformation for the Solaris OS on SPARC based systems.
Table C–2 lists the Sun Studio 12 Update 1 software package configuration and componentinformation for the Solaris OS on x86 based systems.
Table C–3 lists the Sun Studio 12 Update 1 RPM package and component information forLinux platforms.
TABLE C–1 Sun Studio 12 Update 1 Components and Packages for SPARC Based Systems
Component Packages
C Compiler SPROcc
C++ Compiler SPROcpl
SPROcplx
SPROtl7x
SPROtlbn7
SPROtll7
SPROtll7x
Fortran 95 Compiler SPROf90
SPROftool
DBX Debugging Tools SPROdbx
SPROdbxx
CA P P E N D I X C
43
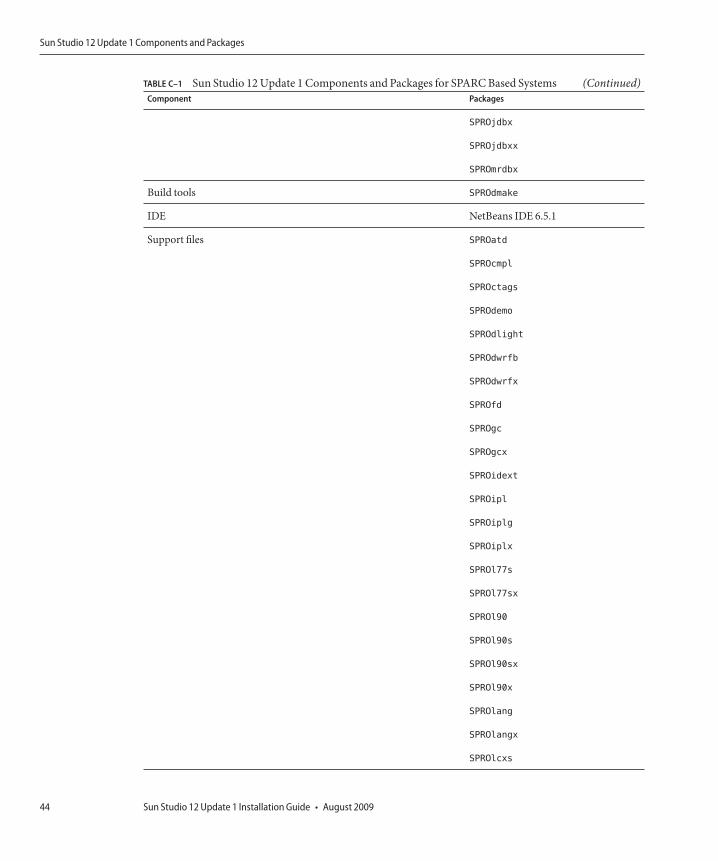
TABLE C–1 Sun Studio 12 Update 1 Components and Packages for SPARC Based Systems (Continued)Component Packages
SPROjdbx
SPROjdbxx
SPROmrdbx
Build tools SPROdmake
IDE NetBeans IDE 6.5.1
Support files SPROatd
SPROcmpl
SPROctags
SPROdemo
SPROdlight
SPROdwrfb
SPROdwrfx
SPROfd
SPROgc
SPROgcx
SPROidext
SPROipl
SPROiplg
SPROiplx
SPROl77s
SPROl77sx
SPROl90
SPROl90s
SPROl90sx
SPROl90x
SPROlang
SPROlangx
SPROlcxs
Sun Studio 12 Update 1 Components and Packages
Sun Studio 12 Update 1 Installation Guide • August 200944
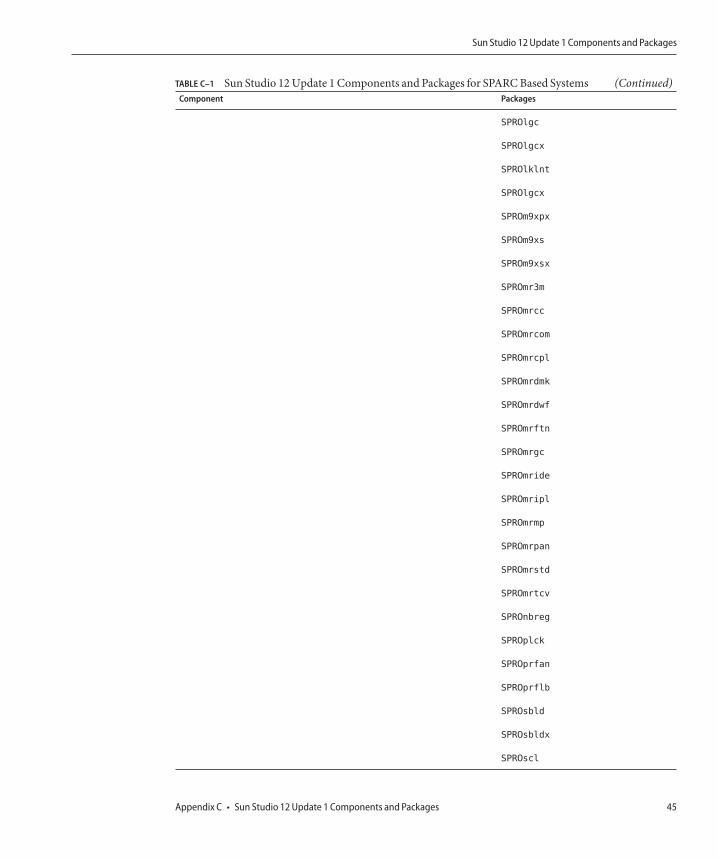
TABLE C–1 Sun Studio 12 Update 1 Components and Packages for SPARC Based Systems (Continued)Component Packages
SPROlgc
SPROlgcx
SPROlklnt
SPROlgcx
SPROm9xpx
SPROm9xs
SPROm9xsx
SPROmr3m
SPROmrcc
SPROmrcom
SPROmrcpl
SPROmrdmk
SPROmrdwf
SPROmrftn
SPROmrgc
SPROmride
SPROmripl
SPROmrmp
SPROmrpan
SPROmrstd
SPROmrtcv
SPROnbreg
SPROplck
SPROprfan
SPROprflb
SPROsbld
SPROsbldx
SPROscl
Sun Studio 12 Update 1 Components and Packages
Appendix C • Sun Studio 12 Update 1 Components and Packages 45
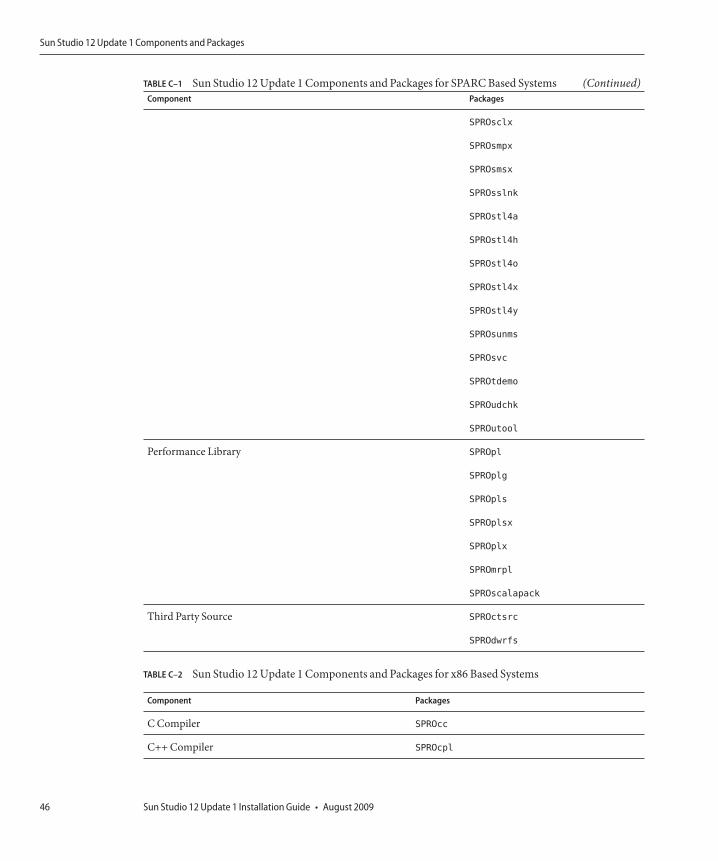
TABLE C–1 Sun Studio 12 Update 1 Components and Packages for SPARC Based Systems (Continued)Component Packages
SPROsclx
SPROsmpx
SPROsmsx
SPROsslnk
SPROstl4a
SPROstl4h
SPROstl4o
SPROstl4x
SPROstl4y
SPROsunms
SPROsvc
SPROtdemo
SPROudchk
SPROutool
Performance Library SPROpl
SPROplg
SPROpls
SPROplsx
SPROplx
SPROmrpl
SPROscalapack
Third Party Source SPROctsrc
SPROdwrfs
TABLE C–2 Sun Studio 12 Update 1 Components and Packages for x86 Based Systems
Component Packages
C Compiler SPROcc
C++ Compiler SPROcpl
Sun Studio 12 Update 1 Components and Packages
Sun Studio 12 Update 1 Installation Guide • August 200946
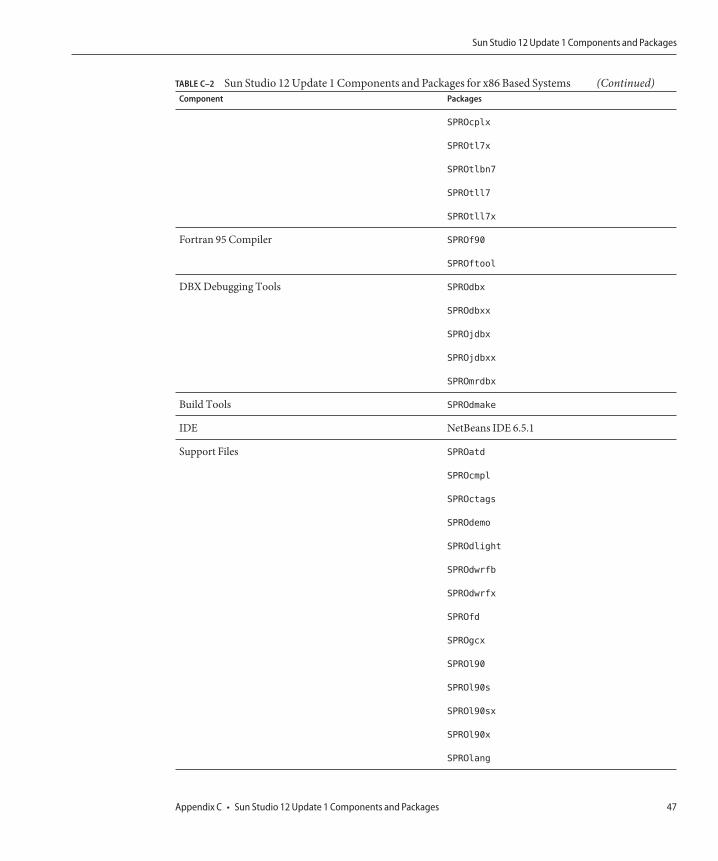
TABLE C–2 Sun Studio 12 Update 1 Components and Packages for x86 Based Systems (Continued)Component Packages
SPROcplx
SPROtl7x
SPROtlbn7
SPROtll7
SPROtll7x
Fortran 95 Compiler SPROf90
SPROftool
DBX Debugging Tools SPROdbx
SPROdbxx
SPROjdbx
SPROjdbxx
SPROmrdbx
Build Tools SPROdmake
IDE NetBeans IDE 6.5.1
Support Files SPROatd
SPROcmpl
SPROctags
SPROdemo
SPROdlight
SPROdwrfb
SPROdwrfx
SPROfd
SPROgcx
SPROl90
SPROl90s
SPROl90sx
SPROl90x
SPROlang
Sun Studio 12 Update 1 Components and Packages
Appendix C • Sun Studio 12 Update 1 Components and Packages 47
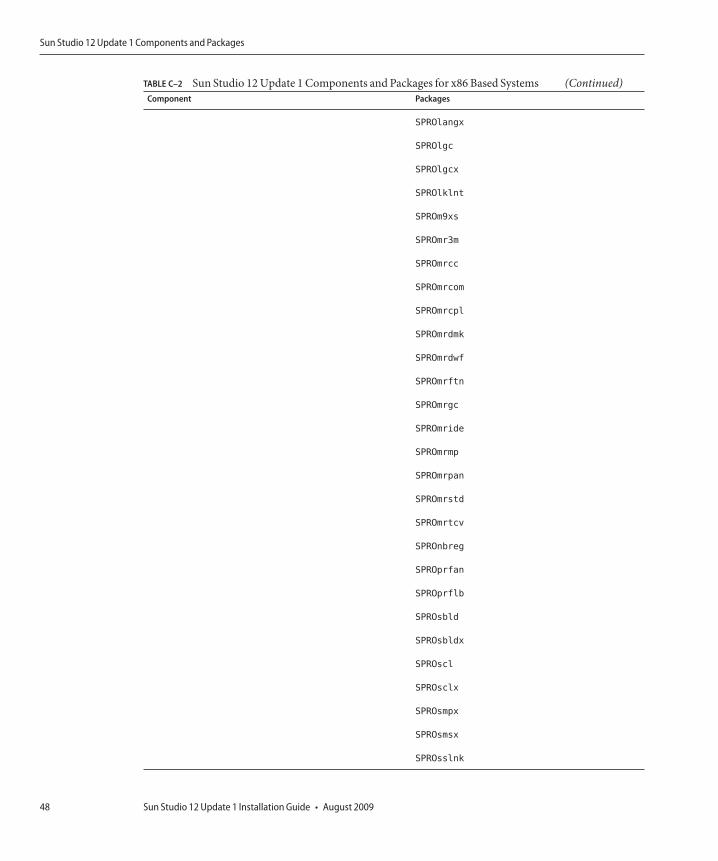
TABLE C–2 Sun Studio 12 Update 1 Components and Packages for x86 Based Systems (Continued)Component Packages
SPROlangx
SPROlgc
SPROlgcx
SPROlklnt
SPROm9xs
SPROmr3m
SPROmrcc
SPROmrcom
SPROmrcpl
SPROmrdmk
SPROmrdwf
SPROmrftn
SPROmrgc
SPROmride
SPROmrmp
SPROmrpan
SPROmrstd
SPROmrtcv
SPROnbreg
SPROprfan
SPROprflb
SPROsbld
SPROsbldx
SPROscl
SPROsclx
SPROsmpx
SPROsmsx
SPROsslnk
Sun Studio 12 Update 1 Components and Packages
Sun Studio 12 Update 1 Installation Guide • August 200948
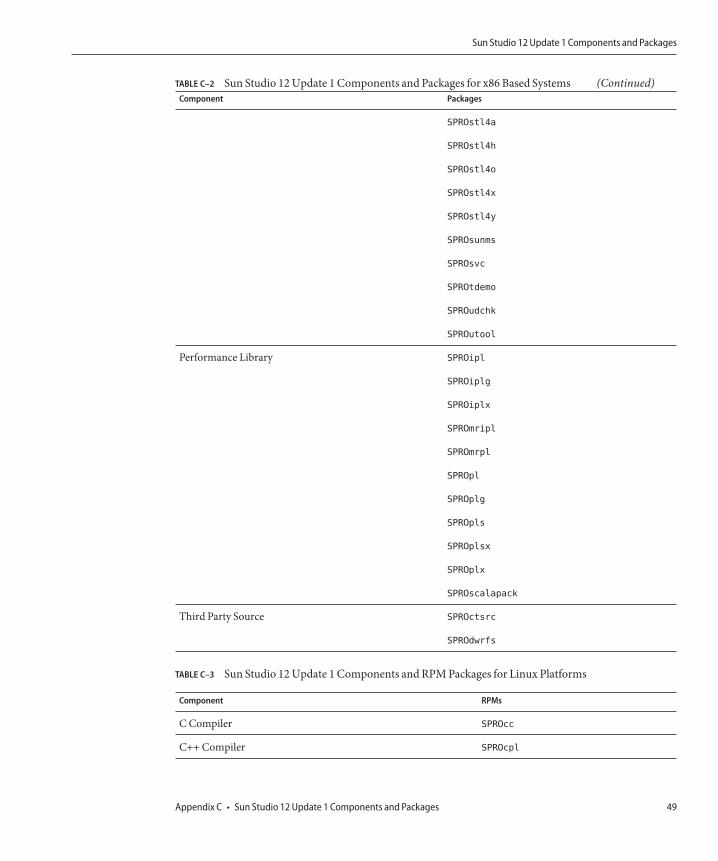
TABLE C–2 Sun Studio 12 Update 1 Components and Packages for x86 Based Systems (Continued)Component Packages
SPROstl4a
SPROstl4h
SPROstl4o
SPROstl4x
SPROstl4y
SPROsunms
SPROsvc
SPROtdemo
SPROudchk
SPROutool
Performance Library SPROipl
SPROiplg
SPROiplx
SPROmripl
SPROmrpl
SPROpl
SPROplg
SPROpls
SPROplsx
SPROplx
SPROscalapack
Third Party Source SPROctsrc
SPROdwrfs
TABLE C–3 Sun Studio 12 Update 1 Components and RPM Packages for Linux Platforms
Component RPMs
C Compiler SPROcc
C++ Compiler SPROcpl
Sun Studio 12 Update 1 Components and Packages
Appendix C • Sun Studio 12 Update 1 Components and Packages 49
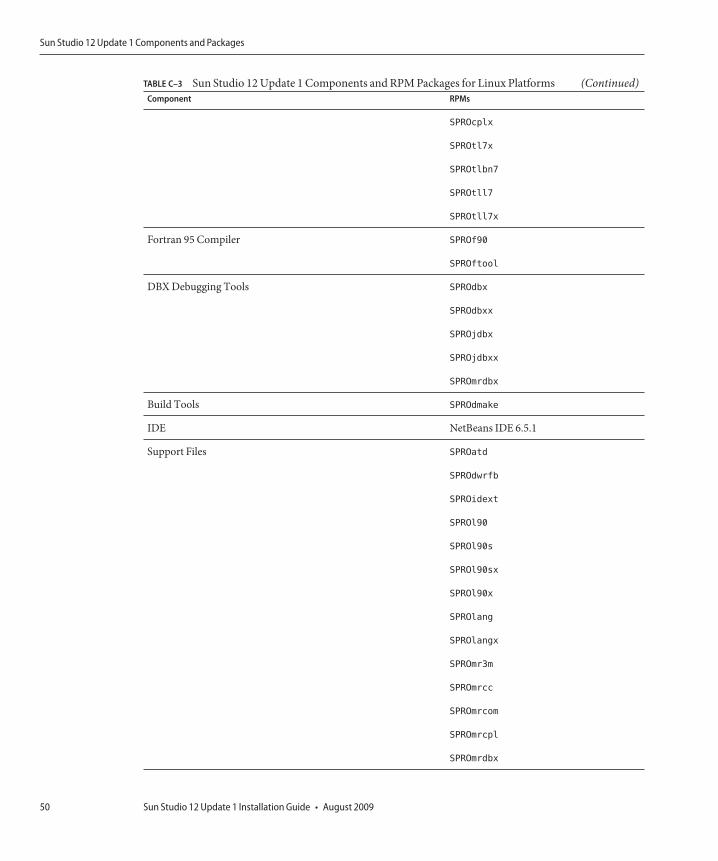
TABLE C–3 Sun Studio 12 Update 1 Components and RPM Packages for Linux Platforms (Continued)Component RPMs
SPROcplx
SPROtl7x
SPROtlbn7
SPROtll7
SPROtll7x
Fortran 95 Compiler SPROf90
SPROftool
DBX Debugging Tools SPROdbx
SPROdbxx
SPROjdbx
SPROjdbxx
SPROmrdbx
Build Tools SPROdmake
IDE NetBeans IDE 6.5.1
Support Files SPROatd
SPROdwrfb
SPROidext
SPROl90
SPROl90s
SPROl90sx
SPROl90x
SPROlang
SPROlangx
SPROmr3m
SPROmrcc
SPROmrcom
SPROmrcpl
SPROmrdbx
Sun Studio 12 Update 1 Components and Packages
Sun Studio 12 Update 1 Installation Guide • August 200950
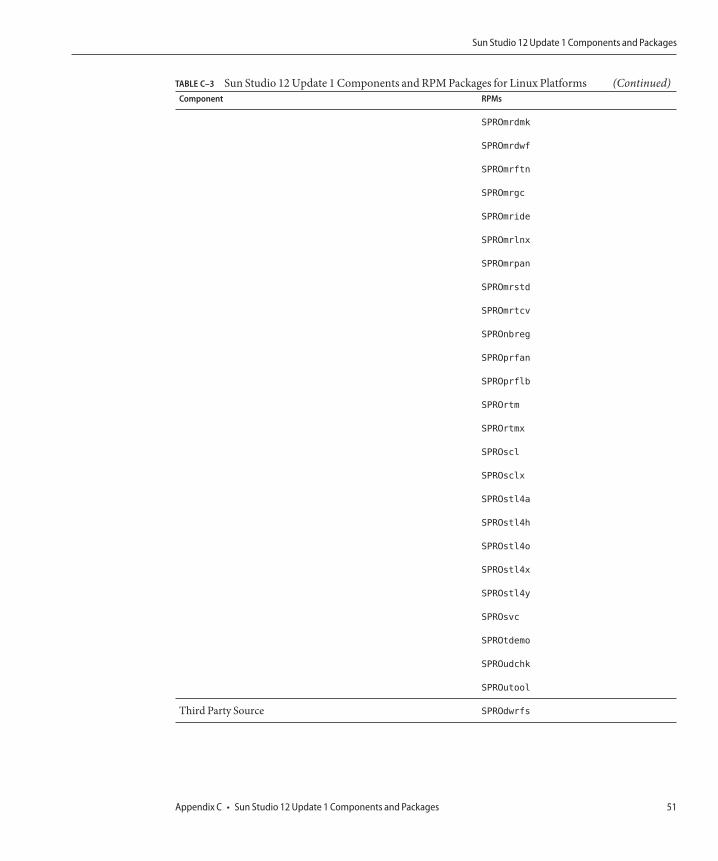
TABLE C–3 Sun Studio 12 Update 1 Components and RPM Packages for Linux Platforms (Continued)Component RPMs
SPROmrdmk
SPROmrdwf
SPROmrftn
SPROmrgc
SPROmride
SPROmrlnx
SPROmrpan
SPROmrstd
SPROmrtcv
SPROnbreg
SPROprfan
SPROprflb
SPROrtm
SPROrtmx
SPROscl
SPROsclx
SPROstl4a
SPROstl4h
SPROstl4o
SPROstl4x
SPROstl4y
SPROsvc
SPROtdemo
SPROudchk
SPROutool
Third Party Source SPROdwrfs
Sun Studio 12 Update 1 Components and Packages
Appendix C • Sun Studio 12 Update 1 Components and Packages 51

52
Patch Identification Numbers and Descriptions
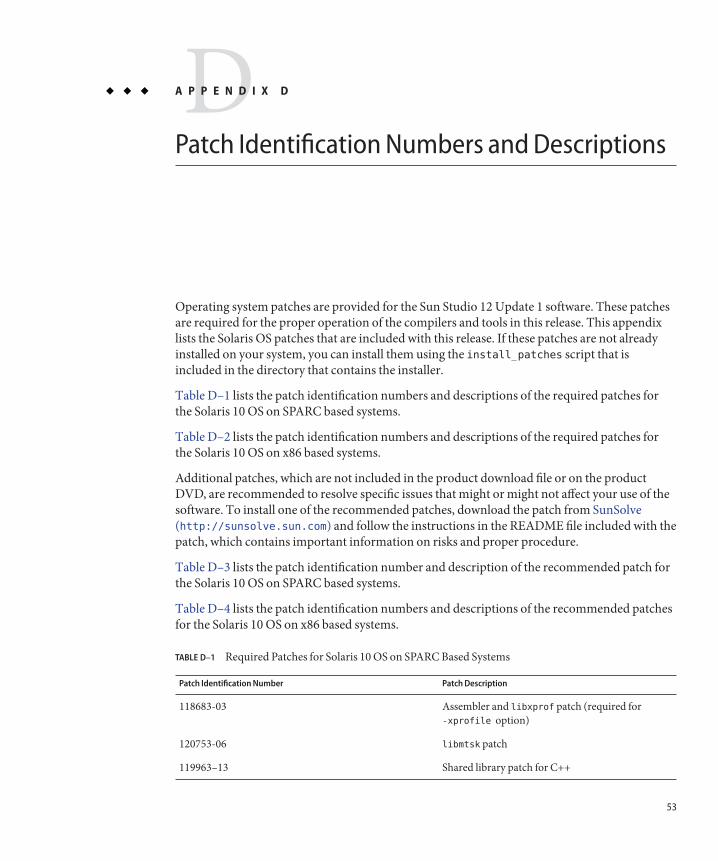
Operating system patches are provided for the Sun Studio 12 Update 1 software. These patchesare required for the proper operation of the compilers and tools in this release. This appendixlists the Solaris OS patches that are included with this release. If these patches are not alreadyinstalled on your system, you can install them using the install_patches script that isincluded in the directory that contains the installer.
Table D–1 lists the patch identification numbers and descriptions of the required patches forthe Solaris 10 OS on SPARC based systems.
Table D–2 lists the patch identification numbers and descriptions of the required patches forthe Solaris 10 OS on x86 based systems.
Additional patches, which are not included in the product download file or on the productDVD, are recommended to resolve specific issues that might or might not affect your use of thesoftware. To install one of the recommended patches, download the patch from SunSolve(http://sunsolve.sun.com) and follow the instructions in the README file included with thepatch, which contains important information on risks and proper procedure.
Table D–3 lists the patch identification number and description of the recommended patch forthe Solaris 10 OS on SPARC based systems.
Table D–4 lists the patch identification numbers and descriptions of the recommended patchesfor the Solaris 10 OS on x86 based systems.
TABLE D–1 Required Patches for Solaris 10 OS on SPARC Based Systems
Patch Identification Number Patch Description
118683-03 Assembler and libxprof patch (required for-xprofile option)
120753-06 libmtsk patch
119963–13 Shared library patch for C++
DA P P E N D I X D
53
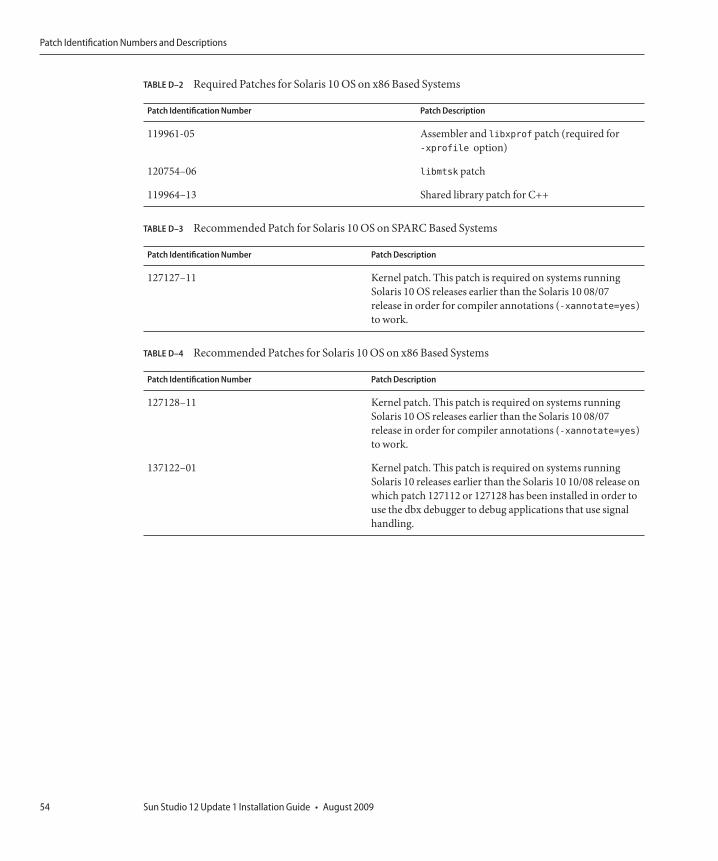
TABLE D–2 Required Patches for Solaris 10 OS on x86 Based Systems
Patch Identification Number Patch Description
119961-05 Assembler and libxprof patch (required for-xprofile option)
120754–06 libmtsk patch
119964–13 Shared library patch for C++
TABLE D–3 Recommended Patch for Solaris 10 OS on SPARC Based Systems
Patch Identification Number Patch Description
127127–11 Kernel patch. This patch is required on systems runningSolaris 10 OS releases earlier than the Solaris 10 08/07release in order for compiler annotations (-xannotate=yes)to work.
TABLE D–4 Recommended Patches for Solaris 10 OS on x86 Based Systems
Patch Identification Number Patch Description
127128–11 Kernel patch. This patch is required on systems runningSolaris 10 OS releases earlier than the Solaris 10 08/07release in order for compiler annotations (-xannotate=yes)to work.
137122–01 Kernel patch. This patch is required on systems runningSolaris 10 releases earlier than the Solaris 10 10/08 release onwhich patch 127112 or 127128 has been installed in order touse the dbx debugger to debug applications that use signalhandling.
Patch Identification Numbers and Descriptions
Sun Studio 12 Update 1 Installation Guide • August 200954
Version Numbers of the Sun Studio 12 Update 1Components
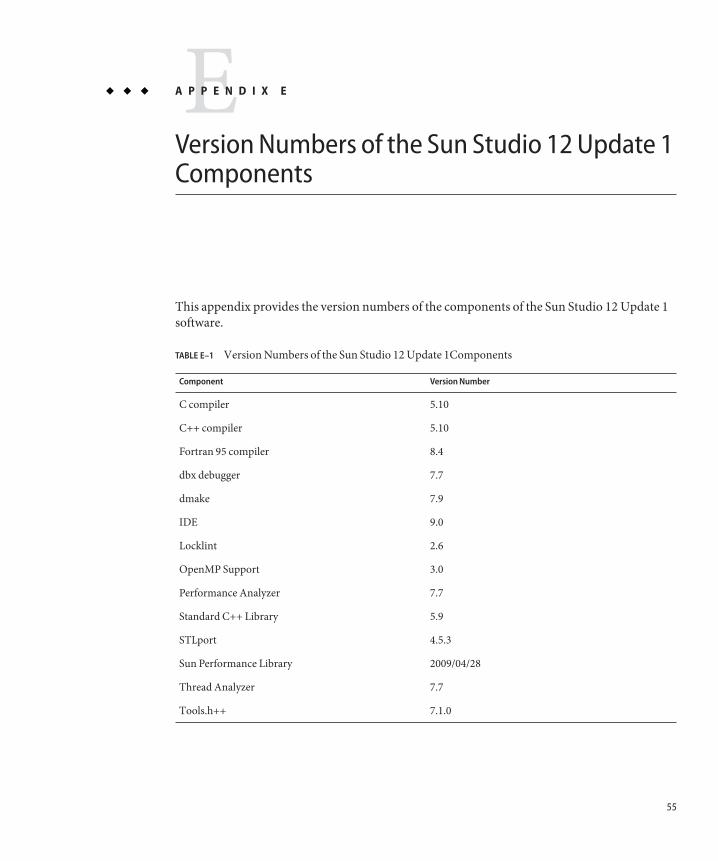
This appendix provides the version numbers of the components of the Sun Studio 12 Update 1software.
TABLE E–1 Version Numbers of the Sun Studio 12 Update 1Components
Component Version Number
C compiler 5.10
C++ compiler 5.10
Fortran 95 compiler 8.4
dbx debugger 7.7
dmake 7.9
IDE 9.0
Locklint 2.6
OpenMP Support 3.0
Performance Analyzer 7.7
Standard C++ Library 5.9
STLport 4.5.3
Sun Performance Library 2009/04/28
Thread Analyzer 7.7
Tools.h++ 7.1.0
EA P P E N D I X E
55

56
Index
Aaccessible documentation, 9-10alternate root directory, installing in, 18
Ccommand-line options
for GUI installer, 35for non-GUI installer, 36for uninstaller, 37
components, information on, 43
Ddisplay
local, of installer, 13local, of uninstaller, 25remote, of installer, 13remote, of uninstaller, 25
display computer, 13documentation, accessing, 9-10documentation index, 9
Ggraphical user interface installer
failure if TMPDIR points to non world-writabledirectory, 29
GNOME errors when starting, 30using, 18
graphical user interface uninstaller, using, 26
IIDE, starting, 23installation
customizing, 19failed, fixing, 30
on Linux platforms, 32on Solaris platforms, 31
failure on NFS-mounted filesystem, 33overview, 11
installation log file, 33installation method, choosing, 16installer lock file, 30installing
in a zone, 18in an alternate root directory, 18on a server for use by clients with the same
architecture, 17on a single-user system, 17on multiple systems, 18required OS patches on a client, 22required OS patches on a server, 22symbolic links, 19using a local display, 13using a remote display, 13
57
Llocal display
of installer, 13of uninstaller, 25
Mman pages, accessing, 22MANPATH environment variable, setting, 22
NNFS-mounted filesystem, installing to, 14non-GUI installer, using, 20non-GUI uninstaller, using, 27
Ppackages, information on, 43patches, operating system, required by the Sun Studio
12 Update 1 software, 53PATH environment variable, setting, 22previous Sun Studio releases, supporting, 15productregistry file, 30
Rremote display
of installer, 13of uninstaller, 25
/root/.nbi directory, 30
Sserver, installing on for use by clients with the same
architecture, 17single-user system, installing on, 17source computer, 13Sun Studio compilers and tools, accessing, 22swap space, checking, 39
symbolic links, installing, 19system requirements, 12-13
Uuninstallation, failed, fixing, 30
on Linux platforms, 32on Solaris platforms, 31
uninstalling, using remote display, 25
Vversion numbers of the components, 55
Zzone, installing in, 18
Index
Sun Studio 12 Update 1 Installation Guide • August 200958