Embed Size (px)
Citation preview
HANDcraft
SoapMaking Kit
We are providing you with a Kit that will make soap. Not just any soap, but soap that is good for you, your family and loved ones. We are also providing you with an opportunity to participate in an adventure that may change your life or …..simply enhance your life. It changed ours, look at our site. We started in a kitchen, probably much like yours. To your Adventure….Ron & Debi.
2
Table of Contents
Our Contact Information:
Willow Way, LLC
12873 W. E. Oler Road
Hagerstown, IN 47346
Sales & Tech Support:
765-530-0307
(870) 429-8230
Shipping:
765-530-0304
E-Mail:
Website:
http://soapequipment.com
Copyright © 1996-2010 Willow Way, LLC. All rights reserved Worldwide
Utensils, Equipment and Recipe 3
Instructions for Cold Process Soapmaking 4-8
Useful Links 9
Helpful Soapmaking Books 10
Soapmaking Suppliers 11
Product Overviews 12

3
Soap Recipe
Single Loaf Mold
Ingredients Ounces Grams
Soybean Oil (Shortening) 13.72 389.0
Coconut Oil 9.14 259.1
Olive Oil 9.14 259.1
Sodium Hydroxide (5% discount) 4.50 127.60
Water 10 283.5
Essential Oil (EO) 1.0 28.4
Total Batch Weight* 47.5 1346.7
Calculated by SoapMaker 3 Software
The Oils and Lye/Water solution included in your HANDcraft SoapMaking Kit have been pre-measured and labeled
labeled based upon the recipe below.
See the Supplier List on page 11 to order more of these quality ingredients, as we do not offer refill kits.
Materials provided with your HANDcraft SoapMaking Kit:
Oils – Olive, Soybean (Shortening), and Coconut
Lye / Water Solution
Soap Mold
Liner Paper
Safety Goggles
Nitrile Gloves
Thermometer
Smooth Blade (optional)
Soap Cutter Box (optional)
Additional Materials Needed:
Glass or Stainless Steel Mixing Bowl. A polypropylene or
polyethylene plastic Tub or Bowl will also work well.
Mixing Tools
Long handled wooden or stainless steel spoon,
Power Wand (stick blender) or
Hand Mixer, Kitchen Aid or similar type Mixer
Small Spatula for smoothing top of soap
Small amount of shortening to grease your Mold so your
Liner Paper will stick
Large, thick bath towel or blanket to wrap your Mold
Paper towels or hand towels
Sharp Knife
Remember, this kit is intended for adult use. Not intended for children.
4
Instructions for Cold Process SoapMaking
General:
Set aside an hour or so (for your first batch) of uninterrupted time.
Read through the instructions thoroughly before beginning.
Make sure to wear the provided Nitrile Gloves (Do not use latex)
and Safety Goggles. See this page for information about safety
equipment: http://soapequipment.com/safetyequipment/
Instructions for Heating the Provided Oils and Lye/Water Solution:
Start with your Oils and Lye/Water Solution at room temperature.
Fill your kitchen sink about half full of hot tap water to make a water
bath to heat your Oils and Lye/Water Solution.
Using the provided thermometer, take the temperature of your wa-
ter bath. The water should be around 120 F (49 C).
Remove your Lye/Water bottle from the protective tube it is in.
Remove the tape seal from the Oils and Lye/Water Solution Con-
tainers.
Now place the closed containers of your Oils and Lye/Water into
the water bath to heat. Let them lay on their sides, this will allow
them to heat faster.
Wait 6 minutes. Gently shake the container of Oil and take the tem-
perature. Your ideal temperature will be 90°F (32 C).
You need not bother taking the Lye/Water Solution temperature. If
your oil is up to temperature, then so will your Lye/Water Solution
(note: it will be a few degrees higher).
If you need to heat the Oil a little longer, be sure to replace the cap
tightly before returning to the water bath.
Be sure to wear your Safety Goggles and Nitrile Gloves whenever
handling the open container of the Lye/Water Solution.
This solution is caustic and hot so be careful. Keep away from Chil-
dren and Pets. Should you for any reason accidently splash it on
you, flush with lots of running water immediately.
While waiting for your ingredients to come to the proper temperature is
a good time to line and assemble your Mold. Follow the instructions on
the next two pages for lining and assembling your Mold.
Soapmaking instructions continued on page 7...
5
Instructions for Cold Process SoapMaking continued...
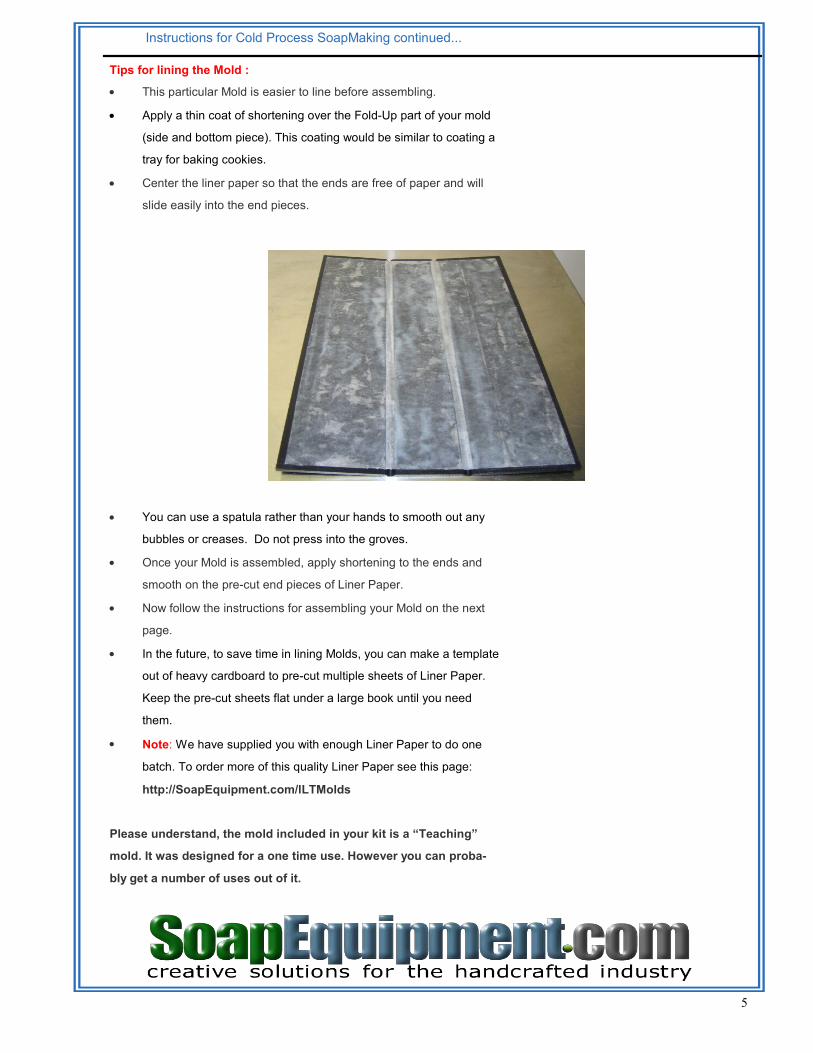
Tips for lining the Mold :
This particular Mold is easier to line before assembling.
Apply a thin coat of shortening over the Fold-Up part of your mold
(side and bottom piece). This coating would be similar to coating a
tray for baking cookies.
Center the liner paper so that the ends are free of paper and will
slide easily into the end pieces.
You can use a spatula rather than your hands to smooth out any
bubbles or creases. Do not press into the groves.
Once your Mold is assembled, apply shortening to the ends and
smooth on the pre-cut end pieces of Liner Paper.
Now follow the instructions for assembling your Mold on the next
page.
In the future, to save time in lining Molds, you can make a template
out of heavy cardboard to pre-cut multiple sheets of Liner Paper.
Keep the pre-cut sheets flat under a large book until you need
them.
Note: We have supplied you with enough Liner Paper to do one
batch. To order more of this quality Liner Paper see this page:
http://SoapEquipment.com/lLTMolds
Please understand, the mold included in your kit is a “Teaching”
mold. It was designed for a one time use. However you can proba-
bly get a number of uses out of it.
6
Instructions for Cold Process SoapMaking continued...
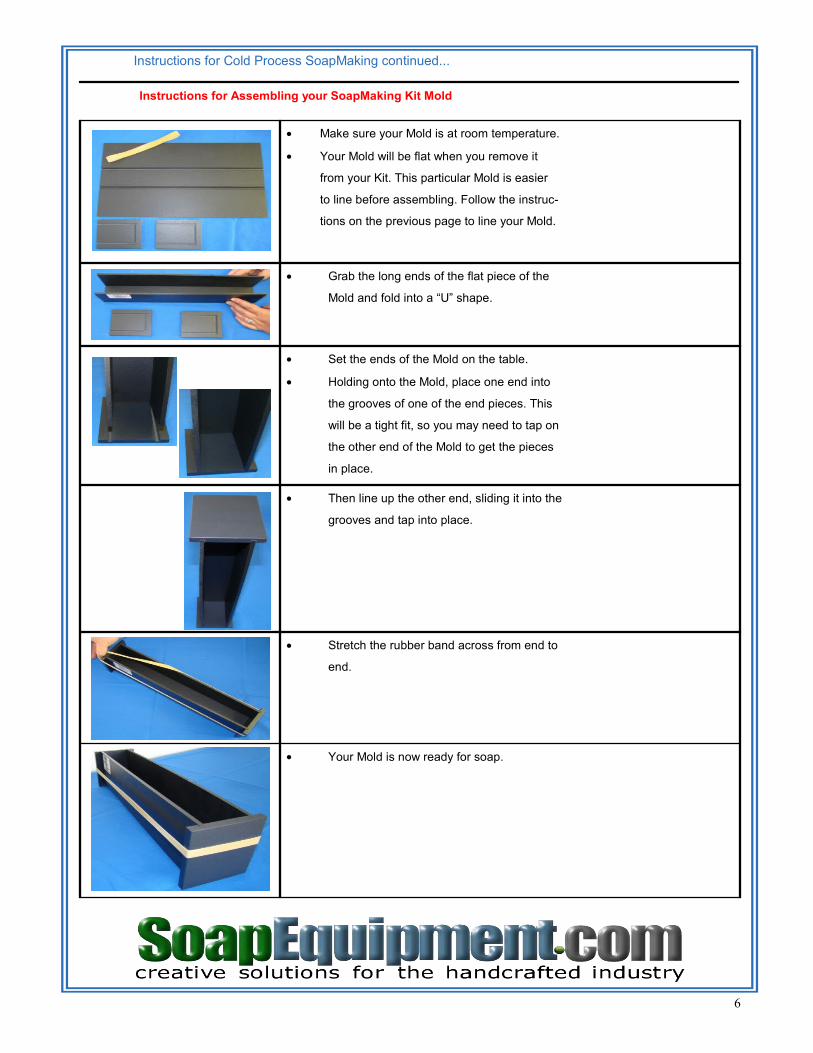
Make sure your Mold is at room temperature.
Your Mold will be flat when you remove it
from your Kit. This particular Mold is easier
to line before assembling. Follow the instruc-
tions on the previous page to line your Mold.
Grab the long ends of the flat piece of the
Mold and fold into a “U” shape.
Set the ends of the Mold on the table.
Holding onto the Mold, place one end into
the grooves of one of the end pieces. This
will be a tight fit, so you may need to tap on
the other end of the Mold to get the pieces
in place.
Then line up the other end, sliding it into the
grooves and tap into place.
Stretch the rubber band across from end to
end.
Your Mold is now ready for soap.
Instructions for Assembling your SoapMaking Kit Mold

7
Instructions for Cold Process SoapMaking continued...
Methods of Mixing Overview
The best method of mixing your soap is to use a Power Wand or
Stick Blender. This is the quickest way to mix a batch of soap.
Your batch could be mixed in a matter or 3-5 minutes. When using
a Power Wand or Stick Blender be sure your soap mixture is
above the blades at all times. Always be sure to turn the motor off
before removing the blades from the soap mixture. When mixing
alternate between hand stirring with the wand and using short
bursts on high and low.
The next choice would be to use a hand mixer or Kitchen Aid type
Mixer. This method takes a lot longer, but will save your hands
from stirring; at least 45 minutes. Making sure to keep the beaters
in the mixture when the power is on, start at a low speed and
gradually increase to high as your soap mixture thickens.
Another option would be to use a long handled, wooden or
stainless steel spoon. This method could take you over 2 hours to
mix your batch of soap. This method is also more tedious as you
will need to continually stir to get your batch to thicken.
Combining Soap and Lye/Water Solution:
Put on your Safety Goggles and Nitrile Gloves.
When the Oils and Lye/Water Solution are at approximately the
same temperature (does not have to be exact), it’s time to com-
bine them to make your soap.
Pour the Oils into your mixing bowl. (See Additional Items needed
for recommended Bowl)
Take a long handled spoon, your Power Wand (with motor off) or
your mixer (with motor off) and stir while carefully adding the Lye/
Water solution.
Begin mixing your soap with your chosen method. Continue mixing
until you come to Trace. Trace is when your soap mixture thickens
to the point that when you dribble a little of it on the surface of the
mixture, it stays there for a few moments before disappearing back
into the rest of the mixture.
Continued on next page...
Trace Picture
Power Wand
8
Instructions for Cold Process SoapMaking continued...
Combining Soap and Lye/Water Solution Continued...
Trace is very important. Watch out for false trace. This is when
your mixture thickens but is still grainy. If you pour your soap at
this point, the mixture may separate as it cools.
When you have reached a thin trace, add the provided Essential
Oil. Mix quickly and well. Be careful not to over mix.
When you have reached a thick trace, pour the soap mixture into
your Lined Mold. Tap the Mold on your counter top a few times to
shake down the soap; similar to preparing a cake to bake.
If your mixture is too thick to even out by tapping on the counter
then you can use a spatula to smooth out the top.
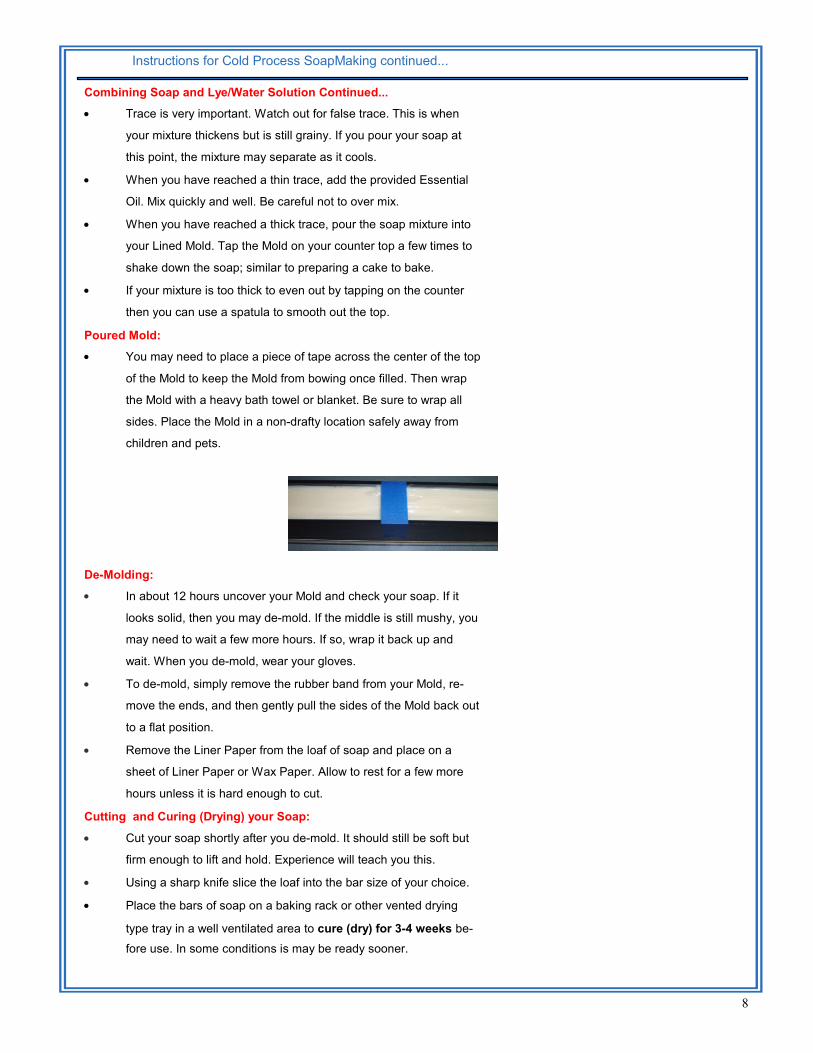
Poured Mold:
You may need to place a piece of tape across the center of the top
of the Mold to keep the Mold from bowing once filled. Then wrap
the Mold with a heavy bath towel or blanket. Be sure to wrap all
sides. Place the Mold in a non-drafty location safely away from
children and pets.
De-Molding:
In about 12 hours uncover your Mold and check your soap. If it
looks solid, then you may de-mold. If the middle is still mushy, you
may need to wait a few more hours. If so, wrap it back up and
wait. When you de-mold, wear your gloves.
To de-mold, simply remove the rubber band from your Mold, re-
move the ends, and then gently pull the sides of the Mold back out
to a flat position.
Remove the Liner Paper from the loaf of soap and place on a
sheet of Liner Paper or Wax Paper. Allow to rest for a few more
hours unless it is hard enough to cut.
Cutting and Curing (Drying) your Soap:
Cut your soap shortly after you de-mold. It should still be soft but
firm enough to lift and hold. Experience will teach you this.
Using a sharp knife slice the loaf into the bar size of your choice.
Place the bars of soap on a baking rack or other vented drying
type tray in a well ventilated area to cure (dry) for 3-4 weeks be-
fore use. In some conditions is may be ready sooner.
9
A Few Useful Links
Ready to Expand Your New Hobby?:
A special page on our web site has been created especially for you.
This page includes recipes and instructions for making cold process
soapmaking. http://soapequipment.com/soapmakinginfo/
Frequently Asked Questions (FAQ):
We have spent many years compiling questions and answers about
Soap Making. Please use this website to enlighten your own knowledge
of the Handcrafted Bodycare Industry and to Grow your business!
https://soapequipment.net/
Instructional Videos:
Watch our small production video to see how to make a single loaf of
soap step by step: https://soapequipment.net/knowledge-base/video-making-cold-process-soap/
SoapEquipment.com Blog, Twitter & Facebook:
For updates and info related to the Handcrafted Bodycare Industry visit
us at: http://blog.soapequipment.com/
http://twitter.com/soapequipment
http://www.facebook.com/pages/
SoapEquipmentcom/131469683620586
SoapEquipment.com Newsletter:
Go to http://soapequipment.com on the left hand side and sign up for
our free newsletter.
More Soap Making Package Deals:
To view more great package deals like the Single Loaf Soap Making
Package, the Triple Loaf Soap Making Package, and the Quad Loaf
Soap Making package visit this page:
http://soapequipment.com/packagedeals/
Recipes:
In this booklet is a true and tried soap recipe. When you are ready to
add some new recipes to your arsenal, you will need some way to con-
vert them into a useful form. These pages have conversion charts and
a link to our SoapMaker 3 Software.
http://soapequipment.com/conversion/
http://soapequipment.com/software/
10
Helpful Soap Making Books
If you enjoyed making this loaf of soap and are interested in making
more, we have a great selection of books to get you started.
http://soapequipment.com/books/
The Soap Book: Simple Herbal Recipes
This best selling soap book has 30 wonderful reci-
pes for hand crafted herbal, aromatherapy and floral
soaps. History, chemistry, equipment, plants and oils
are included to create these soothing soaps.
The Soapmaker’s Companion
Learn basic soapmaking instruction and specialty
techniques like marbling, layering and making liquid
and transparent soaps. Clear, step-by-step instruc-
tions by a Master Soapmaker, Susan Miller Cavitch.
Smart Soapmaking
The simple Guide to making traditional Handmade
Soap quickly, safely, and reliably, or how to make
luxurious Handcrafted Soaps for your family, friends
and yourself.
Milk Soapmaking
The smart and simple guide to making lovely milk
soap from cow milk, goat milk, buttermilk, cream,
coconut milk or any other animal or plant milk.
Soothing Soaps: For Healthy Skin
Soothing Soaps gives readers all the easy steps for
making soaps at home. Author of the best selling
Soap Book, Sandy Maine, now turns her hands to
the creation of beneficent soaps to help heal our
bodies and minds.
11
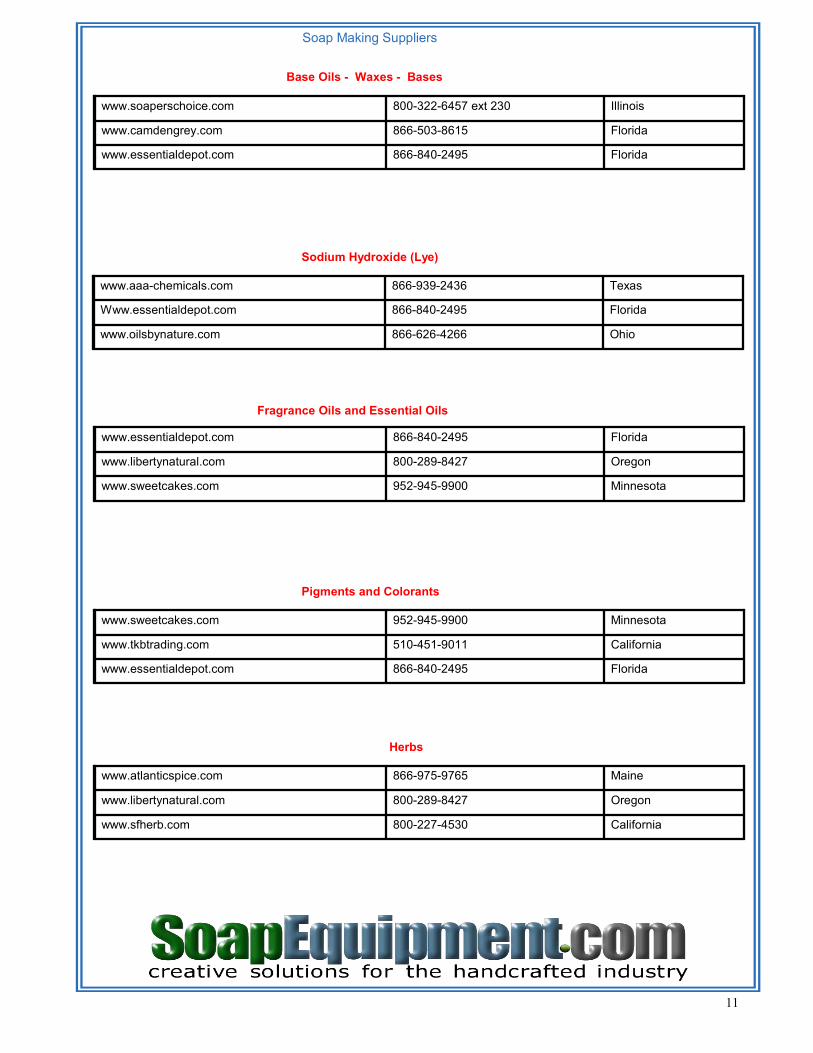
Soap Making Suppliers
Base Oils - Waxes - Bases
www.soaperschoice.com 800-322-6457 ext 230 Illinois
www.camdengrey.com 866-503-8615 Florida
www.essentialdepot.com 866-840-2495 Florida
Sodium Hydroxide (Lye)
www.aaa-chemicals.com 866-939-2436 Texas
Www.essentialdepot.com 866-840-2495 Florida
www.oilsbynature.com 866-626-4266 Ohio
Fragrance Oils and Essential Oils
www.essentialdepot.com 866-840-2495 Florida
www.libertynatural.com 800-289-8427 Oregon
www.sweetcakes.com 952-945-9900 Minnesota
Pigments and Colorants
www.sweetcakes.com 952-945-9900 Minnesota
www.tkbtrading.com 510-451-9011 California
www.essentialdepot.com 866-840-2495 Florida
Herbs
www.atlanticspice.com 866-975-9765 Maine
www.libertynatural.com 800-289-8427 Oregon
www.sfherb.com 800-227-4530 California
12
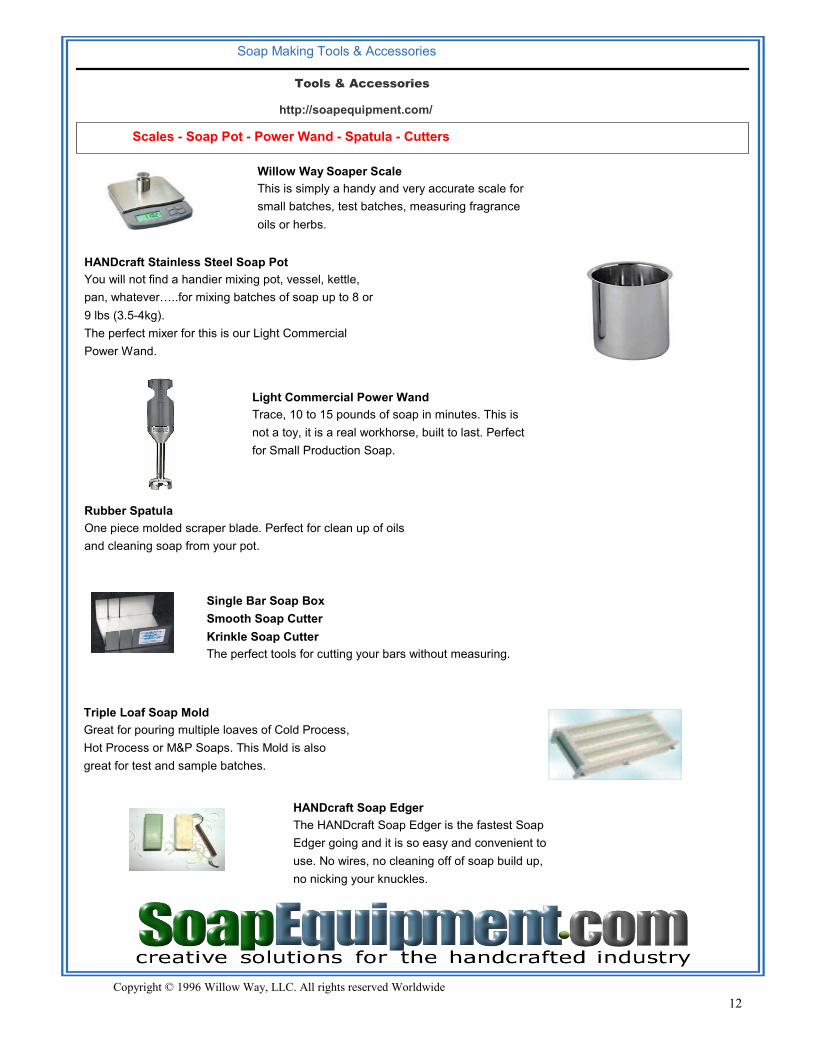
Tools & Accessories
http://soapequipment.com/
Soap Making Tools & Accessories
Scales - Soap Pot - Power Wand - Spatula - Cutters
HANDcraft Stainless Steel Soap Pot
You will not find a handier mixing pot, vessel, kettle,
pan, whatever…..for mixing batches of soap up to 8 or
9 lbs (3.5-4kg).
The perfect mixer for this is our Light Commercial
Power Wand.
Willow Way Soaper Scale
This is simply a handy and very accurate scale for
small batches, test batches, measuring fragrance
oils or herbs.
Light Commercial Power Wand
Trace, 10 to 15 pounds of soap in minutes. This is
not a toy, it is a real workhorse, built to last. Perfect
for Small Production Soap.
Rubber Spatula
One piece molded scraper blade. Perfect for clean up of oils
and cleaning soap from your pot.
Single Bar Soap Box
Smooth Soap Cutter
Krinkle Soap Cutter
The perfect tools for cutting your bars without measuring.
Triple Loaf Soap Mold
Great for pouring multiple loaves of Cold Process,
Hot Process or M&P Soaps. This Mold is also
great for test and sample batches.
HANDcraft Soap Edger
The HANDcraft Soap Edger is the fastest Soap
Edger going and it is so easy and convenient to
use. No wires, no cleaning off of soap build up,
no nicking your knuckles.
Copyright © 1996 Willow Way, LLC. All rights reserved Worldwide


![[MODERN SOAPMAKING] EFFICIENCY IN SCALING …in... · SWATCH MANIA! By Kenna of Modern Soapmaking [MODERN SOAPMAKING] EFFICIENCY IN SCALING AN INTRODUCTION TO MASTERBATCHING Efficiency](https://img.pdfslide.us/doc/110x75/5b14feee7f8b9af15d8cf3fb/modern-soapmaking-efficiency-in-scaling-in-swatch-mania-by-kenna-of-modern.jpg)