Embed Size (px)
Citation preview
SMSQ/EQDOS Compatible Operating System for the
Atari ST/STE/TT Gold Card Family
AuroraQXL
Q40/Q60QPCQ68
Manual Revision 1.05
Important - please read this first!
SMSQ/E
How to use this manual
This manual consists of up to five different sections, depending on which version(s) of SMSQ/E you own.
SMSQ/E
The first section applies to all versions of SMSQ/E: for the GoldCard and SuperGoldCard, Aurora card, the ATARI versions, QXL and QXL 2 and also for QPC. It describes all the new features compared to ordinary QDOS or QDOS with Toolkit II and other extensions. You can skip this section and look at it later, if you prefer to get SMSQ/E first. All features explained in here will work in the various versions for the various systems.
Both the sources and compiled binaries of SMSQ/E for the various platforms may be downloaded from the SMSQ/E Registrar’s website at http://www.wlenerz.com/smsqe/
Now that SMSQ/E has been in existence for a while we have been able to compile a 'Troubleshooter Guide' at the end of this section. This should explain some of the more common problems encountered by users. It should also tell you why things may not look how you expect them to and give hints on how to make changes to the display. Please read through this section before contacting your supplier about any problems you may experience. There is a separate QPC 'Troubleshooting Guide' at the end of the QPC section of the manual.
SMSQ/E for the GoldCard and SuperGoldCard
Go to this section if you are using SMSQ/E on a GoldCard or SuperGoldCard. It explains how to add it to your normal BOOT file and all of the special features that are specific to this hardware. If you want to get it going instantly from a floppy disk copy, put the disk into FLP1_ and type
1
EXEC flp1_SMSQ_GOLD
Or if Toolkit 2 is active:
LRESPR flp1_SMSQ_GOLD
Note that if you use the version available from the SMSQ/E Registrar’s website, the filename is now GoldCard.bin.
SMSQ/E for the Aurora
The version of SMSQ/E for the Aurora card supports a 256 colour (8-bit) graphics mode where the Aurora card is used with a Super Gold Card. The standard Gold Card version of SMSQ/E may also be used, although this would not support the 256 colour modes.
The loading procedure is the same as for the Gold Card version, except that the filename is AURORA.BIN if you use the binaries downloaded from the SMSQ/E Registrar’s website.
SMSQ/E for the ATARI
To start SMSQ/E on the ATARI, insert the floppy disk and reset your system. You can also copy the file SMSQ.PRG into an AUTO-folder on your harddisk (your ATARI harddisk driver manual will explain how to do this).
The original SMSQ/E ATARI floppy disk has a special root sector which will make sure that, when the floppy disk is inserted, it boots with the highest priority. This section describes all of the extra features that are available on the ATARI-version.
SMSQ/E for QXL and QXL 2
Go to this section to see how to start SMSQ/E on the QXL. The method of doing this is the same as that used by the original SMSQ which was shipped with the board and the extra features which are now available are all described in this section.
SMSQ/E for QPC1
VERY IMPORTANT: QPC needs to be installed on your PC, or it requires you to prepare a special DOS BOOT disk which boots up your PC with modified versions of the files CONFIG.SYS and AUTOEXEC.BAT.
It is very important to read this section first and carefully follow the instructions how to install QPC on DOS or WINDOWS 95.
If you run into problems, make sure you do exactly what is written there and please check the special QPC troubleshooter at the end of the QPC section too. Please note that as QPC1 is no longer developed, only a subset of the commands described in this manual may be available.
SMSQ/E for QPC2
Double-click the QPC2-SETUP program - just follow the on-screen installation step by step - it is very easy!
You can switch between other Windows applications and QPC2 by holding the ALT key, then press TAB.
SMSQ/E for Q40
SMSQ/E is supplied as a file called Q40.rom for the Q40.
2
SMSQ/E for Q68
SMSQ/E for Q68 can be run in several forms. If a file called Q68_ROM.SYS is present on the SDHC card, it will be loaded to the Q68 ROM emulation area (this is called Booting From ROM Image in the Q68 manual). If a file called Q68_RAM.SYS is present on the SDHC card, it will be loaded into RAM at an address specified in the Q68 manual.
The third option is for a file called Q68_SMSQ.WIN to be present on the SDHC card. the Q68 will at first check whether it contains a valid SMSQ/E filesystem image. If successful, the Q68 will then look up the first file inside the root directory of this SMSQ/E filesystem image then load the contents of this “inner” file into RAM and booting continues as a RAM image.
For more information on the various ways you can run SMSQ/E on the Q68, please refer to the Q68 manuals.
SMSQ/E for QemuLator
SMSQ/E for the emulator called QemuLator is not part of the standard SMSQ/E distributions and is only available from the website of Daniele Terdina (author of QemuLator), so no details included here.
SMSQ/E for SMSQmulator
SMSQmulator is an emulator of a machine that runs SMSQ/E. In that sense, it is not part of the standard SMSQ/E distributions and is documented solely via the manual for that emulator.
3

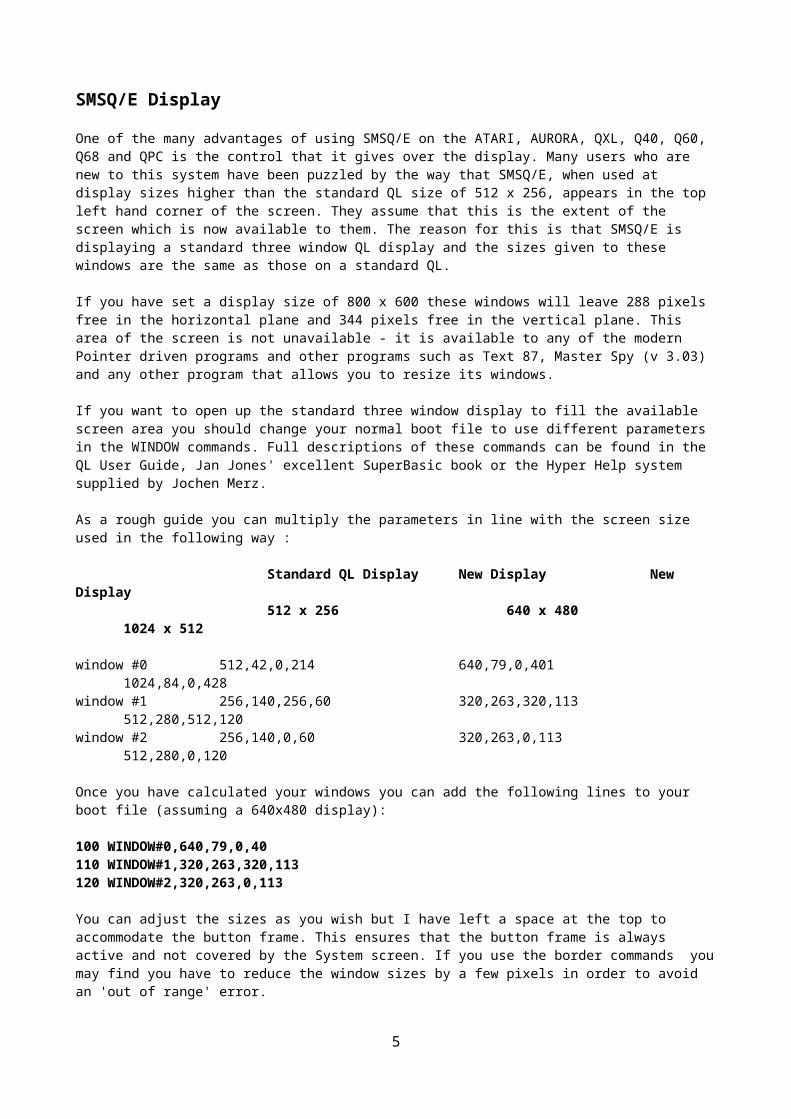
SMSQ/E Display
One of the many advantages of using SMSQ/E on the ATARI, AURORA, QXL, Q40, Q60, Q68 and QPC is the control that it gives over the display. Many users who are new to this system have been puzzled by the way that SMSQ/E, when used at display sizes higher than the standard QL size of 512 x 256, appears in the top left hand corner of the screen. They assume that this is the extent of the screen which is now available to them. The reason for this is that SMSQ/E is displaying a standard three window QL display and the sizes given to these windows are the same as those on a standard QL.
If you have set a display size of 800 x 600 these windows will leave 288 pixels free in the horizontal plane and 344 pixels free in the vertical plane. This area of the screen is not unavailable - it is available to any of the modern Pointer driven programs and other programs such as Text 87, Master Spy (v 3.03) and any other program that allows you to resize its windows.
If you want to open up the standard three window display to fill the available screen area you should change your normal boot file to use different parameters in the WINDOW commands. Full descriptions of these commands can be found in the QL User Guide, Jan Jones' excellent SuperBasic book or the Hyper Help system supplied by Jochen Merz.
As a rough guide you can multiply the parameters in line with the screen size used in the following way :
Standard QL Display New Display New Display 512 x 256 640 x 480 1024 x 512
window #0 512,42,0,214 640,79,0,401 1024,84,0,428window #1 256,140,256,60 320,263,320,113 512,280,512,120window #2 256,140,0,60 320,263,0,113 512,280,0,120
Once you have calculated your windows you can add the following lines to your boot file (assuming a 640x480 display):
100 WINDOW#0,640,79,0,40110 WINDOW#1,320,263,320,113120 WINDOW#2,320,263,0,113
You can adjust the sizes as you wish but I have left a space at the top to accommodate the button frame. This ensures that the button frame is always active and not covered by the System screen. If you use the border commands you may find you have to reduce the window sizes by a few pixels in order to avoid an 'out of range' error.
The above procedure will give you larger Basic windows but programs such as Quill, Archive, Abacus, Easel, Xchange, Perfection etc were written with the old screen size of 512 x 256 coded into them and cannot be expanded.
Most current programs also have their font sizes coded into them as well so there is very little that can be done to increase the size of the letters displayed on the screen. The only current exceptions to this are ProWesS and Text 87 which do allow you to configure font sizes for display purposes.
The best advice is to try several different display sizes until you find the one that fits both your eyesight and your monitor. Don't forget that you can alter the display size without having to reset the computer by using the DISP_SIZE command.
4
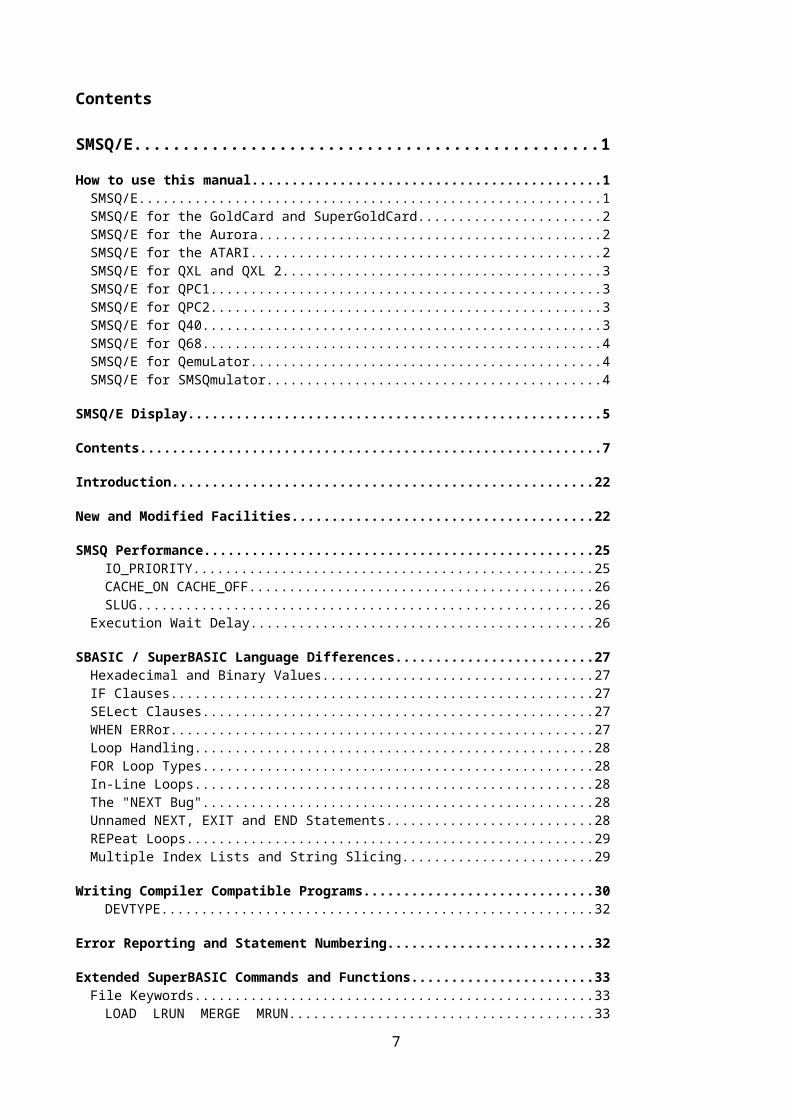
Contents
SMSQ/E........................................................................................................1
How to use this manual.....................................................................................................1SMSQ/E........................................................................................................................... 1SMSQ/E for the GoldCard and SuperGoldCard...............................................................2SMSQ/E for the Aurora....................................................................................................2SMSQ/E for the ATARI.....................................................................................................2SMSQ/E for QXL and QXL 2............................................................................................3SMSQ/E for QPC1...........................................................................................................3SMSQ/E for QPC2...........................................................................................................3SMSQ/E for Q40..............................................................................................................3SMSQ/E for Q68..............................................................................................................4SMSQ/E for QemuLator...................................................................................................4SMSQ/E for SMSQmulator...............................................................................................4
SMSQ/E Display.................................................................................................................. 5
Contents.............................................................................................................................. 7
Introduction...................................................................................................................... 22
New and Modified Facilities.............................................................................................22
SMSQ Performance..........................................................................................................25IO_PRIORITY.............................................................................................................25CACHE_ON CACHE_OFF.........................................................................................26SLUG.......................................................................................................................... 26
Execution Wait Delay.....................................................................................................26
SBASIC / SuperBASIC Language Differences...............................................................27Hexadecimal and Binary Values.....................................................................................27IF Clauses...................................................................................................................... 27SELect Clauses..............................................................................................................27WHEN ERRor................................................................................................................. 27Loop Handling................................................................................................................28FOR Loop Types............................................................................................................28In-Line Loops.................................................................................................................. 28The "NEXT Bug".............................................................................................................28Unnamed NEXT, EXIT and END Statements.................................................................28REPeat Loops................................................................................................................29Multiple Index Lists and String Slicing............................................................................29
Writing Compiler Compatible Programs........................................................................30DEVTYPE................................................................................................................... 32
Error Reporting and Statement Numbering...................................................................32
Extended SuperBASIC Commands and Functions.......................................................33File Keywords................................................................................................................. 33
LOAD LRUN MERGE MRUN..................................................................................33SAVE SAVE_O.........................................................................................................33QLOAD QLRUN........................................................................................................33QMERGE QMRUN QSAVE QSAVE_O...................................................................33RESET....................................................................................................................... 34LBYTES SBYTES SBYTES_O SEXEC SEXEC_O................................................34EPROM_LOAD..........................................................................................................34
Peeking and Poking.......................................................................................................35PEEK$ POKE$..........................................................................................................35
5

PEEK PEEK_W PEEK_L PEEK_F...........................................................................35POKE POKE_W POKE_L POKE_F.........................................................................35
Absolute PEEK, POKE...................................................................................................35Peeking and Poking in the System Variables.................................................................36Peeking and Poking in the SBASIC Variables................................................................36Screen Functions...........................................................................................................37
SCR_BASE SCR_LLEN.............................................................................................37SCR_XLIM SCR_YLIM...............................................................................................37
File I/O............................................................................................................................ 37BPUT BGET...............................................................................................................37WGET, WPUT, LGET, LPUT......................................................................................38HGET, HPUT..............................................................................................................38UPUT.......................................................................................................................... 38
Maths............................................................................................................................. 38ATAN.......................................................................................................................... 38
Date Keywords...............................................................................................................38PROT_DATE..............................................................................................................38YEAR% MONTH% DAY% WEEKDAY%....................................................................39
VER$ Function...............................................................................................................39VER$.......................................................................................................................... 39
INSTR and INSTR_CASE..............................................................................................40INSTR_CASE.............................................................................................................40
System Fonts................................................................................................................. 40CHAR_DEF................................................................................................................40CHAR_USE................................................................................................................41
Program Editing..............................................................................................................41ED.............................................................................................................................. 41
Command Line History...................................................................................................41Stuffer Buffer.................................................................................................................. 42
HOT_GETSTUFF$.....................................................................................................42Outlining......................................................................................................................... 42
OUTLN....................................................................................................................... 42Job ID Function..............................................................................................................42
JOBID......................................................................................................................... 42EX command extensions................................................................................................43
FEX EXF................................................................................................................... 43FET............................................................................................................................. 43FEW........................................................................................................................... 43FEP............................................................................................................................ 43EX_M FEX_M............................................................................................................44
Medium Information - DMEDIUM_xxx............................................................................44DMEDIUM_NAME$....................................................................................................44DMEDIUM_DRIVE$...................................................................................................44DMEDIUM_RDONLY.................................................................................................44DMEDIUM_REMOVE.................................................................................................45DMEDIUM_DENSITY.................................................................................................45DMEDIUM_FORMAT.................................................................................................45DMEDIUM_TYPE.......................................................................................................45DMEDIUM_TOTAL DMEDIUM_FREE......................................................................45EOFW......................................................................................................................... 45
Print Formatting..............................................................................................................45PRINT_USING...........................................................................................................45
Multiple Copies of SBASIC..............................................................................................46SBASIC Daughter Jobs..................................................................................................47
SBASIC Command.....................................................................................................47WTV WMON..............................................................................................................47JOB_NAME................................................................................................................48
Executing SBASIC Programs.........................................................................................48Channel #0................................................................................................................. 49
SBASIC and Resident Extensions..................................................................................49SBASIC Executable Thing..............................................................................................49
6
The SBASIC Interface Things........................................................................................50Terminate An SBASIC Program.....................................................................................51
QUIT........................................................................................................................... 51
Input Line Editing.............................................................................................................51
Language Facilities..........................................................................................................52Language Specification..................................................................................................52Language Control Procedures........................................................................................52
LANG_USE................................................................................................................52LANGUAGE LANGUAGE$.........................................................................................53KBD_TABLE...............................................................................................................53TRA............................................................................................................................ 53
The Home Thing...............................................................................................................54HOME_xxx Extensions...................................................................................................55
HOME_DIR$..............................................................................................................55HOME_FILE$.............................................................................................................55HOME_CURR$..........................................................................................................55HOME_DEF...............................................................................................................55HOME_VER$.............................................................................................................56HOME_CSET.............................................................................................................56HOME_SET................................................................................................................56
The Recent Thing.............................................................................................................57Concepts........................................................................................................................ 57The lists.......................................................................................................................... 58Job IDs........................................................................................................................... 58Buffers............................................................................................................................ 59The Thing Interface In Assembler..................................................................................59SBASIC Keywords.........................................................................................................59
RCNT_INFO...............................................................................................................60RCNT_JOBS..............................................................................................................60RCNT_ADDF..............................................................................................................61RCNT_GFFA$............................................................................................................61RCNT_GFFJ$............................................................................................................62RCNT_GALL..............................................................................................................62RCNT_GALJ..............................................................................................................63RCNT_GARR.............................................................................................................63RCNT_GARJ..............................................................................................................64RCNT_HASH$...........................................................................................................65RCNT_SAVE..............................................................................................................65RCNT_LOAD..............................................................................................................66RCNT_REMV.............................................................................................................66RCNT_SYNC.............................................................................................................66
Configuration.................................................................................................................. 67Performance penalty......................................................................................................67
Machine Type Functions................................................................................................67MACHINE................................................................................................................... 68PROCESSOR............................................................................................................68
Display Extensions..........................................................................................................68DISP_xxx Keywords.......................................................................................................69
DISP_BLANK.............................................................................................................69DISP_COLOUR..........................................................................................................69DISP_INVERSE.........................................................................................................70DISP_RATE...............................................................................................................70DISP_SIZE................................................................................................................. 70DISP_TYPE................................................................................................................71
Graphic Device Interface Version 2................................................................................72
7
Limitations...................................................................................................................... 72Extended Colour SBASIC Procedures...........................................................................73Wallpaper....................................................................................................................... 73
BGCOLOUR_QL........................................................................................................73BGCOLOUR_24.........................................................................................................73BGIMAGE................................................................................................................... 73
Palette Maps.................................................................................................................. 74PALETTE_QL.............................................................................................................74PALETTE_8...............................................................................................................74
SBASIC Colour Definition Selection...............................................................................75COLOUR_QL.............................................................................................................75COLOUR_PAL...........................................................................................................76COLOUR_24..............................................................................................................76COLOUR_NATIVE.....................................................................................................76
Alpha Blending................................................................................................................. 76ALPHA_BLEND..........................................................................................................76
The System Palette and Window Manager 2..................................................................77Colours List.................................................................................................................... 77Colour Commands.........................................................................................................78
WM_INK..................................................................................................................... 78WM_PAPER...............................................................................................................79WM_STRIP................................................................................................................79WM_BORDER............................................................................................................79WM_BLOCK...............................................................................................................79
System and Job Palette Handling..................................................................................80SP_RESET................................................................................................................. 80SP_GETCOUNT........................................................................................................80SP_GET..................................................................................................................... 80SP_SET...................................................................................................................... 80SP_JOBPAL...............................................................................................................81SP_JOBOWNPAL......................................................................................................81
Window Move................................................................................................................. 81WM_MOVEMODE......................................................................................................82
Background drawing.......................................................................................................82PE_BGON PE_BGOFF.............................................................................................82
Cursor Extensions...........................................................................................................83How to load a cursor sprite.............................................................................................83
CURSPRLOAD..........................................................................................................83How to use a sprite as cursor.........................................................................................83
CURSPRON CURSPROFF.......................................................................................83Load A Sprite And Set As System Sprite Number..........................................................84
SYSSPRLOAD...........................................................................................................84
Common keyboard driver................................................................................................84CTRL-C Action...............................................................................................................85
SERIAL IO Devices...........................................................................................................85Serial and Parallel Port Names......................................................................................85Serial Port Control..........................................................................................................86Standard BAUD Command............................................................................................87
BAUD......................................................................................................................... 87Extended BAUD Command............................................................................................87
SER_FLOW................................................................................................................87SER_ROOM...............................................................................................................88SER_BUFF................................................................................................................. 88SER_CLEAR SER_ABORT.......................................................................................88SER_CDEOF.............................................................................................................88SER_USE................................................................................................................... 88
Parallel Port Control.......................................................................................................89
8
PAR_BUFF................................................................................................................. 89PAR_CLEAR PAR_ABORT.......................................................................................89PAR_USE................................................................................................................... 89PRT_USE................................................................................................................... 89
Virtual Devices.................................................................................................................. 90NUL Device.................................................................................................................... 90PIPE Device................................................................................................................... 91HISTORY Device...........................................................................................................91DEV - A Virtual Filing System Device.............................................................................93
DEV_USE................................................................................................................... 93DEV_LIST.................................................................................................................. 94DEV_USE$ DEV_NEXT.............................................................................................94Interaction between DATA_USE, PROG_USE and DEV...........................................94DEV_USEN................................................................................................................95
Directory Devices.............................................................................................................95DOS disks...................................................................................................................... 95
SMSQ/E Event Handling..................................................................................................96Principles........................................................................................................................ 96SBASIC Implementation.................................................................................................97
WAIT_EVENT............................................................................................................97SEND_EVENT, FSEND_EVENT...............................................................................97
Utility Programs................................................................................................................98DRVCHK and DRVLINK Hard Disk Utilities...................................................................98SERNET V3................................................................................................................... 99
xNET_STATION.......................................................................................................100xNET_STATION%....................................................................................................100xNET_TEST%..........................................................................................................100xNET_START...........................................................................................................100xNET_STOP.............................................................................................................100xNET_BAD%............................................................................................................100xNET_RETRIES%....................................................................................................100
SERNET via Modem....................................................................................................100xNET_CONNECT%..................................................................................................101
SERNET File Protection...............................................................................................102SERNET Batchfile Execution.......................................................................................102
SMSQ/E Troubleshooting..............................................................................................102Hints on various extensions and files...........................................................................106
SMSQ/E FOR ATARI ST AND TT...........................................................108
Introduction.................................................................................................................... 108
Machine Type.................................................................................................................. 108MACHINE................................................................................................................. 108PROCESSOR..........................................................................................................108
Memory Protection.........................................................................................................108PROT_MEM.............................................................................................................109POKES POKES_W POKES_L POKES_F POKES$............................................109PEEKS PEEKS_W PEEKS_L PEEKS_F PEEKS$..............................................109
Atari ST and TT Displays...............................................................................................110Display Type................................................................................................................. 110
DISP_TYPE..............................................................................................................110Monochrome Display....................................................................................................110
DISP_INVERSE.......................................................................................................110
9
Colour Displays............................................................................................................110DISP_SIZE...............................................................................................................111DISP_RATE.............................................................................................................111DISP_BLANK...........................................................................................................111
DISP_SIZE Experimenter.............................................................................................112
Serial (RS232) Ports on the Atari ST and TT Series....................................................113SER1............................................................................................................................ 113SER2............................................................................................................................ 113SER3............................................................................................................................ 114SER4............................................................................................................................ 114
Atari ST Printer Port.......................................................................................................114PAR_PULSE............................................................................................................114
Atari ST and TT Hard Disks...........................................................................................114ACSI and SCSI Drives.................................................................................................114WIN Drive Numbers and Name....................................................................................115
WIN_DRIVE.............................................................................................................115WIN_DRIVE$...........................................................................................................115WIN_USE................................................................................................................. 116
Handling ACSI Adapter Timing Faults..........................................................................116WIN_SLUG...............................................................................................................116
Format WIN.................................................................................................................. 116WIN_FORMAT.........................................................................................................117
WIN Control Commands...............................................................................................117WIN_WP................................................................................................................... 117WIN_START WIN_STOP.........................................................................................117WIN_REMV..............................................................................................................118
Atari ST and TT Floppy Disks........................................................................................118Floppy Disk Driver Name..............................................................................................118
FLP_USE................................................................................................................. 118Format FLP.................................................................................................................. 118
FLP_DENSITY.........................................................................................................118FLP_TRACK.............................................................................................................119
FLP Control Commands...............................................................................................119FLP_SEC................................................................................................................. 119FLP_START.............................................................................................................119FLP_STEP...............................................................................................................119
Configuration.................................................................................................................. 120
SMSQ/E FOR GOLD AND SUPER GOLD CARDS.................................121
Introduction.................................................................................................................... 121
Loading SMSQ/E............................................................................................................121
Machine Type.................................................................................................................. 121MACHINE................................................................................................................. 121PROCESSOR..........................................................................................................121
GOLD Card Display........................................................................................................122DISP_TYPE..............................................................................................................122
Serial (RS232) Ports on the GOLD & Super GOLD Card.............................................122BAUD........................................................................................................................... 122STX.............................................................................................................................. 123XON XOFF................................................................................................................... 123
SER_PAUSE............................................................................................................123
10
Super GOLD Card Printer Port......................................................................................123
GOLD Card Floppy Disks..............................................................................................123Floppy Disk Driver Name..............................................................................................124
FLP_USE................................................................................................................. 124Format FLP.................................................................................................................. 124
FLP_DENSITY.........................................................................................................124FLP_TRACK.............................................................................................................124
FLP Control Commands...............................................................................................125FLP_SEC................................................................................................................. 125FLP_START.............................................................................................................125FLP_STEP...............................................................................................................125
GOLD Card Microdrives.................................................................................................125
SER Mouse..................................................................................................................... 125Loading the driver.........................................................................................................126Function........................................................................................................................ 126Printer........................................................................................................................... 126Cable Connector..........................................................................................................127Focussing..................................................................................................................... 127Hermes......................................................................................................................... 128Configuration................................................................................................................128Mouse Buttons.............................................................................................................129BASIC Commands.......................................................................................................129
BAUDRATE%...........................................................................................................129BLS........................................................................................................................... 129SERMAWS...............................................................................................................130SERMCUR SERMPTR.............................................................................................130SERMOFF................................................................................................................130SERMON.................................................................................................................. 130SERMRESET...........................................................................................................130SERMSPEED...........................................................................................................130SERMWAIT..............................................................................................................131
Configuration.................................................................................................................. 131
SMSQ/E FOR THE AURORA..................................................................132
Introduction.................................................................................................................... 132
Loading SMSQ/E............................................................................................................132
Machine Type.................................................................................................................. 132MACHINE................................................................................................................. 132PROCESSOR..........................................................................................................132
GOLD Card Display........................................................................................................133DISP_TYPE..............................................................................................................133DISP_COLOUR........................................................................................................133DISP_SIZE...............................................................................................................133
SMSQ/E FOR THE QXL...........................................................................134
Introduction.................................................................................................................... 134
Loading SMSQ/E............................................................................................................134
Machine Type.................................................................................................................. 134MACHINE................................................................................................................. 134
11
PROCESSOR..........................................................................................................134
QXL Display.................................................................................................................... 135DISP_TYPE..............................................................................................................135DISP_SIZE...............................................................................................................135
Serial (COM) Ports on the PC........................................................................................135BAUD....................................................................................................................... 135
PC Printer Port................................................................................................................136
PC Floppy Disks.............................................................................................................136Floppy Disk Driver Name..............................................................................................136
FLP_USE................................................................................................................. 136Format FLP.................................................................................................................. 136FLP Control Commands...............................................................................................136
FLP_SEC FLP_START FLP_STEP.......................................................................136
PC Hard Disks................................................................................................................. 136Hard Disk Driver Name................................................................................................137
WIN_USE................................................................................................................. 137Format WIN.................................................................................................................. 137
WIN_FORMAT.........................................................................................................137
Configuration.................................................................................................................. 137
SMSQ/E FOR Q40...................................................................................139
Introduction.................................................................................................................... 139
Machine Type.................................................................................................................. 139MACHINE................................................................................................................. 139PROCESSOR..........................................................................................................139
Memory Protection.........................................................................................................139PROT_MEM.............................................................................................................139POKES POKES_W POKES_L POKES_F POKES$............................................139PEEKS PEEKS_W PEEKS_L PEEKS_F PEEKS$..............................................140
Q40 Display..................................................................................................................... 140DISP_TYPE..............................................................................................................140DISP_INVERSE.......................................................................................................140DISP_SIZE...............................................................................................................140DISP_RATE.............................................................................................................141DISP_BLANK...........................................................................................................141
Mouse driver................................................................................................................... 141MOUSE_SPEED......................................................................................................141MOUSE_STUFF.......................................................................................................142
Serial (RS232) Ports on the Q40....................................................................................142
Parallel Printer Ports......................................................................................................143PAR_PULSE............................................................................................................143PAR_WAIT...............................................................................................................143
Q40 Hard Disks...............................................................................................................144IDE drives..................................................................................................................... 144WIN Drive Numbers and Name....................................................................................144
WIN_DRIVE.............................................................................................................145WIN_DRIVE$...........................................................................................................145
12
WIN_USE................................................................................................................. 145Format WIN.................................................................................................................. 146WIN Control Commands...............................................................................................146
WIN_WP................................................................................................................... 146WIN_START WIN_STOP........................................................................................146
Q40 Floppy Disks...........................................................................................................147Floppy Disk Driver Name..............................................................................................147
FLP_USE................................................................................................................. 147Format FLP.................................................................................................................. 147
FLP_DENSITY.........................................................................................................147FLP_TRACK.............................................................................................................148
FLP Control Commands...............................................................................................148FLP_SEC................................................................................................................. 148FLP_START.............................................................................................................148FLP_STEP...............................................................................................................148
Sampled Sound System................................................................................................149
SMSQ/E FOR QPC2................................................................................152
Mouse.............................................................................................................................. 152MOUSE_SPEED......................................................................................................152MOUSE_STUFF.......................................................................................................152
Machine Type.................................................................................................................. 152MACHINE................................................................................................................. 152PROCESSOR..........................................................................................................152
QPC-Specific Commands..............................................................................................153QPC_CMDLINE$.....................................................................................................153QPC_EXEC..............................................................................................................153QPC_EXIT................................................................................................................153QPC_HOSTOS........................................................................................................153QPC_MAXIMIZE QPC_MINIMIZE QPC_RESTORE................................................153QPC_MSPEED........................................................................................................154QPC_NETNAME$....................................................................................................154QPC_QLSCREMU...................................................................................................154QPC_SYNCSCRAP.................................................................................................155QPC_VER$..............................................................................................................155QPC_WINDOWSIZE................................................................................................155QPC_WINDOWTITLE..............................................................................................155
Serial (COM) Ports..........................................................................................................155BAUD....................................................................................................................... 156SER_GETPORT$.....................................................................................................156SER_SETPORT.......................................................................................................156
Printer Support (PAR)....................................................................................................156PAR_DEFAULTPRINTER$......................................................................................157PAR_GETPRINTER$...............................................................................................157PAR_SETPRINTER.................................................................................................157PAR_GETFILTER....................................................................................................157PAR_SETFILTER.....................................................................................................157PAR_PRINTERCOUNT............................................................................................157PAR_PRINTERNAME$............................................................................................158
PC Floppy Disks.............................................................................................................158Native Floppy Support..................................................................................................158Floppy Image Support..................................................................................................158Floppy Disk Driver Name..............................................................................................158
13
FLP Control Commands...............................................................................................158FLP_USE................................................................................................................. 158FLP_DRIVE..............................................................................................................159FLP_DRIVE$............................................................................................................159FLP_DENSITY.........................................................................................................159FLP_SEC, FLP_START and FLP_STEP.................................................................159
WIN Disks........................................................................................................................ 160Hard Disk Driver Name................................................................................................160
WIN_USE................................................................................................................. 160Format WIN.................................................................................................................. 160Drive/Filename Assignment..........................................................................................161
WIN_DRIVE WINDRIVE$.........................................................................................161Removable Drives........................................................................................................161
WIN_REMV..............................................................................................................161
The DOS Device..............................................................................................................161Drive/Directory Assignment..........................................................................................161Restrictions And Some Background Information On The DOS Device........................162DOS Control Commands..............................................................................................163
DOS_USE................................................................................................................163DOS_DRIVE.............................................................................................................163DOS_DRIVE$...........................................................................................................163
The QPC CD-Audio Module...........................................................................................163New Basic Commands.................................................................................................164
CD_INIT................................................................................................................... 164CD_PLAY................................................................................................................. 164CD_STOP................................................................................................................164CD_RESUME...........................................................................................................164CD_EJECT, CD_CLOSE..........................................................................................165CD_ISPLAYING, CD_ISCLOSED, CD_ISINSERTED, CD_ISPAUSED..................165CD_TRACK..............................................................................................................165CD_TRACKTIME.....................................................................................................165CD_ALLTIME...........................................................................................................165CD_HSG2RED, CD_RED2HSG..............................................................................165CD_TRACKSTART..................................................................................................165CD_TRACKLENGTH................................................................................................165CD_FIRSTTRACK, CD_LASTTRACK......................................................................166CD_LENGTH............................................................................................................166CD_HOUR, CD_MINUTE, CD_SECOND................................................................166
SMSQ/E FOR Q68...................................................................................167
Introduction.................................................................................................................... 167
SDHC cards.................................................................................................................... 167Using container, OS and other files on the card...........................................................167Naming scheme...........................................................................................................168
Initialising a card............................................................................................................168CARD_INIT..............................................................................................................168
Swapping cards............................................................................................................169
Win drives on SDHC cards............................................................................................169Safety precaution.........................................................................................................169Basic commands for WIN drives..................................................................................170
WIN_DRIVE.............................................................................................................170WIN_DRIVE$...........................................................................................................170WIN_SAFE...............................................................................................................171WIN_CHECK............................................................................................................171
14
WIN_FORMAT.........................................................................................................172WIN_USE and WIN_WP..........................................................................................172WIN_START, WIN_STOP, WIN_REMV, WIN_SLUG..............................................172
Formatting a drive..........................................................................................................172
The FAT device...............................................................................................................173Principle........................................................................................................................ 173Limitations.................................................................................................................... 173Configuration................................................................................................................174Basic keywords............................................................................................................174
FAT_USE................................................................................................................. 174FAT_DRIVE..............................................................................................................175FAT_DRIVE$............................................................................................................175FAT_WP................................................................................................................... 175
The QUB device..............................................................................................................175
OS and Container filenames..........................................................................................176
Setting the screen modes..............................................................................................177DISP_MODE............................................................................................................177DISP_xxx.................................................................................................................. 178
Configuring SMSQ/E for the Q68..................................................................................178SMSQ/E for the Q68....................................................................................................179A - Q68......................................................................................................................... 179B - Configuring the WIN drives.....................................................................................180C - Configuring the FAT device....................................................................................181D - Configuring the QUB device and drives..................................................................181
Additional keywords and facilities................................................................................182Sound........................................................................................................................... 182
SOUNDFILE.............................................................................................................182SOUNDFILE2...........................................................................................................182SOUNDFILE3...........................................................................................................183KILLSOUND.............................................................................................................183
Access to fast memory.................................................................................................183FREE_FMEM...........................................................................................................184ALFM........................................................................................................................ 184
Slug.............................................................................................................................. 184Limited direct access to the card or the FAT32 file system..........................................184
CARD_INIT..............................................................................................................185CARD_DIR$.............................................................................................................185CARD_RENF...........................................................................................................185CARD_CREATE.......................................................................................................186
Avoiding fragmentation.................................................................................................187
SMSQ/E MANUAL REVISION HISTORY................................................189
INDEX.......................................................................................................190
15
Introduction
SMSQ/E is based on the SMS kernel which was designed to provide a QDOS compatible interface. The kernel has been modified to improve compatibility with most of the "dirty tricks" which QL programmers were either forced to use or used to satisfy their perverted sense of fun.
The kernel itself (memory management, task management, scheduling, and IO) has also been extended to provide facilities which were not available with QDOS. It is now an over-inflated 10k bytes. Despite this inflation, the SMSQ operating system kernel remains more efficient than the old QDOS kernel.
SuperBASIC has been replaced by SBASIC which is a threaded code interpreter which executes at speeds more often associated with compiled SuperBASIC than interpreted SuperBASIC. There is no longer any need to compile SuperBASIC programs: you can just EXECute them.
The SMSQ/E CONsole driver incorporates slightly improved versions of the Pointer Interface, Window Manager and HOTKEY System 2: these do not need to be loaded in your BOOT files.
In addition, SMSQ/E is supplied with entirely new filing system device drivers which allow "foreign" disk formats to be recognised and new formats to be added "at run time".
SMSQ/E allows the user-selected "warmstart". This is achieved by pressing ALT SHIFT CTRL TAB at the same time. The system reboots without loading itself in again. This might be useful, for example, to clean the memory when your heap becomes too fragmented, or to get rid of unwanted extensions after you modified your BOOT file.
It is not advisable to use this warmstart feature when your system has crashed, as SMSQ/E itself might have been damaged by the system crash and you do not notice it immediately, but your data might become corrupted later due to system errors.
New and Modified Facilities
SMSQ/E includes all the QL SuperBASIC commands, the TK2 commands and the commands which have provided to support the various add-on drivers. (This manual does not concern itself with the standard SuperBASIC or TK2 commands.) SMSQ/E supports 99.9% of SuperBASIC. SMSQ/E supports all the devices which were supported by the drivers supplied with the Atari QL Emulator, the GOLD card and the QXL.
There are, however, a number of significant new facilities or improvements, some of which may be familiar to some users. Some facilities (marked HW) are hardware dependent are described in the appropriate hardware specific manuals.
Facility Usage or Difference
$nnn %nnn Hexadecimal and binary values acceptedATAN ATAN (x,y) yields four quadrant resultBAUD Independent baudratesBGCOLOUR_xx Set background colourBGET BPUT Transfer multiple bytes to and from stringsBGIMAGE Background image, wallpaperCACHE_ON _OFF Turn internal caches on or offCD_xx CD-Audio extensions in QPC2CHAR_DEF To activate new system fontsCOLOUR_xx Colour definition selectionCURSPRLOAD Load a file to use as cursor spriteCURSPROFF CURSPRON Switch cursor sprite off/onDAY% Returns current day number or that of supplied DATE valueDEV A defaulting filing system deviceDEV_LIST Lists the current DEVsDEV_NEXT Enquires the next DEV for a DEVDEV_USE Sets the real device for a DEVDEV_USEN Allows renaming of DEV device
16
DEV_USE$ Enquires the real device for a DEVDEVTYPE Find the type of device open as a channelDISP_xxx Display control facilitiesDMEDIUM_xxx Driver- and medium-informationDOS_xx DOS device extensions for QPC2ED Line can be put into the HOTKEY bufferEND FOR END REPeat Do not need namesEOF_W Wait for end of fileEPROM_LOAD Loads and initialises a "QL EPROM cartridge"EX EW EXEC EXEC_W Extended to execute SBASIC programsEX_M Create job owned by calling job, which continues executingEXF Alternate form of FEX functionEXIT Does not need a nameFEX EXF FET FEW FEP Functions corresponding to EX, EW, ET and EXEPFLP_xxx FLP device control facilitiesFOR Both integer and floating point FORFSEND_EVENT Function version of SEND_EVENT commandHISTORY A last in, first out rubbish binHOME_xxx Home Thing extensionsHOT_GETSTUFF$ Get current or previous content of stuffer bufferHPUT HGET Reads and writes part of a file headerIF Multiple nested inline IFs. Nesting is checkedINSTR_CASE Switches between case-dependent and case-independent INSTRIO_PRIORITY Set the priority of IO retry schedulingJOBID Return 32-bit Job ID numberJOB_NAME Sets the Job name for SBASIC jobsKBD_TABLE Uses international codes to set keyboard tablesLANG_USE Sets the message languageLANGUAGE ($) Language enquiryLBYTES Accepts channel number in place of nameLOAD LRUN Accept QLOAD _SAV files and save filenameLPUT LGET Puts and gets long wordsLRESPR If used to load extensions within an SBASIC job other than job 0, the extensions
are private to that jobMACHINE Return machine type numberMERGE MRUN Accept QLiberator _SAV filesMONTH% Returns current month number or that of supplied DATE valueMOUSE_SPEED Define scaling and acceleration factorMOUSE_STUFF Defines character string for mouse centre buttonNEXT Does not need a nameNUL A bottomless bin for output or endless inputOUTLN Does not require window parametersPALETTE_xx Palette colour mappingPAR Centronics port driver with dynamic bufferingPAR_xx Parallel port control extensionsPE_BGON PE_BGOFF Turn on/off background drawingPEEK etc. Extended to access system and SBASIC varsPEEKS etc. Supervisor mode access to IO hardware (Atari/Q40)PEEK$ PEEKs multiple bytesPIPE Named or unnamed pipes for inter task commsPOKE etc. Extended to access system and SBASIC varsPOKES etc. Supervisor mode access to IO hardware (Atari)POKE$ POKEs multiple bytesPRINT_USING Extended versionPROCESSOR Returns processor type valuePROT_DATE Protect the real time clockPROT_MEM Set the memory protection level (Atari)PRT Pseudonym for PARPRT_USE Sets the port to be used for PRTQLOAD QLRUN Qliberator compatible quick load for _SAV fileQMERGE QMRUN Qliberator compatible quick merge for _SAV fileQPC_xx QPC-specific extensions
17
QSAVE QSAVE_O Qliberator compatible save to _SAV fileQUIT Removes this SBASIC job, optional quit valueREPeat Does not need a nameRESET RESETs the computerSAVE SAVE_O Use previously defined filename, update version SBASIC Starts an SBASIC daughterSBYTES SBYTES_O Accepts channel number in place of filenameSCR_BASE SCR_LLEN Find the screen base and line lengthSCR_XLIM SCR_YLIM Find window limitsSELect Both integer and floating point SELectsSEND_EVENT Notify events to another jobSER Additional options and dynamic bufferingSER_xx Serial port extensionsSEXEC SEXEC_O Accepts channel number in place of nameSLUG Slows the machine downSNET_xx Sernet extensionsSP_xx System Palette extensionsSRX As SER but input port onlySTX As SER but output port onlySYSSPRLOAD Load sprite and set as a system spriteTRA language selectable and language independentUPUT send untranslated characters to channelVER$ extended to be Minerva-compatibleWAIT_EVENT Wait forone or more eventsWEEKDAY% returns current day of the week or that of supplied DATE valueWHEN ERRor suppressed within command lineWIN_xxx WIN device control facilitiesWM_xxx Window Manager system palette colour commandsWM_MOVEMODE Set window move modeWM_MOVEALPHA Set window move transparencyWMON WTV Allow the SBASIC windows to be offsetWPUT WGET Puts and gets words YEAR% Returns current year number or that of supplied DATE value
SMSQ Performance
In general, SMSQ is more efficient than QDOS. There are, however, a number of policy differences which are either accidental because, unlike other "QDOS compatible" systems SMSQ is not based on QDOS but is completely re-designed, or deliberate because certain QDOS policies have shown to be less than ideal.
In particular, the IO retry scheduling policy is completely different. This results in a very much higher priority for retry operations which greatly improves the responsiveness of a heavily loaded system at the cost of a modest reduction in crude performance (typically 10%). If crude performance is important to you, you can reduce the the IO priority to QDOS levels.
IO_PRIORITY
The IO_PRIORITY (priority) command sets the priority of the IO retry operations. In effect, this sets a limit on the time spent by the scheduler retrying IO operations.
A priority of one sets the IO retry scheduling policy to the same as QDOS, thus giving a similar level of response but with a higher crude performance.
IO_PRIORITY 1 QDOS levels of response, higher crude performanceIO_PRIORITY 2 QDOS levels of performance, better response under loadIO_PRIORITY 10 Much better response under load, degraded performanceIO_PRIORITY 1000 Maximim response, the performance depends on the number of jobs waiting
for input.
CACHE_ON CACHE_OFF
18
The performance of the more powerful machines depends on the use of the internal cache memory. For the MC680x0 series processors, the implementation of the caches is less than perfect. As well as introducing unnecessary overheads on operating system calls (slightly improved in the MC68040) the MC680x0 cache policy is incompatible with certain programming techniques. It may, therefore, be necessary to disable the internal caches.
No provision is made for disabling the external caches (where these exist) as none of these external caches seem to suffer from the design flaws of the MC680x0 series.
CACHE_OFF turn the caches off to run naughty softwareCACHE_ON and turn back on again
SLUG
The designers of SMSQ have spent much time and effort trying to make the system fairly efficient. Their efforts seem not to be appreciated. Some people will always complain!
SLUG (slug factor) will slug your machine by a well defined factor.
SLUG 2 Half speed aheadSLUG 5 Dead slowSLUG 1 Full ahead both
Execution Wait Delay
Traditionally, commands like EX waited for half a second before returning to give the executed job a chance to open up a window. This, for example, ensures that buttons in the button frame show up in the order you start them in the boot file. Today's machines, however are much faster and don't really need such a long pause anymore.
To counter this problem there is now a new system variable sys_xdly (byte at $17e) that determines the delay for a specific machine. This is preset to 5/50th of a second for QPC originally, which results in a much faster boot time. However for the full effect QPAC2 had to be updated too, which was done with release v1.45.
On machines that don't set sys_xdly, half a second will again be used by default. To change sys_xdly yourself, for example to lower it even further to 3, you can poke a new value using this command:
POKE !;$17F,3 lower execution delay to 3/50 second
SBASIC / SuperBASIC Language Differences
Some differences between SBASIC and SuperBASIC may be accidental. There are, however a number of known, deliberate, differences. Most of these differences are extensions to SuperBASIC. In some cases, however, limitations have been introduced to reduce the chances of difficult-to-track-down program errors.
Hexadecimal and Binary Values
Hexadecimal and binary values may be included directly in SBASIC source. Hexadecimal values are preceded by a $. Binary values by a %.
IF a% && %1001 Check bits 3 and 0 of a%IF PEEK_L ($28000) = $534D5351 Check if SMSQ (very naughty)
IF Clauses
Multiple "in-line" IF clauses can be nested on one line.SBASIC checks for incorrectly nested IF clauses.
SELect Clauses19
SELect clauses may SELect an action on the value of an integer variable (integer SELect) or on the value of a floating point variable or expression (floating point SELect). Integer SELect is more efficient.
SBASIC checks for incorrectly nested or inconsistent SELect clauses.
WHEN ERRor
WHEN ERRor is suppressed within the command line to stop SBASIC rushing off into your error processing if you mistype a command.
You can turn off WHEN ERRor by executing an empty WHEN ERRor clause.
100 WHEN ERRor110 CONTINUE :REMark ignore errors120 END WHEN130 a = 1 / 0 :REMark no error140 WHEN ERRor :REMark restore error processing150 END WHEN160 a = 1 / 0 :REMark BANG!!
Loop Handling
FOR Loop Types
SuperBASIC requires FOR loops to have a floating point control variable. SBASIC allows both floating point and integer control variables. Integer FOR loops are more efficient than floating point for loops: particularly if the control variable is to be used to index an array.
FOR i% = 0 to maxd%: array(i%) = array(i%) * 2: is preferred toFOR i = 0 to maxd: array(i) = array(i) * 2: which is less efficient
N.B. the type is determined before the program is executed.
In-Line Loops
Whereas SuperBASIC only allows a single structure to be defined "in-line", SBASIC allows many loops (and other structures) to be nested in-line without requiring END statements:
100 FOR i = 1 TO n: FOR j = 1 TO m: a(i,j) = a(i,j) + b(i,j)
The "NEXT Bug"
The "NEXT bug" reported in many articles about SuperBASIC, which many people have asked to be fixed, has not been fixed. IT IS NOT A BUG. NEXT is defined to fall through to the next statement when the loop is exhausted. It does not go to the statement after the END FOR (which may not be present). If that is what you wish to do, follow the NEXT by an EXIT.
Unnamed NEXT, EXIT and END Statements
Loop structures are "opened" with a FOR or REPeat statement and closed with an END FOR or END REPeat statement. SuperBASIC requires all loop closing statements as well as the intermediate NEXT and EXIT statements to identify the loop to which they apply. SBASIC, on the other hand, will accept unnamed NEXT, EXIT, END FOR and END REPeat statements. These are applied to the most recent (innermost) unclosed loop structure.
100 FOR i = 1 TO 10110 FOR j = 1 TO 10120 IF a(i,j) < 0: EXIT implicitly EXIT j130 sum = sum + a(i,j)140 END FOR implicitly END FOR j, closes FOR j150 IF sum < 100: NEXT loop j is closed, so this is NEXT i
20
160 PRINT i,sum170 sum=0180 END FOR implicitly END FOR i, closes FOR i
REPeat Loops
Whereas SuperBASIC requires all REPeat clauses to have a name, SBASIC allows unnamed REPeats. These unnamed REPeats may be combined with unnamed NEXT, EXIT and END REpeat statements.
100 REPeat110 a$ = INKEY$(-1)120 IF a$ = ESC$: EXIT goes to 200 (outer loop)130 IF a$ <> 'S': NEXT goes to 110 (outer loop)130 REPeat140 a$ = INKEY$(-1)150 IF a$ = ESC$: EXIT goes to 180 (inner loop)160 x$ = x$ & a$170 END REPeat goes to 140 (inner loop)180 IF LEN (x$) > 20: EXIT goes to 200 (outer loop)190 END REPeat goes to 110 (outer loop)200 PRINT 'DONE'
Multiple Index Lists and String Slicing
For various reasons SBASIC does not support multiple index lists.
100 DIM a(10,10,10)110 a(3,4)(5) = 345 OK for SuperBASIC, SBASIC will not handle this120 a(3,4,5) = 345 Means the same, is easier to type and SBASIC likes it
To make up for this limitation, SBASIC allows you to slice strings at any point in an expression.
200 a$ = 2468 (3) Sets a$ to '6' in SBASIC, prohibited in SuperBASIC210 ax=1234220 a$ = ('abcdef' & ax) (5 to 8) Sets a$ to 'ef12' in SBASIC230 b$ = 'abcdefghi'240 a$ = b$(2 TO 7)(3 TO 5)(2) Sets a$ to ’e' in either SBASIC or SuperBASIC
Also, in SBASIC, the default range for a string or element of a string array is always (1 TO LEN(string)) and zero length slices are accepted at both ends of a string (i.e. a$(1 to 0) or a$(LEN(string)+1 TO LEN(string)) are both null strings).
Writing Compiler Compatible Programs
SuperBASIC programs which are written in such a way as to be used both compiled and interpreted by SuperBASIC often have a small code fragment at the start to allow for the differences in compiled and interpreted environments.
The problem is not that SBASIC is "incompatible" with these code fragments but that SBASIC is compatible with SuperBASIC in a way which the two "compiled" SuperBASICs are not. The simplest way to avoid these problems is to give up using compiled BASIC and remove the junk from your programs. If, on the other hand, you wish to continue using compiled BASIC and also wish to use these programs in SBASIC daughter jobs, you may require some code changes.
There are three principal differences between the SuperBASIC environment and the Liberator and Turbo environments.
1. When executing in compiled form, the program will probably not be requiring windows #0, #1 and #2 in the same form as when it is being interpreted by SuperBASIC. In particular:
channel #0 (the command channel) may not be required at in the compiled version, but it is essential to keep it open in the SuperBASIC version otherwise no commands can ever be given again.;
21
a compiled program may be started with no windows open, a program interpreted by SuperBASIC will (usually) start with windows #0, #1 and #2 open.
This distinction is not so much a difference between compiled and not compiled, but is a difference between interpreting a program within the permanent SuperBASIC interpreter and executing a transient program.
2. An interpreted program may be interrupted and rerun (so that the starting state may be different each time), while a compiled program will always start "clean" (always having the same starting state).
3. An interpreted program will report error messages to window #0 while compiled programs have their own error message facilities.
From the point of view of the last two differences, SBASIC is always much closer to SuperBASIC than to a compiled BASIC. For the first (and most important difference) SBASIC can behave either like a compiled BASIC or SuperBASIC.
If SBASIC is started off with an SBASIC command, then SBASIC behaves like SuperBASIC: window #0 (at least) is open.
If SBASIC is started off with an EX (etc.) command or from a HOTKEY or QPAC2 EXEC menu, then SBASIC behaves more like a compiled program: there are no windows open by default and window #0 is not required.
Unfortunately, the code that usually appears at the start of these compatible programs does not distinguish between compiled and interpreted environments, but between job 0 and other jobs.
100 IF JOB$(-1)<>'' :REMark is it a named job (NOT SuperBASIC)110 CLOSE #0,#2 :REMark close spare windows in case120 OPEN #1,con_512x256a0x0 :REMark our #1130 ELSE140 WINDOW 512,256,0,0 :REMark for SuperBASIC, just set #1150 END IF160 CLS
When used in an SBASIC daughter job, this will treat SBASIC as compiled whereas it should possibly be treated as interpreted as SBASIC programs can be re-run.
The problem cannot be resolved by using a function to distinguish between compiled, SuperBASIC and SBASIC, as there is no such function in SuperBASIC and it cannot be assumed that a suitable extension has been loaded.
SBASIC jobs are, however, always called SBASIC until the name is set by the JOB_NAME command.
The best approach would be to have program start up code which is sensitive to the environment and not having a different behaviour just because the job number is 0 or the job has no name. This is however, not practical with the old QL BASIC compilers.
The least bad solution may be to have a "four way switch" at the start of the program.
100 my$ = 'myjob': j$ = JOB$(-1) :REMark set my assumed and real names110 IF j$ = '' :REMark is it an unnamed job (SuperBASIC)?120 do SuperBASIC or SBASIC job 0 fiddles130 END IF140 IF j$ = 'SBASIC' :REMark is it start of an SBASIC daughter?150 do SBASIC daughter initialisation160 JOB_NAME my$ :REMark from now on it is a named job170 j$ = '' :REMark no further action required180 END IF190 IF j$ = my$ :REMark is it rerun an SBASIC daughter?200 do SBASIC daughter re-initialisation210 j$ = '' :REMark no further action required220 END IF230 IF j$ <> '' :REMark must be compiled!
22
240 do compiled BASIC initialisation250 END IF
DEVTYPE
Within the initialisation code for SBASIC, the DEVTYPE function may be used to determine whether a channel is open.
This returns an integer value of which only the most significant (the sign bit) and least significant two bits are set. To ensure future compatibility, nothing should be assumed about the other bits.
The value returned will be negative if there is no channel open. Otherwise bit 0 indicates that it will support window operations (i.e. it is a screen device), bit 1 indicates that it will support file positioning operations (i.e. it is a file).
100 a% = DEVTYPE (#3) :REMark find the type of device open as #3110 IF a% < 0: PRINT '#3 not open' :REMark negative is not open120 SELECT ON a% && %11 :REMark ensure we only look at bits 0 and 1130 = 0: PRINT '#3 is a purely serial device'140 = 1: PRINT '#3 is a windowing device'150 = 2: PRINT '#3 is a direct access (filing system) device'160 = 3: PRINT '#3 is totally screwed up'170 END SELECT
Error Reporting and Statement Numbering
SBASIC will, usually, report error in the form:
At line 250:3 end of file
The number after the colon is the statement number within the line.
N.B. SBASIC generates a small number of additional statements (jumps round DEF PROCs, jumps to END SELect before each ON and END statements on inline clauses) which are not visible in the SBASIC program. If you like piling up structures and statements into a single line, you may find that the statement number in the error report is larger than you would expect!
Extended SuperBASIC Commands and Functions
File Keywords
LOAD LRUN MERGE MRUN
LOAD, LRUN, MERGE and MRUN have been extended to accept Liberation Software's _SAV file format. In addition, if the filename supplied is not found, SBASIC will try first with _BAS and then _SAV added to the end of the filename (it will try .BAS or .SAV if the given device contains a DOS-formatted medium).
SAVE SAVE_O
If no filename is given, the name of the file that was originally loaded will be used (if necessary substituting _BAS for _SAV at the end or vice versa). The file will be saved with a version number one higher that the file version when it was LOADed. (Repeated SAVEs do not, therefore, keep on incrementing the version number).
If a filename is given, the version number is set to 1.
QLOAD QLRUN
The extension of the SBASIC LOAD command makes the real QLOAD and QLRUN commands (which require a copy or near copy of QDOS ROMs to function at all) nearly redundant. QLOAD and QLRUN are implemented in SBASIC as versions of LOAD and LRUN that ensure that there is a _SAV at the end of the filename.
23
QMERGE QMRUN QSAVE QSAVE_O
These are versions of MERGE, MRUN, SAVE and SAVE_O which work with _SAV files.
If there are 4 SBASIC programs in the data default directory called FRED, JOE, ANNE and CLARA with either _BAS or _SAV at the end of the names.FREDJOE_BASANNE_SAVCLARA_BASCLARA_SAV
QLOAD fred Fails as there is no FRED_SAVLOAD fred Loads FREDSAVE Saves the program as FREDQSAVE Saves the program as FRED_SAV (quickload format)SAVE junk_bas Saves the program as JUNK_BASQSAVE Saves the program as JUNK_SAV (quickload format)MERGE joe Merges the file JOE_BAS into the programMERGE anne Quick merges the file ANNE_SAV into the programSAVE Saves it as JUNK_BAS (MERGE does not change the name)LOAD clara Loads CLARA_BASQLOAD clara Quick loads CLARA_BASLOAD clara_sav Also quick loads CLARA_BAS
RESET
RESETs the computer. Using this command could result in loss of data (e.g. when you RESET while sectors are being written to your floppy disk or harddisk), therefore much care should be taken if this command is used without the control of the user.
LBYTES SBYTES SBYTES_O SEXEC SEXEC_O
All accept a channel number in place of a name. This can improve efficiency.
nc = FOP_IN ('file') Open file once onlybase = ALCHP (FLEN(#nc)) . . . to allocate bit of heapfdt = FUPDT (#nc) . . . get the update dateLBYTES #nc,base . . . and load itCLOSE #nc
EPROM_LOAD
The EPROM_LOAD (filename) command is a special trick for loading the image of a QL EPROM cartridge. Most EPROM cartridges are programmed so that the cartridge may be at any address. Some require to be at exactly $C000, the QL ROM port address. The first time the command is used after reset, the EPROM image will be loaded at address $C000. Subsequent images may be loaded at any address. Fussy EPROM images must, therefore, be loaded first. An EPROM image file must not be longer than 16 kilobytes.
To make an EPROM image, put the EPROM cartridge (for example the Prospero PRL cartridge) into your QL and turn on. SBYTES the image to a suitable file with the magic numbers 49152 ($C000) for the base address and 16384 (16 kilobytes) for the length.
SBYTES flp1_prl, 49152, 16384 Save Prospero PRL image
On your SMSQ machine copy the file to your boot diskette or disk and add the EPROM_LOAD statement to your "boot" file.
EPROM_LOAD flp1_prl Load Prospero PRL image
QL Based Hardware
24
SMSQ on QL based hardware recognises plug-in ROM cartridges and copies them to fast memory when the system is booted. EPROM_LOAD can still be used, however, to load ROM images. If the ROM slot is vacant, then the first EPROM load will load to the QL ROM Port address. Otherwise, all EPROM images will be loaded to arbitrary addresses.
Peeking and Poking
PEEK$ POKE$
PEEK$ (address, number of bytes) returns a string with the number of bytes starting from address. The bytes need not, of course, be text.
POKE$ (address, string) pokes the bytes of the string starting from the address.
PEEK$ and POKE$ can be used for copying memory.
a$ = peek$ (base1,1000) Peek 1000 bytes from address base1poke$ base2,a$ . . . and poke them back to base2
PEEK$ and POKE$ can accept all the extended addressing facilities of PEEK and POKE. Indeed, POKE$ is identical to POKE which can now accept string parameters.
PEEK PEEK_W PEEK_L PEEK_F
POKE POKE_W POKE_L POKE_F
The standard PEEK functions and POKE procedures have been extended to provide compatibility with the Minerva versions. There are three main changes.
1. The address may be specified relative to the base of the system variables or the (current) SBASIC variables.
2. The contents of the memory at the address may itself be used as a base address with a second value providing an offset for this address.
3. More than one value may be POKEd at a time. For POKE_W and POKE_L, the address may be followed by a number of values to poke in
succession. For POKE the address may be followed by a number of values to poke in succession and
the list of values may include strings. If a string is given, all the bytes in the string are POKEd in order. The length is not POKEd.
Absolute PEEK, POKE
The standard forms of PEEK and POKE are supported even though the use of PEEK and POKE is best regarded as a form of terrorism.
a=RESPR (2000)LBYTES myfile,a Load myfilePRINT PEEK (a), Prints the value of the byte of myfilePOKE_L a+28, DATE,0 Set the 28th to 35th bytes to the DATE (4 bytes) and 4 zerosPOKE a+8, 0,6,'My_Job' Set the standard string (word length followed by the chars)
An additional form to handle floating point values has been introduced. PEEK_F and POKE_F function like the existing forms, but handle 6-byte floating point values.
v = 1.23 : POKE_F a, v Set the 6 bytes at address a to the value of the variable vv = PEEK_F(a) Read the 6 byte floating point value at address a
Peeking and Poking in the System Variables
If the first parameter of the peek or poke is preceded by an exclamation mark, then the address of the peek or poke is in the system variables or referenced via the system variables. There are two variations: direct and indirect references.
25

For direct references, the exclamation mark is followed by another exclamation mark and a an offset within the system variables.
For indirect references, the exclamation mark is followed by the offset of a pointer within the system variables, another exclamation mark and an offset from that pointer.
ramt = PEEK_L (!!$20) Find the top of RAM $20 bytes on from the base of sysvarsPOKE_W !!$8e,3 Set the auto-repeat speed to 3job1 = PEEK_L (!$68!4) Find the base address of Job 1 (4 on from base of Job table)POKE !$B0!2, 'WIN' change the first three characters of DATA_USE to WIN
There is slightly more parameter checking than in the Minerva versions. Nevertheless, errors and deliberate abuse are not likely to be detected and may have different effects on SMSQ and Minerva.
Peeking and Poking in the SBASIC Variables
If the first parameter of the peek or poke is preceded by an backslash, then the address of the peek or poke is in the SBASIC variables or referenced via the SBASIC variables. There are two variations: direct and indirect references.
For direct references, the backslash is followed by another backslash and an offset within the SBASIC variables.
For indirect references, the backslash is followed by the offset of a pointer within the SBASIC variables, another backslash and an offset from that pointer.
dal = PEEK_W (\\$94) Find the current data line numbern6 = PEEK_W (\$18\2+6*8) Find the name pointer for the 6th name in the name tablenl6 = PEEK (\$20\n6) . . . and the length of the namen6$ = PEEK$ (\$20\n6+1, nl6) . . . and the name itself.
Screen Functions
SCR_BASE SCR_LLEN
The SCR_BASE (channel) and SCR_LLEN (channel) functions are provided for those who wish to start peeking and poking in the display. They return the base address of the screen and the line length (in bytes). The channel numbers are optional (default is #0), and, in current versions, the values returned are the same for all screen channels.
SCR_XLIM SCR_YLIM
The SCR_XLIM (channel) and SCR_YLIM (channel) return the maximum pixel (+1) for the channel. This is not the same as the current window size, but it defines the maximum size that a window can be. SCR_XLIM and SCR_YLIM should only be called for a primary window (usually #0 for and SBASIC job). #0 is the default channel.
ssz = SCR_LLEN * SCR_YLIM Screen size is number of lines * line length in bytesSBYTES s1, SCR_BASE, ssz . . . so we can save the screenWINDOW SCR_XLIM,SCR_YLIM,0,0 Set window (#1) to cover the whole of the screen
File I/O
BPUT BGET
BPUT will accept string parameters to put multiple bytes. BGET will accept a parameter that is a sub-string of a string array to get multiple bytes.
BPUT #3,27,'R1' Put ESC R 1 to channel #3DIM a$(10): a$(10)=' ':BGET #3, a$(1 to 6) Get 6 bytes from #3 into a$
WGET, WPUT, LGET, LPUT
26
Works like BGET and BPUT, but they always read a word or longword instead of a byte.
HGET, HPUT
For reading and writing the first parts of a file header. Both commands accept up to 5 parameters, which are of the type floating point. The first parameter is the file length (long), followed by the access byte (byte), followed by the file type (byte), then comes the dataspace (long) and finally the extra-information (long).
OPEN#3,dateiHGET#3,length,access,type,space,extraHPUT#3,length,access,1,1024,extraCLOSE#3
converts a file into an executable file with 1kByte dataspace.
UPUT
Works as BPUT, but will never translate the character. Very useful to send translated text to a channel which does use TRA, as well as sending printer control codes using UPUT to the same channel.
Maths
ATAN
The ATAN function has been extended to provide 4 quadrant result by taking two parameters. If x is greater than 0, ATAN (x,y) give the same results as ATAN (y/x). Otherwise it returns values in the other quadrants (>p/2 and <-p/2).
Date Keywords
PROT_DATE
Where the system has a separate battery backed real time clock. The date is read from the clock when the system is reset. Thereafter, the clock is kept up to date by the SMSQ timer. (Thus the impressive speed gains made by some accelerator software: slowing the clock down by disabling interrupts can do wonders for your benchmark timings).
In general, the system real time clock is updated whenever you adjust or set the date. As some QL software writers could not resist the tempation of setting the date to their birthday (or other inconvenient date) this can play havok with your file date stamps etc.
PROT_DATE (0 or 1) is used to protect (1) or unprotect (0) the real time clock. If the real time clock is protected, setting the date affects only SMSQ's own clock, the real time will be restored then next time the computer is reset.
PROT_DATE 1 protect the RTC (should never be required)PROT_DATE 0 unprotect the RTC (normal)
YEAR% MONTH% DAY% WEEKDAY%
These functions complement the DATE and DATE$ functions, by providing extensions to return the year, month, day and weekday numbers corresponding to a given date stamp. WEEKDAY returns the day number of the week (0…6 Sunday…Saturday).
datestamp = DATE[(year, month, day, hour, minute, second)] returns the number of seconds since 1st January 1961. If no parameters are supplied to the DATE function, the current time in seconds is returned.
yr% = YEAR%[(datestamp)] Return year number (1961…2097) of the date value supplied. If no datestamp is supplied, the current year is returned.
m% = MONTH%[(datestamp)] Return month number (1…12) of the date value supplied. If no datestamp is supplied, the current month is returned.
27
d% = DAY%[(datestamp)] Return day of the month (1…31) of the date value supplied. If no datestamp is supplied, the current day is returned.
wd% = WEEKDAY%[(datestamp)] Return day of the week (0…6). If no datestamp is supplied, the current day of the week is returned.
Thus yr% = YEAR% and yr% = YEAR%(DATE) are functionally identical, for example.
VER$ Function
VER$
The VER$ function has been extended to take an (optional, Minerva compatible) parameter. If it is non zero, information is taken from the OS call for system information. Otherwise, the normal SBASIC version (HBx) is returned.
PRINT ver$ prints HBA (or later SBASIC version ID)PRINT ver$(0) also prints HBA (or later SBASIC version ID)PRINT ver$(1) prints 2.22 (or later SMSQ version number)
With a negative parameter, VER$ does not return a version at all, but returns a fairly arbitrary choice of information.
PRINT ver$(-1) print the Job ID (0 for initial SBASIC)PRINT ver$(-2) prints the address of the system variables (163840), WHY?
INSTR and INSTR_CASE
INSTR_CASE
The INSTR operator of SuperBASIC assumes that character strings are being compared and it ignores the case of the characters. It is often useful to use strings to hold data other than characters, and even if the strings contain characters it may be useful to perform a search which requires the case of the characters to match.
SBASIC allows both case independent (SuperBASIC compatible) and case dependent INSTR operations. To maintain compatibility, SBASIC does not introduce a new operator which could cause chaos if the program were to be compiled, but introduces a command to switch the operation of INSTR.
INSTR_CASE 0 from now on INSTR is SuperBASIC compatibleINSTR_CASE 1 from now on INSTR does direct byte by byte comparisons
The internal INSTR_CASE flag is cleared on NEW, LOAD, MERGE and RUN.
System Fonts
It is possible to change the system default fonts in SMSQ/E. This can be achieved with the new command
CHAR_DEF
CHAR_DEF font1,font2
where font1 and font2 may be of the following parameters: address of a valid QL-font or 0 (which will select the inbuilt system font) or -1 (do not change this parameter)
If you have defined a new QL font, which contains the characters SPACE (CHR$(32) to arrow down CHR$(191), and you want to keep the second font (to get the chequeboard pattern if the character is not printable), then you can do it this way:
fb=RESPR(fontsize)LBYTES font_file,fb
28
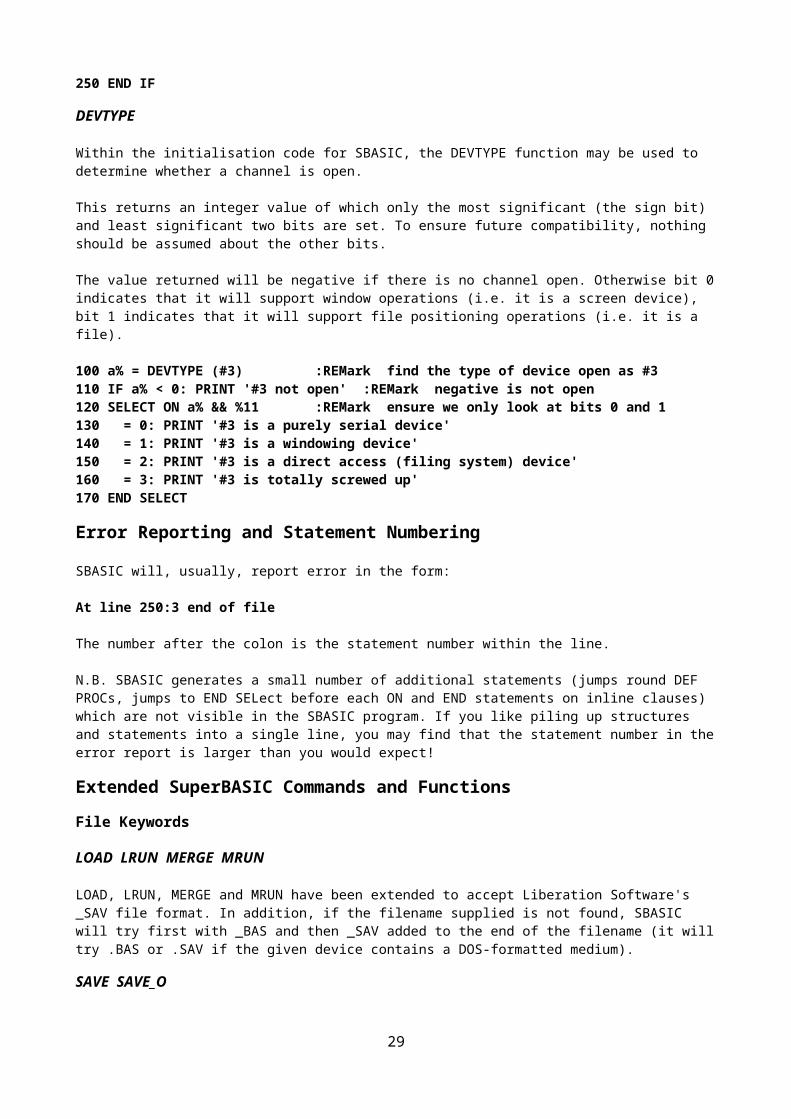
CHAR_DEF fb,0
All windows which are opened now will use the new system fonts (except they define their own fonts, of course).
Channels already open will not use the new fonts automatically for various reasons: the most obvious is, that if the font file did not contain any font data, you will not be able to correct this as all characters printed will look like complete rubbish.
CHAR_USE
It is possible to attach the new fonts to channels already open:
CHAR_USE [#channel,] font1,font2 (you know it from Toolkit II)
which allows three parameters: address of a valid QL-fonts (as usual) or
0 (to use the current system font) or-1 (to leave it as it is)
For SuperBASIC the following line would change the fonts of the channels:
FOR ch=0 TO 2:CHAR_USE #ch,0,0
Program Editing
ED
Offers a new feature: if you press F10 (or SHIFT F5) while the cursor is over a program line, then this line is put (without line number) into the HOTKEY Buffer. It can easily be retrieved by pressing ALT SPACE in any program where input is expected. In order to work, the HOTKEY System has to be going (use HOT_GO to activate).
Just a quick reminder: F9 (or SHIFT F4) toggles between insert and overwrite mode.
The SuperBASIC commands AUTO and EDIT are retained for compatibility, but now function like the ED command and no longer have their original actions.
Command Line History
Basic has a new command line history: if you press the up/down arrows, you get the latest commands entered.
Stuffer Buffer
HOT_GETSTUFF$
A function which returns the content of the hotkey stuffer buffer. If given a parameter of 0, or no parameter, it returns the current content of the stuffer buffer, like ALT-SPACE. A parameter of -1 gets the previous content, like ALT-SHIFT-SPACE.
result$ = HOT_GETSTUFF$ get current content of stuffer bufferresult$ = HOT_GETSTUFF$(0) get current content of stuffer bufferresult$ = HOT_GETSTUFF$(-1) get previous content of stuffer buffer
Outlining
OUTLN
If you have not used OUTLN yet, then do not worry about this command and ignore it. If you have written BASIC programs using the Window Manager, then you have to be familiar with OUTLN. Older versions of the OUTLN command provided by various toolkits need a channel (or default to #0) and a window definition,
29
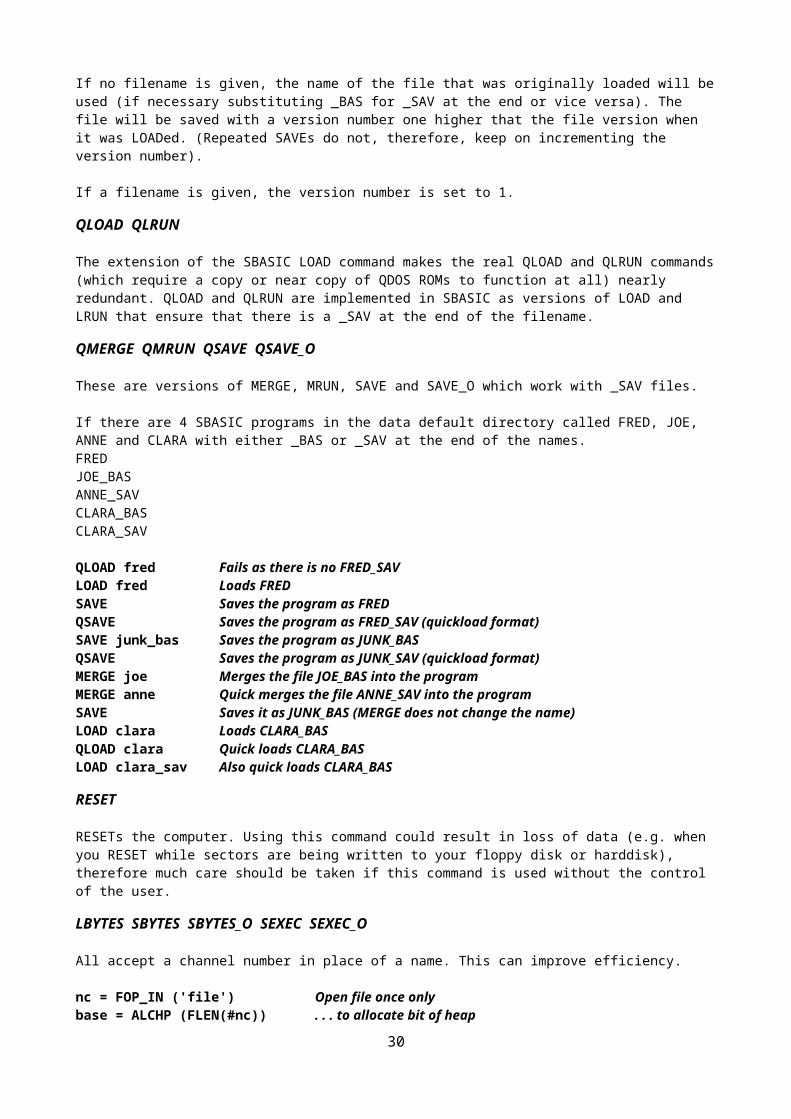
and usually resize the window. This new OUTLN accepts all parameters as before, to maintain compatibility, but there is a special feature:
If OUTLN is used without parameter, then it will declare the smallest area which outlines all windows currently opened for the job to be the Outline for that job without changing the primary window.
Job ID Function
JOBID
id = JOBID[({nr,tag} | <name>)]JOBID returns the 32-bit ID of the given job details as a decimal value. The optional parameters may be either a job number and job tag (as displayed by the JOBS command), or the job name. If no parameters are supplied, the Job ID number of the current job is returned.
id = JOBID (job_number, job_tag) returns the Job ID of the job specified by job_number and job_tag
id = JOBID(job_name$) returns the Job ID of the job specified in job_name$id = JOBID returns the Job ID of the current job
EX command extensions
The S*Basic extensions FEX (and synonym EXF), FEW, FET and FEP have been added to SMSQ/E V3.00 and later. These are function calls corresponding to the procedures EX (EXEC), EW (EXEC_W), ET and EXEP.
FEX EXF
job_id = FEX(filename) job_id = EXF(filename)
Executes and returns the ID of the job filename. This ID can be used to manipulate the job in various ways by using the other job control extensions, such as SPJOB, MOB, RIOB, etc. The full syntax using input and output channels, as well as filters, is supported. See the TK2 documentation, section 8.xx for details. Note: In the event of filters being set up, only the ID of the first job is returned. Note: The name FEX clashes with the eponymous keyword from Filelnfo2. For this reason, the synonymous function EXF has been introduced to avoid this clash. By the time you read this a later version of F12 may be available, otherwise you will need to patch one or the other of the keywords to access both.
FET
As for FEX above, except the job is not activated.
FEW
error_code = FEW(fitename)
Returns the error code returned by the (first) job. Syntax as for FEX above. Note: FEW tries to open the channels of files supplied in the parameter list before executing the job(s). Any errors arising from this, including erroneous parameters, are returned to the caller as “hard’ errors.
FEP
job_id = FEP(thingname)
Executes and returns the ID of the job thingname. FEP is the implementation of EXEP as a function. Refer to your Qpac2 manual for details.
EX_M FEX_M
30
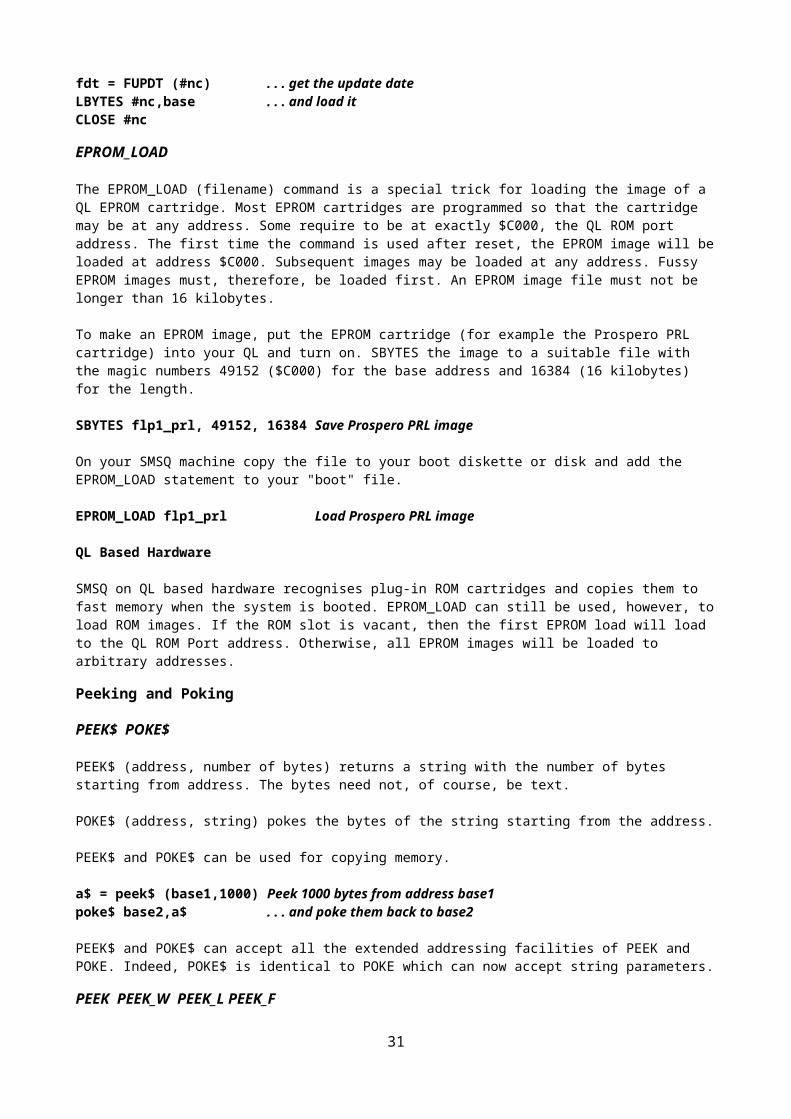
This behaves a bit like EX in that the calling job continues executing (like EX and contrary to EW) but the job created is owned by the calling job (like EW). This means that if you get rid of the calling job, you will also get rid of the created job(s). FEX_M is a function version.
Medium Information - DMEDIUM_xxx
The following set of functions can be used to obtain information about a device driver or a medium which is currently driven by this driver, which could not be obtained easily in the past (or not at all). These functions should be used on directory devices (RAM, FLP, WIN etc.) only. The parameter passed to these functions can either be a channel number (#channel) or a \directory or \file (as with most other file-functions known from Toolkit II, e.g. FDAT, FLEN).
DMEDIUM_NAME$
Returns the medium name of the specified device.
OPEN #3,flp1_bootPRINT DMEDIUM_NAME$(#3) what's the name of the disk in flp1_?CLOSE #3
PRINT DMEDIUM_NAME$(\win1_) returns the name of WIN1_?
DMEDIUM_DRIVE$
Returns the real device name of the specified file or device. This is the only way to check if the access is done to the device it is intended to be done, as devices may be renamed using RAM_USE, FLP_USE, WIN_USE etc. This function also allows to discover the "real" device which may be hidden behind "DEV".
DEV_USE 1,win1_ DEV1_ accesses WIN1_OPEN_NEW #3,dev1_test let's open a new filePRINT DMEDIUM_DRIVE$(#3) really, it's on WIN!CLOSE #3
DMEDIUM_RDONLY
Returns 1 if the medium is write-protected, otherwise 0. It checks the various possibilities of write protection, even the software write-protection which is possible for harddisks and removable harddisks.
DMEDIUM_REMOVE
Returns 1 if the specified device is a removable harddisk.
DMEDIUM_DENSITY
Returns the density: 1=DD, 2=HD etc. RAM-Disks return -1, as they have no density.
DMEDIUM_FORMAT
Returns the logical format of the medium or partition: 1=QDOS/SMSQ, 2=DOS/TOS.
DMEDIUM_TYPE
Returns information abouth the physical drive: 0=RAM-Disk, 1=Floppy Disk, 2=Harddisk, 3=CD-ROM.
DMEDIUM_TOTAL DMEDIUM_FREE
returns the total number and number of free sectors respectively (in 512 bytes sectors).
EOFW
31
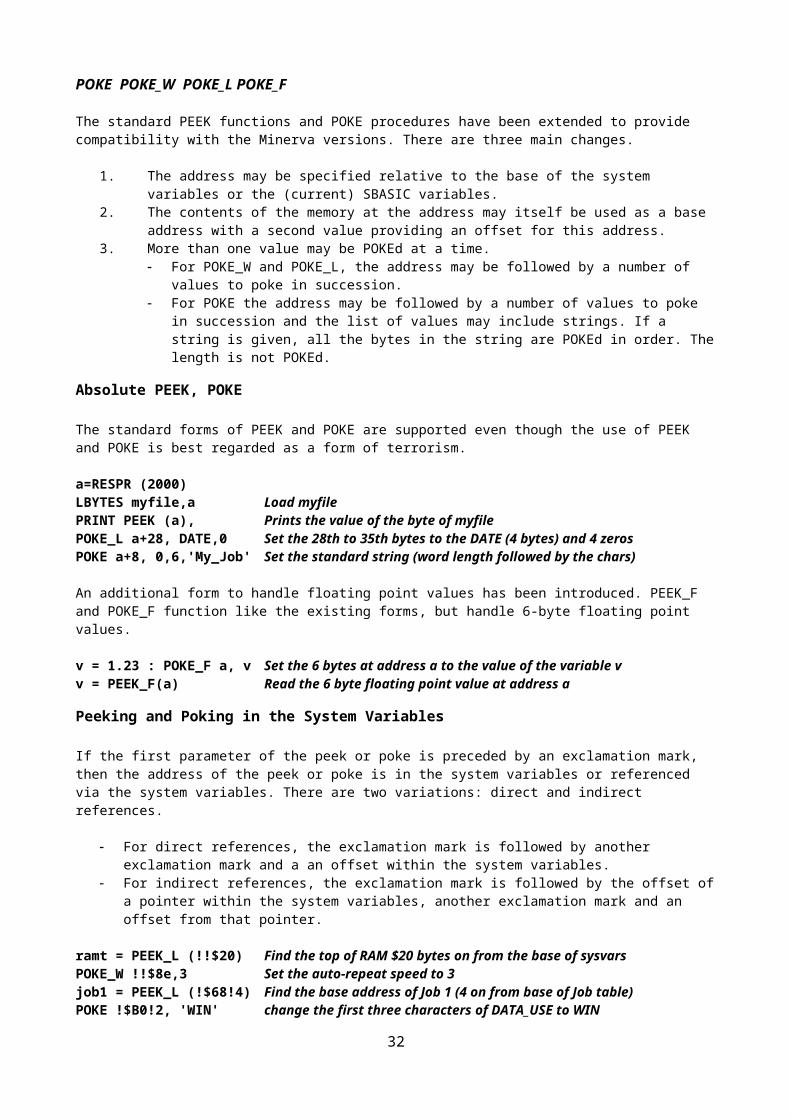
The EOFW is a variation on the SuperBASIC compatible EOF function. While EOF does not wait, and can miss the end of file under some conditions, EOFW waits for data/end of file.
Print Formatting
PRINT_USING
PRINT_USING #channel,format$,listformat$ contains formatting information about the result string. Various special characters define how the following list of numbers should be placed inside the result string.
Special characters inside format$ are:© the next character will be printed as it is, even if it is one of the special characters." or ' will output all characters up to the next " or '.\ generates a new line$ will shift the following currency symbol(s) directly in front of the following number.The other special characters + - # * , . ! > appear in "fields" within format$. The fields define the format of the number to be output. For every numerical field a number is taken from the list and - depending on the format information properly formatted. The fields define the format of the element as well as the length. Lots of possible combinations are possible (field length is assumed to be 5).
Field Format
##### Numbers from the list are right-justified integers; strings from the list are left-justified and, if too long, truncated.
***** Numbers are right-justified, the leading spare characters are filled with '*' (e.g. ***12).####.## Fixed point decimal number, two digits after the dot.****.** As above, but leading spaces are converted to '*'.##,###.## Fixed point decimal number, thousands are separated with a comma.**,***.** as above, but with '*' filling.-#.####!!!! Exponential form with optional sign.+#.####!!!! Exponential form, always signed.###.>> Fixed point decimal, scaled (i.e. if you calculate in pennies).
If you choose the exponential form, it always has to start with a sign, a # or a decimal point or -comma and it has to end in !!!!.A decimal field can have + or - as pre- or postfix, or it can be put in brackets. + or - can be placed in front of a currency symbol or after. If brackets are used, they are shown for negative values only. In case of - the sign is shown only if the value is negative, with + it is always shown.
Numbers can be printed with comma or full stop representing the decimal point. If the field contains one of these characters only, then this character is used as the decimal point. If there is more than one comma or full stop, then the last character is used as the decimal point and the other one is used for separating multiples of 1000. If the decimal point is the last character of the fielt then it is not printed. This allows you to specify 1000-separators on integers.
Currency sysmbols between $ and the first '#' or '*' are put into the numerical field close to the numerical value (i.e. $DM#.###,## or $£###.##).
PRINT_USING #2,"$DM###.###,##\",1250.6 prints to #2: DM1.250,60. '\' generates a newline.
If you use the conversion more than once you simply define a string:dm$ = '$DM***.***,**'PRINT_USING dm$, 31.265 gives *****DM 31,27 (rounding!).
Multiple Copies of SBASIC
There never was much problem getting multiple copies of SuperBASIC to run under QDOS. There is even less of a problem getting multiple copies of SBASIC to run under SMS. The problem was always what to do with the windows.
SBASIC has four distinct forms.
32
1. Job 0 is the "guardian" of SBASIC extensions, permanent memory allocation and channel 0.2. SBASIC "daughter jobs" may be created with the SBASIC command. These may be created with the
same set of 3 windows as the initial Job 0 windows. Alternatively, they may be created with a single channel #0 or even no windows open at all.
3. SBASIC source files (ending in _bas) may be executed by EX, EXEC, EW, EXEC_W.4. SBASIC may be invoked as a Thing which may either operate within the context of an invoking Job,
or, once set up, operate as an independent daughter Job.
SBASIC Daughter Jobs
Having a number of SBASIC jobs which completely cover each other may not be very useful. SBASIC daughter jobs may, therefore, either be created either with the full set of standard windows (in which case they all overlap) or they may be created with only one small window (#0).
SBASIC Command
The SBASIC command, which creates SBASIC daughter jobs, has an optional parameter: the x and y positions of window #0 in a one or two digit number (or string).
- If no parameter is given, the full set of standard windows will be opened. Otherwise, only window #0 will be opened: 6 rows high and 42 mode 4 characters wide within a 1 pixel wide border (total 62x256 pixels).
- If only one digit is given, this is the SBASIC "row" number: row 0 is at the top, row 1 starts at screen line 64, row 4 is just below the standard window #0.
- If two digits are given, this is the SBASIC "column, row" (x,y) position: column 0 is at the left, column 1 starts at 256 pixel in from the left.
SBASIC create an SBASIC daughter with the 3 standard windowsSBASIC 1 create an SBASIC daughter with just channel #0 in row 1SBASIC 24 create an SBASIC daughter to the right of and below the standard windows (a 800x600
display is required)
Because it is quite normal for an SBASIC job to have only #0 open, all the standard commands which default to window #1 (PRINT, CLS etc.) or window #2 (ED, LIST etc.) will default to window #0 if channel #1 or channel #2 is not open. This may not apply to extension commands.
WTV WMON
If you have a screen larger than 512x256 pixels, it is useful to be able to re-position the SBASIC windows. The TK2 WMON and WTV commands have been extended to take an extra pair of parameters: the pixel position of the top left hand corner of the windows. If only one extra parameter is given, this is taken to be both the x and y pixel positions.
WMON 4,50 reset windows to standard monitor layout displaced 50 pixels to the right and 50 pixels down.
If the mode is omitted, the mode is not changed, and, if possible, the contents are preserved and the outline (if defined) is moved.
WMON ,80,40 reset windows to standard monitor layout displaced 80 pixels to the right and 40 pixels down, preserving the contents
A border has been added to window #0 to make it clearer where an SBASIC Job is on the screen.
JOB_NAME
The procedure JOB_NAME (job name) can be used to give a name to an SBASIC Job. It may appear anywhere within a program and may be used to reset the name whenever required. This command has no effect on compiled BASIC programs or Job 0.
JOB_NAME Killer sets the Job name to "Killer"JOB_NAME "My little Job" sets the Job name to "My little Job"
33
Executing SBASIC Programs
SBASIC program files (ending in _BAS, _bas, _SAV or _sav) may be executed using the EX (EXEC) and EW (EXEC_W) commands.
EX my_little_prog_bas executes the SBASIC program "my_little_prog_bas"
Just as for "executable" programs, if file or device names (or channels) are given after the program name, the first file device or channel will be #0 within the program, the second will be #1 etc.
A simple program for "uppercasing" could be
100 JOB_NAME UC110 REPeat120 IF EOF(#0): QUIT130 BGET #0,a%140 SELect ON a% = 97 to 122: BPUT #1, a% ^^ 32: = REMAINDER BPUT #1, a%150 END REPeat
Saved as "uc_bas", this can be used for printing a file in upper case:
EX uc_bas, any_file, par
It can also be used as a filter to uppercase the output of any program sending its output to the "standard output".
EX my_prog TO uc_bas, par
The command QUIT should be used to get rid of an SBASIC job whether it has been created by the SBASIC command, EX or any other means.
Channel #0
There are some oddities in the handling of channel #0 which have been introduced to make the use of SBASIC a little easier.
- On normal completion of a program, if #0 is not open. SBASIC will die naturally. If #0 is open, SBASIC will wait for a command.
- In case of error, if #0 is not open, a default window #0 will be opened for the error message.- Likewise, if an operation is requested on a default channel (#0, #1 or #2) and neither the default
channel nor #0 are open, a default window #0 will be opened for the operation.
SBASIC and Resident Extensions
Resident extensions linked into Job 0 (the initial SBASIC) are available to all SBASIC jobs. If extension procedures and functions are linked into other SBASIC Jobs (using LRESPR), they are local to those Jobs and will be removed when the Jobs die or are removed.
Note that, because of this feature, LRESPR cannot be used from a Job, other than Job 0, to load files which include system extensions (i.e. MENU_REXT, QTYP etc.).
SBASIC Executable Thing
The SBASIC executable Thing is called "SBASIC". The provision of an SBASIC executable Thing enables the diehard QDOS fanatic to go well beyond the facilities provided by the SBASIC and EX commands.
On being invoked, SBASIC expects to find some channel IDs and a string on the stack (standard QDOS conventions). Because, however, SBASIC requires some BASIC source code in order to be able to execute, the treatment these channel IDs and the string on the stack are slightly unconventional.
If SBASIC is invoked without any channel IDs on the stack, SBASIC will behave either as a normal SBASIC interpreter, with the standard set of windows, or as an interpreter with no windows initially opened.
34
- If the string on the stack is null, the standard set of windows is opened and SBASIC waits for a command. (This is what happens when you give an SBASIC command without parameters or when you start SBASIC from the QPAC2 EXEC menu without a command string.)
- If the string on the stack is not null, no windows are opened and the string is treated as a command line. (This is what happens when you start SBASIC from the QPAC2 EXEC menu after specifying a command string.)
If there are one or more channel IDs on the stack, SBASIC will normally treat the first ID as the SBASIC program source file, the next ID as channel #0, the next ID as channel #1 and so on. The string defines the initial value of the CMD$ variable within the SBASIC program. (This is what happens when EX executes an SBASIC program.)
There is a special "trick" for setting up an SBASIC program with just window #0 open. The x,y coordinates of the top left hand corner of the required window #0 are complemented and put on the stack in place of a channel ID.
- If there is only one channel ID on the stack, and this is a "false" ID (i.e. the ID is negative), a 6 line by 42 column channel #0 is opened with the origin at NOT the MSW (x) and NOT the LSW (y) of the false ID. The string is treated as a command line. (This is what happens when you give a SBASIC command specifying the position of window #0.)
- If there are two channel IDs on the stack and the second is a "false" ID, first is used as the SBASIC program source file and the second ID is used to define window #0. The string defines the initial value of the CMD$ variable. (This could be useful.)
The SBASIC Interface Things
Two interface Things are provided for the interface to the SBASIC extension which are compatible with two of the established executable program interfaces. The first is called "SBAS/QD" which provides a QD5 compatible F10 interface (Jochen Merz). The second is a "FileInfo" Thing (Wolfgang Lenerz) which recognises and executes files starting with _sav or _bas.
If QD (version 5 or later) is configured to use the SBAS/QD thing, then you can create (line numbered or unnumbered) SBASIC programs with QD and execute them by pressing F10 (SHIFT F5). QD may be temporarily configured to do this by executing it with the appropriate command string.
EX QD;'\T SBAS/QD' Execute QD using SBAS/QD Thing
The FileInfo Thing is used by the QPAC2 Files Menu (amongst others) to determine how to "Execute" a file. With the default FileInfo Thing incorporated into SMSQ, files ending with _sav or _bas may be executed directly from the Files menu and any other utility program which uses the FileInfo Thing.
Terminate An SBASIC Program
QUIT
QUIT [value]
Terminates an SBASIC program. Please note that QUIT cannot terminate JOB 0, the main SBASIC interpreter.
The “Quit” keyword takes an optional parameter (long integer) that is passed to the calling job. For example, you could have two BASIC programs, the first calling the second with:
return_code = FEW (your_second_program)
Input Line Editing
The range of standard input line editing keystrokes is now much wider, and has been made consistent for INPUT, ED and the Window Manager. The move to start of word and delete start of word have been made reasonably intelligent and are particularly useful for editing filenames (QPAC2 Files) and SBASIC source (ED).
35
Key With Operation
move left one character move right one charaterTAB SHIFT move left eight charactersTAB move right eight characters SHIFT move left one word SHIFT move right one word ALT move to start of line ALT move to end of line CTRL delete left one character CTRL delete right one character CTRL SHIFT delete left one word CTRL SHIFT delete right one word CTRL ALT delete to start of line CTRL ALT delete to end of line CTRL delete whole line
Some keyboards have Delete and Backspace keys.
Bspace delete left one characterDelete delete right one characterBspace SHIFT delete left one wordDelete SHIFT delete right one wordBspace ALT delete to start of lineDelete ALT delete to end of line
Language Facilities
SMSQ/E incorporates several language variations and extra variations may be add "at run time".
Language Specification
A language may be specified either by an international dialling code or an international car registration code. These codes may be modified by the addition of a digit where a country has more than one language.
Language Code Car Registration Language and Country
33 F French (in France) 44 GB English (in England) 49 D German (in Germany) 1 USA USA (in USA)
Language Control Procedures
There is a set of procedures and functions which allow the language of the messages, the keyboard layout and the printer translate tables to be set. Where a language is to be specified, the parameter may be an integer value (the telephone dialing code), a string (the car registration letters) a variable or expression which yields an integer or string result, or a variable name.
It is not necessary for the car registration letters to be in upper case.
LANG_USE
The language of the messages is set by the LANG_USE lang command. This sets the OS language word, and then scans the language dependent module list selecting modules and filling in the message table.
LANG_USE 33 set language to FrenchLANG_USE D set language to GermanLANG_USE 'g'&'b' set language to English
36

WARNING: if you assign a value to a variable, then you will not be able to use that variable name to specify the car registration letters.
D=33: LANG_USE D set language to French (dialing code 33) rather than German (car registration D)
LANGUAGE LANGUAGE$
The LANGUAGE and LANGUAGE$ functions are used to find the currently set language, or to find the language that would be used if a particular language were requested. They can also be used to convert the language (dialing code) into car registration and vice versa.
PRINT LANGUAGE the current languagePRINT LANGUAGE$ the car registration of the current languagePRINT LANGUAGE (F) the language corresponding to FPRINT LANGUAGE$ (45) the car registration corresponding to 45PRINT LANGUAGE (977) the language that would be used for Nepal
KBD_TABLE
The keyboard tables are selected by the KBD_TABLE lang command.
KBD_TABLE GB keyboard table set to EnglishKBD_TABLE 33 keyboard table set to French
Private keyboard tables may also be loaded.
i = RESPR (512): LBYTES "kt",i: KBD_TABLE i keyboard table set to table in "kt"
For compatibility with older drivers, a "private" keyboard table loaded in this way should not be prefaced by flag word.
TRA
The SBASIC TRA command differs very slightly in use from the QL JS and MG TRA. The differences are quite deliberate and have been made to avoid the unfortunate interactions between functions of setting the OS message table and setting the printer translate tables. If you only wish to set the printer translate tables, the only difference is that TRA 0 and TRA 1 merely activate and disactivate the translate. They do not smash the pointer to the translate tables if you have previously set it with a TRA address command.
If you wish to change the system message tables, then the best way is to introduce a new language: this is done by LRESPRing suitable message tables.
Language dependent printer translate tables are selected by the TRA 1,lang command. If no language code or car registration code is given, the currently defined language is used.Language independent translate tables are set by the TRA n command where n is a small odd number.Private translate tables are set by the TRA addr command where addr is the address of a table with the special language code $4AFB.
TRA 0 translate off, table unchangedTRA 0, 44 translate off, table set to EnglishTRA 0, F translate off, table set to French
TRA 1 translate on, table unchangedTRA 1, GB translate on, table set to EnglishTRA 1, 33 translate on, table set to French
TRA 3 translate on, table set to IBM graphicsTRA 5 translate on, table set to GEM VDI
A = RESPR (512): LBYTES "tratab",A: TRA A translate on, table set to table in "tratab"
37
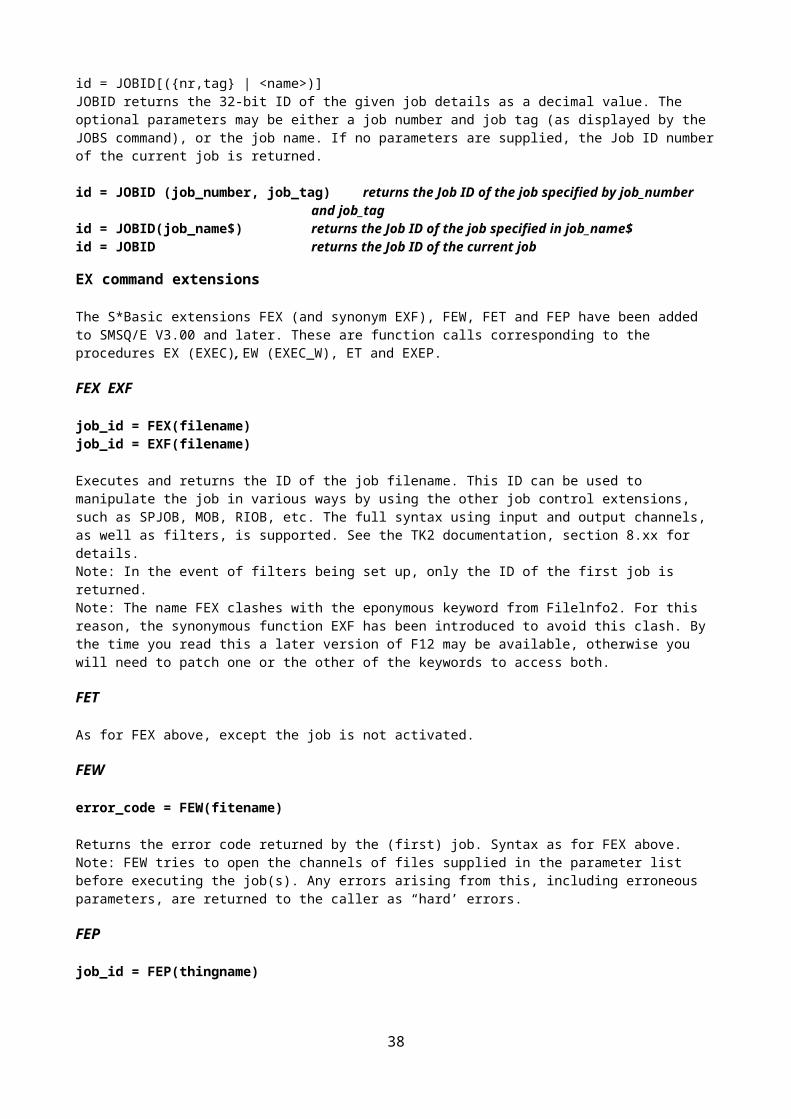
To use the language independent tables, your printer should be set to USA (to ensure that you have all the # $ @ [ ] { } \ | ^ ~ symbols which tend to go missing if you use one of the special country codes (thank you ANSI)), and select IBM graphics or GEM character codes as appropriate.
For the IBM tables, QDOS codes $C0 to $DF are passed through directly and QDOS codes $E0 to $EF are translated to $B0 to $BF to give you all the graphic characters in the range $B0 to $DF. QDOS codes $F0 to $FF are passed though directly to give access to the odd characters at the top of the IBM set.For the GEM tables, QDOS codes $C0 to $FF are passed through directly.
The Home Thing
The Home Thing implements "home directories". A home directory in this context is defined as meaning the directory from which an executable file was executed. A home filename is also supplied by the HOME thing, which is the combination of the filename and the home directory. Once set up, the home directory and home filename may not be changed (with the sole exception of the SBASIC interpreter, which can load BASIC programs from more than one location, or with different filenames).
The Home Thing also implements a "current directory". This is inherited from the job that is setting up the home directory (in most cases the parent job). If the calling job does not have a current directory, a copy of the home directory is used instead.
HOME_xxx Extensions
HOME_DIR$
result$ = HOME_DIR$ [(job_id)]
This function returns the home directory for the job given as job_id. The job ID is optional, in that case -1, meaning the current job, will be assumed. To avoid programs stopping with an error if the home directory cannot be found for some reason, this function returns an empty string if that error happens. result$=HOME_DIR$ return the Home Directory for the current job (job’s own
Home Directory)result$=HOME_DIR$(-1) return the Home Directory for the current job (job’s own
Home Directory)result$=HOME_DIR$(JOBID(‘launchpad’)) returns the Home Directory for job called ‘Launchpad’,
using the JOBID function to provide the job ID of ‘Launchpad’
HOME_FILE$
result$ = HOME_FILE$ [(job_id)]
This function returns the home filename for the job given as job_id. The job ID is optional, in that case -1, meaning the current job, will be assumed.
result$=HOME_FILE$ return the Home Filename for the current job
HOME_CURR$
result$ = HOME_CURR$(job_id)
This function returns the current directory for the job given as job_id. The job ID is optional, in that case -1, meaning the current job, will be assumed.
result$=HOME_CURR$ return the Current Directory for the current job
HOME_DEF
HOME_DEF job_name$, file_name$
38
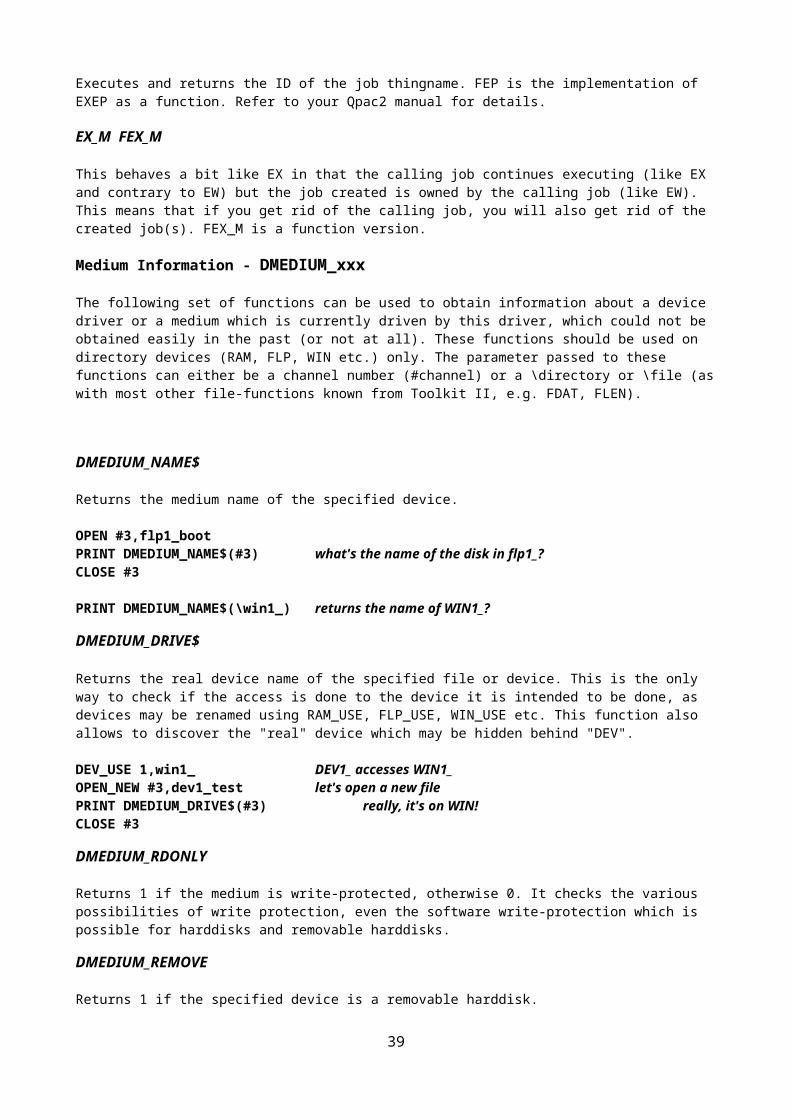
This sets a default filename for a job with the name given as first parameter. This is useful for "executable things", where no filename is readily available, or for file managers that haven't integrated calls to the home thing. With this keyword, you set up the default job name and filename that is to be used for the home/current file/dir. Please note that the file_name$ parameter must indeed be a FILENAME, not a directory name.
HOME_DEF "Sbasic", "dev1_sbasic_test_bas" set default filename for Sbasic to dev1_sbasic_test_bas
HOME_VER$
Function to get the version number of the HOME thing.
result$ = HOME_VER$ get the HOME thing version number into the string result$PRINT HOME_VER$ display the version number of the HOME thing
HOME_CSET
HOME_CSET [job_ID],directory$
Set the current directory for the job indicated. The job ID is optional, in that case -1 (meaning the current job), will be assumed if no job_ID is given.
HOME_CSET 262148,’Win1_Launchpad_’ set Current Directory for job with ID of 262148 ($00040004) to Win1_Launchpad_
HOME_SET
HOME_SET job_id,device_directory_and_filename$
Normally, jobs should not try to set up a home directory for themselves. This should be left to the system/filemanager. When a job is started with EX, EW or any of the similar commands, this is done automatically. However, filemanager writers may be interested in this information.
The HOME_SET command can be used to set the home directory, home filename and current directory. You pass the thing the job ID of the job for which this is to be set up and the entire filename, including the device and directory. The thing extracts the home directory from the filename. If you want to set up the home directory for the current job, you may pass -1 as parameter.
Since there can only be one home directory for a job and since that can only be defined once, the keyword will give an ‘in use’ error if the home directory is already set for this job. Otherwise, this keyword will set the home directory, the home file and the current directory. This keyword exists mainly for testing purposes.
HOME_SET -1,’win1_dir_myprog_exe’ set job’s own home directory, home file and current directory
The Recent Thing
The Recent Thing maintains lists with the names of recently opened files so that you can find out what program recently opened files, and so that application programs may propose a list of the files the user recently opened :
There is one general list, which contains the name of files recently opened, irrespective of the job which opened them.
Then there is a list for each job that opened one or several files and which only contains the files opened by this job.
The RECENT Thing is an “extension thing” in the usual SMSQ/E meaning.
39
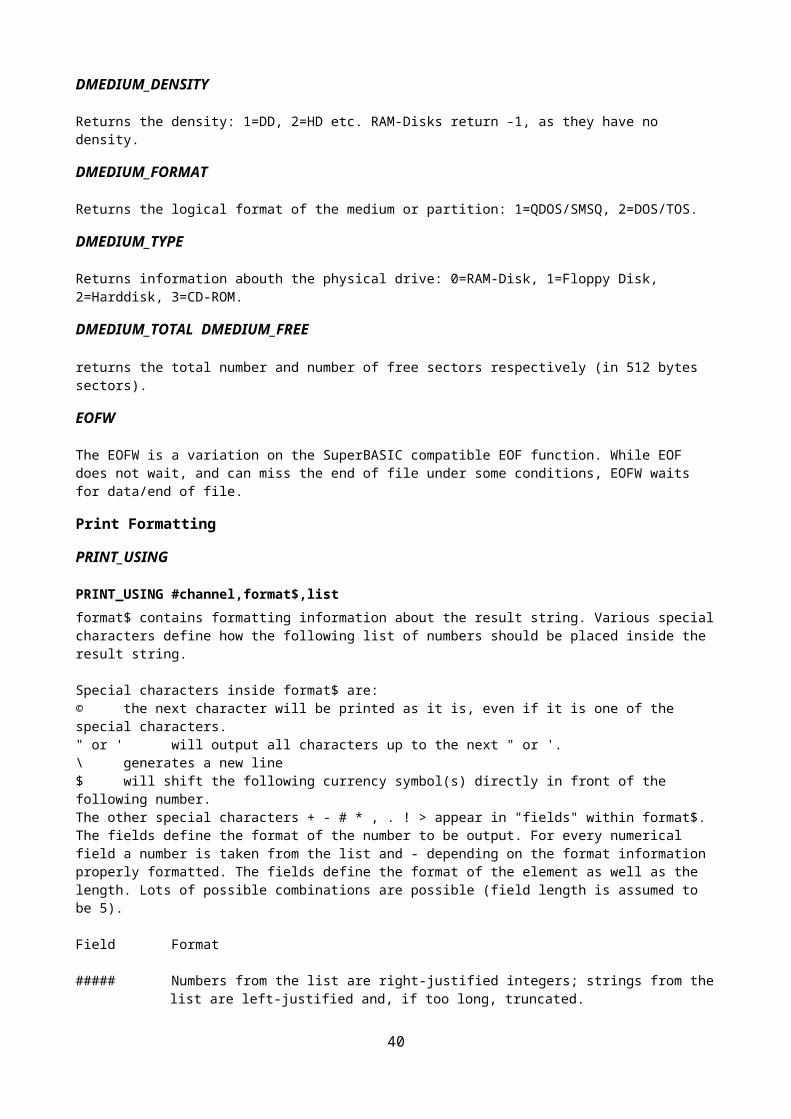
Various ways are provided to obtain the list(s) from the thing. There is an assembler interface to the thing and the extensions, and various SBASIC keywords that map onto the extensions.
Concepts
The RECENT Thing is called directly from the system's open file trap, without any user intervention. Whenever a file is opened, its name is added to the general list and to the job's list, and then becomes the first element of these lists.
There is no provision to delete files from the lists. However, since every list only has a finite size, when it is full and a new file is added to it, this will push the most ancient file off the list and the newest on it. There is also the possibility to remove an entire list for a job.
The system's open file call tries to filter out calls to open a directory, so that a directory open call does not cause the name of the directory to be added to the list. The same is true for the SAVE file. You can configure the size of the lists (i.e. how many files it should contain).
The lists
Each list is implemented as a LIFO (Last In First Out) buffer : the last (most recently) opened file will be the first in the list. There is one exception to this rule:The thing makes sure that a file only exists once in a list. So it checks the general list and the job's list and, if it detects that a file is already in a list, it will not be put in again, NOR WILL IT MOVE TO THE FIRST POSITION.
There is one general list and as many job lists as there are jobs that opened files, or even more than that if lists were LOADed.
The general list is immediately adjacent to the thing itself. Its size is of: rcnt_end + xx * rc_entryl bytes (see dev8_keys_recent_thing in the SMSQ/E sources ) where xx is the number of files configured by the user. The general list always exists.
Job lists are in heaps, i.e. memory allocated on the common heap, one per job that opens a file. The memory is allocated for job 0 and doesn't go away when the job is removed. Heap size is: rcnt_hdr + xx * rc_entryl bytes (see dev8_keys_recent_thing in SMSQ/E sources) again, xx is the number of files as configured by the user.
Job IDs
The primary way of identifying which list goes with which program is, of course, the job Id. Each list contains the ID of the job that opened it, and when the same job tries to open a new file, its name is added to the list of the job with the same Job ID. However, as a general rule, when trying to work with the RECENT Thing and it requires a Job ID, it is better to pass it a job name:
Over the course of a session, a user will typically launch several programs which will open a variety of files. Many of these programs will really be transient and will be removed from the system when they are done. (Note jobs started from Hotkeys are also created and removed, just as if they were loaded from disk). When a program is removed, its list stays in the system, for several reasons.
First it is to speed up the system - constantly removing and adding new lists (which are allocated on the common heap) would just slow the system down (see performance penalty, below).
Second, the information should be saved when the RECENT Thing lists are saved to disk, to be re-loaded in a later session.
Third, and most importantly, a mechanism is provided for jobs with the same name but different job Ids to use only one list.
40
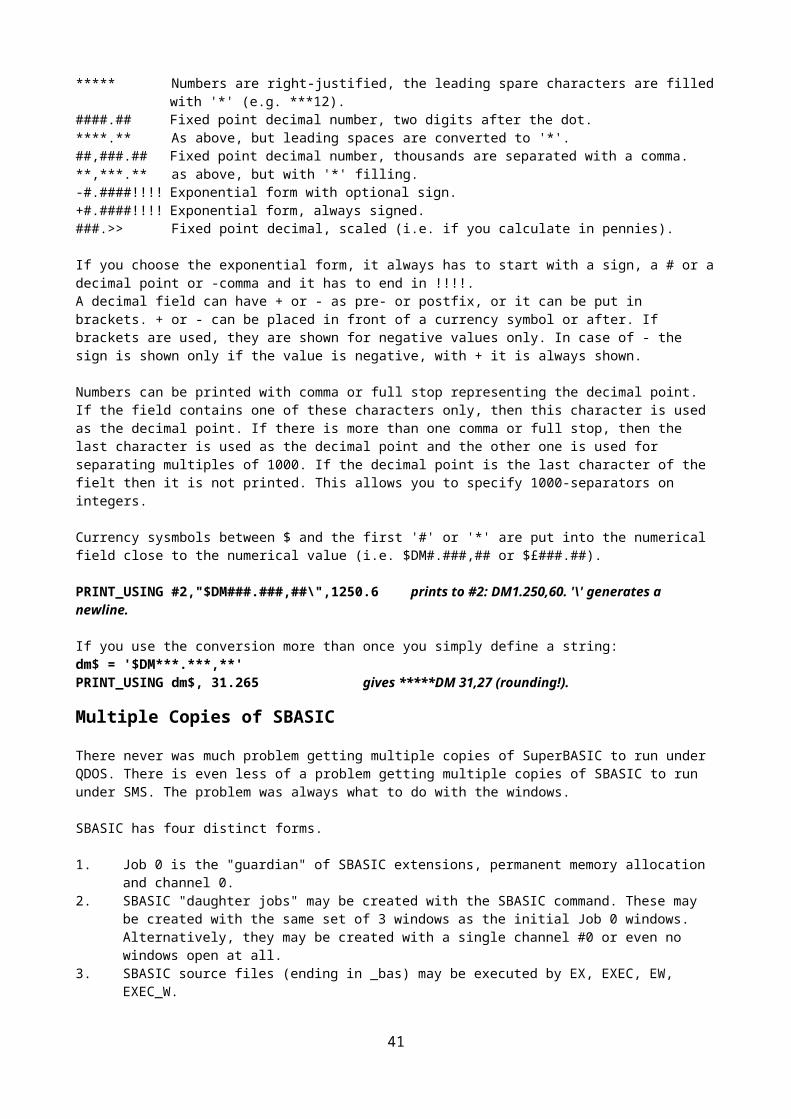
Note that this scheme only works with jobs that keep the same name. QD, for example, changes its name when you load a file, and Xchange also changes its name sometimes. In that case, if the job must be found via a hash, it will not be possible to find the previous list.
The same problem also arises when LOADing the lists at boot time (or whenever): The lists are stored with the Job IDs as they were when the list was saved.
In a nutshell, when trying to use the RECENT Thing, it is better to pass it a job name rather that a Job ID. The mechanism to do that is explained below (see JobIDs and Name pointer for the INFO extension). It is important to understand that, if two jobs have the same name, they will be using the same list (e.g. several instances of SBASIC, unless you changed their name).
Buffers
Whenever a buffer is required, this means an area of memory starting at an even address. The thing does not check that the address is even, if it isn't, mayhem may ensue.
The Thing Interface In Assembler
See the QDOS / SMS Reference Manual, section 23.2.
SBASIC Keywords
The following keywords allow use of the Thing from SBASIC:
RCNT_INFO A function to get some information on a list.RCNT_JOBS A function to get some info on the jobs the thing holds lists for.RCNT_ADDF A keyword to add a file to the list. Should not be used.RCNT_GFFA$ A function to get the first (=most recent) file name in the general list.RCNT_GFFJ$ A function to get the first (=most recent) file name in the list for a certain job.RCNT_GALL A function to get all filenames from the general list.RCNT_GALJ A function to get all filenames from the list for a certain job.RCNT_GARR A keyword to get all filenames from the general list into an array.RCNT_GARJ A keyword to get all filenames from the list for a certain job into an array.RCNT_SAVE A keyword to save the lists to a preconfigured fileRCNT_LOAD A keyword to load the lists from a preconfigured fileRCNT_REMV A keyword to remove a list from the thing.RCNT_SYNC A keyword to synchronize job ids with those in the lists.RCNT_HASH$ A function to get a hash from a string.
RCNT_INFO
length = RCNT_INFO ([job_id,] str_nbr%,str_len%,max_nbr%)
Get information on a list of files, where:
length = space needed for getting all strings, including length wordjob_id = optional id of job the info is about
EITHER as a long int where0 means get the general list,-1 means get the list for myself (= default if omitted)OR as a string with the name of the job
str_len% = RETURN parameter, max length of stringstr_nbr% = RETURN parameter, number of strings currently heldmax_nbr% = RETURN parameter, max number of strings in lists
41
This gets some information about the lists of files maintained by the thing, either the general list (job_id) = 0 or the list for a certain job. The Job ID may be passed as a long word, or, preferably, as a string with the entire name of the job.On return the function returns the size for using the "RCNT_GALL" or "RCNT_GALJ" keywords. The size is the size necessary to store all strings + a length word for each string + a possible byte necessary to even out each individual string length.
The other three parameters are filled in on return of the function:
The str_len% parameter contains the length of the longest filename currently being stored by the Recent list for this job, on in the general list. This length may vary, though, if a new file with a longer name is later opened. It will never exceed 41 characters, though.
The number of files in the list, returned in the str_nbr% parameter, may also vary, if a new file is later opened.
Finally, the max_nbr% is the maximum number of files a list may hold (as configured by the user).
RCNT_JOBS
result% = RCNT_JOBS (length,buffer)
Get a list of all jobs into a buffer:
length = length of buffer, in bytesbuffer = space for the list, preferrably a space allocated with ALCHPresult% = 0 or +ive: number of jobs in the list
else negative error code (e.g. "buffer full" if the buffer was too small)= -1 means get the list for myself (= default if omitted)
if there is an error, as much as possible is filled in the buffer
This gets a listing of all jobs for which the thing holds lists of files.
For each job, the listing in the buffer holds the Job ID in a long word followed by a standard string with the job name (which my be 0 if the job has no name).
The list is terminated by a long word of -1. If the buffer is too small to hold all job names, the buffer will be filled in as much as possible, and the error err.bufl will be returned.
There is no guarantee that any of the jobIDs returned are still valid : if the job with that ID has been removed, the jobID will no longer be valid.
The return in value holds the number of jobs in the buffer, unless it is a negative error code.
RCNT_ADDF
RCNT_ADDF [job_ID,] filename$
adds a file name to the list
filename is the name of the file to addjob_id is the optional jobID of the job supposed to have opened the file(defaults to -1, i.e. myself)
This adds a file to the list. USE OF THIS KEYWORD IS STRONGLY DISCOURAGED.
Normally, a program should not call this, the adding of file is handled by the system whenever a file is opened.
The JobID MUST be passed as a long word.
RCNT_GFFA$42
file$ = RCNT_GFFA$ ()Returns the name of the first (i.e. most recently opened) file from the general list. If the list is empty, this will be a null length string.
RCNT_GFFJ$
file$ = RCNT_GFFJ$ (job_ID)
Gets the name of the first (i.e. most recently opened) file for the job passed as parameter. If the parameter is omitted, it will default to -1, i.e. the current job. If the list is empty, the result will be a null length string.
RCNT_GALL
result% = RCNT_GALL (length,buffer)
Get ALL file names from the general list into a buffer.
length = length of buffer - this should be at least as much as that returned by the RCNT_INFO keyword
buffer = space for list
result% = 0 or +ive: number of files got if all went ok else negative error code:err.bffl Buffer too smallerr.ipar Wrong number of parameterserr.ijob Wrong job idAny error from the thing use routine
If the error is err.bffl, as much as possible is filled in the buffer
This gets all filenames of the general list into a buffer. The filenames will be copied one after the other, the name of the most recently opened file being the first one to be copied. If the filenames don't all fit, as many as possible will be copied and the error "buffer full" is returned.
Filenames are typical SMSQ/E strings, with a length word in front and evened out to start at an even address. This might be used as follows:
str_len%=0str_nbr%=0str_max%=0blength=RCNT_INFO(,0,str_nbr%,str_len%,str_max%) get info on sizebuffer=ALCHP(blength) get bufferresult%=RCNT_GALL (blength,buffer)
Perhaps a better way to get the filenames for the basic programmer is the RCNT_GARR function.
RCNT_GALJ
result% = RCNT_GALJ ( [jobID,] length, buffer)
Get ALL file names for a job into a buffer.
length = length of buffer - this should be at least as much as returned by the RCNT_INFO keyword for this jobs
buffer = space for list
job_id = (optional) id of job:EITHER as a long int where -1 means get the list for myself (=default)OR as a string with the name of the job
43
result% = 0 or +ive: number of files got if all went okelse negative error code:err.bffl buffer too smallerr.ipar wrong number of parameterserr.ijob wrong Job IDany error from the thing use routine
if the error is err.bffl, as much as possible is filled in the buffer
This gets all filenames of the list for a job into a buffer.
The filenames will be copied one after the other, the name of the most recently opened file being the first one to be copied. If the filenames do not all fit, as many as possible will be copied and the error "buffer full" is returned.
Filenames are typical SMSQ/E strings, with a length word in front and evened out to start at an evenaddress.
This might be used as follows:
str_len%=0str_nbr%=0str_max%=0blength=RCNT_INFO("Prowess",str_nbr%,str_len%,str_max%) get info on sizebuffer=ALCHP(blength) get bufferresult%=RCNT_GALL (blength,buffer) data info buffer
RCNT_GARR
RCNT_GARR array$
Get all filenames from the general list into an ARRay
array$=a 2 dimensional string array.
This is similar to the GALL call, in that all, or as many as possible, filenames will be copied. Here however, they will be copied into what must be a two-dimensional string array (i.e. DIM a$(xx,yy). If the filenames do not all fit, as many as possible will be copied, and no error is returned.
An error bad parameter will however be returned if:
The array isn't a two-dimensional string array The second dimension of the array is too small for the longest element in the list.
Note that filenames will not be longer than 41 characters, so a DIM a$(x,41) will guarantee that that errorwon't happen.
The first array element to be filled in will be element 0.
This might be used as follows:
str_len%=0str_nbr%=0blength=RCNT_INFO(0,str_nbr%,str_len%,str_max%)get info on sizeDIM files$(str_nbr%,str_len%) or better DIM files$(str_nbr%,41)RCNT_GARR files$
RCNT_GARJ
RCNT_GARJ array$
44
Get all filenames for a job into an ARRay. Array$ is a 2-dimensional string array. The array will be filled in starting at element 0.
This is similar to the GALJ call, in that all, or as many as possible, filenames will be copied. Here however, they will be copied into what must be a two-dimensional string array (i.e. DIM a$(xx,yy). If the filenames don't all fit, as many as possible will be copied, and no error is returned.
An error bad parameter will however be returned if :
The array isn't a two-dimensional string array The second dimension of the array is too small for the longest element in the list.
Note that filenames will not be longer than 41 characters, so a DIM a$(x,41) will guarantee that that error won't happen.
The first array element to be filled in will be element 0.
This might be used as follows:
str_len%=0str_nbr%=0blength=RCNT_INFO("Prowess",str_nbr%,str_len%,str_max%) get info on sizeDIM files$(str_nbr%,str_len%) or better dim files$(str_nbr%,41)RCNT_GARJ files$
RCNT_HASH$
hash$=RCNT_HASH$(string$)
Returns the hash from the stringstring$ = a normal string to turn into a hash
This returns the hash, as used by the RECENT Thing for job names, from the string passed as parameter. The hash algorithm used is a very simple one, the consideration was speed over anything else. So this hash is certainly very easy to break and probably not very collision proof....
That said, running it over an entire qxl.win file with about 10.000 files did not give any collision for any of thefilenames.
RCNT_SAVE
RCNT_SAVE
SAVE lists to configured file : no parameters
This saves the lists for all jobs currently held in the thing, into the file configured by the user. The file is overwritten. You can't specify another file. The general list is NOT saved. The name of the SAVE file is NOT added to any list of files, not even the general one, when SAVEing or LOADing.
RCNT_LOAD
RCNT_LOAD
LOAD lists from configured file : no parameters.
This loads the lists as saved by the RCNT_SAVE extension. All lists existing in the thing, except for the general list, will be removed prior to loading. The file from which the lists are loaded is as configured by the user, you can not specify another file.
45
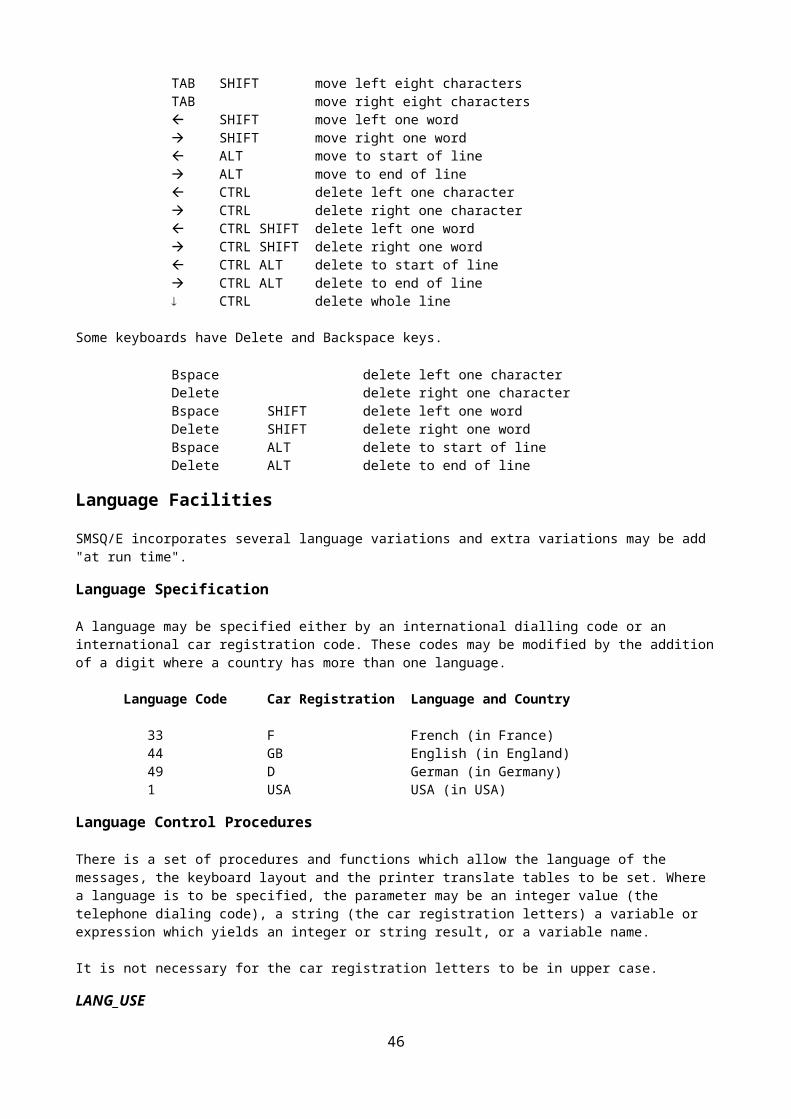
Thus, if you LOAD the lists as the very first thing in your boot file, they will also fill up with the files opened up during your normal boot.
If you LOAD the lists at the end of your boot file, they will replace all lists generated up to that time (except for the general list).
When SAVEing or LOADing, the name of the SAVE file is NOT added to any list of files, not even the general one.
It is possible to save the lists, re-configure SMSQ/E to use lists with a different size, and load the lists after a reboot with the newly configured SMSQ/E. In that case:
If the new list size is smaller than the saved size, only some files will be copied to the new list. THERE IS NO GUARANTEE THAT THESE will include the newest files opened.
If the list size is larger than the saved size, all filenames will be copied.
In the latter case, and also when the sizes stay the same between saving and loading, the order of thefilenames will be preserved.
RCNT_REMV
RCNT_REMV [jobid]
REMoVe a list for a job. This removes the list for the job passed as parameter. If no such job exists, it returns an error.
RCNT_SYNC
RCNT_SYNC
Tries to give current Job IDs to jobs in heap
As explained above, the Job IDs stored in the RECENT Things may not correspond to the Job IDs of the jobs currently executing, for example after loading the lists. The SYNC runs through the list of all iobs currently executing in the system and if a list exists for a job with that name, it sets the Job ID of that list to that name.
Configuration
Using the usual standard config program, you can configure:
Whether SMSQ/E should use the RECENT Thing at all. If not, neither the thing nor the SBASIC extensions for it will be initialised/usable.
The size of the lists (i.e. how many files they should contain):The maximum allowed size is 255. The minimum allowed size is 1.The longer the list, the higher the performance penalty (see below).All lists have the same size. The default list size is 20.
The name of the SAVE file if you want to be able to save/load the lists between sessions.
Performance penalty
There is, of course, a performance penalty involved when opening files, since the RECENT Thing must be used and the lists searched through, but the time necessary to check and add the file to the list is small. As an indication, compiling all of SMSQ/E, under SMSQmulator, in a version of SMSQ/E 3.23 without the RECENT Thing takes about 118 seconds. The same with the RECENT Thing takes about 125 seconds. This is with a list size of 250 files.
Under QPC, these were 58 seconds without the RECENT Thing and 63 seconds with the Recent thing.
46
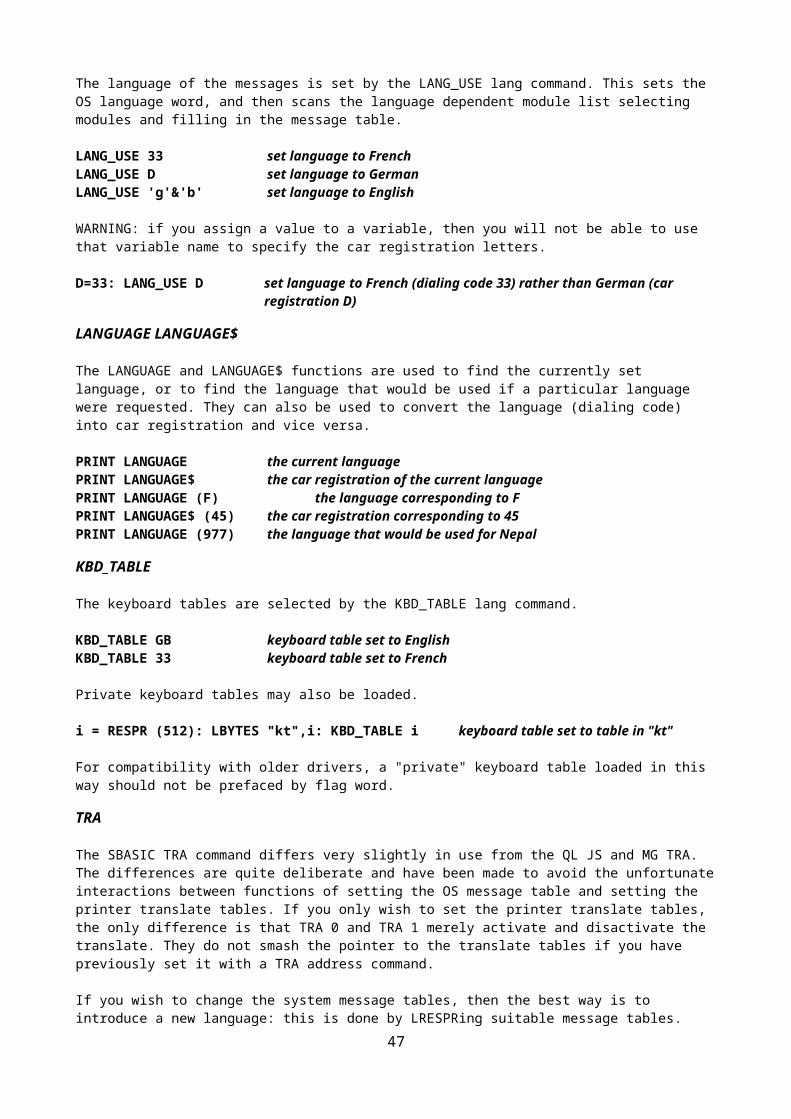
Machine Type Functions
Two standard functions to determine the machine type are supplied. MACHINE returns a number (based on the value held in the system variable sys_mtyp at offset $A7, decimal 167) which identifies the machine or emulator type. PROCESSOR returns a number (based on the value held in the system variable sys_ptyp at offset $A1, decimal 161) which identifies the type of processor and if any floating point unit is available.
MACHINE
The MACHINE function returns the machine type.
0 Atari ST / STM / STF / STFM.1 ditto, with blitter.2 Mega ST (without blitter) or ST etc. with real-time clock.3 Mega ST (with blitter) or ST etc. with RTC and blitter.4 Stacy6 Atari STE8 Mega STE (without blitter!).9 Mega STE.10 Gold Card11 Gold Card with Hermes12 Super Gold Card13 Super Gold Card with Hermes16 Atari Falcon17 Q4018 Q6820 SMSQmulator24 TT 03028 QXL30 QPC31 QLay emulator
PROCESSOR
The PROCESSOR function returns the 680x0 family member.
0 – 68000 or 6800810 – 6801020 – 6802030 – 6803040 – 6804060 – 68060
IF MACHINE = 12 : PRINT "Super Gold Card fitted"IF PROCESSOR = 60 : PRINT”I have a 68060 processor!”
Display Extensions
As of version 2.98 of SMSQ/E, the DISP_xxx command set has been extended to allow the colour depth to be specified. The DISP_COLOUR command follows the same principles as the other DISP_xxx commands. These commands may vary from hardware to hardware – please check the notes for the various hardware platforms.
DISP_xxx Keywords
DISP_BLANK
DISP_BLANK x blank [, y blank] sets the size of the blank area to the sides of and above and below the image for the QVME card on Atari only: it is ignored for all other Atari display cards and other hardware ssytems. If the blank is too small, you will loose some of your image, if it is too large, the image will be too small.
47
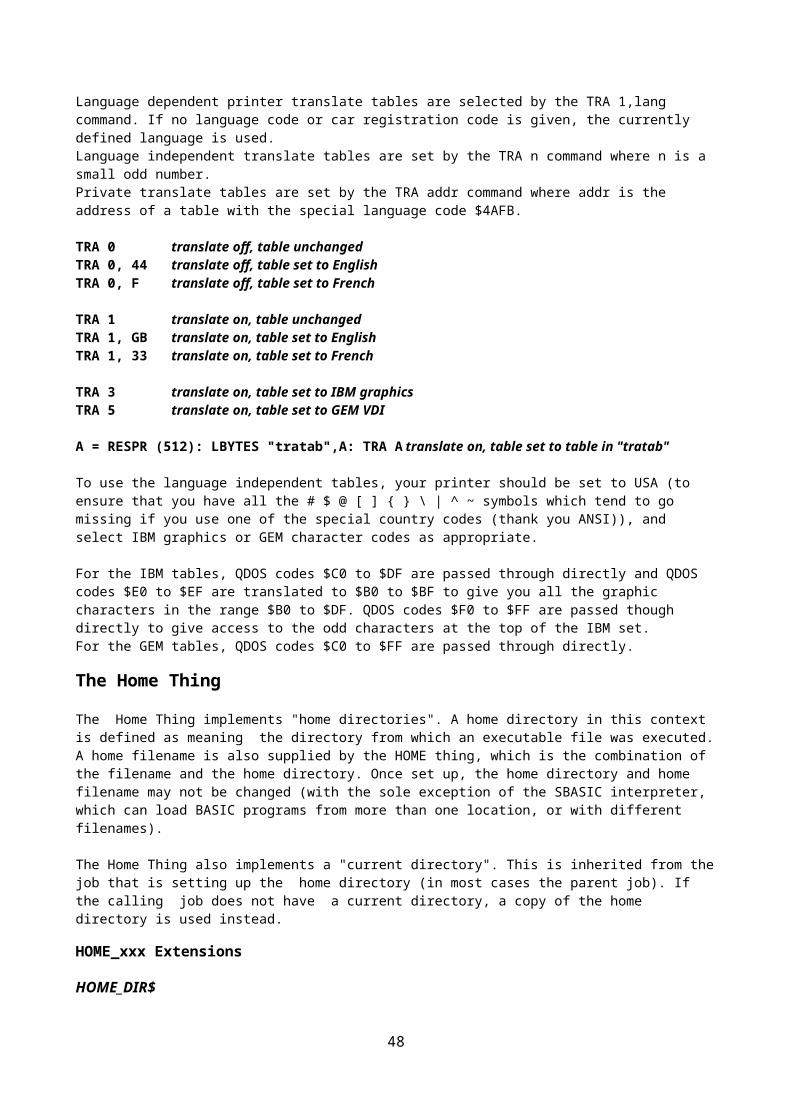
DISP_BLANK 128,64 set horizontal blank to 128 pixels and vertical to 64 lines
As the display size is altered, the blank is automatically adjusted to maintain the proportion of blank. The DISP_BLANK command will not usually be required.
If preferred, the parameters for the DISP_RATE and DISP_BLANK commands may be tacked on to the DISP_SIZE command.
DISP_SIZE 640,480,60 set standard VGADISP_SIZE 800,480,80 set 80 Hz refresh rate, squashed VGA.DISP_SIZE 800,600,70,,128,60 set all of size, frame scan rate and x and y blank
Note that if you specify both frame and line rates, as well as the number of blank lines, the line rate is over-specified: it will be determined by the frame rate and the total number of lines (visible + blank) and the line rate will be ignored.
DISP_COLOUR
DISP_COLOUR colour depth
Specifies the colour depth to be used - 0 for QL, 2 for 8-bit, 3 for 16 bit (also 1 for 4 bit, and 4 for 24 bit - but these do not exist).
DISP_COLOUR 0 QL mode displayDISP_COLOUR 1 16 colour (4-bit) display mode – not currently implementedDISP_COLOUR 2 256 colour (8-bit) display mode, currently used on Aurora and QPC2DISP_COLOUR 3 65,536 colour (16-bit) display modeDISP_COLOUR 4 24-bit colour mode – not currently implemented
It is possible to specify the display size immediately after the colour depth.
DISP_COLOUR 3, 800, 600 specifies a 800x600 16 bit display
Naturally, since the DISP_SIZE size definition can also followed by the frame and line rates, the DISP_COLOUR definition can also specify the frame rate, the line rate and the x and y blank.
DISP_COLOUR colour depth [,xsize [,ysize [,framerate [,linerate [,xblank [,yblank]]]]]]DISP_SIZE xsize [,ysize [,framerate [,linerate [,xblank [,yblank]]]]]DISP_RATE framerate [,linerate [,xblank [,yblank]]]DISP_BLANK xblank [,yblank]
Any parameter can be left undefined, thus
DISP_SIZE , ,72, , , 30
specifies that the frame rate will be 72 Hz and the y (frame) blanking period will be 30 lines - leaving all the other parameters unchanged. Note that on most machines, most parameters will no effect at all!
DISP_INVERSE
The DISP_INVERSE (0 or 1) command is used to invert the monochome display from the normal (black background) to inverse (white background) state. On hardware with no monochrome display, this is ignored.
DISP_INVERSE 1 Invert black and whiteDISP_INVERSE 0 Restore normal
DISP_RATE
DISP_RATE (frame rate, line rate) is used to specify the frame and line scan rates for the QVME card on the Atari ST only: it is ignored for all the other Atari display cards and other hardware. It would be usual to specify only the frame rate: the line rate is equal to the frame rate multiplied by the total number of lines.
DISP_RATE 75 set the frame rate to 75 Hz48
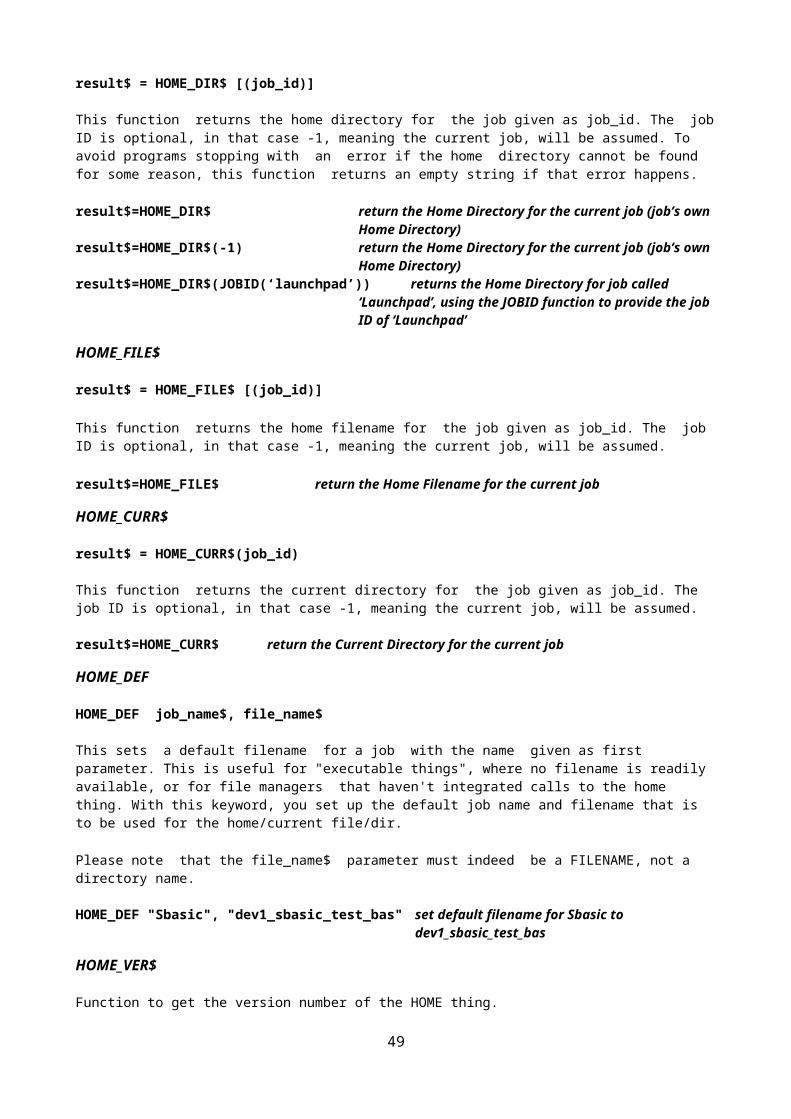
DISP_RATE 70,48000 set the frame rate to 70 Hz and line rate to 48 kHz (686 lines)
DISP_SIZE
DISP_SIZE (xpixels, ylines) is used to set the display size. The nearest feasible size will be selected by the driver.
It is best not to change the display size when the pointer sprite is visible, or you may get some spurious blobs left on the display. There should be few other problems changing from a smaller size to a larger size. You should, however, avoid changing from a larger size to a smaller if there are any windows outside the smaller screen.
Note that, for the QVME card on Atari, the width and height are set in increments of 32 pixels and 8 lines respectively, while for the extended QL mode 4 card on Atari, any width of 512 or less will select the standard resolution mode while any width greater than 512 pixels will select the extended mode.
Certain hardware may only support specific display sizes, e.g. the Q40 and Q60 may only support 512x256 and 1024x512 pixels, while the Aurora card supports only a range of sizes in 4:3 and 2:1 aspect ratios.
DISP_SIZE 1 is a special form, which resets the a QL-sized 512x256 display, originally for use on the Atari extended Mode 4 emulator card.
DISP_SIZE 1024,768 change to SVGA size on a PCDISP_SIZE 1024,512 change to Q40/Q60 resolution displayDISP_SIZE 800,600 change to 800x600 (Atari QVME) or 768x280 (Atari extended mode 4)DISP_SIZE 1 change to 512x256 (extended mode 4) (ignored by QVME)
DISP_TYPE
The DISP_TYPE function is used to find the type of display. For standard QL style displays in MODE 4 (any resolution) DISP_TYPE returns 0. The value returned on other display systems may vary according to the hardware and colour depth. In general, on SMSQ/E versions supporting higher colour modes, and on Atari emulator cards, the following values may be returned.
0 – QL style display (MODE 4)1 - Extended mode 4 emulator (standard and extended display sizes) on Atari.2 - QVME mode 4 emulator on Atari.3 - Aurora LCD4 - Monochrome display on Atari.5 - Aurora QL mode8 – QL MODE 8 display16 – 8-bit (256 colour) mode32 – 16-bit colour mode on QPC, QXL and SMSQmulator33 – 16-bit colour mode on Q40 and Q6064 – 24-bit colour mode (no hardware supports this at the time of writing)
IF DISP_TYPE > 0 THEN PRINT”Not a standard QL display.”IF DISP_TYPE <> 8 : PRINT”Sorry, this game only runs in MODE 8.”IF DISP_TYPE = 4 THEN PRINT”Monochrome display.”
REMark test how many colours this system can displayncol = 4 : REMark assume 4 coloursdt = DISP_TYPE : REMark check display typeSELect ON dt =0,1,2 : ncol=4 : REMark 4 colours =4 : ncol = 2 : REMark monochrome on Atari =8 : ncol = 8 : REMark 8 colours in MODE 8 =16 : ncol = 256 : REMark 256 colour mode =32,33 : ncol = 65536 : REMark 16-bit colour modes 32 and 33 =64 : ncol = 2^24 : REMark 16,777,216 colours, 24-bit systemEND SELectPRINT”This system can display “;ncol;” colours.”
49
Graphic Device Interface Version 2
This part describes the use of the extended colours introduced from version 2.98 of SMSQ/E
Limitations
The modifications limit the colour depth for normal colour stippled colour definitions to 16 bit. Plain colours are limited to 32 bits.
The modifications limit the colour depth for stippled borders to 8 bit. Plain border colours are limited to 16 bits.
The calls to specify the colours can only handle- QL 8 (or 4 of 8) colour definition,- 256 palette mapped colour definition,- true colour (24 bit),- native colour.
Sprites (patterns and blobs) can be handled in- QL 8 (or 4 of 8) colour definition,- 256 palette mapped colour definition,- 256 grbgrbgm colour definition,- native colour.
The operating system mode call does not change the display mode.
Extended Colour SBASIC Procedures.
All the normal SBASIC procedures that set or use colours can work with any of the three "standard" SBASIC colour definitions.
1. QL colour: a value from 0 to 7.2. Palette mapped colour: a value from 0 to 255.3. True colour: red (0-255) * 65536 + green (0-255) * 256 + blue (0-255).
They can also work with the "native" colour definition. Note that, for ease of programming, the true colour definition used in SBASIC is not the same as used for the device driver interface.
The BGCOLOUR_xx, BGIMAGE, COLOUR_xx and PALETTE_xx procedures described below all require a valid window channel ID. The default is the same as PRINT: #1 or #0 for mini SBASICs that have only #0 open.
Wallpaper
A plain or stippled background can be defined using either QL colours or true colours.
BGCOLOUR_QL
BGCOLOUR_QL QL colour sets the background to the QL colour (0-255).
BGCOLOUR_24
BGCOLOUR_24 full colour sets the background colour to the plain true colour.
100 BGCOLOUR_QL 255 set background to black / white check 110 BGCOLOUR_QL 0,7 set background to black / white check 120 BGCOLOUR_QL 0,7,3 set background to black / white check 130 BGCOLOUR_24 40 set the background to deep blue
You can get stippled extended colours by cheating. Set two of the QL palette entries (see below) to the colours you require before calling BGCOLOUR_QL.
50
BGIMAGE
BGIMAGE filenameloads a background image from file.
150 BGIMAGE win1_wallpaper load my wallpaper
Background images must be in the form of a screen snapshot. It is relatively simple to create background images.
500 WINDOW SCR_XLIM, SCR_YLIM, 0, 0 : REMark whole screen window 510 ... draw the wallpaper on the screen 520 SBYTES_0 win1_wallpaper, SCR_BASE, SCR_LLEN * SCR_YSIZE
Palette Maps
The colours used to display the QL colours 0 to 7 are not necessarily the boring old black, blue, red, magenta, green, cyan, yellow and white. They can be set to other colours if you wish. The palette mapped colours can also be changed although they have been pre-defined to put the most useful colours first.
PALETTE_QL
PALETTE_QL start, true colour 1, true colour 2, ...
sets QL palette entries starting with the start entry.
PALETTE_8
PALETTE_8 start, true colour 1, true colour 2, ...
sets 256 colour (8 bit) palette entries starting with the start entry.
On hardware that does not have a true palette map, palette map changes do not affect the information already drawn on screen.
There is a practical reason for changing the QL palette map entries. Many programs define some of the colours displayed as "white-colour" on a 4 colour QL display, white-red appears as green. White-red, however, is really cyan, not green. As a result, many QL mode 4 programs take on rainbow hues when displayed on a 256, 65536 or full colour display.
This can be "fixed" by redefining the colours so that colour 2 is a bright crimson and colour 4 is a bright sea green. This will ensure that colour 2 + colour 4 = colour 7. We also need to ensure that colour 0 = colour 1, colour 2 = colour 3, etc.
600 crimson = 255 * 65536 + 100 crimson is red + a bit of blue 610 sea = 255 * 256 + 155 sea green is green + rest of blue620 white = crimson + sea 630 PALETTE_QL 0, 0, 0, crimson, crimson, sea, sea, white, white set 8 colours
The following program can be used to display the current 256 colour palette using the up and down arrow keys. If new colours are required, they should replace colours towards the top of the table so that the low colours remain unchanged. You change palette entry 0 at your own risk.
100 OPEN #0,con: out = 0110 WINDOW #out, 16*10+2,16*10+2,50,50120 COLOUR_PAL: BORDER #out,1,0,1130 bottom=-16140 FOR i = 1 TO 16: up150 REPeat160 BGET #0,a170 IF a=$D0: IF bottom < 255-16: up180 IF a=$D8: IF bottom > 0: down
51
190 END REPeat200 :210 DEFine PROCedure up220 bottom = bottom+1230 PAPER bottom+15 : SCROLL -10240 l = bottom+1015 : l$ = l250 PAPER #out, l&&1 : INK #out, (l+1)&&1260 AT #out, 15,0 : PRINT #out; l$(2 TO 4);270 END DEFine280 :290 DEFine PROCedure down300 bottom = bottom-1310 PAPER bottom : SCROLL 10320 l = bottom+1000 : l$ = l330 PAPER #out, l&&1 : INK #out, (l+1)&&1340 AT #out, 0,0 : PRINT #out; l$(2 TO 4);350 END DEFine
SBASIC Colour Definition Selection
SBASIC has a new set of procedures for selecting colour definition used by INK, PAPER, STRIP, BORDER, BLOCK.
COLOUR_QL
selects the standard QL colour definitions (the QL colours can be mapped to colours other than the standard black, blue, red, magenta, green, cyan, yellow and white).
COLOUR_PAL
selects the 256 colour palette mapped definition.
COLOUR_24
selects the true colour (24 bit) definition.
COLOUR_NATIVE
selects the native colour definition - the significance of the colour numbers specified by INK, PAPER, etc. depends on the hardware.
200 COLOUR_24 select true colour mode 210 BORDER 2, 128*65536 + 128*256 +128 grey border 220 BORDER 2,$808080 grey border for hexadecimal hackers
The commands have no effect on any other programs executing. When an SBASIC program starts executing, it is set to QL colour definition.
Alpha Blending
ALPHA_BLEND
Alpha Blending is the process of combing a translucent foreground colour, with a background colour, thereby producing a new blended colour. The degree of the foreground colour's translucency may range from completely transparent to completely opaque. It takes two parameters, a channel and an alpha weight from 0 to 255 with 0 being transparent and 255 being opaque.
So, after executing for example ALPHA_BLEND #1,128 all future graphics commands on channel 1 including BLOCK, CIRCLE, LINE and PRINT will draw their contents half-transparent over the existing background until alpha blending is disabled again (by setting the weight to the default of 255: ALPHA_BLEND #1,255).
52
100 PAPER 0 : CLS110 ALPHA_BLEND 128 half-transparent120 FILL 1 : INK 2 : CIRCLE 40,50,20 overlapping circles130 FILL 1 : INK 4 : CIRCLE 65,50,20140 FILL 1 : INK 1 : CIRCLE 50,75,20150 CSIZE 2,0 : AT 10,4160 PRINT “Alpha blending!” superimpose some text170 ALPHA_BLEND 255 back to normal
The System Palette and Window Manager 2
Colours List
The new Window Manager introduced by SMSQ/E v3.00 maintains a table of colour settings for programs to use as “standard colours”. This is called the System Palette, also known as a ‘colour theme’. Four system palette tables, or themes, are currently supplied with the operating system and more may by designed using software such as Wolfgang Uhlig’s Q-CoCo (Colour Configurator) program.
The list includes colour values to be used for display items such as window background, border, loose items and so on. The items are referenced by a 4-digit hex number (16-bit value) as per the list below, or the decimal number equivalent. These numbers should not be used in standard INK, PAPER and BORDER statements – they are not colour values, merely an index to an entry in a list of colour values. They should be used with the WM_x equivalent commands below, which will look up the colour values to be used for the item numbers in the list.
Number Meaning
$0200 Window border$0201 Window background$0202 Window foreground$0203 Window middleground$0204 Title background$0205 Title text background$0206 Title foreground$0207 Loose item highlight$0208 Loose item available background$0209 Loose item available foreground$020a Loose item selected background$020b Loose item selected foreground$020c Loose item unavailable background$020d Loose item unavailable foreground$020e Information window border$020f Information window background$0210 Information window foreground$0211 Information window middleground$0212 Subsidiary information window border$0213 Subsidiary information window background$0214 Subsidiary information window foreground$0215 Subsidiary information window middleground$0216 Application window border$0217 Application window background$0218 Application window foreground$0219 Application window middleground$021a Application window item highlight$021b Application window item available background$021c Application window item available foreground$021d Application window item selected background$021e Application window item selected foreground$021f Application window item unavailable background$0220 Application window item unavailable foreground$0221 Pan/scroll bar
53
$0222 Pan/scroll bar section$0223 Pan/scroll bar arrow$0224 Button highlight$0225 Button border$0226 Button background$0227 Button foreground$0228 Hint border$0229 Hint background$022a Hint foreground$022b Hint middleground$022c Error message background$022d Error message foreground$022e Error message middleground$022f Shaded area$0230 Dark 3D border shade$0231 Light 3D border shade$0232 Vertical area fill$0233 Subtitle background$0234 Subtitle text background$0235 Subtitle foreground$0236 Menu index background$0237 Menu index foreground$0238 Separator lines etc.
Colour Commands
The WM_xxx commands allow access to the System Palette colours. They take a 4 digit hexadecimal colour value for the item in question from the table above. The parameters to these commands are otherwise exactly the same as for the “normal” commands as their corresponding command names without the WM_ prefix (INK, PAPER, BORDER, STRIP, BLOCK). The channel number is optional. If the command is to be compiled using a compiler which does not allow the $number notation, please use the HEX function instead.
WM_INK
Sets the ink colour for the channel indicated to the colour for the specified item number from the table above.
WM_INK #0,$0210 set channel 0 ink colour to information window foreground ink colour specified in the System Palette
WM_INK #2,HEX(‘0202’) set channel 2 ink colour to main window foreground ink colour specified in the System Palette
WM_INK $0218 set default channel (1) ink colour to application window foreground ink colour specified in the System Palette
WM_PAPER
Sets the paper colour for the channel indicated to the colour for the specified item number from the table above. WM_PAPER also sets the STRIP colour as is the case with the normal PAPER command. But there is also the WM_STRIP colour command to set the strip colour only.
WM_PAPER #2,$020F set the paper colour for channel 2 to the information window background colour specified in the System Palette
WM_STRIP
Sets the strip colour for the channel indicated to the colour for the specified item number from the table above.
WM_STRIP #ch,$0203 set the strip colour for channel ch to the window middleground colour specified in the System Palette.
WM_BORDER
54
Sets the border colour for the channel indicated to the colour for the specified item number from the table above.
WM_BORDER #0,$0200 set the border colour for channel 0 to the main window border colour specified in the System Palette.
WM_BLOCK
Draw a block in the channel indicated in the colour for the specified item number from the table above.
WM_BLOCK #1,100,40,0,0,$0201 draw a 100x40 block of colour at 0,0 in the window background colour
System and Job Palette Handling
There are commands to set/get the system palette and commands to set/get the “per job” palettes.
a - System palette keywords:
SP_RESET
SP_RESET [#channel] [,number]
This resets the colour palette given in number to the original values (as configured). Default is number 0.
SP_GETCOUNT
result% = SP_GETCOUNT
Gets the number of elements contained in a system palette. Each system palette, of course, has the same number of elements.
SP_GET
SP_GET [number,] address, first, count
This gets the colours from a system palette and puts them somewhere. The optional "number" parameter tells us which system palette we want (0 to 3, default = 0). "address" is the address of the space for the information, "first" is the number of the first system palette colour to get (starting from 0) and "count" is the number of colours to get.
The space pointed to by "address" MUST have enough space for the number of colours! This is NOT checked by the keyword and it is the programmer's responsibility to make sure that this is so.
As an example, you could use the following code to get ALL of the colours of a system palette:
totcol%= SP_GETCOUNT get number of colours in system paletteaddress= ALCHP(totcol%*2)+4 enough space for colours + securityfirst=0SP_GET #1,0,address,first,totcol%
SP_SET
SP_SET [#channel,] [number,] address, first, count
Sets the system palette entries, the address pointing to a space containing the colours. The parameters are similar to those for SP_GET.
b - Job palette keywords
SP_JOBPAL
SP_JOBPAL [#channel], jobID/Job_name, number55
Set the system palette for the job given to the number. The job is given either as a string or as a standard Job ID number.
SP_JOBOWNPAL
SP_JOBOWNPAL [#channel],jobID/Job_name, pal_pointer
Set the job palette to the palette given in pal_pointer. Of course, the palette must have the format of a standard system palette.
Window Move
As of version 3.01 of SMSQ/E, new ways of moving a window about the screen have been added.
There are now three ways a window be moved:
0 - the old way - the pointer changes to the "move window" sprite which is moved about the screen.
1 - "Outline": click on the move icon with the MOUSE - KEEP HOLDING THE BUTTON DOWN, an outline of the window appears which you can move around and position where you want it. Release the mouse button and the window positions itself correctly. Please note that you cannot use this move mode with anything but the mouse – the keyboard (cursor keys) will not work.
2 - "Full window". This is the same as 1 above, but instead of an outline, the entire window is moved. For Q40/Q60 users, switching on the Cache is advisable... Please note that you cannot use this move mode with anything but the mouse – the keyboard (cursor keys) will not work.
3 - "Full window with tranparency" (implemented in SMSQ/E v. 3.16). This is the same as 2 above, but the window to be moved is made "transparent" : one can "see through" it. This is done via "alpha blending". Alpha blending requires A LOT of computing power. So, even if your machine can theoretically handle this type of move, in practice it might not be feasible. For Q40/Q60 users, switching on the Cache is advisable...
This type of move is only implemented for display modes where alpha blending actually makes sense, i.e. modes 16, 32 and 33. In other display modes, such as the QL screen modes, or Atari mono modes, this will be redirected to move mode 2.
Please note that you cannot use this move mode with anything but the mouse – the keyboard (cursor keys) will not work.
The move modes are configured on a system-wide basis - you cannot have one job moving in mode 0 and the other in mode 1.
Thus, all jobs are affected by the move mode, even those written a long time ago (unless, such as Qlib, the job doesn't use the WMAN move routine).
The move mode can be changed in two ways:
1. Configure SMSQ/E (WMAN) to a mode of your liking.2. Use the new WM_MOVEMODE keyword
WM_MOVEMODE
This takes one parameter, an integer from 0 to 2:
WM_MOVEMODE 0 the old way, using the “move window” spriteWM_MOVEMODE 1 the "outline" moveWM_MOVEMODE 2 the "full window" moveWM_MOVEMODE 3 the “full window with transparency” move
The degree of transparency can be set with the keyword WM_MOVEALPHA. This defines the amount of transparency the window should have when moved about, from 1 (nearly transparent) to 255 (totally
56
opaque). A value of 0 is allowed, but this would make the window completely transparent and you could only see the background, so a value of 255 will actually be used. Note that no check is made on the value of this keyword – only the lower byte is used.
WM_MOVEALPHA 1 window move is almost completely transparentWM_MOVEALPHA 128 window move is half way between transparent and opaqueWM_MOVEALPHA 255 window move is opaque
Background drawing
PE_BGON PE_BGOFF
Even when a window is partially covered, printing into this window continues. This goes with two new BASIC commands: PE_BGON to turn this feature on, PE_BGOFF to turn this feature off. By default, this feature is TURNED OFF, so use the PE_BGON command in your boot file if you want to keep it on.
PE_BGOFF turn off background window drawingPE_BGON turn on background window drawing
Cursor Extensions
From version 3.06 onwards, SMSQ/E allows you to use a sprite for a cursor. The sprite to be used as a cursor:
- MUST be of size 6x10 (WxH), else it will not be used.- MUST be the one set at position 36 in the system sprites- MUST be showable in the current screen resolution
If any of the above conditions is not met, then the normal cursor is shown.
How to load a cursor sprite
CURSPRLOAD
CURSPRLOAD “filename”
This loads "filename" and uses it as a cursor sprite. Please make sure that this file only contains the sprite data for a valid cursor sprite. The command does NOT check this. If this command seems to fail, i.e. the cursor sprite doesn't change to what you want it to be, the data contained in this file is perhaps not a valid cursor sprite for the current screen resolution.
How to use a sprite as cursor.
On a system-wide basis:
Configure your system. As of version 3.06 of SMSQ/E, a new configration item lets you configure whether you want to use sprites as cursor or not.
On a per job basis
Independently of your system-wide cofiguration, you may switch the use of a sprite to be used for the cursor on a per job basis.
CURSPRON CURSPROFF
The keywords CURSPRON and CURSPROFF may be used to switch using the sprite cursor on/off.
CURSPRON job_name or job_number, job_tagCURSPROFF job_name or job_number, job_tag
Example: Let us suppose you have Xchange running on your machine. Typing 'jobs' will tell you more about this job, something like this:
57
Job Tag Owner Priority Job-Name9 8 0 8 Xchange V3.90J
You can now use:
CURSPRON "Xchange V3.90J" Turn sprite cursor on for Xchange 3.90JCURSPROFF 9,8 Turn sprite cursor off for job with job number 9 and job tag 8
Load A Sprite And Set As System Sprite Number
SYSSPRLOAD
SYSSPRLOAD system_sprite_number,file_name$
load the file and sets it as the system sprite with the given number.
This file must contain the sprite data for a valid sprite. The command does NOT check this. If this command seems to fail, i.e. the corresponding system sprite doesn't change to what you want it to be, the data contained in this file is probably not a valid sprite for the current screen resolution.
Common keyboard driver
The keyboard drivers have been rationalised. This means that some special keystrokes may have moved on some versions and some "special features" have disappeared.
Pause / break on IBM keyboards has been made equivalent to Undo on the Atari keyboards (it is in the same place).
NUMLOCK on IBM keyboards has no effect - the keypad is always a keypad!
Special actions
SCROLL LOCK (IBM) freeze screenCTRL F5 freeze screenCTRL SCROLL LOCK (QXL) freeze QXL PC communicationsCTRL SPACE breakCTRL BREAK (IBM) breakCTRL UNDO (Atari) breakCTRL SHIFT ALT TAB soft reset (restarts current SMSQ)CTRL SHIFT ALT BREAK (IBM) hard reset (restarts host system)CTRL SHIFT ALT UNDO (Atari) hard reset (restarts host system)
CTRL-C Action
A new job switching behaviour has been introduced. Instead of the bottom-most window being picked to the top when you press CTRL-C (original behaviour on QDOS and older versions of SMSQ/E), the window just below the one you’ve currently worked with will be picked. This is more logical behaviour as the window at the bottom of the pile is often at that place for a good reason: you just don’t currently need it.
Then, if you keep CTRL pressed down and tap C again, the picker will work its way towards the bottom of the pile of windows. But if you release CTRL, then press CTRL-C again, the game will start again at the top. When you get used to it, the new behaviour becomes easier and more logical. If you can’t get used to it, disable it using MenuConfig (dependent on implementation in a given version of SMSQ/E).
SERIAL IO Devices
The range and number of serial IO devices depends on the hardware on which SMSQ/E is being used. The interface to these devices is kept consistent.
SMSQ/E has serial (SER) and parallel (PAR) port drivers which are just about recognisable as great-great-grandchildren of the QL SER driver. Output sent to any serial or parallel port can be buffered dynamically (that is the output buffer is allocated automatically and expanded as required. In addition, several channels
58
may be open to one output port at any time: the data is buffered and will be sent to the port in the order in which the channels are opened.
Any serial or parallel port can be referred to using the pseudonym PRT (printer) and for compatibilty with ancient software, PAR ports can be referred to as SER and vice versa. The PRT_ABORT, PRT_BUFF and PRT_CLEAR commands are included for compatibility.
Serial and Parallel Port Names
The serial and parallel ports are accessed through devices called SER, SRX, STX or PAR with a variety of optional characters following the name.
SER n p f t c e Serial Port receive and transmitSRX n p f t c e Serial Port receive onlySTX n p f t c e Serial Port transmit onlyPAR n t c e Parallel Port (transmit only)PRT Printer Port (either SER or PAR)
Parameter Characteristic Possible ValuesMeaning
n port number 1, 2, 3 or 4
p parity O 7 bit + odd parity E 7 bit + even parity
M 7 bit + mark=1 S 7 bit + space=0
default is none
f flow control H Hardware CTS/DTR I Ignore flow control X XON/XOFF default is H
t translate D Direct output T Translate
default is use TRA setting
c <CR> R Raw, no effect C <CR> is end of line A <CR><LF> is end of line
<CR><FF> is end of page default is R
e end of file F <FF> at end of file Z CTRL Z at end of file
default none
Usually the only options that will be required are the "F" for form feed, the "D" and "T" options for character translation and the "C" or "A" option for daisywheel printers. If you are only going to use the SER port for output, it is better to use the STX name as this will enable the serial input port to be used by another program.
OPEN_IN #3, SRX2X OPEN a channel to the serial port 2 receiver with XON/XOFFCOPY myfile TO PARF COPY myfile to parallel port and put a form feed at the end
Serial Port Control
In general, the serial port control commands require a port to be specified. If no port number is given, SER1 is assumed.
Standard BAUD Command
BAUD59
The effect of the standard BAUD command depends on the history of the hardware.For the QL based versions, the baud rate is applied to both SER1 and SER2 as, historically, the baud rates for the two ports were generated by the same hardware.For the QXL, the standard BAUD command mimics the QL BAUD command.For the Atari ST series, the baud rate only applies to SER1, which, historically, was the only port available.
BAUD 4800 Set SER1 and SER2 to 4800 baud Gold Card / QXLSet SER1 to 4800 baud Atari ST / TT
Extended BAUD Command
Both the SuperBASIC BAUD command and the OS baud trap have been extended to support independent baud rates for each serial port. The baud rates are now calculated, which allows the use of non standard rates where this is supported by the serial controller chip. The rate must, however, be a multiple of 10. If the baud rate is specified as zero, the highest baud rate available is used.
BAUD 1,19200 Set SER1 to 19200 baudBAUD 2,0 Set SER2 to 153600 baud
SER_FLOW
SER_FLOW (port number, H, X or I) specifies the flow control for the port: "Hardware", "XON/XOFF" or "Ignored". It usually takes effect immediately. If, however, the current flow is "Hardware" and handshake line CTS is negated and there is a byte waiting to be transmitted, the change will not take effect until either the handshake is asserted, or there is an output operation to that port.
The default flow control is hardware unless the port does not have any handshake connections, in which case XON/XOFF is the default.
The flow control for a port is reset if a channel is opened to that port with a specific handshaking (H, X or I) option.
SER_FLOW X XON/XOFF on SER1SER_FLOW 2,H Hardware (default) handshaking on SER2
SER_ROOM
SER_ROOM (port number, spare room) specifies the minimum level for the spare room in the input buffer. When the input buffer is filled beyond this level, the handshake (hardware or XOFF as specified by SER_FLOW) is negated to stop the flow of data into the port. Some spare room is required to handle overruns (not all operating systems can respond as quickly as SMSQ). For hardware handshaking, a few spare bytes are all that is required. For connection to a dinosaur using XON/XOFF handshaking, up to 1000 spare bytes may be required.
SER_FLOW 2,X: SER_ROOM 2,1000 connect SER2 to a UNIX systemSER_FLOW 1,H: SER_ROOM 1,4 hardware handshaking on SER1
SER_ROOM will not usually be required as SER_BUFF (see below) also sets SER_ROOM to one quarter of the buffer size. You will not succeed in setting SER_ROOM to greater than SER_BUFF, however, as SER_ROOM will always ensure that the buffer is at least twice the size of the spare room.
SER_BUFF
SER_BUFF (port number, output buffer ,input buffer) specifies the output buffer size and, optionally, the input buffer size. The output buffer should be at least 5 bytes to avoid confusion with the port number. If the output buffer is specified as zero length, a dynamic buffer is used.
SER_BUFF 200 200 byte output buffer on SER1SER_BUFF 4,0,80 dynamic output buffer, 80 byte input buffer on SER4
SER_CLEAR SER_ABORT
60
SER_CLEAR (port number) and SER_ABORT (port number) clear the output buffers of any closed channels to the port. Channel still open are not affected. SER_ABORT also sends the "ABORTED" message to the port.
SER_ABORT 3 abort output to SER3
SER_CDEOF
SER_CDEOF (port number, ticks to eof) specifies a timeout from CD being negated to the channel returning an end of file. The timeout should be at least 5 ticks to avoid confusion with the port number. If the timeout is zero, CD is ignored. This command is ignored on the QXL and QL.
SER_USE
SER_USE (name) specifies a name for the serial ports. The name can be SER or PAR. SER_USE is provided for compatibility, its use is not recommended.
SER_USE PAR From now on, when you open PAR, you open a serial portSER_USE SER Sets you back to normalSER_USE . . . as does this
Parallel Port Control
There are no implementations with more than one parallel port. Software writer should not assume that this will always be true. In general, the parallel port control commands allow a port to be specified in the same way as the serial port commands.
PAR_BUFF
PAR_BUFF (port number, output buffer) specifies the output buffer size. The output buffer should be at least 5 bytes to avoid confusion with the port number. If the output buffer is specified as zero length, a dynamic buffer is used.
PAR_BUFF 200 200 byte output buffer on PARPAR_BUFF 0 dynamic output buffer on PAR
PAR_CLEAR PAR_ABORT
PAR_CLEAR (port number) and PAR_ABORT (port number) clear the output buffers of any closed channels to the port. Channel still open are not affected. PAR_ABORT also sends the "ABORTED" message to the port.
PAR_ABORT abort output to PAR
PAR_USE
PAR_USE (name) specifies a name for the parallel ports. The name can be SER or PAR. PAR_USE is provided for compatibility, its use is not recommended.
PAR_USE SER From now on, when you open SER, you open a parallel portPAR_USE PAR Sets you back to normalPAR_USE . . . as does this
PRT_USE
The PRT_USE (port name) command differs from the implementation in the old QJUMP RAMPRT operating system extension included in QRAM and the GOLD card and QXL card software. As all output ports incorporate dynamic buffering so an "add-on" printer buffer is not required.
The SMSQ/E version of PRT_USE is identical to that of the Atari ST drivers for QDOS. It merely specifies which port will be opened if you open the device PRT.
PRT_USE PAR61
COPY fred to PRT COPY fred to PARPRT_USE SER4XAOPEN #5,PRT OPEN a channel to SER4 with XON/XOFF and <CR><LF>
Virtual Devices
Virtual devices are not associated with any physical hardware. NUL devices are complete dummy (very useful for benchmarking: SMSQ/E has one of the fastest, if not the fastest, fully functional NUL device in the world). PIPEs and HISTORY devices are buffers for storing information or passing it from one task to another. The PIPE is double ended: what goes in one end, comes out the other in the same order (FIFO - first in first out). The HISTORY device is single ended, what goes in one end, comes out the same end in the reverse order (LIFO - last in first out).
NUL Device
The NUL device may be used in place of a real device. The NUL device is usually used to throw away unwanted output. It may, however, be used to provide dummy input or to force a job to wait forever. There are five variations.
NULP waits (forever or until the specified timeout) on any input or output operation.
NUL, NULF, NULZ and NULL ignore all operations (the output is thrown away).
NUL, NULF, NULZ and NULL return a zero size window in response to window information requests. Pointer Information calls (IOP.PINF, IOP.RPTR) return an invalid parameter error.
NUL is an output only device, all input operations return an invalid parameter error.
NULF emulates a null file. Any attempt to read data from NULF will return an End of File Error as will any file positioning operation. Reading the file header will return 14 bytes of zero (no length, no type).
NULZ emulates a file filled with zeros. The file position can be set to anywhere. Reading the file header will return 14 bytes of zero (no length, no type).
NULL emulates a file filled with null lines. The file appears to be full of the newline character (10). The file position may be set to anywhere. Reading the file header will return 14 bytes of zero (no length, no type).
PIPE Device
There are two variations on the PIPE driver: named and unnamed pipes. Both of these are used to pass data from one program to another. Unnamed pipes cannot be opened with the SBASIC OPEN commands but are opened automatically by the EX and EW commands when these are required to set up a "production line" of Jobs. Whereas, if a pipe is identified by a name, any number of Jobs (including SBASIC) can open channels to it as either inputs or outputs.
If, using named pipes, matters become confused, then that is a problem to be solved by the Jobs themselves. This is not as bad as it sounds. Unlike other devices, named pipes transfer multiple byte strings atomically unless the pipe allocated is too short to hold the messages. This means that provided the messages are shorter than the pipe, many jobs can put messages into a named pipe and many jobs can take messages out of a named pipe without the messages themselves becoming scrambled.
If a PIPE is shared in this way, there are two simple ways of ensuring that the messages are atomic. The first, using fixed length messages, is not available to SBASIC programs. The second, using "lines" terminated by the newline character, works perfectly. N.B. the standard PRINT command will not necessarily send a line as a single string for each item output.
PRINT #3,a$ \ b$ Bad, sends 4 strings: the newline characters are separatePRINT #3,a$ & CHR$ (10); Good, sends 1 string, including the newlineINPUT #4,b$ Good, reads a single line from the pipe
62
Named pipes should be opened with OPEN_NEW (FOP_NEW) for output and OPEN_IN (FOP_IN) for input. A named pipe is created when there is an open call for a named pipe which does not exist. It goes away when there are no longer any channels open to it and it is has been emptied. As well as the name, it is possible to specify a length for a named pipe. If the pipe already exists, the length requested is ignored.
OPEN_NEW #4, PIPE_xp1 Open named output pipe of default length (1024 bytes)OPEN_NEW #5, PIPE_frd_2048 Open named output pipe of length 2048 bytesOPEN_IN #6, PIPE_xfr Open named input pipe
HISTORY Device
A HISTORY device is much simpler than a PIPE as it only has one end. It is used to store a number of messages which may then be retrieved in reverse order: if it becomes full, the oldest messages are thrown away. The messages are separated by newline characters.
There are two types of history devices: private and public. Private HISTORY devices are for use within a particular application and may only have one channel open to them. Public HISTORY devices are named and so may be accessed by many applications at the same time, or at different times. A public HISTORY device may even be used as a "mailbox".
A HISTORY device is opened by name, just like any other device. The name starts with "HISTORY" which is, for a public HISTORY device, followed by public name and then, optionally, the HISTORY device size. If no size is given, 1 kilobyte of message space is assumed. If a public HISTORY device already exists, then the size is ignored!
HISTORY A private HISTORY, 1024 bytes total spaceHISTORY_512 A private HISTORY, 512 bytes total spaceHISTORY_thoughts A public HISTORY for thoughtsHISTORY_box_80 An 80 byte small mailbox called BOX
Single character names should not be used: these are reserved as keys for special variations which may be made available in the future.
HISTORY_U_FILES A public HISTORY with all entries unique???
Messages may be put into a HISTORY device by either using PUT or PRINT. If the HISTORY device becomes full, the oldest message(s) are thrown away.
Messages may be taken out using GET or INPUT. But which message?
For a private HISTORY it is fairly simple. The first GET or INPUT after a message has been put into the HISTORY will get the most recent message. The next GET or INPUT will get the previous message until there are either no messages left (in which case GET or INPUT return null strings) or another message is put in. Note that GETting or INPUTting messages does not take them out of the HISTORY.
OPEN_NEW #4, HISTORY_512 Open a private HISTORY device to hold 512 bytesPRINT #4, msg1$ For a private HISTORY, the message need not be atomicPUT #4, msg2$ ... but this also puts a message in.INPUT #4, a$ Inputs msg2$ into a$GET #4,b$ Gets msg1$ into b$
For a public HISTORY, the channels are fairly independent. A channel being used to read messages would continue to fetch messages in reverse order even if new messages are being added through other channels. In order to get the most recent message, a channel being used for read operations only needs to be able to reset its internal pointer. This is possible using the file positioning facility. Usually the position will be set to 0 (the most recent message) but it may be set to any (smallish) number.
GET #4\0, a$, b$ Get the most recent and next most recent messagesGET #4\4, x$ Get the fifth most recent message.
HISTORY has some characteristics of a filing system device. You can get a directory of public HISTORY devices, you can VIEW a public HISTORY and you can delete a public HISTORY.
63
DIR HISTORY Get a list of public HISTORY devicesVIEW HISTORY_thoughts Have a look at my thoughtsDELETE HISTORY_thoughts ... and get rid of them
DEV - A Virtual Filing System Device
DEV is a defaulting device that provides up to 8 default search paths to be used when opening files. As it was designed to be dumped on top of QDOS it is not very clean, but, equally, it is reasonably efficient.
Each DEV (DEV1 to DEV8) device is a pseudonym for a real filing system device or directory on a filing system device.
Files on a DEV device can be OPENed used and DELETEd in the same way as they can on the real device.
DEV_USE
Each DEV device is defined using the DEV_USE (number, name, next) which specifies the number of the DEV device, the real device or directory and the next device in the chain.
DEV_USE 1, ram1_ DEV1_ is equivalent to ram1_OPEN #3, dev1_f1 opens ram1_f1DEV_USE 2, flp1_ex_ DEV2_ is equivalent to flp1_ex_OPEN #3, dev2_f1 opens flp1_ex_f1DEV_USE 3, win1_work_new DEV3_ is equivalent to win1_work_newOPEN #3, dev3_f1 opens win1_work_newf1DELETE dev3__junk deletes win1_work_new_junk
Note that, unlike the defaulting commands PROG_USE and DATA_USE, the underscore at the end of the real device or directory is significant.
There is a neat variation on the DEV_USE call which enables you to to set up default chains. If you put a "next" number at the end of the DEV_USE command, this will be taken as the DEV to try if the open fails. This next DEV can also chain to another DEV. You can even close the chain: the DEV driver will stop chaining when it has tried all the DEVs in the chain.
DEV_USE 1, ram1_, 3 DEV1_ is equivalent to ram1_, next is DEV3DEV_USE 2, flp1_ex_, 1 DEV2_ is equivalent to flp1_ex_, next is DEV1DEV_USE 3, win1_work_, 2 DEV3_ is equivalent to win1_work_ next is DEV2LOAD dev1_anne will try ram1_anne (DEV1) then win1_work_anne (DEV3) and finally
flp1_ex_anne (DEV2)LOAD dev2_anne will try flp1_ex_anne (DEV2) then ram1_anne (DEV1) and finally
win1_work_anne (DEV3)
Note that DELETE only operates on the DEV specified: it does not chain.
A DEV default may be cleared by giving no name.
DEV_USE 2 clear definition for DEV2
DEV_LIST
DEV_LIST (channel) lists the currently defined DEVs in the specified channel (default #1)
DEV_LIST lists the current DEVs in #1DEV_LIST#2 lists the current DEVs in #2
DEV_USE$ DEV_NEXT
The DEV_USE$ (number) function returns the usage for the specified DEV.The DEV_NEXT (number) function returns the next DEV after the specified DEV.
PRINT DEV_USE$(3) prints the usage for DEV364
PRINT DEV_NEXT(1) prints the next DEV in the chain after DEV1
Interaction between DATA_USE, PROG_USE and DEV
If you are going to use the DEV defaults, it makes sense to set the DATA_USE and PROG_USE defaults to use DEV, and when moving from directory to directory change the DEV definition rather than the DATA_USE.
DATA_USE dev1_ data default directory is DEV1_DEV_USE 1, flp2_myprogs_ . . . which is myprogs on FLP2PROG_USE dev2_ programs from DEV2_DEV_USE 2, flp1_ex_, 1 . . . which is flp1_ex or my data default!
DEV_USEN
Allows renaming of the DEV device. Both DEV_USE or DEV_USEN with one parameter will rename the DEV device, DEV_USEN without parameter will reset the name of DEV back to DEV.
DEV_USEN mdv DEV is now called MDVDEV_USEN and now its name is DEV again
Directory Devices
The devices which handle individual files, organised in directories (with at least one root directory) will behave as before, i.e. the drive RAM is used to access the RAM-disk, FLP is used to access the floppy disk, and WIN is used to access the harddisk. More details can be found in the hardware-dependent sections of this manual. SMSQ/E will read and write from and to QL floppy disk (DD and HD, if your hardware permits).
In addition, SMSQ/E comes with inbuilt drivers to recognise TOS harddisk partitions, DOS floppy disks, and TOS floppy disks (DD and HD).
The SBASIC command DIR has been extended to show density and format of a medium. There are new functions which allow you to fetch this information, see the DMEDIUM_xxx range of functions.
If you insert a QDOS 720k floppy disk into flp1_ and type:
DIR flp1_
then you will see the following (or similar) output on the screen:
diskname QDOS DD720/1440 sectors... directory ...
If you insert a DOS high-density disk and ask for the directory again, you should see:
DISKNAME MSDOS HD720/2880 sectors... directory ...
DOS disks
You can load files from DOS disks as if they were QL disks. You can save files to DOS disks, but you have to make sure that the filename does match the DOS naming convention, i.e. up to eight characters, full stop, up to three characters for the extension.
All the filing system calls will work on DOS disks, you can create subdirectories, delete files. You cannot, however, use the FORMAT command to format a floppy disk to DOS format - it will always be the preferred (QDOS) format.
The DOS filing system does not have the concept of different filetypes. Different filetypes are distinguished by their filename extension. Therefore, QDOS "executable" programs (filetype 1) cannot be handled the way
65
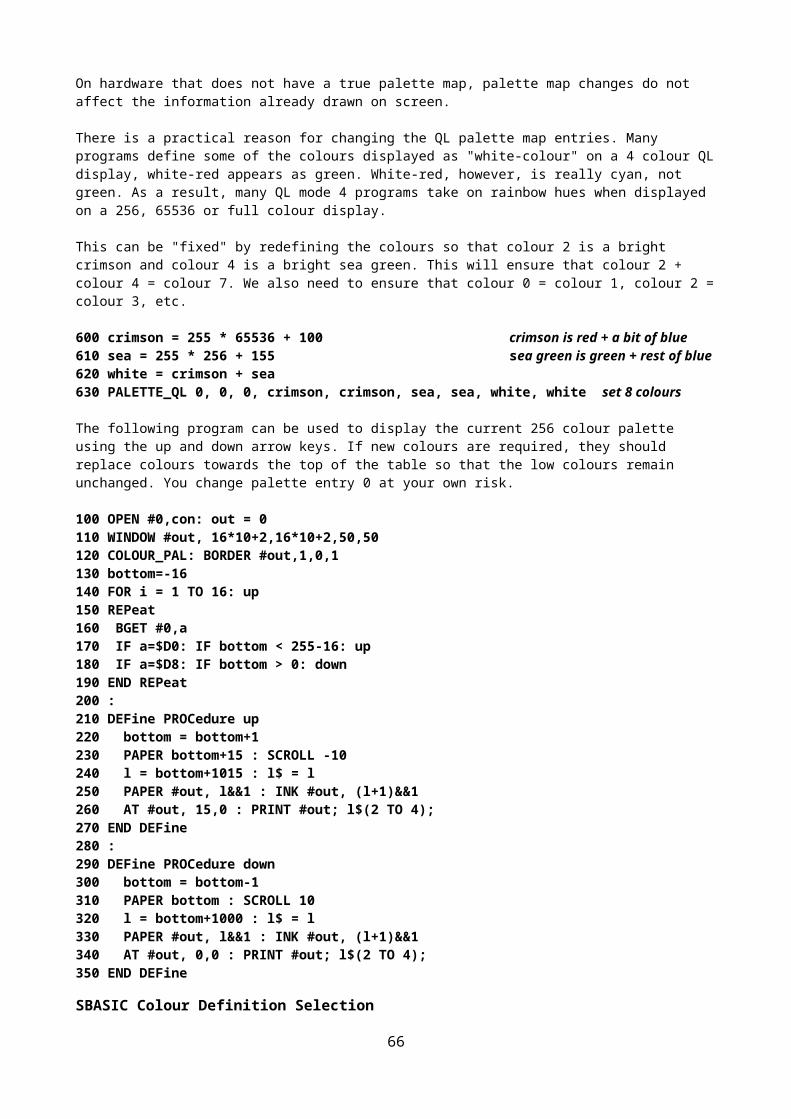
they are handled on a QDOS disk. From SMSQ/E version 2.87 on, you can copy executable files onto DOS disks, which can later be executed from this disk. They will get a special extension '.EXn' where n is the number which specifies the dataspace (which is usually held invisible to the user in the file header): it is 512*2^n. This extension will be invisble in SMSQ/E, but will be seen in DOS. Example (assuming flp1_ contains a DOS disk):
COPY win1_CLOCK, flp1_CLOCK
will create a file flp1_CLOCK.EX1 on the DOS disk. You can still refer to it as flp1_CLOCK, it will be shown in the directory as flp1_CLOCK only, but if you look at this disk on a DOS computer, then you will see the real name. Extensions of executable files will be removed automatically, e.g.
COPY win1_PROGRAM_bin, flp1_PROGRAM.bin
will not create a file flp1_PROGRAM.bin, it will create a file flp1_PROGRAM.EX3, but you have to refer to it as flp1_PROGRAM only, e.g.
EX flp1_PROGRAM
As the filename extension is lost anyway even if you copy the file back, we suggest that you do not specify an extension. This will also make sure that you do not end up with files having the same filename.
SMSQ/E Event Handling
Principles
V2.71 of SMSQ/E introduces facilities for event handling which can be either used as an extension to the Extended Environment window events or independently.
An event is notified from one task to another.
A job may wait for one or more events. If one of the events has already occurred, then the wait will terminate immediately, otherwise the operating system will suspend the job until one of the events has occurred.
SBASIC Implementation
WAIT_EVENT
The WAIT_EVENT (event mask, timeout) function is used to wait for one or more events. 8 events are defined; they are numbered 1, 2, 4, 8 . . . 256. The timeout is an optional 9th event.
The function returns the event or events that have occurred. The events that are returned are removed from the job's "event accumulator". Note that, if WAIT_EVENT is called to wait for events 2 or 4 and events 2 and 8 have occurred, only event 2 is returned: event 8 remains pending and can be checked on another call.
evt = WAIT_EVENT (6) Wait for event 2 or 4 (2+4=6)Events 2 and 8 are notified by another job so the wait is terminated and evt is set.
PRINT evt Prints 2PRINT WAIT_EVENT (15) Wait for event 1, 2, 4, or 8, prints 8 as event 8 is pendingPRINT WAIT_EVENT (15) Wait for event 1, 2, 4, or 8, wait as no events now pending
If a timeout is specified, then, if no event of interest has occurred before the end of the timeout, the call will return the value 0 (no events). A timeout 0 can be used to check for events.
evt = WAIT_EVENT (6,50) Wait for event 2 or 4 (2+4=6) for no more than 1 secondNo events are notified by another job so the waitis terminated after one second and evt is set to 0.
PRINT evt Prints 0PRINT WAIT_EVENT (3,0) Test for event 1 or 2 without waiting
SEND_EVENT, FSEND_EVENT
66
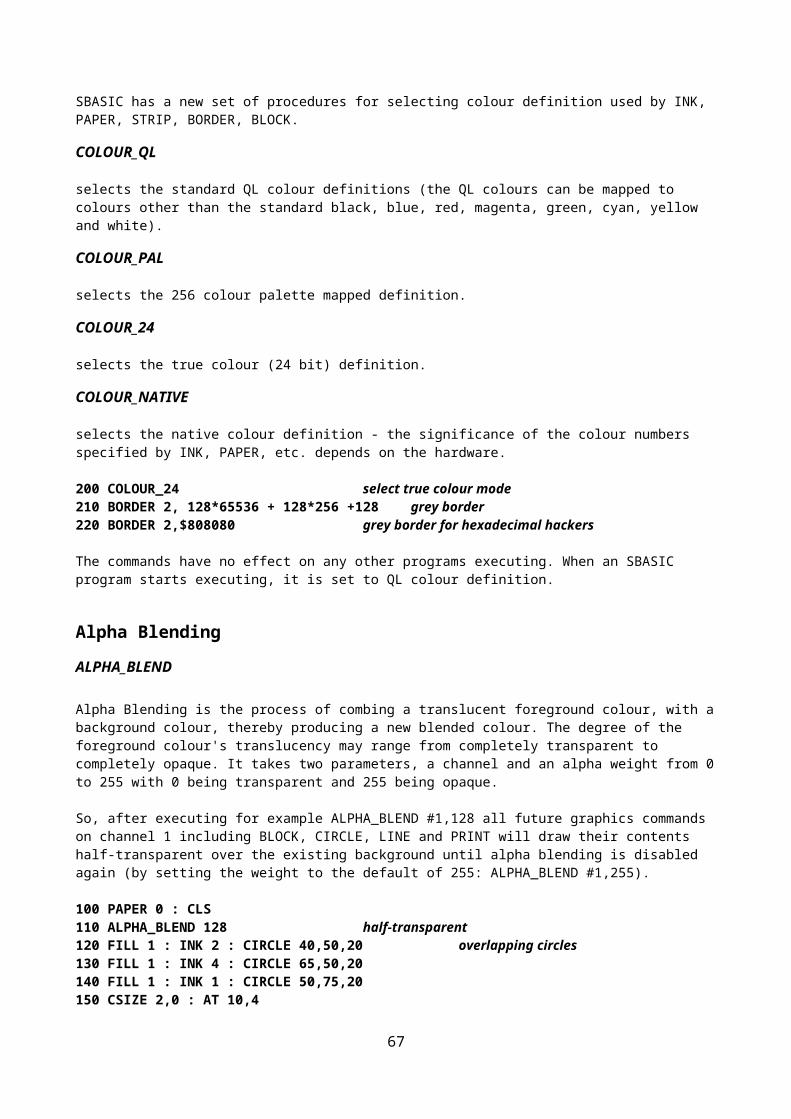
The SEND_EVENT job ID, events procedure is used to notify events to another job. The job ID can be the whole number, the job number and tag or the job name.
SEND_EVENT 'fred',9 Send events 1 and 8 (1+8=9) to job fredSEND_EVENT 20,4,8 Send event 8 to job 20, tag 4SEND_EVENT OJOB(-1),2 Send event 2 to my owner
The FSEND_EVENT function is a version of the SEND_EVENT procedure which works as a function and returns an error value rather than an error message. The syntax is:
error = FSEND_EVENT(job ID, events)
Possible return values are 0 (no error), and -2 (invalid job ID).
error = FSEND_EVENT(‘fred’,9) Send events 1 and 8 (1+8=9) to job frederror = FSEND_EVENT(20,4,8) Send event 8 to job 20, tag 4error = FSEND_EVENT(OJOB(-1),2) Send event 2 to my owner
Utility Programs
DRVCHK and DRVLINK Hard Disk Utilities
DRVCHK and DRVLINK are two hard disk utilities. In an ideal world you should need neither, and if all is well there should be no harm done if you try them. The programs will work on “QLWA” type hard disks, i.e. on the Miracle Harddisk, all ACSI and SCSI harddisks connected to ATARIs, the QXL and QL formatted disks on the Q60. They will also work with QXL.WIN type hard disk containers, as used on QPC, SMSQmulator, Q68 and newer versions of SMSQ/E for the Q60. We have no experience with the Falkenberg Harddisk interface (it might trash your harddisk, we don't know), but it will not work on the QUBIDE.
DRVCHK is rather like a soft format which checks the readability of the free sectors on the drive. It does not check the sectors which have been allocated to files. If you find that reading some files is becoming unreliable, you should copy the contents to a new file and then delete the old file. This returns the sectors to the free space list. Executing DRVCHK will check all the free sectors and eliminate unreadable sectors. Unreliable sectors may not get eliminated and it might be useful to execute DRVCHK more than once. If you have a rather unreliable drive, you may find it worthwhile executing DRVCHK after a hard disk format as an additional check.
DRVLINK is intended to repair the hard disk map of contents when this has been corrupted. (Note that as the hard disk map is in the form of linked lists similar to those used by MSDOS and other low grade operating systems, continuing to create, delete or modify files on the disk when you suspect that it may be corrupted is very unwise. It is safe to copy files to new backup disks, but DO NOT OVERWRITE old backup disks, or you may find that your backups are corrupted as well!). The hard disk map can be corrupted by a variety of software: the main culprits are probably the GST Linker (old version, not the one supplied by Quanta) and any software which draws arcs or uses ATAN, ASIN or ACOS (QDOS only, not SMSQ/E!).
The most obvious symptoms of corrupted maps are "drive full" messages when the drive is not full or "bad or changed medium" when accessing files. In the latter case, execute DRVLINK first, then delete the bad files, and finally execute DRVCHK to check the freed sectors.
DRVLINK may not completely repair the hard disk map, but it should put it into a state where it will not get any worse. BEWARE: although DRVLINK is believed to be safe, there could possibly be circumstances where the cure could be worse than the disease. Corrupted maps are quite rare, so there has not been much opportunity to exercise DRVLINK.
SERNET V3
SERNET provides you with low-cost networking like the Toolkit 2-Network. SERNET allows you to connect two machines together via the serial ports. SERNET V3 has been significantly improved over previous versions. The configuration is easier, you can control more than one SERNET link on one machine
67
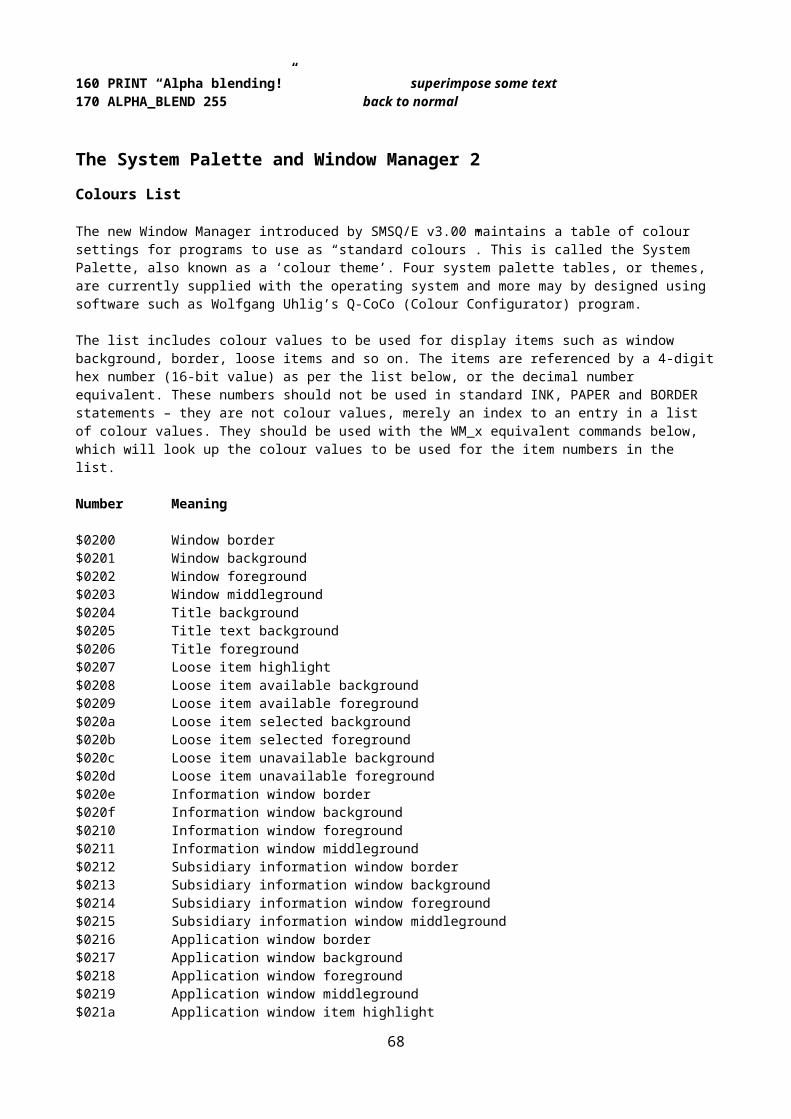
(previously, modifications applied to the most recently loaded SERNET only), and it is even possible to use a SERNET via modem between two machines.
To connect two machines, use a standard Null-Modem-Cable (note: NOT a laplink cable!).
SERNET has to be configured so that it knows which port to use as its communication port (default is SER1), and it needs to know its device name (default is S). Use MenuConfig to configure SERNET.RXT or SERNET_REXT (depending on your disk format) and define the port. Please note that the serial port needs to support independent channels (SRX and STX), hardware handshake and direct, untranslated data flow (parameters "hd"). You need to have SMSQ/E in order to use SERNET!
You can run differently configured SERNETs at the same time to form different circular networks, just by giving a different port number and a different device name.
The BASIC commands which correspond to a SERNET driver start with the same character which is configured as a device name. Therefore, with more than one SERNET being loaded into the same machine, you have independent control of the net by specifying the corresponding BASIC command. For example, if your net is configured to be "S" (default), then all commands will start with S (e.g. SNET, SNET_START, SNET_STOP). If its device name is, for example, N, then the commands will be NNET, NNET_START, NNET_STOP etc.
BEFORE you LRESPR the SERNET driver you have to set the port to the correct BAUD rate. Naturally, all machines in the SERNET circle require to have their SERNET ports set to the same baudrate. The default setting is that, when you LRESPR the SERNET, it is set up fully functional with the server being started (default configuration, but it can be turned to off to start with).
The following commands exist, replace the "x" by the configured SERNET device name letter:
xNET_STATION
xNET_STATION n a procedure to set the SERNET station number. Default is to station 1 - does not normally need to be changed.
xNET_STATION%
xNET_STATION% is a function which returns the current SERNET station number.
xNET_TEST%
xNET_TEST% (s) is a function which informs whether another station with station number s is on the net.
xNET_START
xNET_START is a procedure to open the channels for SERNET and to start the SERNET server job. Unless you configured it off, SERNET will start with fully working with the server job running. You can invoke this command after you accidentally removed the server job or closed SERNETs channels "from outside", or, of course, after a xNET_STOP.
xNET_STOP
xNET_STOP is a procedure which closes the channels used by SERNET and removes the SERNET server job - in case you need to use the serial ports for other reasons.
xNET_BAD%
xNET_BAD% is a function which returns the total number of bad packages received since SERNET has started.
xNET_RETRIES%
68
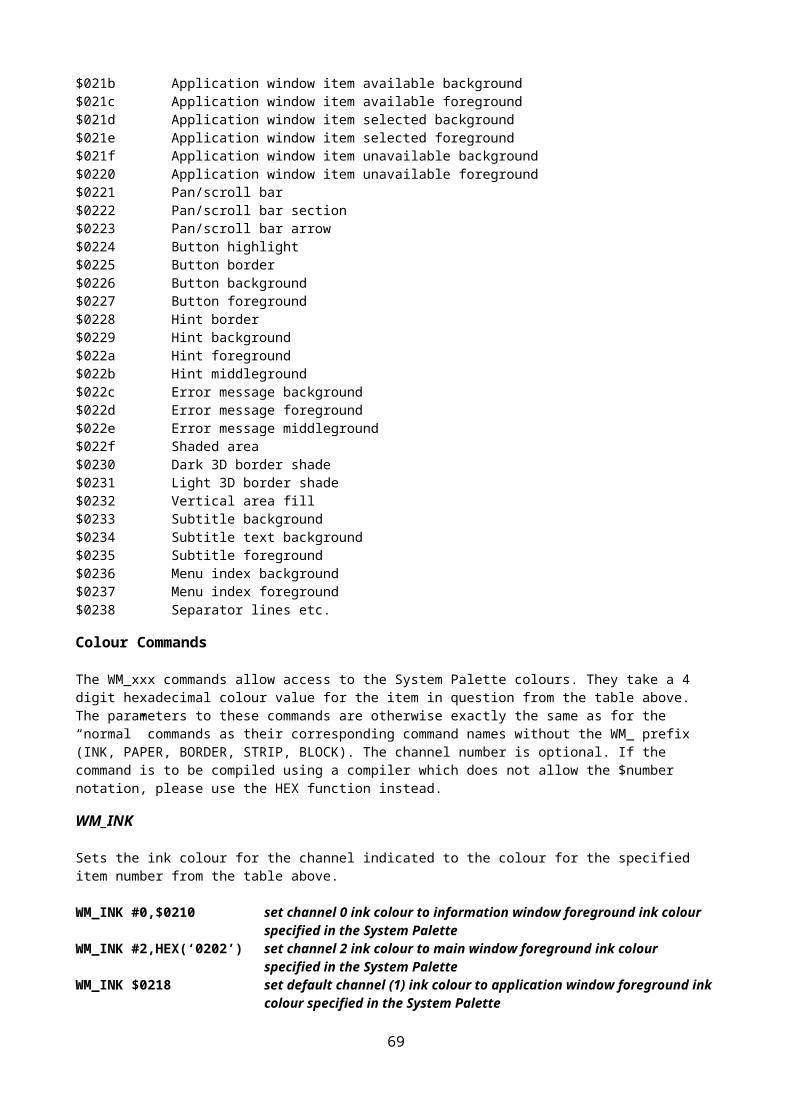
xNET_RETRIES% is a function which returns the number of retries to re-send packages.
SERNET via Modem
It is also possible to use SERNET between two machines as a client/server relationship via modem. The server is the machine which is sitting somewhere remotely, waiting for the client to dial in and initiate the connection. You should be sitting in front of the client. You need to configure SERNET to be used with a modem, and you need to have two configurations, one SERNET being the server, one being the client. Make sure both versions have the same password!
To properly configure the modem init string, refer to the modem's manual. We suggest, you add an instruction to turn the modem's compression off, because this will speed up transferring small packages (which is, what SERNET does). Modify modem dial and modem hangup strings only if required.
You can configure up to 10 destinations to dial to. Simply insert the phone numbers here.
Please note that the whole protocol is not very error-proof, line drops of either side etc. may not be detected so follow the exact route of initiating a transfer and closing it. Some systems (hardware-dependent) allow the loss of carrier detection, so try to issue a SER_CDEOF command for the SER port to which SERNET connects.
Get the server-SERNET running on the remote machine.
Get the client-SERNET running on the machine in front of you. You will see a new button appearing, saying "CONNECT xxx" where xxx is the phone number #0. To select any of the other numbers, press the keys 0 to 9 while having the mouse over the SERNET button. To dial, press SPACE or ENTER. SERNET will not try to dial out to the other modem, and after success, you will hear a beep and the button will display "DISCONNECT". Only disconnect via this button, do not turn the modem etc. otherwise one or both machines will not react to future SERNET calls until reset.
As soon as you see the DISCONNECT, the connection is established and you can access the remove machine over the modems in exactly the same way as with "standard" SERNET.
It is even possible to make the button automatically dial out. Send an event to the SBASIC Button job, which is called "x_SERNET Client" (of course, x needs to be replaced by the SERNET name character). The event should be the number to dial (0 to 9)+16. Example:
SEND_EVENT "S_SERNET Client",2+16
will dial phone number #2. You should then check the function
xNET_CONNECT%
xNET_CONNECT% is a function which returns true if you are connected
until it becomes true (put a PAUSE of 25 or 50 between every check), transfer the required files, and send the same event to disconnect.
SERNET File Protection
Files beginning with (or in directories beginning with) *H or *h will be treated as Host Only, and cannot be read over the net. Any attempt to use these files will return 'not found'.
Files beginning with *R will be classed as Read Only, and can be read, but not written to, as if the device is write protected.
Files beginning *D will return 'not implemented' to prevent hackers accessing disallowed files by direct sector techniques.
69
These facilities allow you to keep sensitive files on a hard disc without anyone on the network being able to access them. However, these can cause problems with some software which does not expect access to be denied.
SERNET Batchfile Execution
It is possible to invoke an SBASIC job on a remote machine and instruct it to execute a given SBASIC program. With this facility, you can do everything you like on the remote machine because you can provide SBASIC programs which do whatever you want them to do. To start an SBASIC program on a remote machine, use
EX "n1_*dev1_program_bas"
where "n1_" can be any kind of network name and station number, e.g. s2_, m1_ etc. and "dev1_program_bas" can be any program on any device on the remote machine.
Example: You would like to see what kind of jobs are running on another machine. Create the following short program first, and save it to, say n1_ram1_jobs_bas
10 OPEN#3,n1_con this is OUR machine, seen from the remote!20 BORDER#3,1,4:CLS#330 JOBS#340 INPUT#3,"Press ENTER"!a$ Wait for an ENTER press
Then, after having it transferred to the remote machine, start it there with
EX "n1_*ram1_jobs_bas"
Please note, that the SBASIC filename specified must be the full filename, including device and extension. The server will not check PROG_USE settings, check for _BAS or _SAV endings because the remote machine can have totally different default devices than your machine, possibly resulting in an execution of a different program.
SMSQ/E Troubleshooting
I get a "not found" error message when trying to write a file to a TOS or DOS format diskette.There are three problems to watch out for:
- The first is that it is obligatory to create directories on a DOS or TOS format disk before you put files into them. You cannot just use any name you like as you have been accustomed to do on QDOS format disks.
- The second is that the filing system does not automatically attempt to convert files which end in, for example, _bas to files ending in .bas.
Files which I intended to write to a DOS format floppy disk were copied instead to my data default directory with "FLP1_" in front of the name.The same problem as above.
When I try to QMON a file, I end up tracing Job 0 in a rather bizarre way.Unlike SuperBASIC, SBASIC initialises all variables to zero or null string.In order to distinguish a name (which would be a filename) from a number (which would be a Job number) QMON, and a small number of other programs, made the assumption that a file name would not have a value. This is not necessarily true for SuperBASIC, it is never true for SBASIC.Either put the file name in quotes or upgrade your QMON.
I have some software which works in the initial SBASIC but does not work when I try to use it from an SBASIC daughter.The initial SBASIC is 99.9% compatible with SuperBASIC. SBASIC daughter Jobs are only 99% compatible with SuperBASIC. In particular
they are not Job 0 and the channel IDs for #0, #1 and #2 are not $00000, $10001 and $20002.
Some naughty software cannot cope with this difference. Old versions of QMON cannot, but old versions of JMON can.
70

The Turbo compiler (NOT Turbo compiled programs!) cannot, but QLiberator can.Either update the software or use this software in the initial SBASIC only.
I only get the end of the error message when I use the SBAS/QD F10 Thing.Some of the SBASIC error messages are longer (hopefully more helpful) than the old SuperBASIC error messages. Older versions of the Menu extensions cannot cope with these long messages. Update your MENU_REXT. MENU_REXT is now freeware and can be downloaded from Marcel Kilgus’ or Dilwyn Jones’ sites.
When I try to use the SuperBASIC channel table from another Job I find that it is empty.As you can have many SBASIC Jobs, you can have many SBASIC channel tables: one in each set of SBASIC variables. From within an SBASIC Job, these look just the same as the SuperBASIC channel table.
The tricks that can be used with QDOS to find the SuperBASIC variables area will, in SMSQ, find a dummy variables area which holds only the global name table. This is the only part of the SuperBASIC environment which is common to all SBASIC jobs.
To find any other part of a SuperBASIC variables area from another Job, you must define which copy of SBASIC you wish to poke about in. To do this you need to go to supervisor mode and find the value of A6 for the particular SBASIC Job you are about to interfere with: the channel table and most other parts of the SuperBASIC variables area will be found at their usual offsets from A6.
Sysmon runs at 200 times its normal speed on the TT.Until the authors manage to update Sysmon to cope with the TT Fast RAM, process your copy with the program SYSMON_BAS. The newer versions of SYSMON should work correctly across all systems.
Not all of my programs run on the TT.Configure SMSQ/E to ignore Fast RAM: it will be much more QL compatible.
QREF crashes when I use it with a program which has binary or hexadecimal constantsMuch "poke around in SuperBASIC" Software, including QREF, does not recognise binary (%1010) or hexadecimal ($4AFB) constants. In general, avoid using these types of constants if you intend to use old SuperBASIC analysers, reformatters or compilers.
QREF (and QLOADREF) may be processed by the QREF_BAS program, which is believed to be harmless, but keep a spare copy of your original QREF or QLOADREF just in case. After processing, they happily accept binary or hexadecimal constants.
My System does unexpected things right from the start, e.g. crash, does not recognise SBASIC commands anymore, does not remove windows, Sysmon wails immediately etc.You should first check the extensions which you load in your BOOT file. Try putting STOPs into your BOOT file and see how far you get until your system falls over, to track down the offending system extension or command. We have put a list of system extensions together which you should first check - extensions in the list will either be marked as bad or good. Ignore the good ones and remove the bad ones and be suspicious about extensions which are not in the list.
Moreover, please be aware that loading extensions from within a procedure or function in SMSQ/E before version 3.33 could seriously corrupt your system.
After loading my BOOT file, my BASIC does not recognise procedures like PRINT. One or more of the extensions which you load in your BOOT file overwrite part of the memory which is used for storing the name table (where all BASIC names are stored). A good candidate is QPTR V0.06 or earlier. REMark suspicious extensions and re-boot again, until you find the one(s) which cause the trouble. Please notify us about faulty extensions, so that other users can be warned.
I get an error when I try to load EASYPTR extensionsFor some reason, versions of EASYEXT before V3.02 checks for the position where it is loaded. EASYEXT is part of EasyPtr, which is now freeware and can be downloaded from Marcel Kilgus’ or Dilwyn Jones’ sites.
The Archive Runtimes don't work anymoreThey were never designed to multitask properly. ARCHRTM grabs all but a few Kbytes of RAM. ARCHRTM can be modified, so that you can tell it how much memory it shall get. ARCHRTM_bas will modify it, so that it
71

will find the variable RTMEM% again. As it is not possible to specify more than 32k to be left, this isn't very useful. However, if you type the following line (where max_space is the maximum amount that ARCHRTM can take) before you execute it, then things will happily multitask:
POKE_L !!$24,max_space
DATEs in Archive/Abacus failsIf you find that, when you try to access the DATE in Psion programs, the program crashes, becomes very slow or returns silly dates like 31/-7/8995 then the language you're using on your system does not seem to be the same as the language in which the Psion software runs. If you want to run an English XChange, then you need to set the language of your system to English too (LANG_USE GB). As Archive and Abacus convert the Month to a month number by comparing the names (e.g. Mar = 3), it cannot find the right name if you set the system language to German or French (it might work on Jan, but not on Mar/Mär or Oct/Okt).
C-compiled programs crash on the QXLSome versions of C68 have own 68030 and 68040 cache handlers which are faulty. Fortunately, the code checking for the processor is faulty too, so that the 68030 cache handler is never called. Bad news for the 68040 on the QXL: it is called! As SMSQ/E handles the cache (very well) itself, there is no need for the C68 programs to do that. You can completely patch the cache handling in the programs out by using the C68_40.BAS program. This does not recognise all versions of C68, but it does work on common programs like BlackKnight. It is better to recompile programs which were compiled with earlier versions of C68.
QLiberators EXTERNals do not workIf you have compiled own procedures and functions using QLiberator, which you want to load using LRESPR, then you have to patch QLIB_RUN and QLIB_OBJ first to make them work. You will find two BASIC programs with the same name which will do this for you. You should also patch files with already inbuilt EXTERNals.
QLOADed files look strange - the numbers are goneIf you QLOADed files which were saved with Minerva Integer tokens, then you will see funny effect like WINDOW , < , , ,then you have to go back to a Minerva machine, QLOAD it there and SAVE it back in ordinary ASCII. Then you can load it into SMSQ/E. If you QSAVE it here, you can QLOAD it into any system.
TRA does not seem to work anymoreAs you have probably noticed by reading the SMSQ/E manual(s), there are various new translating features like the "D" parameter in the device name, UPUT for untranslated output etc. The way TRA is handled is different, much more logical and consistent on SMSQ/E. When you open a channel to, say PAR or SER, then the current TRA setting for this port stays active as long as the port is open. So, if you open PAR with TRA 0 being active and you active TRA 3 later on, the open port is not affected. Two operations affect open ports: changing the BAUD rate and changing the translation table to channels with activated translates. Changing TRA from 0 to an address or vice versa is ignored on open channels.
The program stops after "OK to overwrite.. Y or N" has been answered "N"Save did not overwrite on QDOS anyway, therefore this is no compatibility problem. We think it is better to stop because the action did not finish properly, and you still have the choice to trap it using WHEN ERROR in your program.
ALTKEYs and Last Line Recall (ALT ENTER) do not work anymoreType the command HOT_GO (or better add it to your BOOT file) and both ALTKEYs and ALT ENTER will work again. Both functions have been integrated into the much more powerful HOTKEY System II. Separate documentation for the HOTKEY System II is available.
Hints on various extensions and files
ATR_rext not required, as DV3 are more flexible anyway. Don't load!ATARI_rext not required. Versions before V2.37 might crash on SMSQ/E.ATARIDOS_rext not required, as DV3 are more flexible anyway.DEV_rext not required, as DEV is inbuilt into SMSQ/E. Don't load!EASYEXT before V3.02 creates problems, use newer versions.HOT_rext not required, as HOTKEY System II is inbuilt into SMSQ/E. Don't load!JMON safe. Better use V2.10 or higher on SMSQ/E for proper parameter handling.
72
LIGHTNING not required anymore. SMSQ/E's screendriver is very fast already. Will refuse to load.
MENU_rext safe. Better use V5.08 or higher on SMSQ/E for proper error report in SBAS/QD F10 Thing.
MIDINET_rext safe.Pointer Tools (from W.Lenerz) - if you loose some SBASIC Procedures, this version is too old.
Newer versions can be obtained from Wolfgang Lenerz’ or Dilwyn Jones’ sites.PTR_GEN not required, as it is inbuilt into SMSQ/E. Don't load!PTRMENR_cde safe.QBASIC_rext not really required, as SBAS/QD is better. Can safely be used for QLiberator.QD safe.QLIB_bin safe.QLIB_run safe, as SMSQ/E makes sure the faults are cured.QLIB_ext safe.QLOADREF_bin not required, as QLOAD is inbuilt into SMSQ/E. Use QREF_bin instead. QMON should be safe. Better use V2.10 or higher on SMSQ/E for proper parameter
handling and proper channel use in SBASIC daughter jobs.QPAC2 safe.QPTR From V0.09 onwards safe. Versions before should be upgraded (smashes some
SBASIC commands).QTYP_SPELL safe.SDUMP safe.SPEEDSCREEN not required anymore. SMSQ/E's screendriver is faster and more compatible
anyway. Don't load it, as it may crash the system.THING_rext safe.TRA_rext safe, but check if it is still required, as SMSQ/E's TRA has been extended.WMAN not required, as it is inbuilt into SMSQ/E.
73
SMSQ/E for Atari ST and TT
Introduction
From the point of view of the hardware dependent features, SMSQ/E as implemented on the Atari ST and TT series computers is very similar to the latest E level drivers for QDOS. There are two main changes. Firstly, monochrome monitors are supported. Secondly, the incorporation of the DV3 disk driver subsystem, which replaces the V2 disk driver used by the E level drivers means that Atari GEMDOS partitions of hard disks and GEMDOS (as well as IBM) format floppy disks may be read and written.
Machine Type
The two standard functions to determine the machine type are, of course, supported.
MACHINE
The MACHINE function returns the machine type.
0 ST / STM / STF / STFM.1 ditto, with blitter.2 Mega ST (without blitter) or ST etc. with real-time clock.3 Mega ST (with blitter) or ST etc. with RTC and blitter.8 Mega STE (without blitter!).9 Mega STE.24 TT 030
PROCESSOR
The PROCESSOR function returns the 680x0 family member - 0 or 30 for the Atari ST and TT series. The PROCESSOR function is provided in addition to the MACHINE function as it is possible to fit an MC68030 accelerator card in the lesser ST machines.
IF MACHINE < 24 AND PROCESSOR = 30: PRINT "68030 accelerator fitted"
Memory Protection
One feature of the ST series of computers is its memory access control. This causes a system error (access fault) if a program attempts to access memory which does not exist or which can only be accessed in supervisor mode (the vector area, the TOS system variables and the IO hardware).
Early versions of SMSQ on the ST series of computers detected legitimate accesses to the QL vector area but trapped all other memory access faults. This provided a certain measure of protection against the worst excesses of QL software. While this policy provided compatibility with well written, fault free, QL software, not much of the other 99% would work at all. A new policy has, therefore, been introduced.
1. All legitimate read operations from the QL vector area are allowed.2. All other read operations from protected areas read 0.3. All write operations to protected areas are ignored.
This policy can be applied to all Jobs or just to Job 0. If an access fault is trapped. The job goes into a state of hibernation with the fault program counter on the stack and all other registers preserved. The Job may, therefore, be examined by a debugger.
PROT_MEM
The PROT_MEM (level) procedure sets the level of the memory protection. All legitimate accesses to the vector area are always allowed. Other access faults may be trapped or ignored depending on the level. The default level is 3 which will trap common faults in C programs, but allows certain famous system extensions to be LRESPRed. Cautious users should change this to level 7. Devil-may-care users should change it to level 0.
74
There are five levels: 0, 1, 2, 3 and 7.
- Level 0 does not trap any memory access faults.- Level 1 traps write access faults in all jobs except Job 0. Read operations from a protected area read
0.- Level 2 traps read access faults in all jobs except Job 0. Write operations to a protected area are
ignored.- Level 3 traps both read and write access faults in all Jobs except Job 0.- Level 7 traps access faults in all Jobs.
PROT_MEM 0 Ignore all access faults - almost like the QLPROT_MEM 1 Ignore all but write access faults from Jobs other than Job 0PROT_MEM 7 Trap all access faults
POKES POKES_W POKES_L POKES_F POKES$
POKES (address, value) POKES_W (address, value) POKES_L (address, value) and POKES_F (address, value) are the "supervisor mode" equivalents of POKE, POKE_W, POKE_L and POKE_F. POKES_F pokes a floating point value to the given address. POKES$ is the “supervisor mode” equivalent of POKE$. By operating in supervisor mode they enable data to be written to the ST series IO hardware. Do not be surprised if your computer self-destructs when you use them.
PEEKS PEEKS_W PEEKS_L PEEKS_F PEEKS$
PEEKS (address) PEEKS_W (address) PEEKS_L (address) and PEEKS_F (address) are the "supervisor mode" equivalents of PEEK, PEEK_W PEEK_L and PEEK_F. PEEKS_F(address) returns a floating point value from the given address. PEEKS$ is the “supervisor mode” equivalent of PEEK$. By operating in supervisor mode they enable data to be read from the ST series IO hardware. Do not be surprised if your computer self-destructs when you use them.
Atari ST and TT Displays
Display Type
DISP_TYPE
The DISP_TYPE function is used to find the type of display adapter. For the Atari ST and TT computers, there are four values that may be returned.
0 Original ST QL emulator (this value is returned on QL based hardware).1 Extended mode 4 emulator (standard and extended display sizes).2 QVME mode 4 emulator.4 Monochrome display.
ncol = 4 Assume 4 colour displayif DISP_TYPE = 4: ncol = 2 If it is monochome, there are two colours only - grey and grey
Monochrome Display
If you have an ST series computer and there is a monochome monitor plugged in when you boot, SMSQ/E will automatically load the monochrome (ST high resolution 640x400) display driver. If you have a TT computer, and SMSQ/E does not find a QVME card, then SMSQ/E will set the TT to ST high resolution and load the monochrome display driver.
In either case, if you have not bought the monochrome display driver, you will not get a picture!
DISP_INVERSE
The DISP_INVERSE (0 or 1) command is used to invert the monochome display from the normal (black background) to inverse (white background) state.
75
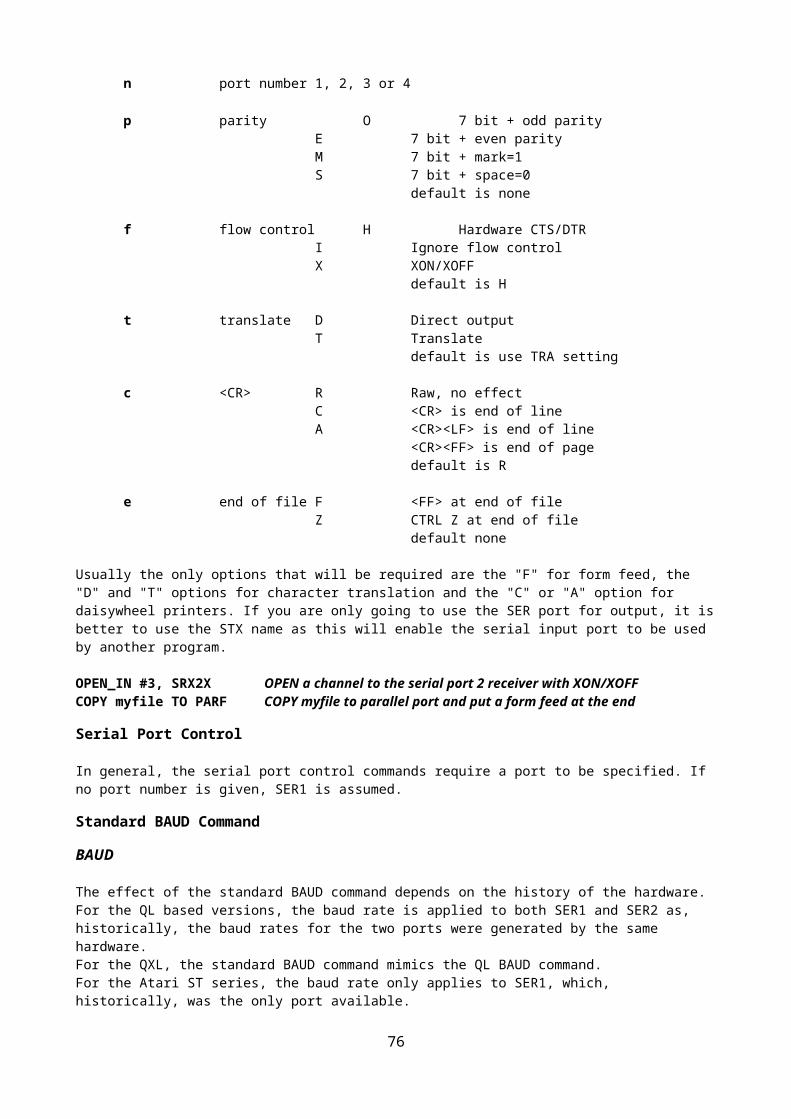
DISP_INVERSE 1 Invert black and whiteDISP_INVERSE 0 Restore normal
Colour Displays
SMSQ/E supports the old QL emulator card, in its original form and modified for MODE 8, the extended QL mode 4 card and the QVME card.The extended QL mode 4 card may be switched from normal to extended display, and the display size of the QVME card may be changed at will.
DISP_SIZE
DISP_SIZE (xpixels, ylines) is used to set the display size. The nearest feasable size will be selected by the driver. It is best not to change the display size when the pointer sprite is visible, or you may get some spurious blobs left on the display. There should be few other problems changing from a smaller size to a larger size. You should, however, avoid changing from a larger size to a smaller if there are any windows outside the smaller screen. Note that, for the QVME card, the width and height are set in increments of 32 pixels and 8 lines respectively, while for the extended QL mode 4 card, any width of 512 or less will select the standard resolution mode while any width greater than 512 pixels will select the extended mode.
DISP_SIZE 800,600 change to 800x600 (QVME) or 768x280 (extended mode 4)DISP_SIZE 1 change to 512x256 (extended mode 4) (ignored by QVME)
DISP_RATE
DISP_RATE (frame rate, line rate) is used to specify the frame and line scan rates for the QVME card only: it is ignored for all the other display cards. It would be usual to specify only the frame rate: the line rate is equal to the frame rate multiplied by the total number of lines.
DISP_RATE 75 set the frame rate to 75 HzDISP_RATE 70,48000 set the frame rate to 70 Hz and line rate to 48 kHz (686 lines)
DISP_BLANK
DISP_BLANK (x blank, y blank) sets the size of the blank area to the sides of and above and below the image for the QVME card only: it is ignored for all the other display cards. If the blank is too small, you will loose some of your image, if it is too large, the image will be too small.
DISP_BLANK 128,64 set horizontal blank to 128 pixels and vertical to 64 lines
As the display size is altered, the blank is automatically adjusted to maintain the proportion of blank. The DISP_BLANK command will not usually be required.
If preferred, the parameters for the DISP_RATE and DISP_BLANK commands may be tacked on to the DISP_SIZE command.
DISP_SIZE 640,480,60 set standard VGADISP_SIZE 800,480,80 set 80 Hz refresh rate, squashed VGA.DISP_SIZE 800,600,70,,128,60 set all of size, frame scan rate and x and y blank
Note that if you specify both frame and line rates, as well as the number of blank lines, the line rate is over-specified: it will be determined by the frame rate and the total number of lines (visible + blank) and the line rate will be ignored.
DISP_SIZE Experimenter
The QVME card does not have an infinite choice of pixel rates. Some combinations of size and display rates may not be acceptable to your monitor. A small experimenter program can be used to change the size and frame rate in small intervals.
This program starts off with the standard VGA settings and adjusts the width when you press the W key, the height when you press the H key and the frame rate when you press the F key. Because you cannot see the
76
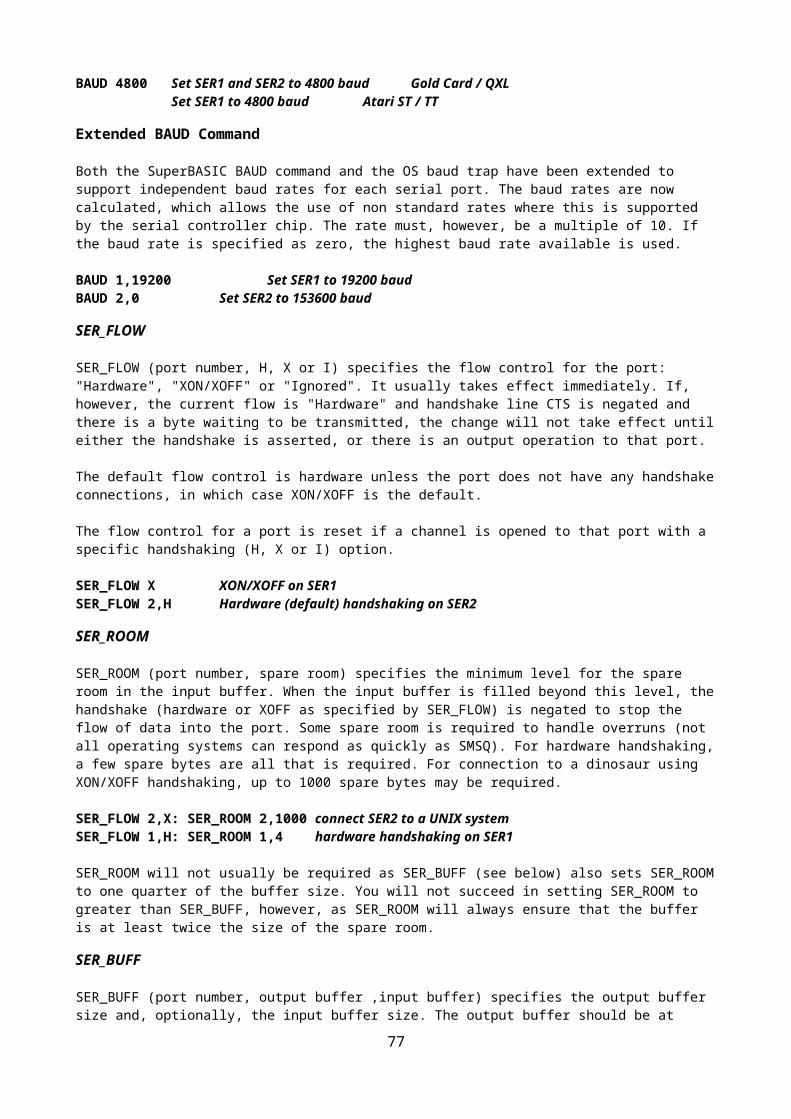
display when you have struck an unsatisfactory combination, you can save a satisfactory setting with the S key and restore it later with the R key.
If, for example, you are increasing the width (SHIFT W) and the display dissolves, DONT PANIC. Pressing the key a few more times may shift you past a bad patch. Alternatively, adjusting the frame rate up or down may improve matters. It is for you to find out what your monitor will accept.
The true hackers can add code to this program to adjust the blank as well.
100 REMark - This is an experimenter for the QVME display size and frame rate.110 REMark120 REMark - w reduces the width - SHIFT W increases the width.130 REMark - h reduces the height - SHIFT H increases the height.140 REMark - f reduces the frame rate - SHIFT F increases the frame rate.150 REMark - s saves the current settings160 REMark - r restores the saved settings170 REMark180 REMark - ESC finishes190 REMark200 REMark - Set initial values for standard VGA210 sw=640: sh=480: sf=60220 a%=CODE('r')230 :240 REPeat250 SELect ON a%260 =27: STOP270 =CODE('w'): dw=dw-32280 =CODE('W'): dw=dw+32290 =CODE('h'): dh=dh-16300 =CODE('H'): dh=dh+16310 =CODE('f'): df=df-1320 =CODE('F'): df=df+1330 =CODE('s'): sw=dw: sh=dh: sf=df340 =CODE('r'): dw=sw: dh=sh: df=sf350 END SELect360 DISP_SIZE dw,dh,df: REMark - Set width, height and frame rate.370 PRINT #1,dw,dh,df380 BGET #1,a%390 END REPeat
This program demonstrated that a perfectly legible 1600x496 (266 column) display was obtainable using a standard monochrome VGA monitor (cost about DM 200).
Serial (RS232) Ports on the Atari ST and TT Series
The number of serial ports depends on the model.
SER1 MODEM 1 ST/STEMega STE TTSER2 MODEM 2 Mega STE TTSER3 SERIAL 1 TTSER4 SERIAL 2 Mega STE TT
The ports themselves are connected to three different serial controllers of two different types. The communications speeds are, therefore, a bit special.
SER1
The rates available on this port are sub-multiples of 19,200. All the standard rates from 300 to 19,200 are available except 7,200.
SER2
77
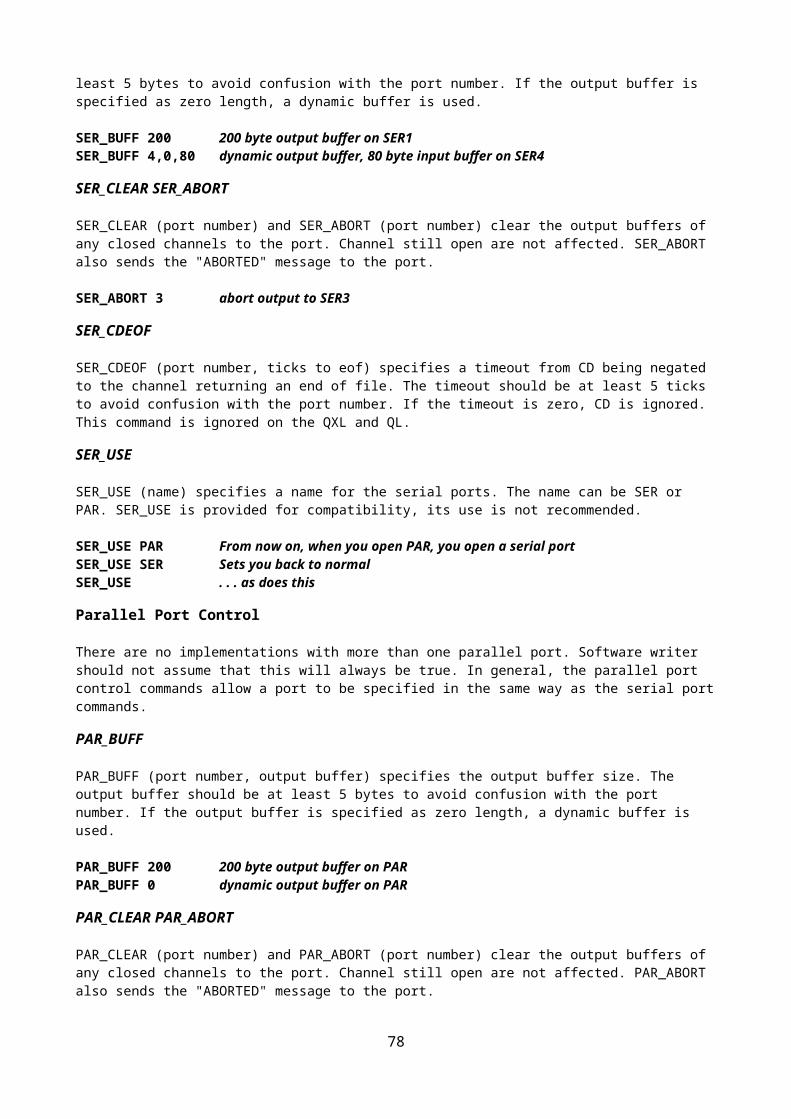
The rates available on this port are sub-multiples of 250,000. 19,200 is very close to 250,000/13. All the standard rates from 300 to 19,200, including 7200 (within 1%) are supported. In addition it supports 1x and 2x MIDI speeds as well as 38,400, 76,800, 83,333 and 125,000 baud. If the rate is specified as 0, the rate used is 153,600 (19,200x8).
SER3
The rates available on this port are sub-multiples of 19,200. All the standard rates from 300 to 19,200 are available except 7,200. Hardware handshaking is not available on this port.
SER4
The rates available on this port are sub-multiples of 114,750. All standard rates from 300 to 38,400 are supported (within 0.4%) as well as 57,600 (19,200x3). If the rate is specified as 0, the rate used is 230,000.
Atari ST Printer Port
The Atari ST (and TT) printer port (the SMSQ/E PAR device) is notionally "centronics compatible", unfortunately a combination of very substandard drive capability on the part of the ST computers, excessive drive requirements of some printers (notably Canon) and long cables can significantly reduce the reliability of the printer connection. The problem can be reduced by extending the length of the strobe pulse.
PAR_PULSE
PAR_PULSE (pulse length) sets the notional pulse length in microseconds. The time will depend on the processor and the clock speed.
PAR_PULSE 50 drive a Canon printer from a standard STPAR_PULSE 500 ... or from a HyperCache 030
Atari ST and TT Hard Disks
ACSI and SCSI Drives
Hard disks for the Atari ST and TT series computers come in two varieties: ACSI and SCSI. Although most drives attached to the ACSI bus will be full standard SCSI devices, the SMSQ/E drivers assume that any drive connected to the ACSI bus does not necessarily conform to the SCSI CCS specifications so, normally, no attempt is made to do anything other than read or write sectors or read the error status on these devices. This means that, for example, the drivers cannot detect whether an ACSI disk drive has a removable cartridge.
On the other hand, the SMSQ/E drivers assume that all drives connected to the SCSI bus (TT only) conform to the minimum CCS specifications for hard disk operations. Any disk drive which responds "OK" to a request to lock the door is considered to have a removable cartridge.
If a file is open on a removable cartridge, the door is locked. It will be unlocked automatically later.
WIN Drive Numbers and Name
ACSI and SCSI drives are identified by a whole series of numbers: the "target" number, the "unit" number and the "partition" number. The target number is the identification number of the disk drive controller. For internal drives, this is 0. For external drives, this is the number (0 to 7) that you set on the little switches on the back of the box. The unit number selects one of a number of drives controlled by a single controller. It is possible, but rare in the Atari world, for a controller to have up to 8 units. In general, there is only one unit per controller, and 99% of Atari hard disk utility software assumes that you can only have one unit per controller, so the unit number is usually 0. Finally, the partition number defines a section of the disk reserved for a particular purpose (e.g. GEM partitions, QDOS partitions etc.).
GEMDOS numbers its target, unit and partitions from 2 (=C) as it finds them. This is a superficially attractive scheme which collapses completely if you have removable media with different numbers of partitions or if the medium is not in the disk drive when you boot the computer.
78
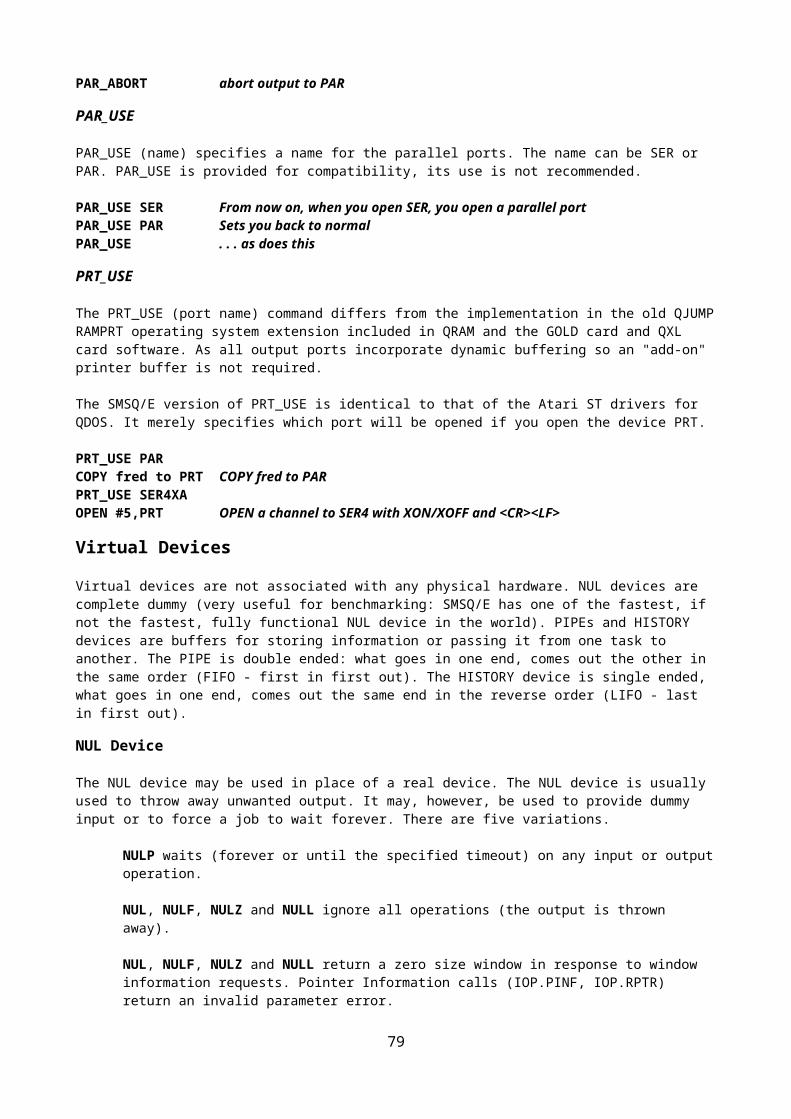
SMSQ/E adopts a more cumbersome approach which is, however, much more precise. Unless you configure SMSQ/E to boot from a target and partition other than 0,0, the initialisation code will attempt to find a file called "BOOT" on any partition on target 0. (For the TT, SMSQ/E will try SCSI 0 first and then try ACSI 0). WIN1 will be set to this partition. Thereafter, you must define your own WIN drives for any other target, unit and partition you wish to access.
WIN_DRIVE
WIN_DRIVE (drive, target, unit, partition) is used to select a particular target, unit and partition combination to be accessed using a particular WIN drive.
If an SCSI drive is to be accessed, 8 should be added to the target number. The unit number may be omitted or both the unit and partition numbers may be omitted.
WIN_DRIVE 2,1,0,2 WIN2 is ACSI target 1, unit 0, partition 2WIN_DRIVE 3,9 WIN3 is SCSI target 1, unit 0, partition 0WIN_DRIVE 4,3,1 WIN4 is ACSI target 3, unit 0, partition 1
Issuing a WIN_DRIVE command for a particular drive will cause the drive map to be re-read the next time the disk is accessed. It can, therefore, be used to force the drivers to recognise a disk change.
WIN_DRIVE$
WIN_DRIVE$ is a function which returns a string giving the target, unit and partition used by a particular WIN drive.
WIN_DRIVE 2,1,0,2 WIN2 is ACSI target 1, unit 0, partition 2WIN_DRIVE 3,9 WIN3 is SCSI target 1, unit 0, partition 0PRINT WIN_DRIVE$(2) Prints 1,0,2PRINT WIN_DRIVE$(3) Prints 9,0,0PRINT WIN_DRIVE$(4) Prints nothing if WIN4 has not been set
WIN_USE
WIN_USE may be used to set the name of the WIN device. The name should be 3 characters long and in upper or lower case.
WIN_USE MDV The WIN device is renamed MDVWIN_USE win The WIN device is restored to WINWIN_USE The WIN device is restored to WIN
Handling ACSI Adapter Timing Faults
Certain ACSI adapters exhibit a timing fault. If commands are issued too quickly one after the other, the adapter fails. The SMSQ/E ACSI driver can be slugged to bring its interval between commands down to GEMDOS levels.
WIN_SLUG
The WIN_SLUG (value) command sets the mimumum time that must elapse between operations on the ACSI bus (in units of 80 µs). ICD recommend 1 ms for their adapters. As an interval of 2.5 ms between operations has proved adequate for most adapters, this is the default. As the typical access times for ACSI hard disks are of the order of 20 ms to 30 ms, this does not represent a large overhead.
WIN_SLUG 12 Wait at least 12*80 µs between ACSI operationsWIN_SLUG 30 Wait at least 30*80 µs between ACSI operations (default)
Format WIN
As SMSQ/E is "hosted" on the Atari ST and TT computers, it only takes control of and formats partitions on the hard disk which you have previously marked as being reserved for QDOS compatible disk drivers. We know that you would not destroy all your GEM desktop publishing files by formatting a QDOS disk on top of them, but someone else might do it.
79
Before formatting a QDOS compatible partition, therefore, you will need to use your favourite GEM utility to make a suitable partition available, marking it as "QWA" (GEMDOS partitions are identified by the letters "GEM" or "BGM").
Before formatting a WIN drive with SMSQ/E, it is necessary to define the ACSI or SCSI target number (and the unit number if it is not 0) and partition.
WIN_FORMAT
The next step is to allow the drive to be formatted. SMSQ/E has a two-level protection scheme, to make sure you (or somebody else) cannot format your harddisk accidentally. All drives are protected by default, so you have to declare them to be formattable before you issue the FORMAT command.
WIN_DRIVE 2,1 Set WIN2 to ACSI target 1, unit 0, partition 0WIN_FORMAT 2 allow WIN2_ it to be formattedFORMAT win2_Fred and FORMAT it
... you have to echo the two characters displayed ...WIN_FORMAT 2,1 protect WIN2_ again
WIN_DRIVE 1,8,2 Set WIN1 to internal TT drive, partition 2WIN_FORMAT 1 allow WIN1_ it to be formattedFORMAT win1_BOOT and FORMAT it
... you have to echo the two characters displayed ...WIN_FORMAT 1,1 protect WIN1_ again
WIN Control Commands
The rest of the commands specific to the Atari ST and TT WIN device control or set the characteristics of a specific WIN drive.
WIN_WP
WIN_WP (drive, 0 or 1) is used to software write protect a WIN drive.
WIN_WP 1,1 Set the "write protect" flag for the drive accessed by WIN1WIN_WP 1,0 Clear the "write protect" flag for the drive accessed by WIN1
WIN_START WIN_STOP
The WIN_START (drive) and WIN_STOP (drive) commands may be used to start and stop a drive. If you issue one of these commands for an ACSI drive, the drivers may assume that the drive will accept other SCSI control commands.
WIN_STOP 2 Stop the drive accessed by WIN2WIN_START 2 Start the drive accessed by WIN2
WIN_REMV
WIN_REMV (drive, 0 or V) is used to notify that the target accessed by the WIN drive has a removable medium. It is usually detected automatically, unless you turned the auto-detection off (see configuration). Drives connected to the SCSI ports are detected automatically, so it is only required on the ACSI port, provided, auto-detection is off. No parameter is required to mark the drive as being a standard removable device. A "V" marks the drive as a VORTEX naughty drive. A "0" cancels the removable medium flag.
WIN_REMV 2 Set the "removable" flag for the drive accessed by WIN2WIN_REMV 2,0 Clear the "removable" flag for the drive accessed by WIN2WIN_REMV 3,V Set the VORTEX flag for the drive accessed by WIN3
Atari ST and TT Floppy Disks
80
Most of the models in the ST and TT range are equipped with a single DD 3.5" floppy disk drive. Some of the later models are equipped with an HD drive. The SMSQ/E FLP driver can read or write QL5A, QL5B, TOS and MSDOS format diskettes. It can format QL5A (DD) and QL5B (HD) format diskettes.
Floppy Disk Driver Name
The default name of the floppy disk driver is FLP. The internal drive is FLP1. The external drive (if any) is FLP2.
FLP_USE
FLP_USE may be used to set the name of the FLP device. The name should be 3 characters long and in upper or lower case.
FLP_USE mdv The FLP device is renamed MDVFLP_USE FLP The FLP device is restored to FLPFLP_USE The FLP device is restored to FLP
Format FLP
The SMSQ/E FLP driver will usually format a diskette to the highest density it can. The density may, however, be set using the FLP_DENSITY command or by adding a special code to the end of the medium name in the format command.
FLP_DENSITY
The SMSQ/E format routines will usually attempt to format a disk to the highest density possible for a medium. The FLP_DENSITY (code) is used to specify a particular recoding density during format. The density codes are "S" for single sided (double density), "D" for double density and "H" for high density.
FLP_DENSITY S Set the default format to single sidedFLP_DENSITY H Set the default format to high densityFLP_DENSITY Reset to automatic density selection
The same code letters may be added (after a *) to the end of the medium name to force a particular density format. (For compatibility with older drivers, if the code letter is omitted after the *, single sided format is assumed.
FORMAT 'FLP1_Disk23' Format at highest density or as specified by FLP_DENSITYFORMAT 'FLP1_Disk24*' Format single sidedFORMAT 'FLP1_Disk25*S' Format single sidedFORMAT 'FLP1_Disk25*D' Format double sided, double density
FLP_TRACK
The FLP_TRACK (number of tracks) is used to limit the number of tracks formatted.
FLP_TRACK 23 Only format 23 tracks
FLP Control Commands
FLP_SEC
FLP_SEC (level) was used to set the security level. The security of the data stored on the diskettes can be seriously compromised if you change diskettes while there are files open. The security level affects the amount of time the FLP driver spends maintaining the data on the diskette up to date with the internal copies of the data in memory. In principle, a lower level is more efficient, but more risky. With the increasing use of hard disks, the security level of the FLP has been fixed at level 2: the most secure. FLP_SEC is ignored.
FLP_START
The FLP_START (ticks) command specifies the number of ticks (1/50th of a second) that the FLP driver waits after starting the drive before writing to it. This allows the diskette to get up to speed before the write
81
operation. The default value is 24, which is a wait of about 0.5 s. There should not be any reason to use this command.
FLP_STEP
In the days when QLers used scrap 5¼" disk drives with 30 ms step rates, FLP_STEP allowed the disk drive step rate to be set. In the 5 years that the Atari drivers for QDOS were distributed, no-one ever complained that FLP_STEP was completely ignored. It still is ignored in the SMSQ/E drivers.
Configuration
It is possible to configure the file SMSQ.PRG to pre-define various settings. For doing that, you require the Menu-Extension to be present in your machine, and you need the program MenuConfig to be able to configure the SMSQ.PRG file. Both files (the extension and the config program) can be found on nearly every commercial program disk (QD, QSpread, QSUP, QMAKE etc.), but if you do not happen to find them on any of your commercial program then it is advisable that you get a copy of the QMenu package, which contains both files you need.
You can pre-define the boot partition of the harddisk to be WIN1_ (0 to 7 for ACSI, 8 to 15 for SCSI and the partition number). If both values are set to 0, then it is "automatic", i.e. SCSI 8 and ACSI 0 are searched from partition 0 onwards until it finds a file called WIN1_BOOT. It then sets WIN1_ to that partition and LRUNs the BOOT file. This means, that you could run your BOOT file from a TOS partition if you wish. Default is 0,0.
Next comes the language code. You can enter here the numerical values explained in LANG_USE. Default is English.
The next setting allows you to disable the use of TT Fast RAM (if it exists). We have not found programs so far which refuse to run in Fast RAM, but it is here, just in case.
You can pre-define the display adaptor, but there is no reason not to leave it in "automatic" mode unless you happen to have more than one QL emulator installed in your machine.
Then you can pre-define all six parameters for the QVME DISPlay, so that you immediately get a picture even if your monitor cannot handle the default rates (50 Hz, 15.625kHz).
Finally, you can turn off the auto-detector of removable harddisks on the ACSI port. You should disable this feature only in case your harddisk controller crashes during the first access (we had no controller yet who did it).
82
SMSQ/E for Gold and Super Gold Cards
Introduction
SMSQ/E for the GOLD and Super GOLD Cards has a number of important improvements in the handling of the serial and parallel ports. In addition, the V2 disk driver supplied with the GOLD and Super GOLD cards has been replaced by the DV3 disk driver subsystem. This means that IBM format floppy disks may be read and written as easily as QL format disks.
Loading SMSQ/E
SMSQ/E for the GOLD and Super GOLD Cards is supplied as an executable file (SMSQ_GOLD) which may be loaded at any time using the LRESPR command or by executing it. Note that you cannot LRESPR a version of SMSQ_GOLD if that using the same version of SMSQ (you can, however, execute it). This means that the LRESPR command for SMSQ_GOLD can safely be put within (preferably at the start of) a normal BOOT file.
100 PRINT VER$ VER$ will be printed by QDOS and then by SMSQ105 TK2_EXT required on a GoldCard only110 LRESPR SMSQ_GOLD QDOS will load SMSQ, SMSQ will ignore this120 LRESPR QPAC2 QDOS will not get this far, SMSQ will load QPAC2
Note that SMSQ incorporates the latest versions of the pointer environment (PTR_GEN, WMAN and HOT_REXT) so these should not be loaded. Lightning cannot be used when the Pointer Environment is already installed, but this does not matter too much as the CON driver of SMSQ/E is, under most circumstances, within a few percent of that speed.
Machine Type
The two standard functions to determine the machine type are, of course, supported.
MACHINE
The MACHINE function returns the machine type:10 GOLD Card.11 GOLD Card with HERMES.12 Super GOLD Card.13 Super GOLD with HERMES.
PROCESSOR
The PROCESSOR function returns the 680x0 family member - 0 for the GOLD card or 20 for Super GOLD Card.
IF MACHINE = 11 OR MACHINE = 13 : PRINT "HEY! I've got Hermes!"IF MACHINE = 12 AND PROCESSOR <> 20: PRINT "Where's my 68020 gone!!"
GOLD Card Display
DISP_TYPE
The DISP_TYPE function is used to find the type of display. For the Gold and Super GOLD card, this is the standard QL display so DISP_TYPE always returns 0.
IF DISP_TYPE : PRINT "This is not a QL display"
Serial (RS232) Ports on the GOLD & Super GOLD Card
83
Unlike the QL serial ports drivers, the SMSQ serial port drivers are dynamically buffered. There is, therefore, no need to use the PRT device.
There are two serial ports on the outside of standard QL although there is only one serial port inside which is shared between the two external ports. This sharing places serious limitations on the capabilities of these ports.
In addition, the implementation of the IPC, which provides serial input on the QL, left a lot to be desired. The Hermes replacement chip provides a number of major improvements. Apart from general improvements in reliability, the Hermes chip also permits the receive baud rate to be different for each external port and to be different from the transmit baud rates.
BAUD
The Baud rates supported by the GOLD and Super GOLD Card are
192009600480024001275 1200 receive 75 transmit (Hermes only)60030075 75 receive 1200 transmit (Hermes only)
Note that, if different baud rates are be used for transmitting on the two ports, you are unlikely to be able to receive any data without the Hermes chip.
BAUD 19200 set both ports to 19200 / 19200BAUD 2,1275 reset SER2 to 1200 receive, 75 transmit (V23)
STX
Because the internal receive hardware is shared between the two input ports, having an input port open unnecessarily can reduce the performance of the other port considerably. For example, if you are using SER2 to connect your QL to a modem for accessing a bulletin board, opening SER1 to print a log file will seriously affect the performance of SER2. If, on the other hand, you open the transmitter side of the SER1 port only (using the device name STX1) the receive performance of SER2 will not be affected.
OPEN #3, ser2 receive and transmit on SER2OPEN #4, stx1 transmit only on SER1
XON XOFF
Although it has been stated by Sinclair that hardware handshaking is required for serial communication with the QL, the XON XOFF protocol is supported by SMSQ/E. The problem is that whether the main flow of data is from the QL or to the QL, the loss of any data on reception by the QL can completely screw up the protocol. Test have shown, however, that the SMSQ/E implementation of XON / XOFF allows heavy flows of data at up to 4800 baud from the QL, and, more surprisingly, heavy flows of data at up to 2400 baud to the QL. With Hermes fitted, higher speeds should be possible.
SER_PAUSE
This procedure allows you to define the length of the stop bits in microseconds independently for both serial ports. The higher the value, the longer the stopbit. This might be helpful if characters sent by the serial port get lost or the device connected, e.g. printer, prints undefined characters. The longer the pause, the slower is the transfer rate.
Super GOLD Card Printer Port
The PAR device (parallel printer port) is only available on the Super GOLD card. By default output is dynamically buffered: the PRT devices is not required.
84
GOLD Card Floppy Disks
SMSQ/E for the GOLD card and Super GOLD card supports up to 4 disk drives which may be single, double, high or extra high density. The SMSQ/E FLP driver can read or write QL5A, QL5B, TOS and MSDOS format diskettes. It can format QL5A (DD) and QL5B (HD, ED) format diskettes.
Floppy Disk Driver Name
The default name of the floppy disk driver is FLP.
FLP_USE
FLP_USE may be used to set the name of the FLP device. The name should be 3 characters long and in upper or lower case.
FLP_USE mdv The FLP device is renamed MDVFLP_USE FLP The FLP device is restored to FLPFLP_USE The FLP device is restored to FLP
Format FLP
The SMSQ/E FLP driver will usually format a diskette to the highest density it can. The density may, however, be set using the FLP_DENSITY command or by adding a special code to the end of the medium name in the format command.
FLP_DENSITY
The SMSQ/E format routines will usually attempt to format a disk to the highest density possible for a medium. The FLP_DENSITY (code) is used to specify a particular recoding density during format.
The density codes are "S" for single sided (double density), "D" for double density, "H" for high density and "E" for extra high density.
FLP_DENSITY S Set the default format to single sidedFLP_DENSITY H Set the default format to high densityFLP_DENSITY Reset to automatic density selection
The same code letters may be added (after a *) to the end of the medium name to force a particular density format. (For compatibility with older drivers, if the code letter is omitted after the *, single sided format is assumed.)
FORMAT 'FLP1_Disk23' Format at highest density or as specified by FLP_DENSITYFORMAT 'FLP1_Disk24*' Format single sidedFORMAT 'FLP1_Disk25*S' Format single sidedFORMAT 'FLP1_Disk25*D' Format double sided, double density
FLP_TRACK
The FLP_TRACK (number of tracks) is used to limit the number of tracks formatted.
FLP_TRACK 23 Only format 23 tracks
FLP Control Commands
FLP_SEC
FLP_SEC (level) was used to set the security level. The security of the data stored on the diskettes can be seriously compromised if you change diskettes while there are files open. The security level affects the amount of time the FLP driver spends maintaining the data on the diskette up to date with the internal copies of the data in memory. In principle, a lower level is more efficient, but more risky. With the increasing use of hard disks, the security level of the FLP has been fixed at level 2: the most secure. FLP_SEC is ignored.
85
FLP_START
The FLP_START (ticks) command specifies the number of ticks (1/50th of a second) that the FLP driver waits after starting the drive before writing to it. This allows the diskette to get up to speed before the write operation. The default value is 24, which is a wait of about 0.5 s. There should not be any reason to use this command.
FLP_STEP
Some drives require step rates slower than the 3ms which is standard in the SMSQ/E FLP driver. For these, the FLP_STEP command may be used to set the step rate either for all drives or for a particular drive.
FLP_STEP 6 set all drives to 6 ms step rateFLP_STEP 2,4 set FLP2 to 4 ms step rate.
GOLD Card Microdrives
This version does not support the QL microdrives.
SER Mouse
Copyright 1992-1995 Albin Hessler Software
SERMouse is a software driver to connect a serial PC mouse to one of the serial ports SER1 or SER2 of a QL. Therefore a specially wired cable interface is necessary. The driver exists both, in a 2-button mouse (Microsoft mode compatible) and a 3-button mouse (PC mouse systems compatible) version.
Most 3-button mice without mode switch are switched into 3-button mode by pressing the left button during power-on. Mice switching automatically (by software) between 2-button or 3-button mode may only work in 2-button mode on a QL.
If the serial ports are used for a mouse and a serial printer only, the power for the mouse can be drawn from the QL without any problem.
The mouse is then supplied through pin 6 (pin 9 on a QL with SUB-D9) of the serial port which nominally has +12V. Not more than 10mA should be drawn, as else, through a resistor in the QL, the voltage would fall below +5V.
The negative voltage comes from the receive line (RxD), while the mouse sends data over the send line (TxD).
If the other serial port shall also be connected to a device which draws power from the +12V pin (i.e. a serial to parallel converter), then pin 6 (pin 9 SUB-D9) of each ports should be connected separately through a resistor (680 Ohm) to +12V on the QL board.
Loading the driver
The driver code is loaded residently. New SuperBASIC commands (described below) are initialised and available. If the driver is configured to initialise on startup, it is immediately installed and active, else only after SERMON.
For testing purposes the code can be started as a job too. Then the driver is installed directly, but the SuperBASIC commands are not available. Removing the job will remove the driver automatically.
Function
The mouse is driven at 1200 baud at one of the serial ports SER1 or SER2. The driver receives the signals from the mouse and passes them to the Pointer Interface or the keyboard driver.
Printer
86
Unfortunately, on a standard QL the baud rate affects both ports. SERMouse saves the actual baud rate before initialisation, then sets the baud rate to 1200. If a channel to the other serial port is opened, the mouse is automatically suspended and the baud rate set back to its previous value.
If the channel is closed again, the mouse is reactivated automatically.
If the old baud rate coincides with the mouse baud rate (i.e. 1200) then the mouse is still working, even if the other port is used.
Cable Connector
Some mice may even require a different wiring!
Mouse with pin name or QL SER1 QL SER2 QL SER1 QL SER2SUB D25 function SUB D9 SUB D9 BT BT------------------------------------------------------------------------------------------------------------------------2 TxD 3 2 3 23 RxD 2 3 2 34 +12V 9 9 6 67 GND 7 7 1 1
Mouse with pin name or QL SER1 QL SER2 QL SER1 QL SER2SUB D9 function SUB D9 SUB D9 BT BT------------------------------------------------------------------------------------------------------------------------2 TxD 2 3 2 33 RxD 3 2 3 25 GND 7 7 1 17 +12V 9 9 6 6
or
Mouse with pin name or QL SER1 QL SER2 QL SER1 QL SER2SUB D25 function SUB D9 SUB D9 BT BT------------------------------------------------------------------------------------------------------------------------1 GND 1 1 1 12 TxD 3 2 3 23 RxD 2 3 2 34 GND 1 1 1 17 GND 1 1 1 120 +12V 9 9 6 6
Mouse with pin name or QL SER1 QL SER2 QL SER1 QL SER2SUB D9 function SUB D9 SUB D9 BT BT------------------------------------------------------------------------------------------------------------------------2 TxD 2 3 2 33 RxD 3 2 3 24 +12V 9 9 6 65 GND 7 7 1 17 +12V 9 9 6 6
Focussing
Resolution, speed, acceleration and wake up speed are all configurable through the config block. They can also be controlled through the SuperBASIC commands SERMSPEED and SERMAWS at run-time. SERMSPEED directly alters the data delivered by the mouse, while SERMAWS determines how these are processed by the Pointer Interface.
Hermes
87
The SERMouse driver is fully compatible with Hermes, the replacement IPC 8749 for the QL. Hermes allows separate baud rates, e.g. the mouse can be driven on SER2 at 1200 Baud, while SER1 can be set to 19200 baud for a printer. The automatic control of the baud rate by the mouse driver as described above is no longer necessary. The SERMouse driver detects Hermes on initialisation if the suspend options in the config block are disabled.
If you have Hermes installed in your QL, then please set:Set mouse baud rate on initialisation > yesSuspend driver if baud rate changed > noSuspend driver if other serial port open > no
Then, and only then, Hermes is detected and only the receive baud rate for the mouse is set. The system baud rate is not changed. Subsequent changes of the system baud rate will not affect the mouse.
Attention: on a QL with a standard 8049 IPC all the above options must be set to yes.
Configuration
The SERMouse driver can be configured with the standard config program of the Pointer Environment. Before you make changes to the preset values, you should try to find out the best values with the SuperBASIC commands SERMSPEED, SERMAWS and BLS. The configuration is widely self-explaining. Here are the recommended default values:
Baud rate 1200Set baud rate on initialisation yesPort ser2Suspend driver if baud rate changed without Hermes yes
with Hermes noSuspend driver if other serial port open without Hermes yes
with Hermes noPointer Speedup 0Pointer Slowdown 0Acceleration Mouse 4Acceleration Pointer Interface 6Cursor Speedup 1Cursor Slowdown 1Double click delay (50=1 sec) 10Double HIT=DO? noTime to blank screen 5Initialise on startupSave working copy as file
(A working copy of the SERMouse driver is saved to the given file. This copy does contain the configurated data only but not the configuration block with the descriptive text.)
Mouse Buttons
All mouse buttons are configurable. Therefore three separate config blocks are present. Changing the mouse buttons should be done with great care. It is possible to assign any control code and SPACE to a button ($00 - $20 and $E8 - $FF). Some codes can not be entered through the keyboard (e.g. ENTER and ESC), but a translate option exists:
Button: NULL HIT DO Cancel SPACE ENTER ESC ALTNumber: 0 1 2 3 6 7 8 9
When such a number was entered, the corresponding key is shown immediately in MenuConfig, while the standard config program shows the keys on a second run only.
Please notice: the IPC reset is performed from the code 255=$FF=ALT (type number 9) - (all three buttons pressed simultaneously by default).
The mouse hotkey is performed from the code 254=$FE=SHIFT ENTER (left and right button pressed simultaneously by default).
88
The Pointer Interface cancel (code 3) does work in pointer programs only and does not generate an ESC in other programs! On the other hand, an ESC character (27=$1B) is translated by the Pointer Interface to a cancel (code 3) and always works. Therefore we have set an ESC for the middle button. The 3-button reset can be switched off easily by setting another code (e.g. NULL) to do nothing.
BASIC Commands
BAUDRATE%
bd%=BAUDRATEreturns the actual baud rate of the system.
BLS
BLS time%time% 0 offtime% 1-20 minutestime% 21-59 seconds
The screen is blanked after the time elapsed if no key was pressed on the keyboard and the mouse was not moved. Any keypress or mouse movement will bring the screen contents back.
SERMAWS
SERMAWS acc%,wup%acc% 0-9 mouse acceleration (Pointer Interface)
Sets the mouse acceleration and wakeup speed as processed by the Pointer Interface. These are the same values as in Sysdef of QPAC2. They take global effect, i.e. for all programs. See configuration.
SERMCUR SERMPTR
SERMCUR switches to cursor mode if the driver is in the pointer mode and the cursor is visible (waiting for keyboard input). In cursor mode the cursor can be moved with the mouse. The cursor speed can be set through the configuration and can be altered with the SERMSPEED parameters at runtime.
If a program waiting for keyboard input, the driver can also be switched to cursor mode by a double-click on the left button.
SERMPTR resets to pointer mode if the driver is in cursor mode. The driver can also be switched back to pointer mode from cursor mode with a double click on the left button. The driver is automatically switched to pointer mode if a job reading the pointer is picked on top.
SERMOFFRemoves the SERMouse driver.
SERMONInstalls and activates (or re-activates after SERMWAIT) the SERMouse driver.
SERMRESETResets the coprocessor (IPC 8049) which controls the serial ports. To be used if the internal buffer of the coprocessor is desynchronised (uncontrolled mouse movements).
SERMSPEED
SERMSPEED mul%,div%,acc%[,cursormul%,cursordiv%]mul% 0-127 Speedup factor 0=offdiv% 0-127 Slowdown factor 0=offacc% 0-8 Acceleration factor 0=offcursormul% 0-127 Cursor mode speedup factorcursordiv% 0-127 Cursor mode slowdown factor
89
The step rate sent by the mouse is multiplied with the speedup and divided through the slowdown factor. This changes the mouse resolution linearly. The recommended values have the effect that only two third of the step rate is passed to the Pointer Interface, i.e. the physical resolution of the mouse is decreased slightly.
The accelerator factor determines a progressive speed up, i.e. on a slow movement nothing is changed, but the faster the mouse is moved, it is accelerated more and more. See configuration.
The recommend values (see configuration) should only be changed if changing the mouse acceleration factor of the Pointer Interface (see SERMAWS or Sysdef in QPAC2) does not lead to a satisfactory mouse movement.
The alternative parameters cursormul% and cursordiv% take effect in cursor mode only.
SERMWAITSuspends the SERMouse driver. See SERMON.
Configuration
It is possible to configure the file SMSQ_GOLD to pre-define various settings. For doing that, you require the Menu-Extension to be present in your machine, and you need the program MenuConfig to be able to configure the SMSQ_GOLD file. Both files (the extension and the config program) can be found on nearly every commercial program disk (QD, QSpread, QSUP, QMAKE etc.), but if you do not happen to find them on any of your commercial program then it is advisable that you get a copy of the QMenu package, which contains both files you need.
First comes the language code. You can enter here the numerical values explained in LANG_USE. Default is English.
Next, specify if you have an ABC keyboard. The "maybe" setting tries to determine automatically whether an ABC keyboard interface is connected or not. "No" will not check, "Yes" assumes it is connected.
90

SMSQ/E for the Aurora
Introduction
The Aurora card is a QL-compatible motherboard, developed by Zeljko Nastasic, originally available from Qubbesoft P/D. It supports QL-compatible screen modes, plus a 16-colour mode (unsupported in current versions of SMSQ/E) and a 256-colour mode (compatible with QPC2 256-colour mode) when the Aurora is used with a Super Gold Card. This section lists the minor differences between the Aurora and QL/Gold Card version. See SMSQ/E for Gold and Super Gold Cards for other details.
Loading SMSQ/E
The loading procedure is similar to that for the standard Gold Card version, except that the filename of the version downloaded from the SMSQ/E Registrar’s website is AURORA.BIN
100 PRINT VER$ VER$ will printed by QDOS and then by SMSQ/E105 TK2_EXT Required oon a Gold Card only110 LRESPR Aurora.bin QDOS will load SMSQ, SMSQ will ignore this120 LRESPR QAPC2 QDOS will not get this far, SMSQ will load QPAC2
Note that SMSQ incorporates the latest versions of the pointer environment (PTR_GEN, WMAN and HOT_REXT) so these should not be loaded. Lightning cannot be used when the Pointer Environment is already installed, but this does not matter too much as the CON driver of SMSQ/E is, under most circumstances, within a few percent of that speed.
Machine Type
The two standard functions to determine the machine type are, of course, supported.
MACHINE
The MACHINE function returns the machine type:10 GOLD Card.11 GOLD Card with HERMES.12 Super GOLD Card.13 Super GOLD with HERMES.
PROCESSOR
The PROCESSOR function returns the 680x0 family member - 0 for the GOLD card or 20 for Super GOLD Card.
IF MACHINE = 11 OR MACHINE = 13 : PRINT "HEY! I've got Hermes!"IF MACHINE = 12 AND PROCESSOR <> 20: PRINT "Where's my 68020 gone!!"
GOLD Card Display
DISP_TYPE
The DISP_TYPE function is used to find the type of display. For the Gold and Super GOLD card, this is the standard QL display so DISP_TYPE always returns 0 on a QL.
Additional modes available on the Aurora mean that the following values can be returned:
3 Aurora LCD5 Aurora QL mode16 8-bit (256 colour) mode
91
IF DISP_TYPE = 16 : PRINT”This is a 256 colour (8-bit) display”
DISP_COLOUR
DISP_COLOUR depth specifies the colour depth to be used.
DISP_COLOUR 0 QL mode displayDISP_COLOUR 1 16 colour (4-bit) display mode – not currently implementedDISP_COLOUR 2 256 colour (8-bit) display mode
It is possible to set the display size immediately after the colour depth, although only a limited range of display sizes are available in the 256-colour mode due to the limited amount of screen memory available.
DISP_SIZE
DISP_SIZE xpixels, ypixels is used to set the display size. The nearest feasible size will be selected by the driver. Only a limited range of resolutions, based on 2:1 or 4:3 aspect ratios, are available on Aurora with Super Gold Card, as listed in the Aurora manual.
DISP_SIZE 640,480 switch to VGA resolution of 640x480 pixelsDISP_SIZE 512,256 restore QL 512x256 display resolution
92
SMSQ/E for the QXL
Introduction
SMSQ/E for the QXL is similar to the basic SMSQ operating system supplied with the QXL. The principal differences lie in the compatibility of the facilities. Whereas the basic SMSQ version shipped with the QXL is designed to be a continuation of the line of QL extensions starting with the first Miracle Trump card, SMSQ/E follows the line which started with the first QL clones (the Futura and others which were never put into production) and passed through the Atari ST series and which will, hopefully, continue to develop.
This line includes more flexible serial device drivers, additional "virtual" devices and the Pointer Interface integrated into a "lightning fast" console driver.
Loading SMSQ/E
SMSQ/E for the QXL is supplied as an IBM PC executable file - SMSQE.EXE (or SMSQEQXL.EXE, if downloaded from the SMSQ/E Registrar’s website). This should be copied to your PC hard disk. When it is executed, SMSQE.EXE will create a small file (QXL.DAT), in the current directory, which holds the default address of the QXL card.
SMSQ/E is executed in the same way as the basic SMSQ version for the QXL.
C:QXL>SMSQE Start SMSQ/E on the QXL at the default addressC:QXL>SMSQE /300 Set default address to 300 and start SMSQ/EC:QXL>SMSQE / Return to the QXL without restarting SMSQ/E
Note that SMSQ/E incorporates the latest versions of the pointer environment (PTR_GEN, WMAN and HOT_REXT) so these should not be loaded in your BOOT file. Lightning cannot be used when the Pointer Environment is already installed, but this does not matter too much as the CON driver of SMSQ/E for the QXL is, under most circumstances, as fast or faster.
Machine Type
The two standard functions to determine the machine type are, of course, supported.
MACHINE
The MACHINE function returns the machine type - 28 for the QXL.
PROCESSOR
The PROCESSOR function returns the 680x0 family member - 40 for the QXL.
IF MACHINE = 28 AND PROCESSOR <> 40: PRINT "Where's my 68040 gone!!"
QXL Display
DISP_TYPE
The DISP_TYPE function is used to find the type of display. For the QXL, this is an emulation of the standard QL display in mode 4 or mode 8, so DISP_TYPE always returns 0 for those modes. When used in 16-bit colour mode, DISP_TYPE returns 32.
IF DISP_TYPE : PRINT "This is not a QL display"IF DISP_TYPE = 32 : PRINT”I am in 16-bit colour mode”
DISP_SIZE
93
DISP_SIZE xpixels, ylines is used to set the display size. The nearest feasible size will be selected by the driver. It is best not to change the display size when the pointer sprite is visible, or you may get some spurious blobs left on the display. There should be few other problems changing from a smaller size to a larger size. You should, however, avoid changing from a larger size to a smaller if there are any windows outside the smaller screen. Values that are well out of range are ignored.
DISP_SIZE 800,600 change to 800x600 (SVGA)DISP_SIZE 1 ignored.
Serial (COM) Ports on the PC
Unlike the basic SMSQ serial port drivers, the SMSQ/E serial port drivers are dynamically buffered. There is, therefore, no need to use the PRT device.
BAUD
The Baud rates supported by SMSQ/E on the QXL are
192009600480024001200600300
If one of the ports is already committed to a mouse, the BAUD command will not affect it.
BAUD 19200 set both ports to 19200BAUD 2,1200 reset SER2 to 1200 baud
PC Printer Port
The PAR device drives the PC printer port. By default, output is dynamically buffered: the PRT device is not required.
PC Floppy Disks
SMSQ/E accesses the PC floppy disks via the BIOS calls. This, although it allows almost any PC to be used as a host for the QXL, is dependent on the efficiency of your BIOS. The efficiency can usually be greatly improved by using one of the public domain BIOS level cache utilities that are available for the PC.
Floppy Disk Driver Name
The default name of the floppy disk driver is FLP. A: is FLP1 and B: is FLP2.
FLP_USE
FLP_USE may be used to set the name of the FLP device. The name should be 3 characters long and in upper or lower case.
FLP_USE mdv The FLP device is renamed MDVFLP_USE FLP The FLP device is restored to FLPFLP_USE The FLP device is restored to FLP
Format FLP
We have not yet discovered any way of reliably formatting diskettes on any PC manufactured since 1985. (All published information that we have found either dates from before the introduction of the PC AT and only applies to 180 kbyte drives or has proved to be wrong). FORMAT, therefore, performs a re-format operation only and cannot be used with virgin disks.
94

FLP Control Commands
FLP_SEC FLP_START FLP_STEP
The QXL floppy disk driver may not be controlled.
PC Hard Disks
SMSQ/E accesses the PC hard disks via the PCDOS calls (the BIOS calls do not appear to work). This, requires a file (called QXL.WIN) to be set up in the ROOT directory of any hard disk you wish to use as a QDOS format disk. This file is the QDOS format disk.
Hard Disk Driver Name
The default name of the hard disk driver is WIN. C:QXL.WIN is WIN1, and D:QXL.WIN is WIN2 etc.
WIN_USE
WIN_USE may be used to set the name of the WIN device. The name should be 3 characters long and in upper or lower case.
WIN_USE mdv The WIN device is renamed MDVWIN_USE WIN The WIN device is restored to WINWIN_USE The WIN device is restored to WIN
Format WIN
Formatting a WIN device requires the creation of a large file under DOS. This takes a long time. The "name" of the WIN device should be the size required in Megabytes.
WIN_FORMAT
Before you can actually issue the FORMAT command, you have have to allow the drive to be formatted. SMSQ/E has a two-level protection scheme, to make sure you (or somebody else) cannot format your harddisk accidentally. All drives are protected by default, so you have to declare them to be formattable before you issue the FORMAT command.
WIN_FORMAT 1 Allow WIN1_ to be formattedFORMAT WIN1_10 Create a 10 Megabyte WIN device on C:
... you have to echo the two characters displayed ...WIN_FORMAT 1,0 protect WIN1_ again against unwanted formatting
Configuration
It is possible to configure the file SMSQE.EXE to pre-define various settings. For doing that, you require the Menu-Extension to be present in your machine, and you need the program MenuConfig to be able to configure the SMSQE.EXE file. Both files (the extension and the config program) can be found on nearly every commercial program disk (QD, QSpread, QSUP, QMAKE etc.), but if you do not happen to find them on any of your commercial program then it is advisable that you get a copy of the QMenu package, which contains both files you need.
You can predefine the port address of your QXL card. Default is 2B0h.
Next you can predefine the default display resolution for SMSQ/E. Default is 512x256.
You can specify if you wish to BOOT from FLP1_ (drive A:) or FLP2_ (drive B:) or none, provided, a disk is inserted. Otherwise specify a WIN drive number to boot from.
The three following items deal with the settings for PAR, SER1 and SER2.
Finally, you can specify the language code (numerical value) as described in the LANG_USE procedure explanation.
95
96
SMSQ/E for Q40
Introduction
From the point of view of the hardware dependent features, SMSQ/E as implemented on the Q40 is very similar to other SMSQ implementations. The only significant differences are minor improvements.
The hard disk and floppy disk drivers can handle multiple disk formats, two floppy disk drives and four hard disk drives. Two IO cards can be used to provide up to 4 serial ports and 3 parallel printer ports.
Machine Type
The two standard functions to determine the machine type are, of course, supported.
MACHINE
The MACHINE function returns the machine type. This function returns 17 for the standard Q40.
PROCESSOR
The PROCESSOR function returns the 680x0 family member - 40 for the Q40.
Memory Protection
All production Q40s include a memory management unit but this is not yet fully used by SMSQ/E. The PROT_MEM procedure has, therefore, no effect in current versions and the supervisor mode access peeks and pokes do not have any different effect from their user mode cousins.
PROT_MEM
The PROT_MEM (level) procedure sets the level of the memory protection. This is ignored in current versions.
POKES POKES_W POKES_L POKES_F POKES$
POKES address, valuePOKES_W address, valuePOKES_L address, value andPOKES_F address, valuePOKES$ address, s$
are the "supervisor mode" equIvalents of POKE, POKE_W POKE_L POKE_F and POKE$. By operating in supervisor mode they enable data to be written to the Q40 IO hardware. Do not be surprised if your computer self-destructs when you use them.
PEEKS PEEKS_W PEEKS_L PEEKS_F PEEKS$
value%=PEEKS (address)value%=PEEKS_W (address) value=PEEKS_L (address)value=PEEKS_F (address) ands$=PEEKS$(address, bytes)
are the "supervisor mode" equivalents of PEEK, PEEK_W PEEK_L PEEK_F and PEEK$. By operating in supervisor mode they enable data to be read from the QL IO hardware. Do not be surprised if your computer self-destructs when you use them.
Q40 Display
97
DISP_TYPE
The DISP_TYPE function is used to find the type of display. For the Q40, there are two values that may be returned.
0 Original ST QL emulator (this value is returned on QL based hardware).1 16 bit colour mode.
ncol = 4 Assume 4 colour displayif DISP_TYPE = 1 : ncol=65536 If it is 16 bit, there are 65536
DISP_INVERSE
The DISP_INVERSE (0 or 1) command is used to invert a monochome display. It has no effect on the Q40.
DISP_SIZE
DISP SIZE (xpixels, ylines) is used to set the display size. When a size greater than 512x256 is specified, 16 bit colour mode is selected (not implemented in this version).
DISP_SIZE 1024,512 change to 1024x512 16 bit colour
DISP_RATE
DISP_RATE (frame rate, line rate) is used to specify the frame and line scan rates. It has no effect on the Q40
DISP_BLANK
DISP_BLANK (x blank, y blank) sets the size of the blank area to the sides of and above and below the image. It has no effect on the Q40.
Mouse driver
The mouse driver checks serial ports 4, 3, 2 and 1, in that order, looking for a Microsoft compatible two or three button mouse. If a mouse is used, it should be plugged into the highest port number available.
Because current serial mice for the PC have a much higher resolution (the pointer moves faster) than older mice, the original pointer interface scheme (accelerating slow mice) is no longer adequate. The new MOUSE_SPEED command is used to define the "acceleration" . The value specified for the MOUSE_SPEED is the same as the value that can be specified in the QPAC2 SYSDEF menu.
MOUSE_SPEED
MOUSE_SPEED (#channel, speed, wake)defines both a scaling for the mouse movement and an acceleration factor used for large movements.
SPEED SCALING ACCELERATION0 1/8 low1 1/8 normal2 1/4 low3 1/4 normal4 1/2 low5 1/2 normal6 1 low7 1 normal8 1 high9 1 extreme
The optional 'wake' defines how far the mouse will need to move before the pointer will appear (waking up the pointer) in a text input window.
98
The channel is optional, if the default channel is available, and is a console, no channel need be specified.
MOUSE_SPEED 2 standard Microsoft mouse with low accelerationMOUSE_SPEED #0,5,8 cheap mouse with acceleration, pointer reluctant to wake up
Speeds 7 to 9 are the same as for previous versions. Speeds 0 to 6 are all slower than in previous versions. If a "low acceleration" speed is chosen, the pointer movement may be slightly viscous (this is an advantage in some applications). The default mouse speed is 7 (old mouse with normal acceleration). This default is overwritten by a configurable speed when QPAC2 is loaded.
The default wake speed is 3 which is fairly sensitive. This default is overwritten by a configurable speed when QPAC2 is loaded.
MOUSE_STUFF
MOUSE_STUFF (#channel, string)
defines a 0, 1 or 2 character string to be stuffed into the keyboard queue when the centre (or left and right) buttons are pressed. This is usually used to send a Hotkey. If a Hotkey is required, the first character should be CHR$(255).
ERT HOT_THING(".","Button_Pick") ALT . picks the button barMOUSE_STUFF CHR$(255)&'.' The middle mouse button picks the button bar
The default stuff string is CHR$(255) & ".". This default is overwritten by a configurable Hotkey when QPAC2 is loaded.
The channel is optional, if the default channel is available, and is a console, no channel need be specified.
Serial (RS232) Ports on the Q40
The serial ports correspond to the standard IBM COM ports. Note that, unlike the PC BIOS SMSQ does not attempt to renumber the ports if it finds that one or more are missing.
SER1 COMl address $3F8SER2 COM2 address $2F8SER3 COMl/3 address $3E8SER4 COM2/4 address $2E8
The baud rates correspond to the normal PC baud rates: standard rates up to 38400 baud and then 57600, 115200, 230400, 460800 and 921600 baud. Only 16550A/16450 compatible serial ports are supported (i.e. any IO card made in the past few years). The availability of rates above 115200 depends on whether the IO card supports these rates and whether the mechanism to produce these rates is recognised by the drivers.
All the SMSQ/E standard serial port control commands are available.
Parallel Printer Ports
The parallel printer ports correspond to the standard IBM LPT ports.
PARl LPTl/2 address $378PAR2 LPT2/3 address $278PAR3 LPT1/2/3 address $3BC
The standard parallel port driver assumes that the parallel port is IEEE 1284 compatible (ECP) and it will normally operate in SPP FIFO mode. The port can also operate in original PC mode. There are three reasons for operating in original PC mode.
1. Some IO cards are not compatible, in ECP mode, with the Q40 interrupt system. If possible, this problem should be resolved by removing the IRQ7/IRQ5 jumper so that the card does not produce
99
parallel port interrupts at all. It may, however, be necessary to set the jumpers on the card to SPP (original PC) mode.
2. Some printers may require a longer strobe pulse than is provided in FIFO mode.
3. It is PAR3 which is the LPT port at address $3BC. This is not an ECP port address.
PAR_PULSE
PAR PULSE (port, pulse length)
sets the notional strobe pulse length in ISA bus cycles. If the port is not specified, PARl is assumed. If the pulse length is zero, then the parallel printer port will operate in FIFO mode. If it is greater than 0, then the parallel printer port will operate in original PC mode.
PAR_PULSE 2,2 drive an old Epson printer on PAR2PAR_PULSE 0 ...set PAR1 to FIFO mode
FIFO mode should be used if possible. The default value for PAR_PULSE is 0 if the IO card is configured for ECP mode or 1 if the IO card is configured for SPP mode.
PAR_WAIT
PAR_WAIT (port, wait cycles) sets the length of time that the parallel port driver will wait for the printer to be ready before it gives up and lets the Q40 do something else. This has no effect in FIFO mode, but in original PC mode it allows the buffer in the printer to be stuffed in bursts. The default value is 0. The larger the value, the higher the probability that a more than one byte of data can be sent on each interrupt, but the higher the load on the machine.
If the IO card does not provide IRQ7 and the machine is busy, PAR_PULSE with have a much greater effect than ifIRQ7 is used and/or the machine is idle.
PAR_WAIT 2,20 give the printer on PAR2 a high priorityPAR_WAIT 0 ...set PAR1 use the minimum of processor time
For an Epson Stylus COLOR Pro printer, PAR_WAIT 10 and PAR_WAIT 50 improved the transfer speed by 30% on an idle machine : the rate was primarily determined by the printer. On a busy machine with no interrupts, PAR_WAIT 10 improved the transfer speed by a factor of 3 and PAR_WAIT 50 improved the transfer speed by a factor of 5. The speed of other tasks in the machine was reduced.
Q40 Hard Disks
IDE drives
The current IDE driver does not support removable drives.
WIN Drive Numbers and Name
ATA (IDE) drives are identified by the bus to which they are attached (primary or secondary), whether they are drive 0 or 1 on that bus (for historical reasons these are often called the master and slave drive although ATA compliant drives are neither master nor slaves: they are truly independent) and a partition on the drive.
Windows numbers its drives from C: as it finds them. This causes chaos if a removable media drive (or a normal drive in a rack) is used. (One of my PCs is obsessed by a phantom drive F: it thinks it is a 100kbyte CDROM).
SMSQ/E adopts a rather more cumbersome approach which is, however, much more precise. The initialisation code will attempt to find a file called "BOOT" on any partition on drive 0 . WIN1 will be set to this partition. Thereafter, you must define your own WIN drives for any other drive and partition you wish to access.
100
This means that if, for example, you have a drive in a rack, the other drive numbers stay the same regardless of whether the drive is in or out when you boot the system.
SMSQ/E does not require the whole of a drive to be used for itself: the drive can be partitioned between different operating systems. Depending on the format of used by the other operating systems, SMSQ/E may be able to read or write these "foreign" partitions. Partitions are numbered from 0.
WIN_DRIVE
WIN_DRIVE (drive, target, unit, partition)
is used to select a particular drive, unit and partition combination to be accessed using a particular WIN drive.
The "target" and "unit" notion comes from the SCSI bus terminology, the target is a physical device and the unit is a subdivision of that device. For IDE bus drives, there is only one unit per drive so the unit number is always zero and may be omitted. If the partition is omitted as well, then partition 0 (or the whole drive) is assumed.
Target Bus Drive0 Primary 0 (Master)1 Primacy 1 (Slave)2 Secondary 0 (Master)3 Secondary 1 (Slave)
Issuing a WIN_DRIVE command for a particular drive will cause the drive map to be re-read the next time the disk is accessed. It can, therefore, be used to force the drivers to recognise a disk change.
WIN_DRIVE 2,0,1 WIN2 is drive 0 on the primary bus, partition 1WIN_DRIVE 3,3 WIN3 is drive 1 on the secondary bus (whole drive or partition 0)
WIN_DRIVE$
WIN DRIVE$ is a function which returns a string giving the target, unit and partition used by a particularWIN drive.
WIN_DRIVE 2,0,1 WIN2 is drive 0 on the primary bus, partition 1WIN_DRIVE 3,3 WlN3 is drive 1 on the secondary bus (whole drive or partition 0)
PRINT WIN_DRIVE$(2) Prints 0,0, 1PRINT WIN_DRIVES(3) Prints 3,0,0
WIN_USE
WIN_USE may be used to set the name of the WIN device. The name should be 3 characters long and in upper or lower case.
WIN_USE MDV The WIN device is renamed MDVWIN_USE win The WIN device is restored to WINWIN_USE The WIN device is restored to WIN
Format WIN
If a drive is unformatted (or not recognisably formatted) you can format the whole drive as an SMSQ drive.
WIN_FORMAT 1 Allow WIN drives to be formattedWIN_DRIVE 3,2 Set WIN3 to secondary drive 0, whole driveFORMAT win3_Fred FORMAT WIN3WIN_FORMAT 0 Prevent WIN drives from being formatted
On the other hand, if you wish to share a drive between different operating systems, you can partition the drive by executing the MKPART utility before formatting.
101
WIN_FORMAT 1 Allow WIN drives to be formattedWIN_DRIVE 3,2,1 Set WIN3 to secondary drive 0, partition 1EW MKPART Partition drive, setting partition 1 to "QWA"FORMAT WIN3_Fred FORMAT WIN3WIN_FORMAT 0 Prevent WIN drives from being formatted
WIN Control Commands
There are a number of "odd" WIN device control commands.
WIN_WP
WIN_WP (drive, 0 or 1) is used to software write protect a WIN drive.
WIN_WP 1,1 Set the "write protect" flag for the drive accessed by WIN1WIN_WP 1,0 Clear the "write protect" flag for the drive accessed by WIN1
WIN_START WIN_STOP
The WIN_START (drive) and WIN STOP (drive, time) commands may be used to start and stop a drive. If a time is given on the WIN_STOP command, the drive should not stop immediately: the time is the period without any disk accesses that must elapse before the drive automatically enters standby mode. A zero time cancels the automatic standby timer.
WIN_STOP 2 Stop the drive accessed by WIN2 nowWIN_STOP 2,3 Stop the drive accessed by WIN2 when there has been no access for 3 minutesWIN_STOP 2,0 Do not stop the drive accessed by WIN2WIN_START 2 Start the drive accessed by WIN2
Note that all the operations that might be used to restart a drive (there is no "official" ATA command) are "vendor specific". on your particular drive, the drive may not start again until you try and read from (or write to) the drive, or it may never start again. You should also note that, on some drives, WIN_STOP drive, time will not only set the timer but stop the drive immediately as well.
As with any ATA command, these commands will work if they work, otherwise they will not work.
Q40 Floppy Disks
The Q40 will normally have one or two HD disk drives. The SMSQ/E FLP driver can read or write QL5A, QL5B and MSDOS format diskettes. It can format QL5A (DD) and QL5B (HD) format diskettes.
Floppy Disk Driver Name
The default name of the floppy disk driver is FLP. The internal drive is FLP1. The external drive (if any) is FLP2.
FLP_USE
FLP USE may be used to set the name of the FLP device. The name should be 3 characters long and in upper or lower case.
FLP_USE mdv The FLP device is renamed MDVFLP_USE FLP The FLP device is restored to FLPFLP_USE The FLP device is restored to FLP
Format FLP
The SMSQ/E FLP driver will usually format a diskette to the highest density it can. The density may, however, be set using the FLP_DENSITY command or by adding a special code to the end of the medium name in the format command.
102

FLP_DENSITY
The SMSQ/E format routines will usually attempt to format a disk to the highest density possible for a medium. The FLP DENSITY (code) is used to specify a particular recording density during format.
The density codes are "S" for single sided (double density), "D" for double density and "H" for high density.
FLP_DENSITY S Set the default format to single sidedFLP_DENSITY H Set the default format to high densityFLP_DENSITY Reset to automatic density selection
The same code letters may be added (after a *) to the end of the medium name to force a particular density format. (For compatibility with older drivers, if the code letter is omitted after the *, single sided format is assumed).
FORMAT 'FLP1 Disk23' Format at highest density or as specified by FLP_DENSITYFORMAT 'FLPl_Disk24*' Format single sidedFORMAT 'FLP1_Disk25*S' Format single sidedFORMAT 'FLPl_Disk25*D' Format double sided, double density
FLP_TRACK
The FLP_TRACK (number of tracks) is used to limit the number of tracksformatted.
FLP_TRACK 23 Only format 23 tracks
FLP Control Commands
FLP_SEC
FLP_SEC (level) was used to set the security level. The security of the data stored on the diskettes can be seriously compromised if you change diskettes while there are files open. The security level affects the amount of time the FLP driver spends maintaining the data on the diskette up to date with the internal copies of the data in memory. In principle, a lower level is more efficient, but more risky. With the increasing use of hard disks, the security level of the FLP has been fixed at level 2: the most secure. FLP_SEC is ignored.
FLP_START
The FLP_START (ticks) command specifies the number of ticks ( 1/50th of a second) that the FLP driver waits after starting the drive before writing to it. This allows the diskette to get up to speed before the write operation. The default value is 24, which is a wait of about 0.5 s. There should not be any reason to use this command.
FLP_STEP
The FLP_STEP (drive, step) command specifies the step rate for a particular drive. If the drive number is omitted, the step rate applies to both drives. The step rate will be adjusted downwards by the driver if there are repeated seek errors. The FLP_STEP command should not, therefore, be necessary.
Sampled Sound System
The SMSQ/E sampled sound system for the Q40 assumes that a sampling rate of 20 kHz will always be used.
The system is based on a 2 byte wide queue. Sound generators should stuff pairs of bytes (left, right) in the queue. The queue is 200 kilobytes long which allows up to 5 seconds free running. A normal "boing" can be set up in a single operation.
The SMSQ/E sampled sound system provides four basic functions to add a single sample, to add an arbitrary number of samples, to stop the sound and to estimate the length of sound samples remaining in the queue.
103
The SMSQ / E sampled sound system should be accessed in supervisor mode (in principle, this will be a sound device driver) via the interrupt level 4 auto vector.
move.l $70,a3 interrupt level 4 auto vectormove.l -(a3),a2 address of sample sound system functionscmp.l #'SSSS',-(a3) SMSQ/E Sampled Sound Systembne.s oops
... jsr $04(a2) add a sample
... jsr $08(a2) set up to add multiple samples
... jsr $0C(a2) notify that multiple samples have been added
... jsr $10(a2) kill the sound
SSS_ADD 1 ($04)
The sss_add1 call is used to add one sample to the sound queue. To limit the overheads, it does not save any registers.
D1 call byte left hand sound levelD2 call byte right hand sound levelA1 smashedA3 call pointer to 'SSSS' flag (see code above)
The sound level is a byte value between 0 and 255. The sound "zero" level is 128. This should be the last value written to the left and right hand sound queues.
This call does not have a standard error return. It returns status Z if the operation sample has not been added because the queue is full.
SSS_SETM ($08)
The sss setm call sets up to add multiple samples to the sound queue.
A1 return the pointer to the next free byte pair in the queueA2 return the pointer past the last free byte pair in the queueA3 call pointer to 'SSSS' flag (see code above)
The calling routine can fill the area from al to a2 with pairs of bytes. It does not, however, need to fill the whole of the area. When it has put samples into the queue, it should call SSS_ADDM to notify the sampled sound system.
SSS_ADDM ($0C)
The sss_addm call notifies that samples have been added to the sound queue.
A1 call the updated pointer to the next free byte pair in the queueA3 call pointer to 'SSSS' flag (see code above)
move.l $70,a3 interrupt level 4 auto vectormove.l -(a3),a2 address of sample sound system functionscmp.l #'SSSS',-(a3) SMSQ/E Sampled Sound Systembne.s oops
jsr sss_setm(a2) setupbra.s end_loop
loopcalculate next sample in d1.b, d2.bmove.b d1,(a1)+ add left sample
104
move.b d2,(al)+ add right sampleend_loop
cmp.l a2,a1 more samples to do?blt.s loop
jsr sss_addm(a2) notify sampled sound system
SSS_KILL ($10)
The sss_kill call stops the sound system and throws the queue away.
A3 call pointer to 'SSSS' flag (see code above)
SSS_SAMPLE ($14)
The sss_sample call estimates the number of samples remaining in the queue. This figure should be divided by 400 to give the length of the sound in ticks or divided by 20000 to give the length of sound in seconds.
D0 return long number of samples remaining in queueA3 call pointer to 'SSSS' flag (see code above)
105
SMSQ/E for QPC2
Mouse
QPC supports the mouse wheel transparently to the applications. For every tick of the mouse wheel several Alt + up/down key combinations are stuffed into the keyboard buffer. The amount depends on the global Windows setting. As Alt + up/down are the standard key-combination for scrolling a window, many applications can immediately profit from the wheel.
MOUSE_SPEED
MOUSE_SPEED [#ch,] acceleration, wakeup This function adjusts the mouse acceleration and wake up factor. The acceleration factor is of no con-sequence to QPC2. The wakeup values, however, may still be set. They range from 1 to 9, with 1 being the most sensitive.
MOUSE_STUFF
MOUSE_STUFF [#ch,] hot$
This function adjusts the string that is stuffed into the keyboard queue when the middle mouse button is pressed (or both left and right buttons are pressed simultaneously). The string cannot be longer than two characters, but this is enough to trigger any hotkey, which in turn, can do almost anything.
MOUSE_STUFF ‘.’ Generates a dot if middle mouse button is pressed MOUSE_STUFF CHR$(255)&’.’ Generates hotkey Alt + .
Machine Type
There are two standard functions to determine the machine type
MACHINE
mach% = MACHINE Returns the machine type SMSQ/E is running on; 30 for QPC.
PROCESSOR
proc% = PROCESSOR
Returns the 680x0 family type; 20 for QPC (10 for versions below 3.33).
IF MACHINE=30 AND PROCESSOR<>20:PRINT 'This can hardly be QPC!'
QPC-Specific Commands
QPC_CMDLINE$
cmd$ = QPC_CMDLINE$
This returns the argument that was supplied to QPC after the “-cmdline” command line argument. This can be used to do different actions depending on the way QPC was started.
QPC_EXEC
QPC_EXEC command$[, parameter$]
106
This command can be used to call an external DOS or Windows program. The name of the executable file is given in the first parameter. Optionally, you can also supply a second parameter, which is then passed to the executed program as its command line arguments.
Furthermore, you can supply a data file as the first parameter. In this case, the associated application for this file type is executed.
QPC_EXEC 'notepad','c:\text.txt' Start notepad and load the c:\text file QPC_EXEC 'c:\text.txt' Start the default viewer for .txt files
QPC_EXIT
QPC_EXIT
This simply quits QPC.
QPC_HOSTOS
os% = QPC_HOSTOS
This function returns the host operating system under which QPC was started. Possible return codes are: 0 = DOS (QPC1) 1 = Win9x/ME (QPC2) 2 = WinNT/2000/XP (QPC2)
QPC_MAXIMIZE QPC_MINIMIZE QPC_RESTORE
QPC_MAXIMIZE, QPC_MINIMIZE, QPC_RESTORE
Maximizes, minimizes or restores the QPC window.
QPC_MSPEED
QPC_MSPEED x_accel, y_accel
This command has no effect on QPC2.
QPC_NETNAME$
name$ = QPC_NETNAME$
This function returns the current network name of your PC (the one you supplied upon installation of Windows). The result can be used to distinguish between different PCs (e.g. in a BOOT program).
QPC_QLSCREMU
QPC_QLSCREMU value
Enables or disables the original QL screen emulation. When emulating the original screen, all memory write accesses to the area $20000-$27FFF are intercepted and translated into writes to the first 512x256 pixels of the big screen area. If the screen is in high colour mode, additional colour conversion is done.
Possible values are: -1: automatic mode0: disabled (default) 4: force to 4-colour mode 8: force to 8-colour mode
When in QL colour mode, the emulation just transfers the written bytes to the larger screen memory, i.e. when the big mode is in 4-colour mode, the original screen area is also treated as 4-colour mode. In high colour mode however, the colour conversion can do both modes. In this case, you can pre-select the emulated mode (parameter = 4 or 8) or let the last issued MODE call decide (automatic mode). Please note that that automatic mode does not work on a per-job basis, so any job that issues a MODE command changes the behaviour globally.
107
Please also note that this transition is one-way only, i.e. bytes written legally to the first 512x256 pixels are not transferred back to the original QL screen (in the case of a high colour screens this would hardly be possible anyway). Unfortunately, this also means that not all old programs will run perfectly with this type of emulation. If you experience problems, start the misbehaving application in 512x256 mode.
QPC_SYNCSCRAP
QPC_SYNCSCRAP
In order to rapidly exchange text passages between Windows and SMSQ/E the Syncscrap functionality has been introduced. The equivalent of the Windows clipboard is the scrap extension of the menu extensions. After loading the menu extensions you can call this command, which creates a job that periodically checks for changes in either the scrap or the Windows clipboard, and synchronizes their contents if necessary. Please note that only text data is supported. The character conversion between the QL character set and the Windows ANSI set is done automatically. The line terminators (LF or LF+CR) are converted too.
QPC_VER$
v$ = QPC_VER$
This returns the current QPC version.
PRINT QPC_VER$ will print 4.00 or higher.
QPC_WINDOWSIZE
QPC_WINDOWSIZE x, y
This sets the size of the client area (the part that displays SMSQ/E) of the QPC window. It does NOT alter the resolution SMSQ/E runs with, so the pixels are effectively zoomed. It is equivalent to the “window size” option in the main configuration window. If QPC is currently in full screen mode it will switch to windowed mode. Window size cannot be set smaller than the SMSQ/E resolution or bigger than the desktop resolution.
DISP_SIZE 512,256 set QPC to 512x256 screen resolutionQPC_WINDOWSIZE 1024,512 do a 200% zoom of the QPC window
QPC_WINDOWTITLE
QPC_WINDOWTITLE title$
Sets the string that can be seen when QPC runs in windowed mode. This can be used to easily distinguish between several QPC instances.
QPC_WINDOWTITLE “Accounting” sets the title to “Accounting”
Serial (COM) Ports
Unlike the basic SMSQ serial port drivers, the SMSQ/E serial port drivers are dynamically buffered. There is therefore no need to use the PRT device.
BAUD
The Baud rates supported by SMSQ/E on QPC are
1152005760038400192009600480024001200
108
600300
The BAUD command works as in SMSQ/E on the Atari: If the port number is omitted, only SER1 is affected:
BAUD 19200 set SER1 to 19200 baudBAUD 3,115200 set SER3 to 115200 baud
SER_GETPORT$
com$ = SER_GETPORT$(port%)
Returns the device the SER port is connected to, for example “COM1”.
SER_SETPORT
SER_SETPORT port%, com$
Sets the COM port a SER port should be connected with. The change will take effect on the next open of the specified serial port.
SER_SETPORT 4,”COM32” Associate SER4 with COM32
Printer Support (PAR)
The PAR device can be linked to a printer port or to a Windows printer queue. By default, output is dynamically buffered: the PRT device is not required.
Please note that no translation of the printer data is done, the data sent to the device is directly piped into the printer itself. The only exception is the “filter” option in the configuration dialog. A filter gets the raw data and can process it however it wants. QPCPrint, which is sold separately, is just such a filter that emulates the popular ESC P/2 printer language.
PAR_DEFAULTPRINTER$
name$ = PAR_DEFAULTPRINTER$
This returns the name of Windows' default printer. The name can later be used with PAR_SETPRINTER for example.
PAR_GETPRINTER$
name$ = PAR_GETPRINTER$(port%)
This returns the PAR port setting: "LPT1", "LPT2" or "LPT3" if it isn't linked to a printer but directly to a printer port or the name of the printer otherwise. An empty string designates the default printer.
PAR_SETPRINTER
PAR_SETPRINTER port%, name$
Connects the PAR port either to a hardware port (e.g. name$ is "LPT1") or to the printer spooler (name$ is one of the names returned by PAR_PRINTERNAME$).
PAR_GETFILTER
state% = PAR_GETFILTER(port%)
This returns whether the printer filter is enabled for the specified port.
PAR_SETFILTER
109
PAR_SETFILTER port%, state%
Enables (state% = 1) or disables (state% = 0) the printer filter for the specified port. If the printer should be enabled although none is available a “not found” error is returned.
PAR_PRINTERCOUNT
n% = PAR_PRINTERCOUNT
This returns the number of printers available on this system.
PAR_PRINTERNAME$
name$ = PAR_PRINTERNAME$(n)
This returns the name of printer number n (counted from 1 to PAR_PRINTERCOUNT).
PC Floppy Disks
QPC2 supports both native floppy access and access to floppy images.
Native Floppy Support
Access to native PC floppy disks is done via low-level Windows calls. Read accesses are buffered internally by QPC2 and should be quite fast. This is not true for write accesses; depending on your Windows version, these might be quite slow. As of version 4 QPC does not physically format floppy disks anymore. The disk must already have been formatted by Windows or any other means. Formatting the disk in QPC only writes the SMSQ/E file system to it.
Floppy Image Support
QPC2 can accept any standard floppy disk image. You can create your own images by formatting an image and filling it with contents:
FLP_DRIVE 2,”C:\TEMP\FLOPPY.IMG” change location of image fileFORMAT FLP2_ format HD floppy image WCOPY FLP1_,FLP2_ copy contents from physical floppy
Floppy Disk Driver Name
The default name of the floppy disk driver is FLP.
FLP Control Commands
FLP_USE
FLP_USE may be used to set the name of the FLP device. The name should be three characters long, in upper or lower case.
FLP_USE mdv The FLP device is renamed MDV FLP_USE FLP The FLP device is restored to FLP FLP_USE The FLP device is restored to FLP
FLP_DRIVE
FLP_DRIVE drive%, drive$
This changes the drive/image the floppy device is connected to.
FLP_DRIVE 2,"C:\FLOPPY.IMG" now FLP2_ is assigned to the floppy image FLOPPY.IMG FLP_DRIVE 2,"B:\" now FLP2_ is assigned to the physical B:\ floppy
110
FLP_DRIVE$
drive$ = FLP_DRIVE$(drive%)
This reads back the current connection of the floppy device.
PRINT FLP_DRIVE$(2) will tell you the current setting
FLP_DENSITY
FLP_DENSITY code
The SMSQ/E format routines will usually attempt to format a disk to the highest density the medium supports. The FLP_DENSITY (code) is used to specify a particular density during format. The density codes are "S" for single sided (double density), "D" for double density and "H" for high density.
FLP_DENSITY S Set the default format to single sided FLP_DENSITY H Set the default format to high density FLP_DENSITY Reset to automatic density selection
The same code letters may be added (after a *) to the end of the medium name to force a particular density format. (For compatibility with older drivers, if the code letter is omitted after the *, single sided format is assumed).
FORMAT 'FLP1_Disk23' Format at highest density or as specified by FLP_DENSITY FORMAT 'FLP1_Disk24*' Format single sided FORMAT 'FLP1_Disk25*S' Format single sided FORMAT 'FLP1_Disk25*D' Format double sided, double density
FLP_SEC, FLP_START and FLP_STEP
QPC has no influence over how the Windows disk driver works, therefore these commands are ignored.
WIN Disks
SMSQ hard disks for QPC are just large files on the host operating system’s file system. The files usually have the suffix “. WIN” but anything else is fine, too. Name and directory can be configured separately for all drives. (See also the configuration section). SMSQ/E’s FORMAT command creates the file.
Hard Disk Driver Name
The default name of the hard disk driver is WIN.
WIN_USE
WIN_USE may be used to set the name of the WIN device. The name should be three characters long, in upper or lower case.
WIN_USE mdv The WIN device is renamed MDV WIN_USE WIN The WIN device is restored to WIN WIN_USE The WIN device is restored to WIN
Format WIN
Formatting a WIN drive simply creates a large file on the PC’s hard disk. The "name" of the WIN device should be the size required in megabytes.
Before you issue the FORMAT command, you have to allow the drive to be formatted. SMSQ/E has a two-level protection scheme to make sure you (or somebody else) cannot format your hard disk acci-dentally. All drives are protected by default so you have to enable them to be formatted first.
111

Please note that the FORMAT command for a WIN drive should only be used from the console of job 0, i.e. the first SBASIC.
FORMAT will fail if there is not sufficient space left on the specified drive, if the medium is write-protected, or if the file *.WIN already exists and contains invalid information (e.g. a DOS-subdirectory).
WIN_FORMAT 1 Allow WIN1_ to be formatted FORMAT WIN1_10 Create a 10 Megabyte WIN device.
... You have to echo the two characters displayed...
WIN_FORMAT 1,0 protect WIN1_ again against unwanted formatting
Drive/Filename Assignment
WIN_DRIVE WINDRIVE$
Every WIN drive number is assigned to a file on your hard disk, which contains the complete contents of your WINx_. It is possible to change the filename of the file that is assigned to a WIN drive number while QPC2 is running:
WIN_DRIVE 2,"D:\QPC.WIN" now WIN2_ is assigned to the WIN file QPC.WIN PRINT WIN_DRIVE$(2) will tell you the current filename.
Removable Drives
WIN_REMV
Removable drives, such as ZIP or SyQuest, are now supported. If auto-detection fails use the WIN_REMV command:
WIN_REMV 2 declares WIN2_ to be a removable drive. WIN_REMV 2,1 does the same for WIN2_. WIN_REMV 2,0 magic - WIN2_ is no longer removable!
When a drive is declared removable, the .WIN file is closed after all SMSQ/E files on it are closed. This can also be used to allow a single .WIN file to be shared over a network. (Files on a remote computer QPC2 are automatically set to be removable). As long as one instance of QPC has open files on the drive, no other instance can access it.
The DOS Device
The DOS device has been created to transfer data between the Windows and SMSQ/E environments. Using this device you can directly browse your PC hard disks (network drives, CD-ROMs or whatever), as well as read and write files.
Please note that the DOS device is NO replacement for the WIN device (it was never intended to be), all SMSQ header information gets lost on DOS drives; therefore, you cannot store executable code on them.
Drive/Directory Assignment
By default, DOS1_ corresponds to C:\, DOS2_ to D:\ and so on, but the base can be freely chosen in the configuration dialog or even at runtime:
DOS_DRIVE 2,"C:\WINDOWS" assign DOS2_ to the windows directory PRINT DOS_DRIVE$(2) would now return “C:\WINDOWS”
Restrictions And Some Background Information On The DOS Device
You can use this device in the same way as any other QL directory device to access and exchange files between Windows and SMSQ/E. It is easier than ever before. The usual restrictions imposed by the general QDOS file naming convention apply, i.e. the length of the directory + filename is limited to 36 characters.
112
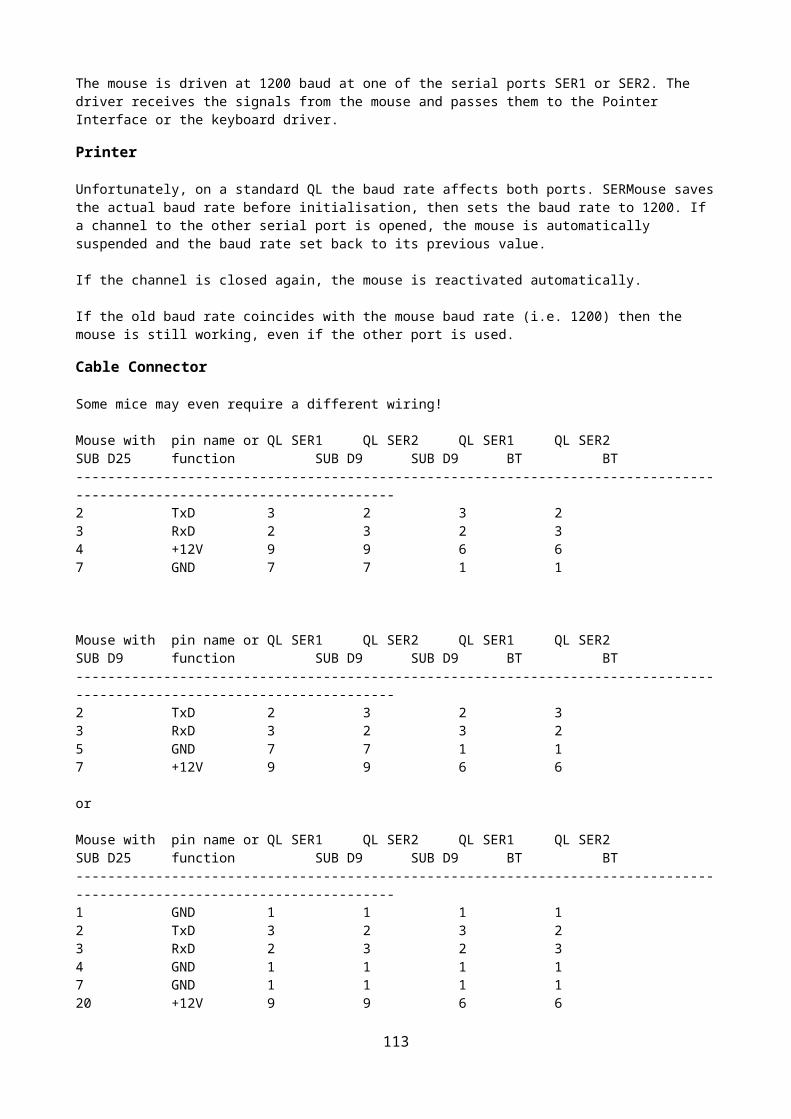
Names longer than that won’t show up in the directory lists! Therefore, it is a good idea to place files that you want to access from both SMSQ/E and Windows only one or two directory levels deep, or change the base of a DOS drive to one directly above the desired directories.
Many filenames that are valid under SMSQ are not valid under Windows. The offending characters (e.g. *, /, ? etc. or filenames with spaces at their end) are translated into other, valid ANSI characters. This conversion works quite well, but you are advised to only use valid filenames wherever possible.
One problem with the SMSQ way of accessing files is that the “_” separator can be a valid part of a name or a directory separator. Therefore, the relation SMSQ filename -> Windows filename is ambiguous. This can cause quite some problems:
Let’s say you have two directories named C:\QL\STUFF\ and C:\QL\STUFF_NEW\ and you want to create a file called dos1_QL_STUFF_NEW_BRANDNEW.TXT. Where does that file belong? It could mean any of the following:
C:\QL_STUFF_NEW_BRANDNEW.TXTC:\QL\STUFF_NEW_BRANDNEW.TXTC:\QL\STUFF\NEW_BRANDNEW.TXTC:\QL\STUFF_NEW\BRANDNEW.TXT
Your intention was probably the last one, but how should QPC now? The easy solution is not to use underscores in directory names. However, if you can’t help it, it becomes essential to know how the DOS device works. The current algorithm is based on the simple assumption that if you have a directory called “QL_STUFF” you won’t also want to create “QL\STUFF”.
The exact working of the algorithm is not easy to describe, but I’ll try nonetheless. The basic principle is that the algorithm always searches for the longest consecutive part of the name. In the example above, QPC would begin by searching for any directory starting with “C:\QL”. If none was found, the process completes and the result is simply “C:\QL_STUFF_NEW_BRANDNEW.TXT”. Otherwise, it will look for any directory starting with “C:\QL_STUFF”. If found QPC will try “C:\QL_STUFF_NEW” and so on. If not found, however, it will test whether the last successful part (“C:\QL_STUFF”) is itself a directory. If it is, it is considered part of the filename and all future searches use this as the base (i.e. the next step would be “C:\QL_STUFF\NEW”). If not, the search terminates with the result again being “C:\QL_STUFF_NEW_BRANDNEW.TXT”. If this sounds too confusing or too badly explained (probably both) just remember one thing: never use “_” within directory names.
Finally, please note that you cannot use RENAME to rename files on a DOS drive. SMSQ/E allows you to rename files from one directory to another one, but this is not compatible with the DOS way of doing things. If you want to rename a file, you need to COPY it to the new location and DELETE the old file.
DOS Control Commands
DOS_USE
DOS_USE may be used to set the name of the DOS device. The name should be three characters long, in upper or lower case.
DOS_USE mdv The DOS device is renamed MDV DOS_USE DOS The DOS device is restored to DOS DOS_USE The DOS device is restored to DOS
DOS_DRIVE
DOS_DRIVE drive%, directory$
This changes the directory the DOS device is connected to.
DOS_DRIVE 2,"C:\WINDOWS" now DOS2_ points to C:\WINDOWS
DOS_DRIVE$ 113

directory$ = DOS_DRIVE$(drive%)
This reads back the currently connected directory of the DOS device.
The QPC CD-Audio Module
As a little extra bonus, QPC contains a module to play Audio CDs. There are 23 new BASIC commands for the complete control of all audio functions of a CD-ROM drive. A tiny CD-player comes with QPC2 as an example. First some terms of CD programming:
Track: one title Frame: one sector of a CD. The sector length on Audio CDs is 2352 Bytes
REDBOOK-Format: a standard format for direct sector addressing. Sectors are addressed through a time index in the form of a longword formatted as $00MMSSFF. MM is the minute, SS the second and FF is the frame. One second has 44100(Hz)*2(Stereo)*2(16 Bit)/2352 (sector length) = 75 frames.
HSG-Format: another format to address a sector. Here they are only addressed sequentially.
HSG=(minute*60+second)*75+frame
New Basic Commands
As usual, all parameters in square brackets are optional. Unless specified, all sectors are addressed in Redbook-Format.
CD_INIT
CD_INIT ['name']
This command must be used before any other in order to initialize the CD drive for SMSQ. After the first call, the command is ignored on all subsequent calls. The string parameter is ignored on QPC2.
CD_PLAY
CD_PLAY [start[,end]]
This is the most important command. Without parameters the whole CD is played. An optional start and end track can be given. The command returns as soon as the CD starts playing. The parameters are given in tracks (bit 31 clear) or in sector units (bit 31 set).
CD_PLAY 3 or with the same effect CD_PLAY CD_TRACKSTART(3) + $80000000
CD_STOP Pauses playing. If the driver was already in pause mode, a complete stop is performed (as if a new CD was inserted; restart from track 1 and so on)
CD_RESUME
Resumes playing from where it stopped.
CD_EJECT, CD_CLOSE
Opens/closes the drive tray.
CD_ISPLAYING, CD_ISCLOSED, CD_ISINSERTED, CD_ISPAUSED
x% = CD_xxx
114
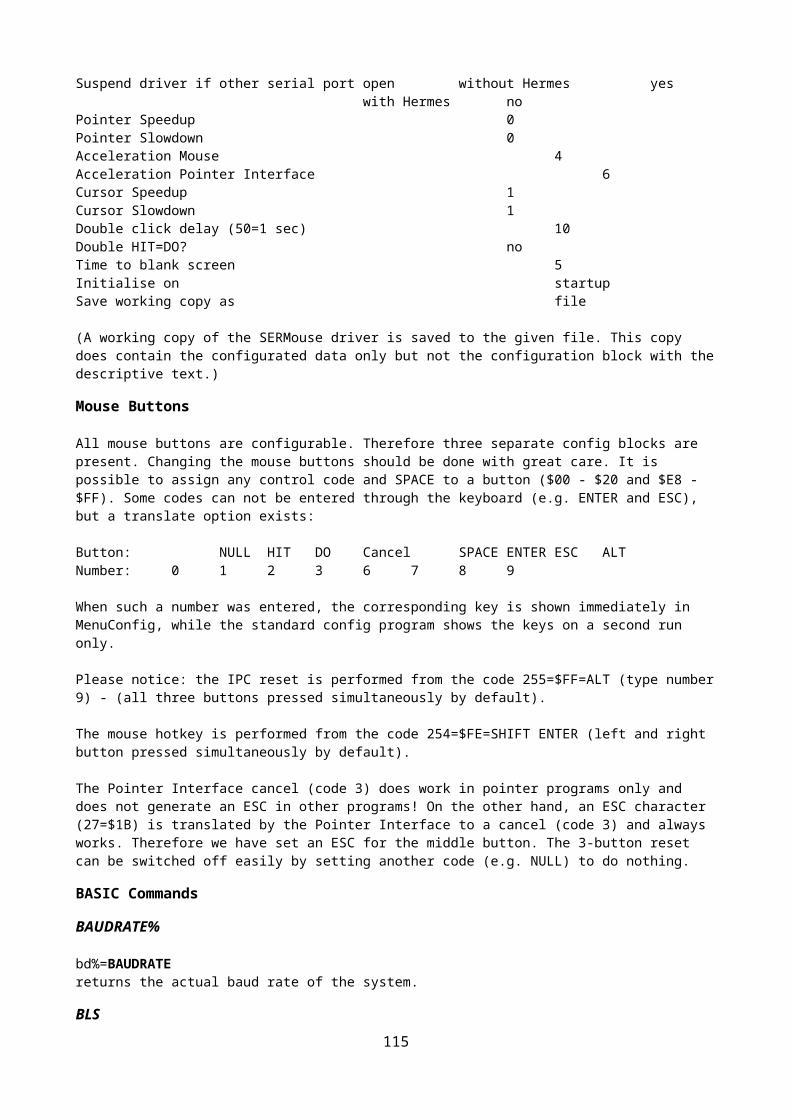
These functions return the current status according to the keyword. Please note that Windows cannot tell whether the tray is closed or not, therefore CD_ISCLOSED always returns the same result as CD_ISINSERTED when used on QPC2. An empty tray was obviously something the Microsoft geniuses could not imagine.
CD_TRACK
track% = CD_TRACK
Returns the number of the track currently being played.
CD_TRACKTIME
x = CD_TRACKTIME
Returns the elapsed time within the current track.
CD_ALLTIME
x = CD_ALLTIME
Returns the total elapsed time of the CD.
CD_HSG2RED, CD_RED2HSG
red=CD_HSG2RED hsg hsg=CD_RED2HSG red
Converts an HSG address to Redbook and vice versa.
CD_TRACKSTART
x = CD_TRACKSTART track
Returns the start sector of a track.
CD_TRACKLENGTH
x = CD_TRACKLENGTH track
Returns the length of a track. Attention: This is the only function that returns an HSG-number.
CD_FIRSTTRACK, CD_LASTTRACK
x% = CD_xxx
Returns the number of the first/last track.
CD_LENGTH
x = CD_LENGTH
Returns the total length of the CD.
CD_HOUR, CD_MINUTE, CD_SECOND
x% = CD_xxx Redbook
Returns the hour, minute or second of a Redbook address
115
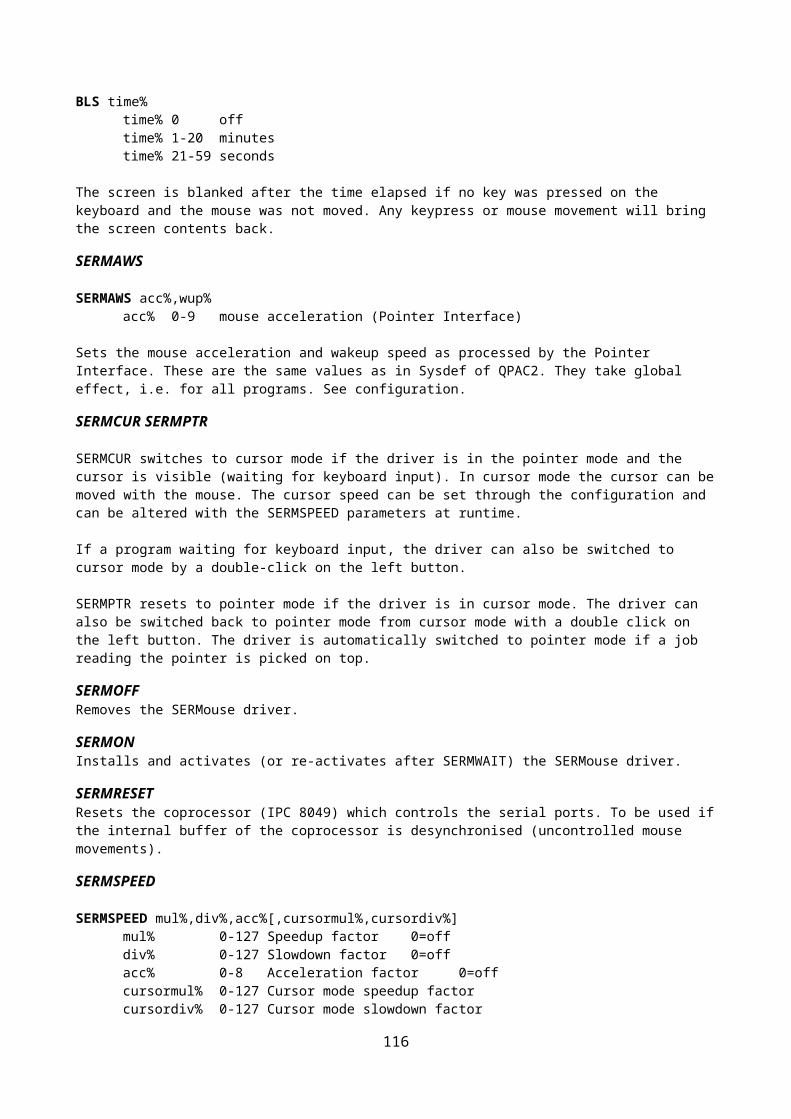
SMSQ/E for Q68
Introduction
This manual explains the SMSQ/E particulars as they pertain to the Q68.
SDHC cards
The Q68 uses SDHC memory cards for mass storage. These must be SDHC cards – simple SD cards are not compatible. There are two card sockets into which you can insert the cards. The left card socket is socket 1, the one on the right is socket 2 (like mdv1_ and mdv2_). From here onward, the card inserted into the left socket will be called card1, the card inserted into the right socket will be called card2.
For the cards to be useful, they must be partitioned and the first primary partition must be formatted in FAT32 format (this cannot be done on the Q68). The different files the Q68 needs must be put into that partition, which should be possible from any machine running an OS that can read/write SDHC cards (Linux, Windows, macOs): just copy the files to the card.
The Q68 always tries to start up from card1, by loading the operating system from that card. Once SMSQ/E is loaded, it will follow its own usual boot process, normally running the boot file found on win1_.
Using container, OS and other files on the card
Under SMSQ/E, the Q68 uses qxl.win type container files as the main mass storage devices. These files must lie in the first primary partition on the SDHC card which must be formatted with a FAT32 file system. Moreover, these container files must be located within the first 16 directory entries of this FAT32 formatted partition. This is also true for the file containing SMSQ/E itself..Special precautions must be taken when writing the container and OS file(s) themselves to the card. Indeed, SMSQ/E expects a container file not to be fragmented in the FAT32 file structure. It assumes that, once it has found the beginning of a container file, the rest of that container file lies in contiguous sectors on the card. This is also true for the SMSQ/E binary files (named "Q68_RAM.SYS" or “Q68_SMSQ.WIN”) itself. Thus the files on the cards must not be fragmented.
The best way to achieve this is to make sure that, before writing the SMSQ/E binary file and the container files, the card is freshly formatted. Then write each container (or other) file, one after the other, immediately after formatting the card.
Hence, you should dedicate a card solely for the purpose of using it with the Q68.
Do not drag and drop several files onto the card at once. Do not delete files from the card – always format it. It is very much recommended that you read the section Avoiding fragmentation to make sure you treat the card as you should.
Naming scheme
The file name of a container or OS file MUST be in "8.3" format, i.e. a name of 1 to 8 characters, possibly followed by a decimal point and a three letter extension. Missing letters are filled up with spaces. The name and extension must be in upper case and the extension, if present, must be separated from the name by a period (".").
Please only use plain ASCII characters for the name and no accented characters, i.e. the letters A-Z and numbers 0-9.
In all commands or configuration items where you must give or configure a name, SMSQ/E tries to help you as much as possible. Names are automatically converted into upper case and correctly formatted, so that “qlwa.win” would automatically be converted to “QLWA .WIN”. However, a “_” is not converted to a “.” .
See also the default names of OS and container files.
116
Initialising a card
CARD_INIT
With the Q68, before you can use drives on an SDHC card, the card must be initialised (it would actually be more accurate to say that the card reader a card is in must be initialised, i.e. put in a state where it will read a card). Card1 is automatically initialised at boot time. By design, card2 is not initialised at boot time, though this will depend on you configuration options. If it is not initialised, you have to initialise it yourself. You can do this with the supplied CARD_INIT command. The card itself is not touched by this command (it is not formatted, written to or anything).
Syntax:CARD_INIT card_number
where card_number is the card to be initialised (1 or 2).
Example:CARD_INIT 2.
Initialisation will fail with the error “medium check failed” if no card is in the drive.
Swapping cards
As a general rule, cards may be swapped in and out, even when the system is running - but this is not a recommended practice. However, if you insist on doing this, you must be aware of a few rules:
1 – Do not remove a card when there are files still open to a drive and certainly not whilst the machine is reading/writing to a card. If you remove a card whilst there are still files open or files being written, data loss WILL (not “may”) occur. Note that you will NOT be able to write the missing data to the card even if you reinsert it immediately after having removed it from the socket. Some device drivers have a special keyword telling you whether it is safe to remove a card from its socket (see, e.g. WIN_SAFE).
2 – When a card is removed from its socket, the card reader in that socket becomes uninitialised. Before using the new card that you just inserted, you must initialise it, as described above. This is true whether you insert a new card or re-insert the old one that was just removed.
Win drives on SDHC cards
For the Q68, SMSQ/E uses “qxl.win” type container files as the main mass storage devices. These files must comply with the rules set out above.The corresponding SMSQ/E device is called "WIN" and, potentially, you may have up to 8 different drives for this device, called "win1_" to "win8_".
Each WIN drive can point to one container file lying indiscriminately on SDHC card one or two. For each WIN drive, you must set the name of the container file, and the number of the card on which this file is to be found. You may do so by configuring this with the standard configuration program. You can also set the names of the container files at any time with the WIN_DRIVE command. Menuconfig is the best choice here.
Safety precaution
Do not point two different WIN drives to the same container file on the same card. For the time being, the system doesn't stop you from doing so, but data loss and file corruption WIN (not "can") occur as a result!If in doubt, use the WIN_DRIVE$ function to consult the list of container files already assigned to a drive.
Basic commands for WIN drives117
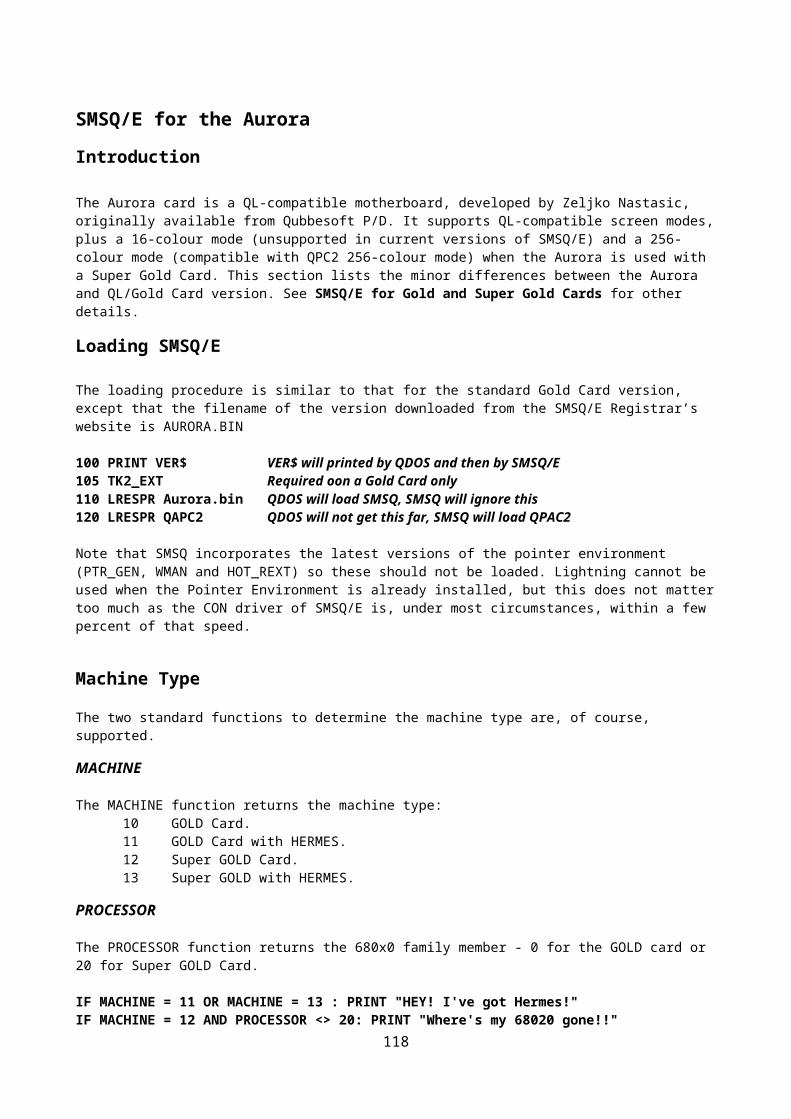
The basic commands related to WIN drives are as follows:
WIN_DRIVE
assigns a container file on a card to become a drive.
Syntax:WIN_DRIVE drive, card, file_name$
where: - drive is the WIN drive number (1... 8) to be assigned. - card is the SDHC card on which the file can be found (1 or 2). - file_name$ is the name of the container file. The file name MUST be in "8.3" format, i.e. a name of one to 8 characters, a decimal point and an extension of up to three letters. The extension, if present, must be separated from the name by a period (".").
Please note that this command does not check that the file is actually present and readable on the card.
The WIN_DRIVE command has an intended side-effect:
If the command is applied to a card that isn't present (any more), all channels to all drives that would have corresponded to files on that card are closed, and the drive definition blocks for such drives are removed.
This is a protection against a card being ripped out of the drive, a new one inserted and a write operation to the new card being made. That way, at least, no old information will be written to the new card.
Example:
WIN_DRIVE 2,6,"QXL.WIN" make the file "QXL.WIN" on card 2 into WIN drive 6.
WIN_DRIVE$
This function returns the name of a container file corresponding to a drive, and the card on which this file should be found.
Syntax:name$=WIN_DRIVE$(drive)
where: - drive is the drive to be questioned (1 to 8)
The function returns, as a string, the name of the container file assigned to the drive passed as parameter, as well as the number of the card this file is on (1 or 2), separated from the name by a comma. Please note that this does not tell you whether such a file actually exists on the card.
Example:
PRINT WIN_DRIVE$(6) returns "QL_WIN6.WIN,2"
this means that the drive win6_ is assigned to a file called "QL_WIN6.WIN" which is to be found on the card in socket 2.
WIN_SAFE
This command checks whether it is safe to remove a card as far as the WIN driver is concerned.
Syntax:118
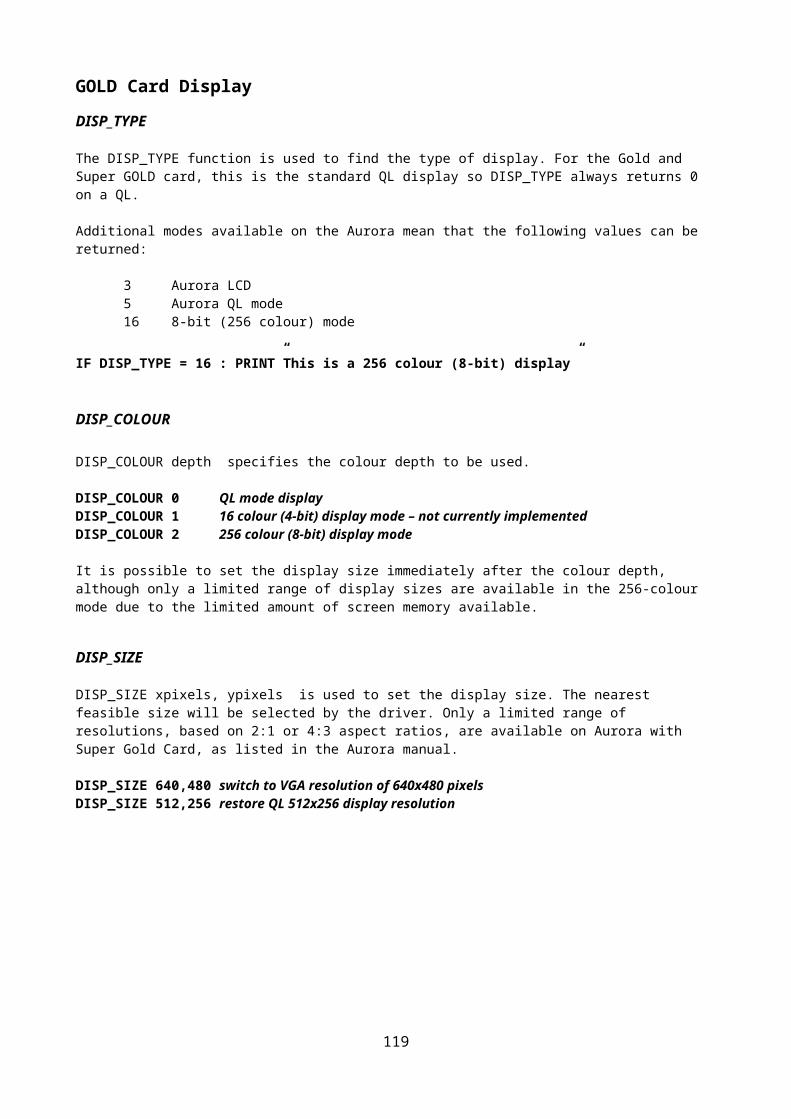
WIN_SAFE card
Where - card is the SDHC card on which the file can be found (1 or 2). If this command returns without error, then, as far as the WIN driver is concerned, the card may be safely removed. If not, it will return the error “is in use”. Be patient then and retry a few seconds later.
Example:
WIN_SAFE 1 checks whether card 1 may be safely removed.
WIN_CHECK
Checks whether a WIN container file on the card is indeed in contiguous sectors on the card.
Syntax:WIN_CHECK drive
where - drive is the container file containing the WIN drive in question. If the command does not return an error, the container file corresponding to the drive is OK.
WIN_FORMAT
Please see below in the section “Formatting a drive”.
WIN_USE and WIN_WP
These are the standard SMSQ/E keywords and work as expected.
WIN_START, WIN_STOP, WIN_REMV, WIN_SLUG
These typical SMSQ/E commands are not needed and do not exist.
Formatting a drive.
Formatting a drive means that an EXISTING file on a card is made into a qxl.win type container file. This is achieved with the usual FORMAT command:
FORMAT winX_name
where, as usual, "X" is the drive number and "name" the formatted name of the drive. This may be up to 10 characters long. Anything longer will be truncated to 10 letters. Please note that this is NOT the name of the container file on the card, just the name that will be displayed when doing a DIR on the drive.
Formatting a drive will irretrievably erase some of the content of the file on the card and make it into a qxl.win container file.
As a security precaution, before issuing the FORMAT command, you must issue the WIN_FORMAT command:
WIN_FORMAT drive, yes_or_no
where - drive is the drive to be formatted, and "yes_or_no" is 1 for allowing the drive to be formatted and 0 for refusing to do so. Please note that this overrides any write protection you may have set for this drive with the WIN_WP command.
119
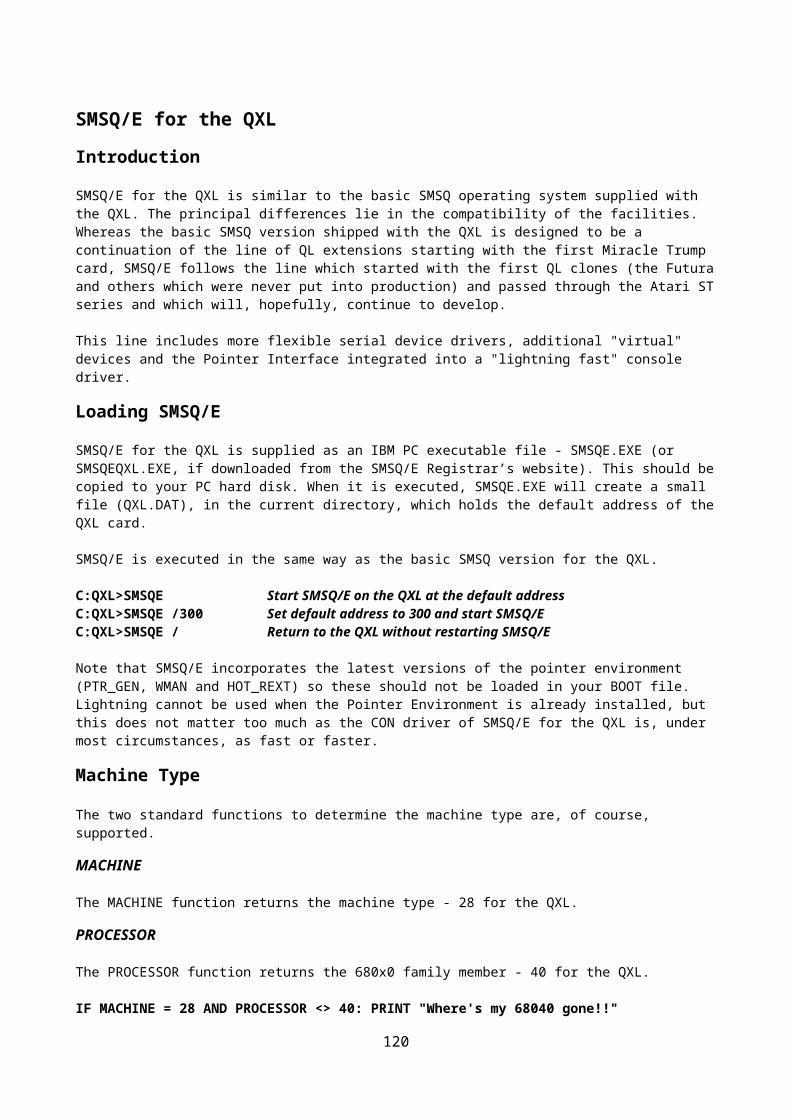
Trying to format the drive without issuing the WIN_FORMAT command first will fail.
Moreover the FORMAT command itself MUST be issued from the main SBasic job, i.e.job 0. This is because the FORMAT command will invite you, as an additional precaution, to enter two random letters into channel#0 of job 0. Failing to enter the letters will make the machine seem to hang. Entering different letters will make the FORMAT command fail. Even though the letters to be entered are displayed in upper case, you may enter them in lower case. If you issue the FORMAT command from another job than job 0, the machinemay seem to have crashed - so don’t.
Example:WIN_DRIVE 3,1,”example.win” set drive 3 to correspond to an existing file called
EXAMPLE.WIN on card1.WIN_FORMAT 3 prepare to allow formattingFORMAT “win3_WINDRIVE 3” format the file to become a qxl.win container.
You can only format an existing file. You cannot create a new container file on the card with the FORMAT command (you can do this with the CARD_CREATE command).
The FAT device
The FAT device is a FAT16 driver for the Q68 (and possibly other SMSQ/E systems). Its purpose is to allow you to exchange files easily between the Q68 (qxl.win type) container files and the outside world. It can read/write a FAT16 formatted partition on the SDHC card. This means that, in addition to the standard FAT32 formatted partition that an SDHC card must have to be recognized by SMSQE, there must be another partition, formatted in FAT16. If you only have one SDHC card, the FAT16 partition must lie AFTER the mainFAT32 partition.
Please note that, by default, SMSQ/E may be configured NOT to load this driver at all. If you want to use this device, you might configure SMSQ/E first to use it.
PrincipleYou just use the FAT device like any other device. There are potentially 8 drives you may use (FAT1_ to FAT8_). You must however configure SMSQ/E to use the device at all and set the device particulars, either by configuration or with the FAT_DRIVE command.
Limitations
The FAT driver comes with a few caveats.
1 – The FAT driver can only handle standard DOS names (i.e. 8.3 names). None of the extended name schemes invented for FAT16 is used by the FAT driver. The presence of extended names doesn't harm the FAT driver's operation, it just won't use them – and when writing back to the partition, it might destroy the extended names (but not the normal ones nor the data!).
2 – The FAT driver can only handle FAT16 partitions formatted with a cluster size of 8 sectors per cluster and a sector size of 512 bytes.
Under Linux, this can be achieved with the command:mkdosfs -F 16 -s 8 /(your device)
3 – The maximum partition size the FAT driver can handle is limited to 255 MiB.
A ready-made file containing a 1.5 GiB FAT32 partition and a 250 MiB FAT16 partition can be downloaded from “www.wlenerz.com/Q68/empty_image _file.zip”. This is a compressed empty file under 3MiB in size which will be expanded to 1.8 GiB when decompressed.
Under Linux, you can use the "dd" command to copy that to an SDHC card, which will give you the necessary partition scheme to start using the SHDC card with the Q68. Under windows, you might use the win32diskimager freeware https://sourceforge.net/ projects/win32diskimager/.
120
4 – Each FAT16 partition must be a primary partition, not be contained in an extended one (remember there can only be 4 primary partitions on an SDHC card. The first one must be the FAT32 partition, any of the others could be an extended one which the Q68 will not use).
5 – Formatting a FAT drive is not possible.
Configuration
In the "Fat drives" section of the configuration (see below) you can configure on what card and what partition the FAT drives should be.
Basic keywords
There are several keywords to be used with the FAT drive:
FAT_USE
You may use the usual FAT_USE keyword to set the usage name of the FAT device:
FAT_USE “flp” results in the device being called FLP instead of FAT.
FAT_DRIVE
With this command you can set, for any FAT drive, the card and partition it is to be found on.
Syntax:FAT_DRIVE drive, card, partition
where: - drive is the drive to be set (1 to 8) - card is the SDHC card it is on (1 or 2) - partition is the primary FAT16 partition (1 – 4)
FAT_DRIVE$
This function will return the card and partition for which a FAT drive is configured.
Syntax:result = FAT_DRIVE$(drive)
where: - drive is the drive number (1 to 8).
This will return a string formatted thus: Card: <card_number>, Partition: <partition_number>
Example:PRINT FAT_DRIVE$(1)might return "Card: 1, Partition: 2".
If the drive isn't configured for any card, the card number will be "N" (for "None"). If the drive isn't configured for any partition, the partition number will be 0.
FAT_WP
121
Sets/removes a software write protection on the drive, just like the usual WIN_WP.
The QUB device
This device allows you to the read the first (!) partition of a container image file formatted the Qubide way. Hence, each drive corresponds to one container file on the card, This is just like the WIN drive. The purpose is mainly for you to be able to get data off the Qubide drive and onto a proper WIN drive. You should not operate a Qubide type drive as your main storage system, use the win drives for that..
So basically, this device behaves just like the WIN device, except that it uses different container files.
Please note that, by default, SMSQ/E may be configured NOT to load this driver at all. If you want to use this device, you might configure SMSQ/E first.
The device is called QUB and there are 8 drives. Like for the WIN device, you must indicate for each drive the name of the container image file and the card it is on. Again, sensible names have been preconfigured.There are the following basic commands: QUB_USE, QUB_WP, QUB_DRIVE and QUB_DRIVE$ which behave in a similar way to the WIN_xxx commands.
OS and Container filenames
There are several types of files that lie on an SDHC card during normal use of the Q68 with SMSQ/E. All of these must adhere to the 8.3 naming scheme.
The SMSQ/E file itself. This may come in two types :
1. as a “naked” file, containing just SMSQ/E itself. In this case, the file MUST necessarily be called “Q68_RAM.SYS”as a qxl.win type container file. In this case, the file MUST necessarily be called “Q68_SMSQ.WIN”.
2. This allows a much easier configuration of SMSQ/E, see below the section on configuration. If you use a container file for the OS, this must contain the file called “Q68_SMSQ” in the root directory, and this file MUST be the very first item in the root directory, even before any sub-directory. When delivered, the Q68 comes with a small (1 MiB) file called “Q68_SMSQ.WIN”, which adheres to this rule. It contains some other software to allow you to configure SMSQ/E (see the configuration section). Or course, you may create your own container file(s) of any reasonable size and use it for the QS. Just remember that it must be called “Q68_SMSQ.WIN” and that the file called “Q68_SMSQ” must be the very first item in the root directory. Perhaps it is better to have a dedicated small container file just for the OS – this will make upgrading it much easier. Despite the fact that the “Q68_SMSQ.WIN” is a qxl.win type container file, there is no obligation to assign it to any of the win drives – the boot process is independent of win drives assignment. By default, however, SMSQ/E is set up to use this file as win8_.
One of these two files must be present on card1, else SMSQ/E will not be booted. It is not possible to change the names of these two files - if you do, they will not be recognized as SMSQ/E files. If both are present, SMSQ/E will be loaded from the container file.
The WIN device container files. These should be called QLWAx.WIN where x can be any number between 0 and 9999, or be omitted. It is recommended, but not mandatory, that you stay with this naming scheme. Since the names of the container files are configurable, you may basically call them whatever you like, provided you adhere to the 8.3 naming rules. SMSQ/E comes pre-configured with what the designers of the Q68 think are sensible names and values. You can configure thesenames with the usual configuration program, Menuconfig is the best choice here.You can also use the WIN_DRIVE command.
The QUB device container files. These should be called QL_BDIx.BIN where x can be any number between 0 and 99. Again, it is recommended but not mandatory that you stay with this naming scheme. However, since the names of the container files are configurable, you may basically call them whatever you like, provided you adhere to the 8.3 naming rules. There again, a sensible default naming scheme has been devised:
QL_BDI.BIN on card1 for qub1_
122
QL_BDI.BIN on card2 for qub2_ QL_BDI3.BIN and QL_BDI4.BIN on card1 for qub3_ and qub4_. QL_BDI5.BIN to QL_BDI8.BIN on card2 for qub5_ to qub8_.
Please remember that the qub device should not be your main storage system for the Q68.
Setting the screen modes
The Q68 has several different screen modes presenting different screen sizes and colours. Please note that the more colours are displayed and the higher the resolution, the slower the Q68 will become.
DISP_MODE
You may set the Q68 screen modes with the DISP_MODE command:
DISP_MODE mode
where mode can take the following values:
0 = QL 8 colour modethe standard 512 x 256 pixels mode in 8 colours. In this mode you can also set mode 4,with the usual MODE keyword. This is then equivalent to setting DISP_MODE 1.
1 = QL 4 colour modethe standard 512 x 256 pixels in 4 colours mode. In this mode you can also set mode 8, with the usual MODE keyword. This is then equivalent to setting DISP_MODE 0.
2 = Small 16 bit mode512 x 256 pixels in mode 33 (16 bits per pixel).
3 = Large 16 bit mode1024 x 512 pixels in mode 33 (16 bits per pixel). Please note that this mode will slow down the Q68, you should not use this mode when doing something time-critical.
4 = Large QL Mode 41024 x 768 pixels in QL 4 colours mode (there is no mode 8 in this display mode).
5 = Aurora compatible 8 bit colours1024 x 768 pixels in Aurora 256 colours mode. This allows you to have a big screen with nicer colours while still being reasonably fast (but slower than the QL modes).
6 = Medium 16 bit mode512 x 384 pixels in mode 33 (16 bits per pixel).
7 = Very large 16 bit mode1024 x 768 pixels in mode 33 (16 bits per pixel). Please note that this mode will severely slow down the Q68, you should not use this mode when doing something time-critical.
DISP_xxx
With the exception of the DISP_TYPE function, which returns the standard SMSQ/E values, the other DISP_xxxx keywords, whilst they exist, have no effect on the Q68.
Configuring SMSQ/E for the Q68
Configuring SMSQ/E for the Q68 should be made via a standard configuration program. “MenuConfig” is certainly the way to go here.
123
If you opt to have SMSQ/E in a qxl.win container file called “Q68_SMSQ.WIN”, you can directly configure the file “Q68_SMSQ” in there. Thus, you do not have to leave the Q68 to configure its operating system. Please note, however, that once you have configured the Q68_SMSQ file to your liking, you MUST switch the Q68 off and on again. Simply resetting the machine (with the RESET command or otherwise) is not enough, as the OS is then not re-read from the card.
To make things easier, the Q68_SMSQ.WIN file delivered with the Q68 contains all files necessary for configuring SMSQ/E. As standard, this file is allocated to win8_. If you run win8_boot, it will LRESPR the necessary Menu extensions and launch MenuConfig. Please note that these two programs are © Jochen Merz.
The Q68 configuration block is divided into several sections, as follows:
SMSQ/E for the Q68In this block, you can configure several standard SMSQ/E facilities (keyboard/message languages and so on). There should be no need to go into more details for them here, except perhaps to mention that the new CTRL behaviour enables you to keep CTRL+C pressed and the jobs will continuously cycle through.
A - Q68This section contains some Q68 specific configuration items:
1.Initial display mode
Here you can set the display mode the Q68 should have when booting SMSQ/E. You may choose between the following:
Normal QL Mode 4the standard 512 x 256 pixels in 4 colours mode. In this mode you can also set mode8, with the usual MODE keyword.
Large QL Mode 41024 x 768 pixels in QL 4 colours mode (no mode 8 possible).
Aurora compatible 256 colours mode1024 x 768 pixels in Aurora 8 bit colours mode.
Small 16 bit mode512 x 256 pixels in mode 33 (16 bits per pixel).
Medium 16 bit mode512 x 384 pixels in mode 33 (16 bits per pixel).
Large 16 bit mode1024 x 512 pixels in mode 33 (16 bits per pixel). Please note that this mode will severely slow down the Q68, you should not use this mode when doing something time-critical.
Very large 16 bit mode1024 x 768 pixels in mode 33 (16 bits per pixel). Please note that this mode will severely slow down the Q68, you should not use this mode when doing something time-critical. 2.Initialise card 2 when booting
This allows you to determine whether card2 should be initialised automatically during the boot process. Note that this will only work if there is actually a card in the socket to be initialised. You may choose between the following options:
- Never initialise the card when booting. This means that you will have to initialise it later yourself.- Always initialise the card when booting. The driver will attempt to initialise card 2. Note that this will
fail if no card is inserted at boot time. The driver does NOT tell you that the initialisation has failed in such a case.
124
- Only initialise the card during booting if a WIN drive is configured to be located there. This is the default option.
3.Boot from
Here you may set from what device SMSQ/E will attempt to load a boot file. You may choose between WIN drives 1 to 8, FAT drive 1, or no drive at all. Please note that if you choose to boot from FAT1, then the FAT device will be called FLP (i.e. you’ll be booting from FLP1_). Using the command “FAT_USE” in your boot file will let the device be called FAT again.
4.Switch LED off when SMSQ/E is set up
The Q68 has a configurable LED which is switched on when SMSQ/E is loaded. Here you can determine whether it should stay on or not once SMSQ/E is fully set up.
B - Configuring the WIN drives
The following items may be configured for the WIN drives:
1.Filenames for win1_ to win8_
Each win drive corresponds to one container file on an SDHC card inserted into one of the two sockets. Here you may enter the file names for the container file for each of the 8 drives. Each name must respect the file name rules set out above – you won't be able to enter a name that does not comply with the 8.3 FAT32 standard, but you may give the name in lower case, it will be converted to upper case later by the system.Please also make sure to check the warning given above.
2.Card assignmentGiving the file name of the container file for a win drive is not enough. The system must also know on what card this container file should be. Here you tell the system, for each drive, whether the corresponding container file should be on card1, card2, or on no card at all.
C - Configuring the FAT device
The following items may be configured for the FAT device: 1.Is the device to be loaded at all?
By default, the device is not linked into the system. If you do need it, set this configuration item to “yes”. In not, neither the device, nor its control thing nor the basic keywords associated with it are loaded.
2.On what card is the partition for each drive?
For a FAT drive to work, one (or both) SDHC card(s) must have at least one FAT16 formatted partition. You must thus tell the system, for each drive, on what card it must search for its partition.
3.What is the partition on that card for each drive?
The system also needs to know which partition on the card it is to look for. The partition needs to be a primary partition, not an extended partition. Since there can be only 4 primary partitions on an SDHC card to be used by the Q68, you can choose partitions 1-4. Note that in general, at least card1 will have a FAT32 partition as its first partition.
D - Configuring the QUB device and drives
The following items may be configured for the QUB device and drives:
1.Is the device to be loaded at all?
125
By default, the device is NOT linked into the system. If you do need it, set this configuration item to “yes”. In not, neither the device, nor its control thing, nor the basic keywords associated with it are loaded.
2.Filenames for qub1_ to qub8_
Each win drive corresponds to one container file on an SDHC card inserted into one of the two sockets. Here you may enter the file names for the container file for each of the 8 drives. Each name must respect the file name rules set out above – you won't be able to enter a name that does not comply with the 8.3 FAT32 standard, but you may give the name in lower case, it will be converted to upper case later by the system.Please also make sure to check the warning given above.
3.Card assignment
Giving the file name of the container file for a QUB drive is not enough. The system must also know on what card this container file should be. Here you tell the system, for each drive, whether the corresponding container file should be on card1, card2, or on no card at all (in which case, the drive doesn’t exist).
Additional keywords and facilities
Sound
The Q68 tries to emulate the QL beep sounds. This is far from perfect. The sound will often be too “clean”. Moreover, the “wrap”, “random” and “fuzziness” parameters to the BEEP command are simply ignored.
On the other hand, the Q68 uses a more modern sound system than the QL. This enables it to play stereo files with a surprisingly good sound. To make use of this, SMSQ/E for the Q68 uses the SSSS (SMSQ/E Sampled Sound System). This allows you to play “_ub” files.
To make this easier, some new keywords exist:
SOUNDFILE
Loads and plays a sound file through the SMSQ/E Sampled Sound System. SOUNDFILE "file_name" [,rep%]
where:“file_name” is the file to be played. This loads and plays this sound file. Please note that the file is not loaded into memory all at once. Hence, it seems desirable to load it from a fast device (e.g. a ram disk) to avoid the music being broken up. The quotes around the name are necessary unless it is a string variable.
The rep% parameter means that, when the end of the file is reached, the file will be replayed again as often as indicated by the rep% parameter. So if the parameter is 1, it will be replayed once again, which means that it will be played twice in total (once + 1 repetition). Please use only positive values from 1 to 32766.
SOUNDFILE2 SOUNDFILE2 "file_name"[,rep%]
Does just about the same as SOUNDFILE, but the sound is played through another job created just for this. This means that the command comes back immediately after the sound playing job has been set up – it allows your program to continue whilst the sound is being played.
The sound playing job is owned by the job issuing the SOUNDFILE2 command, so if you remove that job, the sound playing job will be removed, too.
The parameters have the same meaning as for SOUNDFILE.
126
SOUNDFILE3
SOUNDFILE3 "file_name"[,rep%]
Is the same as SOUNDFILE2, but the job playing the sound is totally independent of the one issuing the command.
The parameters have the same meaning as for SOUNDFILE.
For all of these jobs, please note that the sound may continue to play for a few seconds after the soundjob is killed, as there is an internal buffer. Use KILLSOUND (below) to stop
KILLSOUND
Kills (stops) the sound.
Please note that this also removes the first job called "SOUNDFILE JOB" that it can find. NORMALLY, this should be the only sound playing job that runs in the machine. It is indeed not advisable to have several jobs all trying to make sounds in the machine, since the sound will be totally intermingled and garbled! So, having multiple sound sources playing all at once is not a good idea...
Access to fast memory
The Q68 has some “fast” memory, which can be accessed faster than the normal memory. There is only a very limited amount of fast memory available, some of which is already used by SMSQ/E.
Two keywords exist to get the amount of fast memory still available, and to reserve some space in it. Note: once reserved, the space cannot be given back (just like RESPR on a normal QL)!
FREE_FMEM
This function returns the amount, in bytes, of memory that is still FREE in the Fast MEMory area. It does NOT free any memory in that area.
result = FREE_FMEM
where result will be the amount of fast memory that is still free. In a freshly booted system this should be around 10 KiB.
ALFMThis function ALlocates Fast Memory and returns the address of the allocated space in the fast memory area.
address = ALFM (size)
where:
size is the amount of memory to allocate, in bytes. If you try to reserve more than is available, then the function returns with an out of memory error and no memory will have been reserved.
address is the start address of the memory allocated if the call was successful. You may then use up to size bytes in the memory area starting at address. Note that the system does NOT stop you from using more than that – but sooner or later (and probably sooner rather than later) you WILL crash the system doing so.
Slug
The SLUG command can slow the machine down, which might be useful for some games.
SLUG how_much
127
where how_much is a value between 0 (no slug) and 255 (slowed down to a crawl).
Limited direct access to the card or the FAT32 file system
There are a few very limited (in number and scope) commands that allow some direct access to a card or the FAT32 file system of the first partition on a card. All of the related commands start with CARD_ as they relate to a card and not to any SMSQ/E device.WARNING : please read this section carefully if you want to make use of these comands. Only use them if you know what you are doing!
CARD_INIT
Please see the section on initialising a card. This command is safe to use for everyone.
CARD_DIR$This function shows the first 16 entries in the FAT32 root directory of the first partition on a card.
result$ = CARD_DIR$(card)
where card is the card to question (1 or 2).
On return, result$ will contain a large string with the 8.3 formatted names of the 16 entries, separated between them by a linefeed (CHR$(10)). These names may also be shown as“-- Empty --” which shows that the corresponding entry in the FAT32 root directory is empty, or “-Long name-” which shows that this entry does not point to a file but to a long name. The latter is NOT considered by SMSQ/E to be an empty entry in the directory.
CARD_RENF
This allows you to REName a File already existing in the first 16 entries in the FAT32 root directory of the first partition on a card.
CARD_RENF card,”old name”,”new name”
where
card is the card in question (1 or 2). “old name” is the name of the existing file to be renamed. It is preferred but not required that this be
within quotes. “new name” is the new name of that file. It is preferred but not required that this be within quotes. If
the new name already exists, the command fails with that error (see below, note 2).
Both names must comply with the “8.3” naming scheme
CARD_CREATE
Allows creation of a file in the FAT32 file system of the first partition on a card. Remember, this partition must be a FAT32 partition. There must be a an empty slot for this file within the first 16 entries in the root directory of this partition (which you can check with CARD_DIR$).
CARD_CREATE card, size, file_name$
where
card is the card on which the file is to be created (1 or 2). size is the size, in MiB, of the file to be created. For the time being, this cannot be more than 16
GiB in most cases (see below, note 1)
128
file_name is the name of the file to be created**. This must obey the “8.3 rule”. It is recommended (but not necessary) that the name be within quotes.
The content of the file thus created is not “nulled”. It may contain random bytes.
Error returns
Due to the complexity of this command, there are numerous possible error returns eachhaving a different meaning:
name number meaning
err.drfl ( = -1) drive full - there is no space for a file of this size within contiguoussectors on the card.
err.imem ( = -3) insufficient memory for operation (I’d like to know how you managed that).err.orng ( = -4) the projected size of the is file too big, or 0 or negative.err.bffl ( = -5) buffer full - there is no space in the first 16 directory entries for a new file.err.fex ( = -8) already exists - a file with this name already exists in the first 16 directory
entries for a new file (see below note 2).err.inam ( = -12) Invalid file name (not an 8.3 name).err.ipar ( = -15) wrong card number (not 1 or 2).err.mchk ( = -16) medium check failed because card wasn't readable (perhaps absent / not
initialised) or this isn't a valid FAT32 partition
If everything goes alright, the command comes back without any error.
Example:
CARD_CREATE 1,200,”test.win”
This will create a file called “TEST.WIN” on card 1, with a size of 200 MiB.
Finally, this command, combined with others, allows you to create a new qxl.win container on the card. To do this, you should proceed as follows:
10 CARD_CREATE 1,200,”test.win” : REM create empty file, 200MiB in size20 WIN_DRIVE 4,1,”test.win” : REM point win4_ to it30 WIN_FORMAT 4 : REM allow formatting of win4_40 FORMAT win4_your_name : REM format win4_
(of course, you can use any other win drive for this, not only win4_).
Remember that the steps in lines 30 and 40 MUST be made from job 0, the main Sbasic job, not from a daughter job!
Notes:(1) The actual maximum size depends on the “cluster size” of the FaA32 file system on your card. As an indication:
Cluster size of max file size2 just under 8 GiB4 just under 16 GiB8 just under 32 GiB
(2) Please be careful when creating or renaming a file. SMSQ/E only checks for an existing file in the first 16 directory entries. If you have filled your card with enough files so that there are more than 16 entries (with some empty slot in the first 16 entries), then the risk exists that you may create a file with the name of an existing file.
Avoiding fragmentation
129
SMSQ/E for the Q68 expects that all container files (i.e. files for WIN drives, and also for QUB drives) lie in contiguous sectors on the SDHC card. If this is not the case, the file is said to be “fragmented”. Fragmented files are deadly on the Q68 under SMSQ/E: SMSQ/E assumes that, once it has found the beginning of a container file, the rest of that container file lies in contiguous sectors on the card, and it will cheerfully write into those contiguous sectors which it deems still belong to that file. If the file is fragmented, these contiguous sectors may not belong to it but to another file, which will thus be irretrievably corrupted.
This is also true for the SMSQ/E binary file (named "QL_RAM.BIN") itself.
So, special precautions must be taken when writing the container and OS file(s) themselves to the card. The best and recommended way to achieve this is to make sure that, before writing the SMSQ/E binary file and the container files, the card is freshly formatted. Then, one after the other, write each container file to the card immediately after formatting the card.
Hence, you should dedicate a card solely for the purpose of using it with the Q68.
Note : practise has shown that in most cases it may not be necessary to reformat the card. You could also delete every single file on the card before copying new files onto it. Under no circumstances, however, should you only delete files selectively: this may leave “holes” in the file allocation table and this lead to fragmented files (see below). However, the recommendation still is to format the card and not just to delete all files from it.
When copying several files to the freshly formatted card, make sure that the copy process of each file is finished before you start that for the next file. If not, it may happen that the two copy processes write concurrently to the card, which could mean that the sectors for the two files interleave. Depending on the operating system you use (linux, windows, mac os) if you drag several files to the card at once, several concurrent copy processes might be started which might lead to file fragmentation. So, to avoid this, just drag the files to copy one after the other.
Moreover, never just delete a single file -be it a container file or any other file- from the card, but always format it (or at least delete ALL files from the card), and then write the files to the card again: If you delete a single file from the card and later write another, bigger, container file to the card, it is possible that part of this container file will lie in the sectors previously occupied by the deleted file, and the rest in previously unoccupied sectors. This file would then be fragmented and not lie in contiguous sectors on the card: a recipe for a disaster.
If a container file becomes fragmented, you WILL experience data loss, and other files on the card might also be irrecoverably damaged!
For some file systems, a special command exists to check whether a container file is fragmented or safe to use (see, e.g. the WIN_CHECK command)
130
SMSQ/E Manual Revision History
1.00 First release version. [02/04/14]1.01 Indexes and headings changed at suggestion of Marcel Kilgus to use Word Table of Contents and
Index systems to make it easier to update the content. [08/04/14]1.02 Long list of typos corrected (thank you, Dave Westbury). New sections added on CTRL-C behaviour
and Execution Delay Times (sys_xdly) [28/04/14]1.03 Some minor typos and layout issues fixed. FEX_M keyword added. HTML version created for online
use. [09/02/16]1.04 Added documentation for ALPHA_BLEND, Recent Thing and SMSQ/E for Aurora. [12/02/17]1.05 Updated notes for DRVCHK and DRVLINK utility programs. Added documentation for new
FSEND_EVENT function. Q68 SMSQ/E pages added. SMSQ/E Troubleshooting section updated by Wolfgang Lenerz. Q68 SMSQ/E manual added. [18/04/18]
131
Index
$ Hex Values........................................27$nnn.....................................................23% and $..............................................104% Binary Values...................................27%nnn....................................................23ABC keyboard....................................131ACSI and SCSI Drives on ST/TT.......114ALFM.................................................184ALPHA_BLEND...................................76ALT ENTER.......................................106ALTKEY.............................................106Archive Runtimes...............................105ATAN.............................................23, 38Atari ST and TT..................................108Atari ST and TT Hard Disks...............114Atari ST Printer Port...........................114ATARI_rext........................................106ATARIDOS_rext.................................106ATR_rext............................................106Aurora............................................2, 132Background drawing............................82BAUD.....................23, 87, 122, 135, 156BAUDRATE%....................................129BGCOLOUR_24..................................73BGCOLOUR_QL..................................73BGCOLOUR_xx...................................23BGET.............................................23, 37BGIMAGE......................................23, 73BLS....................................................129BPUT.............................................23, 37C programs on QXL...........................105CACHE_OFF.................................23, 26CACHE_ON...................................23, 26CARD_CREATE................................186CARD_DIR$.......................................185CARD_INIT................................168, 185CARD_RENF.....................................185CD_ALLTIME.....................................165CD_CLOSE........................................165CD_EJECT........................................165CD_FIRSTTRACK.............................166CD_HOUR.........................................166CD_HSG2RED..................................165CD_INIT.............................................164CD_ISCLOSED..................................165CD_ISINSERTED..............................165CD_ISPAUSED..................................165CD_ISPLAYING.................................165CD_LASTTRACK...............................166CD_LENGTH.....................................166CD_MINUTE......................................166CD_PLAY...........................................164CD_RED2HSG..................................165CD_RESUME....................................164CD_SECOND....................................166CD_STOP..........................................164CD_TRACK........................................165CD_TRACKLENGTH.........................165
CD_TRACKSTART............................165CD_TRACKTIME...............................165CD_xx..................................................23CHAR_DEF....................................23, 40CHAR_USE.........................................41Colour Commands...............................78COLOUR_24........................................76COLOUR_NATIVE...............................76COLOUR_PAL.....................................75COLOUR_QL.......................................75COLOUR_xx........................................23Colours List..........................................77Common keyboard driver.....................84Configuration..............120, 128, 131, 137Cursor Extensions................................83CURSPRLOAD..............................23, 83CURSPROFF.................................23, 83CURSPRON..................................23, 83DATA_USE..........................................94DATEs in Archive/Abacus..................105DAY%............................................23, 39DEV..........................................23, 93, 94DEV_LIST......................................23, 94DEV_NEXT....................................23, 94DEV_rext............................................106DEV_USE................................23, 93, 94DEV_USE$..........................................23DEV_USEN....................................23, 95DEVTYPE......................................23, 32Directory Devices.................................95DISP_BLANK.......................69, 111, 141DISP_COLOUR...................................69DISP_INVERSE...................70, 110, 140DISP_MODE......................................177DISP_RATE.........................70, 111, 141DISP_SIZE...................70, 111, 135, 140DISP_SIZE Experimenter..................112DISP_TYPE. 71, 110, 122, 133, 135, 140DISP_xxx...............................23, 69, 178DMEDIUM_DENSITY..........................45DMEDIUM_DRIVE$.............................44DMEDIUM_FORMAT...........................45DMEDIUM_FREE................................45DMEDIUM_NAME$.............................44DMEDIUM_RDONLY...........................44DMEDIUM_REMOVE..........................45DMEDIUM_TOTAL..............................45DMEDIUM_TYPE................................45DMEDIUM_xxx..............................23, 44DOS Device.......................................161DOS disks....................................95, 103DOS_DRIVE......................................163DOS_DRIVE$....................................163DOS_USE..........................................163DOS_xx................................................23DRVCHK..............................................98DRVLINK.............................................98EASYEXT..........................................106
132
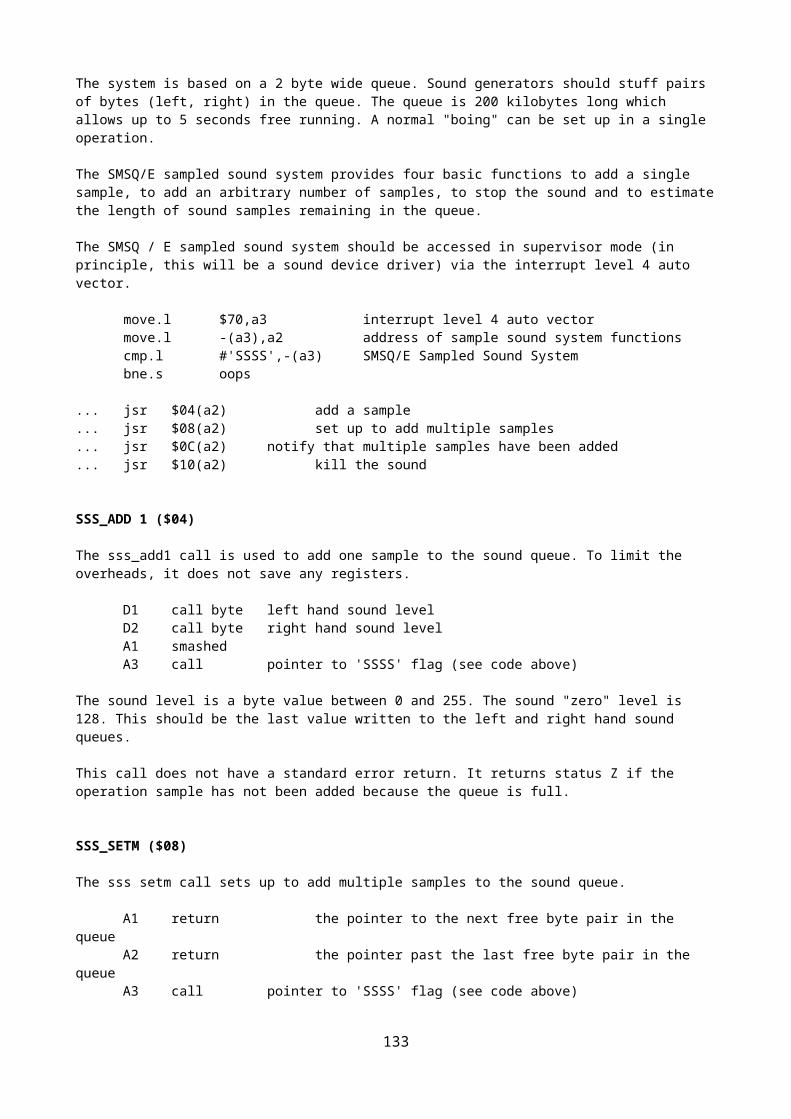
EASYPTR..........................................105ED..................................................23, 41END.....................................................28END FOR.............................................23END REPeat........................................23EOF_W................................................23EOFW..................................................45EPROM_LOAD..............................23, 34Event Handling.....................................96EW.......................................................23EX........................................................23EX_M.............................................23, 44EXEC...................................................23EXEC_W..............................................23EXF................................................23, 43EXIT...............................................23, 28FAT_DRIVE.......................................175FAT_DRIVE$.....................................175FAT_USE...........................................174FAT_WP............................................175FEP................................................23, 43FET................................................23, 43FEW...............................................23, 43FEX................................................23, 43Floppy Image Support........................158FLP_DENSITY...........118, 124, 147, 159FLP_DRIVE.......................................159FLP_DRIVE$.....................................159FLP_SEC...........119, 125, 136, 148, 159FLP_START.......119, 125, 136, 148, 159FLP_STEP.........119, 125, 136, 148, 159FLP_TRACK......................119, 124, 148FLP_USE...........118, 124, 136, 147, 158FLP_xxx...............................................23FOR...............................................23, 28Format WIN........................................160FREE_FMEM.....................................184FSEND_EVENT...................................97GD2.....................................................72Gold Card...........................................121GOLD Card Display...................122, 133Gold Card Microdrives.......................125Hermes..............................................128HGET.............................................23, 38HISTORY.............................................23HISTORY Device.................................91Home Thing, The.................................54HOME_CSET.......................................56HOME_CURR$....................................55HOME_DEF.........................................55HOME_DIR$........................................55HOME_FILE$.......................................55HOME_SET.........................................56HOME_VER$.......................................56HOME_xxx.....................................23, 55HOT_GETSTUFF$........................23, 42HOT_GO............................................106HOT_rext...........................................106HPUT.............................................23, 38HSG-Format.......................................164IF ...................................................23, 27In-Line Loops.......................................28
Input Line Editing.................................51INSTR..................................................40INSTR_CASE................................23, 40IO_PRIORITY................................23, 25JMON.........................................103, 106JOB_NAME....................................24, 48JOBID............................................24, 42KBD_TABLE..................................24, 53KILLSOUND.......................................183LANG_USE....................................24, 52LANGUAGE...................................24, 53LANGUAGE LANGUAGE$..................53LANGUAGE$.......................................24LBYTES.........................................24, 34LGET..............................................24, 38LIGHTNING.......................................106LOAD.............................................24, 33Loading SMSQ/E.......................121, 134LPUT..............................................24, 38LRESPR...............................................24LRUN.............................................24, 33MACHINE24, 68, 108, 121, 132, 134, 139, 152Memory Protection.............................108MENU_rext........................................106MERGE..........................................24, 33MIDINET_rext....................................106Monochrome Display.........................110MONTH%.......................................24, 39MOUSE_SPEED..................24, 141, 152MOUSE_STUFF..................24, 142, 152MRUN............................................24, 33NEXT.............................................24, 28NUL......................................................24NUL Device..........................................90OUTLN...........................................24, 42PALETTE_8.........................................74PALETTE_QL......................................74PALETTE_xx.......................................24PAR..............................................24, 136PAR_ABORT.......................................89PAR_BUFF..........................................89PAR_CLEAR........................................89PAR_DEFAULTPRINTER$................157PAR_GETFILTER..............................157PAR_GETPRINTER$........................157PAR_PRINTERCOUNT.....................157PAR_PRINTERNAME$......................158PAR_PULSE......................................143PAR_SETFILTER..............................157PAR_SETPRINTER...........................157PAR_USE............................................89PAR_WAIT.........................................143PAR_xx................................................24Parallel Port Control.............................89PC Floppy Disks........................136, 158PC Hard Disks...................................136PE_BGOFF....................................24, 82PE_BGON......................................24, 82PEEK.............................................24, 35PEEK$...........................................24, 35PEEK_F...............................................35PEEK_L...............................................35
133
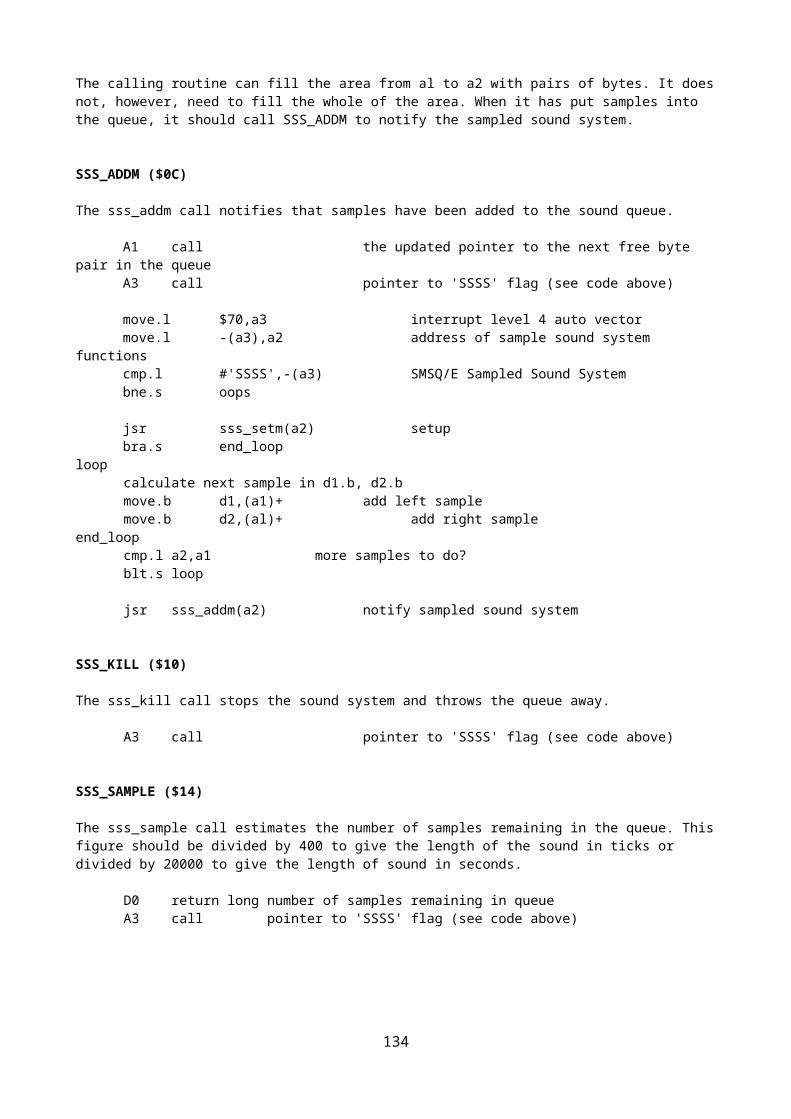
PEEK_W..............................................35PEEKS.................................24, 109, 140PEEKS$.....................................109, 140PEEKS_F...................................109, 140PEEKS_L...................................109, 140PEEKS_W..................................109, 140PIPE.....................................................24PIPE Device.........................................91Pointer Tools......................................107POKE.............................................24, 35POKE$...........................................24, 35POKE_F...............................................35POKE_L...............................................35POKE_W..............................................35POKES.................................24, 109, 139POKES$.....................................109, 139POKES_F..................................109, 139POKES_L...................................109, 139POKES_W.................................109, 139PRINT_USING...............................24, 45PROCESSOR24, 68, 108, 121, 132, 134, 139,
152PROG_USE.........................................94PROT_DATE.................................24, 38PROT_MEM.........................24, 109, 139PRT......................................................24PRT_USE......................................24, 89PTR_GEN..........................................107PTRMENR_cde.................................107Q40 Display.......................................140Q40 Floppy Disks...............................147Q40 Hard Disks..................................144Q40 Mouse driver..............................141Q40 Parallel Printer Ports..................143Q40 Serial Ports.................................142Q40 Sound.........................................149Q40/Q60............................................139QBASIC_rext.....................................107QD.....................................................107QLIB_bin............................................107QLIB_ext............................................107QLIB_run............................................107QLiberators EXTERNals....................105QLOAD..................................24, 33, 105QLOADREF_bin................................107QLRUN..........................................24, 33QMERGE.......................................24, 33QMON........................................103, 107QMRUN.........................................24, 33QPAC2...............................................107QPC CD-Audio Module......................163QPC_CMDLINE$...............................153QPC_EXEC.......................................153QPC_EXIT.........................................153QPC_HOSTOS..................................153QPC_MAXIMIZE................................153QPC_MINIMIZE.................................153QPC_MSPEED..................................154QPC_NETNAME$..............................154QPC_QLSCREMU.............................154QPC_RESTORE................................153QPC_SYNCSCRAP...........................155
QPC_VER$........................................155QPC_WINDOWSIZE.........................155QPC_WINDOWTITLE........................155QPC_xx................................................24QPC2.................................................152QPC2 Mouse.....................................152QPC2 Printer Support (PAR).............156QPC2 Serial (COM) Ports..................155QPC2 WIN Disks...............................160QPTR.................................................107QREF.................................................104QSAVE...........................................24, 33QSAVE_O......................................24, 33QTYP_SPELL....................................107QUB_DRIVE......................................176QUB_DRIVE$....................................176QUB_USE..........................................176QUB_WP...........................................176QUIT..............................................24, 51QXL....................................................134QXL Display.......................................135QXL.WIN............................................160RCNT_ADDF.................................59, 61RCNT_GALJ............................59, 60, 63RCNT_GALL......................59, 60, 62, 63RCNT_GARJ...........................59, 64, 65RCNT_GARR.....................59, 62, 63, 64RCNT_GFFA$...............................59, 61RCNT_GFFJ$................................59, 62RCNT_HASH$...............................60, 65RCNT_INFO...........59, 60, 62, 63, 64, 65RCNT_JOBS..................................59, 60RCNT_LOAD.................................59, 66RCNT_REMV.................................59, 66RCNT_SAVE...........................59, 65, 66RCNT_SYNC...........................59, 66, 67Recent Thing, The...............................57REDBOOK-Format............................164REPeat...........................................24, 29RESET...........................................24, 34Sampled Sound System.....................149SAVE.............................................24, 33SAVE_O.........................................24, 33SBAS/QD F10 Thing..........................103SBASIC..................................24, 47, 103SBYTES.........................................24, 34SBYTES_O....................................24, 34SCR_BASE....................................25, 37SCR_LLEN....................................25, 37SCR_XLIM.....................................25, 37SCR_YLIM.....................................25, 37SDUMP..............................................107SELect...........................................25, 27SEND_EVENT.......................25, 97, 101SER.....................................................25SER Mouse........................................125SER_ABORT.......................................88SER_BUFF..........................................88SER_CDEOF.......................................88SER_CLEAR........................................88SER_FLOW.........................................87SER_GETPORT$..............................156
134

SER_PAUSE.....................................123SER_ROOM........................................88SER_SETPORT.................................156SER_USE............................................88SER_xx................................................25Serial (RS232) on ST/TT....................113SERIAL IO Devices..............................85Serial Port Control................................86SERMAWS........................................130SERMCUR.........................................130SERMOFF.........................................130SERMON...........................................130SerMouse Cable Connector...............127SERMPTR.........................................130SERMRESET.....................................130SERMSPEED....................................130SERMWAIT........................................131SERNET Batchfile Execution.............102SERNET V3.........................................99SERNET via Modem..........................100SEXEC...........................................25, 34SEXEC_O......................................25, 34SLUG.....................................25, 26, 184SMSQ/E Troubleshooting..................102SNET_xx..............................................25SOUNDFILE......................................182SOUNDFILE2....................................182SOUNDFILE3....................................183SP_GET...............................................80SP_GETCOUNT..................................80SP_JOBOWNPAL................................81SP_JOBPAL........................................81SP_RESET..........................................80SP_SET...............................................80SP_xx..................................................25SPEEDSCREEN................................107SRX.....................................................25STX..............................................25, 123Super Gold Card................................121Super Gold Card Printer Port.............123Sysmon..............................................104SYSSPRLOAD...............................25, 84System Palette.....................................76THING_rext........................................107TRA........................................25, 53, 106
TRA_rext............................................107UPUT.............................................25, 38VER$..............................................25, 39Virtual Devices.....................................90WAIT_EVENT................................25, 97Wallpaper.............................................73WEEKDAY%..................................25, 39WGET............................................25, 38WHEN ERRor................................25, 27WIN_CHECK.....................................171WIN_DRIVE...............115, 145, 161, 170WIN_DRIVE$.....................115, 145, 170WIN_FORMAT...........117, 137, 146, 172WIN_REMV........................118, 161, 172WIN_SAFE.........................................171WIN_SLUG................................116, 172WIN_START......................117, 146, 172WIN_STOP........................117, 146, 172WIN_USE...........116, 137, 145, 160, 172WIN_WP............................117, 146, 172WIN_xxx...............................................25Window Manager 2..............................76Window Move......................................81WINDRIVE$.......................................161WM_BLOCK........................................79WM_BORDER.....................................79WM_INK...............................................78WM_MOVEALPHA..............................25WM_MOVEMODE.........................25, 82WM_PAPER........................................79WM_STRIP..........................................79WM_xxx.........................................25, 78WMAN................................................107WMON...........................................25, 47WPUT............................................25, 38WTV...............................................25, 47xNET_BAD%.....................................100xNET_RETRIES%.............................100xNET_START....................................100xNET_STATION................................100xNET_STATION%.............................100xNET_STOP......................................100xNET_TEST%....................................100XON XOFF.........................................123YEAR%..........................................25, 39
135