Embed Size (px)
Citation preview
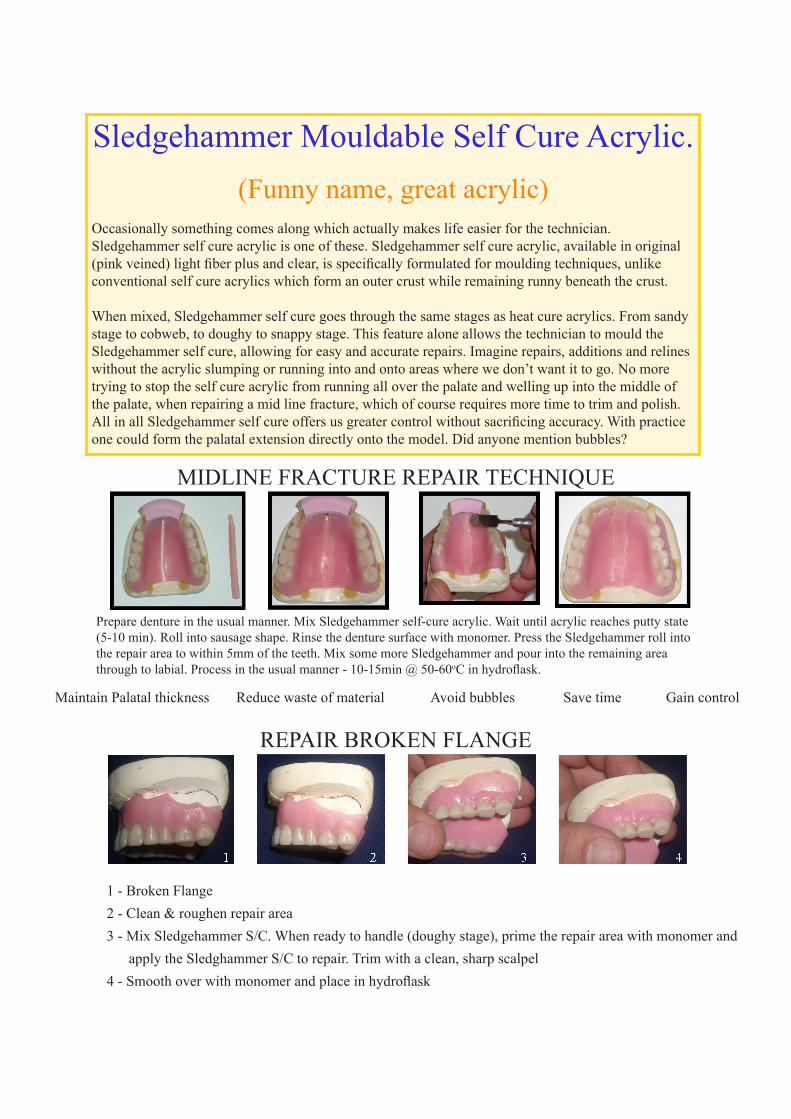
Sledgehammer Mouldable Self Cure Acrylic.(Funny name, great acrylic)
Occasionally something comes along which actually makes life easier for the technician. Sledgehammer self cure acrylic is one of these. Sledgehammer self cure acrylic, available in original (pink veined) light fiber plus and clear, is specifically formulated for moulding techniques, unlike conventional self cure acrylics which form an outer crust while remaining runny beneath the crust.
When mixed, Sledgehammer self cure goes through the same stages as heat cure acrylics. From sandy stage to cobweb, to doughy to snappy stage. This feature alone allows the technician to mould the Sledgehammer self cure, allowing for easy and accurate repairs. Imagine repairs, additions and relines without the acrylic slumping or running into and onto areas where we don’t want it to go. No more trying to stop the self cure acrylic from running all over the palate and welling up into the middle of the palate, when repairing a mid line fracture, which of course requires more time to trim and polish. All in all Sledgehammer self cure offers us greater control without sacrificing accuracy. With practice one could form the palatal extension directly onto the model. Did anyone mention bubbles?
Prepare denture in the usual manner. Mix Sledgehammer self-cure acrylic. Wait until acrylic reaches putty state (5-10 min). Roll into sausage shape. Rinse the denture surface with monomer. Press the Sledgehammer roll into the repair area to within 5mm of the teeth. Mix some more Sledgehammer and pour into the remaining area through to labial. Process in the usual manner - 10-15min @ 50-60oC in hydroflask.
MIDLINE FRACTURE REPAIR TECHNIQUE
1 - Broken Flange2 - Clean & roughen repair area3 - Mix Sledgehammer S/C. When ready to handle (doughy stage), prime the repair area with monomer and apply the Sledghammer S/C to repair. Trim with a clean, sharp scalpel4 - Smooth over with monomer and place in hydroflask
Maintain Palatal thickness Reduce waste of material Avoid bubbles Save time Gain control
REPAIR BROkEN FLANGE
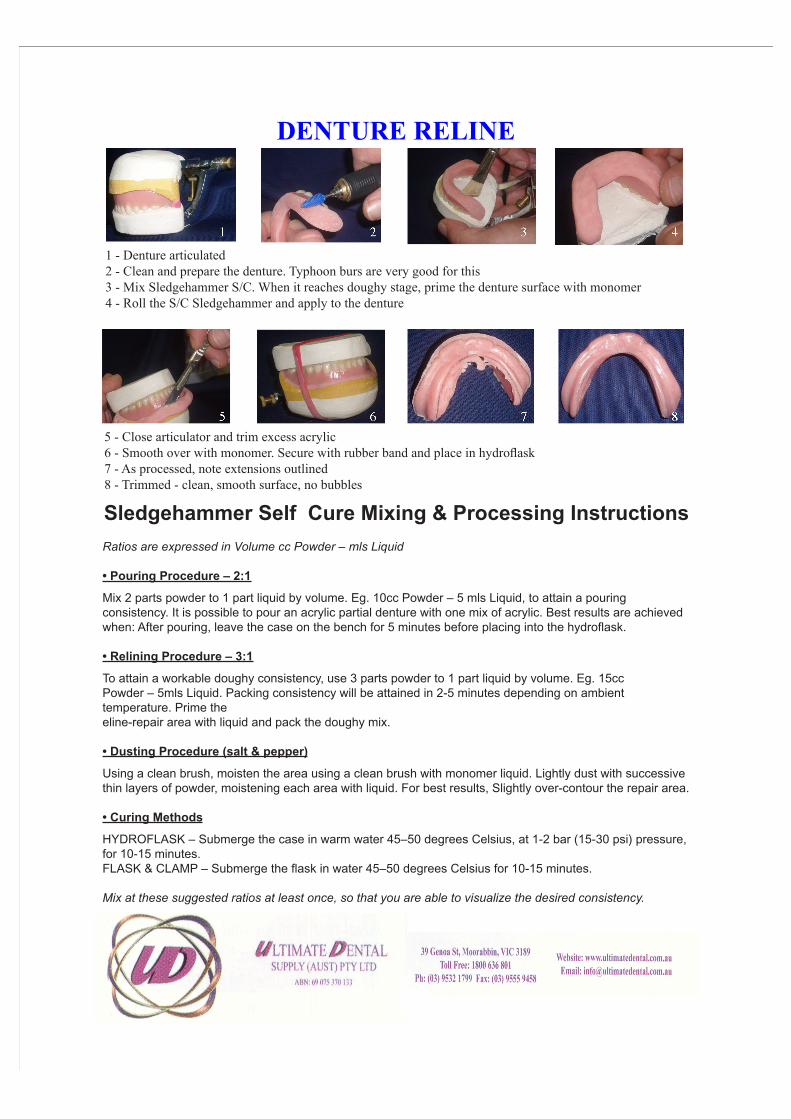
DENTURE RELINE
1 - Denture articulated2 - Clean and prepare the denture. Typhoon burs are very good for this3 - Mix Sledgehammer S/C. When it reaches doughy stage, prime the denture surface with monomer4 - Roll the S/C Sledgehammer and apply to the denture
5 - Close articulator and trim excess acrylic6 - Smooth over with monomer. Secure with rubber band and place in hydroflask7 - As processed, note extensions outlined8 - Trimmed - clean, smooth surface, no bubbles
Sledgehammer Self Cure Mixing & Processing Instructions
Ratios are expressed in Volume cc Powder – mls Liquid
• Pouring Procedure – 2:1
Mix 2 parts powder to 1 part liquid by volume. Eg. 10cc Powder – 5 mls Liquid, to attain a pouring consistency. It is possible to pour an acrylic partial denture with one mix of acrylic. Best results are achieved when: After pouring, leave the case on the bench for 5 minutes before placing into the hydroflask.
• Relining Procedure – 3:1
To attain a workable doughy consistency, use 3 parts powder to 1 part liquid by volume. Eg. 15cc Powder – 5mls Liquid. Packing consistency will be attained in 2-5 minutes depending on ambient temperature. Prime the eline-repair area with liquid and pack the doughy mix.
• Dusting Procedure (salt & pepper)
Using a clean brush, moisten the area using a clean brush with monomer liquid. Lightly dust with successive thin layers of powder, moistening each area with liquid. For best results, Slightly over-contour the repair area.
• Curing Methods
HYDROFLASK – Submerge the case in warm water 45–50 degrees Celsius, at 1-2 bar (15-30 psi) pressure, for 10-15 minutes.FLASK & CLAMP – Submerge the flask in water 45–50 degrees Celsius for 10-15 minutes.
Mix at these suggested ratios at least once, so that you are able to visualize the desired consistency.