Embed Size (px)
Citation preview

PERMISSION IS GIVEN TO REPRODUCE FOR PERSONAL USE ONLY ©2011 - PCP Group, LLC
Graphic Artist Alexandra Henry© 2011 Marjory Peck
Oblong Potholders Skill Level: Beginner
Make these potholders designed by Marjory Peck as a gift or to brightenyour kitchen. An easy project for both beginners and seasoned quilters alike.
Fabric NeededWill make two potholdersMain fabric 1 fat quarterCompanion fabric 1 fat quarterBinding 1/8 yard
Materials Needed
Pellon® Insul-Fleece™ 975 1/2 yardPellon® Legacy Natural Cotton Batting™ NB-96 1/2 yardThread
Tools Needed
Sewing Machine and related toolsGeneral Sewing Supplies
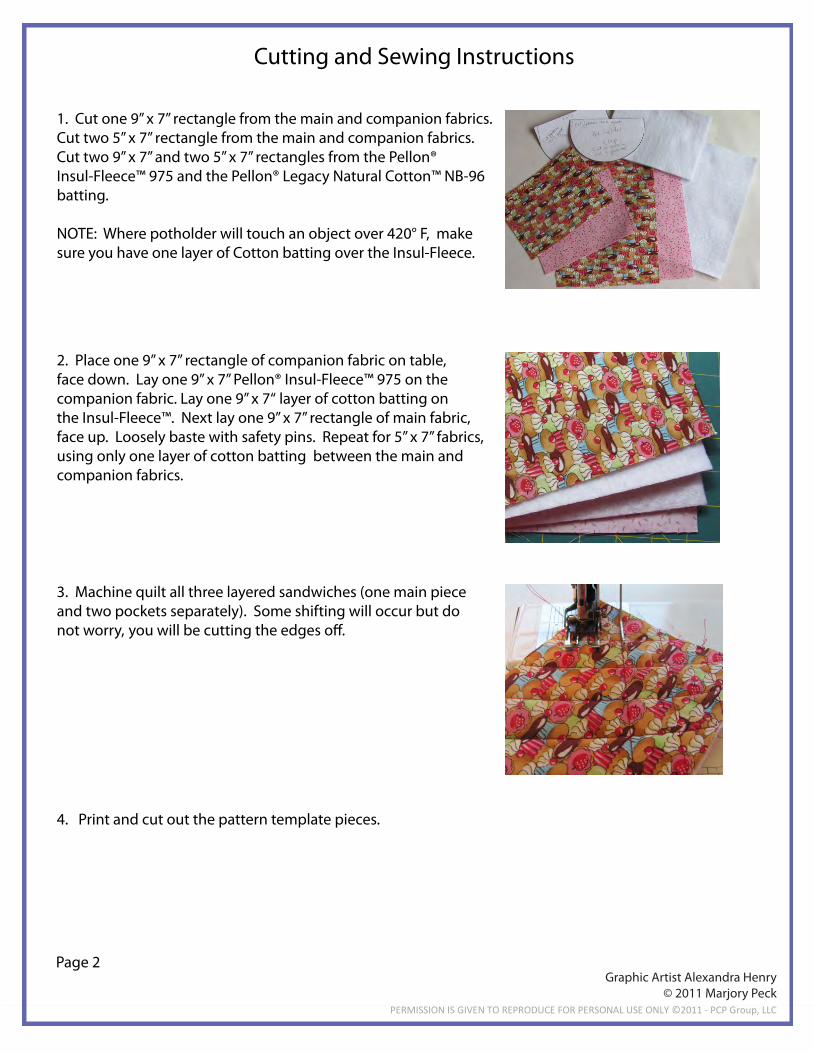
3. Machine quilt all three layered sandwiches (one main pieceand two pockets separately). Some shifting will occur but do not worry,
Page 2
4. Print and cut out the pattern template pieces.
1. Cut one 9” x 7” rectangle from the main and companion fabrics.Cut two 5” x 7” rectangle from the main and companion fabrics.Cut two 9” x 7” and two 5” x 7” rectangles from the Pellon® Insul-Fleece™ 975 and the Pellon® Legacy Natural Cotton™ NB-96batting.
NOTE: Where potholder will touch an object over 420° F, makesure you have one layer of Cotton batting over the Insul-Fleece.
Cutting and Sewing Instructions
2. Place one 9” x 7” rectangle of companion fabric on table, face down. Lay one 9” x 7” Pellon® Insul-Fleece™ 975 on the companion fabric. Lay one 9” x 7“ layer of cotton batting on the Insul-Fleece™. Next lay one 9” x 7” rectangle of main fabric,face up. Loosely baste with safety pins. Repeat for 5” x 7” fabrics, using only one layer of cotton batting between the main and companion fabrics.
PERMISSION IS GIVEN TO REPRODUCE FOR PERSONAL USE ONLY ©2011 - PCP Group, LLC
Graphic Artist Alexandra Henry© 2011 Marjory Peck

8. Press binding toward raw edges. Then foldbinding to the other side, press again. The bindingwill be slightly larger on the back than on the front.This will not be seen. Topstitch from the front 1/8”to 1/16” from sewn edge. This will catch the back.
.
7. Cut two 2 3/8” x 40“ binding strips. Fold one of the binding strips in half lengthwise and press. Cut two piecesof the folded binding about 1/2” larger than the straight edge of the pocket. Match raw edges of the binding and the straight edge of the front of a pocket. Stitch using a 1/4” seam allowance.
5. Fold the 9” x 7” quilted sandwich in half crosswise andpin in the center. Place the paper template for the bodyof the potholder with the straight edge on the fold (seemarkings). Trace pattern onto the sandwich. Cut withsharp scissors. Mark and quilt across the middle crosswise tohelp potholder fold at the center.
6. Take each 5” x 7” sandwich and straighten one 7” lengthwith a rotary cutter and ruler. Place pocket pattern with the straight edge of the pattern on the cut edge. Traceand cut out.
PERMISSION IS GIVEN TO REPRODUCE FOR PERSONAL USE ONLY ©2011 - PCP Group, LLC
Graphic Artist Alexandra Henry© 2011 Marjory Peck
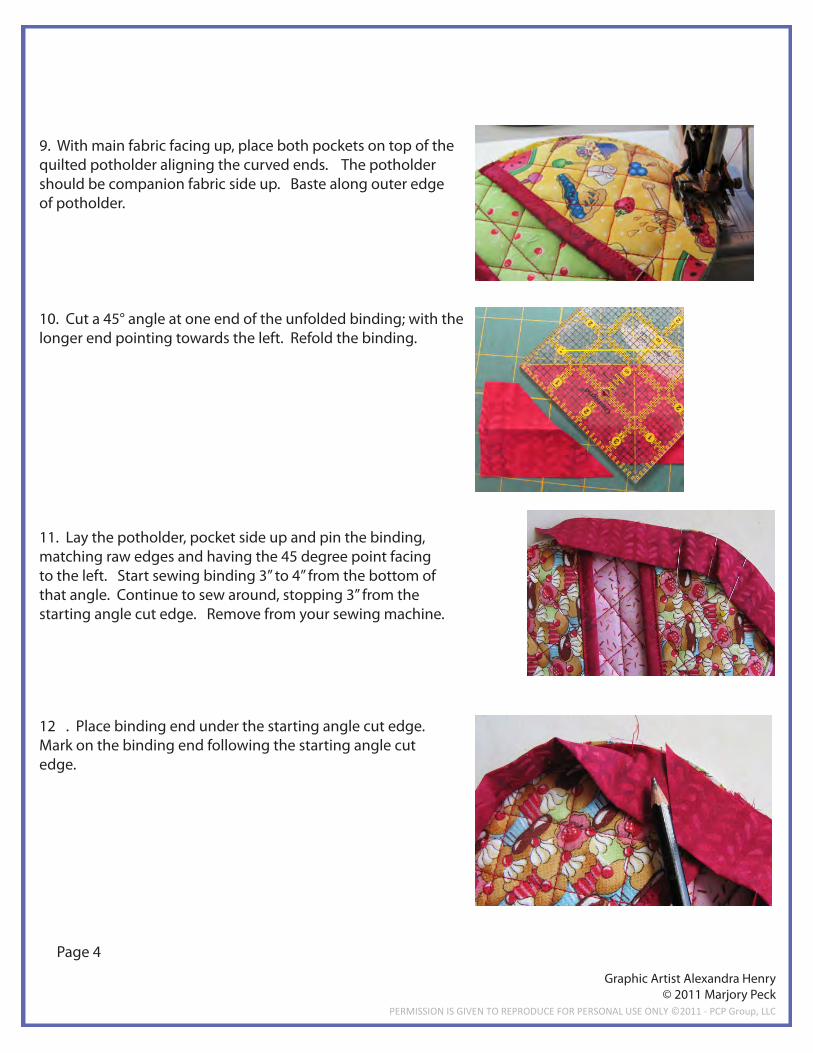
9. With main fabric facing up, place both pockets on top of the quilted potholder aligning the curved ends. The potholdershould be companion fabric side up. Baste along outer edgeof potholder.
10. Cut a 45° angle at one end of the unfolded binding; with the longer end pointing towards the left. Refold the binding.
11. Lay the potholder, pocket side up and pin the binding, matching raw edges and having the 45 degree point facing to the left. Start sewing binding 3” to 4” from the bottom of that angle. Continue to sew around, stopping 3” from the starting angle cut edge. Remove from your sewing machine.
12 . Place binding end under the starting angle cut edge.Mark on the binding end following the starting angle cutedge.
PERMISSION IS GIVEN TO REPRODUCE FOR PERSONAL USE ONLY ©2011 - PCP Group, LLC
Graphic Artist Alexandra Henry© 2011 Marjory Peck
Page 4

13. Unfold the binding end where the drawn line is. Align the 1/2” marking on a ruler to the drawn line withthe 1/2“ allowance to the right of the drawn line andcut. This adds 1/2” length to the marked line, allowing for a 1/4” seam allowance.
14. Unfold both ends of the binding, matching angled edgesand pin. Fold the potholder in a little. There should be a 1/4”tail on each end (A). Sew, using a 1/4“ seam allowance. Finger press seam to one side. Refold binding (B). Finish sewing thebinding down (C). Press binding away from body of potholder and toward the raw edge.
Fold binding over to the back side of potholder, pin in placeand sew binding down by hand or machine.
PERMISSION IS GIVEN TO REPRODUCE FOR PERSONAL USE ONLY ©2011 - PCP Group, LLC
Graphic Artist Alexandra Henry© 2011 Marjory Peck
Page 5
1/4” tail
A
B
C

Fold
Main Part of Potholder Template
PERMISSION IS GIVEN TO REPRODUCE FOR PERSONAL USE ONLY ©2011 - PCP Group, LLC
Graphic Artist Alexandra Henry© 2011 Marjory Peck
Cut one on fold
Cutting Line
Center line
Flap cutting line
(Center)

PERMISSION IS GIVEN TO REPRODUCE FOR PERSONAL USE ONLY ©2011 - PCP Group, LLC G
Graphic Artist Alexandra Henry©2011 Marjory Peck
Pocket TemplateCut Two
Cutting Line