Embed Size (px)
Citation preview

Sheridan: Faculty Support Guide for PeopleSoft v.9 1
Contents
Welcome to PeopleSoft .................................................................................................................2
Understanding Term Codes ..........................................................................................................3
Understanding Academic Groups, Careers, Programs and Plans ................................................4
Understanding Course Codes .......................................................................................................5
Change Your User Defaults...........................................................................................................6
Display and Print a Class Roster...................................................................................................7
Notify Students ..............................................................................................................................9
Enter Grades for a Student......................................................................................................... 10
View Courses by Term ............................................................................................................... 18
View a Weekly Schedule ............................................................................................................ 19
Sheridan: Faculty Support Guide for PeopleSoft v.9 2
Welcome to PeopleSoft at Sheridan This booklet has been provided to you as a quick reference guide to some common functions in the Student Administration system. It will help you remember the lessons you may have learned during training, and provide the correct navigation at your fingertips. For more detailed information and procedures, refer to your training manual or online documentation.
If you have problems accessing the production database (i.e. logging in, viewing specific screens) or difficulty performing any PeopleSoft functions, please contact the Helpdesk at extension 2150 or by email: [email protected]
Remember: The more you use PeopleSoft, the better you will become on the system, and the more you will be able to take advantage of its functionality. Don’t be afraid to use it: it’s very hard to break!
LOG IN
1. Go to AccessSheridan at https://access.sheridaninstitute.ca 2. Select Access PeopleSher SA/HR 3. Enter your username and password, then click SIGN ON.
Sheridan: Faculty Support Guide for PeopleSoft v.9 3
Understanding Term Codes
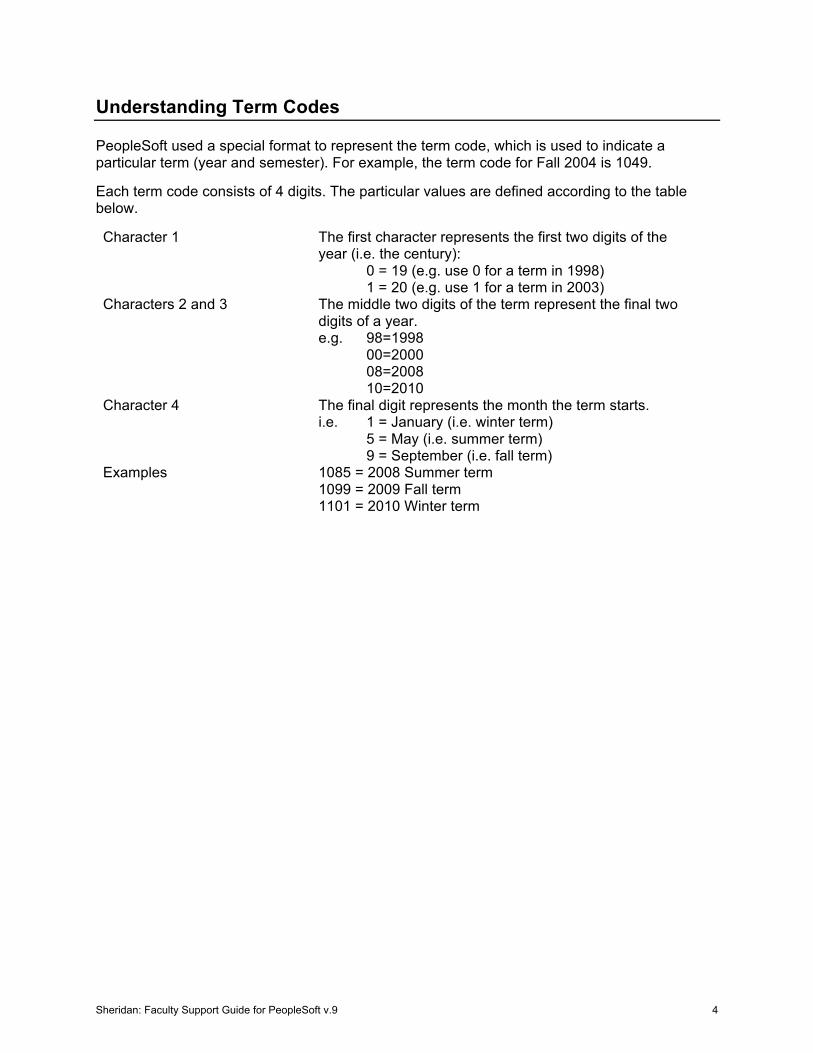
PeopleSoft used a special format to represent the term code, which is used to indicate a particular term (year and semester). For example, the term code for Fall 2004 is 1049.
Each term code consists of 4 digits. The particular values are defined according to the table below.
Character 1 The first character represents the first two digits of the year (i.e. the century): 0 = 19 (e.g. use 0 for a term in 1998) 1 = 20 (e.g. use 1 for a term in 2003)
Characters 2 and 3 The middle two digits of the term represent the final two digits of a year. e.g. 98=1998 00=2000 08=2008 10=2010
Character 4 The final digit represents the month the term starts. i.e. 1 = January (i.e. winter term) 5 = May (i.e. summer term) 9 = September (i.e. fall term)
Examples 1085 = 2008 Summer term 1099 = 2009 Fall term 1101 = 2010 Winter term
Sheridan: Faculty Support Guide for PeopleSoft v.9 4

Understanding Academic Groups, Careers, Programs and Plans
In PeopleSoft the Academic Structure has been defined as follows:
The Academic Institution is Sheridan (SHRDN).
Five Academic Groups represent the five schools:
• SAAD – School of Animation, Arts and Design • CECT – School of Continuing Education and Corporate Training • ACES – School of Applied Computing and Engineering Science • SBUS – School of Business • SCLS – School of Community and Liberal Studies
Two Academic Careers have been defined:
• ACAD (Academic): Used for all post-secondary approved programs and credit courses • TRDV (Training and Development): Used for non-credit courses
The Academic Program defines the program within an academic career to which a student applies. The first letter indicates if the program is post-secondary (p) or ConEd (c) (e.g. PBUSS for post-secondary Business, PSYAC for Systems Analyst Co-op).
An Academic Plan defines a specialization within an academic program.
Sheridan: Faculty Support Guide for PeopleSoft v.9 5
Understanding Course Codes
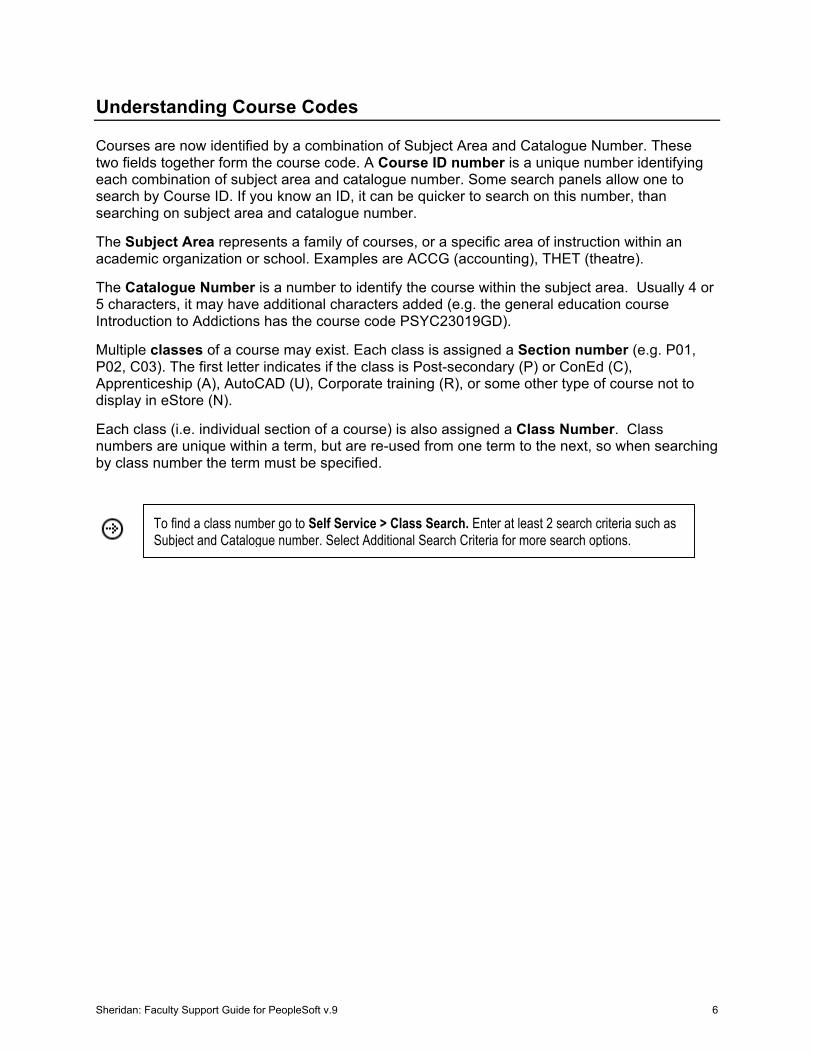
Courses are now identified by a combination of Subject Area and Catalogue Number. These two fields together form the course code. A Course ID number is a unique number identifying each combination of subject area and catalogue number. Some search panels allow one to search by Course ID. If you know an ID, it can be quicker to search on this number, than searching on subject area and catalogue number.
The Subject Area represents a family of courses, or a specific area of instruction within an academic organization or school. Examples are ACCG (accounting), THET (theatre).
The Catalogue Number is a number to identify the course within the subject area. Usually 4 or 5 characters, it may have additional characters added (e.g. the general education course Introduction to Addictions has the course code PSYC23019GD).
Multiple classes of a course may exist. Each class is assigned a Section number (e.g. P01, P02, C03). The first letter indicates if the class is Post-secondary (P) or ConEd (C), Apprenticeship (A), AutoCAD (U), Corporate training (R), or some other type of course not to display in eStore (N).
Each class (i.e. individual section of a course) is also assigned a Class Number. Class numbers are unique within a term, but are re-used from one term to the next, so when searching by class number the term must be specified.
To find a class number go to Self Service > Class Search. Enter at least 2 search criteria such as Subject and Catalogue number. Select Additional Search Criteria for more search options.
Sheridan: Faculty Support Guide for PeopleSoft v.9 6
Change Your User Defaults
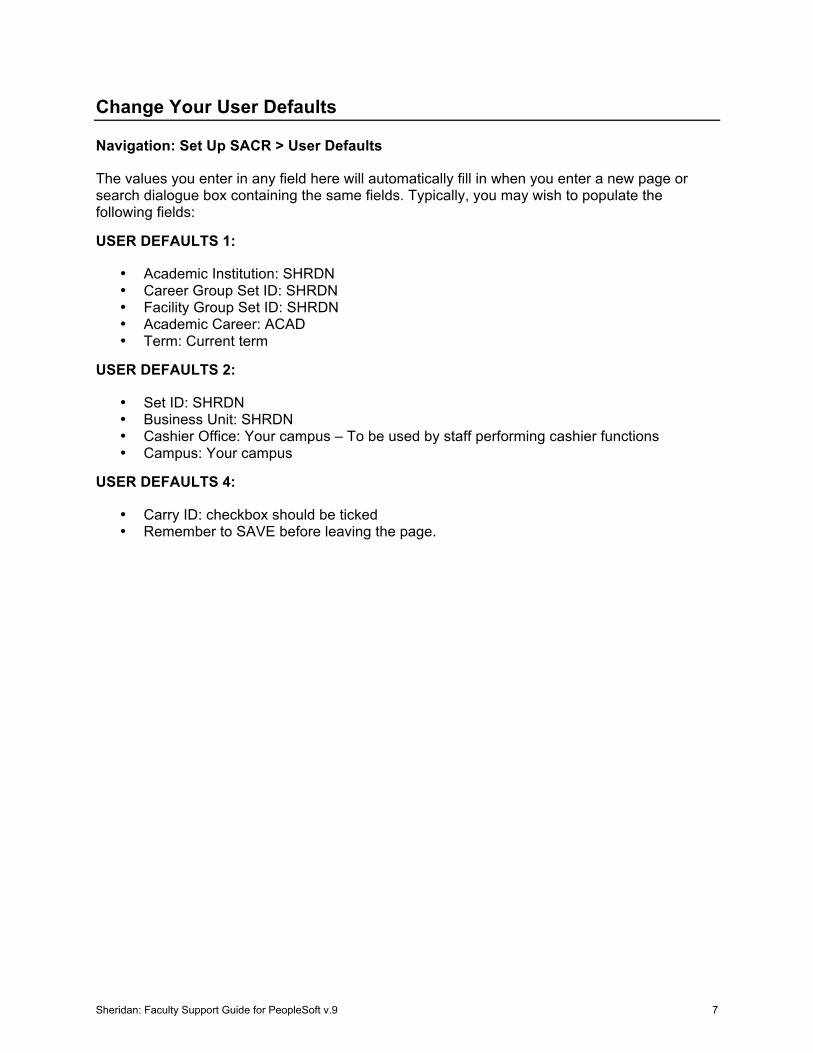
Navigation: Set Up SACR > User Defaults
The values you enter in any field here will automatically fill in when you enter a new page or search dialogue box containing the same fields. Typically, you may wish to populate the following fields:
USER DEFAULTS 1:
• Academic Institution: SHRDN • Career Group Set ID: SHRDN • Facility Group Set ID: SHRDN • Academic Career: ACAD • Term: Current term
USER DEFAULTS 2:
• Set ID: SHRDN • Business Unit: SHRDN • Cashier Office: Your campus – To be used by staff performing cashier functions • Campus: Your campus
USER DEFAULTS 4:
• Carry ID: checkbox should be ticked • Remember to SAVE before leaving the page.
Sheridan: Faculty Support Guide for PeopleSoft v.9 7
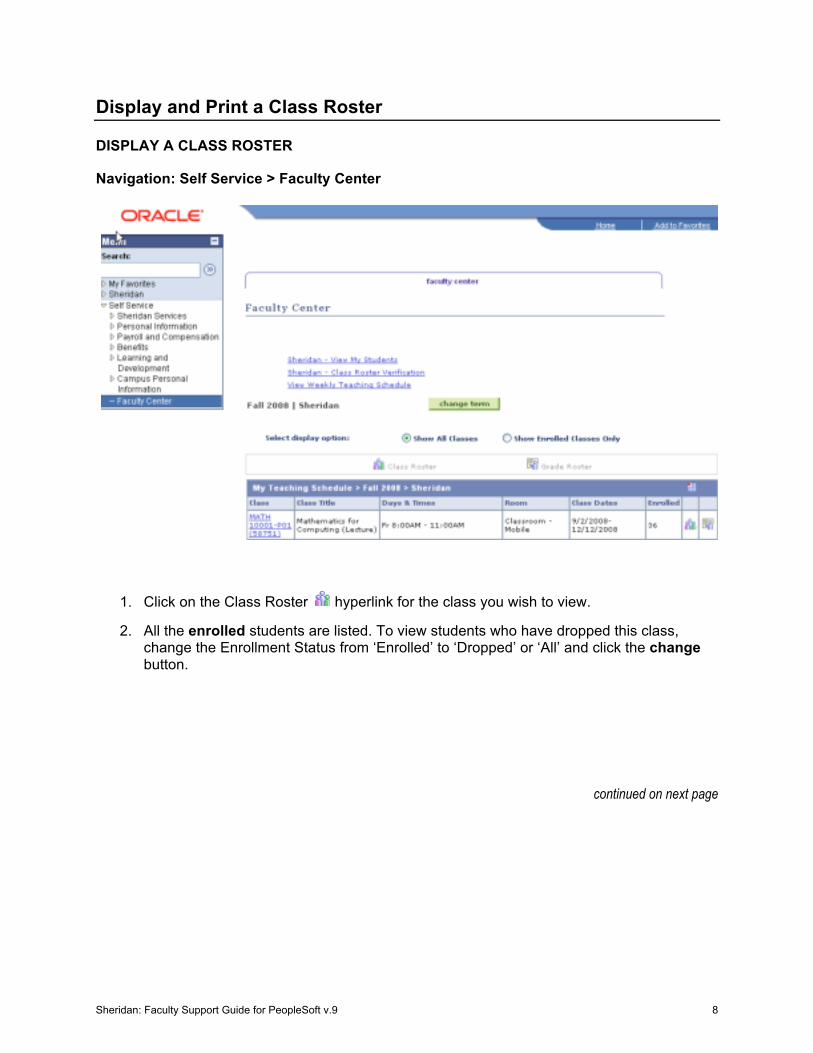
Display and Print a Class Roster
DISPLAY A CLASS ROSTER
Navigation: Self Service > Faculty Center
1. Click on the Class Roster hyperlink for the class you wish to view.
2. All the enrolled students are listed. To view students who have dropped this class, change the Enrollment Status from ‘Enrolled’ to ‘Dropped’ or ‘All’ and click the change button.
continued on next page
Sheridan: Faculty Support Guide for PeopleSoft v.9 8
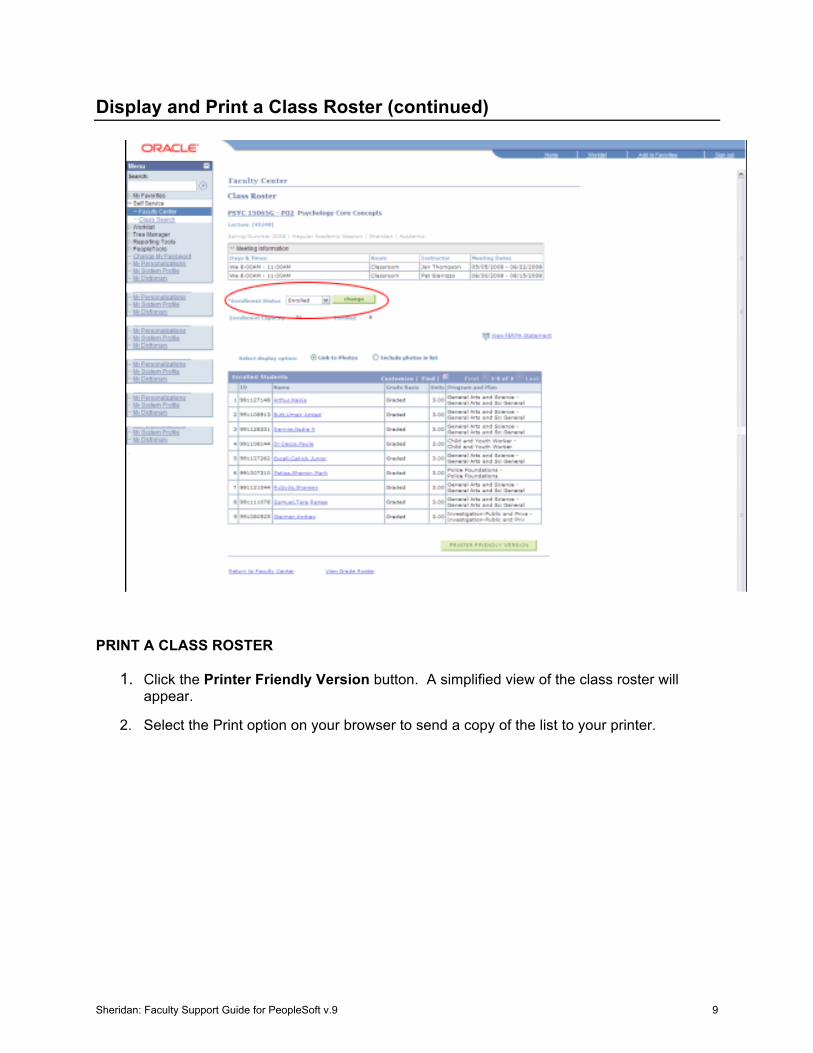
Display and Print a Class Roster (continued)
PRINT A CLASS ROSTER
1. Click the Printer Friendly Version button. A simplified view of the class roster will appear.
2. Select the Print option on your browser to send a copy of the list to your printer.
Sheridan: Faculty Support Guide for PeopleSoft v.9 9
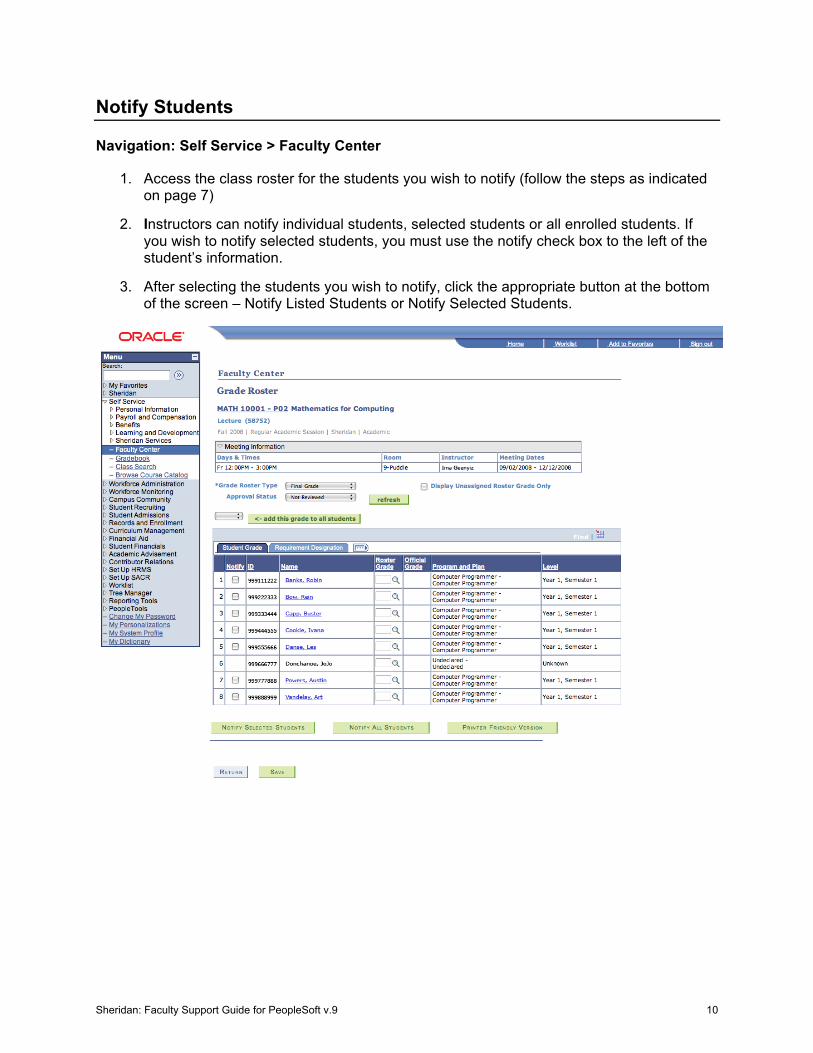
Notify Students
Navigation: Self Service > Faculty Center
1. Access the class roster for the students you wish to notify (follow the steps as indicated on page 7)
2. Instructors can notify individual students, selected students or all enrolled students. If you wish to notify selected students, you must use the notify check box to the left of the student’s information.
3. After selecting the students you wish to notify, click the appropriate button at the bottom of the screen – Notify Listed Students or Notify Selected Students.
Sheridan: Faculty Support Guide for PeopleSoft v.9 10
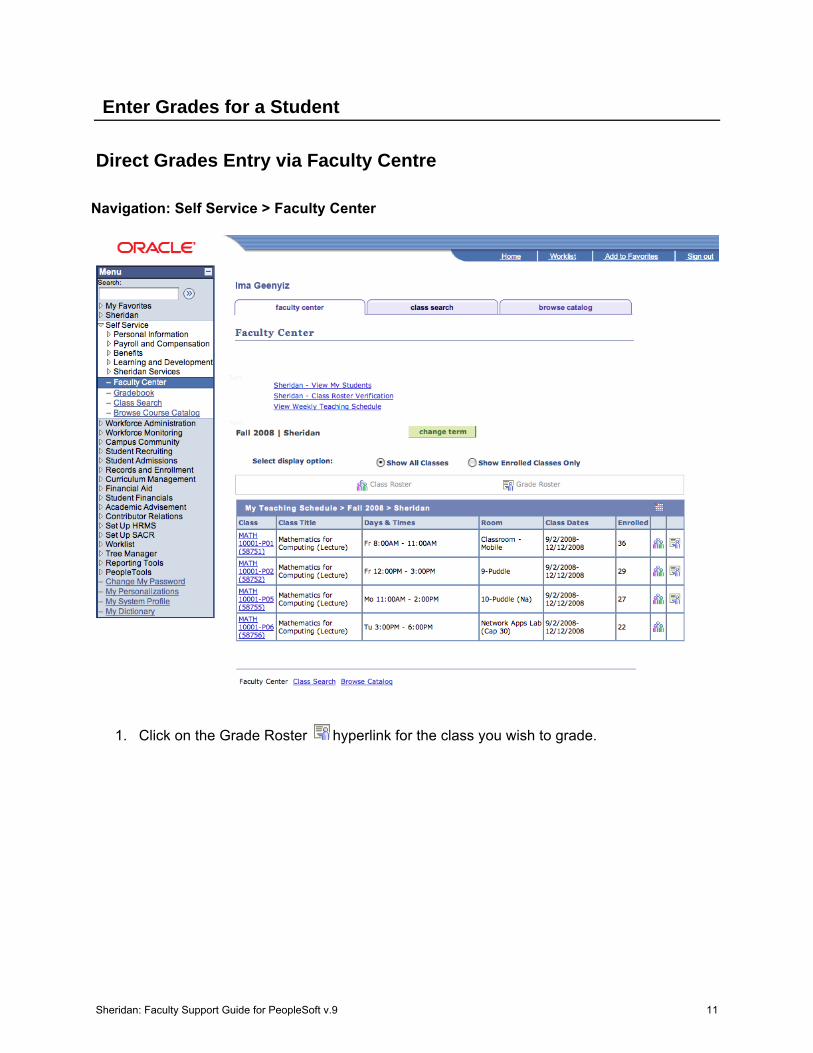
Enter Grades for a Student Direct Grades Entry via Faculty Centre
Navigation: Self Service > Faculty Center
1. Click on the Grade Roster hyperlink for the class you wish to grade.
Sheridan: Faculty Support Guide for PeopleSoft v.9 11
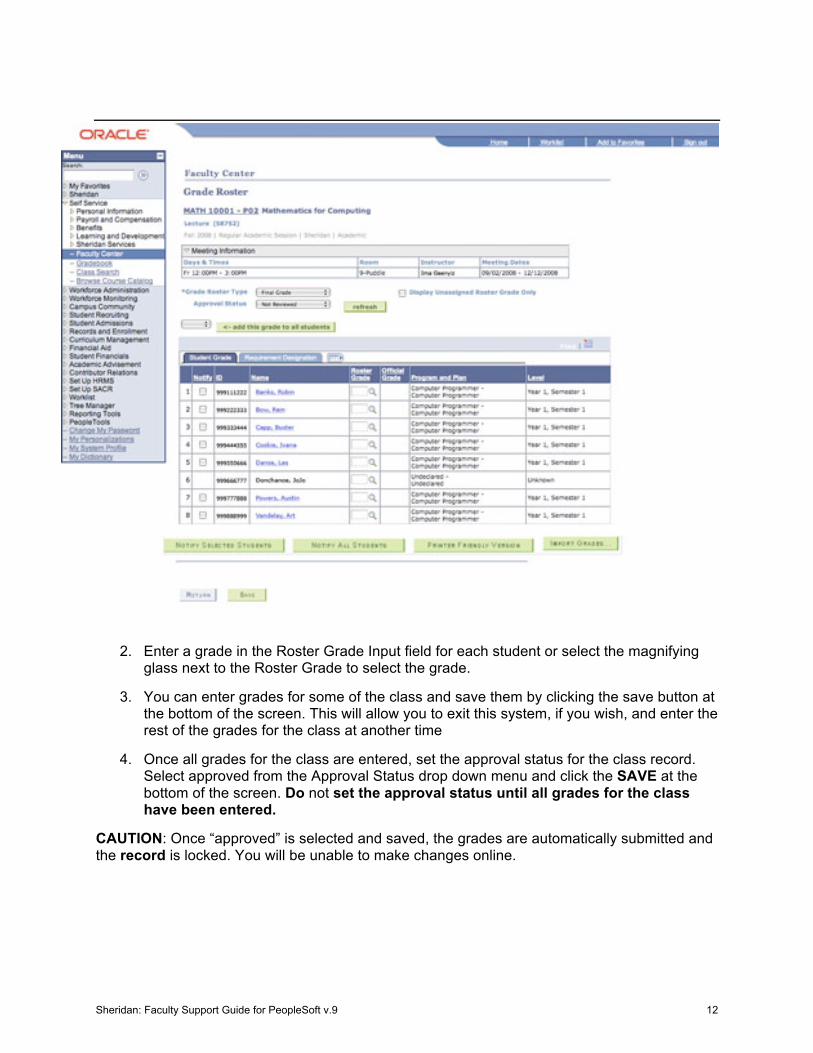
2. Enter a grade in the Roster Grade Input field for each student or select the magnifying glass next to the Roster Grade to select the grade.
3. You can enter grades for some of the class and save them by clicking the save button at the bottom of the screen. This will allow you to exit this system, if you wish, and enter the rest of the grades for the class at another time
4. Once all grades for the class are entered, set the approval status for the class record. Select approved from the Approval Status drop down menu and click the SAVE at the bottom of the screen. Do not set the approval status until all grades for the class have been entered.
CAUTION: Once “approved” is selected and saved, the grades are automatically submitted and the record is locked. You will be unable to make changes online.
Sheridan: Faculty Support Guide for PeopleSoft v.9 12
GRADE CHANGES
Grade changes require approval by the Associate Dean and/or designate. A copy of the Grade Change form is available on the Office of the Registrar intranet site. Note: Office of the Registrar staff may not change a grade without the Grade Change Form.
1. Login to AccessSheridan at https://access.sheridaninstitute.ca
2. Click the link titled: "Office of the Registrar Intranet"
3. From the "Services" menu at the top of the page, select "Staff Resources" then "Forms and Resources"
4. Click the link "Grade Change Form" found under the heading "Academic Advisement/Grading Resources"
5. Please complete the form and forward it to the school designate for approval
Forward the completed form to the Office of the Registrar for processing.
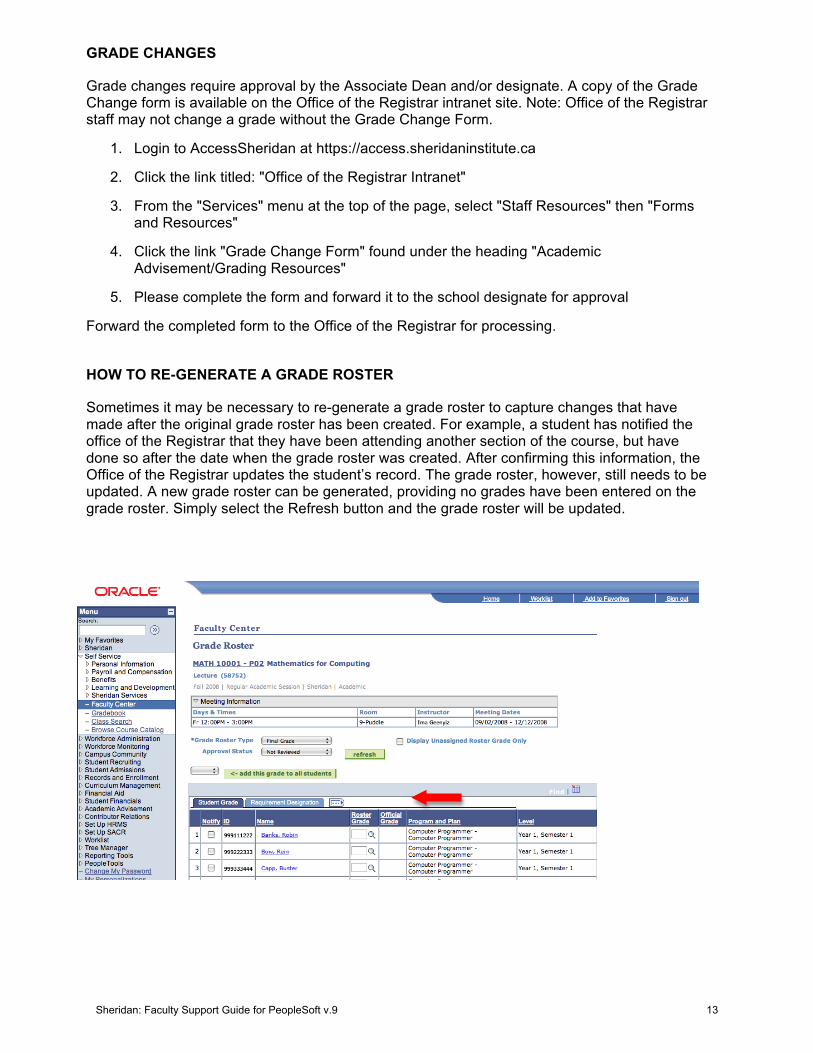
HOW TO RE-GENERATE A GRADE ROSTER
Sometimes it may be necessary to re-generate a grade roster to capture changes that have made after the original grade roster has been created. For example, a student has notified the office of the Registrar that they have been attending another section of the course, but have done so after the date when the grade roster was created. After confirming this information, the Office of the Registrar updates the student’s record. The grade roster, however, still needs to be updated. A new grade roster can be generated, providing no grades have been entered on the grade roster. Simply select the Refresh button and the grade roster will be updated.
Sheridan: Faculty Support Guide for PeopleSoft v.9 13
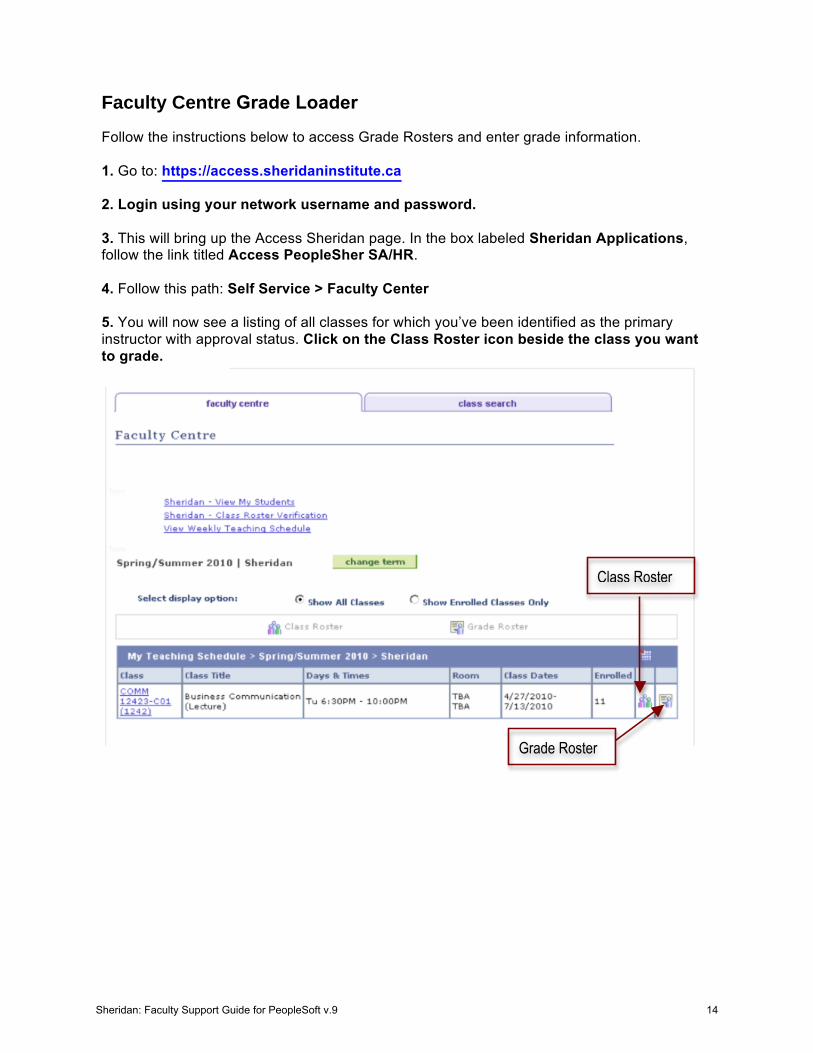
Faculty Centre Grade Loader Follow the instructions below to access Grade Rosters and enter grade information. 1. Go to: https://access.sheridaninstitute.ca 2. Login using your network username and password. 3. This will bring up the Access Sheridan page. In the box labeled Sheridan Applications, follow the link titled Access PeopleSher SA/HR. 4. Follow this path: Self Service > Faculty Center 5. You will now see a listing of all classes for which you’ve been identified as the primary instructor with approval status. Click on the Class Roster icon beside the class you want to grade.
Class Roster
Grade Roster
Sheridan: Faculty Support Guide for PeopleSoft v.9 14
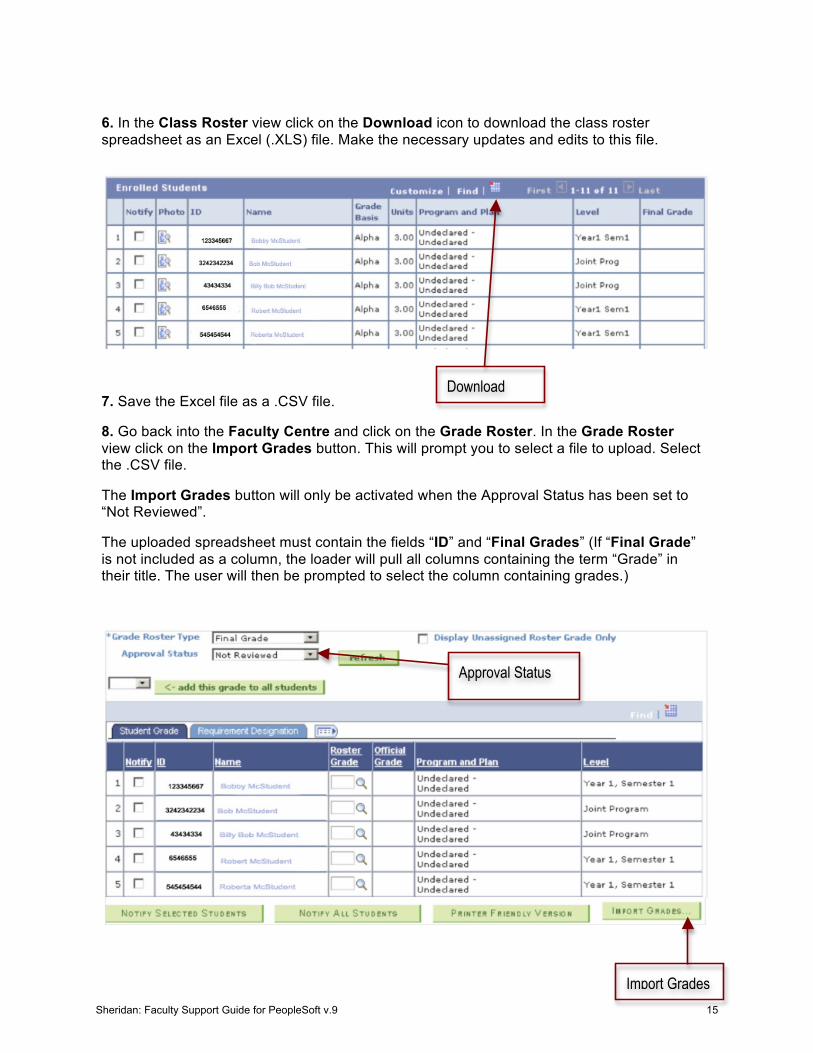
6. In the Class Roster view click on the Download icon to download the class roster spreadsheet as an Excel (.XLS) file. Make the necessary updates and edits to this file.
7. Save the Excel file as a .CSV file.
8. Go back into the Faculty Centre and click on the Grade Roster. In the Grade Roster view click on the Import Grades button. This will prompt you to select a file to upload. Select the .CSV file.
The Import Grades button will only be activated when the Approval Status has been set to “Not Reviewed”.
The uploaded spreadsheet must contain the fields “ID” and “Final Grades” (If “Final Grade” is not included as a column, the loader will pull all columns containing the term “Grade” in their title. The user will then be prompted to select the column containing grades.)
Download
Approval Status
Import Grades
Sheridan: Faculty Support Guide for PeopleSoft v.9 15
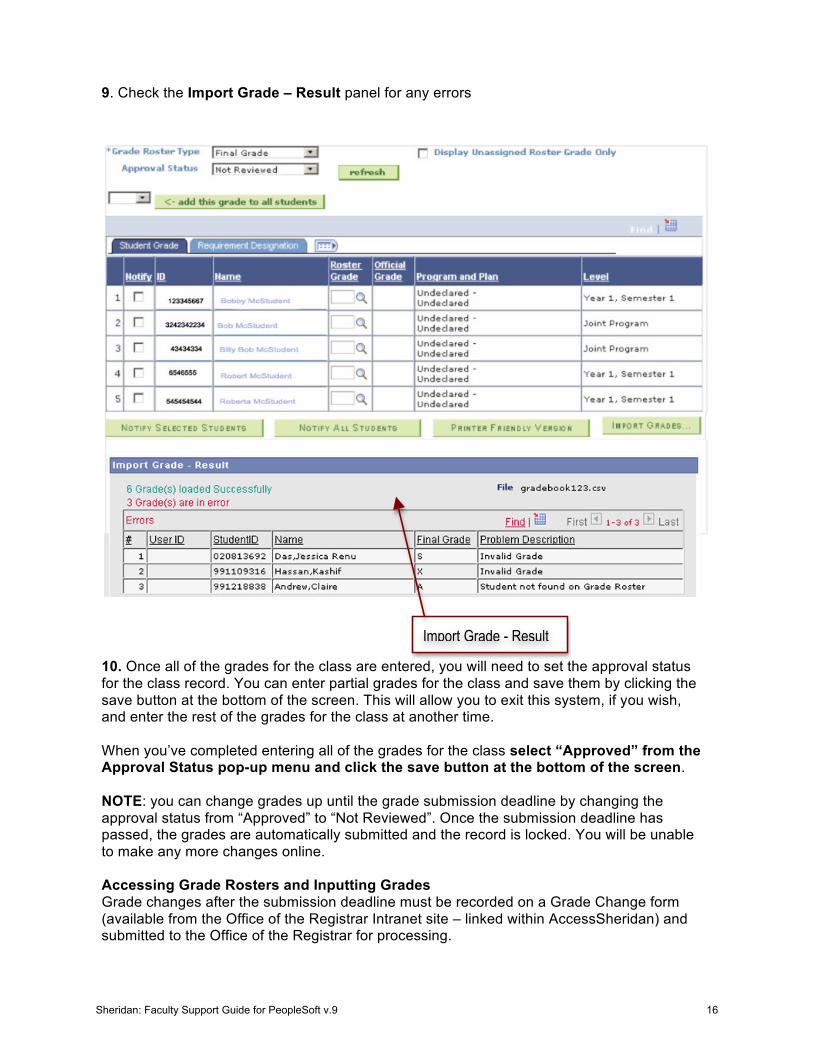
9. Check the Import Grade – Result panel for any errors
10. Once all of the grades for the class are entered, you will need to set the approval status for the class record. You can enter partial grades for the class and save them by clicking the save button at the bottom of the screen. This will allow you to exit this system, if you wish, and enter the rest of the grades for the class at another time. When you’ve completed entering all of the grades for the class select “Approved” from the Approval Status pop-up menu and click the save button at the bottom of the screen. NOTE: you can change grades up until the grade submission deadline by changing the approval status from “Approved” to “Not Reviewed”. Once the submission deadline has passed, the grades are automatically submitted and the record is locked. You will be unable to make any more changes online. Accessing Grade Rosters and Inputting Grades Grade changes after the submission deadline must be recorded on a Grade Change form (available from the Office of the Registrar Intranet site – linked within AccessSheridan) and submitted to the Office of the Registrar for processing.
Import Grade - Result
Sheridan: Faculty Support Guide for PeopleSoft v.9 16
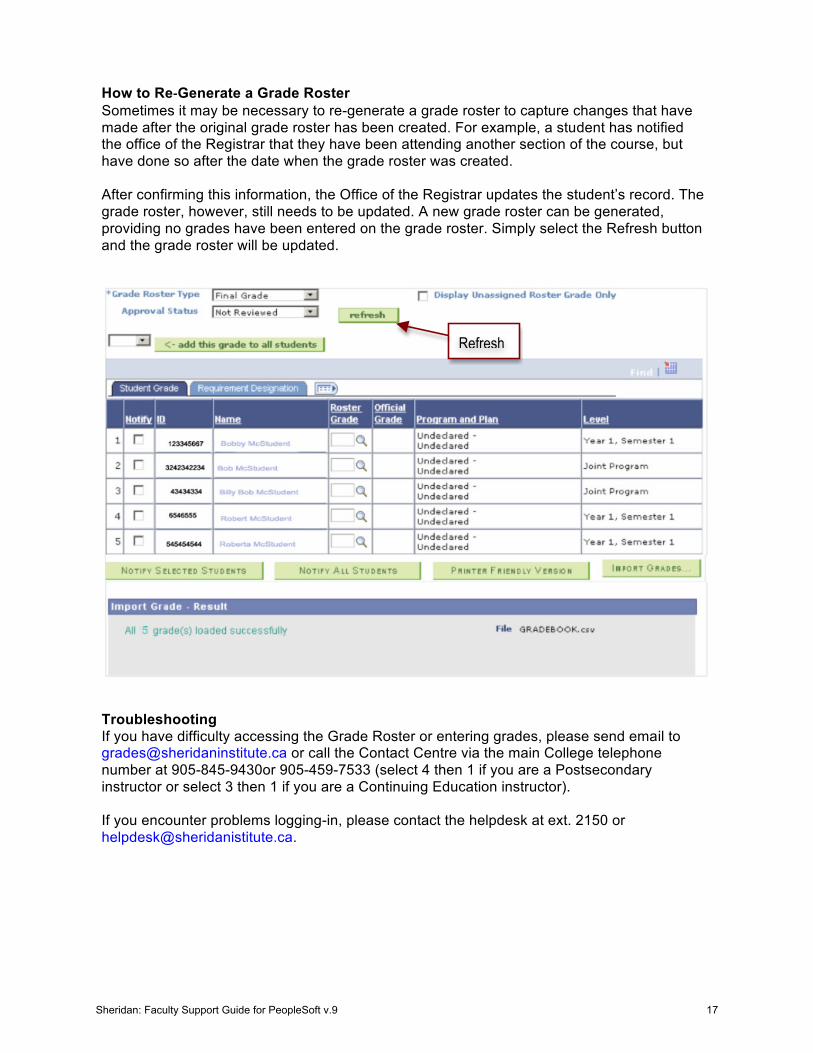
How to Re‐Generate a Grade Roster Sometimes it may be necessary to re-generate a grade roster to capture changes that have made after the original grade roster has been created. For example, a student has notified the office of the Registrar that they have been attending another section of the course, but have done so after the date when the grade roster was created. After confirming this information, the Office of the Registrar updates the student’s record. The grade roster, however, still needs to be updated. A new grade roster can be generated, providing no grades have been entered on the grade roster. Simply select the Refresh button and the grade roster will be updated.
Troubleshooting If you have difficulty accessing the Grade Roster or entering grades, please send email to [email protected] or call the Contact Centre via the main College telephone number at 905-845-9430or 905-459-7533 (select 4 then 1 if you are a Postsecondary instructor or select 3 then 1 if you are a Continuing Education instructor). If you encounter problems logging-in, please contact the helpdesk at ext. 2150 or [email protected].
Refresh
Sheridan: Faculty Support Guide for PeopleSoft v.9 17

View Courses by Term
Navigation: Self-Service > Faculty Center
• Defaults to show current term
• A list of courses you are teaching in the specified term appears showing Class, Class Title, Days and Times, Room, Class Dates and Enrolled number.
• Select your display option to ‘Show All Classes’ or ‘Show Enrolled Classes Only’.
• Change the term by clicking on the change term button.
Sheridan: Faculty Support Guide for PeopleSoft v.9 18
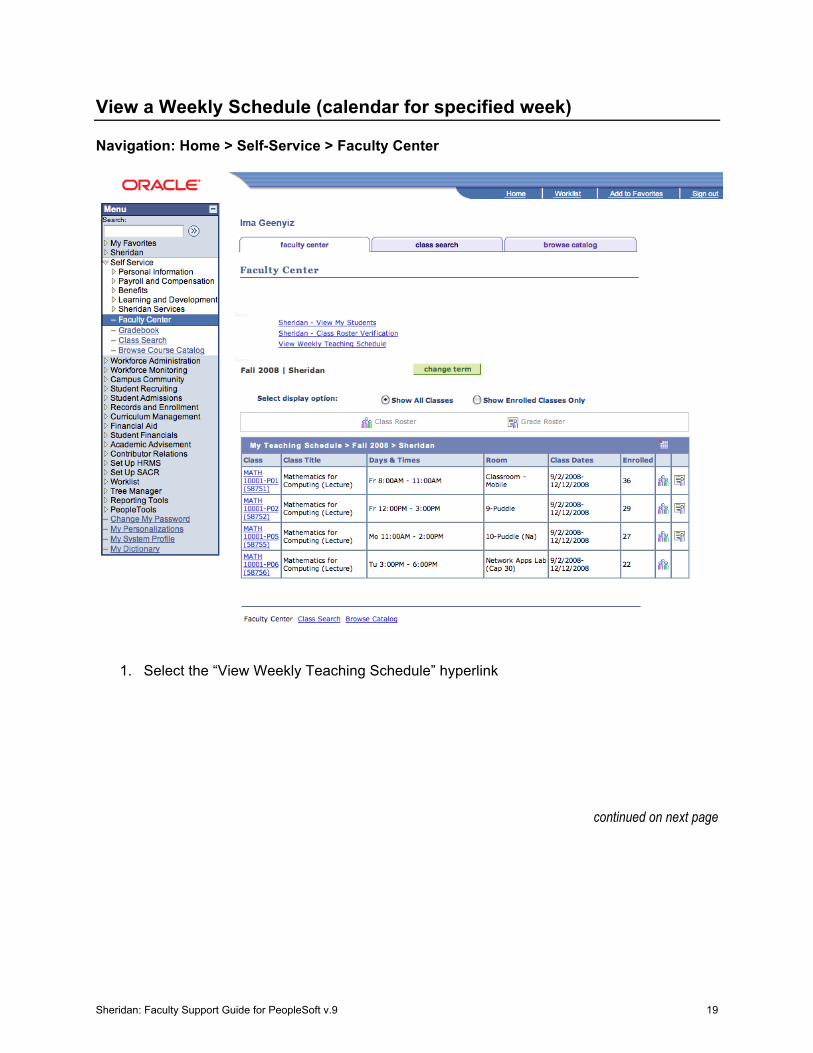
View a Weekly Schedule (calendar for specified week)
Navigation: Home > Self-Service > Faculty Center
1. Select the “View Weekly Teaching Schedule” hyperlink
continued on next page
Sheridan: Faculty Support Guide for PeopleSoft v.9 19
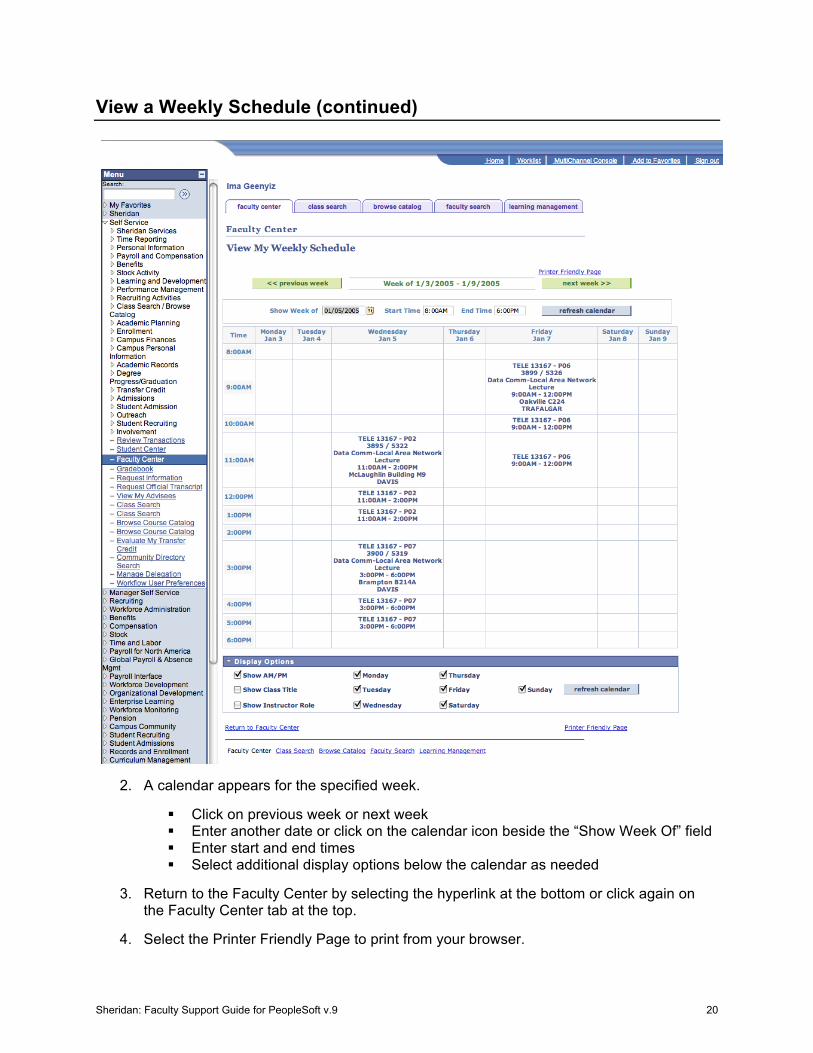
View a Weekly Schedule (continued)
2. A calendar appears for the specified week.
Click on previous week or next week Enter another date or click on the calendar icon beside the “Show Week Of” field Enter start and end times Select additional display options below the calendar as needed
3. Return to the Faculty Center by selecting the hyperlink at the bottom or click again on the Faculty Center tab at the top.
4. Select the Printer Friendly Page to print from your browser.
Sheridan: Faculty Support Guide for PeopleSoft v.9 20