Embed Size (px)
Citation preview
SharePoint Project Timer Tutorial
SharePoint Project Timer is a SharePoint project time management web part
to help you keep track of your deadlines. It allows you to set a countdown
to the target date, and will then display a clock on your screen counting
down to that specific date. It is very useful in project management
environments, or to have tasks more structured and finished on time.
To use SharePoint Project Timer please add it to the SharePoint site you
want to use it on. Please see the screenshots below for reference:
After clicking Add a new window will open with the SharePoint Project Timer
Web Part. Please click on Modify Shared Web Part or on open the tool pane
to change the web part settings.
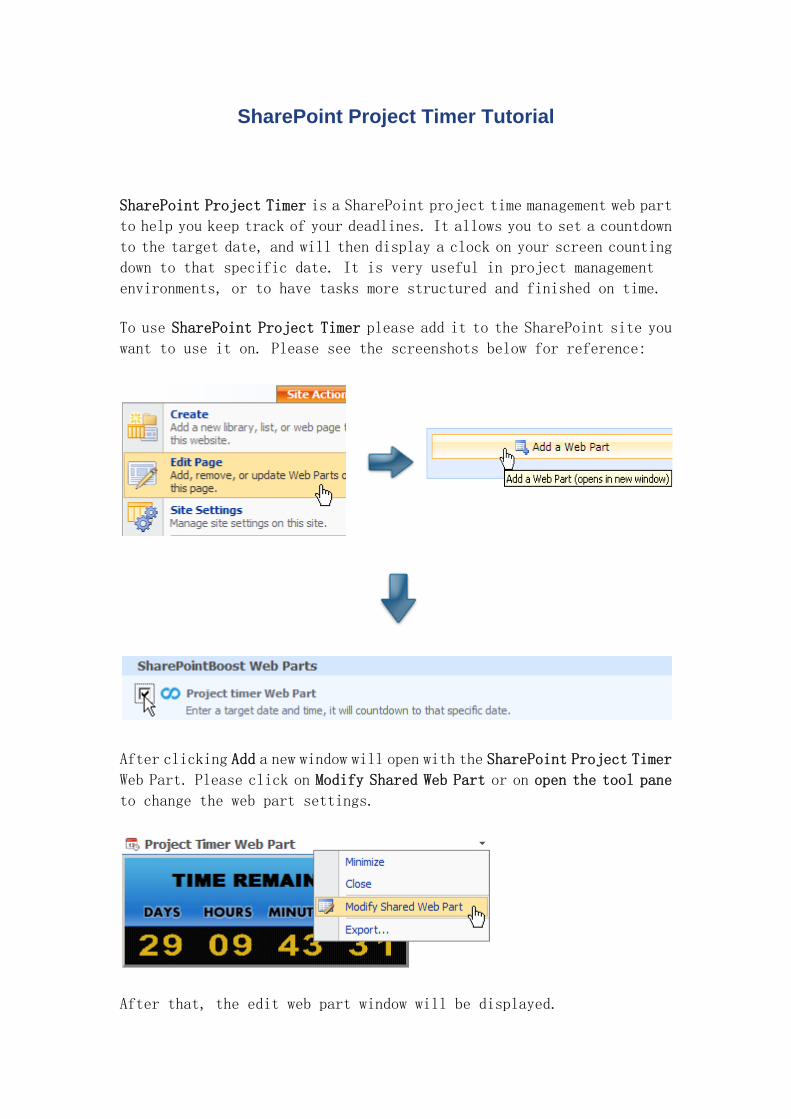
After that, the edit web part window will be displayed.
In the edit web part window, 2 boxes for text editing are displayed. One
is the standard input, displaying the title above the remaining time area.
The second one is the message once the countdown end-date has been reached.
Both text boxes support Rich-Text text editing features. Below the text
editing boxes you find a preview of the current style of the Project Timer
web part.
On the right you find the Project Timer web part configuration box, divided
into a Countdown Configuration, Appearance, Layout, and Advanced
section.
The Appearance, Layout, and Advanced sections of the SharePoint Project
Timer configuration box are added by default settings in SharePoint. If
you need assistance using these sections, please refer to the SharePoint
Help.

In its Countdown Configuration section you can modify general settings,
like the countdown end-date and time, the Display Options, and the Style
of the web part. It also shows the link to the license management for the
product.
The Display options let you choose between 3 options:
• To display Days only;
• To display Days, Hours, and Minutes;
• To display Days, Hours, Minutes, and Seconds.
SharePoint Project Timer gives the user the option to choose from 5 preset
styles, and one option to customize the style yourself. Customizing the
style allows you to upload different styles of digits into the web part
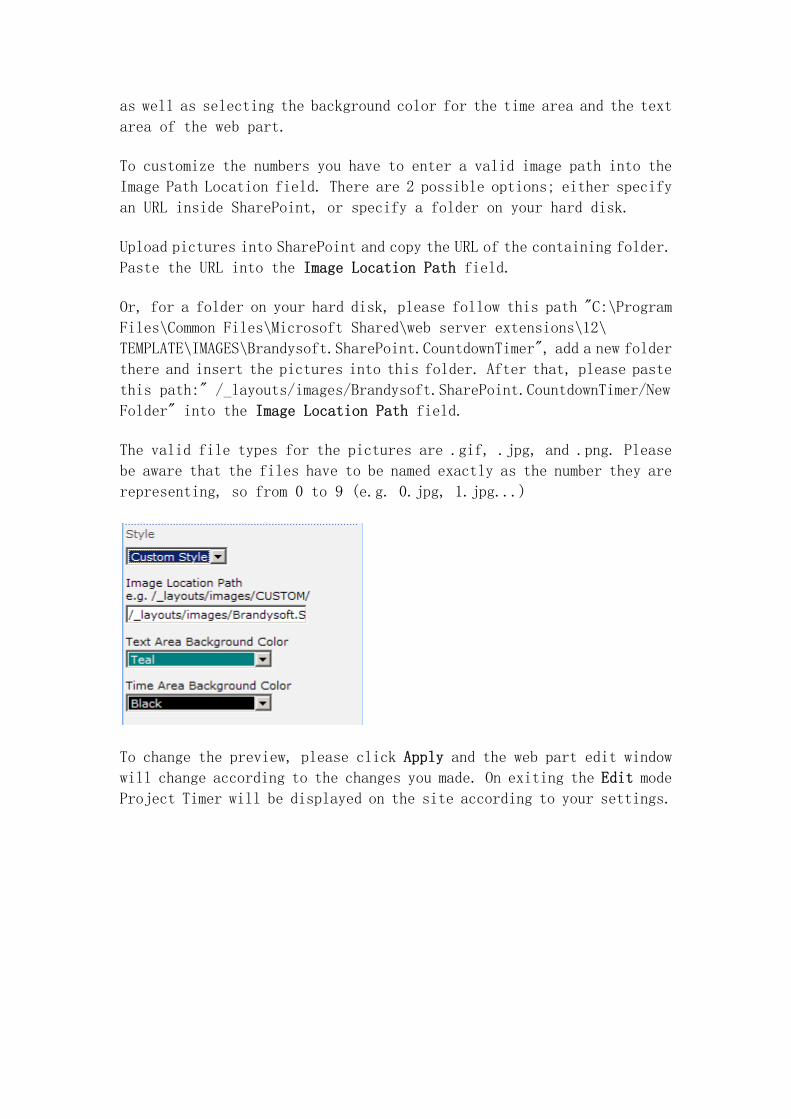
as well as selecting the background color for the time area and the text
area of the web part.
To customize the numbers you have to enter a valid image path into the
Image Path Location field. There are 2 possible options; either specify
an URL inside SharePoint, or specify a folder on your hard disk.
Upload pictures into SharePoint and copy the URL of the containing folder.
Paste the URL into the Image Location Path field.
Or, for a folder on your hard disk, please follow this path "C:\Program
Files\Common Files\Microsoft Shared\web server extensions\12\
TEMPLATE\IMAGES\Brandysoft.SharePoint.CountdownTimer", add a new folder
there and insert the pictures into this folder. After that, please paste
this path:" /_layouts/images/Brandysoft.SharePoint.CountdownTimer/New
Folder" into the Image Location Path field.
The valid file types for the pictures are .gif, .jpg, and .png. Please
be aware that the files have to be named exactly as the number they are
representing, so from 0 to 9 (e.g. 0.jpg, 1.jpg...)
To change the preview, please click Apply and the web part edit window
will change according to the changes you made. On exiting the Edit mode
Project Timer will be displayed on the site according to your settings.
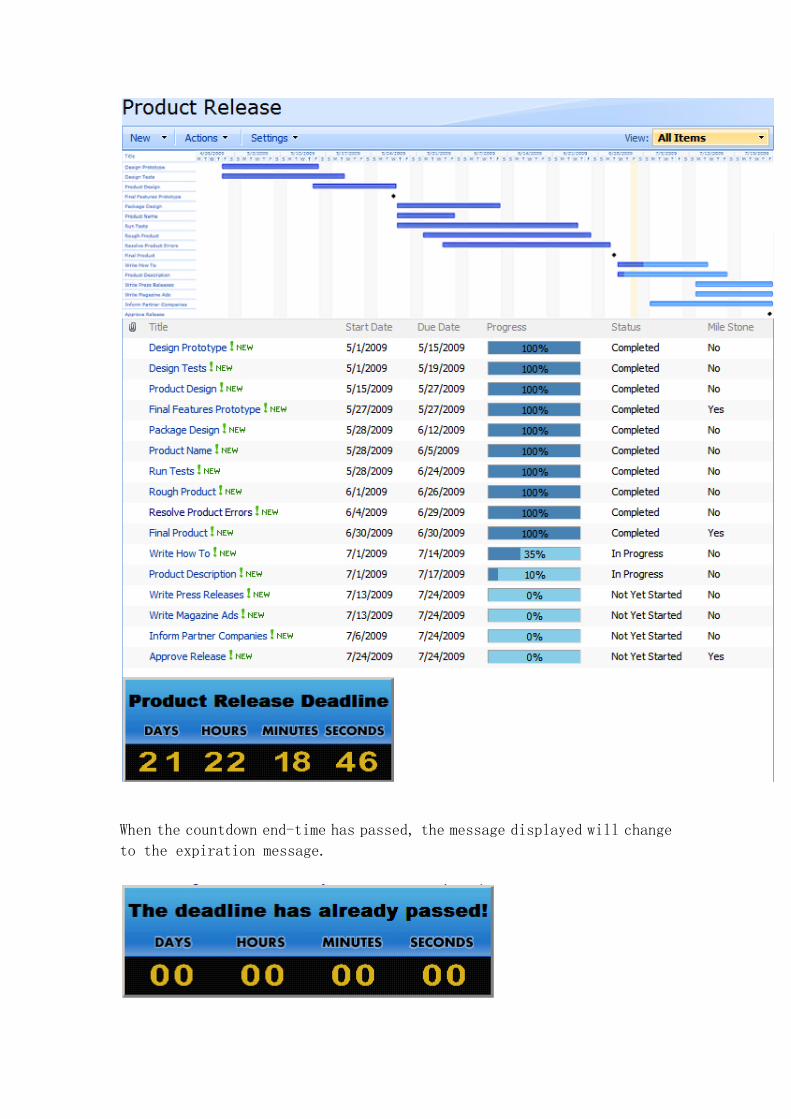
When the countdown end-time has passed, the message displayed will change
to the expiration message.