Embed Size (px)
DESCRIPTION
http://impactcanopy.com/download/setup/Set_up_Display_Dome_CAN.pdf
Citation preview
Canada 877.776.6655 USA 877.840.3524 impactcanopy.com
1 2
3 4
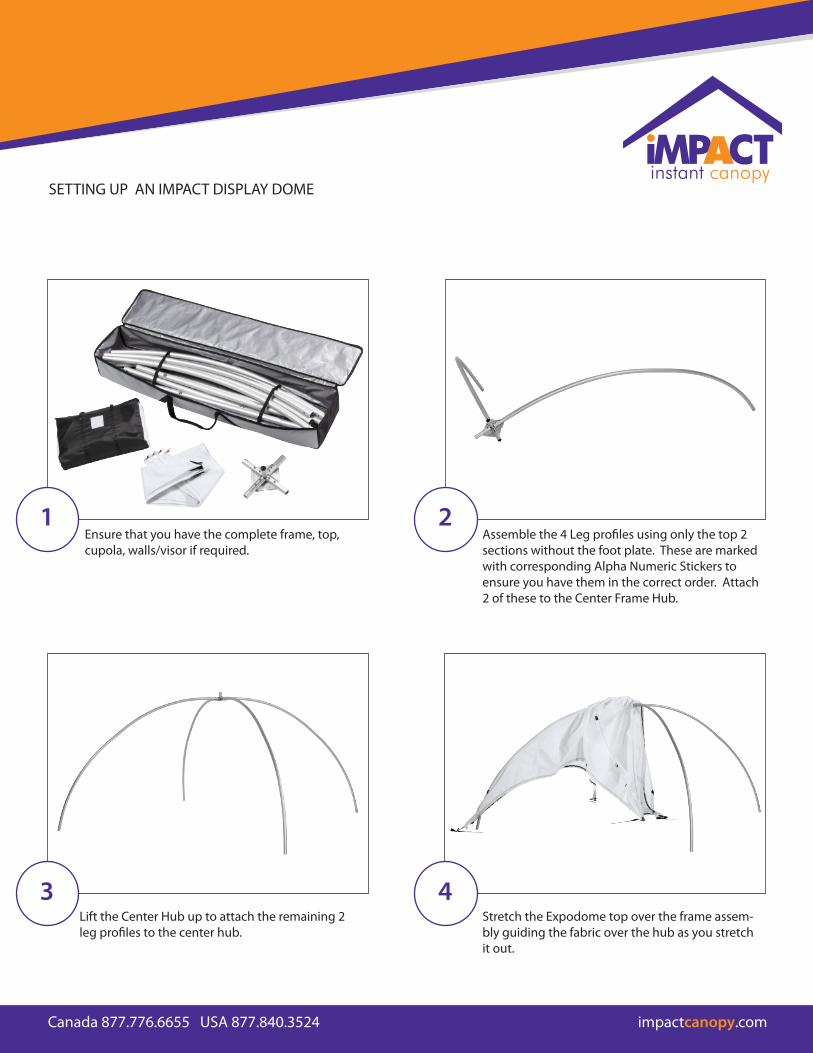
Ensure that you have the complete frame, top, cupola, walls/visor if required.
Assemble the 4 Leg profiles using only the top 2 sections without the foot plate. These are marked with corresponding Alpha Numeric Stickers to ensure you have them in the correct order. Attach 2 of these to the Center Frame Hub.
Lift the Center Hub up to attach the remaining 2 leg profiles to the center hub.
Stretch the Expodome top over the frame assem-bly guiding the fabric over the hub as you stretch it out.
SETTING UP AN IMPACT DISPLAY DOME
Canada 877.776.6655 USA 877.840.3524 impactcanopy.com
5 6
7 8
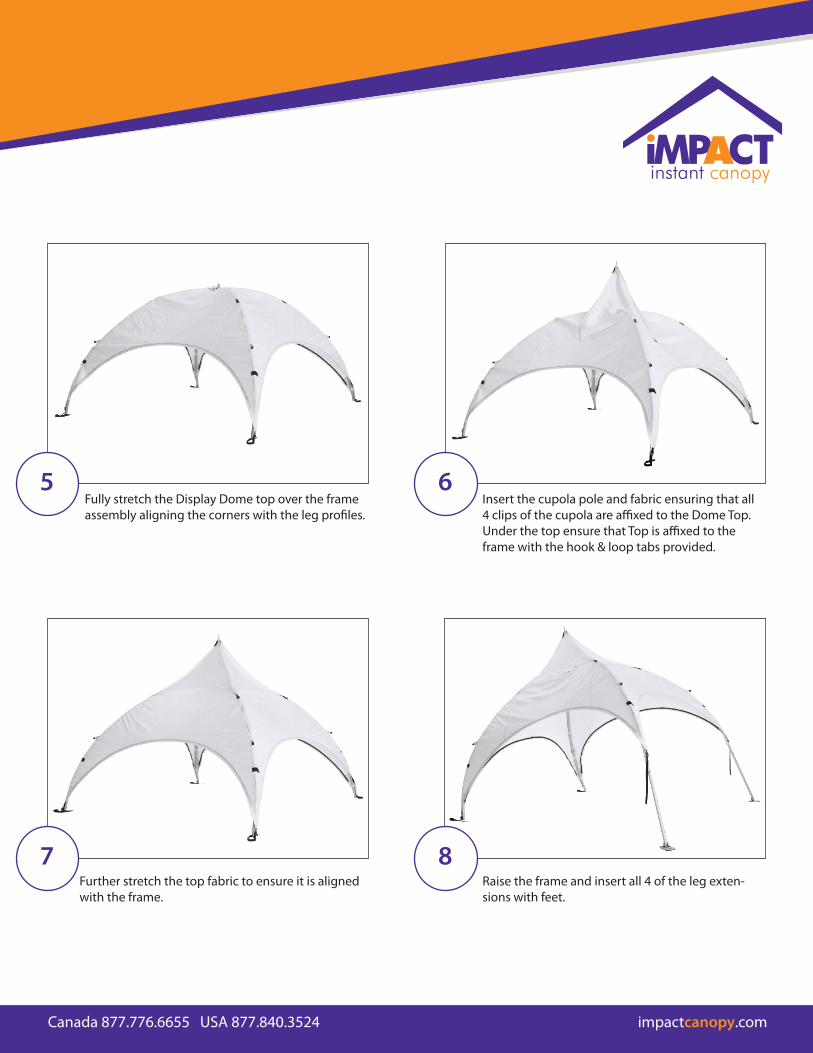
Fully stretch the Display Dome top over the frame assembly aligning the corners with the leg profiles.
Insert the cupola pole and fabric ensuring that all 4 clips of the cupola are affixed to the Dome Top. Under the top ensure that Top is affixed to the frame with the hook & loop tabs provided.
Further stretch the top fabric to ensure it is aligned with the frame.
Raise the frame and insert all 4 of the leg exten-sions with feet.
Canada 877.776.6655 USA 877.840.3524 impactcanopy.com
9
11
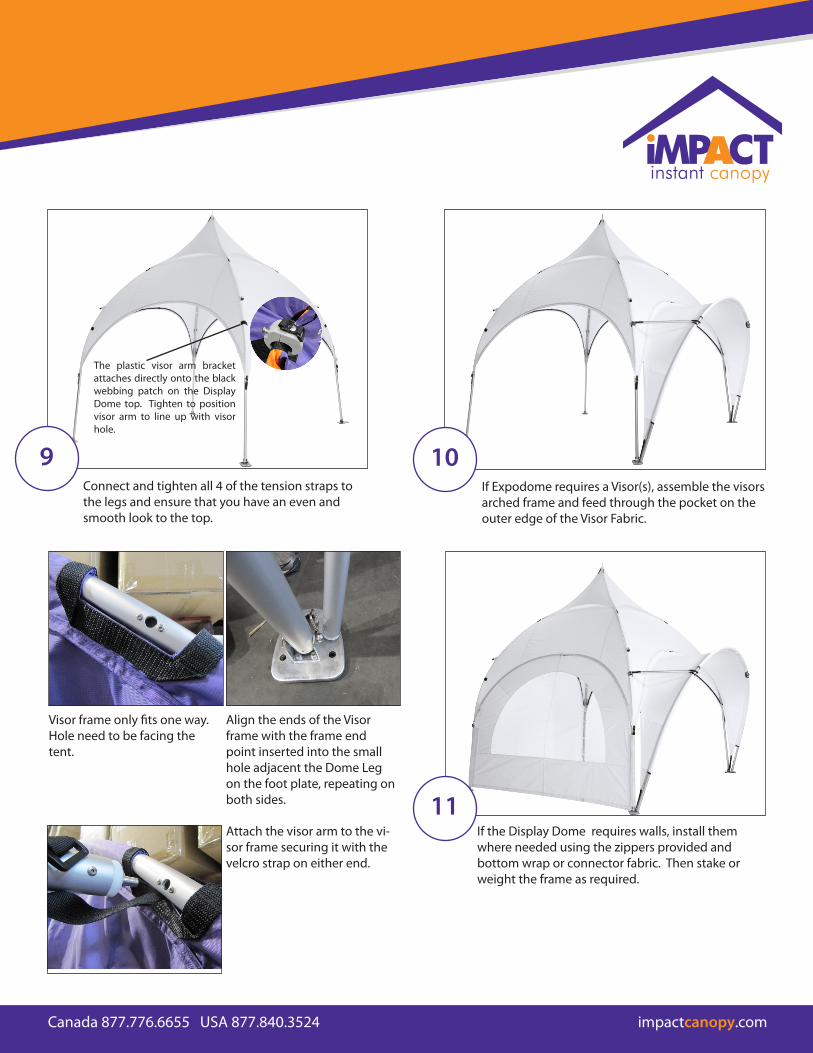
Connect and tighten all 4 of the tension straps to the legs and ensure that you have an even and smooth look to the top.
If the Display Dome requires walls, install them where needed using the zippers provided and bottom wrap or connector fabric. Then stake or weight the frame as required.
10If Expodome requires a Visor(s), assemble the visors arched frame and feed through the pocket on the outer edge of the Visor Fabric.
The plastic visor arm bracket attaches directly onto the black webbing patch on the Display Dome top. Tighten to position visor arm to line up with visor hole.
Visor frame only fits one way. Hole need to be facing the tent.
Align the ends of the Visor frame with the frame end point inserted into the small hole adjacent the Dome Leg on the foot plate, repeating on both sides.
Attach the visor arm to the vi-sor frame securing it with the velcro strap on either end.


