Embed Size (px)
DESCRIPTION
Setup Digital Classroom
Citation preview
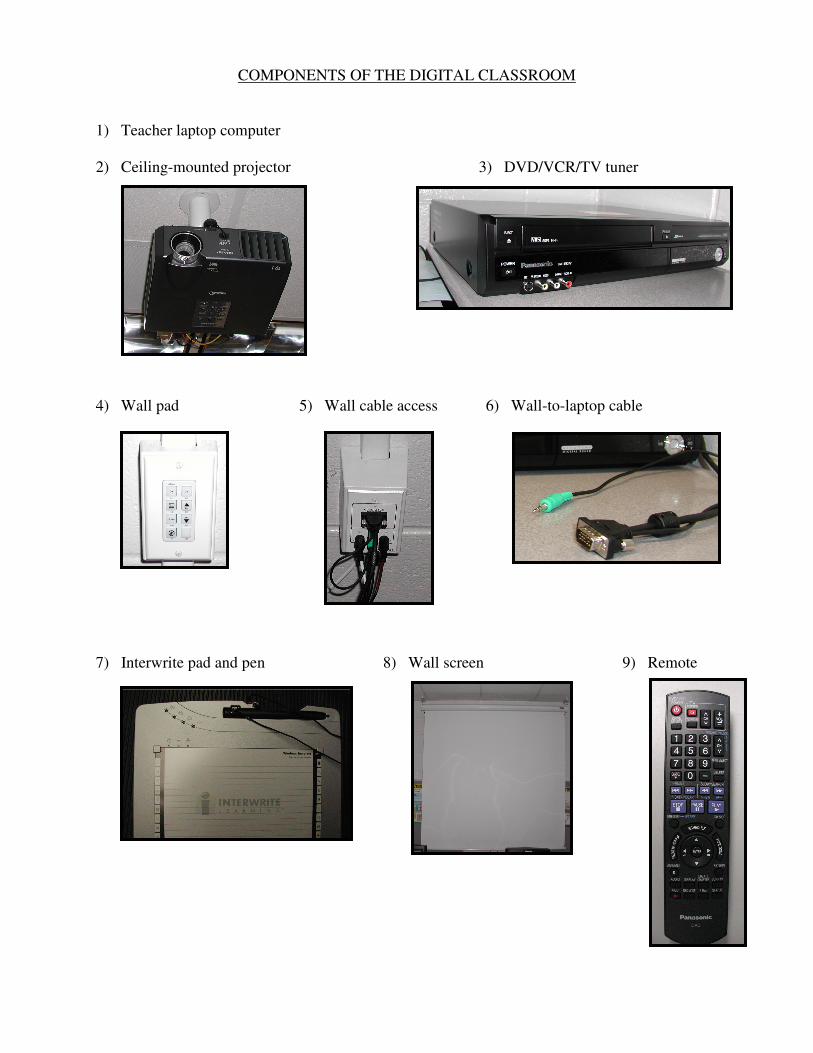
COMPONENTS OF THE DIGITAL CLASSROOM
1) Teacher laptop computer 2) Ceiling-mounted projector 3) DVD/VCR/TV tuner
4) Wall pad 5) Wall cable access 6) Wall-to-laptop cable 7) Interwrite pad and pen 8) Wall screen 9) Remote
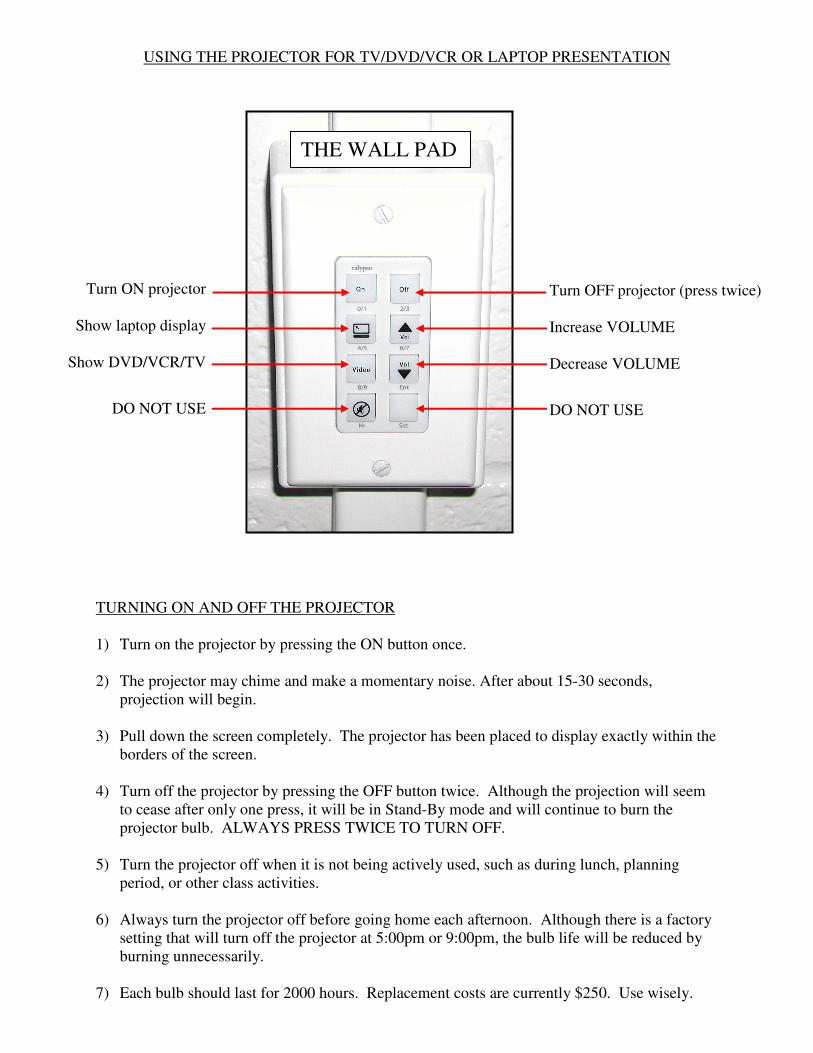
USING THE PROJECTOR FOR TV/DVD/VCR OR LAPTOP PRESENTATION
TURNING ON AND OFF THE PROJECTOR 1) Turn on the projector by pressing the ON button once. 2) The projector may chime and make a momentary noise. After about 15-30 seconds,
projection will begin. 3) Pull down the screen completely. The projector has been placed to display exactly within the
borders of the screen. 4) Turn off the projector by pressing the OFF button twice. Although the projection will seem
to cease after only one press, it will be in Stand-By mode and will continue to burn the projector bulb. ALWAYS PRESS TWICE TO TURN OFF.
5) Turn the projector off when it is not being actively used, such as during lunch, planning
period, or other class activities. 6) Always turn the projector off before going home each afternoon. Although there is a factory
setting that will turn off the projector at 5:00pm or 9:00pm, the bulb life will be reduced by burning unnecessarily.
7) Each bulb should last for 2000 hours. Replacement costs are currently $250. Use wisely.
Turn ON projector
Show laptop display
Show DVD/VCR/TV
DO NOT USE
Turn OFF projector (press twice) Increase VOLUME Decrease VOLUME
DO NOT USE
THE WALL PAD
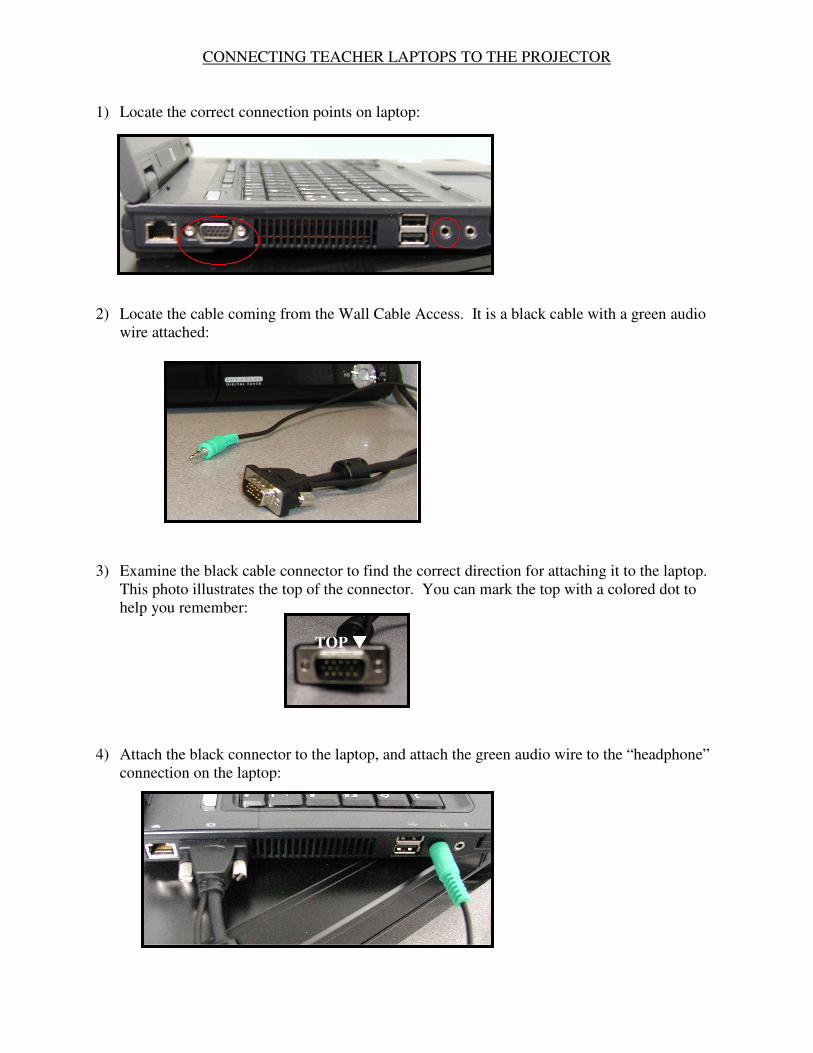
CONNECTING TEACHER LAPTOPS TO THE PROJECTOR
1) Locate the correct connection points on laptop: 2) Locate the cable coming from the Wall Cable Access. It is a black cable with a green audio
wire attached: 3) Examine the black cable connector to find the correct direction for attaching it to the laptop.
This photo illustrates the top of the connector. You can mark the top with a colored dot to help you remember:
4) Attach the black connector to the laptop, and attach the green audio wire to the “headphone”
connection on the laptop:
TOP ����
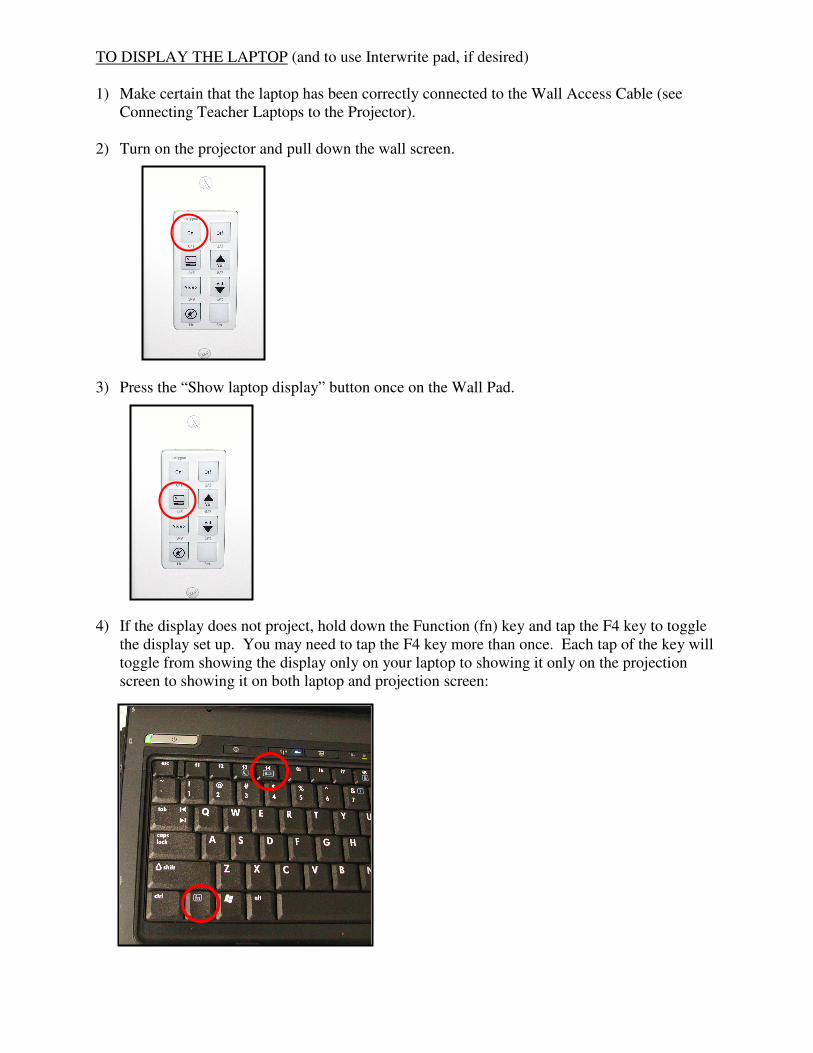
TO DISPLAY THE LAPTOP (and to use Interwrite pad, if desired) 1) Make certain that the laptop has been correctly connected to the Wall Access Cable (see
Connecting Teacher Laptops to the Projector). 2) Turn on the projector and pull down the wall screen. 3) Press the “Show laptop display” button once on the Wall Pad. 4) If the display does not project, hold down the Function (fn) key and tap the F4 key to toggle
the display set up. You may need to tap the F4 key more than once. Each tap of the key will toggle from showing the display only on your laptop to showing it only on the projection screen to showing it on both laptop and projection screen:
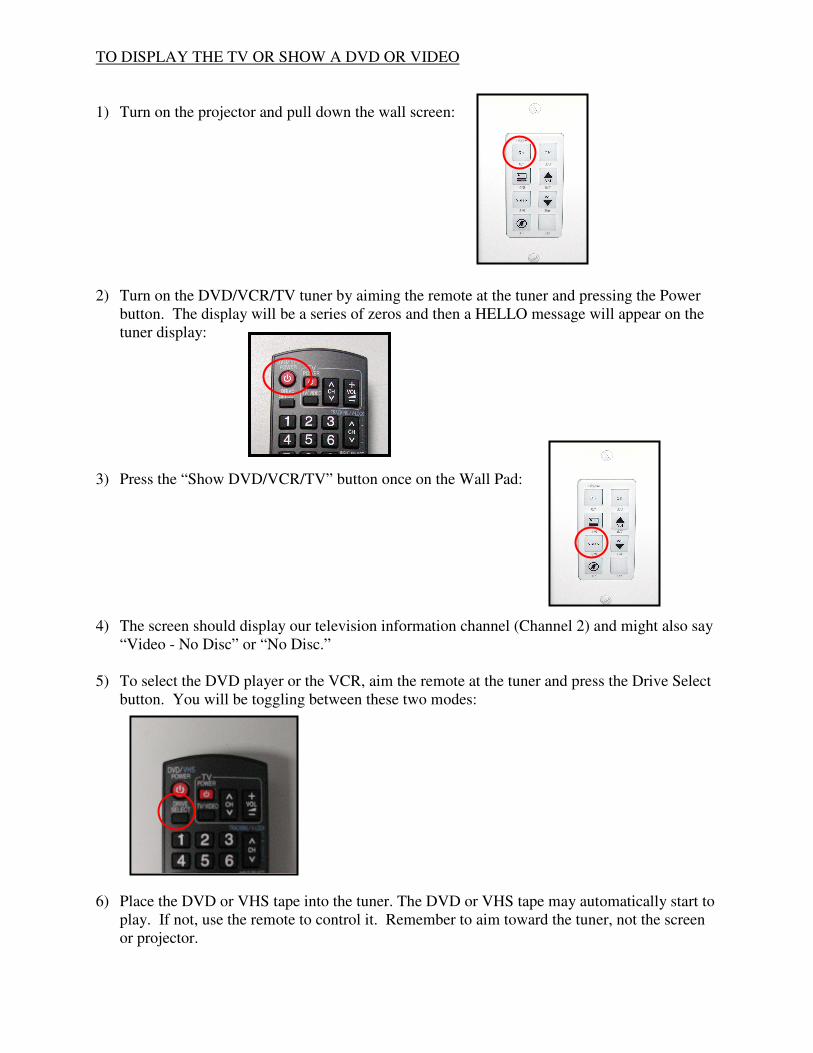
TO DISPLAY THE TV OR SHOW A DVD OR VIDEO 1) Turn on the projector and pull down the wall screen: 2) Turn on the DVD/VCR/TV tuner by aiming the remote at the tuner and pressing the Power
button. The display will be a series of zeros and then a HELLO message will appear on the tuner display:
3) Press the “Show DVD/VCR/TV” button once on the Wall Pad: 4) The screen should display our television information channel (Channel 2) and might also say
“Video - No Disc” or “No Disc.” 5) To select the DVD player or the VCR, aim the remote at the tuner and press the Drive Select
button. You will be toggling between these two modes: 6) Place the DVD or VHS tape into the tuner. The DVD or VHS tape may automatically start to
play. If not, use the remote to control it. Remember to aim toward the tuner, not the screen or projector.