Embed Size (px)
Citation preview
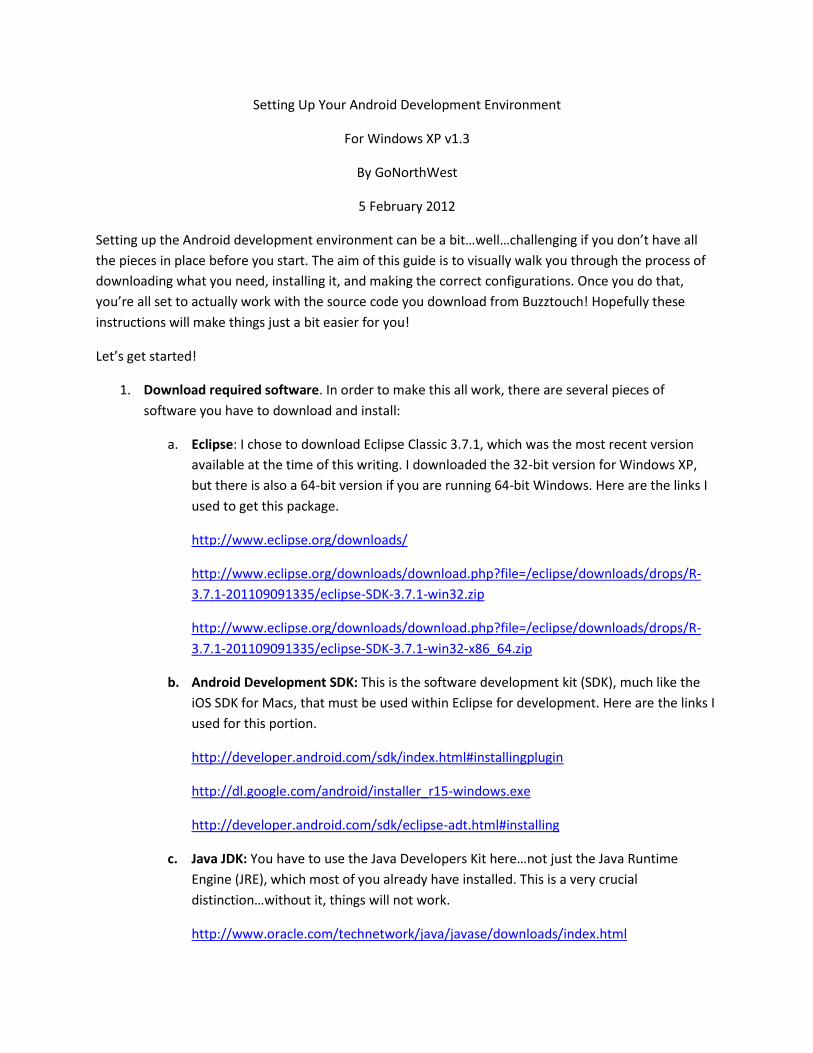
Setting Up Your Android Development Environment
For Windows XP v1.3
By GoNorthWest
5 February 2012
Setting up the Android development environment can be a bit…well…challenging if you don’t have all
the pieces in place before you start. The aim of this guide is to visually walk you through the process of
downloading what you need, installing it, and making the correct configurations. Once you do that,
you’re all set to actually work with the source code you download from Buzztouch! Hopefully these
instructions will make things just a bit easier for you!
Let’s get started!
1. Download required software. In order to make this all work, there are several pieces of
software you have to download and install:
a. Eclipse: I chose to download Eclipse Classic 3.7.1, which was the most recent version
available at the time of this writing. I downloaded the 32-bit version for Windows XP,
but there is also a 64-bit version if you are running 64-bit Windows. Here are the links I
used to get this package.
http://www.eclipse.org/downloads/
http://www.eclipse.org/downloads/download.php?file=/eclipse/downloads/drops/R-
3.7.1-201109091335/eclipse-SDK-3.7.1-win32.zip
http://www.eclipse.org/downloads/download.php?file=/eclipse/downloads/drops/R-
3.7.1-201109091335/eclipse-SDK-3.7.1-win32-x86_64.zip
b. Android Development SDK: This is the software development kit (SDK), much like the
iOS SDK for Macs, that must be used within Eclipse for development. Here are the links I
used for this portion.
http://developer.android.com/sdk/index.html#installingplugin
http://dl.google.com/android/installer_r15-windows.exe
http://developer.android.com/sdk/eclipse-adt.html#installing
c. Java JDK: You have to use the Java Developers Kit here…not just the Java Runtime
Engine (JRE), which most of you already have installed. This is a very crucial
distinction…without it, things will not work.
http://www.oracle.com/technetwork/java/javase/downloads/index.html
http://www.oracle.com/technetwork/java/javase/downloads/jdk-7u1-download-
513651.html
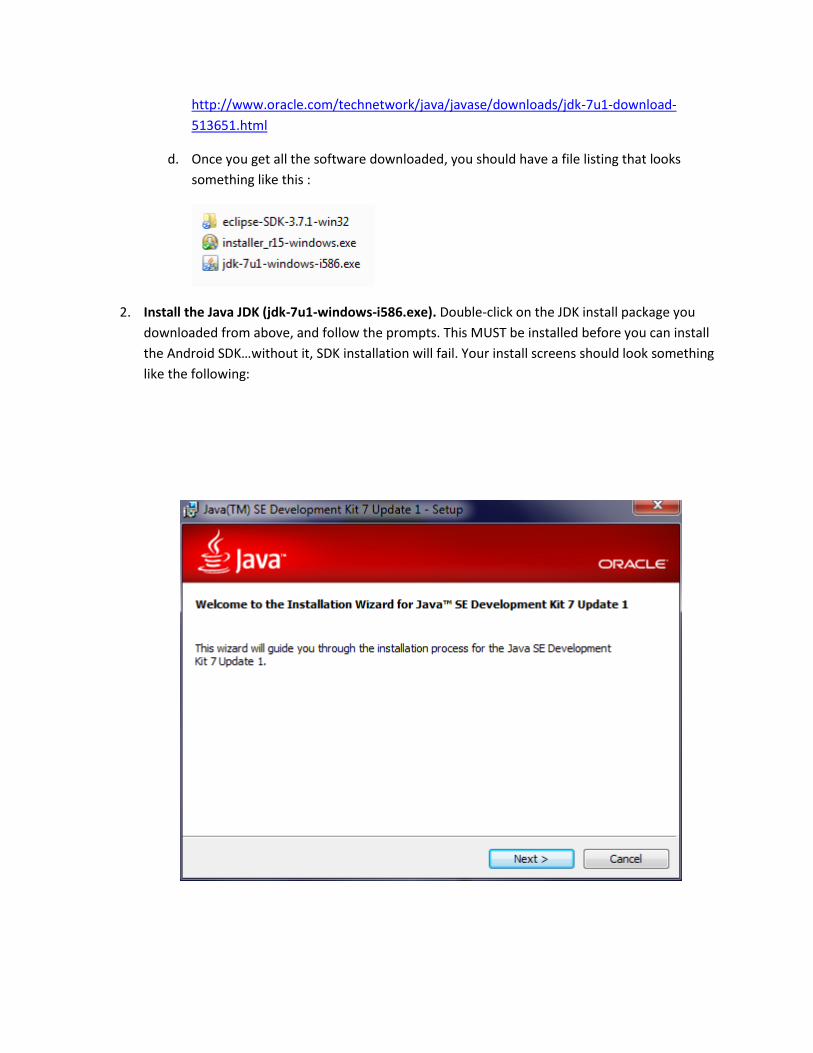
d. Once you get all the software downloaded, you should have a file listing that looks
something like this :
2. Install the Java JDK (jdk-7u1-windows-i586.exe). Double-click on the JDK install package you
downloaded from above, and follow the prompts. This MUST be installed before you can install
the Android SDK…without it, SDK installation will fail. Your install screens should look something
like the following:
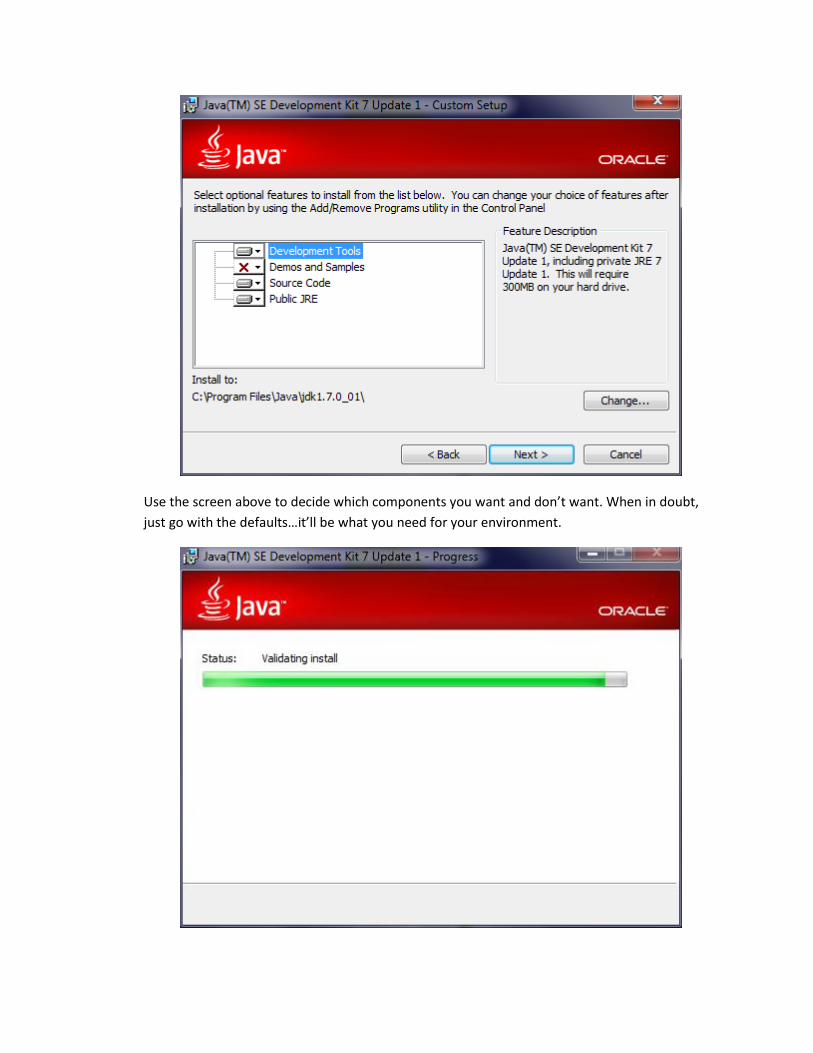
Use the screen above to decide which components you want and don’t want. When in doubt,
just go with the defaults…it’ll be what you need for your environment.
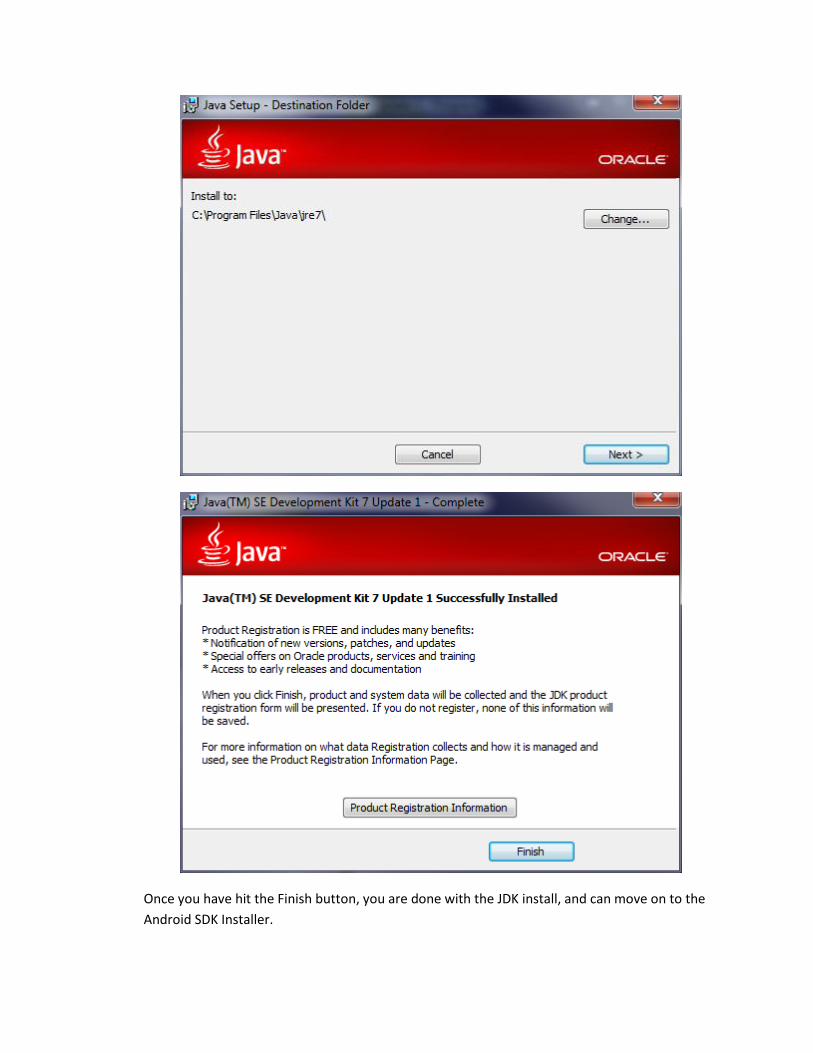
Once you have hit the Finish button, you are done with the JDK install, and can move on to the
Android SDK Installer.
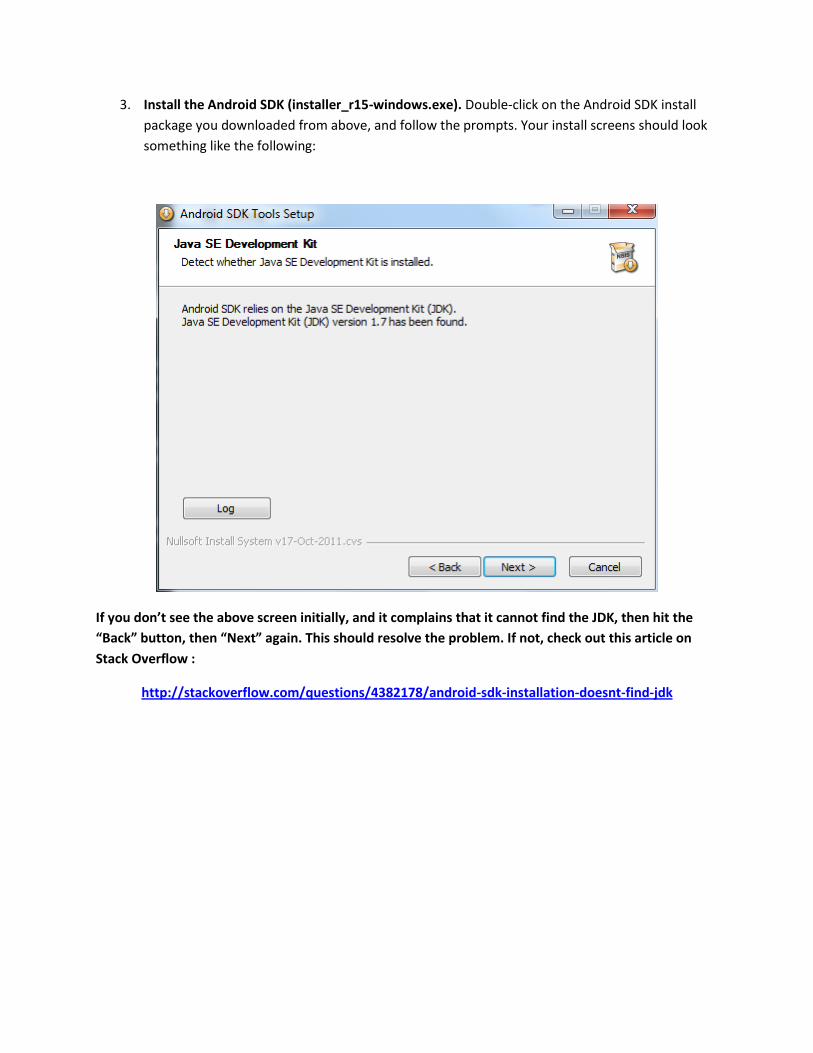
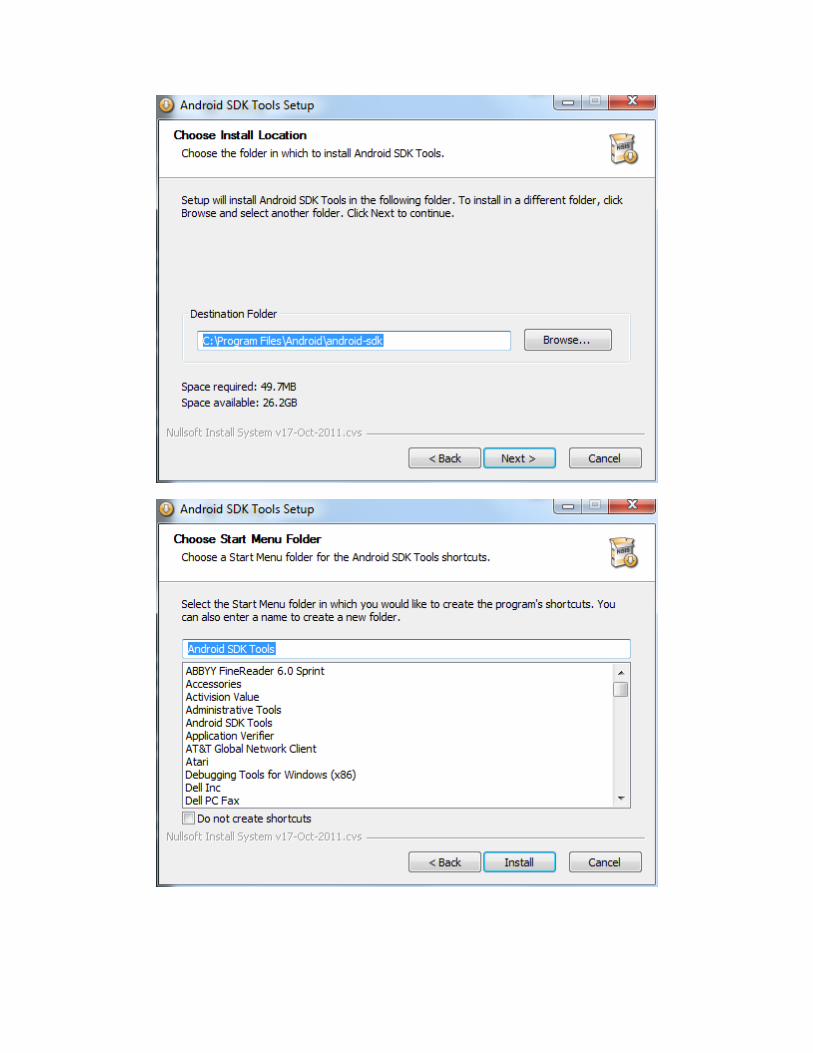
3. Install the Android SDK (installer_r15-windows.exe). Double-click on the Android SDK install
package you downloaded from above, and follow the prompts. Your install screens should look
something like the following:
If you don’t see the above screen initially, and it complains that it cannot find the JDK, then hit the
“Back” button, then “Next” again. This should resolve the problem. If not, check out this article on
Stack Overflow :
http://stackoverflow.com/questions/4382178/android-sdk-installation-doesnt-find-jdk
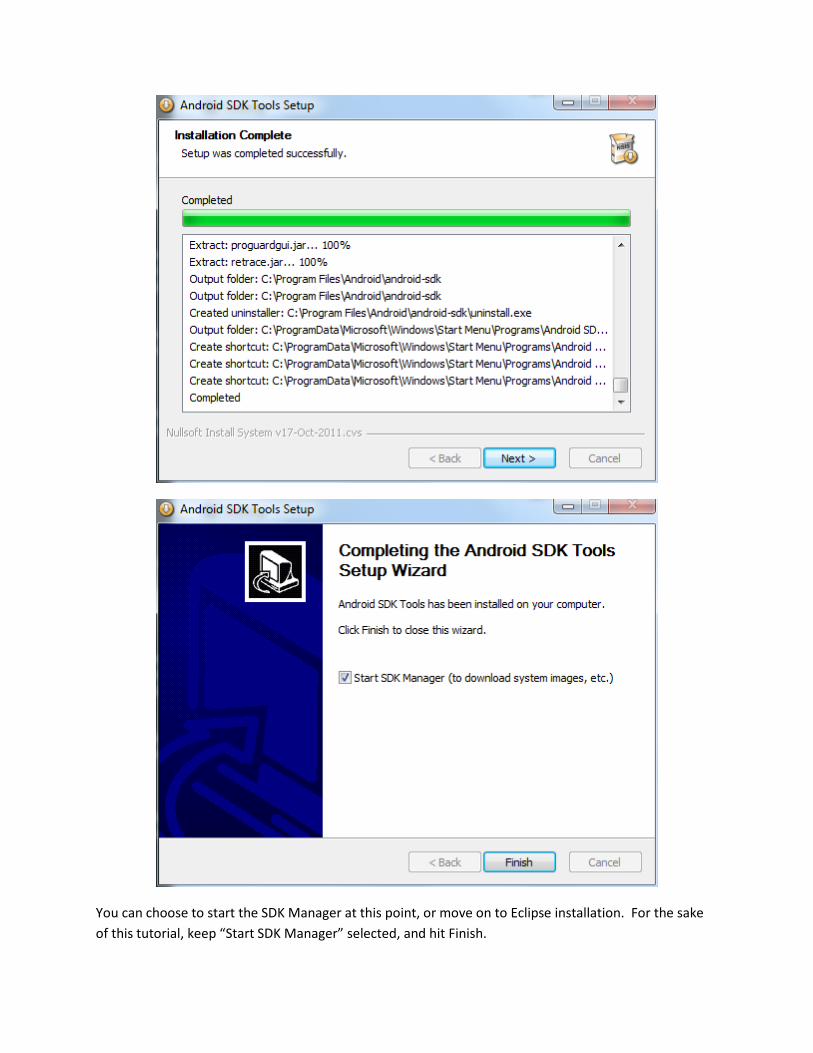
You can choose to start the SDK Manager at this point, or move on to Eclipse installation. For the sake
of this tutorial, keep “Start SDK Manager” selected, and hit Finish.

4. Configure the Android SDK for Development Tools and Google API. This is where you configure
the Android SDK Manager to download the tools you will need to create Buzztouch apps. This is
essentially downloading the Google API's Platform 2.2 and API level 8. Keep in mind a common
mistake, as pointed out in the Readme file provided by Buzztouch with your Android source
code : “A common mistake is to assume Android 2.2 API's and Google 2.2 API's are the same,
they are not.” This is important to keep in mind…if you grab the wrong ones, you won’t be able
to get your program to work.
This should be the first screen you see. If you select what I selected above, you’ll get what you need for
developing with Buzztouch. In fact, you’ll get more than what you need, but sometimes it’s difficult to
narrow down exactly where all the necessary packages are, so just grab everything!
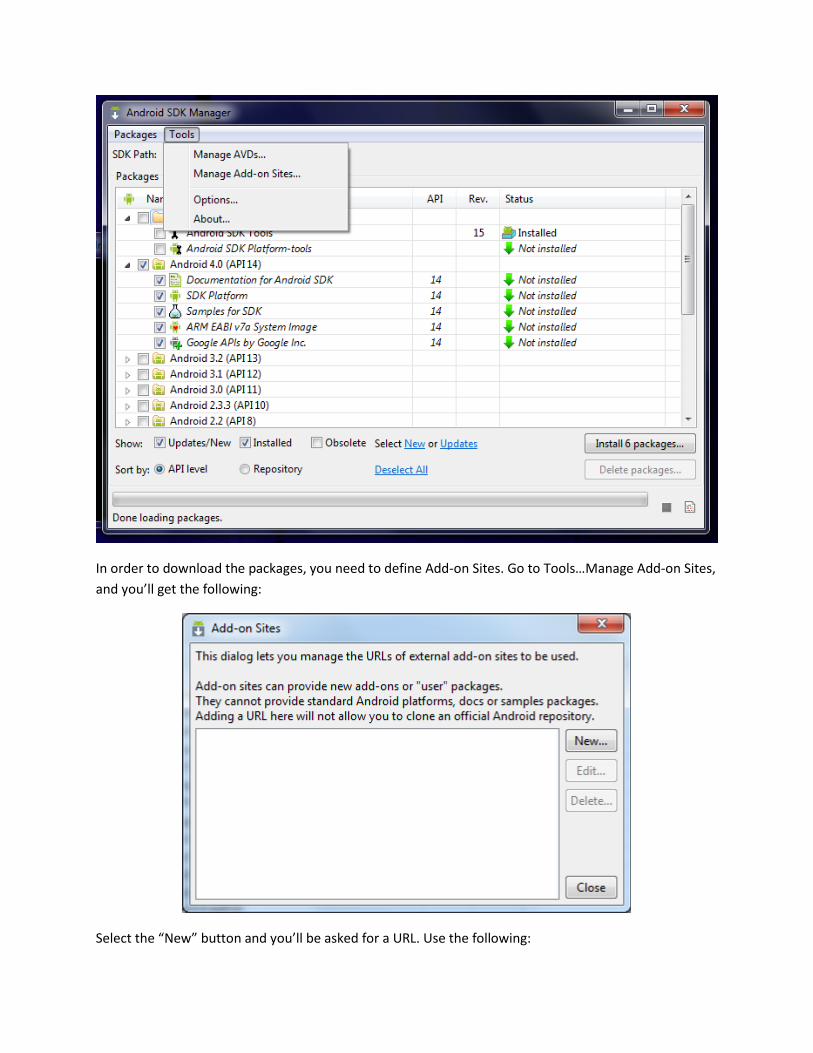
In order to download the packages, you need to define Add-on Sites. Go to Tools…Manage Add-on Sites,
and you’ll get the following:
Select the “New” button and you’ll be asked for a URL. Use the following:
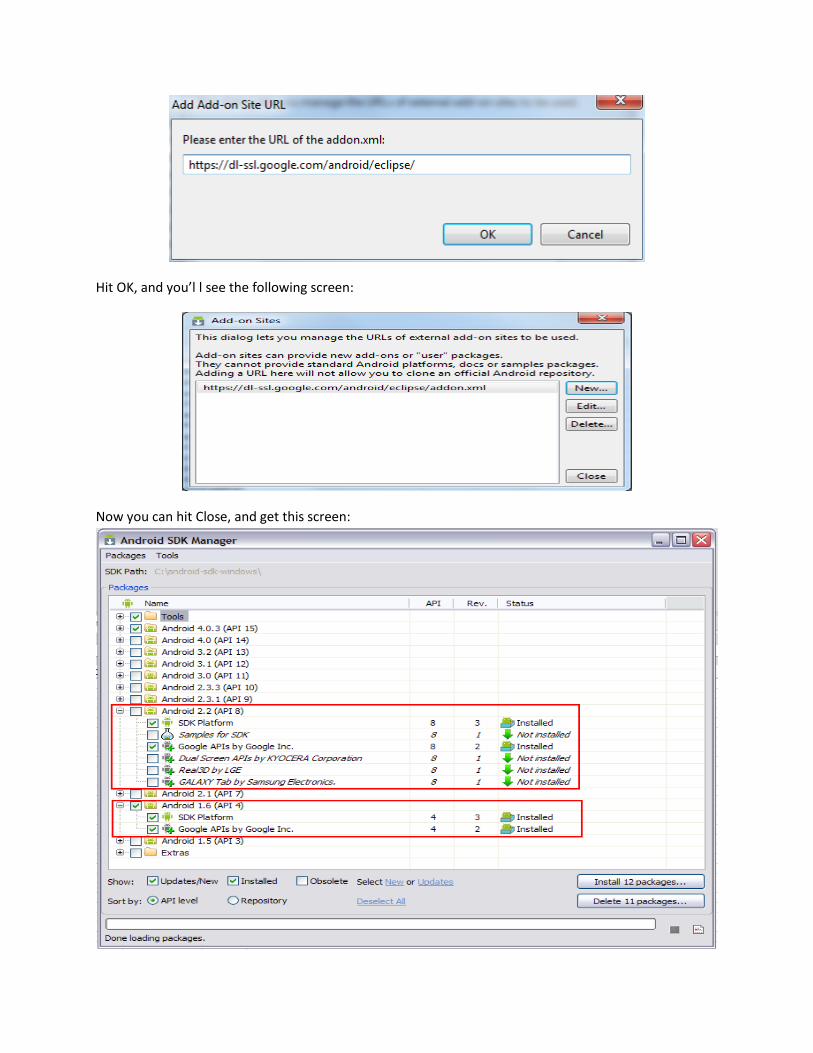
Hit OK, and you’l l see the following screen:
Now you can hit Close, and get this screen:
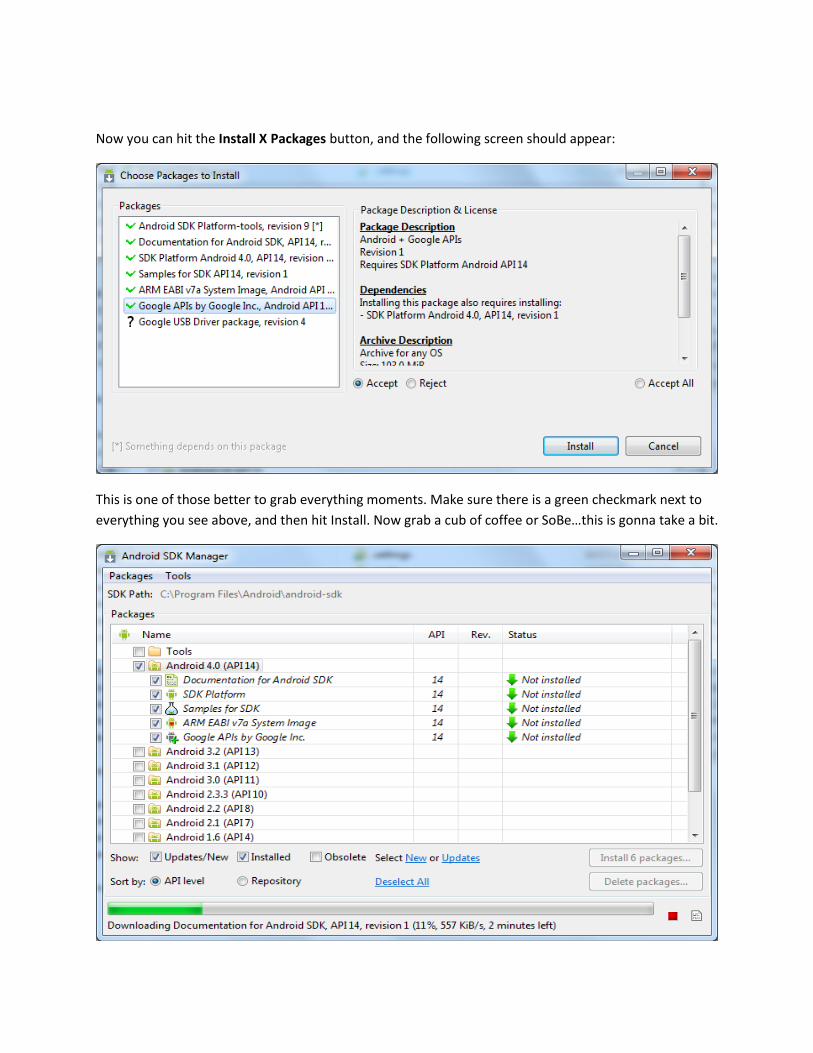
Now you can hit the Install X Packages button, and the following screen should appear:
This is one of those better to grab everything moments. Make sure there is a green checkmark next to
everything you see above, and then hit Install. Now grab a cub of coffee or SoBe…this is gonna take a bit.
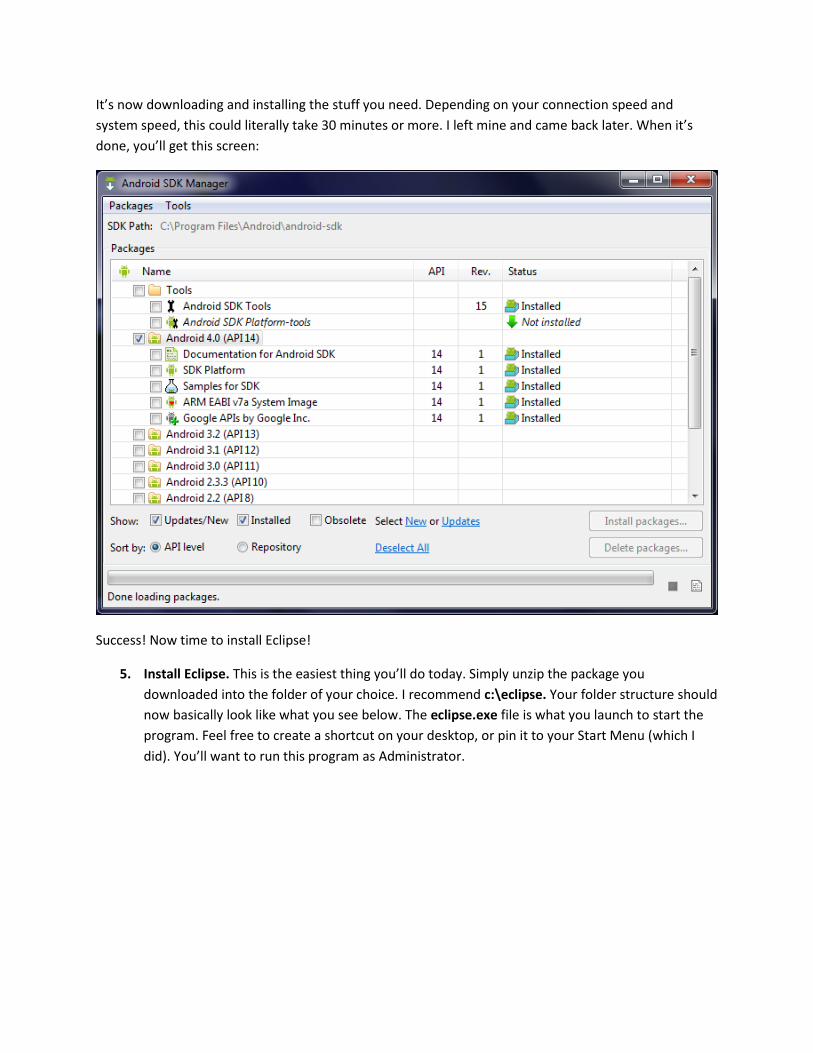
It’s now downloading and installing the stuff you need. Depending on your connection speed and
system speed, this could literally take 30 minutes or more. I left mine and came back later. When it’s
done, you’ll get this screen:
Success! Now time to install Eclipse!
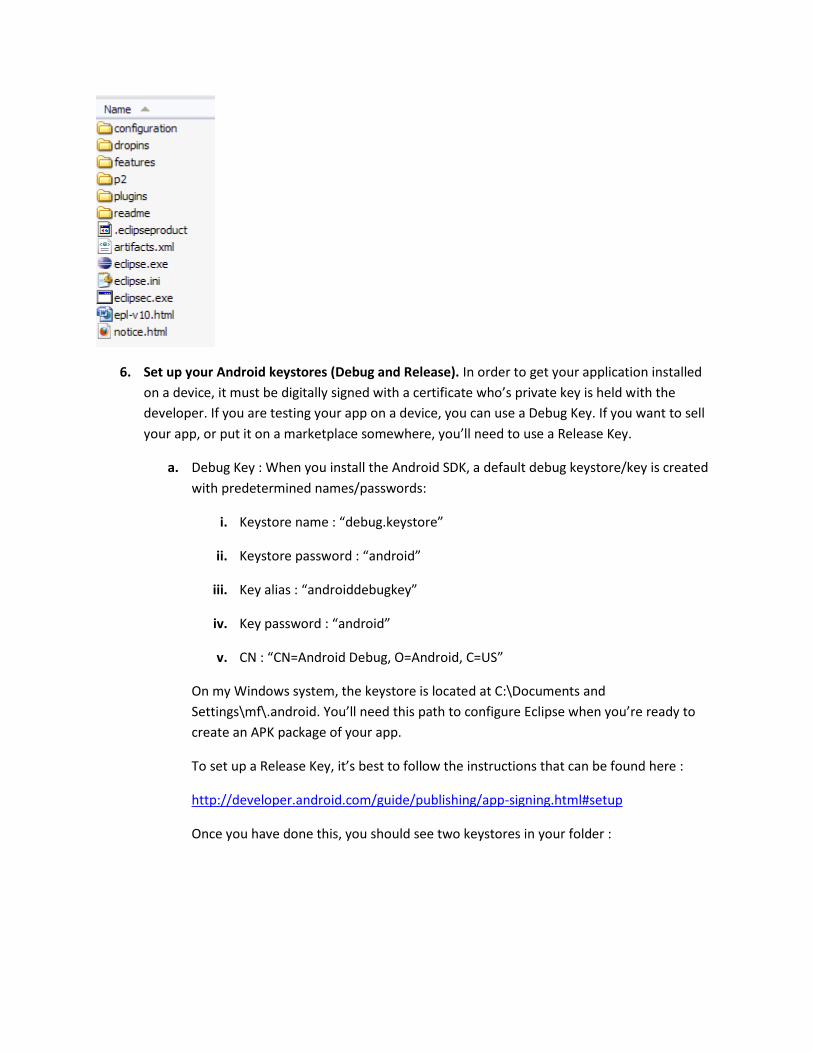
5. Install Eclipse. This is the easiest thing you’ll do today. Simply unzip the package you
downloaded into the folder of your choice. I recommend c:\eclipse. Your folder structure should
now basically look like what you see below. The eclipse.exe file is what you launch to start the
program. Feel free to create a shortcut on your desktop, or pin it to your Start Menu (which I
did). You’ll want to run this program as Administrator.
6. Set up your Android keystores (Debug and Release). In order to get your application installed
on a device, it must be digitally signed with a certificate who’s private key is held with the
developer. If you are testing your app on a device, you can use a Debug Key. If you want to sell
your app, or put it on a marketplace somewhere, you’ll need to use a Release Key.
a. Debug Key : When you install the Android SDK, a default debug keystore/key is created
with predetermined names/passwords:
i. Keystore name : “debug.keystore”
ii. Keystore password : “android”
iii. Key alias : “androiddebugkey”
iv. Key password : “android”
v. CN : “CN=Android Debug, O=Android, C=US”
On my Windows system, the keystore is located at C:\Documents and
Settings\mf\.android. You’ll need this path to configure Eclipse when you’re ready to
create an APK package of your app.
To set up a Release Key, it’s best to follow the instructions that can be found here :
http://developer.android.com/guide/publishing/app-signing.html#setup
Once you have done this, you should see two keystores in your folder :
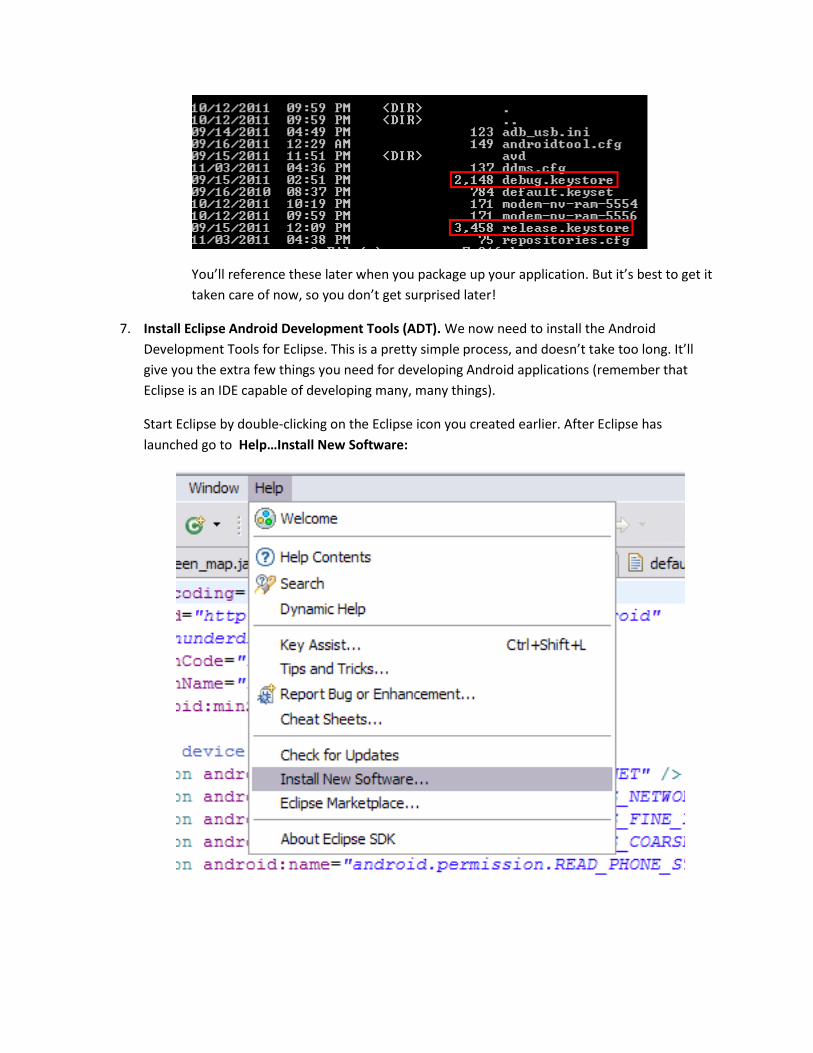
You’ll reference these later when you package up your application. But it’s best to get it
taken care of now, so you don’t get surprised later!
7. Install Eclipse Android Development Tools (ADT). We now need to install the Android
Development Tools for Eclipse. This is a pretty simple process, and doesn’t take too long. It’ll
give you the extra few things you need for developing Android applications (remember that
Eclipse is an IDE capable of developing many, many things).
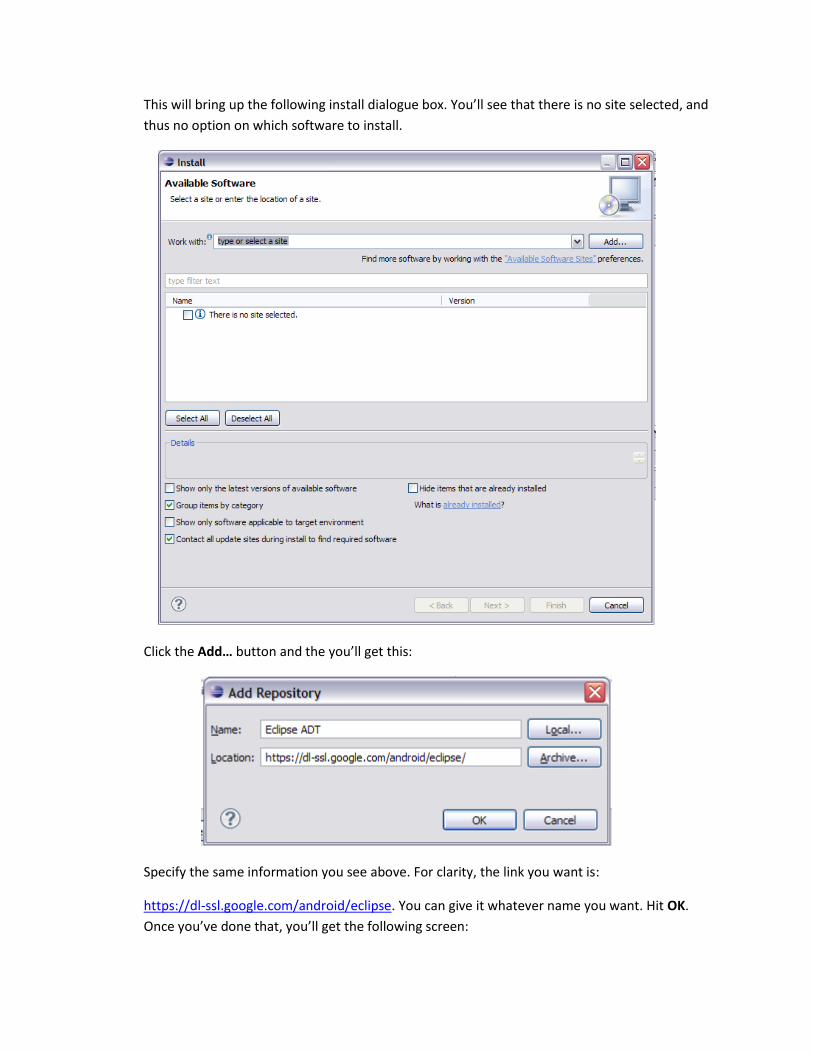
Start Eclipse by double-clicking on the Eclipse icon you created earlier. After Eclipse has
launched go to Help…Install New Software:
This will bring up the following install dialogue box. You’ll see that there is no site selected, and
thus no option on which software to install.
Click the Add… button and the you’ll get this:
Specify the same information you see above. For clarity, the link you want is:
https://dl-ssl.google.com/android/eclipse. You can give it whatever name you want. Hit OK.
Once you’ve done that, you’ll get the following screen:
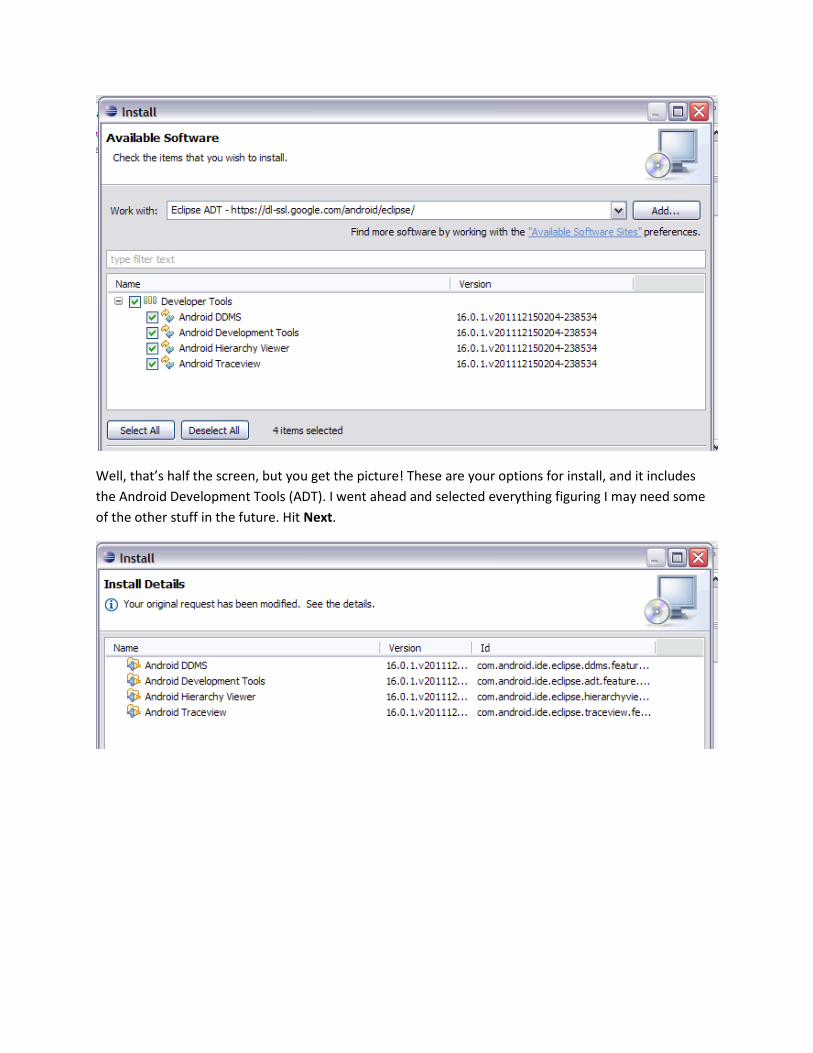
Well, that’s half the screen, but you get the picture! These are your options for install, and it includes
the Android Development Tools (ADT). I went ahead and selected everything figuring I may need some
of the other stuff in the future. Hit Next.
This screen verifies the details of what you are going to install. Hit Next.
If you feel the need, review the licenses for the stuff you are going to install here. Most important point
on this screen is to select I accept the terms of the license agreements. If you don’t, you won’t be able
to install. Hit Next.
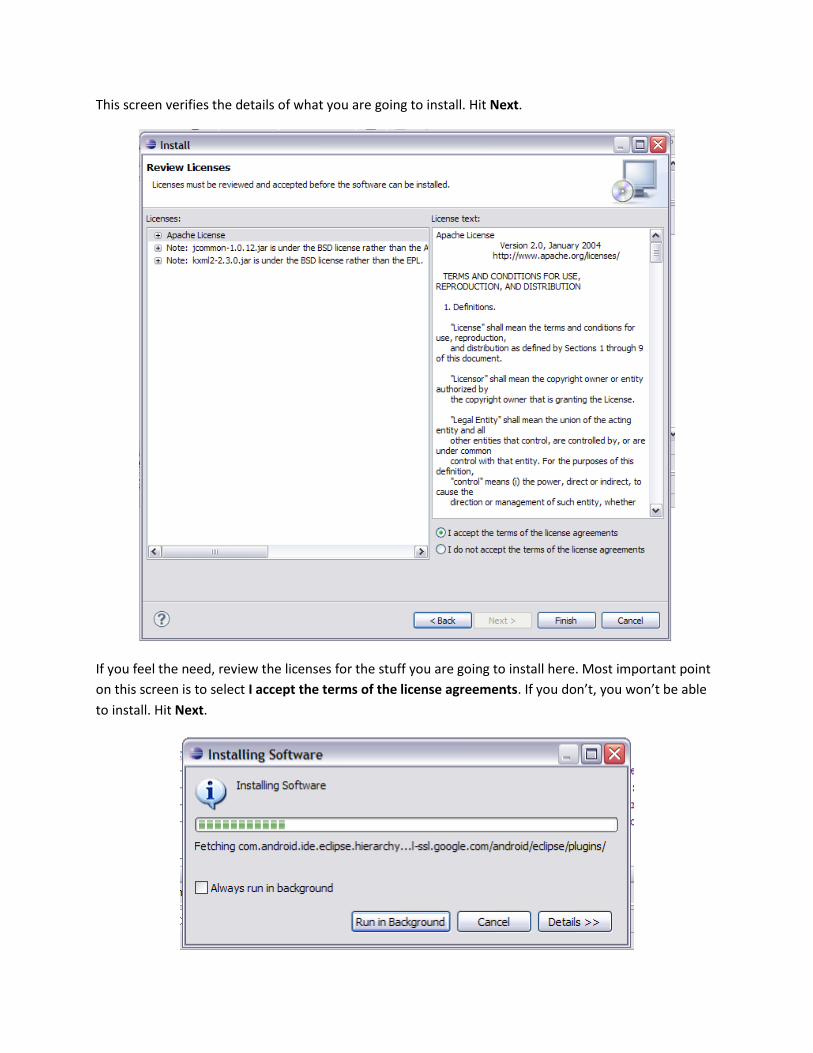
Congratulations! ADT is now installing! Sit back and relax…at least until you see this screen:
Nothing to be worried about here. Just hit OK and move on. It’s all good. After install is done, the
program will ask if you would like to reset Eclipse so the changes can take effect. Say Reset Eclipse, wait
for it to restart, and you can move on to the next step
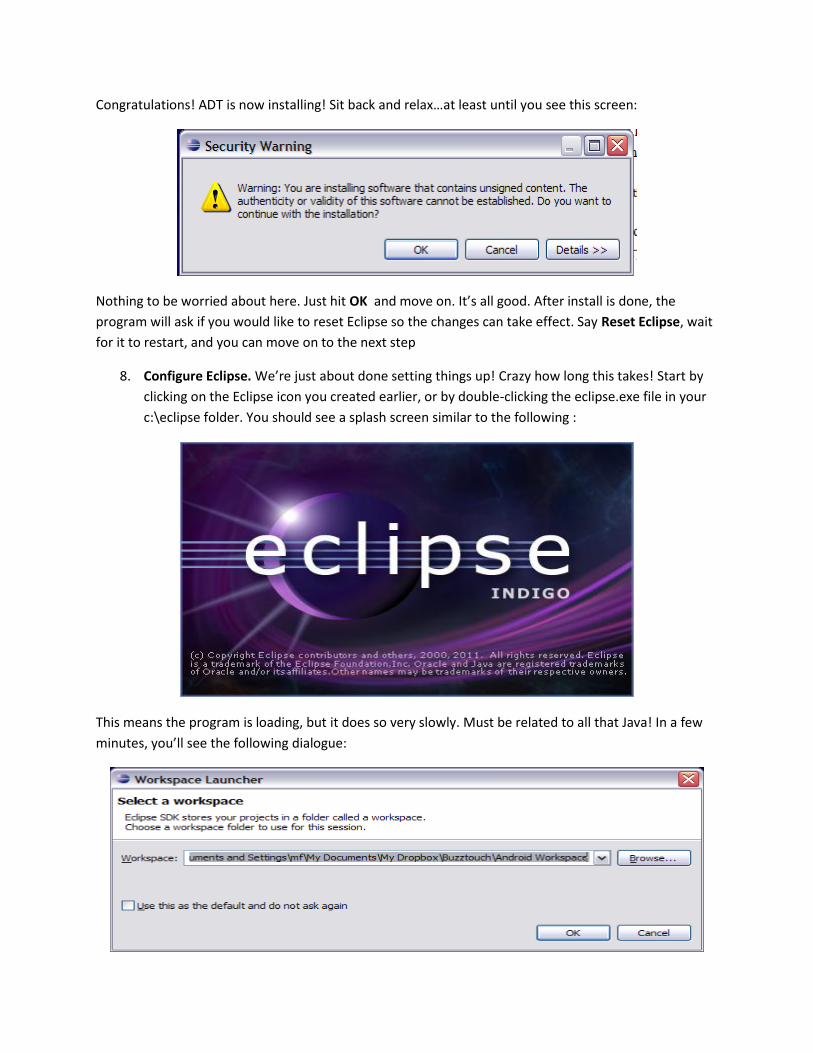
8. Configure Eclipse. We’re just about done setting things up! Crazy how long this takes! Start by
clicking on the Eclipse icon you created earlier, or by double-clicking the eclipse.exe file in your
c:\eclipse folder. You should see a splash screen similar to the following :
This means the program is loading, but it does so very slowly. Must be related to all that Java! In a few
minutes, you’ll see the following dialogue:
You can choose whatever you want here. I use DropBox for my Workspace, so that way everything is
synced between computers. I’m not entirely sure how to explain the Workspace, but you need it, and it
can be anywhere.
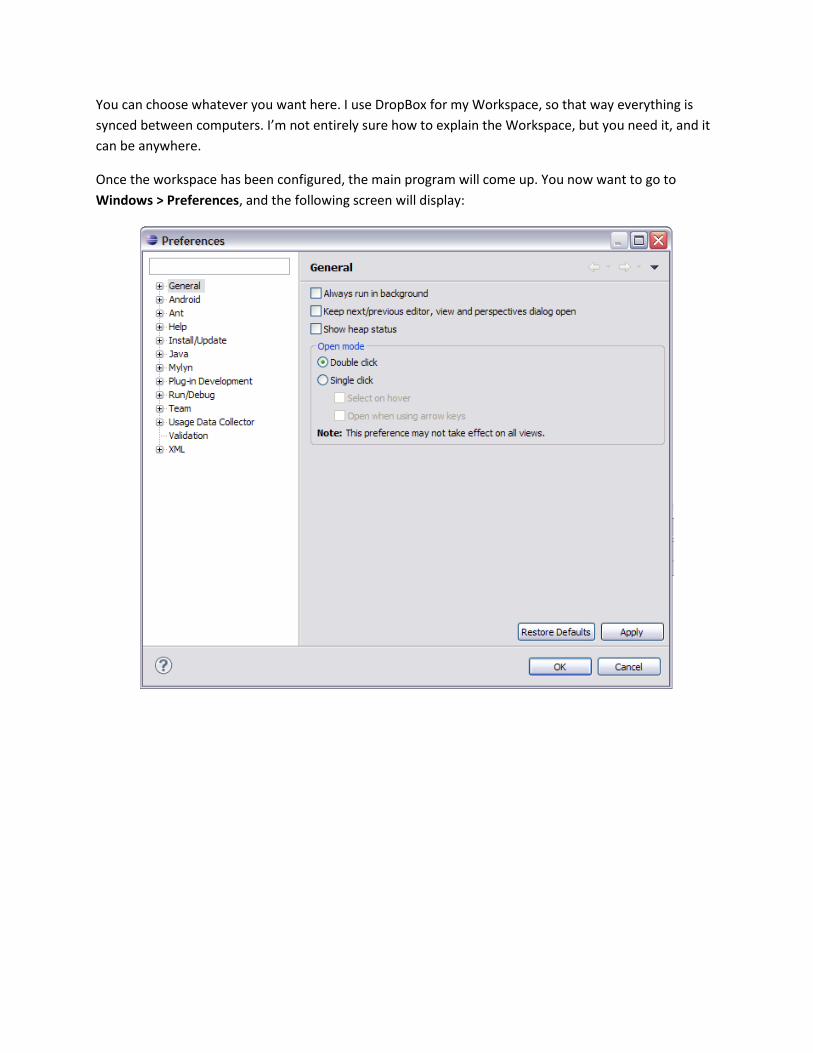
Once the workspace has been configured, the main program will come up. You now want to go to
Windows > Preferences, and the following screen will display:
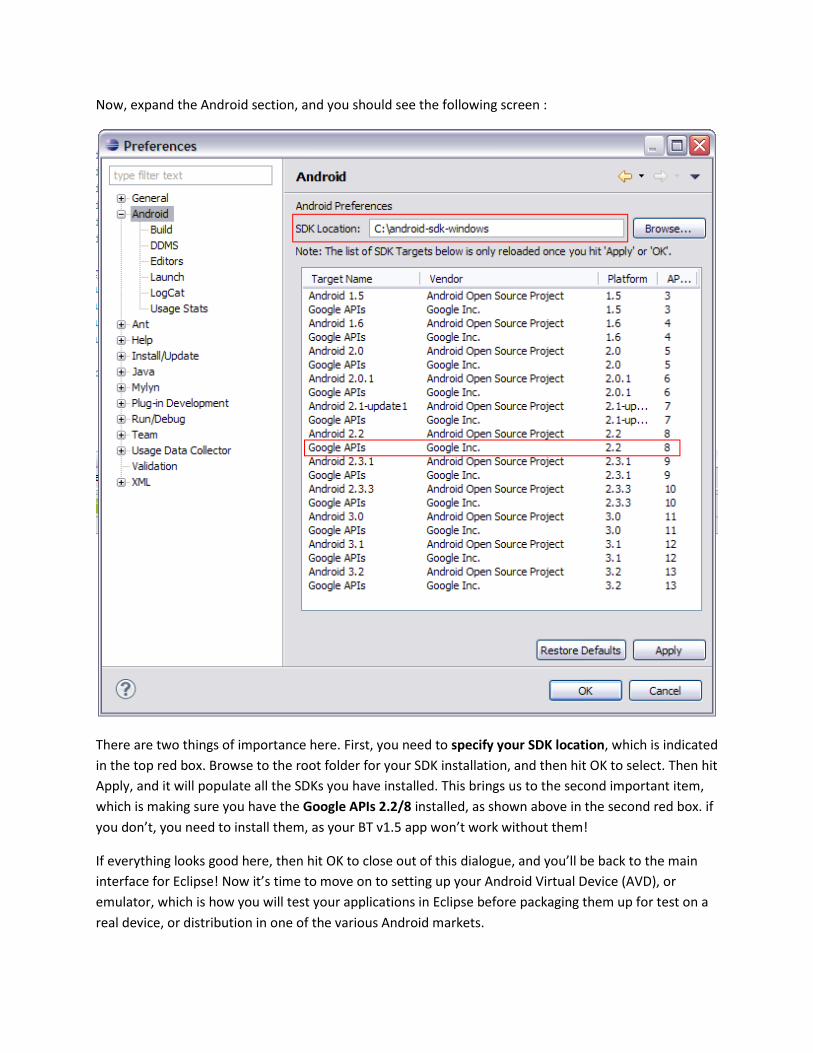
Now, expand the Android section, and you should see the following screen :
There are two things of importance here. First, you need to specify your SDK location, which is indicated
in the top red box. Browse to the root folder for your SDK installation, and then hit OK to select. Then hit
Apply, and it will populate all the SDKs you have installed. This brings us to the second important item,
which is making sure you have the Google APIs 2.2/8 installed, as shown above in the second red box. if
you don’t, you need to install them, as your BT v1.5 app won’t work without them!
If everything looks good here, then hit OK to close out of this dialogue, and you’ll be back to the main
interface for Eclipse! Now it’s time to move on to setting up your Android Virtual Device (AVD), or
emulator, which is how you will test your applications in Eclipse before packaging them up for test on a
real device, or distribution in one of the various Android markets.
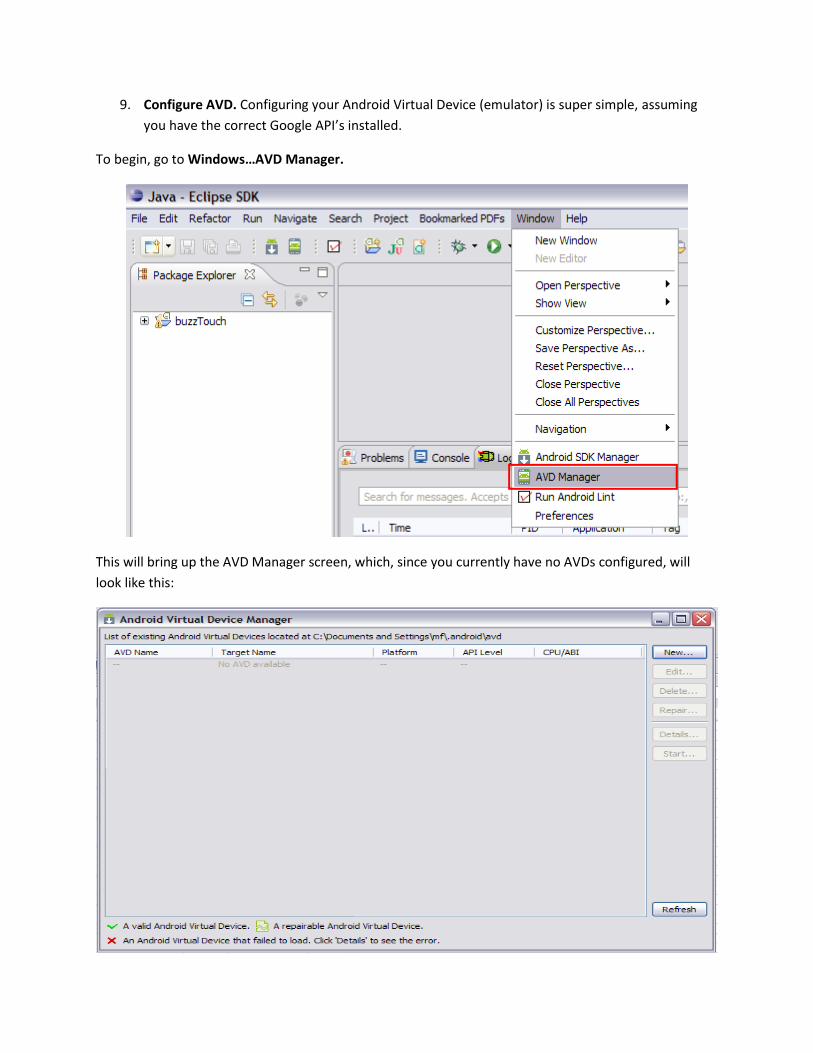
9. Configure AVD. Configuring your Android Virtual Device (emulator) is super simple, assuming
you have the correct Google API’s installed.
To begin, go to Windows…AVD Manager.
This will bring up the AVD Manager screen, which, since you currently have no AVDs configured, will
look like this:
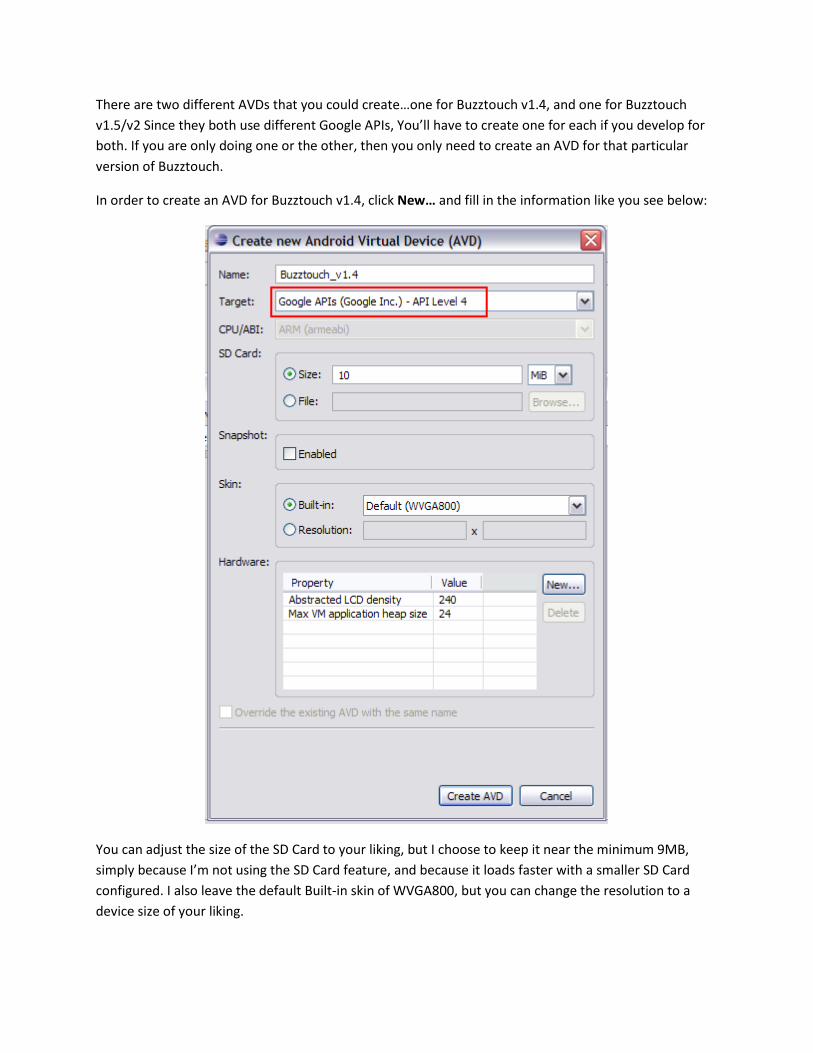
There are two different AVDs that you could create…one for Buzztouch v1.4, and one for Buzztouch
v1.5/v2 Since they both use different Google APIs, You’ll have to create one for each if you develop for
both. If you are only doing one or the other, then you only need to create an AVD for that particular
version of Buzztouch.
In order to create an AVD for Buzztouch v1.4, click New… and fill in the information like you see below:
You can adjust the size of the SD Card to your liking, but I choose to keep it near the minimum 9MB,
simply because I’m not using the SD Card feature, and because it loads faster with a smaller SD Card
configured. I also leave the default Built-in skin of WVGA800, but you can change the resolution to a
device size of your liking.
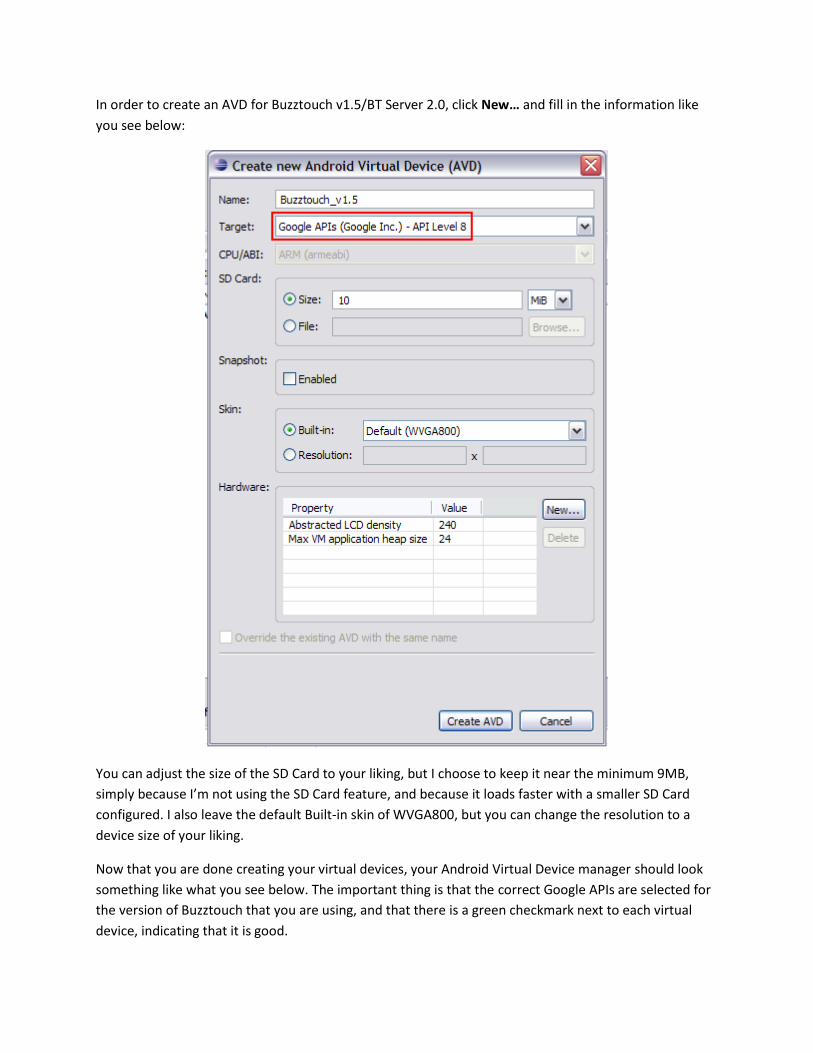
In order to create an AVD for Buzztouch v1.5/BT Server 2.0, click New… and fill in the information like
you see below:
You can adjust the size of the SD Card to your liking, but I choose to keep it near the minimum 9MB,
simply because I’m not using the SD Card feature, and because it loads faster with a smaller SD Card
configured. I also leave the default Built-in skin of WVGA800, but you can change the resolution to a
device size of your liking.
Now that you are done creating your virtual devices, your Android Virtual Device manager should look
something like what you see below. The important thing is that the correct Google APIs are selected for
the version of Buzztouch that you are using, and that there is a green checkmark next to each virtual
device, indicating that it is good.
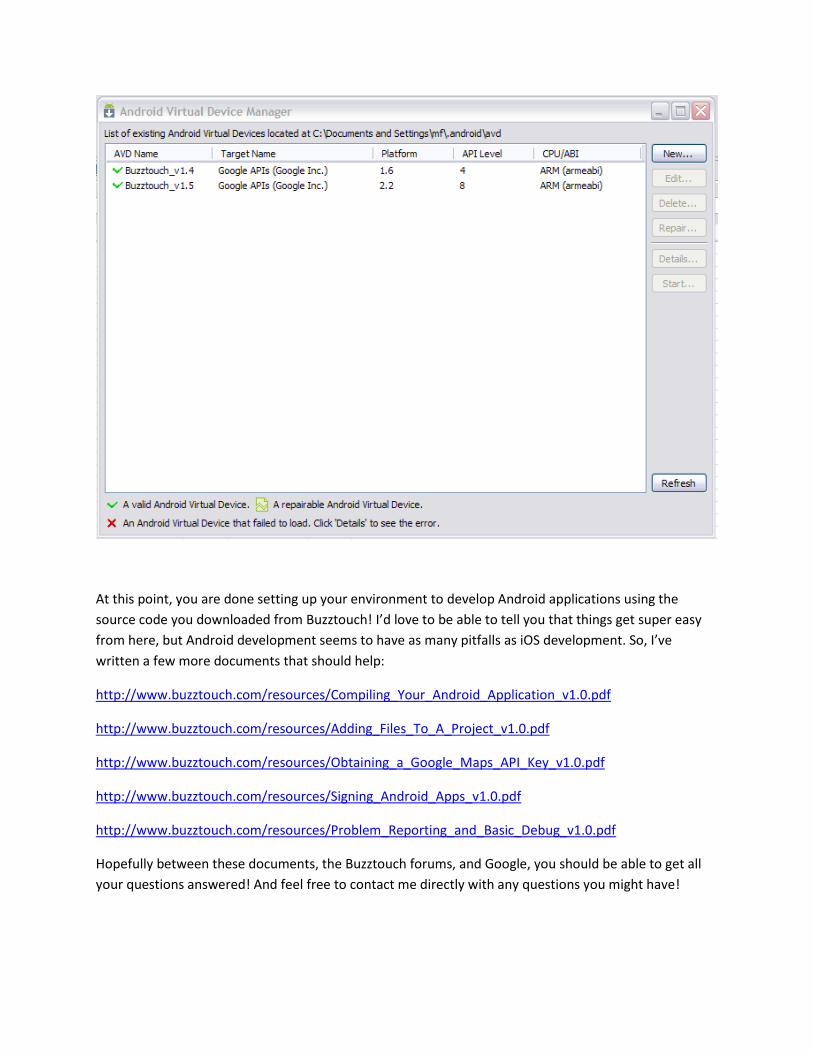
At this point, you are done setting up your environment to develop Android applications using the
source code you downloaded from Buzztouch! I’d love to be able to tell you that things get super easy
from here, but Android development seems to have as many pitfalls as iOS development. So, I’ve
written a few more documents that should help:
http://www.buzztouch.com/resources/Compiling_Your_Android_Application_v1.0.pdf
http://www.buzztouch.com/resources/Adding_Files_To_A_Project_v1.0.pdf
http://www.buzztouch.com/resources/Obtaining_a_Google_Maps_API_Key_v1.0.pdf
http://www.buzztouch.com/resources/Signing_Android_Apps_v1.0.pdf
http://www.buzztouch.com/resources/Problem_Reporting_and_Basic_Debug_v1.0.pdf
Hopefully between these documents, the Buzztouch forums, and Google, you should be able to get all
your questions answered! And feel free to contact me directly with any questions you might have!
Comments? Post them in the forum or email me at [email protected].
Revision Log
v1.0 11/26/11 Initial release of document. GoNorthWest
v1.1 11/28/11 Added Revision Log. GoNorthWest
v1.2 12/20/11 Added ADT installation instructions. GoNorthWest
v1.3 02/05/12 Added info about correct Google APIs, Added AVD
configuration instructions.
GoNorthWest