Embed Size (px)
Citation preview

User Manual Guide de l’utilisateur
SelfSet™ Clock Radio with Dual AlarmRadio- réveil SelfSet™ avec double alarme
EAAC601
electrohome.com/support
Thank you for your purchase of this Electrohome product. Please read this instruction manual carefully before using product to ensure proper use. Keep this manual in a safe place for future reference.
Merci d’avoir fait l’achat de cet appareil Electrohome. Veuillez lire le présent guide attentivement avant de faire fonctionner l’appareil pour vous assurer de l’utiliser correctement. Conservez le présent guide dans un
endroit sûr afin de pouvoir vous y référer au besoin.
2
IMPORTANT SAFETY INFORMATION
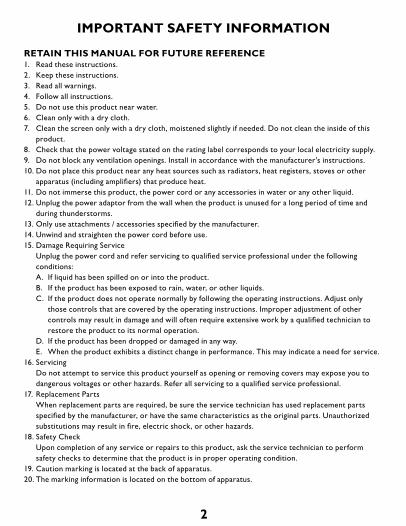
RETAIN THIS MANUAL FOR FUTURE REFERENCE1. Read these instructions.2. Keep these instructions.3. Read all warnings.4. Follow all instructions.5. Do not use this product near water.6. Clean only with a dry cloth.7. Clean the screen only with a dry cloth, moistened slightly if needed. Do not clean the inside of this
product.8. Check that the power voltage stated on the rating label corresponds to your local electricity supply.9. Do not block any ventilation openings. Install in accordance with the manufacturer’s instructions.10. Do not place this product near any heat sources such as radiators, heat registers, stoves or other
apparatus (including amplifiers) that produce heat.11. Do not immerse this product, the power cord or any accessories in water or any other liquid.12. Unplug the power adaptor from the wall when the product is unused for a long period of time and
during thunderstorms.13. Only use attachments / accessories specified by the manufacturer.14. Unwind and straighten the power cord before use.15. Damage Requiring Service
Unplug the power cord and refer servicing to qualified service professional under the following conditions:
A. If liquid has been spilled on or into the product. B. If the product has been exposed to rain, water, or other liquids. C. If the product does not operate normally by following the operating instructions. Adjust only
those controls that are covered by the operating instructions. Improper adjustment of other controls may result in damage and will often require extensive work by a qualified technician to restore the product to its normal operation.
D. If the product has been dropped or damaged in any way. E. When the product exhibits a distinct change in performance. This may indicate a need for service.16. Servicing
Do not attempt to service this product yourself as opening or removing covers may expose you to dangerous voltages or other hazards. Refer all servicing to a qualified service professional.
17. Replacement Parts When replacement parts are required, be sure the service technician has used replacement parts specified by the manufacturer, or have the same characteristics as the original parts. Unauthorized substitutions may result in fire, electric shock, or other hazards.
18. Safety Check Upon completion of any service or repairs to this product, ask the service technician to perform safety checks to determine that the product is in proper operating condition.
19. Caution marking is located at the back of apparatus.20. The marking information is located on the bottom of apparatus.
3
TABLE OF CONTENTSIMPORTANT SAFETY INFORMATION ...................................................2
PRODUCT INFORMATION .......................................................................4
OPERATING INSTRUCTIONS ..................................................................6Connecting Power .........................................................................................................6Setting Alarm 1 & Alarm 2...........................................................................................6Setting the Date & Time ...............................................................................................8Daylight Saving Time (DST) / Summer Time ..........................................................8Cancelling / Reactivating Automatic DST / Summer Time .................................8Battery Backup ................................................................................................................9Installing the Battery .....................................................................................................9Snooze Function ......................................................................................................... 10Sleep Timer ................................................................................................................... 10Nap Timer ..................................................................................................................... 10Dimmer .......................................................................................................................... 10Temperature Settings ..................................................................................................11Listening to the Radio .................................................................................................11To Set the Radio Presets ............................................................................................11To Recall the Radio Presets.......................................................................................12Projection Unit .............................................................................................................12AUX In ............................................................................................................................12
ELECTROHOME® WARRANTY ..............................................................13
TROUBLESHOOTING ..............................................................................15
SPECIFICATIONS ......................................................................................15
CARE AND MAINTENANCE ...................................................................16
WARNINGS .................................................................................................17
4
NAP / SIESTE°C / °FDST / HA
14 15 16 17
13
TIME ZONE / FUS HOR
DIMMER / GRADATEUR AM / FMMEM / M+
SET / RÉGL
SNOOZE / SLEEP MIN SOM / SOMNO
18 19 20 21
12
11
5
910
34
1 2
7 8
6
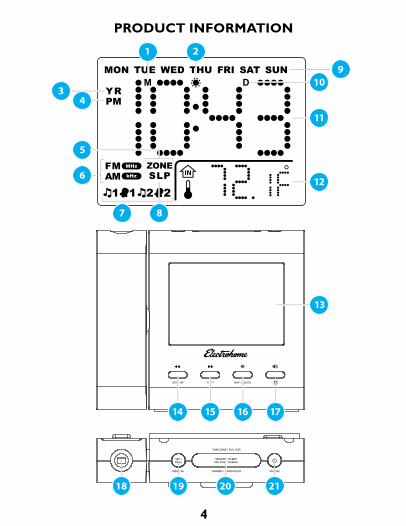
PRODUCT INFORMATION
5
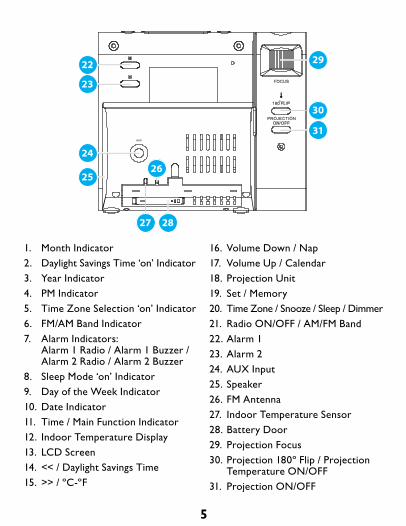
1. Month Indicator2. Daylight Savings Time ‘on’ Indicator3. Year Indicator4. PM Indicator5. Time Zone Selection ‘on’ Indicator6. FM/AM Band Indicator7. Alarm Indicators:
Alarm 1 Radio / Alarm 1 Buzzer / Alarm 2 Radio / Alarm 2 Buzzer
8. Sleep Mode ‘on’ Indicator9. Day of the Week Indicator10. Date Indicator11. Time / Main Function Indicator12. Indoor Temperature Display13. LCD Screen14. << / Daylight Savings Time15. >> / ºC-ºF
16. Volume Down / Nap17. Volume Up / Calendar18. Projection Unit19. Set / Memory20. Time Zone / Snooze / Sleep / Dimmer21. Radio ON/OFF / AM/FM Band22. Alarm 123. Alarm 224. AUX Input25. Speaker26. FM Antenna27. Indoor Temperature Sensor28. Battery Door29. Projection Focus30. Projection 180º Flip / Projection
Temperature ON/OFF31. Projection ON/OFF
AUX
2827
26
29
30
22
23
25
24
31
6
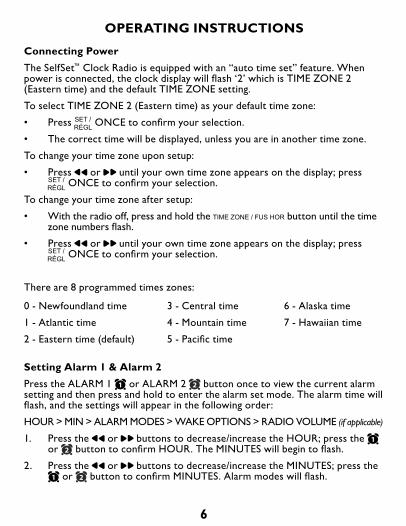
Connecting PowerThe SelfSet™ Clock Radio is equipped with an “auto time set” feature. When power is connected, the clock display will flash ‘2’ which is TIME ZONE 2 (Eastern time) and the default TIME ZONE setting.
To select TIME ZONE 2 (Eastern time) as your default time zone:
• Press ONCE to confirm your selection.
• The correct time will be displayed, unless you are in another time zone.
To change your time zone upon setup:
• Press or until your own time zone appears on the display; press ONCE to confirm your selection.
To change your time zone after setup:
• With the radio off, press and hold the button until the time zone numbers flash.
• Press or until your own time zone appears on the display; press ONCE to confirm your selection.
There are 8 programmed times zones:
OPERATING INSTRUCTIONS
0 - Newfoundland time
1 - Atlantic time
2 - Eastern time (default)
3 - Central time
4 - Mountain time
5 - Pacific time
6 - Alaska time
7 - Hawaiian time
Setting Alarm 1 & Alarm 2Press the ALARM 1 or ALARM 2 button once to view the current alarm setting and then press and hold to enter the alarm set mode. The alarm time will flash, and the settings will appear in the following order:
HOUR > MIN > ALARM MODES > WAKE OPTIONS > RADIO VOLUME (if applicable)
1. Press the or buttons to decrease/increase the HOUR; press the or button to confirm HOUR. The MINUTES will begin to flash.
2. Press the or buttons to decrease/increase the MINUTES; press the or button to confirm MINUTES. Alarm modes will flash.
7
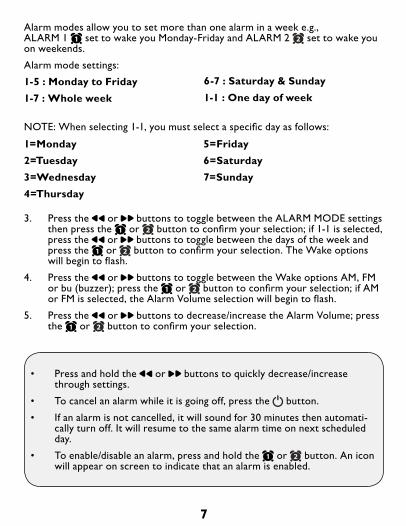
1=Monday2=Tuesday3=Wednesday4=Thursday
NOTE: When selecting 1-1, you must select a specific day as follows:
5=Friday6=Saturday7=Sunday
3. Press the or buttons to toggle between the ALARM MODE settings then press the or button to confirm your selection; if 1-1 is selected, press the or buttons to toggle between the days of the week and press the or button to confirm your selection. The Wake options will begin to flash.
4. Press the or buttons to toggle between the Wake options AM, FM or bu (buzzer); press the or button to confirm your selection; if AM or FM is selected, the Alarm Volume selection will begin to flash.
5. Press the or buttons to decrease/increase the Alarm Volume; press the or button to confirm your selection.
Alarm modes allow you to set more than one alarm in a week e.g., ALARM 1 set to wake you Monday-Friday and ALARM 2 set to wake you on weekends.
Alarm mode settings:
1-5 : Monday to Friday1-7 : Whole week
6-7 : Saturday & Sunday1-1 : One day of week
• Press and hold the or buttons to quickly decrease/increase through settings.
• To cancel an alarm while it is going off, press the button.
• If an alarm is not cancelled, it will sound for 30 minutes then automati-cally turn off. It will resume to the same alarm time on next scheduled day.
• To enable/disable an alarm, press and hold the or button. An icon will appear on screen to indicate that an alarm is enabled.
8
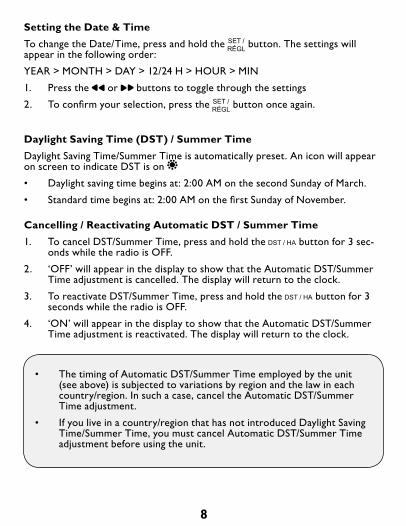
Setting the Date & TimeTo change the Date/Time, press and hold the button. The settings will appear in the following order:
YEAR > MONTH > DAY > 12/24 H > HOUR > MIN
1. Press the or buttons to toggle through the settings
2. To confirm your selection, press the button once again.
Daylight Saving Time (DST) / Summer TimeDaylight Saving Time/Summer Time is automatically preset. An icon will appear on screen to indicate DST is on
• Daylight saving time begins at: 2:00 AM on the second Sunday of March.
• Standard time begins at: 2:00 AM on the first Sunday of November.
Cancelling / Reactivating Automatic DST / Summer Time1. To cancel DST/Summer Time, press and hold the button for 3 sec-
onds while the radio is OFF.
2. ‘OFF’ will appear in the display to show that the Automatic DST/Summer Time adjustment is cancelled. The display will return to the clock.
3. To reactivate DST/Summer Time, press and hold the button for 3 seconds while the radio is OFF.
4. ‘ON’ will appear in the display to show that the Automatic DST/Summer Time adjustment is reactivated. The display will return to the clock.
• The timing of Automatic DST/Summer Time employed by the unit (see above) is subjected to variations by region and the law in each country/region. In such a case, cancel the Automatic DST/Summer Time adjustment.
• If you live in a country/region that has not introduced Daylight Saving Time/Summer Time, you must cancel Automatic DST/Summer Time adjustment before using the unit.
9
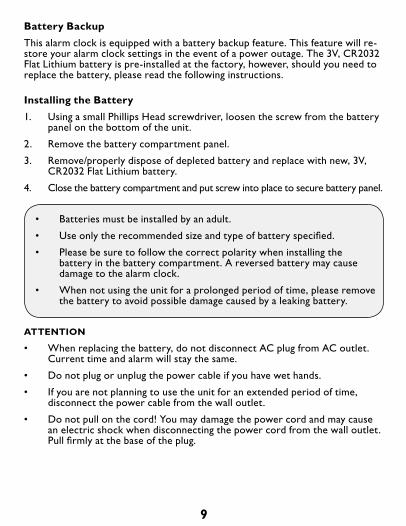
Battery BackupThis alarm clock is equipped with a battery backup feature. This feature will re-store your alarm clock settings in the event of a power outage. The 3V, CR2032 Flat Lithium battery is pre-installed at the factory, however, should you need to replace the battery, please read the following instructions.
Installing the Battery1. Using a small Phillips Head screwdriver, loosen the screw from the battery
panel on the bottom of the unit.
2. Remove the battery compartment panel.
3. Remove/properly dispose of depleted battery and replace with new, 3V, CR2032 Flat Lithium battery.
4. Close the battery compartment and put screw into place to secure battery panel.
ATTENTION
• When replacing the battery, do not disconnect AC plug from AC outlet. Current time and alarm will stay the same.
• Do not plug or unplug the power cable if you have wet hands.
• If you are not planning to use the unit for an extended period of time, disconnect the power cable from the wall outlet.
• Do not pull on the cord! You may damage the power cord and may cause an electric shock when disconnecting the power cord from the wall outlet. Pull firmly at the base of the plug.
• Batteries must be installed by an adult.
• Use only the recommended size and type of battery specified.
• Please be sure to follow the correct polarity when installing the battery in the battery compartment. A reversed battery may cause damage to the alarm clock.
• When not using the unit for a prolonged period of time, please remove the battery to avoid possible damage caused by a leaking battery.
10
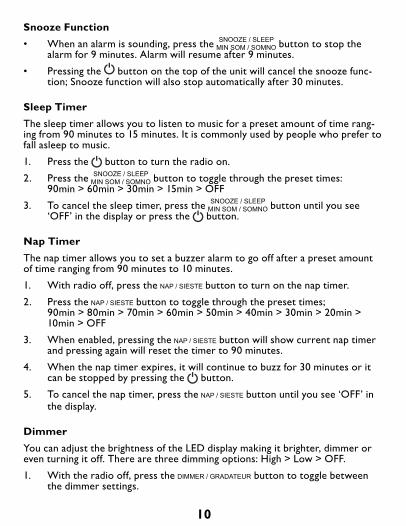
Snooze Function • When an alarm is sounding, press the button to stop the
alarm for 9 minutes. Alarm will resume after 9 minutes.
• Pressing the button on the top of the unit will cancel the snooze func-tion; Snooze function will also stop automatically after 30 minutes.
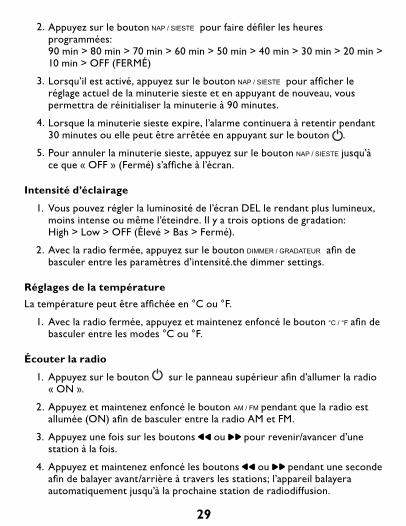
Sleep TimerThe sleep timer allows you to listen to music for a preset amount of time rang-ing from 90 minutes to 15 minutes. It is commonly used by people who prefer to fall asleep to music.
1. Press the button to turn the radio on.
2. Press the button to toggle through the preset times: 90min > 60min > 30min > 15min > OFF
3. To cancel the sleep timer, press the button until you see ‘OFF’ in the display or press the button.
Nap TimerThe nap timer allows you to set a buzzer alarm to go off after a preset amount of time ranging from 90 minutes to 10 minutes.
1. With radio off, press the button to turn on the nap timer.
2. Press the button to toggle through the preset times; 90min > 80min > 70min > 60min > 50min > 40min > 30min > 20min > 10min > OFF
3. When enabled, pressing the button will show current nap timer and pressing again will reset the timer to 90 minutes.
4. When the nap timer expires, it will continue to buzz for 30 minutes or it can be stopped by pressing the button.
5. To cancel the nap timer, press the button until you see ‘OFF’ in the display.
DimmerYou can adjust the brightness of the LED display making it brighter, dimmer or even turning it off. There are three dimming options: High > Low > OFF.
1. With the radio off, press the button to toggle between the dimmer settings.
11
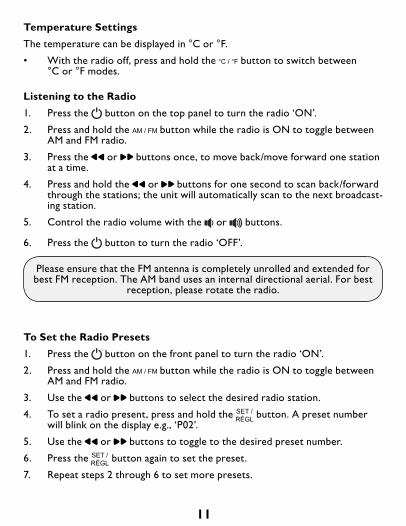
Temperature SettingsThe temperature can be displayed in °C or °F.
• With the radio off, press and hold the button to switch between °C or °F modes.
Listening to the Radio1. Press the button on the top panel to turn the radio ‘ON’.
2. Press and hold the button while the radio is ON to toggle between AM and FM radio.
3. Press the or buttons once, to move back/move forward one station at a time.
4. Press and hold the or buttons for one second to scan back/forward through the stations; the unit will automatically scan to the next broadcast-ing station.
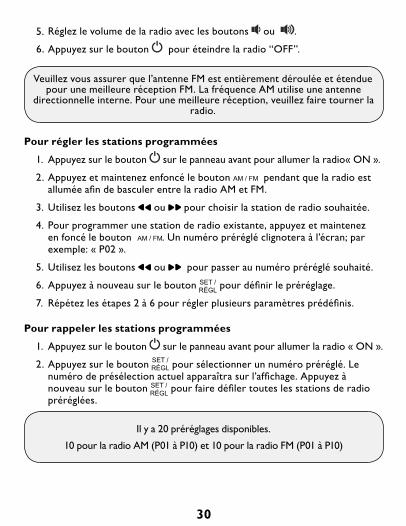
5. Control the radio volume with the or buttons.
6. Press the button to turn the radio ‘OFF’.
7.
Please ensure that the FM antenna is completely unrolled and extended for best FM reception. The AM band uses an internal directional aerial. For best
reception, please rotate the radio.
To Set the Radio Presets1. Press the button on the front panel to turn the radio ‘ON’.
2. Press and hold the button while the radio is ON to toggle between AM and FM radio.
3. Use the or buttons to select the desired radio station.
4. To set a radio present, press and hold the button. A preset number will blink on the display e.g., ‘P02’.
5. Use the or buttons to toggle to the desired preset number.
6. Press the button again to set the preset.
7. Repeat steps 2 through 6 to set more presets.
12
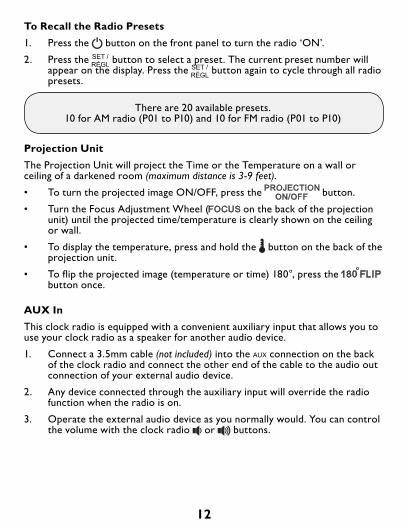
To Recall the Radio Presets1. Press the button on the front panel to turn the radio ‘ON’.
2. Press the button to select a preset. The current preset number will appear on the display. Press the button again to cycle through all radio presets.
There are 20 available presets. 10 for AM radio (P01 to P10) and 10 for FM radio (P01 to P10)
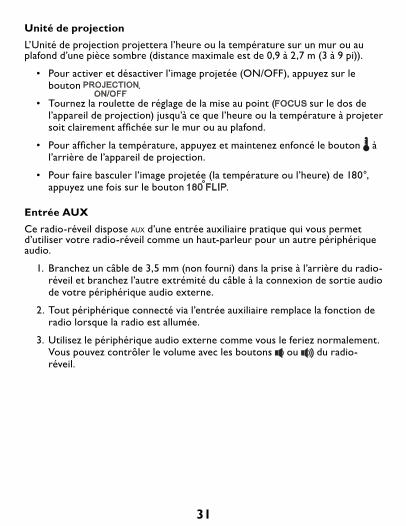
Projection UnitThe Projection Unit will project the Time or the Temperature on a wall or ceiling of a darkened room (maximum distance is 3-9 feet).
• To turn the projected image ON/OFF, press the button.
• Turn the Focus Adjustment Wheel ( on the back of the projection unit) until the projected time/temperature is clearly shown on the ceiling or wall.
• To display the temperature, press and hold the button on the back of the projection unit.
• To flip the projected image (temperature or time) 180°, press the button once.
AUX InThis clock radio is equipped with a convenient auxiliary input that allows you to use your clock radio as a speaker for another audio device.
1. Connect a 3.5mm cable (not included) into the connection on the back of the clock radio and connect the other end of the cable to the audio out connection of your external audio device.
2. Any device connected through the auxiliary input will override the radio function when the radio is on.
3. Operate the external audio device as you normally would. You can control the volume with the clock radio or buttons.
13
ELECTROHOME® WARRANTYThank you for choosing Electrohome. We guarantee your investment in our products is a solid one! Extensive thought, research, planning and design goes into every product we make. High quality components combined with precision manufacturing allows us to maintain the highest possible production standards. All items are guaranteed against defects in materials and craftsmanship.
Electrohome products come with a complete one-year parts and labour warranty. This warranty is nontransfe able and proof of purchase is required when seeking warranty assistance. Electrohome has outstandingquality control, if something should go wrong with any of our products, we will repair it free of charge! If theproduct cannot be repaired, we will replace the product. If the product has been discontinued, we will replace the product with either the newest version of said product or current equivalent. Replacement parts furnished in connection with this warranty shall be warranted to a period equal to the unexpired portion of the original product warranty.
This warranty shall not apply to:
A. Any defects caused or repairs required as a result of abusive operation, negligence, accident, improper installation or inappropriate use as outlined in the owner’s manual.
B. Any Electrohome product tampered with, modified, adjusted or repaired by any party other than Electrohome.
C. Any cosmetic damage to the surface or exterior that has been defaced or caused by normal wear and tear.
D. Any damage caused by external or environmental conditions, including but not limited to transmission line/power line voltage or liquid spillage.
E. Any product received without appropriate model, serial number and CSA /cUL /cULus /cETL /cETLus markings.
F. Any products used for rental or commercial purposes.G. Any installation, setup and/or programming charges.
If in any situation your purchase displays a manufacturer’s defect during the warranty period and does notfunction correctly, Electrohome will repair your product and cover all parts, labour, and return costs upondelivery of the Electrohome product together with proof of purchase. Products returned to Electrohome forwarranty service must be shipped prepaid (paid by the customer). Products must be shipped in the originalshipping container or its equivalent; in any case the risk of loss or damage in transit is to be borne by you.
We believe in music’s power to bring people together. We pledge to work with you in resolving any issue thatoccurs with your product. If you are in need of assistance do not hesitate to contact us via our Contact Us page on www.electrohome.com/support.
14
DO NOT RETURN THIS PRODUCT TO THE STORE
NEEDHELP?
Please contact an ELECTROHOME customer support representative first regarding any additional information on product features, specifications or assistance with setup.
Please contact us via one of the methods below:
For more product information visit electrohome.com
Support: electrohome.com/supportOnline Web Chat: electrohome.com
15
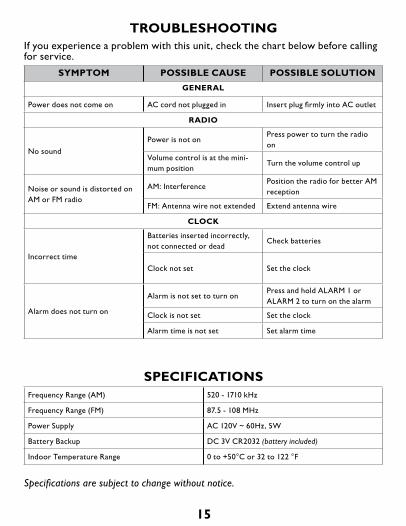
TROUBLESHOOTINGIf you experience a problem with this unit, check the chart below before calling for service.
SYMPTOM POSSIBLE CAUSE POSSIBLE SOLUTIONGENERAL
Power does not come on AC cord not plugged in Insert plug firmly into AC outlet
RADIO
No soundPower is not on
Press power to turn the radio on
Volume control is at the mini-mum position
Turn the volume control up
Noise or sound is distorted on AM or FM radio
AM: InterferencePosition the radio for better AM reception
FM: Antenna wire not extended Extend antenna wire
CLOCK
Incorrect time
Batteries inserted incorrectly, not connected or dead
Check batteries
Clock not set Set the clock
Alarm does not turn on
Alarm is not set to turn onPress and hold ALARM 1 or ALARM 2 to turn on the alarm
Clock is not set Set the clock
Alarm time is not set Set alarm time
SPECIFICATIONSFrequency Range (AM) 520 - 1710 kHz
Frequency Range (FM) 87.5 - 108 MHz
Power Supply AC 120V ~ 60Hz, 5W
Battery Backup DC 3V CR2032 (battery included)
Indoor Temperature Range 0 to +50°C or 32 to 122 °F
Specifications are subject to change without notice.
16
CARE AND MAINTENANCEPRECAUTIONS:1. Always turn off the unit after use.
2. Keep the unit away from magnetic objects, water or heat sources.
3. Use a clean soft cloth moistened with lukewarm water to clean the cabi-net. Never use chemical cleaners that could damage the finish of the unit.
4. Disconnect the unit from any power sources before cleaning.
NOTE: This equipment has been tested and found to comply with the limits for a Class B digital device, pursuant to Part 15 of the FCC Rules. These limits are designed to provide reasonable protection against harmful interference in a residential installation. This equipment generates, uses, and can radiate radio frequency energy and, if not installed and used in accordance with the instruc-tions, may cause harmful interference to radio communications. However, there is no guarantee that interference will not occur in a particular installation. If this equipment does cause harmful interference to radio or television recep-tion, which can be determined by turning the equipment off and on, the user is encouraged to try to correct the interference by one or more of the following measures:
• Reorient or relocate the receiving antenna.
• Increase the separation between the equipment and the receiver.
• Connect the equipment to an outlet on a circuit different from that to which the receiver is connected.
17
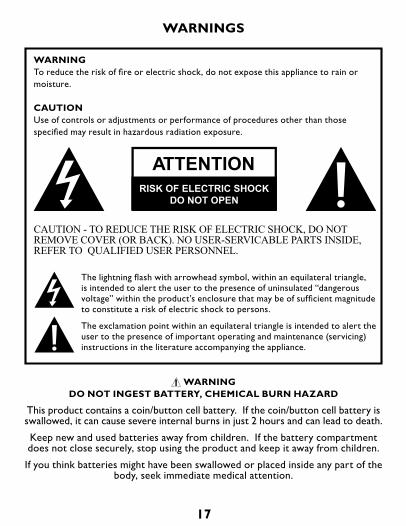
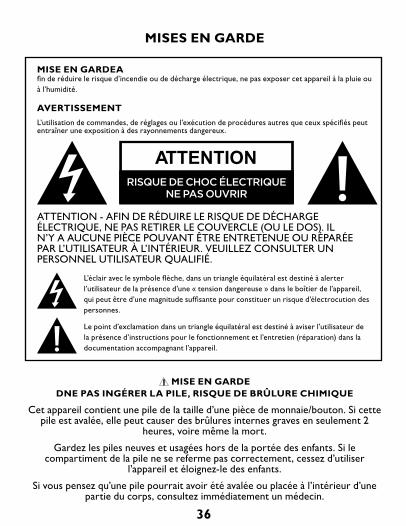
WARNING DO NOT INGEST BATTERY, CHEMICAL BURN HAZARD
This product contains a coin/button cell battery. If the coin/button cell battery is swallowed, it can cause severe internal burns in just 2 hours and can lead to death.
Keep new and used batteries away from children. If the battery compartment does not close securely, stop using the product and keep it away from children.
If you think batteries might have been swallowed or placed inside any part of the body, seek immediate medical attention.
WARNINGS
WARNING To reduce the risk of fire or electric shock, do not expose this appliance to rain or moisture.
CAUTION Use of controls or adjustments or performance of procedures other than those specified may result in hazardous radiation exposure.
CAUTION - TO REDUCE THE RISK OF ELECTRIC SHOCK, DO NOT REMOVE COVER (OR BACK). NO USER-SERVICABLE PARTS INSIDE, REFER TO QUALIFIED USER PERSONNEL.
The lightning flash with arrowhead symbol, within an equilateral triangle, is intended to alert the user to the presence of uninsulated “dangerous voltage” within the product’s enclosure that may be of sufficient magnitude to constitute a risk of electric shock to persons.
The exclamation point within an equilateral triangle is intended to alert the user to the presence of important operating and maintenance (servicing) instructions in the literature accompanying the appliance.
RISK OF ELECTRIC SHOCK
ATTENTION
DO NOT OPEN
18
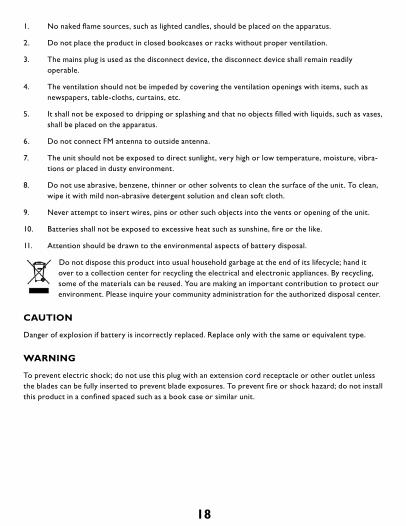
1. No naked flame sources, such as lighted candles, should be placed on the apparatus.
2. Do not place the product in closed bookcases or racks without proper ventilation.
3. The mains plug is used as the disconnect device, the disconnect device shall remain readily operable.
4. The ventilation should not be impeded by covering the ventilation openings with items, such as newspapers, table-cloths, curtains, etc.
5. It shall not be exposed to dripping or splashing and that no objects filled with liquids, such as vases, shall be placed on the apparatus.
6. Do not connect FM antenna to outside antenna.
7. The unit should not be exposed to direct sunlight, very high or low temperature, moisture, vibra-tions or placed in dusty environment.
8. Do not use abrasive, benzene, thinner or other solvents to clean the surface of the unit. To clean, wipe it with mild non-abrasive detergent solution and clean soft cloth.
9. Never attempt to insert wires, pins or other such objects into the vents or opening of the unit.
10. Batteries shall not be exposed to excessive heat such as sunshine, fire or the like.
11. Attention should be drawn to the environmental aspects of battery disposal.
Do not dispose this product into usual household garbage at the end of its lifecycle; hand it over to a collection center for recycling the electrical and electronic appliances. By recycling, some of the materials can be reused. You are making an important contribution to protect our environment. Please inquire your community administration for the authorized disposal center.
CAUTION
Danger of explosion if battery is incorrectly replaced. Replace only with the same or equivalent type.
WARNING
To prevent electric shock; do not use this plug with an extension cord receptacle or other outlet unless the blades can be fully inserted to prevent blade exposures. To prevent fire or shock hazard; do not install this product in a confined spaced such as a book case or similar unit.

19
NOTES

20
21
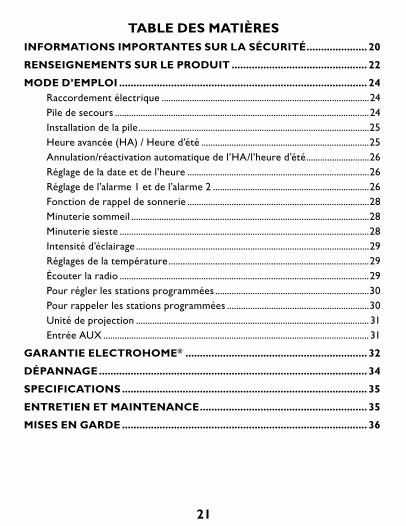
TABLE DES MATIÈRESINFORMATIONS IMPORTANTES SUR LA SÉCURITÉ .....................20
RENSEIGNEMENTS SUR LE PRODUIT ............................................... 22
MODE D’EMPLOI ...................................................................................... 24Raccordement électrique .........................................................................................24Pile de secours .............................................................................................................24Installation de la pile ...................................................................................................25Heure avancée (HA) / Heure d’été ........................................................................25Annulation/réactivation automatique de l’HA/l’heure d’été ...........................26Réglage de la date et de l’heure ..............................................................................26Réglage de l’alarme 1 et de l’alarme 2 ...................................................................26Fonction de rappel de sonnerie ..............................................................................28Minuterie sommeil ......................................................................................................28Minuterie sieste ...........................................................................................................28Intensité d’éclairage ....................................................................................................29Réglages de la température ......................................................................................29Écouter la radio ...........................................................................................................29Pour régler les stations programmées ..................................................................30Pour rappeler les stations programmées .............................................................30Unité de projection .................................................................................................... 31Entrée AUX .................................................................................................................. 31
GARANTIE ELECTROHOME® ............................................................... 32
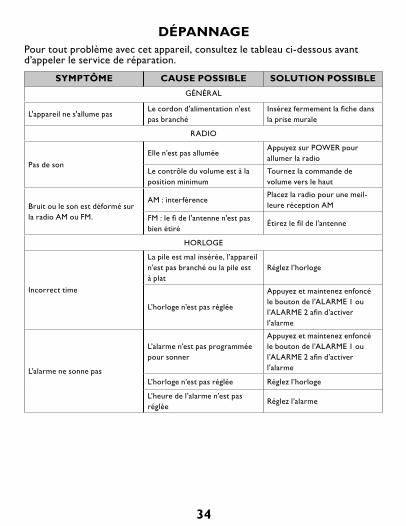
DÉPANNAGE ............................................................................................. 34
SPECIFICATIONS ..................................................................................... 35
ENTRETIEN ET MAINTENANCE .......................................................... 35
MISES EN GARDE ..................................................................................... 36
22
NAP / SIESTE°C / °FDST / HA
14 15 16 17
13
TIME ZONE / FUS HOR
DIMMER / GRADATEUR AM / FMMEM / M+
SET / RÉGL
SNOOZE / SLEEP MIN SOM / SOMNO
18 19 20 21
12
11
5
910
34
1 2
7 8
6
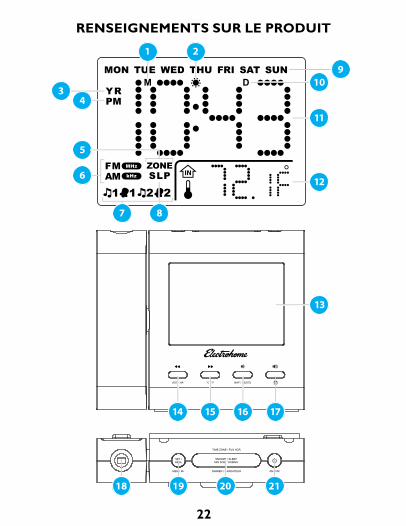
RENSEIGNEMENTS SUR LE PRODUIT
23
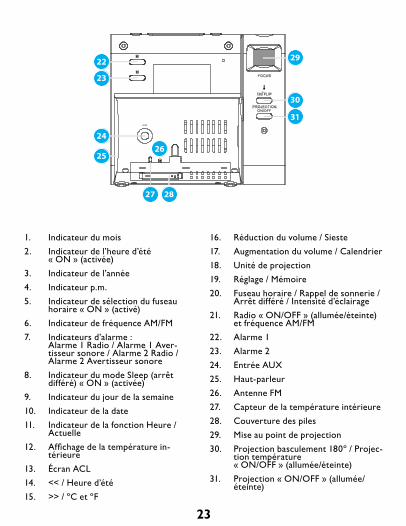
1. Indicateur du mois2. Indicateur de l’heure d’été
« ON » (activée)3. Indicateur de l’année4. Indicateur p.m.5. Indicateur de sélection du fuseau
horaire « ON » (activé)6. Indicateur de fréquence AM/FM7. Indicateurs d’alarme :
Alarme 1 Radio / Alarme 1 Aver-tisseur sonore / Alarme 2 Radio / Alarme 2 Avertisseur sonore
8. Indicateur du mode Sleep (arrêt différé) « ON » (activée)
9. Indicateur du jour de la semaine10. Indicateur de la date11. Indicateur de la fonction Heure /
Actuelle12. Affichage de la température in-
térieure13. Écran ACL14. << / Heure d’été15. >> / ºC et ºF
16. Réduction du volume / Sieste17. Augmentation du volume / Calendrier18. Unité de projection19. Réglage / Mémoire20. Fuseau horaire / Rappel de sonnerie /
Arrêt différé / Intensité d’éclairage21. Radio « ON/OFF » (allumée/éteinte)
et fréquence AM/FM22. Alarme 123. Alarme 224. Entrée AUX25. Haut-parleur26. Antenne FM27. Capteur de la température intérieure28. Couverture des piles29. Mise au point de projection30. Projection basculement 180º / Projec-
tion température « ON/OFF » (allumée/éteinte)
31. Projection « ON/OFF » (allumée/éteinte)
AUX
2827
26
29
30
22
23
25
24
31
24
MODE D’EMPLOIRaccordement électriqueLe radio-réveil SelfSetMC est doté d’une fonction de “réglage automatique de l’heure”. Lorsque l’alimentation est connectée, l’affichage de l’horloge clignote “2”qui représente le FUSEAU HORAIRE 2 (heure de l’Est) et le réglage du fuseau horaire par défaut.
Pour choisir le FUSEAU HORAIRE 2 (heure de l’Est) comme fuseau horaire par défaut:
• Appuyez UNE fois sur • afin de confirmer votre choix.
• L’heure exacte s’affiche, sauf si vous êtes dans un autre fuseau horaire.
Pour changer votre fuseau horaire lors de la configuration:
• Appuyez sur ou jusqu’à ce que votre propre fuseau horaire apparaît à l’écran; appuyez sur UNE fois pour confirmer votre sélection.
Pour changer votre fuseau horaire après la configuration:
• Avec la radio éteinte, appuyez et maintenez enfoncé le bouton jusqu’à ce que les numéros des fuseaux horaires clignotent.
• Appuyez sur ou jusqu’à ce que votre propre fuseau horaire apparaît à l’écran; appuyez sur UNE fois pour confirmer votre sélection.
Il y a huit (8) fuseaux horaires programmes
0 – Heure de Terre-Neuve
1 – Heure de l’Atlantique
2 – Heure normale de l’Est (par défaut)
3 – Heure normale du Centre
Pile de secoursCe réveil dispose d’une fonction de sauvegarde de la pile. Cette fonction permet de restaurer vos réglages d’alarme de réveil en cas de coupure de courant. La pile lithium-ion plate 3V de modèle CR2032 est préinstallée en usine, cepen-dant, si vous devez remplacer la pile, veuillez lire les instructions suivantes.
4 – Heure normale des Rocheuses
5 – Heure normale du Pacifique
6 – Heure normale du Alaska
7 – Heure d’Hawaii
25
• La pile doit être installée par un adulte.
• N’utilisez que la taille et le type de pile spécifiés.
• Veuillez prendre soin de respecter la polarité lors de l’installation de la pile dans son compartiment. Une pile inversée peut endommager le réveil.
• L’orsque l’appareil n’est pas utilise pendant une période prolongée, veuillez retirer la pile afin d’éviter les dommages éventuels causés par une pile qui a fui.

26
• La programmation automatique de l’HA/l’heure d’été utilisée par l’appareil (voir ci-dessus) est soumise à des variations selon la région et la juridiction de chaque pays/région. Dans un tel cas, annulez le réglage automatique de l’HA/l’heure été.
• Si vous vivez dans un pays ou une région qui n’a pas introduit l’heure avancée/l’heure d’été, vous devez annuler le réglage automatique de l’HA/l’heure d’été avant d’utiliser l’appareil.
27
3.
4.
5.
28
• Appuyez et maintenez enfoncé les boutons ou pour passer rapidement à travers les paramètres.
• Pour annuler une alarme lorsqu’elle retentit, appuyez sur le bouton .
• Si une alarme n’est pas annulée, elle retentira pendant 30 minutes, puis s’éteindra automatiquement. Il reprendra à la même heure établie pour l’alarme au prochain jour prévu.
• Pour activer/désactiver une alarme, appuyez et maintenez enfoncé le bouton ou . Une icône apparaîtra sur l’écran pour indiquer qu’une alarme est activée.
29
2.
3.
4.
5.
30
Veuillez vous assurer que l’antenne FM est entièrement déroulée et étendue pour une meilleure réception FM. La fréquence AM utilise une antenne
directionnelle interne. Pour une meilleure réception, veuillez faire tourner la radio.
Il y a 20 préréglages disponibles.
10 pour la radio AM (P01 à P10) et 10 pour la radio FM (P01 à P10)
5.
6.
31
32
GARANTIE ELECTROHOME®
Merci d’avoir choisi Electrohome. Nous garantissons que votre investissement dans nos produits est solide! Une réflexion approfondie, la recherche, la planification et la conception entre tous les produits que nous fabriquons. Des composants de haute qualité combinés à une fabrication de précision nous per-mettent de maintenir les normes de production les plus élevées possibles. Tous les articles sont garantis contre les défauts de matériaux et d’artisanat.
Les produits Electrohome sont livrés avec une garantie complète de pièces et main d’œuvre d’un an. Cette garantie n’est pas transférable et une preuve d’achat est nécessaire pour obtenir l’assistance de la garantie. Electrohome a des
Le contrôle de qualité, si quelque chose devait aller mal avec n’importe lequel de nos produits, nous le réparerons gratuitement! Si la
Produit ne peut pas être réparé, nous allons remplacer le produit. Si le produit a été interrompu, nous remplacerons le produit soit par la version la plus récente de ce produit, soit par son équivalent actuel. Les pièces de rechange fournies en rapport avec cette garantie sont garanties à une période égale à la partie restant à courir de la garantie du produit d’origine.
Cette garantie ne s’applique pas:
A. Les défauts causés ou les réparations nécessaires à la suite d’une utilisation abusive, d’une négli-gence, d’un accident, d’une installation incorrecte ou d’une utilisation inappropriée comme indiqué dans le manuel du propriétaire.
B. Tout produit Electrohome altéré, modifié, réglé ou réparé par une autre partie Que Electrohome.
C. Tout dommage cosmétique à la surface ou à l’extérieur qui a été défiguré ou causé par une usure normale Et la déchirure.
D. Tout dommage causé par des conditions externes ou environnementales, y compris, mais sans s’y limiter, la tension de la ligne de transmission / de la ligne d’alimentation ou le déversement de liquide.
E. Tout produit reçu sans le modèle approprié, le numéro de série et les marquages CSA / cUL / cULus / cETL / cETLus.
F. Tous produits utilisés à des fins de location ou à des fins commerciales.
G. Toute installation, configuration et / ou frais de programmation.
Si, dans une situation quelconque, votre achat affiche un défaut du fabricant pendant la période de garantie et Fonctionne correctement, Electrohome réparera votre produit et couvrira toutes les pièces, le travail et les frais de retour Livraison du produit Electrohome avec preuve d’achat. Produits retournés à Electrohome pour Le service sous garantie doit être expédié prépayé (payé par le client). Les produits doivent être expédiés dans le Conteneur d’expédition ou son équivalent; Dans tous les cas, le risque de perte ou de dommage en cours de transport vous incombe. Nous croyons en la puissance de la musique pour rassembler les gens. Nous nous engageons à travailler avec vous pour résoudre tout problème qui
Avec votre produit. Si vous avez besoin d’aide, n’hésitez pas à nous contacter via notre page Contactez-nous sur www.electrohome.com/support.
33
34
SYMPTÔME CAUSE POSSIBLE SOLUTION POSSIBLEGÉNÉRAL
L'appareil ne s'allume pasLe cordon d'alimentation n'est pas branché
Insérez fermement la fiche dans la prise murale
RADIO
Pas de sonElle n’est pas allumée
Appuyez sur POWER pour allumer la radio
Le contrôle du volume est à la position minimum
Tournez la commande de volume vers le haut
Bruit ou le son est déformé sur la radio AM ou FM.
AM : interférencePlacez la radio pour une meil-leure réception AM
FM : le fi de l'antenne n'est pas bien étiré
Étirez le fil de l’antenne
HORLOGE
Incorrect time
La pile est mal insérée, l’appareil n’est pas branché ou la pile est à plat
Réglez l’horloge
L’horloge n’est pas réglée
Appuyez et maintenez enfoncé le bouton de l’ALARME 1 ou l’ALARME 2 afin d’activer l'alarme
L’alarme ne sonne pas
L’alarme n’est pas programmée pour sonner
Appuyez et maintenez enfoncé le bouton de l’ALARME 1 ou l’ALARME 2 afin d’activer l'alarme
L’horloge n’est pas réglée Réglez l’horloge
L’heure de l’alarme n’est pas réglée
Réglez l’alarme
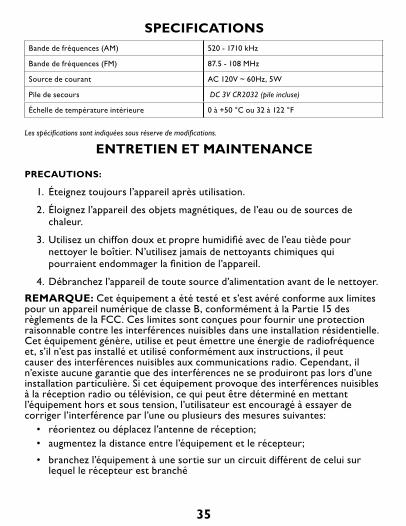
35
Bande de fréquences (AM) 520 - 1710 kHz
Bande de fréquences (FM) 87.5 - 108 MHz
Source de courant AC 120V ~ 60Hz, 5W
Pile de secours DC 3V CR2032 (pile incluse)
Échelle de température intérieure 0 à +50 °C ou 32 à 122 °F
36
ATTENTIONRISQUE DE CHOC ÉLECTRIQUE
NE PAS OUVRIR
37

38
NOTES

39
NOTES

electrohome.com