Embed Size (px)
Citation preview
Fm
Nm
N m
X 0
ES TESEDUCATOR
TM
Sm
A Curriculum
for GRADES 5, 6, 7, 8
Written by
SYLVIA NOLTE, Ed. D.
Based on
NANCY STOOPS’
Model Rocketry Course Outline
Edited by Ann Grimm
©Copyright 1992, 1999 Centuri Corporation.
All rights reserved.
SCIENCE
AND
MODEL ROCKETS
®

ESTES 2 EDUCATOR™
NOTES
ESTES 3 EDUCATOR™
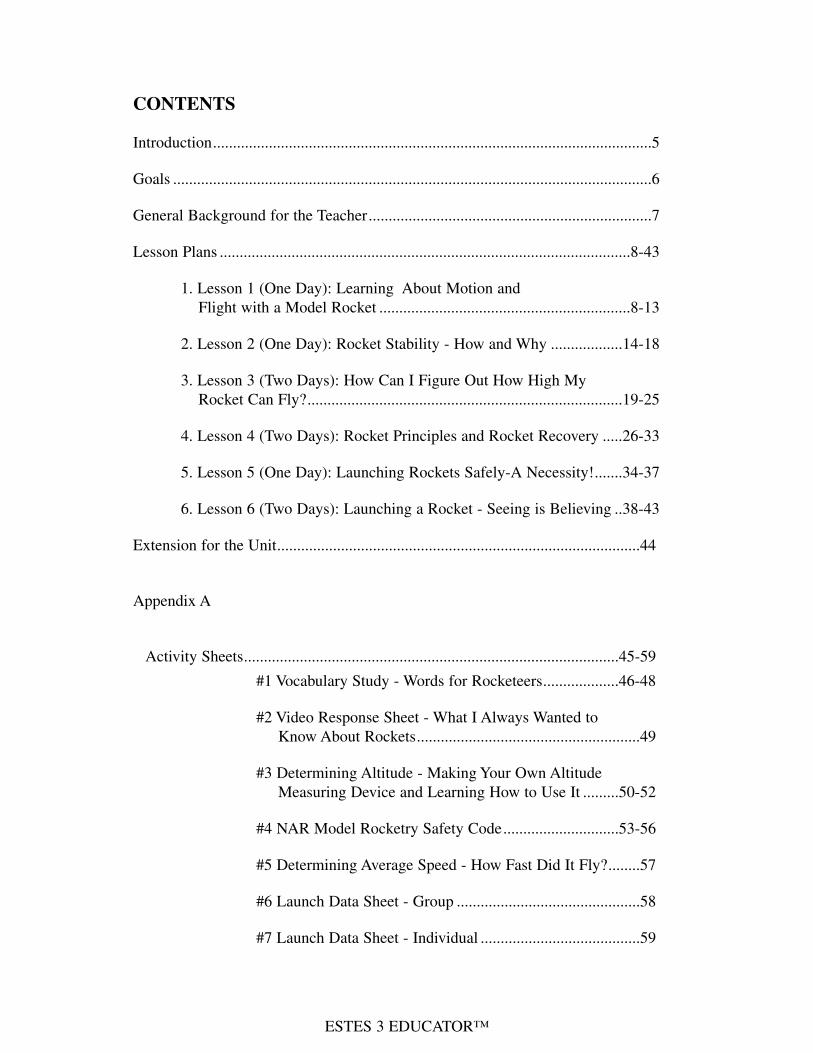
CONTENTS
Introduction..............................................................................................................5
Goals ........................................................................................................................6
General Background for the Teacher.......................................................................7
Lesson Plans .......................................................................................................8-43
1. Lesson 1 (One Day): Learning About Motion and Flight with a Model Rocket ...............................................................8-13
2. Lesson 2 (One Day): Rocket Stability - How and Why ..................14-18
3. Lesson 3 (Two Days): How Can I Figure Out How High My Rocket Can Fly?...............................................................................19-25
4. Lesson 4 (Two Days): Rocket Principles and Rocket Recovery .....26-33
5. Lesson 5 (One Day): Launching Rockets Safely-A Necessity!.......34-37
6. Lesson 6 (Two Days): Launching a Rocket - Seeing is Believing ..38-43
Extension for the Unit...........................................................................................44
Appendix A
Activity Sheets..............................................................................................45-59
#1 Vocabulary Study - Words for Rocketeers...................46-48
#2 Video Response Sheet - What I Always Wanted to Know About Rockets........................................................49
#3 Determining Altitude - Making Your Own Altitude Measuring Device and Learning How to Use It .........50-52
#4 NAR Model Rocketry Safety Code.............................53-56
#5 Determining Average Speed - How Fast Did It Fly?........57
#6 Launch Data Sheet - Group ..............................................58
#7 Launch Data Sheet - Individual ........................................59
ESTES 4 EDUCATOR™
CONTENTS (Continued)
Appendix B
Overhead Transparencies............................................................................60-65
#1 Flight Sequence of a Model Rocket (Lesson 1) ..................................61
#2 Newton’s First Law of Motion (Lesson 4) ..........................................61
#3 Newton’s Second Law of Motion (Lesson 4) ......................................63
#4 Newton’s Third Law of Motion (Lesson 4).........................................64
#5 Newton’s Laws of Motion - Putting Them Together withModel Rocketry (Lesson 4 and Lesson 6) ..........................................65
Appendix C
Puzzles .......................................................................................................66-68
Word Search Puzzle - Words for Rocketeers (Lesson 1)..........................67
Word Search Puzzle - All About Rocketry (Lesson 6) .............................68
Appendix D
Certificates ..................................................................................................69-76
Participation Certificate - Rocket Launch.................................................70
Good Guesser Award - Estimation............................................................71
“Get the Facts” Award...............................................................................72
High Flying Rocket Award .......................................................................73
Best Rocket Recovery ...............................................................................74
Best Rocket Speed Ascending ..................................................................75
Best Rocket Speed Descending ................................................................76
ESTES 5 EDUCATOR™
INTRODUCTION
This curriculum guide is designed to meet the needs of the teacher who hashad experience teaching rocketry to students as well as the teacher who is abeginner in teaching rocketry.
Rocketry is an excellent means for teaching a number of scientific conceptssuch as aerodynamics, center of gravity, point of balance, apogee, drag andthrust. It is also great for the teaching of math using problem solving, calcu-lating formulas, geometry and determining altitude and speed.
Graphing is another skill which can be used in rocketry.
In learning to construct rockets, the student must follow directions, read adiagram and work carefully and precisely.
This guide is intended to make it as easy as possible to understand rocketsand to teach about rockets. The objectives for each lesson are stated, alongwith a list of the vocabulary to be emphasized, the materials needed andwhat to do during each lesson. The background for the teacher is designedto give the necessary information to present the lesson and to help theteacher develop understanding of the concepts.
This guide is directed to teachers of fifth, sixth, seventh and eighth gradeswhose students have had little or no experience with rockets. The math maybe challenging for some fifth, sixth or seventh graders. If that is the case, themath does not need to be done independently. The teacher may choose toguide the students through all activities and problems.
This curriculum provides an introduction to an enhancement of the study ofspace, space exploration, the study of motion or aerospace education.
ESTES 6 EDUCATOR™
GOALS
• Bring science to life through the experience of building and flying a model rocket.
• Integrate rocketry with science and math.
STUDENT OUTCOMESThe student will be able to:- Describe and demonstrate proper safety procedures when launching
a rocket.- Identify each part of a rocket and describe its function.- Construct an E2X Series or Beta Series rocket.- Describe how an E2X Series or Beta Series rocket works from launch
through acceleration, coasting, apogee and landing.- Describe how fins provide aerodynamic stability to the flying rocket.- Construct and demonstrate the use of an altitude measuring device.- Describe rocket recovery systems and determine which type is best for the
rocket being constructed.- Demonstrate proper safety procedures based on the Model Rocketry Safety
Code when launching a rocket.- Describe Newton’s three Laws of Motion and how they relate to model
rocketry.
CONCEPTS TO BE DEVELOPED
• How a rocket is constructed.• How the parts of a rocket function.• How a rocket works.• How math is related to rocketry, specifically formulas for determining
altitude and speed.• How science and rocketry are connected, specifically Newton’s three
Laws of Motion.
SCIENCE PROCESS SKILLS
• Observing• Reading and following a diagram• Predicting• Describing• Identifying• Evaluating• Problem Solving
ESTES 7 EDUCATOR™
GENERAL BACKGROUND FOR THE TEACHER
There are four basic forces operating on objects in flight such as a rocket.They are gravity, thrust, drag and lift.Gravity is the force that pulls all objects toward the center of the earth. Theamount of this force is proportional to the mass of the object. Thrust is the force that propels the flying object. Drag is the force acting on an object moving through a fluid. Since air andwater are fluids, drag is the resistance that the object encounters as it movesthrough the fluid. Lift is the force that is directed opposite to the force of gravity produced bythe shape and position of a body moving through a fluid. An object movingin a vacuum produces no lift. Lift is generated by an object moving througha fluid if the object’s shape causes appropriate reactions as the object movesthrough a fluid.Newton’s three Laws of Motion are concepts essential to understandingrocket flight. The laws will be an integral part of the lessons in this unit.The laws are as follows: 1. A body at rest will remain at rest, the body inmotion will continue in motion with a constant speed in a straight line aslong as no unbalanced force acts upon it. This law is often referred to as thelaw of inertia.2. If an unbalanced force acts on a body, the body will be accelerated; themagnitude of the acceleration is proportional to the magnitude of the unbal-anced force, and the direction of the acceleration is in the direction of theunbalanced force. 3. Whenever one body exerts a force on another body, the second body exertsa force equal in magnitude and opposite in direction of the first body. Thislaw relates to the principle of action-reaction.
ESTES 8 EDUCATOR™
UNIT PLAN
Lesson 1 (One Day)
Learning About Motion and Flight With a Model RocketObjective of the Lesson:
The student will be able to:
• Identify and trace the basic path of a rocket from launch to recovery.• Describe how Newton’s Third Law of Motion relates to launching a
model rocket.• Begin the construction of a rocket by assembling the engine mount.• Recognize and define vocabulary.
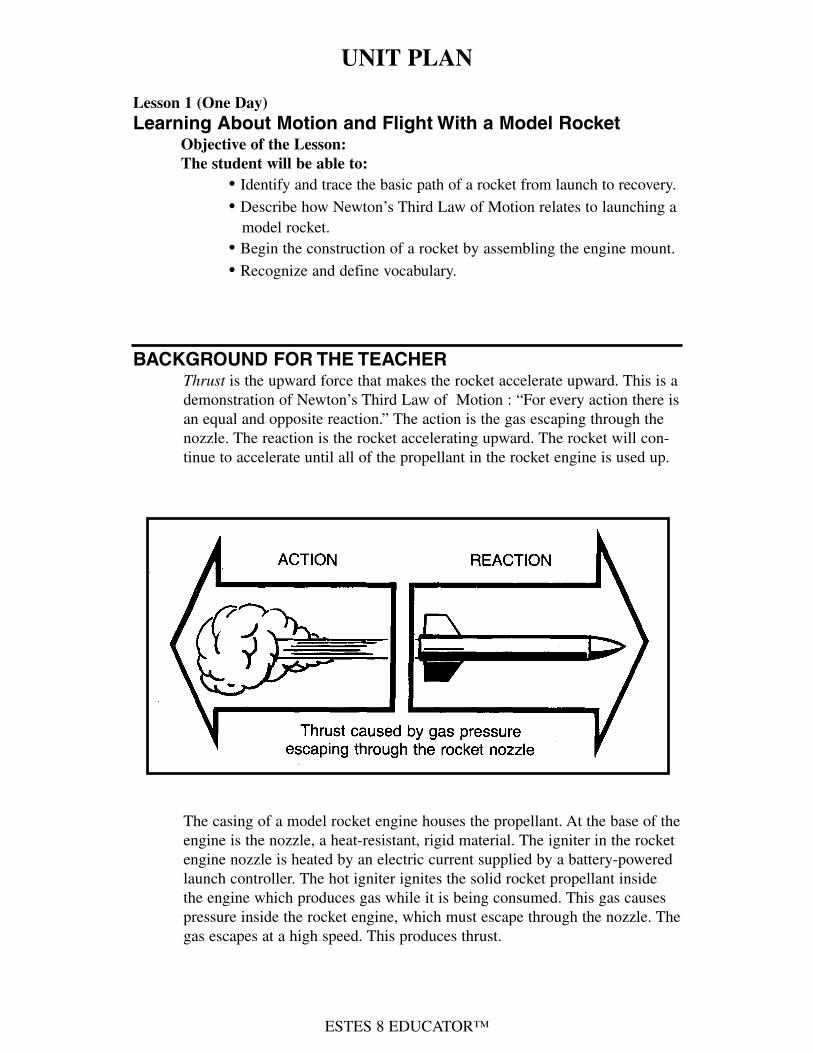
BACKGROUND FOR THE TEACHERThrust is the upward force that makes the rocket accelerate upward. This is ademonstration of Newton’s Third Law of Motion : “For every action there isan equal and opposite reaction.” The action is the gas escaping through thenozzle. The reaction is the rocket accelerating upward. The rocket will con-tinue to accelerate until all of the propellant in the rocket engine is used up.
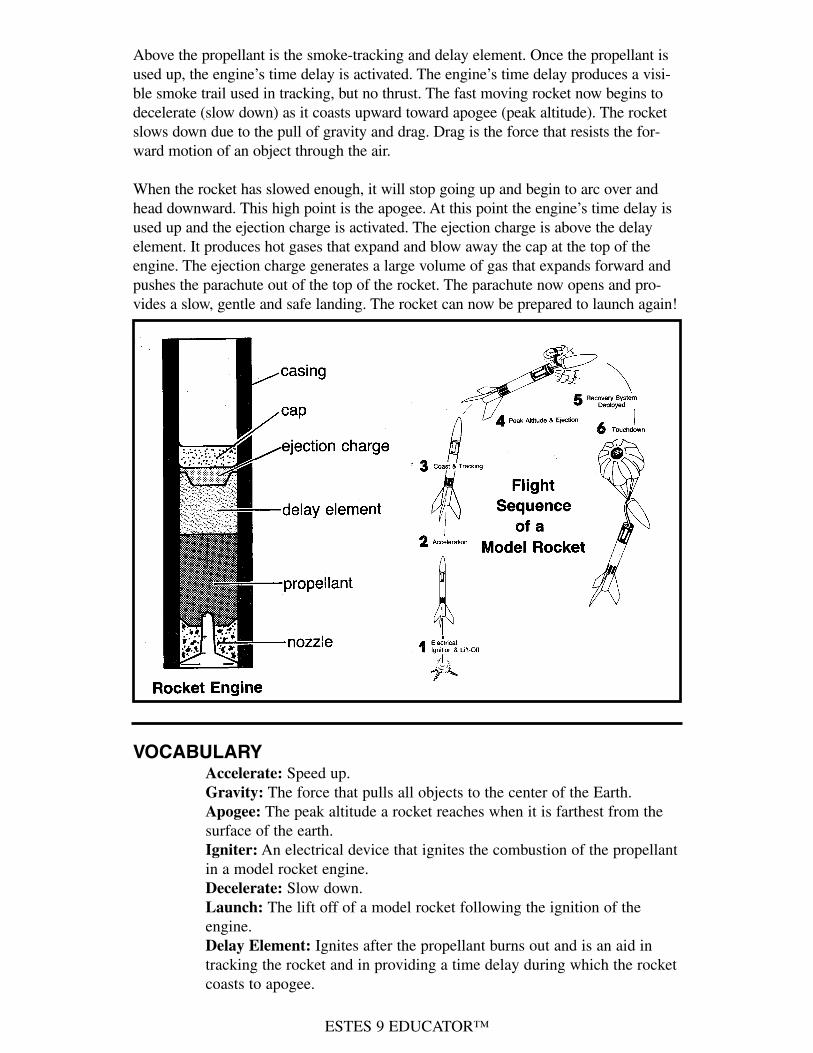
The casing of a model rocket engine houses the propellant. At the base of theengine is the nozzle, a heat-resistant, rigid material. The igniter in the rocketengine nozzle is heated by an electric current supplied by a battery-poweredlaunch controller. The hot igniter ignites the solid rocket propellant insidethe engine which produces gas while it is being consumed. This gas causespressure inside the rocket engine, which must escape through the nozzle. Thegas escapes at a high speed. This produces thrust.
ESTES 9 EDUCATOR™
Above the propellant is the smoke-tracking and delay element. Once the propellant isused up, the engine’s time delay is activated. The engine’s time delay produces a visi-ble smoke trail used in tracking, but no thrust. The fast moving rocket now begins todecelerate (slow down) as it coasts upward toward apogee (peak altitude). The rocketslows down due to the pull of gravity and drag. Drag is the force that resists the for-ward motion of an object through the air.
When the rocket has slowed enough, it will stop going up and begin to arc over andhead downward. This high point is the apogee. At this point the engine’s time delay isused up and the ejection charge is activated. The ejection charge is above the delay element. It produces hot gases that expand and blow away the cap at the top of theengine. The ejection charge generates a large volume of gas that expands forward andpushes the parachute out of the top of the rocket. The parachute now opens and pro-vides a slow, gentle and safe landing. The rocket can now be prepared to launch again!
VOCABULARYAccelerate: Speed up.Gravity: The force that pulls all objects to the center of the Earth.Apogee: The peak altitude a rocket reaches when it is farthest from thesurface of the earth.Igniter: An electrical device that ignites the combustion of the propellantin a model rocket engine.Decelerate: Slow down.Launch: The lift off of a model rocket following the ignition of theengine.Delay Element: Ignites after the propellant burns out and is an aid intracking the rocket and in providing a time delay during which the rocketcoasts to apogee.
ESTES 10 EDUCATOR™
VOCABULARY (Continued)Propellant: A mixture of fuel and an oxidizer which is the source ofmotive energy in a rocket.Drag: The force that resists the forward motion of an object as it movesthrough the air.Recovery System: The device in a model rocket whose purpose is toreturn the rocket to the ground safely by creating excess drag or by creating lift.Ejection Charge: Ignited by the delay element and produces expandinggases which activate or eject a recovery device.Thrust: The force that makes the rocket accelerate upward as the propel-lant is burning.
STRATEGYMaterials Needed for Each Student: An Estes E2X Series or Beta Series rocket,the appropriate glue* (Caution—-Plastic model cement should be used only in awell-ventilated area) and a pencil. In addition, the teacher should have constructedone model rocket in order to understand the assembly and to serve as a demonstra-tion model.
Each student should have a small shoe box or other similar shape and size box tostore the model parts and instructions. If notches are cut in each side of the shoebox, the rocket can rest in them as the rocket is assembled and as glue is drying.Each student should have a manilla envelope or folder for the activity and recordkeeping sheets that will be accumulated during this unit.
*Requirements for types of glue are listed on the E2X or Beta kit instructions.
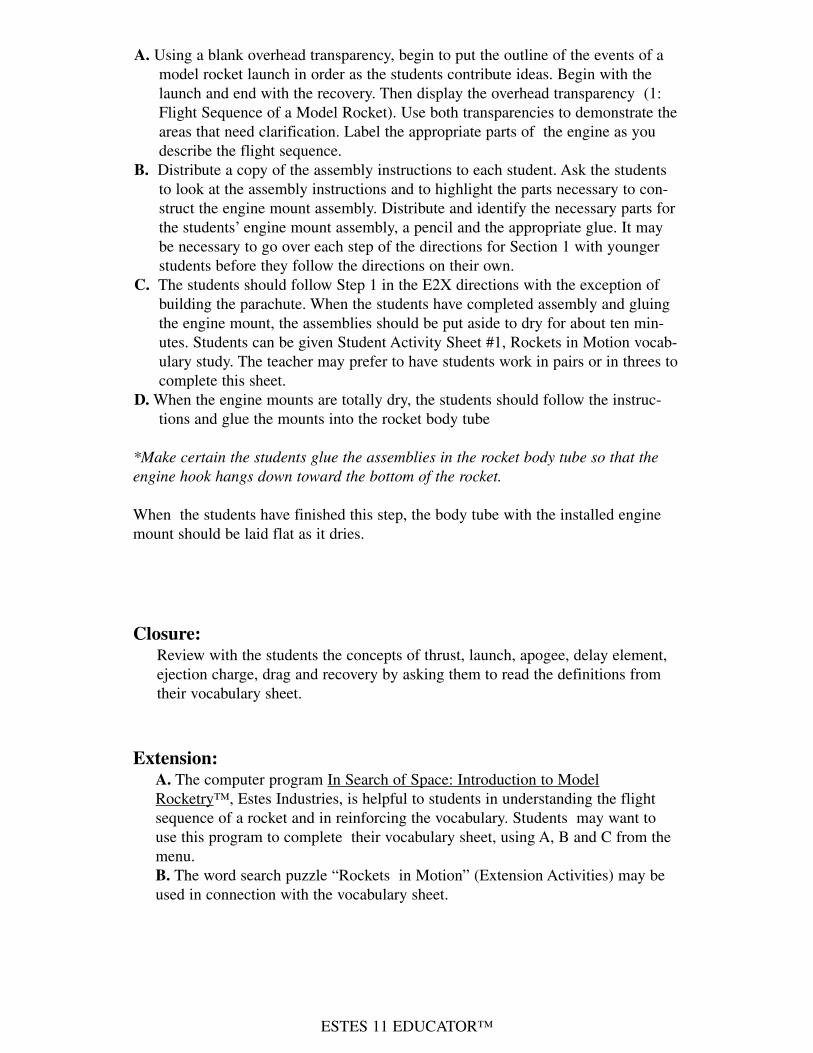
MOTIVATION:Show the students the rocket you have constructed. (It is essential that the
teacher construct the specific rocket before beginning this unit.) Ask:What is this object? How does it work? (Allow the students to discuss howrockets are used in space specifically and other ideas they may have, such asrockets used to launch missiles and for launching fireworks.)
ESTES 11 EDUCATOR™
A. Using a blank overhead transparency, begin to put the outline of the events of amodel rocket launch in order as the students contribute ideas. Begin with thelaunch and end with the recovery. Then display the overhead transparency (1:Flight Sequence of a Model Rocket). Use both transparencies to demonstrate theareas that need clarification. Label the appropriate parts of the engine as youdescribe the flight sequence.
B. Distribute a copy of the assembly instructions to each student. Ask the studentsto look at the assembly instructions and to highlight the parts necessary to con-struct the engine mount assembly. Distribute and identify the necessary parts forthe students’ engine mount assembly, a pencil and the appropriate glue. It maybe necessary to go over each step of the directions for Section 1 with youngerstudents before they follow the directions on their own.
C. The students should follow Step 1 in the E2X directions with the exception ofbuilding the parachute. When the students have completed assembly and gluingthe engine mount, the assemblies should be put aside to dry for about ten min-utes. Students can be given Student Activity Sheet #1, Rockets in Motion vocab-ulary study. The teacher may prefer to have students work in pairs or in threes tocomplete this sheet.
D. When the engine mounts are totally dry, the students should follow the instruc-tions and glue the mounts into the rocket body tube
*Make certain the students glue the assemblies in the rocket body tube so that theengine hook hangs down toward the bottom of the rocket.
When the students have finished this step, the body tube with the installed enginemount should be laid flat as it dries.
Closure:Review with the students the concepts of thrust, launch, apogee, delay element,ejection charge, drag and recovery by asking them to read the definitions fromtheir vocabulary sheet.
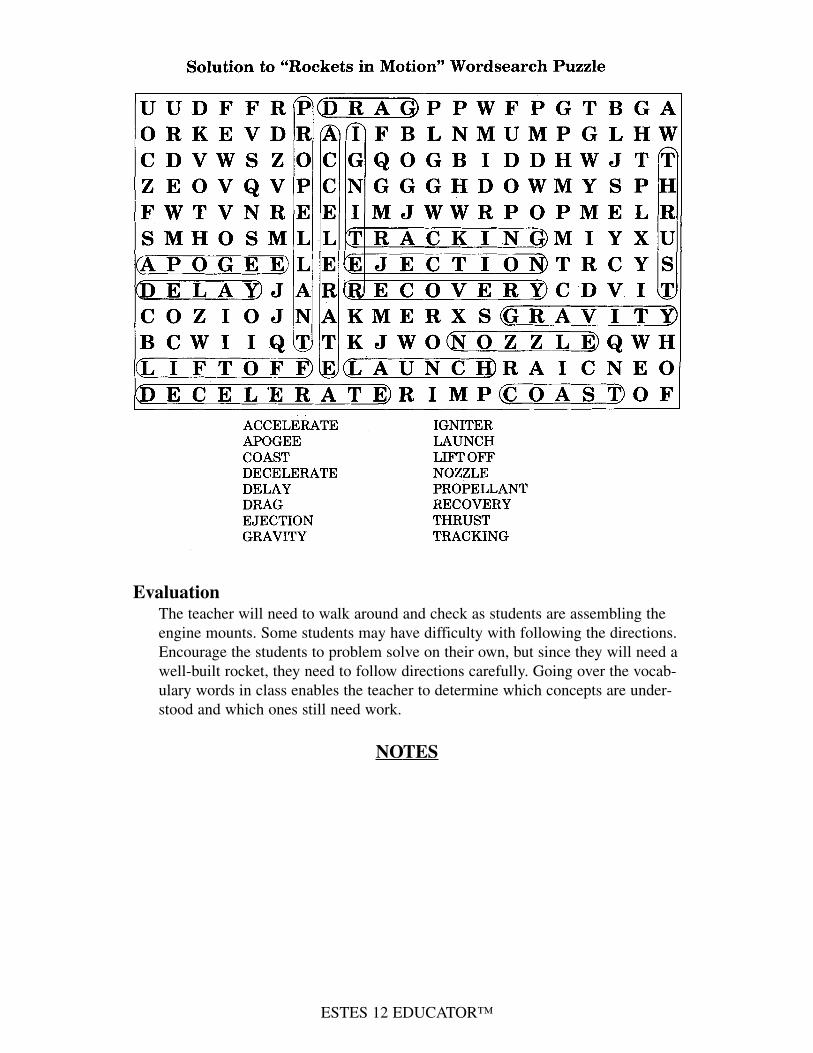
Extension:A. The computer program In Search of Space: Introduction to ModelRocketry™, Estes Industries, is helpful to students in understanding the flightsequence of a rocket and in reinforcing the vocabulary. Students may want touse this program to complete their vocabulary sheet, using A, B and C from themenu.B. The word search puzzle “Rockets in Motion” (Extension Activities) may beused in connection with the vocabulary sheet.
ESTES 12 EDUCATOR™
EvaluationThe teacher will need to walk around and check as students are assembling theengine mounts. Some students may have difficulty with following the directions.Encourage the students to problem solve on their own, but since they will need awell-built rocket, they need to follow directions carefully. Going over the vocab-ulary words in class enables the teacher to determine which concepts are under-stood and which ones still need work.
NOTES
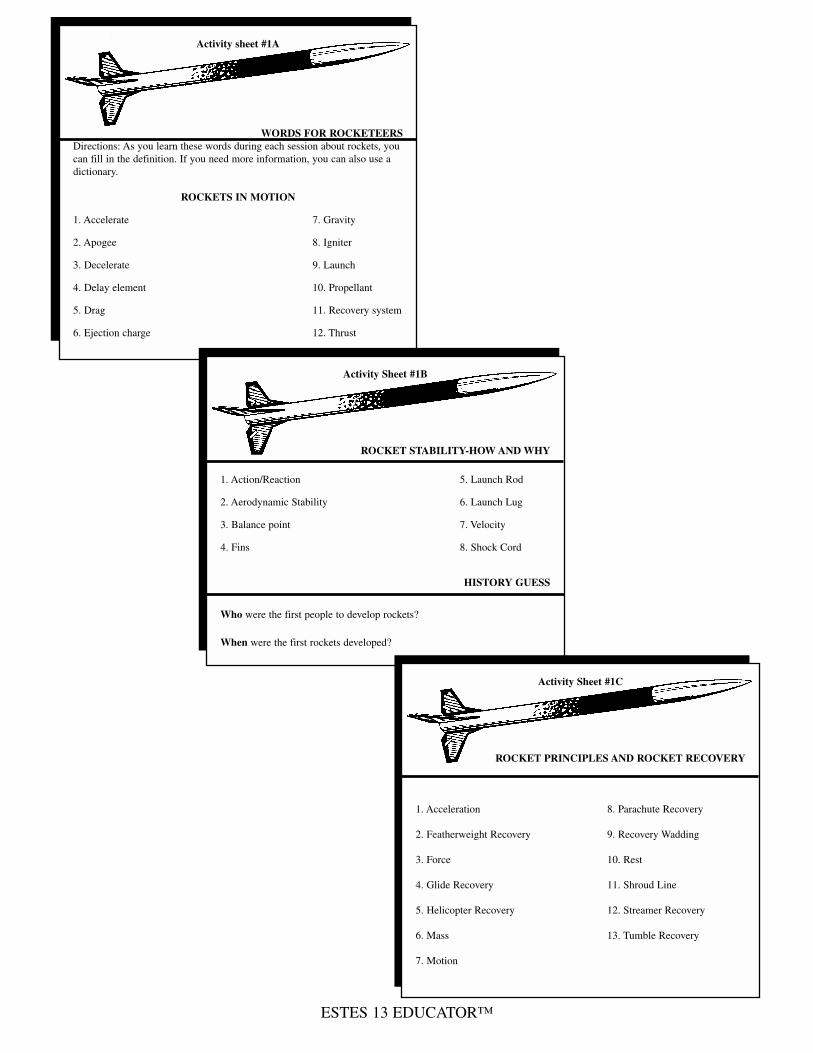
Activity sheet #1A
WORDS FOR ROCKETEERS
Directions: As you learn these words during each session about rockets, youcan fill in the definition. If you need more information, you can also use adictionary.
ROCKETS IN MOTION
1. Accelerate 7. Gravity
2. Apogee 8. Igniter
3. Decelerate 9. Launch
4. Delay element 10. Propellant
5. Drag 11. Recovery system
6. Ejection charge 12. Thrust
ESTES 13 EDUCATOR™
Activity Sheet #1B
ROCKET STABILITY-HOW AND WHY
1. Action/Reaction 5. Launch Rod
2. Aerodynamic Stability 6. Launch Lug
3. Balance point 7. Velocity
4. Fins 8. Shock Cord
HISTORY GUESS
Who were the first people to develop rockets?
When were the first rockets developed?
Activity Sheet #1C
ROCKET PRINCIPLES AND ROCKET RECOVERY
1. Acceleration 8. Parachute Recovery
2. Featherweight Recovery 9. Recovery Wadding
3. Force 10. Rest
4. Glide Recovery 11. Shroud Line
5. Helicopter Recovery 12. Streamer Recovery
6. Mass 13. Tumble Recovery
7. Motion

ESTES 14 EDUCATOR™
Lesson 2 (One Day)
Rocket Stability - How and WhyObjectives of the Lesson:
The student will be able to:
• Recognize the application of Newton’s Third Law of Motion to rocket stability, the law of action and reaction.
• Describe the necessity of fins on a rocket for aerodynamic stability.• Follow directions to add fins to a rocket correctly.
BACKGROUND FOR THE TEACHERNewton’s third Law of Motion states that whenever one body exerts a forceon another, the second body exerts a force equal in magnitude and oppositein direction on the first body. An effective model of this law is an inflatedrubber balloon. The pressure on the outside of the balloon is equal to thepressure on the inside.
Forces on an Inflated Balloon
ESTES 15 EDUCATOR™
When air is allowed to escape from the balloon, the balloon will fly about erratically.The unbalanced force on the inside front end of the balloon as on a rocket engine,pushes the balloon around the room or pushes a rocket through space. The action ofthe gas escaping from the balloon causes a reaction, moving the balloon forward.
Fins make a rocket fly straight. A rocket without fins will tumble around its balancepoint when flying through the air like a balloon that is inflated and then let go. Theballoon will fly erratically because it is uncontrolled. With fins a rocket has moresurface area behind the balance point than in front. The balance point is also knownas the “center of gravity”.
When the rocket is flying through the air, the air has more surface area to pushagainst behind the balance point than in front because of the greater surface areaprovided by the fins. Therefore, the rocket tends to stabilize itself. The rocket willrotate until the nose is pointing forward in the air and the fins are pointing backward.
Fins only work to provide stability when the rocket is flying fast through the air andthe rocket has left the launch rod on the launch pad. The students will glue a launchlug, which resembles a straw, on their rockets. The launch lug will slide along thelaunch rod. The launch rod guides the rocket as it is accelerating. When the rocketleaves the end of the launch rod, it is moving fast enough for the fins to take over theguidance of the rocket.
VOCABULARY
Action/Reaction: Newton’s Third Law of Motion.
Fins: Provide guidance for the model rocket.
Aerodynamic Stability: Tendency of a rocket to maintain a straightcourse along the axis of its thrust.
Launch Lug: Slipped over the launch rod and guides the rocket in a stable path until the rocket has reached a speed at which the fins stabilize it.
Velocity: Rate of motion in a given direction measured in terms of dis-tance moved per unit of time.
STRATEGY
Materials Needed: Pencil, instructions, body tube, launch lug(s), finsor fin unit and the appropriate glue for each student. The teachershould also have available an uninflated balloon and a completedmodel rocket. If possible, the teacher should show the video tape,Ignite the Imagination™, Estes Industries, or a similar video showinghow model rockets are put together, the functions of the parts of arocket and how much fun model rocketry can be.
ESTES 16 EDUCATOR™
Motivation:If possible, show the video tape, Ignite The Imagination™ EstesIndustries. Use Activity Sheet 2 to accompany the video. Before the stu-dents watch the video, ask them to fill in the first and second columns. Asthey watch the video, they can write some new information in the thirdcolumn. Allow some students to share what new information they learnedfrom the video. The students should put these sheets in their folders.
Show the students an uninflated balloon. Ask them what will happen tothe balloon when it is inflated and then released. Allow the students todescribe what they think will happen and to tell why.
Blow up the balloon and hold it so the air is trapped inside. Ask them totell why they think the balloon stays inflated. Draw the diagram showingthe pressures both inside and outside the balloon (Background for theTeacher) . Now let the balloon go. The students will observe that it flieserratically without control. If time permits and students are interested,distribute a balloon to each student. Allow them to inflate it and test itssurface to feel the tension on the balloon’s wall as the compressed airkeeps the balloon inflated. Then allow them to release the balloon andobserve its flight. Students can also let the balloon push against theiropen palms. They can feel the balloon push against their hands as the airescapes the nozzle.
Ask the students, “Is this how rockets move through space?” Let themdiscuss why not.
Allow the students to describe how they think the rocket should move.Show them the model rocket you made or a picture of a model rocket.Also refer back to the video they just watched. Ask, “What on this rocketdo you think causes the rocket to move straight?” (Allow the students toguess which part does make the rocket move straight and ask them tosupport their guess.) The teacher should demonstrate how the fins provideguidance for the rocket. The basic principle is that the center of gravitymust be ahead of the center of pressure for the rocket to be stable. Thecenter of gravity is the point at which the mass of the rocket is balancedbecause the weight forward from this point is equal to the weight to therear of this point. Refer to the balloon demonstration to show how finsprovide the guidance the balloon did not have. The center of pressure isthe point on the rocket at which half of the aerodynamic surface is locat-ed forward and half to the rear.

ESTES 17 EDUCATOR™
A. Using either the model rocket or a diagram of the rocket, explain how the finsstabilize the rocket. (Background For The Teacher)
B. Distribute each student’s kit, making certain that there are fins, a rocket body, theengine mount assembly and launch lugs. Go over the assembly instructions with thestudents. Emphasize that it is important that the fins be glued correctly and carefullyto provide stability.
C. If the rockets have individual fins (Beta Series rockets), demonstrate the correctway the fins go on by holding up the already completed rocket or a student’s bodytube and one fin. Walk around the room to check that each student can demonstratethe correct way to glue fins by holding one fin and their body tube.
If the rockets have a complete fin unit (E2X Series rockets), make certain it is all theway on and straight. Check each student’s fins to make certain they are on correctlybefore they dry. The fins must dry before moving the rockets. Rockets may be storedin the notches in the shoeboxes on a shelf or a counter.
The smoother the joint, the less the drag. By eliminating sharp angles and
smoothing the flow of air over the joint, drag is reduced. Fin attachment is
stronger, but glue adds weight.
D. Students should follow the kit assembly directions to put the launch lugs on theirrockets. Explain that the launch lug enables their rocket to slide on the launch rod onthe launch pad as it is being launched. As you demonstrate using your own rocket,explain that the purpose of the launch lug is to guide the rocket straight on thelaunch rod until the rocket is going fast enough for the fins to guide it straightthrough the air.
E. Distribute students’ folders and give them time to complete the vocabulary studyfor “Rocket Stability - How and Why”.
Closure:
Spend the last few minutes of class going over the definitions to ensure that students have a good understanding of the concepts.
Extension:
Pose the challenge questions, “Who were the first known people to develop any kind of rocket and when was it?” Allow the students to guess today and record their guesses on the bottom of their vocabulary sheet. They will have until the next class period to find out the answer and bring it to class. Give some kind of recognition (Certificate in Appendix D) to those who guessed correctly and those who brought in the facts.
Evaluation:
Observe the students’ responses on Activity Sheets 1 and 2 to determine whatconcepts they are grasping and which ones need continued emphasis.
ESTES 18 EDUCATOR™
Student Activity Sheet #2
WHAT I ALWAYS WANTED TO KNOW ABOUT ROCKETS
NOTES
Questions I have about rocketsthat may be answered in thisvideo
Important things I learned inthis video
What I know about rockets
ESTES 19 EDUCATOR™
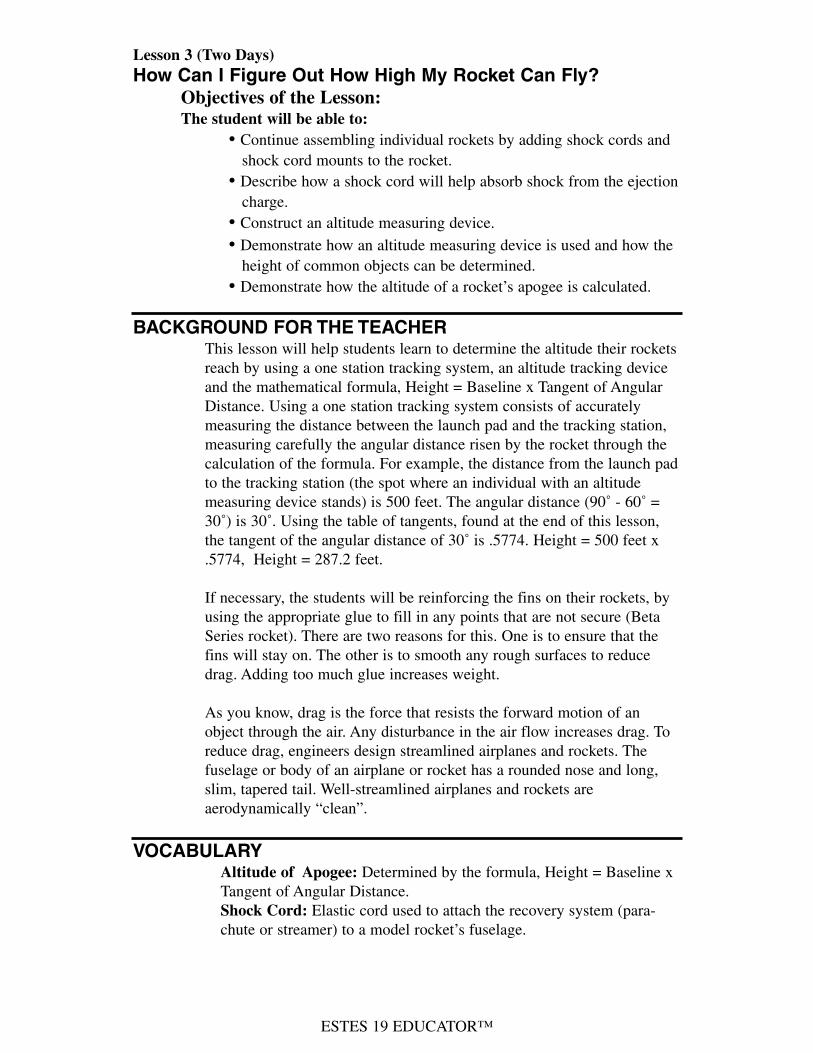
Lesson 3 (Two Days)
How Can I Figure Out How High My Rocket Can Fly?
Objectives of the Lesson:The student will be able to:
• Continue assembling individual rockets by adding shock cords and shock cord mounts to the rocket.
• Describe how a shock cord will help absorb shock from the ejectioncharge.
• Construct an altitude measuring device.• Demonstrate how an altitude measuring device is used and how the
height of common objects can be determined.• Demonstrate how the altitude of a rocket’s apogee is calculated.
BACKGROUND FOR THE TEACHERThis lesson will help students learn to determine the altitude their rocketsreach by using a one station tracking system, an altitude tracking deviceand the mathematical formula, Height = Baseline x Tangent of AngularDistance. Using a one station tracking system consists of accuratelymeasuring the distance between the launch pad and the tracking station,measuring carefully the angular distance risen by the rocket through thecalculation of the formula. For example, the distance from the launch padto the tracking station (the spot where an individual with an altitudemeasuring device stands) is 500 feet. The angular distance (90˚ - 60˚ =30˚) is 30˚. Using the table of tangents, found at the end of this lesson,the tangent of the angular distance of 30˚ is .5774. Height = 500 feet x.5774, Height = 287.2 feet.
If necessary, the students will be reinforcing the fins on their rockets, byusing the appropriate glue to fill in any points that are not secure (BetaSeries rocket). There are two reasons for this. One is to ensure that thefins will stay on. The other is to smooth any rough surfaces to reducedrag. Adding too much glue increases weight.
As you know, drag is the force that resists the forward motion of anobject through the air. Any disturbance in the air flow increases drag. Toreduce drag, engineers design streamlined airplanes and rockets. Thefuselage or body of an airplane or rocket has a rounded nose and long,slim, tapered tail. Well-streamlined airplanes and rockets are aerodynamically “clean”.
VOCABULARYAltitude of Apogee: Determined by the formula, Height = Baseline xTangent of Angular Distance.Shock Cord: Elastic cord used to attach the recovery system (para-chute or streamer) to a model rocket’s fuselage.
ESTES 20 EDUCATOR™
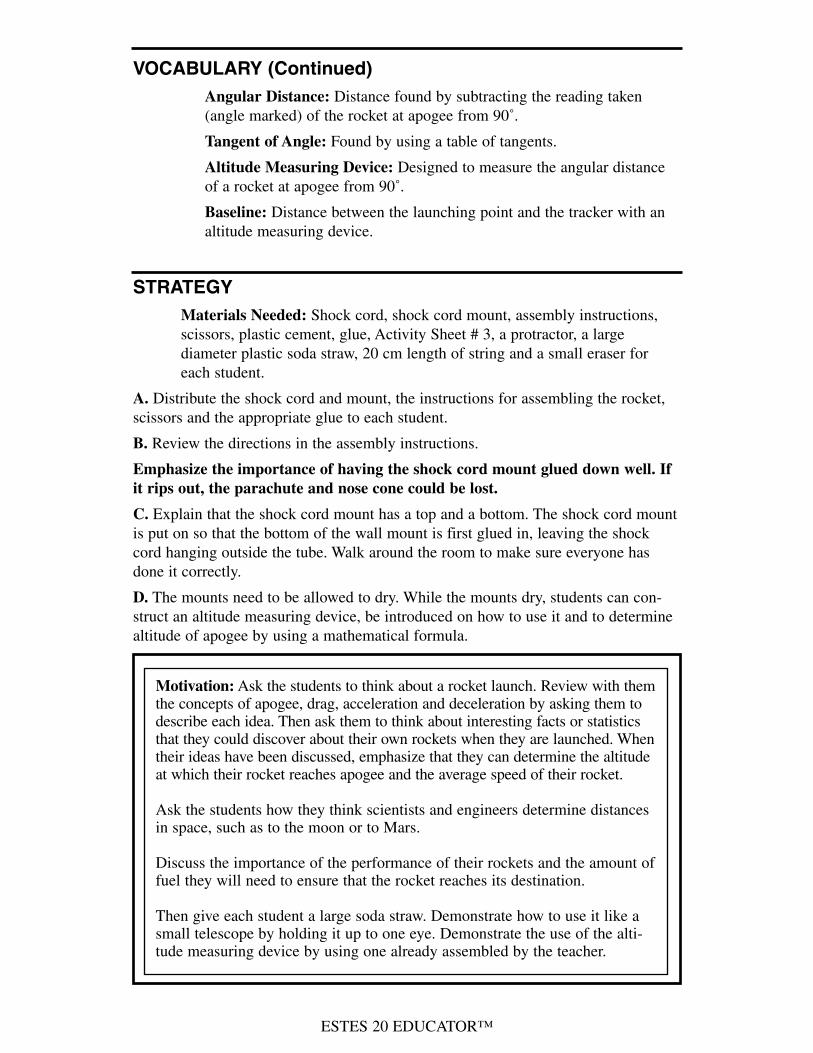
VOCABULARY (Continued)
Angular Distance: Distance found by subtracting the reading taken(angle marked) of the rocket at apogee from 90˚.
Tangent of Angle: Found by using a table of tangents.
Altitude Measuring Device: Designed to measure the angular distanceof a rocket at apogee from 90˚.
Baseline: Distance between the launching point and the tracker with analtitude measuring device.
STRATEGY
Materials Needed: Shock cord, shock cord mount, assembly instructions,scissors, plastic cement, glue, Activity Sheet # 3, a protractor, a large diameter plastic soda straw, 20 cm length of string and a small eraser for each student.
A. Distribute the shock cord and mount, the instructions for assembling the rocket,scissors and the appropriate glue to each student.
B. Review the directions in the assembly instructions.
Emphasize the importance of having the shock cord mount glued down well. If
it rips out, the parachute and nose cone could be lost.
C. Explain that the shock cord mount has a top and a bottom. The shock cord mountis put on so that the bottom of the wall mount is first glued in, leaving the shockcord hanging outside the tube. Walk around the room to make sure everyone hasdone it correctly.
D. The mounts need to be allowed to dry. While the mounts dry, students can con-struct an altitude measuring device, be introduced on how to use it and to determinealtitude of apogee by using a mathematical formula.
Motivation: Ask the students to think about a rocket launch. Review with themthe concepts of apogee, drag, acceleration and deceleration by asking them todescribe each idea. Then ask them to think about interesting facts or statisticsthat they could discover about their own rockets when they are launched. Whentheir ideas have been discussed, emphasize that they can determine the altitudeat which their rocket reaches apogee and the average speed of their rocket.
Ask the students how they think scientists and engineers determine distancesin space, such as to the moon or to Mars.
Discuss the importance of the performance of their rockets and the amount offuel they will need to ensure that the rocket reaches its destination.
Then give each student a large soda straw. Demonstrate how to use it like asmall telescope by holding it up to one eye. Demonstrate the use of the alti-tude measuring device by using one already assembled by the teacher.
ESTES 21 EDUCATOR™
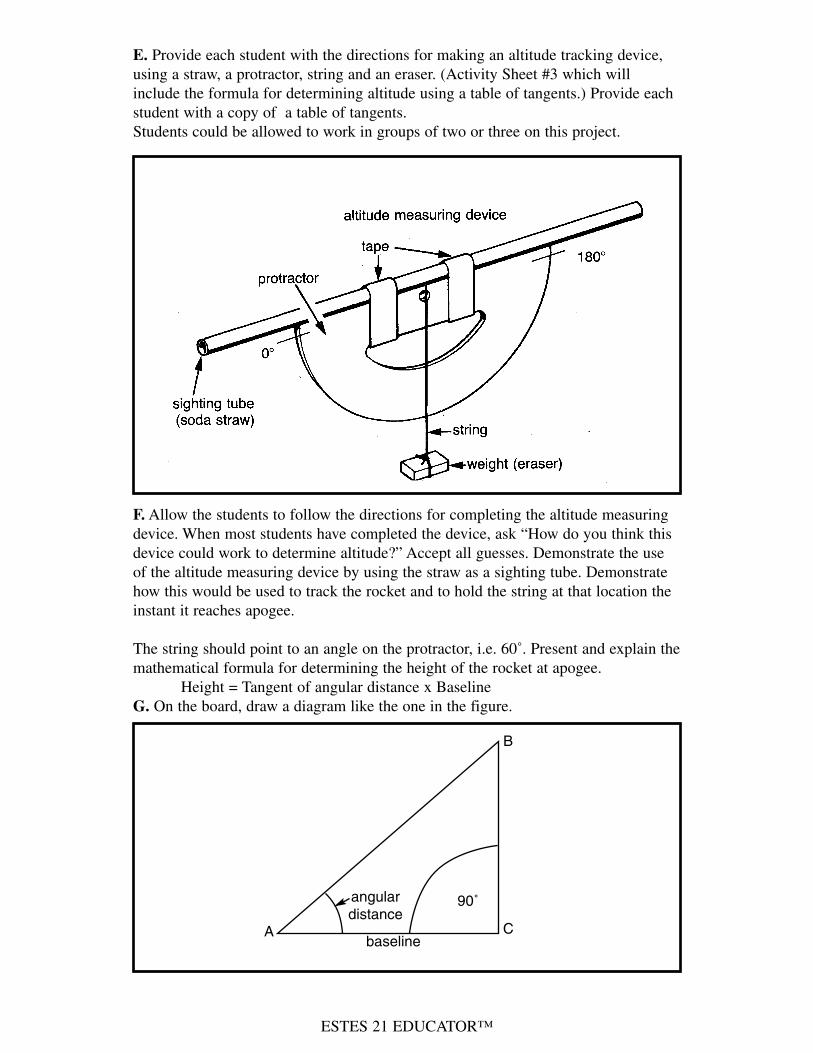
E. Provide each student with the directions for making an altitude tracking device,using a straw, a protractor, string and an eraser. (Activity Sheet #3 which willinclude the formula for determining altitude using a table of tangents.) Provide eachstudent with a copy of a table of tangents.Students could be allowed to work in groups of two or three on this project.
F. Allow the students to follow the directions for completing the altitude measuringdevice. When most students have completed the device, ask “How do you think thisdevice could work to determine altitude?” Accept all guesses. Demonstrate the useof the altitude measuring device by using the straw as a sighting tube. Demonstratehow this would be used to track the rocket and to hold the string at that location theinstant it reaches apogee.
The string should point to an angle on the protractor, i.e. 60˚. Present and explain themathematical formula for determining the height of the rocket at apogee.
Height = Tangent of angular distance x BaselineG. On the board, draw a diagram like the one in the figure.
baseline
angular
distance
A
B
C
90˚
ESTES 22 EDUCATOR™
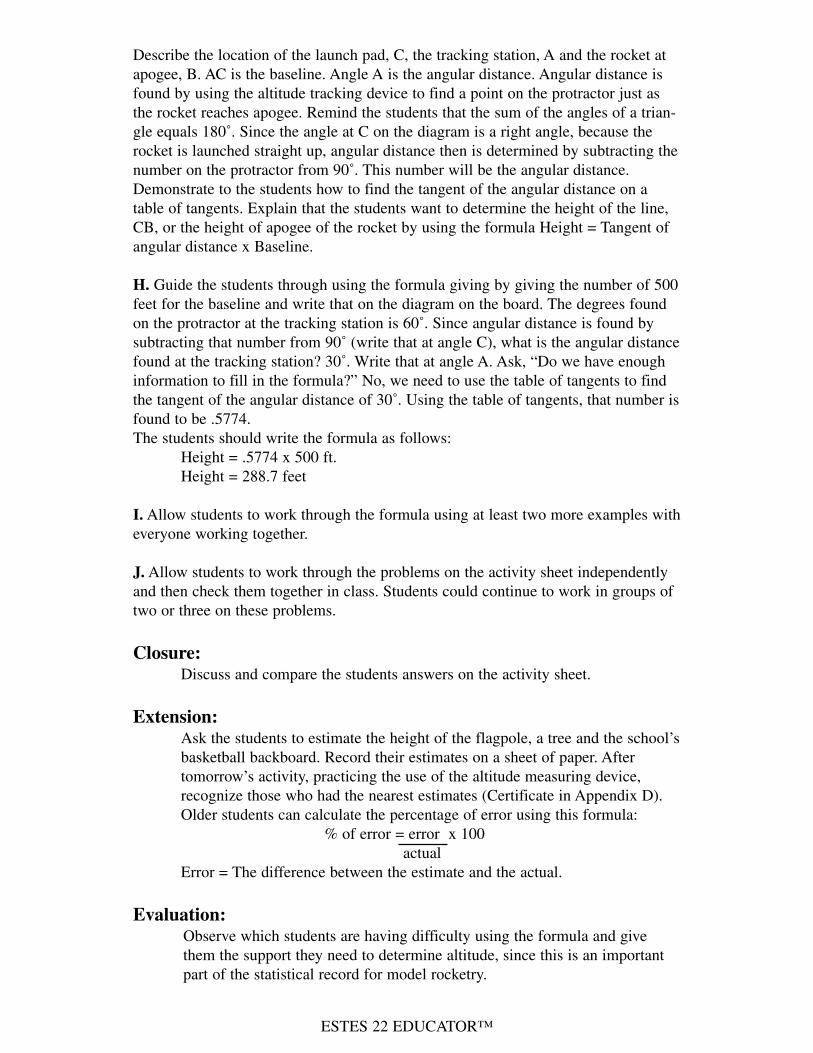
Describe the location of the launch pad, C, the tracking station, A and the rocket atapogee, B. AC is the baseline. Angle A is the angular distance. Angular distance isfound by using the altitude tracking device to find a point on the protractor just asthe rocket reaches apogee. Remind the students that the sum of the angles of a trian-gle equals 180˚. Since the angle at C on the diagram is a right angle, because therocket is launched straight up, angular distance then is determined by subtracting thenumber on the protractor from 90˚. This number will be the angular distance.Demonstrate to the students how to find the tangent of the angular distance on atable of tangents. Explain that the students want to determine the height of the line,CB, or the height of apogee of the rocket by using the formula Height = Tangent ofangular distance x Baseline.
H. Guide the students through using the formula giving by giving the number of 500feet for the baseline and write that on the diagram on the board. The degrees foundon the protractor at the tracking station is 60˚. Since angular distance is found bysubtracting that number from 90˚ (write that at angle C), what is the angular distancefound at the tracking station? 30˚. Write that at angle A. Ask, “Do we have enoughinformation to fill in the formula?” No, we need to use the table of tangents to findthe tangent of the angular distance of 30˚. Using the table of tangents, that number isfound to be .5774.The students should write the formula as follows:
Height = .5774 x 500 ft.Height = 288.7 feet
I. Allow students to work through the formula using at least two more examples witheveryone working together.
J. Allow students to work through the problems on the activity sheet independentlyand then check them together in class. Students could continue to work in groups oftwo or three on these problems.
Closure:Discuss and compare the students answers on the activity sheet.
Extension:Ask the students to estimate the height of the flagpole, a tree and the school’sbasketball backboard. Record their estimates on a sheet of paper. After tomorrow’s activity, practicing the use of the altitude measuring device,recognize those who had the nearest estimates (Certificate in Appendix D). Older students can calculate the percentage of error using this formula:
% of error = error x 100actual
Error = The difference between the estimate and the actual.
Evaluation:Observe which students are having difficulty using the formula and give them the support they need to determine altitude, since this is an important part of the statistical record for model rocketry.
ESTES 23 EDUCATOR™
Activity Sheet #3b
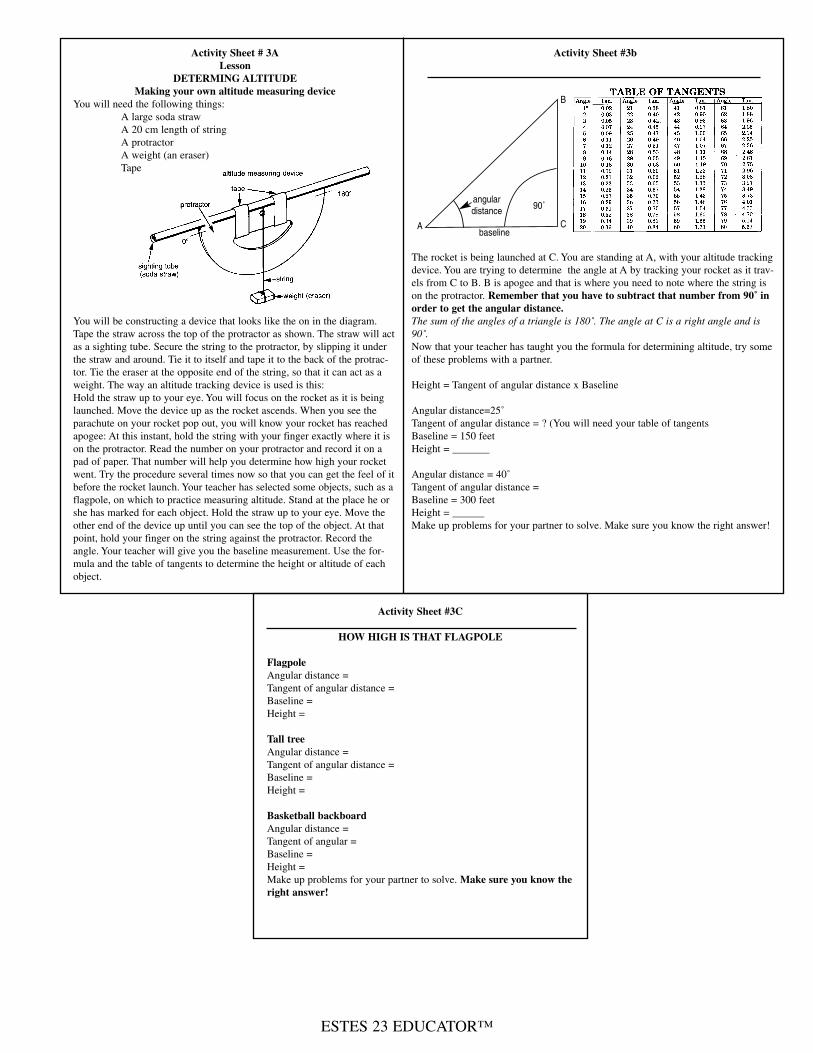
The rocket is being launched at C. You are standing at A, with your altitude trackingdevice. You are trying to determine the angle at A by tracking your rocket as it trav-els from C to B. B is apogee and that is where you need to note where the string ison the protractor. Remember that you have to subtract that number from 90˚ in
order to get the angular distance.
The sum of the angles of a triangle is 180˚. The angle at C is a right angle and is90˚.Now that your teacher has taught you the formula for determining altitude, try someof these problems with a partner.
Height = Tangent of angular distance x Baseline
Angular distance=25˚Tangent of angular distance = ? (You will need your table of tangentsBaseline = 150 feetHeight = _______
Angular distance = 40˚Tangent of angular distance =Baseline = 300 feetHeight = ______Make up problems for your partner to solve. Make sure you know the right answer!
Activity Sheet # 3A
Lesson
DETERMING ALTITUDE
Making your own altitude measuring device
You will need the following things:A large soda straw A 20 cm length of string A protractor A weight (an eraser) Tape
You will be constructing a device that looks like the on in the diagram.Tape the straw across the top of the protractor as shown. The straw will actas a sighting tube. Secure the string to the protractor, by slipping it underthe straw and around. Tie it to itself and tape it to the back of the protrac-tor. Tie the eraser at the opposite end of the string, so that it can act as aweight. The way an altitude tracking device is used is this:Hold the straw up to your eye. You will focus on the rocket as it is beinglaunched. Move the device up as the rocket ascends. When you see theparachute on your rocket pop out, you will know your rocket has reachedapogee: At this instant, hold the string with your finger exactly where it ison the protractor. Read the number on your protractor and record it on apad of paper. That number will help you determine how high your rocketwent. Try the procedure several times now so that you can get the feel of itbefore the rocket launch. Your teacher has selected some objects, such as aflagpole, on which to practice measuring altitude. Stand at the place he orshe has marked for each object. Hold the straw up to your eye. Move theother end of the device up until you can see the top of the object. At thatpoint, hold your finger on the string against the protractor. Record theangle. Your teacher will give you the baseline measurement. Use the for-mula and the table of tangents to determine the height or altitude of eachobject.
Activity Sheet #3C
HOW HIGH IS THAT FLAGPOLE
Flagpole
Angular distance =Tangent of angular distance =Baseline =Height =
Tall tree
Angular distance =Tangent of angular distance =Baseline =Height =
Basketball backboard
Angular distance =Tangent of angular =Baseline =Height =Make up problems for your partner to solve. Make sure you know the
right answer!
baseline
angular
distance
A
B
C
90˚
ESTES 24 EDUCATOR™
Lesson 3 (Continued)
HOW High is That Thing, Anyway?
Objectives of the Lesson:
The student will be able to:
• Use an altitude measuring device to determine the angular distance to the top of an object.
• Use the data of angular distance, baseline and the tangent of an angle to determine the heights of objects.
STRATEGY
Materials Needed: Individual altitude measuring devices, Activity Sheet #3, a pencil. The teacher should have selected some objects to measure, such as the flagpole or a tall tree. The baseline from the objects to the spot where the trackerwill stand should be measured and marked ahead of time.
A. Distribute the students’ folders with Activity Sheet #3. Review the problems donein the previous lesson. Review the formula and remind the students of the informa-tion they will need to get and record outdoors: the angular distance and the baseline.
B. Allow the students to work in groups of two or three. Point out the objects to bemeasured, where the tracking stations are and the length of each baseline.
C. When all students have had an opportunity to use their altitude tracking device,bring them in to calculate their problems.
D. Let each group report their answers. There may be disagreement. Angles, baselinedistances, tangents and calculations will need to be rechecked until there is reason-able agreement.
E. Look at the list of estimates with the students. Determine which ones were nearest to the correct answer.
Motivation: Review the students’ estimates of the height of various objects around the playground. Review the use of the altitude measuring device by demonstrating its use and then letting the students try it out in the classroom.
ESTES 25 EDUCATOR™
Closure and Evaluation:Ask the students to discuss what was the most challenging part of this activity and why? Observe which concepts and skills need continued emphasis.
Extension:Challenge question: What was the big event in 1957 that challenged theUnited States to become more focused on rockets?
NOTES
ESTES 26 EDUCATOR™
Lesson 4 (Two Days)
Rocket Principles and Rocket Recovery
Objectives of the Lesson:The student will be able to:
• Describe the relationship of Newton’s three Laws of Motion to the launch and flight sequence of a model rocket.
• Recognize and identify the recovery systems including feather-weight recovery, tumble recovery, streamer recovery, parachute recovery, helicopter recovery and glide recovery.
• Build a parachute recovery system.
BACKGROUND FOR THE TEACHER
Newton’s Three Laws of Motion1. Objects at rest will stay at rest, and objects in motion will stay in motion in a straight line unless acted upon by an unbalanced force.
To understand this law it is necessary to understand the terms rest, motion andunbalanced force. Rest and motion can be thought of as opposite. Rest is the state of an object when itis not changing position in relation to its surroundings. Rest cannot be defined as atotal absence of motion because it could not exist in nature. All matter in the uni-verse is moving all the time, but in the first law of motion, motion means changingposition in relation to surroundings.
When an object is at rest, the forces acting upon it are balanced. In order for anobject to move, the forces acting upon it must become unbalanced.
A model rocket is at rest when it is on the launch pad. The forces acting upon it arebalanced. In order for an object to move, the forces acting upon it must becomeunbalanced. The force of gravity is pulling the rocket downward and the rocketlaunch pad is pushing against it holding it up. When the propellant in the engine isignited, that provides an unbalanced force. The rocket is then set in motion and willstay in a straight line until other unbalanced forces act upon it.
2. Force is equal to mass times acceleration. This is really a mathematical equation, f = ma. Force in the equation can be thought of asthe thrust of the rocket. Mass in the equation is the amount of rocket fuel being burnedand converted into gas that expands and then escapes from the rocket (Background forthe Teacher, Lesson 1). Acceleration is the rate at which the gas escapes. The gas insidethe rocket does not really move. The gas inside the engine picks up speed or velocity asit leaves the engine. The greater the mass of rocket fuel burned and the faster the gas pro-duced can escape the engine, the greater the thrust of the rocket.
3. For every action there is always an opposite and equal reaction.A rocket can lift off from a launch pad only when it expels gas out of its engine.
The rocket pushes on the gas and the gas pushes on the rocket. With rockets, theaction is the expelling of gas out of the engine. The reaction is the movement of therocket in the opposite direction. To enable a rocket to lift off from the launch pad,the action or thrust from the engine must be greater than the weight of the rocket.
ESTES 27 EDUCATOR™
Recovery Systems - Six Main TypesThe purpose of all recovery systems is to bring the rocket safely back to earth bycreating enough drag or lift to resist the force of gravity. Given Newton’s First Lawof Motion, the ejection charge is an unbalanced force that stops the motion of therocket from continuing in a straight line in addition to the force of gravity. Without arecovery system, the ejection charge would cause the rocket to fall to Earth rapidlyreacting to the force of gravity.
1. Featherweight Recovery The model is very light, usually under 1/4 oz. without the engine and flutters to theground after the engine ejects from it. The spent engine also flutters unless a stream-er is attached to it to further slow it down. The rocket is light in relation to its size. Afeatherweight rocket can encounter a thermal or heated rising air which produces liftduring recovery. The rising air slows the rocket’s descent due to gravity, making itsreturn slower. These models have to be very well constructed to survive this type ofrecovery.
2. Tumble Recovery The force of the engine’s ejection charge pushes the engine backwards and thismoves the center of gravity (center of balance) of the rocket back. The center ofgravity is now behind the center of pressure, the point about which all of the aerody-namic forces appear to be centered. The aerodynamic forces in operation duringrecovery do not realign the rocket as it falls so that the nose of the rocket precedesthe tail. The rocket is now unstable and tumbles end over end. The tumbling motionof the rocket produces extremely high drag on the rocket so it falls slowly. Thismethod of recovery is rarely used on models that are not simple in design and sturdyin construction because the rate of descent is usually higher than with a parachute orstreamer recovery.
3. Streamer Recovery A streamer is usually attached to the nose of the rocket and ejected by the engine’sejection charge to whip around in the air, creating substantial drag with which toslow the rocket’s descent. The effectiveness of the streamer in slowing the descent ofthe model rocket is chiefly determined by the streamer’s surface area and its rough-ness. The larger the streamer, the slower is the descent of the rocket. Streamers areuseful for returning rockets with a minimum of drift. The size of the streamer need-ed primarily depends upon the weight of the rocket being returned. Parachutes andstreamers can be easily interchanged, depending upon needs and wind conditions.However, streamers do not produce enough drag for heavier rockets. Streamers arepacked by rolling them into a compact roll or into two compact rolls.

ESTES 28 EDUCATOR™
Recovery Systems (Continued)
4. Parachute Recovery
The parachute is usually attached to the nose of the rocket and is ejected from therocket body by the engine’s ejection charge, like the streamer. It fills with air andcreates tremendous drag to slow the rocket’s descent and allow it to float gently backto earth. Between the parachute packed in the body tube and the engine is a layer offlameproof recovery wadding. If there is not enough wadding, gases from the ejec-tion charge can pass through or around the wadding layer and either burn holes inthe parachute or melt the parachute into a lump.
5. Helicopter Recovery
An example: vanes on the rocket are activated by the engine’s ejection charge. Theair hits these vanes and is deflected causing the side of the rocket to rotate away inthe opposite direction. The deflection is the action and the rocket rotating in theopposite direction is the reaction. The rotation produces drag and slows the descent.
6. Glide Recovery
The rocket is launched and the engine’s ejection charge causes it to convert into aglider. The wings of the glider generate lift as it flies through the air. The gliderglides through the air, descending slowly. During glide recovery, the rocket movesforward as it descends. The horizontal motion decreases the rate of fall. Most modelrockets that use the glide recovery system are shaped much like airplanes. Theymove forward along their longitudinal axis as they descend and sink at the sametime they move forward. As with the featherweight recovery system, a glider canencounter an area of heated, rising air called a thermal which slows the rate ofdescent, but it can also carry the glider away from sight.
VOCABULARY
Acceleration: The rate of change in the speed of an object.
Motion: Moving, change of position in relation to surroundings.
Featherweight Recovery: Rocket recovery system which involves a verylight model which flutters to the ground.
Parachute Recovery: Rocket recovery system in which a parachute isattached to the nose of the rocket and is ejected from the rocket by theengine’s ejection charge.
Force: Causes acceleration of a body which can cause movement.
Recovery Wadding: Flame resistant tissues that are packed between themodel rocket engine and the streamer or parachute to protect the recoverydevice from hot gases of the ejection charge.
Glide Recovery: Rocket recovery system in which the engine’s ejectioncharge causes it to convert into a glider and which creates lift as it fliesthrough the air.
ESTES 29 EDUCATOR™
VOCABULARY (Continued)
Rest: Not moving, without motion.
Helicopter Recovery: Rocket recovery system in which vanes on therocket are activated by the engine’s ejection charge and air hits thesevanes and is deflected causing the side of the rocket to rotate away in theopposite direction.
Shroud Line: String or cord used to attach a parachute to a shock cord ornose cone.
Mass: Amount of matter an object contains. On Earth, this is measured asweight which is the amount of the force of gravity acting on the mass.
Streamer Recovery: Rocket recovery system in which a streamer isattached to the nose of the rocket and ejected by the engine’s ejectioncharge to whip around in the air.
Tumble Recovery: Rocket recovery system in which the force of theengine’s ejection charge pushes the engine backwards. This moves the bal-ance point of the rocket to the rear causing the rocket to be unstable sothat it tumbles end over end.
Unbalanced Force: Causes an object at rest to move or an object inmotion to slow or stop.
STRATEGY
First Day
Material Needed: Tennis balls, one for each small group of students.
A. Use overhead transparencies to project each law of motion. Give each smallgroup of students a tennis ball or other small ball.
Project Law #1 on overhead projector - Discuss with the students whatthey think it means. Ask them to place the tennis ball in the middle of thegroup and to leave it at rest. Discuss what would cause it to stay at restand what would put it into motion. Discuss what balanced forces areholding it at rest (The force of gravity and the floor or the table). Whatunbalanced force would put it in motion? Rolling it, tossing it up.
Motivation: Ask if anyone found out the significant rocket event of 1957(Sputnik was launched by the Soviet Union). Ask the students how long theythink rocket-powered devices have been in use? (They may know from thequestion about history.) Ask them how long the scientific basis for the under-standing how rockets work has been known? (Since about 1687 with thework of Sir Isaac Newton.) Newton stated three important scientific princi-ples that govern motion of all objects whether on earth or in space. Becauseof these principles, rocket scientists have been able to construct the moderngiant rockets of today.
ESTES 30 EDUCATOR™
Ask a student from each group to carefully toss the ball in the air. Whatunbalanced force caused the ball to leave the student’s hand? What causedthe ball to change from a state of motion? As the ball leaves the student’shand, it is going fast? What two forces are acting on the ball to slow itdown as it rises? (Gravity and drag).
Project Law #2 on the overhead - Ask a student from each group to dropthe ball on the ground. Discuss with the students that the ball fallsbecause of the unbalanced force of gravity acting on it. The ball is accelerating as it falls and begins to gain momentum. The mass stays thesame but the velocity or speed of the ball changes.
At the same time, the air the ball is passing through resists the movementof the ball through it. This resistance is called drag.
Project Law #3 - Remind the students of the balloon demonstration.Review with them the action and reaction. Ask the student to roll the tennis ball against a wall or a barrier. What happens when the ball hits thebarrier? If it is rolling fast enough it rolls away from the barrier. Discusswhat happens when a ball is pitched to a batter. The ball is travelingthrough air being acted upon by the forces of gravity and drag. When ithits the bat, it begins traveling through the air in another direction.
B. Project Newton’s Laws of Motion, Putting Them Together with Model Rocketry.Discuss each law as it relates to a rocket flight sequence. Lead the students to makethe connections between the performance of the tennis ball and the performance of arocket.
Closure:
Allow the students to work on their vocabulary sheets, “Rocket Principles andRocket Recovery”, with a partner or small group. The teacher should walkaround and give assistance as needed. Some of the concepts involved will bechallenging for some of the students.
Evaluation:
Observe the involvement and participation of the students in the small grouptennis ball activity. Observe the students’ responses to the vocabulary studyand clarify concepts as needed.
Extension:
Challenge the students to design a demonstration of one of the laws of motionto present to the class.
NOTES
ESTES 31 EDUCATOR™
Second Day
Materials Needed: Shroud lines, parachutes, set of tape discs, scissors,recovery wadding and nose cone for each student. One can of talcum powderfor the class. A model rocket to demonstrate the effects of the types of recov-ery systems and examples of streamers and parachutes.
A. Describe each type of recovery system (Background for the Teacher). As youname each type, write it on the board and ask students to think about how it mightwork and make a prediction. As you complete the description of each type, reinforcethe student who was closest to the correct description. The teacher should use amodel rocket to demonstrate how the rocket behaves during recovery with each sys-tem.
B. When you have completed the description of all six types, ask the students to con-sider which one they think would work best with the rocket they are constructingand to support their opinion with facts about how it is constructed.
C. One recovery system that is good for this type of rocket is the parachute recoverysystem. That is what students will be constructing. Distribute the shroud line, thebundled thread with tape on it, to each student. The shroud line should be openedvery carefully so it will not tangle. Cut the shroud line into three equal pieces.
D. Distribute a parachute canopy and a set of tape discs to each student. Each stu-dent should cut out the parachute, if not pre-cut already. Check to see that each stu-dent has a parachute, tape discs and three shroud lines.
E. Help the students determine that they have a hexagonal parachute and threeshroud lines with two ends each. Ask them how they think the shroud lines will beattached to the parachute. Emphasize that the top of the parachute is the side towhich the discs will be stuck.
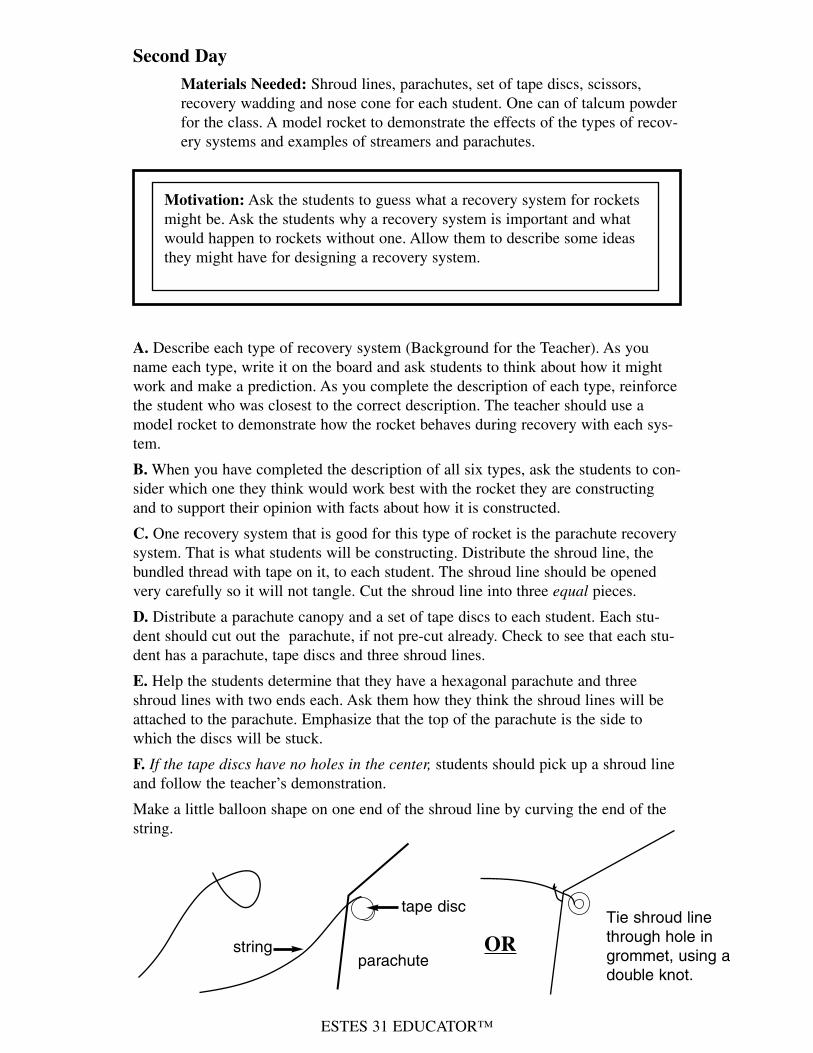
F. If the tape discs have no holes in the center, students should pick up a shroud lineand follow the teacher’s demonstration.
Make a little balloon shape on one end of the shroud line by curving the end of thestring.
Motivation: Ask the students to guess what a recovery system for rocketsmight be. Ask the students why a recovery system is important and whatwould happen to rockets without one. Allow them to describe some ideasthey might have for designing a recovery system.
string
tape discTie shroud line
through hole in
grommet, using a
double knot.
ORparachute
ESTES 32 EDUCATOR™
Stick one of the tape discs to the balloon shape with some of the “balloon” stickingabove. This will help prevent the shroud lines from pulling away from the completedparachute. Students should attach the tape discs with the shroud line attached to thefirst corner of the parachute canopy on the circle, pressing firmly. They should takethe other end of the same shroud line, repeat the steps of forming the balloon andattaching the tape disc, and then attach that end to the next corner of the parachute.If the tape discs (grommets) have holes in the center, instruct the students to attach agrommet to each corner of their parachute. If holes are pre-cut in the parachute cor-ners, grommets should be put over the holes. If the holes are not pre-cut in the cor-ners, students will need to make holes in their parachutes. They should push a pencilgently through the center of the grommet. The ends of the shroud lines are attachedto the parachute by tying them through the grommets. Use double knots.
The process should be repeated with each shroud line until all three shroud lines areconnected to all six corners of the parachute. (Note: Some Estes Bulk Pack rocketkits may come with parachutes preassembled).
G. Pick up the parachute from the middle of the top side. Slide one hand down over itand pull the parachute and shroud lines together. At the bottom of the gathered shroudlines, tie a knot. Explain that the reason for doing this is that it leaves the shroud lineslong from the knot up to the parachute and each of the lines will be of equal length.
H. The students should test their parachutes by holding onto the knot only andpulling the chute through the air to see how well it opens.
I. Distribute three squares of recovery wadding to each student. Explain that thismaterial is treated with a fire retardant chemical. It will protect the parachute frommelting from the intense heat caused by the engine’s ejection charge. It is necessaryto use fresh wadding every time a rocket is launched because it floats away from therocket and is lost. The wadding is biodegradable so it is easy on the environment.The student should loosely crumple the wadding and push it down the top of thebody tube with a pencil. The wadding should be pushed all the way down until ittouches the top of the engine mount assembly.
J. It is desirable for each student’s parachute to be sprinkled with a little talcumpowder in order for the parachute to open easily, since nothing sticks to talcum pow-der. The teacher may want to go outside to do this. The students should line up andthe teacher can sprinkle a little powder on each student’s parachute. Dump out anyexcess on the ground if outdoors.
K. Distribute the nose cones. The teacher may need to clean the flash from the eye-lets. Tie the end of the shock cord onto the nose cone with a double knot. Be carefulnot to use too much of the shock cord when tying knots. Being careful not to tanglethe shroud lines with the shock cord, tie the parachute onto the nose cone by passingthe knotted end of the shroud lines through the eyelet and tie a double knot. Keepthe shroud lines long. This completes the assembly of the rocket.
L. To pack the parachute, the teacher should demonstrate how to fold and pack it soit will easily eject and open. Use the following method:
Fold the parachute by pulling it gently into a spike shape.
Fold in half and then roll up in the other direction, not too tightly. Loosely wrap
the shroud lines around the folded parachute like the stripes on a barber pole.
M. Put the folded parachute into the body tube first, followed by the shock cord andthen plug in the nose cone. Nothing should be sticking out or jamming the nosecone.

ESTES 33 EDUCATOR™
Closure:Review the recovery systems with the students and discuss the appropriate-ness of parachute recovery for their rockets
NOTES
ESTES 34 EDUCATOR™
Lesson 5 (One Day)
Launching Rockets Safely - A Necessity !
Objectives of the Lesson:
The student will be able to:
• Demonstrate proper safety procedures based on the Model RocketrySafety Code.
• Check rocket for stability.
• Install the engine and igniters in the rocket.
BACKGROUND FOR THE TEACHER
NAR MODEL ROCKETRY SAFETY CODE
1. Materials - My model rocket will be made of lightweight materials such as paper,wood, rubber, and plastic suitable for the power used and the performance of mymodel rocket. I will not use any metal for the nose cone, body, or fins of a modelrocket.
2. Engines/Motors - I will use only commercially-made NAR certified model rocketengines in the manner recommended by the manufacturer. I will not alter the modelrocket engine, its parts, or its ingredients in any way.
3. Recovery - I will always use a recovery system in my model rocket that willreturn it safely to the ground so it may be flown again. I will use only flame resistantrecovery wadding if required.
4. Weight and Power Limits - My model rocket will weigh no more the 1500grams (53 ounces) at liftoff, and its rocket engines will produce no more than 320newton-seconds (4.45 newtons equal 1.0 pound) of total impulse. My model rocketwill weigh no more than the engine manufacturer’s recommended maximum liftoffweight for the engines used, or I will use engines recommended by the manufacturerfor my model rocket.
5. Stability - I will check the stability of my model rocket before its first flight,except when launching a model rocket of already proven stability.
6. Payloads - Except for insects, my model rocket will never carry live animals or apayload that is intended to be flammable, explosive, or harmful.
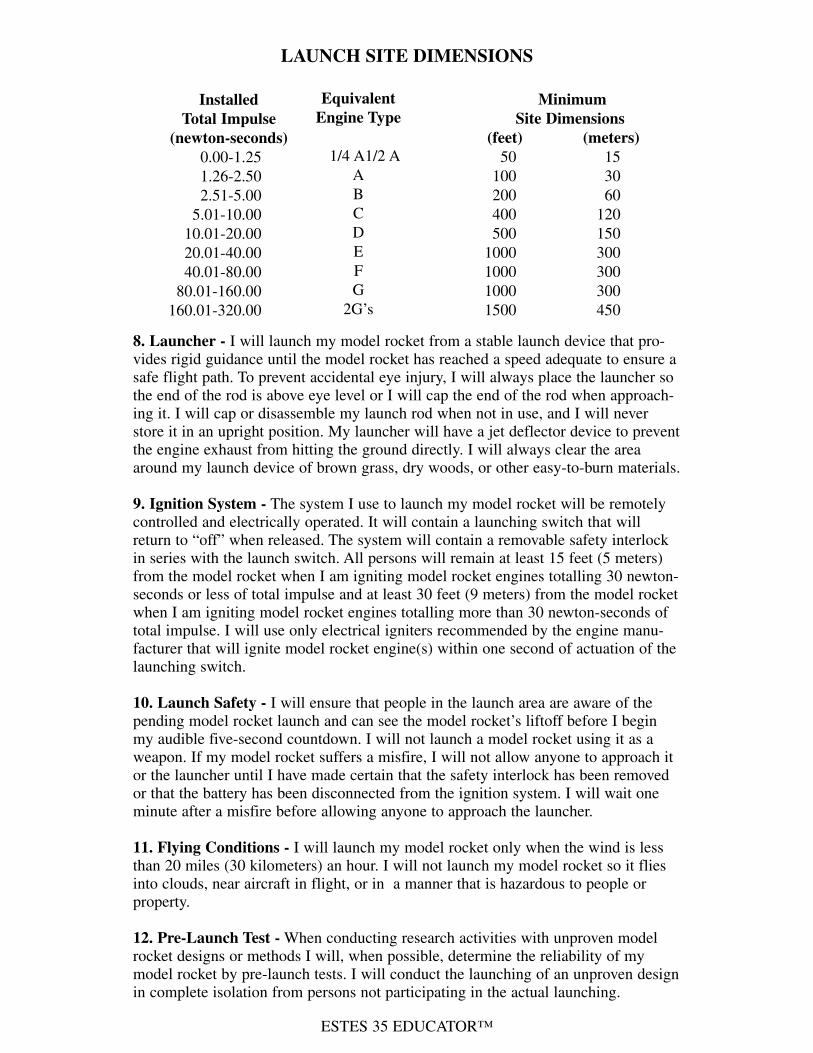
7. Launch Site - I will launch my model rocket outdoors in a cleared area, free oftall trees, power lines, buildings, and dry brush and grass. My launch site will be atleast as large as that recommended in the following table.
ESTES 35 EDUCATOR™
8. Launcher - I will launch my model rocket from a stable launch device that pro-vides rigid guidance until the model rocket has reached a speed adequate to ensure asafe flight path. To prevent accidental eye injury, I will always place the launcher sothe end of the rod is above eye level or I will cap the end of the rod when approach-ing it. I will cap or disassemble my launch rod when not in use, and I will neverstore it in an upright position. My launcher will have a jet deflector device to preventthe engine exhaust from hitting the ground directly. I will always clear the areaaround my launch device of brown grass, dry woods, or other easy-to-burn materials.
9. Ignition System - The system I use to launch my model rocket will be remotelycontrolled and electrically operated. It will contain a launching switch that willreturn to “off” when released. The system will contain a removable safety interlockin series with the launch switch. All persons will remain at least 15 feet (5 meters)from the model rocket when I am igniting model rocket engines totalling 30 newton-seconds or less of total impulse and at least 30 feet (9 meters) from the model rocketwhen I am igniting model rocket engines totalling more than 30 newton-seconds oftotal impulse. I will use only electrical igniters recommended by the engine manu-facturer that will ignite model rocket engine(s) within one second of actuation of thelaunching switch.
10. Launch Safety - I will ensure that people in the launch area are aware of thepending model rocket launch and can see the model rocket’s liftoff before I beginmy audible five-second countdown. I will not launch a model rocket using it as aweapon. If my model rocket suffers a misfire, I will not allow anyone to approach itor the launcher until I have made certain that the safety interlock has been removedor that the battery has been disconnected from the ignition system. I will wait oneminute after a misfire before allowing anyone to approach the launcher.
11. Flying Conditions - I will launch my model rocket only when the wind is lessthan 20 miles (30 kilometers) an hour. I will not launch my model rocket so it fliesinto clouds, near aircraft in flight, or in a manner that is hazardous to people orproperty.
12. Pre-Launch Test - When conducting research activities with unproven modelrocket designs or methods I will, when possible, determine the reliability of mymodel rocket by pre-launch tests. I will conduct the launching of an unproven designin complete isolation from persons not participating in the actual launching.
LAUNCH SITE DIMENSIONS
Installed
Total Impulse
(newton-seconds)
0.00-1.251.26-2.502.51-5.00
5.01-10.0010.01-20.0020.01-40.0040.01-80.00
80.01-160.00160.01-320.00
Equivalent
Engine Type
1/4 A1/2 AABCDEFG
2G’s
Minimum
Site Dimensions
(feet) (meters)
50 15100 30200 60400 120500 150
1000 3001000 3001000 300 1500 450
ESTES 36 EDUCATOR™
13. Launch Angle - My launch device will be pointed within 30 degrees ofvertical. I will never use model rocket engines to propel any device horizon-tally.
14. Recovery Hazards - If a model rocket becomes entangled in a powerline or other dangerous place, I will not attempt to retrieve it. This is the official Model Rocketry Safety Code of the National Associationof Rocketry and the Model Rocket Manufacturers Association.
STRATEGY
Materials Needed: Rocket launch controller and launch pad; an example ofthe engine being used to launch the rockets; Activity Sheet #4 and copies ofthe NAR Safety Code for each student; an engine igniter and plug (if avail-able) for each student with instructions for installing the igniter and installingthe engine into the mount; plus a decal sheet for each student.
A. Distribute decal sheets to each student. Students should follow instruction #7 onthe assembly instructions for placement of the decals.
B. Distribute copies of the safety code to each student. Distribute copies of ActivitySheet #4 (contains evaluation questions related to each part of the safety code) toeach student.
C. The students should, in groups of three or four, read each item of the safety codeand answer the questions related to it on the Activity Sheet. When most groups havefinished, a total group discussion could involve the responses of each group on theActivity Sheet. Students can be allowed to correct their activity sheets if necessary.To make sure each student knows and understands the safety code, give each studenta written test on it. Each student should pass with a score of 98% or above tobecome an official “Launch Control Officer” and be able to launch their rocket.
D. Distribute engines and the instructions included with engines for the properinstallation of igniters. Each student should carefully insert an igniter into an engineand secure it with an igniter plug. Demonstrate to the students how to slide theengine into the engine mount. The igniter end should stick out the bottom and theengine hook should be latched over the end of the engine to prevent it from ejecting.
The rockets are ready to launch.
Motivation: Ask the students to think of some situations in their lives wherethey have to follow safety rules or put themselves at risk. Allow the studentsto tell some of these situations.
Ask the students, “What reasons can you think of that safety around rockets isso important that the NAR has developed a safety code for model rocketry?”Allow the students to contribute reasons.
Ask the students “What are some ideas for rules that might be included in themodel Rocket Safety Code?” Let the students give their ideas. Record themon paper.
ESTES 37 EDUCATOR™
Activity Sheet #4C
NAR MODEL ROCKETRY SAFETY CODE
1. Materials- Does the method we have constructed meet thecode according the materials used to constructit?________________________________________________
List the materials used in your model rocket.
____________________________________________________________________________________________________
2. Engines/Motors- Your teacher will show you the enginesthat will be used. Do they meet the Safety Code standards?
__________________________________________________
3. Recovery- Describe the recovery system you will be using.____________________________________________________________________________________________________Will this recovery system meet the Safety Code?
__________________________________________________
4. Weight and Power Limits- Use a small postage scale toweigh your rocket. What is your rocket’sweight?_____________________. You can also look on thepackage that contained your kit to determine the weight.Does the weight of your rocket meet thecode?_____________________________________________
5. Stability- Did you follow the directions carefully forattaching the fins?___________ If the fins are attached prop-erly at the end of the rocket, then the balance point of therocket should be correct. Since you built the rocket from akit, it should be stable.
6. Payloads- Describe the likely consequences of a flamma-ble, explosive or harmful payload.__________________________________________________________________________________________________________________________
7. Launch Site- Does the launch site your teacher hasdesigned meet the Safety Code standards?__________ Whatsize engine will you be using?______________ Find it on thechart of launch site dimensions. Is the launch site largeenough for that engine?______________________________
8. Launcher-Your teacher should have the launch device thatwill be used for your launch. Take a look at it. Describe howan accidental eye injury could occur.
____________________________________________________________________________________________________
Why do we need to be careful to prevent the engine exhaustfrom hitting the ground directly?
____________________________________________________________________________________________________
Why is it important to consider the danger of fire?
____________________________________________________________________________________________________
Activity Sheet #4D
9. Ignition System- Your teacher will be in charge of theignition system for this launch. Observe how it works. Why isit important for all persons to stand a specific distance fromthe launcher?______________________________________________________________________________________________________________________________________________________
10. Launch Safety- What are the possible consequences offailing to warn people of the pending launch? __________________________________________________What are possible consequences of launching the rocket as aweapon?___________________________________________________________________________________________
11. Flying Conditions- Think of each adverse condition.Describe why each one could be dangerous when launching arocket.High winds of over 20 miles an hour______________________________________________________________________
Near buildings______________________________________
__________________________________________________
Near power lines____________________________________
__________________________________________________
Near tall trees ______________________________________
__________________________________________________
On a crowded playground_____________________________
__________________________________________________
12. Pre-Launch Test- The rocket you will be launching forthis launch is a proven design, built from a kit. However, ifyou build rockets on your own, describe why pre-launch testsare essential. _________________________________________________________________________________________
What are things you would test? ___________________________________________________________________________________________________________________________
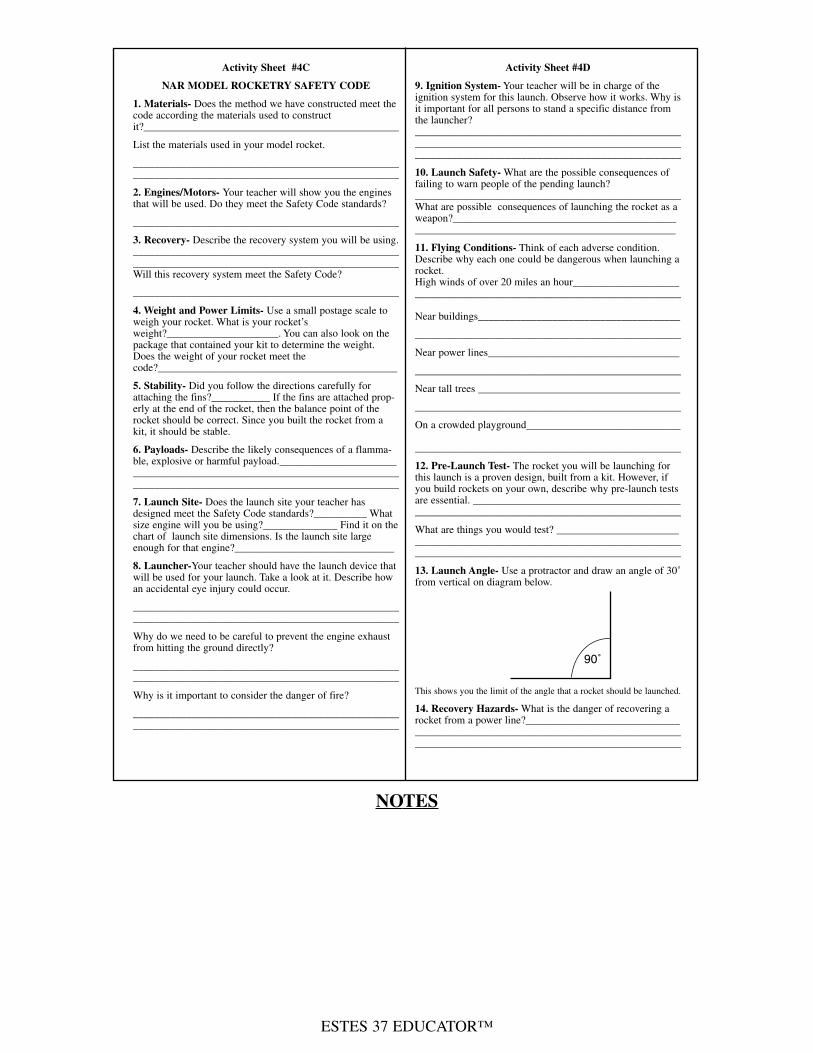
13. Launch Angle- Use a protractor and draw an angle of 30˚from vertical on diagram below.
This shows you the limit of the angle that a rocket should be launched.
14. Recovery Hazards- What is the danger of recovering arocket from a power line?_________________________________________________________________________________________________________________________________
NOTES
90˚
ESTES 38 EDUCATOR™
Lesson 6: (Two Days)
Launching a Rocket - Seeing is Believing
Objectives of the Lesson:
The student will be able to:
• Participate appropriately in the launching of each student’s rocket.
• Demonstrate proper safety procedures during a launch.
• Record flight data on a class chart and on an individual chart.
• Demonstrate ability to track the rocket, measure the angular distance and mathematically determine the height of apogee for the rocket.
• Calculate the average speed of the rocket ascending and the rocket descending.
BACKGROUND FOR THE TEACHER
The launch area should be large enough, clear of people and clear of any easy toburn materials. On the day of the launch, the wind speed should not be more than 20mph. Early morning or early evening when there is little wind is usually the besttime of day to launch.
The launch pad and the launch cable should be anchored down by bricks or some-thing similar.
The safety cap should be on the launch rod at all times except during launch.
The teacher should be in possession of the safety key at all times.
STRATEGY
Materials Needed: A completed model rocket for each student, an altitude measur-ing device for each student, Activity Sheet #7 for each student, two stopwatches, thelauncher and the launch controller.
A. The launch pad should be set up by the teacher. Measure off a 100 foot baselinefrom the launch pad for the tracking station. Mark the end of the baseline with acone or flag.
B. Demonstrate where each student must stand during the launch, a minimum of 15feet away from the launch pad while launching.
Motivation: Review with the students the need for safety and followingprocedures.
Review the launch data sheets.
ESTES 39 EDUCATOR™
C. Each student should have his/her rocket and his/her altitude measuring device, aswell as a pencil and the Individual Launch Data Sheet. Review with the group howto use the altitude measuring device - sighting, following the rocket, holding thestring promptly at apogee against the protractor and recording the number on theprotractor. The parachute will pop out at apogee.
D. The safety key must never be in the launch controller while the rocket is beingloaded onto the launch pad and the micro-clips are being attached. When it is eachstudent’s time for launch, the student gives the rocket to the teacher or another stu-dent. That person slides the rocket onto the launch rod and hooks up the launch sys-tem’s micro-clips. That student should go out to the tracking station. After everyoneis 15 feet or more away from the rocket, insert the safety key. All the students do thecountdown, 5...4...3...2...1...0. The teacher or student then presses the launch buttonon the controller. Be sure to remove the safety key immediately after launch.
E. The students should look at the rocket through the straw and allow the weightedstring to swing freely. Lift the altitude measuring device to follow the rocket until itreaches apogee, when the parachute pops out. The students should “lock” in thereading by by holding the string with their finger against the protractor the instantthe parachute pops out. Write down the number where the string rests. The teachermay select one or two student recovery teams to recover rockets after a certain num-ber of rockets have landed or the students may recover their own rockets.
F. Two other teachers, or a student timing team should record the time of each flightto apogee and again to landing, using a stopwatch. Make certain each student recordshis/her angle of distance, the baseline distance, the time to apogee and the time torecovery on both the class chart and his/her individual chart (Activity Sheet #6 and#7). It will help to have a student in charge of the Group Launch Data Sheet (#6).
G. Before going in, be certain all students’ Activity Sheet #7 are collected. Distributeparticipant certificates to all rocket launchers. (Appendix D)
NOTES
ESTES 40 EDUCATOR™
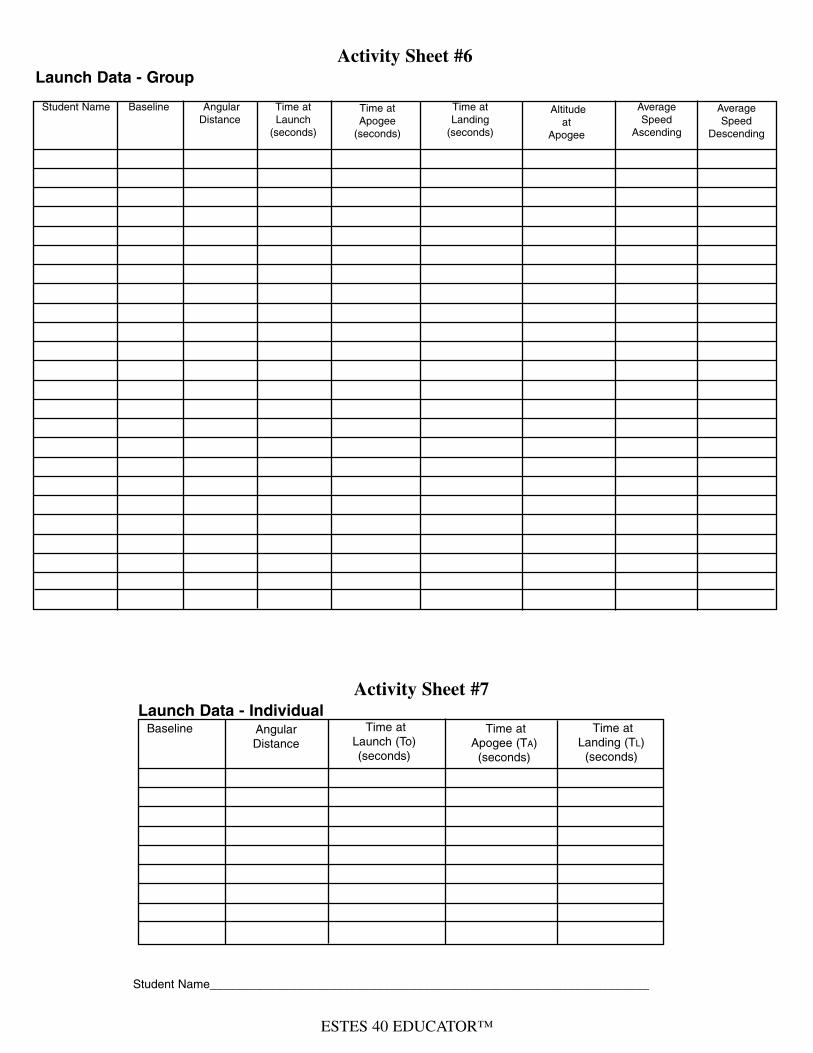
Activity Sheet #6Launch Data - Group
Activity Sheet #7Launch Data - Individual
Average
Speed
Ascending
Average
Speed
Descending
Student Name Baseline Angular
Distance
Time at
Launch
(seconds)
Time at
Apogee
(seconds)
Time at
Landing
(seconds)
Altitude
at
Apogee
Student Name__________________________________________________________________
Baseline Angular
Distance
Time at
Launch (To)
(seconds)
Time at
Apogee (TA)
(seconds)
Time at
Landing (TL)
(seconds)
ESTES 41 EDUCATOR™
Second Day
STRATEGY
Materials Needed: Individual student folders, Activity Sheets #3, #5 and#7 and a table of tangents for each student.
A transparency of completed Activity Sheet #6.
A. Distribute individual student folders, Activity Sheet #5 and completed ActivitySheet #7.
B. Display the overhead transparency for the Group Launch Data. Make certain thatall students have their individual sheets filled in. The teacher will give them themeasurement of the baseline. The column for Time at Launch will be 0.
C. Using the formula for determining altitude, guide the students through theprocess, if needed. When each student has an altitude, record that beside their nameon the Group Launch Data Sheet. From this data, determine which five rocketsachieved the highest altitude. Also determine which estimates were nearest to thehighest altitudes. (If desired, give certificates to closest estimates and for the highestaltitudes achieved by the rockets.)
D. Guide the students through Activity Sheet #5. Using the formulas, guide the stu-dents through the process of determining the average speeds of their rockets, ascend-ing and their rockets descending. Record the average speeds for each student on theGroup Launch Data. From this data, determine which five rockets had the highestspeed ascending and the lowest speed descending. Also determine which estimateswere nearest the actual data. (Give certificates for best estimates, highest speedsascending, and lowest speeds descending.)
Motivation: Before beginning calculations ask for several volunteers toestimate the highest altitude reached by a rocket during yesterday’s launch.Record the estimates on a piece of paper. Repeat the procedure with esti-mates of highest average speed ascending per second and lowest averagespeed descending per second.
Ask the students to give ideas about variables that would have an effect onthe average speed of descent, such as wind or the type of recovery system.
ESTES 42 EDUCATOR™
Closure:
Display the overhead transparency, “Newton’s Laws of Motion, Putting ThemTogether With Model Rocketry”. Review each point with the students and tie it totheir experience with the launch.
Allow the students to discuss why their rockets did not continue going on into space.What unbalanced forces continued to act on their rockets after the launch?
Distribute the giant wordsearch puzzle, “All About Rockets”, (Appendix C). The stu-dents should highlight or circle rocket part words in red, rocket flight sequencewords in blue, laws of motion words and principles in green and recovery systemwords in orange.
Evaluation:
Collect the students’ folders and assess their work, particularly the responses to thevocabulary words and their individual launch data charts.
Ask the students to write three new and important things they learned from studyingabout and launching model rockets.
Use the wordsearch puzzle as an assessment of their understanding of the concepts.
NOTES
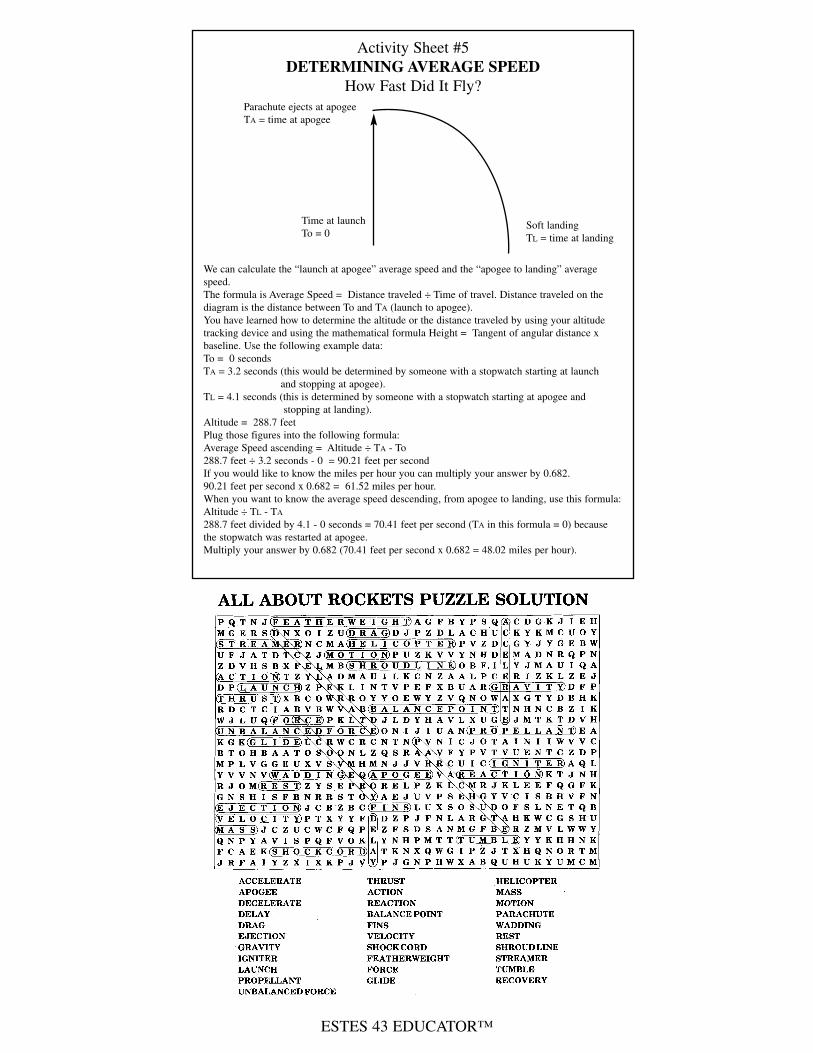
ESTES 43 EDUCATOR™
Activity Sheet #5DETERMINING AVERAGE SPEED
How Fast Did It Fly?
We can calculate the “launch at apogee” average speed and the “apogee to landing” averagespeed.The formula is Average Speed = Distance traveled ÷ Time of travel. Distance traveled on thediagram is the distance between To and TA (launch to apogee). You have learned how to determine the altitude or the distance traveled by using your altitudetracking device and using the mathematical formula Height = Tangent of angular distance xbaseline. Use the following example data:To = 0 seconds TA = 3.2 seconds (this would be determined by someone with a stopwatch starting at launch
and stopping at apogee).TL = 4.1 seconds (this is determined by someone with a stopwatch starting at apogee and
stopping at landing).Altitude = 288.7 feetPlug those figures into the following formula:Average Speed ascending = Altitude ÷ TA - To288.7 feet ÷ 3.2 seconds - 0 = 90.21 feet per secondIf you would like to know the miles per hour you can multiply your answer by 0.682.90.21 feet per second x 0.682 = 61.52 miles per hour.When you want to know the average speed descending, from apogee to landing, use this formula:Altitude ÷ TL - TA
288.7 feet divided by 4.1 - 0 seconds = 70.41 feet per second (TA in this formula = 0) becausethe stopwatch was restarted at apogee.Multiply your answer by 0.682 (70.41 feet per second x 0.682 = 48.02 miles per hour).
Soft landingTL = time at landing
Time at launchTo = 0
Parachute ejects at apogeeTA = time at apogee
ESTES 44 EDUCATOR™
UNIT EXTENSION
Science:Interested students can be encouraged to present a demonstration illustratingNewton’s Laws of Motion. Class time should be set aside for the demonstrations.
Math:Since students have had experience with calculating a rocket’s altitude at apogee,they could predict the altitude of a rocket before another launch. Since they have hadexperience with calculating altitude, their predictions will probably be more accu-rate. One variable could be a different power engine or a different recovery system,such as a streamer or a different sized parachute.
Graphing:The students could construct graphs which show the average speed for the group foreach launch. They could also graph the altitudes of their individual rockets at eachlaunch or for each person in their group for each launch.
History:For those students interested in biographies and history, Robert Goddard, WernerVan Braun or Sir Isaac Newton would make subjects for an interesting bulletin boardfor which students could collect information and pictures. NASA would make agood focus for a bulletin board or center created by students for another grade levelclassroom.
Language Arts:Students interested in receiving information from NASA or from the U.S. SpaceFoundation can visit their web sites at the following addresses:
NASA Spacelinkhttp://spacelink.nasa.gov
U.S. Space Foundationwww.spacefoundation.org
BIBLIOGRAPHYCannon, Robert L. Model Rocketry, The Space Age Teaching Aid, Estes Industries,Third Edition, 1990
Cannon, Robert L. The Laws of Motion and Model Rocketry, Estes Industries, 1979
Cannon, Robert L. and Banks, Michael A., The Rocket Book, A Guide to Buildingand Launching Model Rockets for the Space Age, Prentice-Hall, Inc. 1985
Smith, Harry T. and Warden, Henry J., Industrial Arts Teachers Manual for ModelRocketry, Estes Industries, 1980
Model Rocketry Study Guide, TR-8, Estes Industries, 1985 EST 2841
Rockets, A Teaching Guide for an Elementary Science Unit on Rocketry, NASA,1991, PED-112
ESTES 45 EDUCATOR™
ACTIVITY SHEETS

ESTES 46 EDUCATOR™
Activity Sheet # 1A
WORDS FOR ROCKETEERS
Directions: As you learn these words during each session about rockets, you can fillin the definition. If you need more information, you can also use a dictionary.
ROCKETS IN MOTION
1. ACCELERATE
2. APOGEE
3. DECELERATE
4. DELAY ELEMENT
5. DRAG
6. EJECTION CHARGE
7. GRAVITY
8. IGNITER
9. LAUNCH
10. PROPELLANT
11. RECOVERY SYSTEM
12. THRUST
Name_________________________
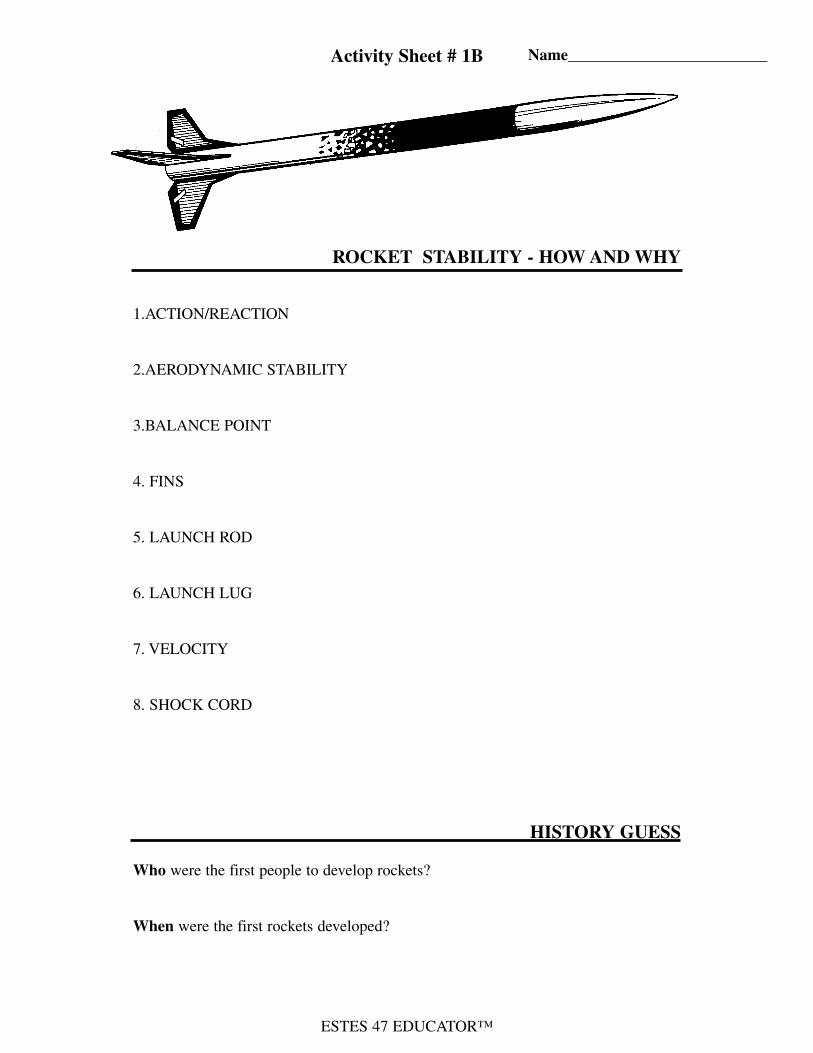
ESTES 47 EDUCATOR™
Activity Sheet # 1B
ROCKET STABILITY - HOW AND WHY
1.ACTION/REACTION
2.AERODYNAMIC STABILITY
3.BALANCE POINT
4. FINS
5. LAUNCH ROD
6. LAUNCH LUG
7. VELOCITY
8. SHOCK CORD
HISTORY GUESS
Who were the first people to develop rockets?
When were the first rockets developed?
Name_________________________
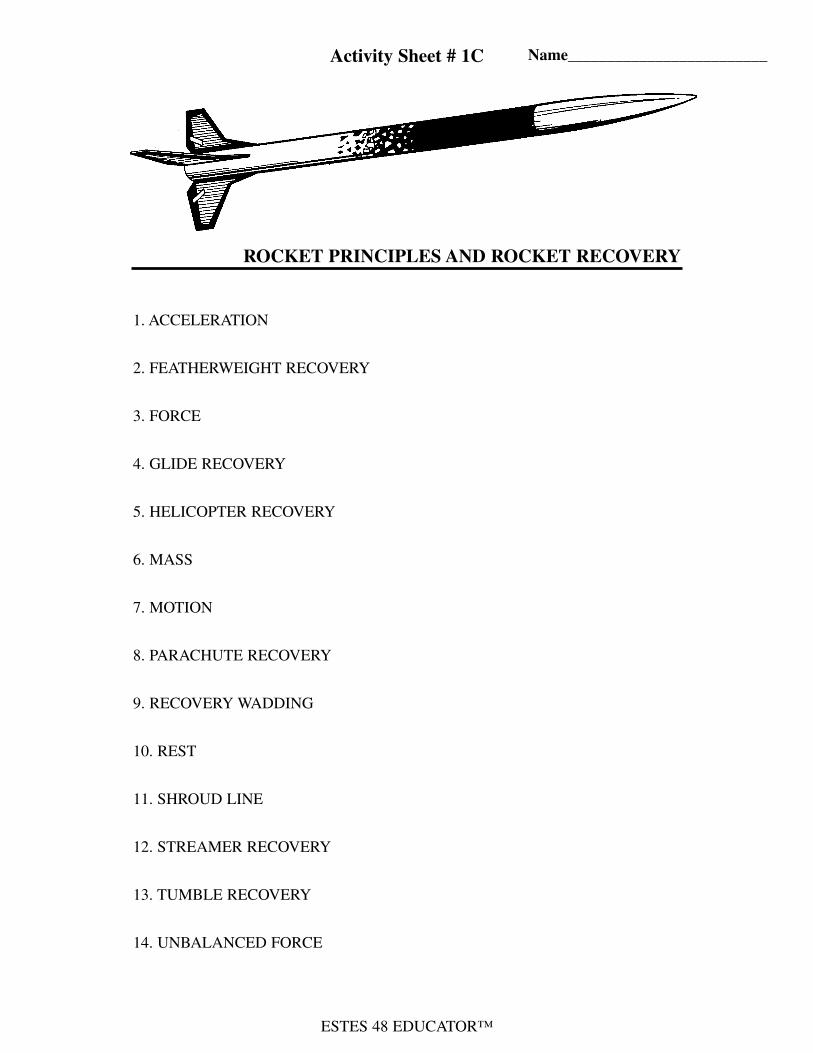
ESTES 48 EDUCATOR™
Activity Sheet # 1C
ROCKET PRINCIPLES AND ROCKET RECOVERY
1. ACCELERATION
2. FEATHERWEIGHT RECOVERY
3. FORCE
4. GLIDE RECOVERY
5. HELICOPTER RECOVERY
6. MASS
7. MOTION
8. PARACHUTE RECOVERY
9. RECOVERY WADDING
10. REST
11. SHROUD LINE
12. STREAMER RECOVERY
13. TUMBLE RECOVERY
14. UNBALANCED FORCE
Name_________________________
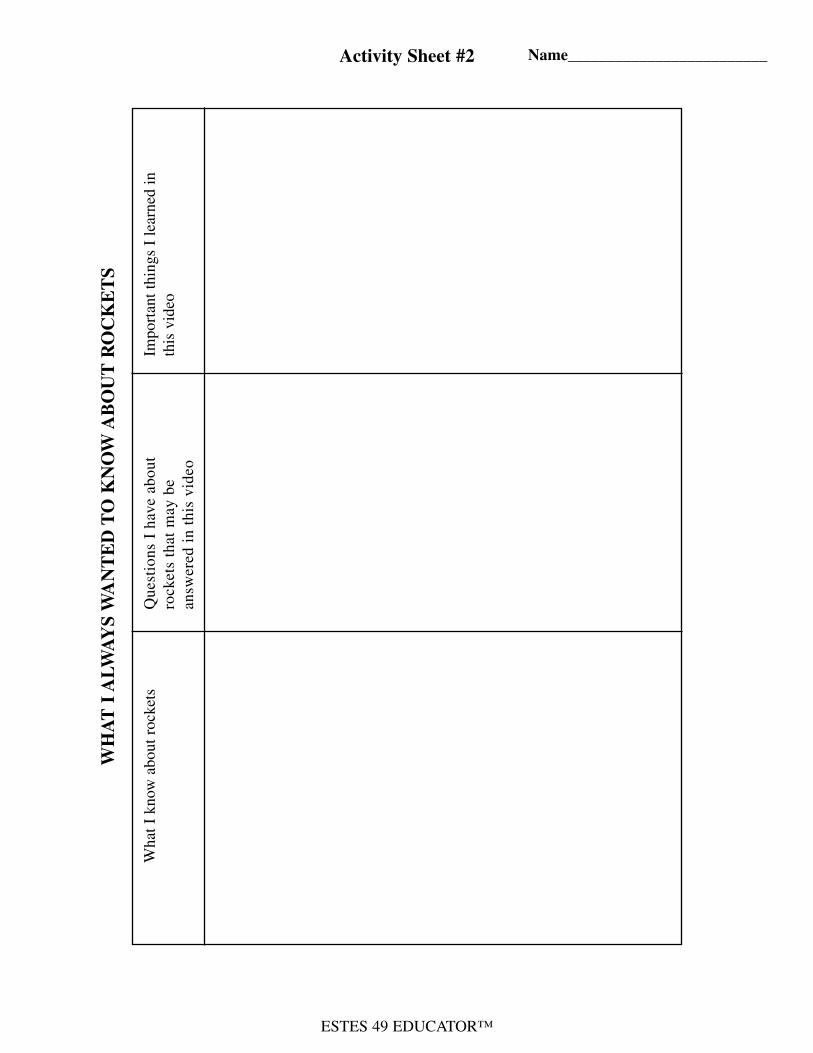
ESTES 49 EDUCATOR™
Activity Sheet #2
Wha
t I k
now
abo
ut r
ocke
tsIm
port
ant t
hing
s I
lear
ned
inth
is v
ideo
Que
stio
ns I
hav
e ab
out
rock
ets
that
may
be
answ
ered
in th
is v
ideo
WH
AT
I A
LW
AY
S W
AN
TE
D T
O K
NO
W A
BO
UT
RO
CK
ET
S
Name_________________________
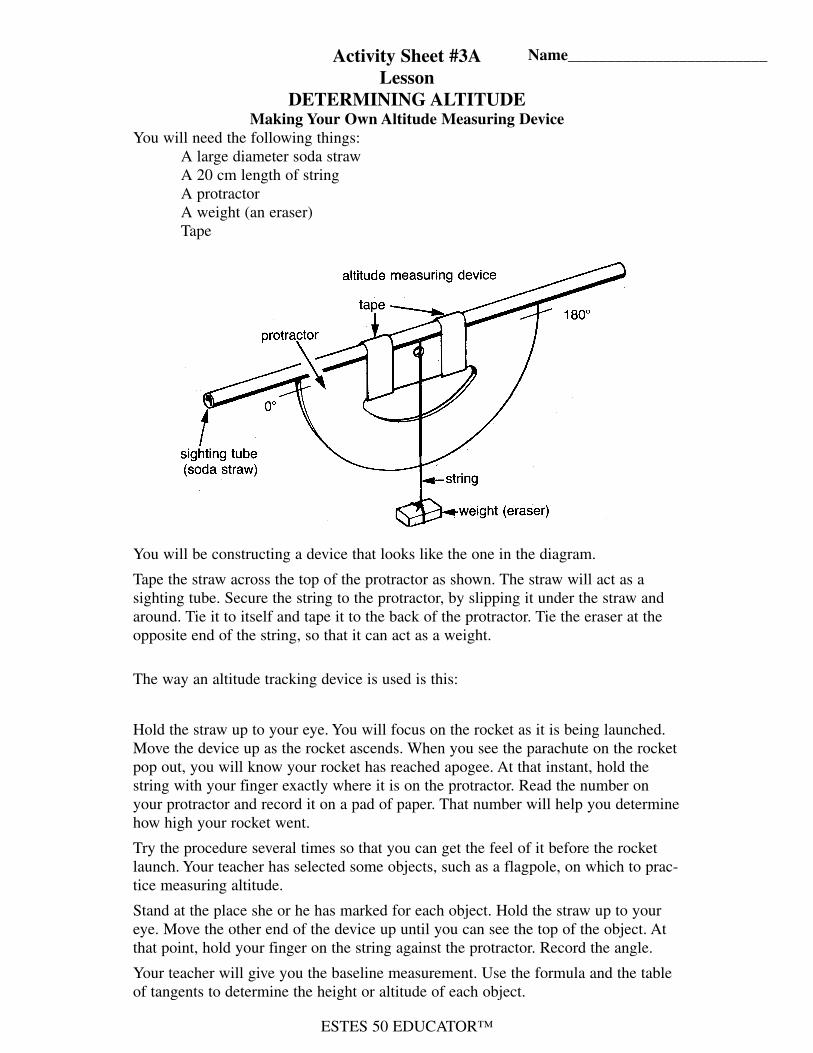
ESTES 50 EDUCATOR™
Activity Sheet #3A
Lesson
DETERMINING ALTITUDEMaking Your Own Altitude Measuring Device
You will need the following things:A large diameter soda strawA 20 cm length of stringA protractorA weight (an eraser)Tape
You will be constructing a device that looks like the one in the diagram.
Tape the straw across the top of the protractor as shown. The straw will act as asighting tube. Secure the string to the protractor, by slipping it under the straw andaround. Tie it to itself and tape it to the back of the protractor. Tie the eraser at theopposite end of the string, so that it can act as a weight.
The way an altitude tracking device is used is this:
Hold the straw up to your eye. You will focus on the rocket as it is being launched.Move the device up as the rocket ascends. When you see the parachute on the rocketpop out, you will know your rocket has reached apogee. At that instant, hold thestring with your finger exactly where it is on the protractor. Read the number onyour protractor and record it on a pad of paper. That number will help you determinehow high your rocket went.
Try the procedure several times so that you can get the feel of it before the rocketlaunch. Your teacher has selected some objects, such as a flagpole, on which to prac-tice measuring altitude.
Stand at the place she or he has marked for each object. Hold the straw up to youreye. Move the other end of the device up until you can see the top of the object. Atthat point, hold your finger on the string against the protractor. Record the angle.
Your teacher will give you the baseline measurement. Use the formula and the tableof tangents to determine the height or altitude of each object.
Name_________________________
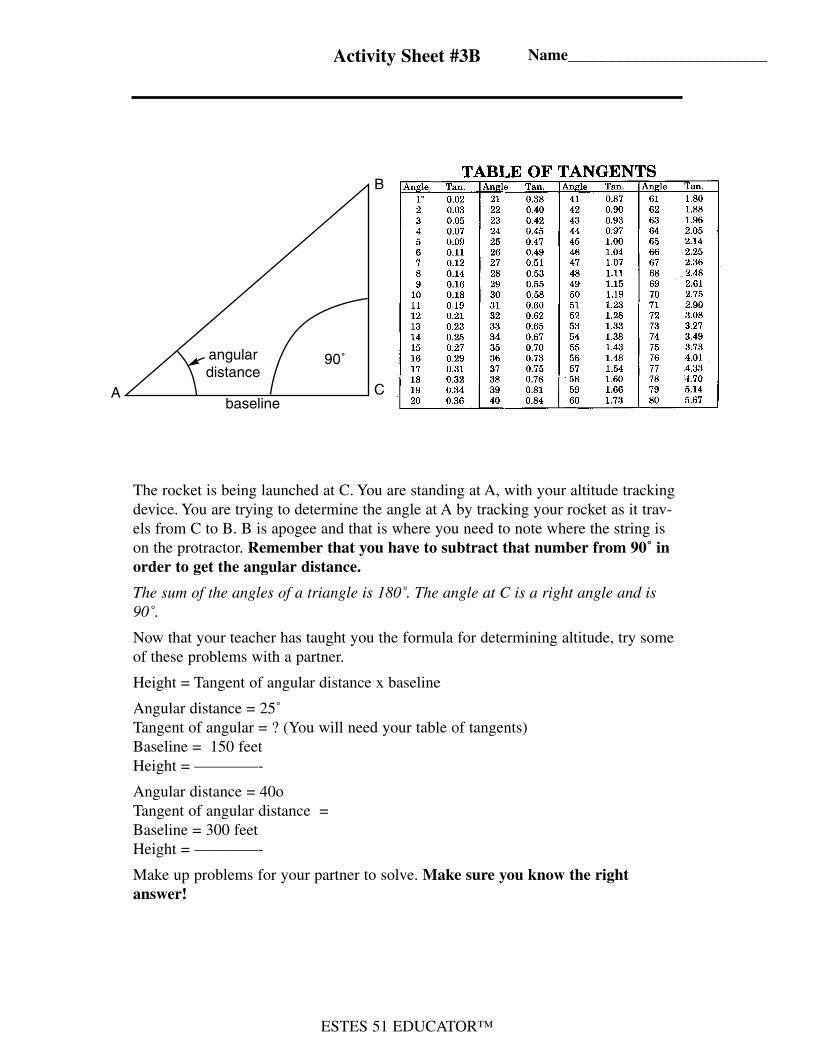
ESTES 51 EDUCATOR™
Activity Sheet #3B
The rocket is being launched at C. You are standing at A, with your altitude trackingdevice. You are trying to determine the angle at A by tracking your rocket as it trav-els from C to B. B is apogee and that is where you need to note where the string ison the protractor. Remember that you have to subtract that number from 90˚ in
order to get the angular distance.
The sum of the angles of a triangle is 180˚. The angle at C is a right angle and is90˚.
Now that your teacher has taught you the formula for determining altitude, try someof these problems with a partner.
Height = Tangent of angular distance x baseline
Angular distance = 25˚Tangent of angular = ? (You will need your table of tangents)Baseline = 150 feetHeight = ————-
Angular distance = 40oTangent of angular distance = Baseline = 300 feetHeight = ————-
Make up problems for your partner to solve. Make sure you know the right
answer!
baseline
angular
distance
A
B
C
90˚
Name_________________________
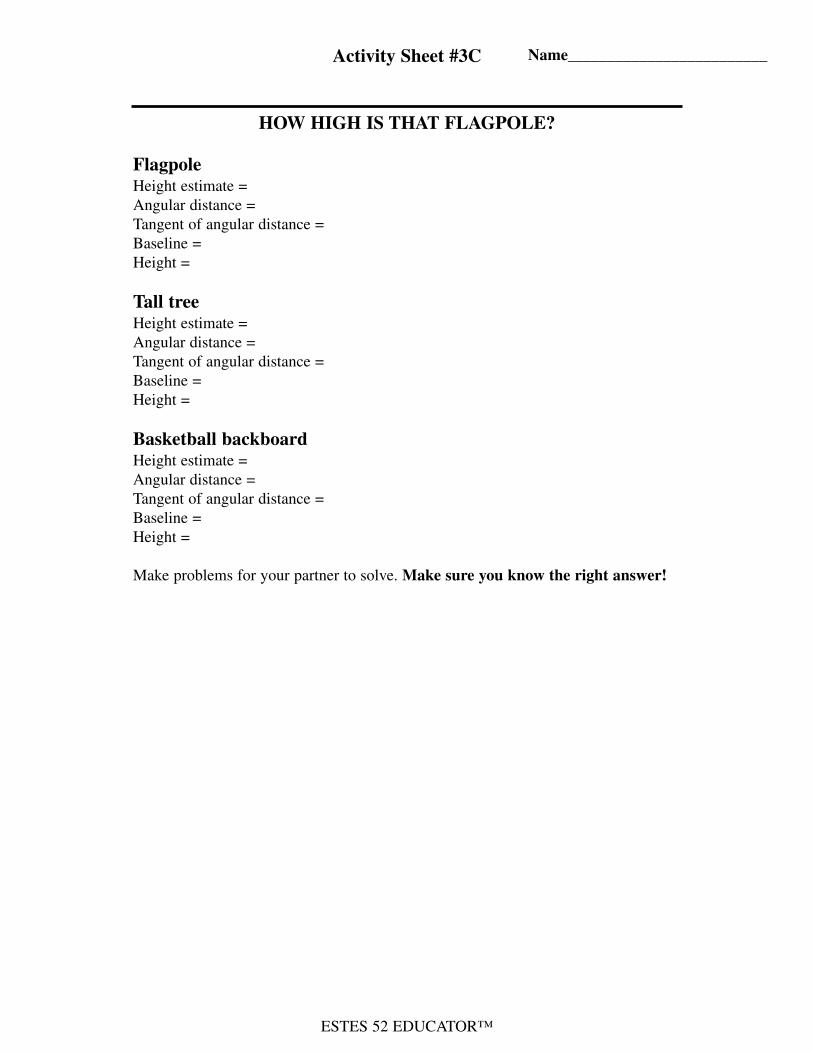
ESTES 52 EDUCATOR™
Activity Sheet #3C
HOW HIGH IS THAT FLAGPOLE?
FlagpoleHeight estimate = Angular distance =Tangent of angular distance =Baseline =Height =
Tall treeHeight estimate =Angular distance =Tangent of angular distance =Baseline =Height =
Basketball backboardHeight estimate =Angular distance =Tangent of angular distance =Baseline =Height =
Make problems for your partner to solve. Make sure you know the right answer!
Name_________________________
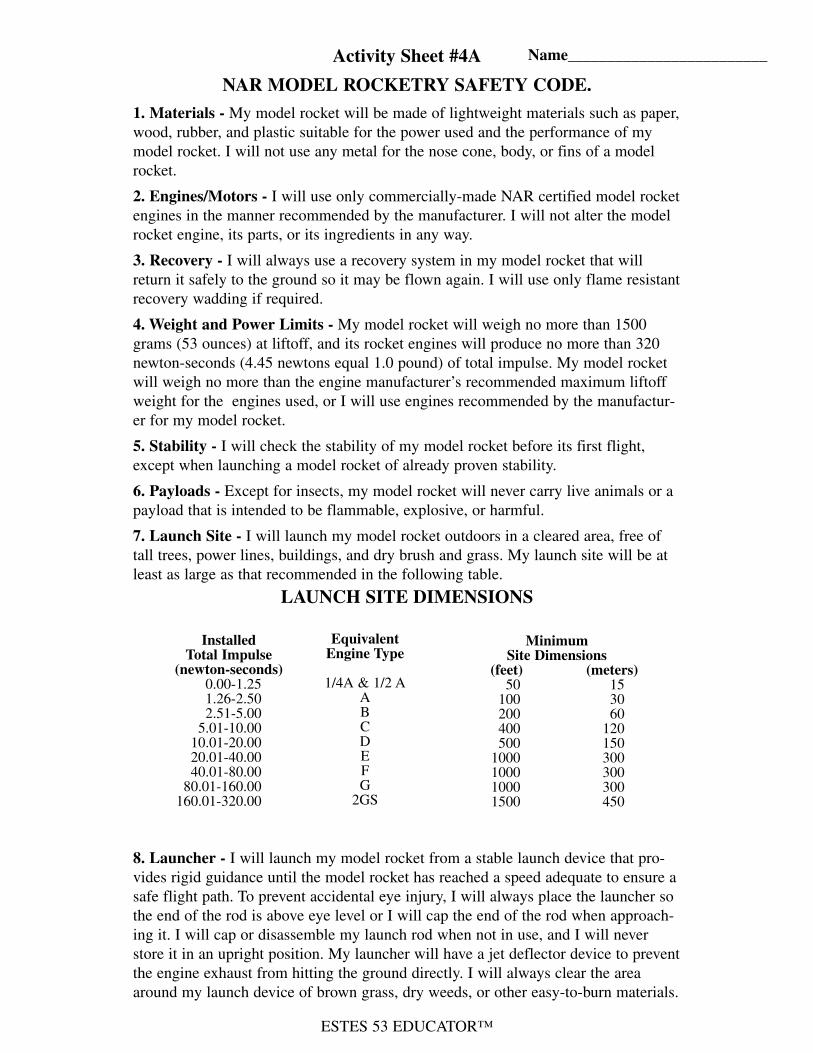
ESTES 53 EDUCATOR™
Activity Sheet #4A
NAR MODEL ROCKETRY SAFETY CODE.
1. Materials - My model rocket will be made of lightweight materials such as paper,wood, rubber, and plastic suitable for the power used and the performance of mymodel rocket. I will not use any metal for the nose cone, body, or fins of a modelrocket.
2. Engines/Motors - I will use only commercially-made NAR certified model rocketengines in the manner recommended by the manufacturer. I will not alter the modelrocket engine, its parts, or its ingredients in any way.
3. Recovery - I will always use a recovery system in my model rocket that willreturn it safely to the ground so it may be flown again. I will use only flame resistantrecovery wadding if required.
4. Weight and Power Limits - My model rocket will weigh no more than 1500grams (53 ounces) at liftoff, and its rocket engines will produce no more than 320newton-seconds (4.45 newtons equal 1.0 pound) of total impulse. My model rocketwill weigh no more than the engine manufacturer’s recommended maximum liftoffweight for the engines used, or I will use engines recommended by the manufactur-er for my model rocket.
5. Stability - I will check the stability of my model rocket before its first flight,except when launching a model rocket of already proven stability.
6. Payloads - Except for insects, my model rocket will never carry live animals or apayload that is intended to be flammable, explosive, or harmful.
7. Launch Site - I will launch my model rocket outdoors in a cleared area, free oftall trees, power lines, buildings, and dry brush and grass. My launch site will be atleast as large as that recommended in the following table.
8. Launcher - I will launch my model rocket from a stable launch device that pro-vides rigid guidance until the model rocket has reached a speed adequate to ensure asafe flight path. To prevent accidental eye injury, I will always place the launcher sothe end of the rod is above eye level or I will cap the end of the rod when approach-ing it. I will cap or disassemble my launch rod when not in use, and I will neverstore it in an upright position. My launcher will have a jet deflector device to preventthe engine exhaust from hitting the ground directly. I will always clear the areaaround my launch device of brown grass, dry weeds, or other easy-to-burn materials.
LAUNCH SITE DIMENSIONS
InstalledTotal Impulse
(newton-seconds)0.00-1.251.26-2.502.51-5.00
5.01-10.0010.01-20.0020.01-40.0040.01-80.00
80.01-160.00160.01-320.00
EquivalentEngine Type
1/4A & 1/2 AABCDEFG
2GS
Minimum Site Dimensions
(feet) (meters)50 15
100 30200 60400 120500 150
1000 3001000 3001000 300 1500 450
Name_________________________
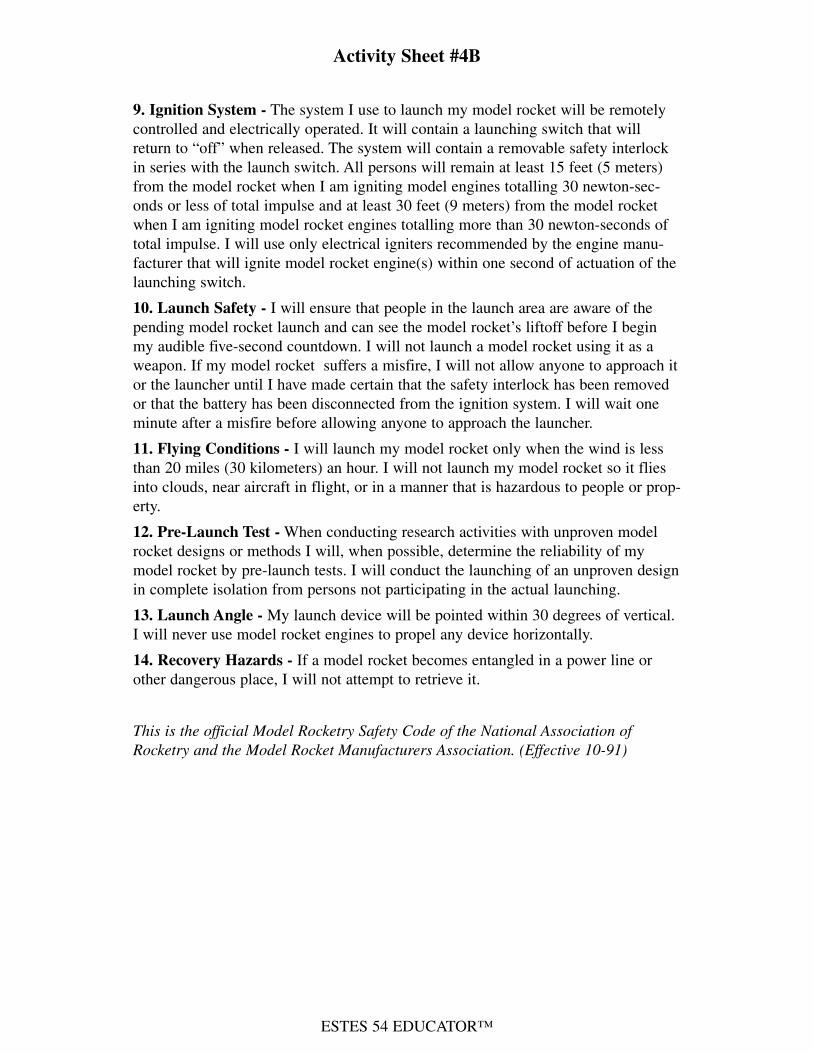
ESTES 54 EDUCATOR™
Activity Sheet #4B
9. Ignition System - The system I use to launch my model rocket will be remotelycontrolled and electrically operated. It will contain a launching switch that willreturn to “off” when released. The system will contain a removable safety interlockin series with the launch switch. All persons will remain at least 15 feet (5 meters)from the model rocket when I am igniting model engines totalling 30 newton-sec-onds or less of total impulse and at least 30 feet (9 meters) from the model rocketwhen I am igniting model rocket engines totalling more than 30 newton-seconds oftotal impulse. I will use only electrical igniters recommended by the engine manu-facturer that will ignite model rocket engine(s) within one second of actuation of thelaunching switch.
10. Launch Safety - I will ensure that people in the launch area are aware of thepending model rocket launch and can see the model rocket’s liftoff before I beginmy audible five-second countdown. I will not launch a model rocket using it as aweapon. If my model rocket suffers a misfire, I will not allow anyone to approach itor the launcher until I have made certain that the safety interlock has been removedor that the battery has been disconnected from the ignition system. I will wait oneminute after a misfire before allowing anyone to approach the launcher.
11. Flying Conditions - I will launch my model rocket only when the wind is lessthan 20 miles (30 kilometers) an hour. I will not launch my model rocket so it fliesinto clouds, near aircraft in flight, or in a manner that is hazardous to people or prop-erty.
12. Pre-Launch Test - When conducting research activities with unproven modelrocket designs or methods I will, when possible, determine the reliability of mymodel rocket by pre-launch tests. I will conduct the launching of an unproven designin complete isolation from persons not participating in the actual launching.
13. Launch Angle - My launch device will be pointed within 30 degrees of vertical.I will never use model rocket engines to propel any device horizontally.
14. Recovery Hazards - If a model rocket becomes entangled in a power line orother dangerous place, I will not attempt to retrieve it.
This is the official Model Rocketry Safety Code of the National Association ofRocketry and the Model Rocket Manufacturers Association. (Effective 10-91)
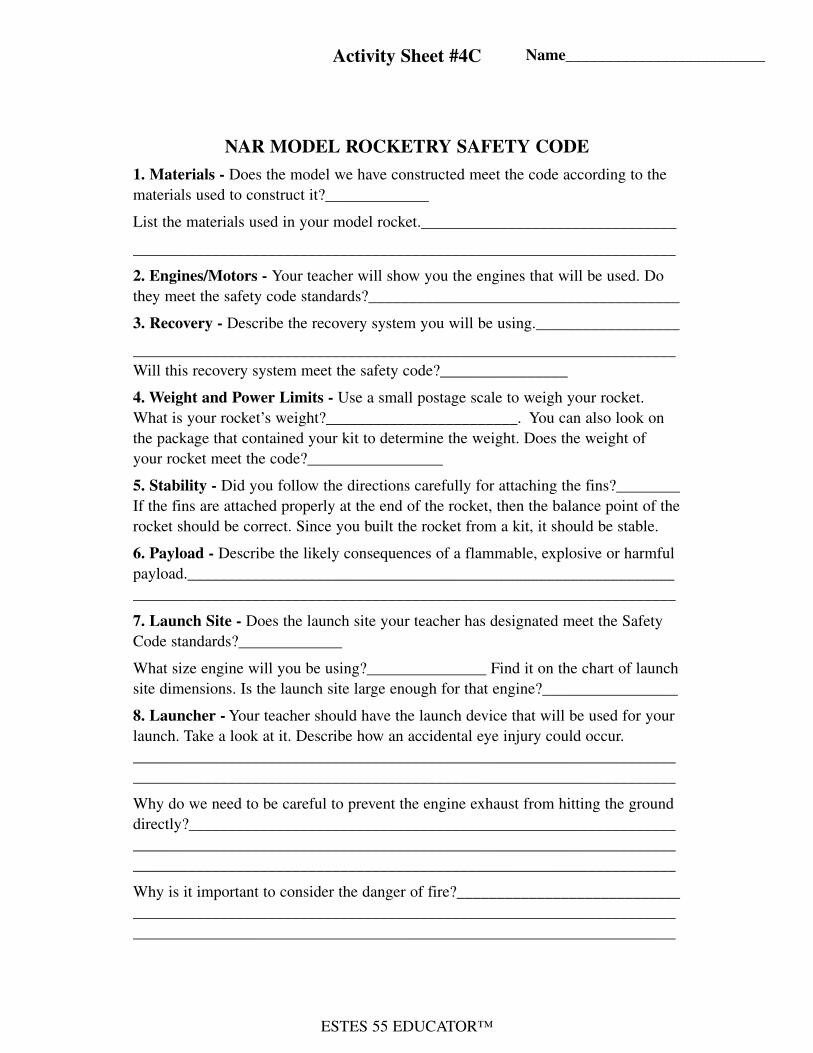
ESTES 55 EDUCATOR™
Activity Sheet #4C
NAR MODEL ROCKETRY SAFETY CODE
1. Materials - Does the model we have constructed meet the code according to thematerials used to construct it?_____________
List the materials used in your model rocket.________________________________
____________________________________________________________________
2. Engines/Motors - Your teacher will show you the engines that will be used. Dothey meet the safety code standards?_______________________________________
3. Recovery - Describe the recovery system you will be using.__________________
____________________________________________________________________Will this recovery system meet the safety code?________________
4. Weight and Power Limits - Use a small postage scale to weigh your rocket.What is your rocket’s weight?________________________. You can also look onthe package that contained your kit to determine the weight. Does the weight ofyour rocket meet the code?_________________
5. Stability - Did you follow the directions carefully for attaching the fins?________If the fins are attached properly at the end of the rocket, then the balance point of therocket should be correct. Since you built the rocket from a kit, it should be stable.
6. Payload - Describe the likely consequences of a flammable, explosive or harmfulpayload._________________________________________________________________________________________________________________________________
7. Launch Site - Does the launch site your teacher has designated meet the SafetyCode standards?_____________
What size engine will you be using?_______________ Find it on the chart of launchsite dimensions. Is the launch site large enough for that engine?_________________
8. Launcher - Your teacher should have the launch device that will be used for yourlaunch. Take a look at it. Describe how an accidental eye injury could occur.________________________________________________________________________________________________________________________________________
Why do we need to be careful to prevent the engine exhaust from hitting the grounddirectly?_____________________________________________________________________________________________________________________________________________________________________________________________________
Why is it important to consider the danger of fire?____________________________________________________________________________________________________________________________________________________________________
Name_________________________
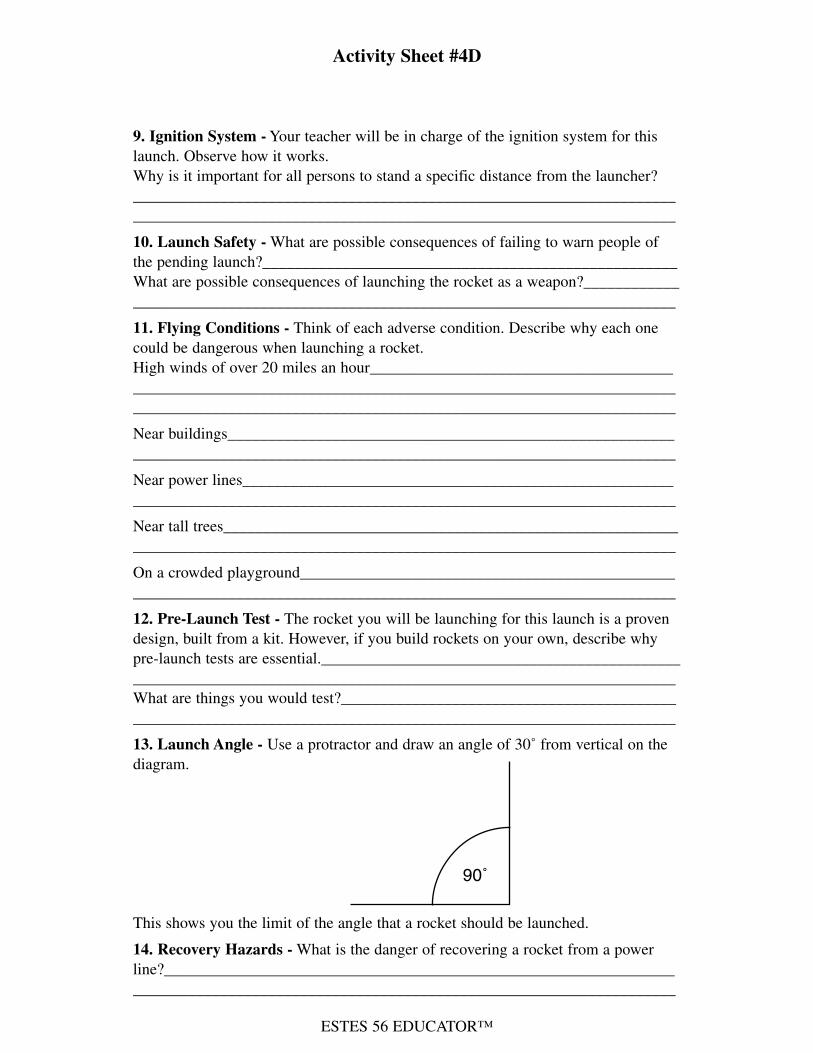
ESTES 56 EDUCATOR™
Activity Sheet #4D
9. Ignition System - Your teacher will be in charge of the ignition system for thislaunch. Observe how it works. Why is it important for all persons to stand a specific distance from the launcher?________________________________________________________________________________________________________________________________________
10. Launch Safety - What are possible consequences of failing to warn people ofthe pending launch?____________________________________________________What are possible consequences of launching the rocket as a weapon?________________________________________________________________________________
11. Flying Conditions - Think of each adverse condition. Describe why each onecould be dangerous when launching a rocket. High winds of over 20 miles an hour______________________________________________________________________________________________________________________________________________________________________________
Near buildings____________________________________________________________________________________________________________________________
Near power lines__________________________________________________________________________________________________________________________
Near tall trees_____________________________________________________________________________________________________________________________
On a crowded playground___________________________________________________________________________________________________________________
12. Pre-Launch Test - The rocket you will be launching for this launch is a provendesign, built from a kit. However, if you build rockets on your own, describe whypre-launch tests are essential._________________________________________________________________________________________________________________ What are things you would test?______________________________________________________________________________________________________________
13. Launch Angle - Use a protractor and draw an angle of 30˚ from vertical on thediagram.
This shows you the limit of the angle that a rocket should be launched.
14. Recovery Hazards - What is the danger of recovering a rocket from a powerline?____________________________________________________________________________________________________________________________________
90˚
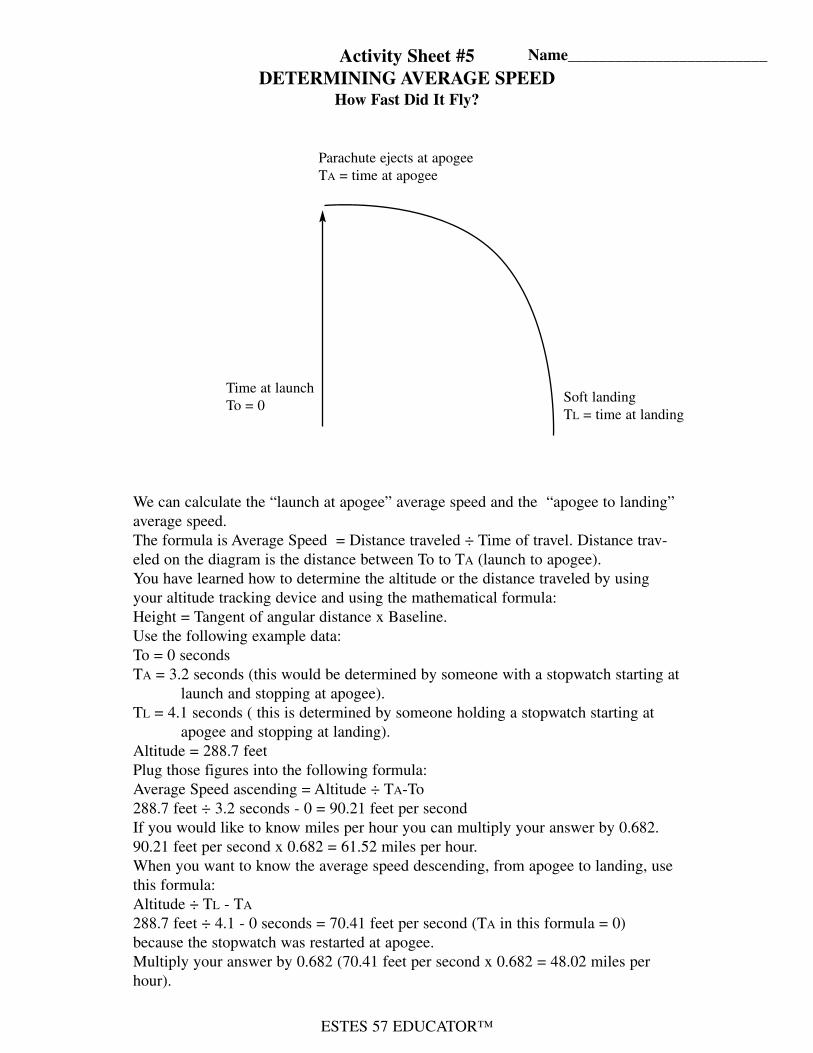
ESTES 57 EDUCATOR™
Activity Sheet #5
DETERMINING AVERAGE SPEEDHow Fast Did It Fly?
We can calculate the “launch at apogee” average speed and the “apogee to landing”average speed.The formula is Average Speed = Distance traveled ÷ Time of travel. Distance trav-eled on the diagram is the distance between To to TA (launch to apogee). You have learned how to determine the altitude or the distance traveled by usingyour altitude tracking device and using the mathematical formula:Height = Tangent of angular distance x Baseline.Use the following example data:To = 0 secondsTA = 3.2 seconds (this would be determined by someone with a stopwatch starting at
launch and stopping at apogee).TL = 4.1 seconds ( this is determined by someone holding a stopwatch starting at
apogee and stopping at landing).Altitude = 288.7 feetPlug those figures into the following formula:Average Speed ascending = Altitude ÷ TA-To288.7 feet ÷ 3.2 seconds - 0 = 90.21 feet per secondIf you would like to know miles per hour you can multiply your answer by 0.682.90.21 feet per second x 0.682 = 61.52 miles per hour.When you want to know the average speed descending, from apogee to landing, usethis formula:Altitude ÷ TL - TA
288.7 feet ÷ 4.1 - 0 seconds = 70.41 feet per second (TA in this formula = 0)because the stopwatch was restarted at apogee. Multiply your answer by 0.682 (70.41 feet per second x 0.682 = 48.02 miles perhour).
Soft landingTL = time at landing
Time at launchTo = 0
Parachute ejects at apogeeTA = time at apogee
Name_________________________
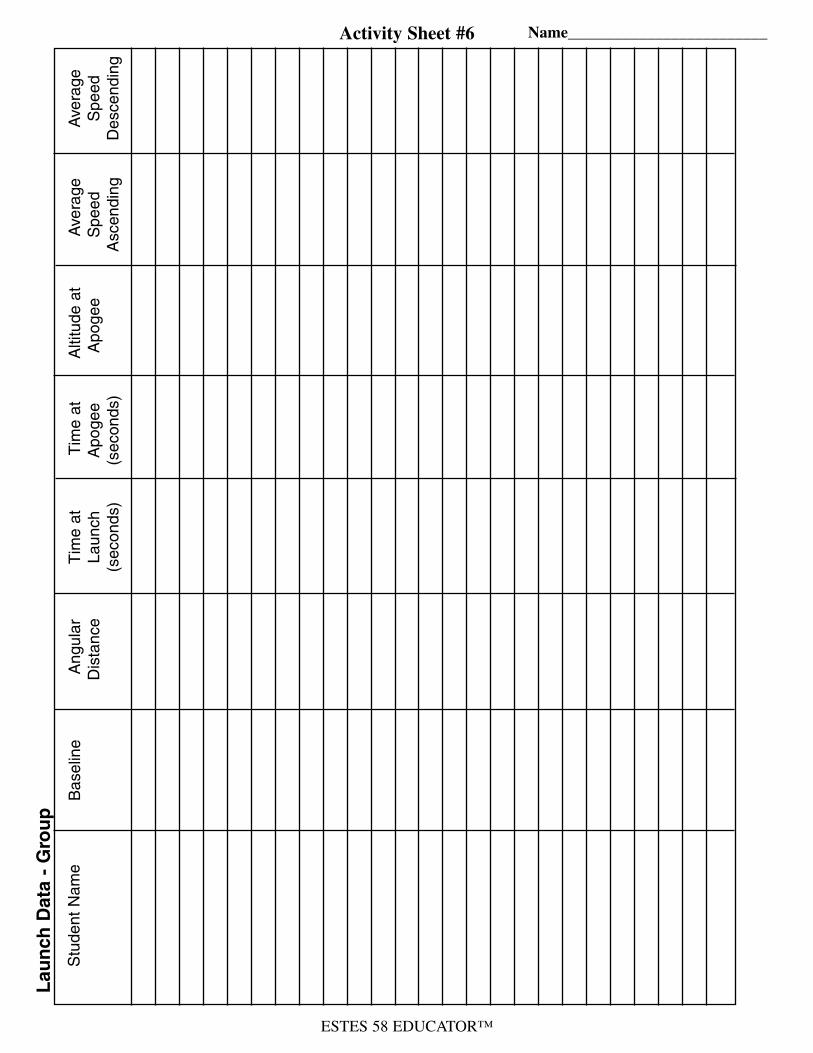
ESTES 58 EDUCATOR™
Activity Sheet #6L
au
nch
Data
- G
rou
p
Stu
dent
Nam
e
Baselin
e
Angula
r
Dis
tance
Tim
e a
t
Launch
(seconds)
Tim
e a
t
Apogee
(seconds)
Altitude a
t
Apogee
Avera
ge
Speed
Ascendin
g
Avera
ge
Speed
Descendin
g
Name_________________________
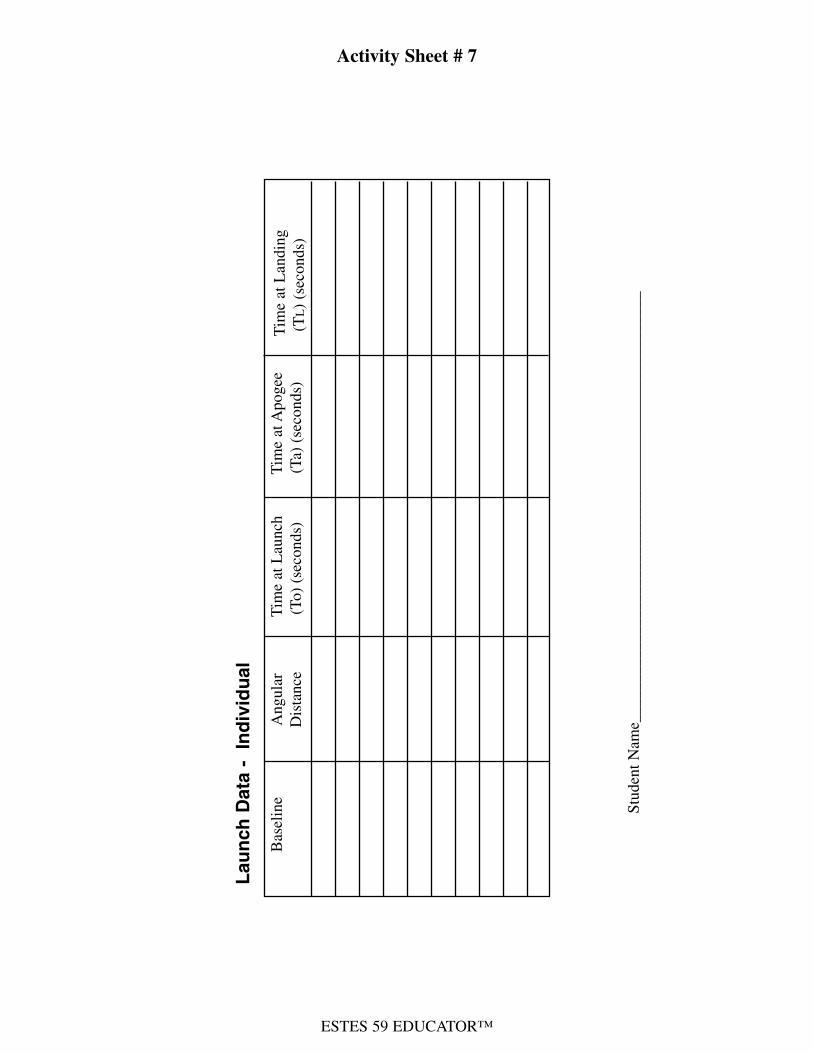
ESTES 59 EDUCATOR™
Activity Sheet # 7
Stud
ent N
ame_
____
____
____
____
____
____
____
____
____
____
____
____
____
_
Bas
elin
e A
ngul
arD
ista
nce
Tim
e at
Lau
nch
(To)
(se
cond
s)Ti
me
at A
poge
e(T
a) (
seco
nds)
Tim
e at
Lan
ding
(TL)
(sec
onds
)
Lau
nch
Data
-
Ind
ivid
ual

ESTES 60 EDUCATOR™
OVERHEAD TRANSPARENCIES
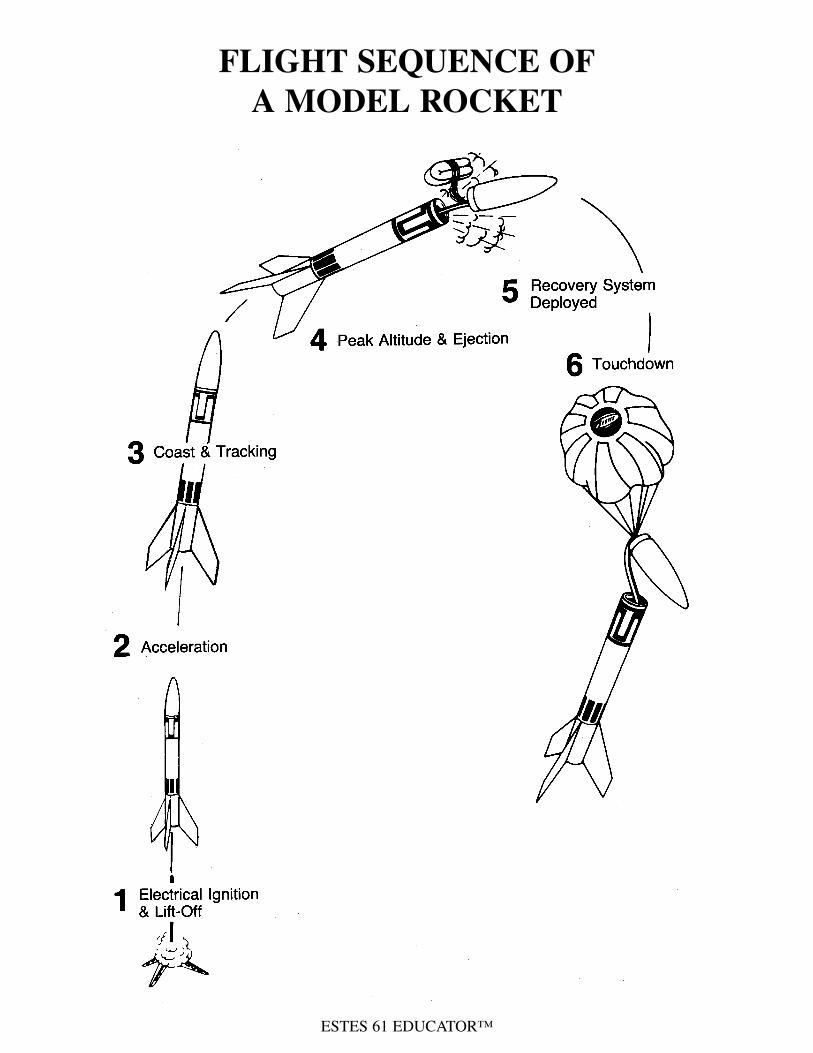
ESTES 61 EDUCATOR™
FLIGHT SEQUENCE OF
A MODEL ROCKET
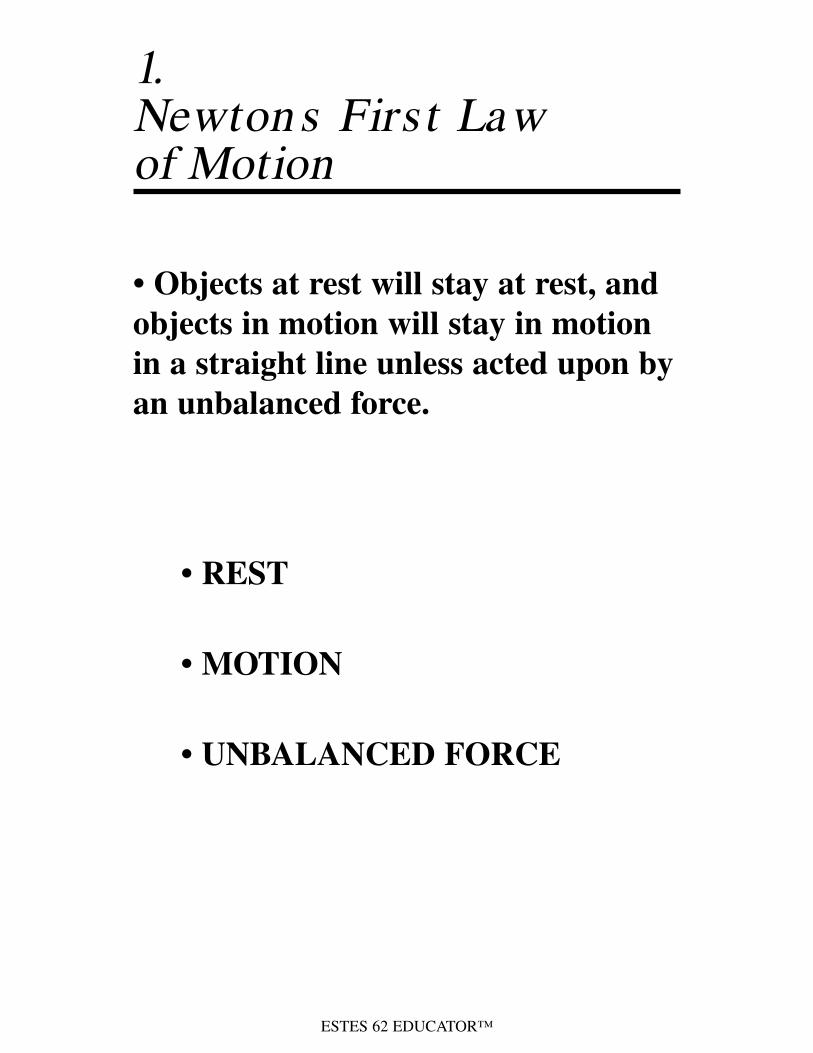
ESTES 62 EDUCATOR™
1. Newton s Firs t Law of Motion
• Objects at rest will stay at rest, and
objects in motion will stay in motion
in a straight line unless acted upon by
an unbalanced force.
• REST
• MOTION
• UNBALANCED FORCE
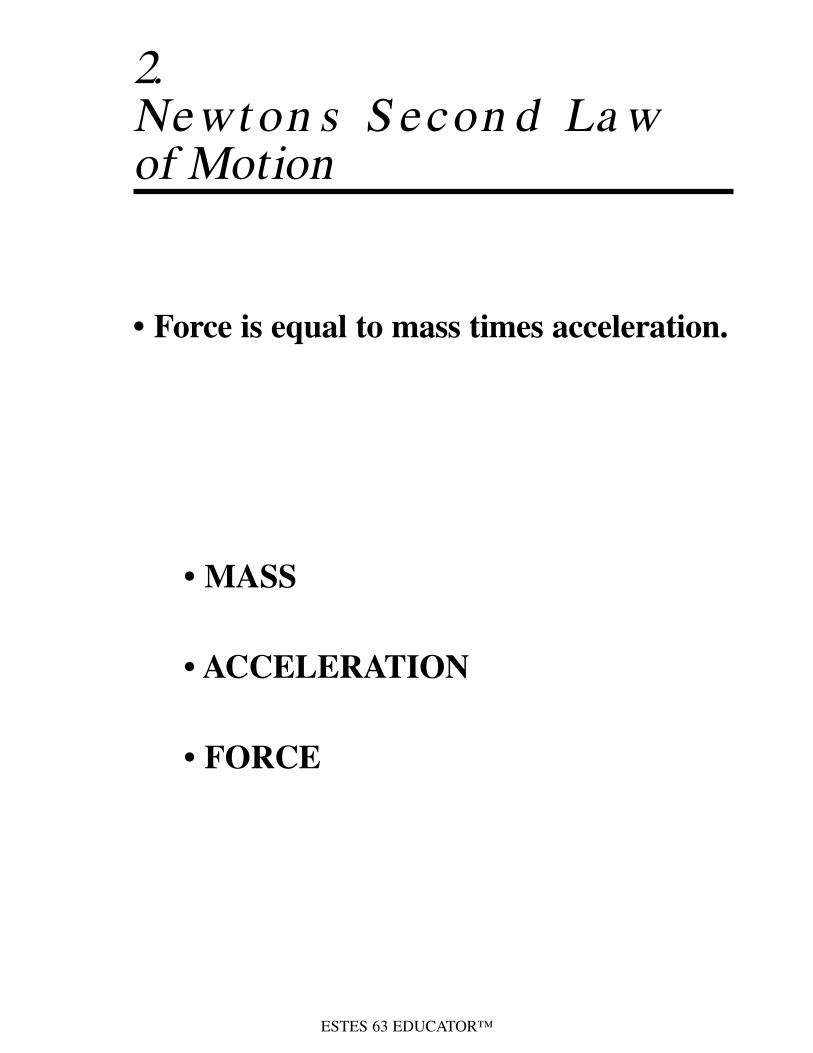
ESTES 63 EDUCATOR™
2. Newt on s S econ d La wof Motion
• Force is equal to mass times acceleration.
• MASS
• ACCELERATION
• FORCE

ESTES 64 EDUCATOR™
3. Newton s Th ird La wof Motion
• For every action there is an
opposite and equal reaction.
• ACTION
• REACTION
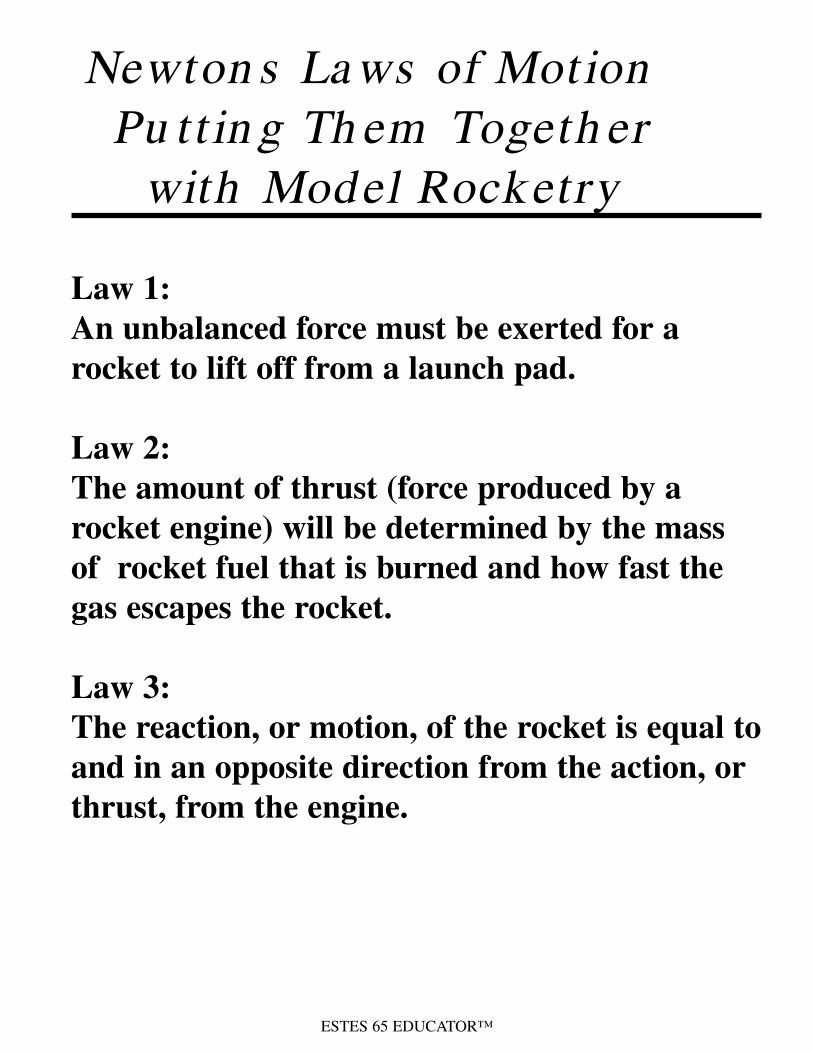
ESTES 65 EDUCATOR™
Newton s La ws of MotionPu t t in g Th em Togeth er
with Model Rocketry
Law 1:
An unbalanced force must be exerted for a
rocket to lift off from a launch pad.
Law 2:
The amount of thrust (force produced by a
rocket engine) will be determined by the mass
of rocket fuel that is burned and how fast the
gas escapes the rocket.
Law 3:
The reaction, or motion, of the rocket is equal to
and in an opposite direction from the action, or
thrust, from the engine.

ESTES 66 EDUCATOR™
PUZZLES
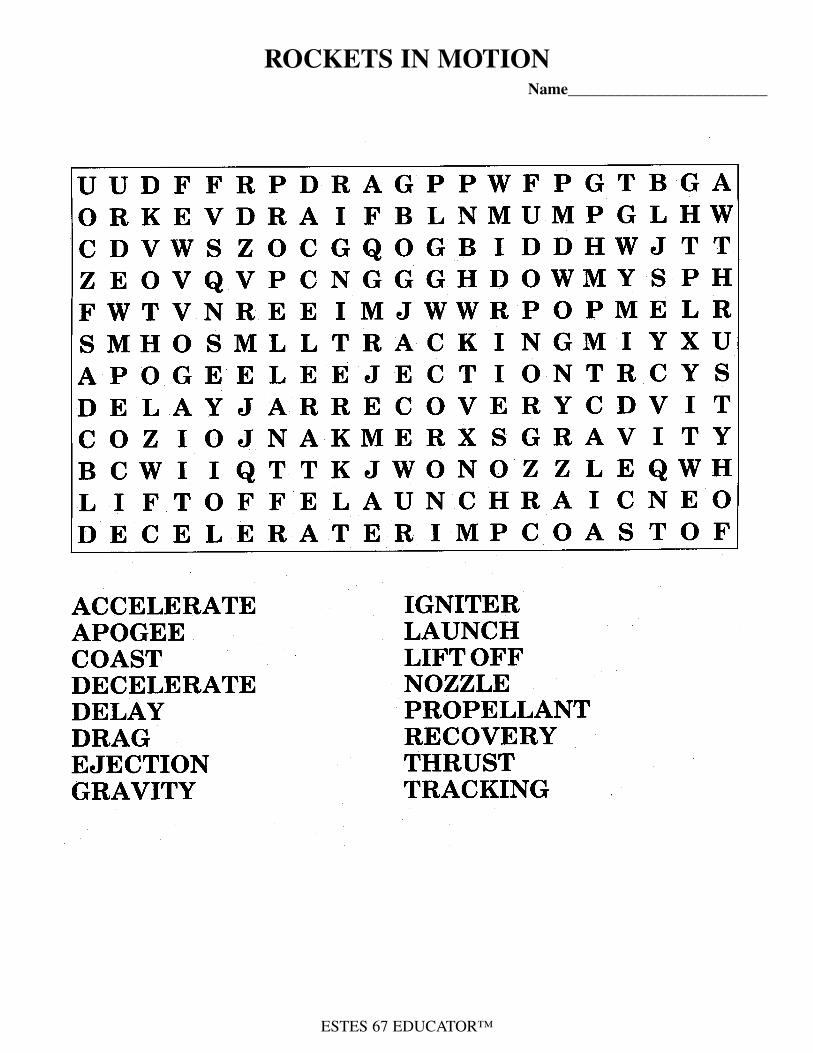
ESTES 67 EDUCATOR™
ROCKETS IN MOTIONName_________________________

ESTES 68 EDUCATOR™
ALL ABOUT ROCKETS
Highlight or circle rocket part words in red, rocket flight sequence words in
blue, laws of motion and principles in green and recovery system words in
orange.
Name_________________________

ESTES 69 EDUCATOR™
CERTIFICATES
ESTES 70 EDUCATOR™
ESTES 71 EDUCATOR™
ESTES 72 EDUCATOR™
ESTES 73 EDUCATOR™
ESTES 74 EDUCATOR™
ESTES 75 EDUCATOR™

ESTES 76 EDUCATOR™

ESTES 77 EDUCATOR™
NOTES

ESTES INDUSTRIES
1295 H Street
Penrose, CO 81240 EST 2847


![Copy of Untitled · 1 i e j m r k x l v s y k l x l i p e w x w i g x m s r l s [ i z i v m x l m x q i ; l e x . l e h e g x y e p p ] [ v m x x i r [ e w e ... ( eq tfippuysxiwtvyrkxsq](https://img.pdfslide.us/doc/110x75/5f4a5d01cc6460594828966d/copy-of-untitled-1-i-e-j-m-r-k-x-l-v-s-y-k-l-x-l-i-p-e-w-x-w-i-g-x-m-s-r-l-s-i.jpg)