Embed Size (px)
Citation preview
— LPI Certification —— General Linux 1 —
(Study Notes) 1 2
geoffrey hector [email protected]
September 24, 2002
1Copyright c�
2002 Geoffrey Robertson. Permission is granted to make and dis-tribute verbatim copies or modified versions of this document provided that this copy-right notice and this permission notice are preserved on all copies under the terms ofthe GNU General Public License as published by the Free Software Foundation—eitherversion 2 of the License or (at your option) any later version.
2RCS Id = Id: lpic.general-linux-1.notes.tex,v 1.2 2002/02/28 23:06:04 geoffrey Exp geoffrey

2
Contents
Topic 101: Hardware & Architecture 15
Objective 101.1: Configure Fundamental BIOS Settings 151.1 Overview . . . . . . . . . . . . . . . . . . . . . . . . . . . . . . . . 15
1.1.1 Weight: [] . . . . . . . . . . . . . . . . . . . . . . . . . . . 151.1.2 Statement of Objective: . . . . . . . . . . . . . . . . . . . . 151.1.3 Key files, terms, and utilities: . . . . . . . . . . . . . . . . 151.1.4 Resources: . . . . . . . . . . . . . . . . . . . . . . . . . . . 15
1.2 Notes . . . . . . . . . . . . . . . . . . . . . . . . . . . . . . . . . . 161.3 Lab . . . . . . . . . . . . . . . . . . . . . . . . . . . . . . . . . . . 161.4 Questions . . . . . . . . . . . . . . . . . . . . . . . . . . . . . . . 16
Objective 101.3: Configure Modem and Sound cards 173.1 Overview . . . . . . . . . . . . . . . . . . . . . . . . . . . . . . . . 17
3.1.1 Weight: [] . . . . . . . . . . . . . . . . . . . . . . . . . . . 173.1.2 Statement of Objective: . . . . . . . . . . . . . . . . . . . . 173.1.3 Key files, terms, and utilities: . . . . . . . . . . . . . . . . 173.1.4 Resources: . . . . . . . . . . . . . . . . . . . . . . . . . . . 17
3.2 Notes . . . . . . . . . . . . . . . . . . . . . . . . . . . . . . . . . . 183.3 LAB 1: Seting Up a Shell Dialup Service . . . . . . . . . . . . . . 19
3.3.1 Inbound Shell Login - Server . . . . . . . . . . . . . . . . 193.3.2 Outbound Shell login - Client . . . . . . . . . . . . . . . . 19
3.4 LAB 2: Seting Up a PPP Dialup Service . . . . . . . . . . . . . . 203.4.1 Inbound Dialup ppp - Server . . . . . . . . . . . . . . . . 203.4.2 Outbound Dialup ppp - Client . . . . . . . . . . . . . . . 213.4.3 Adding Automatic DNS setup . . . . . . . . . . . . . . . 22
3.5 Questions . . . . . . . . . . . . . . . . . . . . . . . . . . . . . . . 22
Objective 101.4: Setup SCSI Devices 234.1 Overview . . . . . . . . . . . . . . . . . . . . . . . . . . . . . . . . 23
4.1.1 Weight: [] . . . . . . . . . . . . . . . . . . . . . . . . . . . 234.1.2 Statement of Objective: . . . . . . . . . . . . . . . . . . . . 234.1.3 Key files, terms, and utilities: . . . . . . . . . . . . . . . . 234.1.4 Resources: . . . . . . . . . . . . . . . . . . . . . . . . . . . 23
4.2 Notes . . . . . . . . . . . . . . . . . . . . . . . . . . . . . . . . . . 244.2.1 SCSI Devices . . . . . . . . . . . . . . . . . . . . . . . . . 244.2.2 SCSI TYPES . . . . . . . . . . . . . . . . . . . . . . . . . . 244.2.3 SCSI Key Points . . . . . . . . . . . . . . . . . . . . . . . . 244.2.4 SCSI Addressing . . . . . . . . . . . . . . . . . . . . . . . 25
3
4 CONTENTS
4.2.5 SCSI Driver Layers . . . . . . . . . . . . . . . . . . . . . . 254.2.6 SCSI Driver Layers - Example . . . . . . . . . . . . . . . . 254.2.7 SCSI Upper Level Drivers . . . . . . . . . . . . . . . . . . 264.2.8 SCSI & the Kernel . . . . . . . . . . . . . . . . . . . . . . . 264.2.9 /proc/scsi . . . . . . . . . . . . . . . . . . . . . . . . . 26
4.3 Lab . . . . . . . . . . . . . . . . . . . . . . . . . . . . . . . . . . . 264.4 Questions . . . . . . . . . . . . . . . . . . . . . . . . . . . . . . . 26
Objective 101.5: Setup different PC expansion cards 275.1 Overview . . . . . . . . . . . . . . . . . . . . . . . . . . . . . . . . 27
5.1.1 Weight: [] . . . . . . . . . . . . . . . . . . . . . . . . . . . 275.1.2 Statement of Objective: . . . . . . . . . . . . . . . . . . . . 275.1.3 Key files, terms, and utilities: . . . . . . . . . . . . . . . . 275.1.4 Resources: . . . . . . . . . . . . . . . . . . . . . . . . . . . 27
5.2 Notes . . . . . . . . . . . . . . . . . . . . . . . . . . . . . . . . . . 295.3 Lab . . . . . . . . . . . . . . . . . . . . . . . . . . . . . . . . . . . 295.4 Questions . . . . . . . . . . . . . . . . . . . . . . . . . . . . . . . 29
Objective 101.6: Configure Communication Devices 316.1 Overview . . . . . . . . . . . . . . . . . . . . . . . . . . . . . . . . 31
6.1.1 Weight: [] . . . . . . . . . . . . . . . . . . . . . . . . . . . 316.1.2 Statement of Objective: . . . . . . . . . . . . . . . . . . . . 316.1.3 Key files, terms, and utilities: . . . . . . . . . . . . . . . . 316.1.4 Resources: . . . . . . . . . . . . . . . . . . . . . . . . . . . 31
6.2 Notes . . . . . . . . . . . . . . . . . . . . . . . . . . . . . . . . . . 336.3 Lab . . . . . . . . . . . . . . . . . . . . . . . . . . . . . . . . . . . 336.4 Questions . . . . . . . . . . . . . . . . . . . . . . . . . . . . . . . 33
Objective 101.7: Configure USB devices 357.1 Overview . . . . . . . . . . . . . . . . . . . . . . . . . . . . . . . . 35
7.1.1 Weight: [] . . . . . . . . . . . . . . . . . . . . . . . . . . . 357.1.2 Statement of Objective: . . . . . . . . . . . . . . . . . . . . 357.1.3 Key files, terms, and utilities: . . . . . . . . . . . . . . . . 357.1.4 Resources: . . . . . . . . . . . . . . . . . . . . . . . . . . . 35
7.2 Notes . . . . . . . . . . . . . . . . . . . . . . . . . . . . . . . . . . 367.2.1 The Universal Serial Bus . . . . . . . . . . . . . . . . . . . 367.2.2 USB Topology . . . . . . . . . . . . . . . . . . . . . . . . . 367.2.3 USB Device Driver Layers . . . . . . . . . . . . . . . . . . 377.2.4 USB Controllers . . . . . . . . . . . . . . . . . . . . . . . . 377.2.5 USB Modules . . . . . . . . . . . . . . . . . . . . . . . . . 387.2.6 USB Interrogation Utilities . . . . . . . . . . . . . . . . . 387.2.7 Hotplugging Usb Devices . . . . . . . . . . . . . . . . . . 40
7.3 Lab . . . . . . . . . . . . . . . . . . . . . . . . . . . . . . . . . . . 407.4 Questions . . . . . . . . . . . . . . . . . . . . . . . . . . . . . . . 40
Topic 102: Linux Installation & Package Management 43
Objective 102.1: Design hard disk layout 431.1 Overview . . . . . . . . . . . . . . . . . . . . . . . . . . . . . . . . 43
CONTENTS 5
1.1.1 Weight: [] . . . . . . . . . . . . . . . . . . . . . . . . . . . 431.1.2 Statement of Objective: . . . . . . . . . . . . . . . . . . . . 431.1.3 Key files, terms, and utilities: . . . . . . . . . . . . . . . . 431.1.4 Resources: . . . . . . . . . . . . . . . . . . . . . . . . . . . 43
1.2 Notes . . . . . . . . . . . . . . . . . . . . . . . . . . . . . . . . . . 441.3 Lab . . . . . . . . . . . . . . . . . . . . . . . . . . . . . . . . . . . 441.4 Questions . . . . . . . . . . . . . . . . . . . . . . . . . . . . . . . 44
Objective 102.2: Install a boot manager 452.1 Overview . . . . . . . . . . . . . . . . . . . . . . . . . . . . . . . . 45
2.1.1 Weight: [] . . . . . . . . . . . . . . . . . . . . . . . . . . . 452.1.2 Statement of Objective: . . . . . . . . . . . . . . . . . . . . 452.1.3 Key files, terms, and utilities: . . . . . . . . . . . . . . . . 452.1.4 Resources: . . . . . . . . . . . . . . . . . . . . . . . . . . . 45
2.2 Notes . . . . . . . . . . . . . . . . . . . . . . . . . . . . . . . . . . 462.2.1 grub entry for adding Debian . . . . . . . . . . . . . . . . 46
2.3 Lab . . . . . . . . . . . . . . . . . . . . . . . . . . . . . . . . . . . 462.4 Questions . . . . . . . . . . . . . . . . . . . . . . . . . . . . . . . 46
Objective 102.3: Make and install programs from source 473.1 Overview . . . . . . . . . . . . . . . . . . . . . . . . . . . . . . . . 47
3.1.1 Weight: [] . . . . . . . . . . . . . . . . . . . . . . . . . . . 473.1.2 Statement of Objective: . . . . . . . . . . . . . . . . . . . . 473.1.3 Key files, terms, and utilities: . . . . . . . . . . . . . . . . 473.1.4 Resources: . . . . . . . . . . . . . . . . . . . . . . . . . . . 47
3.2 Notes . . . . . . . . . . . . . . . . . . . . . . . . . . . . . . . . . . 483.2.1 Source Code Destribution . . . . . . . . . . . . . . . . . . 483.2.2 Installing the trivial database tdb . . . . . . . . . . . . . 483.2.3 Play with the trivial database tdb . . . . . . . . . . . . . 51
3.3 Lab . . . . . . . . . . . . . . . . . . . . . . . . . . . . . . . . . . . 513.4 Questions . . . . . . . . . . . . . . . . . . . . . . . . . . . . . . . 51
Objective 102.4: Manage shared libraries 534.1 Overview . . . . . . . . . . . . . . . . . . . . . . . . . . . . . . . . 53
4.1.1 Weight: [] . . . . . . . . . . . . . . . . . . . . . . . . . . . 534.1.2 Statement of Objective: . . . . . . . . . . . . . . . . . . . . 534.1.3 Key files, terms, and utilities: . . . . . . . . . . . . . . . . 534.1.4 Resources: . . . . . . . . . . . . . . . . . . . . . . . . . . . 53
4.2 Ken Foskey’s Notes on Shared Libraries . . . . . . . . . . . . . . 544.2.1 What are they . . . . . . . . . . . . . . . . . . . . . . . . . 544.2.2 What we need to know about libraries. . . . . . . . . . . 544.2.3 LD LIBRARY PATH . . . . . . . . . . . . . . . . . . . . . . 554.2.4 Extra to POMS . . . . . . . . . . . . . . . . . . . . . . . . 55
4.3 Lab . . . . . . . . . . . . . . . . . . . . . . . . . . . . . . . . . . . 564.4 Questions . . . . . . . . . . . . . . . . . . . . . . . . . . . . . . . 56
6 CONTENTS
Objective 102.5: Use Debian package management 575.1 Overview . . . . . . . . . . . . . . . . . . . . . . . . . . . . . . . . 57
5.1.1 Weight: [] . . . . . . . . . . . . . . . . . . . . . . . . . . . 575.1.2 Statement of Objective: . . . . . . . . . . . . . . . . . . . . 575.1.3 Key files, terms, and utilities: . . . . . . . . . . . . . . . . 575.1.4 Resources: . . . . . . . . . . . . . . . . . . . . . . . . . . . 57
5.2 Notes . . . . . . . . . . . . . . . . . . . . . . . . . . . . . . . . . . 585.2.1 Debian Package Management Overview . . . . . . . . . 585.2.2 Debian Package Management Tool—dpkg . . . . . . . . 585.2.3 Debian Package Mgt. Utility—apt-get . . . . . . . . . 595.2.4 Debian Package Mgt. Utility—deselect . . . . . . . . . 605.2.5 Debian Package Conversion Utility—alien . . . . . . . 60
5.3 Lab . . . . . . . . . . . . . . . . . . . . . . . . . . . . . . . . . . . 615.3.1 Exploring dkpg . . . . . . . . . . . . . . . . . . . . . . . . 615.3.2 Using dkpg . . . . . . . . . . . . . . . . . . . . . . . . . . 615.3.3 Using the apt package managment tool . . . . . . . . . . 62
5.4 Questions . . . . . . . . . . . . . . . . . . . . . . . . . . . . . . . 64
Objective 102.6: Use Red Hat Package Manager (RPM) 676.1 Overview . . . . . . . . . . . . . . . . . . . . . . . . . . . . . . . . 67
6.1.1 Weight: [] . . . . . . . . . . . . . . . . . . . . . . . . . . . 676.1.2 Statement of Objective: . . . . . . . . . . . . . . . . . . . . 676.1.3 Key files, terms, and utilities: . . . . . . . . . . . . . . . . 676.1.4 Resources: . . . . . . . . . . . . . . . . . . . . . . . . . . . 67
6.2 Notes . . . . . . . . . . . . . . . . . . . . . . . . . . . . . . . . . . 686.3 Lab . . . . . . . . . . . . . . . . . . . . . . . . . . . . . . . . . . . 746.4 Questions . . . . . . . . . . . . . . . . . . . . . . . . . . . . . . . 75
Topic 103: GNU & Unix Commands 79
Objective 103.1: Work on the command line 791.1 Overview . . . . . . . . . . . . . . . . . . . . . . . . . . . . . . . . 79
1.1.1 Weight: [] . . . . . . . . . . . . . . . . . . . . . . . . . . . 791.1.2 Statement of Objective: . . . . . . . . . . . . . . . . . . . . 791.1.3 Key files, terms, and utilities: . . . . . . . . . . . . . . . . 791.1.4 Resources: . . . . . . . . . . . . . . . . . . . . . . . . . . . 79
1.2 Notes . . . . . . . . . . . . . . . . . . . . . . . . . . . . . . . . . . 801.3 Lab . . . . . . . . . . . . . . . . . . . . . . . . . . . . . . . . . . . 801.4 Questions . . . . . . . . . . . . . . . . . . . . . . . . . . . . . . . 80
Objective 103.2: Process text streams using filters 812.1 Overview . . . . . . . . . . . . . . . . . . . . . . . . . . . . . . . . 81
2.1.1 Weight: [] . . . . . . . . . . . . . . . . . . . . . . . . . . . 812.1.2 Statement of Objective: . . . . . . . . . . . . . . . . . . . . 812.1.3 Key files, terms, and utilities: . . . . . . . . . . . . . . . . 812.1.4 Resources: . . . . . . . . . . . . . . . . . . . . . . . . . . . 82
2.2 Notes . . . . . . . . . . . . . . . . . . . . . . . . . . . . . . . . . . 832.3 Lab . . . . . . . . . . . . . . . . . . . . . . . . . . . . . . . . . . . 83
2.3.1 Text Filter Exercise . . . . . . . . . . . . . . . . . . . . . . 83
CONTENTS 7
2.4 Questions . . . . . . . . . . . . . . . . . . . . . . . . . . . . . . . 85
Objective 103.3: Perform basic file management 873.1 Overview . . . . . . . . . . . . . . . . . . . . . . . . . . . . . . . . 87
3.1.1 Weight: [] . . . . . . . . . . . . . . . . . . . . . . . . . . . 873.1.2 Statement of Objective: . . . . . . . . . . . . . . . . . . . . 873.1.3 Key files, terms, and utilities: . . . . . . . . . . . . . . . . 873.1.4 Resources: . . . . . . . . . . . . . . . . . . . . . . . . . . . 87
3.2 Notes . . . . . . . . . . . . . . . . . . . . . . . . . . . . . . . . . . 883.3 Lab . . . . . . . . . . . . . . . . . . . . . . . . . . . . . . . . . . . 883.4 Questions . . . . . . . . . . . . . . . . . . . . . . . . . . . . . . . 88
Objective 103.4: Use streams, pipes, and redirects 894.1 Overview . . . . . . . . . . . . . . . . . . . . . . . . . . . . . . . . 89
4.1.1 Weight: [] . . . . . . . . . . . . . . . . . . . . . . . . . . . 894.1.2 Statement of Objective: . . . . . . . . . . . . . . . . . . . . 894.1.3 Key files, terms, and utilities: . . . . . . . . . . . . . . . . 894.1.4 Resources: . . . . . . . . . . . . . . . . . . . . . . . . . . . 89
4.2 Notes . . . . . . . . . . . . . . . . . . . . . . . . . . . . . . . . . . 904.3 Lab . . . . . . . . . . . . . . . . . . . . . . . . . . . . . . . . . . . 904.4 Questions . . . . . . . . . . . . . . . . . . . . . . . . . . . . . . . 90
Objective 103.5: Create, monitor, and kill processes 915.1 Overview . . . . . . . . . . . . . . . . . . . . . . . . . . . . . . . . 91
5.1.1 Weight: [] . . . . . . . . . . . . . . . . . . . . . . . . . . . 915.1.2 Statement of Objective: . . . . . . . . . . . . . . . . . . . . 915.1.3 Key files, terms, and utilities: . . . . . . . . . . . . . . . . 915.1.4 Resources: . . . . . . . . . . . . . . . . . . . . . . . . . . . 91
5.2 Notes . . . . . . . . . . . . . . . . . . . . . . . . . . . . . . . . . . 925.2.1 Processes . . . . . . . . . . . . . . . . . . . . . . . . . . . . 925.2.2 Process Attributes and Concepts . . . . . . . . . . . . . . 925.2.3 Process Monitoring . . . . . . . . . . . . . . . . . . . . . . 925.2.4 Process Management . . . . . . . . . . . . . . . . . . . . . 935.2.5 What is multitasking? . . . . . . . . . . . . . . . . . . . . 935.2.6 Task Scheduling . . . . . . . . . . . . . . . . . . . . . . . . 945.2.7 What is a Process? . . . . . . . . . . . . . . . . . . . . . . 945.2.8 Process types . . . . . . . . . . . . . . . . . . . . . . . . . 945.2.9 Elements associated with a process . . . . . . . . . . . . . 945.2.10 Process States . . . . . . . . . . . . . . . . . . . . . . . . . 955.2.11 The Process Family Tree . . . . . . . . . . . . . . . . . . . 955.2.12 The Kernel is at the Top of the Family Tree . . . . . . . . 955.2.13 Process IDs . . . . . . . . . . . . . . . . . . . . . . . . . . 965.2.14 Process IDs . . . . . . . . . . . . . . . . . . . . . . . . . . 965.2.15 Displaying Process Information . . . . . . . . . . . . . . . 965.2.16 Process Monitoring—ps . . . . . . . . . . . . . . . . . . . 975.2.17 ps options . . . . . . . . . . . . . . . . . . . . . . . . . . . 975.2.18 ps options . . . . . . . . . . . . . . . . . . . . . . . . . . . 975.2.19 ps field names & their meanings . . . . . . . . . . . . . . 985.2.20 ps Status Field . . . . . . . . . . . . . . . . . . . . . . . . 985.2.21 ps Status Field . . . . . . . . . . . . . . . . . . . . . . . . 99
8 CONTENTS
5.2.22 Process Monitoring—pstree . . . . . . . . . . . . . . . . 995.2.23 pstree options . . . . . . . . . . . . . . . . . . . . . . . . 995.2.24 Process Monitoring—top . . . . . . . . . . . . . . . . . . 1005.2.25 top . . . . . . . . . . . . . . . . . . . . . . . . . . . . . . 1005.2.26 top’s basic command line options . . . . . . . . . . . . . 1005.2.27 top’s upper screen . . . . . . . . . . . . . . . . . . . . . . 1015.2.28 top’s lower screen . . . . . . . . . . . . . . . . . . . . . . 1015.2.29 top: selected interactive commands . . . . . . . . . . . . 1025.2.30 top’s interactive commands . . . . . . . . . . . . . . . . 1025.2.31 ˜/.toprc . . . . . . . . . . . . . . . . . . . . . . . . . . . 1025.2.32 Killing Processes . . . . . . . . . . . . . . . . . . . . . . . 1035.2.33 Job Control . . . . . . . . . . . . . . . . . . . . . . . . . . 1035.2.34 &— Direct the shell to execute a command in the back-
ground. . . . . . . . . . . . . . . . . . . . . . . . . . . . . 1035.2.35 Job Control . . . . . . . . . . . . . . . . . . . . . . . . . . 1035.2.36 Background Processing . . . . . . . . . . . . . . . . . . . 1045.2.37 The jobs command . . . . . . . . . . . . . . . . . . . . . 1045.2.38 The fg command . . . . . . . . . . . . . . . . . . . . . . . 1045.2.39 The fg command . . . . . . . . . . . . . . . . . . . . . . . 1045.2.40 The bg command . . . . . . . . . . . . . . . . . . . . . . . 105
5.3 Lab . . . . . . . . . . . . . . . . . . . . . . . . . . . . . . . . . . . 1055.4 Questions . . . . . . . . . . . . . . . . . . . . . . . . . . . . . . . 105
Objective 103.6: Modify process execution priorities 1076.1 Overview . . . . . . . . . . . . . . . . . . . . . . . . . . . . . . . . 107
6.1.1 Weight: [] . . . . . . . . . . . . . . . . . . . . . . . . . . . 1076.1.2 Statement of Objective: . . . . . . . . . . . . . . . . . . . . 1076.1.3 Key files, terms, and utilities: . . . . . . . . . . . . . . . . 1076.1.4 Resources: . . . . . . . . . . . . . . . . . . . . . . . . . . . 107
6.2 Notes . . . . . . . . . . . . . . . . . . . . . . . . . . . . . . . . . . 1086.3 Lab . . . . . . . . . . . . . . . . . . . . . . . . . . . . . . . . . . . 1086.4 Questions . . . . . . . . . . . . . . . . . . . . . . . . . . . . . . . 109
Objective 103.7: Search text files using regular expressions 1117.1 Overview . . . . . . . . . . . . . . . . . . . . . . . . . . . . . . . . 111
7.1.1 Weight: [] . . . . . . . . . . . . . . . . . . . . . . . . . . . 1117.1.2 Statement of Objective: . . . . . . . . . . . . . . . . . . . . 1117.1.3 Key files, terms, and utilities: . . . . . . . . . . . . . . . . 1117.1.4 Resources: . . . . . . . . . . . . . . . . . . . . . . . . . . . 111
7.2 Notes . . . . . . . . . . . . . . . . . . . . . . . . . . . . . . . . . . 1127.2.1 sed—stream editor . . . . . . . . . . . . . . . . . . . . . . 112
7.3 Lab . . . . . . . . . . . . . . . . . . . . . . . . . . . . . . . . . . . 1167.4 Questions . . . . . . . . . . . . . . . . . . . . . . . . . . . . . . . 116
Objective 103.8: Perform basic file editing operations using vi 1178.1 Overview . . . . . . . . . . . . . . . . . . . . . . . . . . . . . . . . 117
8.1.1 Weight: [] . . . . . . . . . . . . . . . . . . . . . . . . . . . 1178.1.2 Statement of Objective: . . . . . . . . . . . . . . . . . . . . 1178.1.3 Key files, terms, and utilities: . . . . . . . . . . . . . . . . 1178.1.4 Resources: . . . . . . . . . . . . . . . . . . . . . . . . . . . 117
CONTENTS 9
8.2 Notes . . . . . . . . . . . . . . . . . . . . . . . . . . . . . . . . . . 1188.3 Lab . . . . . . . . . . . . . . . . . . . . . . . . . . . . . . . . . . . 118
8.3.1 Vi tour . . . . . . . . . . . . . . . . . . . . . . . . . . . . . 1188.4 Questions . . . . . . . . . . . . . . . . . . . . . . . . . . . . . . . 121
Topic 104: Devices, Linux Filesystems, Filesystem HierarchyStandard 125
Objective 104.1: Create partitions and filesystems 1251.1 Overview . . . . . . . . . . . . . . . . . . . . . . . . . . . . . . . . 125
1.1.1 Weight: [] . . . . . . . . . . . . . . . . . . . . . . . . . . . 1251.1.2 Statement of Objective: . . . . . . . . . . . . . . . . . . . . 1251.1.3 Key files, terms, and utilities: . . . . . . . . . . . . . . . . 1251.1.4 Resources: . . . . . . . . . . . . . . . . . . . . . . . . . . . 125
1.2 Notes . . . . . . . . . . . . . . . . . . . . . . . . . . . . . . . . . . 1261.2.1 Using fdisk . . . . . . . . . . . . . . . . . . . . . . . . . 126
1.3 Lab . . . . . . . . . . . . . . . . . . . . . . . . . . . . . . . . . . . 1271.4 Questions . . . . . . . . . . . . . . . . . . . . . . . . . . . . . . . 127
Objective 104.2: Maintain the integrity of filesystems 1292.1 Overview . . . . . . . . . . . . . . . . . . . . . . . . . . . . . . . . 129
2.1.1 Weight: [] . . . . . . . . . . . . . . . . . . . . . . . . . . . 1292.1.2 Statement of Objective: . . . . . . . . . . . . . . . . . . . . 1292.1.3 Key files, terms, and utilities: . . . . . . . . . . . . . . . . 1292.1.4 Resources: . . . . . . . . . . . . . . . . . . . . . . . . . . . 129
2.2 Notes . . . . . . . . . . . . . . . . . . . . . . . . . . . . . . . . . . 1302.3 Lab . . . . . . . . . . . . . . . . . . . . . . . . . . . . . . . . . . . 1302.4 Questions . . . . . . . . . . . . . . . . . . . . . . . . . . . . . . . 130
Objective 104.3: Control mounting and unmounting filesystem 1313.1 Overview . . . . . . . . . . . . . . . . . . . . . . . . . . . . . . . . 131
3.1.1 Weight: [] . . . . . . . . . . . . . . . . . . . . . . . . . . . 1313.1.2 Statement of Objective: . . . . . . . . . . . . . . . . . . . . 1313.1.3 Key files, terms, and utilities: . . . . . . . . . . . . . . . . 1313.1.4 Resources: . . . . . . . . . . . . . . . . . . . . . . . . . . . 131
3.2 Notes . . . . . . . . . . . . . . . . . . . . . . . . . . . . . . . . . . 1323.3 Lab . . . . . . . . . . . . . . . . . . . . . . . . . . . . . . . . . . . 1323.4 Questions . . . . . . . . . . . . . . . . . . . . . . . . . . . . . . . 132
Objective 104.4: Managing disk quota 1334.1 Overview . . . . . . . . . . . . . . . . . . . . . . . . . . . . . . . . 133
4.1.1 Weight: [] . . . . . . . . . . . . . . . . . . . . . . . . . . . 1334.1.2 Statement of Objective: . . . . . . . . . . . . . . . . . . . . 1334.1.3 Key files, terms, and utilities: . . . . . . . . . . . . . . . . 1334.1.4 Resources: . . . . . . . . . . . . . . . . . . . . . . . . . . . 133
4.2 Notes . . . . . . . . . . . . . . . . . . . . . . . . . . . . . . . . . . 1344.3 Lab . . . . . . . . . . . . . . . . . . . . . . . . . . . . . . . . . . . 1344.4 Questions . . . . . . . . . . . . . . . . . . . . . . . . . . . . . . . 134
10 CONTENTS
Objective 104.5: Use file permissions to control access to files 1355.1 Overview . . . . . . . . . . . . . . . . . . . . . . . . . . . . . . . . 135
5.1.1 Weight: [] . . . . . . . . . . . . . . . . . . . . . . . . . . . 1355.1.2 Statement of Objective: . . . . . . . . . . . . . . . . . . . . 1355.1.3 Key files, terms, and utilities: . . . . . . . . . . . . . . . . 1355.1.4 Resources: . . . . . . . . . . . . . . . . . . . . . . . . . . . 135
5.2 Notes . . . . . . . . . . . . . . . . . . . . . . . . . . . . . . . . . . 1365.2.1 File Permissions . . . . . . . . . . . . . . . . . . . . . . . . 1365.2.2 Directory Permissions . . . . . . . . . . . . . . . . . . . . 1365.2.3 USERS & GROUPS . . . . . . . . . . . . . . . . . . . . . . 1365.2.4 ls -l is your friend . . . . . . . . . . . . . . . . . . . . . 1375.2.5 Numeric Equivalents . . . . . . . . . . . . . . . . . . . . . 1375.2.6 Change Permissions with chmod . . . . . . . . . . . . . . 1385.2.7 chmod - what specification . . . . . . . . . . . . . . . . . 1395.2.8 Some examples: . . . . . . . . . . . . . . . . . . . . . . . . 1395.2.9 Permission Defaults: umask . . . . . . . . . . . . . . . . . 1395.2.10 SUID Setuid bit (4000) . . . . . . . . . . . . . . . . . . . . 1395.2.11 SGID Setgid bit (2000) . . . . . . . . . . . . . . . . . . . . 1405.2.12 Sticky bit (1000) . . . . . . . . . . . . . . . . . . . . . . . . 1415.2.13 Ken Caldwell’s Summary: Use file permissions to control
access to files . . . . . . . . . . . . . . . . . . . . . . . . . 1425.3 Lab . . . . . . . . . . . . . . . . . . . . . . . . . . . . . . . . . . . 144
5.3.1 File Permissions Exercises . . . . . . . . . . . . . . . . . . 1445.3.2 SUID & GUID Exercises . . . . . . . . . . . . . . . . . . . 1455.3.3 Stickey Bit Exercises . . . . . . . . . . . . . . . . . . . . . 146
5.4 Questions . . . . . . . . . . . . . . . . . . . . . . . . . . . . . . . 147
Objective 104.6: Manage file ownership 1496.1 Overview . . . . . . . . . . . . . . . . . . . . . . . . . . . . . . . . 149
6.1.1 Weight: [] . . . . . . . . . . . . . . . . . . . . . . . . . . . 1496.1.2 Statement of Objective: . . . . . . . . . . . . . . . . . . . . 1496.1.3 Key files, terms, and utilities: . . . . . . . . . . . . . . . . 1496.1.4 Resources: . . . . . . . . . . . . . . . . . . . . . . . . . . . 149
6.2 Notes . . . . . . . . . . . . . . . . . . . . . . . . . . . . . . . . . . 1506.2.1 Change File Ownership with chown . . . . . . . . . . . . 1506.2.2 Change File Group Ownership with chgrp . . . . . . . . 1506.2.3 Summary: Managing File Ownership . . . . . . . . . . . 150
6.3 Lab . . . . . . . . . . . . . . . . . . . . . . . . . . . . . . . . . . . 1506.4 Questions . . . . . . . . . . . . . . . . . . . . . . . . . . . . . . . 150
Objective 104.7: Create and change hard and symbolic links 1517.1 Overview . . . . . . . . . . . . . . . . . . . . . . . . . . . . . . . . 151
7.1.1 Weight: [] . . . . . . . . . . . . . . . . . . . . . . . . . . . 1517.1.2 Statement of Objective: . . . . . . . . . . . . . . . . . . . . 1517.1.3 Key files, terms, and utilities: . . . . . . . . . . . . . . . . 1517.1.4 Resources: . . . . . . . . . . . . . . . . . . . . . . . . . . . 151
7.2 Notes . . . . . . . . . . . . . . . . . . . . . . . . . . . . . . . . . . 1527.2.1 ln — link . . . . . . . . . . . . . . . . . . . . . . . . . . . 1527.2.2 Linux files and inodes . . . . . . . . . . . . . . . . . . . . . 1527.2.3 Linux files and inodes . . . . . . . . . . . . . . . . . . . . . 152
CONTENTS 11
7.2.4 The inode information . . . . . . . . . . . . . . . . . . . . 1527.2.5 Hard links are directory entries . . . . . . . . . . . . . . . 1537.2.6 Hard links are directory entries . . . . . . . . . . . . . . . 1547.2.7 foo a.k.a. bar . . . . . . . . . . . . . . . . . . . . . . . . . 1547.2.8 Hard link constraints . . . . . . . . . . . . . . . . . . . . . 1557.2.9 Symbolic links . . . . . . . . . . . . . . . . . . . . . . . . . 1557.2.10 A symbolic link is a file that points to another . . . . . . . 155
7.3 Lab . . . . . . . . . . . . . . . . . . . . . . . . . . . . . . . . . . . 1557.3.1 Make some files and directories . . . . . . . . . . . . . . . 1557.3.2 Hard and soft links . . . . . . . . . . . . . . . . . . . . . . 156
7.4 Questions . . . . . . . . . . . . . . . . . . . . . . . . . . . . . . . 156
Objective 104.8: Find system files and place files in the correct location 1578.1 Overview . . . . . . . . . . . . . . . . . . . . . . . . . . . . . . . . 157
8.1.1 Weight: [] . . . . . . . . . . . . . . . . . . . . . . . . . . . 1578.1.2 Statement of Objective: . . . . . . . . . . . . . . . . . . . . 1578.1.3 Key files, terms, and utilities: . . . . . . . . . . . . . . . . 1578.1.4 Resources: . . . . . . . . . . . . . . . . . . . . . . . . . . . 157
8.2 Notes . . . . . . . . . . . . . . . . . . . . . . . . . . . . . . . . . . 1588.2.1 Ken Foskey’s Summary: Using find . . . . . . . . . . . 1588.2.2 Andrew Eager’s Summary: Using locate, updatedb
and slocate . . . . . . . . . . . . . . . . . . . . . . . . . 1608.3 Lab . . . . . . . . . . . . . . . . . . . . . . . . . . . . . . . . . . . 1628.4 Questions . . . . . . . . . . . . . . . . . . . . . . . . . . . . . . . 162
Topic 110: X 165
Objective 110.1: Install & Configure XFree86 1651.1 Overview . . . . . . . . . . . . . . . . . . . . . . . . . . . . . . . . 165
1.1.1 Weight: [] . . . . . . . . . . . . . . . . . . . . . . . . . . . 1651.1.2 Statement of Objective: . . . . . . . . . . . . . . . . . . . . 1651.1.3 Key files, terms, and utilities: . . . . . . . . . . . . . . . . 1651.1.4 Resources: . . . . . . . . . . . . . . . . . . . . . . . . . . . 165
1.2 Notes . . . . . . . . . . . . . . . . . . . . . . . . . . . . . . . . . . 1661.3 Lab . . . . . . . . . . . . . . . . . . . . . . . . . . . . . . . . . . . 1661.4 Questions . . . . . . . . . . . . . . . . . . . . . . . . . . . . . . . 166
Objective 110.2: Setup a display manager 1672.1 Overview . . . . . . . . . . . . . . . . . . . . . . . . . . . . . . . . 167
2.1.1 Weight: [] . . . . . . . . . . . . . . . . . . . . . . . . . . . 1672.1.2 Statement of Objective: . . . . . . . . . . . . . . . . . . . . 1672.1.3 Key files, terms, and utilities: . . . . . . . . . . . . . . . . 1672.1.4 Resources: . . . . . . . . . . . . . . . . . . . . . . . . . . . 167
2.2 Notes . . . . . . . . . . . . . . . . . . . . . . . . . . . . . . . . . . 1682.3 Lab . . . . . . . . . . . . . . . . . . . . . . . . . . . . . . . . . . . 1682.4 Questions . . . . . . . . . . . . . . . . . . . . . . . . . . . . . . . 168
12 CONTENTS
Objective 110.4: Install & Customize a Window Manager Environment 1694.1 Overview . . . . . . . . . . . . . . . . . . . . . . . . . . . . . . . . 169
4.1.1 Weight: [] . . . . . . . . . . . . . . . . . . . . . . . . . . . 1694.1.2 Statement of Objective: . . . . . . . . . . . . . . . . . . . . 1694.1.3 Key files, terms, and utilities: . . . . . . . . . . . . . . . . 1694.1.4 Resources: . . . . . . . . . . . . . . . . . . . . . . . . . . . 169
4.2 Notes . . . . . . . . . . . . . . . . . . . . . . . . . . . . . . . . . . 1704.3 Lab . . . . . . . . . . . . . . . . . . . . . . . . . . . . . . . . . . . 1704.4 Questions . . . . . . . . . . . . . . . . . . . . . . . . . . . . . . . 170
A Debian Install 171
B openMosix 173B.1 Open Mosix . . . . . . . . . . . . . . . . . . . . . . . . . . . . . . 173B.2 Obtaining packages . . . . . . . . . . . . . . . . . . . . . . . . . . 173B.3 Installing openmosix . . . . . . . . . . . . . . . . . . . . . . . . . 173B.4 Testing Openmosix . . . . . . . . . . . . . . . . . . . . . . . . . . 174B.5 Summary of Mosix Userland Utilities . . . . . . . . . . . . . . . 175B.6 Setting up the Mosix File System . . . . . . . . . . . . . . . . . . 176B.7 Lab . . . . . . . . . . . . . . . . . . . . . . . . . . . . . . . . . . . 176B.8 Questions . . . . . . . . . . . . . . . . . . . . . . . . . . . . . . . 176
Topic 101
Hardware & Architecture
13

Objective 101.1
Configure Fundamental BIOSSettings
1.1 Overview
1.1.1 Weight: []
1.1.2 Statement of Objective:
Candidates should be able to configure fundamental system hardware by mak-ing the correct settings in the system BIOS. This objective includes a proper un-derstanding of BIOS configuration issues such as the use of LBA on IDE harddisks larger than 1024 cylinders, enabling or disabling integrated peripherals,as well as configuring systems with (or without) external peripherals such askeyboards. It also includes the correct setting for IRQ, DMA and I/O addressesfor all BIOS administrated ports and settings for error handling.
1.1.3 Key files, terms, and utilities:
/proc/ioports/proc/interrupts/proc/dma/proc/pci
1.1.4 Resources:
Large Disk HOWTO by Andries Brouwer
http://www.linuxdoc.org/HOWTO/Large-Disk-HOWTO.html
15

16 CONTENTS
1.2 Notes
1.3 Lab
1.4 Questions
Objective 101.3
Configure Modem and Soundcards
3.1 Overview
3.1.1 Weight: []
3.1.2 Statement of Objective:
Ensure devices meet compatibility requirements (particularly that the modemis NOT a win-modem), verify that both the modem and sound card are usingunique and correct IRQ’s, I/O, and DMA addresses, if the sound card is PnPinstall and run sndconfig and isapnp, configure modem for outbound dial-up,configure modem for outbound PPP — SLIP — CSLIP connection, set serialport for 115.2 Kbps
3.1.3 Key files, terms, and utilities:
3.1.4 Resources:
17

18 CONTENTS
3.2 Notes
3.3. LAB 1: SETING UP A SHELL DIALUP SERVICE 19
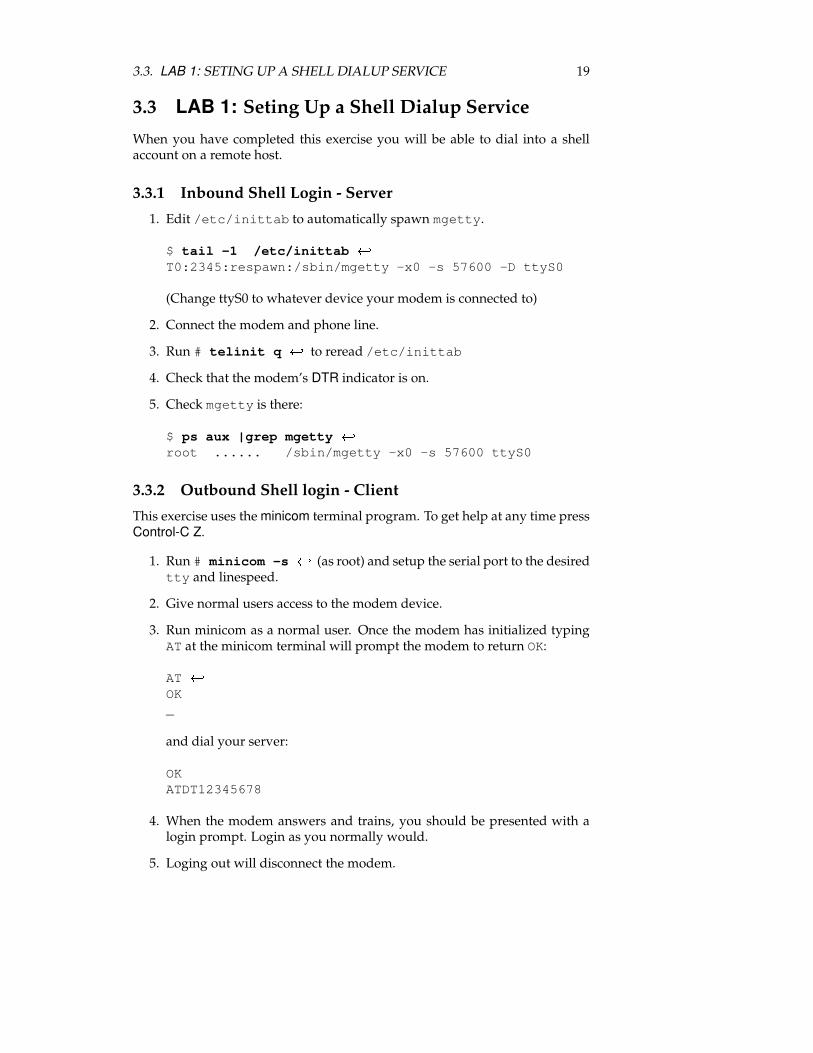
3.3 LAB 1: Seting Up a Shell Dialup Service
When you have completed this exercise you will be able to dial into a shellaccount on a remote host.
3.3.1 Inbound Shell Login - Server
1. Edit /etc/inittab to automatically spawn mgetty.
$ tail -1 /etc/inittab ���T0:2345:respawn:/sbin/mgetty -x0 -s 57600 -D ttyS0
(Change ttyS0 to whatever device your modem is connected to)
2. Connect the modem and phone line.
3. Run # telinit q ��� to reread /etc/inittab
4. Check that the modem’s DTR indicator is on.
5. Check mgetty is there:
$ ps aux |grep mgetty ���root ...... /sbin/mgetty -x0 -s 57600 ttyS0
3.3.2 Outbound Shell login - Client
This exercise uses the minicom terminal program. To get help at any time pressControl-C Z.
1. Run # minicom -s ��� (as root) and setup the serial port to the desiredtty and linespeed.
2. Give normal users access to the modem device.
3. Run minicom as a normal user. Once the modem has initialized typingAT at the minicom terminal will prompt the modem to return OK:
AT ���OK_
and dial your server:
OKATDT12345678
4. When the modem answers and trains, you should be presented with alogin prompt. Login as you normally would.
5. Loging out will disconnect the modem.
20 CONTENTS
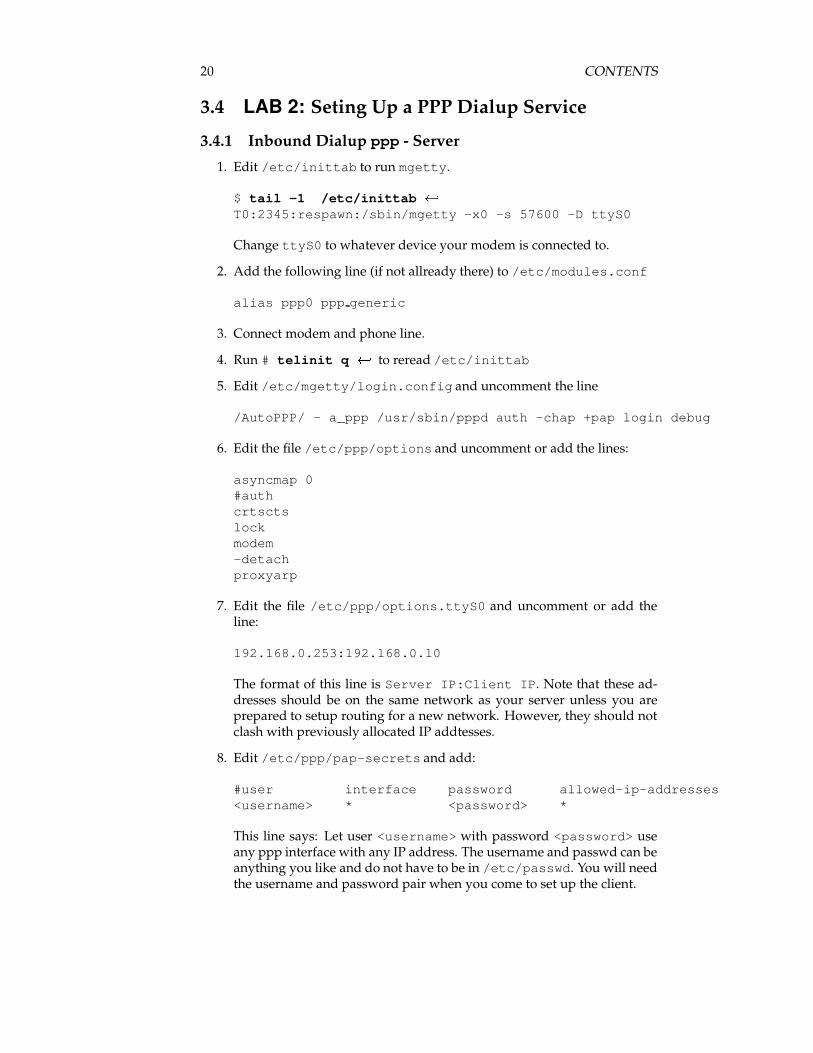
3.4 LAB 2: Seting Up a PPP Dialup Service
3.4.1 Inbound Dialup ppp - Server
1. Edit /etc/inittab to run mgetty.
$ tail -1 /etc/inittab ���T0:2345:respawn:/sbin/mgetty -x0 -s 57600 -D ttyS0
Change ttyS0 to whatever device your modem is connected to.
2. Add the following line (if not allready there) to /etc/modules.conf
alias ppp0 ppp generic
3. Connect modem and phone line.
4. Run # telinit q ��� to reread /etc/inittab
5. Edit /etc/mgetty/login.config and uncomment the line
/AutoPPP/ - a_ppp /usr/sbin/pppd auth -chap +pap login debug
6. Edit the file /etc/ppp/options and uncomment or add the lines:
asyncmap 0#authcrtsctslockmodem-detachproxyarp
7. Edit the file /etc/ppp/options.ttyS0 and uncomment or add theline:
192.168.0.253:192.168.0.10
The format of this line is Server IP:Client IP. Note that these ad-dresses should be on the same network as your server unless you areprepared to setup routing for a new network. However, they should notclash with previously allocated IP addtesses.
8. Edit /etc/ppp/pap-secrets and add:
#user interface password allowed-ip-addresses<username> * <password> *
This line says: Let user <username> with password <password> useany ppp interface with any IP address. The username and passwd can beanything you like and do not have to be in /etc/passwd. You will needthe username and password pair when you come to set up the client.
3.4. LAB 2: SETING UP A PPP DIALUP SERVICE 21
3.4.2 Outbound Dialup ppp - Client
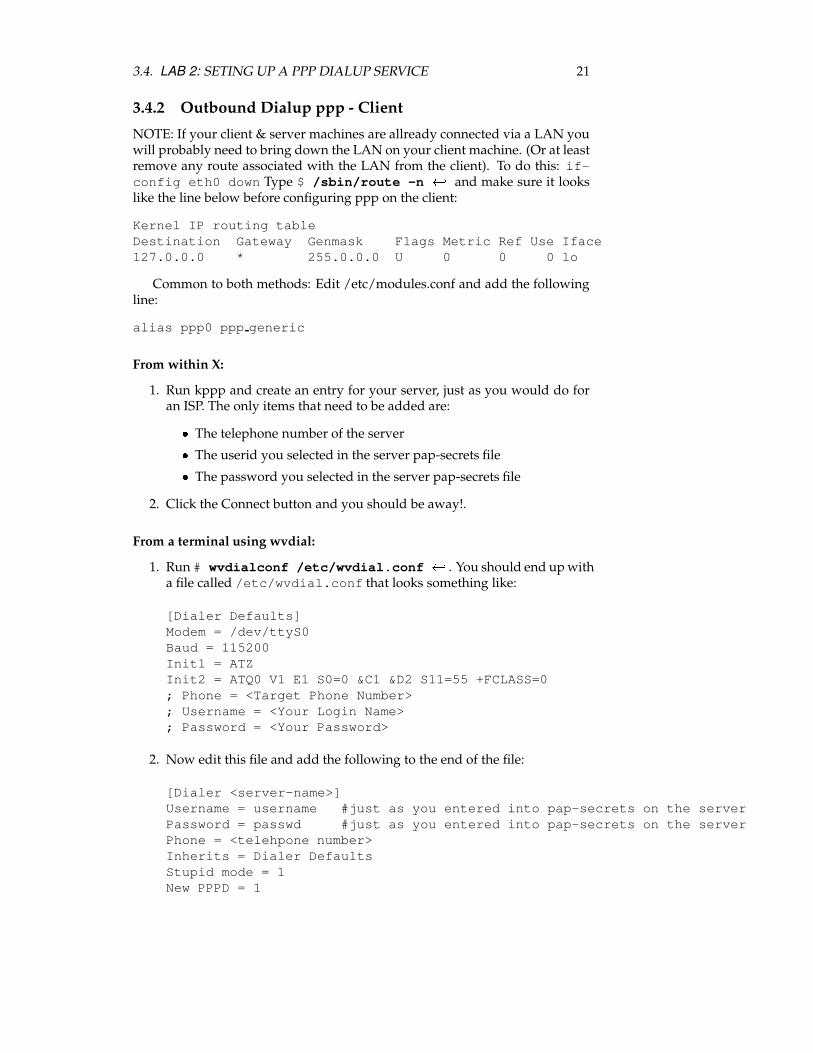
NOTE: If your client & server machines are allready connected via a LAN youwill probably need to bring down the LAN on your client machine. (Or at leastremove any route associated with the LAN from the client). To do this: if-config eth0 down Type $ /sbin/route -n ��� and make sure it lookslike the line below before configuring ppp on the client:
Kernel IP routing tableDestination Gateway Genmask Flags Metric Ref Use Iface127.0.0.0 * 255.0.0.0 U 0 0 0 lo
Common to both methods: Edit /etc/modules.conf and add the followingline:
alias ppp0 ppp generic
From within X:
1. Run kppp and create an entry for your server, just as you would do foran ISP. The only items that need to be added are:
� The telephone number of the server� The userid you selected in the server pap-secrets file� The password you selected in the server pap-secrets file
2. Click the Connect button and you should be away!.
From a terminal using wvdial:
1. Run # wvdialconf /etc/wvdial.conf ��� . You should end up witha file called /etc/wvdial.conf that looks something like:
[Dialer Defaults]Modem = /dev/ttyS0Baud = 115200Init1 = ATZInit2 = ATQ0 V1 E1 S0=0 &C1 &D2 S11=55 +FCLASS=0; Phone = <Target Phone Number>; Username = <Your Login Name>; Password = <Your Password>
2. Now edit this file and add the following to the end of the file:
[Dialer <server-name>]Username = username #just as you entered into pap-secrets on the serverPassword = passwd #just as you entered into pap-secrets on the serverPhone = <telehpone number>Inherits = Dialer DefaultsStupid mode = 1New PPPD = 1
22 CONTENTS
Stupid mode tells wvdial to start pppd as soon as it sees the login promptand not to log into the server as a normal user first.
3. Now you can dial your server by doing the following:
$ wvdial <server-name> ���
Where � server-name � is the name you gave to the second dialer stanzaabove.
Note that wvdial will add an entry into /etc/ppp/pap-secrets con-taining the username and password pair automatically.
3.4.3 Adding Automatic DNS setup
You can have the server pass a pair of DNS IP addresses to the client which theclient can use to resolve dns queries. If you do this, you should be able to useWindows as a client just like any other ISP.
Server Side:
Add the following line to /etc/ppp/options
ms-dns <DNS-IPADDR1>ms-dns <DNS-IPADDR2>
The DNS ip addresses should be whatever your server is using ($ cat/etc/resolv.conf ��� to see). If your server is using the local interface(127.0.0.1) then you should set the address to that of eth0 and make sure thatbind is configured to listen on that interface. The following line should be in/etc/named.conf
listen-on <ip-address>
Client Side:
Add the following line to /etc/ppp/options
usepeerdns
Now create a file called /etc/ppp/ip-up.localwhich contains:
cp /etc/resolv.conf /etc/ppp/resolv.conf.origecho "nameserver $DNS1" > /etc/resolv.confecho "nameserver $DNS2" >> /etc/resolv.conf
Create another file called /etc/ppp/ip-down.local which contains:
cp /etc/ppp/resolv.conf.orig /etc/resolv.conf
Congratulations. You now have a server which behaves just like an ISP!
3.5 Questions

Objective 101.4
Setup SCSI Devices
4.1 Overview
4.1.1 Weight: []
4.1.2 Statement of Objective:
Candidates should be able to configure SCSI devices using the SCSI BIOS aswell as the necessary Linux tools. They also should be able to differentiate be-tween the various types of SCSI. This objective includes manipulating the SCSIBIOS to detect used and available SCSI IDs and setting the correct ID numberfor different devices especially the boot device. It also includes managing thesettings in the computer’s BIOS to determine the desired boot sequence if bothSCSI and IDE drives are used.
4.1.3 Key files, terms, and utilities:
SCSI ID/proc/scsi/scsi_info
4.1.4 Resources:
23
24 CONTENTS
4.2 Notes
4.2.1 SCSI Devices� SCSI - Small Computer Systems Interface
� SCSI can support a range of devices
– Hard disks
– Tape drives
– Scanners
� There are many different types of SCSI based on:
– Bus Width
– Bus Speed
– Max no of devices
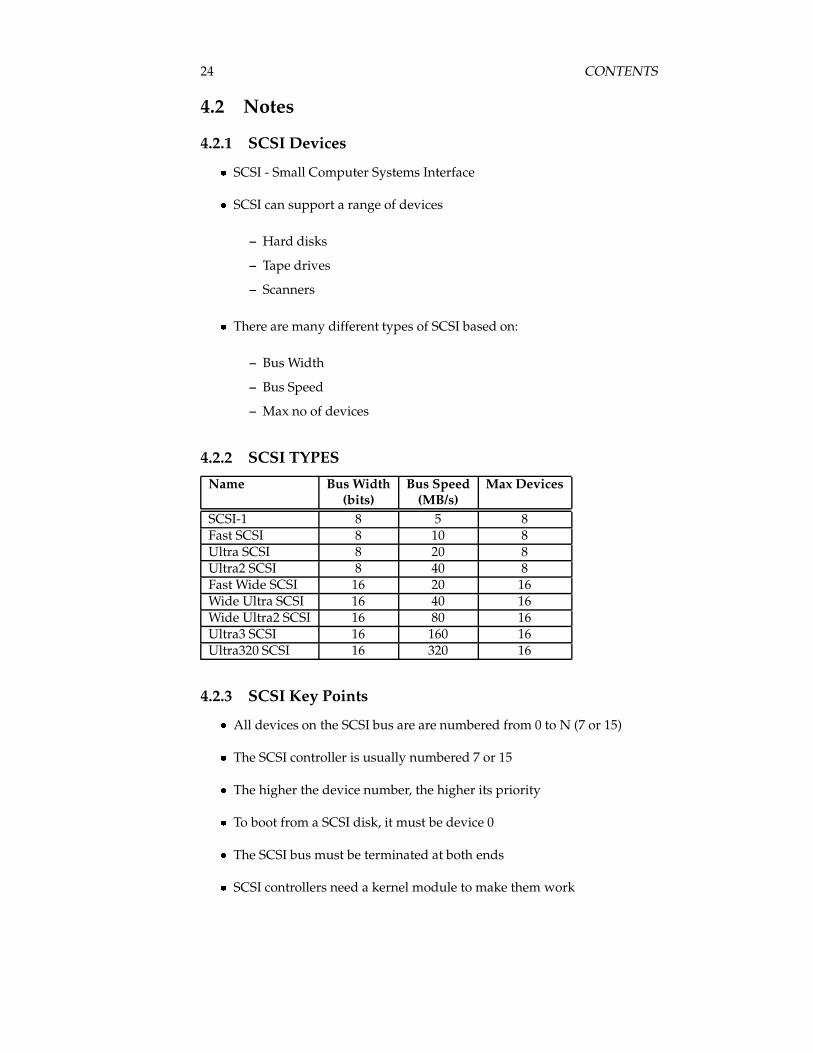
4.2.2 SCSI TYPES
Name Bus Width Bus Speed Max Devices(bits) (MB/s)
SCSI-1 8 5 8Fast SCSI 8 10 8Ultra SCSI 8 20 8Ultra2 SCSI 8 40 8Fast Wide SCSI 16 20 16Wide Ultra SCSI 16 40 16Wide Ultra2 SCSI 16 80 16Ultra3 SCSI 16 160 16Ultra320 SCSI 16 320 16
4.2.3 SCSI Key Points� All devices on the SCSI bus are are numbered from 0 to N (7 or 15)
� The SCSI controller is usually numbered 7 or 15
� The higher the device number, the higher its priority
� To boot from a SCSI disk, it must be device 0
� The SCSI bus must be terminated at both ends
� SCSI controllers need a kernel module to make them work
4.2. NOTES 25
4.2.4 SCSI Addressing
SCSI devices are addressed according to:
� SCSI adapter number (host)
� channel number (bus)
� id number (target)
� lun (lun)
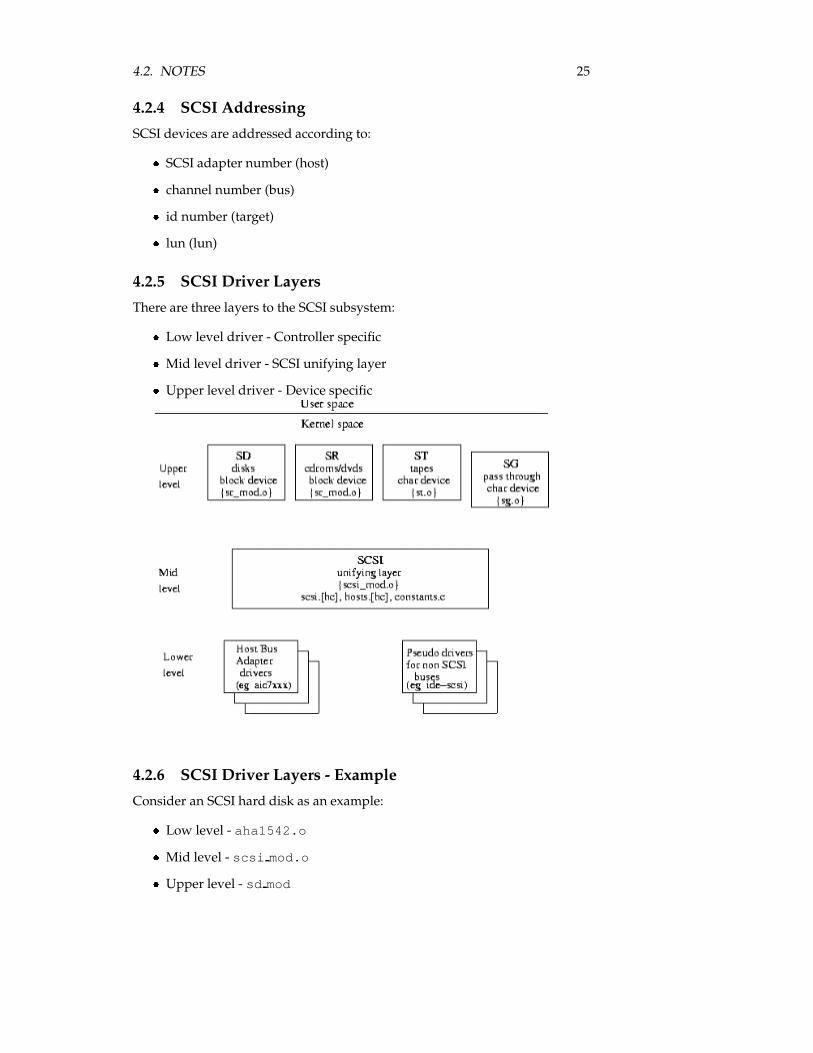
4.2.5 SCSI Driver Layers
There are three layers to the SCSI subsystem:
� Low level driver - Controller specific
� Mid level driver - SCSI unifying layer
� Upper level driver - Device specific
4.2.6 SCSI Driver Layers - Example
Consider an SCSI hard disk as an example:
� Low level - aha1542.o
� Mid level - scsi mod.o
� Upper level - sd mod
26 CONTENTS
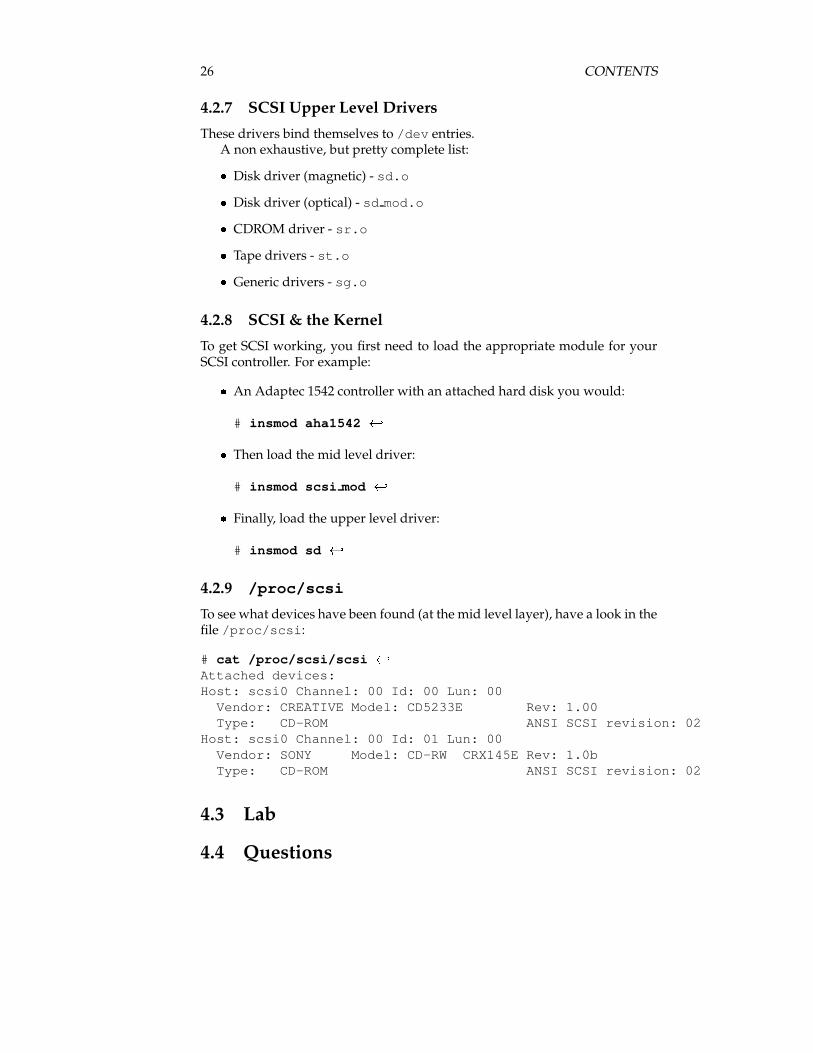
4.2.7 SCSI Upper Level Drivers
These drivers bind themselves to /dev entries.A non exhaustive, but pretty complete list:
� Disk driver (magnetic) - sd.o
� Disk driver (optical) - sd mod.o
� CDROM driver - sr.o
� Tape drivers - st.o
� Generic drivers - sg.o
4.2.8 SCSI & the Kernel
To get SCSI working, you first need to load the appropriate module for yourSCSI controller. For example:
� An Adaptec 1542 controller with an attached hard disk you would:
# insmod aha1542 ���� Then load the mid level driver:
# insmod scsi mod ���� Finally, load the upper level driver:
# insmod sd ���
4.2.9 /proc/scsi
To see what devices have been found (at the mid level layer), have a look in thefile /proc/scsi:
# cat /proc/scsi/scsi ���Attached devices:Host: scsi0 Channel: 00 Id: 00 Lun: 00
Vendor: CREATIVE Model: CD5233E Rev: 1.00Type: CD-ROM ANSI SCSI revision: 02
Host: scsi0 Channel: 00 Id: 01 Lun: 00Vendor: SONY Model: CD-RW CRX145E Rev: 1.0bType: CD-ROM ANSI SCSI revision: 02
4.3 Lab
4.4 Questions
Objective 101.5
Setup different PC expansioncards
5.1 Overview
5.1.1 Weight: []
5.1.2 Statement of Objective:
Candidates should be able to configure various cards for the various expan-sion slots. They should know the differences between ISA and PCI cards withrespect to configuration issues. This objective includes the correct settings ofIRQs, DMAs and I/O Ports of the cards, especially to avoid conflicts betweendevices. It also includes using isapnp if the card is an ISA PnP device.
5.1.3 Key files, terms, and utilities:
/proc/dma/proc/interrupts/proc/ioports/proc/pcipnpdump(8)isapnp(8)lspci(8)
5.1.4 Resources:
Linux Hardware Compatibility HOWTO - Steven Pritchard :
http://www.linuxdoc.org/HOWTO/Hardware-HOWTO/index.html
Linux PCI-HOWTO by Michael Will :
27

28 CONTENTS
http://www.linuxdoc.org/HOWTO/PCI-HOWTO.html
Plug-and-Play-HOWTO David S.Lawyer :
http://www.linuxdoc.org/HOWTO/Plug-and-Play-HOWTO.html

5.2. NOTES 29
5.2 Notes
5.3 Lab
5.4 Questions

30 CONTENTS
Objective 101.6
Configure CommunicationDevices
6.1 Overview
6.1.1 Weight: []
6.1.2 Statement of Objective:
Candidates should be able to install and configure different internal and exter-nal communication devices like modems, ISDN adapters, and DSL switches.This objective includes verification of compatibility requirements (especiallyimportant if that modem is a winmodem), necessary hardware settings for in-ternal devices (IRQs, DMAs, I/O ports), and loading and configuring suitabledevice drivers. It also includes communication device and interface configura-tion requirements, such as the right serial port for 115.2 Kbps, and the correctmodem settings for outbound PPP connection(s).
6.1.3 Key files, terms, and utilities:
/proc/dma/proc/interrupts/proc/ioportssetserial(8)
6.1.4 Resources:
Linmodem-HOWTO by Sean Walbran and Marvin Stodolsky :
http://www.linuxdoc.org/HOWTO/Linmodem-HOWTO.html
Modem-HOWTO - David S.Lawyer :
31
32 CONTENTS
http://www.linuxdoc.org/HOWTO/Modem-HOWTO.html
The Winmodems-and-Linux HOWTO by Alexandre J. :
http://www.linuxdoc.org/HOWTO/Winmodems-and-Linux-HOWTO.html
Serial HOWTO - David S.Lawyer original by Greg Hankins :
http://www.linuxdoc.org/HOWTO/Serial-HOWTO.html
The Linux Winmodem Support Website :
http://www.linmodems.org

6.2. NOTES 33
6.2 Notes
6.3 Lab
6.4 Questions

34 CONTENTS
Objective 101.7
Configure USB devices
7.1 Overview
7.1.1 Weight: []
7.1.2 Statement of Objective:
Candidates should be able to activate USB support, use and configure differentUSB devices. This objective includes the correct selection of the USB chipsetand the corresponding module. It also includes the knowledge of the basicarchitecture of the layer model of USB as well as the different modules used inthe different layers.
7.1.3 Key files, terms, and utilities:
lspci(8)usb-uhci.ousb-ohci.o/etc/usbmgr/usbmodules/etc/hotplug
7.1.4 Resources:
The Linux-USB Project http://www.linux-usb.org:
The Linux USB Sub System by Brad Hards, Sigma Bravo Pty. Ltd.
Slides LCDP gl1.101.7.slides.tex
35
36 CONTENTS
7.2 Notes
These notes were prepared by Andrew Eager.
7.2.1 The Universal Serial Bus� A serial transmission scheme
� Two versions of USB Version 1 & Version 2
� Version
– 1 released January 1996
– supports speeds up to 12MBit/s (8.5Mbit/s in practice)
– supports up to 127 devices connected to the bus
Version 2:
– announced 1999
– supports speeds up to 480Mbit/s
� Devices can be self or bus powered
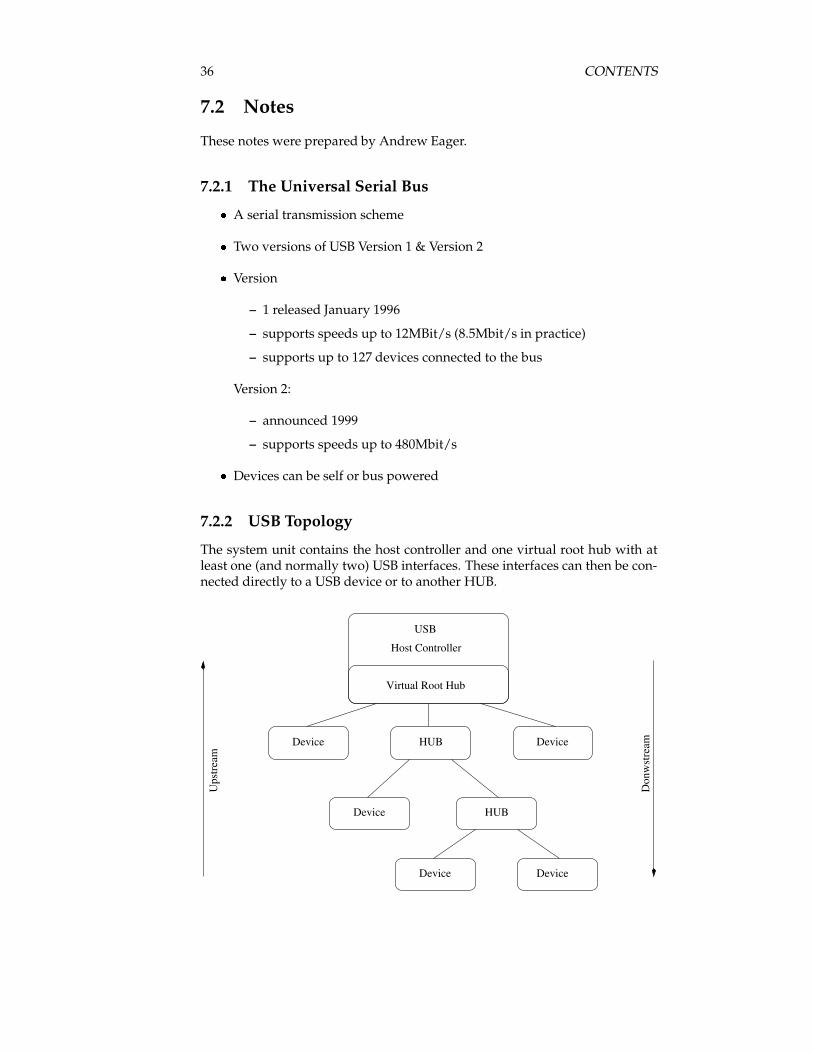
7.2.2 USB Topology
The system unit contains the host controller and one virtual root hub with atleast one (and normally two) USB interfaces. These interfaces can then be con-nected directly to a USB device or to another HUB.
USB
Host Controller
Virtual Root Hub
Device HUB Device
Device HUB
Device Device
Ups
trea
m
Don
wst
ream
7.2. NOTES 37
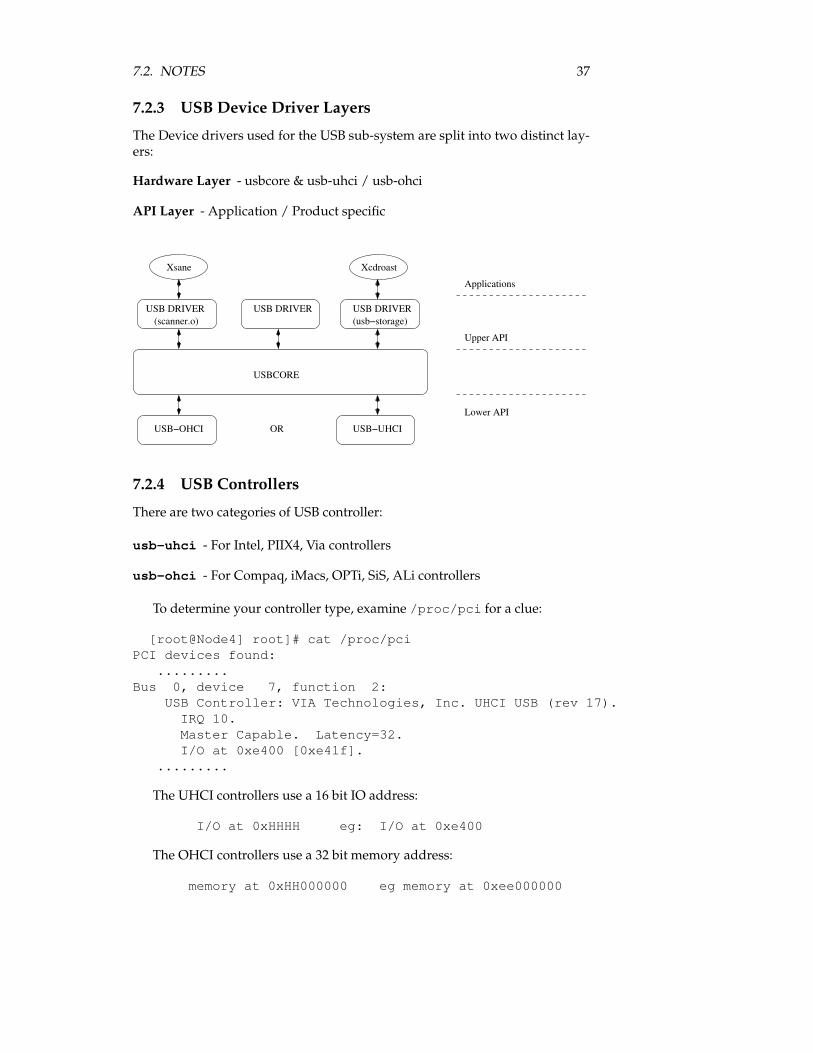
7.2.3 USB Device Driver Layers
The Device drivers used for the USB sub-system are split into two distinct lay-ers:
Hardware Layer - usbcore & usb-uhci / usb-ohci
API Layer - Application / Product specific
USB−OHCI USB−UHCI
USBCORE
OR
USB DRIVER USB DRIVER USB DRIVER(scanner.o) (usb−storage)
Lower API
Applications
Upper API
Xsane Xcdroast
7.2.4 USB Controllers
There are two categories of USB controller:
usb-uhci - For Intel, PIIX4, Via controllers
usb-ohci - For Compaq, iMacs, OPTi, SiS, ALi controllers
To determine your controller type, examine /proc/pci for a clue:
[root@Node4] root]# cat /proc/pciPCI devices found:
.........Bus 0, device 7, function 2:
USB Controller: VIA Technologies, Inc. UHCI USB (rev 17).IRQ 10.Master Capable. Latency=32.I/O at 0xe400 [0xe41f].
.........
The UHCI controllers use a 16 bit IO address:
I/O at 0xHHHH eg: I/O at 0xe400
The OHCI controllers use a 32 bit memory address:
memory at 0xHH000000 eg memory at 0xee000000
38 CONTENTS
7.2.5 USB Modules
Assuming you have a modular kernel, the following modules will be required:
1. usbcore - The base usb kernel module
2. plus one of the controller specific modules:� usb-uhci - For Intel, PIIX4, Via controllers� usb-ohci - For Compaq, iMacs, OPTi, SiS, ALi controllers
Configuration:
An entry in /etc/modules.confaliases the specific controller to usb-controlleras follows:
alias usb-controller usb-uhci
Starting up the USB sub-system
To have the usb sub-system startup automatically at boot time, all you need todo is ensure that the above alias line is present in /etc/modules.conf.
To startup manually, do the following steps:
1. insmod usbcore
2. insmod usb-uhci (or usb-ohci)
3. mount the usbdevfs filesystem (optional but highly recommended)
Example:
[root@Node4] root]# insmod usbcoreUsing /lib/modules/2.4.18-4/kernel/drivers/usb/usbcore.o[root@Node4] root]# insmod usb-uhciUsing /lib/modules/2.4.18-4/kernel/drivers/usb/usb-uhci.o[root@Node4] root]# mount -t usbdevfs usbdevfs /proc/bus/usb
Once this is done, you should see the following entries in /proc/bus/usb:
[root@Node4] root]# ls /proc/bus/usb001 devices drivers
7.2.6 USB Interrogation Utilities
lsusb - A console view of USB devices
Lsusb is a text utility contained in the usbutils package. Use ’rpm -Uvh usbu-tils.xxx.rpm’ to install.
[root@node4]# lsusb
Bus 001 Device 001: ID 0000:0000 Virtual HubDevice Descriptor:
bLength 18
7.2. NOTES 39
bDescriptorType 1bcdUSB 1.00bDeviceClass 9 HubiProduct 2 USB UHCI Root Hub
..........
Bus 001 Device 002: ID 03f0:0601 Hewlett-Packard ScanJet 6300cDevice Descriptor:
bLength 18bDescriptorType 1bcdUSB 1.00bDeviceClass 0 InterfacebDeviceSubClass 0bDeviceProtocol 0bMaxPacketSize0 8idVendor 0x03f0 Hewlett-PackardidProduct 0x0601 ScanJet 6300cbcdDevice 1.00iManufacturer 1iProduct 2 HP ScanJet 6300CiSerial 3 SG9941706SPE
........
Bus 001 Device 003: ID 1189:6000Device Descriptor:
bLength 18bDescriptorType 1bcdUSB 1.00bDeviceClass 0 InterfacebDeviceSubClass 0bDeviceProtocol 0bMaxPacketSize0 8idVendor 0x1189idProduct 0x6000bcdDevice a.03iManufacturer 0iProduct 1 USB Optical Storage DeviceiSerial 0
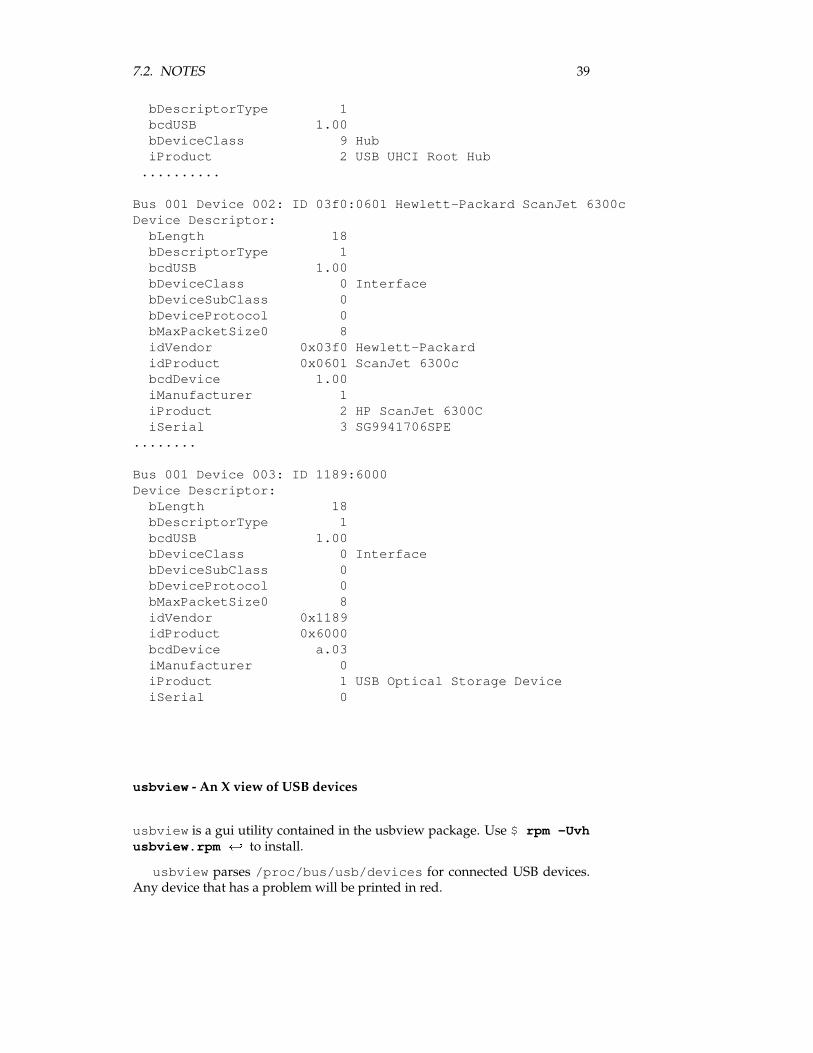
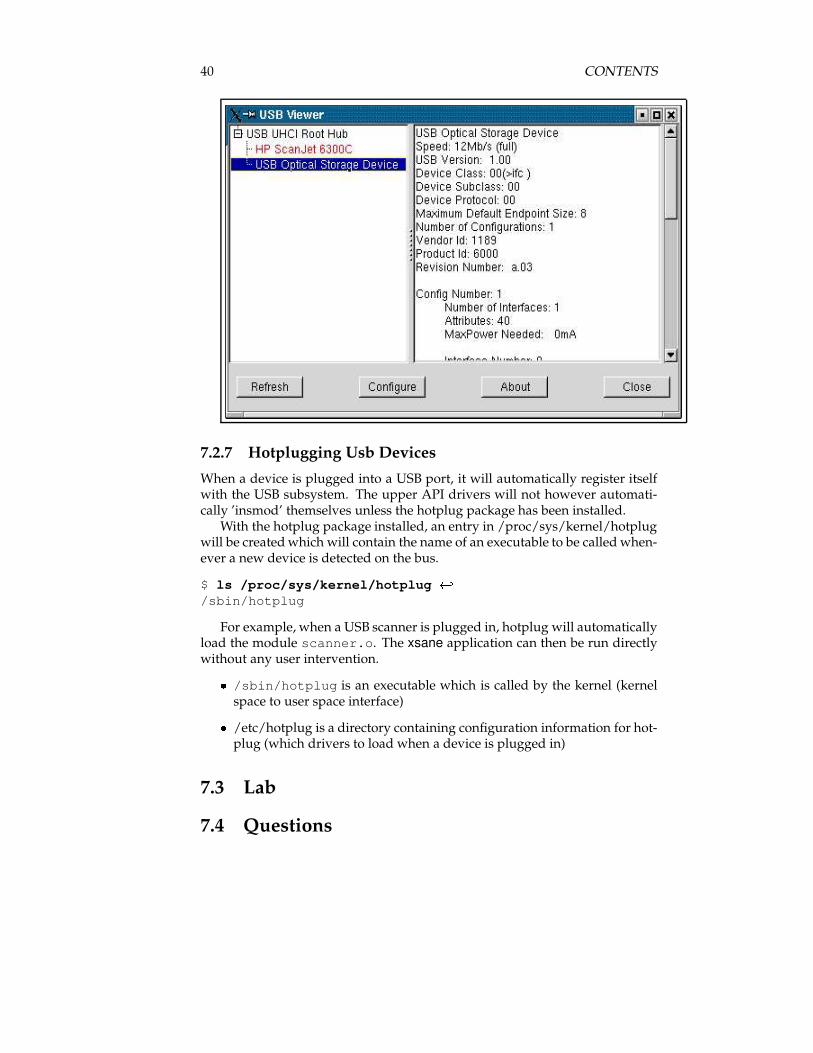
usbview - An X view of USB devices
usbview is a gui utility contained in the usbview package. Use $ rpm -Uvhusbview.rpm ��� to install.
usbview parses /proc/bus/usb/devices for connected USB devices.Any device that has a problem will be printed in red.
40 CONTENTS
7.2.7 Hotplugging Usb Devices
When a device is plugged into a USB port, it will automatically register itselfwith the USB subsystem. The upper API drivers will not however automati-cally ’insmod’ themselves unless the hotplug package has been installed.
With the hotplug package installed, an entry in /proc/sys/kernel/hotplugwill be created which will contain the name of an executable to be called when-ever a new device is detected on the bus.
$ ls /proc/sys/kernel/hotplug ���/sbin/hotplug
For example, when a USB scanner is plugged in, hotplug will automaticallyload the module scanner.o. The xsane application can then be run directlywithout any user intervention.
� /sbin/hotplug is an executable which is called by the kernel (kernelspace to user space interface)
� /etc/hotplug is a directory containing configuration information for hot-plug (which drivers to load when a device is plugged in)
7.3 Lab
7.4 Questions
Topic 102
Linux Installation & PackageManagement
41

Objective 102.1
Design hard disk layout
1.1 Overview
1.1.1 Weight: []
1.1.2 Statement of Objective:
Candidates should be able to design a disk partitioning scheme for a Linuxsystem. This objective includes allocating filesystems or swap space to sep-arate partitions or disks, and tailoring the design to the intended use of thesystem. It also includes placing /boot on a partition that conforms with theBIOS’ requirements for booting.
1.1.3 Key files, terms, and utilities:
/ (root) filesystem/var filesystem/home filesystemswap spacemount pointspartitionscylinder 1024
1.1.4 Resources:
Mini-FAQ from Karsten M Self on Linux Partitioning :
http://pw1.netcom.com/˜kmself/Linux/FAQs/partition.html
43

44 CONTENTS
1.2 Notes
1.3 Lab
1.4 Questions
Objective 102.2
Install a boot manager
2.1 Overview
2.1.1 Weight: []
2.1.2 Statement of Objective:
Candidate should be able to select, install, and configure a boot manager. Thisobjective includes providing alternative boot locations and backup boot op-tions (for example, using a boot floppy).
2.1.3 Key files, terms, and utilities:
/etc/lilo.conf/boot/grub/grub.conflilogrub-installMBRsuperblockfirst stage boot loader
2.1.4 Resources:
LinuxGazette GRUB Article :
http://www.linuxgazette.com/issue64/kohli.html
The Gnu Grub Site :
http://www.gnu.org/software/grub/
45
46 CONTENTS
2.2 Notes
2.2.1 grub entry for adding Debian
default=1timeout=10splashimage=(hd0,4)/grub/splash.xpm.gztitle Red Hat Linux (2.4.18-3debug)
root (hd0,4)kernel /vmlinuz-2.4.18-3debug ro root=/dev/hda7initrd /initrd-2.4.18-3debug.img
title Win MErootnoverify (hd0,0)chainloader +1
title Debianroot (hd0,1)kernel /boot/vmlinuz-2.2.20-idepci ro root=/dev/hda2
2.3 Lab
2.4 Questions
Objective 102.3
Make and install programsfrom source
3.1 Overview
3.1.1 Weight: []
3.1.2 Statement of Objective:
Candidates should be able to build and install an executable program fromsource. This objective includes being able to unpack a file of sources. Candi-dates should be able to make simple customizations to the Makefile, for exam-ple changing paths or adding extra include directories.
3.1.3 Key files, terms, and utilities:
gunzipgzipbzip2tarconfiguremake
3.1.4 Resources:
TBA
47
48 CONTENTS
3.2 Notes
3.2.1 Source Code Destribution
To distribute software in the form of source code a source tree is archived intoone file using the tar command and then compressed. The resulting file iscalled a tarball.
Source code may also be distributed using the package management toolsof a particular distribution.
Debian apt-get install kernel-source-2.2.27
Redhat rpm -Uhv at-3.1.8-23.src.rpm
Tarball tdb-1.0.6.tar.gz
subsectionSteps to Install a package from tarball
� Unpack the taball:
$ tar zxvf my-prog.tar.gz ���
� Change dircetory into the source tree:
$ cd my-prog ���
� Configure the Makefile:
$ ./configure ���
� Make:
$ make ���
� Install:
$ su -c ’make install’ ���
3.2.2 Installing the trivial database tdb
Download
Locate and download the tarball
� googling for it: http://google.com
� search on freshmeat: http://freshmeat.net
� see if it lives on sourceforge: http://www.sf.net
Downlload the tarball to a suitable directory such as /tmp.
3.2. NOTES 49
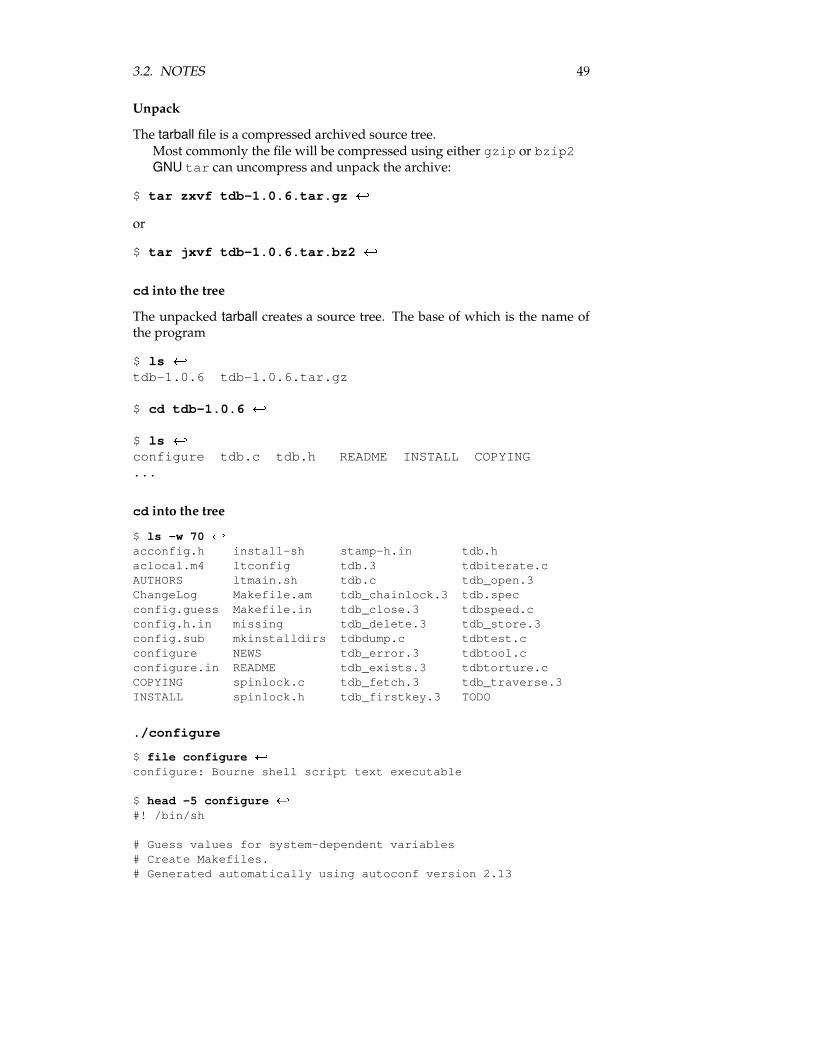
Unpack
The tarball file is a compressed archived source tree.Most commonly the file will be compressed using either gzip or bzip2GNU tar can uncompress and unpack the archive:
$ tar zxvf tdb-1.0.6.tar.gz ���
or
$ tar jxvf tdb-1.0.6.tar.bz2 ���
cd into the tree
The unpacked tarball creates a source tree. The base of which is the name ofthe program
$ ls ���tdb-1.0.6 tdb-1.0.6.tar.gz
$ cd tdb-1.0.6 ���
$ ls ���configure tdb.c tdb.h README INSTALL COPYING...
cd into the tree
$ ls -w 70 �acconfig.h install-sh stamp-h.in tdb.haclocal.m4 ltconfig tdb.3 tdbiterate.cAUTHORS ltmain.sh tdb.c tdb_open.3ChangeLog Makefile.am tdb_chainlock.3 tdb.specconfig.guess Makefile.in tdb_close.3 tdbspeed.cconfig.h.in missing tdb_delete.3 tdb_store.3config.sub mkinstalldirs tdbdump.c tdbtest.cconfigure NEWS tdb_error.3 tdbtool.cconfigure.in README tdb_exists.3 tdbtorture.cCOPYING spinlock.c tdb_fetch.3 tdb_traverse.3INSTALL spinlock.h tdb_firstkey.3 TODO
./configure
$ file configure ��configure: Bourne shell script text executable
$ head -5 configure �#! /bin/sh
# Guess values for system-dependent variables# Create Makefiles.# Generated automatically using autoconf version 2.13
50 CONTENTS
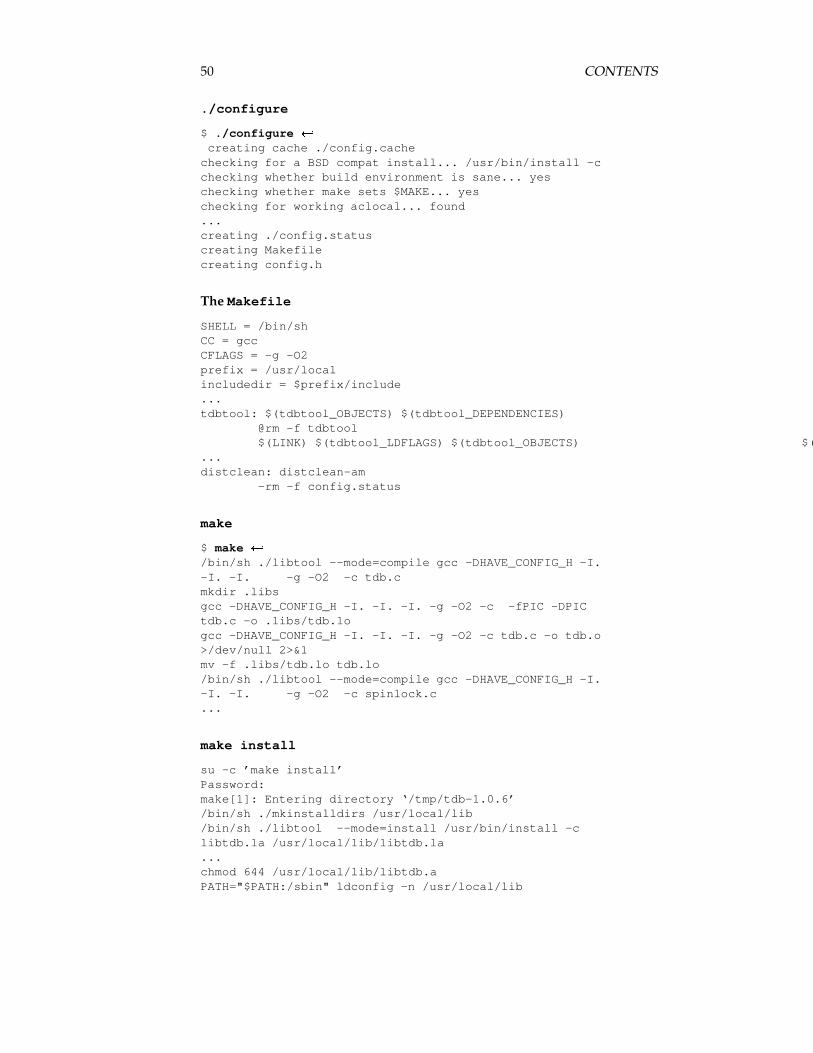
./configure
$ ./configure ��creating cache ./config.cache
checking for a BSD compat install... /usr/bin/install -cchecking whether build environment is sane... yeschecking whether make sets $MAKE... yeschecking for working aclocal... found...creating ./config.statuscreating Makefilecreating config.h
The Makefile
SHELL = /bin/shCC = gccCFLAGS = -g -O2prefix = /usr/localincludedir = $prefix/include...tdbtool: $(tdbtool_OBJECTS) $(tdbtool_DEPENDENCIES)
@rm -f tdbtool$(LINK) $(tdbtool_LDFLAGS) $(tdbtool_OBJECTS) $(tdbtool_LDADD) $(LIBS)
...distclean: distclean-am
-rm -f config.status
make
$ make �/bin/sh ./libtool --mode=compile gcc -DHAVE_CONFIG_H -I.-I. -I. -g -O2 -c tdb.cmkdir .libsgcc -DHAVE_CONFIG_H -I. -I. -I. -g -O2 -c -fPIC -DPICtdb.c -o .libs/tdb.logcc -DHAVE_CONFIG_H -I. -I. -I. -g -O2 -c tdb.c -o tdb.o>/dev/null 2>&1mv -f .libs/tdb.lo tdb.lo/bin/sh ./libtool --mode=compile gcc -DHAVE_CONFIG_H -I.-I. -I. -g -O2 -c spinlock.c...
make install
su -c ’make install’Password:make[1]: Entering directory ‘/tmp/tdb-1.0.6’/bin/sh ./mkinstalldirs /usr/local/lib/bin/sh ./libtool --mode=install /usr/bin/install -clibtdb.la /usr/local/lib/libtdb.la...chmod 644 /usr/local/lib/libtdb.aPATH="$PATH:/sbin" ldconfig -n /usr/local/lib
3.3. LAB 51
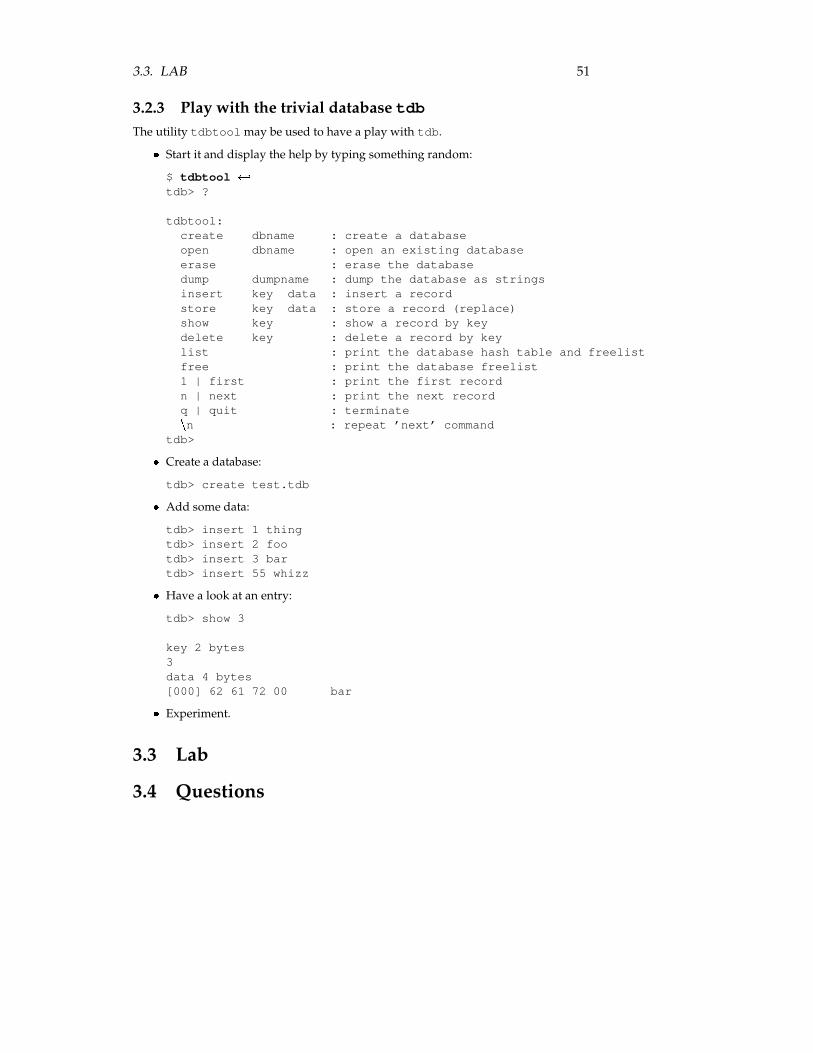
3.2.3 Play with the trivial database tdbThe utility tdbtool may be used to have a play with tdb.
� Start it and display the help by typing something random:
$ tdbtool �tdb> ?
tdbtool:create dbname : create a databaseopen dbname : open an existing databaseerase : erase the databasedump dumpname : dump the database as stringsinsert key data : insert a recordstore key data : store a record (replace)show key : show a record by keydelete key : delete a record by keylist : print the database hash table and freelistfree : print the database freelist1 | first : print the first recordn | next : print the next recordq | quit : terminate n : repeat ’next’ command
tdb>
� Create a database:
tdb> create test.tdb
� Add some data:
tdb> insert 1 thingtdb> insert 2 footdb> insert 3 bartdb> insert 55 whizz
� Have a look at an entry:
tdb> show 3
key 2 bytes3data 4 bytes[000] 62 61 72 00 bar
� Experiment.
3.3 Lab
3.4 Questions

52 CONTENTS
Objective 102.4
Manage shared libraries
4.1 Overview
4.1.1 Weight: []
4.1.2 Statement of Objective:Candidates should be able to determine the shared libraries that executable programsdepend on and install them when necessary. Candidates should be able to state wheresystem libraries are kept.
4.1.3 Key files, terms, and utilities:lddldconfig
/etc/ld.so.confLD_LIBRARY_PATH
4.1.4 Resources:Shared-Library HOWTO Used to be at:
http://www.linux.com/howto/Program-Library-HOWTO/shared-libraries.html
53
54 CONTENTS
4.2 Ken Foskey’s Notes on Shared Libraries
4.2.1 What are theyShared libraries are code bytes that perform useful tasks for programmers.
Consider the operating system itself. It provides services to access the hard disk,the hard disk can be ext2 or reiserfs. You do not change your scripting or programmingin any way. The file system and hard disk interface has been isolated from the rest ofthe programs.
Libraries are a similar thing. There are a number of libraries, all performing somefunctions. For example putting text to the screen (libncurses), to doing complexgraphics (libpng).
Finally shared libraries reduce memory usage, only one copy of the library is neededin memory no matter how many programs use it, therefore it is very efficient.
4.2.2 What we need to know about libraries.From the point of view of users we need to be able to look at a program and determinewhether the appropriate libraries are installed for it. Mostly package managers suchas RPM and apt takes care of this but it is nice to know more detail. Especially whenworking with tarballs.
What programs are using:Firstly when we are having problems we might want to check what the particular
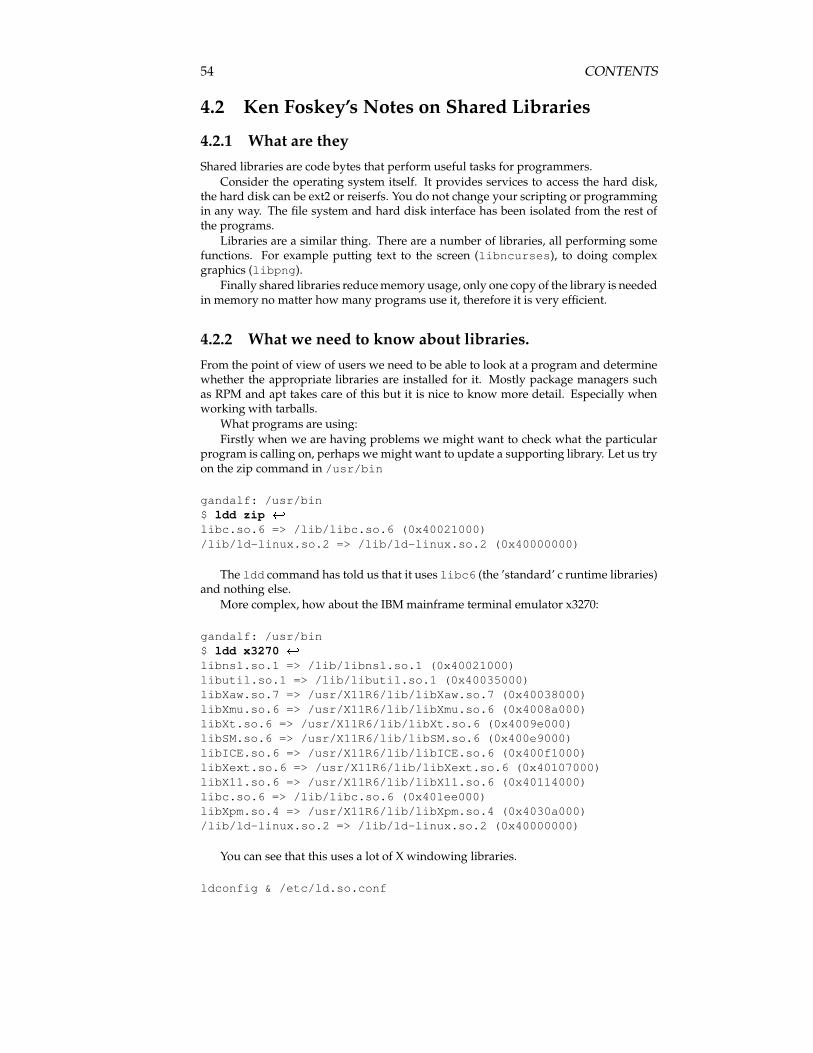
program is calling on, perhaps we might want to update a supporting library. Let us tryon the zip command in /usr/bin
gandalf: /usr/bin$ ldd zip ��libc.so.6 => /lib/libc.so.6 (0x40021000)/lib/ld-linux.so.2 => /lib/ld-linux.so.2 (0x40000000)
The ldd command has told us that it uses libc6 (the ’standard’ c runtime libraries)and nothing else.
More complex, how about the IBM mainframe terminal emulator x3270:
gandalf: /usr/bin$ ldd x3270 ��libnsl.so.1 => /lib/libnsl.so.1 (0x40021000)libutil.so.1 => /lib/libutil.so.1 (0x40035000)libXaw.so.7 => /usr/X11R6/lib/libXaw.so.7 (0x40038000)libXmu.so.6 => /usr/X11R6/lib/libXmu.so.6 (0x4008a000)libXt.so.6 => /usr/X11R6/lib/libXt.so.6 (0x4009e000)libSM.so.6 => /usr/X11R6/lib/libSM.so.6 (0x400e9000)libICE.so.6 => /usr/X11R6/lib/libICE.so.6 (0x400f1000)libXext.so.6 => /usr/X11R6/lib/libXext.so.6 (0x40107000)libX11.so.6 => /usr/X11R6/lib/libX11.so.6 (0x40114000)libc.so.6 => /lib/libc.so.6 (0x401ee000)libXpm.so.4 => /usr/X11R6/lib/libXpm.so.4 (0x4030a000)/lib/ld-linux.so.2 => /lib/ld-linux.so.2 (0x40000000)
You can see that this uses a lot of X windowing libraries.
ldconfig & /etc/ld.so.conf
4.2. KEN FOSKEY’S NOTES ON SHARED LIBRARIES 55
Or rather the other way around. ldconfig creates an optimized cache of the li-braries in use in the system. It is used every time a new library is installed to update allthe various links.
/etc/ld.so.conf is a file that lists directories to be scanned. there is two di-rectories implied /usr/lib and /lib that will always be scanned. On my system itcontains:
/usr/X11R6/lib/Xaw3d/usr/X11R6/lib
The tells ldconfig to also scan these directories. running ldconfig simply re-turns us to the command prompt, you will notice however that the ld.so.cache filehas been updated.
If you have updated your /etc/ld.so.conf it is worth running ldconfig -v
gandalf:/etc # ldconfig -v �ldconfig: Can’t stat /usr/X11R6/lib/Xaw3d:No such file or directory/usr/X11R6/lib:
libxrx.so.6 -> libxrx.so.6.3libXtst.so.6 -> libXtst.so.6.1
You will notice that the first directory listed in ld.so.confwas not valid and doesnot cause an error.
Note that the order of directories is very important, the first located shared librarywill be used.
4.2.3 LD LIBRARY PATH
Some time you need to install conflicting libraries onto your system. For example OpenOffice supplies all its own versions of the shared libraries so that it can perform qualitycontrol on the install. It must override the installed versions with its own. The answeris LD LIBRARY PATH, it makes Linux check the local path before going to the standardpath.
A scenario that you may use you have discovered a bug in an application but youare using a back version of shared libraries. The support people have asked you to loadthe most current version of a shared library however this is a production server and youdo not want to upgrade everything.
You grab the shared library please it in a non-standard area and then use the LD LIBRARY PATHto make the application find the new version first. If the bug persists then the sharedlibraries is not an issue, if it disappears then you can leave the LD LIBRARY PATH as awork around or install the library into your system properly.
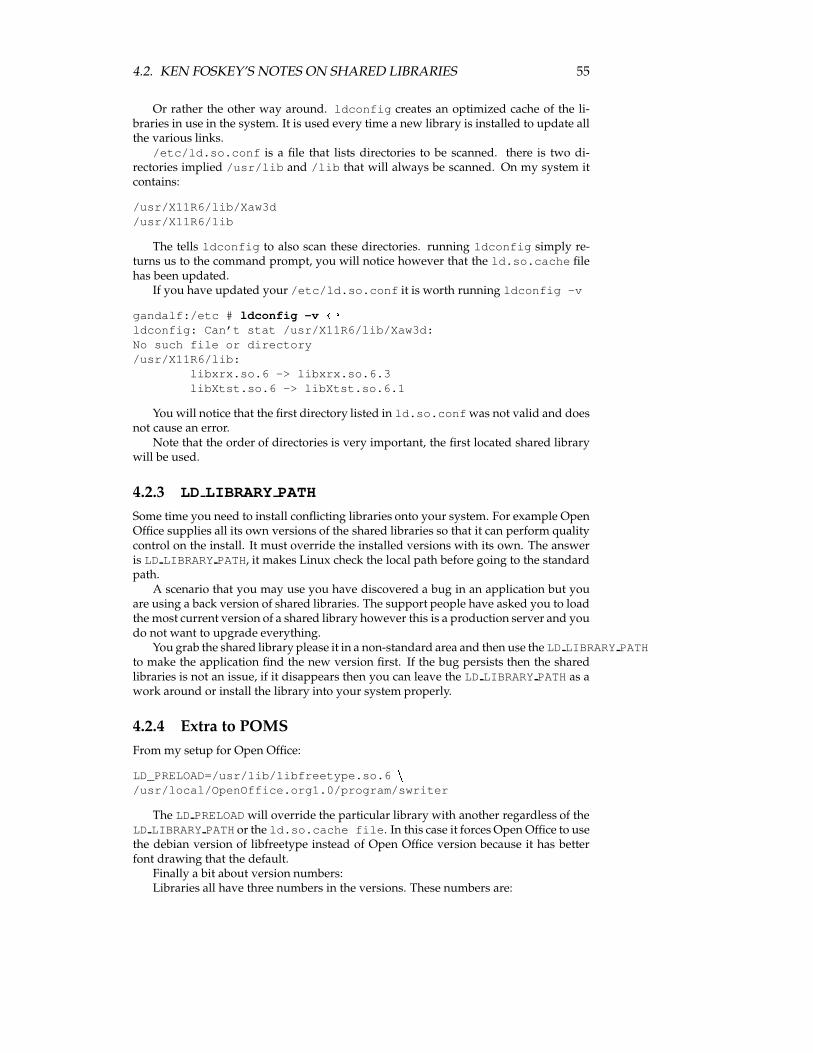
4.2.4 Extra to POMSFrom my setup for Open Office:
LD_PRELOAD=/usr/lib/libfreetype.so.6
/usr/local/OpenOffice.org1.0/program/swriter
The LD PRELOAD will override the particular library with another regardless of theLD LIBRARY PATH or the ld.so.cache file. In this case it forces Open Office to usethe debian version of libfreetype instead of Open Office version because it has betterfont drawing that the default.
Finally a bit about version numbers:Libraries all have three numbers in the versions. These numbers are:
56 CONTENTS
current.revision.age
If the age is reset to zero then you cannot use this library to replace with a previousversion, if it is non-zero then it can replace a previous version. for more details seeautobook section 10.4 library versioning.
4.3 Lab
4.4 Questions1. (a)
(b)
(c)
(d)
(e)
2. (a)
(b)
(c)
(d)
(e)
3. Which tool is used to update the ld.so.cache file?
(a) ldconf
(b) ldconfig
(c) ldcache
(d) ldd
(e) ldupdate
4. (a)
(b)
(c)
(d)
(e)
Objective 102.5
Use Debian packagemanagement
5.1 Overview
5.1.1 Weight: []
5.1.2 Statement of Objective:
Candidates should be able to perform Debian package management.This ob-jective includes being able to use command-line and interactive tools to install,upgrade, or uninstall packages, as well as find packages containing specificfiles or software (such packages might or might not be installed). This objec-tive also includes being able to obtain package information like version, con-tent, dependencies, package integrity and installation status (whether or notthe package is installed).
5.1.3 Key files, terms, and utilities:
/etc/dpkg/dpkg.cfg/var/lib/dpkg/*/etc/apt/apt.conf/etc/apt/sources.listdpkgdselectdpkg-reconfigureapt-getalien
5.1.4 Resources:
The Debian GNU/Linux FAQ :
http://www.debian.org/doc/FAQ/index.html
57
58 CONTENTS
Quick Reference for Debian GNU/Linux :
http://qref.sourceforge.net/
lcdp slides :
gl1.102.5.slides.tex
5.2 Notes
These notes are based on a presentation given by Jeff Waugh.
5.2.1 Debian Package Management Overview
The main Debian Package Management tools are:
� Basic tool—dpkg
dpkg is the back end for all Debian package management.
� Old Menu System—dselect
ncurses menu system for dselect—bizarre interface.
� The Ultimate Package Tool—apt-get
“Once you’ve been spoiled by the apt thing you just carn’t goback.”
5.2.2 Debian Package Management Tool—dpkg
dpkg does basic package management: installation, removal, extraction andbuilding.
Does not handle or fulfill dependencies, that’s left for higher level softwaresuch as apt.
dpkg Tasks� Install a package: dpkg -i <package-file>
� Remove a package: dpkg -r <package-name>
� Purge a package: dpkg -P <package-name>
� Find out which files a package owns: dpkg -L <package-name>
� Find out which package a file belongs to: dpkg -S <file-name>
� Extract information from package: dpkg -e <package-file>
� List contents of package file: dpkg -c <package-file>
5.2. NOTES 59
/etc/dpkg/dpkg.cfg
� Configuration file for dpkg(1)� Each line contains a single option which is exactly the same as a normal
commandline option for dpkg except for the leading dashes. Hashes forcomments.
� See ’man dpkg’ or ’dpkg –help’ for commands.� Example:
# dpkg configuration file## This file can contain default options for dpkg.# All commandline options are allowed. Values can# be specific by putting them after the option,# seperated by whitespace and/or an ‘=’ sign.#no-debsigabort-after 2no-act
/var/lib/dpkg/*
� Package management status and system files, generally not directly ma-nipulated.
� Most important files:
alternatives: Contains files that define and store configuration for thecommand alternatives on the system. (Good examples: editor andx-window-manager.)
available: Information about packages available to the system, retrievedfrom every specified sources. (See also: grep-available.)
status: Information about packages installed on, or removed from yoursystem.
5.2.3 Debian Package Mgt. Utility—apt-get
/etc/apt/apt.conf
� Configuration files for apt(1).� apt.conf used by administrator for unique system configurations.� Example: Setting apt’s HTTP proxy:
Acquire::http "http://192.168.10.1/";
� apt.conf.d managed by software that integrates with apt, such as ourexamples: dpkg-reconfigure and apt-listchanges.
� See ’man apt.conf’ for configuration directives and format.� apt-config(1) is useful for troubleshooting apt.conf problems.

60 CONTENTS
/etc/apt/sources.list
� Administrator-configured list of package repositories used by apt.
� Numerous retrieval methods: file, cdrom, http, ftp, copy, rsh and ssh.
� Many repositories exist for developers, specific software, other distribu-tions, etc.
� Example:
deb http://mirror.aarnet.edu.au/debian woody main contrib non-freedeb file:/mnt/devserver/packages woody main contrib non-freedeb http://user:[email protected]/path distro section sectiondeb ssh://[email protected]/path distro section section
5.2.4 Debian Package Mgt. Utility—deselect� Hideous! Ugh! Run for your lives!
� Original frontend to apt/dpkg.
� Subject of many jokes:
”All package managers feature creep until they’re as compli-cated and horrible as dselect.”
”Debian’s extensive features provide not only to ability shootyourself in the foot, but to blow off each toe individually.”
� Offers more help than apt-get, but is incredibly baroque and hard to use.
5.2.5 Debian Package Conversion Utility—alien
Theory :
”alien is a program that converts between Redhat rpm, Debiandeb, Stampede slp, Slackware tgz, and Solaris pkg file formats.If you want to use a package from another linux distributionthan the one you have installed on your system, you can usealien to convert it to your preferred package format and installit. It also supports LSB packages.”
Reality :
� You are completely batshit insane, and/or,� You are using proprietary software.
Useful for quick stuff, or pulling apart RPMs and SRPMs without too muchhassle.
5.3. LAB 61
5.3 Lab
5.3.1 Exploring dkpg
1. List /var/lib/dpkg:
$ ls /var/lib/dpkg ���
2. Have a look at the alternatives directory:
$ ls /var/lib/dpkg/alternatives ���
3. Have a look at an alternative file:
$ cat /var/lib/dpkg/alternatives/vi ���auto/usr/bin/vivi.1.gz/usr/share/man/man1/vi.1.gz
/usr/bin/nvi30/usr/share/man/man1/nvi.1.gz/usr/bin/vile20/usr/share/man/man1/vile.1.gz/usr/bin/vim120/usr/share/man/man1/vim.1.gz/bin/elvis-tiny10/usr/share/man/man1/elvis-tiny.1.gz
4. View the dpkg configuration file:
$ cat /etc/dpkg/dpkg.cfg ���
5. Inspect the list of packages available:
$ less /var/lib/dpkg/available ���
6. Look at the package status list:
$ less /var/lib/dpkg/status ���
5.3.2 Using dkpg
Download a few debs to your /tmp:
$ cd /tmp ���$ scp student@foozle:/mnt/floppy/*.deb . ���$ ls *.deb ���
62 CONTENTS
1. Obtain a debian package and install it:
# dpkg -i junior-doc_1.15_all.deb ���
Note that this package has no dependencies.
2. Try to install a package with unmet dependencies:
# dpkg -i junior-typing_1.1_all.deb ���
Note that this install was unsuccessful.
3. Check which files a debian package owns:
$ dpkg -L junior-doc ���...
4. Find out which package a file belongs to:
$ dpkg -S /usr/share/doc/junior-doc/quickguide ���junior-doc: /usr/share/doc/junior-doc/quickguide
5. Extract information from the package:
$ dpkg -e junior-doc_1.15_all.deb ���
6. List the contents of a package:
$ dpkg -c junior-doc_1.15_all.deb ���
7. Remove the package: (Note that -P would purge any configuration files)
# dpkg -r junior-doc ���
5.3.3 Using the apt package managment tool
1. Update your /etc/apt/sources.list with any CDROMs that youcan mount locally. You can use apt-cdrom to do this for you.
# apt-cdrom add -d /mnt/cdrom ���
2. Edit your sources.list:
# vi /etc/apt/sources.list ���
(a) Identify any lines you added using apt-cdrom.
(b) “Hash out” any sources that don’t currently exist on your system byadding a “#” at the beginning of the line.
(c) Add any sources that you do have available:
i. For locally mounted CDROMS images:
5.3. LAB 63
deb file:/nfs/woody/cd1 woody main
ii. For sources available over HTTP locally:deb http://192.168.222.254/debian woody main con-trib non-free
iii. For sources available over HTTP on the internet:deb http://http.us.debian.org/debian woody main con-trib non-free
3. Do an update for apt:
# apt-get update ���
4. Search for a package you might want to install:
$ apt-cache search junior ���
5. View the information about your chosen packege:
$ apt-cache show junior-typing ���
6. Download and install the package and it’s dependencies:
# apt-get install junior-typing ���
64 CONTENTS
5.4 Questions
1. Which apt-get parameter updates the database of available packages?
(a) renew
(b) upgrade
(c) update
(d) reload
(e) refresh
2. Which one of the following tools is used to convert packages from onesystem to another?
(a) alien
(b) dpkg
(c) apt
(d) pkg convert
(e) rpm2deb
3. Which tool provides a high-level user friendly interface to Debian pack-age management?
(a) dselect
(b) apt-get
(c) dpkg
(d) kdedpkg
(e) gnodpkg
4. Which of the following package formats is supported by the alien util-ity? Select all that apply.
(a) .deb
(b) .bsd
(c) .rpm
(d) .tgz
(e) .zip
5. Which of the following sources may be not used by the apt-get utility?
(a) NFS
(b) IRC
(c) FTP
(d) HTTP
(e) CD-ROM
6. Which one of these commands removes a Debian package, including itsconfiguration files?
5.4. QUESTIONS 65
(a) dpkg --remove <packagename>
(b) apt-get purge <packagename>
(c) dpkg -P <packagename>
(d) apt-remove config <packagename>
(e) dpkg -e <packagename>
7. Which one of these commands will convert an RPM package to Debianformat?
(a) alien -d package.rpm
(b) alien -c package
(c) alien -r package.rpm
(d) alien -t package.rpm
(e) alien -d package.deb
8. A Debian package may be installed with:
(a) dpkg -i <packagename>
(b) rpm -i <packagename>
(c) apt --install <packagename>
(d) rpm --deb <packagename>
(e) apt-get -I <packagename>

66 CONTENTS
Objective 102.6
Use Red Hat PackageManager (RPM)
6.1 Overview
6.1.1 Weight: []
6.1.2 Statement of Objective:
Candidates should be able to perform package management under Linux dis-tributions that use RPMs for package distribution. This objective includes be-ing able to install, re-install, upgrade, and remove packages, as well as obtainstatus and version information on packages. This objective also includes ob-taining package information such as version, status, dependencies, integrity,and signatures. Candidates should be able to determine what files a packageprovides, as well as find which package a specific file comes from.
6.1.3 Key files, terms, and utilities:
/etc/rpmrc/usr/lib/rpm/*
6.1.4 Resources:
TBA
67
68 CONTENTS
6.2 Notes
RPM - RedHat Package Manager� RPM works with RedHat, Suse & Mandrake (among others) and can do
the following:
– Build an RPM package– Install an RPM package– Update an already installed RPM package– Query an RPM package– Erase an RPM package– Verify an RPM package.
RPM Packages
RPM package files consist of a single compressed file much like a tarball. Pack-age files can be sourced from:
� Local media (hard disk, cdrom etc)� An ftp site� An http site
Packages sourced from local media are specified using just their filename. Forexample:
� acroread-4.05-1.i686.rpm
Packages sourced from ftp or http sites are specified using the following syn-tax:
� ftp://USER:PASSWORD@HOST:PORT/path/to/package.rpm
RPM Filenames
RPM Filenames use a standard naming scheme:package-version-patch.arch.rpmpackage - The name of the package version - The version number patch -
patch number of this package arch - The architecture this package is for (i386,i586, i686, alpha, sparc)
Example:
kernel-2.4.9-21.i686.rpm
RPM Operating Modes
RPM operations are split up into 4 major modes:� Querying & Verifying� Installing, Upgrading or Removing� Building Packages� RPM database administration functions
6.2. NOTES 69
Verifying package Integrity
Having downloaded an rpm from the internet, the very first thing you want todo is verify its integrity. You do this with the -K or –checksig option to rpm:
# rpm -K kernel-2.4.9-31.i586.rpm ���kernel-2.4.9-31.i586.rpm: md5 gpg OK
NOTE: Some packages use PGP to check integrity while others use GnuPG.
Installing, Upgrading & Removing
Understanding the RPM terminology in relation to Installing, upgrading & re-moving rpm packages is essential:
� Install - Install a package. Good for Kernels� Upgrade - Upgrade a package if it’s installed, otherwise install the pack-
age� Freshen - Upgrade a package only if it’s already installed.� Erase - Remove a package.
Installing, Upgrading & Removing - Options
The table below summarises the various options used for package installation,freshening and removal.
Mode Short option Long optionInstall -i --install
Upgrade -U --upgradeFreshen -F --freshen
Erase -e –erase
Using RPM on the command line
Generally you use rpm in one of the following modes:� rpm -i [install options] package file ...
� rpm -U [install-options] package file ...
� rpm -F [install-options] package file ...
� rpm -e [erase-options] package name ...
Commonly used options are:
-v Verbose
-h print progress hash marks
--force Force RPM to overwrite existing packages or files
--nodeps Bypass dependency checking
--replacefiles Overwrite files owned by other packages
70 CONTENTS
Example - install option
Install kernel-2.4.18-4 without removing the existing kernel:
# rpm -q kernelkernel-2.4.9-21# rpm -ivh kernel-2.4.18-4*.rpmPreparing... ########################### [100%]
1:kernel-2.4.18-4 ########################### [100%]# rpm -q kernelkernel-2.4.18-4kernel-2.4.9-21#
Example - Freshen option
Upgrade the existing kernel to kernel-2.4.18-4.
# rpm -q kernelkernel-2.4.9-21# rpm -Uvh kernel-2.4.18-4*.rpmPreparing... ########################### [100%]
1:kernel-2.4.18-4 ########################### [100%]# rpm -q kernelkernel-2.4.18-4#
Example - Upgrade option:
What the upgrade option does will depend on whether or not the packageis currently installed. If installed, it will perform a freshen, otherwise it willperform an install:
# rpm -q gocrpackage gocr is not installed# rpm -Uvh gocr-0.3.4-1.i386.rpmPreparing... ########################### [100%]
1:gocr-0.3.4-1.rpm ########################### [100%]# rpm -q gocrgocr-0.3.4-1# rpm -Uvh gocr-0.3.6-1.i386.rpmPreparing... ########################### [100%]
1:gocr-0.3.6-1.rpm ########################### [100%]# rpm -q gocrgocr-0.3.6-1
Example - Erase option
Remove the package gocr from the system
6.2. NOTES 71
# rpm -q gocrgocr-0.3.6-1# rpm -e gocr# rpm -q gocr#
Querying Packages
RPM can be used to query a package (either installed or not).
rpm -q|--query [select-options] [query-options]
Select options : Choose what it is you want to query
-a Query all installed packages.
-f Query package owning FILE.
-p Query an (uninstalled) package file
Query options : Choose what it is you want to see from the query:
-i Show all information about the package
-l Show what files are contained in the package
-R List packages on which this package depends
Query - Example
Give a list of all packages with kern in their name:
$ rpm -qa | grep kernkernelcfg-0.5-5glibc-kernheaders-2.4-7.14kernel-2.4.9-21kernel-source-2.4.18-4
Show a list of all files in kernel-2.4.9-21
$ rpm -ql kernel-2.4.9-21/boot/System.map-2.4.9-21/boot/module-info-2.4.9-21/boot/vmlinuz-2.4.9-21....
Show package which owns /bin/ls:
$ rpm -qf /bin/ls$ fileutils-4.1-10
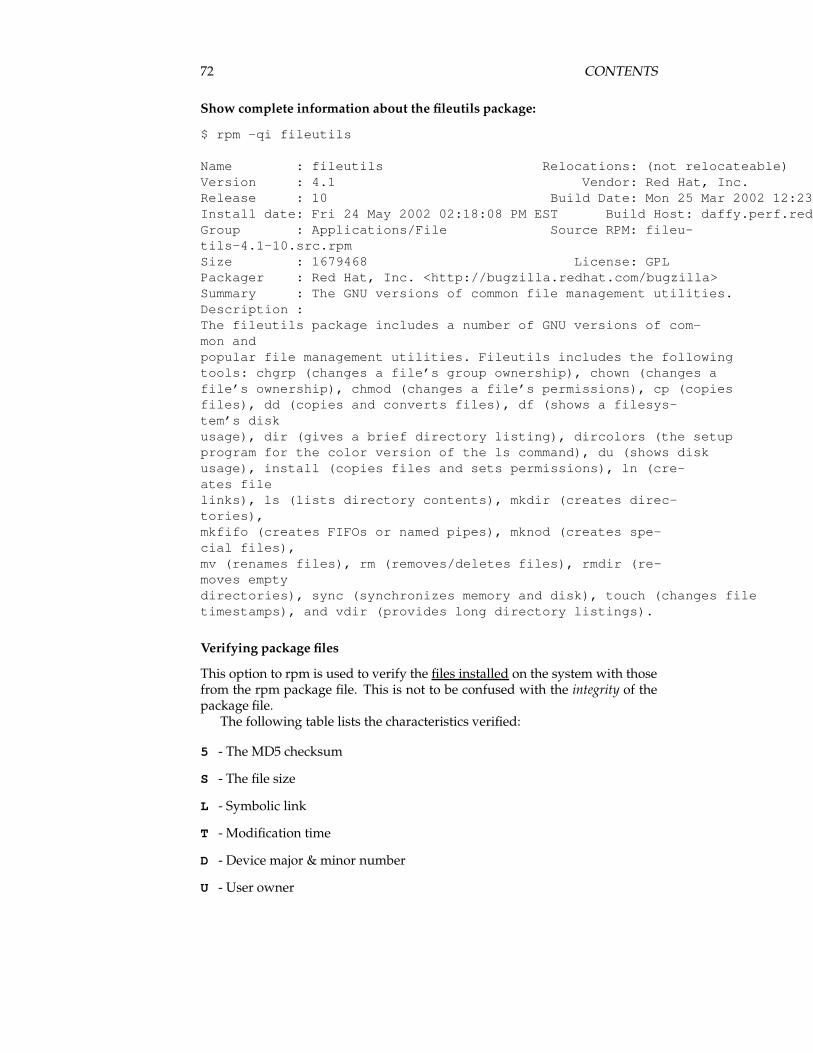
72 CONTENTS
Show complete information about the fileutils package:
$ rpm -qi fileutils
Name : fileutils Relocations: (not relocateable)Version : 4.1 Vendor: Red Hat, Inc.Release : 10 Build Date: Mon 25 Mar 2002 12:23:22 PM ESTInstall date: Fri 24 May 2002 02:18:08 PM EST Build Host: daffy.perf.redhat.comGroup : Applications/File Source RPM: fileu-tils-4.1-10.src.rpmSize : 1679468 License: GPLPackager : Red Hat, Inc. <http://bugzilla.redhat.com/bugzilla>Summary : The GNU versions of common file management utilities.Description :The fileutils package includes a number of GNU versions of com-mon andpopular file management utilities. Fileutils includes the followingtools: chgrp (changes a file’s group ownership), chown (changes afile’s ownership), chmod (changes a file’s permissions), cp (copiesfiles), dd (copies and converts files), df (shows a filesys-tem’s diskusage), dir (gives a brief directory listing), dircolors (the setupprogram for the color version of the ls command), du (shows diskusage), install (copies files and sets permissions), ln (cre-ates filelinks), ls (lists directory contents), mkdir (creates direc-tories),mkfifo (creates FIFOs or named pipes), mknod (creates spe-cial files),mv (renames files), rm (removes/deletes files), rmdir (re-moves emptydirectories), sync (synchronizes memory and disk), touch (changes filetimestamps), and vdir (provides long directory listings).
Verifying package files
This option to rpm is used to verify the files installed on the system with thosefrom the rpm package file. This is not to be confused with the integrity of thepackage file.
The following table lists the characteristics verified:
5 - The MD5 checksum
S - The file size
L - Symbolic link
T - Modification time
D - Device major & minor number
U - User owner
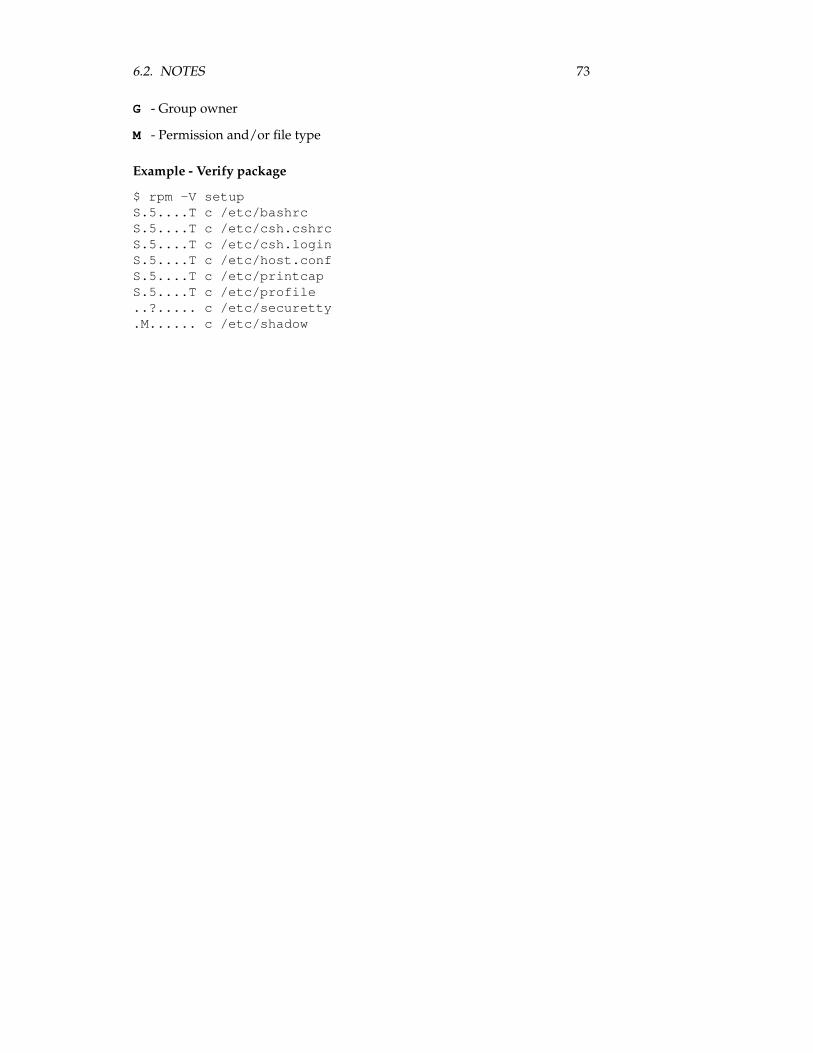
6.2. NOTES 73
G - Group owner
M - Permission and/or file type
Example - Verify package
$ rpm -V setupS.5....T c /etc/bashrcS.5....T c /etc/csh.cshrcS.5....T c /etc/csh.loginS.5....T c /etc/host.confS.5....T c /etc/printcapS.5....T c /etc/profile..?..... c /etc/securetty.M...... c /etc/shadow
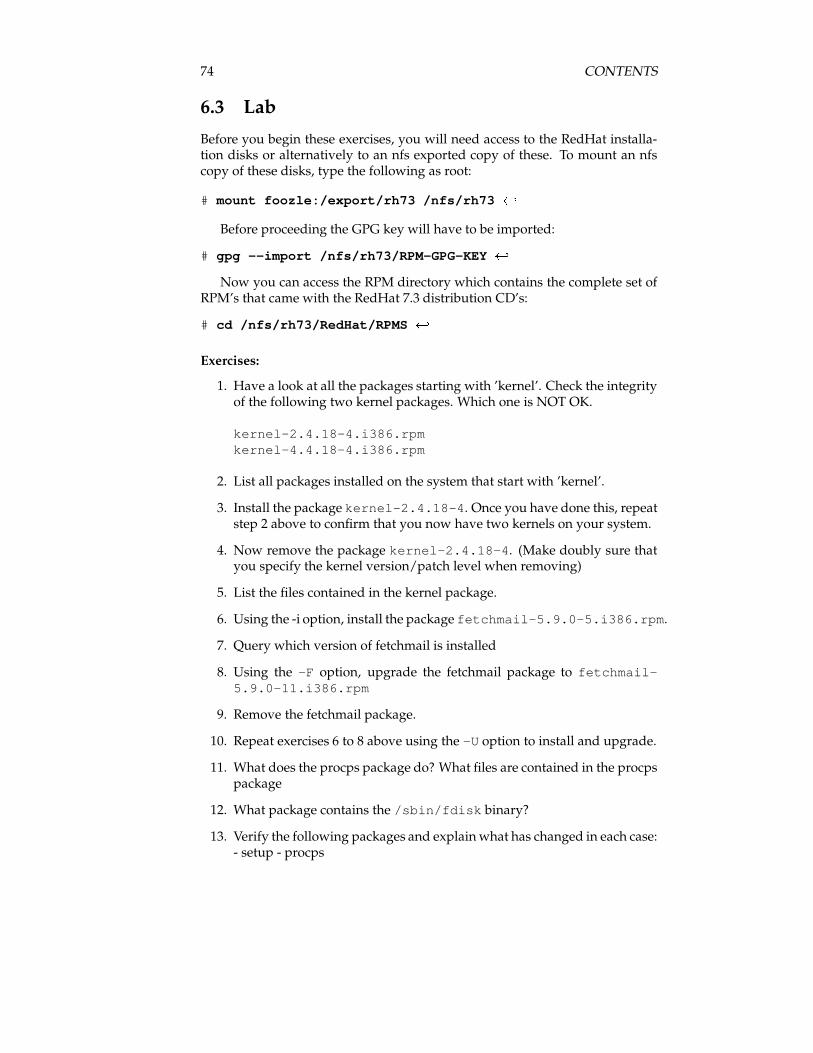
74 CONTENTS
6.3 Lab
Before you begin these exercises, you will need access to the RedHat installa-tion disks or alternatively to an nfs exported copy of these. To mount an nfscopy of these disks, type the following as root:
# mount foozle:/export/rh73 /nfs/rh73 ���
Before proceeding the GPG key will have to be imported:
# gpg --import /nfs/rh73/RPM-GPG-KEY ���
Now you can access the RPM directory which contains the complete set ofRPM’s that came with the RedHat 7.3 distribution CD’s:
# cd /nfs/rh73/RedHat/RPMS ���
Exercises:
1. Have a look at all the packages starting with ’kernel’. Check the integrityof the following two kernel packages. Which one is NOT OK.
kernel-2.4.18-4.i386.rpmkernel-4.4.18-4.i386.rpm
2. List all packages installed on the system that start with ’kernel’.
3. Install the package kernel-2.4.18-4. Once you have done this, repeatstep 2 above to confirm that you now have two kernels on your system.
4. Now remove the package kernel-2.4.18-4. (Make doubly sure thatyou specify the kernel version/patch level when removing)
5. List the files contained in the kernel package.
6. Using the -i option, install the package fetchmail-5.9.0-5.i386.rpm.
7. Query which version of fetchmail is installed
8. Using the -F option, upgrade the fetchmail package to fetchmail-5.9.0-11.i386.rpm
9. Remove the fetchmail package.
10. Repeat exercises 6 to 8 above using the -U option to install and upgrade.
11. What does the procps package do? What files are contained in the procpspackage
12. What package contains the /sbin/fdisk binary?
13. Verify the following packages and explain what has changed in each case:- setup - procps
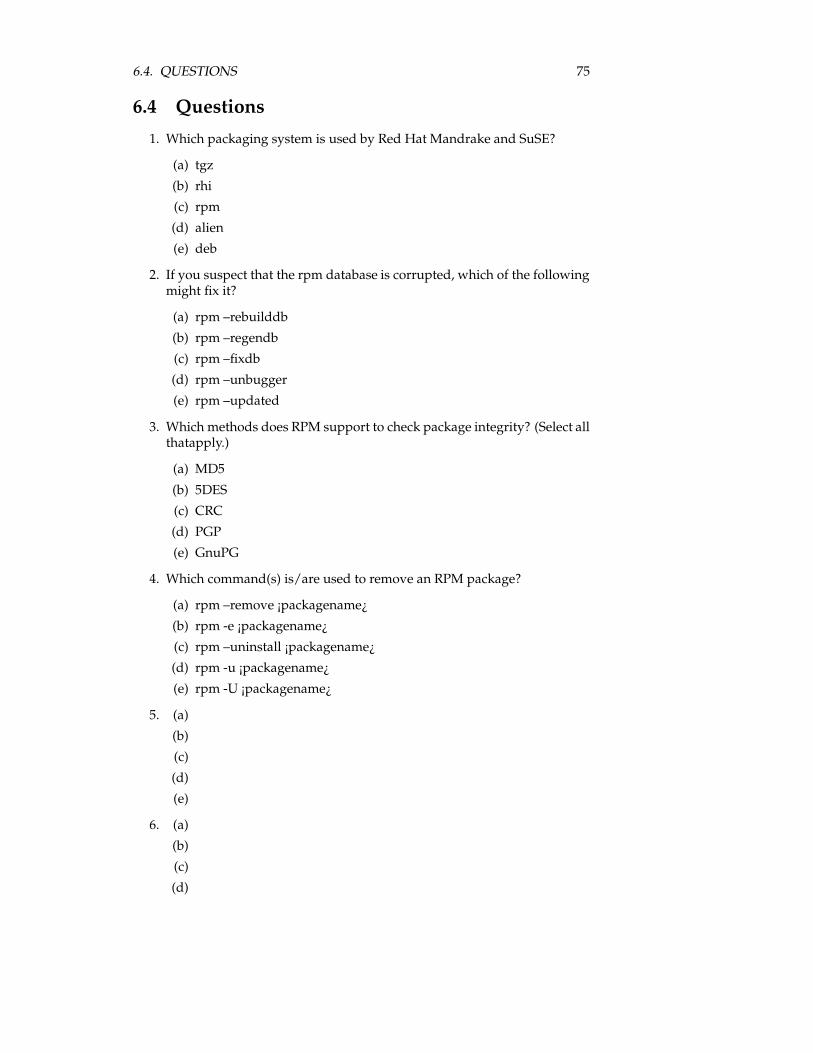
6.4. QUESTIONS 75
6.4 Questions
1. Which packaging system is used by Red Hat Mandrake and SuSE?
(a) tgz
(b) rhi
(c) rpm
(d) alien
(e) deb
2. If you suspect that the rpm database is corrupted, which of the followingmight fix it?
(a) rpm –rebuilddb
(b) rpm –regendb
(c) rpm –fixdb
(d) rpm –unbugger
(e) rpm –updated
3. Which methods does RPM support to check package integrity? (Select allthatapply.)
(a) MD5
(b) 5DES
(c) CRC
(d) PGP
(e) GnuPG
4. Which command(s) is/are used to remove an RPM package?
(a) rpm –remove ¡packagename¿
(b) rpm -e ¡packagename¿
(c) rpm –uninstall ¡packagename¿
(d) rpm -u ¡packagename¿
(e) rpm -U ¡packagename¿
5. (a)
(b)
(c)
(d)
(e)
6. (a)
(b)
(c)
(d)

76 CONTENTS
(e)
7. (a)
(b)
(c)
(d)
(e)
8. (a)
(b)
(c)
(d)
(e)
9.

Topic 103
GNU & Unix Commands
77

Objective 103.1
Work on the command line
1.1 Overview
1.1.1 Weight: []
1.1.2 Statement of Objective:
Candidate should be able to Interact with shells and commands using the com-mand line. This includes typing valid commands and command sequences,defining, referencing and exporting environment variables, using commandhistory and editing facilities, invoking commands in the path and outside thepath, using command substitution, applying commands recursively through adirectory tree and using man to find out about commands.
1.1.3 Key files, terms, and utilities:
.bashechoenvexecexportmanpwdsetunset˜/.bash_history˜/.profile
1.1.4 Resources:
79

80 CONTENTS
1.2 Notes
1.3 Lab
1.4 Questions
Objective 103.2
Process text streams usingfilters
2.1 Overview
2.1.1 Weight: []
2.1.2 Statement of Objective:
Candidate should be able to apply filters to text streams. Tasks include sendingtext files and output streams through text utility filters to modify the output,and using standard UNIX commands found in the GNU textutils package.
2.1.3 Key files, terms, and utilities:
catcutexpandfmtheadjoinnlodpasteprsedsortsplittactailtrunexpanduniqwc
81

82 CONTENTS
2.1.4 Resources:
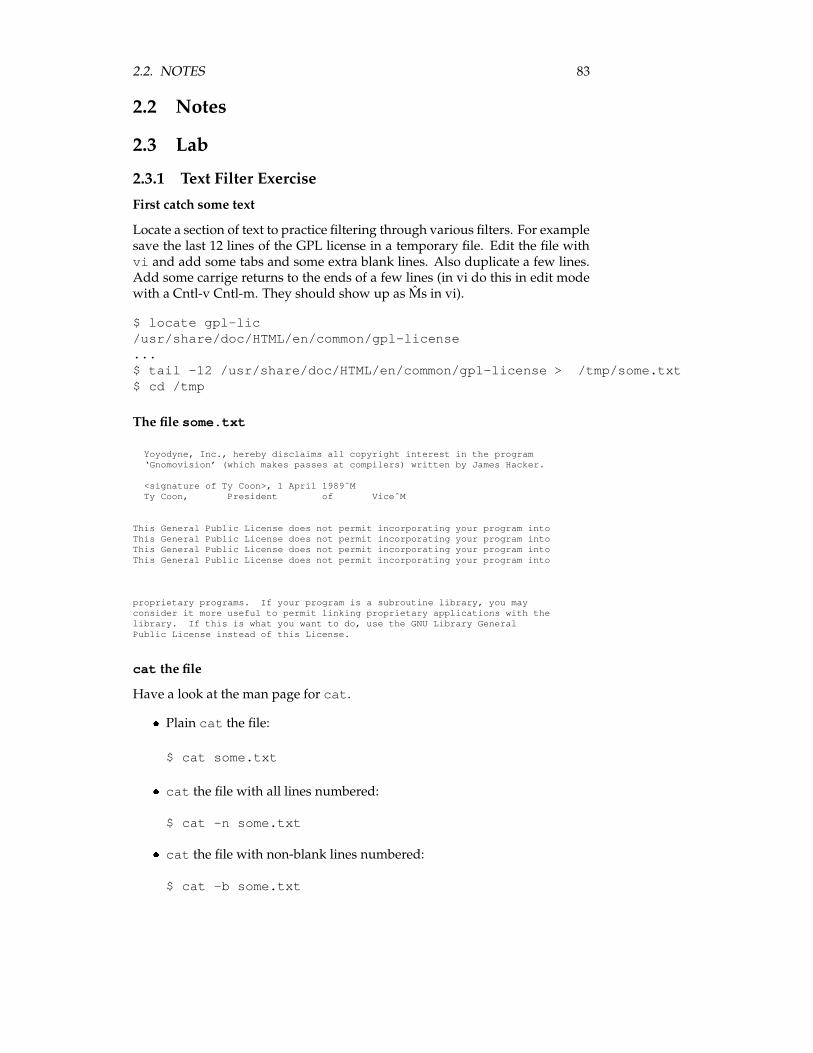
2.2. NOTES 83
2.2 Notes
2.3 Lab
2.3.1 Text Filter Exercise
First catch some text
Locate a section of text to practice filtering through various filters. For examplesave the last 12 lines of the GPL license in a temporary file. Edit the file withvi and add some tabs and some extra blank lines. Also duplicate a few lines.Add some carrige returns to the ends of a few lines (in vi do this in edit modewith a Cntl-v Cntl-m. They should show up as M̂s in vi).
$ locate gpl-lic/usr/share/doc/HTML/en/common/gpl-license...$ tail -12 /usr/share/doc/HTML/en/common/gpl-license > /tmp/some.txt$ cd /tmp
The file some.txt
Yoyodyne, Inc., hereby disclaims all copyright interest in the program‘Gnomovision’ (which makes passes at compilers) written by James Hacker.
<signature of Ty Coon>, 1 April 1989ˆMTy Coon, President of ViceˆM
This General Public License does not permit incorporating your program intoThis General Public License does not permit incorporating your program intoThis General Public License does not permit incorporating your program intoThis General Public License does not permit incorporating your program into
proprietary programs. If your program is a subroutine library, you mayconsider it more useful to permit linking proprietary applications with thelibrary. If this is what you want to do, use the GNU Library GeneralPublic License instead of this License.
cat the file
Have a look at the man page for cat.
� Plain cat the file:
$ cat some.txt
� cat the file with all lines numbered:
$ cat -n some.txt
� cat the file with non-blank lines numbered:
$ cat -b some.txt
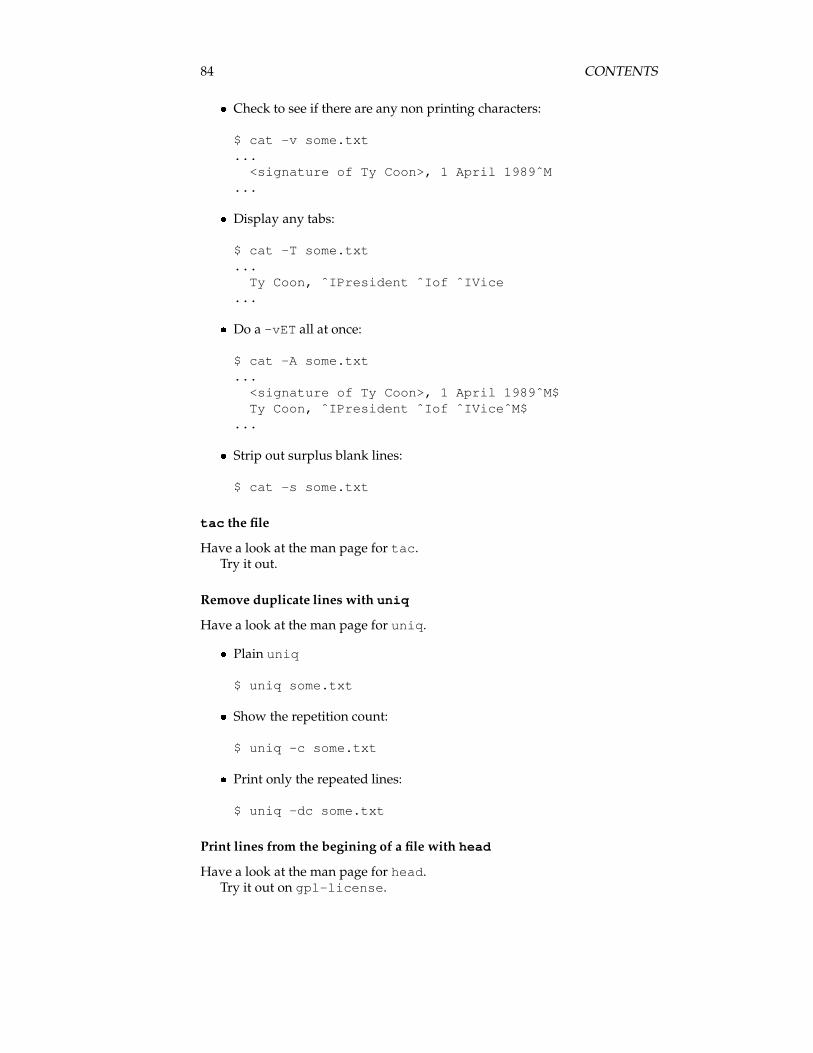
84 CONTENTS
� Check to see if there are any non printing characters:
$ cat -v some.txt...
<signature of Ty Coon>, 1 April 1989ˆM...
� Display any tabs:
$ cat -T some.txt...
Ty Coon, ˆIPresident ˆIof ˆIVice...
� Do a -vET all at once:
$ cat -A some.txt...
<signature of Ty Coon>, 1 April 1989ˆM$Ty Coon, ˆIPresident ˆIof ˆIViceˆM$
...
� Strip out surplus blank lines:
$ cat -s some.txt
tac the file
Have a look at the man page for tac.Try it out.
Remove duplicate lines with uniq
Have a look at the man page for uniq.
� Plain uniq
$ uniq some.txt
� Show the repetition count:
$ uniq -c some.txt
� Print only the repeated lines:
$ uniq -dc some.txt
Print lines from the begining of a file with head
Have a look at the man page for head.Try it out on gpl-license.
2.4. QUESTIONS 85
Print lines from the end of a file with tail
Have a look at the man page for tail.
� Try it out on gpl-license.
� Try the follow option:
$ tail -f /var/log/messages
Create a message in another console to see it work.
Isolate fields with cut
Have a look at the man page for cut.
� Use cut to display only the gecos field and the shell field of the passwdfile:
$ cut -d ":" -f5,7 /etc/passwd
Format the text with fmt
Have a look at the man page for fmt.
$ fmt -w 50 some.txt
$ fmt -t -w 60 some.txt
merge lines of files using paste
Have a look at the man page for paste.Create two files and merge them.
$ cat > firstonetwothreefourˆD
$ cat > secondthisthatthese andthose
$ paste first second
2.4 Questions

86 CONTENTS
Objective 103.3
Perform basic filemanagement
3.1 Overview
3.1.1 Weight: []
3.1.2 Statement of Objective:
Candidate should be able to use the basic UNIX commands to copy, move,and remove files and directories. Tasks include advanced file managementoperations such as copying multiple files recursively, removing directories re-cursively, and moving files that meet a wildcard pattern. This includes usingsimple and advanced wildcard specifications to refer to files, as wella as usingfind to locate and act on files based on type, size, or time.
3.1.3 Key files, terms, and utilities:
cpfindmkdirmvlsrmrmdirtouchfile globbing
3.1.4 Resources:
87

88 CONTENTS
3.2 Notes
3.3 Lab
3.4 Questions
Objective 103.4
Use streams, pipes, andredirects
4.1 Overview
4.1.1 Weight: []
4.1.2 Statement of Objective:
Candidate should be able to redirect streams and connect them in order to effi-ciently process textual data. Tasks include redirecting standard input, standardoutput, and standard error, piping the output of one command to the input ofanother command, using the output of one command as arguments to anothercommand and sending output to both stdout and a file.
4.1.3 Key files, terms, and utilities:
teexargs<<<>>>|‘‘
4.1.4 Resources:
89

90 CONTENTS
4.2 Notes
4.3 Lab
4.4 Questions
Objective 103.5
Create, monitor, and killprocesses
5.1 Overview
5.1.1 Weight: []
5.1.2 Statement of Objective:
Candidate should be able to manage processes. This includes knowing how torun jobs in the foreground and background, bring a job from the backgroundto the foreground and vice versa, start a process that will run without beingconnected to a terminal and signal a program to continue running after logout.Tasks also include monitoring active processes, selecting and sorting processesfor display, sending signals to processes, killing processes and identifying andkilling X applications that did not terminate after the X session closed.
5.1.3 Key files, terms, and utilities:
&bgfgjobskillnohuppstop
5.1.4 Resources:
91
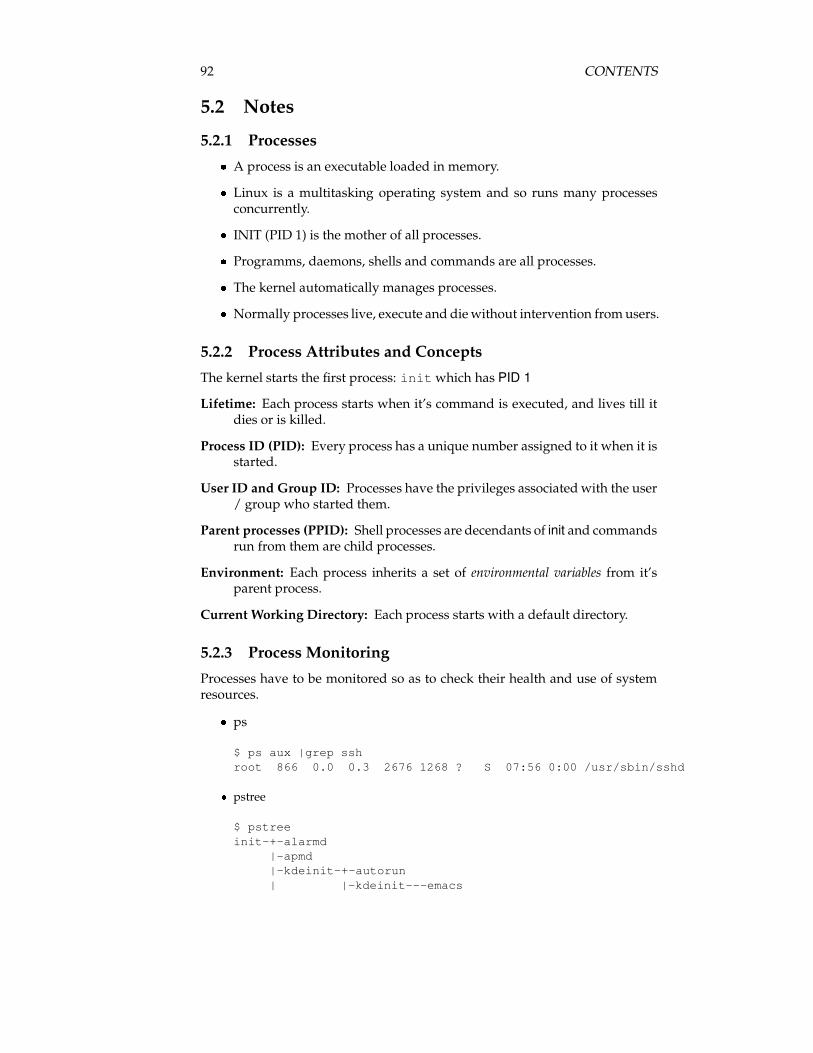
92 CONTENTS
5.2 Notes
5.2.1 Processes� A process is an executable loaded in memory.� Linux is a multitasking operating system and so runs many processes
concurrently.� INIT (PID 1) is the mother of all processes.� Programms, daemons, shells and commands are all processes.
� The kernel automatically manages processes.
� Normally processes live, execute and die without intervention from users.
5.2.2 Process Attributes and Concepts
The kernel starts the first process: init which has PID 1
Lifetime: Each process starts when it’s command is executed, and lives till itdies or is killed.
Process ID (PID): Every process has a unique number assigned to it when it isstarted.
User ID and Group ID: Processes have the privileges associated with the user/ group who started them.
Parent processes (PPID): Shell processes are decendants of init and commandsrun from them are child processes.
Environment: Each process inherits a set of environmental variables from it’sparent process.
Current Working Directory: Each process starts with a default directory.
5.2.3 Process Monitoring
Processes have to be monitored so as to check their health and use of systemresources.
� ps
$ ps aux |grep sshroot 866 0.0 0.3 2676 1268 ? S 07:56 0:00 /usr/sbin/sshd
� pstree
$ pstreeinit-+-alarmd
|-apmd|-kdeinit-+-autorun| |-kdeinit---emacs
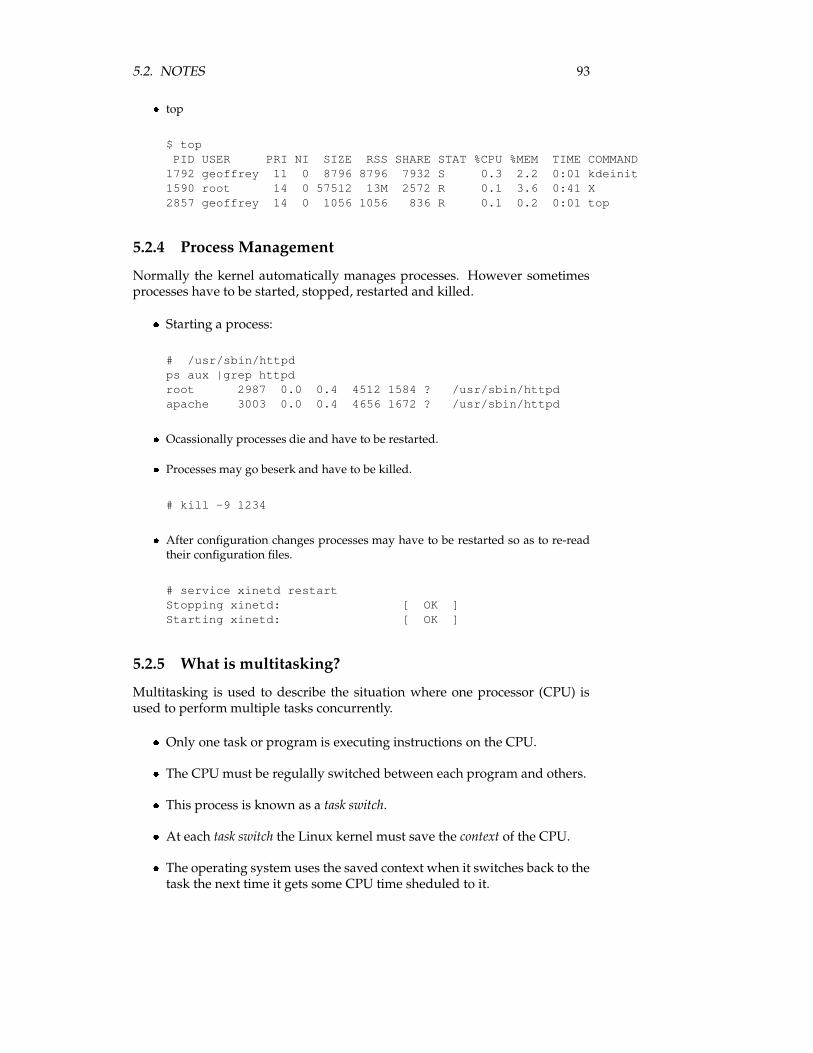
5.2. NOTES 93
� top
$ topPID USER PRI NI SIZE RSS SHARE STAT %CPU %MEM TIME COMMAND
1792 geoffrey 11 0 8796 8796 7932 S 0.3 2.2 0:01 kdeinit1590 root 14 0 57512 13M 2572 R 0.1 3.6 0:41 X2857 geoffrey 14 0 1056 1056 836 R 0.1 0.2 0:01 top
5.2.4 Process Management
Normally the kernel automatically manages processes. However sometimesprocesses have to be started, stopped, restarted and killed.
� Starting a process:
# /usr/sbin/httpdps aux |grep httpdroot 2987 0.0 0.4 4512 1584 ? /usr/sbin/httpdapache 3003 0.0 0.4 4656 1672 ? /usr/sbin/httpd
� Ocassionally processes die and have to be restarted.
� Processes may go beserk and have to be killed.
# kill -9 1234
� After configuration changes processes may have to be restarted so as to re-readtheir configuration files.
# service xinetd restartStopping xinetd: [ OK ]Starting xinetd: [ OK ]
5.2.5 What is multitasking?
Multitasking is used to describe the situation where one processor (CPU) isused to perform multiple tasks concurrently.
� Only one task or program is executing instructions on the CPU.
� The CPU must be regulally switched between each program and others.
� This process is known as a task switch.
� At each task switch the Linux kernel must save the context of the CPU.
� The operating system uses the saved context when it switches back to thetask the next time it gets some CPU time sheduled to it.
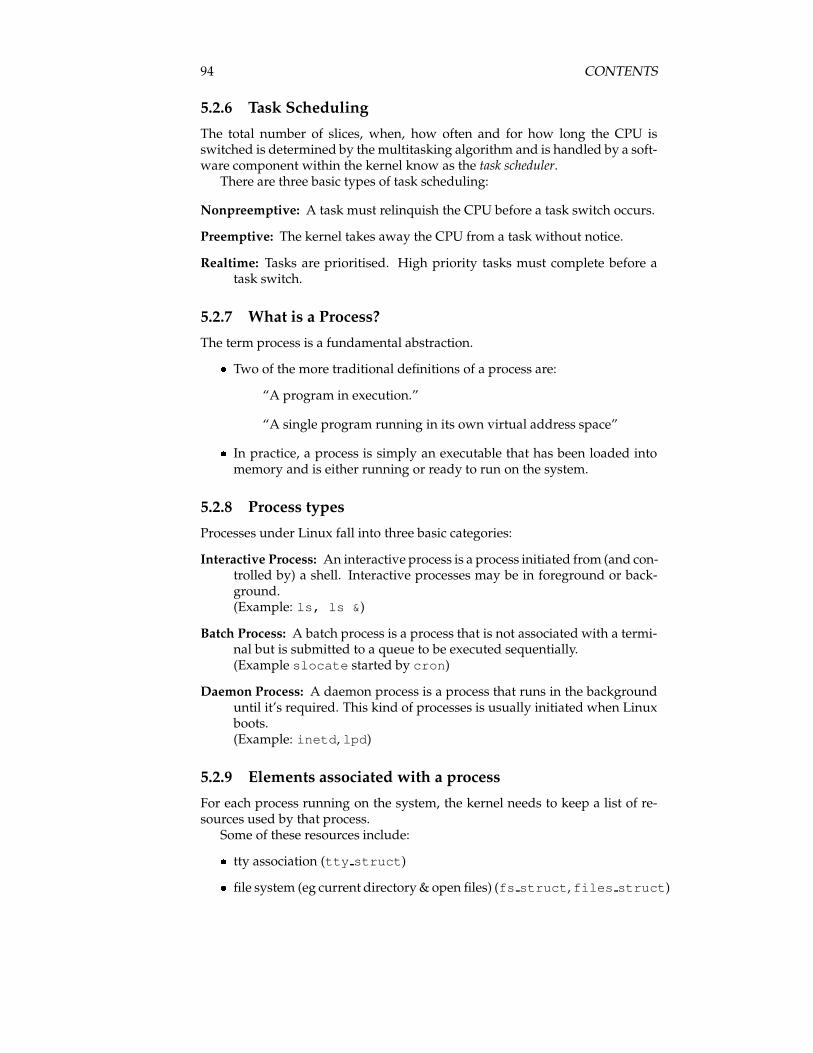
94 CONTENTS
5.2.6 Task Scheduling
The total number of slices, when, how often and for how long the CPU isswitched is determined by the multitasking algorithm and is handled by a soft-ware component within the kernel know as the task scheduler.
There are three basic types of task scheduling:
Nonpreemptive: A task must relinquish the CPU before a task switch occurs.
Preemptive: The kernel takes away the CPU from a task without notice.
Realtime: Tasks are prioritised. High priority tasks must complete before atask switch.
5.2.7 What is a Process?
The term process is a fundamental abstraction.� Two of the more traditional definitions of a process are:
“A program in execution.”
“A single program running in its own virtual address space”
� In practice, a process is simply an executable that has been loaded intomemory and is either running or ready to run on the system.
5.2.8 Process types
Processes under Linux fall into three basic categories:
Interactive Process: An interactive process is a process initiated from (and con-trolled by) a shell. Interactive processes may be in foreground or back-ground.(Example: ls, ls &)
Batch Process: A batch process is a process that is not associated with a termi-nal but is submitted to a queue to be executed sequentially.(Example slocate started by cron)
Daemon Process: A daemon process is a process that runs in the backgrounduntil it’s required. This kind of processes is usually initiated when Linuxboots.(Example: inetd, lpd)
5.2.9 Elements associated with a process
For each process running on the system, the kernel needs to keep a list of re-sources used by that process.
Some of these resources include:� tty association (tty struct)
� file system (eg current directory & open files) (fs struct, files struct)

5.2. NOTES 95
� memory allocation (mm struct)
� Signals received (signal struct)
5.2.10 Process States
At any given point in time, a process is in one of 5 states:
TASK RUNNING: The process is either executing on the CPU or waiting tobe executed.
TASK INTERRUPTIBLE: The process is sleeping until something becomestrue. Raising a hardware interrupt, waiting for a system resource etc areexamples of a condition that might wake the process up. If a signal isreceived by the process (eg KILL -HUP) the process will also be wokenup.
TASK UNINTERRUPTIBLE: Like the previous state except that delivering asignal will not wake the process up.
TASK STOPPED: Process execution has stopped. A process enters this stateafter receiving a SIGSTOP signal. A debugger may use this to step througha program.
TASK ZOMBIE: Process execution has stopped but the kernel has not yet?cleaned up? the resources allocated to the process.
5.2.11 The Process Family Tree
Every process (with the sole exception of the kernel), must be created by an-other process. The terms parent, child and sibling (or sometimes father, son andbrother in a patriarchal sense) are used to describe the relationships betweenprocesses.
As an example consider the following line executed from the bash prompt:
[andy@Node4] andy]$ ls & df -h &
The following relationships are true:
� The ls and df processes are both siblings to each other.
� The bash process (ie the shell) is the parent to both ls and df.
� The ls process has bash as its parent.
� The df process has bash as its parent.
5.2.12 The Kernel is at the Top of the Family Tree� When linux boots, the first thing it does is load the kernel into memory
and start executing itself.
� One of the first things it does once execution starts, is to spawn a processcalled init, which in turn spawns other processes.
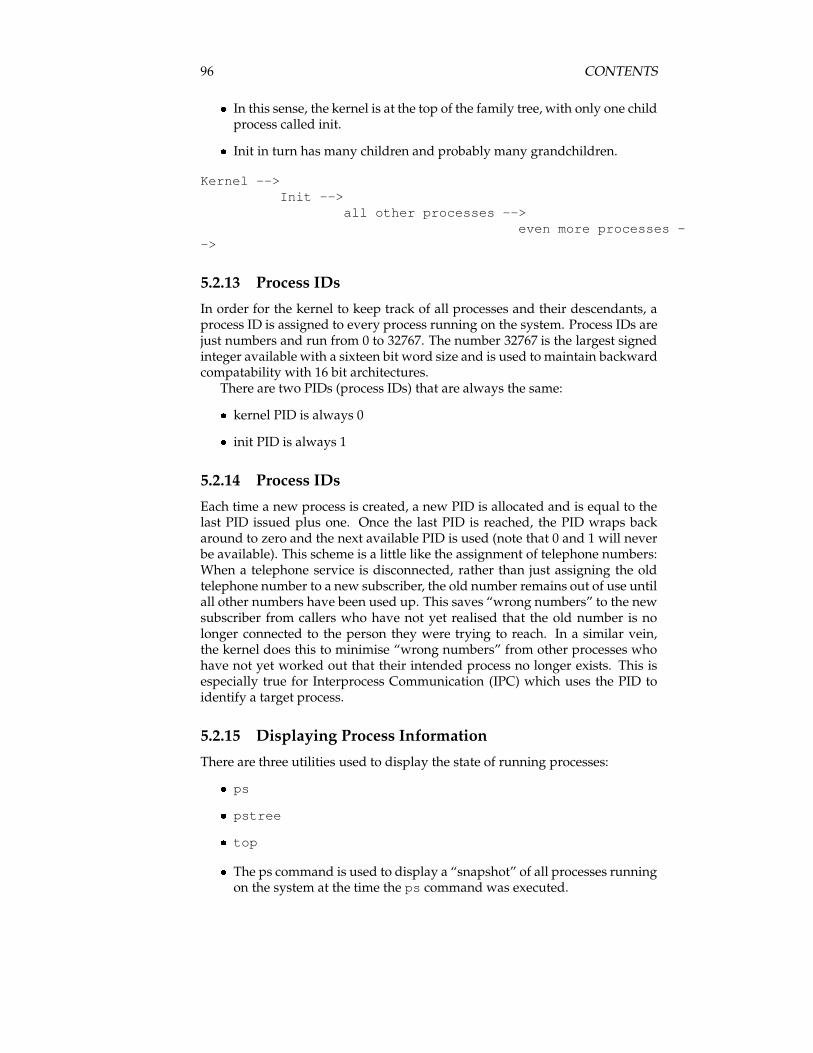
96 CONTENTS
� In this sense, the kernel is at the top of the family tree, with only one childprocess called init.
� Init in turn has many children and probably many grandchildren.
Kernel -->Init -->
all other processes -->even more processes -
->
5.2.13 Process IDs
In order for the kernel to keep track of all processes and their descendants, aprocess ID is assigned to every process running on the system. Process IDs arejust numbers and run from 0 to 32767. The number 32767 is the largest signedinteger available with a sixteen bit word size and is used to maintain backwardcompatability with 16 bit architectures.
There are two PIDs (process IDs) that are always the same:
� kernel PID is always 0
� init PID is always 1
5.2.14 Process IDs
Each time a new process is created, a new PID is allocated and is equal to thelast PID issued plus one. Once the last PID is reached, the PID wraps backaround to zero and the next available PID is used (note that 0 and 1 will neverbe available). This scheme is a little like the assignment of telephone numbers:When a telephone service is disconnected, rather than just assigning the oldtelephone number to a new subscriber, the old number remains out of use untilall other numbers have been used up. This saves “wrong numbers” to the newsubscriber from callers who have not yet realised that the old number is nolonger connected to the person they were trying to reach. In a similar vein,the kernel does this to minimise “wrong numbers” from other processes whohave not yet worked out that their intended process no longer exists. This isespecially true for Interprocess Communication (IPC) which uses the PID toidentify a target process.
5.2.15 Displaying Process Information
There are three utilities used to display the state of running processes:
� ps
� pstree
� top
� The ps command is used to display a “snapshot” of all processes runningon the system at the time the ps command was executed.
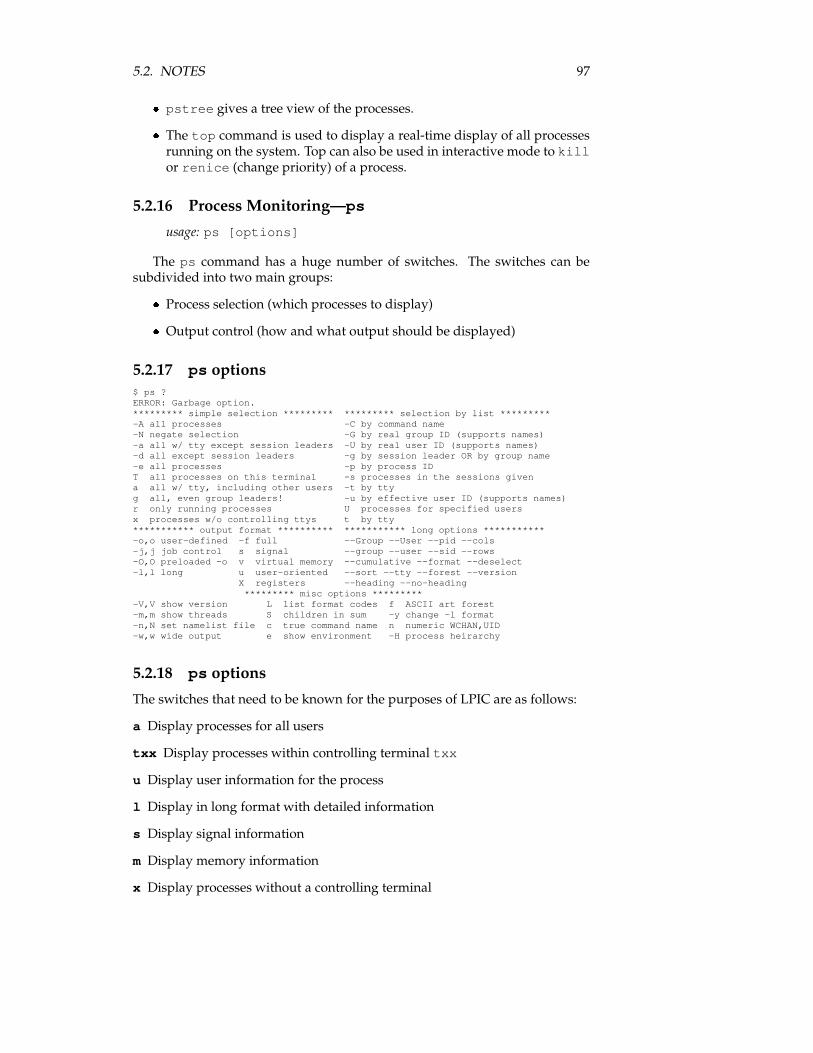
5.2. NOTES 97
� pstree gives a tree view of the processes.
� The top command is used to display a real-time display of all processesrunning on the system. Top can also be used in interactive mode to killor renice (change priority) of a process.
5.2.16 Process Monitoring—ps
usage: ps [options]
The ps command has a huge number of switches. The switches can besubdivided into two main groups:
� Process selection (which processes to display)
� Output control (how and what output should be displayed)
5.2.17 ps options$ ps ?ERROR: Garbage option.********* simple selection ********* ********* selection by list *********-A all processes -C by command name-N negate selection -G by real group ID (supports names)-a all w/ tty except session leaders -U by real user ID (supports names)-d all except session leaders -g by session leader OR by group name-e all processes -p by process IDT all processes on this terminal -s processes in the sessions givena all w/ tty, including other users -t by ttyg all, even group leaders! -u by effective user ID (supports names)r only running processes U processes for specified usersx processes w/o controlling ttys t by tty*********** output format ********** *********** long options ***********-o,o user-defined -f full --Group --User --pid --cols-j,j job control s signal --group --user --sid --rows-O,O preloaded -o v virtual memory --cumulative --format --deselect-l,l long u user-oriented --sort --tty --forest --version
X registers --heading --no-heading********* misc options *********
-V,V show version L list format codes f ASCII art forest-m,m show threads S children in sum -y change -l format-n,N set namelist file c true command name n numeric WCHAN,UID-w,w wide output e show environment -H process heirarchy
5.2.18 ps options
The switches that need to be known for the purposes of LPIC are as follows:
a Display processes for all users
txx Display processes within controlling terminal txx
u Display user information for the process
l Display in long format with detailed information
s Display signal information
m Display memory information
x Display processes without a controlling terminal
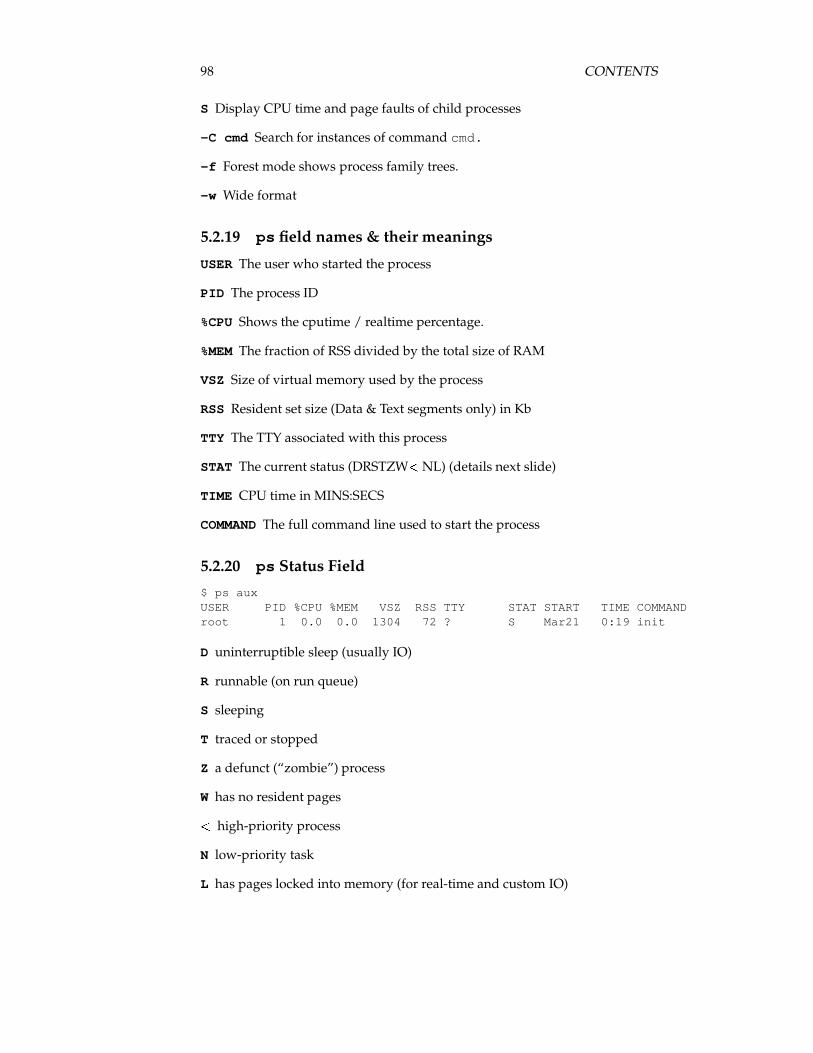
98 CONTENTS
S Display CPU time and page faults of child processes
-C cmd Search for instances of command cmd.
-f Forest mode shows process family trees.
-w Wide format
5.2.19 ps field names & their meanings
USER The user who started the process
PID The process ID
%CPU Shows the cputime / realtime percentage.
%MEM The fraction of RSS divided by the total size of RAM
VSZ Size of virtual memory used by the process
RSS Resident set size (Data & Text segments only) in Kb
TTY The TTY associated with this process
STAT The current status (DRSTZW � NL) (details next slide)
TIME CPU time in MINS:SECS
COMMAND The full command line used to start the process
5.2.20 ps Status Field
$ ps auxUSER PID %CPU %MEM VSZ RSS TTY STAT START TIME COMMANDroot 1 0.0 0.0 1304 72 ? S Mar21 0:19 init
D uninterruptible sleep (usually IO)
R runnable (on run queue)
S sleeping
T traced or stopped
Z a defunct (“zombie”) process
W has no resident pages
� high-priority process
N low-priority task
L has pages locked into memory (for real-time and custom IO)
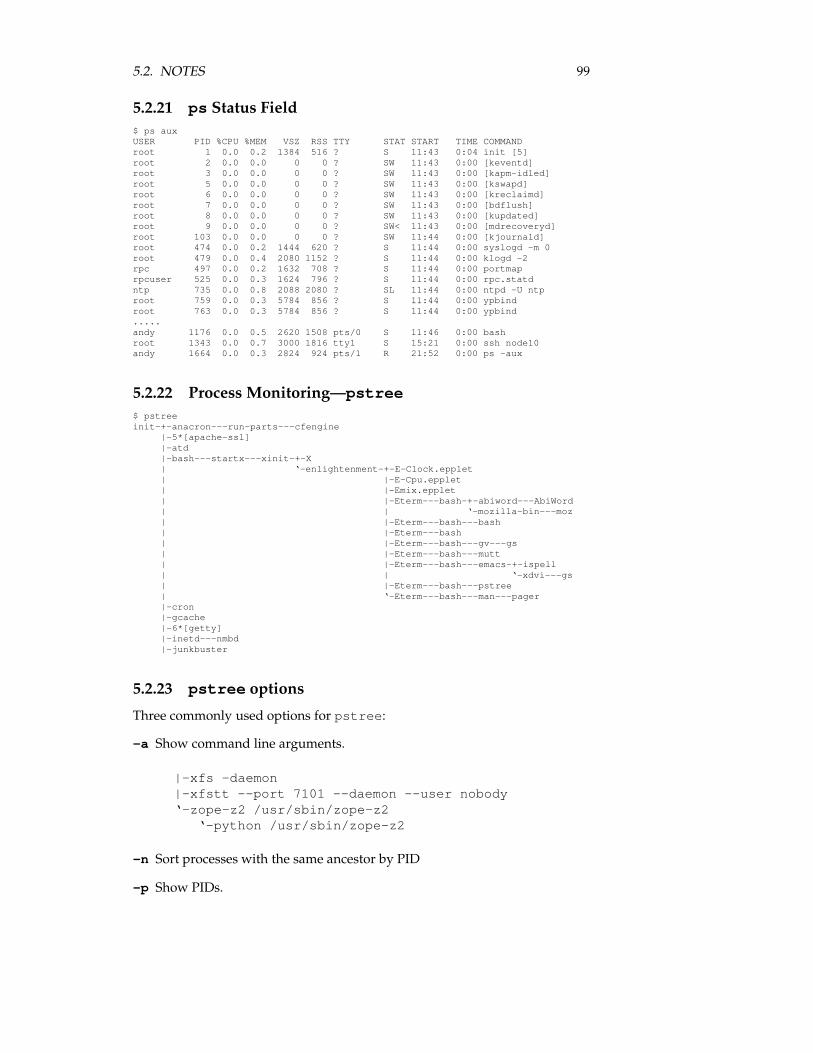
5.2. NOTES 99
5.2.21 ps Status Field$ ps auxUSER PID %CPU %MEM VSZ RSS TTY STAT START TIME COMMANDroot 1 0.0 0.2 1384 516 ? S 11:43 0:04 init [5]root 2 0.0 0.0 0 0 ? SW 11:43 0:00 [keventd]root 3 0.0 0.0 0 0 ? SW 11:43 0:00 [kapm-idled]root 5 0.0 0.0 0 0 ? SW 11:43 0:00 [kswapd]root 6 0.0 0.0 0 0 ? SW 11:43 0:00 [kreclaimd]root 7 0.0 0.0 0 0 ? SW 11:43 0:00 [bdflush]root 8 0.0 0.0 0 0 ? SW 11:43 0:00 [kupdated]root 9 0.0 0.0 0 0 ? SW< 11:43 0:00 [mdrecoveryd]root 103 0.0 0.0 0 0 ? SW 11:44 0:00 [kjournald]root 474 0.0 0.2 1444 620 ? S 11:44 0:00 syslogd -m 0root 479 0.0 0.4 2080 1152 ? S 11:44 0:00 klogd -2rpc 497 0.0 0.2 1632 708 ? S 11:44 0:00 portmaprpcuser 525 0.0 0.3 1624 796 ? S 11:44 0:00 rpc.statdntp 735 0.0 0.8 2088 2080 ? SL 11:44 0:00 ntpd -U ntproot 759 0.0 0.3 5784 856 ? S 11:44 0:00 ypbindroot 763 0.0 0.3 5784 856 ? S 11:44 0:00 ypbind.....andy 1176 0.0 0.5 2620 1508 pts/0 S 11:46 0:00 bashroot 1343 0.0 0.7 3000 1816 tty1 S 15:21 0:00 ssh node10andy 1664 0.0 0.3 2824 924 pts/1 R 21:52 0:00 ps -aux
5.2.22 Process Monitoring—pstree$ pstreeinit-+-anacron---run-parts---cfengine
|-5*[apache-ssl]|-atd|-bash---startx---xinit-+-X| ‘-enlightenment-+-E-Clock.epplet| |-E-Cpu.epplet| |-Emix.epplet| |-Eterm---bash-+-abiword---AbiWord| | ‘-mozilla-bin---moz| |-Eterm---bash---bash| |-Eterm---bash| |-Eterm---bash---gv---gs| |-Eterm---bash---mutt| |-Eterm---bash---emacs-+-ispell| | ‘-xdvi---gs| |-Eterm---bash---pstree| ‘-Eterm---bash---man---pager|-cron|-gcache|-6*[getty]|-inetd---nmbd|-junkbuster
5.2.23 pstree options
Three commonly used options for pstree:
-a Show command line arguments.
|-xfs -daemon|-xfstt --port 7101 --daemon --user nobody‘-zope-z2 /usr/sbin/zope-z2
‘-python /usr/sbin/zope-z2
-n Sort processes with the same ancestor by PID
-p Show PIDs.
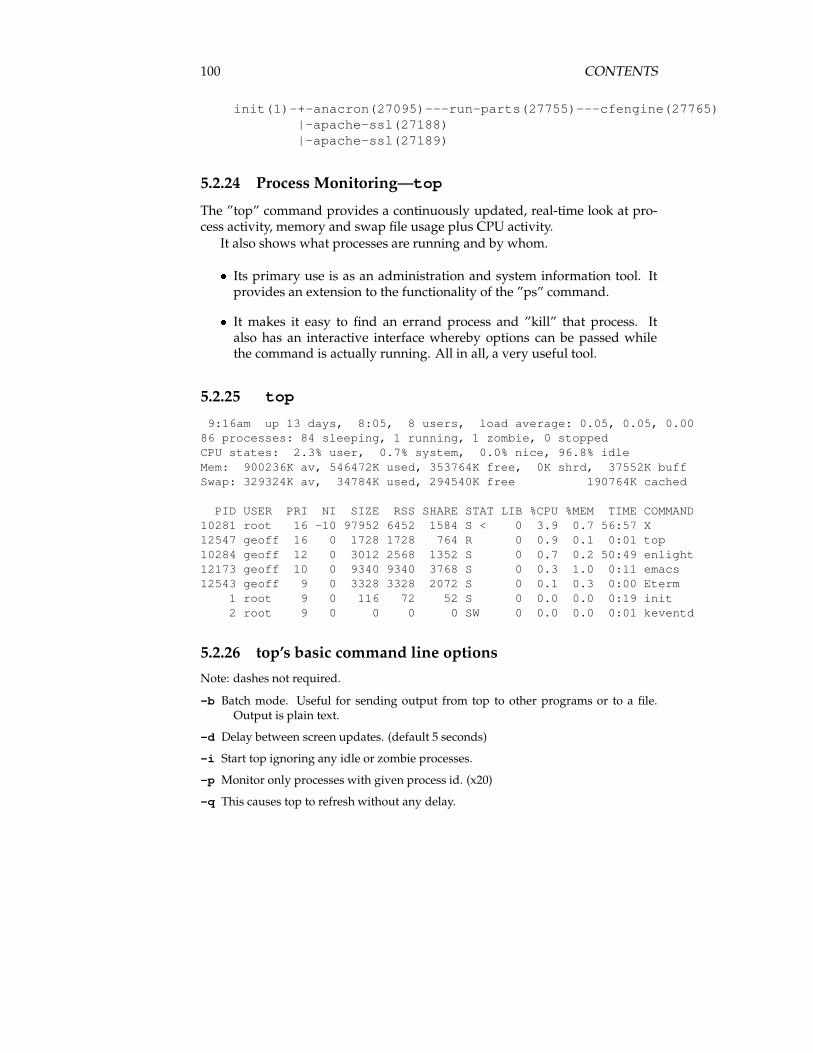
100 CONTENTS
init(1)-+-anacron(27095)---run-parts(27755)---cfengine(27765)|-apache-ssl(27188)|-apache-ssl(27189)
5.2.24 Process Monitoring—top
The ”top” command provides a continuously updated, real-time look at pro-cess activity, memory and swap file usage plus CPU activity.
It also shows what processes are running and by whom.
� Its primary use is as an administration and system information tool. Itprovides an extension to the functionality of the ”ps” command.
� It makes it easy to find an errand process and ”kill” that process. Italso has an interactive interface whereby options can be passed whilethe command is actually running. All in all, a very useful tool.
5.2.25 top
9:16am up 13 days, 8:05, 8 users, load average: 0.05, 0.05, 0.0086 processes: 84 sleeping, 1 running, 1 zombie, 0 stoppedCPU states: 2.3% user, 0.7% system, 0.0% nice, 96.8% idleMem: 900236K av, 546472K used, 353764K free, 0K shrd, 37552K buffSwap: 329324K av, 34784K used, 294540K free 190764K cached
PID USER PRI NI SIZE RSS SHARE STAT LIB %CPU %MEM TIME COMMAND10281 root 16 -10 97952 6452 1584 S < 0 3.9 0.7 56:57 X12547 geoff 16 0 1728 1728 764 R 0 0.9 0.1 0:01 top10284 geoff 12 0 3012 2568 1352 S 0 0.7 0.2 50:49 enlight12173 geoff 10 0 9340 9340 3768 S 0 0.3 1.0 0:11 emacs12543 geoff 9 0 3328 3328 2072 S 0 0.1 0.3 0:00 Eterm
1 root 9 0 116 72 52 S 0 0.0 0.0 0:19 init2 root 9 0 0 0 0 SW 0 0.0 0.0 0:01 keventd
5.2.26 top’s basic command line options
Note: dashes not required.
-b Batch mode. Useful for sending output from top to other programs or to a file.Output is plain text.
-d Delay between screen updates. (default 5 seconds)
-i Start top ignoring any idle or zombie processes.
-p Monitor only processes with given process id. (x20)
-q This causes top to refresh without any delay.
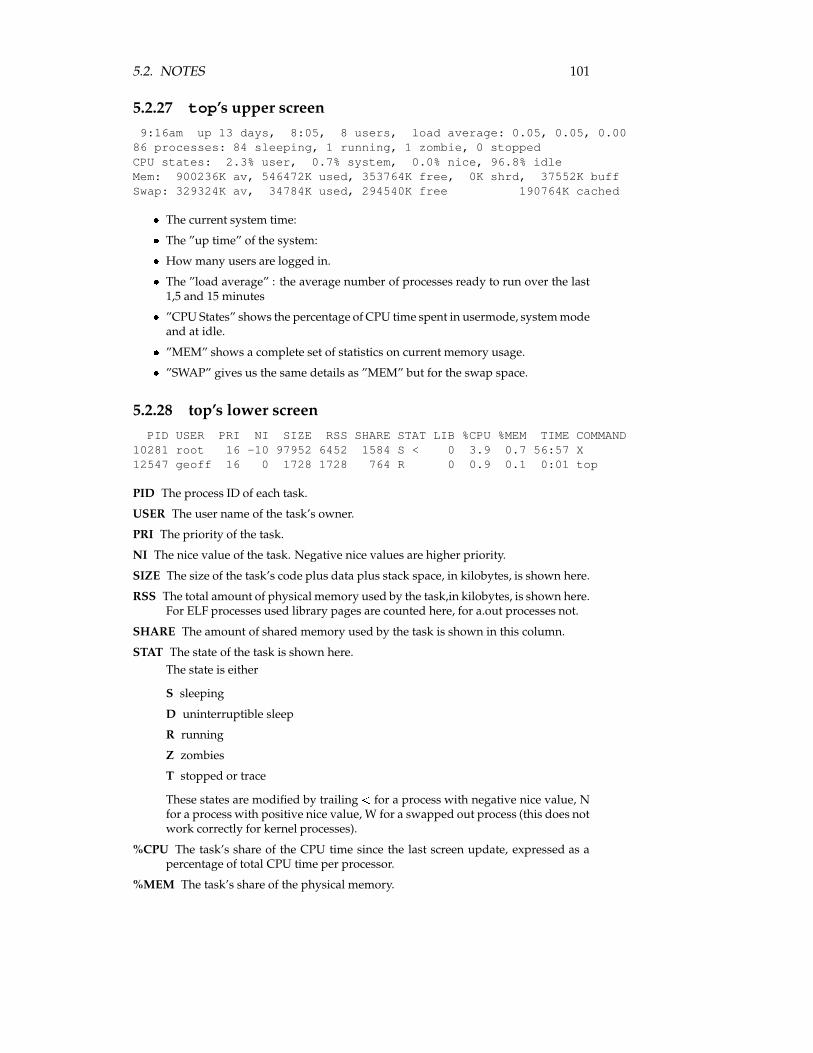
5.2. NOTES 101
5.2.27 top’s upper screen9:16am up 13 days, 8:05, 8 users, load average: 0.05, 0.05, 0.00
86 processes: 84 sleeping, 1 running, 1 zombie, 0 stoppedCPU states: 2.3% user, 0.7% system, 0.0% nice, 96.8% idleMem: 900236K av, 546472K used, 353764K free, 0K shrd, 37552K buffSwap: 329324K av, 34784K used, 294540K free 190764K cached
� The current system time:� The ”up time” of the system:� How many users are logged in.� The ”load average” : the average number of processes ready to run over the last
1,5 and 15 minutes� ”CPU States” shows the percentage of CPU time spent in usermode, system mode
and at idle.� ”MEM” shows a complete set of statistics on current memory usage.� ”SWAP” gives us the same details as ”MEM” but for the swap space.
5.2.28 top’s lower screenPID USER PRI NI SIZE RSS SHARE STAT LIB %CPU %MEM TIME COMMAND
10281 root 16 -10 97952 6452 1584 S < 0 3.9 0.7 56:57 X12547 geoff 16 0 1728 1728 764 R 0 0.9 0.1 0:01 top
PID The process ID of each task.
USER The user name of the task’s owner.
PRI The priority of the task.
NI The nice value of the task. Negative nice values are higher priority.
SIZE The size of the task’s code plus data plus stack space, in kilobytes, is shown here.
RSS The total amount of physical memory used by the task,in kilobytes, is shown here.For ELF processes used library pages are counted here, for a.out processes not.
SHARE The amount of shared memory used by the task is shown in this column.
STAT The state of the task is shown here.The state is either
S sleeping
D uninterruptible sleep
R running
Z zombies
T stopped or trace
These states are modified by trailing � for a process with negative nice value, Nfor a process with positive nice value, W for a swapped out process (this does notwork correctly for kernel processes).
%CPU The task’s share of the CPU time since the last screen update, expressed as apercentage of total CPU time per processor.
%MEM The task’s share of the physical memory.
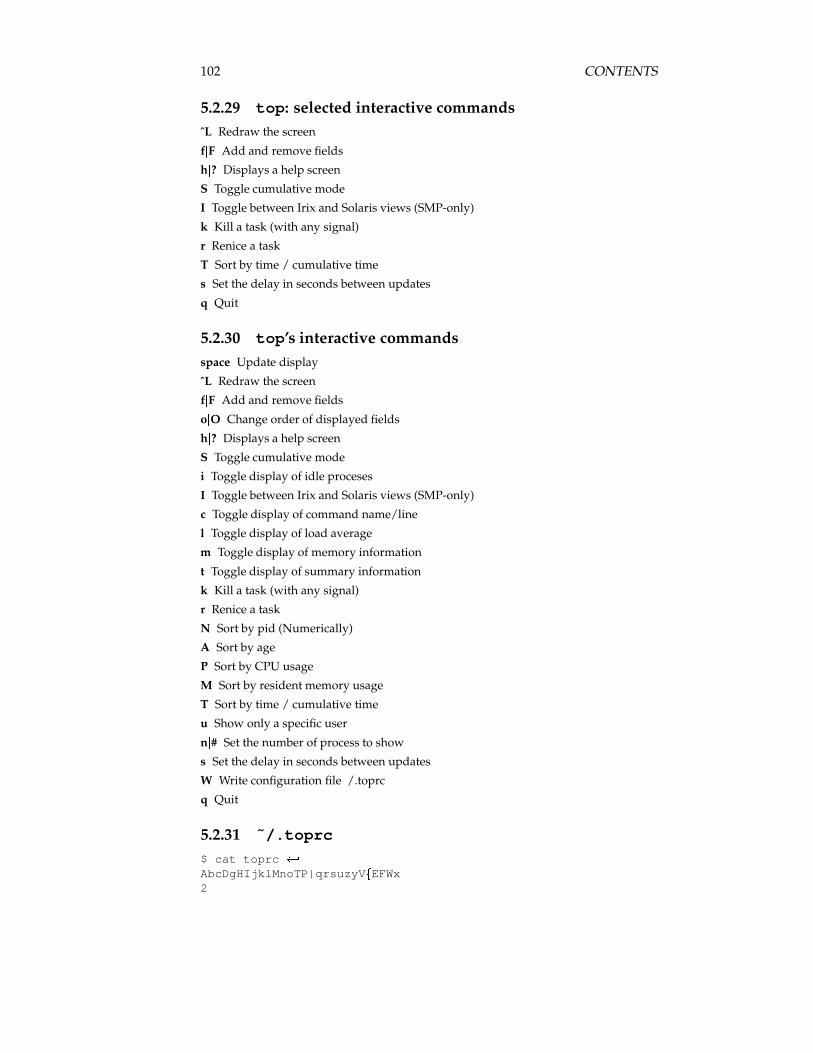
102 CONTENTS
5.2.29 top: selected interactive commandsˆL Redraw the screen
f � F Add and remove fields
h � ? Displays a help screen
S Toggle cumulative mode
I Toggle between Irix and Solaris views (SMP-only)
k Kill a task (with any signal)
r Renice a task
T Sort by time / cumulative time
s Set the delay in seconds between updates
q Quit
5.2.30 top’s interactive commandsspace Update display
ˆL Redraw the screen
f � F Add and remove fields
o �O Change order of displayed fields
h � ? Displays a help screen
S Toggle cumulative mode
i Toggle display of idle proceses
I Toggle between Irix and Solaris views (SMP-only)
c Toggle display of command name/line
l Toggle display of load average
m Toggle display of memory information
t Toggle display of summary information
k Kill a task (with any signal)
r Renice a task
N Sort by pid (Numerically)
A Sort by age
P Sort by CPU usage
M Sort by resident memory usage
T Sort by time / cumulative time
u Show only a specific user
n � # Set the number of process to show
s Set the delay in seconds between updates
W Write configuration file /.toprc
q Quit
5.2.31 ˜/.toprc
$ cat toprc ��AbcDgHIjklMnoTP|qrsuzyV � EFWx2
5.2. NOTES 103
5.2.32 Killing Processes
5.2.33 Job Control
There are three comands and a pretzel used for job control.
� jobs
� fg
� bg
� &
They are bash built-ins:
$ type jobs fg bg ��jobs is a shell builtinfg is a shell builtinbg is a shell builtin
For more information, see the Job Control section of man bash.
5.2.34 &— Direct the shell to execute a command in the back-ground.
Example:
$ xeyes �
Notice the xeyes process is started in the foreground and you have no prompt. Theuser is locked out of further interaction with the shell until a process is stopped, termi-nated or completed.
Now start the xeyes process in the background.
$ xeyes & �[1] 1650$
Two numbers are listed and the prompt is now also displayed waiting for another com-mand.
5.2.35 Job Control
$ xeyes & �[1] 1650$
� The [1] is the programs job id, a unique number for the shell starting from 1.� The 1650 is the process id (pid), which identifies the process across the entiresys-
tem.� Either of these numbers can be used to interact with the program thru bash.
104 CONTENTS
5.2.36 Background ProcessingThe best candidates for background processing are programs that do not require userinput, as these programs will keep on waiting until input is provided.
Programs that send their results to standard output (The screen), will do so even ifrunning in the background. If the user is performing another operation, the results maybe difficult to interpret. The output from these processes can be redirected to a file.
$ wc bigfile > bigfile.wc & �[1] 1654$
5.2.37 The jobs command$ jobs � :
Lists all commands stopped, or running in the background.
Options :-l List pid
Example :Start some processes in the background and suspend a foreground process.
$ jobs �[1]+ Stopped less job_control.txt[2]- Running xeyes &$
5.2.38 The fg command$ fg � :
Shell built-in used to force a suspended or background process to continue run-ning in the foreground.
Example :� Use the ’jobs’ command to find job id.
$ jobs �[1]+ Stopped less job_control.txt[2]- Running xeyes &$
� Use fg to bring xeyes to foreground.
$ fg 2 �xeyes
� A % used with the job id is equivalent to fg 2.
$ %2 �xeyes
5.2.39 The fg commandA job can also be referred to by a string that uniquely identifies the beginningof thecommand line used to start a job. A ’%’ can also be used with a unique string.
$ fg x �xeyes
5.3. LAB 105
or
$ %x �xeyes
If fg is issued without any argument, the job with the ’+’ in the job list is brought tothe foreground.
$ fg �xeyes
5.2.40 The bg command$ bg � :
Used to force a suspended process to continue running in the background.
Example :Use the ’jobs’ command to find job id.
$ jobs ��[1]- Stopped find -name myfile >myfile.found (wd: /)[2]+ Stopped less job_control.txt[3] Running xeyes &$
Job 1 shows the ’find’ command was started in the foreground and then suspended.Tostart ’find’ in the background, use the ’bg’ command or ’%’.
Example :
$ bg 1 � or $ bg f � or $ %1 & � or $ %f & �
5.3 Lab
5.4 Questions

106 CONTENTS
Objective 103.6
Modify process executionpriorities
6.1 Overview
6.1.1 Weight: []
6.1.2 Statement of Objective:Candidate should be able to manage process execution priorities. Tasks include run-ning a program with higher or lower priority, determining the priority of a process andchanging the priority of a running process.
6.1.3 Key files, terms, and utilities:nicepsrenicetop
6.1.4 Resources:
107
108 CONTENTS
6.2 Notes
6.3 Lab1. This exercise requires a few example processes to play around with, so first we
will create a few.� Using the vi editor (for practice) make a file called a.c.
– Do not use the arrow keys—use h, j, k and l.– Do not use the Backspace or Delete keys—use x.– Be sure you are familiar with the use of i, a, o and O for entering new
text.– For saving and quiting use each of ZZ, :w, q: and !.– Delete, Yank and Put with dd, yy and p.– Use u to undo, numerical modifiers (e.g. 5dd) and . to repeat.
� The file should contain this text:
#include <stdio.h>
int main(){
int i = 0;
while (1) {system("clear");printf("Process a: %d\n", i);++i;
}
return 0;}
� Copy the file a.c to b.c and c.c.
$ cp a.c b,c.c ��� Edit the printf() calls in files b.c and c.c to refer to Process b: andProcess c: respectively.
� Compile the programs:
$ gcc a.c -o a; gcc b.c -o b; gcc c.c -o c �2. Test your three programs.
� Start a program running in the background:
$ ./a �Process a: 400
� Suspend the program:
ˆz[1]+ Stopped ./a
� Kill the job:
$ kill %1 ��3. Use ps to view the processes.
6.4. QUESTIONS 109
� Run the processes in the background with differing degrees of niceness:
$ ./a& nice ./b& nice -19 ./c& �� Glance at and absorb the manpage for ps. Note well that some options are
preceded by a minus(-) and others are not. For example ps a and ps -ado different things.
� Locate the processes using the ps command; try the a, u, x, and f optionsseparately and in combinations. e.g.:
$ ps aux |grep "./a " �� Kill and restart one of the processes (use the PID not “123456”:
$ kill 123456 �$ ps aux |grep "./a " �$ ./a&$ ps aux |grep "./a " �
4. Use top to view and modify the processes.� Run top in the foreground:
$ top �� Look at the top help: Press h� Sort by accumulated time: Press T� Re-nice a process (Note: Users may only monotonically increase the nice-
ness processes, and (&&) they must own the process.):
– Press r– PID to renice: 1234567890 �– Renice PID 1973 to value: 5 �
5. Reniceing from the command line:� After finding it’s PIDrenice one of your processes:
$ ps aux |grep "./c " �$ renice +15 1234567890
� Re-nice negatively—notice that only the superuser may reduce the nicenessof a process.
$ renice -10 1234567890 �renice: 1234567890: setpriority: Permission denied$ su -c ’renice -10 1234567890’ �
6. Kill off ./a, ./b and ./c.
6.4 Questions

110 CONTENTS
Objective 103.7
Search text files using regularexpressions
7.1 Overview
7.1.1 Weight: []
7.1.2 Statement of Objective:The candidate should be able to manipulate files and text data using regular expres-sions. This objective includes creating simple regular expressions containing severalnotational elements. It also includes using regular expression tools to perform searchesthrough a filesystem or file content.
7.1.3 Key files, terms, and utilities:grepregexpsed
7.1.4 Resources:Fun with Regular Expressions by Adrian J. Chung
http://thelinuxgurus.org/regexp.html
111
112 CONTENTS
7.2 Notes
7.2.1 sed—stream editor� Example (replace “teh” with “the”):
$ sed s/teh/the/g my_file.txt �� Non-interactive.� The original file is not touched by sed� Save the results:
$ sed s/teh/the/g old.txt > new.txt �
Calling sed� sed one liners:
$ sed [opts] ’sed-cmds’ input-file(s) ��� sed using a script file:
$ sed [opts] -f script-file input-file(s) �� Script with a sed shebang:
$ cat script.sed ��#!/bin/sed -f...
headingThe sed options
-n No print. The default is to print all lines plus lines selected with the p command.
-e The next command is an edit command; used for multiple edits.
-f sed commands are in a file.
Finding text using sed� Using line numbers: singly or in a range.� Using Regular Expressions.
Examples:
x Where x is a line number
x,y In a range of lines, from x to y
/pattern/ Where pattern is a regex
/patern/patern/ Choice of patterns
/pattern/,x Look for the pattern on this line
x,/pattern/ Look only at line x for the pattern
x,y! Not lines x to y
7.2. NOTES 113
Basic sed editing commands
p Print the matched lines
= Display the line number of the file
a \ Append the text after the addressed line
i \ Insert new text after the addressed line
d Delete addressed lines
c Replace addressed text with new text
s Substitute pattern with replacement pattern
r Read text from another file
w Write text to file
q Quit after first pattern has been matched, or just quit
l Show control characters in their octal ASCII equivalent
() Group a series of commands to be performed only on addressed lines
n Read the next line of text from another file and append it
g Paste the contents of pattern2 into pattern1
y Translate characters
n Append next input line; this allows pattern matching across two lines
sed examples� Print line 3 only:
$ sed -n ’3p’ foo.txt �� Print lines 5 through 8:
$ sed -n ’5,8p’ foo.txt �� Print lines with Fred in them:
$ sed -n ’/fred/p’ foo.txt ��� Search for Fred only on line 4:
$ sed -n ’4,/Fred/p’ foo.txt �� Print lines containing $100:
$ sed -n ’/\$100/p’ foo.txt
� Print file 10th line to the last:
$ sed -n ’1,$p’ �� Print lines with ing’s in them
$ sed -n ’/.*ing/p’ �
114 CONTENTS
sed examples� Print just the line number of a match:
$ sed -n ’/funny/=’ foo.txt �3
� Print the line and its number:
$ sed -n -e ’/fun/p’ -e ’/fun/=’ foo.txt ��That was funny3
� Appending text:
$ cat my.script/funny/p/funny/a ha ha ha$ sed -n -f my.script foo.txt �That was funnyha ha ha
� Substitution:
$ sed -n ’s/this/that/’ foo.file
Using a sed script� Create a script find the.sh that will print (append) “Got One!” every time it sees
the word “the” in a file.
#!/bin/sed -f/the/ a\Got one!
� Run the script:
$ chmod u+x find_the.sh �
$ ./find_the.sh owl.pussy.cat.poem ��
"Dear Pig, are you willing to sellfor one shilling
Your ring?" Said the Piggy, "I will."Got one!So they took it away, and were married
next dayGot one!By the Turkey who lives on the hill.Got one!
7.2. NOTES 115
The Owl and the Pussy-Cat
The Owl and the Pussy-Cat went to seaIn a beautiful pea-green boat:They took some honey, and plenty of moneyWrapped up in a five-pound note.The Owl looked up to the stars above,And sang to a small guitar,”O lovely Pussy, O Pussy, my love,What a beautiful Pussy you are,You are,You are!What a beautiful Pussy you are!”Pussy said to the Owl, ”You elegant fowl,How charmingly sweet you sing!Oh! let us be married; too long we have tarried:But what shall we do for a ring?”They sailed away, for a year and a day,To the land where the bong-tree grows;And there in a wood a Piggy-wig stood,With a ring at the end of his nose,His nose,His nose,With a ring at the end of his nose.”Dear Pig, are you willing to sell for one shillingYour ring?” Said the Piggy, ”I will.”So they took it away, and were married next dayBy the Turkey who lives on the hill.They dined on mince and slices of quince,Which they ate with a runcible spoon;And hand in hand on the edge of the sandThey danced by the light of the moon,The moon,The moon,They danced by the light of the moon.
Edward Lear
Inserting test with sed� Create a script find the.sh that will print (append) “Got One!” every time it sees
the word “the” in a file.
#!/bin/sed -f/Owl/ i\Owl coming up!
� Run the script:
$ chmod u+x owl.sh �
$ ./owl.sh owl.pussy.cat.poem �Wrapped up in a five-pound note.Owl coming up!The Owl looked up to the stars above,

116 CONTENTS
7.3 Lab
7.4 Questions
Objective 103.8
Perform basic file editingoperations using vi
8.1 Overview
8.1.1 Weight: []
8.1.2 Statement of Objective:Candidate must be able to edit text files using vi. This objective includes vi navigation,basic vi nodes, inserting, editing, deleting, copying, and finding text.
8.1.3 Key files, terms, and utilities:vi/, ?h,j,k,lG, H, Li, c, d, dd, p, o, aZZ, :w!, :q!, :e!:!
8.1.4 Resources:
117
118 CONTENTS
8.2 Notes
8.3 Lab
8.3.1 Vi tourNote
Should you need a good sized text file to practice editing on, you will almost certainlyfind a copy of the GPL Liscence on your system. Be sure to deconsecrate the file byrenaming before mungeing it. You may locate one thus:
$ locate GPL ��.../usr/share/doc/netpbm-9.14/GPL_LICENSE.txt/usr/share/doc/cdda2wav-1.10/GPL/usr/share/doc/cdparanoia-alpha9.8/GPL/usr/share/doc/stunnel-3.19/COPYRIGHT.GPL/usr/share/doc/libesmtp-0.8.4/COPYING.GPL...
Make a scratch copy at a suitable location and open it for editing:
$ cp /usr/share/doc/stunnel-3.19/COPYRIGHT.GPL ��/tmp/munged_gpl.txt �$ vi /tmp/munged_gpl.txt �
vi
Vi is the unix editor, simply it is available on just about every Unix installation by de-fault. This is the reason that you have to have a minimum of basic vi skills to allow youto change files when you favourite editor is not available, boot disks have vi due to lackof space.
Please note that there are many implementations of vi, the baseline is a very crudeeditor. This extends to a very extended and powerful VIM editor available on mostplatforms. I use vim because I am restricted to vi on many of the unix systems I sup-port, rather than trying to ’switch editors’ mentally I have vi on every platform I use,including Windows.
vi is a mode editor
Vi is an editor and it is definitely not a friendly editing environment. In fact a randomtyping of keys of the keyboard can render your text totally unreadable. Vi has beenaround a long time it was created in an era where editors were modal. The editor canbe in three different unrelated states described below.
Input mode This is the mode where you simply type. You characters appear in the textfile as you type.
Command mode This is where character take on special significance, for example ’i’for insert ’D’ to delete to the end of the line.
Line mode This is the mode when you press a : in command mode, this is where youcan type some powerful (and sed like) commands to alter the document.
Rather than bore you with yet another description I will give you a series of exer-cises to work through showing each command. In the examples ¡esc¿ means to press theescape key. This will return you to command mode or cancel an action in other modes.
8.3. LAB 119
Inserting text
There are at least three ways to insert text into a document in vi, the following exerciseswill take you through the basic commands.
Exercise 1 - insert Create a text document, just to get you used to switching in and outof the insert and command mode.
$ vi test.txt �ithis is the Linux course<return>We want a few lines of txt to work with. <esc>
The i inserts text before the cursor.
Exercise 2 - open We want to add some extra text to the document, we want to enter iton the line after the current line, we use the open command by pressing o.
oI am adding an line after the current line.<esc>
Exercise 3 - append Now I want ot continue adding another sentence on the currentline. If I press ’i’ I will insert before the full stop, in this case I want to append itafter the full stop.
a I want to add another sentence.<esc>
You line should now look like:
I am adding an line after the current line. I want toadd another sentence.
Movement keys & multiplication
There are a huge number of ways to move around in vi, the arrow keys will not alwayswork . You should be aware of the single character work arounds for these in case yourterminal is not set up properly on the box you are ’telnet’ing or ’ssh’ing from or to.
h Left one character *
j Down one line *
k Up one line *
l Left one character *
w Forward one word
b Back one word
e End of current word
G End of file *
nG Goto a particular line *
� Back one paragraph�Forward one paragraph
$ End of current line
ˆ First non blank character in line
0 Beginning of line (also |)
Ones marked with an asterisk are requierd by POMS, Personally I find word move-ment is my main tool here. I also use the control keys to scroll screens a far bit. Theseare listed on the printed cheat sheet.
ALL these movement commands can be prefixed by a number to muliply the effectof the movement. To move up 99 lines enter 99k.
Note that some vi editor have a status on the bottom line, sometime it will show thatyou have entered a multiplier, sometimes it is quiet but the results are unexpected .
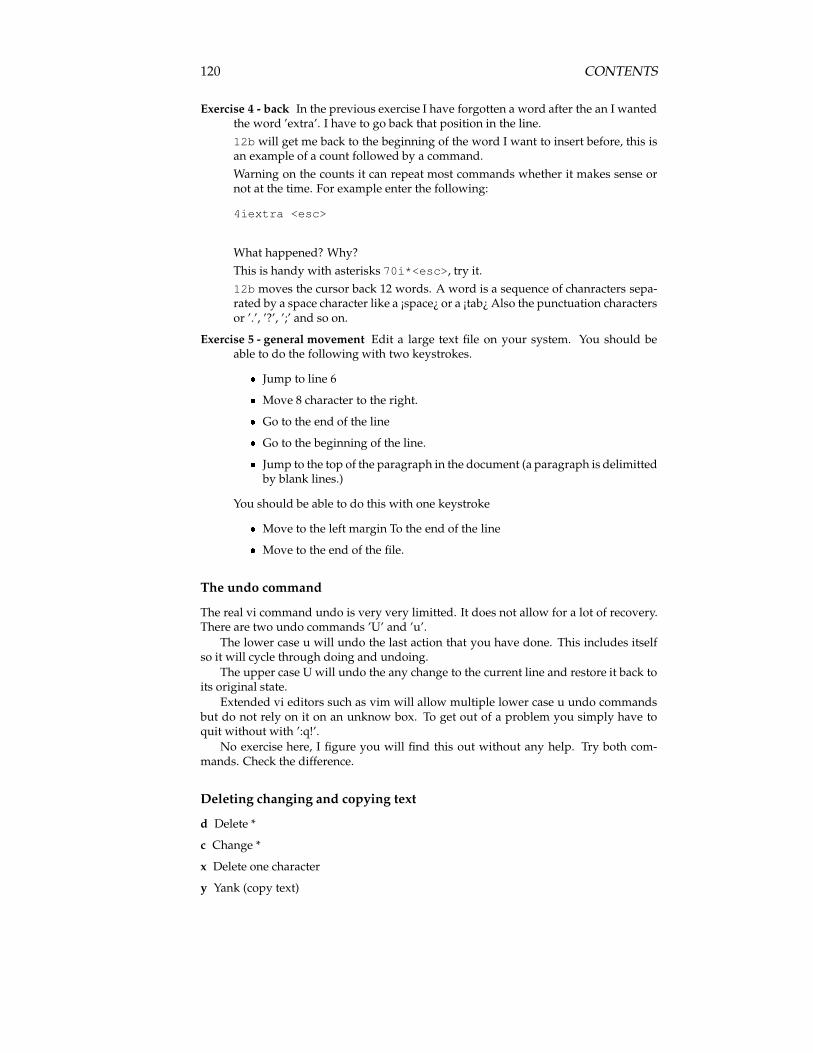
120 CONTENTS
Exercise 4 - back In the previous exercise I have forgotten a word after the an I wantedthe word ’extra’. I have to go back that position in the line.12b will get me back to the beginning of the word I want to insert before, this isan example of a count followed by a command.Warning on the counts it can repeat most commands whether it makes sense ornot at the time. For example enter the following:
4iextra <esc>
What happened? Why?This is handy with asterisks 70i*<esc>, try it.12b moves the cursor back 12 words. A word is a sequence of chanracters sepa-rated by a space character like a ¡space¿ or a ¡tab¿ Also the punctuation charactersor ’.’, ’?’, ’;’ and so on.
Exercise 5 - general movement Edit a large text file on your system. You should beable to do the following with two keystrokes.
� Jump to line 6� Move 8 character to the right.� Go to the end of the line� Go to the beginning of the line.� Jump to the top of the paragraph in the document (a paragraph is delimitted
by blank lines.)
You should be able to do this with one keystroke
� Move to the left margin To the end of the line� Move to the end of the file.
The undo command
The real vi command undo is very very limitted. It does not allow for a lot of recovery.There are two undo commands ’U’ and ’u’.
The lower case u will undo the last action that you have done. This includes itselfso it will cycle through doing and undoing.
The upper case U will undo the any change to the current line and restore it back toits original state.
Extended vi editors such as vim will allow multiple lower case u undo commandsbut do not rely on it on an unknow box. To get out of a problem you simply have toquit without with ’:q!’.
No exercise here, I figure you will find this out without any help. Try both com-mands. Check the difference.
Deleting changing and copying text
d Delete *
c Change *
x Delete one character
y Yank (copy text)
8.4. QUESTIONS 121
Ones marked with an asterisk are required by POMS, Personally I use single char-acter deletion all the time. I use line deletion all the time.
There delete command and yank command can be used with a movement to deleteall text within this movement. For example d$ will delete to the end of the current line,y$ will yank it into a buffer. Delete will also store the deletion in a buffer to get it backquickly just use paste describe later.
To delete or yank a line simply repeat the d or y. To delete a single line use dd, todelete the current line and the next two use 3dd. To yank the next 10 lines use 10yy.
Exercise 6Please your cursor in the middle of a line. Delete from the current position to the
beginning of the line with two keystrokes.Delete from the current position to the end of the line.Note that there is a shorthand for d$ (delete, move to end of line) by using a capital
D. Move to the center of a line of text and try it.
8.4 Questions

122 CONTENTS
Topic 104
Devices, Linux Filesystems,Filesystem Hierarchy
Standard
123

Objective 104.1
Create partitions andfilesystems
1.1 Overview
1.1.1 Weight: []
1.1.2 Statement of Objective:Candidates should be able to configure disk partitions and then create filesystems onmedia such as hard disks. This objective includes using various mkfs commands to setup partitions to various filesystems, including ext2, ext3, reiserfs, vfat, and xfs.
1.1.3 Key files, terms, and utilities:fdiskmkfs
1.1.4 Resources:
125
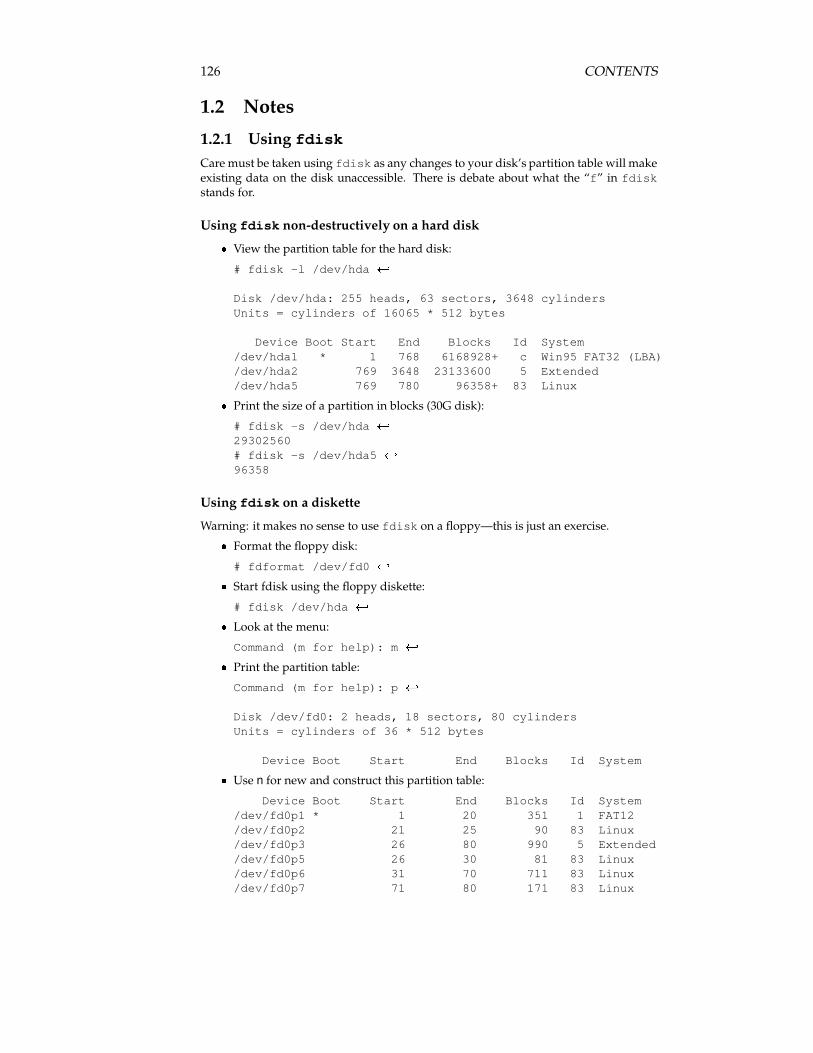
126 CONTENTS
1.2 Notes
1.2.1 Using fdiskCare must be taken using fdisk as any changes to your disk’s partition table will makeexisting data on the disk unaccessible. There is debate about what the “f” in fdiskstands for.
Using fdisk non-destructively on a hard disk� View the partition table for the hard disk:
# fdisk -l /dev/hda ��
Disk /dev/hda: 255 heads, 63 sectors, 3648 cylindersUnits = cylinders of 16065 * 512 bytes
Device Boot Start End Blocks Id System/dev/hda1 * 1 768 6168928+ c Win95 FAT32 (LBA)/dev/hda2 769 3648 23133600 5 Extended/dev/hda5 769 780 96358+ 83 Linux
� Print the size of a partition in blocks (30G disk):
# fdisk -s /dev/hda ��29302560# fdisk -s /dev/hda5 ��96358
Using fdisk on a diskette
Warning: it makes no sense to use fdisk on a floppy—this is just an exercise.� Format the floppy disk:
# fdformat /dev/fd0 ��� Start fdisk using the floppy diskette:
# fdisk /dev/hda �� Look at the menu:
Command (m for help): m �� Print the partition table:
Command (m for help): p �
Disk /dev/fd0: 2 heads, 18 sectors, 80 cylindersUnits = cylinders of 36 * 512 bytes
Device Boot Start End Blocks Id System� Use n for new and construct this partition table:
Device Boot Start End Blocks Id System/dev/fd0p1 * 1 20 351 1 FAT12/dev/fd0p2 21 25 90 83 Linux/dev/fd0p3 26 80 990 5 Extended/dev/fd0p5 26 30 81 83 Linux/dev/fd0p6 31 70 711 83 Linux/dev/fd0p7 71 80 171 83 Linux
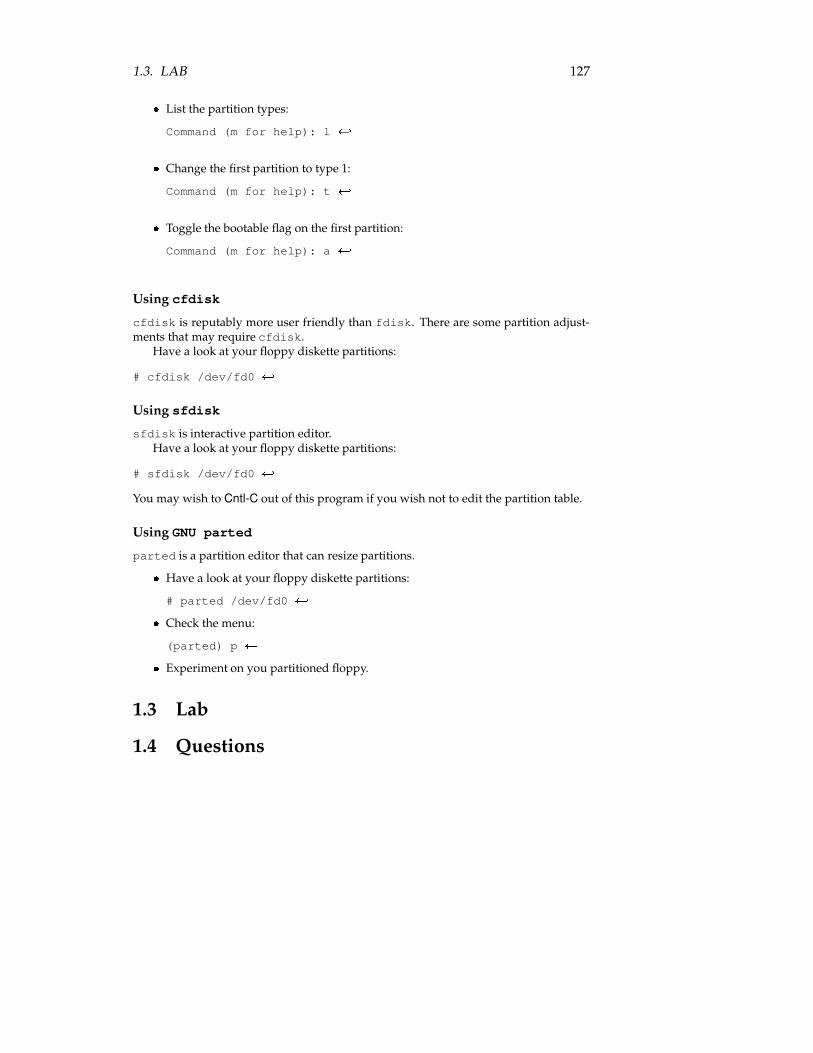
1.3. LAB 127
� List the partition types:
Command (m for help): l �
� Change the first partition to type 1:
Command (m for help): t �
� Toggle the bootable flag on the first partition:
Command (m for help): a �
Using cfdisk
cfdisk is reputably more user friendly than fdisk. There are some partition adjust-ments that may require cfdisk.
Have a look at your floppy diskette partitions:
# cfdisk /dev/fd0 �
Using sfdisk
sfdisk is interactive partition editor.Have a look at your floppy diskette partitions:
# sfdisk /dev/fd0 �You may wish to Cntl-C out of this program if you wish not to edit the partition table.
Using GNU parted
parted is a partition editor that can resize partitions.� Have a look at your floppy diskette partitions:
# parted /dev/fd0 �� Check the menu:
(parted) p �� Experiment on you partitioned floppy.
1.3 Lab
1.4 Questions

128 CONTENTS

Objective 104.2
Maintain the integrity offilesystems
2.1 Overview
2.1.1 Weight: []
2.1.2 Statement of Objective:Candidates should be able to verify the integrity of filesystems, monitor free space andinodes, and repair simple filesystem problems. This objective includes the commandsrequired to maintain a standard filesystem, as well as the extra data associated with ajournaling filesystem.
2.1.3 Key files, terms, and utilities:dudffscke2fsckmke2fsdebugfsdumpe2fstune2fs
2.1.4 Resources:
129

130 CONTENTS
2.2 Notes
2.3 Lab
2.4 Questions

Objective 104.3
Control mounting andunmounting filesystem
3.1 Overview
3.1.1 Weight: []
3.1.2 Statement of Objective:Candidates should be able to configure the mounting of a filesystem. This objectiveincludes the ability to manually mount and unmount filesystems, configure filesystemmounting on bootup, and configure user mountable removeable filesystems such astape drives, floppies, and CDs.
3.1.3 Key files, terms, and utilities:/etc/fstabmountumount
3.1.4 Resources:
131

132 CONTENTS
3.2 Notes
3.3 Lab
3.4 Questions
Objective 104.4
Managing disk quota
4.1 Overview
4.1.1 Weight: []
4.1.2 Statement of Objective:Candidates should be able to manage disk quotas for users. This objective includessetting up a disk quota for a filesystem, editing, checking, and generating user quotareports.
4.1.3 Key files, terms, and utilities:quotaedquotarepquotaquotao
4.1.4 Resources:
133

134 CONTENTS
4.2 Notes
4.3 Lab
4.4 Questions
Objective 104.5
Use file permissions to controlaccess to files
5.1 Overview
5.1.1 Weight: []
5.1.2 Statement of Objective:Candidates should be able to control file access through permissions. This objectiveincludes access permissions on regular and special files as well as directories. Alsoincluded are access modes such as suid, sgid, and the sticky bit, the use of the groupfield to grant file access to workgroups, the immutable flag, and the default file creationmode.
5.1.3 Key files, terms, and utilities:chmodumaskchattr
5.1.4 Resources:
135
136 CONTENTS
5.2 Notes
Notes for slide presentation: gl1.104.5.slides.texPrepared by Andrew Eager
5.2.1 File Permissions� An access control mechanism� Based on relation between file & user� Analogy:
– Documents receive classification
– Employees receive clearance
– Access to a particular document is determined by the documents classifica-tion and the employees clearance
� A file has 3 modes of access:
– Read (r) - Can view the file
– Write (w) - Can change the file
– Execute (x) - Can run the file (program)
� A file can be accessed by 3 different types of people:
– The file owner or user (u)
– A member of the files group (g)
– Anyone else or others (o)
5.2.2 Directory Permissions� Directories are treated in the same way as files� They have an associated owner� They have an associated group� The permissions do slightly different things
– Read (r) - Can view the contents of directory (ls)
– Write (w) - Can add, delete, rename files
– Execute (x) - Can ’cd’ into the directory and open files in it or its subdirec-tories
5.2.3 USERS & GROUPS� A user is any one person (one & only one)� A group consists of one or more users� A user may be a member of more than one group
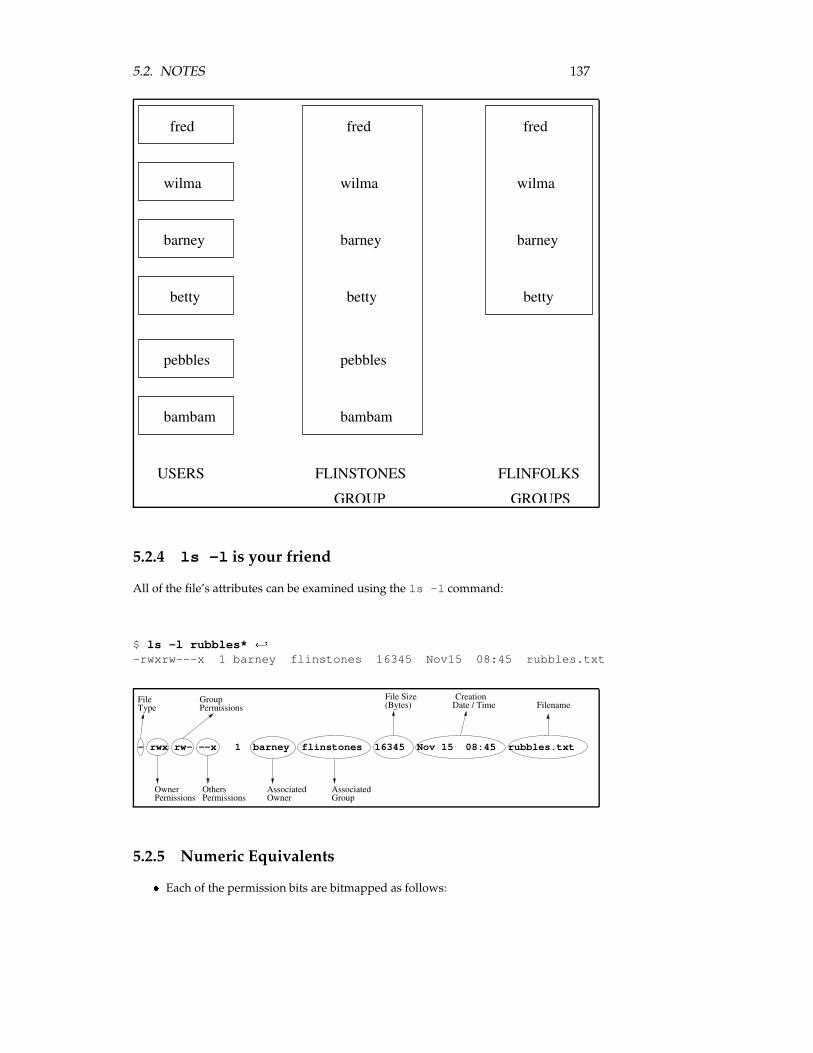
5.2. NOTES 137
fred
wilma
barney
betty
pebbles
bambam
wilma
barney
betty
pebbles
fred fred
wilma
barney
betty
bambam
USERS
GROUP
FLINSTONES
GROUPS
FLINFOLKS
5.2.4 ls -l is your friend
All of the file’s attributes can be examined using the ls -l command:
$ ls -l rubbles* �-rwxrw---x 1 barney flinstones 16345 Nov15 08:45 rubbles.txt
− rwx rw− −−x 1 barney flinstones 16345 Nov 15 08:45 rubbles.txt
Owner OthersPermissionsPernissions Owner Group
Associated Associated
(Bytes)File Size
Date / TimeCreation
FilenameGroup
Type PermissionsFile
5.2.5 Numeric Equivalents
� Each of the permission bits are bitmapped as follows:
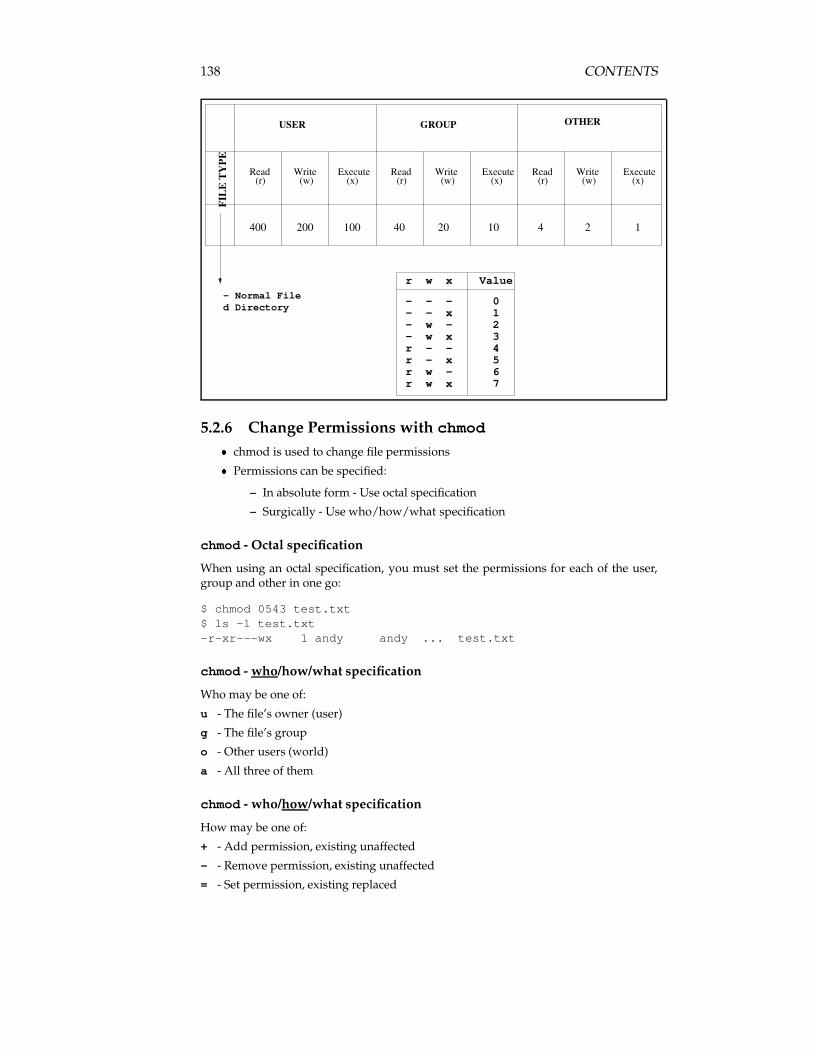
138 CONTENTS
OTHER
Read Write Execute
USER GROUP
Read ReadWrite WriteExecute Execute(r) (r)(w) (w)(x) (x)(r) (w) (x)
100 40 20 10 4 12400 200FI
LE
TY
PE
− Normal Filed Directory
− − − 0− − x 1− w − 2− w x 3r − − 4r − x 5r w − 6r w x 7
r w x Value
5.2.6 Change Permissions with chmod� chmod is used to change file permissions� Permissions can be specified:
– In absolute form - Use octal specification
– Surgically - Use who/how/what specification
chmod - Octal specification
When using an octal specification, you must set the permissions for each of the user,group and other in one go:
$ chmod 0543 test.txt$ ls -l test.txt-r-xr---wx 1 andy andy ... test.txt
chmod - who/how/what specification
Who may be one of:
u - The file’s owner (user)
g - The file’s group
o - Other users (world)
a - All three of them
chmod - who/how/what specification
How may be one of:
+ - Add permission, existing unaffected
- - Remove permission, existing unaffected
= - Set permission, existing replaced
5.2. NOTES 139
chmod - who/how/what specification
What may be one of:
r - Read permission
w - Write permission
x - Execute permission
5.2.7 chmod - what specification
5.2.8 Some examples:Add execute permission for the file’s owner (and leave everything else)
# chmod u+x file.txt �Remove write permission from group and others (and leave everything else)
# chmod go-w file.txt �Set the file to read only for everyone (kills existing permissions)
# chmod a=r file.txt �
5.2.9 Permission Defaults: umask� When a file is created, the system needs to know what permissions to assign to
the newly created file. This is done using umask.� You set the bits in umask that you don’t want set on any newly created file.� A newly created file will never have the execute bit set, regardless of the value ofumask.
� For example, a umask of 0022 will ensure that write access is not granted to groupand others.
$ umask 0022$ touch test.txt$ ls -l test.txt-rw-r--r-- 1 andy andy ... test.txt
5.2.10 SUID Setuid bit (4000)The setuid bit is represented by a ’S’ in the user/executable field in the file permissionsif the file is not executable or by an ’s’ in that field if the file is executable:
-rwSrw-rw- --> Setuid bit set, not executable-rwsrw-rw- --> Setuid bit set, executable
The setuid bit is only used for files:
Files:
The user executing the file gains the privileges of the file’s owner for the duration ofthat process’ run life. For example, a program owned by root with the setuid bit set(setuid root) when run by a normal user will gain root privileges for the purposesof that process. It changes the effective user. One exception: Setuid is ignored if theexecutable file is a script (security)
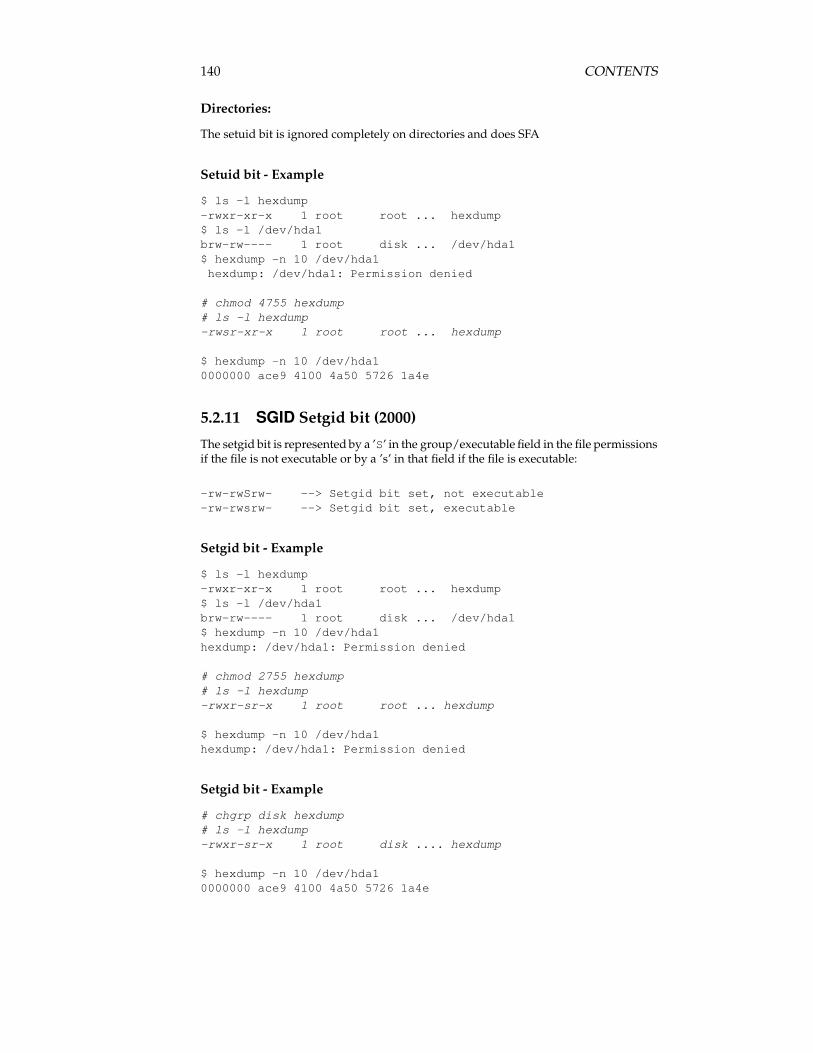
140 CONTENTS
Directories:
The setuid bit is ignored completely on directories and does SFA
Setuid bit - Example
$ ls -l hexdump-rwxr-xr-x 1 root root ... hexdump$ ls -l /dev/hda1brw-rw---- 1 root disk ... /dev/hda1$ hexdump -n 10 /dev/hda1hexdump: /dev/hda1: Permission denied
# chmod 4755 hexdump# ls -l hexdump-rwsr-xr-x 1 root root ... hexdump
$ hexdump -n 10 /dev/hda10000000 ace9 4100 4a50 5726 1a4e
5.2.11 SGID Setgid bit (2000)
The setgid bit is represented by a ’S’ in the group/executable field in the file permissionsif the file is not executable or by a ’s’ in that field if the file is executable:
-rw-rwSrw- --> Setgid bit set, not executable-rw-rwsrw- --> Setgid bit set, executable
Setgid bit - Example
$ ls -l hexdump-rwxr-xr-x 1 root root ... hexdump$ ls -l /dev/hda1brw-rw---- 1 root disk ... /dev/hda1$ hexdump -n 10 /dev/hda1hexdump: /dev/hda1: Permission denied
# chmod 2755 hexdump# ls -l hexdump-rwxr-sr-x 1 root root ... hexdump
$ hexdump -n 10 /dev/hda1hexdump: /dev/hda1: Permission denied
Setgid bit - Example
# chgrp disk hexdump# ls -l hexdump-rwxr-sr-x 1 root disk .... hexdump
$ hexdump -n 10 /dev/hda10000000 ace9 4100 4a50 5726 1a4e
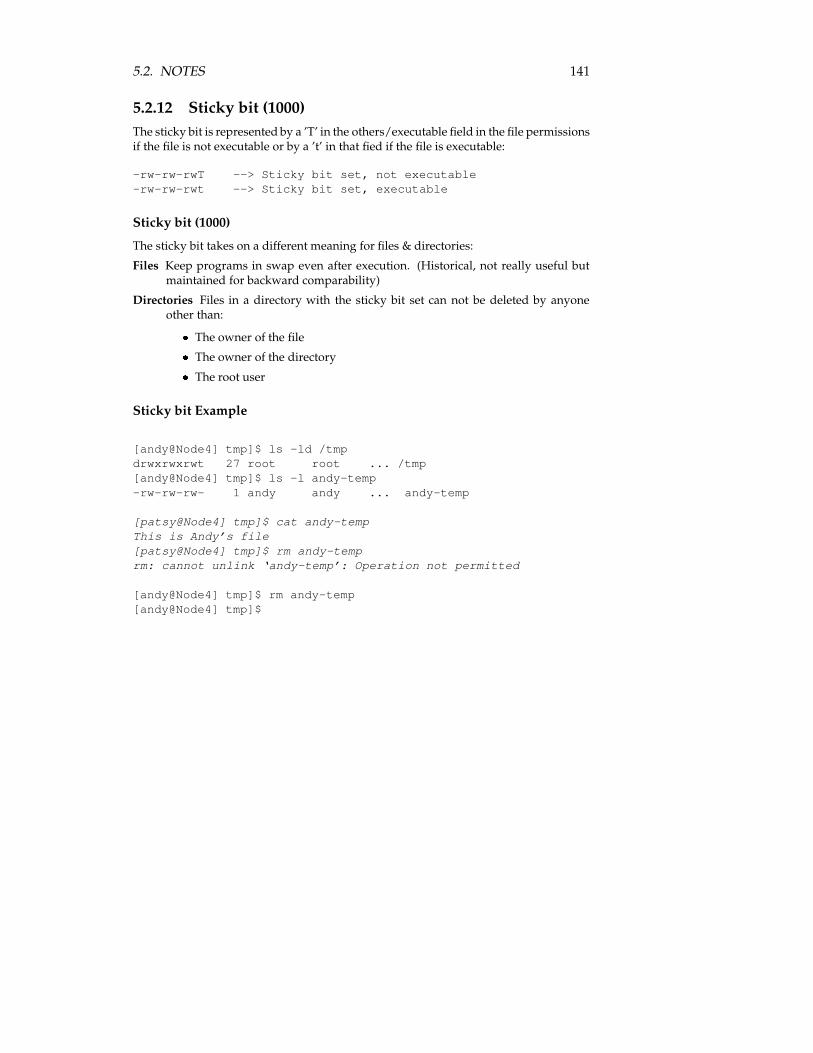
5.2. NOTES 141
5.2.12 Sticky bit (1000)The sticky bit is represented by a ’T’ in the others/executable field in the file permissionsif the file is not executable or by a ’t’ in that fied if the file is executable:
-rw-rw-rwT --> Sticky bit set, not executable-rw-rw-rwt --> Sticky bit set, executable
Sticky bit (1000)
The sticky bit takes on a different meaning for files & directories:
Files Keep programs in swap even after execution. (Historical, not really useful butmaintained for backward comparability)
Directories Files in a directory with the sticky bit set can not be deleted by anyoneother than:� The owner of the file� The owner of the directory� The root user
Sticky bit Example
[andy@Node4] tmp]$ ls -ld /tmpdrwxrwxrwt 27 root root ... /tmp[andy@Node4] tmp]$ ls -l andy-temp-rw-rw-rw- 1 andy andy ... andy-temp
[patsy@Node4] tmp]$ cat andy-tempThis is Andy’s file[patsy@Node4] tmp]$ rm andy-temprm: cannot unlink ‘andy-temp’: Operation not permitted
[andy@Node4] tmp]$ rm andy-temp[andy@Node4] tmp]$
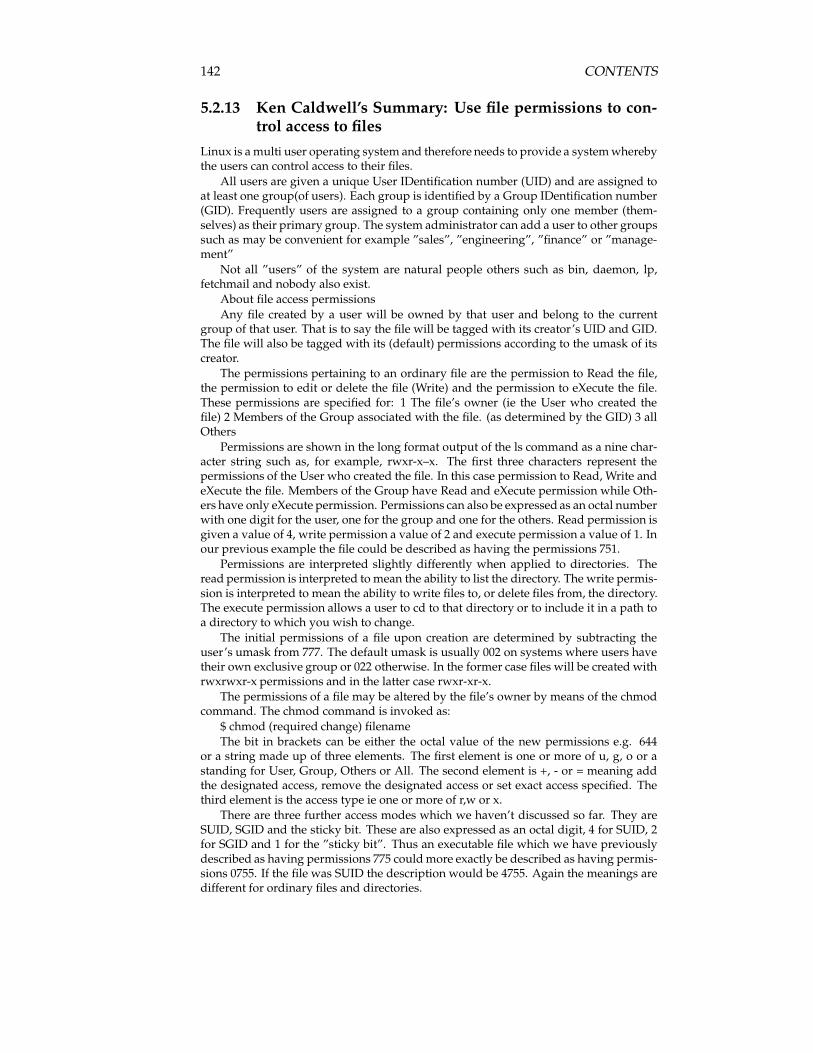
142 CONTENTS
5.2.13 Ken Caldwell’s Summary: Use file permissions to con-trol access to files
Linux is a multi user operating system and therefore needs to provide a system wherebythe users can control access to their files.
All users are given a unique User IDentification number (UID) and are assigned toat least one group(of users). Each group is identified by a Group IDentification number(GID). Frequently users are assigned to a group containing only one member (them-selves) as their primary group. The system administrator can add a user to other groupssuch as may be convenient for example ”sales”, ”engineering”, ”finance” or ”manage-ment”
Not all ”users” of the system are natural people others such as bin, daemon, lp,fetchmail and nobody also exist.
About file access permissionsAny file created by a user will be owned by that user and belong to the current
group of that user. That is to say the file will be tagged with its creator’s UID and GID.The file will also be tagged with its (default) permissions according to the umask of itscreator.
The permissions pertaining to an ordinary file are the permission to Read the file,the permission to edit or delete the file (Write) and the permission to eXecute the file.These permissions are specified for: 1 The file’s owner (ie the User who created thefile) 2 Members of the Group associated with the file. (as determined by the GID) 3 allOthers
Permissions are shown in the long format output of the ls command as a nine char-acter string such as, for example, rwxr-x–x. The first three characters represent thepermissions of the User who created the file. In this case permission to Read, Write andeXecute the file. Members of the Group have Read and eXecute permission while Oth-ers have only eXecute permission. Permissions can also be expressed as an octal numberwith one digit for the user, one for the group and one for the others. Read permission isgiven a value of 4, write permission a value of 2 and execute permission a value of 1. Inour previous example the file could be described as having the permissions 751.
Permissions are interpreted slightly differently when applied to directories. Theread permission is interpreted to mean the ability to list the directory. The write permis-sion is interpreted to mean the ability to write files to, or delete files from, the directory.The execute permission allows a user to cd to that directory or to include it in a path toa directory to which you wish to change.
The initial permissions of a file upon creation are determined by subtracting theuser’s umask from 777. The default umask is usually 002 on systems where users havetheir own exclusive group or 022 otherwise. In the former case files will be created withrwxrwxr-x permissions and in the latter case rwxr-xr-x.
The permissions of a file may be altered by the file’s owner by means of the chmodcommand. The chmod command is invoked as:
$ chmod (required change) filenameThe bit in brackets can be either the octal value of the new permissions e.g. 644
or a string made up of three elements. The first element is one or more of u, g, o or astanding for User, Group, Others or All. The second element is +, - or = meaning addthe designated access, remove the designated access or set exact access specified. Thethird element is the access type ie one or more of r,w or x.
There are three further access modes which we haven’t discussed so far. They areSUID, SGID and the sticky bit. These are also expressed as an octal digit, 4 for SUID, 2for SGID and 1 for the ”sticky bit”. Thus an executable file which we have previouslydescribed as having permissions 775 could more exactly be described as having permis-sions 0755. If the file was SUID the description would be 4755. Again the meanings aredifferent for ordinary files and directories.

5.2. NOTES 143
An executable file with the SUID bit set runs with the UID of the file owner insteadof inheriting the UID of the parent process. Similarly for the SGID bit. The ”sticky bit”has no meaning on Linux systems when applied to ordinary files. If the ”sticky bit” isset on a directory then only the owner of a file may delete it from that directory even ifthe directory is world writeable. This is most often seen on the /tmp directory. If theSGID bit is set on a directory then all files created in that directory will be assigned theGID of the directory rather than the GID of the user. Another way of creating files witha desired GID is to change the user’s GID with the newgrp command.
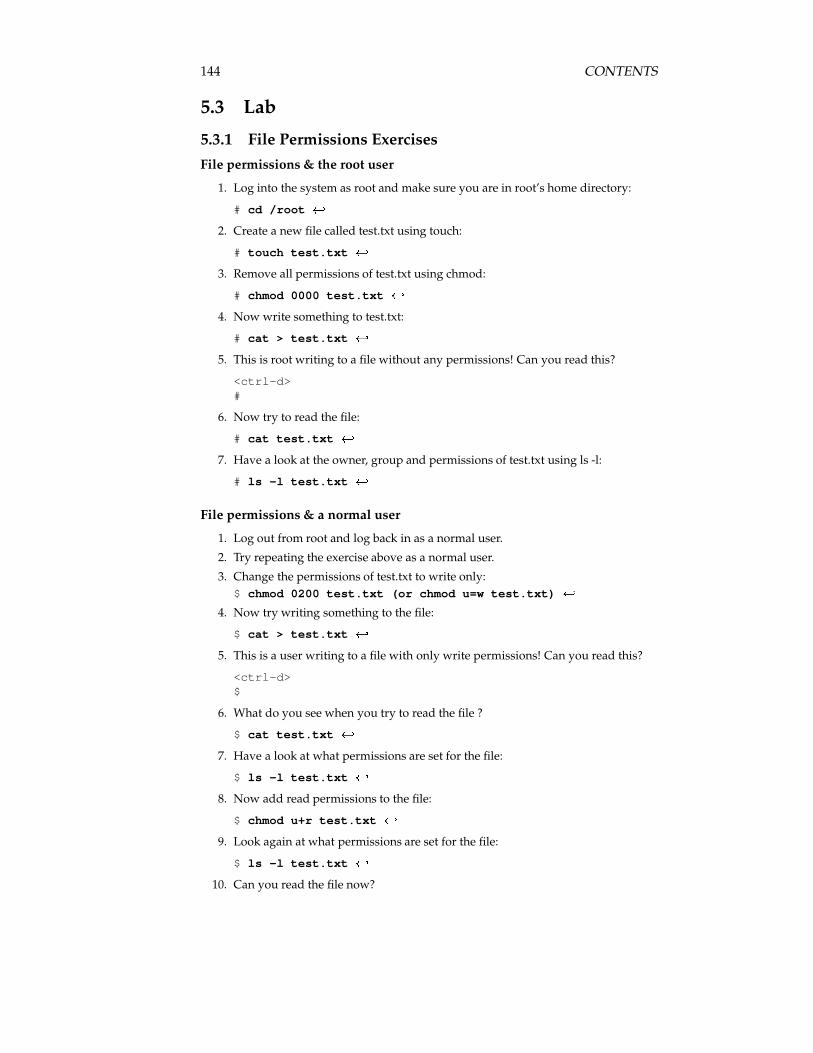
144 CONTENTS
5.3 Lab
5.3.1 File Permissions ExercisesFile permissions & the root user
1. Log into the system as root and make sure you are in root’s home directory:
# cd /root �2. Create a new file called test.txt using touch:
# touch test.txt �3. Remove all permissions of test.txt using chmod:
# chmod 0000 test.txt ��4. Now write something to test.txt:
# cat > test.txt �5. This is root writing to a file without any permissions! Can you read this?
<ctrl-d>#
6. Now try to read the file:
# cat test.txt �7. Have a look at the owner, group and permissions of test.txt using ls -l:
# ls -l test.txt �
File permissions & a normal user
1. Log out from root and log back in as a normal user.
2. Try repeating the exercise above as a normal user.
3. Change the permissions of test.txt to write only:$ chmod 0200 test.txt (or chmod u=w test.txt) �
4. Now try writing something to the file:
$ cat > test.txt �5. This is a user writing to a file with only write permissions! Can you read this?
<ctrl-d>$
6. What do you see when you try to read the file ?
$ cat test.txt �7. Have a look at what permissions are set for the file:
$ ls -l test.txt �8. Now add read permissions to the file:
$ chmod u+r test.txt ��9. Look again at what permissions are set for the file:
$ ls -l test.txt �10. Can you read the file now?
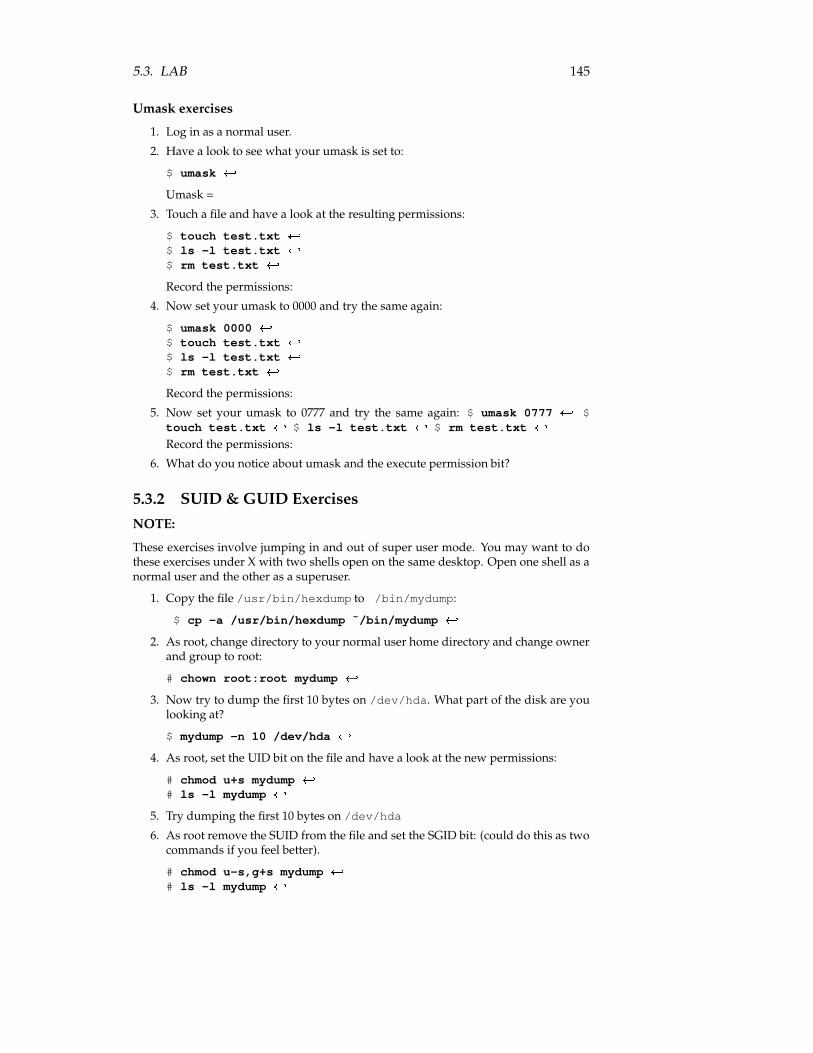
5.3. LAB 145
Umask exercises
1. Log in as a normal user.
2. Have a look to see what your umask is set to:
$ umask ��Umask =
3. Touch a file and have a look at the resulting permissions:
$ touch test.txt �$ ls -l test.txt �$ rm test.txt �Record the permissions:
4. Now set your umask to 0000 and try the same again:
$ umask 0000 �$ touch test.txt �$ ls -l test.txt �$ rm test.txt �Record the permissions:
5. Now set your umask to 0777 and try the same again: $ umask 0777 � $touch test.txt � $ ls -l test.txt � $ rm test.txt �Record the permissions:
6. What do you notice about umask and the execute permission bit?
5.3.2 SUID & GUID ExercisesNOTE:
These exercises involve jumping in and out of super user mode. You may want to dothese exercises under X with two shells open on the same desktop. Open one shell as anormal user and the other as a superuser.
1. Copy the file /usr/bin/hexdump to /bin/mydump:
$ cp -a /usr/bin/hexdump ˜/bin/mydump �2. As root, change directory to your normal user home directory and change owner
and group to root:
# chown root:root mydump �3. Now try to dump the first 10 bytes on /dev/hda. What part of the disk are you
looking at?
$ mydump -n 10 /dev/hda �4. As root, set the UID bit on the file and have a look at the new permissions:
# chmod u+s mydump �# ls -l mydump �
5. Try dumping the first 10 bytes on /dev/hda
6. As root remove the SUID from the file and set the SGID bit: (could do this as twocommands if you feel better).
# chmod u-s,g+s mydump �# ls -l mydump �
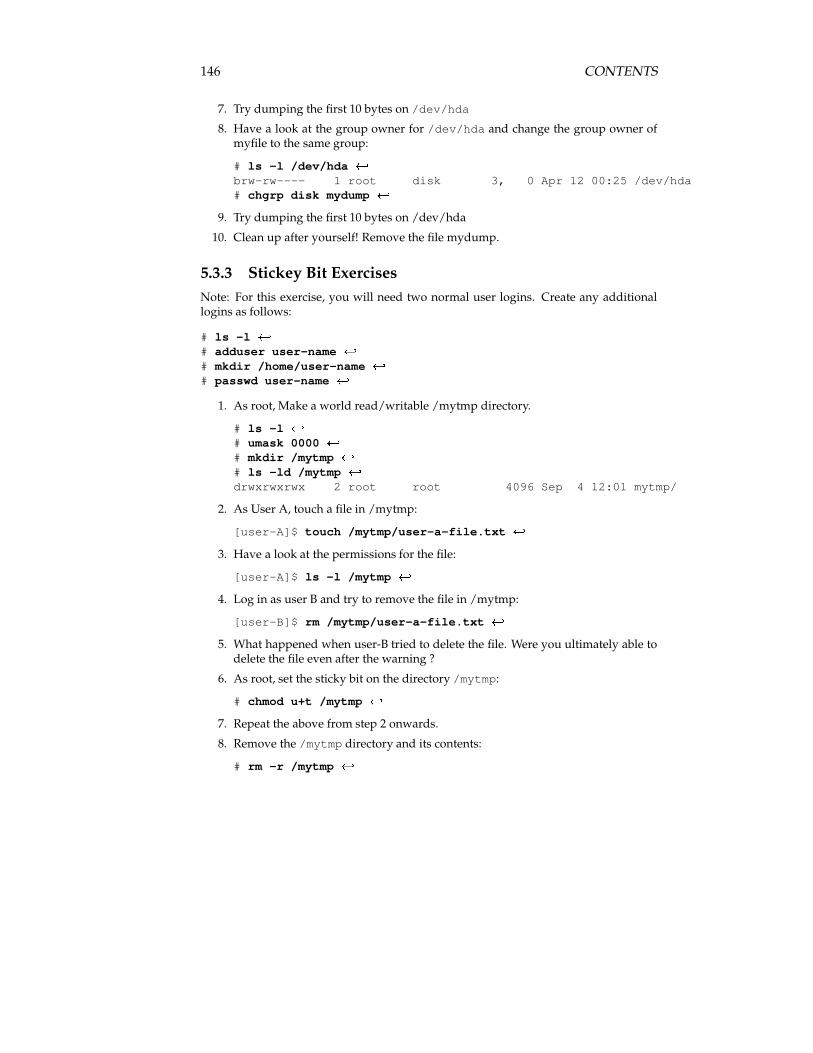
146 CONTENTS
7. Try dumping the first 10 bytes on /dev/hda
8. Have a look at the group owner for /dev/hda and change the group owner ofmyfile to the same group:
# ls -l /dev/hda �brw-rw---- 1 root disk 3, 0 Apr 12 00:25 /dev/hda# chgrp disk mydump ��
9. Try dumping the first 10 bytes on /dev/hda
10. Clean up after yourself! Remove the file mydump.
5.3.3 Stickey Bit ExercisesNote: For this exercise, you will need two normal user logins. Create any additionallogins as follows:
# ls -l �# adduser user-name �# mkdir /home/user-name �# passwd user-name �
1. As root, Make a world read/writable /mytmp directory.
# ls -l �# umask 0000 �# mkdir /mytmp �# ls -ld /mytmp �drwxrwxrwx 2 root root 4096 Sep 4 12:01 mytmp/
2. As User A, touch a file in /mytmp:
[user-A]$ touch /mytmp/user-a-file.txt ��3. Have a look at the permissions for the file:
[user-A]$ ls -l /mytmp ��4. Log in as user B and try to remove the file in /mytmp:
[user-B]$ rm /mytmp/user-a-file.txt ��5. What happened when user-B tried to delete the file. Were you ultimately able to
delete the file even after the warning ?
6. As root, set the sticky bit on the directory /mytmp:
# chmod u+t /mytmp ��7. Repeat the above from step 2 onwards.
8. Remove the /mytmp directory and its contents:
# rm -r /mytmp �

5.4. QUESTIONS 147
5.4 Questions

148 CONTENTS
Objective 104.6
Manage file ownership
6.1 Overview
6.1.1 Weight: []
6.1.2 Statement of Objective:Candidates should be able to control user and group ownership of files. This objectiveincludes the ability to change the user and group owner of a file as well as the defaultgroup owner for new files.
6.1.3 Key files, terms, and utilities:chmodchownchgrp
6.1.4 Resources:
149
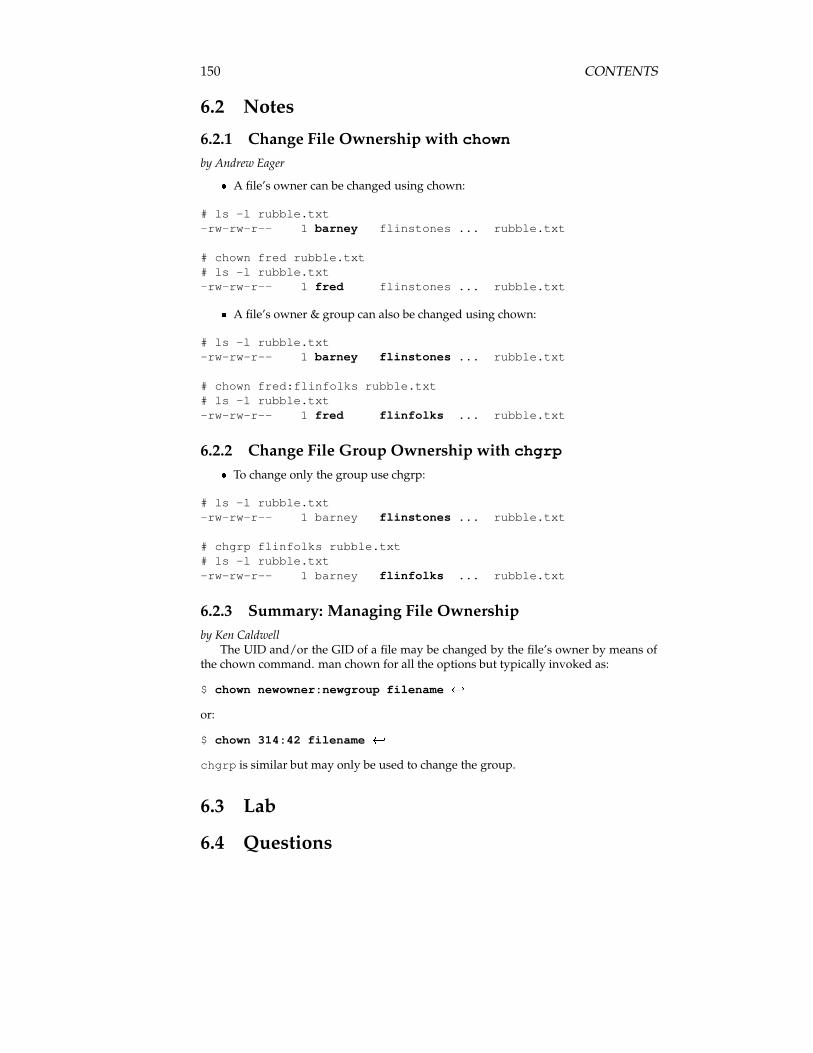
150 CONTENTS
6.2 Notes
6.2.1 Change File Ownership with chown
by Andrew Eager� A file’s owner can be changed using chown:
# ls -l rubble.txt-rw-rw-r-- 1 barney flinstones ... rubble.txt
# chown fred rubble.txt# ls -l rubble.txt-rw-rw-r-- 1 fred flinstones ... rubble.txt
� A file’s owner & group can also be changed using chown:
# ls -l rubble.txt-rw-rw-r-- 1 barney flinstones ... rubble.txt
# chown fred:flinfolks rubble.txt# ls -l rubble.txt-rw-rw-r-- 1 fred flinfolks ... rubble.txt
6.2.2 Change File Group Ownership with chgrp� To change only the group use chgrp:
# ls -l rubble.txt-rw-rw-r-- 1 barney flinstones ... rubble.txt
# chgrp flinfolks rubble.txt# ls -l rubble.txt-rw-rw-r-- 1 barney flinfolks ... rubble.txt
6.2.3 Summary: Managing File Ownershipby Ken Caldwell
The UID and/or the GID of a file may be changed by the file’s owner by means ofthe chown command. man chown for all the options but typically invoked as:
$ chown newowner:newgroup filename �or:
$ chown 314:42 filename �chgrp is similar but may only be used to change the group.
6.3 Lab
6.4 Questions
Objective 104.7
Create and change hard andsymbolic links
7.1 Overview
7.1.1 Weight: []
7.1.2 Statement of Objective:Candidates should be able to create and manage hard and symbolic links to a file. Thisobjective includes the ability to create and identify links, copy files through links, anduse linked files to support system administration tasks.
7.1.3 Key files, terms, and utilities:ln
7.1.4 Resources:
151
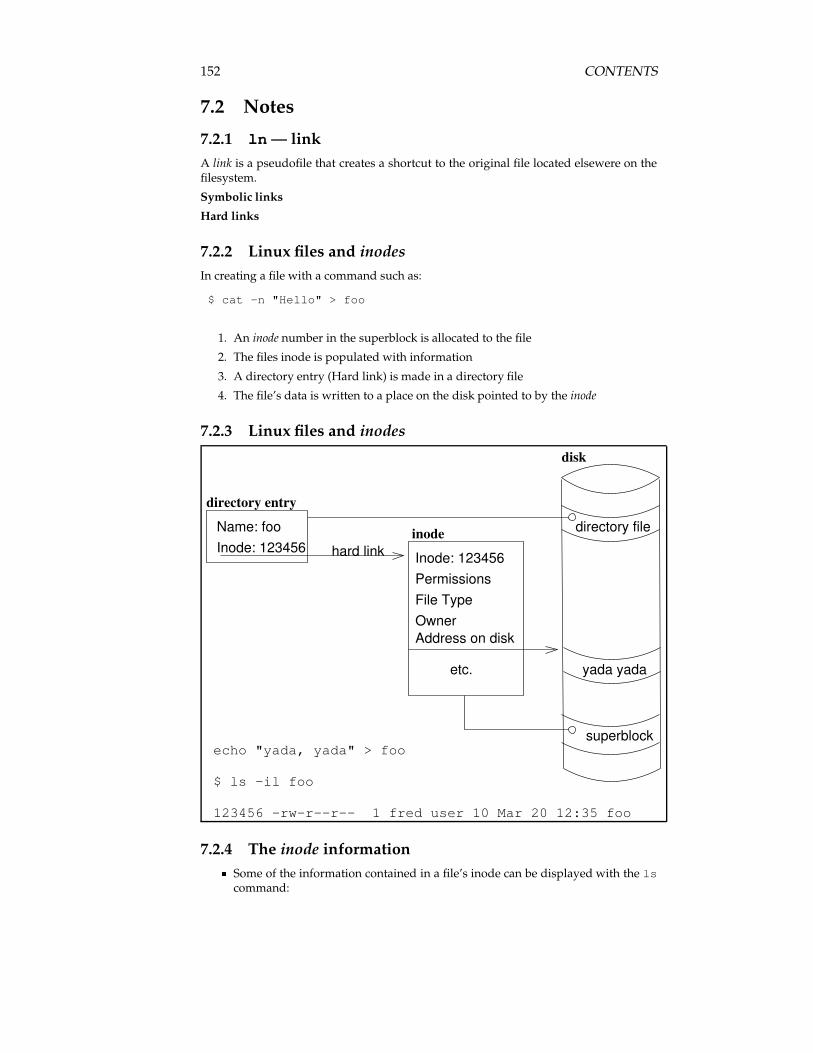
152 CONTENTS
7.2 Notes
7.2.1 ln — linkA link is a pseudofile that creates a shortcut to the original file located elsewere on thefilesystem.
Symbolic links
Hard links
7.2.2 Linux files and inodesIn creating a file with a command such as:
$ cat -n "Hello" > foo
1. An inode number in the superblock is allocated to the file
2. The files inode is populated with information
3. A directory entry (Hard link) is made in a directory file
4. The file’s data is written to a place on the disk pointed to by the inode
7.2.3 Linux files and inodes
Inode: 123456
Address on diskOwner
PermissionsFile Type
yada yada
hard linkInode: 123456Name: foo
directory entry
superblock
directory fileinode
disk
123456 −rw−r−−r−− 1 fred user 10 Mar 20 12:35 foo
$ ls −il foo
echo "yada, yada" > foo
etc.
7.2.4 The inode information� Some of the information contained in a file’s inode can be displayed with the ls
command:
7.2. NOTES 153
$ ls -il foo �2723514 -rw-r--r-- 2 geoff geoff 16 Mar 22 09:38 /tmp/foo
� A more complete view of inode information may be had with stat:
$ stat foo �File: "/tmp/foo"Size: 5 Blocks: 2 IO Block: 4096 Regular File
Device: 802h/2050d Inode: 2723514 Links: 1Access: (0644/-rw-r--r--) Uid: ( 1000/geoffrey) Gid: ( 1000/geoffrey)Access: Fri Mar 22 08:25:00 2002Modify: Fri Mar 22 09:38:19 2002Change: Fri Mar 22 09:52:26 2002
7.2.5 Hard links are directory entries� A file may have one or more hard links to it. Additional hard links are made with
the ln command:
$ ln foo bar �$ ls -il foo bar �2723514 -rw-r--r-- 2 geoff geoff 5 Mar 22 09:38 bar2723514 -rw-r--r-- 2 geoff geoff 5 Mar 22 09:38 foo
� there is only one file on the disk� it has one inode� it has two names (hard links)
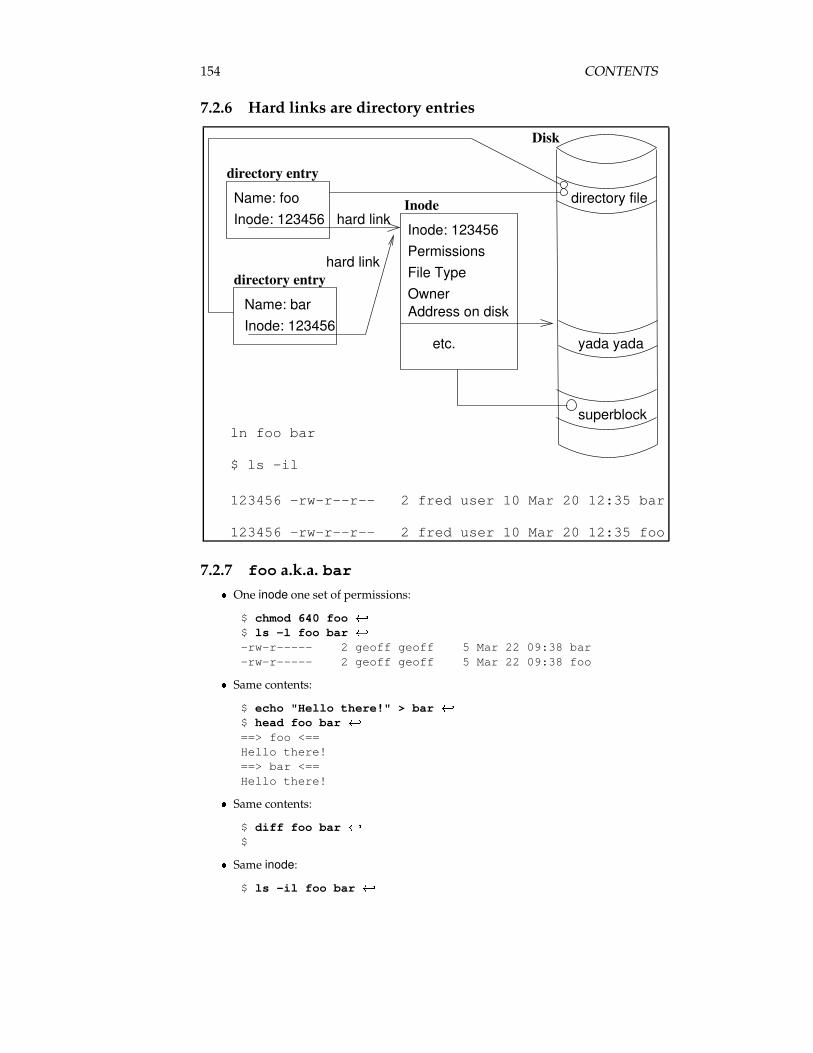
154 CONTENTS
7.2.6 Hard links are directory entries
Inode: 123456
Address on disk
Inode
Owner
PermissionsFile Type
yada yada
ln foo bar
Disk
123456 −rw−r−−r−− 2 fred user 10 Mar 20 12:35 bar
123456 −rw−r−−r−− 2 fred user 10 Mar 20 12:35 foo
$ ls −il
etc.
hard linkInode: 123456Name: foo
directory entry
directory entry
Name: barInode: 123456
hard link
superblock
directory file
7.2.7 foo a.k.a. bar� One inode one set of permissions:
$ chmod 640 foo �$ ls -l foo bar �-rw-r----- 2 geoff geoff 5 Mar 22 09:38 bar-rw-r----- 2 geoff geoff 5 Mar 22 09:38 foo
� Same contents:
$ echo "Hello there!" > bar �$ head foo bar �==> foo <==Hello there!==> bar <==Hello there!
� Same contents:
$ diff foo bar �$
� Same inode:
$ ls -il foo bar �
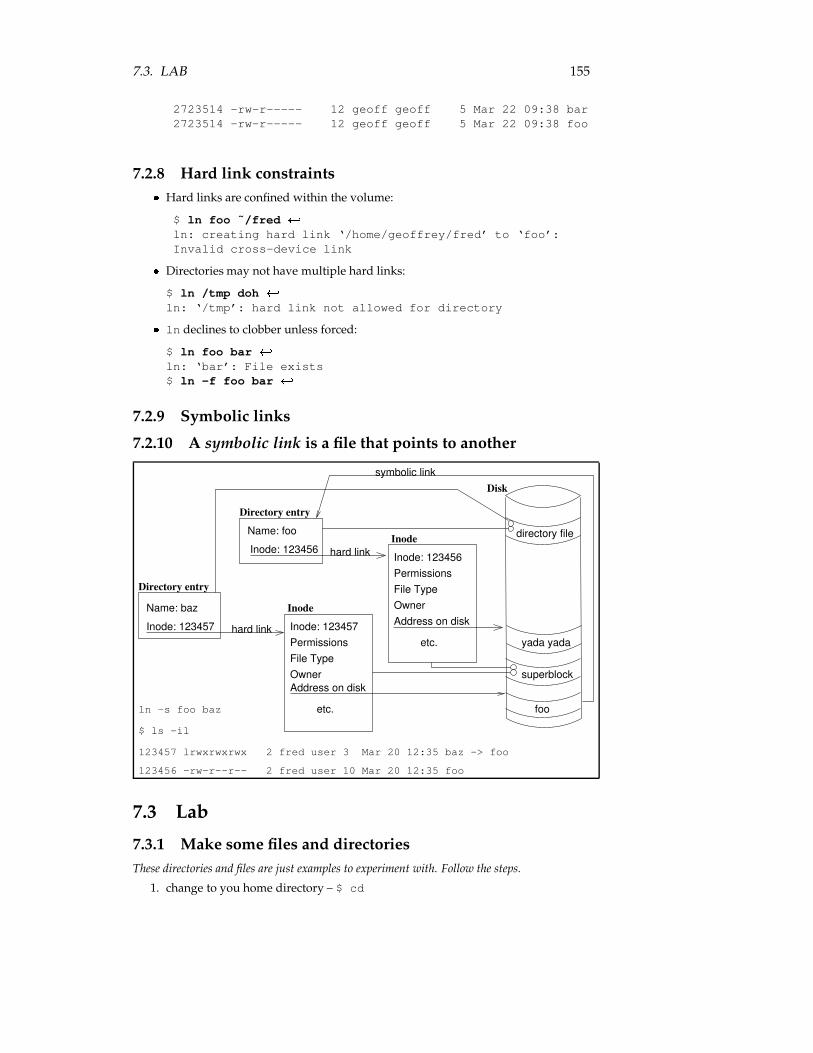
7.3. LAB 155
2723514 -rw-r----- 12 geoff geoff 5 Mar 22 09:38 bar2723514 -rw-r----- 12 geoff geoff 5 Mar 22 09:38 foo
7.2.8 Hard link constraints� Hard links are confined within the volume:
$ ln foo ˜/fred �ln: creating hard link ‘/home/geoffrey/fred’ to ‘foo’:Invalid cross-device link
� Directories may not have multiple hard links:
$ ln /tmp doh �ln: ‘/tmp’: hard link not allowed for directory
� ln declines to clobber unless forced:
$ ln foo bar �ln: ‘bar’: File exists$ ln -f foo bar �
7.2.9 Symbolic links
7.2.10 A symbolic link is a file that points to another
yada yada
Disk
foo
Address on disk
Inode
Owner
PermissionsFile Type
Inode: 123457
Name: foo
Directory entry
hard link
hard link
Name: baz
Directory entry
symbolic link
Inode: 123456
123457 lrwxrwxrwx 2 fred user 3 Mar 20 12:35 baz −> foo
123456 −rw−r−−r−− 2 fred user 10 Mar 20 12:35 foo
$ ls −il
ln −s foo baz
Inode: 123456
Inode
Owner
PermissionsFile Type
Address on disk
etc.
etc.Inode: 123457
superblock
directory file
7.3 Lab
7.3.1 Make some files and directoriesThese directories and files are just examples to experiment with. Follow the steps.
1. change to you home directory – $ cd
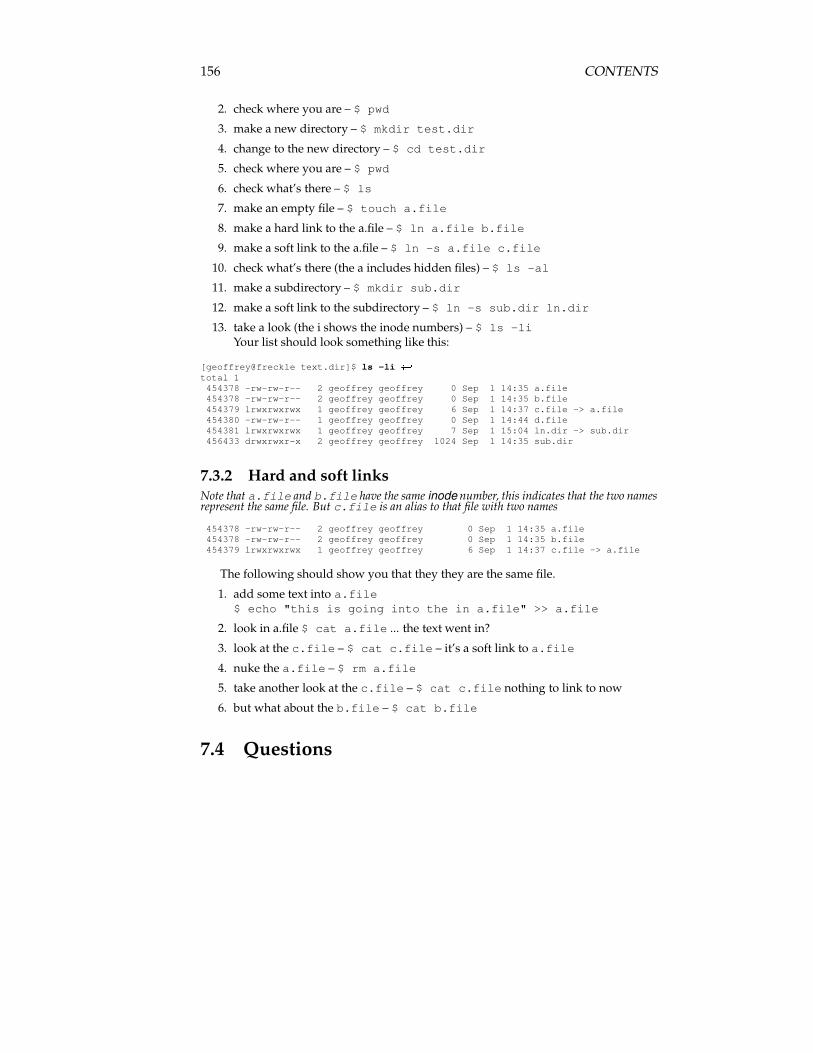
156 CONTENTS
2. check where you are – $ pwd
3. make a new directory – $ mkdir test.dir
4. change to the new directory – $ cd test.dir
5. check where you are – $ pwd
6. check what’s there – $ ls
7. make an empty file – $ touch a.file
8. make a hard link to the a.file – $ ln a.file b.file
9. make a soft link to the a.file – $ ln -s a.file c.file
10. check what’s there (the a includes hidden files) – $ ls -al
11. make a subdirectory – $ mkdir sub.dir
12. make a soft link to the subdirectory – $ ln -s sub.dir ln.dir
13. take a look (the i shows the inode numbers) – $ ls -liYour list should look something like this:
[geoffrey@freckle text.dir]$ ls -li ���total 1454378 -rw-rw-r-- 2 geoffrey geoffrey 0 Sep 1 14:35 a.file454378 -rw-rw-r-- 2 geoffrey geoffrey 0 Sep 1 14:35 b.file454379 lrwxrwxrwx 1 geoffrey geoffrey 6 Sep 1 14:37 c.file -> a.file454380 -rw-rw-r-- 1 geoffrey geoffrey 0 Sep 1 14:44 d.file454381 lrwxrwxrwx 1 geoffrey geoffrey 7 Sep 1 15:04 ln.dir -> sub.dir456433 drwxrwxr-x 2 geoffrey geoffrey 1024 Sep 1 14:35 sub.dir
7.3.2 Hard and soft linksNote that a.file and b.file have the same inode number, this indicates that the two namesrepresent the same file. But c.file is an alias to that file with two names
454378 -rw-rw-r-- 2 geoffrey geoffrey 0 Sep 1 14:35 a.file454378 -rw-rw-r-- 2 geoffrey geoffrey 0 Sep 1 14:35 b.file454379 lrwxrwxrwx 1 geoffrey geoffrey 6 Sep 1 14:37 c.file -> a.file
The following should show you that they they are the same file.
1. add some text into a.file$ echo "this is going into the in a.file" >> a.file
2. look in a.file $ cat a.file ... the text went in?
3. look at the c.file – $ cat c.file – it’s a soft link to a.file
4. nuke the a.file – $ rm a.file
5. take another look at the c.file – $ cat c.file nothing to link to now
6. but what about the b.file – $ cat b.file
7.4 Questions
Objective 104.8
Find system files and placefiles in the correct location
8.1 Overview
8.1.1 Weight: []
8.1.2 Statement of Objective:Candidates should be thouroughly familiar with the Filesystem Hierarchy Standard,including typical file locations and directory classifications. This objective includes theability to find files and commands on a Linux system.
8.1.3 Key files, terms, and utilities:findlocateslocateupdatedbwhereiswhich/etc/updatedb.conf
8.1.4 Resources:
157
158 CONTENTS
8.2 Notes
8.2.1 Ken Foskey’s Summary: Using find:vi tw=72
...heading ... The find command.The find command is one of the fundamental tools of Unix. It is a tool that is con-
stantly rediscovered as you perform more and more complex operations with it. Theman page of this simple tool is 555 lines long.
The most basic use of find is:find ¡directory¿ -name ” � mask � ”To find a missing file somewhere in you home directoryfind -name missing.filewhere is shorthand for your home directory. You can also use masks like ”*.txt.gz”
but you must put it in quotes.Why do you have to put it in quotes?...pause for discussion from floor...When you use an * in a bash command line it is interpreted as a file expansion
and it is looked for in the current directory and if it does exist it is substituted beforethe command is sent to find. If it is not found then your shell may generate an errormessage (for example csh, I think).
... page ...According to the man page ’find - search for files in a directory hierachy’ This is true
but you can also find directories as well, like the filesystems .First we will start with some basic options:Doing options: -print list the filename (default, never really use it). -exec run a
command -ok run a command after prompting for confirmation. -ls list file like ‘ls -dils‘, is a lot of file information.
Advanced doing options, I am sure you will use these one day:-prune don’t descend past this directory. -printf Print a filename based on format
like C printf. -print0 print but end with a null character. -fprintf ¡fn¿ print a formatstring to a filename, (scripting??) -fprint ¡fn¿ print filenames to a file. -fls ¡fn¿ ls to a file
Options on what entries we select:Most of these options take a number, +number, -number. A little explanation is
required first.picking one option, -atime:-atime 2 Will pick any file accessed two days ago. -atime -2 Will pick any file access
more than two days ago -atime +2 Will pick any file accessed in the last day.** file date and timeSome basic stuff based on the file details itself.-atime n files on access date -ctime n files on creation date (note chmod mucks this
up) -mtime n files on modification date-anewer n files on access date based on another file. -cnewer n files on creation date
based on another file. -newer n files on modification date based on another file.example: delete all files older than 7 days in the /data directory who have a .A
extension.Write the solution here.A script may run a command and then ’touch’ a tag file to give a timestamp when
it was run. assume that the last thing a script does is touch modification.tag in the/parms directory. Write a command line that lists all details of files modified in the/apps/source/ directory based on this tag file.
.... pause to get suggestions from floor... .... lecturers note solution is find /data-mnewer /parms/modification.tag -ls....
Write solution here.
8.2. NOTES 159
There is also a amin, cmin and mmin version of the above.** Owner and group.One problem with the Unix authenticification system, when you delete a userid you
end up with magic numbers on a directory listing. It is handy to be able to change theownership on all files from the exiting staff member to the new person working on thoseprojects.
-nouser users numeric id does not have and entry in /etc/passwd -nogroup groupnumeric id does not have an entry in /etc/group -uid n User by number -user nameUser by name -gid n Group by number -group name Group by name
I recently converted from Redhat to Debian. I installed a new harddisk and mountedthe old one as /mnt/old1. I notice that when I do ls -al I get a username of 500 in thedirectory listing. Change all the occurences of 500 to the username of ken.
.... lecturers note solution is AS ROOT
find /mnt/old1 -uid 500 -exec chown ken {} \;....
Write solution here** Inode number and linksYou have a directory listing, the hard link count is greater than 1. ... lecturers note
wait and ask class how we know this ....You have no idea where the other hard link is and you want to locate the other
version to see what impact a change may have.-inode n... lecturers note, I have no idea how to do this ....Write solution here——————————————————-Advanced options on what entries we select:-iregex Use regex rather than standard file masks.Options on how we go through the directories: -xdev don’t go into other file sys-
tems.
160 CONTENTS
8.2.2 Andrew Eager’s Summary: Using locate, updatedb andslocate
SLOCATE - Secure LocateLOCATE - Normal Locate (Normally symlinked to slocate)Slocate is used to find files on the system without actually having to search the entire
directory tree. A database of all files on the system is created and is then used by slocateto reveal the files actual location. It is important to note that slocate may return a resultwhich is no longer valid since the directory structure may have been modified since theslocate database was last created. For example, you create a file called poobar.txt, createthe slocate database and then remove poobar.txt. Slocate will still return poobar.txt?soriginal location until the slocate database is recreated.
Slocate can be used in two modes:� Search mode:- To locate an actual file within the database� Database creation mode:- To build the database
Search usage:
slocate [-qi] [-d <path>] [-r <regexp>] <search string>...
-q Quiet mode. Suppress error messages.
-i Does a case insensitive search.
-d Specify a database to use.
-r Pass a regular expression instead of a search string.
Examples:
locate ls $ locate ls �.../etc/X11/xkb/symbols/xfree68/ataritt
/etc/X11/xkb/symbols/xfree68/amiga/etc/alternatives/tclsh...
locate -r "/ls$" $ locate -r "/ls$" ��/home/geoffrey/tafe/mos/compress/ls/usr/lib/bitchx/help/8_Scripts/ls/bin/ls
The above example illustrates the need for a regex option to locate. In the first exam-ple there will be lots of hits. In the second there is only one (the actual ls command).
As well as searching for a file in the database, locate can also build the searchdatabase.
Database Creation Usage:
As well as searching for a file in the database, slocate can also build the search database.
-u Create slocate database starting at path /.
-U � dir � Create slocate database starting at path ��������� .
-c Parse original GNU Locate’s /etc/updatedb.conf
-e � dir1... � Exclude directories from the slocate database when using the -u or -U options.
-f � fs... � Exclude file system types from the slocate database
8.2. NOTES 161
-l Security level. 0– � security off, 1– � security on
-q Quiet mode. Error messages are suppressed.
-o � file � Specify the name of the database file to create
-v Be verbose
Examples� Create a database for all directories under /usr and place the resulting database
file into slocate.db in andy’s home directory.
# slocate -U /usr -o /home/andy/slocate.db �� Create a database for all directories under /usr, excluding directories under /usr/man
and place the resulting database file into slocate.db in andy?s home directory.
# slocate -U /usr -e /usr/man -o /home/andy/slocate.db �
Update slocate database—update
udatedb is simply a link to slocate that implies the -u option. (Excerpt from the manpage:- man updatedb)
$ ls -l ‘which updatedb‘ �lrwxrwxrwx 1 root root 7 Mar 27 10:44 /usr/bin/updatedb -> slocate*
updatedb is typically executed periodically via cron.
/etc/updatedb.conf
� The udatedb (or slocate) tool can use a configuration file to decidewhich directories and file systems are included when the database is cre-ated. This file is normally located in /etc/updatedb.conf
� The following is a list of keywords that are recognised by updatedb (slo-cate) and their equivalent command line options
PRUNEFS � fs type1 fs type2... � - Option -f
PRUNEPATHS � dir1 dir2 dir3... � - Opion -e
� Example updatedb.conf
PRUNEFS="devpts NFS nfs afs proc smbfs autofs auto iso9660"PRUNEPATHS="/tmp /usr/tmp /var/tmp /afs /net?export PRUNEFSexport PRUNEPATHS
slocate Exercises
1. Create an slocate database in your home directory including all direc-tories from / down.
2. Using the database created in step 1, locate all files with rm in the file-name
162 CONTENTS
3. Using the database created in step 1, locate the executable file rm using aregex. (ie /some/path/rm)
4. Create an slocate database in your home directory include all directoriesfrom / down but excluding the /bin directory.
5. Repeat (2) and (3) above. Do you notice anything different ?
6. After backing up your existing /etc/updatedb.conf, say
# cp /etc/updatedb.conf /etc/updatedb.conf.orig ���
edit /etc/updatedb.conf to perform the same actions as in step (4).
7. When you have finished this exercise restore your original /etc/updatedb.conf.
8.3 Lab
8.4 Questions

Topic 110
X
163

Objective 110.1
Install & Configure XFree86
1.1 Overview
1.1.1 Weight: []
1.1.2 Statement of Objective:
Candidate should be able to configure and install X and an X font server. Thisobjective includes verifying that the video card and monitor are supported byan X server, as well as customizing and tuning X for the videocard and monitor.It also includes installing an X font server, installing fonts, and configuring Xto use the font server (may require a manual edit of /etc/X11/XF86Config inthe ”Files” section)
1.1.3 Key files, terms, and utilities:
XF86Setupxf86configxvidtune/etc/X11/XF86Config.Xresources
1.1.4 Resources:
165

166 CONTENTS
1.2 Notes
1.3 Lab
1.4 Questions

Objective 110.2
Setup a display manager
2.1 Overview
2.1.1 Weight: []
2.1.2 Statement of Objective:
Candidate should be able setup and customize a Display manager. This objec-tive includes turning the display manager on or off and changing the displaymanager greeting. This objective includes changing default bitplanes for thedisplay manager. It also includes configuring display managers for use by X-stations. This objective covers the display managers XDM (X Display Manger),GDM (Gnome Display Manager) and KDM (KDE Display Manager).
2.1.3 Key files, terms, and utilities:
/etc/inittab/etc/X11/xdm/*/etc/X11/kdm/*/etc/X11/gdm/*
2.1.4 Resources:
167

168 CONTENTS
2.2 Notes
2.3 Lab
2.4 Questions
Objective 110.4
Install & Customize aWindow ManagerEnvironment
4.1 Overview
4.1.1 Weight: []
4.1.2 Statement of Objective:
Candidate should be able to customize a system-wide desktop environmentand/or window manager, to demonstrate an understanding of customizationprocedures for window manager menus and/or desktop panel menus. this ob-jective includes selecting and configuring the desired x-terminal (xterm, rxvt,aterm etc.), verifing and resolving library dependency issues for X applications,exporting X-display to a client workstation.
4.1.3 Key files, terms, and utilities:
.XdefaultsxhostDISPLAY environment variable
4.1.4 Resources:
169

170 CONTENTS
4.2 Notes
4.3 Lab
4.4 Questions
Appendix A
Debian Install
171

172 APPENDIX A. DEBIAN INSTALL
Appendix B
openMosix
B.1 Open Mosix
Open Mosix is a collection of software designed for clustering a set of ma-chines. It comprises two parts:
� The kernel� User land utilities
B.2 Obtaining packages
The following packages can be obtained from www.openmosix.org
1. openmosix-kernel-2.4.18-openmosix4.i386.rpm
2. openmosix-tools-0.2.4-1.i386.rpm
The optional gui viewer for openmosix can be obtained from:www.openmosixview.com/download.html
1. openMosixview-1.2-rh73.rpm
B.3 Installing openmosix
For each of the machines in your cluster do the following:
� Install kernel: # rpm -ivh openmosix-kernel-2.4.18-openmosix4.i386.rpm
If you are using grub, the installer should update the grub configurationfiles automatically. If using lilo, you will need to add to /etc/lilo.confa stanza that looks something like:
image=/boot/vmlinuz-2.4.18-openmosix4label=linux-mosixread-onlyroot=/dev/hda7
173
174 APPENDIX B. OPENMOSIX
Then run # lilo -v
� Install the tools: # rpm -Uvh openmosix-tools-0.2.4-1.i386.rpm
� Edit Configuration file:
Edit the file /etc/mosix.map to include the nodes in your cluster. Forexample:
# MOSIX-# IP number-of-nodes# =======================================1 192.168.222.1 16
This says we have 16 nodes labelled 1 to 16 with IP addresses rangingfrom 192.168.222.1 to 192.168.222.16
� Install the GUI (optional)
# rpm -Uvh openMosixview-1.2-rh73.rpm
� Reboot the machine
When the machine has rebooted, make sure you are running the open-mosix kernel:
$ uname -aLinux Node4 2.4.18-openmosix4 #1 ...
� Run mosmon from the command line and you should see a display of allnodes up in the cluster.
B.4 Testing Openmosix
How you test openmosix will depend upon what configuration of machinesyou have in your cluster. The two possibilities are:
� Machines are all of similar ’grunt’� Machines have different ’grunt’
If your machines are all of similar CPU speed, the only way to see the per-formance gain is to test the difference between running two concurrent taskson your ’home’ node vs running them normally.
� Create a simple program that exercises the CPU. The simplest way to testopenmosix is to run a simple C program called timewaster.c:
#include <stdio.h>#include <time.h>#include <sys/types.h>
int main(int argc, char **argv){
int i, j;
B.5. SUMMARY OF MOSIX USERLAND UTILITIES 175
double val;time_t ts, elapse = 0, prev_elapse;
ts = time((time_t *)NULL);for (i = 0; i < 101; i++) {for (j = 0; j < 9999999; j++)
val = (double)(j+1) / (double)(i+1);if (!(i%10)) {
prev_elapse = elapse;elapse = time((time_t *)NULL) - ts;printf("i=%d, val=%lg, %d s elapsed, %d s since last print\n"
, i, val, elapse, elapse-prev_elapse);}
}return 0;
}
� Make the above program: (You don’t need a makefile)
make timewaster.c
� Open up two consoles and run an instance of timewaster on each console:
$ ./timewaster
� Now try the same test by forcing each instance to run on your home node:
$ runhome ./timewaster
B.5 Summary of Mosix Userland Utilities
The following tools are part of the openmosix-tools package:
mosctl - OpenMosix system administrator’s toolsmon [mosmon] - MOSIX load monitormigrate - request migration of a particular process on MOSIXmps - report multicomputer process statusmosrun - run a command with particular node-allocation preferencessetpe - OpenMosix node configurationshowmap - Display current node configuration
Mosrun contains a subsuite of tools to perform various job allocation func-tions
mosrun [cpujob] - Tell mosix this is a CPU intensive appmosrun [iojob] - Tell mosix this is an I/O intensive appmosrun [nomig] - Run job with node lockmosrun [runhome] - Run job on home CPUmosrun [runon] - Run job on particular nodemosrun [slowdecay] - Apply slow decay to stat algorithmsmosrun [fastdecay] - Apply fast decay to stat algorithmsmosrun [nodecay] - Apply no decay to stat algorithms
176 APPENDIX B. OPENMOSIX
B.6 Setting up the Mosix File System
OpenMosix contains its own network wide file system called mfs. With mfsyou have access to the root filesystem of each node in your cluster.
To enable mfs, do the following
� Make a the directory /mfs
#mkdir /mfs
� Edit /etc/fstab to include the following line:
mfs mnt /mfs mfs dfsa=1 0 0
� Mount the mfs filesystem
#mount /mfs
Now you can move around the root filesystem of any node in your clusterby changing directory to /mfs/N where N is the node number.
B.7 Lab
B.8 Questions


![Š òsò ¸Ñ Ã0GE$s Z:z Š gZ ZgzZz Š gZ gZÔz Š gZ€¦ · 5 ¸(q HZÆw**™ zzÅyDg~¡LZ ðW~Š z]©!Š ZgzZ ]©uh+zñ ázŠÅ kZлgZÆ]© Ôc,KÔ~»Zg'ÕÿÅ]™Z6,~ÇVzÆVâ!*iðc*gW](https://img.pdfslide.us/doc/110x75/5ecc0161a125911d213f3b97/-s-f0ges-zz-gz-zgzzz-gz-gzz-gz-5-q-hzwa-zzydglz.jpg)