Embed Size (px)
Citation preview

Rust proofing a Citroen D series
“The easy way” By Philip Caron.
Introduction. Restoring a very rusty D is not fun. I was having nightmares about rust. I was seeing rust everywhere! It became an obsession… After reading an excellent document on this subject by Denis Foley, edited by Mark L. Bardenwerper, ‘Oiling A Citroen “D” Model’, I decided to spray tons of oil all over my D’s. The problem is that I am kind of lazy and this process is usually very involved and time consuming, requiring quite a lot of parts removing. So, the following is intended to protect a DS or an ID against corrosion without removing a lot of parts. Knowing myself, I would fine all kinds of excuses to avoid spending a weekend oiling a D. This method might not be the best one, but you can oil a D within two hours or so. Your initial investment is to drill the necessary oiling holes. The second time you will oil your D, it will be a quick process. Prep your car. Put the car to the highest position, place stands under the car (see page 3), remove the rear fenders, remove rear carpet and push the fronts seats all the way to the dashboard. Open hood and remove spear wheel. Tools: See page 4. The mix: In the document ‘Oiling A Citroen “D” Model’, the mix of chemicals is 50% Kerosene, 25% chain saw oil and 25% straight 30 W non detergent, which is well suited for good penetration and atomization. Since I spray at a high pressure, I sometime use an even 33% for each chemical. Spraying procedure: Spray with a straight wand, starting on the driver side, from the front of the car and going towards the back. Come back to the front, on the passenger side, and do the same. Repeat this procedure with a 90o angle spray wand. Turn wand 360 o while spraying. Oiling points: Follow the oiling point order indicated page 8.
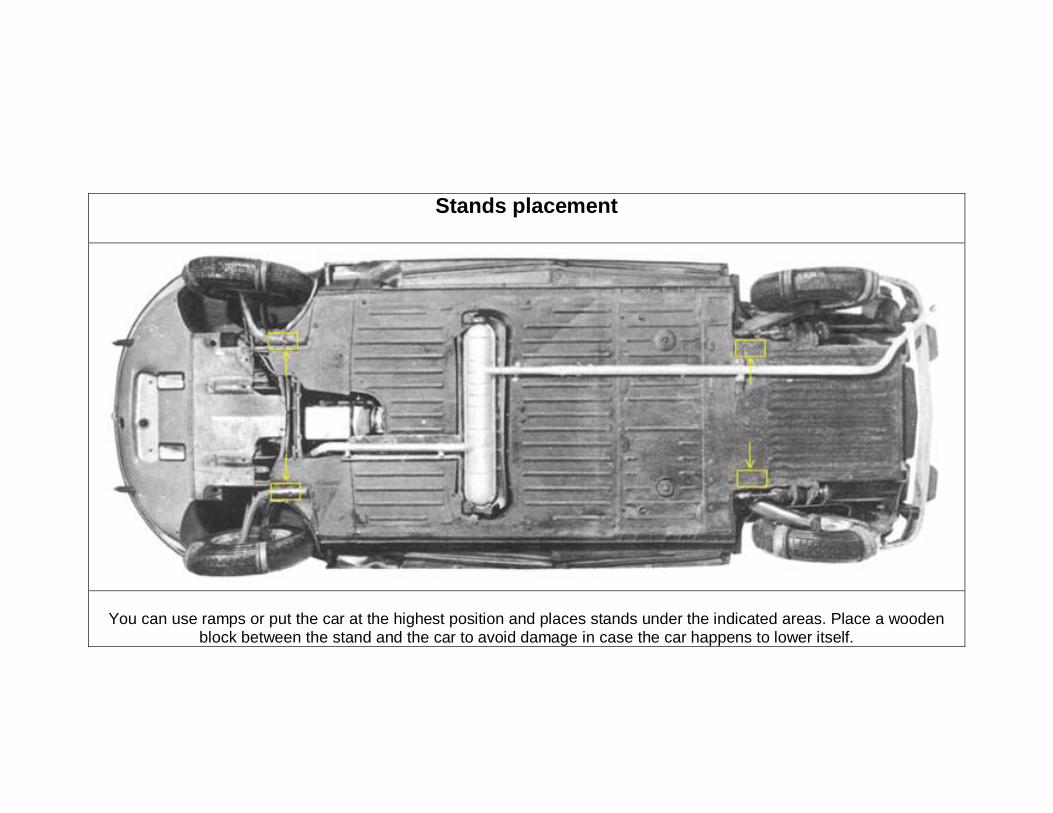
Stands placement
You can use ramps or put the car at the highest position and places stands under the indicated areas. Place a wooden block between the stand and the car to avoid damage in case the car happens to lower itself.
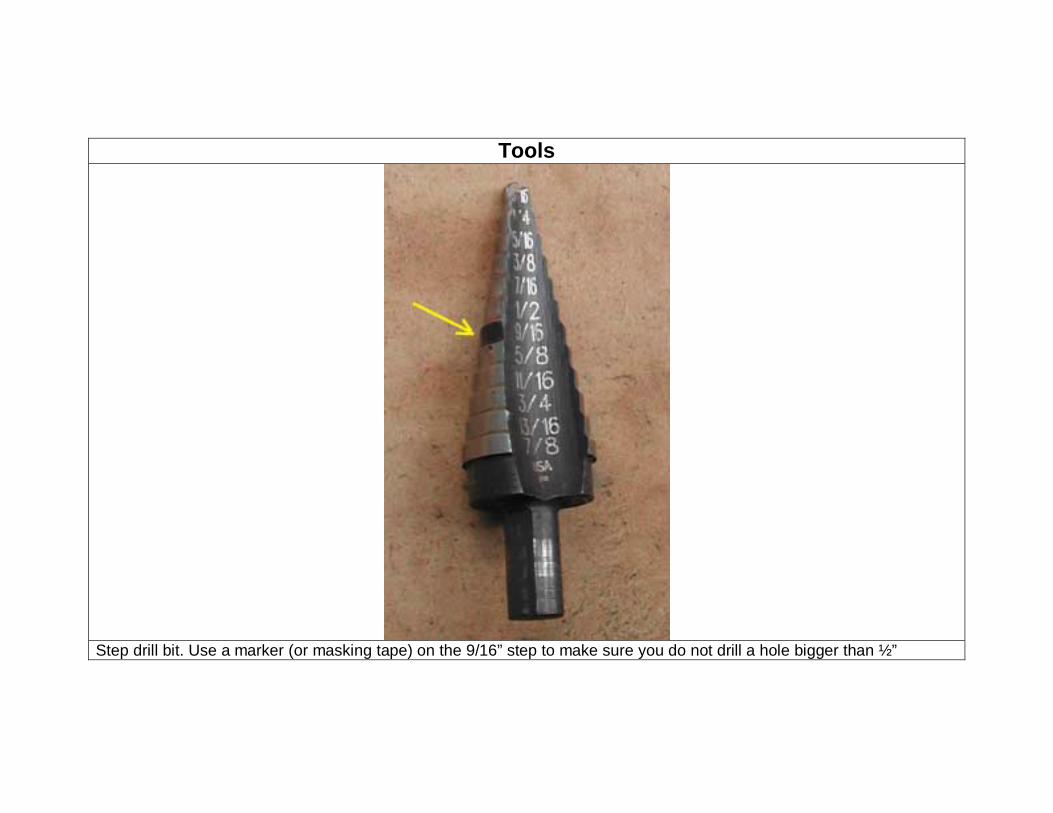
Tools
Step drill bit. Use a marker (or masking tape) on the 9/16” step to make sure you do not drill a hole bigger than ½”
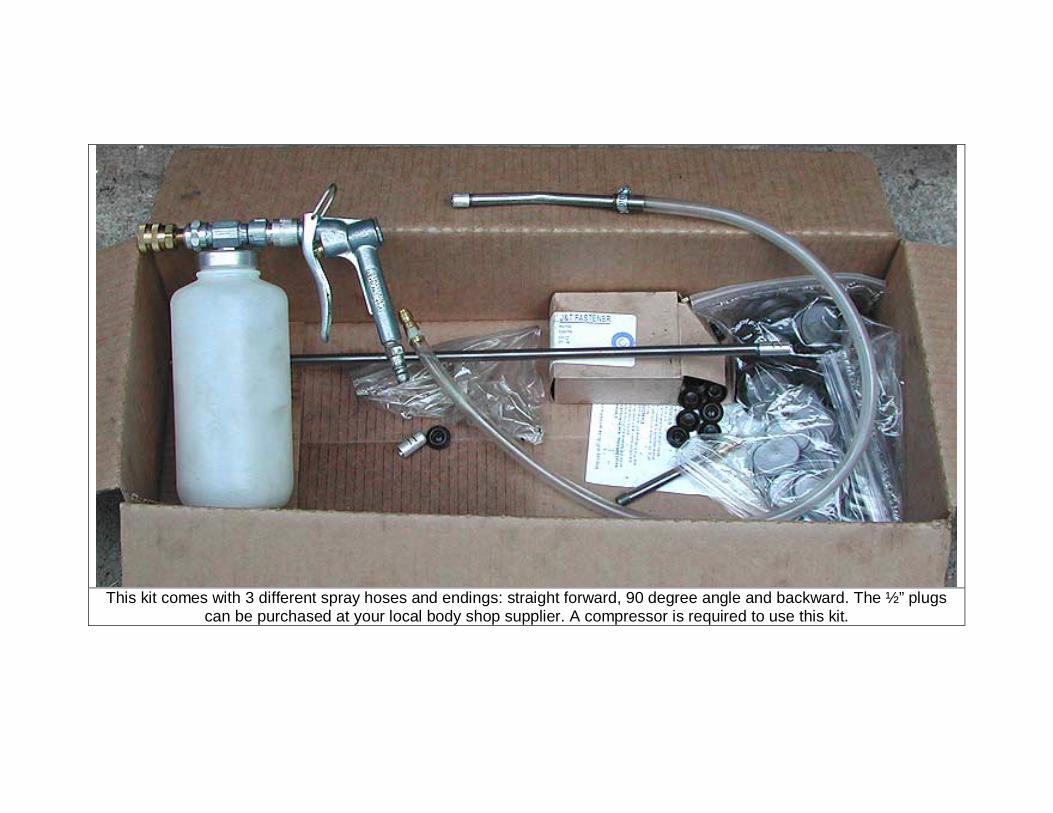
This kit comes with 3 different spray hoses and endings: straight forward, 90 degree angle and backward. The ½” plugs
can be purchased at your local body shop supplier. A compressor is required to use this kit.
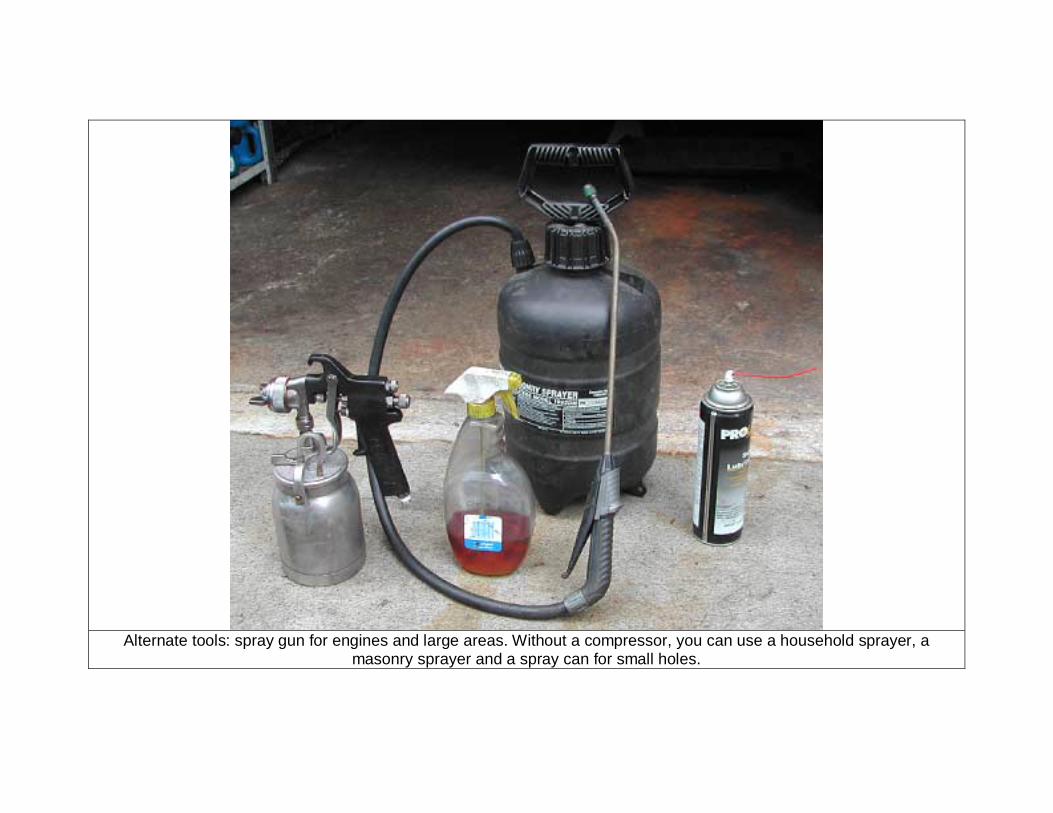
Alternate tools: spray gun for engines and large areas. Without a compressor, you can use a household sprayer, a
masonry sprayer and a spray can for small holes.

Sprayer after modification. Remove end (due to size), flatten hole and re-drill with 1/16” or smaller. This can shoot over
18’. By turning the tank upside down, this will mix air with the oil, which will make a fine mist.
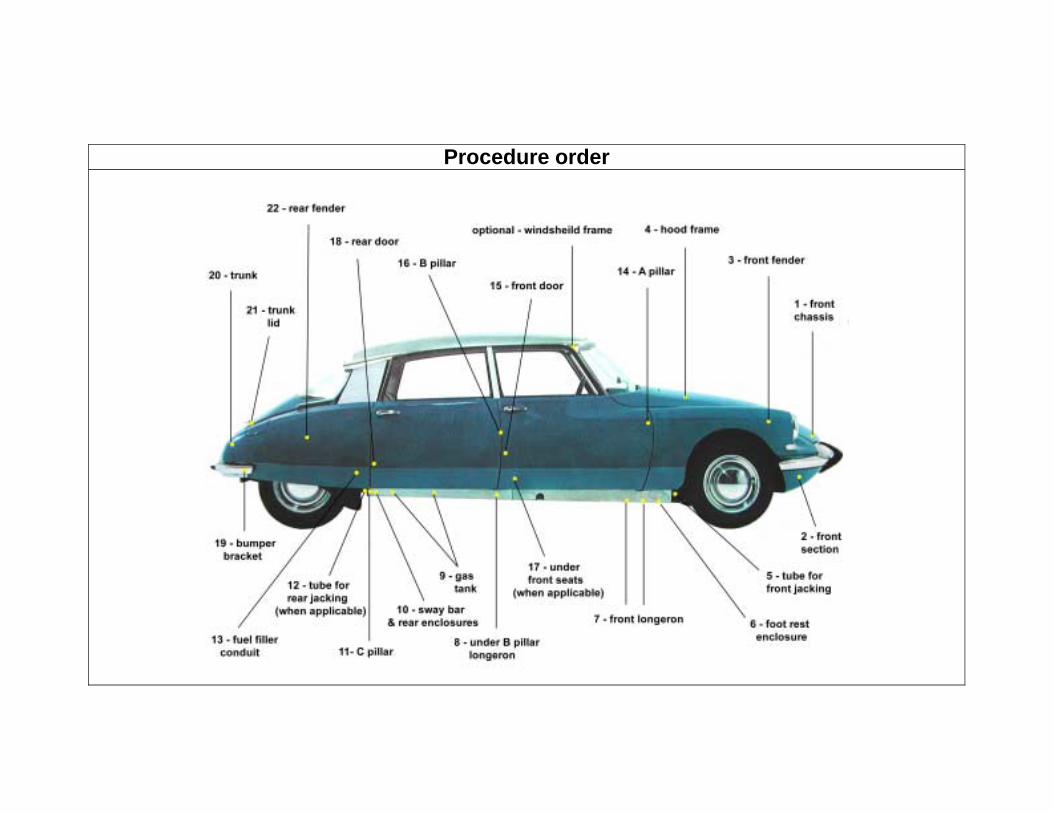
Procedure order
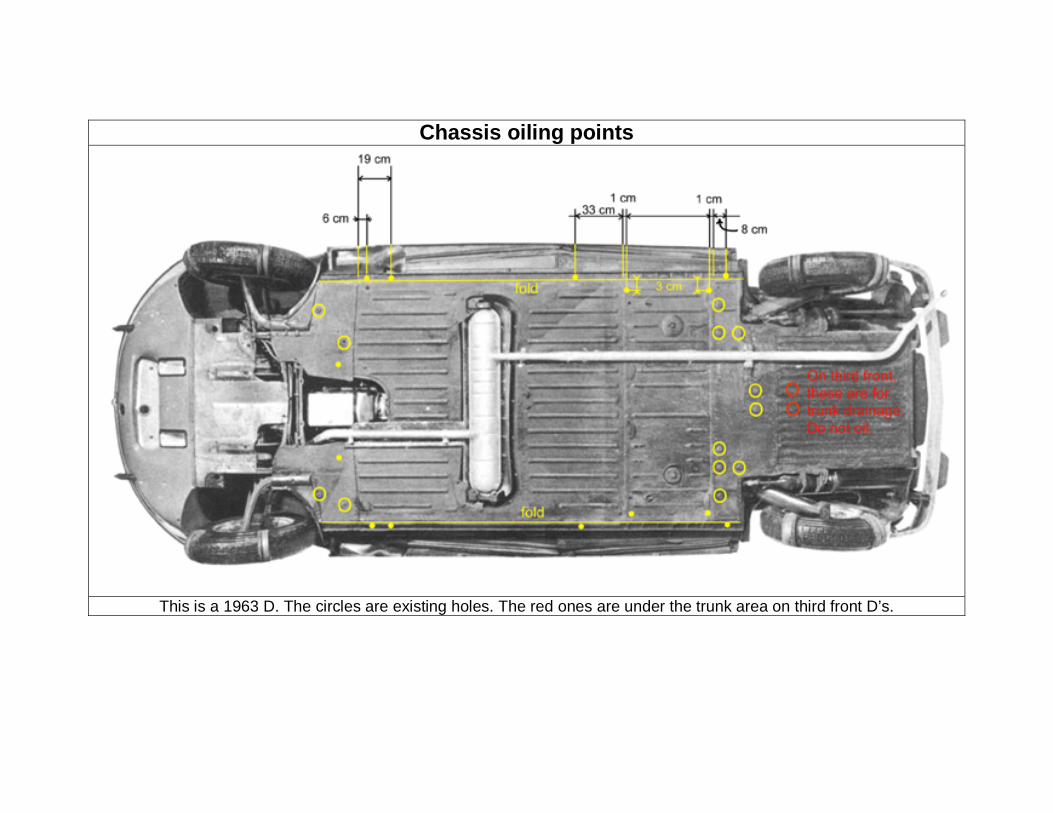
Chassis oiling points
This is a 1963 D. The circles are existing holes. The red ones are under the trunk area on third front D’s.
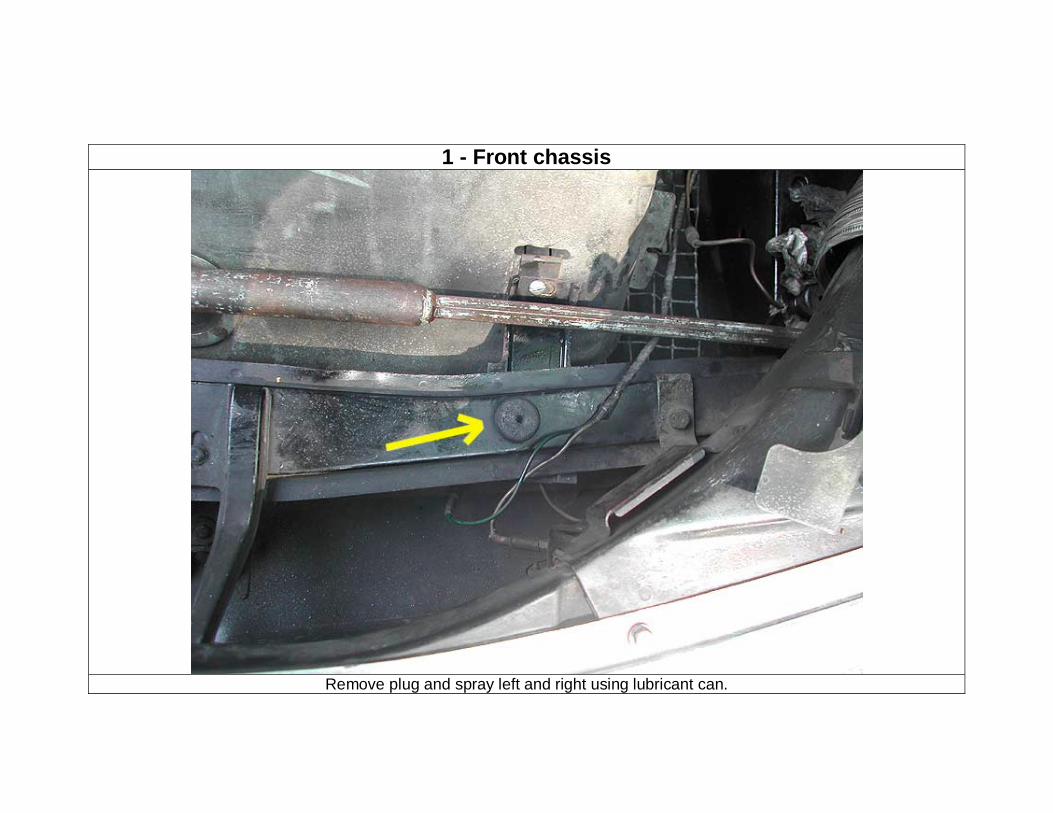
1 - Front chassis
Remove plug and spray left and right using lubricant can.
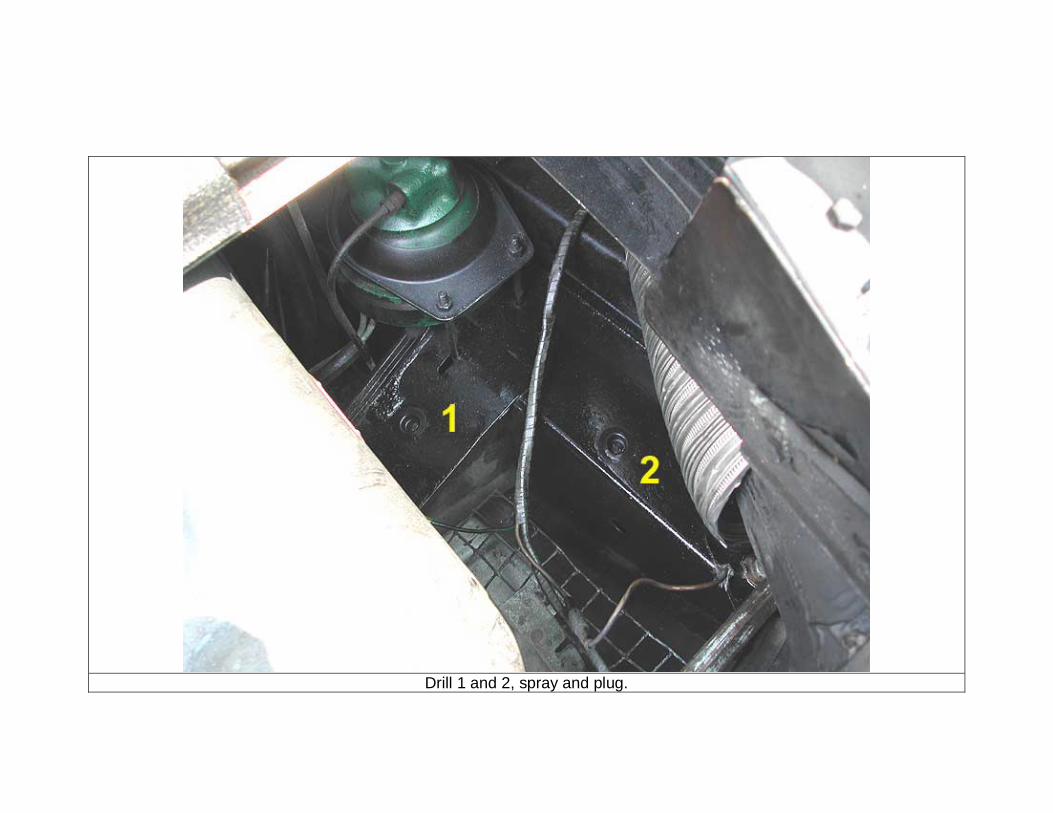
Drill 1 and 2, spray and plug.
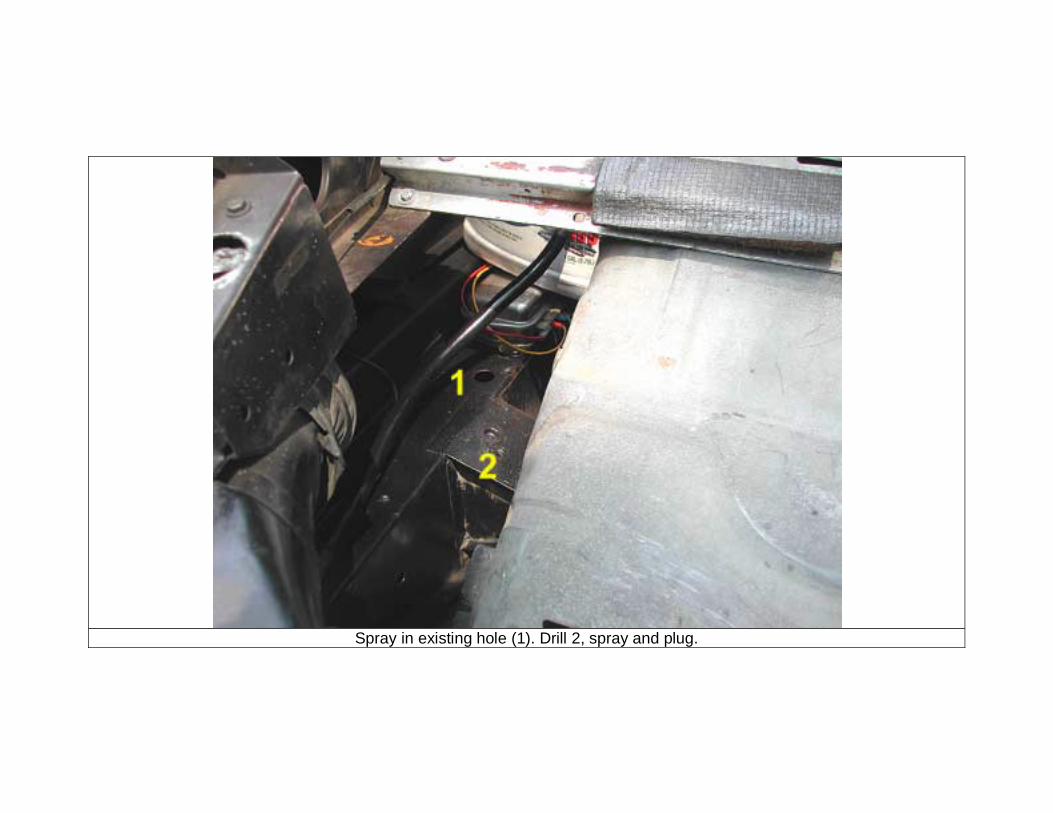
Spray in existing hole (1). Drill 2, spray and plug.
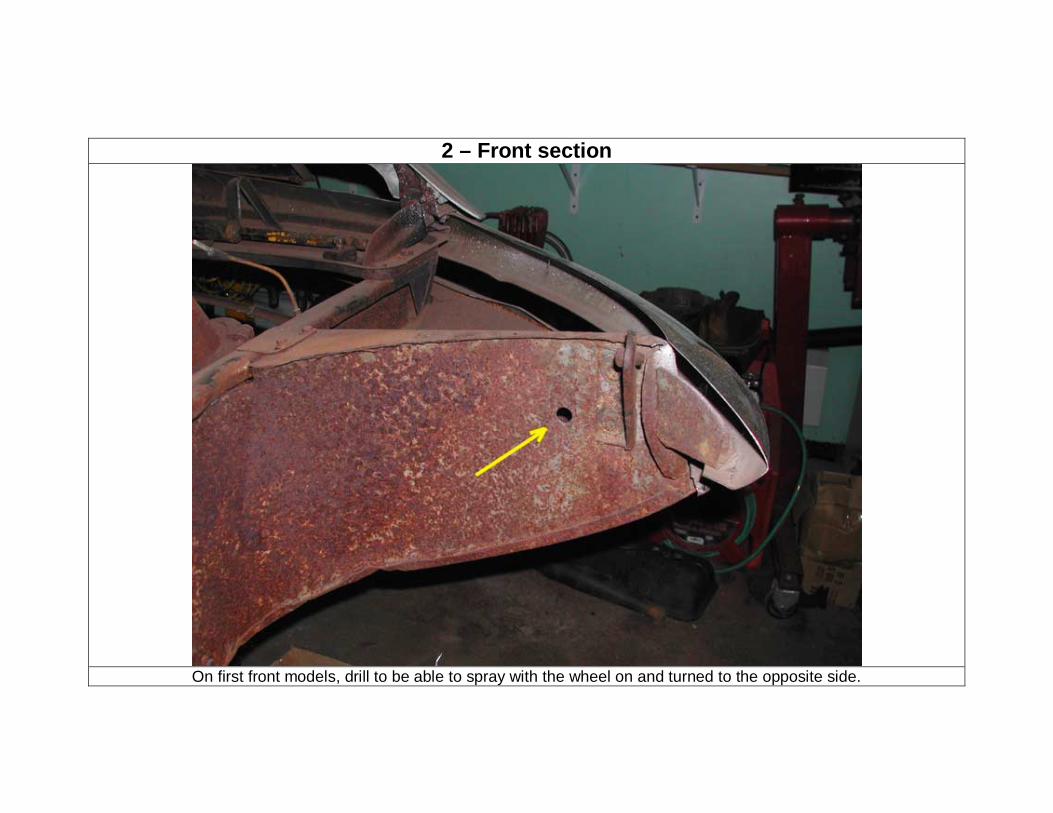
2 – Front section
On first front models, drill to be able to spray with the wheel on and turned to the opposite side.
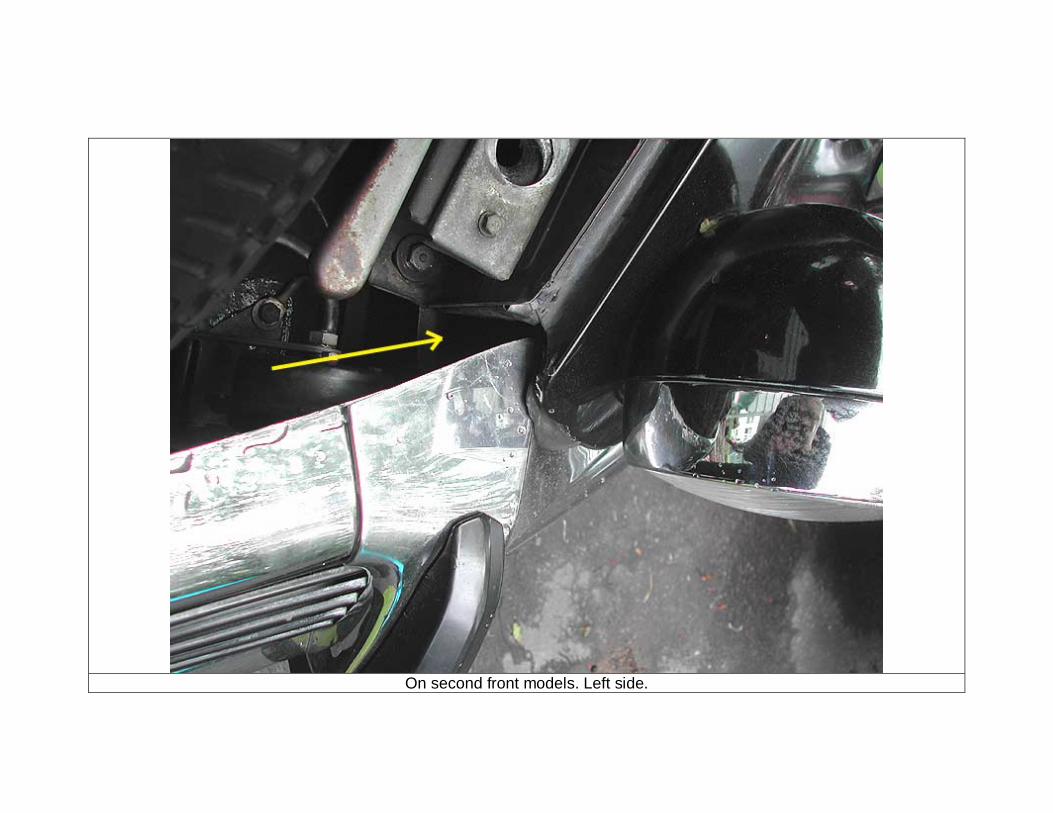
On second front models. Left side.
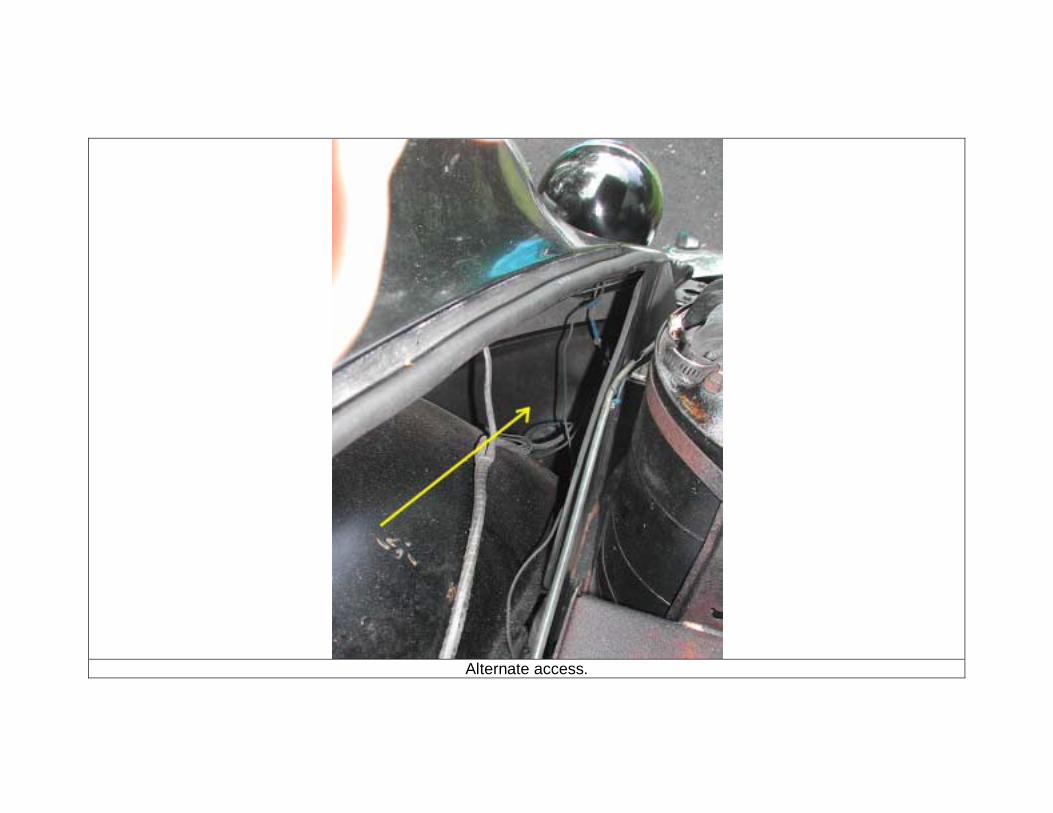
Alternate access.
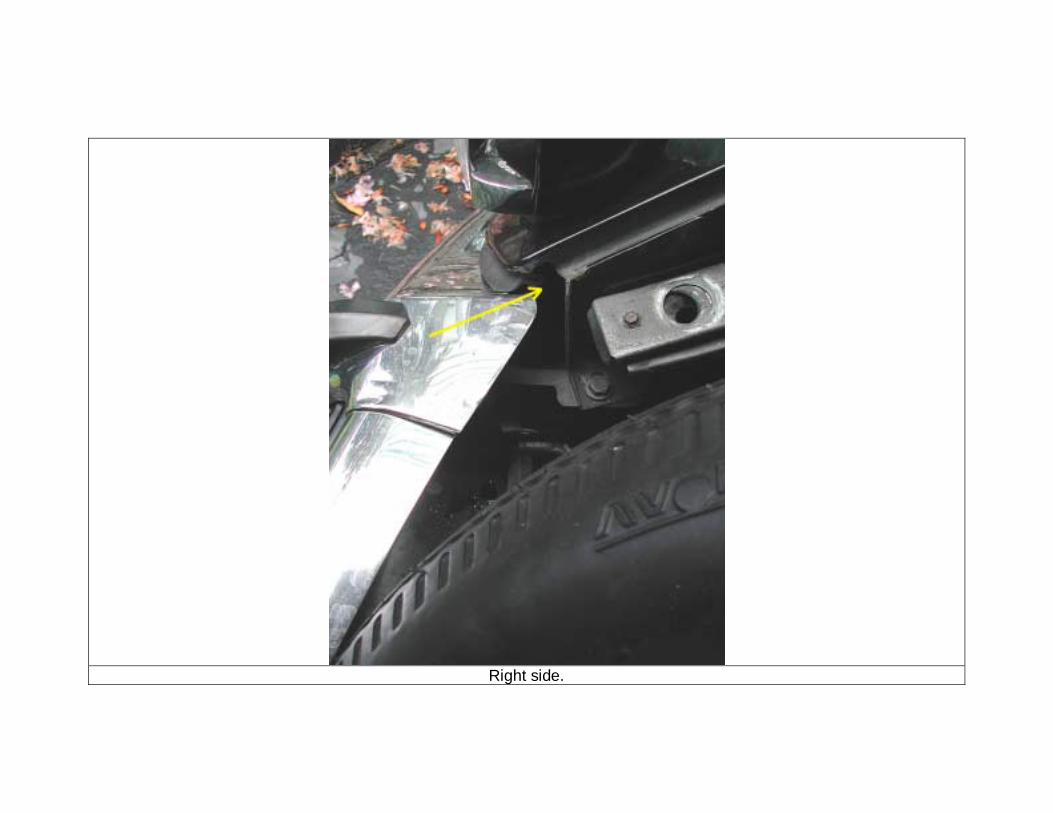
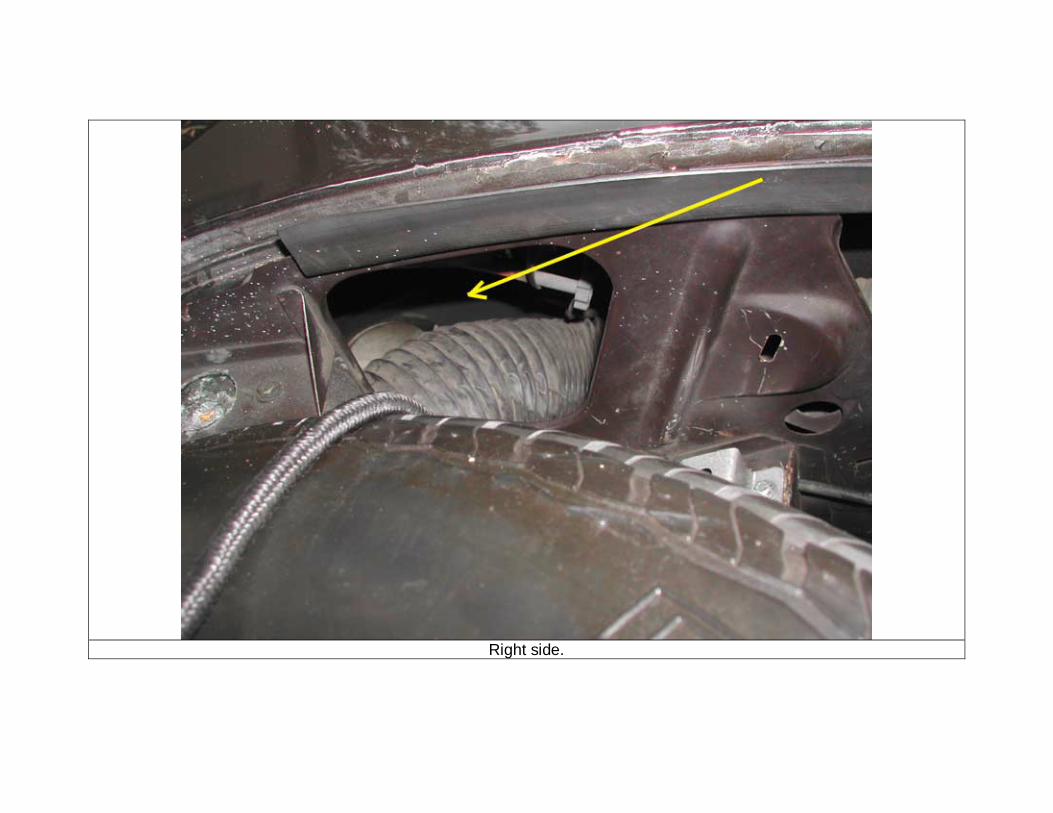
Right side.
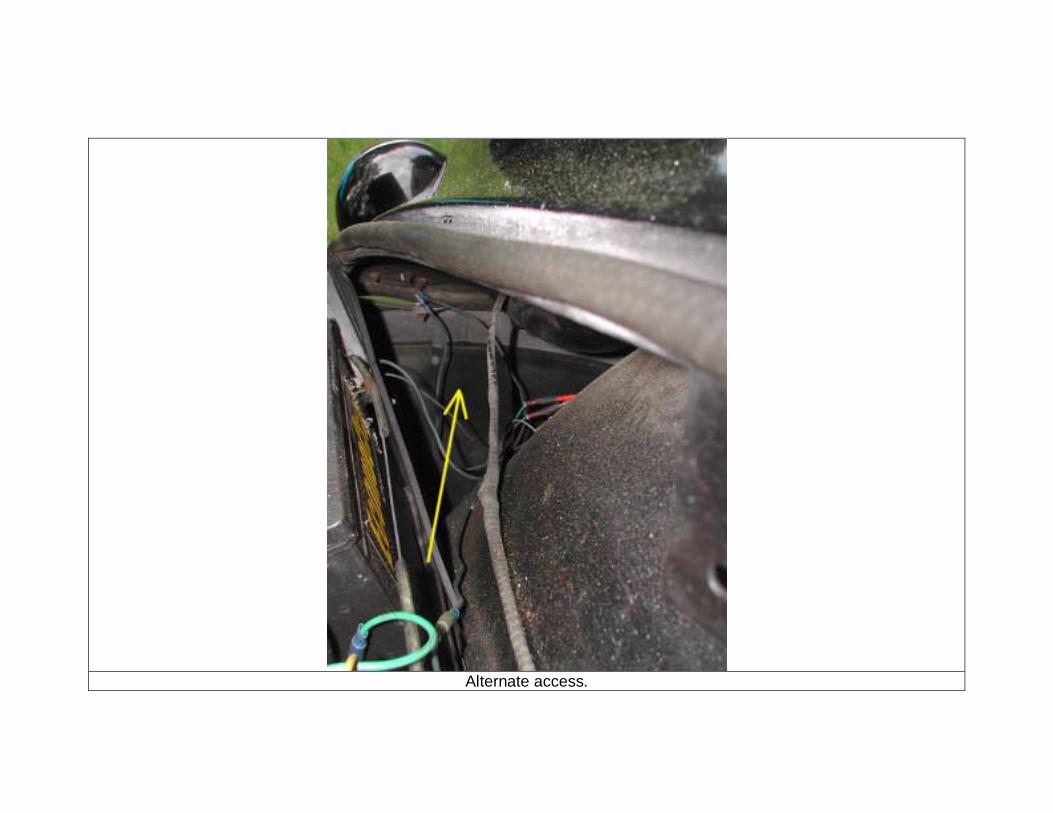
Alternate access.
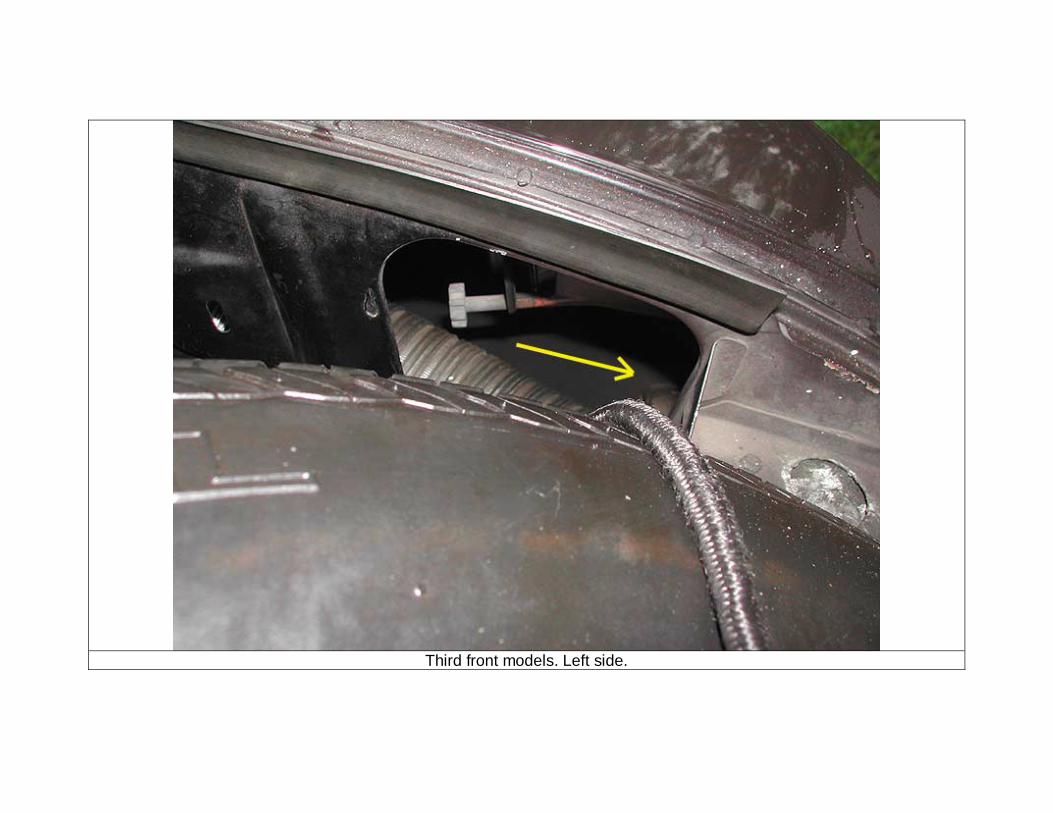
Third front models. Left side.
Right side.

3 – Front fenders
On first front models. Spray under front bumper.
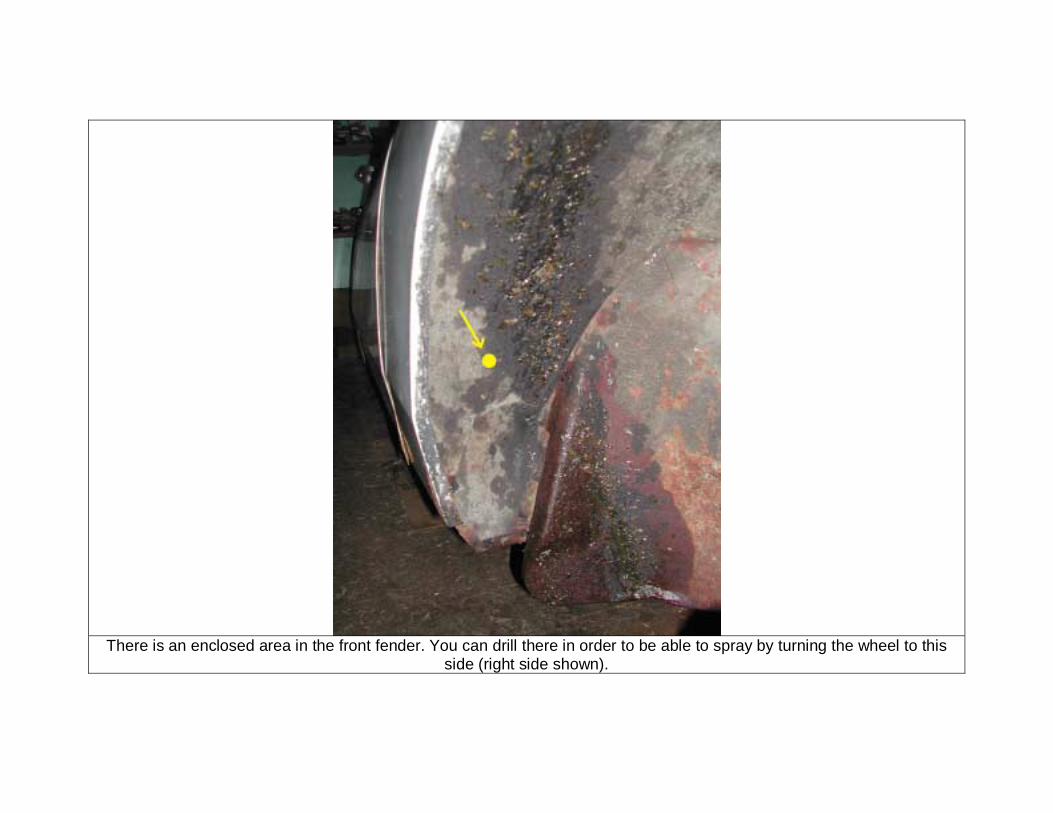
There is an enclosed area in the front fender. You can drill there in order to be able to spray by turning the wheel to this
side (right side shown).
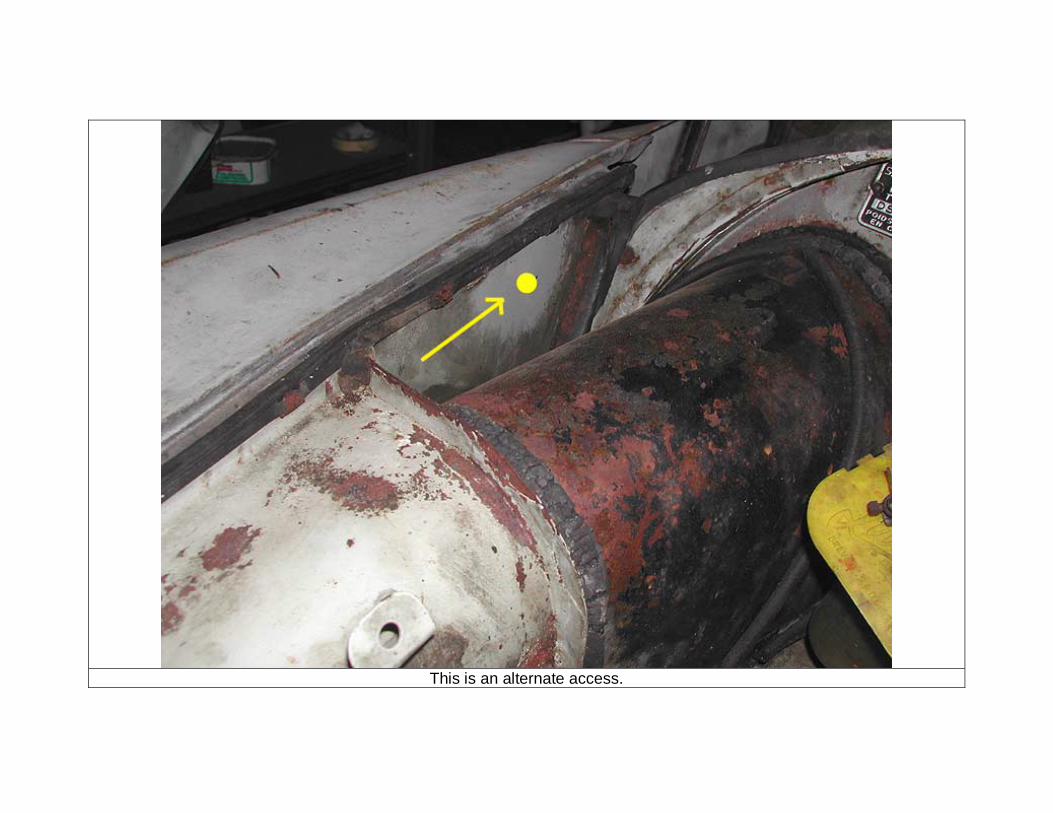
This is an alternate access.
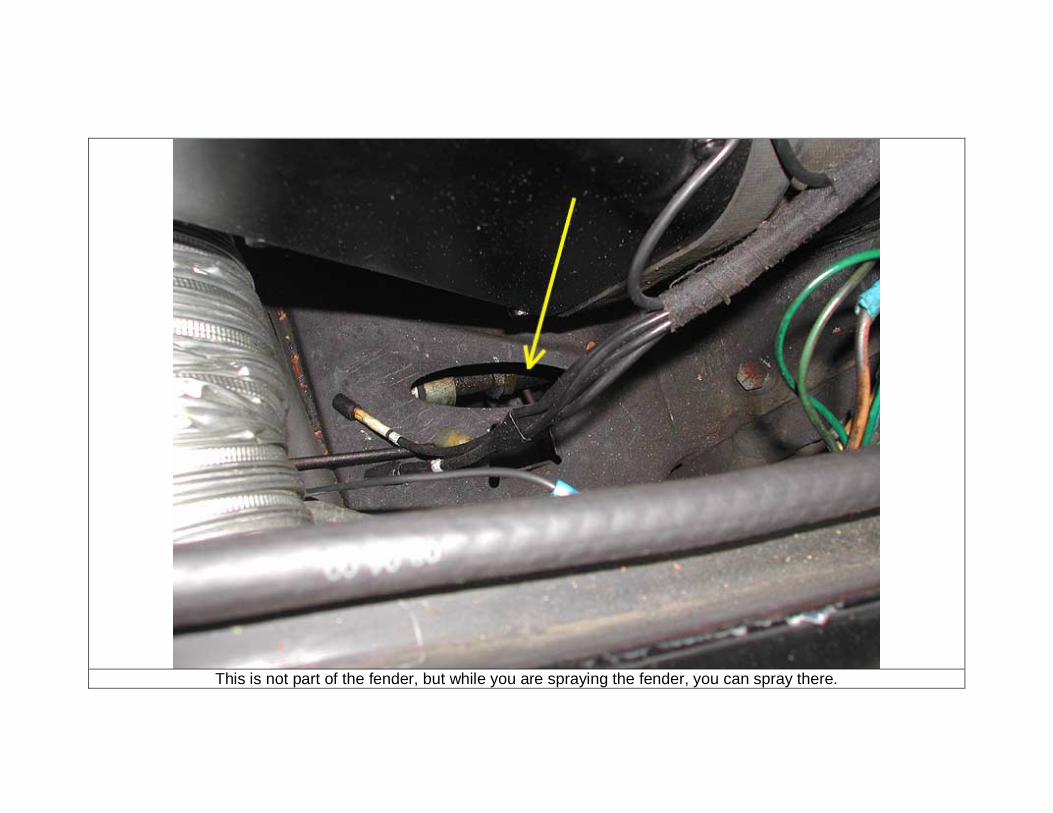
This is not part of the fender, but while you are spraying the fender, you can spray there.
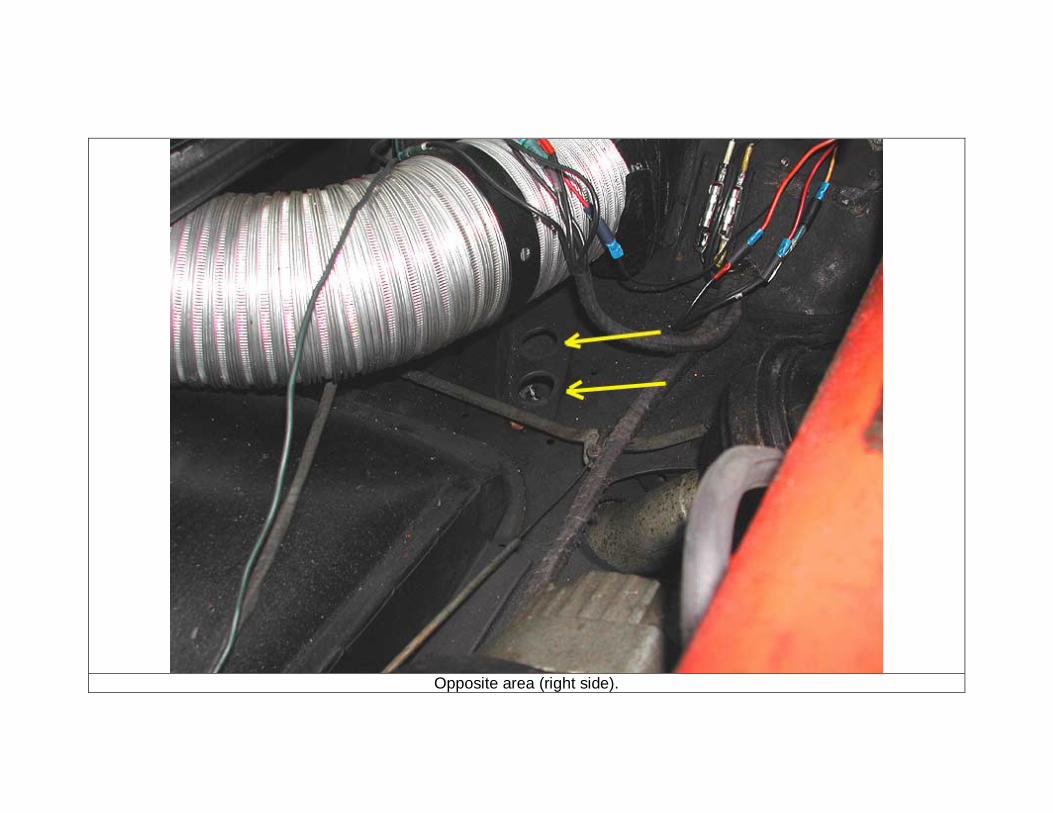
Opposite area (right side).
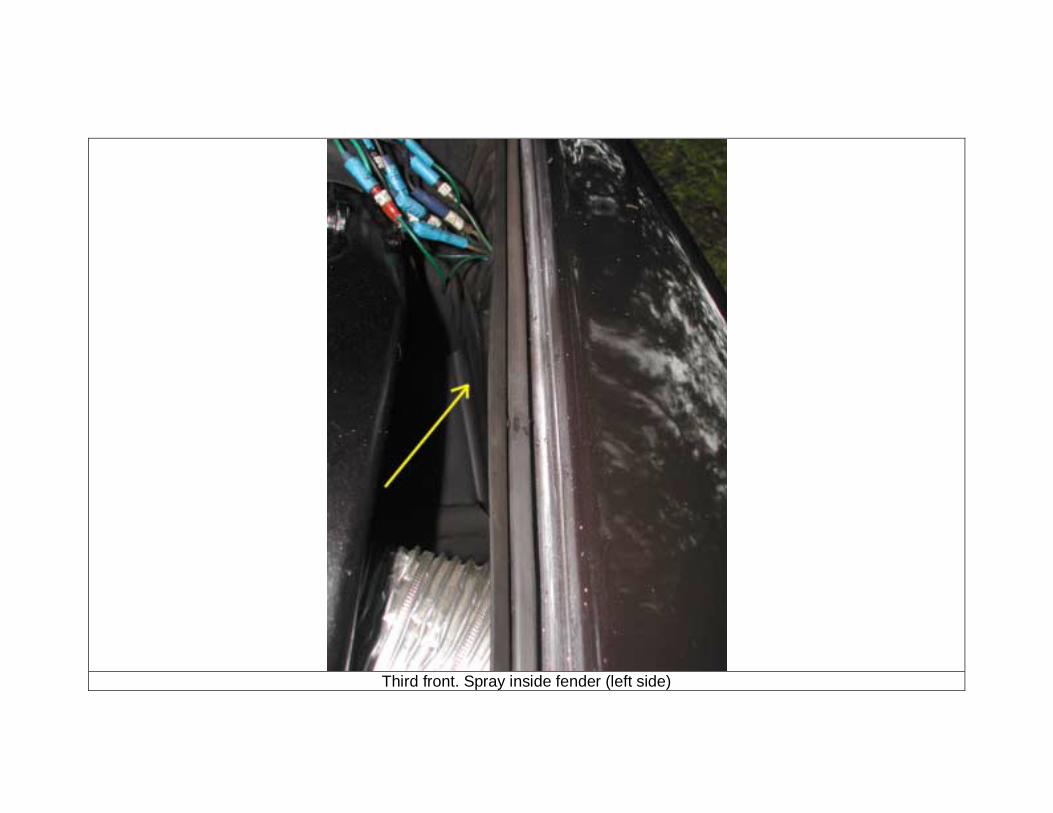
Third front. Spray inside fender (left side)
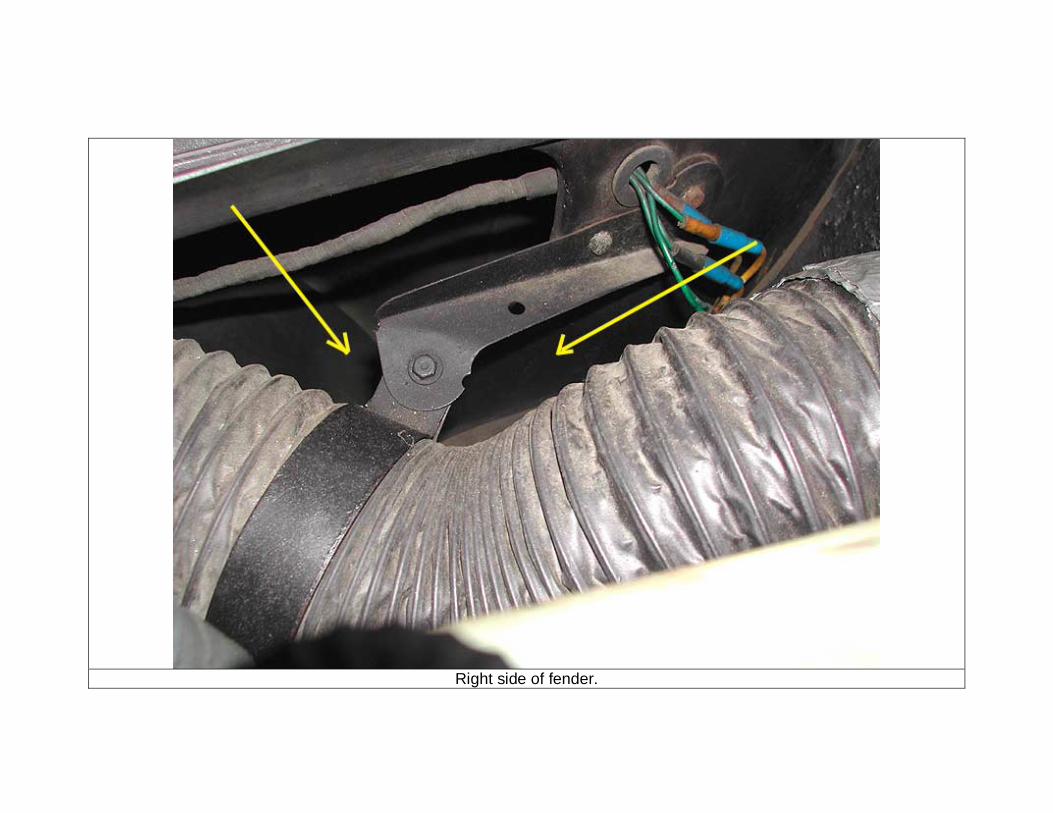
Right side of fender.
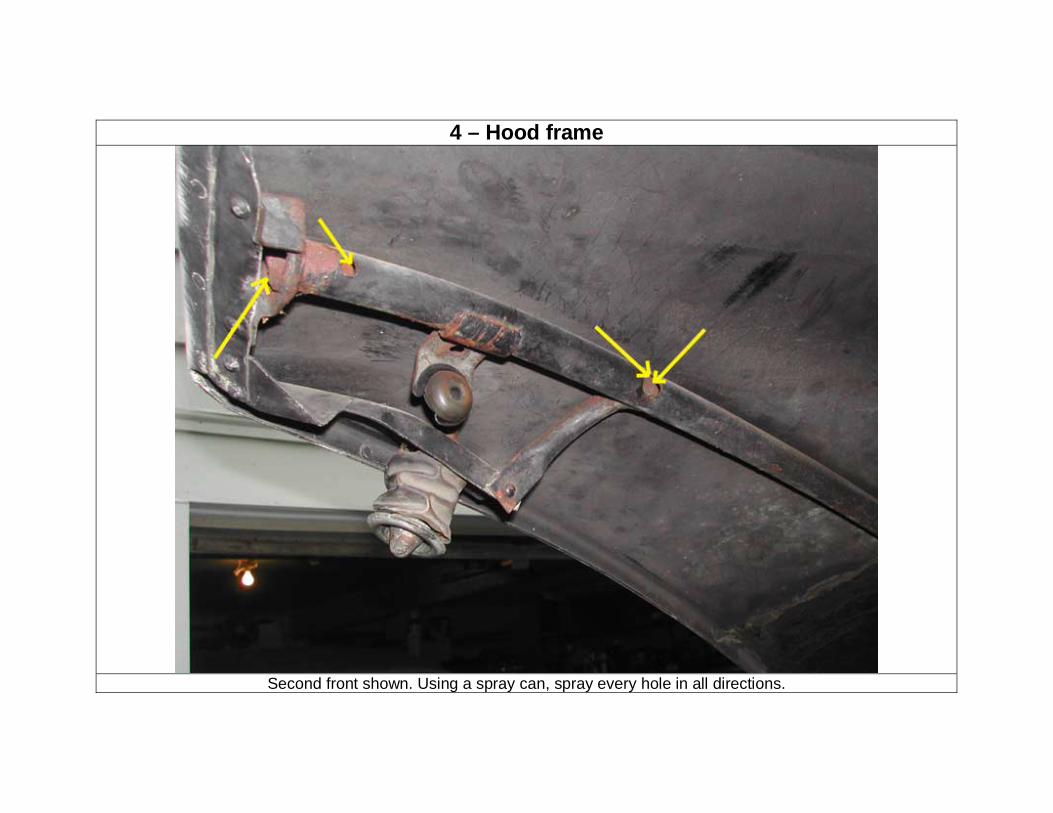
4 – Hood frame
Second front shown. Using a spray can, spray every hole in all directions.
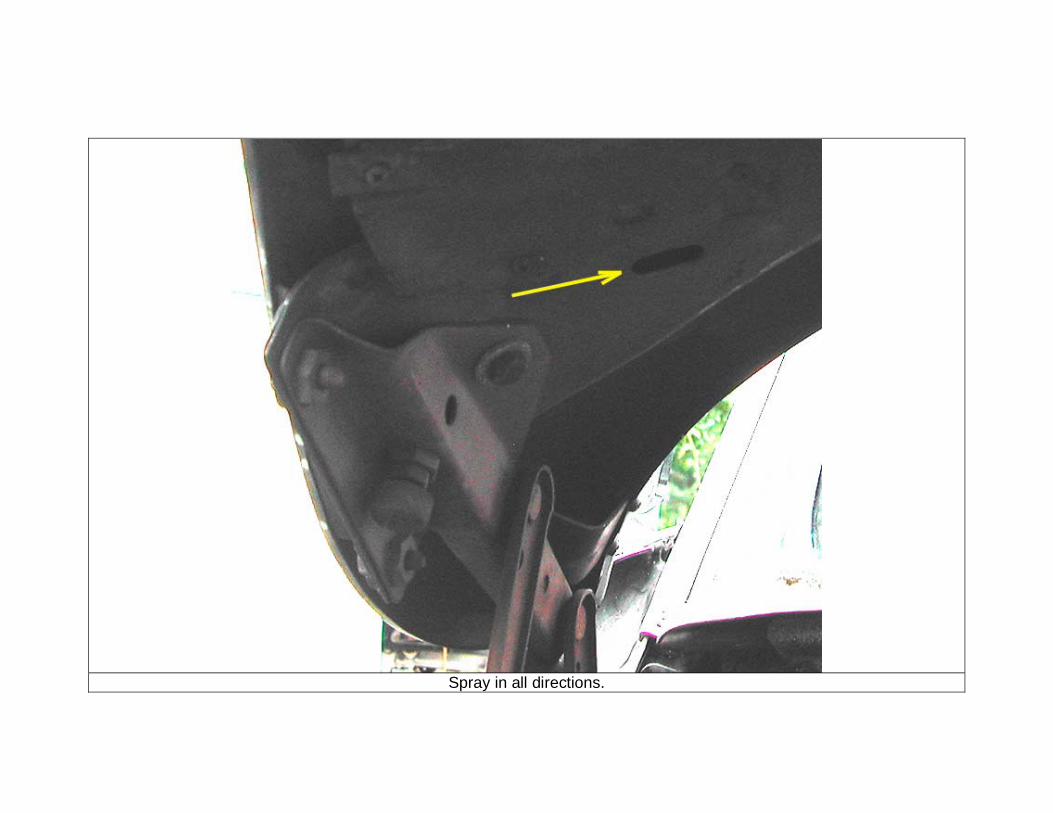
Spray in all directions.

Spray left and right.
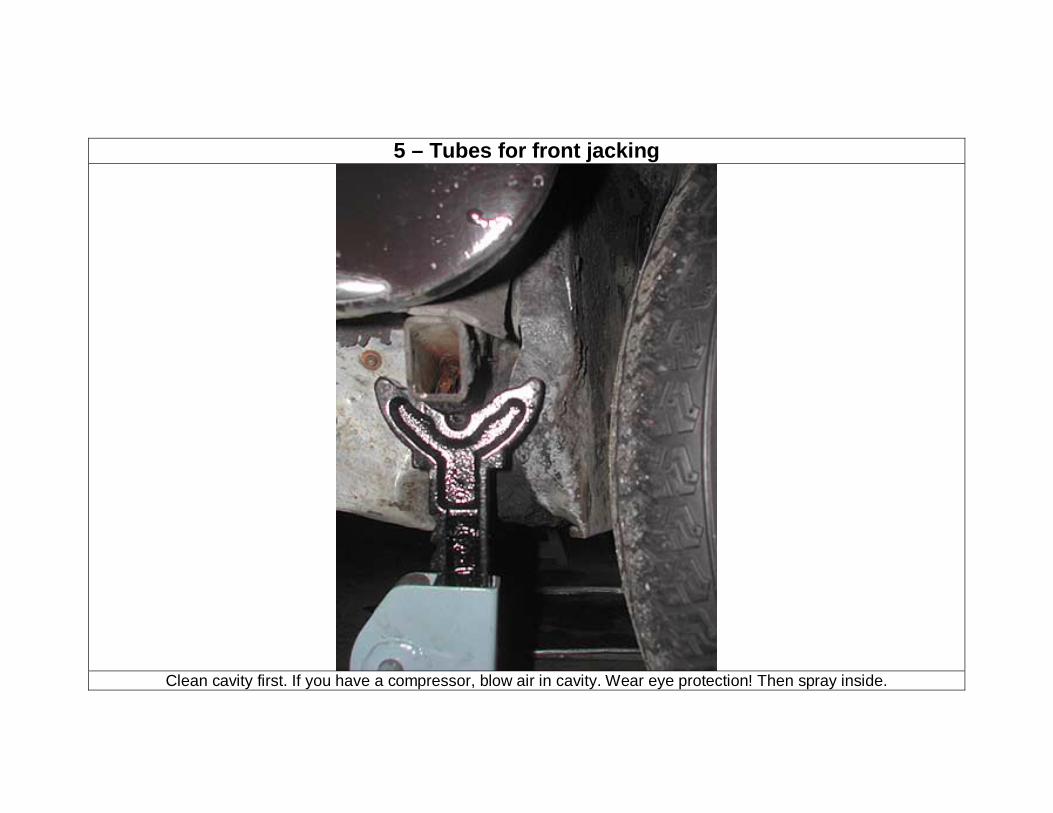
5 – Tubes for front jacking
Clean cavity first. If you have a compressor, blow air in cavity. Wear eye protection! Then spray inside.
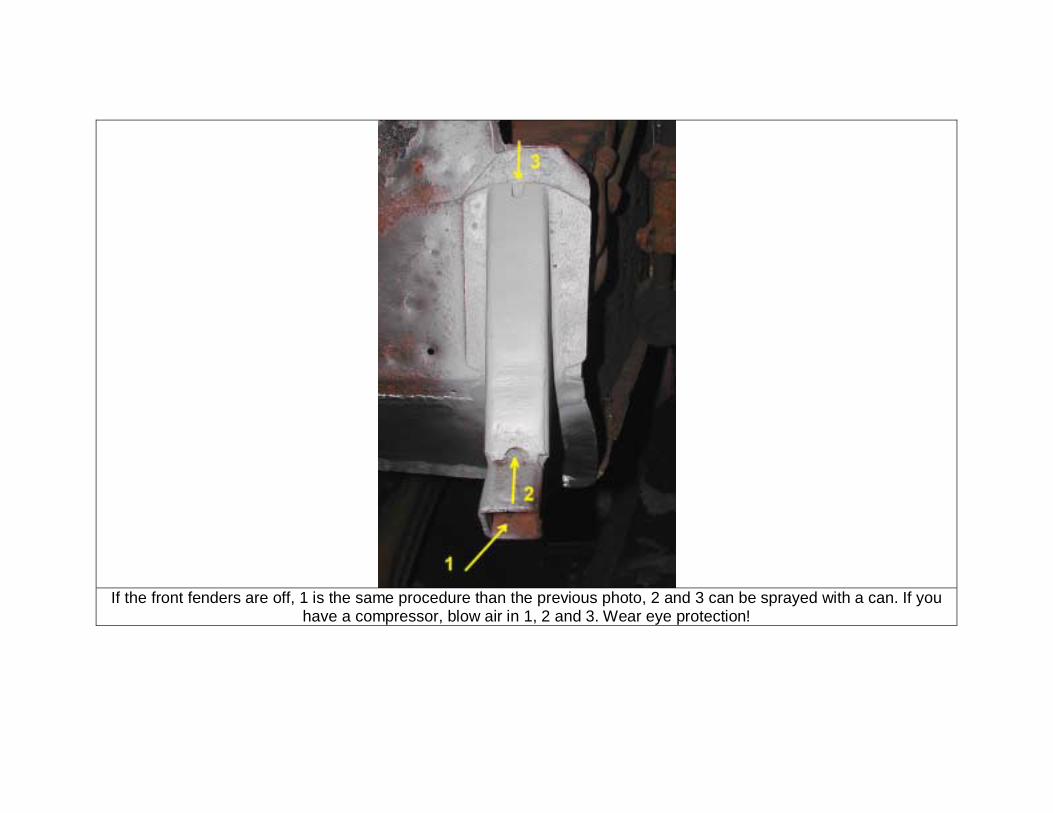
If the front fenders are off, 1 is the same procedure than the previous photo, 2 and 3 can be sprayed with a can. If you
have a compressor, blow air in 1, 2 and 3. Wear eye protection!
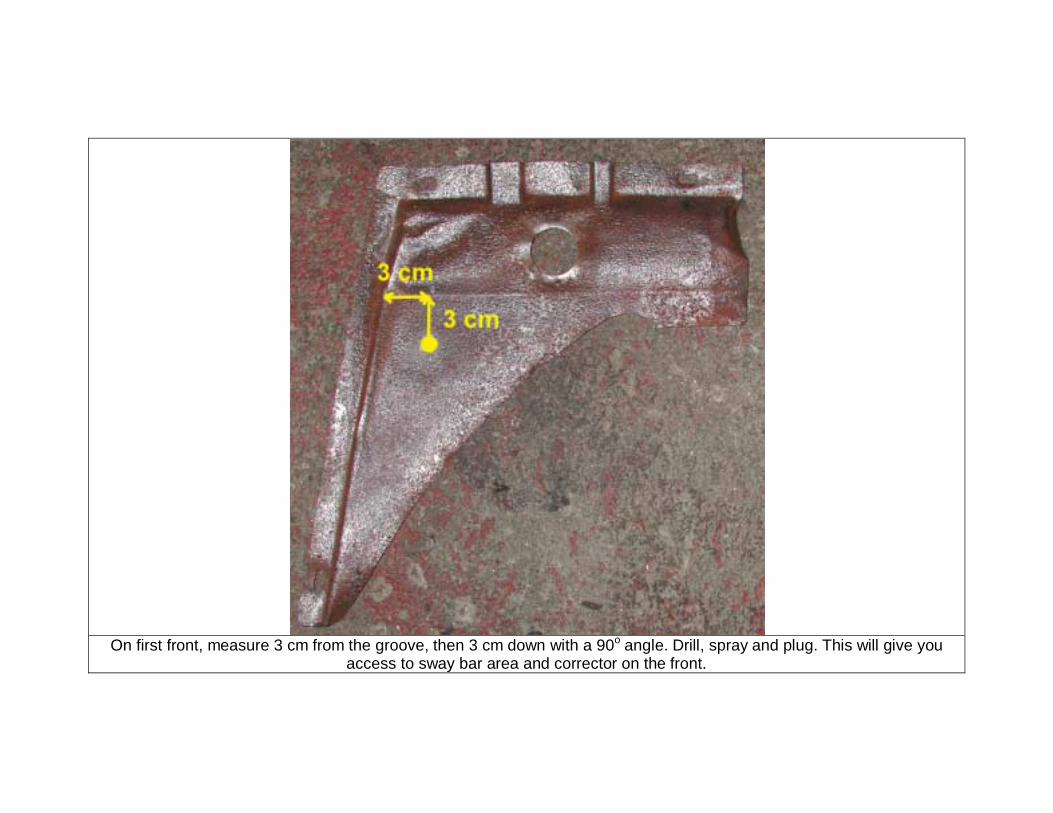
On first front, measure 3 cm from the groove, then 3 cm down with a 90o angle. Drill, spray and plug. This will give you
access to sway bar area and corrector on the front.
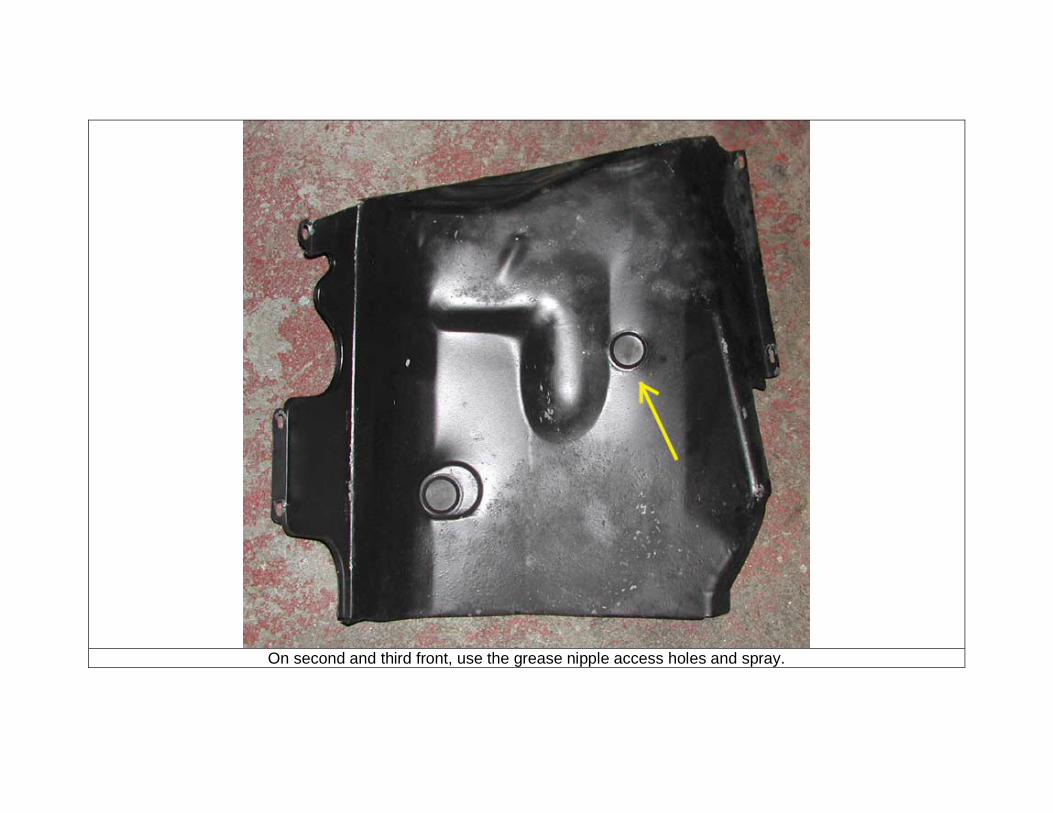
On second and third front, use the grease nipple access holes and spray.
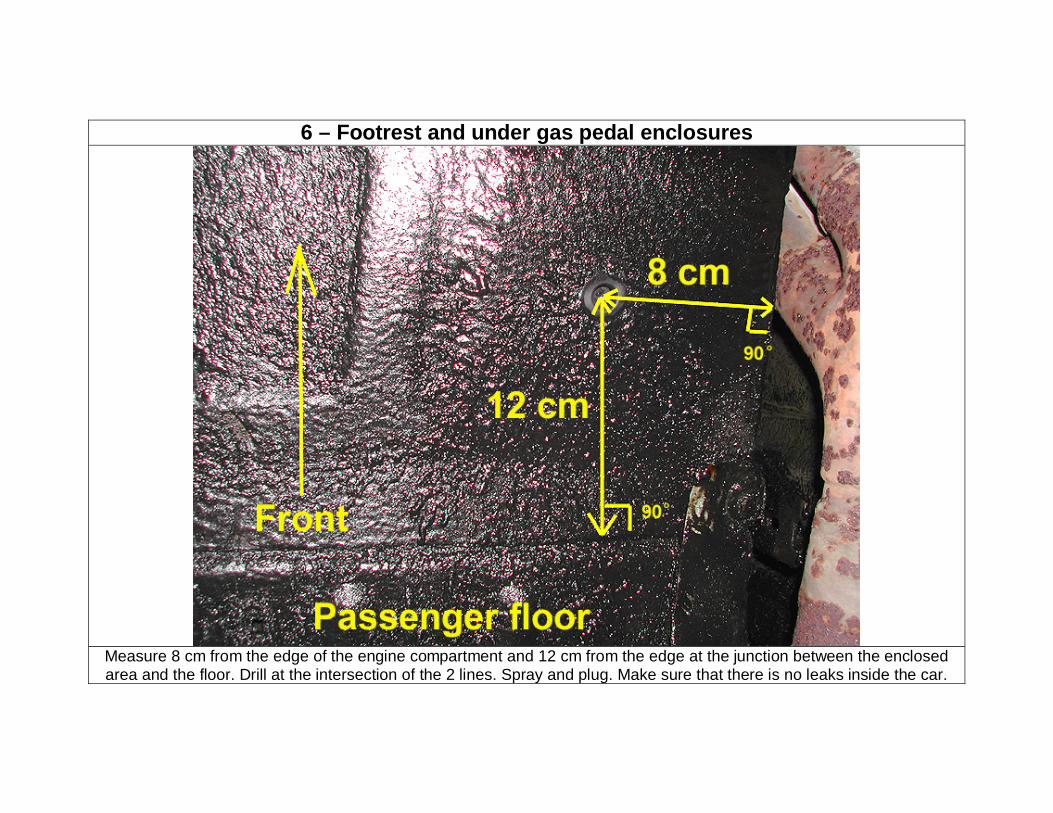
6 – Footrest and under gas pedal enclosures
Measure 8 cm from the edge of the engine compartment and 12 cm from the edge at the junction between the enclosed area and the floor. Drill at the intersection of the 2 lines. Spray and plug. Make sure that there is no leaks inside the car.
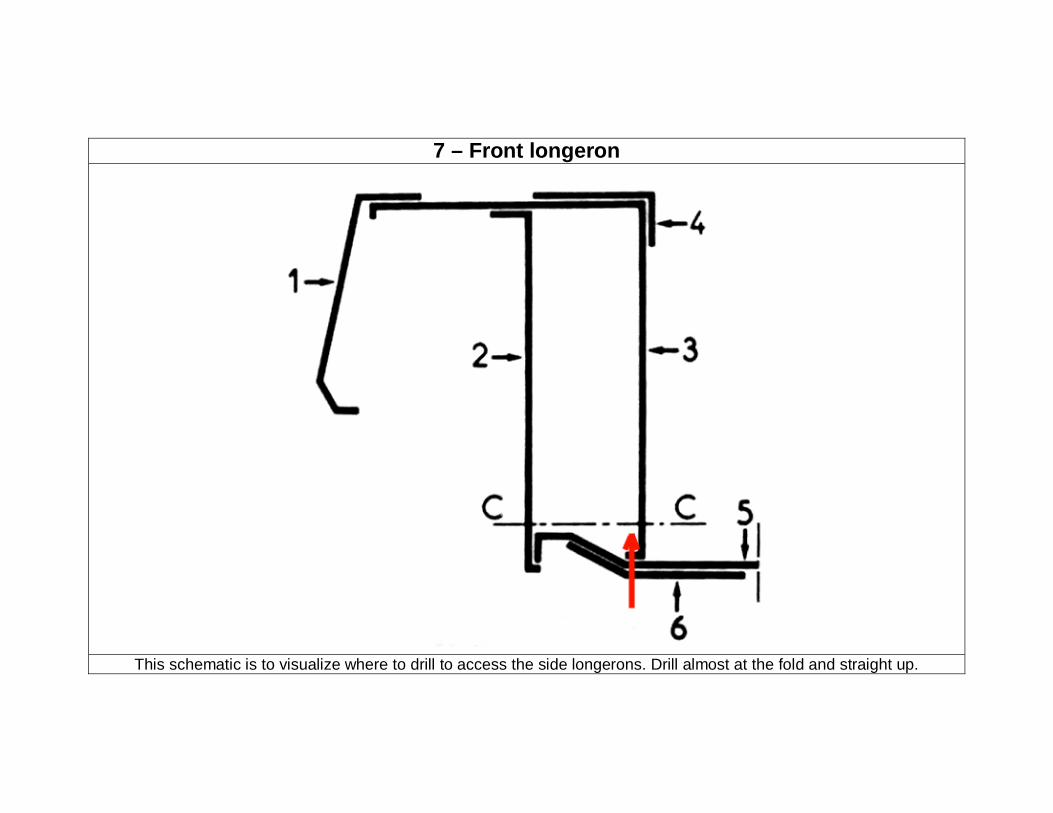
7 – Front longeron
This schematic is to visualize where to drill to access the side longerons. Drill almost at the fold and straight up.

Measure 6 and 19 cm from the edge at the junction between the enclosed area and the floor. Drill on the outside edge of
the fold (horizontal yellow line).
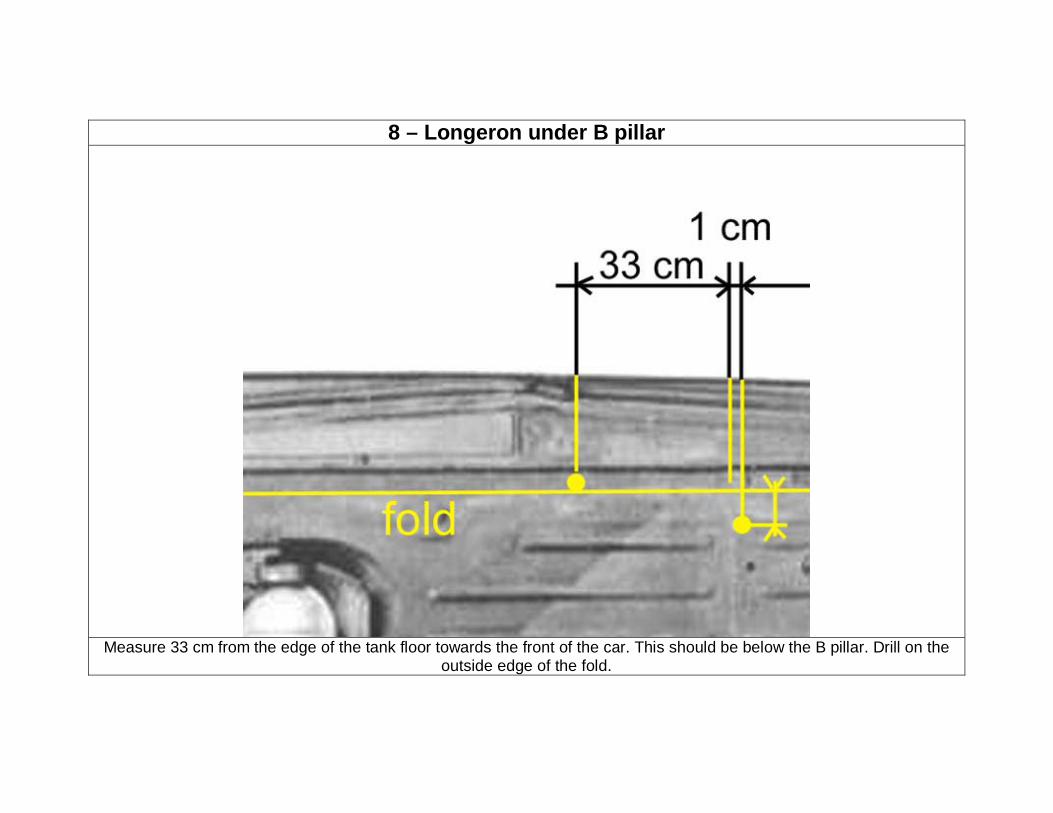
8 – Longeron under B pillar
Measure 33 cm from the edge of the tank floor towards the front of the car. This should be below the B pillar. Drill on the
outside edge of the fold.
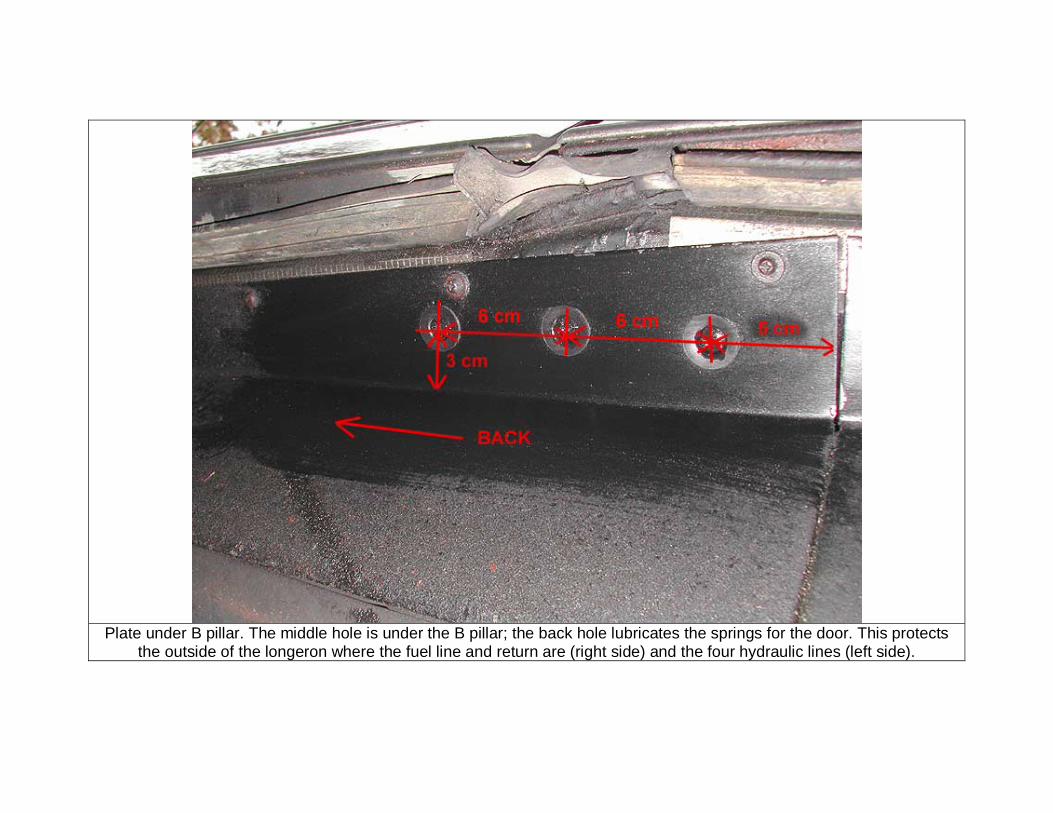
Plate under B pillar. The middle hole is under the B pillar; the back hole lubricates the springs for the door. This protects
the outside of the longeron where the fuel line and return are (right side) and the four hydraulic lines (left side).
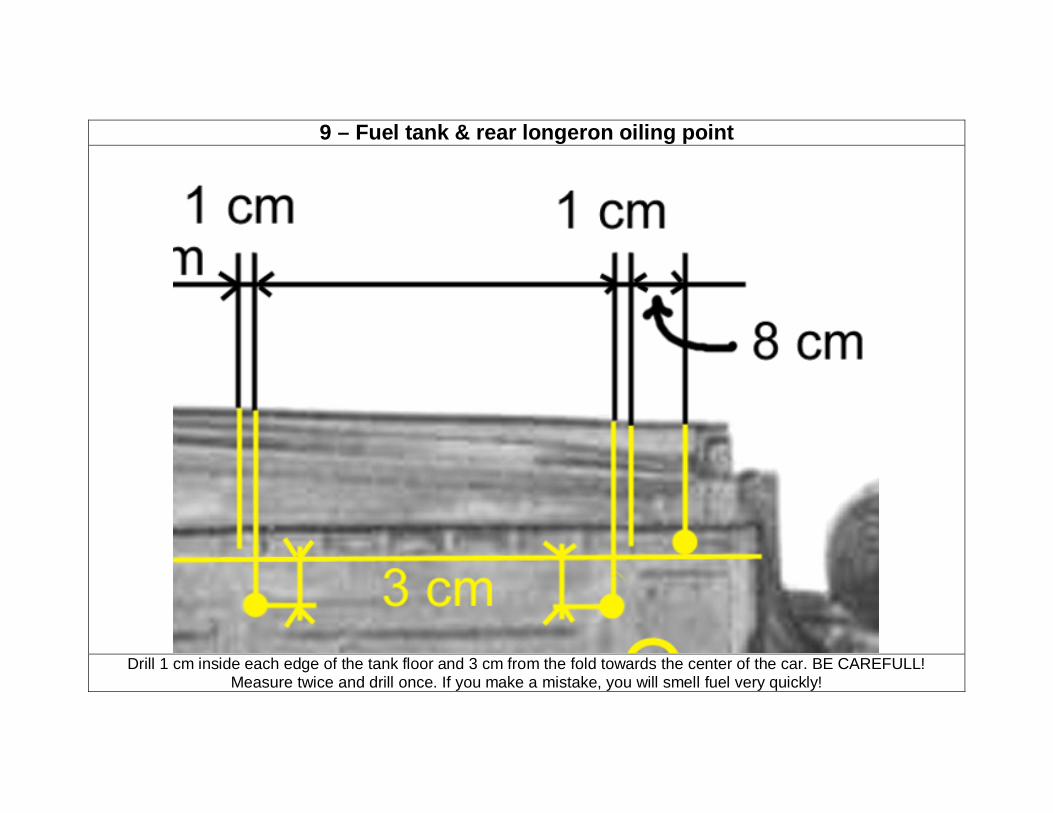
9 – Fuel tank & rear longeron oiling point
Drill 1 cm inside each edge of the tank floor and 3 cm from the fold towards the center of the car. BE CAREFULL!
Measure twice and drill once. If you make a mistake, you will smell fuel very quickly!
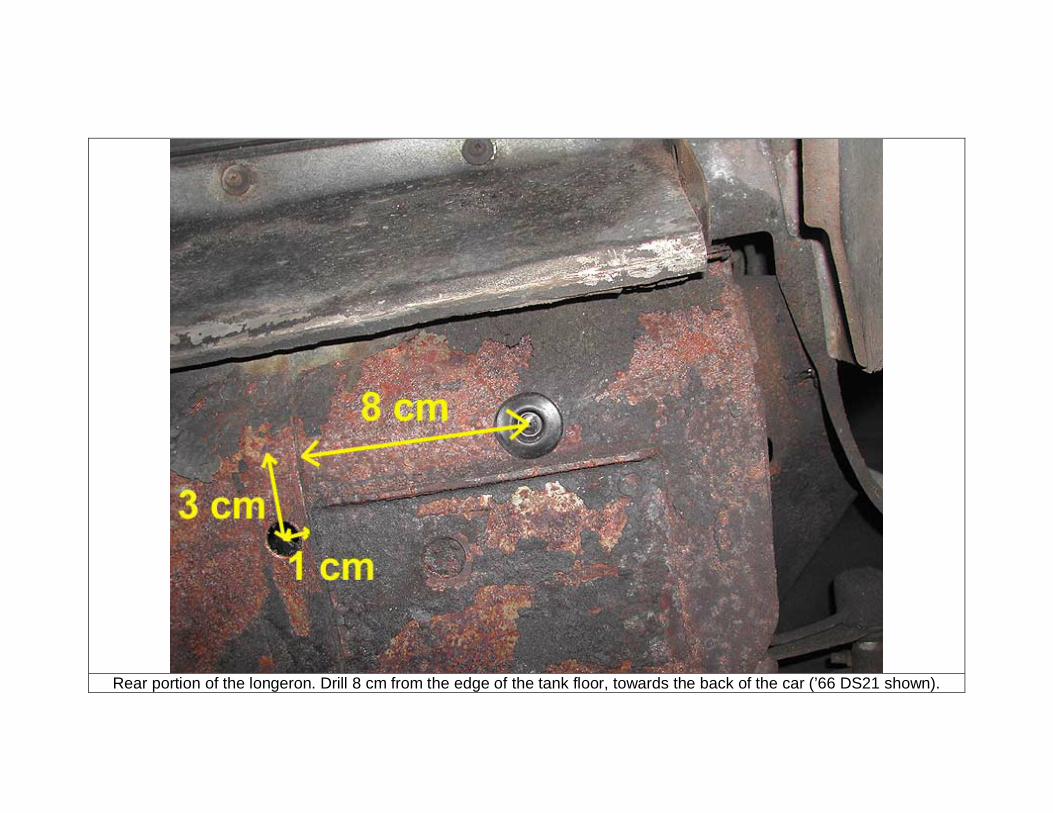
Rear portion of the longeron. Drill 8 cm from the edge of the tank floor, towards the back of the car (’66 DS21 shown).
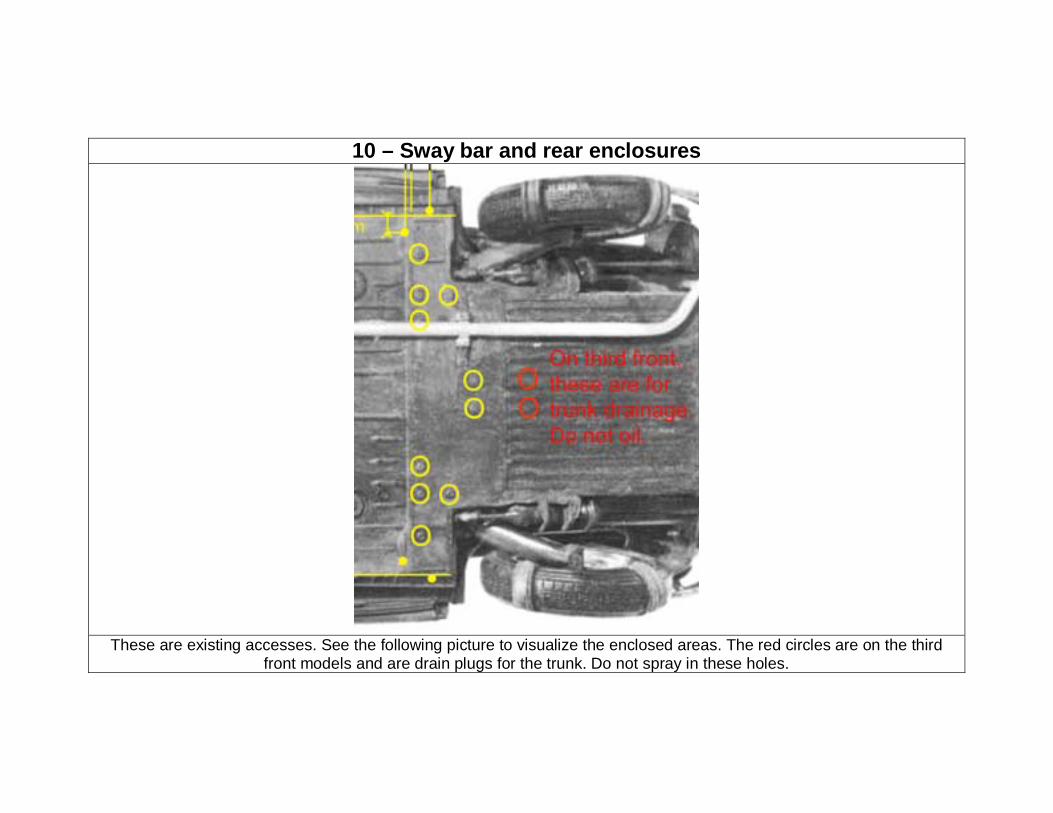
10 – Sway bar and rear enclosures
These are existing accesses. See the following picture to visualize the enclosed areas. The red circles are on the third
front models and are drain plugs for the trunk. Do not spray in these holes.
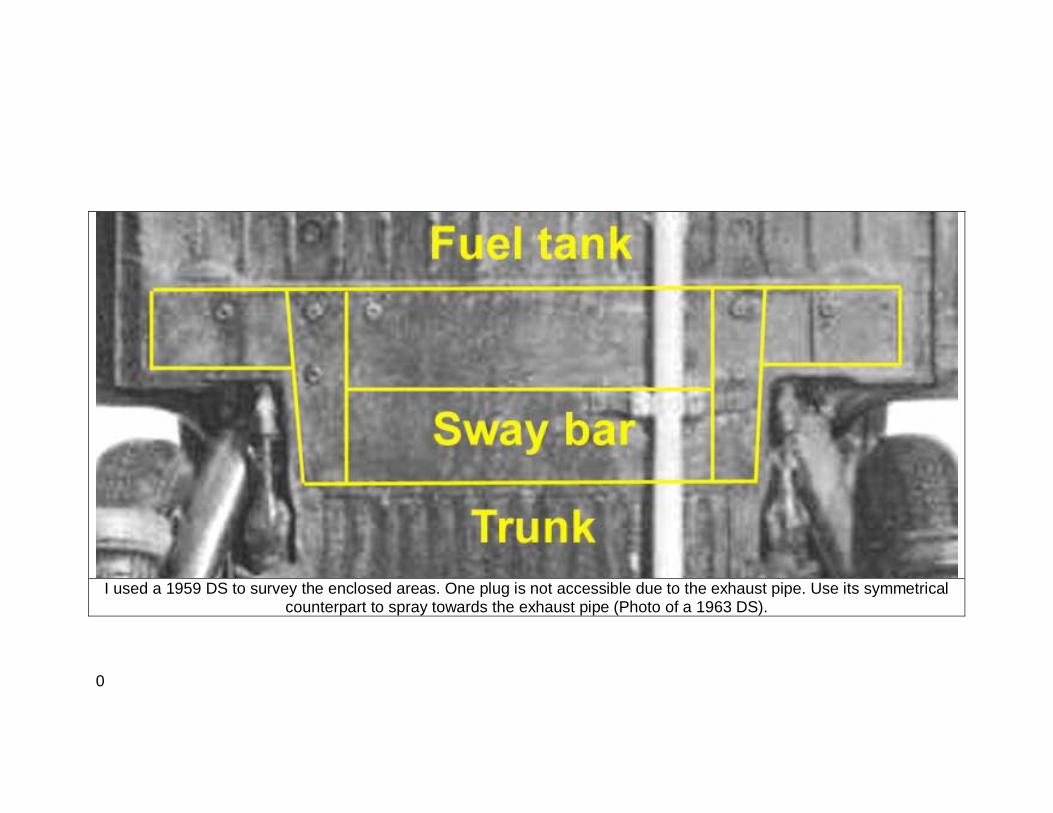
I used a 1959 DS to survey the enclosed areas. One plug is not accessible due to the exhaust pipe. Use its symmetrical
counterpart to spray towards the exhaust pipe (Photo of a 1963 DS).
0
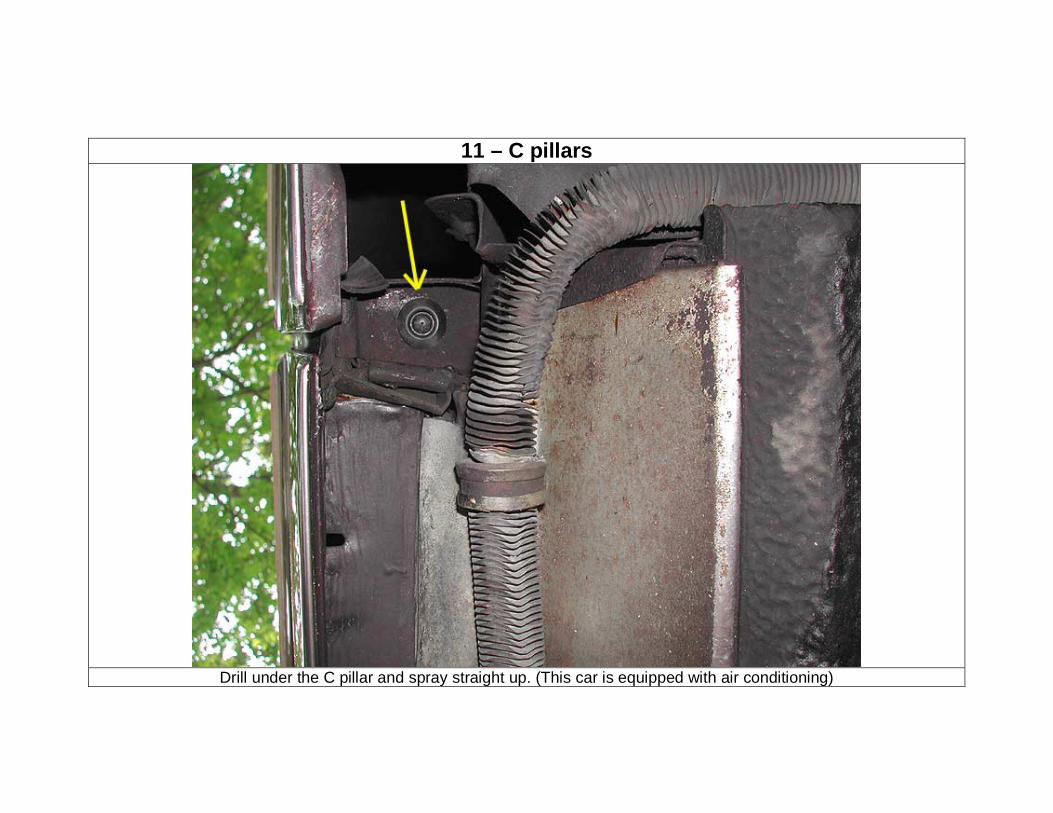
11 – C pillars
Drill under the C pillar and spray straight up. (This car is equipped with air conditioning)
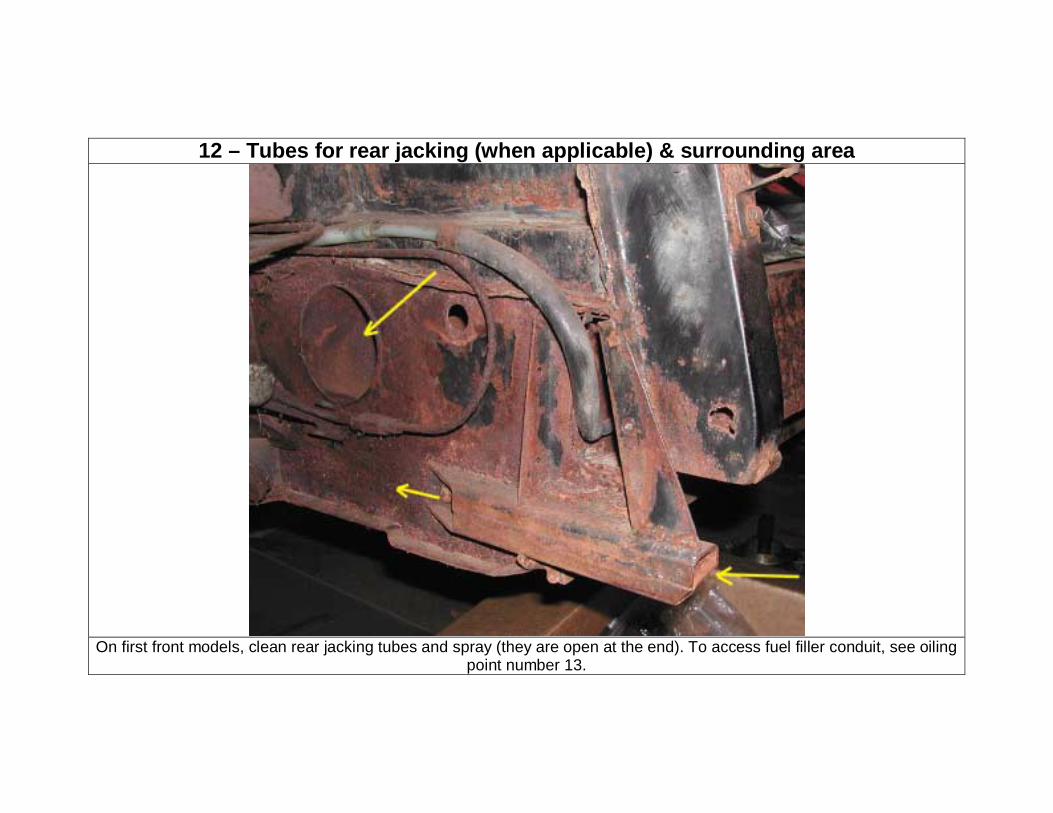
12 – Tubes for rear jacking (when applicable) & surrounding area
On first front models, clean rear jacking tubes and spray (they are open at the end). To access fuel filler conduit, see oiling
point number 13.
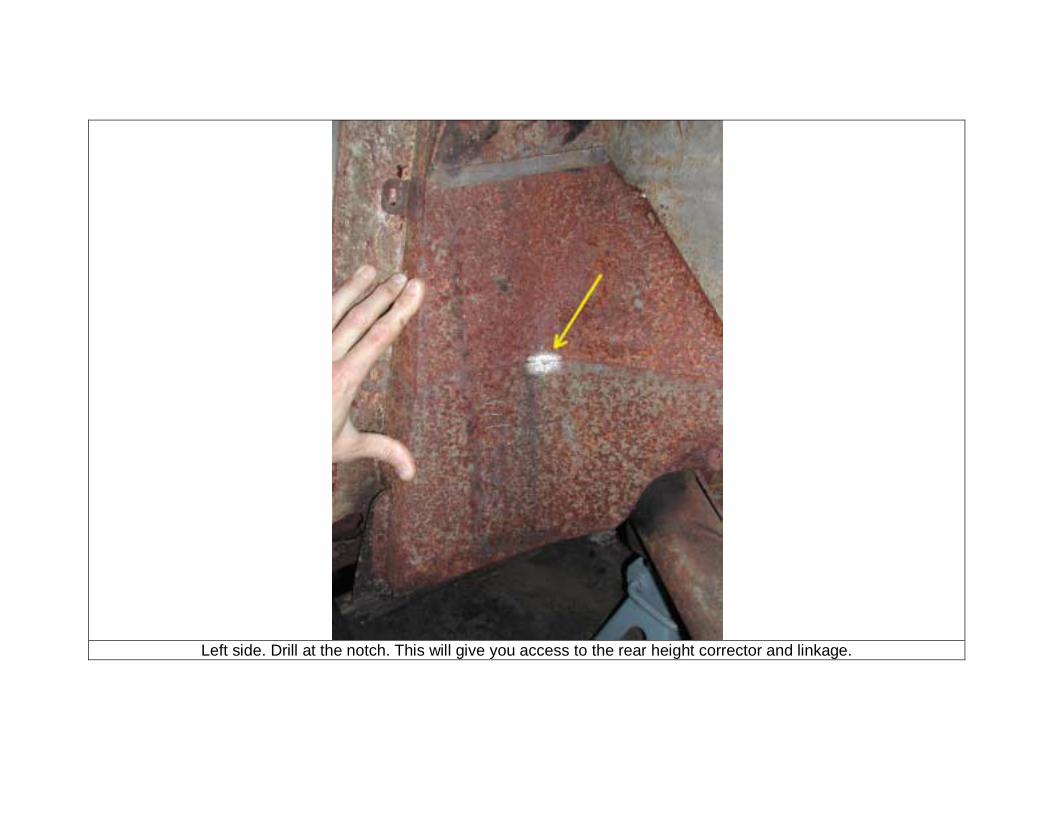
Left side. Drill at the notch. This will give you access to the rear height corrector and linkage.
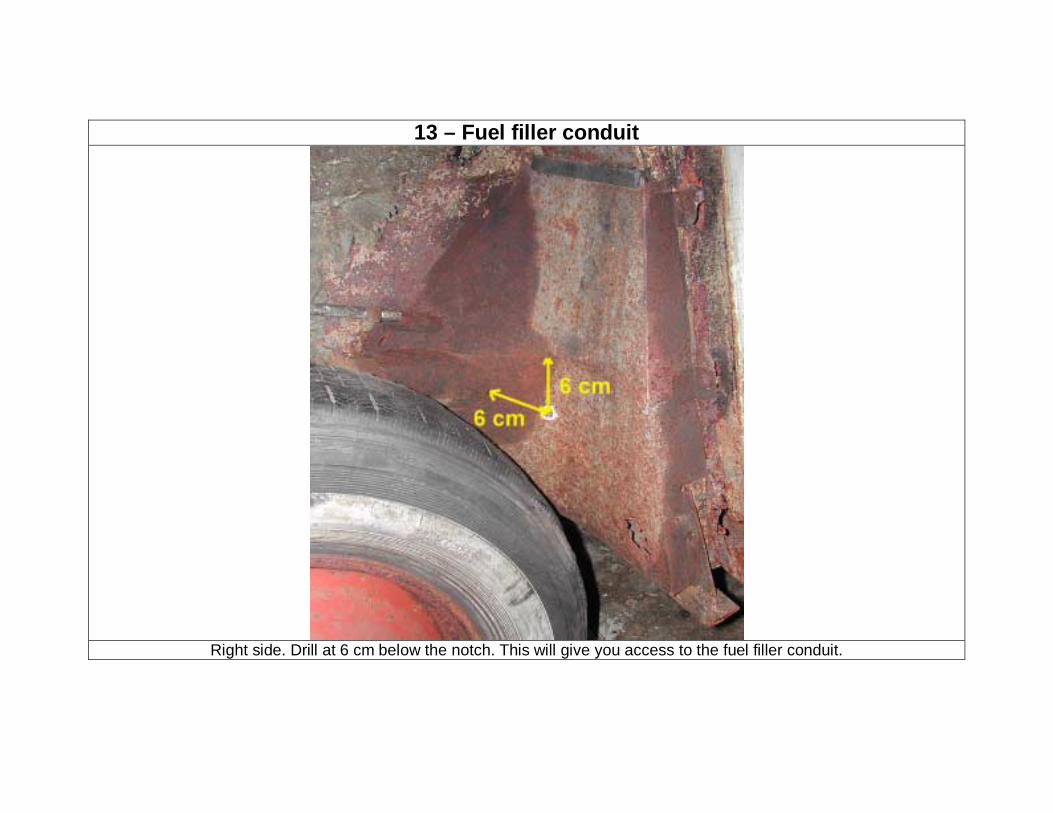
13 – Fuel filler conduit
Right side. Drill at 6 cm below the notch. This will give you access to the fuel filler conduit.

14 – A pillars
Drill at number one, spray straight and down. Remove plug (2) and spray in fender guide.
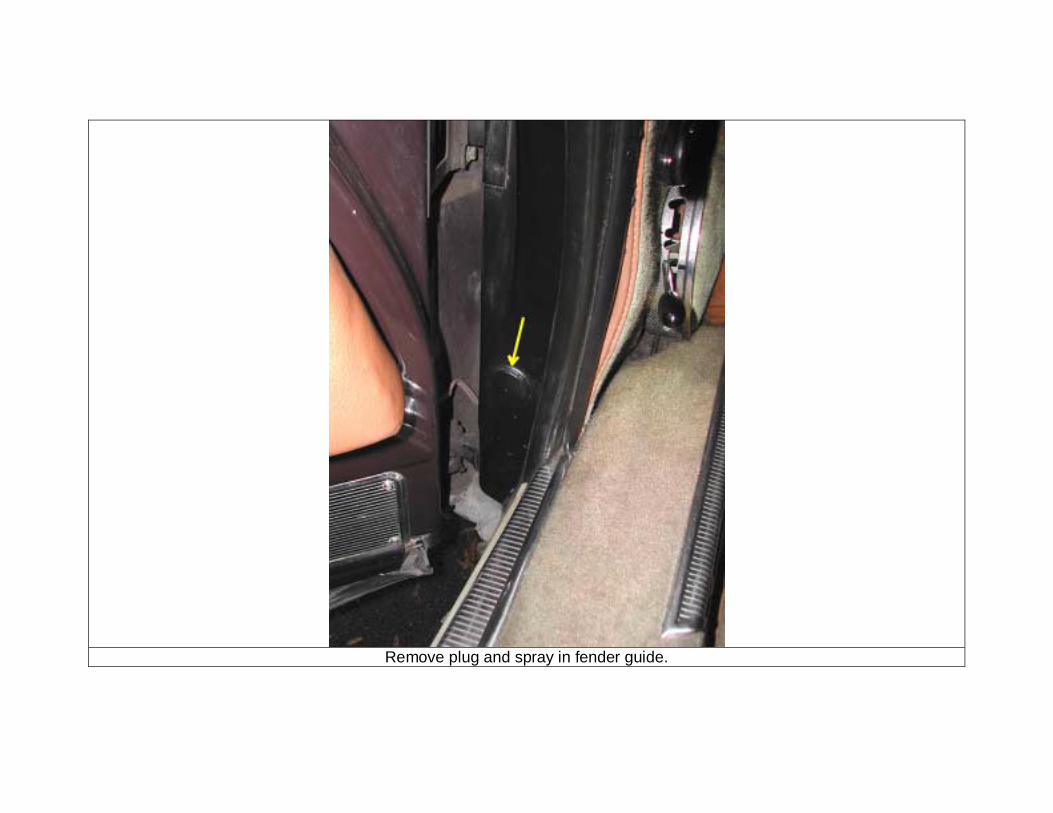
Remove plug and spray in fender guide.
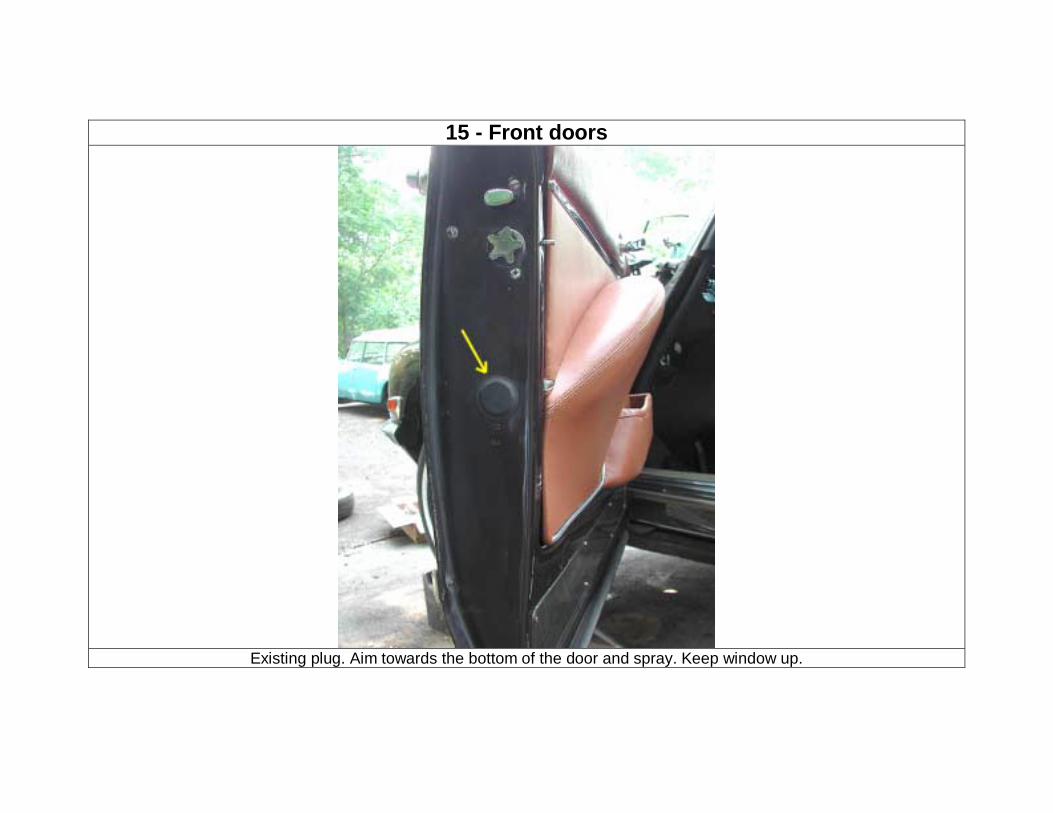
15 - Front doors
Existing plug. Aim towards the bottom of the door and spray. Keep window up.
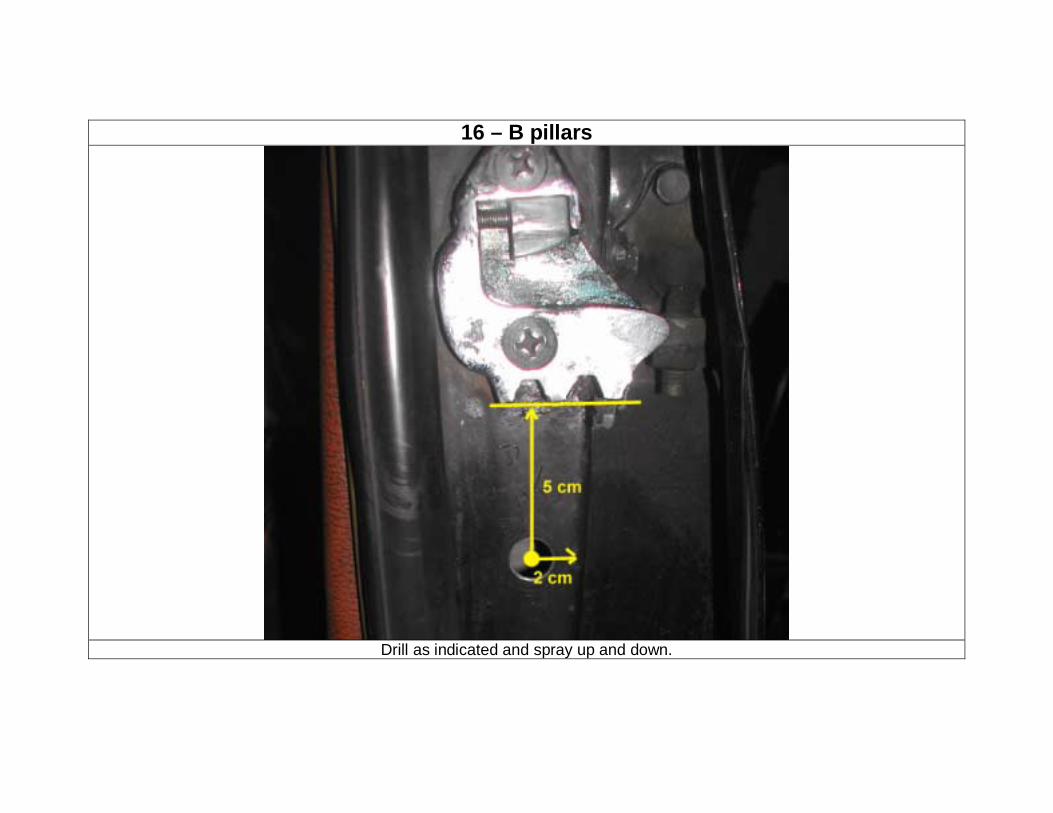
16 – B pillars
Drill as indicated and spray up and down.
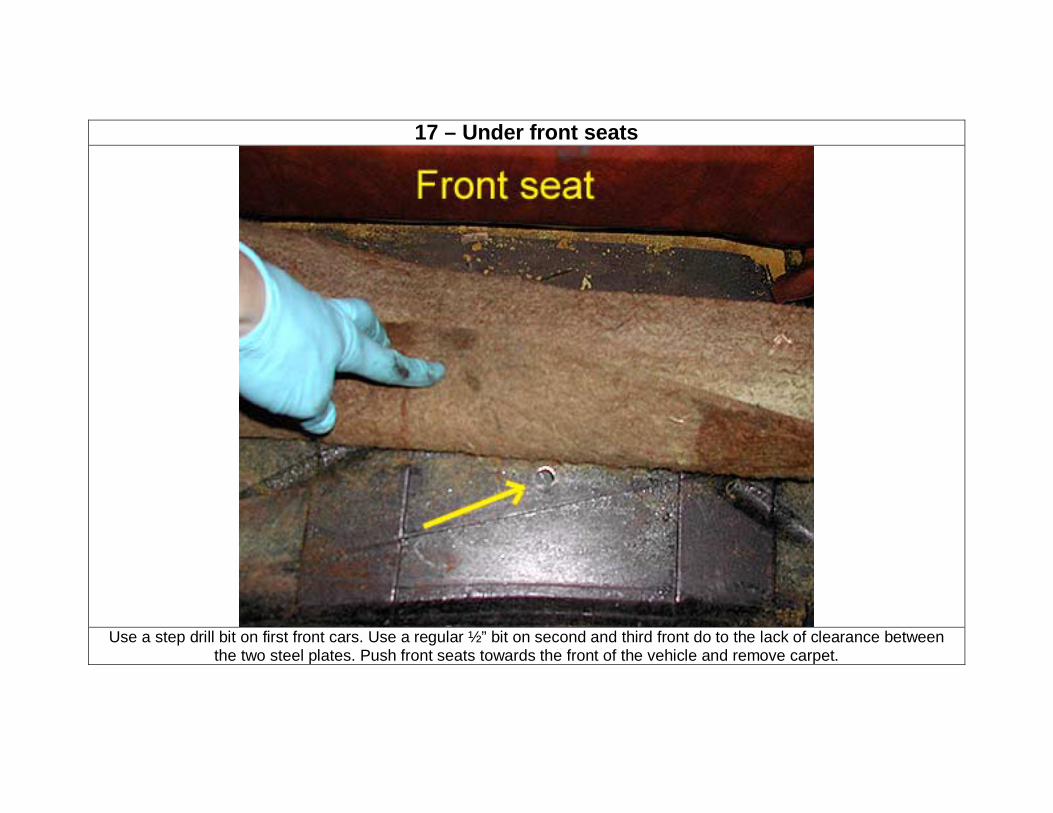
17 – Under front seats
Use a step drill bit on first front cars. Use a regular ½” bit on second and third front do to the lack of clearance between
the two steel plates. Push front seats towards the front of the vehicle and remove carpet.
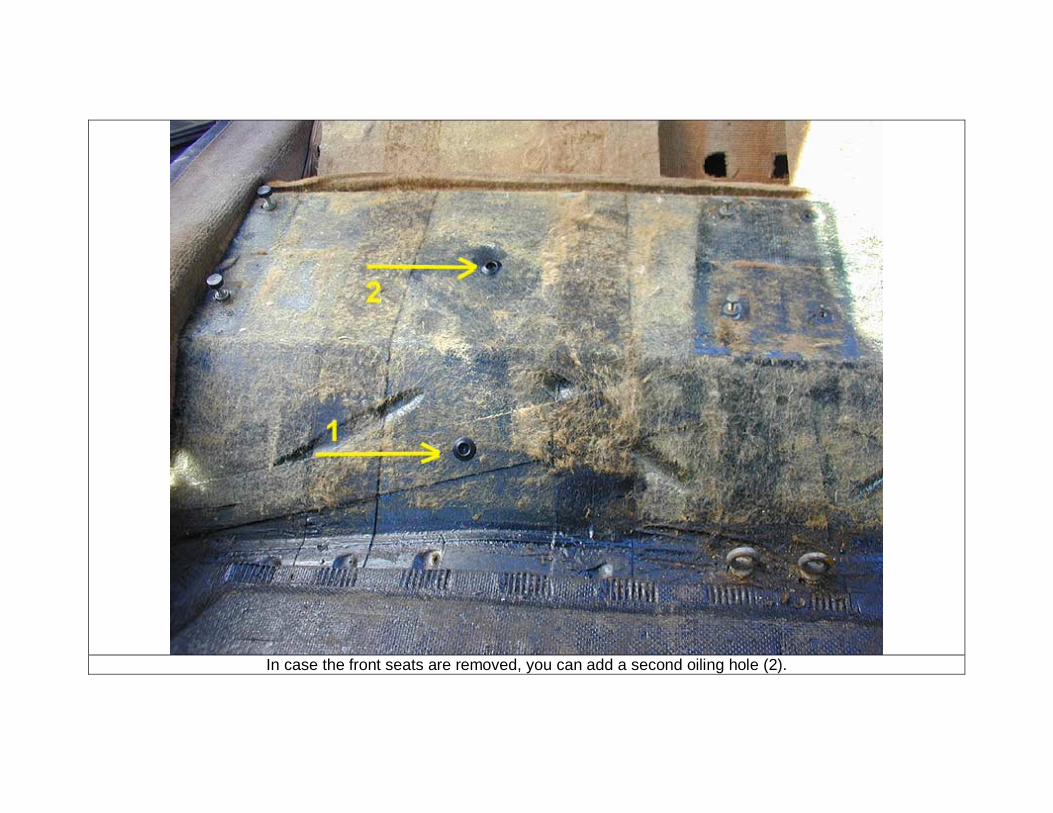
In case the front seats are removed, you can add a second oiling hole (2).
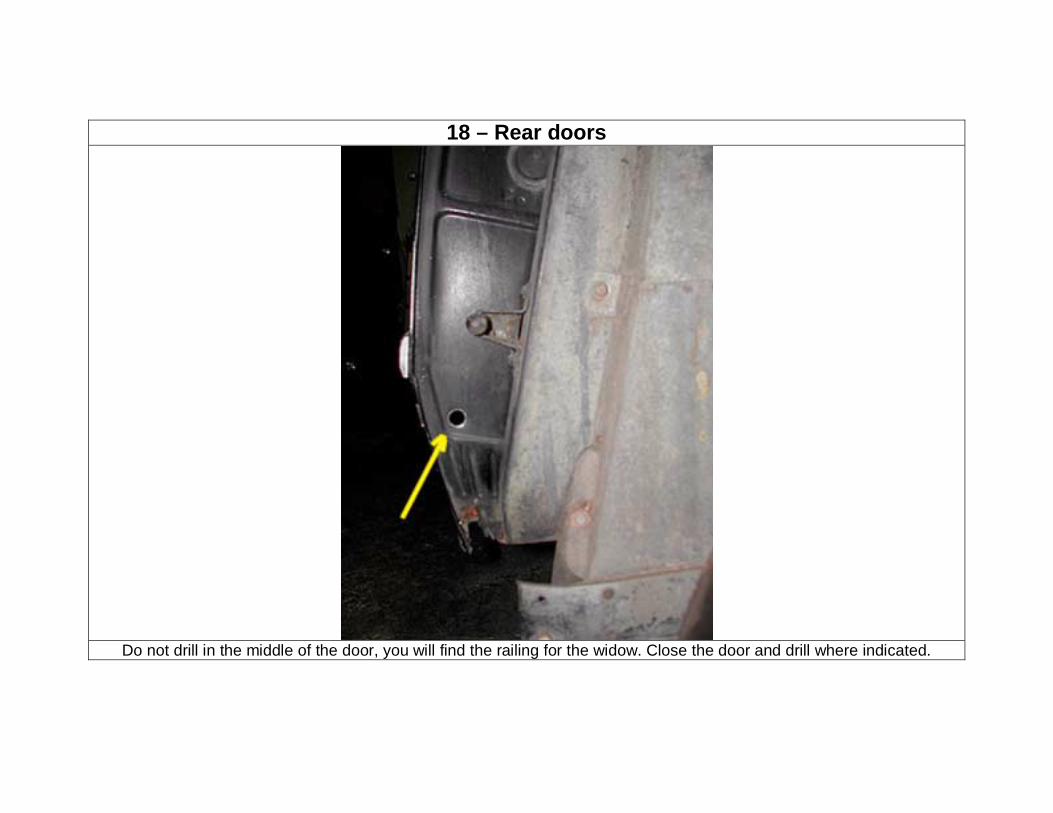
18 – Rear doors
Do not drill in the middle of the door, you will find the railing for the widow. Close the door and drill where indicated.
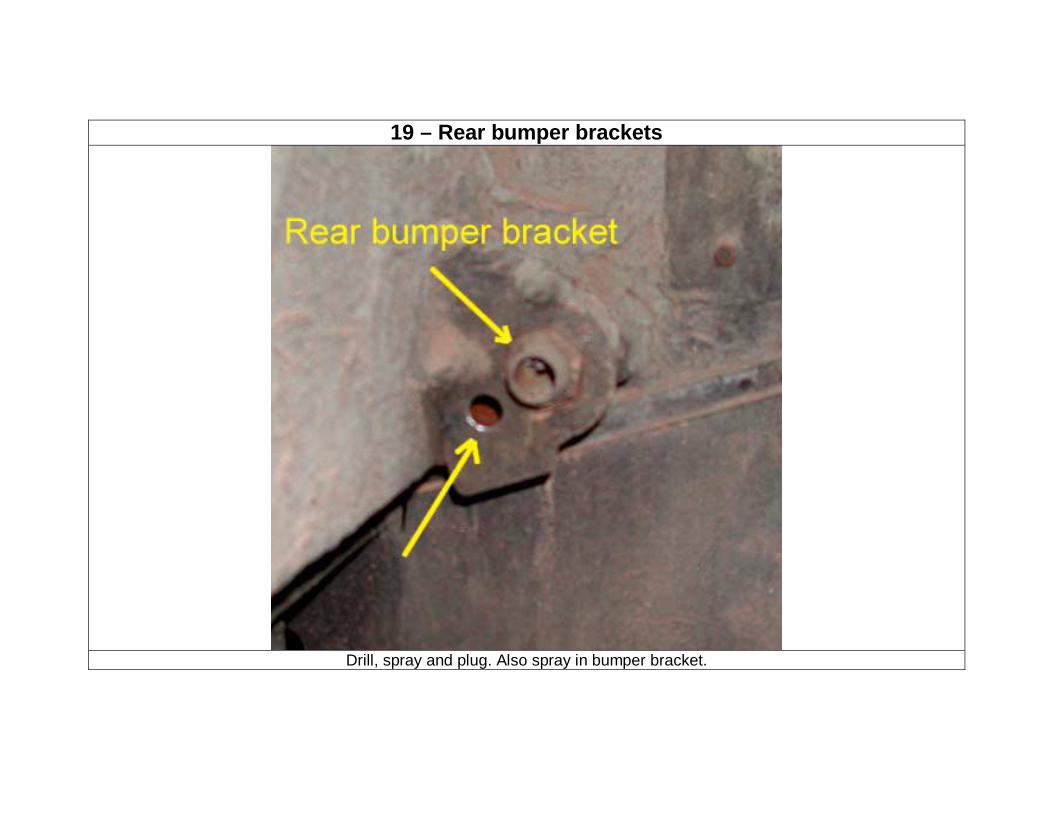
19 – Rear bumper brackets
Drill, spray and plug. Also spray in bumper bracket.
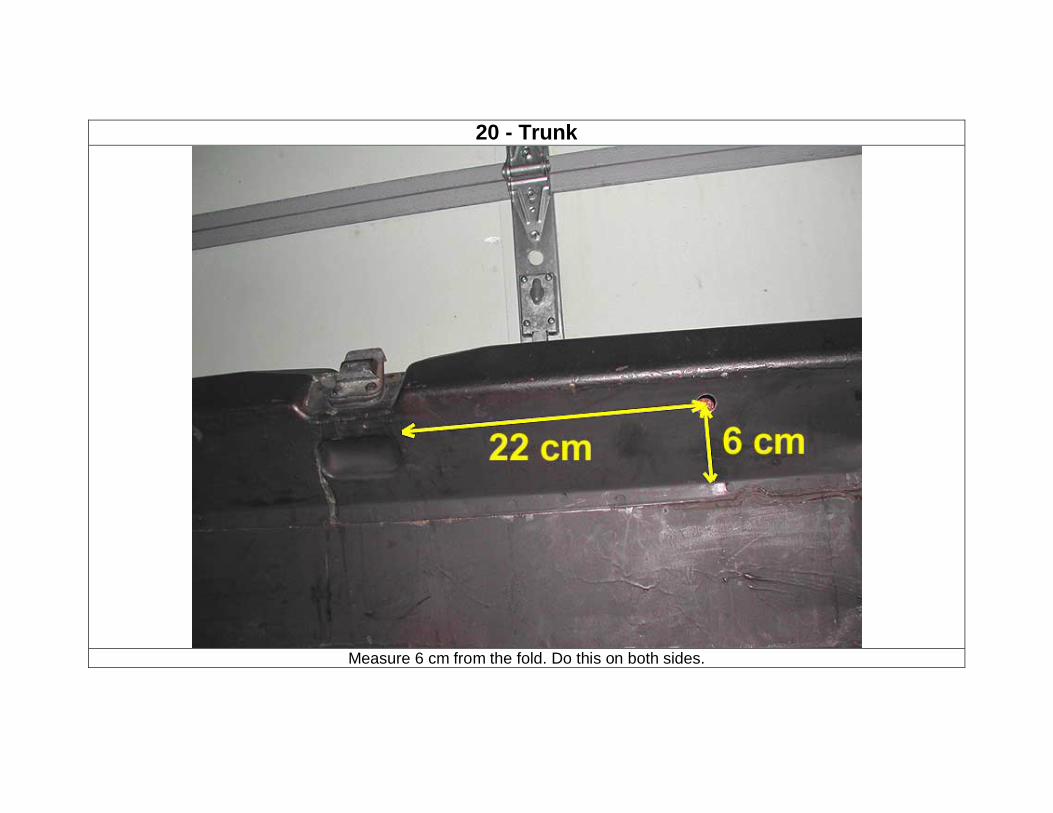
20 - Trunk
Measure 6 cm from the fold. Do this on both sides.
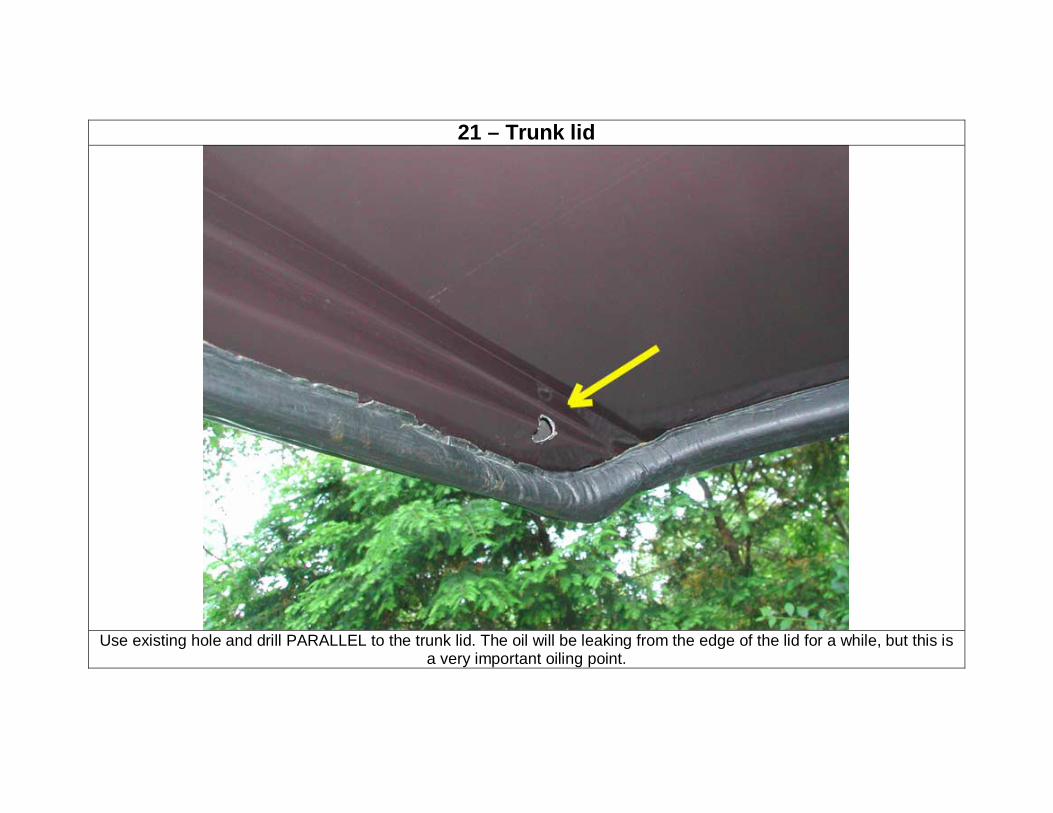
21 – Trunk lid
Use existing hole and drill PARALLEL to the trunk lid. The oil will be leaking from the edge of the lid for a while, but this is
a very important oiling point.
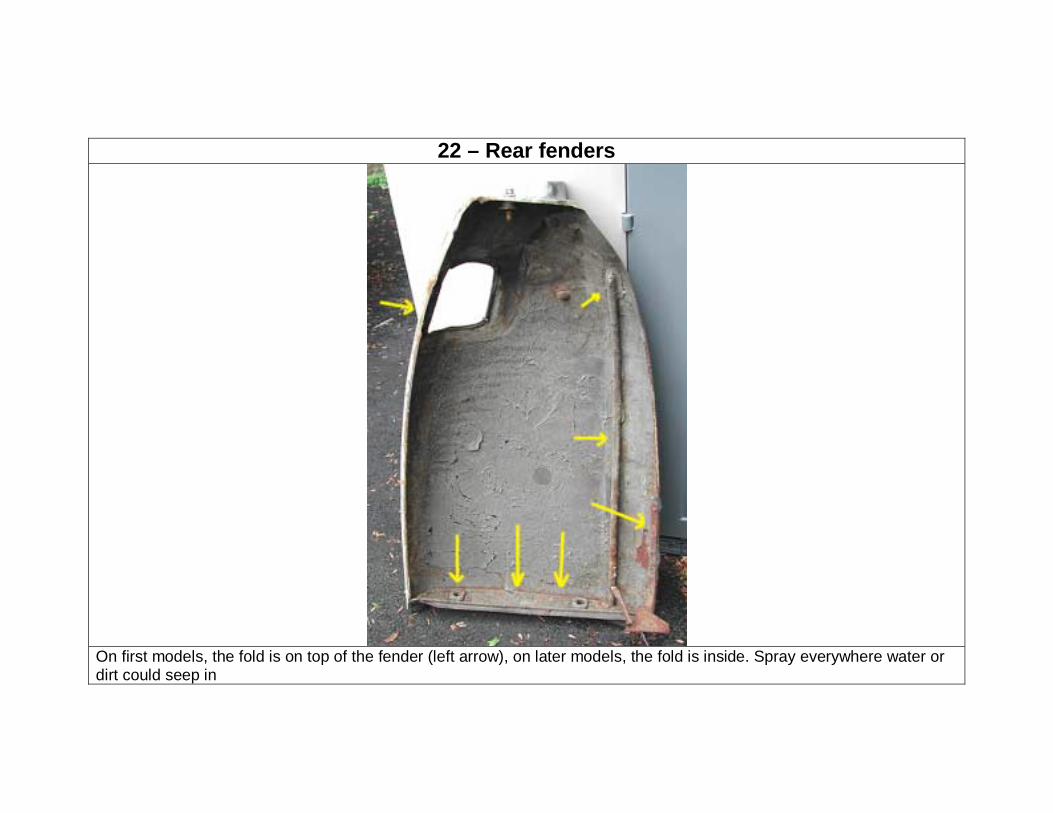
22 – Rear fenders
On first models, the fold is on top of the fender (left arrow), on later models, the fold is inside. Spray everywhere water or dirt could seep in
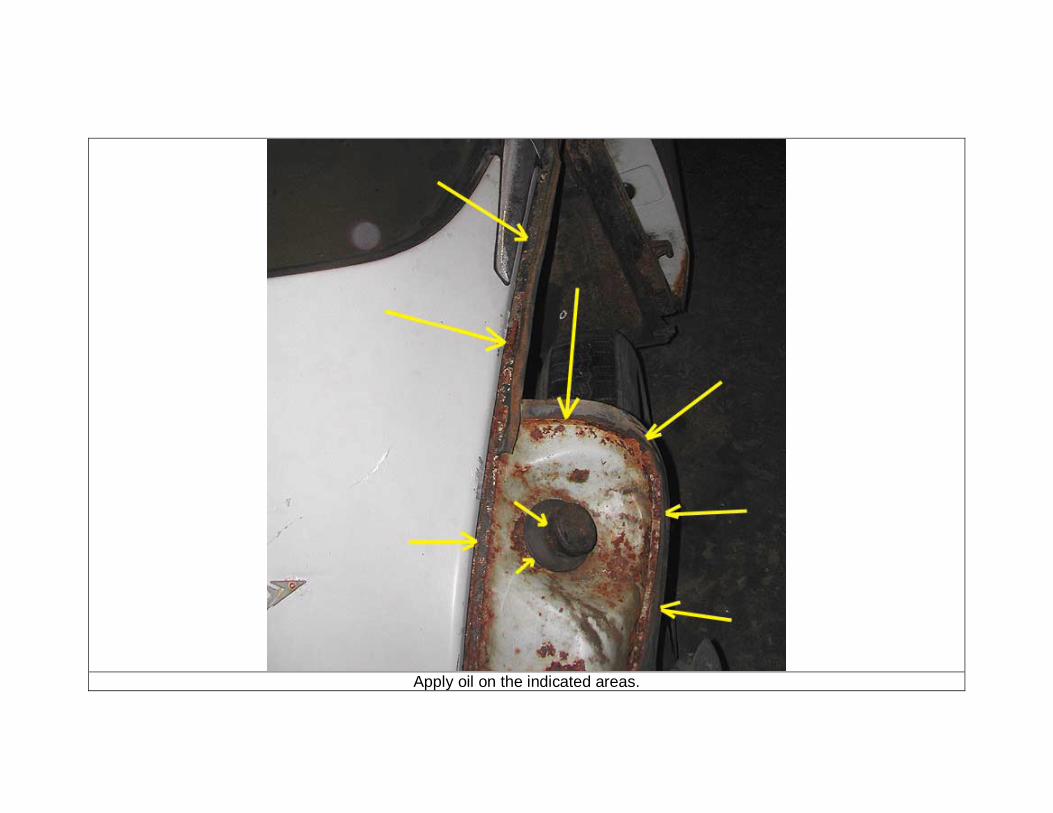
Apply oil on the indicated areas.
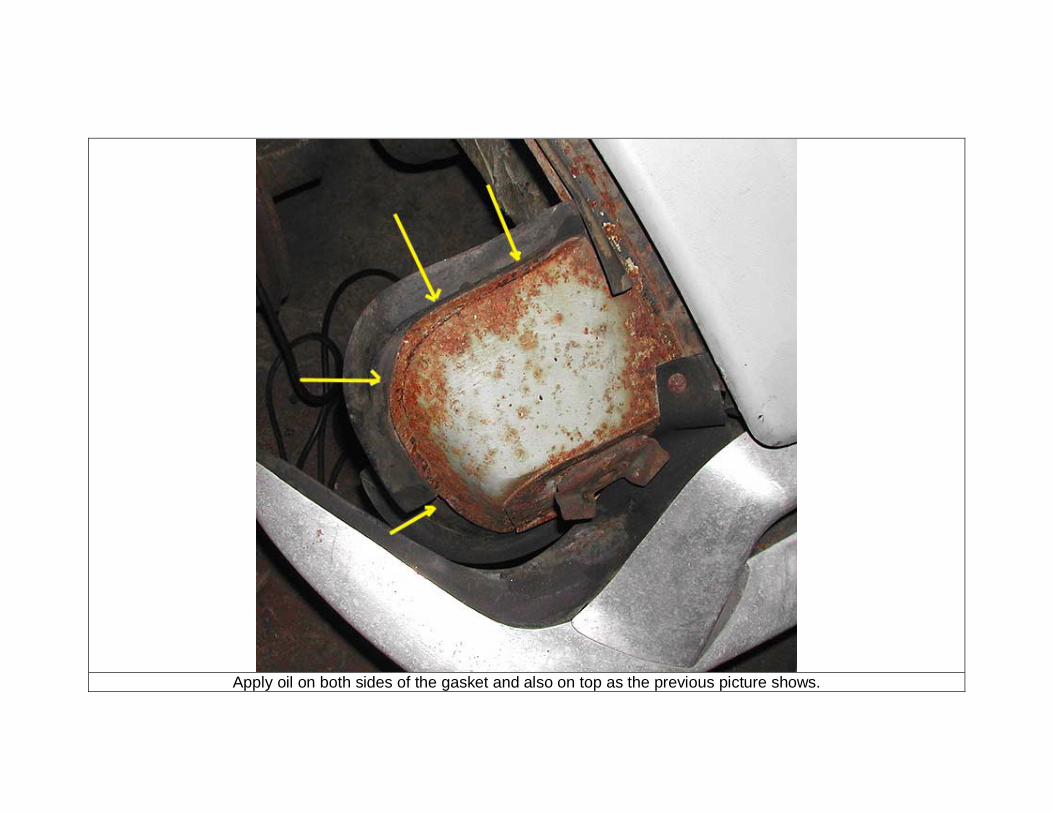
Apply oil on both sides of the gasket and also on top as the previous picture shows.

Optional – Windshield frame
The windshield frame is a very vulnerable area. If you remove the sun visors, you can access a cavity there. Careful, you
may end up with oil everywhere.
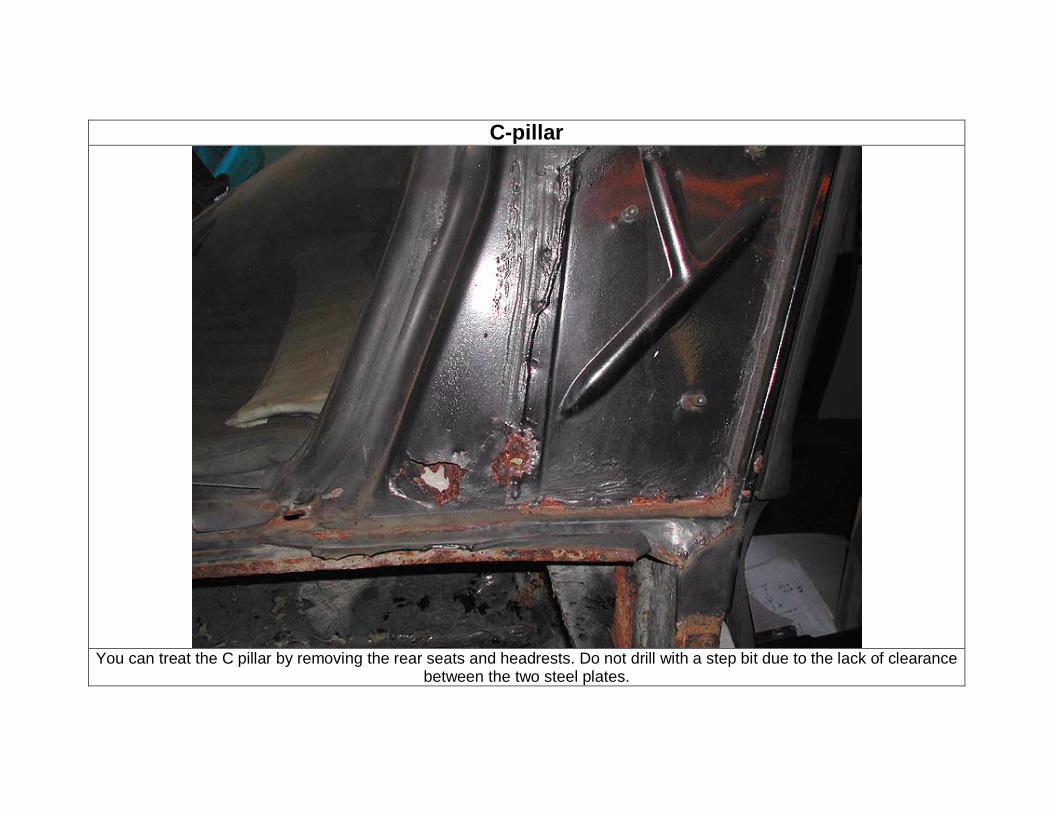
C-pillar
You can treat the C pillar by removing the rear seats and headrests. Do not drill with a step bit due to the lack of clearance
between the two steel plates.

If you find any mistake or if you have any comments or question, feel free to contact me at [email protected] To access Denis Foley and Mark L. Bardenwerper’s document, go to: http://www.candokaraoke.com/rust.html Good luck! Philip Caron.


![SPIES HECKER CITROEN 2010 [Kompatibilitätsmodus]info.pages.color.tc/Yellowpages/SH/CITROEN/CITROEN Color Guide.pdf · citroen models / modelle vin / typenschild 01 vin plate location](https://img.pdfslide.us/doc/110x75/5ae65dd97f8b9a29048d6ac6/spies-hecker-citroen-2010-kompatibilittsmodusinfopagescolortcyellowpagesshcitroencitroen.jpg)