Embed Size (px)
Citation preview
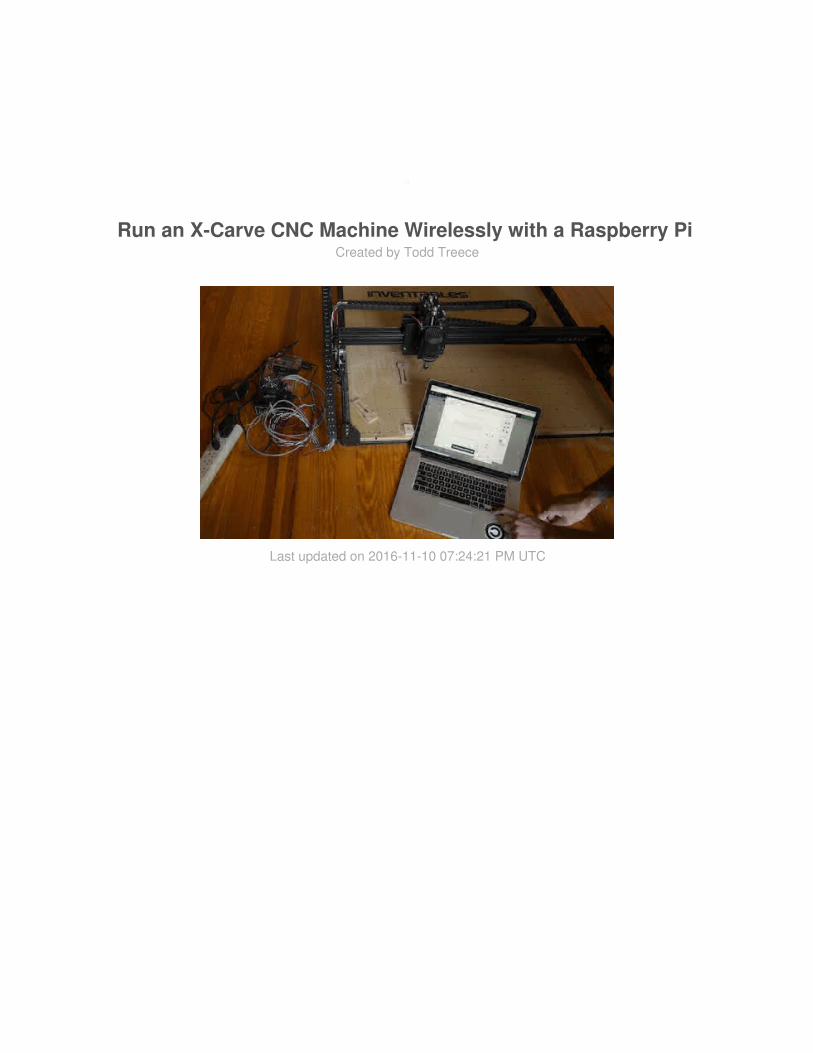
Run an X-Carve CNC Machine Wirelessly with a Raspberry PiCreated by Todd Treece
Last updated on 2016-11-10 07:24:21 PM UTC
2334
101418182025
Guide Contents
Guide ContentsSetting Up the Proxy
Hardware RequirementsRaspberry Pi SetupInstalling the X-Carve Service on the Raspberry PiConnecting the X-Carve to the Raspberry PiDisabling the Local Easel InstallInstalling the ProxyTesting CommunicationFinal Thoughts
© Adafruit Industries https://learn.adafruit.com/control-an-xcarve-cnc-machine-wirelessly-with-a-raspberry-pi
Page 2 of 26

Setting Up the Proxy
I recently picked up an X-Carve CNC router (http://adafru.it/fQg). Its a great tool, butInventables' web based digital CNC software, Easel (http://adafru.it/fQf), currently requiresa constant connection from a Mac or Windows based computer in order to send commandsto the X-Carve (http://adafru.it/fQg) over USB. This tutorial will show you how you can freeup your main computer while the X-Carve is running by using a Raspberry Pi as a bridge towirelessly send commands to the X-Carve's Arduino Uno. We will also use a PowerswitchTail to automatically control the main power to the X-Carve when Easel launches in yourweb browser.
Setup your X-Carve with the standard install instructions before continuing with this guide.
Hardware Requirements
If you aren't using our Raspberry Pi 2 starter pack (http://adafru.it/fQh), you will need thefollowing pieces of hardware to complete this project:
Raspberry Pi 2 (http://adafru.it/eCB)
© Adafruit Industries https://learn.adafruit.com/control-an-xcarve-cnc-machine-wirelessly-with-a-raspberry-pi
Page 3 of 26

microSD card (http://adafru.it/1121) formatted with the latest version ofRaspbian (http://adafru.it/fQi).WiFi dongle (http://adafru.it/1012)Power Supply (http://adafru.it/1995)Raspberry Pi 2 case (http://adafru.it/dV5)
In addition to the hardware included in the starter pack, you will also need the followingitems:
Ethernet Cable (http://adafru.it/730) (for the setup process)2x Female to Male (http://adafru.it/1952) jumper wires (12 inches or longer)Powerswitch Tail (http://adafru.it/268) (for automatic control of the X-Carve's powersupply)USB Type A to B Cable (http://adafru.it/fQj)
Raspberry Pi Setup
Install your Raspberry Pi into the case, and insert the microSD card into the Pi's microSDcard slot. If you have not formatted your microSD card with Raspbian, please follow ourguide (http://adafru.it/jd1) on the formatting process. If you have the Raspberry Pi starterpack, your SD card should come with Raspbian pre-installed.
Once you have the SD card setup, attach the WiFi dongle, power supply, and ethernetcable to the appropriate ports on the Pi. You will need to move your Pi close to yournetwork router during the setup process, but you will be able to move it anywhere withinWiFi range once the setup process is complete. Plug in the other end of the ethernet cableinto a free port on your wireless router, and power on the Raspberry Pi by plugging in thepower supply to a wall outlet.
© Adafruit Industries https://learn.adafruit.com/control-an-xcarve-cnc-machine-wirelessly-with-a-raspberry-pi
Page 4 of 26

Next, download a copy of the Adafruit Raspberry Pi Finder (http://adafru.it/iDP) on yourWindows, Mac, or Linux computer, install it, and launch the application. Follow the PiFinder's guide (http://adafru.it/iDP) if you need more info about the installation process.
After the Pi Finder launches, click the Find My Pi! button to search for your Pi.
© Adafruit Industries https://learn.adafruit.com/control-an-xcarve-cnc-machine-wirelessly-with-a-raspberry-pi
Page 5 of 26

Once the Raspberry Pi has been located, you will see a screen like the one shown below.
© Adafruit Industries https://learn.adafruit.com/control-an-xcarve-cnc-machine-wirelessly-with-a-raspberry-pi
Page 6 of 26

Enter xcarve into the hostname field, and fill in the appropriate WiFi SSID and WiFiPassword for your network. Then click the green Bootstrap! button to set up your Pi.
© Adafruit Industries https://learn.adafruit.com/control-an-xcarve-cnc-machine-wirelessly-with-a-raspberry-pi
Page 7 of 26

You will then see a window appear that will show you the progress of the bootstrappingprocess. It will take a few minutes to complete, and may take several minutes depending onthe speed of your internet connection.
© Adafruit Industries https://learn.adafruit.com/control-an-xcarve-cnc-machine-wirelessly-with-a-raspberry-pi
Page 8 of 26

You will then be returned to the Pi Finder window once the bootstrapping process hascompleted. Click on the blue Terminal button to open a SSH session to the Raspberry Pi. Ifyou need help getting started with the command line, check out our great command lineintroduction guide (http://adafru.it/slE).
© Adafruit Industries https://learn.adafruit.com/control-an-xcarve-cnc-machine-wirelessly-with-a-raspberry-pi
Page 9 of 26

Installing the X-Carve Service on the Raspberry Pi
First, check to make sure Node.js was properly installed by the bootstrap process by typingthe following command at the prompt.
node -v
You should have v4.6.2 or higher installed.
© Adafruit Industries https://learn.adafruit.com/control-an-xcarve-cnc-machine-wirelessly-with-a-raspberry-pi
Page 10 of 26

Make sure that npm has the proper permissions to install packages by running thefollowing command.
sudo chown -R pi /usr/local
Next, install the xcarve-server package using npm.
npm install -g xcarve-server
It will take a few minutes to build and install the server software.
© Adafruit Industries https://learn.adafruit.com/control-an-xcarve-cnc-machine-wirelessly-with-a-raspberry-pi
Page 11 of 26

Once the packages have been installed, start the X-Carve service by running the followingcommand.
xcarve-server start
You should then see the service start in the SSH window.
© Adafruit Industries https://learn.adafruit.com/control-an-xcarve-cnc-machine-wirelessly-with-a-raspberry-pi
Page 12 of 26

Once the service has been started, quit the SSH session by typing exit at the prompt andpressing return. You can then power down the Raspberry Pi by pressing the red Shutdownbutton in the main Pi Finder window.
© Adafruit Industries https://learn.adafruit.com/control-an-xcarve-cnc-machine-wirelessly-with-a-raspberry-pi
Page 13 of 26

Connecting the X-Carve to the Raspberry Pi
Next, remove the ethernet cable from the Pi, and unplug the Pi from the wall. Move the Pinear your X-Carve power supply, and attach the X-Carve's Arduino Uno to the Pi using ashort USB Type A to B cable. Don't power on the Raspberry Pi yet.
© Adafruit Industries https://learn.adafruit.com/control-an-xcarve-cnc-machine-wirelessly-with-a-raspberry-pi
Page 14 of 26

Next, we will connect the Powerswitch Tail to the Raspberry Pi using the Female to Malejumper cables. Attach the female end of one jumper cable to a GND pin on the Pi, and thefemale end of a second jumper cable to GPIO 17 on the Pi. Check out this pindiagram (http://adafru.it/fQk) if you need help locating the appropriate pins on theRaspberry Pi.
© Adafruit Industries https://learn.adafruit.com/control-an-xcarve-cnc-machine-wirelessly-with-a-raspberry-pi
Page 15 of 26

Plug in the male side of the GPIO 17 jumper wire to the 1: +in connector on thePowerswitch Tail. Then, plug in the male side of the GND jumper wire to the 2: -inconnector on the Powerswitch Tail.
© Adafruit Industries https://learn.adafruit.com/control-an-xcarve-cnc-machine-wirelessly-with-a-raspberry-pi
Page 16 of 26

Plug the power cord from the X-Carve power supply into the Powerswitch Tail, and thenplug in the Powerswitch Tail into an outlet. Flip the X-Carve power supply into the onposition, and plug in your Raspberry Pi to a power outlet. From now on the Raspberry Piwill be controlling the power to your X-Carve.
© Adafruit Industries https://learn.adafruit.com/control-an-xcarve-cnc-machine-wirelessly-with-a-raspberry-pi
Page 17 of 26

Disabling the Local Easel Install
You will need to disable the local install of Easel on your computer in order to use theproxy. Follow the instructions for OS X or Windows to remove the software from yourcomputer.
If you are running OS X, you will need to disable the local copy of Easel by running thefollowing command in the terminal.
sudo launchctl unload -w /Library/LaunchDaemons/com.Iris.Iris.plist
If you are running Windows, you will need to disable the local copy of Easel by uninstallingEaselLocal from the Control Pannel.
Installing the Proxy
Next, you will need to install a simple proxy on your computer that will relay traffic between
© Adafruit Industries https://learn.adafruit.com/control-an-xcarve-cnc-machine-wirelessly-with-a-raspberry-pi
Page 18 of 26

easel.inventables.com and your Raspberry Pi. First, install the latest version of Node.js foryour operating system.
Node.js Downloadhttp://adafru.it/fQl
After installation, confirm that you have the latest version by opening the terminal on OS X& Linux, or the command prompt in Windows. Run the following command to confirm thatyou are running Node.js v4.6.2 or higher.
node -v
Next, install the xcarve-proxy package using npm.
npm install -g xcarve-proxy
Finally, start the proxy.
xcarve-proxy start
© Adafruit Industries https://learn.adafruit.com/control-an-xcarve-cnc-machine-wirelessly-with-a-raspberry-pi
Page 19 of 26

Testing Communication
Now that you have the server and proxy started, you can visiteasel.inventables.com/setup (http://adafru.it/fQm) to test communication. It might take a fewseconds for the connection to be established. You will see a download screen like the oneshown below until Easel establishes communication with the X-Carve.
© Adafruit Industries https://learn.adafruit.com/control-an-xcarve-cnc-machine-wirelessly-with-a-raspberry-pi
Page 20 of 26

You will then see the normal X-Carve setup screen once Easel connects to the RaspberryPi. Click Confirm settings once you have set the approprate settings for your machine.
© Adafruit Industries https://learn.adafruit.com/control-an-xcarve-cnc-machine-wirelessly-with-a-raspberry-pi
Page 21 of 26

Windows only: You will need to enter a fake COM port when Easel prompts you to enterone. Any number will do here since the Arduino is connected to the Raspberry Pi.
© Adafruit Industries https://learn.adafruit.com/control-an-xcarve-cnc-machine-wirelessly-with-a-raspberry-pi
Page 22 of 26

You should then see a screen that will allow you to test communication between Easel andthe X-Carve. Use the arrows on the screen to test the stepper motors.
© Adafruit Industries https://learn.adafruit.com/control-an-xcarve-cnc-machine-wirelessly-with-a-raspberry-pi
Page 23 of 26

Finish the rest of the install process, and try a test carve to make sure everything isworking.
© Adafruit Industries https://learn.adafruit.com/control-an-xcarve-cnc-machine-wirelessly-with-a-raspberry-pi
Page 24 of 26

Final Thoughts
© Adafruit Industries https://learn.adafruit.com/control-an-xcarve-cnc-machine-wirelessly-with-a-raspberry-pi
Page 25 of 26
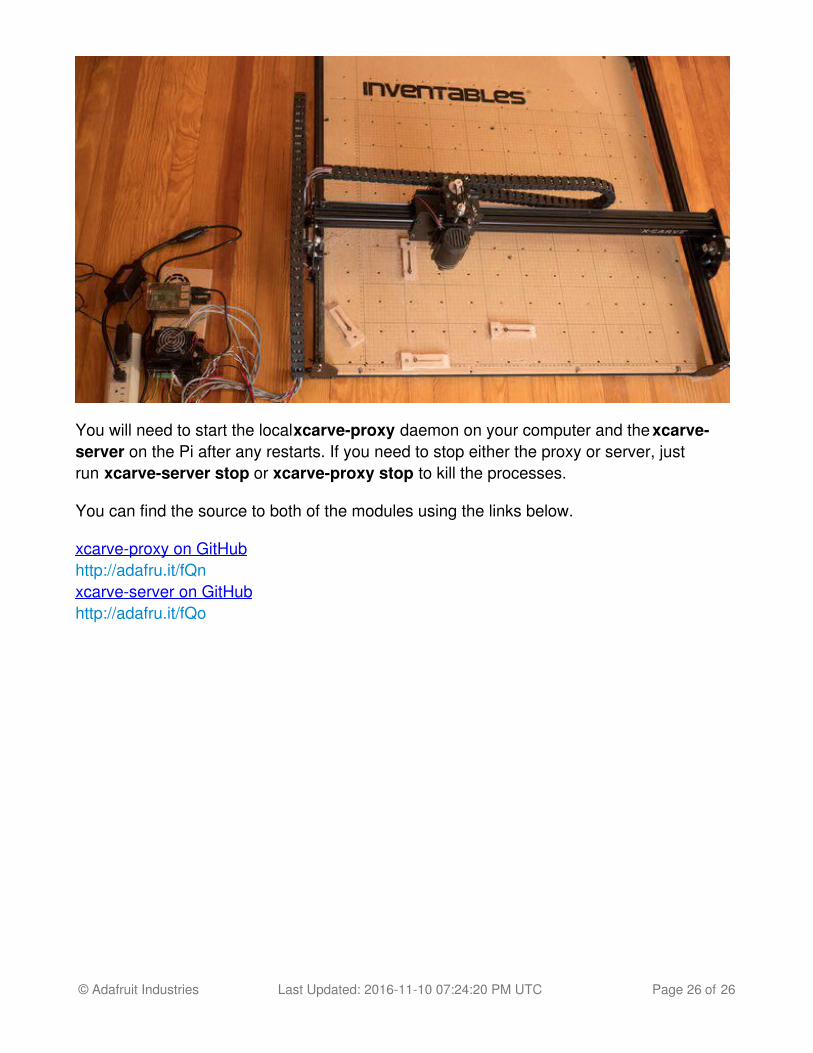
You will need to start the local xcarve-proxy daemon on your computer and the xcarve-server on the Pi after any restarts. If you need to stop either the proxy or server, justrun xcarve-server stop or xcarve-proxy stop to kill the processes.
You can find the source to both of the modules using the links below.
xcarve-proxy on GitHubhttp://adafru.it/fQnxcarve-server on GitHubhttp://adafru.it/fQo
© Adafruit Industries Last Updated: 2016-11-10 07:24:20 PM UTC Page 26 of 26