Embed Size (px)
Citation preview
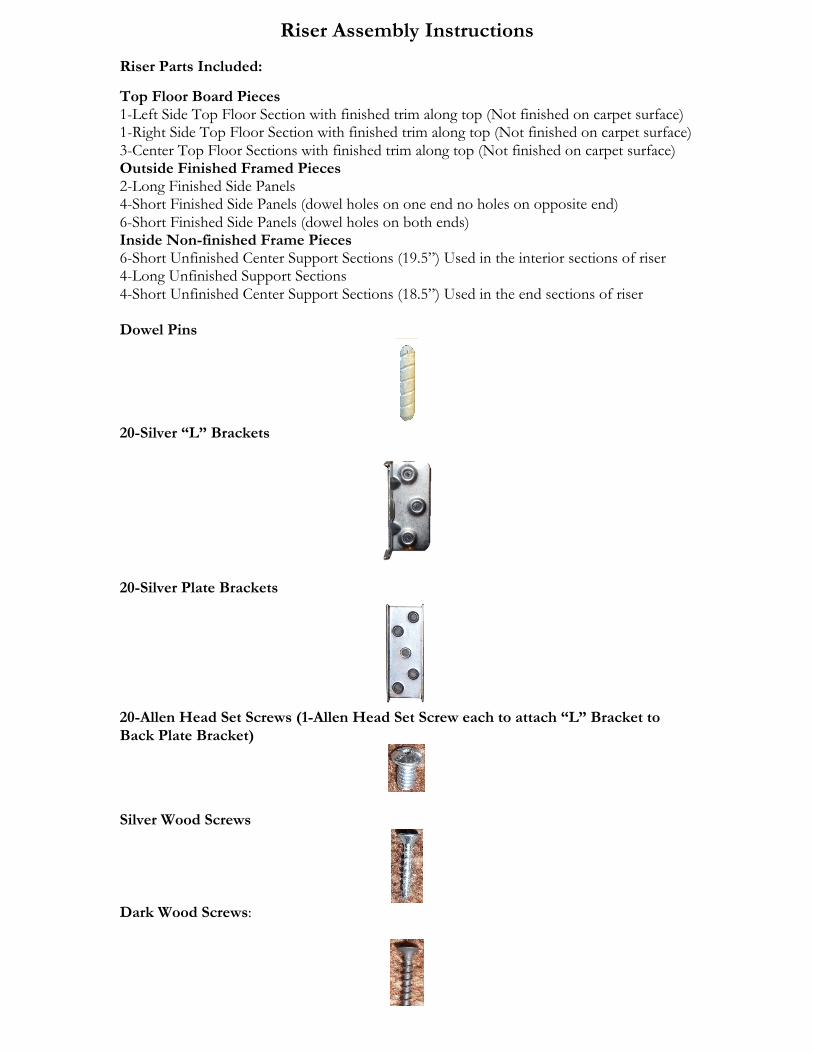
Riser Assembly Instructions Riser Parts Included:
Top Floor Board Pieces 1-Left Side Top Floor Section with finished trim along top (Not finished on carpet surface) 1-Right Side Top Floor Section with finished trim along top (Not finished on carpet surface) 3-Center Top Floor Sections with finished trim along top (Not finished on carpet surface) Outside Finished Framed Pieces 2-Long Finished Side Panels 4-Short Finished Side Panels (dowel holes on one end no holes on opposite end) 6-Short Finished Side Panels (dowel holes on both ends) Inside Non-finished Frame Pieces 6-Short Unfinished Center Support Sections (19.5”) Used in the interior sections of riser 4-Long Unfinished Support Sections 4-Short Unfinished Center Support Sections (18.5”) Used in the end sections of riser Dowel Pins
20-Silver “L” Brackets
20-Silver Plate Brackets
20-Allen Head Set Screws (1-Allen Head Set Screw each to attach “L” Bracket to Back Plate Bracket)
Silver Wood Screws
Dark Wood Screws:
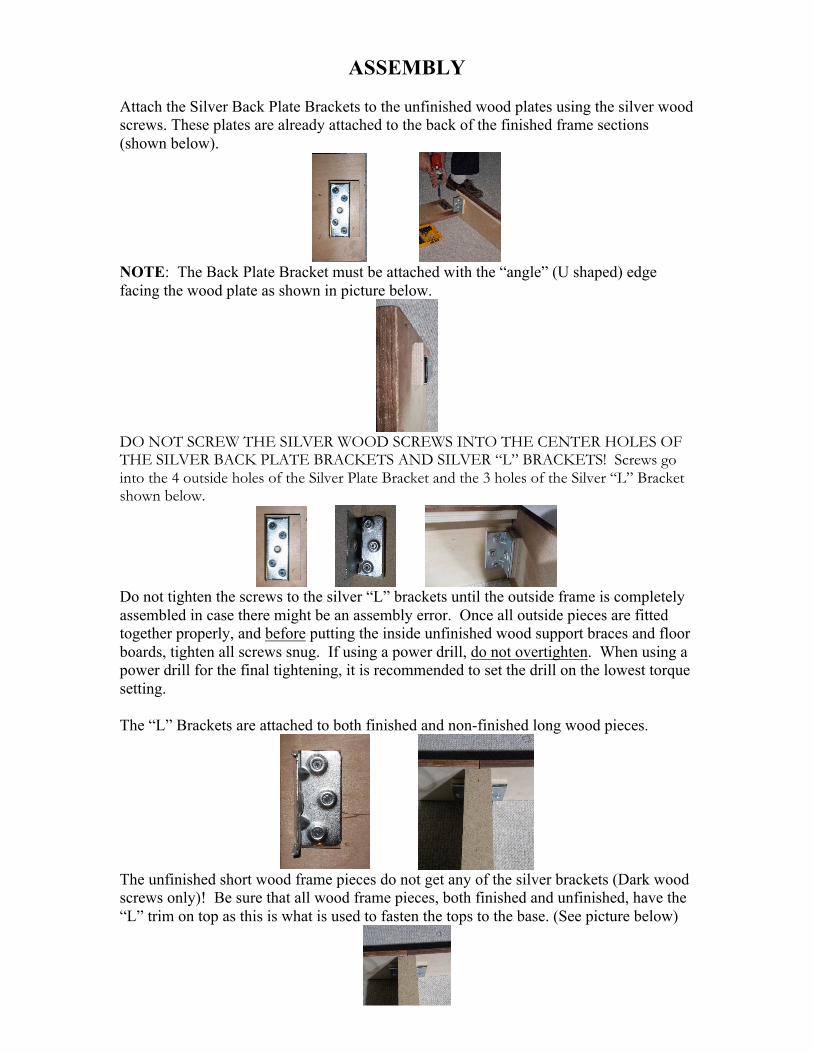
ASSEMBLY
Attach the Silver Back Plate Brackets to the unfinished wood plates using the silver wood screws. These plates are already attached to the back of the finished frame sections (shown below).
NOTE: The Back Plate Bracket must be attached with the “angle” (U shaped) edge facing the wood plate as shown in picture below.
DO NOT SCREW THE SILVER WOOD SCREWS INTO THE CENTER HOLES OF THE SILVER BACK PLATE BRACKETS AND SILVER “L” BRACKETS! Screws go into the 4 outside holes of the Silver Plate Bracket and the 3 holes of the Silver “L” Bracket shown below.
Do not tighten the screws to the silver “L” brackets until the outside frame is completely assembled in case there might be an assembly error. Once all outside pieces are fitted together properly, and before putting the inside unfinished wood support braces and floor boards, tighten all screws snug. If using a power drill, do not overtighten. When using a power drill for the final tightening, it is recommended to set the drill on the lowest torque setting.
The “L” Brackets are attached to both finished and non-finished long wood pieces.
The unfinished short wood frame pieces do not get any of the silver brackets (Dark wood screws only)! Be sure that all wood frame pieces, both finished and unfinished, have the “L” trim on top as this is what is used to fasten the tops to the base. (See picture below)
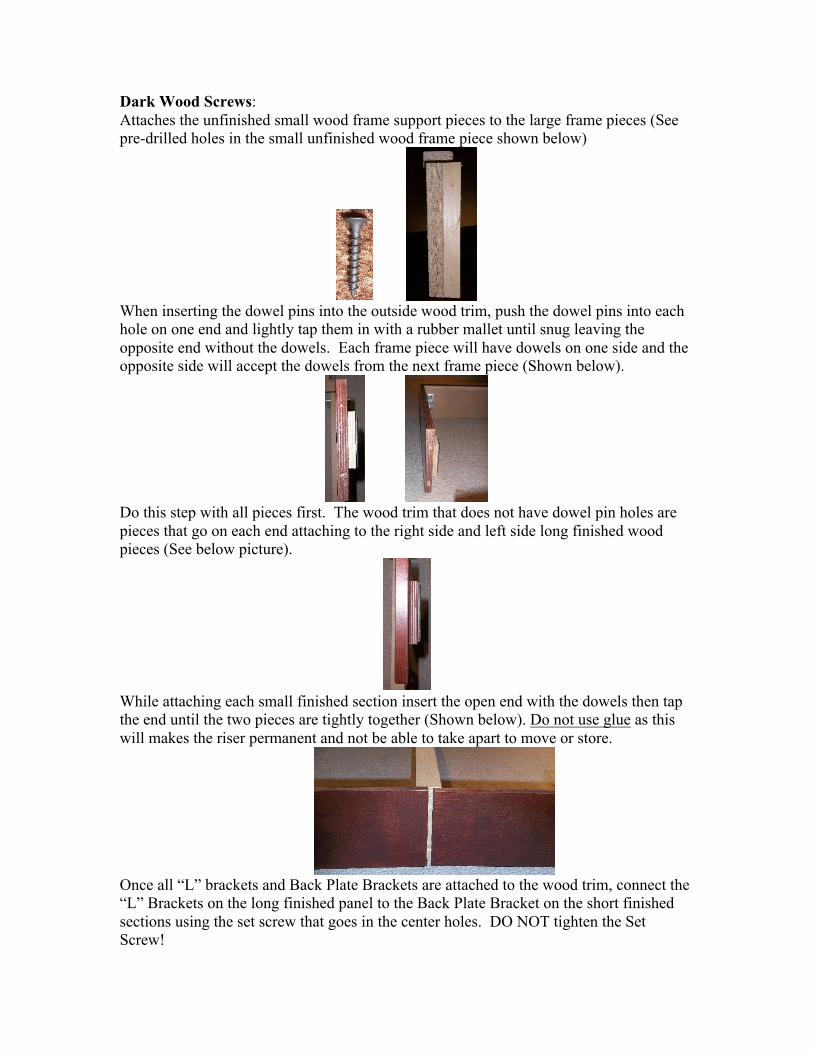
Dark Wood Screws: Attaches the unfinished small wood frame support pieces to the large frame pieces (See pre-drilled holes in the small unfinished wood frame piece shown below)
When inserting the dowel pins into the outside wood trim, push the dowel pins into each hole on one end and lightly tap them in with a rubber mallet until snug leaving the opposite end without the dowels. Each frame piece will have dowels on one side and the opposite side will accept the dowels from the next frame piece (Shown below).
Do this step with all pieces first. The wood trim that does not have dowel pin holes are pieces that go on each end attaching to the right side and left side long finished wood pieces (See below picture).
While attaching each small finished section insert the open end with the dowels then tap the end until the two pieces are tightly together (Shown below). Do not use glue as this will makes the riser permanent and not be able to take apart to move or store.
Once all “L” brackets and Back Plate Brackets are attached to the wood trim, connect the “L” Brackets on the long finished panel to the Back Plate Bracket on the short finished sections using the set screw that goes in the center holes. DO NOT tighten the Set Screw!
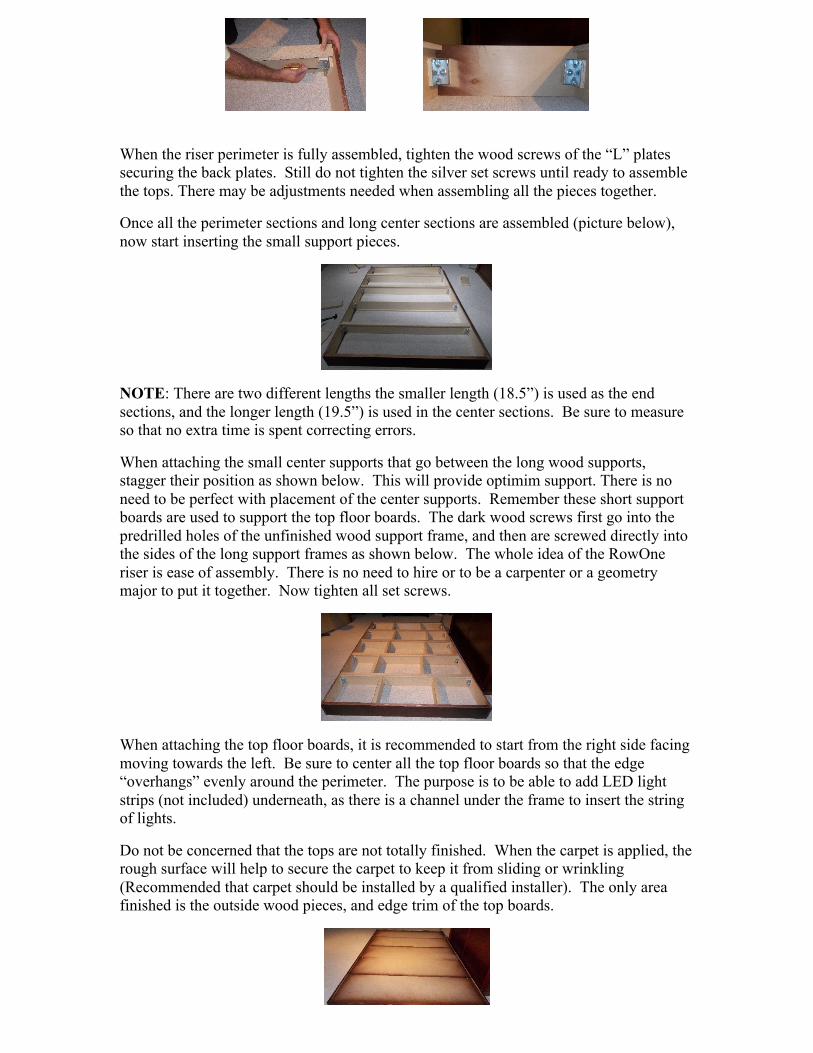
When the riser perimeter is fully assembled, tighten the wood screws of the “L” plates securing the back plates. Still do not tighten the silver set screws until ready to assemble the tops. There may be adjustments needed when assembling all the pieces together. Once all the perimeter sections and long center sections are assembled (picture below), now start inserting the small support pieces.
NOTE: There are two different lengths the smaller length (18.5”) is used as the end sections, and the longer length (19.5”) is used in the center sections. Be sure to measure so that no extra time is spent correcting errors. When attaching the small center supports that go between the long wood supports, stagger their position as shown below. This will provide optimim support. There is no need to be perfect with placement of the center supports. Remember these short support boards are used to support the top floor boards. The dark wood screws first go into the predrilled holes of the unfinished wood support frame, and then are screwed directly into the sides of the long support frames as shown below. The whole idea of the RowOne riser is ease of assembly. There is no need to hire or to be a carpenter or a geometry major to put it together. Now tighten all set screws.
When attaching the top floor boards, it is recommended to start from the right side facing moving towards the left. Be sure to center all the top floor boards so that the edge “overhangs” evenly around the perimeter. The purpose is to be able to add LED light strips (not included) underneath, as there is a channel under the frame to insert the string of lights. Do not be concerned that the tops are not totally finished. When the carpet is applied, the rough surface will help to secure the carpet to keep it from sliding or wrinkling (Recommended that carpet should be installed by a qualified installer). The only area finished is the outside wood pieces, and edge trim of the top boards.
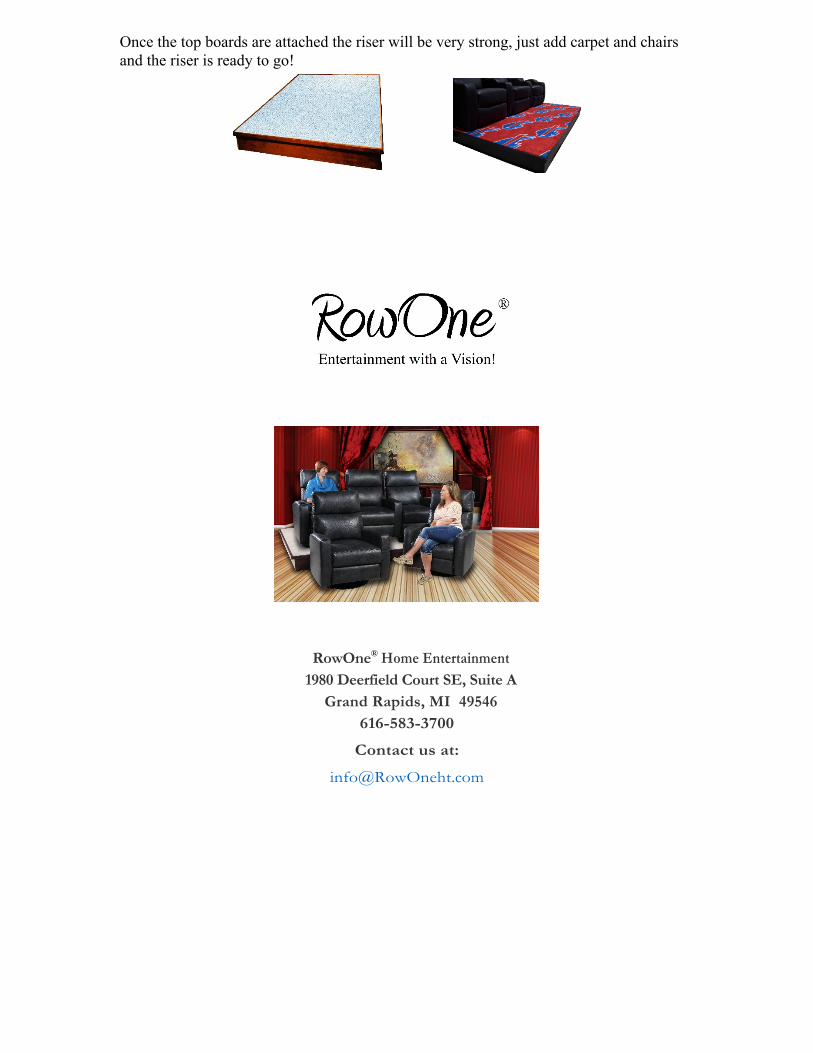
Once the top boards are attached the riser will be very strong, just add carpet and chairs and the riser is ready to go!
RowOne® Home Entertainment 1980 Deerfield Court SE, Suite A
Grand Rapids, MI 49546 616-583-3700
Contact us at: