Embed Size (px)
Citation preview
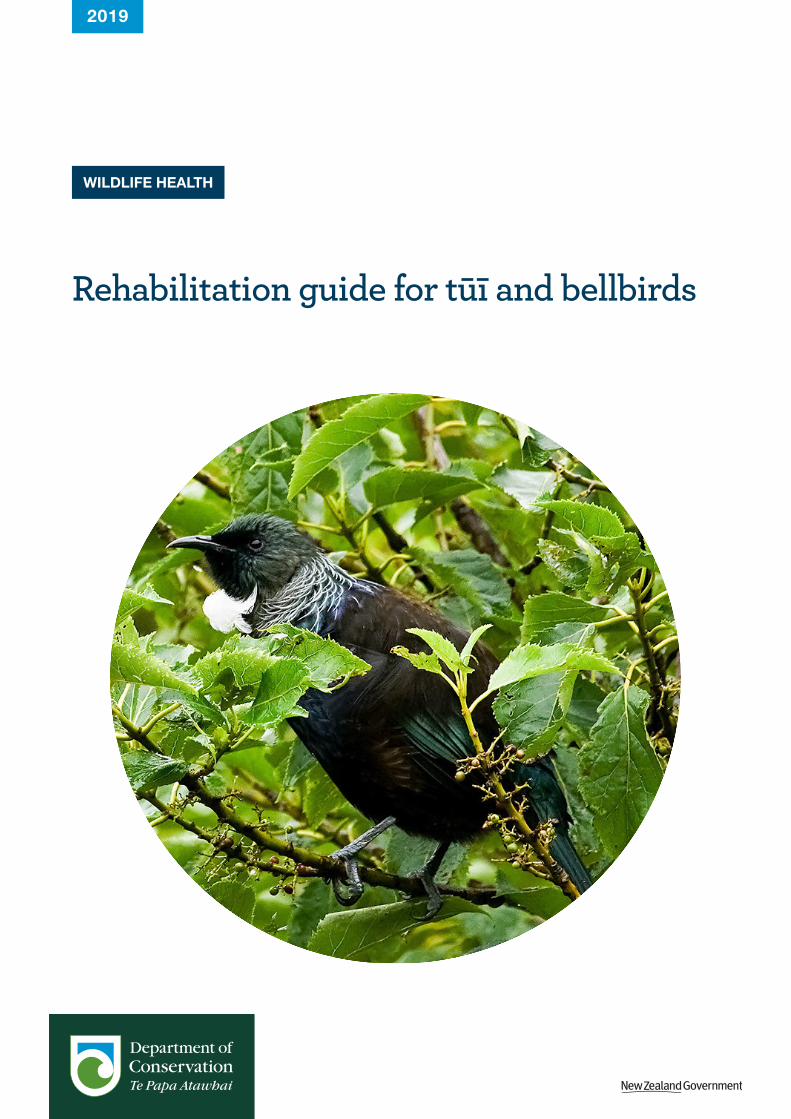
Rehabilitation guide for tūī and bellbirds
WILDLIFE HEALTH
2019
2 Rehabilitation guide for tūī and bellbirds
Cover: Adult tūī. Photo: David Cook.
New Zealand Wildlife Rehabilitation Fact Sheets are occasional publications produced to describe best practice for rehabilitation of New Zealand native species. They are available in pdf form from the Department of Conservation website (www.doc.govt.nz).
© Copyright December 2019, New Zealand Department of Conservation
ISBN 978-0-473-50911-8 (web PDF)
This factsheet was approved by the Director, Threats Unit, Department of Conservation, PO Box 10420, Wellington, New Zealand.
Editing and design: Creative Services Team, Department of Conservation, PO Box 10420, Wellington, New Zealand.
In the interest of forest conservation, we support paperless electronic publishing.
3Rehabilitation guide for tūī and bellbirds
Contents1. Species 5
2. First aid 6
3. Why and when do tūī and bellbirds require health care? 6
3.1 The most common causes of harm 6
3.2 The most common types of injury and illness seen in tūī and bellbirds 6
4. Veterinary care 6
5. Handling tūī and bellbirds 7
6. Hospital cages 7
7. Diet 8
7.1 Natural diet 8
7.2 Convalescent diet 8
7.3 Self-feeder’s diet 9
8. Aviaries for tūī and bellbirds 9
9. Requirements for flight aviaries 9
10. Cleaning and disinfection 11
11. Potential complications 11
11.1 Imprinting 11
11.2 Failure to heal 11
11.3 Foot lesions 12
11.4 Feather damage 12
12. Criteria for release 12
13. Method of release 12
14. Further information 12
15. Acknowledgements 12
16. References 13

4 Rehabilitation guide for tūī and bellbirds

5Rehabilitation guide for tūī and bellbirds
Rehabilitation guide for tūī and bellbirdsThis guide describes the appropriate food, housing and husbandry requirements for tūī
(Prosthemadera novaeseelandiae spp.) and bellbirds (Anthornis melanura melanura) when they are
held in captivity for rehabilitation and it should be considered a reference for minimum standards
of care. This guide does not cover specifics of veterinary care.
1. SpeciesTūī Endemic NZTCS1 status: Not threatened(Prosthemadera novaeseelandiae novaeseelandiae)
Chatham Island tūī Endemic NZTCS status: Threatened(Prosthemadera novaeseelandiae chathamensis)
Bellbird, korimako Endemic NZTCS status: Not threatened(Anthornis melanura melanura)
A Wildlife Act Authority (DOC Permit) is required to Hold in Captivity. Go to https://www.doc.govt.
nz/get-involved/apply-for-permits/interacting-with-wildlife/holding-wildlife-for-rehabilitation/
1 NZTCS New Zealand Threat Classification System, for more information visit http://www.doc.govt.nz/nature/conservation-status/
Figure 1. Images of the birds addressed in this guide. A. – Juvenile tūī. Photo: Dick Veitch. B. – Adult tūī. Photo: Jonathan Astin. C. – Adult male bellbird. Photo: Leon Berard. D. – Adult female bellbird on flax (Phormium sp.). Bird has flax pollen on its head. Photo: Andrew Walmsley.
A B
C D

6 Rehabilitation guide for tūī and bellbirds
2. First aidFirst aid is provided when the bird arrives for treatment to stabilise it and minimise pain. Sick or injured honeyeaters (Tūī, bellbirds and hīhī) will require immediate liquid food supplementation, as they quickly develop hypoglycemia (low blood sugar levels). Refer to the ‘DIET’ section below. Other first aid includes:
• Oral fluid therapy to treat dehydration.
• A source of warmth such as heat pads or hot water bottles wrapped in a towel, or placing the bird in an incubator or a warm room (set at 28–30°C). If the bird is alert and eating it may not need heat supplementation.
• Holding the bird in a quiet area away from any disturbance (including people and pets).
• Stabilising broken bones using a bandage.
For details on oral fluid therapy and bandaging, go to Modules 3 & 7 of the DOC online wildlife health course at: http://www.doc.govt.nz/wildlife-health-course
3. Why and when do tūī and bellbirds require health care? 3.1 The most common causes of harm are:
• Collision (with a solid object such as a window or vehicle).
• An attack from a predator.
• A fall from height (e.g. out of a nest).
• Chicks being abandoned by parents.
• Ingestion of a toxin (e.g. nectar from a toxic plant can cause brain or central nervous system disorders).
• The effects of inadequate supplementary food or the effects of long-term captive care and medications for rehabilitation.
3.2 The most common types of injury and illness seen in tūī and bellbirds are:
• Fractures to the humerus, radius or ulna bones in the wing
• Head injuries and concussion.
• Signs of central (brain) nervous system damage, such as twisting of the head and neck,
shrieking, seizures, paralysis.
• Signs of spinal injuries, such as partial or full paralysis of the legs and tail.
• Penetrating tooth wounds and extensive fractures after attack by an animal (e.g. cat).
• Oral or intestinal Candida sp. (yeast) infection.
• Infestation by external parasites – lice, mites, ticks.
• Infestation by internal parasites – worms and coccidia.
4. Veterinary careA veterinary consultation is required for any bird that displays symptoms consistent with any of
the conditions listed above or which is not improving as expected during care (within 1–3 days
of arrival). X-rays (radiographs) are usually required to determine the best treatment for broken
bones. Medications such as pain relief and antibiotics require a veterinary prescription to ensure
the correct drugs and doses are used.
7Rehabilitation guide for tūī and bellbirds
5. Handling tūī and bellbirdsCorrect handling of birds minimises the risk of harm to both birds and handlers. Before handling a bird, identify its most dangerous features and gain control of these first. The main defence mechanism of tūī and bellbirds are their sharp, needle-like claws. When handling, control the wings and feet by wrapping the bird in a small towel (such as a hand towel or tea towel). The towel will also protect the feathers from damage and covering the head will help calm the bird. Alternatively, use the ‘bander’s grip’ by holding the body and wings in one hand with the head exiting between the index and middle fingers. The other hand can then keep the feet under control by holding the legs above the hock. If the bird has gripped a towel or object and will not release its talons, then it may be easier to leave the bird grasping smaller items while examining it. Whenever handling a bird AVOID placing any pressure on the chest because, unlike mammals, birds do not have a diaphragm. This means that if the movement of the chest is restricted the bird will be unable to breathe. Any handling should involve only light restraint over the chest in a ‘loose caged’ grip, where the fingers or towel surround the bird’s chest to prevent it from escaping, while still enabling the bird to breathe freely.
As the recovery of the bird progresses it will become much harder to catch. Turning the lights down low and removing the perch prior to attempting capture may be helpful. Draping a towel over the bird in the cage can also facilitate capture.
For more details on handling small passerines, go to Module 1 of the DOC online wildlife health course at http://www.doc.govt.nz/wildlife-health-course
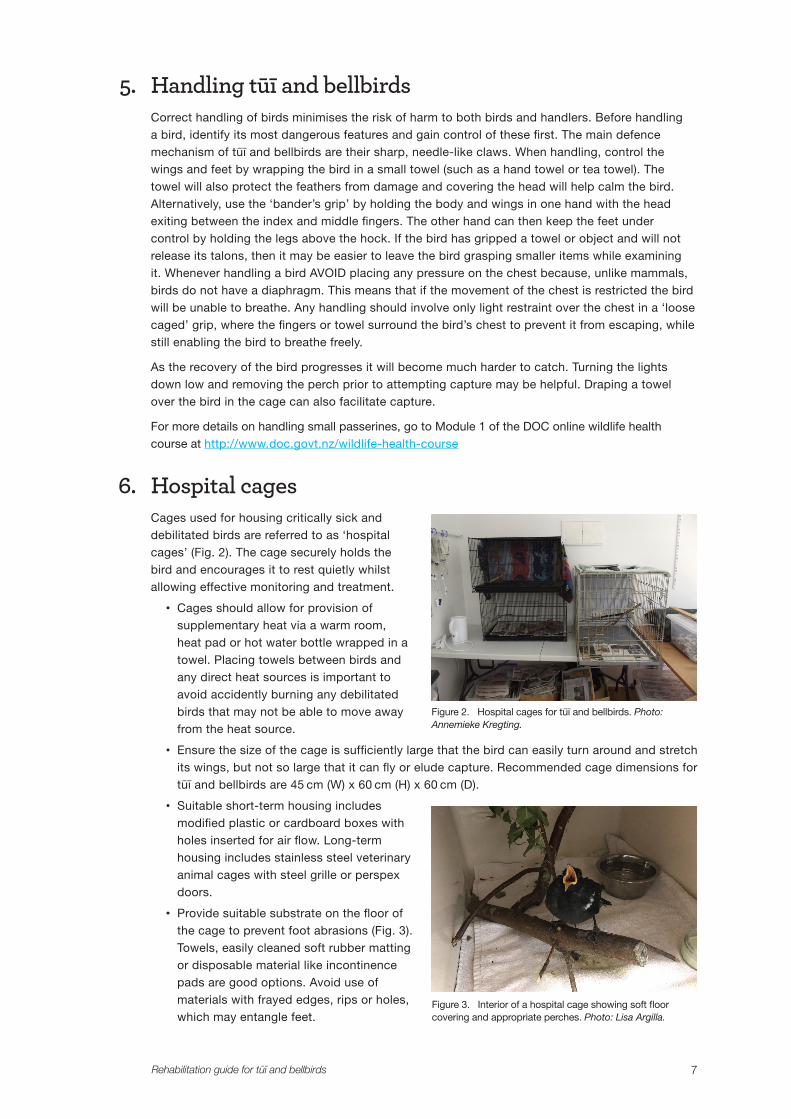
6. Hospital cagesCages used for housing critically sick and debilitated birds are referred to as ‘hospital cages’ (Fig. 2). The cage securely holds the bird and encourages it to rest quietly whilst allowing effective monitoring and treatment.
• Cages should allow for provision of supplementary heat via a warm room, heat pad or hot water bottle wrapped in a towel. Placing towels between birds and any direct heat sources is important to avoid accidently burning any debilitated birds that may not be able to move away from the heat source.
• Ensure the size of the cage is sufficiently large that the bird can easily turn around and stretch its wings, but not so large that it can fly or elude capture. Recommended cage dimensions for tūī and bellbirds are 45 cm (W) x 60 cm (H) x 60 cm (D).
• Suitable short-term housing includes modified plastic or cardboard boxes with holes inserted for air flow. Long-term housing includes stainless steel veterinary animal cages with steel grille or perspex doors.
• Provide suitable substrate on the floor of the cage to prevent foot abrasions (Fig. 3). Towels, easily cleaned soft rubber matting or disposable material like incontinence pads are good options. Avoid use of materials with frayed edges, rips or holes, which may entangle feet.
Figure 2. Hospital cages for tūī and bellbirds. Photo: Annemieke Kregting.
Figure 3. Interior of a hospital cage showing soft floor covering and appropriate perches. Photo: Lisa Argilla.
8 Rehabilitation guide for tūī and bellbirds
• Perches should be a suitable diameter (approx. 18–25 mm) for tūī/bellbird claws. They need
to be stable and cut from natural branches. Artificial or smooth branches should be covered
with towels, artificial turf, rubber, foam or disposable bandage (3M VetrapTM). A small rolled-
up towel placed on the cage floor can also be used as a temporary perch. Perches should
be approximately 40–50 mm above the floor, which allows birds to hop up easily but also
avoids their tail dragging on the floor when perching (Fig. 2). Providing fresh branches daily
is a suitable alternative to artificial perches and are good enrichment for tūī and bellbirds to
retreat into. Do not use poisonous plants for enrichment (such as tutu (Coriaria species) or
rhododendron species). Safe options include: tarata / lemonwood (Pittosporum eugenoides),
kawa kawa (Piper excelsum), Coprosma species or any plant species within the nectar-eater’s
natural diet.
• Cover transparent doors or whole wire cages with towels or cloth to give some privacy and to
prevent attempts to escape which may cause further injury. Allow some natural light to enter
the cage to encourage feeding during the day
• Place food and water bowls on the floor of the cage, close to the door for ease of access.
If the bird is healthy enough to feed while perching, then elevate the bowels to avoid any tail
feather damage from contact with the floor.
7. Diet 7.1 Natural diet
Tūī and bellbirds are nectar-feeders that feed on native and introduced flowering plants, honeydew
(from beech forests), as well as fruits and insects. Source plant species include pūriri (Vitex
lucens), kōwhai (Sophora spp.), tree fuchsia (Fuchsia excorticata), rewarewa (Knightia excelsa),
flax (Phormium spp.), rātā and pohutukawa (Metrosideros spp.), wineberry (Aristotelia serrata),
kaikōmako (Pennantia corymbosa), māhoe (Melicytus ramiflorus), ngaio (Myoporum laetum),
rimu (Dacrydium cupressinum), kahikatea (Dacrycarpus dacrydioides), eucalypts, tree lucerne
(tagasaste, Chamaecytisus palmensis) and banksias. Insects, e.g. cicadas and stick insects, are
particularly important during the breeding season for chick growth. Bellbirds appear to mainly feed
insects to their young, including spiders. Natural diet items can be provided to birds in aviaries to
encourage natural behaviour prior to release; however, the self-feeder’s diet must also be offered
to fulfil all dietary needs.
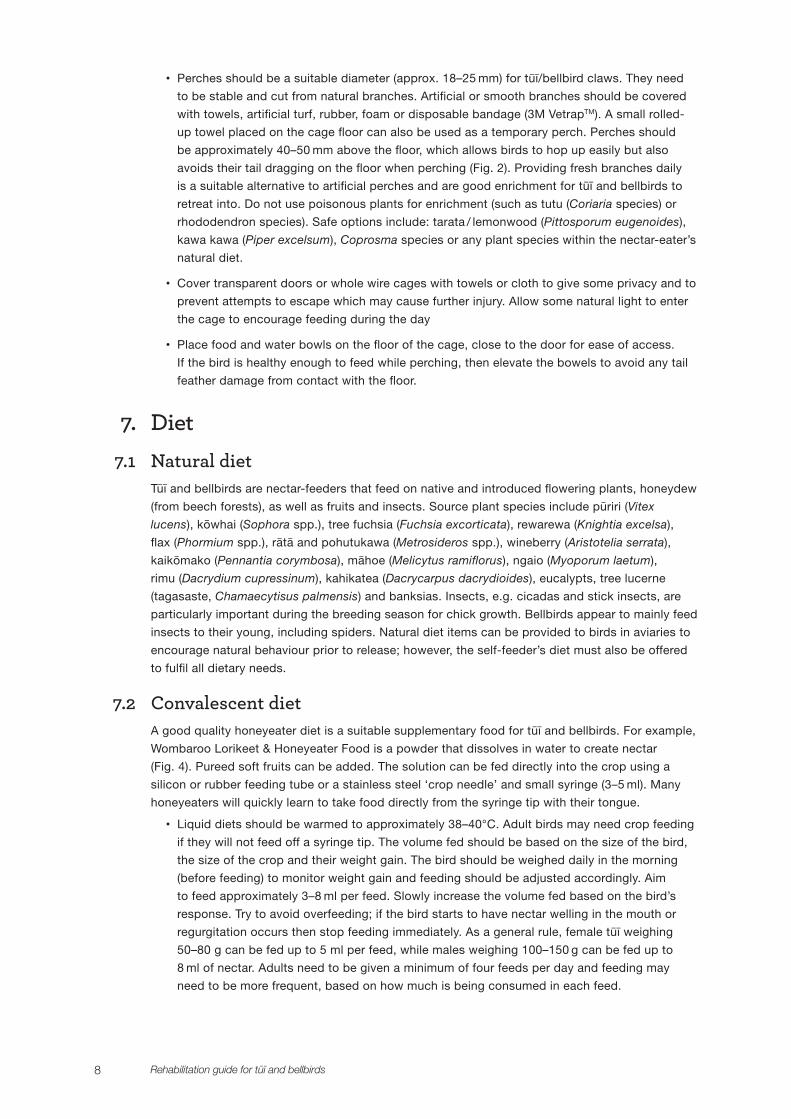
7.2 Convalescent dietA good quality honeyeater diet is a suitable supplementary food for tūī and bellbirds. For example,
Wombaroo Lorikeet & Honeyeater Food is a powder that dissolves in water to create nectar
(Fig. 4). Pureed soft fruits can be added. The solution can be fed directly into the crop using a
silicon or rubber feeding tube or a stainless steel ‘crop needle’ and small syringe (3–5 ml). Many
honeyeaters will quickly learn to take food directly from the syringe tip with their tongue.
• Liquid diets should be warmed to approximately 38–40°C. Adult birds may need crop feeding
if they will not feed off a syringe tip. The volume fed should be based on the size of the bird,
the size of the crop and their weight gain. The bird should be weighed daily in the morning
(before feeding) to monitor weight gain and feeding should be adjusted accordingly. Aim
to feed approximately 3–8 ml per feed. Slowly increase the volume fed based on the bird’s
response. Try to avoid overfeeding; if the bird starts to have nectar welling in the mouth or
regurgitation occurs then stop feeding immediately. As a general rule, female tūī weighing
50–80 g can be fed up to 5 ml per feed, while males weighing 100–150 g can be fed up to
8 ml of nectar. Adults need to be given a minimum of four feeds per day and feeding may
need to be more frequent, based on how much is being consumed in each feed.
9Rehabilitation guide for tūī and bellbirds
• Neonatal tūī and bellbirds need to be fed every 1–2 hours, with the frequency of feeding
adjusting with growth. Juveniles will need to be fed 6 times per day. Very young tūī and
bellbirds require additional protein which can be provided by adding Wombaroo Insectivore
Rearing mix (or similar) to the diet and by feeding insects such as small mealworms or wax
moth larvae. Increase the proportion of honeyeater food after the first week.
• Tube feeding should be the last treatment given during handling, so that the bird does not
regurgitate because of stress from being restrained. Observe the bird’s droppings to check
that it is passing faeces normally. If there is any food spilt onto the feathers around the
mouth, clean the area with water using a misting spray bottle.
• Tūī and bellbirds have high energy requirements and supplementary food should be
continuously available in their cages via a shallow bowl or liquid feeder. Offer fresh fruit (e.g.
mandarins) cut into small pieces (Fig. 4). Gently dipping the nectar-feeder’s bill into the nectar
can help them to recognise that the bowl contains food. Younger birds learn to self-feed
rapidly once they work out where the food is. Tall cylindrical water feeders sold for budgie
aviaries can be good for placing nectar in, as the birds are less likely to tip over the bowl and
accidently splash it into their feathers.
• For further details on crop feeding techniques go to Module 3 of the DOC online wildlife
health course: http://www.doc.govt.nz/wildlife-health-course
7.3 Self-feeder’s dietA self-feeder’s diet is provided to birds that
are alert and can demonstrate the ability
to feed themselves. The diet must provide
all of the bird’s nutritional requirements. A
formulated diet such as Wombaroo Lorikeet
& Honeyeater Food provides a balanced diet.
Providing a solution of water with honey, raw
sugar or jam is only appropriate for a few
days. A variety of fresh fruits cut into small
pieces can be offered to provide some variety
and behavioural enrichment. Provide slightly
more food than the bird(s) consume each day.
Ensure fresh water is always available. The
recipe for honey, sugar or jam water is: 1 part sugar to 4 parts water or 1 part honey to 4 parts
water or 1 part jam to 2 parts water.
8. Aviaries for tūī and bellbirdsTūī and bellbirds can be moved to aviaries once they are self-feeding and no longer requiring handling
for medical treatments. Flight aviaries are used to regain strength and fitness prior to release.
9. Requirements for flight aviaries • Small aviaries can be used for juvenile birds that are learning to fly or for adults that have
been in hospital cages for more than a week, in order to regain flight skills and have their
flying abilities assessed. Aviaries of approximate dimensions 2 m (L) x 1.8 m (H) x 1 m (W) are
suitable for small flight aviaries.
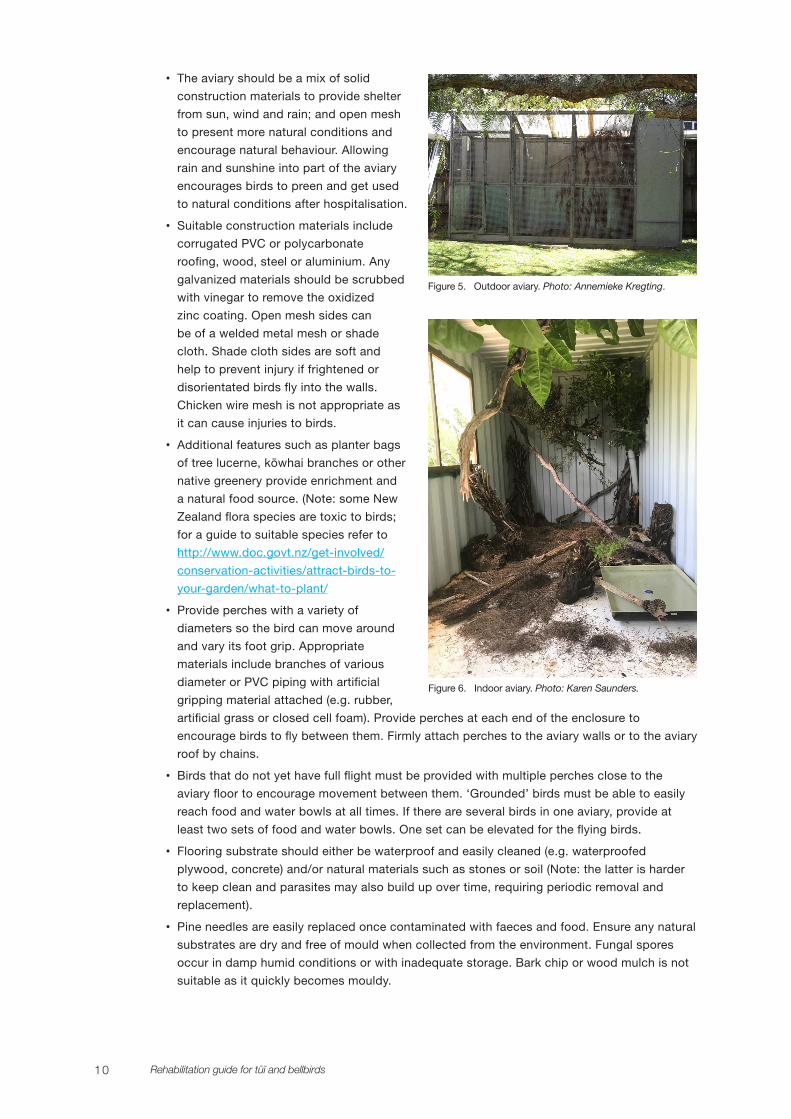
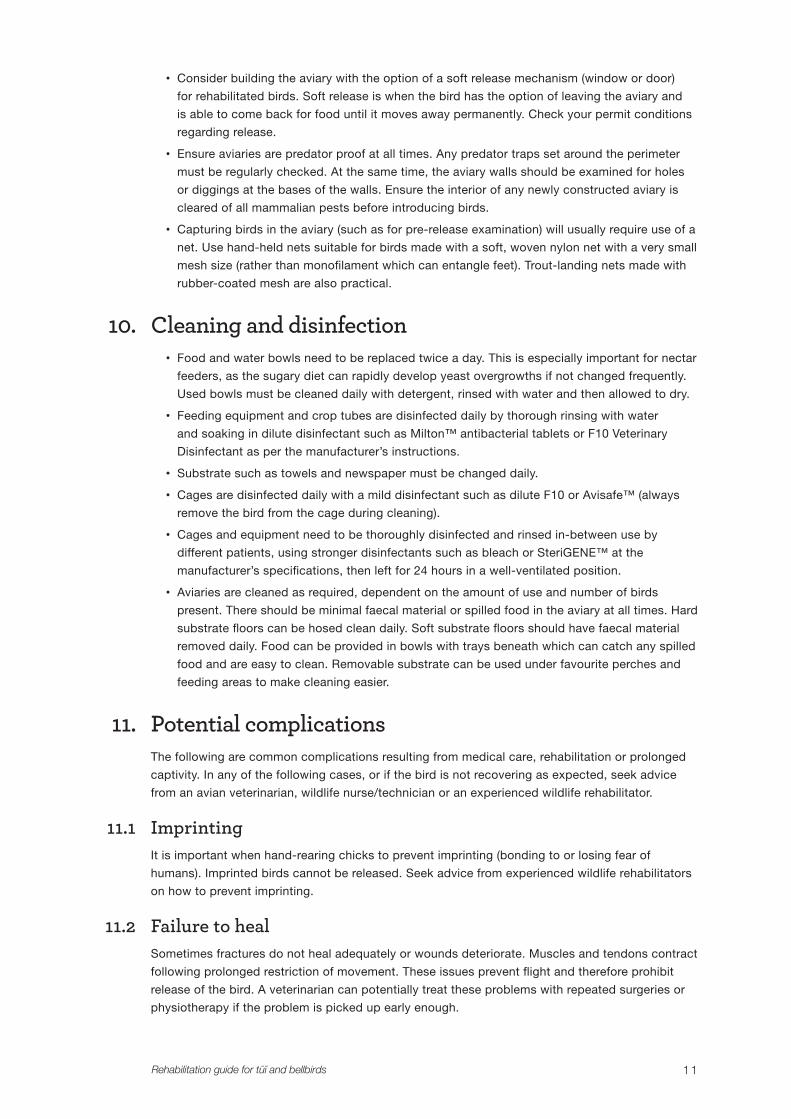
• Larger flight aviaries (Figs 5, 6) must have sufficient space that the tūī or bellbird has room
to fly around the cage and between perches. Aviaries of approximate dimensions 6 m (L) x
2 m (H) x 3 m (W). Note: an aviary exceeding these dimensions will lead to difficulties when
catching birds that are ready for release.
Figure 4. Nectar made from Wombaroo Lorikeet & Honeyeater Food powder and fresh fruit pieces. Photo: Kate McInnes.
10 Rehabilitation guide for tūī and bellbirds
• The aviary should be a mix of solid
construction materials to provide shelter
from sun, wind and rain; and open mesh
to present more natural conditions and
encourage natural behaviour. Allowing
rain and sunshine into part of the aviary
encourages birds to preen and get used
to natural conditions after hospitalisation.
• Suitable construction materials include
corrugated PVC or polycarbonate
roofing, wood, steel or aluminium. Any
galvanized materials should be scrubbed
with vinegar to remove the oxidized
zinc coating. Open mesh sides can
be of a welded metal mesh or shade
cloth. Shade cloth sides are soft and
help to prevent injury if frightened or
disorientated birds fly into the walls.
Chicken wire mesh is not appropriate as
it can cause injuries to birds.
• Additional features such as planter bags
of tree lucerne, kōwhai branches or other
native greenery provide enrichment and
a natural food source. (Note: some New
Zealand flora species are toxic to birds;
for a guide to suitable species refer to
http://www.doc.govt.nz/get-involved/
conservation-activities/attract-birds-to-
your-garden/what-to-plant/
• Provide perches with a variety of
diameters so the bird can move around
and vary its foot grip. Appropriate
materials include branches of various
diameter or PVC piping with artificial
gripping material attached (e.g. rubber,
artificial grass or closed cell foam). Provide perches at each end of the enclosure to
encourage birds to fly between them. Firmly attach perches to the aviary walls or to the aviary
roof by chains.
• Birds that do not yet have full flight must be provided with multiple perches close to the
aviary floor to encourage movement between them. ‘Grounded’ birds must be able to easily
reach food and water bowls at all times. If there are several birds in one aviary, provide at
least two sets of food and water bowls. One set can be elevated for the flying birds.
• Flooring substrate should either be waterproof and easily cleaned (e.g. waterproofed
plywood, concrete) and/or natural materials such as stones or soil (Note: the latter is harder
to keep clean and parasites may also build up over time, requiring periodic removal and
replacement).
• Pine needles are easily replaced once contaminated with faeces and food. Ensure any natural
substrates are dry and free of mould when collected from the environment. Fungal spores
occur in damp humid conditions or with inadequate storage. Bark chip or wood mulch is not
suitable as it quickly becomes mouldy.
Figure 5. Outdoor aviary. Photo: Annemieke Kregting.
Figure 6. Indoor aviary. Photo: Karen Saunders.
11Rehabilitation guide for tūī and bellbirds
• Consider building the aviary with the option of a soft release mechanism (window or door)
for rehabilitated birds. Soft release is when the bird has the option of leaving the aviary and
is able to come back for food until it moves away permanently. Check your permit conditions
regarding release.
• Ensure aviaries are predator proof at all times. Any predator traps set around the perimeter
must be regularly checked. At the same time, the aviary walls should be examined for holes
or diggings at the bases of the walls. Ensure the interior of any newly constructed aviary is
cleared of all mammalian pests before introducing birds.
• Capturing birds in the aviary (such as for pre-release examination) will usually require use of a
net. Use hand-held nets suitable for birds made with a soft, woven nylon net with a very small
mesh size (rather than monofilament which can entangle feet). Trout-landing nets made with
rubber-coated mesh are also practical.
10. Cleaning and disinfection • Food and water bowls need to be replaced twice a day. This is especially important for nectar
feeders, as the sugary diet can rapidly develop yeast overgrowths if not changed frequently.
Used bowls must be cleaned daily with detergent, rinsed with water and then allowed to dry.
• Feeding equipment and crop tubes are disinfected daily by thorough rinsing with water
and soaking in dilute disinfectant such as Milton™ antibacterial tablets or F10 Veterinary
Disinfectant as per the manufacturer’s instructions.
• Substrate such as towels and newspaper must be changed daily.
• Cages are disinfected daily with a mild disinfectant such as dilute F10 or Avisafe™ (always
remove the bird from the cage during cleaning).
• Cages and equipment need to be thoroughly disinfected and rinsed in-between use by
different patients, using stronger disinfectants such as bleach or SteriGENE™ at the
manufacturer’s specifications, then left for 24 hours in a well-ventilated position.
• Aviaries are cleaned as required, dependent on the amount of use and number of birds
present. There should be minimal faecal material or spilled food in the aviary at all times. Hard
substrate floors can be hosed clean daily. Soft substrate floors should have faecal material
removed daily. Food can be provided in bowls with trays beneath which can catch any spilled
food and are easy to clean. Removable substrate can be used under favourite perches and
feeding areas to make cleaning easier.
11. Potential complicationsThe following are common complications resulting from medical care, rehabilitation or prolonged
captivity. In any of the following cases, or if the bird is not recovering as expected, seek advice
from an avian veterinarian, wildlife nurse/technician or an experienced wildlife rehabilitator.
11.1 ImprintingIt is important when hand-rearing chicks to prevent imprinting (bonding to or losing fear of
humans). Imprinted birds cannot be released. Seek advice from experienced wildlife rehabilitators
on how to prevent imprinting.
11.2 Failure to healSometimes fractures do not heal adequately or wounds deteriorate. Muscles and tendons contract
following prolonged restriction of movement. These issues prevent flight and therefore prohibit
release of the bird. A veterinarian can potentially treat these problems with repeated surgeries or
physiotherapy if the problem is picked up early enough.
12 Rehabilitation guide for tūī and bellbirds
11.3 Foot lesionsInadequate perches, inappropriate substrate or prolonged captivity can lead to ‘bumblefoot’ or
pododermatitis. This is seen as scabs and deep infections of the footpads. It is a serious and
painful condition and should always be treated by a veterinarian.
11.4 Feather damageExcessive damage to primary wing feathers or tail feathers may mean a loss of ability to fly and
will require the bird to remain in captivity until it moults. Protect feathers from damage by careful
handling, using appropriately sized cages, avoiding cages that have wire mesh sides/bases and
by installing elevated perches and feeding bowls.
12. Criteria for release • Courses of medication and treatments have been completed and injuries have healed.
• The bird is observed to be flying properly, and able to gain vertical lift.
• The bird has a good body weight and body condition.
• The feathers are in good condition.
• The bird is physically and behaviourally able to fully function in the wild.
13. Method of releaseCheck your DOC permit for release requirements.
Hard release: transport the tūī or bellbirds from the captive location and release them directly into
native forest or a park. If it is possible and the location is safe, release the birds where they were
originally found. If not, contact the local DOC office to arrange a suitable release site.
Soft release: open the cage door to release the bird at the rehabilitation location (if your permit
allows this). Continue to provide access to supplementary food for a few days to weeks as
required.
14. Further information‘Wild City Neighbours’ at: http://www.doc.govt.nz/Documents/science-and-technical/
BirdRehabGuide.pdf
Wildlife Rehabilitators Network of New Zealand (WReNNZ): https://www.wrennz.org.nz/
Department of Conservation online wildlife health modules: http://www.doc.govt.nz/wildlife-
health-course
15. AcknowledgementsThis document was compiled by Dr Janelle Ward MVSc (Wildlife Health) MANZCVS (Avian Health),
Wildlife Health Solutions, Raglan, New Zealand. [email protected]
It was reviewed and edited by Kate McInnes, Emma Neill, Clio Reid, Micah Jensen, Susan
Shannon, Andrea Wilson and Pauline Nijman.
Information was provided by:
• Mandy Robertson, Wild Bird Care Charitable Trust, Tauranga, New Zealand: https://www.
birdcare.org.nz/

13Rehabilitation guide for tūī and bellbirds
• Wildbase, Massey University, Palmerston North, New Zealand: https://www.massey.ac.nz/
massey/learning/departments/centres-research/wildbase/wildbase_home.cfm
• Te Kōhanga, The Nest, Wellington Zoo: https://wellingtonzoo.com/conservation/saving-
wildlife-in-the-nest-te-kohanga/
• Dr Micah Jensen BSc BVSc MANZCVSc (Avian Health), Wild Vet Care, Cambridge, NZ.
16. ReferencesCastro, I. Robertson, A.W. (1997). Honeyeaters and the New Zealand forest flora: The utilisation and profitability of
small flowers. New Zealand Journal of Ecology 21(2): 169–179.
Hall, E. (2005). Release considerations for rehabilitated wildlife. Proceedings of the 3rd Australian National Wildlife Rehabilitation Conference. 12 pp. Retrieved from http://www.awrc.org.au/uploads/5/8/6/6/5866843/awrc_elizabeth_hall.pdf
Rich, G. (2018). Feed Guidelines for Native Birds in Rehabilitation. Retrieved from https://www.awrc.org.au/uploads/5/8/6/6/5866843/41_rich_-_feed_guidelines_for_native_birds_in_rehabilitation_final.pdf
Robertson, H.A. (2013). Tūī. In Miskelly, C.M. (ed.) New Zealand Birds Online. Retrieved from http://nzbirdsonline.org.nz/species/tui
Robertson, H.A.; Baird, K.; Dowding,J.E.; Elliott, G.P.; Hitchmough, R.A.; Miskelly, C.M.; McArthur, N.; O’Donnell, C.F.J.; Sagar, P.M.; Scofield, R.P.;Taylor, G.A. (2017). Conservation status of New Zealand birds, 2016. New Zealand Threat Classification Series 19. Department of Conservation, Wellington. 23 p. Retrieved from: https://www.doc.govt.nz/globalassets/documents/science-and-technical/nztcs19entire.pdf
Sagar, P.M. (2013). Bellbird. In Miskelly, C.M. (ed.) New Zealand Birds Online. Retrieved from http://nzbirdsonline.org.nz/species/bellbird
WReNNZ. (2010). Minimum Standards for Rehabilitators. Retrieved from https://www.wrennz.org.nz/rehabilitation-standards