Embed Size (px)
Citation preview
Refurbishing Steps for Success
Hard Drive Wiping
Sponsored by Microsoft Refurbishment Programs
www.microsoft.com/refurbishedpcs
Why wipe hard drives?
• Responsible refurbishers always wipe or destroy hard drives.
• Drives cannot be wiped through reformatting or repartitioning.
It would be similar to tearing the index out of a book. While
the chapters would not be visible the information is still there.
• Businesses, governmental agencies and the public are all
demanding that their information be destroyed. Many
agencies think their information has been wiped, but don’t
take it for granted. Wipe it again and be sure.
• If information from a hard drive donated to your facility is
released, confidence in donating will be destroyed.
• The drive can be removed first and wiped or wiped while in
the computer. The computer must not boot up to the hard
drive. Protect donor privacy.

Tools needed
Needle Nose Pliers
and a Marker Pen3 or 4 Drive Wiping Station
KVM Switch Box
Use 1 monitor, keyboard & mouse for
8 computer wiping stations
Wipe 16 hard drives at a time by
building your own Raid server.
Adapters for wiping 2 ½”
Drives and SCSI Drives
(Winchester)
KVM Switch Box
Sort the hard drives
• How big is the hard drive? If it is too small to keep, destroy the drive rather
than taking time to wipe it.
• 2 ½” IDE drives or notebook drives. Get an adapter to attach to your IDE
ribbon cables or wipe the drive in the laptop. Get a 2 ½” to 3 ½” IDE
adapter.
• SCSI drives – Wipe the drive in the computer or have a station set up with a
SCSI cable. Get an adapter so you can wipe Winchester drives.
• SATA (serial ATA drives) Some newer computers have SATA options on
the motherboards. SATA drives will become more numerous as time goes
by.
• Most drives will be 3 ½” IDE drives but be prepared to wipe other popular
kinds as well.
• Don’t forget to wipe the hard drives in donated printers.
• You can create a data wiper that wipes 16 different hard drives at one time –
IDE – laptop – SCSI – SATA. You just need a motherboard that supports
the various options, a power supply with the appropriate power connectors
and a sense of adventure in putting it together.
IDE drive jumpers
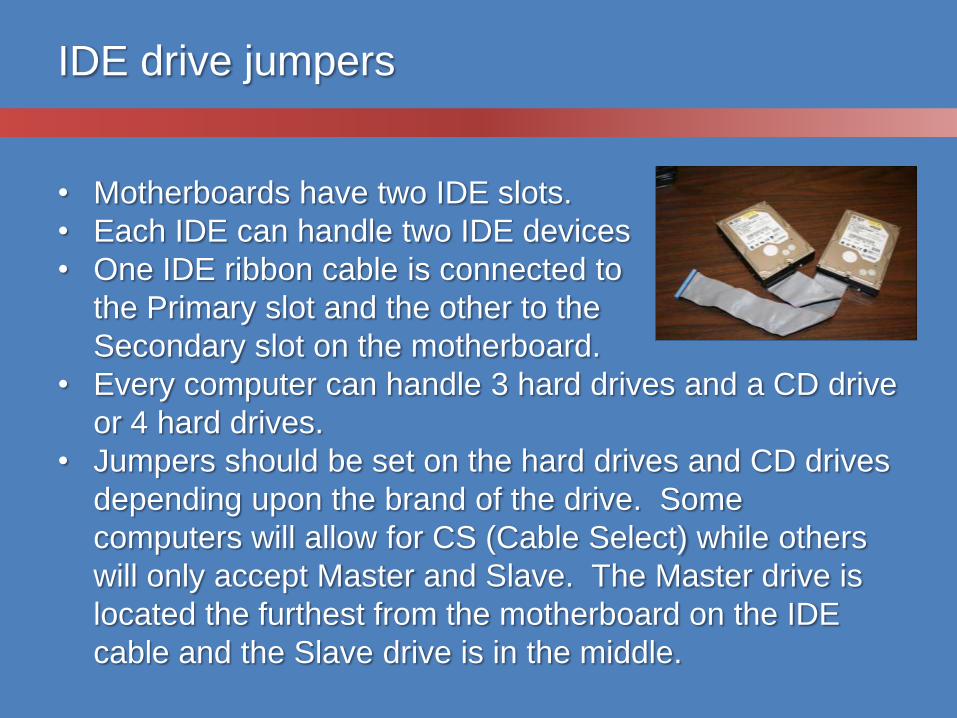
• Motherboards have two IDE slots.
• Each IDE can handle two IDE devices
• One IDE ribbon cable is connected to
the Primary slot and the other to the
Secondary slot on the motherboard.
• Every computer can handle 3 hard drives and a CD drive
or 4 hard drives.
• Jumpers should be set on the hard drives and CD drives
depending upon the brand of the drive. Some
computers will allow for CS (Cable Select) while others
will only accept Master and Slave. The Master drive is
located the furthest from the motherboard on the IDE
cable and the Slave drive is in the middle.
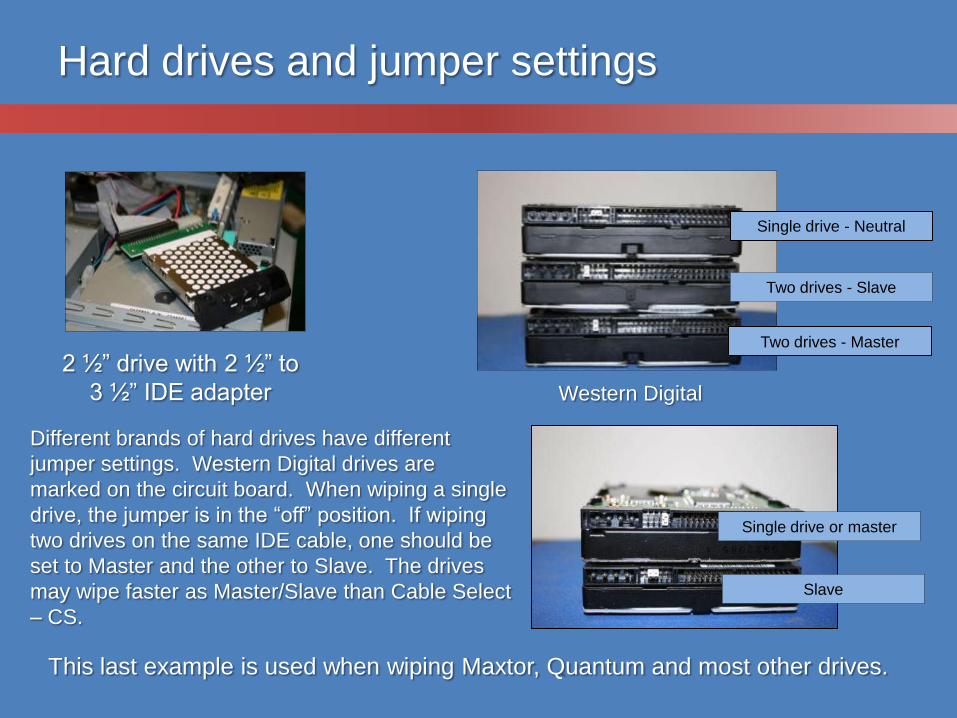
Hard drives and jumper settings
2 ½” drive with 2 ½” to
3 ½” IDE adapter
Different brands of hard drives have different
jumper settings. Western Digital drives are
marked on the circuit board. When wiping a single
drive, the jumper is in the “off” position. If wiping
two drives on the same IDE cable, one should be
set to Master and the other to Slave. The drives
may wipe faster as Master/Slave than Cable Select
– CS.
Single drive - Neutral
Two drives - Slave
Two drives - Master
Western Digital
Single drive or master
Slave
This last example is used when wiping Maxtor, Quantum and most other drives.
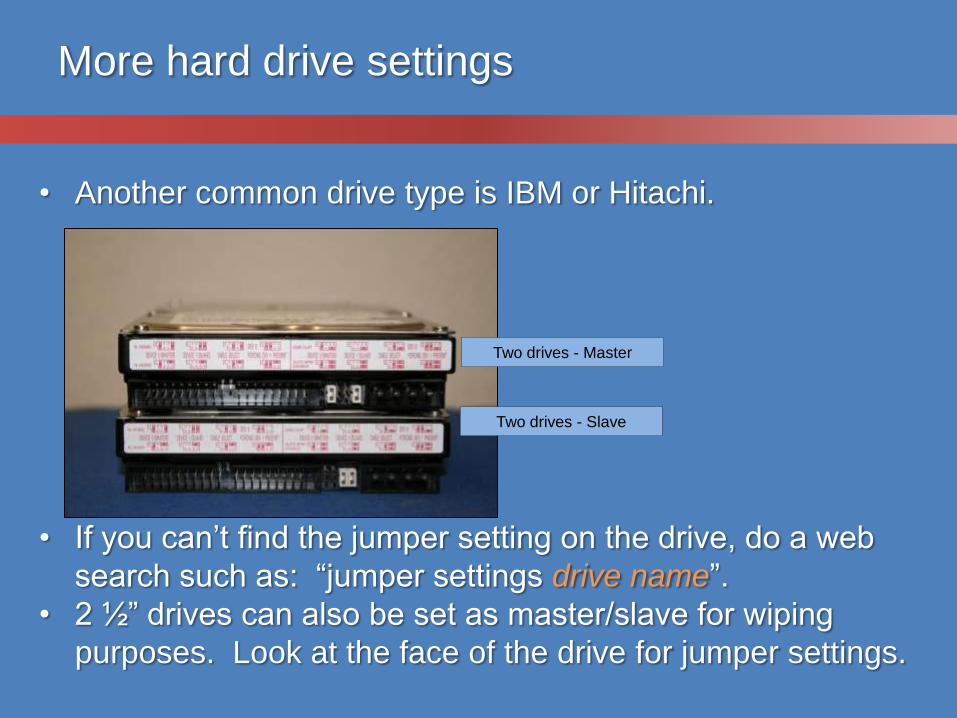
More hard drive settings
• Another common drive type is IBM or Hitachi.
• If you can’t find the jumper setting on the drive, do a web
search such as: “jumper settings drive name”.
• 2 ½” drives can also be set as master/slave for wiping
purposes. Look at the face of the drive for jumper settings.
Two drives - Master
Two drives - Slave

More information on setting jumpers
• Settings depend on the brand of
the drive. Look at the drive for the
settings.
• The master jumper on most drives
goes next to the IDE cable. This drive
shows that the slave setting should be
left blank. The jumper can go horizontally across the pins to be in
the neutral position. If removed the jumper might get lost.
• The red or blue line on the ribbon cable indicates Pin 1. Pin 1 is
located nearest the jumpers.
• Use needle nosed pliers or a bent pin (paper clip) to remove the
jumpers.
• The wiping process may go more quickly with matching drives.

Wiping software
• A good, free software wiping program that has been around for a
long time is Darik’s Boot and Nuke or DBAN.
• You can download and create a bootable floppy or CD. DBAN can
be used to wipe multiple drives, SCSI and SATA drives as well.
• Older computers work better using the floppy drive rather than the
CD drive. Some newer computers don’t have floppy drives and the
CD disk would be necessary. Download a free copy of a program
that can burn .iso images to CDs or DVDs.
• If DBAN runs slowly, one or more of the drives may be defective.
• Whatever software you select, you should wipe to the recognized
standard, the US Department of Defense clearing standard DOD
5220.22-M.
• There are excellent wiping programs such as Blancco but they are
fee-based. Your donors may have certain requirements.
Boot to the bios
• Plug in the computer, the keyboard and the monitor and insert the DBAN
floppy disk.
• Get into the computer bios…
– If you don’t know how, try hitting F1, F2, F10 and Del in succession. You
may find the function key by watching the screen when the computer is
turned on. If all else fails, either remove a stick of Ram or add a stick so
that the memory changes and the computer will go to the bios.
• Set the IDE drives to “auto detect”
• Set the boot order so that the floppy drive is first.
• Save the settings and reboot the system.
• If the computer boots to the hard drive, immediately shut it off. Check the
cable connections and the power light on the floppy drive. Check the bios to
be sure the floppy drive is seen. If necessary replace the floppy drive or
cable and try again.
• If the bios doesn’t see the IDE drive, the drive may be bad. Try the drive in
another computer after checking the cable and power connections to the
drive. Be sure the jumpers are set correctly on the hard drive.
Set up and run the wiping software
• Boot the system with the DBAN disk in the floppy drive.
• The suggested method of wiping is the DOD 3 pass wipe that is
the default wipe when using DBAN.
• After booting up type “autonuke” for the wiping process to start
up. Once the drive has been completely wiped the message
“All drives have been wiped successfully” will appear on the
screen.
• If the drive does not wipe completely press F4 for additional
suggestions.
• Some drives can be revived by formatting and wiping again .
• If the drive clicks or makes noises, it is bad and should be
destroyed. Drives that don’t wipe completely are destroyed.
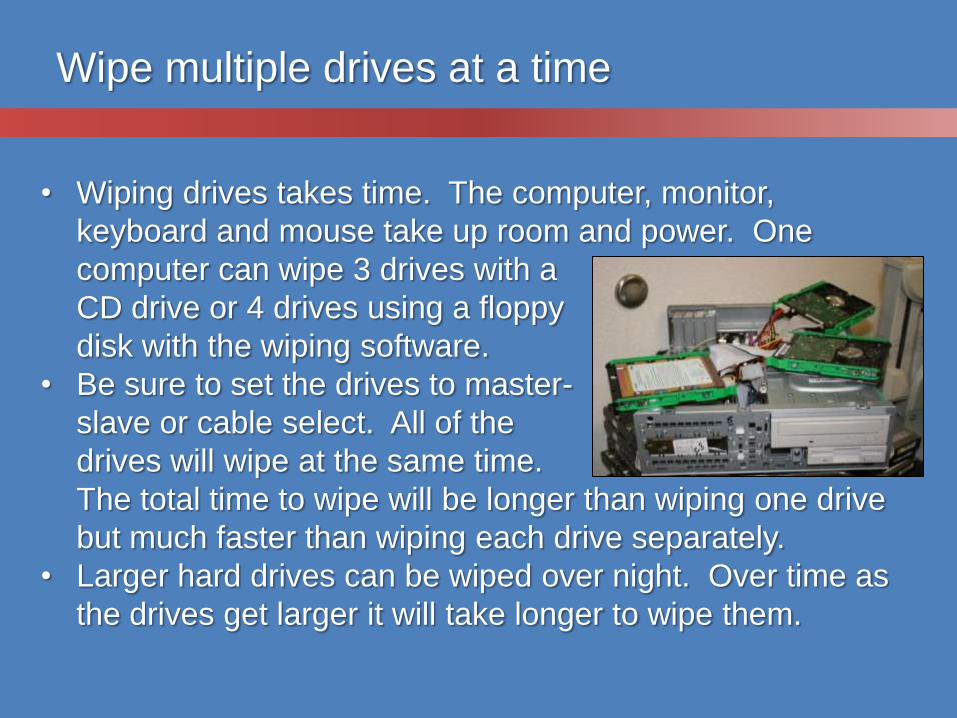
Wipe multiple drives at a time
• Wiping drives takes time. The computer, monitor,
keyboard and mouse take up room and power. One
computer can wipe 3 drives with a
CD drive or 4 drives using a floppy
disk with the wiping software.
• Be sure to set the drives to master-
slave or cable select. All of the
drives will wipe at the same time.
The total time to wipe will be longer than wiping one drive
but much faster than wiping each drive separately.
• Larger hard drives can be wiped over night. Over time as
the drives get larger it will take longer to wipe them.

Use a KVM switch box
• A KVM Switch Box can be used to
save space and energy. When using
an 8 port switch, only one monitor,
one keyboard and 1 mouse is
needed. You can cycle between 8
computers on one desk.
• Each computer can wipe 4 hard
drives so the station can handle an
optimum of 32 hard drives at a time.
• Use monitor shelves that clamp on
the desk to stage the computers at
different heights for ease of
operation.
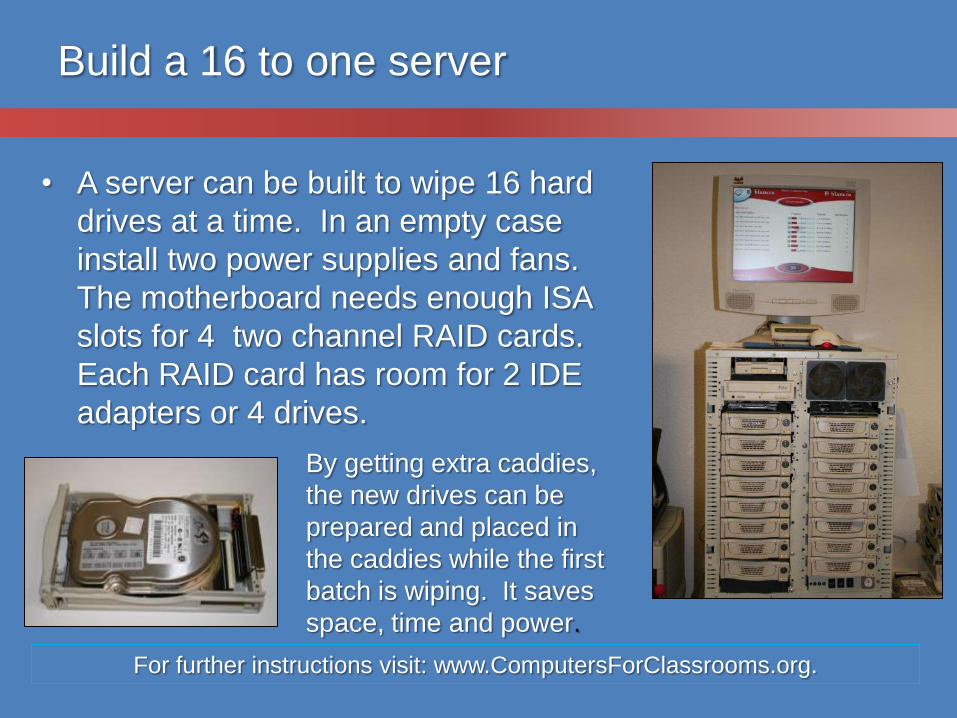
Build a 16 to one server
• A server can be built to wipe 16 hard
drives at a time. In an empty case
install two power supplies and fans.
The motherboard needs enough ISA
slots for 4 two channel RAID cards.
Each RAID card has room for 2 IDE
adapters or 4 drives.
By getting extra caddies,
the new drives can be
prepared and placed in
the caddies while the first
batch is wiping. It saves
space, time and power.
For further instructions visit: www.ComputersForClassrooms.org.
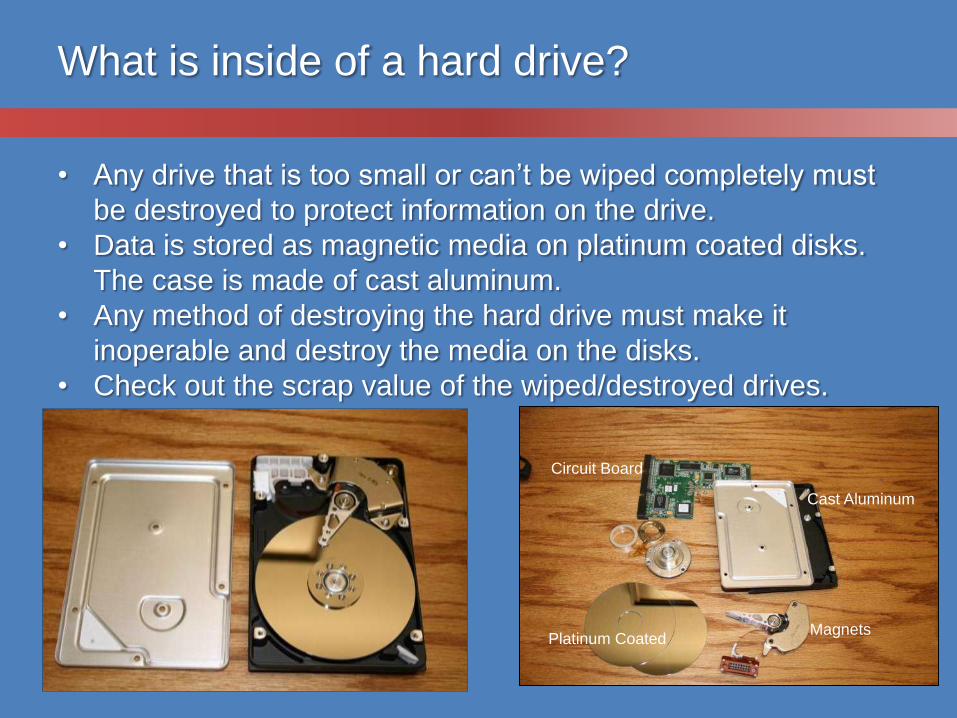
What is inside of a hard drive?
• Any drive that is too small or can’t be wiped completely must
be destroyed to protect information on the drive.
• Data is stored as magnetic media on platinum coated disks.
The case is made of cast aluminum.
• Any method of destroying the hard drive must make it
inoperable and destroy the media on the disks.
• Check out the scrap value of the wiped/destroyed drives.
Cast Aluminum
Platinum CoatedMagnets
Circuit Board
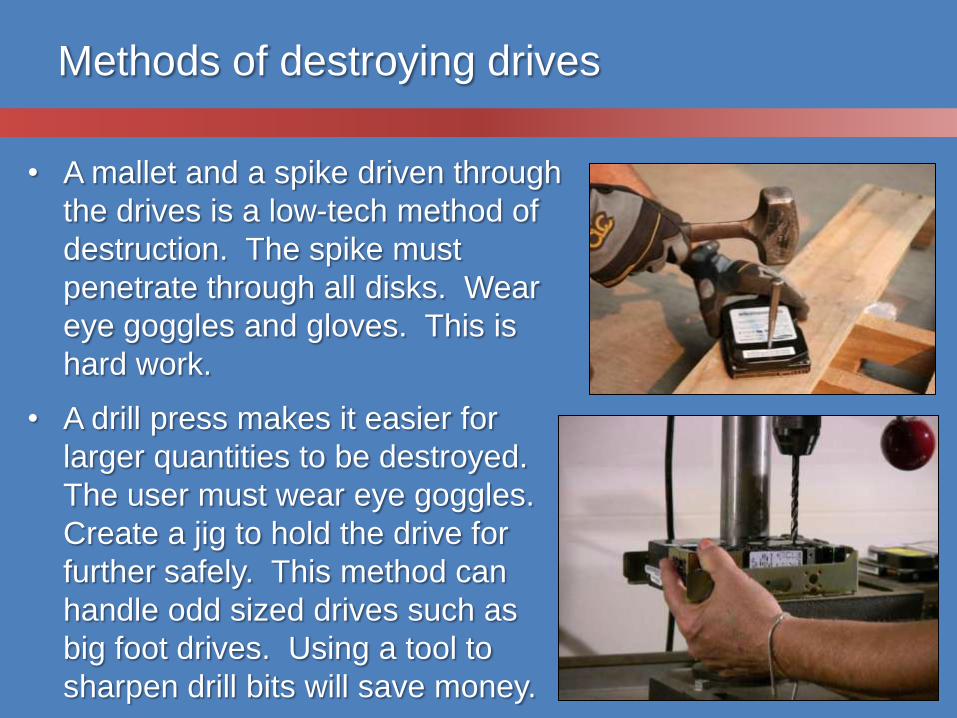
Methods of destroying drives
• A mallet and a spike driven through
the drives is a low-tech method of
destruction. The spike must
penetrate through all disks. Wear
eye goggles and gloves. This is
hard work.
• A drill press makes it easier for
larger quantities to be destroyed.
The user must wear eye goggles.
Create a jig to hold the drive for
further safely. This method can
handle odd sized drives such as
big foot drives. Using a tool to
sharpen drill bits will save money.
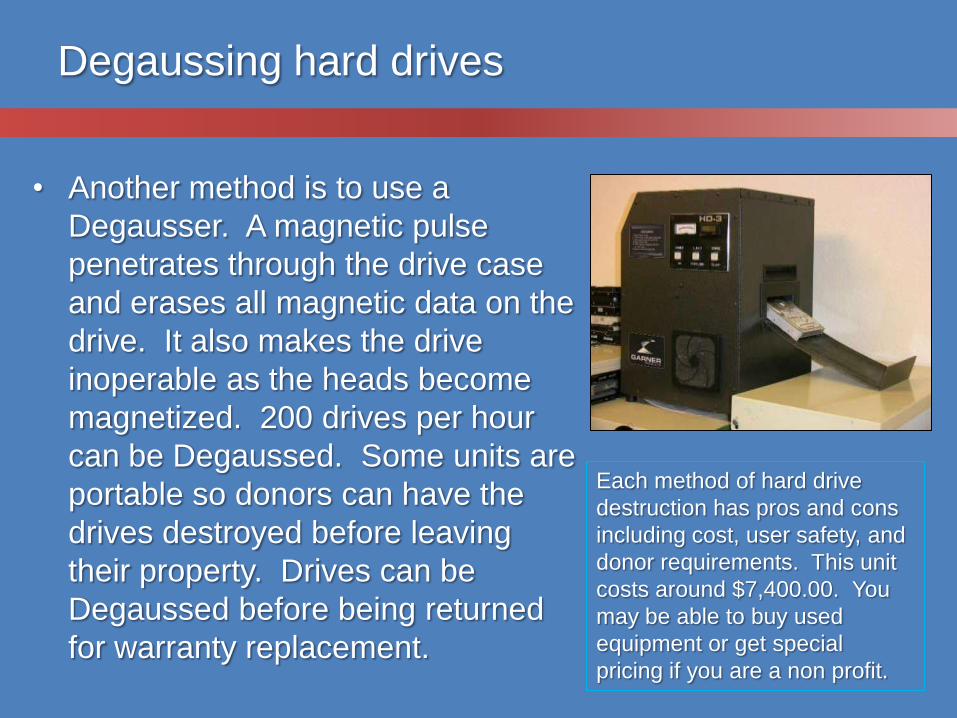
Degaussing hard drives
• Another method is to use a
Degausser. A magnetic pulse
penetrates through the drive case
and erases all magnetic data on the
drive. It also makes the drive
inoperable as the heads become
magnetized. 200 drives per hour
can be Degaussed. Some units are
portable so donors can have the
drives destroyed before leaving
their property. Drives can be
Degaussed before being returned
for warranty replacement.
Each method of hard drive
destruction has pros and cons
including cost, user safety, and
donor requirements. This unit
costs around $7,400.00. You
may be able to buy used
equipment or get special
pricing if you are a non profit.
Destroyed drives have a scrap value
• Encourage donors to donate their drives for reuse by giving
assurances of your method of wiping.
• Destroy all drives that do not wipe completely.
• Some methods of destruction drill large holes in the drive or
bend the drive in half. Whatever method you use think about
the scrap value for the drive. Check with your recycler to find
out how to give him the drive in the form to get the best price.
If the drives are bent in half they may be more difficult to pack
and ship for recycling.
• Some donors want to have their drives shredded – the finer
the pieces the better. Use whatever method you can afford
and that your donors demand.
• Since Flash drives do not contain magnetic data they cannot
be destroyed by using Degaussing, they must be smashed or
shredded.
Sponsored by Microsoft Refurbishing Programs
www.microsoft.com/refurbishedpcs


![[OINP2013] Techsoup Italia - Davide Minelli](https://img.pdfslide.us/doc/110x75/548ba9b2b47959e70c8b6229/oinp2013-techsoup-italia-davide-minelli.jpg)