Embed Size (px)
Citation preview

4/29/17
1
Mammography Clinical Image Review
Special Recognition to Dr. Bassett for analog and Dr. Comstock for digital Images and the
ACR for images from the 1999 ACR QC Manual
Presented by Bonnie Rush, RT(R)(M)(QM) President, BIS - Breast Imaging Specialists An Educational and Consulting Company [email protected] www.mammobis.org PRESENTED IN 2012
MQSA/ACR CIR Components
l Positioning
l Compression
l Exposure
l Contrast
l Sharpness
l Noise
l Artifacts
l Labeling
Accreditation Bodies
l MQSA 21 CFR 900.4 (c) ¡ The accreditation body (AB) shall review
clinical images from each facility (unit) at least once every 3 years
The 20% of Positioning Errors Clinical Image Review (CIR) “Due to the variations in the body habitus of
patients and their ability to cooperate, it is not possible to attain ideal positioning and compression in all women.”
Facilities are ….“requested to submit what they consider to be their best representative images”.
ACR QC Manual Pg 79
4/29/17
2
MQSA – The Interpreting Physician (IP)
l Each day for each image the IP shall evaluate image quality to meet clinical image attributes ¡ Technologist should document
valid reason not able to meet the standard(s)
l Provide feedback when image quality is poor ¡ Can be written or verbal
l Follow corrective actions if images not adequate ¡ Call patient back for additional imaging
MQSA - Image Attributes l Positioning
¡ Sufficient tissue to ensure cancers are not likely to be missed.
l Compression ¡ Adequate to minimize
obscuring effect of overlying breast tissue and motion artifact.
l Exposure Level ¡ Adequate to visualize breast
structures, not under or over underexposed
l Contrast ¡ Shall permit differentiation
of subtle tissue density differences.
l Sharpness ¡ Margins of normal breast
structures are distinct and not blurred.
l Noise ¡ Breast structures are not
obscured or suggest the appearance of structures not actually present
l Artifacts ¡ Breast structures shall not be
obscured due to factors external to the breast or suggest appearance of structures not actually present.
l Exam Identification ¡ Patient ID, date of exam,
technologist ID, view and laterality, facility, cassette, and mammography unit if more than one.
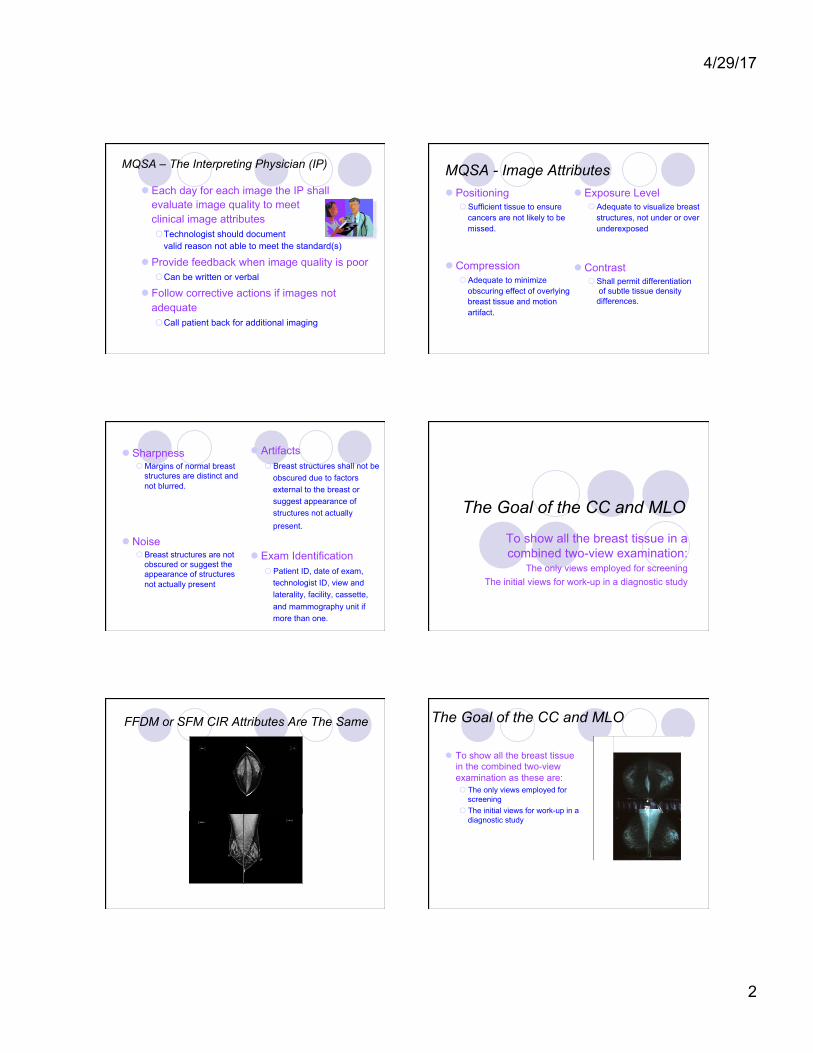
The Goal of the CC and MLO
To show all the breast tissue in a combined two-view examination:
The only views employed for screening The initial views for work-up in a diagnostic study
FFDM or SFM CIR Attributes Are The Same The Goal of the CC and MLO
l To show all the breast tissue in the combined two-view examination as these are: ¡ The only views employed for
screening ¡ The initial views for work-up in a
diagnostic study
4/29/17
3
The Breast Capsule Is a Tear Drop The Pectoral Mm is The MLO Motivator
l Since the breast lies on the pectoralis major muscle moving the mm allows for movement of the breast. ¡ The muscle must be
relaxed to show a anterior convexity.
MLO View - Principles
l The MLO view offers the best opportunity to show all the breast tissue in a single image. ¡ Whenever possible, the muscle shown should
extend to the posterior nipple line (PNL) or below. l It has been proved that this criterion can be
achieved in more than 80% of examinations
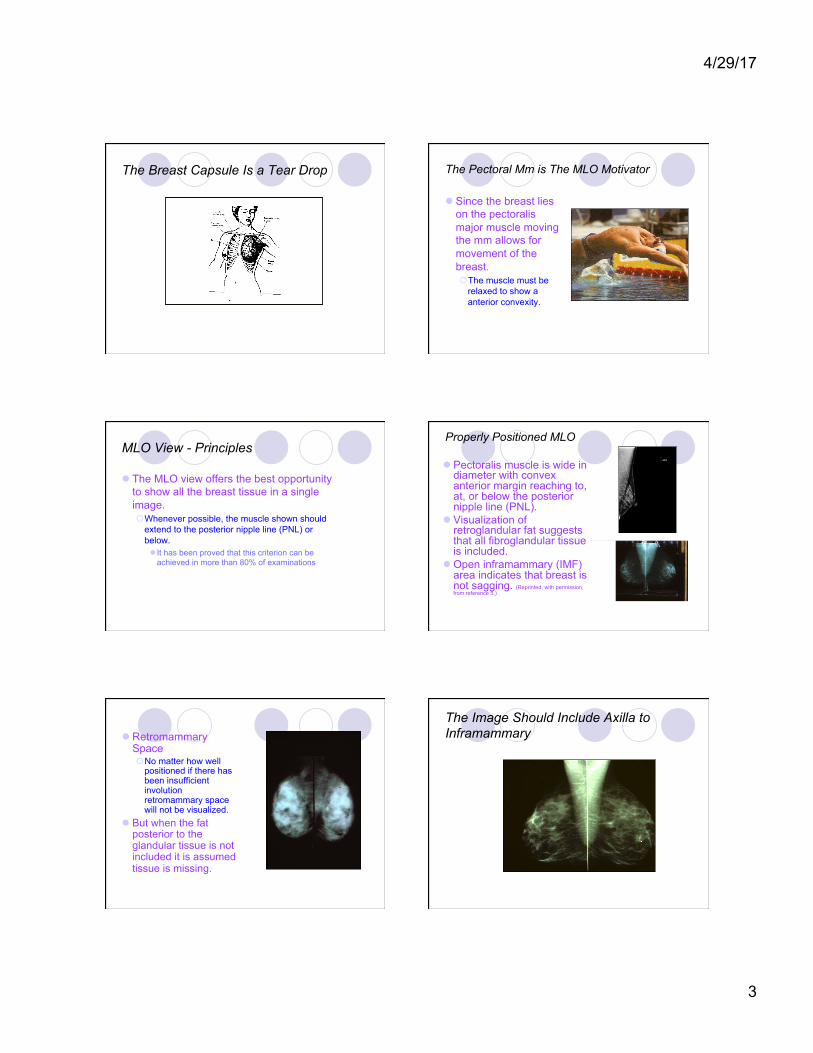
Properly Positioned MLO
l Pectoralis muscle is wide in diameter with convex anterior margin reaching to, at, or below the posterior nipple line (PNL).
l Visualization of retroglandular fat suggests that all fibroglandular tissue is included.
l Open inframammary (IMF) area indicates that breast is not sagging. (Reprinted, with permission, from reference 5.)
l Retromammary Space ¡ No matter how well
positioned if there has been insufficient involution retromammary space will not be visualized.
l But when the fat posterior to the glandular tissue is not included it is assumed tissue is missing.
The Image Should Include Axilla to Inframammary
4/29/17
4
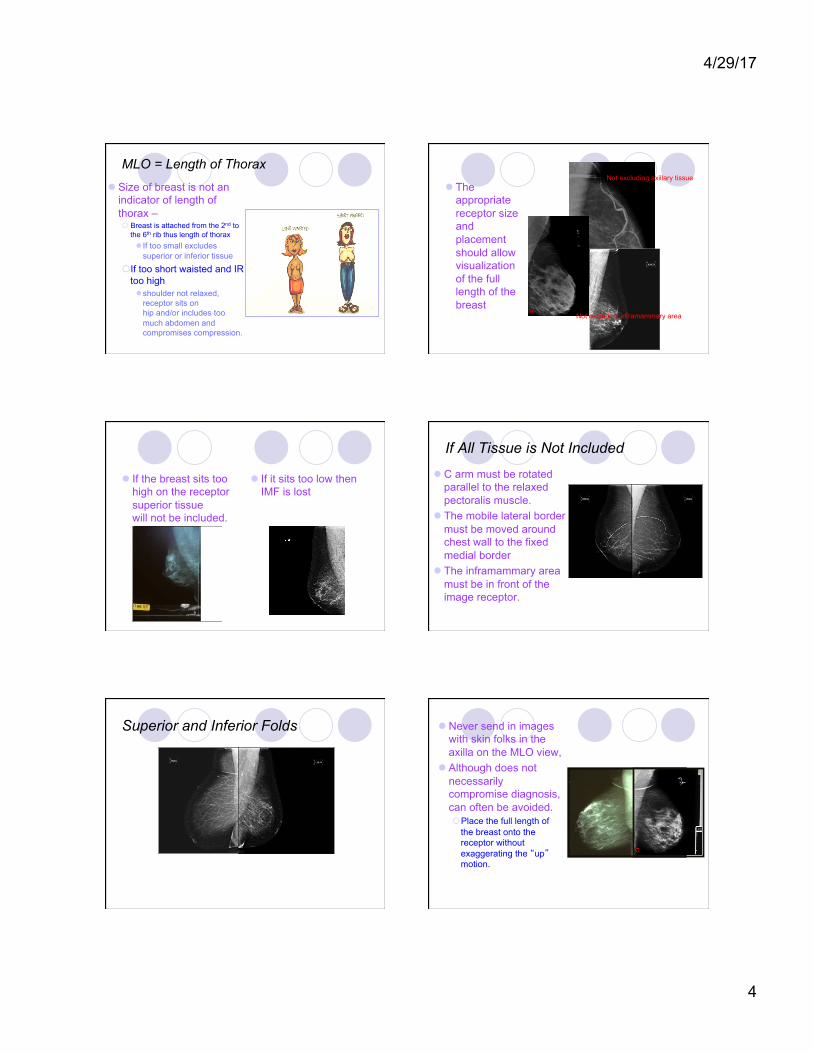
MLO = Length of Thorax
l Size of breast is not an indicator of length of thorax – ¡ Breast is attached from the 2nd to
the 6th rib thus length of thorax l If too small excludes
superior or inferior tissue
¡ If too short waisted and IR too high l shoulder not relaxed,
receptor sits on hip and/or includes too much abdomen and compromises compression.
l The appropriate receptor size and placement should allow visualization of the full length of the breast
Not excluding axillary tissue
Not excluding inframammary area
l If the breast sits too high on the receptor superior tissue will not be included.
l If it sits too low then IMF is lost
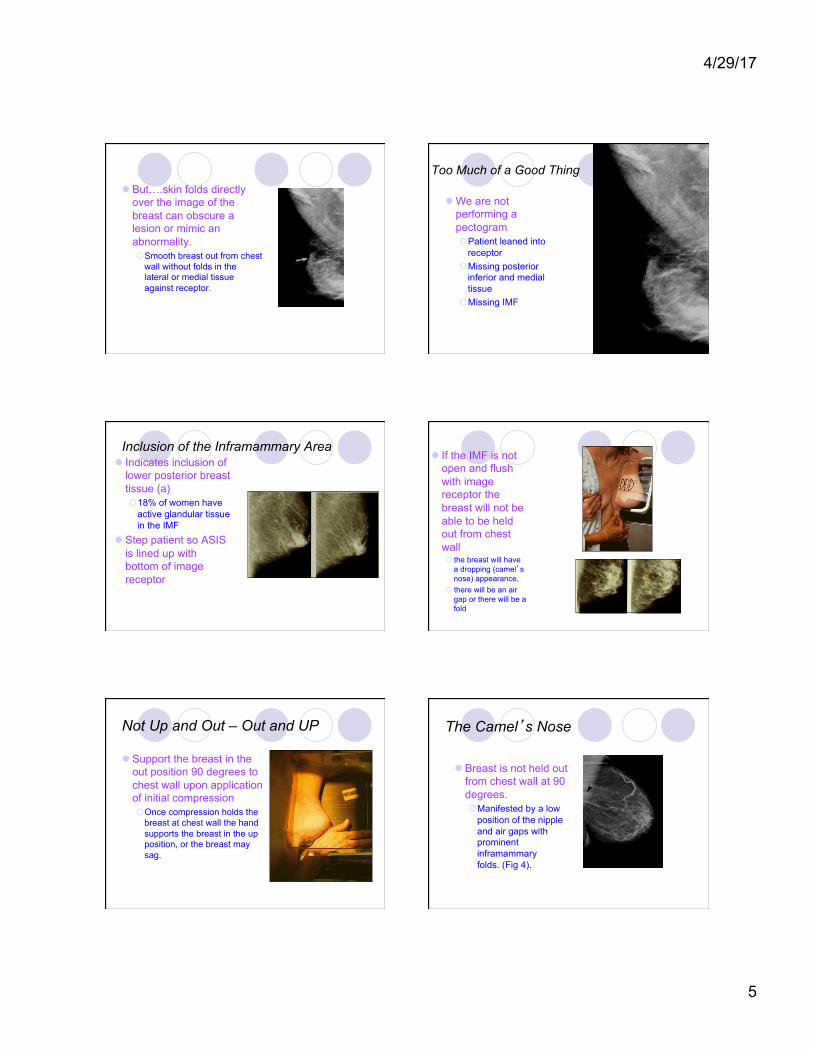
If All Tissue is Not Included
l C arm must be rotated parallel to the relaxed pectoralis muscle.
l The mobile lateral border must be moved around chest wall to the fixed medial border
l The inframammary area must be in front of the image receptor.
Superior and Inferior Folds l Never send in images with skin folks in the axilla on the MLO view,
l Although does not necessarily compromise diagnosis, can often be avoided. ¡ Place the full length of
the breast onto the receptor without exaggerating the “up” motion.
4/29/17
5
l But….skin folds directly over the image of the breast can obscure a lesion or mimic an abnormality. ¡ Smooth breast out from chest
wall without folds in the lateral or medial tissue against receptor.
l We are not performing a pectogram ¡ Patient leaned into
receptor ¡ Missing posterior
inferior and medial tissue
¡ Missing IMF
Too Much of a Good Thing
Inclusion of the Inframammary Area l Indicates inclusion of
lower posterior breast tissue (a) ¡ 18% of women have
active glandular tissue in the IMF
l Step patient so ASIS is lined up with bottom of image receptor
l If the IMF is not open and flush with image receptor the breast will not be able to be held out from chest wall ¡ the breast will have
a dropping (camel’s nose) appearance,
¡ there will be an air gap or there will be a fold
l Support the breast in the out position 90 degrees to chest wall upon application of initial compression ¡ Once compression holds the
breast at chest wall the hand supports the breast in the up position, or the breast may sag.
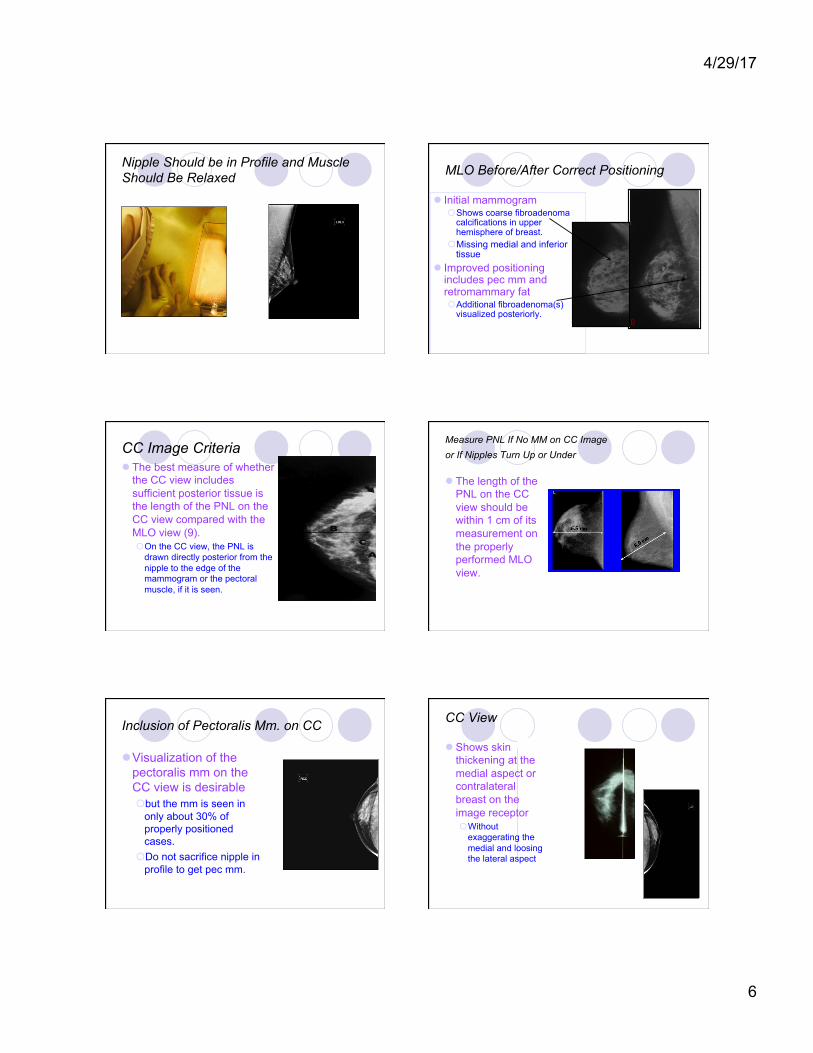
Not Up and Out – Out and UP The Camel’s Nose
l Breast is not held out from chest wall at 90 degrees. ¡ Manifested by a low
position of the nipple and air gaps with prominent inframammary folds. (Fig 4).
4/29/17
6
Nipple Should be in Profile and Muscle Should Be Relaxed MLO Before/After Correct Positioning
l Initial mammogram ¡ Shows coarse fibroadenoma
calcifications in upper hemisphere of breast.
¡ Missing medial and inferior tissue
l Improved positioning includes pec mm and retromammary fat ¡ Additional fibroadenoma(s)
visualized posteriorly.
CC Image Criteria l The best measure of whether
the CC view includes sufficient posterior tissue is the length of the PNL on the CC view compared with the MLO view (9). ¡ On the CC view, the PNL is
drawn directly posterior from the nipple to the edge of the mammogram or the pectoral muscle, if it is seen.
Measure PNL If No MM on CC Image or If Nipples Turn Up or Under
l The length of the PNL on the CC view should be within 1 cm of its measurement on the properly performed MLO view.
Inclusion of Pectoralis Mm. on CC
l Visualization of the pectoralis mm on the CC view is desirable ¡ but the mm is seen in
only about 30% of properly positioned cases.
¡ Do not sacrifice nipple in profile to get pec mm.
CC View l Shows skin
thickening at the medial aspect or contralateral breast on the image receptor ¡ Without
exaggerating the medial and loosing the lateral aspect
4/29/17
7
Muscle Inclusion:
l Should be visualized directly behind the nipple
l If offset the shoulders are not in-line with each other ¡ Medial position is usual
failure.
CC Image Receptor Size
l Size of breast is consideration but width and placement of breast on thorax is ultimate criteria for image receptor size ¡ Better to do a posterior
and anterior film with proper compression than one image
l If the receptor is too large, ¡ interposition of the
shoulder or the contralateral breast can prevent adequate breast compression.
l If the image receptor is too small for the thorax, ¡ a portion of either the
lateral or medial tissue will be excluded.
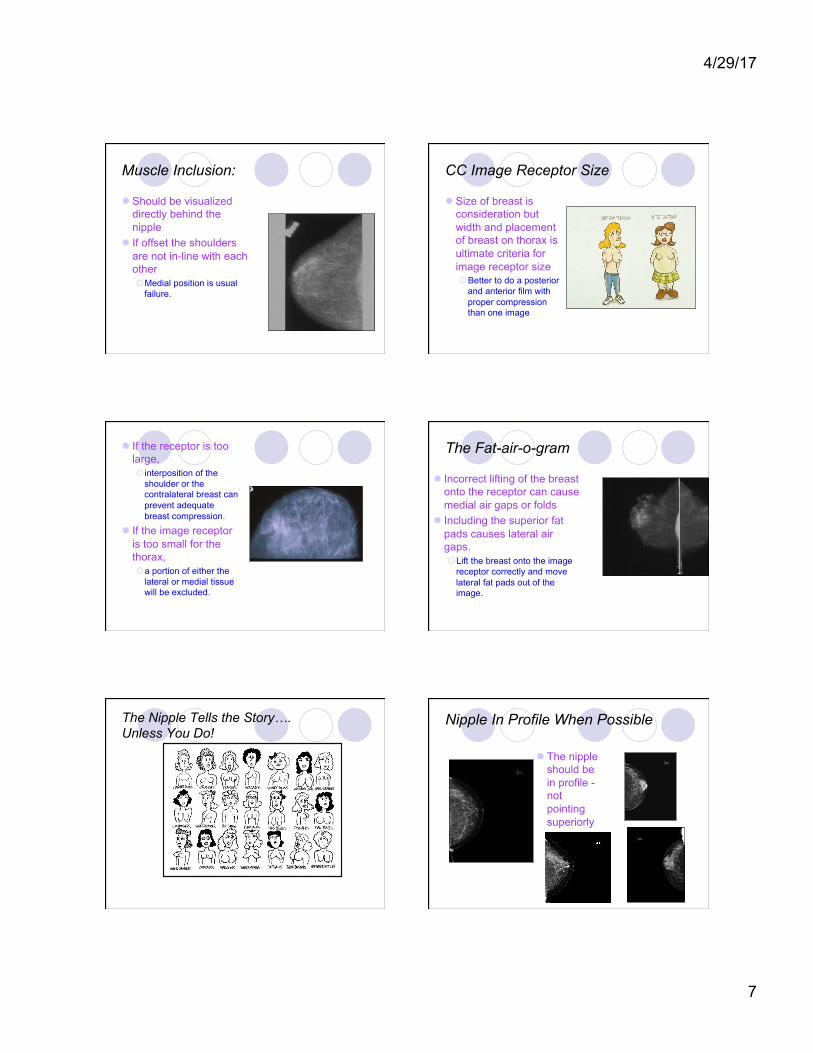
The Fat-air-o-gram
l Incorrect lifting of the breast onto the receptor can cause medial air gaps or folds
l Including the superior fat pads causes lateral air gaps. ¡ Lift the breast onto the image
receptor correctly and move lateral fat pads out of the image.
The Nipple Tells the Story…. Unless You Do!
Nipple In Profile When Possible
l The nipple should be in profile - not pointing superiorly or inferiorly.
4/29/17
8
Exaggeration l The nipple should be
located in the midline of the image, not exaggerated to the lateral or medial. (Fig 7). ¡ Pull additional lateral
tissue onto the receptor ¡ Do not loose the sternal
contact at the medial aspect of the breast
Comparison Can Be Revealing PNL Additional Information Following Year
Image Criteria for Compression
l The breast tissue is adequately shown from the thicker posterior to the anterior region.
l There is no blurring of structures – such as ¡ microcalcifications,
Cooper’s ligaments, subareolar area, vessels, anterior edge of pectoral muscle, IMF
l The fibroglandular tissues are adequately exposed and evenly penetrated.
l The fibroglandular tissues are separated rather than overlapping
Compression Comparison Compress to taut!
l Inadequate results in images with overlapping breast structures and nonuniform tissue exposure. (Figs 10, 11)
l Adequate compression opens up the breast structures for interpretation.
Compression and Contrast
l Adequate compression is needed to improve contrast and visualize parenchyma and pathology
Compression and Sharpness
l Sharpness is the ability of the mammography system to define an edge.
4/29/17
9
Compression and Motion
l Motion due to inadequate compression is more commonly seen on the MLO view than on the CC view, ¡ As the breast is not
supported by the receptor on the MLO view.
Exposure and Unsharpness
l Lack of sufficient exposure can lead to the appearance of unsharpness due to lack of contrast.
See Thru To The Breast Tissue
l The Pectogram – l With small breasts
and a well developed pectoralis the mm can “hide” much of the active tissue.
l Must have sufficient exposure to see thru the mm.
Even in FFDM Exposure Matters
l With adequate photons (exposure) noise is reduced and manipulation of the image can improve image viewing.
Exposure Must Be Adequate
l Inadequate number of x-ray photons leads to greater mottle and thus reduced sharpness ¡ Pixels are not saturated
They Were Not the Good ‘Ol Days
l Settings in the range of 23-26 kilovolt peak were previously used and yet contrast was still an issue. ¡ FFDM’s dynamic range
along with higher energy producing target/filter combinations to penetrate fibroglandular tissue while maintaining contrast
4/29/17
10
Optimal kVp is a Must For the Bust
l Proper kVp for penetration is a must ¡ no matter how many
photons are produced the breast is the attenuato
¡ contrast will flatten out with lower kVp or incorrect target/filter combination.
See “Thru” the Clouds
l Fibroglandular tissue should have a density of at least 1.0, ¡ Gray adequately exposed
fibroglandular tissue is preferable to white underexposed fibroglandular tissue
l Fat should be 1.2 (dark gray) to 2.0 (black) or over if needed. ¡ Use of “bright” light can
compensate for overexposed areas
CONTRAST l The degree of
variation in optical density between different areas of the image or between an abnormality and surrounding tissues. ¡ Contrast allows us to
perceive attenuation differences in the breast tissues.
Sufficient Exposure Improves Contrast
l Underexposure common cause of decreased contrast
l In dense breast need sufficient kVp to penetrate – in fatty breast need less KvP to increase contrast
Artifacts
l No density variations that could detract from the ability to delineate structures contained within the breast.
l Dust, lint, dirt, scratches, fingerprints, fog, grid lines, roller marks, chemical residues, compression device, powders, deodorants, hair, tattoos
Blame It On the Patient!
4/29/17
11
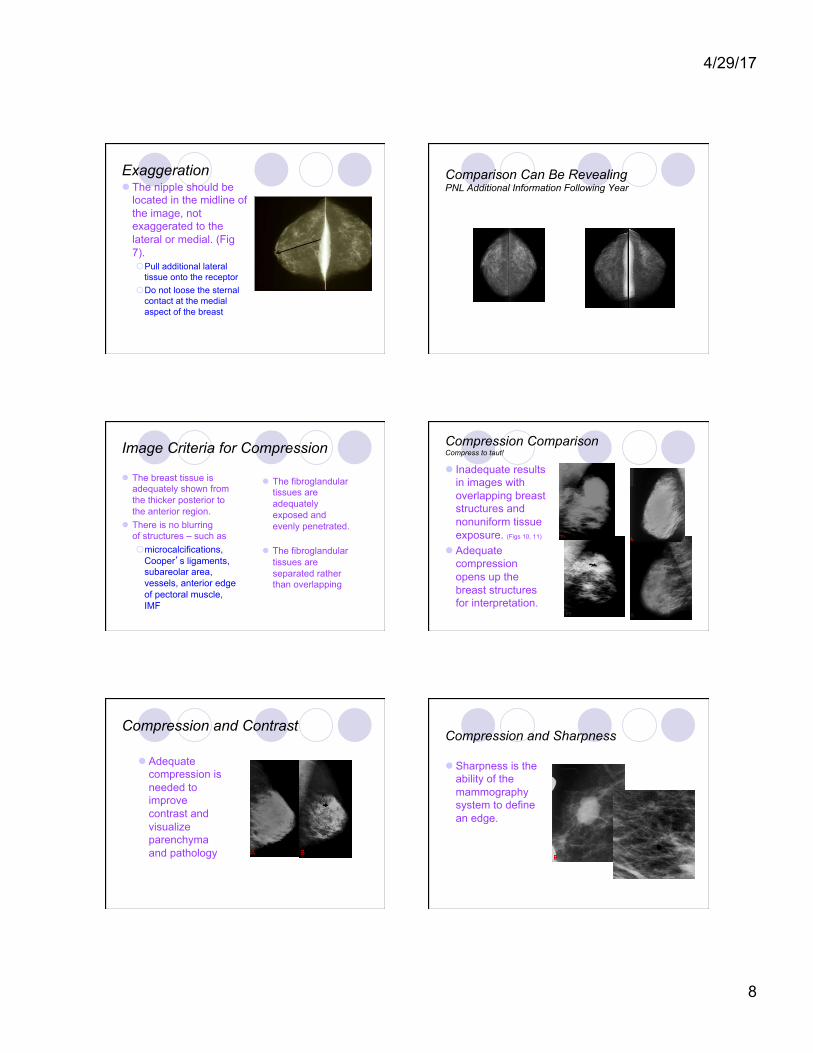
A Bad Hair Day
l The woman's hair can also appear as an artifact on the image (Fig 21).
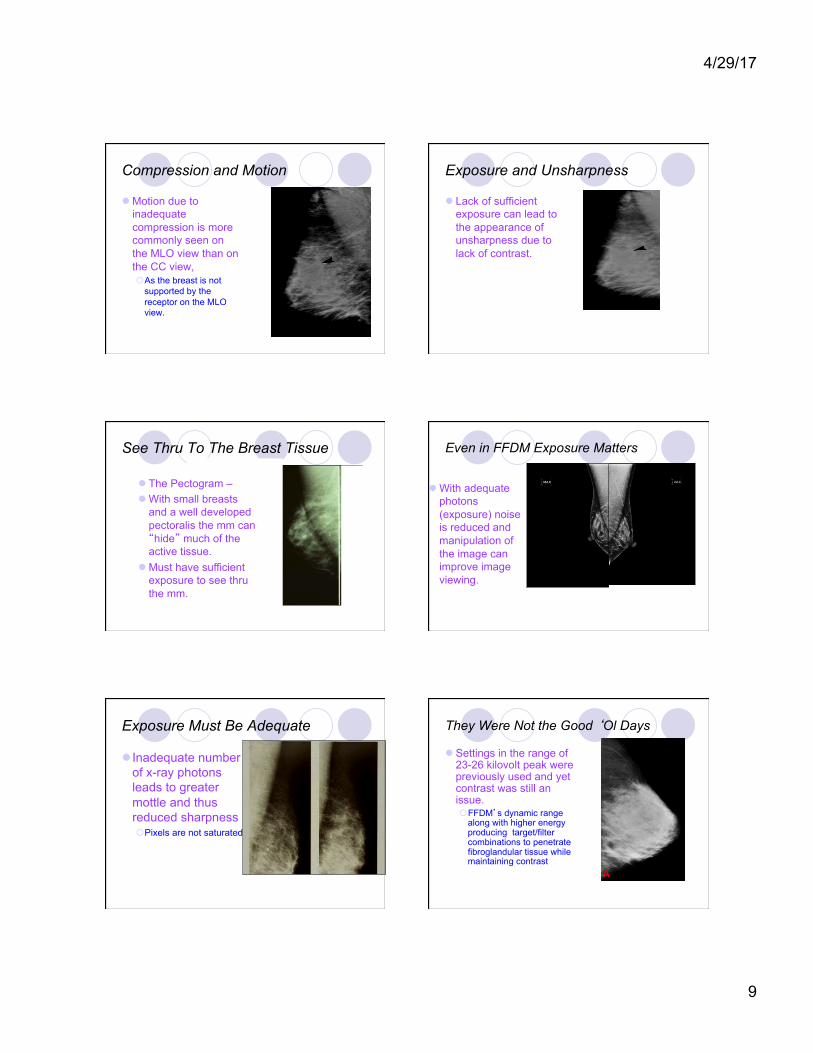
The Deoderant
l Images should be inspected with a magnifying lens for artifacts. Commonly encountered artifacts include dust or lint (Fig 17).
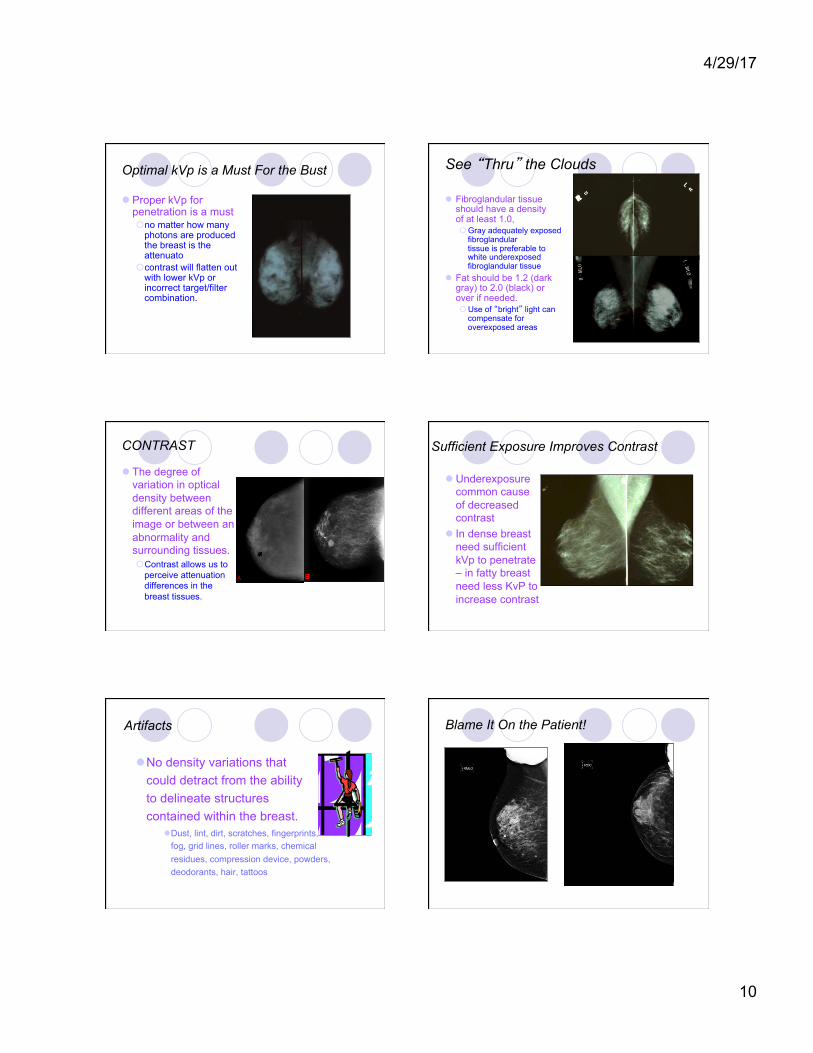
Objects On Not In the Breast
l Deodorant residue is one of the most commonly encountered of these artifacts.
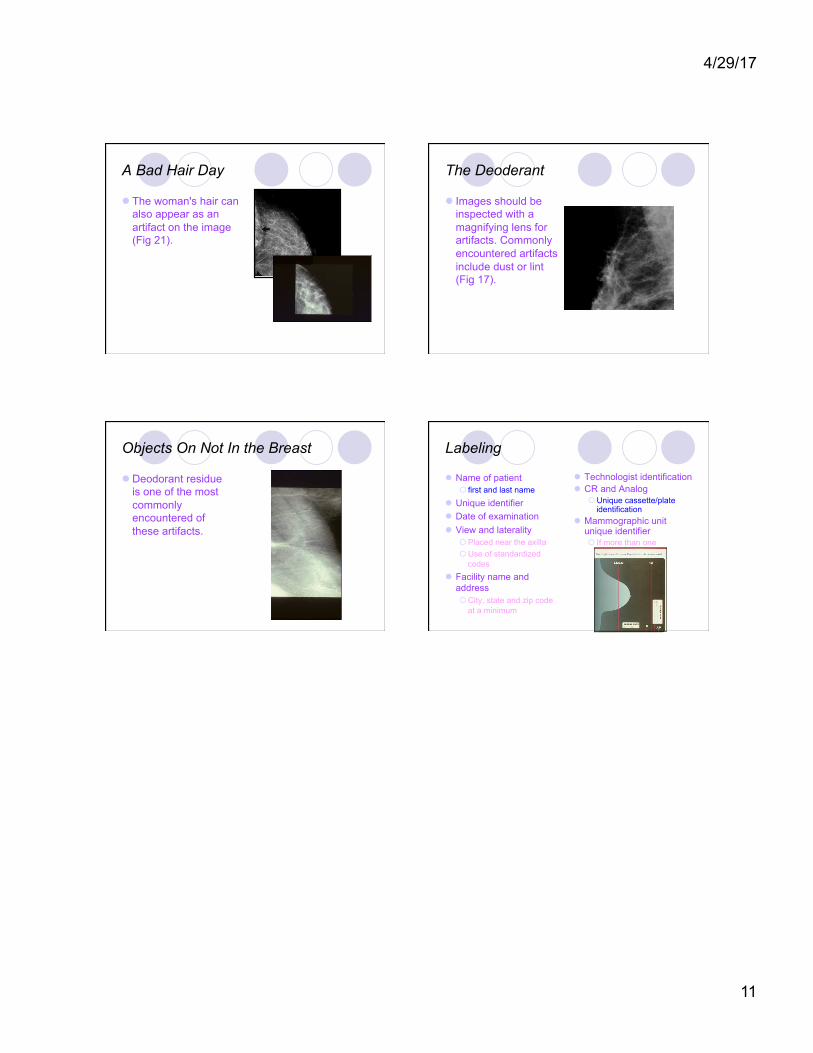
Labeling
l Name of patient ¡ first and last name
l Unique identifier l Date of examination l View and laterality
¡ Placed near the axilla ¡ Use of standardized
codes l Facility name and
address ¡ City, state and zip code
at a minimum
l Technologist identification l CR and Analog
¡ Unique cassette/plate identification
l Mammographic unit unique identifier ¡ If more than one
![Radiology Case Reports - COnnecting REpositories · the retroglandular fat [6]. The normal, scalloped appearance of breast tissue may take on a tented appearance [6]. Other nonspecific,](https://img.pdfslide.us/doc/110x75/5ba2c04009d3f26f6e8c78e5/radiology-case-reports-connecting-repositories-the-retroglandular-fat-6.jpg)