Embed Size (px)
Citation preview
Red Hat Enterprise Virtualization 3.6
Self-Hosted Engine Guide
Installing and Maintaining the Red Hat Enterprise Virtualization Self-Hosted Engine
Last Updated: 2018-01-24


Red Hat Enterprise Virtualization 3.6 Self-Hosted Engine Guide
Installing and Maintaining the Red Hat Enterprise Virtualization Self-Hosted Engine
Red Hat Enterprise Virtualization Documentation TeamRed Hat Customer Content [email protected]

Legal Notice
Copyright © 2018 Red Hat.
This document is licensed by Red Hat under the Creative Commons Attribution-ShareAlike 3.0Unported License. If you distribute this document, or a modified version of it, you must provideattribution to Red Hat, Inc. and provide a link to the original. If the document is modified, all Red Hattrademarks must be removed.
Red Hat, as the licensor of this document, waives the right to enforce, and agrees not to assert,Section 4d of CC-BY-SA to the fullest extent permitted by applicable law.
Red Hat, Red Hat Enterprise Linux, the Shadowman logo, JBoss, OpenShift, Fedora, the Infinitylogo, and RHCE are trademarks of Red Hat, Inc., registered in the United States and othercountries.
Linux ® is the registered trademark of Linus Torvalds in the United States and other countries.
Java ® is a registered trademark of Oracle and/or its affiliates.
XFS ® is a trademark of Silicon Graphics International Corp. or its subsidiaries in the United Statesand/or other countries.
MySQL ® is a registered trademark of MySQL AB in the United States, the European Union andother countries.
Node.js ® is an official trademark of Joyent. Red Hat Software Collections is not formally related toor endorsed by the official Joyent Node.js open source or commercial project.
The OpenStack ® Word Mark and OpenStack logo are either registered trademarks/service marksor trademarks/service marks of the OpenStack Foundation, in the United States and other countriesand are used with the OpenStack Foundation's permission. We are not affiliated with, endorsed orsponsored by the OpenStack Foundation, or the OpenStack community.
All other trademarks are the property of their respective owners.
Abstract
A comprehensive guide to the self-hosted engine.

. . . . . . . . . . . . . . . . . . . . . . . . . . . . . . . . . . . . . . . . . . . . . . . . . . . . . . . . . . . . . . . . . . . . . . . . . . . . . . . . . . . . . . . . . . . . . . . . . . . . . . . . . . . . . . . . . . . . . . . . . . . . . . . . . . . . . . . . . . . . . . . . . . . . . . . . . . . . . . . . . . . . . . . . . . . . . . . . . . . . . . . . . . . . . . . . . . . . . . . . . . . . . . . . . . . . . . . . . . . . . . . . . . . . . . . . . . . . . . . . . . . . . . . . . . . . . . . . . . . . . . . . . . . . . . . . . . . . . . . .
. . . . . . . . . . . . . . . . . . . . . . . . . . . . . . . . . . . . . . . . . . . . . . . . . . . . . . . . . . . . . . . . . . . . . . . . . . . . . . . . . . . . . . . . . . . . . . . . . . . . . . . . . . . . . . . . . . . . . . . . . . . . . . . . . . . . . . . . . . . . . . . . . . . . . . . . . . . . . . . . . . . . . . . . . . . . . . . . . . . . . . . . . . . . . . . . . . . . . . . . . . . . . . . . . . . . . . . . . . . . . . . . . . . . . . . . . . . . . . . . . . . . . . . . . . . . . . . . . . . . . . . . . . . . . . . . . . . . . . . .
. . . . . . . . . . . . . . . . . . . . . . . . . . . . . . . . . . . . . . . . . . . . . . . . . . . . . . . . . . . . . . . . . . . . . . . . . . . . . . . . . . . . . . . . . . . . . . . . . . . . . . . . . . . . . . . . . . . . . . . . . . . . . . . . . . . . . . . . . . . . . . . . . . . . . . . . . . . . . . . . . . . . . . . . . . . . . . . . . . . . . . . . . . . . . . . . . . . . . . . . . . . . . . . . . . . . . . . . . . . . . . . . . . . . . . . . . . . . . . . . . . . . . . . . . . . . . . . . . . . . . . . . . . . . . . . . . . . . . . . .
. . . . . . . . . . . . . . . . . . . . . . . . . . . . . . . . . . . . . . . . . . . . . . . . . . . . . . . . . . . . . . . . . . . . . . . . . . . . . . . . . . . . . . . . . . . . . . . . . . . . . . . . . . . . . . . . . . . . . . . . . . . . . . . . . . . . . . . . . . . . . . . . . . . . . . . . . . . . . . . . . . . . . . . . . . . . . . . . . . . . . . . . . . . . . . . . . . . . . . . . . . . . . . . . . . . . . . . . . . . . . . . . . . . . . . . . . . . . . . . . . . . . . . . . . . . . . . . . . . . . . . . . . . . . . . . . . . . . . . . .
. . . . . . . . . . . . . . . . . . . . . . . . . . . . . . . . . . . . . . . . . . . . . . . . . . . . . . . . . . . . . . . . . . . . . . . . . . . . . . . . . . . . . . . . . . . . . . . . . . . . . . . . . . . . . . . . . . . . . . . . . . . . . . . . . . . . . . . . . . . . . . . . . . . . . . . . . . . . . . . . . . . . . . . . . . . . . . . . . . . . . . . . . . . . . . . . . . . . . . . . . . . . . . . . . . . . . . . . . . . . . . . . . . . . . . . . . . . . . . . . . . . . . . . . . . . . . . . . . . . . . . . . . . . . . . . . . . . . . . . .
. . . . . . . . . . . . . . . . . . . . . . . . . . . . . . . . . . . . . . . . . . . . . . . . . . . . . . . . . . . . . . . . . . . . . . . . . . . . . . . . . . . . . . . . . . . . . . . . . . . . . . . . . . . . . . . . . . . . . . . . . . . . . . . . . . . . . . . . . . . . . . . . . . . . . . . . . . . . . . . . . . . . . . . . . . . . . . . . . . . . . . . . . . . . . . . . . . . . . . . . . . . . . . . . . . . . . . . . . . . . . . . . . . . . . . . . . . . . . . . . . . . . . . . . . . . . . . . . . . . . . . . . . . . . . . . . . . . . . . . .
. . . . . . . . . . . . . . . . . . . . . . . . . . . . . . . . . . . . . . . . . . . . . . . . . . . . . . . . . . . . . . . . . . . . . . . . . . . . . . . . . . . . . . . . . . . . . . . . . . . . . . . . . . . . . . . . . . . . . . . . . . . . . . . . . . . . . . . . . . . . . . . . . . . . . . . . . . . . . . . . . . . . . . . . . . . . . . . . . . . . . . . . . . . . . . . . . . . . . . . . . . . . . . . . . . . . . . . . . . . . . . . . . . . . . . . . . . . . . . . . . . . . . . . . . . . . . . . . . . . . . . . . . . . . . . . . . . . . . . . .
. . . . . . . . . . . . . . . . . . . . . . . . . . . . . . . . . . . . . . . . . . . . . . . . . . . . . . . . . . . . . . . . . . . . . . . . . . . . . . . . . . . . . . . . . . . . . . . . . . . . . . . . . . . . . . . . . . . . . . . . . . . . . . . . . . . . . . . . . . . . . . . . . . . . . . . . . . . . . . . . . . . . . . . . . . . . . . . . . . . . . . . . . . . . . . . . . . . . . . . . . . . . . . . . . . . . . . . . . . . . . . . . . . . . . . . . . . . . . . . . . . . . . . . . . . . . . . . . . . . . . . . . . . . . . . . . . . . . . . . .
. . . . . . . . . . . . . . . . . . . . . . . . . . . . . . . . . . . . . . . . . . . . . . . . . . . . . . . . . . . . . . . . . . . . . . . . . . . . . . . . . . . . . . . . . . . . . . . . . . . . . . . . . . . . . . . . . . . . . . . . . . . . . . . . . . . . . . . . . . . . . . . . . . . . . . . . . . . . . . . . . . . . . . . . . . . . . . . . . . . . . . . . . . . . . . . . . . . . . . . . . . . . . . . . . . . . . . . . . . . . . . . . . . . . . . . . . . . . . . . . . . . . . . . . . . . . . . . . . . . . . . . . . . . . . . . . . . . . . . . .
. . . . . . . . . . . . . . . . . . . . . . . . . . . . . . . . . . . . . . . . . . . . . . . . . . . . . . . . . . . . . . . . . . . . . . . . . . . . . . . . . . . . . . . . . . . . . . . . . . . . . . . . . . . . . . . . . . . . . . . . . . . . . . . . . . . . . . . . . . . . . . . . . . . . . . . . . . . . . . . . . . . . . . . . . . . . . . . . . . . . . . . . . . . . . . . . . . . . . . . . . . . . . . . . . . . . . . . . . . . . . . . . . . . . . . . . . . . . . . . . . . . . . . . . . . . . . . . . . . . . . . . . . . . . . . . . . . . . . . . .
. . . . . . . . . . . . . . . . . . . . . . . . . . . . . . . . . . . . . . . . . . . . . . . . . . . . . . . . . . . . . . . . . . . . . . . . . . . . . . . . . . . . . . . . . . . . . . . . . . . . . . . . . . . . . . . . . . . . . . . . . . . . . . . . . . . . . . . . . . . . . . . . . . . . . . . . . . . . . . . . . . . . . . . . . . . . . . . . . . . . . . . . . . . . . . . . . . . . . . . . . . . . . . . . . . . . . . . . . . . . . . . . . . . . . . . . . . . . . . . . . . . . . . . . . . . . . . . . . . . . . . . . . . . . . . . . . . . . . . . .
. . . . . . . . . . . . . . . . . . . . . . . . . . . . . . . . . . . . . . . . . . . . . . . . . . . . . . . . . . . . . . . . . . . . . . . . . . . . . . . . . . . . . . . . . . . . . . . . . . . . . . . . . . . . . . . . . . . . . . . . . . . . . . . . . . . . . . . . . . . . . . . . . . . . . . . . . . . . . . . . . . . . . . . . . . . . . . . . . . . . . . . . . . . . . . . . . . . . . . . . . . . . . . . . . . . . . . . . . . . . . . . . . . . . . . . . . . . . . . . . . . . . . . . . . . . . . . . . . . . . . . . . . . . . . . . . . . . . . . . .
Table of Contents
CHAPTER 1. INTRODUCTION1.1. INSTALLATION OPTIONS
CHAPTER 2. DEPLOYING SELF-HOSTED ENGINE ON RED HAT ENTERPRISE VIRTUALIZATIONHYPERVISOR
2.1. INSTALLING RED HAT ENTERPRISE VIRTUALIZATION HYPERVISOR2.2. CONFIGURING SELF-HOSTED ENGINE ON RED HAT ENTERPRISE VIRTUALIZATION HYPERVISOR2.3. ADMINISTERING THE MANAGER VIRTUAL MACHINE
CHAPTER 3. DEPLOYING SELF-HOSTED ENGINE ON A RED HAT ENTERPRISE LINUX HOST3.1. SUBSCRIBING TO THE REQUIRED ENTITLEMENTS3.2. INSTALLING THE SELF-HOSTED ENGINE PACKAGES3.3. CONFIGURING A RHEL-BASED SELF-HOSTED ENGINE3.4. ADMINISTERING THE MANAGER VIRTUAL MACHINE
CHAPTER 4. TROUBLESHOOTING A SELF-HOSTED ENGINE DEPLOYMENT4.1. TROUBLESHOOTING THE MANAGER VIRTUAL MACHINE4.2. CLEANING UP A FAILED SELF-HOSTED ENGINE DEPLOYMENT
CHAPTER 5. MIGRATING FROM BARE METAL TO A RHEL-BASED SELF-HOSTED ENVIRONMENT5.1. MIGRATING TO A SELF-HOSTED ENVIRONMENT5.2. MIGRATING TO A SELF-HOSTED ENVIRONMENT USING THE RHEV-M VIRTUAL APPLIANCE
CHAPTER 6. MAINTENANCE AND UPGRADING RESOURCES6.1. MAINTAINING THE SELF-HOSTED ENGINE6.2. UPGRADING A RHEL OR RHEV-H 7 SELF-HOSTED ENGINE ENVIRONMENT6.3. UPGRADING A RHEL OR RHEV-H 6 SELF-HOSTED ENGINE ENVIRONMENT6.4. REMOVING A HOST FROM A SELF-HOSTED ENGINE ENVIRONMENT
CHAPTER 7. BACKING UP AND RESTORING A RHEL-BASED SELF-HOSTED ENVIRONMENT7.1. BACKING UP THE SELF-HOSTED ENGINE MANAGER VIRTUAL MACHINE7.2. RESTORING THE SELF-HOSTED ENGINE ENVIRONMENT7.3. INSTALLING ADDITIONAL HOSTS TO A RESTORED SELF-HOSTED ENGINE ENVIRONMENT
CHAPTER 8. INSTALLING ADDITIONAL HOSTS TO A SELF-HOSTED ENVIRONMENT
CHAPTER 9. MIGRATING DATABASES9.1. MIGRATING THE SELF-HOSTED ENGINE DATABASE TO A REMOTE SERVER DATABASE9.2. MIGRATING DATA WAREHOUSE AND REPORTS TO SEPARATE MACHINES9.3. MIGRATING THE DATA WAREHOUSE DATABASE TO A SEPARATE MACHINE9.4. MIGRATING THE DATA WAREHOUSE SERVICE TO A SEPARATE MACHINE9.5. MIGRATING THE REPORTS SERVICE TO A SEPARATE MACHINE
CHAPTER 10. DATA WAREHOUSE AND REPORTS10.1. OVERVIEW OF CONFIGURING DATA WAREHOUSE AND REPORTS10.2. DATA WAREHOUSE AND REPORTS CONFIGURATION NOTES10.3. DATA WAREHOUSE AND REPORTS INSTALLATION OPTIONS
APPENDIX A. MANUALLY INSTALLING THE MANAGER OPERATING SYSTEM
APPENDIX B. REVISION HISTORY
33
555
12
1313131420
212122
232332
4343444755
57606179
83
868688888993
98989899
121
126
Table of Contents
1

Self-Hosted Engine Guide
2
CHAPTER 1. INTRODUCTIONA self-hosted engine is a virtualized environment in which the engine, or Manager, runs on a virtualmachine on the hosts managed by that engine. The virtual machine is created as part of the hostconfiguration, and the Manager is installed and configured in parallel to the host configuration process.The primary benefit of the self-hosted engine is that it requires less hardware to deploy an instance ofRed Hat Enterprise Virtualization as the Manager runs as a virtual machine, not on physical hardware.Additionally, the Manager is configured to be highly available. If the host running the Manager virtualmachine goes into maintenance mode, or fails unexpectedly, the virtual machine will be migratedautomatically to another host in the environment. A minimum of two self-hosted engine hosts arerequired to support the high availability feature.
Table 1.1. Supported OS versions to Deploy Self-Hosted Engine
System Type Supported Versions
Red Hat Enterprise Linux Host 7.2
Red Hat Enterprise Virtualization Hypervisor Host 7.2
HostedEngine-VM (Manager) 6.7
IMPORTANT
It is important to synchronize the system clocks of the hosts, Manager, and other serversin the environment to avoid potential timing or authentication issues. To do this, configurethe Network Time Protocol (NTP) on each system to synchronize with the same NTPserver.
1.1. INSTALLATION OPTIONS
Self-Hosted Engine Hosts
You can use Red Hat Enterprise Virtualization Hypervisors or Red Hat Enterprise Linux hosts, or both.
Red Hat Enterprise Virtualization Hypervisor is distributed as an ISO file and contains only thepackages required for the machine to act as a virtualization host. See Chapter 2, Deploying Self-Hosted Engine on Red Hat Enterprise Virtualization Hypervisor
Red Hat Enterprise Linux systems subscribed to the appropriate entitlements can be used asvirtualization hosts. See Chapter 3, Deploying Self-Hosted Engine on a Red Hat Enterprise LinuxHost.
Self-Hosted Engine Manager
You can use the RHEV-M Virtual Appliance, or you can install and configure the Manager virtualmachine manually.
The RHEV-M Virtual Appliance automates the process of installing and configuring the Managervirtual machine, and does not require you to access the virtual machine during the setup.
CHAPTER 1. INTRODUCTION
3

Manually installing and configuring the Manager virtual machine is also supported but requiresyou to access the virtual machine directly during the setup.
Self-Hosted Engine Guide
4

CHAPTER 2. DEPLOYING SELF-HOSTED ENGINE ON REDHAT ENTERPRISE VIRTUALIZATION HYPERVISOR
2.1. INSTALLING RED HAT ENTERPRISE VIRTUALIZATIONHYPERVISOR
You will need to install a Red Hat Enterprise Virtualization Hypervisor machine before configuring self-hosted engine on it.
For more information on storage requirements, see Storage Requirements in the InstallationGuide. To use the RHEV-M Virtual Appliance for the Manager virtual machine installation, thedata partition (/data) must be at least 60 GB.
See Installing the Red Hat Enterprise Virtualization Hypervisor in the Installation Guide for theinstallation procedure.
After the Red Hat Enterprise Virtualization Hypervisor is installed, configure the Network screenbefore proceeding to the Hosted Engine screen. See Configuring the Red Hat EnterpriseVirtualization Hypervisor in the Installation Guide.
2.2. CONFIGURING SELF-HOSTED ENGINE ON RED HAT ENTERPRISEVIRTUALIZATION HYPERVISOR
Once you have installed a Red Hat Enterprise Virtualization Hypervisor using the Hypervisor ISO, set upself-hosted engine using the Hosted Engine screen. Self-hosted engine is currently supported on RedHat Enterprise Virtualization Hypervisor 7.
Prerequisites:
You must have prepared a freshly installed Red Hat Enterprise Virtualization Hypervisor (RHEV-H).
You must have the Manager virtual machine operating system installation media. Therecommended method is to use the RHEV-M Virtual Appliance to automate the setup. To usethe appliance, the data partition (/data) must be at least 60 GB. The appliance must beaccessible from the hypervisor via HTTP. Log in to the Customer Portal, and download theRHEV-M Virtual Appliance from https://access.redhat.com/downloads/content/150/ver=3.6/rhel---6/3.6/x86_64/product-software.
You must have prepared storage for your self-hosted engine environment. At least two storagedomains are required:
A shared storage domain dedicated to the Manager virtual machine. This domain is createdduring the self-hosted engine deployment, and must be at least 60 GB.
A data storage domain for regular virtual machine data. This domain must be added to theself-hosted engine environment after completing the deployment.
For more information on preparing storage for your deployment, see the Storage chapter of theAdministration Guide.
You must have a fully qualified domain name prepared for your Manager and Hypervisor host.Forward and reverse lookup records must both be set in the DNS.
CHAPTER 2. DEPLOYING SELF-HOSTED ENGINE ON RED HAT ENTERPRISE VIRTUALIZATION HYPERVISOR
5

NOTE
For evaluation purposes, you can use the /etc/hosts file for name resolution.
You must have enabled SSH password authentication in the Security screen.
Procedure 2.1. Setting Up Self-Hosted Engine on RHEV-H
This example configures self-hosted engine on a Red Hat Enterprise Virtualization Hypervisor 7.
1. Click Deploy Hosted Engine.
2. Specify the Red Hat Enterprise Virtualization Manager virtual machine installation method. Toinstall using the RHEV-M Virtual Appliance, enter the URL to the appliance. For example: http://file.domain.com/rhevm-appliance.ova. This is the recommended Managerinstallation method. Click Deploy, and click Close.
Alternatively, select PXE Boot Engine VM if PXE installation is the desired installation method.
3. Click OK to start the hosted-engine deployment script. Press Enter to confirm to continue.
Self-Hosted Engine Guide
6

4. Configuring StorageSelect the type of storage to use.
During customization use CTRL-D to abort.Please specify the storage you would like to use (glusterfs, iscsi, fc, nfs3, nfs4)[nfs3]:
For NFS storage types, specify the full address, using either the FQDN or IP address, andpath name of the shared storage domain.
Please specify the full shared storage connection path to use (example: host:/path): storage.example.com:/hosted_engine/nfs
For iSCSI, specify the iSCSI portal IP address, port, user name and password, and select atarget name from the auto-detected list. You can only select one iSCSI target during thedeployment.
Please specify the iSCSI portal IP address:Please specify the iSCSI portal port [3260]:Please specify the iSCSI portal user:Please specify the iSCSI portal password:Please specify the target name (auto-detected values) [default]:
For Gluster storage, specify the full address, using either the FQDN or IP address, and pathname of the shared storage domain.
CHAPTER 2. DEPLOYING SELF-HOSTED ENGINE ON RED HAT ENTERPRISE VIRTUALIZATION HYPERVISOR
7

IMPORTANT
Only replica 3 Gluster storage is supported. Ensure the followingconfiguration has been made:
In the /etc/glusterfs/glusterd.vol file on all three Glusterservers, set rpc-auth-allow-insecure to on.
option rpc-auth-allow-insecure on
Configure the volume as follows:
gluster volume set volume cluster.quorum-type autogluster volume set volume network.ping-timeout 10gluster volume set volume auth.allow \*gluster volume set volume group virtgluster volume set volume storage.owner-uid 36gluster volume set volume storage.owner-gid 36gluster volume set volume server.allow-insecure on
Please specify the full shared storage connection path to use (example: host:/path): storage.example.com:/hosted_engine/gluster_volume
For Fibre Channel, the host bus adapters must be configured and connected, and the hosted-engine script will auto-detect the LUNs available. The LUNs must not contain anyexisting data.
The following luns have been found on the requested target:[1] 3514f0c5447600351 30GiB XtremIO XtremApp status: used, paths: 2 active
[2] 3514f0c5447600352 30GiB XtremIO XtremApp status: used, paths: 2 active
Please select the destination LUN (1, 2) [1]:
Choose the storage domain and storage data center names to be used in the environment.
[ INFO ] Installing on first hostPlease provide storage domain name. [hosted_storage]:Local storage datacenter name is an internal name and currently will not be shown in engine's admin UI.Please enter local datacenter name [hosted_datacenter]:
5. Configuring the NetworkThe script detects possible network interface controllers (NICs) to use as a management bridgefor the environment. It then checks your firewall configuration and offers to modify it for console(SPICE or VNC) access.
Self-Hosted Engine Guide
8

NOTE
Configuring a bonded and vlan-tagged network interface as the managementbridge is currently not supported. To work around this issue, seehttps://access.redhat.com/solutions/1417783 for more information.
Please indicate a nic to set rhevm bridge on: (eth1, eth0) [eth1]:iptables was detected on your computer, do you wish setup to configure it? (Yes, No)[Yes]: YesPlease indicate a pingable gateway IP address [X.X.X.X]:
6. Configuring the Virtual MachineThe script creates a virtual machine to be configured as the Red Hat Enterprise VirtualizationManager.
NOTE
If you want to manually install the Manager virtual machine, see Appendix A,Manually Installing the Manager Operating System to complete the self-hostedengine setup. Using the appliance eases the workflow, because user interactionwith the Manager virtual machine is not required. Manual installation allows you totake full control of the installation.
[ INFO ] Checking OVF archive content (could take a few minutes depending on archive size)[ INFO ] Checking OVF XML content (could take a few minutes depending on archive size) Would you like to use cloud-init to customize the appliance on the first boot (Yes, No)[Yes]? Would you like to generate on-fly a cloud-init no-cloud ISO image or do you have an existing one(Generate, Existing)[Generate]? Generate Please provide the FQDN you would like to use for the engine appliance. Note: This will be the FQDN of the engine VM you are now going to launch. It should not point to the base host or to any other existing machine. Engine VM FQDN: (leave it empty to skip): manager.example.com Automatically execute engine-setup on the engine appliance on first boot (Yes, No)[Yes]? Yes Automatically restart the engine VM as a monitored service after engine-setup (Yes, No)[Yes]? Yes Please provide the domain name you would like to use for the engine appliance. Engine VM domain: [example.com] Enter root password that will be used for the engine appliance (leave it empty to skip): p@ssw0rd Confirm appliance root password: p@ssw0rd How should the engine VM network be configured (DHCP, Static)[DHCP]? Static Please enter the IP address to be used for the engine VM:
CHAPTER 2. DEPLOYING SELF-HOSTED ENGINE ON RED HAT ENTERPRISE VIRTUALIZATION HYPERVISOR
9

192.168.x.x[ INFO ] The engine VM will be configured to use 192.168.x.x/24 Please provide a comma-separated list (max3) of IP addresses of domain name servers for the engine VM Engine VM DNS (leave it empty to skip): Add lines for the appliance itself and for this host to /etc/hosts on the engine VM? Note: ensuring that this host could resolve the engine VM hostname is still up to you (Yes, No)[No] Yes Please specify an alias for the Hosted Engine image [hosted_engine]: The following CPU types are supported by this host: - model_Penryn: Intel Penryn Family - model_Conroe: Intel Conroe Family Please specify the CPU type to be used by the VM [model_Penryn]: Please specify the number of virtual CPUs for the VM [Defaults to appliance OVF value: 4]: You may specify a MAC address for the VM or accept a randomly generated default [00:16:3e:77:b2:a4]: Please specify the console type you would like to use to connect to the VM (vnc, spice) [vnc]: vnc
7. Configuring the Hosted EngineSpecify a name for the hypervisor to be identified in the Red Hat Enterprise Virtualizationenvironment, and the password for the admin@internal user to access the AdministrationPortal. Provide the FQDN for the Manager virtual machine.
Enter the name which will be used to identify this host inside the Administrator Portal [hosted_engine_1]:Enter 'admin@internal' user password that will be used for accessing the Administrator Portal: p@ssw0rdConfirm 'admin@internal' user password: p@ssw0rdPlease provide the name of the SMTP server through which we will send notifications [localhost]:Please provide the TCP port number of the SMTP server [25]:Please provide the email address from which notifications will be sent [root@localhost]:Please provide a comma-separated list of email addresses which will get notifications [root@localhost]:
8. Configuration PreviewBefore proceeding, the hosted-engine script displays the configuration values you haveentered, and prompts for confirmation to proceed with these values.
9. Creating the Manager Virtual MachineThe script creates the Manager virtual machine, starts the ovirt-engine and high availabilityservices, and connects the hypervisor host and shared storage domain to the Manager virtualmachine.
You can now connect to the VM with the following command: /usr/bin/remote-viewer vnc://localhost:5900Use temporary password "3042QHpX" to connect to vnc console.Please note that in order to use remote-viewer you need to be able to run graphical applications.
Self-Hosted Engine Guide
10

This means that if you are using ssh you have to supply the -Y flag (enables trusted X11 forwarding).Otherwise you can run the command from a terminal in your preferred desktop environment.If you cannot run graphical applications you can connect to the graphic console from another host or connect to the serial console using the following command:socat UNIX-CONNECT:/var/run/ovirt-vmconsole-console/fabbea5a-1989-411f-8ed7-7abe0917fc66.sock,user=ovirt-vmconsole STDIO,raw,echo=0,escape=1
If you need to reboot the VM you will need to start it manually using the command:hosted-engine --vm-startYou can then set a temporary password using the command:hosted-engine --add-console-password[ INFO ] Running engine-setup on the appliance...[ INFO ] Engine-setup successfully completed[ INFO ] Engine is still unreachable[ INFO ] Engine is still unreachable, waiting...[ INFO ] Engine replied: DB Up!Welcome to Health Status![ INFO ] Connecting to the Engine Enter the name of the cluster to which you want to add the host (Default) [Default]:[ INFO ] Waiting for the host to become operational in the engine. This may take several minutes... [ INFO ] Still waiting for VDSM host to become operational...[ INFO ] The VDSM Host is now operational[ INFO ] Shutting down the engine VM[ INFO ] Enabling and starting HA services[ INFO ] Saving hosted-engine configuration on the shared storage domain Hosted Engine successfully set up[ INFO ] Stage: Clean up[ INFO ] Generating answer file '/var/lib/ovirt-hosted-engine-setup/answers/answers-2015xx.conf'[ INFO ] Generating answer file '/etc/ovirt-hosted-engine/answers.conf'[ INFO ] Stage: Pre-termination[ INFO ] Stage: Termination
[screen is terminating]Hit <Return> to return to the TUI
When the hosted-engine deployment script completes successfully, the Red Hat EnterpriseVirtualization Manager name and status are displayed in the Hosted Engine screen. This may take afew minutes to appear. The Red Hat Enterprise Virtualization Manager is configured and running on yourhypervisor host. The Manager has already configured the data center, cluster, hypervisor host, theManager virtual machine, and a shared storage domain dedicated to the Manager virtual machine.
CHAPTER 2. DEPLOYING SELF-HOSTED ENGINE ON RED HAT ENTERPRISE VIRTUALIZATION HYPERVISOR
11

IMPORTANT
Log in as the admin@internal user to continue configuring the Manager and add furtherresources. You must create another data domain for the data center to be initialized tohost regular virtual machine data, and for the Manager virtual machine to be visible. SeeStorage in the Administration Guide for different storage options and on how to add a datastorage domain.
Link your Red Hat Enterprise Virtualization Manager to a directory server so you can add additionalusers to the environment. Red Hat Enterprise Virtualization supports many directory server types; forexample, Red Hat Directory Server (RHDS), Red Hat Identity Management (IdM), Active Directory, andmany other types. Add a directory server to your environment using the ovirt-engine-extension-aaa-ldap-setup interactive setup script. For more information, see Configuring an External LDAPProvider in the Administration Guide.
The ovirt-hosted-engine-setup script also saves the answers you gave during configuration to afile, to help with disaster recovery. If a destination is not specified using the --generate-answer=<file> argument, the answer file is generated at /etc/ovirt-hosted-engine/answers.conf.
NOTE
SSH password authentication is not enabled by default on the RHEV-M Virtual Appliance.You can enable SSH password authentication by accessing the Red Hat EnterpriseVirtualization Manager virtual machine through the SPICE or VNC console. Verify that the sshd service is running. Edit /etc/ssh/sshd_config and change the following twooptions to yes:
PasswordAuthentication
PermitRootLogin
Restart the sshd service for the changes to take effect.
2.3. ADMINISTERING THE MANAGER VIRTUAL MACHINE
The hosted-engine utility is provided to assist with administering the Manager virtual machine.
To check the status of the Manager virtual machine, in the text user interface, select the Hosted Engine screen and select < Hosted Engine VM status >.
See Section 4.1, “Troubleshooting the Manager Virtual Machine” for more information.
Self-Hosted Engine Guide
12

CHAPTER 3. DEPLOYING SELF-HOSTED ENGINE ON A REDHAT ENTERPRISE LINUX HOST
3.1. SUBSCRIBING TO THE REQUIRED ENTITLEMENTS
Register the system and subscribe to the required entitlements.
Procedure 3.1. Subscribing to Required Entitlements Using Subscription Manager
1. Register your system with the Content Delivery Network, entering your Customer Portal Username and Password when prompted:
# subscription-manager register
2. Find the Red Hat Enterprise Linux Server and Red Hat Enterprise Virtualization subscription pools and note down the pool IDs.
# subscription-manager list --available
3. Use the pool identifiers located in the previous step to attach the Red Hat Enterprise Linux Server and Red Hat Enterprise Virtualization entitlements to the system:
# subscription-manager attach --pool=poolid
4. Disable all existing repositories:
# subscription-manager repos --disable=*
5. Enable the required repositories for Red Hat Enterprise Linux 7:
# subscription-manager repos --enable=rhel-7-server-rpms# subscription-manager repos --enable=rhel-7-server-rhev-mgmt-agent-rpms
6. Ensure that all packages currently installed are up to date:
# yum update
NOTE
Reboot the machine if any kernel related packages have been updated.
3.2. INSTALLING THE SELF-HOSTED ENGINE PACKAGES
Procedure 3.2. Installing the Self-Hosted Engine
1. Install the self-hosted engine packages:
# yum install ovirt-hosted-engine-setup
CHAPTER 3. DEPLOYING SELF-HOSTED ENGINE ON A RED HAT ENTERPRISE LINUX HOST
13

2. Optionally install the RHEV-M Virtual Appliance package if you intend to use the appliance forthe Manager virtual machine installation:
# yum install rhevm-appliance
You can also use a CD-ROM, disk, or PXE installation media for the Manager operating systeminstallation. The physical CD-ROM drive is not supported.
Proceed to the next section to deploy and configure self-hosted engine on a Red Hat Enterprise Linuxhost.
3.3. CONFIGURING A RHEL-BASED SELF-HOSTED ENGINE
The hosted-engine script is provided to assist with configuring the host hypervisor and Managervirtual machine. The script asks you a series of questions, and configures your environment based onyour answers.
Ensure that you have completed the following prerequisites:
Prerequisites
You must have a freshly installed Red Hat Enterprise Linux 7 system with the ovirt-hosted-engine-setup package installed.
You must have prepared storage for your self-hosted engine environment. At least two storagedomains are required:
A shared storage domain dedicated to the Manager virtual machine. This domain is createdduring the self-hosted engine deployment, and must be at least 60 GB.
A data storage domain for regular virtual machine data. This domain must be added to theself-hosted engine environment after completing the deployment.
For more information on preparing storage for your deployment, see the Storage chapter of theAdministration Guide.
You must have a fully qualified domain name prepared for your Manager and the hypervisorhost. Forward and reverse lookup records must both be set in the DNS.
You must have prepared either CD-ROM, disk, or PXE installation media for the Manageroperating system installation. The recommended method is to select the disk option and use theRHEV-M Virtual Appliance for the Manager installation. Obtain the RHEV-M Virtual Appliance byinstalling the rhevm-appliance package. To use the CD-ROM option, you must have an ISO fileavailable. The physical CD-ROM drive is not supported.
To use the RHEV-M Virtual Appliance for the Manager installation, ensure one directory is atleast 60 GB. The hosted-engine script first checks if /var/tmp has enough space to extractthe appliance files. If not, you can specificy a different directory.
Procedure 3.3. Configuring a RHEL-based Self-Hosted Engine
1. Initiating Hosted Engine DeploymentRun the hosted-engine script. To escape the script at any time, use the CTRL+D keyboardcombination to abort deployment. It is recommended to use the screen window manager to run
Self-Hosted Engine Guide
14

the script to avoid losing the session in case of network or terminal disruption. If not alreadyinstalled, install the screen package, which is available in the standard Red Hat Enterprise Linuxrepository.
# yum install screen
# screen
# hosted-engine --deploy
NOTE
In the event of session timeout or connection disruption, run screen -d -r torecover the hosted-engine deployment session.
2. Configuring StorageSelect the type of storage to use.
During customization use CTRL-D to abort.Please specify the storage you would like to use (glusterfs, iscsi, fc, nfs3, nfs4)[nfs3]:
For NFS storage types, specify the full address, using either the FQDN or IP address, andpath name of the shared storage domain.
Please specify the full shared storage connection path to use (example: host:/path): storage.example.com:/hosted_engine/nfs
For iSCSI, specify the iSCSI portal IP address, port, user name and password, and select atarget name from the auto-detected list. You can only select one iSCSI target during thedeployment.
Please specify the iSCSI portal IP address: Please specify the iSCSI portal port [3260]: Please specify the iSCSI portal user: Please specify the iSCSI portal password:Please specify the target name (auto-detected values) [default]:
For Gluster storage, specify the full address, using either the FQDN or IP address, and pathname of the shared storage domain.
CHAPTER 3. DEPLOYING SELF-HOSTED ENGINE ON A RED HAT ENTERPRISE LINUX HOST
15

IMPORTANT
Only replica 3 Gluster storage is supported. Ensure the followingconfiguration has been made:
In the /etc/glusterfs/glusterd.vol file on all three Glusterservers, set rpc-auth-allow-insecure to on.
option rpc-auth-allow-insecure on
Configure the volume as follows:
gluster volume set volume cluster.quorum-type autogluster volume set volume network.ping-timeout 10gluster volume set volume auth.allow \*gluster volume set volume group virtgluster volume set volume storage.owner-uid 36gluster volume set volume storage.owner-gid 36gluster volume set volume server.allow-insecure on
Please specify the full shared storage connection path to use (example: host:/path): storage.example.com:/hosted_engine/gluster_volume
For Fibre Channel, the host bus adapters must be configured and connected, and the hosted-engine script will auto-detect the LUNs available. The LUNs must not contain anyexisting data.
The following luns have been found on the requested target:[1] 3514f0c5447600351 30GiB XtremIO XtremApp status: used, paths: 2 active [2] 3514f0c5447600352 30GiB XtremIO XtremApp status: used, paths: 2 active
Please select the destination LUN (1, 2) [1]:
Choose the storage domain and storage data center names to be used in the environment.
[ INFO ] Installing on first hostPlease provide storage domain name. [hosted_storage]: Local storage datacenter name is an internal name and currently will not be shown in engine's admin UI.Please enter local datacenter name [hosted_datacenter]:
3. Configuring the NetworkThe script detects possible network interface controllers (NICs) to use as a management bridgefor the environment. It then checks your firewall configuration and offers to modify it for console(SPICE or VNC) access.
Self-Hosted Engine Guide
16

NOTE
Configuring a bonded and vlan-tagged network interface as the managementbridge is currently not supported. To work around this issue, seehttps://access.redhat.com/solutions/1417783 for more information.
Please indicate a nic to set rhevm bridge on: (eth1, eth0) [eth1]:iptables was detected on your computer, do you wish setup to configure it? (Yes, No)[Yes]: YesPlease indicate a pingable gateway IP address [X.X.X.X]:
4. Configuring the Virtual Machine
NOTE
If you want to manually install the Manager virtual machine, see Appendix A,Manually Installing the Manager Operating System to complete the self-hostedengine setup. Using the appliance eases the workflow, because user interactionwith the Manager virtual machine is not required. Manual installation allows you totake full control of the installation.
Select disk for the boot device type, and the script will automatically detect the RHEV-MAppliances available. Specify the memory size.
Please specify the device to boot the VM from (cdrom, disk, pxe) [disk]: [ INFO ] Detecting available oVirt engine appliances The following appliance have been found on your system: [1] - The oVirt Engine Appliance image (OVA) [2] - Directly select an OVA file Please select an appliance (1, 2) [1]:[ INFO ] Checking OVF archive content (could take a few minutes depending on archive size) Please specify the memory size of the appliance in MB (Defaults to OVF value: 16384):
Specify Yes if you want cloud-init to take care of the initial configuration of the Manager virtualmachine. Specify Generate for cloud-init to take care of tasks like setting the root password,configuring networking, configuring the host name, injecting an answers file for engine-setupto use, and running engine-setup on boot. Optionally, select Existing if you have an existingcloud-init script to take care of more sophisticated functions of cloud-init. Specify the FQDN forthe Manager virtual machine. Specify a MAC address for the HostedEngine-VM, or accept arandomly generated one. The MAC address can be used to update your DHCP and DNS serverprior to installing the operating system on the virtual machine.
NOTE
For more information on cloud-init, see https://cloudinit.readthedocs.org/en/latest/.
Would you like to use cloud-init to customize the appliance on the first boot (Yes, No)[Yes]? YesWould you like to generate on-fly a cloud-init no-cloud ISO image or
CHAPTER 3. DEPLOYING SELF-HOSTED ENGINE ON A RED HAT ENTERPRISE LINUX HOST
17

do you have an existing one(Generate, Existing)[Generate]? GeneratePlease provide the FQDN you would like to use for the engine appliance.Note: This will be the FQDN of the engine VM you are now going to launch.It should not point to the base host or to any other existing machine.Engine VM FQDN: (leave it empty to skip): manager.example.comAutomatically execute engine-setup on the engine appliance on first boot (Yes, No)[Yes]? YesAutomatically restart the engine VM as a monitored service after engine-setup (Yes, No)[Yes]? YesPlease provide the domain name you would like to use for the engine appliance.Engine VM domain: [example.com]Enter root password that will be used for the engine appliance (leave it empty to skip): p@ssw0rdConfirm appliance root password: p@ssw0rdHow should the engine VM network be configured (DHCP, Static)[DHCP]? StaticPlease enter the IP address to be used for the engine VM: 192.168.x.xPlease provide a comma-separated list (max3) of IP addresses of domain name servers for the engine VMEngine VM DNS (leave it empty to skip):Add lines for the appliance itself and for this host to /etc/hosts on the engine VM?Note: ensuring that this host could resolve the engine VM hostname is still up to you (Yes, No)[No] YesPlease specify an alias for the Hosted Engine image [hosted_engine]:The following CPU types are supported by this host: - model_Penryn: Intel Penryn Family - model_Conroe: Intel Conroe FamilyPlease specify the CPU type to be used by the VM [model_Penryn]: Please specify the number of virtual CPUs for the VM [Defaults to appliance OVF value: 4]: You may specify a MAC address for the VM or accept a randomly generated default [00:16:3e:77:b2:a4]: Please specify the console type you would like to use to connect to the VM (vnc, spice) [vnc]: vnc
5. Configuring the Hosted EngineSpecify a name for hypervisor host to be identified in the Administration Portal, and thepassword for the admin@internal user to access the Administration Portal. Provide the nameand TCP port number of the SMTP server, the email address used to send email notifications,and a comma-separated list of email addresses to receive these notifications.
Enter the name which will be used to identify this host inside the Administrator Portal [hosted_engine_1]:Enter 'admin@internal' user password that will be used for accessing the Administrator Portal: p@ssw0rdConfirm 'admin@internal' user password: p@ssw0rdPlease provide the name of the SMTP server through which we will send notifications [localhost]: Please provide the TCP port number of the SMTP server [25]: Please provide the email address from which notifications will be
Self-Hosted Engine Guide
18

sent [root@localhost]: Please provide a comma-separated list of email addresses which will get notifications [root@localhost]:
6. Configuration PreviewBefore proceeding, the hosted-engine script displays the configuration values you haveentered, and prompts for confirmation to proceed with these values.
7. Creating the Manager Virtual MachineThe script creates the Manager virtual machine, starts the ovirt-engine and high availabilityservices, and connects the hypervisor host and shared storage domain to the Manager virtualmachine.
You can now connect to the VM with the following command: /usr/bin/remote-viewer vnc://localhost:5900Use temporary password "3042QHpX" to connect to vnc console.Please note that in order to use remote-viewer you need to be able to run graphical applications.This means that if you are using ssh you have to supply the -Y flag (enables trusted X11 forwarding).Otherwise you can run the command from a terminal in your preferred desktop environment.If you cannot run graphical applications you can connect to the graphic console from another host or connect to the serial console using the following command:socat UNIX-CONNECT:/var/run/ovirt-vmconsole-console/fabbea5a-1989-411f-8ed7-7abe0917fc66.sock,user=ovirt-vmconsole STDIO,raw,echo=0,escape=1
If you need to reboot the VM you will need to start it manually using the command:hosted-engine --vm-startYou can then set a temporary password using the command:hosted-engine --add-console-password[ INFO ] Running engine-setup on the appliance...[ INFO ] Engine-setup successfully completed[ INFO ] Engine is still unreachable[ INFO ] Engine is still unreachable, waiting...[ INFO ] Engine replied: DB Up!Welcome to Health Status![ INFO ] Connecting to the Engine Enter the name of the cluster to which you want to add the host (Default) [Default]:[ INFO ] Waiting for the host to become operational in the engine. This may take several minutes... [ INFO ] Still waiting for VDSM host to become operational...[ INFO ] The VDSM Host is now operational [ INFO ] Shutting down the engine VM[ INFO ] Enabling and starting HA services[ INFO ] Saving hosted-engine configuration on the shared storage domain Hosted Engine successfully set up[ INFO ] Stage: Clean up[ INFO ] Generating answer file '/var/lib/ovirt-hosted-engine-setup/answers/answers-2015xx.conf'[ INFO ] Generating answer file '/etc/ovirt-hosted-
CHAPTER 3. DEPLOYING SELF-HOSTED ENGINE ON A RED HAT ENTERPRISE LINUX HOST
19

engine/answers.conf'[ INFO ] Stage: Pre-termination[ INFO ] Stage: Termination
When the hosted-engine deployment script completes successfully, the Red Hat EnterpriseVirtualization Manager is configured and running on your hypervisor host. The Manager has alreadyconfigured the data center, cluster, hypervisor host, the Manager virtual machine, and a shared storagedomain dedicated to the Manager virtual machine.
IMPORTANT
Log in as the admin@internal user to continue configuring the Manager and add furtherresources. You must create another data domain for the data center to be initialized tohost regular virtual machine data, and for the Manager virtual machine to be visible. SeeStorage in the Administration Guide for different storage options and on how to add a datastorage domain.
Link your Red Hat Enterprise Virtualization Manager to a directory server so you can add additionalusers to the environment. Red Hat Enterprise Virtualization supports many directory server types; forexample, Red Hat Directory Server (RHDS), Red Hat Identity Management (IdM), Active Directory, andmany other types. Add a directory server to your environment using the ovirt-engine-extension-aaa-ldap-setup interactive setup script. For more information, see Configuring an External LDAPProvider in the Administration Guide.
The ovirt-hosted-engine-setup script also saves the answers you gave during configuration to afile, to help with disaster recovery. If a destination is not specified using the --generate-answer=<file> argument, the answer file is generated at /etc/ovirt-hosted-engine/answers.conf.
NOTE
SSH password authentication is not enabled by default on the RHEV-M Virtual Appliance.You can enable SSH password authentication by accessing the Red Hat EnterpriseVirtualization Manager virtual machine through the SPICE or VNC console. Verify that the sshd service is running. Edit /etc/ssh/sshd_config and change the following twooptions to yes:
PasswordAuthentication
PermitRootLogin
Restart the sshd service for the changes to take effect.
3.4. ADMINISTERING THE MANAGER VIRTUAL MACHINE
The hosted-engine utility is provided to assist with administering the Manager virtual machine. It canbe run on any self-hosted engine hosts in the environment. For all the options, run hosted-engine --help. For additional information on a specific command, run hosted-engine --command --help.
See Section 4.1, “Troubleshooting the Manager Virtual Machine” for more information.
Self-Hosted Engine Guide
20
CHAPTER 4. TROUBLESHOOTING A SELF-HOSTED ENGINEDEPLOYMENT
4.1. TROUBLESHOOTING THE MANAGER VIRTUAL MACHINE
Procedure 4.1. Troubleshooting the Manager Virtual Machine
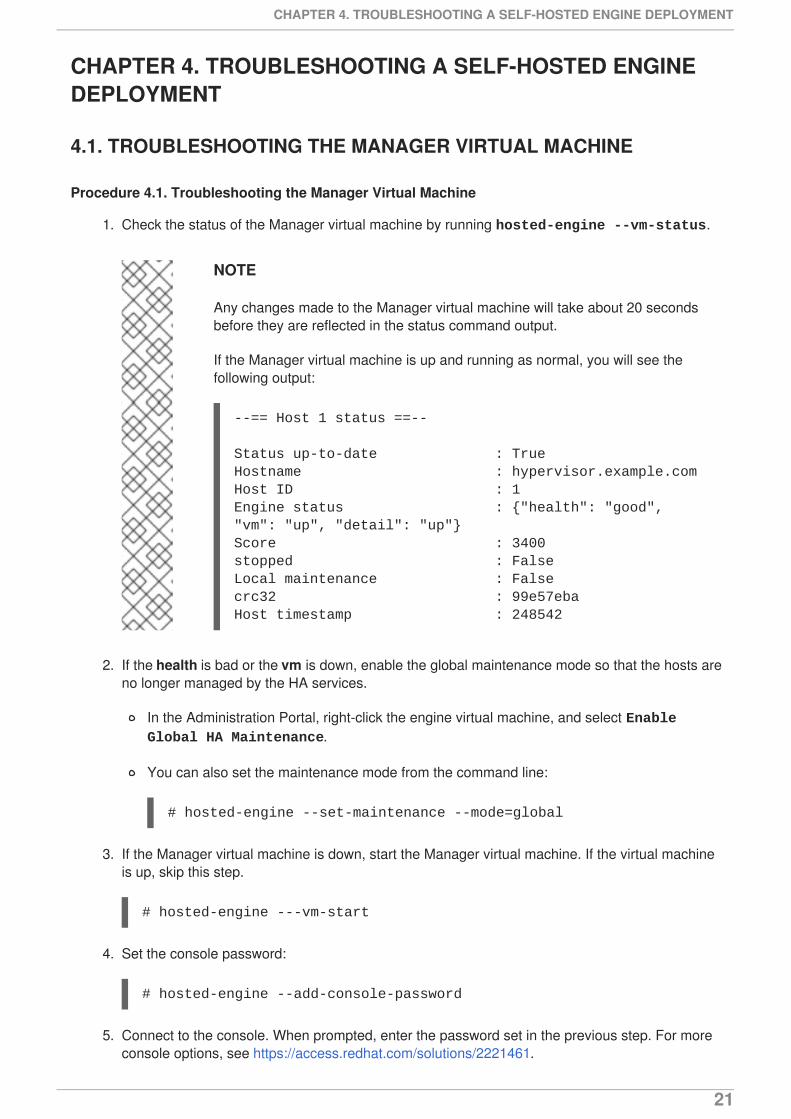
1. Check the status of the Manager virtual machine by running hosted-engine --vm-status.
NOTE
Any changes made to the Manager virtual machine will take about 20 secondsbefore they are reflected in the status command output.
If the Manager virtual machine is up and running as normal, you will see thefollowing output:
--== Host 1 status ==--
Status up-to-date : TrueHostname : hypervisor.example.comHost ID : 1Engine status : {"health": "good", "vm": "up", "detail": "up"}Score : 3400stopped : FalseLocal maintenance : Falsecrc32 : 99e57ebaHost timestamp : 248542
2. If the health is bad or the vm is down, enable the global maintenance mode so that the hosts areno longer managed by the HA services.
In the Administration Portal, right-click the engine virtual machine, and select Enable Global HA Maintenance.
You can also set the maintenance mode from the command line:
# hosted-engine --set-maintenance --mode=global
3. If the Manager virtual machine is down, start the Manager virtual machine. If the virtual machineis up, skip this step.
# hosted-engine ---vm-start
4. Set the console password:
# hosted-engine --add-console-password
5. Connect to the console. When prompted, enter the password set in the previous step. For moreconsole options, see https://access.redhat.com/solutions/2221461.
CHAPTER 4. TROUBLESHOOTING A SELF-HOSTED ENGINE DEPLOYMENT
21

# hosted-engine --console
6. Determine why the Manager virtual machine is down or in a bad health state. Check /var/log/messages and /var/log/ovirt-engine/engine.log. After fixing the issue,reboot the Manager virtual machine.
7. Log in to the Manager virtual machine as root and verfiy that the ovirt-engine service is upand running:
# service ovirt-engine status
8. After ensuring the Manager virtual machine is up and running, close the console session anddisable the maintenance mode to enable the HA services again:
# hosted-engine --set-maintenance --mode=none
Additional Troubleshooting Commands:
IMPORTANT
Contact the Red Hat Support Team if you feel you need to run any of these commands totroubleshoot your self-hosted engine environment.
hosted-engine --reinitialize-lockspace: This command is used when the sanlocklockspace is broken. Ensure that the global maintenance mode is enabled and that the Managervirtual machine is stopped before reinitializing the sanlock lockspaces.
hosted-engine --clean-metadata: Remove the metadata for a host's agent from theglobal status database. This makes all other hosts forget about this host. Ensure that the targethost is down and that the global maintenance mode is enabled.
hosted-engine --check-liveliness: This command checks the liveliness page of theovirt-engine service. You can also check by connecting to https://engine-fqdn/ovirt-engine/services/health/ in a web browser.
hosted-engine --connect-storage: This command instructs VDSM to prepare all storageconnections needed for the host and and the Manager virtual machine. This is normally run inthe back-end during the self-hosted engine deployment. Ensure that the global maintenancemode is enabled if you need to run this command to troubleshoot storage issues.
4.2. CLEANING UP A FAILED SELF-HOSTED ENGINE DEPLOYMENT
If a self-hosted engine deployment was interrupted, subsequent deployments will fail with the followingerror:
Failed to connect to broker, the number of errors has exceeded the limit.
See https://access.redhat.com/solutions/2121581 for more information on how to clean up a faileddeployment.
Self-Hosted Engine Guide
22

CHAPTER 5. MIGRATING FROM BARE METAL TO A RHEL-BASED SELF-HOSTED ENVIRONMENT
5.1. MIGRATING TO A SELF-HOSTED ENVIRONMENT
To migrate an existing instance of a standard Red Hat Enterprise Virtualization to a self-hosted engineenvironment, use the hosted-engine script to assist with the task. The script asks you a series ofquestions, and configures your environment based on your answers. The Manager from the standardRed Hat Enterprise Virtualization environment is referred to as the BareMetal-Manager in the followingprocedure.
The migration involves the following key actions:
Run the hosted-engine script to configure the host to be used as a self-hosted engine hostand to create a new Red Hat Enterprise Virtualization virtual machine.
Back up the the engine database and configuration files using the engine-backup tool, copythe backup to the new Manager virtual machine, and restore the backup using the --mode=restore parameter of engine-backup. Run engine-setup to complete the Managervirtual machine configuration.
Follow the hosted-engine script to complete the setup.
In the following procedure, the Manager operating system is installed manually. Optionally, use theRHEV-M Virtual Appliance to ease that part of the process. See Section 5.2, “Migrating to a Self-HostedEnvironment using the RHEV-M Virtual Appliance” for more information.
Prerequisites
Prepare a new hypervisor host with the ovirt-hosted-engine-setup package installed. SeeChapter 3, Deploying Self-Hosted Engine on a Red Hat Enterprise Linux Host for moreinformation on subscriptions and package installation. The host must be a supported version ofthe current Red Hat Enterprise Virtualization environment.
NOTE
If you intend to use an existing host, place the host in maintenance and remove itfrom the existing environment. See Removing a Host in the Administration Guidefor more information.
Prepare storage for your self-hosted engine environment. The self-hosted engine requires ashared storage domain dedicated to the Manager virtual machine. This domain is created duringdeployment, and must be at least 60 GB. For more information on preparing storage for yourdeployment, see the Storage chapter of the Administration Guide.
Prepare an installation media of the same version of the operating system used for theBareMetal-Manager.
The fully qualified domain name of the new Manager must be the same fully qualified domainname as that of the BareMetal-Manager. Forward and reverse lookup records must both be setin DNS.
You must have access and can make changes to the BareMetal-Manager.
CHAPTER 5. MIGRATING FROM BARE METAL TO A RHEL-BASED SELF-HOSTED ENVIRONMENT
23

Procedure 5.1. Migrating to a Self-Hosted Environment
1. Initiating a Self-Hosted Engine Deployment
NOTE
If your original installation was version 3.5 or earlier, and the current name of themanagement network is rhevm, you must modify the answer file prior to running hosted-engine --deploy. For more information, seehttps://access.redhat.com/solutions/2292861.
Run the hosted-engine script. To escape the script at any time, use the CTRL+D keyboardcombination to abort deployment. It is recommended to use the screen window manager to runthe script to avoid losing the session in case of network or terminal disruption. If not alreadyinstalled, install the screen package, which is available in the standard Red Hat Enterprise Linuxrepository.
# yum install screen
# screen
# hosted-engine --deploy
NOTE
In the event of session timeout or connection disruption, run screen -d -r torecover the hosted-engine deployment session.
2. Configuring StorageSelect the type of storage to use.
During customization use CTRL-D to abort.Please specify the storage you would like to use (glusterfs, iscsi, fc, nfs3, nfs4)[nfs3]:
For NFS storage types, specify the full address, using either the FQDN or IP address, andpath name of the shared storage domain.
Please specify the full shared storage connection path to use (example: host:/path): storage.example.com:/hosted_engine/nfs
For iSCSI, specify the iSCSI portal IP address, port, user name and password, and select atarget name from the auto-detected list. You can only select one iSCSI target during thedeployment.
Please specify the iSCSI portal IP address: Please specify the iSCSI portal port [3260]: Please specify the iSCSI portal user: Please specify the iSCSI portal password:Please specify the target name (auto-detected values) [default]:
Self-Hosted Engine Guide
24

For Gluster storage, specify the full address, using either the FQDN or IP address, and pathname of the shared storage domain.
IMPORTANT
Only replica 3 Gluster storage is supported. Ensure the followingconfiguration has been made:
In the /etc/glusterfs/glusterd.vol file on all three Glusterservers, set rpc-auth-allow-insecure to on.
option rpc-auth-allow-insecure on
Configure the volume as follows:
gluster volume set volume cluster.quorum-type autogluster volume set volume network.ping-timeout 10gluster volume set volume auth.allow \*gluster volume set volume group virtgluster volume set volume storage.owner-uid 36gluster volume set volume storage.owner-gid 36gluster volume set volume server.allow-insecure on
Please specify the full shared storage connection path to use (example: host:/path): storage.example.com:/hosted_engine/gluster_volume
For Fibre Channel, the host bus adapters must be configured and connected, and the hosted-engine script will auto-detect the LUNs available. The LUNs must not contain anyexisting data.
The following luns have been found on the requested target:[1] 3514f0c5447600351 30GiB XtremIO XtremApp status: used, paths: 2 active [2] 3514f0c5447600352 30GiB XtremIO XtremApp status: used, paths: 2 active
Please select the destination LUN (1, 2) [1]:
Choose the storage domain and storage data center names to be used in the environment.
[ INFO ] Installing on first hostPlease provide storage domain name. [hosted_storage]: Local storage datacenter name is an internal name and currently will not be shown in engine's admin UI.Please enter local datacenter name [hosted_datacenter]:
3. Configuring the NetworkThe script detects possible network interface controllers (NICs) to use as a management bridgefor the environment. It then checks your firewall configuration and offers to modify it for console(SPICE or VNC) access HostedEngine-VM. Provide a pingable gateway IP address, to be used
CHAPTER 5. MIGRATING FROM BARE METAL TO A RHEL-BASED SELF-HOSTED ENVIRONMENT
25
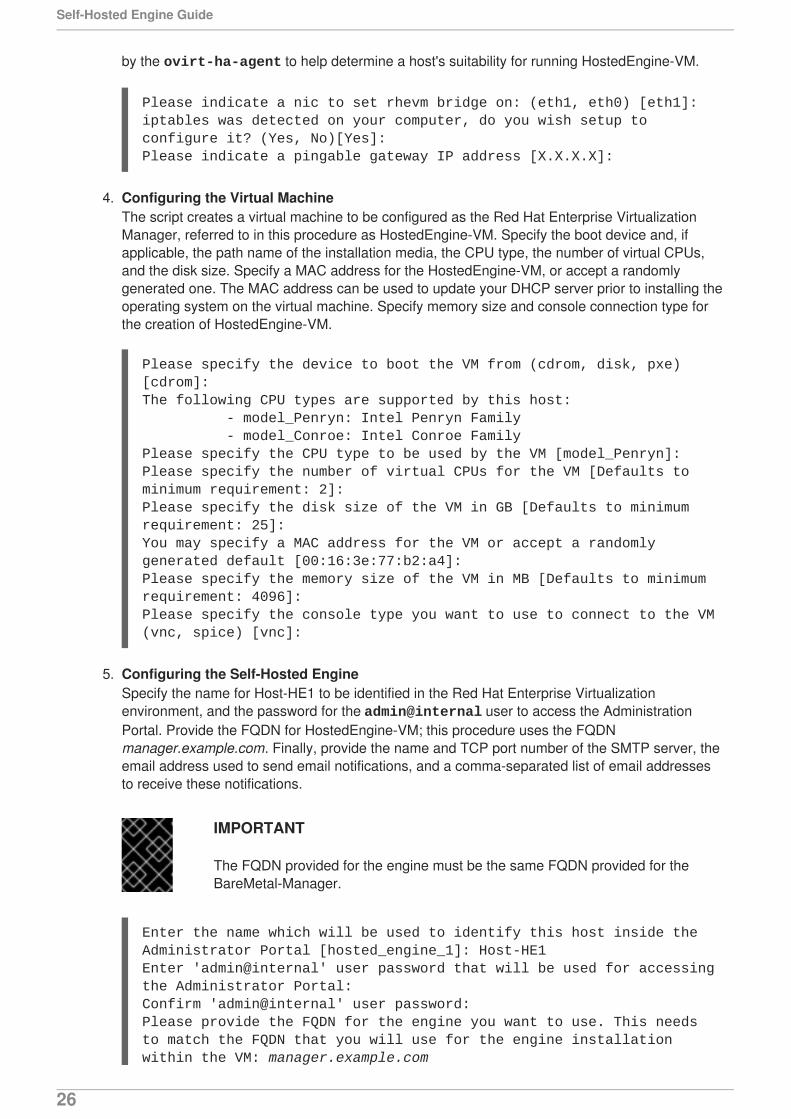
by the ovirt-ha-agent to help determine a host's suitability for running HostedEngine-VM.
Please indicate a nic to set rhevm bridge on: (eth1, eth0) [eth1]:iptables was detected on your computer, do you wish setup to configure it? (Yes, No)[Yes]: Please indicate a pingable gateway IP address [X.X.X.X]:
4. Configuring the Virtual MachineThe script creates a virtual machine to be configured as the Red Hat Enterprise VirtualizationManager, referred to in this procedure as HostedEngine-VM. Specify the boot device and, ifapplicable, the path name of the installation media, the CPU type, the number of virtual CPUs,and the disk size. Specify a MAC address for the HostedEngine-VM, or accept a randomlygenerated one. The MAC address can be used to update your DHCP server prior to installing theoperating system on the virtual machine. Specify memory size and console connection type forthe creation of HostedEngine-VM.
Please specify the device to boot the VM from (cdrom, disk, pxe) [cdrom]: The following CPU types are supported by this host: - model_Penryn: Intel Penryn Family - model_Conroe: Intel Conroe FamilyPlease specify the CPU type to be used by the VM [model_Penryn]: Please specify the number of virtual CPUs for the VM [Defaults to minimum requirement: 2]: Please specify the disk size of the VM in GB [Defaults to minimum requirement: 25]: You may specify a MAC address for the VM or accept a randomly generated default [00:16:3e:77:b2:a4]: Please specify the memory size of the VM in MB [Defaults to minimum requirement: 4096]: Please specify the console type you want to use to connect to the VM (vnc, spice) [vnc]:
5. Configuring the Self-Hosted EngineSpecify the name for Host-HE1 to be identified in the Red Hat Enterprise Virtualizationenvironment, and the password for the admin@internal user to access the AdministrationPortal. Provide the FQDN for HostedEngine-VM; this procedure uses the FQDNmanager.example.com. Finally, provide the name and TCP port number of the SMTP server, theemail address used to send email notifications, and a comma-separated list of email addressesto receive these notifications.
IMPORTANT
The FQDN provided for the engine must be the same FQDN provided for theBareMetal-Manager.
Enter the name which will be used to identify this host inside the Administrator Portal [hosted_engine_1]: Host-HE1Enter 'admin@internal' user password that will be used for accessing the Administrator Portal: Confirm 'admin@internal' user password: Please provide the FQDN for the engine you want to use. This needs to match the FQDN that you will use for the engine installation within the VM: manager.example.com
Self-Hosted Engine Guide
26

Please provide the name of the SMTP server through which we will send notifications [localhost]: Please provide the TCP port number of the SMTP server [25]: Please provide the email address from which notifications will be sent [root@localhost]: Please provide a comma-separated list of email addresses which will get notifications [root@localhost]:
6. Configuration PreviewBefore proceeding, the hosted-engine script displays the configuration values you haveentered, and prompts for confirmation to proceed with these values.
Bridge interface : eth1Engine FQDN : manager.example.comBridge name : rhevmSSH daemon port : 22Firewall manager : iptablesGateway address : X.X.X.XHost name for web application : Host-HE1Host ID : 1Image size GB : 25Storage connection : storage.example.com:/hosted_engine/nfsConsole type : vncMemory size MB : 4096MAC address : 00:16:3e:77:b2:a4Boot type : pxeNumber of CPUs : 2CPU Type : model_Penryn
Please confirm installation settings (Yes, No)[No]:
7. Creating HostedEngine-VMThe script creates the virtual machine to be configured as HostedEngine-VM and providesconnection details. You must install an operating system on HostedEngine-VM before the hosted-engine script can proceed on Host-HE1.
[ INFO ] Stage: Transaction setup...[ INFO ] Creating VMYou can now connect to the VM with the following command: /usr/bin/remote-viewer vnc://localhost:5900Use temporary password "5379skAb" to connect to vnc console.Please note that in order to use remote-viewer you need to be able to run graphical applications.This means that if you are using ssh you have to supply the -Y flag (enables trusted X11 forwarding).Otherwise you can run the command from a terminal in your preferred desktop environment.If you cannot run graphical applications you can connect to the graphic console from another host or connect to the console using the following command:virsh -c qemu+tls://Test/system console HostedEngineIf you need to reboot the VM you will need to start it manually using the command:
CHAPTER 5. MIGRATING FROM BARE METAL TO A RHEL-BASED SELF-HOSTED ENVIRONMENT
27
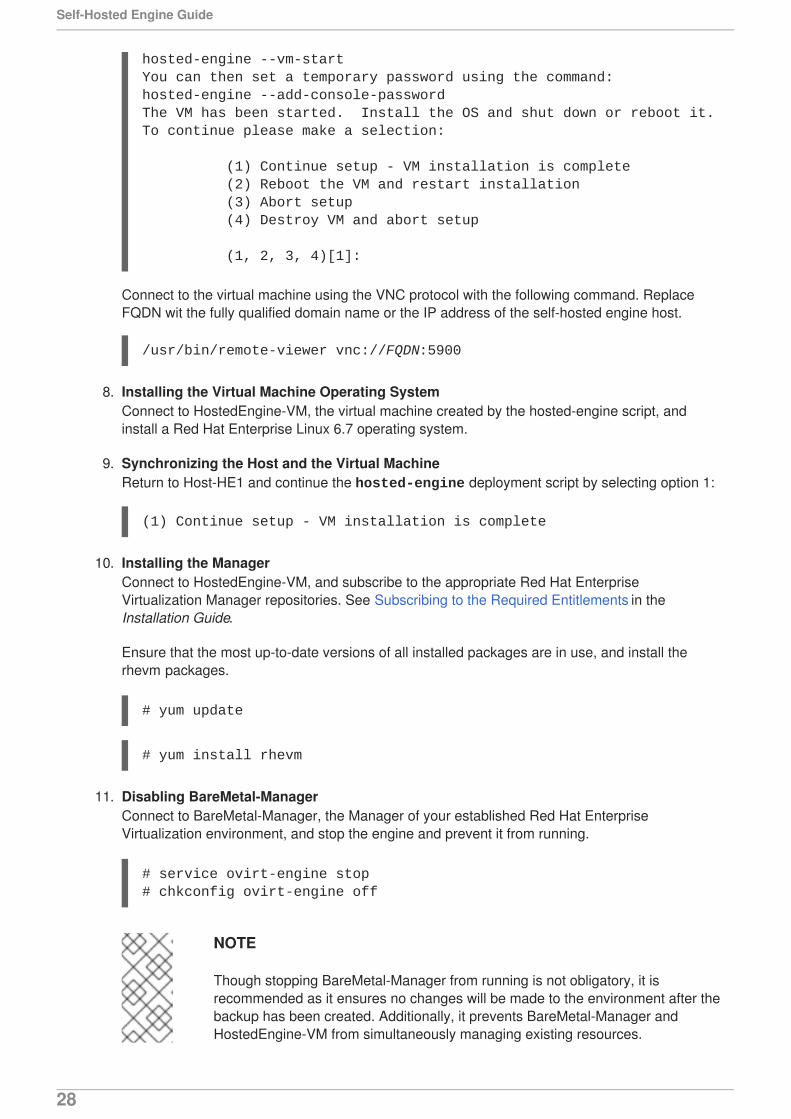
hosted-engine --vm-startYou can then set a temporary password using the command:hosted-engine --add-console-passwordThe VM has been started. Install the OS and shut down or reboot it. To continue please make a selection: (1) Continue setup - VM installation is complete (2) Reboot the VM and restart installation (3) Abort setup (4) Destroy VM and abort setup (1, 2, 3, 4)[1]:
Connect to the virtual machine using the VNC protocol with the following command. ReplaceFQDN wit the fully qualified domain name or the IP address of the self-hosted engine host.
/usr/bin/remote-viewer vnc://FQDN:5900
8. Installing the Virtual Machine Operating SystemConnect to HostedEngine-VM, the virtual machine created by the hosted-engine script, andinstall a Red Hat Enterprise Linux 6.7 operating system.
9. Synchronizing the Host and the Virtual MachineReturn to Host-HE1 and continue the hosted-engine deployment script by selecting option 1:
(1) Continue setup - VM installation is complete
10. Installing the ManagerConnect to HostedEngine-VM, and subscribe to the appropriate Red Hat EnterpriseVirtualization Manager repositories. See Subscribing to the Required Entitlements in theInstallation Guide.
Ensure that the most up-to-date versions of all installed packages are in use, and install therhevm packages.
# yum update
# yum install rhevm
11. Disabling BareMetal-ManagerConnect to BareMetal-Manager, the Manager of your established Red Hat EnterpriseVirtualization environment, and stop the engine and prevent it from running.
# service ovirt-engine stop# chkconfig ovirt-engine off
NOTE
Though stopping BareMetal-Manager from running is not obligatory, it isrecommended as it ensures no changes will be made to the environment after thebackup has been created. Additionally, it prevents BareMetal-Manager andHostedEngine-VM from simultaneously managing existing resources.
Self-Hosted Engine Guide
28
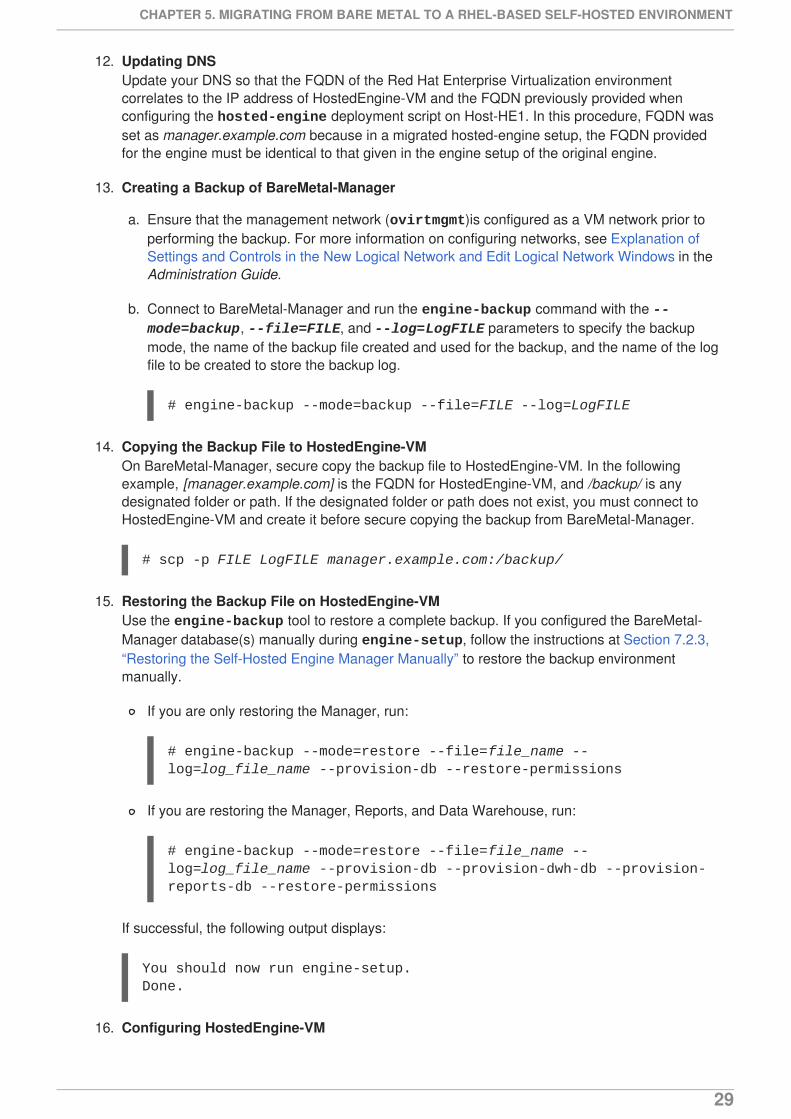
12. Updating DNSUpdate your DNS so that the FQDN of the Red Hat Enterprise Virtualization environmentcorrelates to the IP address of HostedEngine-VM and the FQDN previously provided whenconfiguring the hosted-engine deployment script on Host-HE1. In this procedure, FQDN wasset as manager.example.com because in a migrated hosted-engine setup, the FQDN providedfor the engine must be identical to that given in the engine setup of the original engine.
13. Creating a Backup of BareMetal-Manager
a. Ensure that the management network (ovirtmgmt)is configured as a VM network prior toperforming the backup. For more information on configuring networks, see Explanation ofSettings and Controls in the New Logical Network and Edit Logical Network Windows in theAdministration Guide.
b. Connect to BareMetal-Manager and run the engine-backup command with the --mode=backup, --file=FILE, and --log=LogFILE parameters to specify the backupmode, the name of the backup file created and used for the backup, and the name of the logfile to be created to store the backup log.
# engine-backup --mode=backup --file=FILE --log=LogFILE
14. Copying the Backup File to HostedEngine-VMOn BareMetal-Manager, secure copy the backup file to HostedEngine-VM. In the followingexample, [manager.example.com] is the FQDN for HostedEngine-VM, and /backup/ is anydesignated folder or path. If the designated folder or path does not exist, you must connect toHostedEngine-VM and create it before secure copying the backup from BareMetal-Manager.
# scp -p FILE LogFILE manager.example.com:/backup/
15. Restoring the Backup File on HostedEngine-VMUse the engine-backup tool to restore a complete backup. If you configured the BareMetal-Manager database(s) manually during engine-setup, follow the instructions at Section 7.2.3,“Restoring the Self-Hosted Engine Manager Manually” to restore the backup environmentmanually.
If you are only restoring the Manager, run:
# engine-backup --mode=restore --file=file_name --log=log_file_name --provision-db --restore-permissions
If you are restoring the Manager, Reports, and Data Warehouse, run:
# engine-backup --mode=restore --file=file_name --log=log_file_name --provision-db --provision-dwh-db --provision-reports-db --restore-permissions
If successful, the following output displays:
You should now run engine-setup.Done.
16. Configuring HostedEngine-VM
CHAPTER 5. MIGRATING FROM BARE METAL TO A RHEL-BASED SELF-HOSTED ENVIRONMENT
29
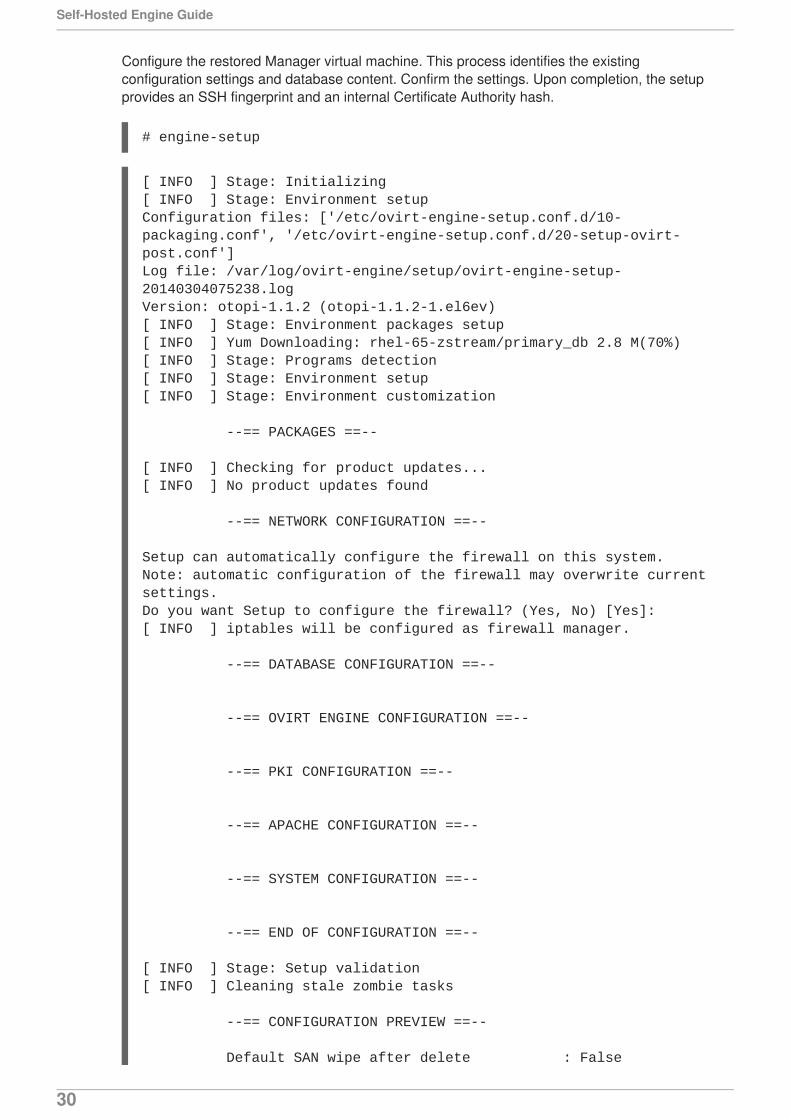
Configure the restored Manager virtual machine. This process identifies the existingconfiguration settings and database content. Confirm the settings. Upon completion, the setupprovides an SSH fingerprint and an internal Certificate Authority hash.
# engine-setup
[ INFO ] Stage: Initializing[ INFO ] Stage: Environment setupConfiguration files: ['/etc/ovirt-engine-setup.conf.d/10-packaging.conf', '/etc/ovirt-engine-setup.conf.d/20-setup-ovirt-post.conf']Log file: /var/log/ovirt-engine/setup/ovirt-engine-setup-20140304075238.logVersion: otopi-1.1.2 (otopi-1.1.2-1.el6ev)[ INFO ] Stage: Environment packages setup[ INFO ] Yum Downloading: rhel-65-zstream/primary_db 2.8 M(70%)[ INFO ] Stage: Programs detection[ INFO ] Stage: Environment setup[ INFO ] Stage: Environment customization --== PACKAGES ==-- [ INFO ] Checking for product updates...[ INFO ] No product updates found --== NETWORK CONFIGURATION ==-- Setup can automatically configure the firewall on this system.Note: automatic configuration of the firewall may overwrite current settings.Do you want Setup to configure the firewall? (Yes, No) [Yes]: [ INFO ] iptables will be configured as firewall manager. --== DATABASE CONFIGURATION ==-- --== OVIRT ENGINE CONFIGURATION ==-- --== PKI CONFIGURATION ==-- --== APACHE CONFIGURATION ==-- --== SYSTEM CONFIGURATION ==-- --== END OF CONFIGURATION ==-- [ INFO ] Stage: Setup validation[ INFO ] Cleaning stale zombie tasks --== CONFIGURATION PREVIEW ==-- Default SAN wipe after delete : False
Self-Hosted Engine Guide
30

Firewall manager : iptables Update Firewall : True Host FQDN : manager.example.com Engine database secured connection : False Engine database host : X.X.X.X Engine database user name : engine Engine database name : engine Engine database port : 5432 Engine database host name validation : False Engine installation : True PKI organization : example.com NFS mount point : /var/lib/exports/iso Configure VMConsole Proxy : True Engine Host FQDN : manager.example.com Configure WebSocket Proxy : True Please confirm installation settings (OK, Cancel) [OK]:
17. Synchronizing the Host and the ManagerReturn to Host-HE1 and continue the hosted-engine deployment script by selecting option 1:
(1) Continue setup - engine installation is complete
[ INFO ] Engine replied: DB Up!Welcome to Health Status![ INFO ] Waiting for the host to become operational in the engine. This may take several minutes...[ INFO ] Still waiting for VDSM host to become operational...[ INFO ] The VDSM Host is now operational Please shutdown the VM allowing the system to launch it as a monitored service. The system will wait until the VM is down.
18. Shutting Down HostedEngine-VMShutdown HostedEngine-VM.
# shutdown -h now
19. Setup ConfirmationReturn to Host-HE1 to confirm it has detected that HostedEngine-VM is down.
[ INFO ] Enabling and starting HA services Hosted Engine successfully set up[ INFO ] Stage: Clean up[ INFO ] Stage: Pre-termination[ INFO ] Stage: Termination
Your Red Hat Enterprise Virtualization engine has been migrated to a hosted-engine setup. TheManager is now operating on a virtual machine on Host-HE1, called HostedEngine-VM in theenvironment. As HostedEngine-VM is highly available, it is migrated to other hosts in the environmentwhen applicable.
CHAPTER 5. MIGRATING FROM BARE METAL TO A RHEL-BASED SELF-HOSTED ENVIRONMENT
31
5.2. MIGRATING TO A SELF-HOSTED ENVIRONMENT USING THERHEV-M VIRTUAL APPLIANCE
To migrate an existing instance of a standard Red Hat Enterprise Virtualization to a self-hosted engineenvironment, use the hosted-engine script to assist with the task. The script asks you a series ofquestions, and configures your environment based on your answers. The Manager from the standardRed Hat Enterprise Virtualization environment is referred to as the BareMetal-Manager in the followingprocedure.
The RHEV-M Virtual Appliance shortens the process by reducing the required user interaction with theManager virtual machine. However, although the appliance can automate engine-setup in a standardinstallation, in the migration process engine-setup must be run manually so that you can restore theBareMetal-Manager backup file on the new Manager virtual machine beforehand.
The migration involves the following key actions:
Run the hosted-engine script to configure the host to be used as a self-hosted engine hostand to create a new Red Hat Enterprise Virtualization virtual machine.
Back up the the engine database and configuration files using the engine-backup tool, copythe backup to the new Manager virtual machine, and restore the backup using the --mode=restore parameter of engine-backup. Run engine-setup to complete the Managervirtual machine configuration.
Follow the hosted-engine script to complete the setup.
Prerequisites
Prepare a new hypervisor host with the ovirt-hosted-engine-setup package installed. SeeChapter 3, Deploying Self-Hosted Engine on a Red Hat Enterprise Linux Host for moreinformation on subscriptions and package installation. The host must be a supported version ofthe current Red Hat Enterprise Virtualization environment.
NOTE
If you intend to use an existing host, place the host in maintenance and remove itfrom the existing environment. See Removing a Host in the Administration Guidefor more information.
Prepare storage for your self-hosted engine environment. The self-hosted engine requires ashared storage domain dedicated to the Manager virtual machine. This domain is created duringdeployment, and must be at least 60 GB. For more information on preparing storage for yourdeployment, see the Storage chapter of the Administration Guide.
Obtain the RHEV-M Virtual Appliance by installing the rhevm-appliance package. The RHEV-MVirtual Appliance is always based on the latest supported Manager version. Ensure the Managerversion in your current environment is updated to the latest supported Y-stream version as theManager version needs to be the same for the migration.
To use the RHEV-M Virtual Appliance for the Manager installation, ensure one directory is atleast 60 GB. The hosted-engine script first checks if /var/tmp has enough space to extractthe appliance files. If not, you can specificy a different directory.
Self-Hosted Engine Guide
32

The fully qualified domain name of the new Manager must be the same fully qualified domainname as that of the BareMetal-Manager. Forward and reverse lookup records must both be setin DNS.
You must have access and can make changes to the BareMetal-Manager.
Procedure 5.2. Migrating to a Self-Hosted Environment using the RHEV-M Virtual Appliance
1. Initiating a Self-Hosted Engine DeploymentRun the hosted-engine script. To escape the script at any time, use the CTRL+D keyboardcombination to abort deployment. It is recommended to use the screen window manager to runthe script to avoid losing the session in case of network or terminal disruption. If not alreadyinstalled, install the screen package, which is available in the standard Red Hat Enterprise Linuxrepository.
# yum install screen
# screen
# hosted-engine --deploy
NOTE
In the event of session timeout or connection disruption, run screen -d -r torecover the hosted-engine deployment session.
2. Configuring StorageSelect the type of storage to use.
During customization use CTRL-D to abort.Please specify the storage you would like to use (glusterfs, iscsi, fc, nfs3, nfs4)[nfs3]:
For NFS storage types, specify the full address, using either the FQDN or IP address, andpath name of the shared storage domain.
Please specify the full shared storage connection path to use (example: host:/path): storage.example.com:/hosted_engine/nfs
For iSCSI, specify the iSCSI portal IP address, port, user name and password, and select atarget name from the auto-detected list. You can only select one iSCSI target during thedeployment.
Please specify the iSCSI portal IP address: Please specify the iSCSI portal port [3260]: Please specify the iSCSI portal user: Please specify the iSCSI portal password:Please specify the target name (auto-detected values) [default]:
For Gluster storage, specify the full address, using either the FQDN or IP address, and pathname of the shared storage domain.
CHAPTER 5. MIGRATING FROM BARE METAL TO A RHEL-BASED SELF-HOSTED ENVIRONMENT
33

IMPORTANT
Only replica 3 Gluster storage is supported. Ensure the followingconfiguration has been made:
In the /etc/glusterfs/glusterd.vol file on all three Glusterservers, set rpc-auth-allow-insecure to on.
option rpc-auth-allow-insecure on
Configure the volume as follows:
gluster volume set volume cluster.quorum-type autogluster volume set volume network.ping-timeout 10gluster volume set volume auth.allow \*gluster volume set volume group virtgluster volume set volume storage.owner-uid 36gluster volume set volume storage.owner-gid 36gluster volume set volume server.allow-insecure on
Please specify the full shared storage connection path to use (example: host:/path): storage.example.com:/hosted_engine/gluster_volume
For Fibre Channel, the host bus adapters must be configured and connected, and the hosted-engine script will auto-detect the LUNs available. The LUNs must not contain anyexisting data.
The following luns have been found on the requested target:[1] 3514f0c5447600351 30GiB XtremIO XtremApp status: used, paths: 2 active [2] 3514f0c5447600352 30GiB XtremIO XtremApp status: used, paths: 2 active
Please select the destination LUN (1, 2) [1]:
3. Configuring the NetworkThe script detects possible network interface controllers (NICs) to use as a management bridgefor the environment. It then checks your firewall configuration and offers to modify it for console(SPICE or VNC) access HostedEngine-VM. Provide a pingable gateway IP address, to be usedby the ovirt-ha-agent to help determine a host's suitability for running HostedEngine-VM.
Please indicate a nic to set rhevm bridge on: (eth1, eth0) [eth1]:iptables was detected on your computer, do you wish setup to configure it? (Yes, No)[Yes]: Please indicate a pingable gateway IP address [X.X.X.X]:
4. Configuring the Virtual MachineThe script creates a virtual machine to be configured as the Red Hat Enterprise VirtualizationManager, referred to in this procedure as HostedEngine-VM. Select disk for the boot devicetype, and the script will automatically detect the RHEV-M Appliances available. Select an
Self-Hosted Engine Guide
34

appliance.
Please specify the device to boot the VM from (choose disk for the oVirt engine appliance) (cdrom, disk, pxe) [disk]: [ INFO ] Detecting available oVirt engine appliances The following appliance have been found on your system: [1] - The RHEV-M Appliance image (OVA) [2] - Directly select an OVA file Please select an appliance (1, 2) [1]:[ INFO ] Verifying its sha1sum[ INFO ] Checking OVF archive content (could take a few minutes depending on archive size)
Specify Yes if you want cloud-init to take care of the initial configuration of the Manager virtualmachine. Specify Generate for cloud-init to take care of tasks like setting the root password,configuring networking, and configuring the host name. Optionally, select Existing if you havean existing cloud-init script to take care of more sophisticated functions of cloud-init. Specify theFQDN for the Manager virtual machine. This must be the same FQDN provided for theBareMetal-Manager.
NOTE
For more information on cloud-init, see https://cloudinit.readthedocs.org/en/latest/.
Would you like to use cloud-init to customize the appliance on the first boot (Yes, No)[Yes]? YesWould you like to generate on-fly a cloud-init no-cloud ISO image or do you have an existing one(Generate, Existing)[Generate]? GeneratePlease provide the FQDN you would like to use for the engine appliance.Note: This will be the FQDN of the engine VM you are now going to launch.It should not point to the base host or to any other existing machine.Engine VM FQDN: (leave it empty to skip): manager.example.com
You must answer No to the following question so that you can restore the BareMetal-Managerbackup file on HostedEngine-VM before running engine-setup.
Automatically execute engine-setup on the engine appliance on first boot (Yes, No)[Yes]? No
Configure the Manager domain name, root password, networking, hardware, and consoleaccess details.
Please provide the domain name you would like to use for the engine appliance.Engine VM domain: [example.com]Enter root password that will be used for the engine appliance (leave it empty to skip): p@ssw0rdConfirm appliance root password: p@ssw0rdHow should the engine VM network be configured (DHCP, Static)[DHCP]? Static
CHAPTER 5. MIGRATING FROM BARE METAL TO A RHEL-BASED SELF-HOSTED ENVIRONMENT
35

Please enter the IP address to be used for the engine VM: 192.168.x.xPlease provide a comma-separated list (max3) of IP addresses of domain name servers for the engine VMEngine VM DNS (leave it empty to skip):Add lines for the appliance itself and for this host to /etc/hosts on the engine VM?Note: ensuring that this host could resolve the engine VM hostname is still up to you (Yes, No)[No] YesThe following CPU types are supported by this host: - model_SandyBridge: Intel SandyBridge Family - model_Westmere: Intel Westmere Family - model_Nehalem: Intel Nehalem Family - model_Penryn: Intel Penryn Family - model_Conroe: Intel Conroe FamilyPlease specify the CPU type to be used by the VM [model_SandyBridge]: Please specify the number of virtual CPUs for the VM [Defaults to appliance OVF value: 2]: You may specify a unicast MAC address for the VM or accept a randomly generated default [00:16:3e:77:b2:a4]: Please specify the memory size of the VM in MB [Defaults to appliance OVF value: 4096]:Please specify the console type you would like to use to connect to the VM (vnc, spice) [vnc]: vnc
5. Configuring the Self-Hosted EngineSpecify the name for Host-HE1 to be identified in the Red Hat Enterprise Virtualizationenvironment, and the password for the admin@internal user to access the AdministrationPortal. Finally, provide the name and TCP port number of the SMTP server, the email addressused to send email notifications, and a comma-separated list of email addresses to receive thesenotifications.
Enter the name which will be used to identify this host inside the Administrator Portal [hosted_engine_1]: Host-HE1Enter 'admin@internal' user password that will be used for accessing the Administrator Portal: Confirm 'admin@internal' user password: Please provide the name of the SMTP server through which we will send notifications [localhost]: Please provide the TCP port number of the SMTP server [25]: Please provide the email address from which notifications will be sent [root@localhost]: Please provide a comma-separated list of email addresses which will get notifications [root@localhost]:
6. Configuration PreviewBefore proceeding, the hosted-engine script displays the configuration values you haveentered, and prompts for confirmation to proceed with these values.
Bridge interface : eth1Engine FQDN : manager.example.comBridge name : ovirtmgmtHost address : host.example.comSSH daemon port : 22
Self-Hosted Engine Guide
36

Firewall manager : iptablesGateway address : X.X.X.XHost name for web application : Host-HE1Host ID : 1Image size GB : 50Storage connection : storage.example.com:/hosted_engine/nfsConsole type : vncMemory size MB : 4096MAC address : 00:16:3e:77:b2:a4Boot type : pxeNumber of CPUs : 2CPU Type : model_SandyBridge
Please confirm installation settings (Yes, No)[Yes]:
7. Creating HostedEngine-VMThe script creates the virtual machine to be configured as HostedEngine-VM and providesconnection details. You must manually run engine-setup after restoring the backup file onHostedEngine-VM before the hosted-engine script can proceed on Host-HE1.
[ INFO ] Stage: Transaction setup...[ INFO ] Creating VM You can now connect to the VM with the following command: /bin/remote-viewer vnc://localhost:5900 Use temporary password "3463VnKn" to connect to vnc console. Please note that in order to use remote-viewer you need to be able to run graphical applications. This means that if you are using ssh you have to supply the -Y flag (enables trusted X11 forwarding). Otherwise you can run the command from a terminal in your preferred desktop environment. If you cannot run graphical applications you can connect to the graphic console from another host or connect to the serial console using the following command: socat UNIX-CONNECT:/var/run/ovirt-vmconsole-console/8f74b589-8c6f-4a32-9adf-6e615b69de07.sock,user=ovirt-vmconsole STDIO,raw,echo=0,escape=1 Please ensure that your Guest OS is properly configured to support serial console according to your distro documentation. Follow http://www.ovirt.org/Serial_Console_Setup#I_need_to_access_the_console_the_old_way for more info. If you need to reboot the VM you will need to start it manually using the command: hosted-engine --vm-start You can then set a temporary password using the command: hosted-engine --add-console-password Please install and setup the engine in the VM. You may also be interested in subscribing to "agent" RHN/Satellite channel and installing rhevm-guest-agent-common package in the VM.
CHAPTER 5. MIGRATING FROM BARE METAL TO A RHEL-BASED SELF-HOSTED ENVIRONMENT
37

The VM has been rebooted. To continue please install oVirt-Engine in the VM (Follow http://www.ovirt.org/Quick_Start_Guide for more info). Make a selection from the options below: (1) Continue setup - oVirt-Engine installation is ready and ovirt-engine service is up (2) Abort setup (3) Power off and restart the VM (4) Destroy VM and abort setup (1, 2, 3, 4)[1]:
Connect to the virtual machine using the VNC protocol with the following command. ReplaceFQDN with the fully qualified domain name or the IP address of the self-hosted engine host.
# /bin/remote-viewer vnc://FQDN:5900
8. Enabling SSH on HostedEngine-VMSSH password authentication is not enabled by default on the RHEV-M Virtual Appliance.Connect to HostedEngine-VM via VNC and enable SSH password authentication so that youcan access the virtual machine via SSH later to restore the BareMetal-Manager backup file andconfigure the new Manager. Verify that the sshd service is running. Edit /etc/ssh/sshd_config and change the following two options to yes:
[...]PermitRootLogin yes [...]PasswordAuthentication yes
Restart the sshd service for the changes to take effect.
# service sshd restart
9. Disabling BareMetal-ManagerConnect to BareMetal-Manager, the Manager of your established Red Hat EnterpriseVirtualization environment, and stop the engine and prevent it from running.
# service ovirt-engine stop# chkconfig ovirt-engine off
NOTE
Though stopping BareMetal-Manager from running is not obligatory, it isrecommended as it ensures no changes will be made to the environment after thebackup has been created. Additionally, it prevents BareMetal-Manager andHostedEngine-VM from simultaneously managing existing resources.
10. Updating DNSUpdate your DNS so that the FQDN of the Red Hat Enterprise Virtualization environmentcorrelates to the IP address of HostedEngine-VM and the FQDN previously provided whenconfiguring the hosted-engine deployment script on Host-HE1. In this procedure, FQDN was
Self-Hosted Engine Guide
38
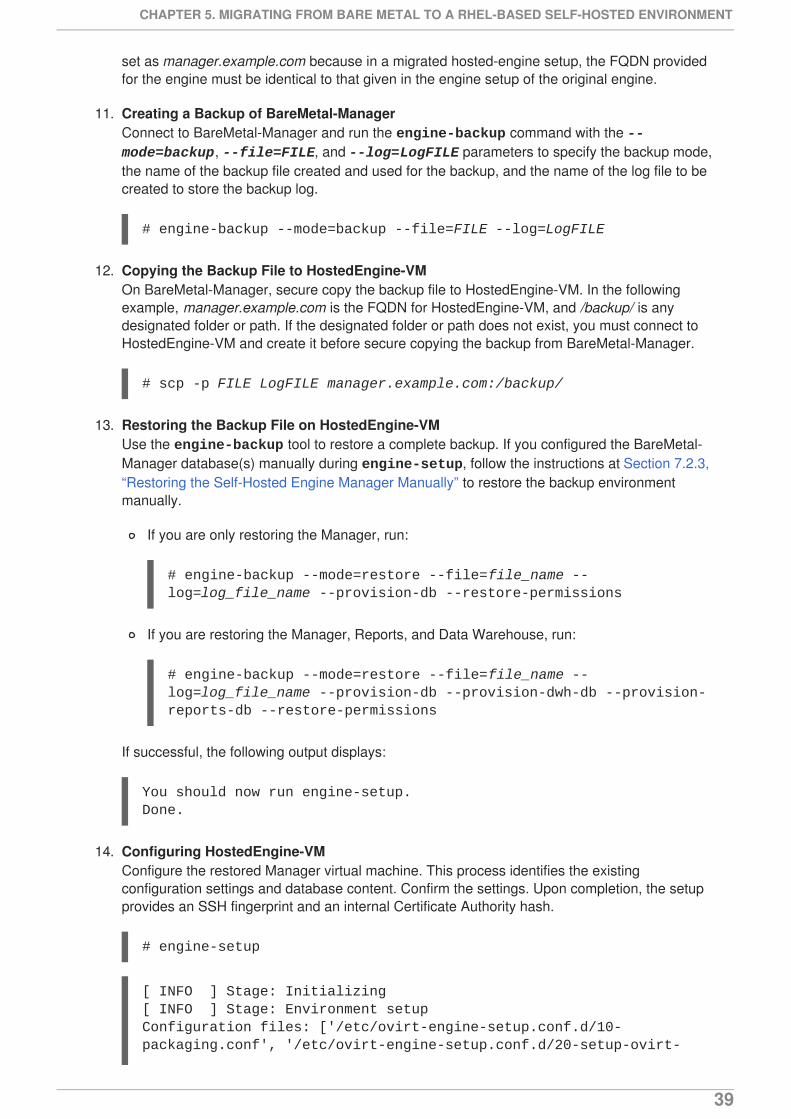
set as manager.example.com because in a migrated hosted-engine setup, the FQDN providedfor the engine must be identical to that given in the engine setup of the original engine.
11. Creating a Backup of BareMetal-ManagerConnect to BareMetal-Manager and run the engine-backup command with the --mode=backup, --file=FILE, and --log=LogFILE parameters to specify the backup mode,the name of the backup file created and used for the backup, and the name of the log file to becreated to store the backup log.
# engine-backup --mode=backup --file=FILE --log=LogFILE
12. Copying the Backup File to HostedEngine-VMOn BareMetal-Manager, secure copy the backup file to HostedEngine-VM. In the followingexample, manager.example.com is the FQDN for HostedEngine-VM, and /backup/ is anydesignated folder or path. If the designated folder or path does not exist, you must connect toHostedEngine-VM and create it before secure copying the backup from BareMetal-Manager.
# scp -p FILE LogFILE manager.example.com:/backup/
13. Restoring the Backup File on HostedEngine-VMUse the engine-backup tool to restore a complete backup. If you configured the BareMetal-Manager database(s) manually during engine-setup, follow the instructions at Section 7.2.3,“Restoring the Self-Hosted Engine Manager Manually” to restore the backup environmentmanually.
If you are only restoring the Manager, run:
# engine-backup --mode=restore --file=file_name --log=log_file_name --provision-db --restore-permissions
If you are restoring the Manager, Reports, and Data Warehouse, run:
# engine-backup --mode=restore --file=file_name --log=log_file_name --provision-db --provision-dwh-db --provision-reports-db --restore-permissions
If successful, the following output displays:
You should now run engine-setup.Done.
14. Configuring HostedEngine-VMConfigure the restored Manager virtual machine. This process identifies the existingconfiguration settings and database content. Confirm the settings. Upon completion, the setupprovides an SSH fingerprint and an internal Certificate Authority hash.
# engine-setup
[ INFO ] Stage: Initializing[ INFO ] Stage: Environment setupConfiguration files: ['/etc/ovirt-engine-setup.conf.d/10-packaging.conf', '/etc/ovirt-engine-setup.conf.d/20-setup-ovirt-
CHAPTER 5. MIGRATING FROM BARE METAL TO A RHEL-BASED SELF-HOSTED ENVIRONMENT
39

post.conf']Log file: /var/log/ovirt-engine/setup/ovirt-engine-setup-20140304075238.logVersion: otopi-1.1.2 (otopi-1.1.2-1.el6ev)[ INFO ] Stage: Environment packages setup[ INFO ] Yum Downloading: rhel-65-zstream/primary_db 2.8 M(70%)[ INFO ] Stage: Programs detection[ INFO ] Stage: Environment setup[ INFO ] Stage: Environment customization --== PACKAGES ==-- [ INFO ] Checking for product updates...[ INFO ] No product updates found --== NETWORK CONFIGURATION ==-- Setup can automatically configure the firewall on this system.Note: automatic configuration of the firewall may overwrite current settings.Do you want Setup to configure the firewall? (Yes, No) [Yes]: [ INFO ] iptables will be configured as firewall manager. --== DATABASE CONFIGURATION ==-- --== OVIRT ENGINE CONFIGURATION ==-- --== PKI CONFIGURATION ==-- --== APACHE CONFIGURATION ==-- --== SYSTEM CONFIGURATION ==-- --== END OF CONFIGURATION ==-- [ INFO ] Stage: Setup validation[ INFO ] Cleaning stale zombie tasks --== CONFIGURATION PREVIEW ==-- Default SAN wipe after delete : False Firewall manager : iptables Update Firewall : True Host FQDN : manager.example.com Engine database secured connection : False Engine database host : X.X.X.X Engine database user name : engine Engine database name : engine Engine database port : 5432 Engine database host name validation : False
Self-Hosted Engine Guide
40

Engine installation : True PKI organization : example.com NFS mount point : /var/lib/exports/iso Configure VMConsole Proxy : True Engine Host FQDN : manager.example.com Configure WebSocket Proxy : True Please confirm installation settings (OK, Cancel) [OK]:
15. Synchronizing the Host and the ManagerReturn to Host-HE1 and continue the hosted-engine deployment script by selecting option 1:
(1) Continue setup - oVirt-Engine installation is ready and ovirt-engine service is up
The script displays the internal Certificate Authority hash, and prompts you to select the clusterto which to add Host-HE1.
[ INFO ] Engine replied: DB Up!Welcome to Health Status![ INFO ] Acquiring internal CA cert from the engine[ INFO ] The following CA certificate is going to be used, please immediately interrupt if not correct:[ INFO ] Issuer: C=US, O=example.com, CN=manager.example.com.23240, Subject: C=US, O=example.com, CN=manager.example.com.23240, Fingerprint (SHA-1): XXXXXXXXXXXXXXXXXXXXXXXXXXXXXXXXXXXXXXXX[ INFO ] Connecting to the Engine Enter the name of the cluster to which you want to add the host (DB1, DB2, Default) [Default]:[ INFO ] Waiting for the host to become operational in the engine. This may take several minutes...[ INFO ] The VDSM Host is now operational[ INFO ] Saving hosted-engine configuration on the shared storage domain Please shutdown the VM allowing the system to launch it as a monitored service. The system will wait until the VM is down.
16. Shutting Down HostedEngine-VMShut down HostedEngine-VM.
# shutdown -h now
17. Setup ConfirmationReturn to Host-HE1 to confirm it has detected that HostedEngine-VM is down.
[ INFO ] Enabling and starting HA services[ INFO ] Stage: Clean up[ INFO ] Generating answer file '/var/lib/ovirt-hosted-engine-setup/answers/answers-20160509162843.conf'[ INFO ] Generating answer file '/etc/ovirt-hosted-engine/answers.conf'
CHAPTER 5. MIGRATING FROM BARE METAL TO A RHEL-BASED SELF-HOSTED ENVIRONMENT
41

[ INFO ] Stage: Pre-termination[ INFO ] Stage: Termination[ INFO ] Hosted Engine successfully set up
Your Red Hat Enterprise Virtualization engine has been migrated to a self-hosted engine setup. TheManager is now operating on a virtual machine on Host-HE1, called HostedEngine-VM in theenvironment. As HostedEngine-VM is highly available, it is migrated to other hosts in the environmentwhen applicable.
Self-Hosted Engine Guide
42

CHAPTER 6. MAINTENANCE AND UPGRADING RESOURCES
6.1. MAINTAINING THE SELF-HOSTED ENGINE
The maintenance modes enable you to start, stop, and modify the engine virtual machine withoutinterference from the high-availability agents, and to restart and modify the hosts in the environmentwithout interfering with the engine.
There are three maintenance modes that can be enforced:
global - All high-availability agents in the cluster are disabled from monitoring the state of theengine virtual machine. The global maintenance mode must be applied for any setup or upgradeoperations that require the engine to be stopped. Examples of this include upgrading to a laterversion of Red Hat Enterprise Virtualization, and installation of the rhevm-dwh and rhevm-reportspackages necessary for the Reports Portal.
local - The high-availability agent on the host issuing the command is disabled from monitoringthe state of the engine virtual machine. The host is exempt from hosting the engine virtualmachine while in local maintenance mode; if hosting the engine virtual machine when placedinto this mode, the engine will be migrated to another host, provided there is a suitablecontender. The local maintenance mode is recommended when applying system changes orupdates to the host.
none - Disables maintenance mode, ensuring that the high-availability agents are operating.
Procedure 6.1. Maintaining a RHEL-Based Self-Hosted Engine (Local Maintenance)
1. Place a self-hosted engine host into the local maintenance mode:
In the Administration Portal, place the host into maintenance, and the local maintenancemode is automatically triggered for that host.
You can also set the maintenance mode from the command line:
# hosted-engine --set-maintenance --mode=local
2. After you have completed any maintenance tasks, disable the maintenance mode:
# hosted-engine --set-maintenance --mode=none
Procedure 6.2. Maintaining a RHEL-Based Self-Hosted Engine (Global Maintenance)
1. Place a self-hosted engine host into the global maintenance mode:
In the Administration Portal, right-click the engine virtual machine, and select Enable Global HA Maintenance.
You can also set the maintenance mode from the command line:
# hosted-engine --set-maintenance --mode=global
2. After you have completed any maintenance tasks, disable the maintenance mode:
CHAPTER 6. MAINTENANCE AND UPGRADING RESOURCES
43
# hosted-engine --set-maintenance --mode=none
Procedure 6.3. Maintaining a RHEV-H-Based Self-Hosted Engine
1. In the text user interface, select the Hosted Engine screen.
2. Select < Set Hosted Engine maintenance >, and select a maintenance mode, either Local or Global.
3. After you have completed any maintenance tasks, disable the maintenance mode. Select < Set Hosted Engine maintenance >, and select None.
6.2. UPGRADING A RHEL OR RHEV-H 7 SELF-HOSTED ENGINEENVIRONMENT
NOTE
The following procedure is only for upgrading a Red Hat Enterprise Virtualization 3.5 self-hosted engine environment running on Red Hat Enterprise Linux (RHEL) 7 hosts or RedHat Enterprise Virtualization Hypervisor (RHEV-H) 7 hosts.
New RHEL 7 hosts cannot be used in Red Hat Enterprise Virtualization 3.5 self-hostedengine environments; use the appropriate RHEV-H 7 host instead. Seehttps://access.redhat.com/solutions/2456071.
To upgrade your Red Hat Enterprise Virtualization self-hosted engine environment from version 3.5 to3.6, update the Manager virtual machine, the self-hosted engine hosts, and any standard hosts. All hostsin a self-hosted engine environment must be the same version; you cannot upgrade only some of thehosts.
IMPORTANT
During the 3.5 to 3.6 upgrade, at least one self-hosted engine host must be upgraded first.Upgrading the host will trigger the self-hosted engine storage domain upgrade. A new 3.6host will not trigger the required upgrade.
The self-hosted engine storage domain auto-import will happen automatically after a 3.5host is upgraded with 3.6 packages.
The upgrade process involves the following key steps:
Place the high-availability agents that manage the Manager virtual machine in the globalmaintenance mode.
Update the Manager virtual machine.
Place a self-hosted engine host into maintenance. The Manager virtual machine and other virtualmachines will be migrated to another host in the cluster if necessary.
Update the self-hosted engine host. Repeat for all hosts. It is recommended to update all hostsin the environment, including standard hosts.
Self-Hosted Engine Guide
44

After all hosts in the cluster and the Manager virtual machine have been updated, change thecluster compatibility version to 3.6.
Procedure 6.4. Upgrading the Self-Hosted Engine Manager Virtual Machine
1. Disable the high-availability agents on all the self-hosted engine hosts. To do this run thefollowing command on any self-hosted engine host in the cluster.
# hosted-engine --set-maintenance --mode=global
After a few minutes, run hosted-engine --vm-status to confirm that the environment is inmaintenance mode.
2. Log in to the Manager virtual machine to upgrade the Red Hat Enterprise Virtualization Manager.
a. Enable the Red Hat Enterprise Virtualization Manager 3.6 repository:
# subscription-manager repos --enable=rhel-6-server-rhevm-3.6-rpms
b. Update the rhevm setup packages:
# yum update rhevm\*setup\*
c. Run engine-setup and follow the prompts to upgrade the Red Hat EnterpriseVirtualization Manager:
# engine-setup
d. Remove or disable the Red Hat Enterprise Virtualization Manager 3.5 repository to ensurethe system does not use any Red Hat Enterprise Virtualization Manager 3.5 packages:
# subscription-manager repos --disable=rhel-6-server-rhevm-3.5-rpms
e. Update the base operating system:
# yum update
Now that the Manager virtual machine has been upgraded, you can update the hosts. The followingprocedure is for updating Red Hat Enterprise Virtualisation Hypervisor 7 hosts.
Procedure 6.5. Updating the RHEV-H Self-Hosted Engine Host
1. Update the RHEV-H host. See Updating Red Hat Enterprise Virtualization Hypervisors in theUpgrade Guide for more information.
2. On the host, restart VDSM:
# systemctl restart vdsmd
3. Restart ovirt-ha-broker and ovirt-ha-agent:
CHAPTER 6. MAINTENANCE AND UPGRADING RESOURCES
45

# systemctl restart ovirt-ha-broker
# systemctl restart ovirt-ha-agent
4. Repeat step 1 to step 3 to update all self-hosted engine hosts. If you have any standard RHEV-H hosts you can update them using step 1.
5. Disable global maintenance after all self-hosted engine hosts have been updated.
# hosted-engine --set-maintenance --mode=none
The following procedure is for updating Red Hat Enterprise Linux 7-based hosts.
Procedure 6.6. Updating the RHEL-Based Self-Hosted Engine Host
1. Access the Administration Portal. Select a self-hosted engine host and place it into maintenancemode by clicking Maintenance. If the host is hosting the Manager virtual machine, the virtualmachine will be migrated to another host. Any other virtual machines will be migrated accordingto your virtual machine migration policy. The high-availability agents are automatically placedinto local maintenance.
2. Update the self-hosted engine host:
# yum update
3. Restart VDSM:
# systemctl restart vdsmd
4. Restart ovirt-ha-broker and ovirt-ha-agent:
# systemctl restart ovirt-ha-broker
# systemctl restart ovirt-ha-agent
5. Access the Administration Portal. Select the same host and click Activate.
6. Repeat step 1 to step 5 to update all self-hosted engine hosts. If you have standard Red HatEnterprise Linux 7 hosts in your environment, ensure the required repository is enabled on thehost as in step 2, and update the host. See Updating Red Hat Enterprise Linux VirtualizationHosts in the Upgrade Guide for more information.
7. Disable global maintenance after all self-hosted engine hosts have been updated.
# hosted-engine --set-maintenance --mode=none
It is recommended that all hosts in your self-hosted environment are upgraded at the same time. Thisprevents the older version hosts from going into a Non Operational state. If this is not possible in yourenvironment, follow this procedure to upgrade any additional hosts.
Procedure 6.7. Upgrading Additional Hosts
Self-Hosted Engine Guide
46

1. Access the Administration Portal. Select the host and place it into maintenance mode by clickingMaintenance. If the host is hosting the Manager virtual machine, the virtual machine will bemigrated to another host. Any other virtual machines will be migrated according to your virtualmachine migration policy. The high-availability agents are automatically placed into localmaintenance.
2. Ensure the required repository is enabled:
# subscription-manager repos --enable=rhel-7-server-rhev-mgmt-agent-rpms
3. Update the self-hosted engine host:
# yum update
4. Restart VDSM:
# service vdsmd restart
5. Restart ovirt-ha-broker and ovirt-ha-agent:
# service ovirt-ha-broker restart
# service ovirt-ha-agent restart
6. Access the Administration Portal. Select the host and activate it by clicking Activate.
7. Repeat the steps for all self-hosted engine hosts you want to upgrade.
You can now update the cluster compatibility version to 3.6.
IMPORTANT
Only update the compatibility version if all hosts have been updated for Red HatEnterprise Virtualization 3.6 to avoid some hosts becoming non-operational.
Procedure 6.8. Updating the Cluster Compatibility Version
1. Access the Administration Portal. Select the Default cluster and click Edit to open the Edit Cluster window.
2. Use the Compatibility Version drop-down menu to select 3.6. Click OK to save thechange and close the window.
6.3. UPGRADING A RHEL OR RHEV-H 6 SELF-HOSTED ENGINEENVIRONMENT
This section describes how to upgrade a Red Hat Enterprise Virtualization 3.5 self-hosted engineenvironment, running on Red Hat Enterprise Linux (RHEL) 6 or Red Hat Enterprise VirtualizationHypervisor (RHEV-H) 6 hosts, to Red Hat Enterprise Virtualization 3.6, running on Next Generation RedHat Virtualization Host (RHVH) or RHEL 7 hosts.
CHAPTER 6. MAINTENANCE AND UPGRADING RESOURCES
47

The upgrade procedure comprises the following key steps:
1. Upgrade the Manager
2. Upgrade the hosts
3. Perform post-upgrade tasks
This procedure describes how to upgrade the Manager from 3.5 to 3.6. This procedure assumes that thesystem on which the Manager is installed is subscribed to the entitlements for receiving Red HatEnterprise Virtualization 3.5 packages at the start of the procedure.
IMPORTANT
If the upgrade fails, the engine-setup command will attempt to roll back the Managerinstallation to its previous state. For this reason, the repositories required by Red HatEnterprise Virtualization 3.5 must not be removed until after the upgrade is complete. Ifthe upgrade fails, detailed instructions display that explain how to restore your installation.
Procedure 6.9. Upgrading the Manager
1. Enable global maintenance from one of the self-hosted engine hosts:
# hosted-engine --set-maintenance --mode=global
2. On the Manager virtual machine, subscribe to the required entitlements for receiving theManager 3.6 packages:
# subscription-manager repos --enable=rhel-6-server-rhevm-3.6-rpms
3. Update the rhevm setup packages:
# yum update rhevm\*setup\*
4. Run the following command and follow the prompts to upgrade the Manager:
# engine-setup --otopi-environment=OVESETUP_DB/forceUpgradeWithHeEl6Hosts=bool:True
5. Remove or disable the Manager 3.5 repository to ensure the system does not use any Manager3.5 packages:
# subscription-manager repos --disable=rhel-6-server-rhevm-3.5-rpms
After upgrading the Manager, you can upgrade the hosts.
These procedures describe how to upgrade the hosts to Next Generation RHVH or RHEL 7, using the host-direct-upgrade tool.
host-direct-upgrade Tool
The host-direct-upgrade tool provides a simple and fast way to upgrade a Red Hat EnterpriseVirtualization 3.5 self-hosted engine environment, running on RHEV-H 6 or RHEL 6, to a Red Hat
Self-Hosted Engine Guide
48
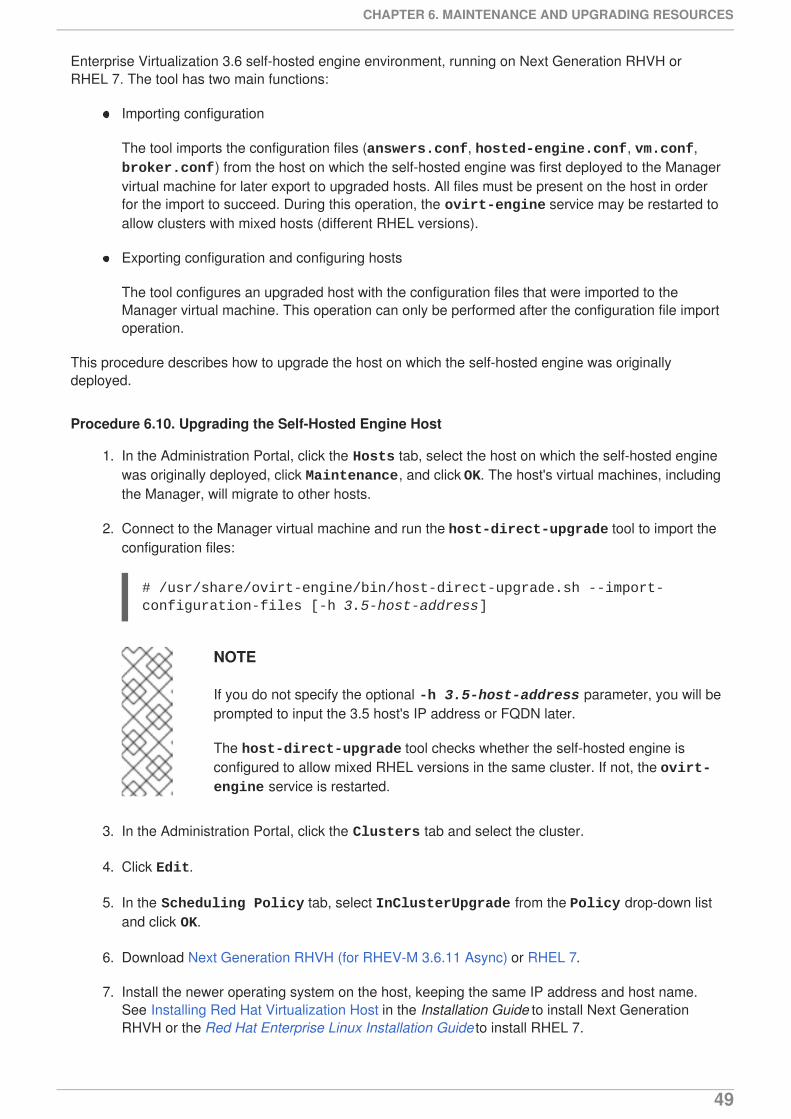
Enterprise Virtualization 3.6 self-hosted engine environment, running on Next Generation RHVH orRHEL 7. The tool has two main functions:
Importing configuration
The tool imports the configuration files (answers.conf, hosted-engine.conf, vm.conf, broker.conf) from the host on which the self-hosted engine was first deployed to the Managervirtual machine for later export to upgraded hosts. All files must be present on the host in orderfor the import to succeed. During this operation, the ovirt-engine service may be restarted toallow clusters with mixed hosts (different RHEL versions).
Exporting configuration and configuring hosts
The tool configures an upgraded host with the configuration files that were imported to theManager virtual machine. This operation can only be performed after the configuration file importoperation.
This procedure describes how to upgrade the host on which the self-hosted engine was originallydeployed.
Procedure 6.10. Upgrading the Self-Hosted Engine Host
1. In the Administration Portal, click the Hosts tab, select the host on which the self-hosted enginewas originally deployed, click Maintenance, and click OK. The host's virtual machines, includingthe Manager, will migrate to other hosts.
2. Connect to the Manager virtual machine and run the host-direct-upgrade tool to import theconfiguration files:
# /usr/share/ovirt-engine/bin/host-direct-upgrade.sh --import-configuration-files [-h 3.5-host-address]
NOTE
If you do not specify the optional -h 3.5-host-address parameter, you will beprompted to input the 3.5 host's IP address or FQDN later.
The host-direct-upgrade tool checks whether the self-hosted engine isconfigured to allow mixed RHEL versions in the same cluster. If not, the ovirt-engine service is restarted.
3. In the Administration Portal, click the Clusters tab and select the cluster.
4. Click Edit.
5. In the Scheduling Policy tab, select InClusterUpgrade from the Policy drop-down listand click OK.
6. Download Next Generation RHVH (for RHEV-M 3.6.11 Async) or RHEL 7.
7. Install the newer operating system on the host, keeping the same IP address and host name.See Installing Red Hat Virtualization Host in the Installation Guide to install Next GenerationRHVH or the Red Hat Enterprise Linux Installation Guide to install RHEL 7.
CHAPTER 6. MAINTENANCE AND UPGRADING RESOURCES
49
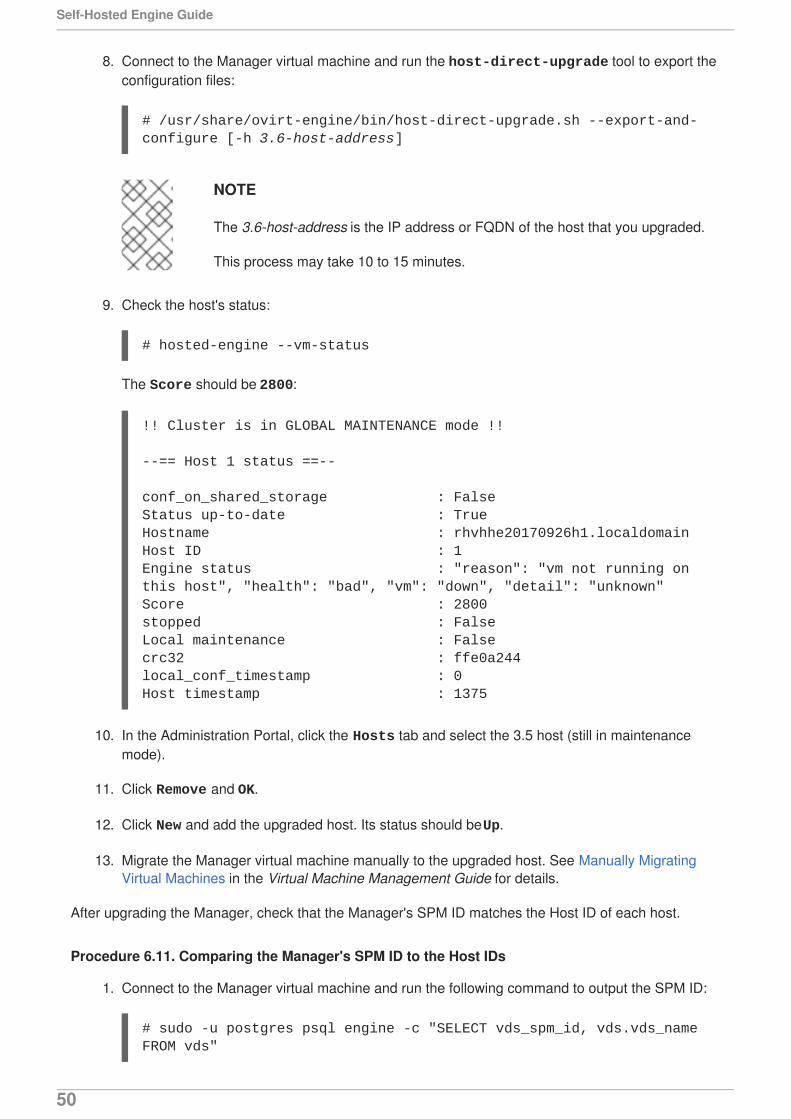
8. Connect to the Manager virtual machine and run the host-direct-upgrade tool to export theconfiguration files:
# /usr/share/ovirt-engine/bin/host-direct-upgrade.sh --export-and-configure [-h 3.6-host-address]
NOTE
The 3.6-host-address is the IP address or FQDN of the host that you upgraded.
This process may take 10 to 15 minutes.
9. Check the host's status:
# hosted-engine --vm-status
The Score should be 2800:
!! Cluster is in GLOBAL MAINTENANCE mode !!
--== Host 1 status ==--
conf_on_shared_storage : FalseStatus up-to-date : TrueHostname : rhvhhe20170926h1.localdomainHost ID : 1Engine status : "reason": "vm not running on this host", "health": "bad", "vm": "down", "detail": "unknown"Score : 2800stopped : FalseLocal maintenance : Falsecrc32 : ffe0a244local_conf_timestamp : 0Host timestamp : 1375
10. In the Administration Portal, click the Hosts tab and select the 3.5 host (still in maintenancemode).
11. Click Remove and OK.
12. Click New and add the upgraded host. Its status should be Up.
13. Migrate the Manager virtual machine manually to the upgraded host. See Manually MigratingVirtual Machines in the Virtual Machine Management Guide for details.
After upgrading the Manager, check that the Manager's SPM ID matches the Host ID of each host.
Procedure 6.11. Comparing the Manager's SPM ID to the Host IDs
1. Connect to the Manager virtual machine and run the following command to output the SPM ID:
# sudo -u postgres psql engine -c "SELECT vds_spm_id, vds.vds_name FROM vds"
Self-Hosted Engine Guide
50
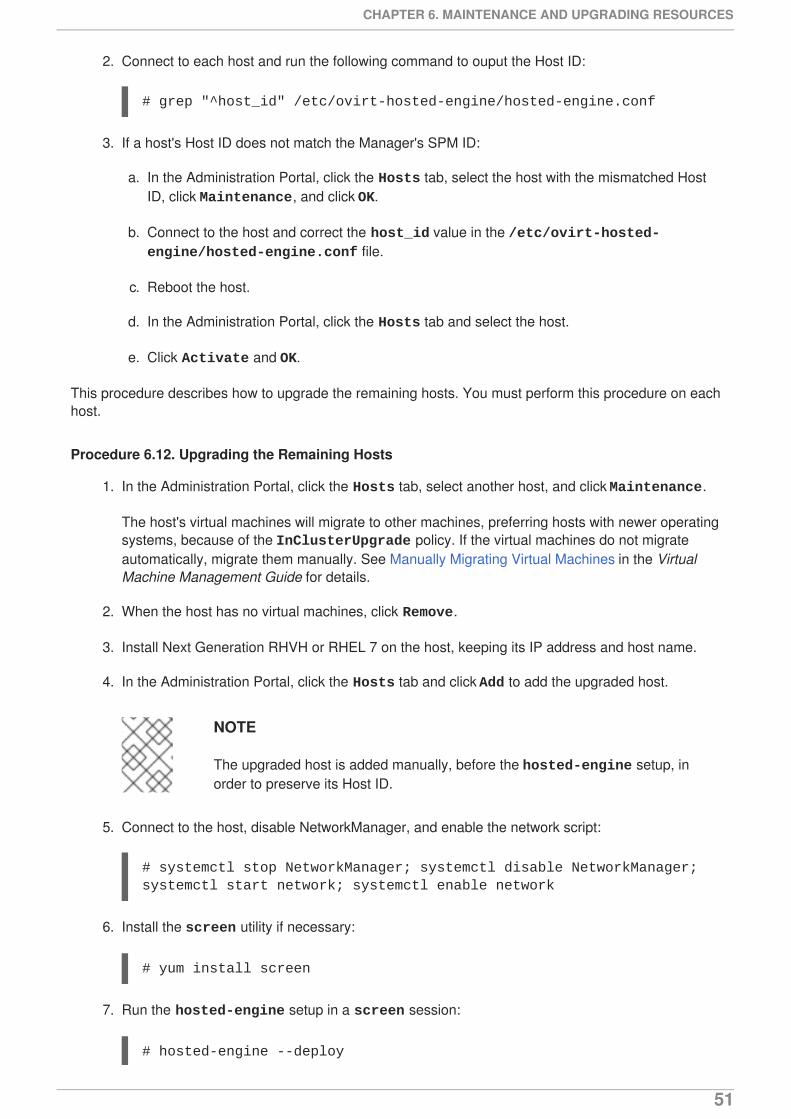
2. Connect to each host and run the following command to ouput the Host ID:
# grep "^host_id" /etc/ovirt-hosted-engine/hosted-engine.conf
3. If a host's Host ID does not match the Manager's SPM ID:
a. In the Administration Portal, click the Hosts tab, select the host with the mismatched HostID, click Maintenance, and click OK.
b. Connect to the host and correct the host_id value in the /etc/ovirt-hosted-engine/hosted-engine.conf file.
c. Reboot the host.
d. In the Administration Portal, click the Hosts tab and select the host.
e. Click Activate and OK.
This procedure describes how to upgrade the remaining hosts. You must perform this procedure on eachhost.
Procedure 6.12. Upgrading the Remaining Hosts
1. In the Administration Portal, click the Hosts tab, select another host, and click Maintenance.
The host's virtual machines will migrate to other machines, preferring hosts with newer operatingsystems, because of the InClusterUpgrade policy. If the virtual machines do not migrateautomatically, migrate them manually. See Manually Migrating Virtual Machines in the VirtualMachine Management Guide for details.
2. When the host has no virtual machines, click Remove.
3. Install Next Generation RHVH or RHEL 7 on the host, keeping its IP address and host name.
4. In the Administration Portal, click the Hosts tab and click Add to add the upgraded host.
NOTE
The upgraded host is added manually, before the hosted-engine setup, inorder to preserve its Host ID.
5. Connect to the host, disable NetworkManager, and enable the network script:
# systemctl stop NetworkManager; systemctl disable NetworkManager; systemctl start network; systemctl enable network
6. Install the screen utility if necessary:
# yum install screen
7. Run the hosted-engine setup in a screen session:
# hosted-engine --deploy
CHAPTER 6. MAINTENANCE AND UPGRADING RESOURCES
51

[ INFO ] Stage: Initializing[ INFO ] Generating a temporary VNC password. [ INFO ] Stage: Environment setup Continuing will configure this host for serving as hypervisor and create a VM where you have to install the engine afterwards. Are you sure you want to continue? (Yes, No)[Yes]: Configuration files: [] Log file: /var/log/ovirt-hosted-engine-setup/ovirt-hosted-engine-setup.log Version: otopi-1.4.2 (otopi-1.4.2-1.el7ev)[ INFO ] Hardware supports virtualization[ INFO ] Stage: Environment packages setup[ INFO ] Stage: Programs detection[ INFO ] Stage: Environment setup[ INFO ] Stage: Environment customization
--== STORAGE CONFIGURATION ==--
During customization use CTRL-D to abort. Please specify the storage you would like to use (glusterfs, iscsi, fc, nfs3, nfs4)[nfs3]: nfs4 Please specify the full shared storage connection path to use (example: host:/path): hostname:/path The specified storage location already contains a data domain. Is this an additional host setup (Yes, No)[Yes]?[ INFO ] Installing on additional host Please specify the Host ID [Must be integer, default: 2]:
--== SYSTEM CONFIGURATION ==--
[WARNING] A configuration file must be supplied to deploy Hosted Engine on an additional host.[ INFO ] Answer file successfully loaded
--== NETWORK CONFIGURATION ==--
[ INFO ] Bridge rhevm already created[ INFO ] Additional host deployment, firewall manager is 'iptables' The following CPU types are supported by this host: - model_SandyBridge: Intel SandyBridge Family - model_Westmere: Intel Westmere Family - model_Nehalem: Intel Nehalem Family - model_Penryn: Intel Penryn Family - model_Conroe: Intel Conroe Family
--== HOSTED ENGINE CONFIGURATION ==--
Enter the name which will be used to identify this host inside the Administrator Portal [hosted_engine_2]: Enter 'admin@internal' user password that will be used for accessing the Administrator Portal: Confirm 'admin@internal' user password:[ INFO ] Stage: Setup validation Please provide the address of this host.
Self-Hosted Engine Guide
52
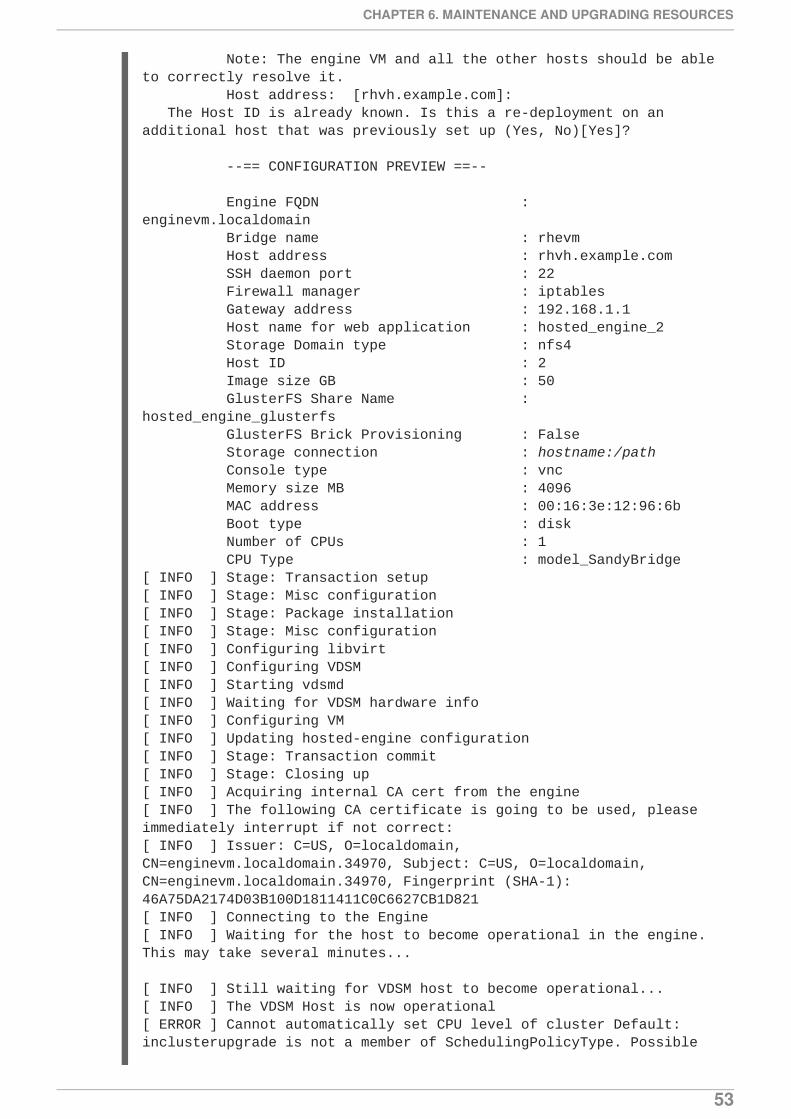
Note: The engine VM and all the other hosts should be able to correctly resolve it. Host address: [rhvh.example.com]: The Host ID is already known. Is this a re-deployment on an additional host that was previously set up (Yes, No)[Yes]?
--== CONFIGURATION PREVIEW ==--
Engine FQDN : enginevm.localdomain Bridge name : rhevm Host address : rhvh.example.com SSH daemon port : 22 Firewall manager : iptables Gateway address : 192.168.1.1 Host name for web application : hosted_engine_2 Storage Domain type : nfs4 Host ID : 2 Image size GB : 50 GlusterFS Share Name : hosted_engine_glusterfs GlusterFS Brick Provisioning : False Storage connection : hostname:/path Console type : vnc Memory size MB : 4096 MAC address : 00:16:3e:12:96:6b Boot type : disk Number of CPUs : 1 CPU Type : model_SandyBridge[ INFO ] Stage: Transaction setup[ INFO ] Stage: Misc configuration[ INFO ] Stage: Package installation[ INFO ] Stage: Misc configuration[ INFO ] Configuring libvirt[ INFO ] Configuring VDSM[ INFO ] Starting vdsmd[ INFO ] Waiting for VDSM hardware info[ INFO ] Configuring VM[ INFO ] Updating hosted-engine configuration [ INFO ] Stage: Transaction commit[ INFO ] Stage: Closing up[ INFO ] Acquiring internal CA cert from the engine[ INFO ] The following CA certificate is going to be used, please immediately interrupt if not correct:[ INFO ] Issuer: C=US, O=localdomain, CN=enginevm.localdomain.34970, Subject: C=US, O=localdomain, CN=enginevm.localdomain.34970, Fingerprint (SHA-1): 46A75DA2174D03B100D1811411C0C6627CB1D821[ INFO ] Connecting to the Engine[ INFO ] Waiting for the host to become operational in the engine. This may take several minutes...
[ INFO ] Still waiting for VDSM host to become operational...[ INFO ] The VDSM Host is now operational[ ERROR ] Cannot automatically set CPU level of cluster Default: inclusterupgrade is not a member of SchedulingPolicyType. Possible
CHAPTER 6. MAINTENANCE AND UPGRADING RESOURCES
53
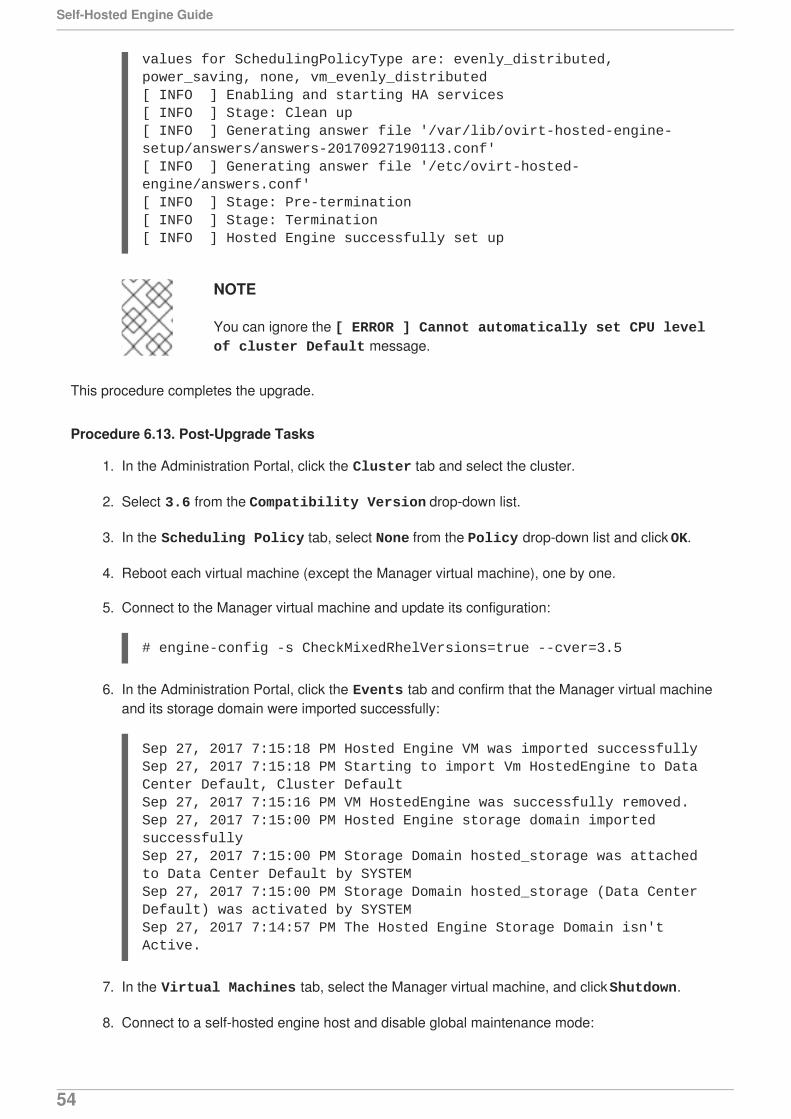
values for SchedulingPolicyType are: evenly_distributed, power_saving, none, vm_evenly_distributed [ INFO ] Enabling and starting HA services[ INFO ] Stage: Clean up[ INFO ] Generating answer file '/var/lib/ovirt-hosted-engine-setup/answers/answers-20170927190113.conf'[ INFO ] Generating answer file '/etc/ovirt-hosted-engine/answers.conf'[ INFO ] Stage: Pre-termination[ INFO ] Stage: Termination[ INFO ] Hosted Engine successfully set up
NOTE
You can ignore the [ ERROR ] Cannot automatically set CPU level of cluster Default message.
This procedure completes the upgrade.
Procedure 6.13. Post-Upgrade Tasks
1. In the Administration Portal, click the Cluster tab and select the cluster.
2. Select 3.6 from the Compatibility Version drop-down list.
3. In the Scheduling Policy tab, select None from the Policy drop-down list and click OK.
4. Reboot each virtual machine (except the Manager virtual machine), one by one.
5. Connect to the Manager virtual machine and update its configuration:
# engine-config -s CheckMixedRhelVersions=true --cver=3.5
6. In the Administration Portal, click the Events tab and confirm that the Manager virtual machineand its storage domain were imported successfully:
Sep 27, 2017 7:15:18 PM Hosted Engine VM was imported successfullySep 27, 2017 7:15:18 PM Starting to import Vm HostedEngine to Data Center Default, Cluster DefaultSep 27, 2017 7:15:16 PM VM HostedEngine was successfully removed.Sep 27, 2017 7:15:00 PM Hosted Engine storage domain imported successfullySep 27, 2017 7:15:00 PM Storage Domain hosted_storage was attached to Data Center Default by SYSTEMSep 27, 2017 7:15:00 PM Storage Domain hosted_storage (Data Center Default) was activated by SYSTEMSep 27, 2017 7:14:57 PM The Hosted Engine Storage Domain isn't Active.
7. In the Virtual Machines tab, select the Manager virtual machine, and click Shutdown.
8. Connect to a self-hosted engine host and disable global maintenance mode:
Self-Hosted Engine Guide
54

# hosted-engine --set-maintenance --mode=none
Wait for the ovirt-ha-agent service to restart the Manager virtual machine.
9. Check the status of each host:
# hosted-engine --vm-status
Each host should have a score of 3400:
--== Host 1 status ==--
conf_on_shared_storage : FalseStatus up-to-date : TrueHostname : rhvhhe20170926h1.localdomainHost ID : 1Engine status : "health": "good", "vm": "up", "detail": "up"Score : 3400stopped : FalseLocal maintenance : Falsecrc32 : 6a5a17a7local_conf_timestamp : 7580Host timestamp : 7579
--== Host 2 status ==--
conf_on_shared_storage : FalseStatus up-to-date : TrueHostname : rhvhhe20170926h2.localdomainHost ID : 2Engine status : "reason": "vm not running on this host", "health": "bad", "vm": "down", "detail": "unknown"Score : 3400stopped : FalseLocal maintenance : Falsecrc32 : 1c87c83dlocal_conf_timestamp : 4323Host timestamp : 4323
6.4. REMOVING A HOST FROM A SELF-HOSTED ENGINEENVIRONMENT
If you wish to remove a self-hosted engine host from your environment, you will need to place the hostinto maintenance, disable the HA services, and remove the self-hosted engine configuration file.
Procedure 6.14. Removing a Host from a Self-Hosted Engine Environment
1. In the Administration Portal, click the Hosts tab. Select the host and click Maintenance to setthe host to the local maintenance mode. This action stops the ovirt-ha-agent and ovirt-ha-broker services.
CHAPTER 6. MAINTENANCE AND UPGRADING RESOURCES
55
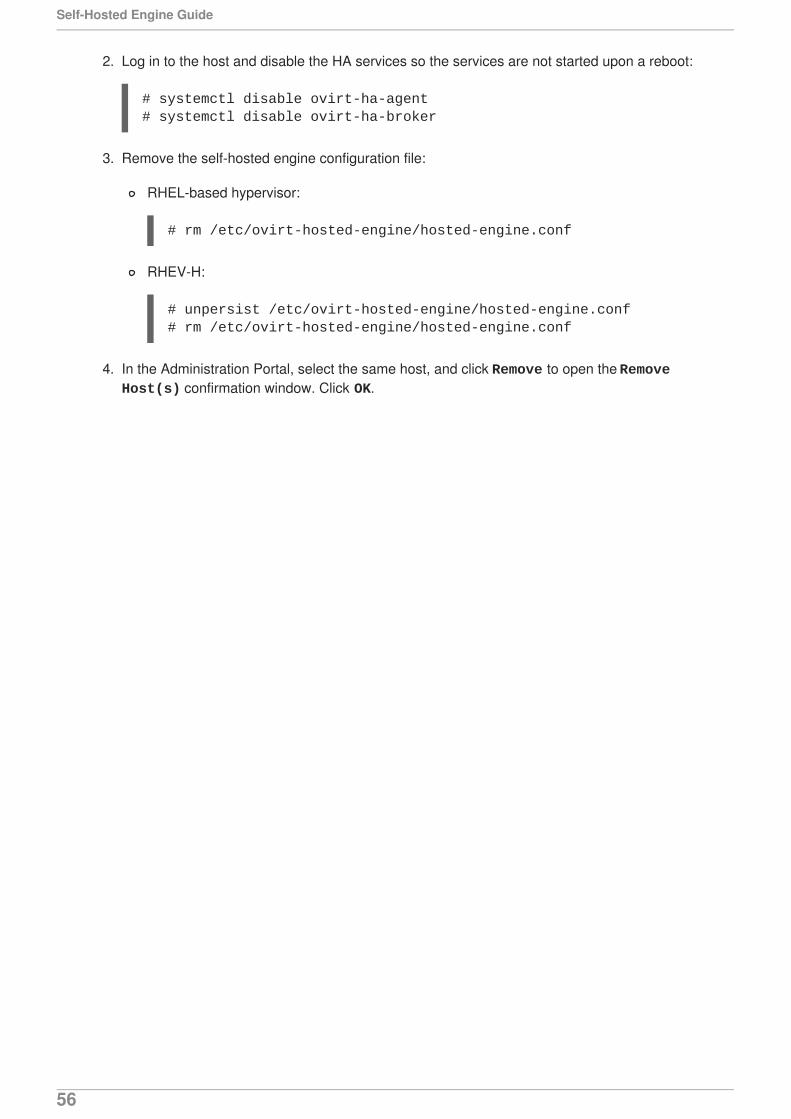
2. Log in to the host and disable the HA services so the services are not started upon a reboot:
# systemctl disable ovirt-ha-agent# systemctl disable ovirt-ha-broker
3. Remove the self-hosted engine configuration file:
RHEL-based hypervisor:
# rm /etc/ovirt-hosted-engine/hosted-engine.conf
RHEV-H:
# unpersist /etc/ovirt-hosted-engine/hosted-engine.conf# rm /etc/ovirt-hosted-engine/hosted-engine.conf
4. In the Administration Portal, select the same host, and click Remove to open the Remove Host(s) confirmation window. Click OK.
Self-Hosted Engine Guide
56

CHAPTER 7. BACKING UP AND RESTORING A RHEL-BASEDSELF-HOSTED ENVIRONMENTThe nature of the self-hosted engine, and the relationship between the hosts and the hosted-enginevirtual machine, means that backing up and restoring a self-hosted engine environment requiresadditional considerations to that of a standard Red Hat Enterprise Virtualization environment. Inparticular, the hosted-engine hosts remain in the environment at the time of backup, which can result in afailure to synchronize the new host and hosted-engine virtual machine after the environment has beenrestored.
To address this, it is recommended that one of the hosts be placed into maintenance mode prior tobackup, thereby freeing it from a virtual load. This failover host can then be used to deploy the new self-hosted engine.
If a hosted-engine host is carrying a virtual load at the time of backup, then a host with any of thematching identifiers - IP address, FQDN, or name - cannot be used to deploy a restored self-hostedengine. Conflicts in the database will prevent the host from synchronizing with the restored hosted-engine virtual machine. The failover host, however, can be removed from the restored hosted-enginevirtual machine prior to synchronization.
NOTE
A failover host at the time of backup is not strictly necessary if a new host is used todeploy the self-hosted engine. The new host must have a unique IP address, FQDN, andname so that it does not conflict with any of the hosts present in the database backup.
Procedure 7.1. Workflow for Backing Up the Self-Hosted Engine Environment
This procedure provides an example of the workflow for backing up a self-hosted engine using a failoverhost. This host can then be used later to deploy the restored self-hosted engine environment. For moreinformation on backing up the self-hosted engine, see Section 7.1, “Backing up the Self-Hosted EngineManager Virtual Machine”.
1. The engine virtual machine is running on Host 2 and the six regular virtual machines in theenvironment are balanced across the three hosts.
CHAPTER 7. BACKING UP AND RESTORING A RHEL-BASED SELF-HOSTED ENVIRONMENT
57

Place Host 1 into maintenance mode. This will migrate the virtual machines on Host 1 to theother hosts, freeing it of any virtual load and enabling it to be used as a failover host for thebackup.
2. Host 1 is in maintenance mode. The two virtual machines it previously hosted have beenmigrated to Host 3.
Use engine-backup to create backups of the environment. After the backup has been taken, Host 1 can be activated again to host virtual machines, including the engine virtual machine.
Procedure 7.2. Workflow for Restoring the Self-Hosted Engine Environment
This procedure provides an example of the workflow for restoring the self-hosted engine environmentfrom a backup. The failover host deploys the new engine virtual machine, which then restores thebackup. Directly after the backup has been restored, the failover host is still present in the Red HatEnterprise Virtualization Manager because it was in the environment when the backup was created.Removing the old failover host from the Manager enables the new host to synchronize with the enginevirtual machine and finalize deployment. For more information on restoring the self-hosted engine, seeSection 7.2, “Restoring the Self-Hosted Engine Environment”.
1. Host 1 has been used to deploy a new self-hosted engine and has restored the backup taken inthe previous example procedure. Deploying the restored environment involves additional stepsto that of a regular self-hosted engine deployment:
After Red Hat Enterprise Virtualization Manager has been installed on the engine virtualmachine, but before engine-setup is first run, restore the backup using the engine-backup tool.
After engine-setup has configured and restored the Manager, log in to the AdministrationPortal and remove Host 1, which will be present from the backup. If old Host 1 is notremoved, and is still present in the Manager when finalizing deployment on new Host 1, theengine virtual machine will not be able to synchronize with new Host 1 and the deploymentwill fail.
Self-Hosted Engine Guide
58

After Host 1 and the engine virtual machine have synchronized and the deployment has beenfinalized, the environment can be considered operational on a basic level. With only one hosted-engine host, the engine virtual machine is not highly available. However, if necessary, high-priority virtual machines can be started on Host 1.
Any standard RHEL-based hosts - hosts that are present in the environment but are not self-hosted engine hosts - that are operational will become active, and the virtual machines that wereactive at the time of backup will now be running on these hosts and available in the Manager.
2. Host 2 and Host 3 are not recoverable in their current state. These hosts need to be removedfrom the environment, and then added again to the environment using the hosted-enginedeployment script. For more information on these actions, see Section 7.2.4, “Removing Non-Operational Hosts from a Restored Self-Hosted Engine Environment” and Section 7.3, “InstallingAdditional Hosts to a Restored Self-Hosted Engine Environment”.
Host 2 and Host 3 have been re-deployed into the restored environment. The environment isnow as it was in the first image, before the backup was taken, with the exception that the enginevirtual machine is hosted on Host 1.
CHAPTER 7. BACKING UP AND RESTORING A RHEL-BASED SELF-HOSTED ENVIRONMENT
59

7.1. BACKING UP THE SELF-HOSTED ENGINE MANAGER VIRTUALMACHINE
It is recommended that you back up your self-hosted engine environment regularly. The supportedbackup method uses the engine-backup tool and can be performed without interrupting the ovirt-engine service. The engine-backup tool only allows you to back up the Red Hat EnterpriseVirtualization Manager virtual machine, but not the host that contains the Manager virtual machine orother virtual machines hosted in the environment.
Procedure 7.3. Backing up the Original Red Hat Enterprise Virtualization Manager
1. Preparing the Failover HostA failover host, one of the hosted-engine hosts in the environment, must be placed intomaintenance mode so that it has no virtual load at the time of the backup. This host can thenlater be used to deploy the restored self-hosted engine environment. Any of the hosted-enginehosts can be used as the failover host for this backup scenario, however the restore process ismore straightforward if Host 1 is used. The default name for the Host 1 host is hosted_engine_1; this was set when the hosted-engine deployment script was initially run.
a. Log in to one of the hosted-engine hosts.
b. Confirm that the hosted_engine_1 host is Host 1:
# hosted-engine --vm-status
c. Log in to the Administration Portal.
d. Click the Hosts tab.
e. Select the hosted_engine_1 host in the results list, and click Maintenance.
f. Click Ok.
Depending on the virual load of the host, it may take some time for all the virtual machines to bemigrated. Proceed to the next step after the host status has changed to Maintenance.
2. Creating a Backup of the ManagerOn the Manager virtual machine, back up the configuration settings and database content,replacing [EngineBackupFile] with the file name for the backup file, and [LogFILE] with the filename for the backup log.
# engine-backup --mode=backup --file=[EngineBackupFile] --log=[LogFILE]
3. Backing up the Files to an External ServerBack up the files to an external server. In the following example, [Storage.example.com] is thefully qualified domain name of a network storage server that will store the backup until it isneeded, and /backup/ is any designated folder or path. The backup files must be accessible torestore the configuration settings and database content.
# scp -p [EngineBackupFiles] [Storage.example.com:/backup/EngineBackupFiles]
Self-Hosted Engine Guide
60

4. Activating the Failover HostBring the hosted_engine_1 host out of maintenance mode.
a. Log in to the Administration Portal.
b. Click the Hosts tab.
c. Select hosted_engine_1 from the results list.
d. Click Activate.
You have backed up the configuration settings and database content of the Red Hat EnterpriseVirtualization Manager virtual machine.
7.2. RESTORING THE SELF-HOSTED ENGINE ENVIRONMENT
This section explains how to restore a self-hosted engine environment from a backup on a newly installedhost. The supported restore method uses the engine-backup tool.
Restoring a self-hosted engine environment involves the following key actions:
1. Create a newly installed Red Hat Enterprise Linux host and run the hosted-engine deploymentscript.
2. Restore the Red Hat Enterprise Virtualization Manager configuration settings and databasecontent in the new Manager virtual machine.
3. Remove hosted-engine hosts in a Non Operational state and re-install them into the restoredself-hosted engine environment.
Prerequisites
To restore a self-hosted engine environment, you must prepare a newly installed Red HatEnterprise Linux system on a physical host.
The operating system version of the new host and Manager must be the same as that of theoriginal host and Manager.
You must have Red Hat Subscription Manager entitlements for your new environment. For a listof the required repositories, see Subscribing to the Required Entitlements in the InstallationGuide.
The fully qualified domain name of the new Manager must be the same fully qualified domainname as that of the original Manager. Forward and reverse lookup records must both be set inDNS.
You must prepare storage for the new self-hosted engine environment to use as the Managervirtual machine's shared storage domain. This domain must be at least 60 GB. For moreinformation on preparing storage for your deployment, see the Storage chapter of theAdministration Guide.
7.2.1. Creating a New Self-Hosted Engine Environment to be Used as the RestoredEnvironment
You can restore a self-hosted engine on hardware that was used in the backed-up environment.
CHAPTER 7. BACKING UP AND RESTORING A RHEL-BASED SELF-HOSTED ENVIRONMENT
61

However, you must use the failover host for the restored deployment. The failover host, Host 1, used inSection 7.1, “Backing up the Self-Hosted Engine Manager Virtual Machine” uses the default hostname of hosted_engine_1 which is also used in this procedure. Due to the nature of the restore process for theself-hosted engine, before the final synchronization of the restored engine can take place, this failoverhost will need to be removed, and this can only be achieved if the host had no virtual load when thebackup was taken. You can also restore the backup on a separate hardware which was not used in thebacked up environment and this is not a concern.
IMPORTANT
This procedure assumes that you have a freshly installed Red Hat Enterprise Linuxsystem on a physical host, have subscribed the host to the required entitlements, andinstalled the ovirt-hosted-engine-setup package. See Section 3.1, “Subscribing to theRequired Entitlements” and Section 3.2, “Installing the Self-Hosted Engine Packages” formore information.
Procedure 7.4. Creating a New Self-Hosted Environment to be Used as the Restored Environment
1. Updating DNSUpdate your DNS so that the fully qualified domain name of the Red Hat Enterprise Virtualizationenvironment correlates to the IP address of the new Manager. In this procedure, fully qualifieddomain name was set as Manager.example.com. The fully qualified domain name provided forthe engine must be identical to that given in the engine setup of the original engine that wasbacked up.
2. Initiating Hosted Engine DeploymentOn the newly installed Red Hat Enterprise Linux host, run the hosted-engine deploymentscript. To escape the script at any time, use the CTRL+D keyboard combination to abortdeployment. If running the hosted-engine deployment script over a network, it isrecommended to use the screen window manager to avoid losing the session in case ofnetwork or terminal disruption. Install the screen package first if not installed.
# screen
# hosted-engine --deploy
3. Preparing for InitializationThe script begins by requesting confirmation to use the host as a hypervisor for use in a self-hosted engine environment.
Continuing will configure this host for serving as hypervisor and create a VM where you have to install oVirt Engine afterwards. Are you sure you want to continue? (Yes, No)[Yes]:
4. Configuring StorageSelect the type of storage to use.
During customization use CTRL-D to abort.Please specify the storage you would like to use (glusterfs, iscsi, fc, nfs3, nfs4)[nfs3]:
For NFS storage types, specify the full address, using either the FQDN or IP address, andpath name of the shared storage domain.
Self-Hosted Engine Guide
62
Please specify the full shared storage connection path to use (example: host:/path): storage.example.com:/hosted_engine/nfs
For iSCSI, specify the iSCSI portal IP address, port, user name and password, and select atarget name from the auto-detected list. You can only select one iSCSI target during thedeployment.
Please specify the iSCSI portal IP address: Please specify the iSCSI portal port [3260]: Please specify the iSCSI portal user: Please specify the iSCSI portal password:Please specify the target name (auto-detected values) [default]:
For Gluster storage, specify the full address, using either the FQDN or IP address, and pathname of the shared storage domain.
IMPORTANT
Only replica 3 Gluster storage is supported. Ensure the followingconfiguration has been made:
In the /etc/glusterfs/glusterd.vol file on all three Glusterservers, set rpc-auth-allow-insecure to on.
option rpc-auth-allow-insecure on
Configure the volume as follows:
gluster volume set volume cluster.quorum-type autogluster volume set volume network.ping-timeout 10gluster volume set volume auth.allow \*gluster volume set volume group virtgluster volume set volume storage.owner-uid 36gluster volume set volume storage.owner-gid 36gluster volume set volume server.allow-insecure on
Please specify the full shared storage connection path to use (example: host:/path): storage.example.com:/hosted_engine/gluster_volume
For Fibre Channel, the host bus adapters must be configured and connected, and the hosted-engine script will auto-detect the LUNs available. The LUNs must not contain anyexisting data.
The following luns have been found on the requested target:[1] 3514f0c5447600351 30GiB XtremIO XtremApp status: used, paths: 2 active [2] 3514f0c5447600352 30GiB XtremIO XtremApp status: used, paths: 2 active
Please select the destination LUN (1, 2) [1]:
CHAPTER 7. BACKING UP AND RESTORING A RHEL-BASED SELF-HOSTED ENVIRONMENT
63
Choose the storage domain and storage data center names to be used in the environment.
[ INFO ] Installing on first hostPlease provide storage domain name. [hosted_storage]: Local storage datacenter name is an internal name and currently will not be shown in engine's admin UI.Please enter local datacenter name [hosted_datacenter]:
5. Configuring the NetworkThe script detects possible network interface controllers (NICs) to use as a management bridgefor the environment. It then checks your firewall configuration and offers to modify it for console(SPICE or VNC) access the Manager virtual machine. Provide a pingable gateway IP address, tobe used by the ovirt-ha-agent, to help determine a host's suitability for running a Managervirtual machine.
Please indicate a nic to set rhevm bridge on: (eth1, eth0) [eth1]:iptables was detected on your computer, do you wish setup to configure it? (Yes, No)[Yes]: Please indicate a pingable gateway IP address [X.X.X.X]:
6. Configuring the New Manager Virtual MachineThe script creates a virtual machine to be configured as the new Manager virtual machine.Specify the boot device and, if applicable, the path name of the installation media, the imagealias, the CPU type, the number of virtual CPUs, and the disk size. Specify a MAC address forthe Manager virtual machine, or accept a randomly generated one. The MAC address can beused to update your DHCP server prior to installing the operating system on the Manager virtualmachine. Specify memory size and console connection type for the creation of Manager virtualmachine.
Please specify the device to boot the VM from (cdrom, disk, pxe) [cdrom]: Please specify an alias for the Hosted Engine image [hosted_engine]: The following CPU types are supported by this host: - model_Penryn: Intel Penryn Family - model_Conroe: Intel Conroe FamilyPlease specify the CPU type to be used by the VM [model_Penryn]: Please specify the number of virtual CPUs for the VM [Defaults to minimum requirement: 2]: Please specify the disk size of the VM in GB [Defaults to minimum requirement: 25]: You may specify a MAC address for the VM or accept a randomly generated default [00:16:3e:77:b2:a4]: Please specify the memory size of the VM in MB [Defaults to minimum requirement: 4096]: Please specify the console type you want to use to connect to the VM (vnc, spice) [vnc]:
7. Identifying the Name of the HostA unique name must be provided for the name of the host, to ensure that it does not conflict withother resources that will be present when the engine has been restored from the backup. Thename hosted_engine_1 can be used in this procedure because this host was placed intomaintenance mode before the environment was backed up, enabling removal of this hostbetween the restoring of the engine and the final synchronization of the host and the engine.
Self-Hosted Engine Guide
64
Enter the name which will be used to identify this host inside the Administration Portal [hosted_engine_1]:
8. Configuring the Hosted EngineSpecify a name for the self-hosted engine environment, and the password for the admin@internal user to access the Administration Portal. Provide the fully qualified domainname for the new Manager virtual machine. This procedure uses the fully qualified domain nameManager.example.com. Provide the name and TCP port number of the SMTP server, the emailaddress used to send email notifications, and a comma-separated list of email addresses toreceive these notifications.
IMPORTANT
The fully qualified domain name provided for the engine (Manager.example.com)must be the same fully qualified domain name provided when original Managerwas initially set up.
Enter 'admin@internal' user password that will be used for accessing the Administrator Portal: Confirm 'admin@internal' user password: Please provide the FQDN for the engine you would like to use.This needs to match the FQDN that you will use for the engine installation within the VM. Note: This will be the FQDN of the VM you are now going to create, it should not point to the base host or to any other existing machine. Engine FQDN: Manager.example.comPlease provide the name of the SMTP server through which we will send notifications [localhost]: Please provide the TCP port number of the SMTP server [25]: Please provide the email address from which notifications will be sent [root@localhost]: Please provide a comma-separated list of email addresses which will get notifications [root@localhost]:
9. Configuration PreviewBefore proceeding, the hosted-engine deployment script displays the configuration valuesyou have entered, and prompts for confirmation to proceed with these values.
Bridge interface : eth1Engine FQDN : Manager.example.comBridge name : rhevmSSH daemon port : 22Firewall manager : iptablesGateway address : X.X.X.XHost name for web application : hosted_engine_1Host ID : 1Image alias : hosted_engineImage size GB : 25Storage connection : storage.example.com:/hosted_engine/nfsConsole type : vncMemory size MB : 4096
CHAPTER 7. BACKING UP AND RESTORING A RHEL-BASED SELF-HOSTED ENVIRONMENT
65

MAC address : 00:16:3e:77:b2:a4Boot type : pxeNumber of CPUs : 2CPU Type : model_Penryn
Please confirm installation settings (Yes, No)[Yes]:
10. Creating the New Manager Virtual MachineThe script creates the virtual machine to be configured as the Manager virtual machine andprovides connection details. You must install an operating system on it before the hosted-engine deployment script can proceed on Hosted Engine configuration.
[ INFO ] Stage: Transaction setup[ INFO ] Stage: Misc configuration[ INFO ] Stage: Package installation[ INFO ] Stage: Misc configuration[ INFO ] Configuring libvirt[ INFO ] Configuring VDSM[ INFO ] Starting vdsmd[ INFO ] Waiting for VDSM hardware info[ INFO ] Waiting for VDSM hardware info[ INFO ] Configuring the management bridge[ INFO ] Creating Storage Domain[ INFO ] Creating Storage Pool[ INFO ] Connecting Storage Pool[ INFO ] Verifying sanlock lockspace initialization[ INFO ] Creating VM Image[ INFO ] Disconnecting Storage Pool[ INFO ] Start monitoring domain[ INFO ] Configuring VM[ INFO ] Updating hosted-engine configuration[ INFO ] Stage: Transaction commit[ INFO ] Stage: Closing up[ INFO ] Creating VMYou can now connect to the VM with the following command: /usr/bin/remote-viewer vnc://localhost:5900Use temporary password "3477XXAM" to connect to vnc console.Please note that in order to use remote-viewer you need to be able to run graphical applications.This means that if you are using ssh you have to supply the -Y flag (enables trusted X11 forwarding).Otherwise you can run the command from a terminal in your preferred desktop environment.If you cannot run graphical applications you can connect to the graphic console from another host or connect to the console using the following command:virsh -c qemu+tls://Test/system console HostedEngineIf you need to reboot the VM you will need to start it manually using the command:hosted-engine --vm-startYou can then set a temporary password using the command:hosted-engine --add-console-passwordThe VM has been started. Install the OS and shut down or reboot it. To continue please make a selection: (1) Continue setup - VM installation is complete
Self-Hosted Engine Guide
66
(2) Reboot the VM and restart installation (3) Abort setup (4) Destroy VM and abort setup (1, 2, 3, 4)[1]:
Using the naming convention of this procedure, connect to the virtual machine using VNC withthe following command:
/usr/bin/remote-viewer vnc://hosted_engine_1.example.com:5900
11. Installing the Virtual Machine Operating SystemConnect to Manager virtual machine and install a Red Hat Enterprise Linux 6.7 operatingsystem.
12. Synchronizing the Host and the ManagerReturn to the host and continue the hosted-engine deployment script by selecting option 1:
(1) Continue setup - VM installation is complete
Waiting for VM to shut down...[ INFO ] Creating VMYou can now connect to the VM with the following command: /usr/bin/remote-viewer vnc://localhost:5900Use temporary password "3477XXAM" to connect to vnc console.Please note that in order to use remote-viewer you need to be able to run graphical applications.This means that if you are using ssh you have to supply the -Y flag (enables trusted X11 forwarding).Otherwise you can run the command from a terminal in your preferred desktop environment.If you cannot run graphical applications you can connect to the graphic console from another host or connect to the console using the following command:virsh -c qemu+tls://Test/system console HostedEngineIf you need to reboot the VM you will need to start it manually using the command:hosted-engine --vm-startYou can then set a temporary password using the command:hosted-engine --add-console-passwordPlease install and setup the engine in the VM.You may also be interested in subscribing to "agent" RHN/Satellite channel and installing rhevm-guest-agent-common package in the VM.To continue make a selection from the options below: (1) Continue setup - engine installation is complete (2) Power off and restart the VM (3) Abort setup (4) Destroy VM and abort setup (1, 2, 3, 4)[1]:
13. Installing the ManagerConnect to new Manager virtual machine, ensure the latest versions of all installed packages arein use, and install the rhevm packages.
CHAPTER 7. BACKING UP AND RESTORING A RHEL-BASED SELF-HOSTED ENVIRONMENT
67

# yum update
# yum install rhevm
14. Install Reports and the Data WarehouseIf you are also restoring Reports and the Data Warehouse, install the rhevm-reports-setup andrhevm-dwh-setup packages.
# yum install rhevm-reports-setup rhevm-dwh-setup
After the packages have completed installation, you will be able to continue with restoring the self-hostedengine Manager.
7.2.2. Restoring the Self-Hosted Engine Manager
The following procedure outlines how to use the engine-backup tool to automate the restore of theconfiguration settings and database content for a backed-up self-hosted engine Manager virtualmachine, Reports, and Data Warehouse. The procedure only applies to components that wereconfigured automatically during the initial engine-setup. If you configured the database(s) manuallyduring engine-setup, follow the instructions at Section 7.2.3, “Restoring the Self-Hosted EngineManager Manually” to restore the back-up environment manually.
Procedure 7.5. Restoring the Self-Hosted Engine Manager
1. Secure copy the backup files to the new Manager virtual machine. This example copies the filesfrom a network storage server to which the files were copied in Section 7.1, “Backing up theSelf-Hosted Engine Manager Virtual Machine”. In this example, Storage.example.com is the fullyqualified domain name of the storage server, /backup/EngineBackupFiles is the designated filepath for the backup files on the storage server, and /backup/ is the path to which the files will becopied on the new Manager.
# scp -p Storage.example.com:/backup/EngineBackupFiles /backup/
2. Use the engine-backup tool to restore a complete backup.
If you are only restoring the Manager, run:
# engine-backup --mode=restore --file=file_name --log=log_file_name --provision-db --restore-permissions
If you are restoring the Manager, Reports, and Data Warehouse, run:
# engine-backup --mode=restore --file=file_name --log=log_file_name --provision-db --provision-dwh-db --provision-reports-db --restore-permissions
If successful, the following output displays:
You should now run engine-setup.Done.
Self-Hosted Engine Guide
68

3. Configure the restored Manager virtual machine. This process identifies the existingconfiguration settings and database content. Confirm the settings. Upon completion, the setupprovides an SSH fingerprint and an internal Certificate Authority hash.
# engine-setup
[ INFO ] Stage: Initializing[ INFO ] Stage: Environment setupConfiguration files: ['/etc/ovirt-engine-setup.conf.d/10-packaging.conf', '/etc/ovirt-engine-setup.conf.d/20-setup-ovirt-post.conf']Log file: /var/log/ovirt-engine/setup/ovirt-engine-setup-20140304075238.logVersion: otopi-1.1.2 (otopi-1.1.2-1.el6ev)[ INFO ] Stage: Environment packages setup[ INFO ] Yum Downloading: rhel-65-zstream/primary_db 2.8 M(70%)[ INFO ] Stage: Programs detection[ INFO ] Stage: Environment setup[ INFO ] Stage: Environment customization --== PACKAGES ==-- [ INFO ] Checking for product updates...[ INFO ] No product updates found --== NETWORK CONFIGURATION ==-- Setup can automatically configure the firewall on this system.Note: automatic configuration of the firewall may overwrite current settings.Do you want Setup to configure the firewall? (Yes, No) [Yes]: [ INFO ] iptables will be configured as firewall manager. --== DATABASE CONFIGURATION ==-- --== OVIRT ENGINE CONFIGURATION ==-- Skipping storing options as database already prepared --== PKI CONFIGURATION ==-- PKI is already configured --== APACHE CONFIGURATION ==-- --== SYSTEM CONFIGURATION ==-- --== END OF CONFIGURATION ==-- [ INFO ] Stage: Setup validation[ INFO ] Cleaning stale zombie tasks --== CONFIGURATION PREVIEW ==--
CHAPTER 7. BACKING UP AND RESTORING A RHEL-BASED SELF-HOSTED ENVIRONMENT
69

Database name : engine Database secured connection : False Database host : X.X.X.X Database user name : engine Database host name validation : False Database port : 5432 NFS setup : True Firewall manager : iptables Update Firewall : True Configure WebSocket Proxy : True Host FQDN : Manager.example.com NFS mount point : /var/lib/exports/iso Set application as default page : True Configure Apache SSL : True Please confirm installation settings (OK, Cancel) [OK]:
4. Removing the Host from the Restored EnvironmentIf the deployment of the restored self-hosted engine is on new hardware that has a unique namenot present in the backed-up engine, skip this step. This step is only applicable to deploymentsoccurring on the failover host, hosted_engine_1. Because this host was present in theenvironment at time the backup was created, it maintains a presence in the restored engine andmust first be removed from the environment before final synchronization can take place.
a. Log in to the Administration Portal.
b. Click the Hosts tab. The failover host, hosted_engine_1, will be in maintenance modeand without a virtual load, as this was how it was prepared for the backup.
c. Click Remove.
d. Click Ok.
NOTE
If the host you are trying to remove becomes non-operational, see Section 7.2.4,“Removing Non-Operational Hosts from a Restored Self-Hosted EngineEnvironment” for instructions on how to force the removal of a host.
5. Synchronizing the Host and the ManagerReturn to the host and continue the hosted-engine deployment script by selecting option 1:
(1) Continue setup - engine installation is complete
[ INFO ] Engine replied: DB Up!Welcome to Health Status![ INFO ] Waiting for the host to become operational in the engine. This may take several minutes...[ INFO ] Still waiting for VDSM host to become operational...
At this point, hosted_engine_1 will become visible in the Administration Portal with Installing and Initializing states before entering a Non Operational state. The hostwill continue to wait for the VDSM host to become operational until it eventually times out. Thishappens because another host in the environment maintains the Storage Pool Manager (SPM)
Self-Hosted Engine Guide
70

role and hosted_engine_1 cannot interact with the storage domain because the SPM host isin a Non Responsive state. When this process times out, you are prompted to shut down thevirtual machine to complete the deployment. When deployment is complete, the host can bemanually placed into maintenance mode and activated through the Administration Portal.
[ INFO ] Still waiting for VDSM host to become operational...[ ERROR ] Timed out while waiting for host to start. Please check the logs.[ ERROR ] Unable to add hosted_engine_2 to the manager Please shutdown the VM allowing the system to launch it as a monitored service. The system will wait until the VM is down.
6. Shut down the new Manager virtual machine.
# shutdown -h now
7. Return to the host to confirm it has detected that the Manager virtual machine is down.
[ INFO ] Enabling and starting HA services Hosted Engine successfully set up[ INFO ] Stage: Clean up[ INFO ] Stage: Pre-termination[ INFO ] Stage: Termination
8. Activate the host.
a. Log in to the Administration Portal.
b. Click the Hosts tab.
c. Select hosted_engine_1 and click the Maintenance button. The host may take severalminutes before it enters maintenance mode.
d. Click the Activate button.
Once active, hosted_engine_1 immediately contends for SPM, and the storage domain anddata center become active.
9. Migrate virtual machines to the active host by manually fencing the Non Responsive hosts. Inthe Administration Portal, right-click the hosts and select Confirm 'Host has been Rebooted'.
Any virtual machines that were running on that host at the time of the backup will now beremoved from that host, and move from an Unknown state to a Down state. These virtualmachines can now be run on hosted_engine_1. The host that was fenced can now beforcefully removed using the REST API.
The environment has now been restored to a point where hosted_engine_1 is active and is able to runvirtual machines in the restored environment. The remaining hosted-engine hosts in Non Operationalstate can now be removed and then re-installed into the environment.
CHAPTER 7. BACKING UP AND RESTORING A RHEL-BASED SELF-HOSTED ENVIRONMENT
71

NOTE
If the Manager database is restored successfully, but the Manager virtual machineappears to be Down and cannot be migrated to another self-hosted engine host, you canenable a new Manager virtual machine and remove the dead Manager virtual machinefrom the environment by following the steps provided inhttps://access.redhat.com/solutions/1517683.
7.2.3. Restoring the Self-Hosted Engine Manager Manually
The following procedure outlines how to manually restore the configuration settings and databasecontent for a backed-up self-hosted engine Manager virtual machine.
Procedure 7.6. Restoring the Self-Hosted Engine Manager
1. Manually create an empty database to which the database content in the backup can berestored. The following steps must be performed on the machine where the database is to behosted.
1. If the database is to be hosted on a machine other than the Manager virtual machine, installthe postgresql-server package. This step is not required if the database is to be hosted onthe Manager virtual machine because this package is included with the rhevm package.
# yum install postgresql-server
2. Initialize the postgresql database, start the postgresql service, and ensure this servicestarts on boot:
# service postgresql initdb# service postgresql start# chkconfig postgresql on
3. Enter the postgresql command line:
# su postgres$ psql
4. Create the engine user:
postgres=# create role engine with login encrypted password 'password';
If you are also restoring the Reports and Data Warehouse, create the ovirt_engine_reports and ovirt_engine_history users on the relevant host:
postgres=# create role ovirt_engine_reports with login encrypted password 'password';
postgres=# create role ovirt_engine_history with login encrypted password 'password';
5. Create the new database:
Self-Hosted Engine Guide
72
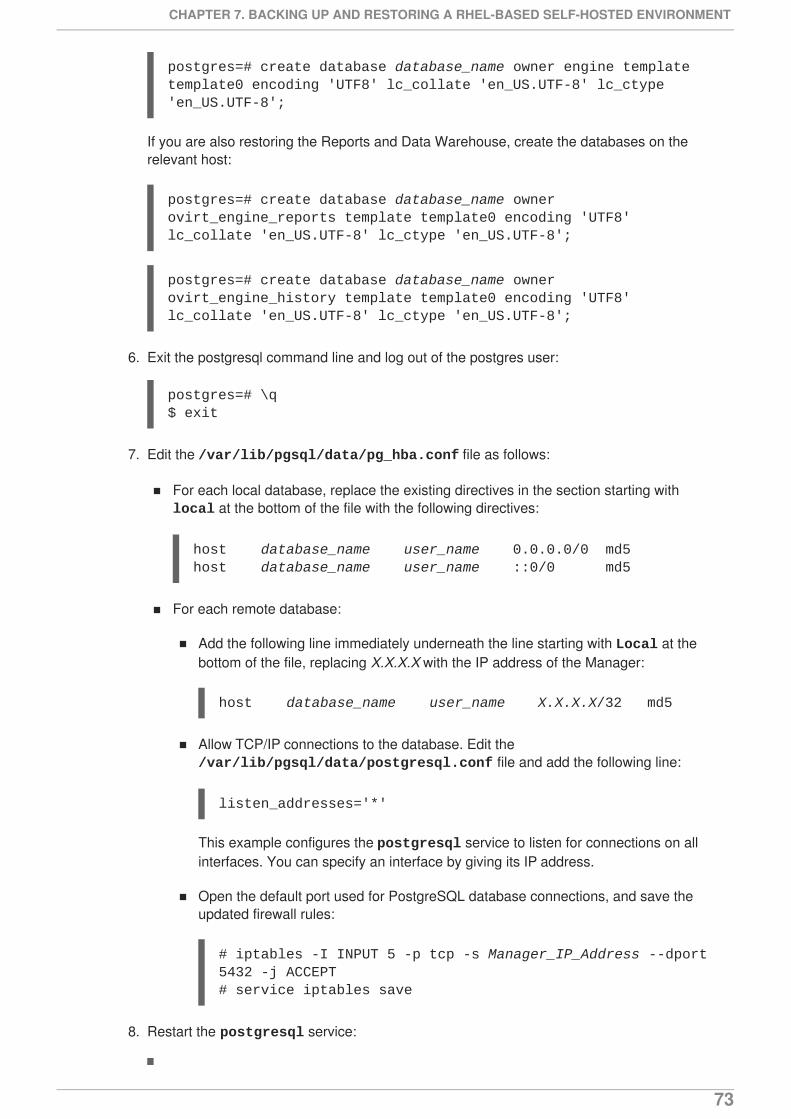
postgres=# create database database_name owner engine template template0 encoding 'UTF8' lc_collate 'en_US.UTF-8' lc_ctype 'en_US.UTF-8';
If you are also restoring the Reports and Data Warehouse, create the databases on therelevant host:
postgres=# create database database_name owner ovirt_engine_reports template template0 encoding 'UTF8' lc_collate 'en_US.UTF-8' lc_ctype 'en_US.UTF-8';
postgres=# create database database_name owner ovirt_engine_history template template0 encoding 'UTF8' lc_collate 'en_US.UTF-8' lc_ctype 'en_US.UTF-8';
6. Exit the postgresql command line and log out of the postgres user:
postgres=# \q$ exit
7. Edit the /var/lib/pgsql/data/pg_hba.conf file as follows:
For each local database, replace the existing directives in the section starting with local at the bottom of the file with the following directives:
host database_name user_name 0.0.0.0/0 md5host database_name user_name ::0/0 md5
For each remote database:
Add the following line immediately underneath the line starting with Local at thebottom of the file, replacing X.X.X.X with the IP address of the Manager:
host database_name user_name X.X.X.X/32 md5
Allow TCP/IP connections to the database. Edit the /var/lib/pgsql/data/postgresql.conf file and add the following line:
listen_addresses='*'
This example configures the postgresql service to listen for connections on allinterfaces. You can specify an interface by giving its IP address.
Open the default port used for PostgreSQL database connections, and save theupdated firewall rules:
# iptables -I INPUT 5 -p tcp -s Manager_IP_Address --dport 5432 -j ACCEPT# service iptables save
8. Restart the postgresql service:
CHAPTER 7. BACKING UP AND RESTORING A RHEL-BASED SELF-HOSTED ENVIRONMENT
73
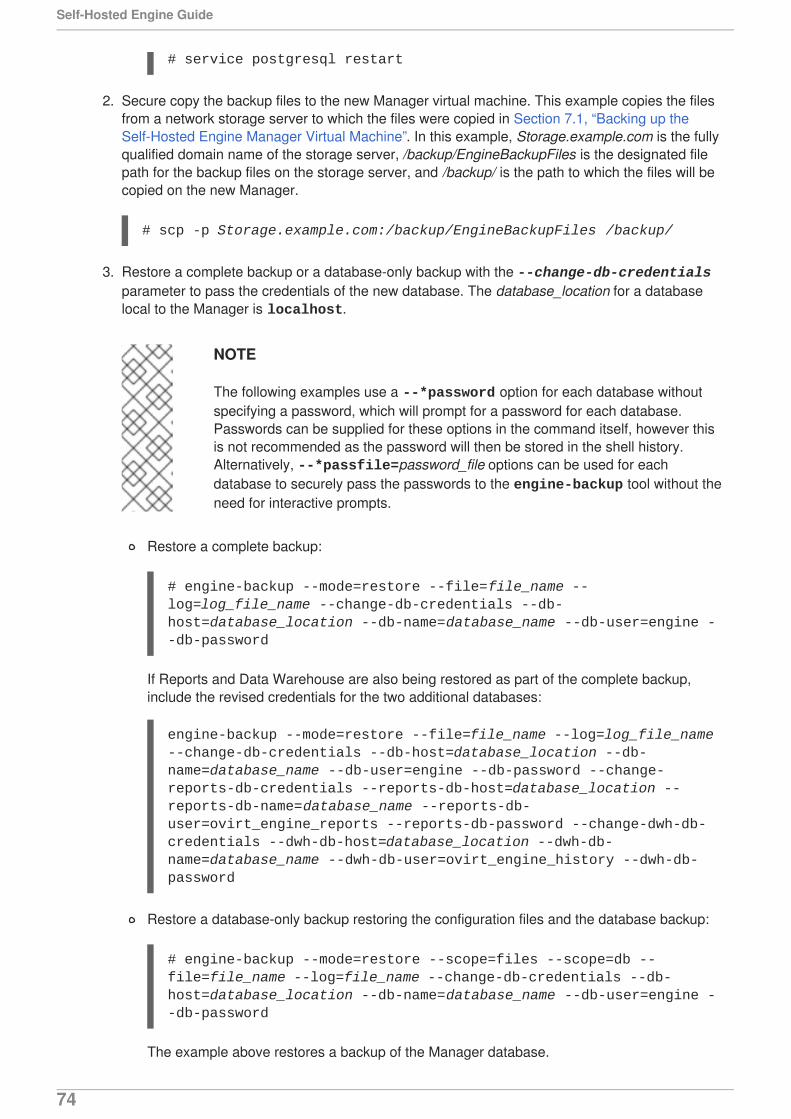
# service postgresql restart
2. Secure copy the backup files to the new Manager virtual machine. This example copies the filesfrom a network storage server to which the files were copied in Section 7.1, “Backing up theSelf-Hosted Engine Manager Virtual Machine”. In this example, Storage.example.com is the fullyqualified domain name of the storage server, /backup/EngineBackupFiles is the designated filepath for the backup files on the storage server, and /backup/ is the path to which the files will becopied on the new Manager.
# scp -p Storage.example.com:/backup/EngineBackupFiles /backup/
3. Restore a complete backup or a database-only backup with the --change-db-credentialsparameter to pass the credentials of the new database. The database_location for a databaselocal to the Manager is localhost.
NOTE
The following examples use a --*password option for each database withoutspecifying a password, which will prompt for a password for each database.Passwords can be supplied for these options in the command itself, however thisis not recommended as the password will then be stored in the shell history.Alternatively, --*passfile=password_file options can be used for eachdatabase to securely pass the passwords to the engine-backup tool without theneed for interactive prompts.
Restore a complete backup:
# engine-backup --mode=restore --file=file_name --log=log_file_name --change-db-credentials --db-host=database_location --db-name=database_name --db-user=engine --db-password
If Reports and Data Warehouse are also being restored as part of the complete backup,include the revised credentials for the two additional databases:
engine-backup --mode=restore --file=file_name --log=log_file_name --change-db-credentials --db-host=database_location --db-name=database_name --db-user=engine --db-password --change-reports-db-credentials --reports-db-host=database_location --reports-db-name=database_name --reports-db-user=ovirt_engine_reports --reports-db-password --change-dwh-db-credentials --dwh-db-host=database_location --dwh-db-name=database_name --dwh-db-user=ovirt_engine_history --dwh-db-password
Restore a database-only backup restoring the configuration files and the database backup:
# engine-backup --mode=restore --scope=files --scope=db --file=file_name --log=file_name --change-db-credentials --db-host=database_location --db-name=database_name --db-user=engine --db-password
The example above restores a backup of the Manager database.
Self-Hosted Engine Guide
74

# engine-backup --mode=restore --scope=files --scope=reportsdb --file=file_name --log=file_name --change-reports-db-credentials --reports-db-host=database_location --reports-db-name=database_name --reports-db-user=ovirt_engine_reports --reports-db-password
The example above restores a backup of the Reports database.
# engine-backup --mode=restore --scope=files --scope=dwhdb --file=file_name --log=file_name --change-dwh-db-credentials --dwh-db-host=database_location --dwh-db-name=database_name --dwh-db-user=ovirt_engine_history --dwh-db-password
The example above restores a backup of the Data Warehouse database.
If successful, the following output displays:
You should now run engine-setup.Done.
4. Configure the restored Manager virtual machine. This process identifies the existingconfiguration settings and database content. Confirm the settings. Upon completion, the setupprovides an SSH fingerprint and an internal Certificate Authority hash.
# engine-setup
[ INFO ] Stage: Initializing[ INFO ] Stage: Environment setupConfiguration files: ['/etc/ovirt-engine-setup.conf.d/10-packaging.conf', '/etc/ovirt-engine-setup.conf.d/20-setup-ovirt-post.conf']Log file: /var/log/ovirt-engine/setup/ovirt-engine-setup-20140304075238.logVersion: otopi-1.1.2 (otopi-1.1.2-1.el6ev)[ INFO ] Stage: Environment packages setup[ INFO ] Yum Downloading: rhel-65-zstream/primary_db 2.8 M(70%)[ INFO ] Stage: Programs detection[ INFO ] Stage: Environment setup[ INFO ] Stage: Environment customization --== PACKAGES ==-- [ INFO ] Checking for product updates...[ INFO ] No product updates found --== NETWORK CONFIGURATION ==-- Setup can automatically configure the firewall on this system.Note: automatic configuration of the firewall may overwrite current settings.Do you want Setup to configure the firewall? (Yes, No) [Yes]: [ INFO ] iptables will be configured as firewall manager. --== DATABASE CONFIGURATION ==--
CHAPTER 7. BACKING UP AND RESTORING A RHEL-BASED SELF-HOSTED ENVIRONMENT
75

--== OVIRT ENGINE CONFIGURATION ==-- Skipping storing options as database already prepared --== PKI CONFIGURATION ==-- PKI is already configured --== APACHE CONFIGURATION ==-- --== SYSTEM CONFIGURATION ==-- --== END OF CONFIGURATION ==-- [ INFO ] Stage: Setup validation[ INFO ] Cleaning stale zombie tasks --== CONFIGURATION PREVIEW ==-- Database name : engine Database secured connection : False Database host : X.X.X.X Database user name : engine Database host name validation : False Database port : 5432 NFS setup : True Firewall manager : iptables Update Firewall : True Configure WebSocket Proxy : True Host FQDN : Manager.example.com NFS mount point : /var/lib/exports/iso Set application as default page : True Configure Apache SSL : True Please confirm installation settings (OK, Cancel) [OK]:
5. Removing the Host from the Restored EnvironmentIf the deployment of the restored self-hosted engine is on new hardware that has a unique namenot present in the backed-up engine, skip this step. This step is only applicable to deploymentsoccurring on the failover host, hosted_engine_1. Because this host was present in theenvironment at time the backup was created, it maintains a presence in the restored engine andmust first be removed from the environment before final synchronization can take place.
a. Log in to the Administration Portal.
b. Click the Hosts tab. The failover host, hosted_engine_1, will be in maintenance modeand without a virtual load, as this was how it was prepared for the backup.
c. Click Remove.
d. Click Ok.
6. Synchronizing the Host and the Manager
Self-Hosted Engine Guide
76
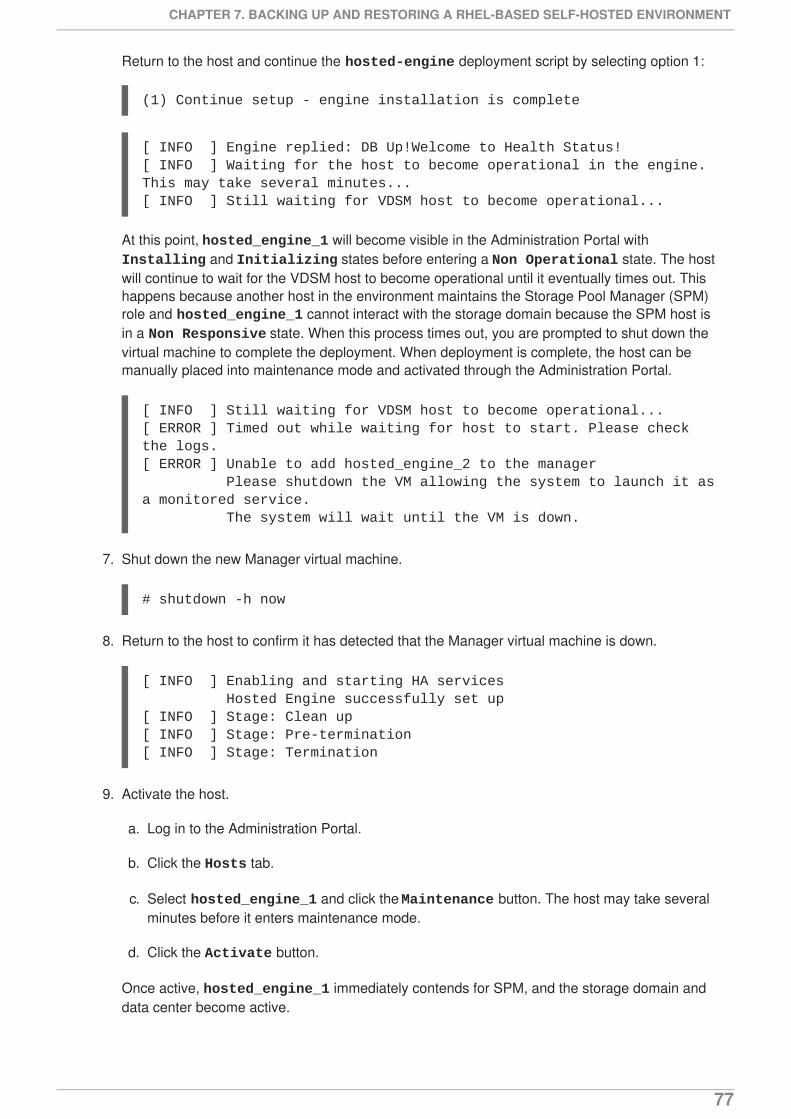
Return to the host and continue the hosted-engine deployment script by selecting option 1:
(1) Continue setup - engine installation is complete
[ INFO ] Engine replied: DB Up!Welcome to Health Status![ INFO ] Waiting for the host to become operational in the engine. This may take several minutes...[ INFO ] Still waiting for VDSM host to become operational...
At this point, hosted_engine_1 will become visible in the Administration Portal with Installing and Initializing states before entering a Non Operational state. The hostwill continue to wait for the VDSM host to become operational until it eventually times out. Thishappens because another host in the environment maintains the Storage Pool Manager (SPM)role and hosted_engine_1 cannot interact with the storage domain because the SPM host isin a Non Responsive state. When this process times out, you are prompted to shut down thevirtual machine to complete the deployment. When deployment is complete, the host can bemanually placed into maintenance mode and activated through the Administration Portal.
[ INFO ] Still waiting for VDSM host to become operational...[ ERROR ] Timed out while waiting for host to start. Please check the logs.[ ERROR ] Unable to add hosted_engine_2 to the manager Please shutdown the VM allowing the system to launch it as a monitored service. The system will wait until the VM is down.
7. Shut down the new Manager virtual machine.
# shutdown -h now
8. Return to the host to confirm it has detected that the Manager virtual machine is down.
[ INFO ] Enabling and starting HA services Hosted Engine successfully set up[ INFO ] Stage: Clean up[ INFO ] Stage: Pre-termination[ INFO ] Stage: Termination
9. Activate the host.
a. Log in to the Administration Portal.
b. Click the Hosts tab.
c. Select hosted_engine_1 and click the Maintenance button. The host may take severalminutes before it enters maintenance mode.
d. Click the Activate button.
Once active, hosted_engine_1 immediately contends for SPM, and the storage domain anddata center become active.
CHAPTER 7. BACKING UP AND RESTORING A RHEL-BASED SELF-HOSTED ENVIRONMENT
77

10. Migrate virtual machines to the active host by manually fencing the Non Responsive hosts. Inthe Administration Portal, right-click the hosts and select Confirm 'Host has been Rebooted'.
Any virtual machines that were running on that host at the time of the backup will now beremoved from that host, and move from an Unknown state to a Down state. These virtualmachines can now be run on hosted_engine_1. The host that was fenced can now beforcefully removed using the REST API.
The environment has now been restored to a point where hosted_engine_1 is active and is able to runvirtual machines in the restored environment. The remaining hosted-engine hosts in Non Operationalstate can now be removed and then re-installed into the environment.
NOTE
If the Manager database is restored successfully, but the Manager virtual machineappears to be Down and cannot be migrated to another self-hosted engine host, you canenable a new Manager virtual machine and remove the dead Manager virtual machinefrom the environment by following the steps provided inhttps://access.redhat.com/solutions/1517683.
7.2.4. Removing Non-Operational Hosts from a Restored Self-Hosted EngineEnvironment
Once a host has been fenced in the Administration Portal, it can be forcefully removed with a REST APIrequest. This procedure will use cURL, a command line interface for sending requests to HTTP servers.Most Linux distributions include cURL. This procedure will connect to the Manager virtual machine toperform the relevant requests.
1. Fencing the Non-Operational HostIn the Administration Portal, right-click the hosts and select Confirm 'Host has been Rebooted'.
Any virtual machines that were running on that host at the time of the backup will now beremoved from that host, and move from an Unknown state to a Down state. The host that wasfenced can now be forcefully removed using the REST API.
2. Retrieving the Manager Certificate AuthorityConnect to the Manager virtual machine and use the command line to perform the followingrequests with cURL.
Use a GET request to retrieve the Manager Certificate Authority (CA) certificate for use in allfuture API requests. In the following example, the --output option is used to designate the filehosted-engine.ca as the output for the Manager CA certificate. The --insecure option meansthat this initial request will be without a certificate.
# curl --output hosted-engine.ca --insecure https://[Manager.example.com]/ca.crt
3. Retrieving the GUID of the Host to be RemovedUse a GET request on the hosts collection to retrieve the Global Unique Identifier (GUID) for thehost to be removed. The following example includes the Manager CA certificate file, and usesthe admin@internal user for authentication, the password for which will be prompted once the
Self-Hosted Engine Guide
78

command is executed.
# curl --request GET --cacert hosted-engine.ca --user admin@internal https://[Manager.example.com]/api/hosts
This request returns the details of all of the hosts in the environment. The host GUID is ahexadecimal string associated with the host name. For more information on the Red HatEnterprise Virtualization REST API, see the Red Hat Enterprise Virtualization REST API Guide.
4. Removing the Fenced HostUse a DELETE request using the GUID of the fenced host to remove the host from theenvironment. In addition to the previously used options this example specifies headers to specifythat the request is to be sent and returned using eXtensible Markup Language (XML), and thebody in XML that sets the force action to be true.
curl --request DELETE --cacert hosted-engine.ca --user admin@internal --header "Content-Type: application/xml" --header "Accept: application/xml" --data "<action><force>true</force></action>" https://[Manager.example.com]/api/hosts/ecde42b0-de2f-48fe-aa23-1ebd5196b4a5
This DELETE request can be used to removed every fenced host in the self-hosted engineenvironment, as long as the appropriate GUID is specified.
Once the host has been removed, it can be re-installed to the self-hosted engine environment.
7.3. INSTALLING ADDITIONAL HOSTS TO A RESTORED SELF-HOSTEDENGINE ENVIRONMENT
Re-installing hosted-engine hosts that were present in a restored self-hosted engine environment at thetime of the backup is slightly different to adding new hosts. Re-installing hosts will encounter the sameVDSM timeout as the first host when it synchronized with the engine.
Prerequisites
Prepare a physical host to be used as an additional self-hosted engine host. You can use afreshly installed Red Hat Enterprise Linux host or a self-hosted engine host from the backed upenvironment. If you are using a freshly installed host, subscribe the host to the requiredentitlements and install ovirt-hosted-engine-setup. See Section 3.1, “Subscribing to theRequired Entitlements”. If you are resuing a self-hosted engine host, remove the self-hostedengine configuration. See Section 6.4, “Removing a Host from a Self-Hosted EngineEnvironment”.
Procedure 7.7. Adding Additional Self-Hosted Engine Hosts
1. Install the ovirt-hosted-engine-setup package.
# yum install ovirt-hosted-engine-setup
2. Configure the host with the deployment command.
# hosted-engine --deploy
CHAPTER 7. BACKING UP AND RESTORING A RHEL-BASED SELF-HOSTED ENVIRONMENT
79

If running the hosted-engine deployment script over a network, it is recommended to use the screen window manager to avoid losing the session in case of network or terminal disruption.Install the screen package first if not installed.
# screen
# hosted-engine --deploy
3. Preparing for InitializationThe script begins by requesting confirmation to use the host as a hypervisor for use in a self-hosted engine environment.
Continuing will configure this host for serving as hypervisor and create a VM where you have to install oVirt Engine afterwards. Are you sure you want to continue? (Yes, No)[Yes]:
4. Configuring StorageSelect the type of storage to use.
During customization use CTRL-D to abort.Please specify the storage you would like to use (iscsi, nfs3, nfs4)[nfs3]:
For NFS storage types, specify the full address, using either the FQDN or IP address, andpath name of the shared storage domain.
Please specify the full shared storage connection path to use (example: host:/path): storage.example.com:/hosted_engine/nfs
For iSCSI, specify the iSCSI portal IP address, port, user name and password, and select atarget name from the auto-detected list:
Please specify the iSCSI portal IP address: Please specify the iSCSI portal port [3260]: Please specify the iSCSI portal user: Please specify the iSCSI portal password:Please specify the target name (auto-detected values) [default]:
5. Detecting the Self-Hosted EngineThe hosted-engine script detects that the shared storage is being used and asks if this is anadditional host setup. You are then prompted for the host ID, which must be an integer notalready assigned to a host in the environment.
The specified storage location already contains a data domain. Is this an additional host setup (Yes, No)[Yes]? [ INFO ] Installing on additional hostPlease specify the Host ID [Must be integer, default: 2]:
6. Configuring the SystemThe hosted-engine script uses the answer file generated by the original hosted-engine setup.To achieve this, the script requires the FQDN or IP address and the password of the root userof that host so as to access and secure-copy the answer file to the additional host.
Self-Hosted Engine Guide
80
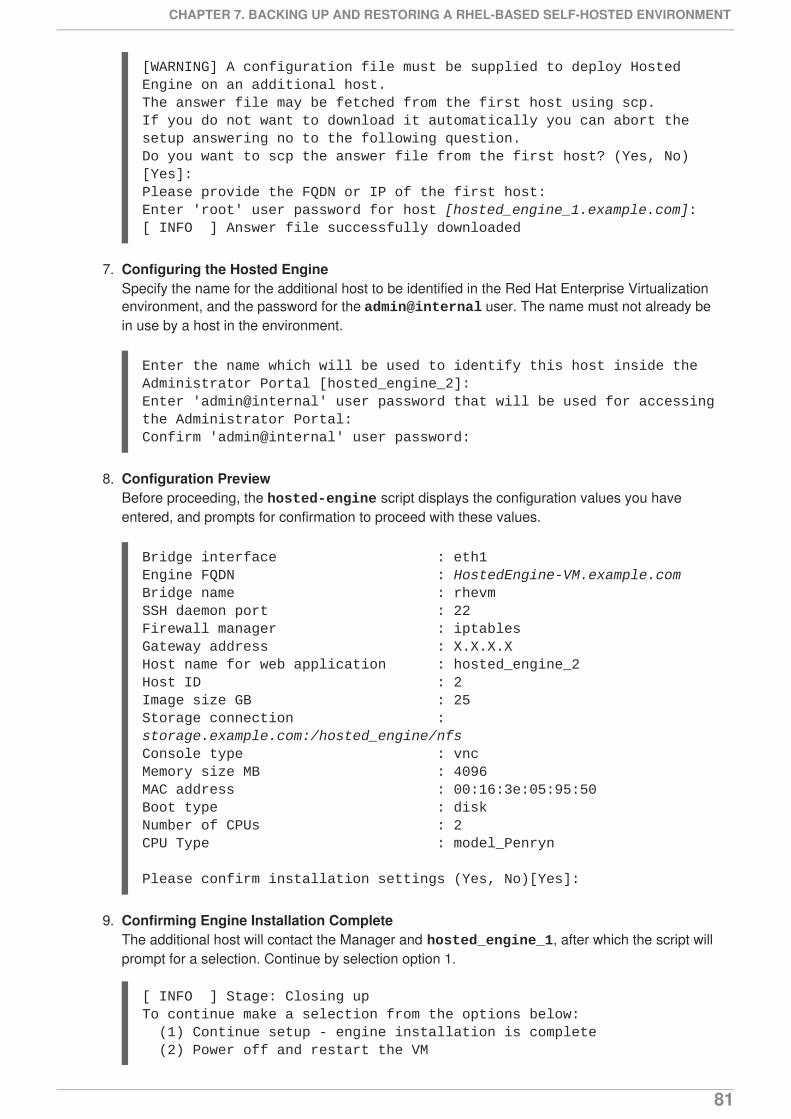
[WARNING] A configuration file must be supplied to deploy Hosted Engine on an additional host.The answer file may be fetched from the first host using scp.If you do not want to download it automatically you can abort the setup answering no to the following question.Do you want to scp the answer file from the first host? (Yes, No)[Yes]: Please provide the FQDN or IP of the first host: Enter 'root' user password for host [hosted_engine_1.example.com]: [ INFO ] Answer file successfully downloaded
7. Configuring the Hosted EngineSpecify the name for the additional host to be identified in the Red Hat Enterprise Virtualizationenvironment, and the password for the admin@internal user. The name must not already bein use by a host in the environment.
Enter the name which will be used to identify this host inside the Administrator Portal [hosted_engine_2]: Enter 'admin@internal' user password that will be used for accessing the Administrator Portal: Confirm 'admin@internal' user password:
8. Configuration PreviewBefore proceeding, the hosted-engine script displays the configuration values you haveentered, and prompts for confirmation to proceed with these values.
Bridge interface : eth1Engine FQDN : HostedEngine-VM.example.comBridge name : rhevmSSH daemon port : 22Firewall manager : iptablesGateway address : X.X.X.XHost name for web application : hosted_engine_2Host ID : 2Image size GB : 25Storage connection : storage.example.com:/hosted_engine/nfsConsole type : vncMemory size MB : 4096MAC address : 00:16:3e:05:95:50Boot type : diskNumber of CPUs : 2CPU Type : model_Penryn Please confirm installation settings (Yes, No)[Yes]:
9. Confirming Engine Installation CompleteThe additional host will contact the Manager and hosted_engine_1, after which the script willprompt for a selection. Continue by selection option 1.
[ INFO ] Stage: Closing upTo continue make a selection from the options below: (1) Continue setup - engine installation is complete (2) Power off and restart the VM
CHAPTER 7. BACKING UP AND RESTORING A RHEL-BASED SELF-HOSTED ENVIRONMENT
81

(3) Abort setup (4) Destroy VM and abort setup (1, 2, 3, 4)[1]
10. [ INFO ] Engine replied: DB Up!Welcome to Health Status![ INFO ] Waiting for the host to become operational in the engine. This may take several minutes...
At this point, the host will become visible in the Administration Portal with Installing and Initializing states before entering a Non Operational state. The host will continue towait for VDSM host to become operational until it eventually times out.
[ INFO ] Still waiting for VDSM host to become operational...[ INFO ] Still waiting for VDSM host to become operational...[ ERROR ] Timed out while waiting for host to start. Please check the logs.[ ERROR ] Unable to add hosted_engine_1 to the manager[ INFO ] Enabling and starting HA services Hosted Engine successfully set up[ INFO ] Stage: Clean up[ INFO ] Generating answer file '/etc/ovirt-hosted-engine/answers.conf'[ INFO ] Stage: Pre-termination[ INFO ] Stage: Termination
11. Activate the host.
a. Log in to the Administration Portal.
b. Click the Hosts tab and select the host to activate.
c. Click the Activate button.
The host is now able to host the Manager virtual machine, and other virtual machines running in the self-hosted engine environment.
Self-Hosted Engine Guide
82
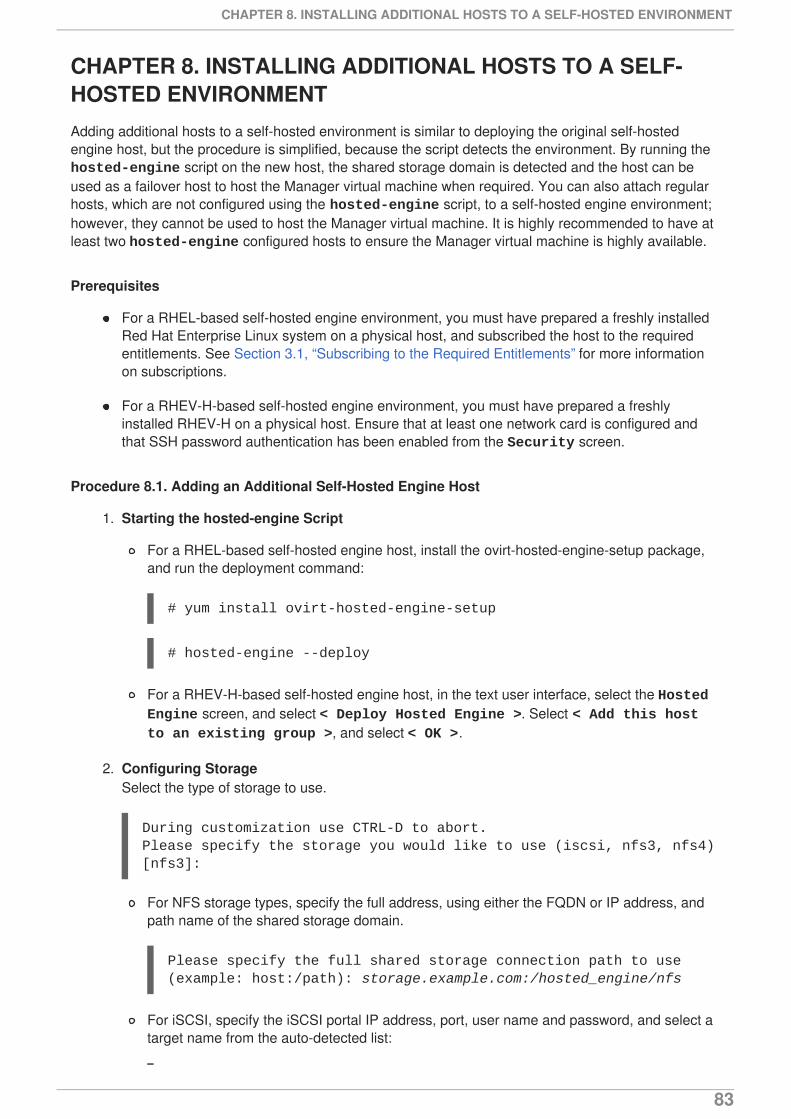
CHAPTER 8. INSTALLING ADDITIONAL HOSTS TO A SELF-HOSTED ENVIRONMENTAdding additional hosts to a self-hosted environment is similar to deploying the original self-hostedengine host, but the procedure is simplified, because the script detects the environment. By running the hosted-engine script on the new host, the shared storage domain is detected and the host can beused as a failover host to host the Manager virtual machine when required. You can also attach regularhosts, which are not configured using the hosted-engine script, to a self-hosted engine environment;however, they cannot be used to host the Manager virtual machine. It is highly recommended to have atleast two hosted-engine configured hosts to ensure the Manager virtual machine is highly available.
Prerequisites
For a RHEL-based self-hosted engine environment, you must have prepared a freshly installedRed Hat Enterprise Linux system on a physical host, and subscribed the host to the requiredentitlements. See Section 3.1, “Subscribing to the Required Entitlements” for more informationon subscriptions.
For a RHEV-H-based self-hosted engine environment, you must have prepared a freshlyinstalled RHEV-H on a physical host. Ensure that at least one network card is configured andthat SSH password authentication has been enabled from the Security screen.
Procedure 8.1. Adding an Additional Self-Hosted Engine Host
1. Starting the hosted-engine Script
For a RHEL-based self-hosted engine host, install the ovirt-hosted-engine-setup package,and run the deployment command:
# yum install ovirt-hosted-engine-setup
# hosted-engine --deploy
For a RHEV-H-based self-hosted engine host, in the text user interface, select the Hosted Engine screen, and select < Deploy Hosted Engine >. Select < Add this host to an existing group >, and select < OK >.
2. Configuring StorageSelect the type of storage to use.
During customization use CTRL-D to abort.Please specify the storage you would like to use (iscsi, nfs3, nfs4)[nfs3]:
For NFS storage types, specify the full address, using either the FQDN or IP address, andpath name of the shared storage domain.
Please specify the full shared storage connection path to use (example: host:/path): storage.example.com:/hosted_engine/nfs
For iSCSI, specify the iSCSI portal IP address, port, user name and password, and select atarget name from the auto-detected list:
CHAPTER 8. INSTALLING ADDITIONAL HOSTS TO A SELF-HOSTED ENVIRONMENT
83

Please specify the iSCSI portal IP address: Please specify the iSCSI portal port [3260]: Please specify the iSCSI portal user: Please specify the iSCSI portal password:Please specify the target name (auto-detected values) [default]:
3. Detecting the Self-Hosted EngineThe hosted-engine script detects that the shared storage is being used and asks if this is anadditional host setup. You are then prompted for the host ID, which must be an integer notalready assigned to an additional host in the environment.
The specified storage location already contains a data domain. Is this an additional host setup (Yes, No)[Yes]? [ INFO ] Installing on additional hostPlease specify the Host ID [Must be integer, default: 2]:
4. Configuring the SystemThe hosted-engine script uses the answer file generated by the original hosted-engine setup.To achieve this, the script requires the FQDN or IP address and the password of the root userof that host so as to access and secure-copy the answer file to the additional host.
[WARNING] A configuration file must be supplied to deploy Hosted Engine on an additional host.The answer file may be fetched from the first host using scp.If you do not want to download it automatically you can abort the setup answering no to the following question.Do you want to scp the answer file from the first host? (Yes, No)[Yes]: Please provide the FQDN or IP of the first host: Enter 'root' user password for host Host-HE1.example.com: [ INFO ] Answer file successfully downloaded
5. Configuring the Hosted EngineSpecify the name for the additional host to be identified in the Red Hat Enterprise Virtualizationenvironment, and the password for the admin@internal user.
Enter the name which will be used to identify this host inside the Administrator Portal [hosted_engine_2]: Enter 'admin@internal' user password that will be used for accessing the Administrator Portal: Confirm 'admin@internal' user password:
6. Configuration PreviewBefore proceeding, the hosted-engine script displays the configuration values you haveentered, and prompts for confirmation to proceed with these values.
Bridge interface : eth1Engine FQDN : HostedEngine-VM.example.comBridge name : rhevmSSH daemon port : 22Firewall manager : iptablesGateway address : X.X.X.XHost name for web application : hosted_engine_2
Self-Hosted Engine Guide
84

Host ID : 2Image size GB : 25Storage connection : storage.example.com:/hosted_engine/nfsConsole type : vncMemory size MB : 4096MAC address : 00:16:3e:05:95:50Boot type : diskNumber of CPUs : 2CPU Type : model_Penryn Please confirm installation settings (Yes, No)[Yes]:
After confirmation, the script completes installation of the host and adds it to the environment.
CHAPTER 8. INSTALLING ADDITIONAL HOSTS TO A SELF-HOSTED ENVIRONMENT
85
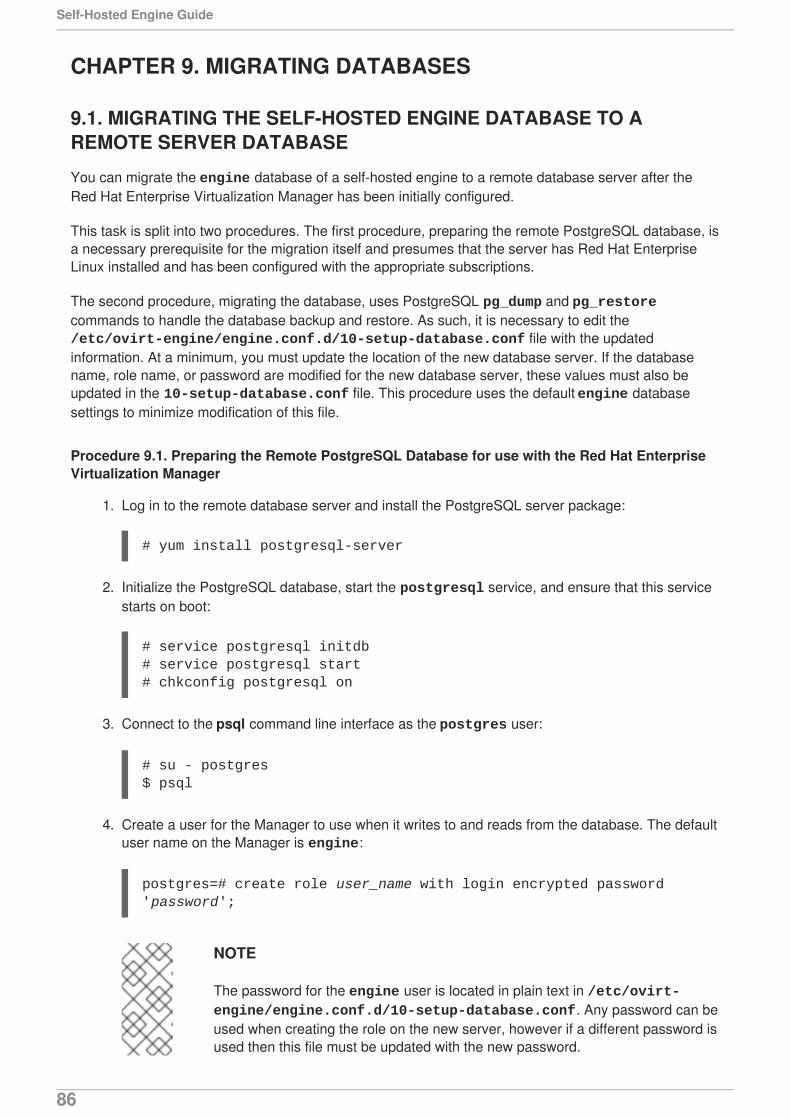
CHAPTER 9. MIGRATING DATABASES
9.1. MIGRATING THE SELF-HOSTED ENGINE DATABASE TO AREMOTE SERVER DATABASE
You can migrate the engine database of a self-hosted engine to a remote database server after theRed Hat Enterprise Virtualization Manager has been initially configured.
This task is split into two procedures. The first procedure, preparing the remote PostgreSQL database, isa necessary prerequisite for the migration itself and presumes that the server has Red Hat EnterpriseLinux installed and has been configured with the appropriate subscriptions.
The second procedure, migrating the database, uses PostgreSQL pg_dump and pg_restorecommands to handle the database backup and restore. As such, it is necessary to edit the /etc/ovirt-engine/engine.conf.d/10-setup-database.conf file with the updatedinformation. At a minimum, you must update the location of the new database server. If the databasename, role name, or password are modified for the new database server, these values must also beupdated in the 10-setup-database.conf file. This procedure uses the default engine databasesettings to minimize modification of this file.
Procedure 9.1. Preparing the Remote PostgreSQL Database for use with the Red Hat EnterpriseVirtualization Manager
1. Log in to the remote database server and install the PostgreSQL server package:
# yum install postgresql-server
2. Initialize the PostgreSQL database, start the postgresql service, and ensure that this servicestarts on boot:
# service postgresql initdb# service postgresql start# chkconfig postgresql on
3. Connect to the psql command line interface as the postgres user:
# su - postgres$ psql
4. Create a user for the Manager to use when it writes to and reads from the database. The defaultuser name on the Manager is engine:
postgres=# create role user_name with login encrypted password 'password';
NOTE
The password for the engine user is located in plain text in /etc/ovirt-engine/engine.conf.d/10-setup-database.conf. Any password can beused when creating the role on the new server, however if a different password isused then this file must be updated with the new password.
Self-Hosted Engine Guide
86

5. Create a database in which to store data about the Red Hat Enterprise Virtualizationenvironment. The default database name on the Manager is engine, and the default user nameis engine:
postgres=# create database database_name owner user_name template template0 encoding 'UTF8' lc_collate 'en_US.UTF-8' lc_ctype 'en_US.UTF-8';
6. Ensure the database can be accessed remotely by enabling md5 client authentication. Edit the /var/lib/pgsql/data/pg_hba.conf file, and add the following line immediatelyunderneath the line starting with local at the bottom of the file, replacing X.X.X.X with the IPaddress of the Manager:
host database_name user_name X.X.X.X/32 md5
7. Allow TCP/IP connections to the database. Edit the /var/lib/pgsql/data/postgresql.conf file and add the following line:
listen_addresses='*'
This example configures the postgresql service to listen for connections on all interfaces.You can specify an interface by giving its IP address.
8. Open the default port used for PostgreSQL database connections, and save the updated firewallrules:
# iptables -I INPUT 5 -p tcp --dport 5432 -j ACCEPT# service iptables save
9. Restart the postgresql service:
# service postgresql restart
Optionally, set up SSL to secure database connections using the instructions athttp://www.postgresql.org/docs/8.4/static/ssl-tcp.html#SSL-FILE-USAGE.
Procedure 9.2. Migrating the Database
1. Log in to one of the hosted-engine hosts and place the environment into global maintenancemode. This disables the High Availability agents and prevents the Manager virtual machine frombeing migrated occurring during the procedure:
# hosted-engine --set-maintenance --mode=global
2. Log in to the Manager virtual machine and stop the ovirt-engine service so that it does notinterfere with the engine backup:
# service ovirt-engine stop
3. Create the engine database backup using the PostgreSQL pg_dump command:
CHAPTER 9. MIGRATING DATABASES
87

# su - postgres -c 'pg_dump -F c engine -f /tmp/engine.dump'
4. Copy the backup file to the new database server. The target directory must allow write access forthe postgres user:
# scp /tmp/engine.dump [email protected]:/tmp/engine.dump
5. Log in to the new database server and restore the database using the PostgreSQL pg_restorecommand:
# su - postgres -c 'pg_restore -d engine /tmp/engine.dump'
6. Log in to the Manager virtual machine and update the /etc/ovirt-engine/engine.conf.d/10-setup-database.conf and replace the localhost value of ENGINE_DB_HOST with the IP address of the new database server. If the engine name, rolename, or password differ on the new database server, update those values in this file.
7. Now that the database has been migrated, start the ovirt-engine service:
# service ovirt-engine start
8. Log in to a hosted-engine host and turn off maintenance mode, enabling the High Availabilityagents:
# hosted-engine --set-maintenance --mode=none
9.2. MIGRATING DATA WAREHOUSE AND REPORTS TO SEPARATEMACHINES
Migrate the Data Warehouse service, the Reports service, or both from the Red Hat EnterpriseVirtualization Manager to separate machines. Hosting the Data Warehouse service and the Reportsservice on separate machines reduces the load on each individual machine, and allows each service toavoid potential conflicts caused by sharing CPU and memory with other processes.
Migrate the Data Warehouse service and connect it with the existing ovirt_engine_historydatabase, or optionally migrate the ovirt_engine_history database to a new database machinebefore migrating the Data Warehouse service. If the ovirt_engine_history database is hosted onthe Manager, migrating the database in addition to the Data Warehouse service further reduces thecompetition for resources on the Manager machine. You can migrate the database to the same machineonto which you will migrate the Data Warehouse service, or to a machine that is separate from both theManager machine and the new Data Warehouse service machine.
9.3. MIGRATING THE DATA WAREHOUSE DATABASE TO ASEPARATE MACHINE
Optionally migrate the ovirt_engine_history database before you migrate the Data Warehouseservice. This procedure uses pg_dump to create a database backup, and psql to restore the backup onthe new database machine. The pg_dump command provides flexible options for backing up andrestoring databases; for more information on options that may be suitable for your system, see the pg_dump manual page.
Self-Hosted Engine Guide
88

The following procedure assumes that a PostgreSQL database has already been configured on the newmachine. To migrate the Data Warehouse service only, see Section 9.4, “Migrating the Data WarehouseService to a Separate Machine”.
IMPORTANT
If the existing Data Warehouse database is connected to an existing Reports service, youmust reconfigure that service by running engine-setup and entering the details of thenew Data Warehouse database when prompted. If you do not do this, the Reports serviceis still connected to the old database, and does not receive any new data.
Procedure 9.3. Migrating the Data Warehouse Database to a Separate Machine
1. On the existing database machine, dump the ovirt_engine_history database into a SQLscript file:
# pg_dump ovirt_engine_history > ovirt_engine_history.sql
2. Copy the script file from the existing database machine to the new database machine.
3. Restore the ovirt_engine_history database on the new database machine:
# psql -d ovirt_engine_history -f ovirt_engine_history.sql
The command above assumes that the database on the new machine is also named ovirt_engine_history.
9.4. MIGRATING THE DATA WAREHOUSE SERVICE TO A SEPARATEMACHINE
Migrate a Data Warehouse service that was installed and configured on the Red Hat EnterpriseVirtualization Manager to a dedicated host machine. Hosting the Data Warehouse service on a separatemachine helps to reduce the load on the Manager machine. Note that this procedure migrates the DataWarehouse service only; to migrate the Data Warehouse database (also known as the ovirt_engine_history database) prior to migrating the Data Warehouse service, see Section 9.3,“Migrating the Data Warehouse Database to a Separate Machine”.
Installing this scenario involves four key steps:
1. Set up the new Data Warehouse machine.
2. Stop the Data Warehouse service on the Manager machine.
3. Configure the new Data Warehouse machine.
4. Remove the Data Warehouse package from the Manager machine.
Prerequisites
Ensure that you have completed the following prerequisites:
1. You must have installed and configured the Manager and Data Warehouse on the samemachine.
CHAPTER 9. MIGRATING DATABASES
89

2. To set up the new Data Warehouse machine, you must have the following:
A virtual or physical machine with Red Hat Enterprise Linux 6.6 or later versions of Red HatEnterprise Linux 6 installed.
A subscription to the Red Hat Enterprise Linux Server and Red Hat Enterprise Virtualization entitlement pools.
The password from the Manager's /etc/ovirt-engine/engine.conf.d/10-setup-database.conf file.
Allowed access from the Data Warehouse machine to the Manager database machine's TCPport 5432.
The ovirt_engine_history database credentials from the Manager's /etc/ovirt-engine-dwh/ovirt-engine-dwhd.conf.d/10-setup-database.conf file. If youmigrated the ovirt_engine_history database using Section 9.3, “Migrating the DataWarehouse Database to a Separate Machine”, retrieve the credentials you defined duringthe database setup on that machine.
Procedure 9.4. Step 1: Setting up the New Data Warehouse Machine
1. Register your system with the Content Delivery Network, entering your Customer Portal username and password when prompted:
# subscription-manager register
2. Find the Red Hat Enterprise Linux Server and Red Hat Enterprise Virtualization subscription pools and note down the pool IDs.
# subscription-manager list --available
3. Use the pool IDs located in the previous step to attach the entitlements to the system:
# subscription-manager attach --pool=pool_id
4. Disable all existing repositories:
# subscription-manager repos --disable=*
5. Enable the required channels:
# subscription-manager repos --enable=rhel-6-server-rpms# subscription-manager repos --enable=rhel-6-server-supplementary-rpms# subscription-manager repos --enable=rhel-6-server-rhevm-3.6-rpms# subscription-manager repos --enable=jb-eap-6-for-rhel-6-server-rpms
6. Ensure that all packages currently installed are up to date:
# yum update
Self-Hosted Engine Guide
90

7. Install the rhevm-dwh-setup package:
# yum install rhevm-dwh-setup
Procedure 9.5. Step 2: Stopping the Data Warehouse Service on the Manager Machine
1. Stop the Data Warehouse service:
# service ovirt-engine-dwhd stop
2. If the ovirt_engine_history database, the Manager database, or both are hosted on theManager machine and were configured by a previous version (Red Hat Enterprise Virtualization3.4 or prior) that was then upgraded, you must allow the new Data Warehouse machine toaccess them. Edit the /var/lib/pgsql/data/postgresql.conf file and modify the listen_addresses line so that it matches the following:
listen_addresses = '*'
If the line does not exist or has been commented out, add it manually.
If one or both databases are hosted on a remote machine, you must manually grant access byediting the postgres.conf file on each machine, and adding the listen_addresses line, asabove. If both databases are hosted on the Manager machine and were configured during aclean setup of Red Hat Enterprise Virtualization Manager 3.5, access is granted by default.
3. Restart the postgresql service:
# service postgresql restart
Procedure 9.6. Step 3: Configuring the New Data Warehouse Machine
1. Run the engine-setup command to begin configuration of Data Warehouse on the machine:
# engine-setup
2. Press Enter to configure Data Warehouse:
Configure Data Warehouse on this host (Yes, No) [Yes]:
3. Press Enter to automatically configure the firewall, or type No and press Enter to maintainexisting settings:
Setup can automatically configure the firewall on this system.Note: automatic configuration of the firewall may overwrite current settings.Do you want Setup to configure the firewall? (Yes, No) [Yes]:
If you choose to automatically configure the firewall, and no firewall managers are active, you areprompted to select your chosen firewall manager from a list of supported options. Type the nameof the firewall manager and press Enter. This applies even in cases where only one option islisted.
CHAPTER 9. MIGRATING DATABASES
91

4. Press Enter to accept the automatically detected hostname, or enter an alternative hostnameand press Enter:
Host fully qualified DNS name of this server [autodetected host name]:
5. Answer the following question about the location of the ovirt_engine_history database:
Where is the DWH database located? (Local, Remote) [Local]: Remote
Type the alternative option as shown above and then press Enter.
6. Enter the fully qualified domain name and password for your ovirt_engine_historydatabase host. Press Enter to accept the default values in each other field:
DWH database host []: dwh-db-fqdnDWH database port [5432]: DWH database secured connection (Yes, No) [No]: DWH database name [ovirt_engine_history]: DWH database user [ovirt_engine_history]: DWH database password: password
7. Enter the fully qualified domain name and password for the Manager database machine. Press Enter to accept the default values in each other field:
Engine database host []: engine-db-fqdnEngine database port [5432]: Engine database secured connection (Yes, No) [No]: Engine database name [engine]: Engine database user [engine]: Engine database password: password
8. Press Enter to create a backup of the existing Data Warehouse database:
Would you like to backup the existing database before upgrading it? (Yes, No) [Yes]:
The time and space required for the database backup depends on the size of the database. Itmay take several hours to complete. If you choose not to back up the database here, and engine-setup fails for any reason, you will not be able to restore the database or any of thedata within it. The location of the backup file appears at the end of the setup script.
9. Confirm that you want to permanently disconnect the existing Data Warehouse service from theManager:
Do you want to permanently disconnect this DWH from the engine? (Yes, No) [No]:
10. Confirm your installation settings:
Please confirm installation settings (OK, Cancel) [OK]:
Self-Hosted Engine Guide
92

Procedure 9.7. Step 4: Removing the Data Warehouse Package from the Manager Machine
1. Remove the Data Warehouse package:
# yum remove rhevm-dwh
This step prevents the Data Warehouse service from attempting to automatically restart after anhour.
2. Remove the Data Warehouse files:
# rm -rf /etc/ovirt-engine-dwh /var/lib/ovirt-engine-dwh
The Data Warehouse service is now hosted on a separate machine from that on which the Manager ishosted.
9.5. MIGRATING THE REPORTS SERVICE TO A SEPARATE MACHINE
Migrate a Reports service that was installed and configured on the Red Hat Enterprise VirtualizationManager to a dedicated host machine. Hosting the Reports service on a separate machine helps toreduce the load on the Manager machine. Note that this procedure migrates the Reports service only.The Reports database (also known as the ovirt_engine_reports database) cannot be migrated;you must create a new ovirt_engine_reports database when you configure Reports on the newmachine. Saved ad hoc reports can be migrated from the Manager machine to the new Reportsmachine. Migrate the Reports service only after the Manager and Data Warehouse have beenconfigured.
Installing this scenario involves three key steps:
1. Configure the new Reports machine.
2. Migrate any saved reports to the new Reports machine.
3. Remove the Reports service from the Manager machine.
Prerequisites
Ensure that you have completed the following prerequisites:
1. You must have installed and configured the Manager and Reports on the same machine.
2. You must have installed and configured Data Warehouse, either on the Manager machine or ona separate machine.
3. To set up the new Reports machine, you must have the following:
A virtual or physical machine with Red Hat Enterprise Linux 6.6 or later versions of Red HatEnterprise Linux 6 installed
A subscription to the Red Hat Enterprise Linux Server and Red Hat Enterprise Virtualization entitlement pools
The password from the Data Warehouse machine's /etc/ovirt-engine-dwh/ovirt-engine-dwhd.conf.d/10-setup-database.conf file
CHAPTER 9. MIGRATING DATABASES
93
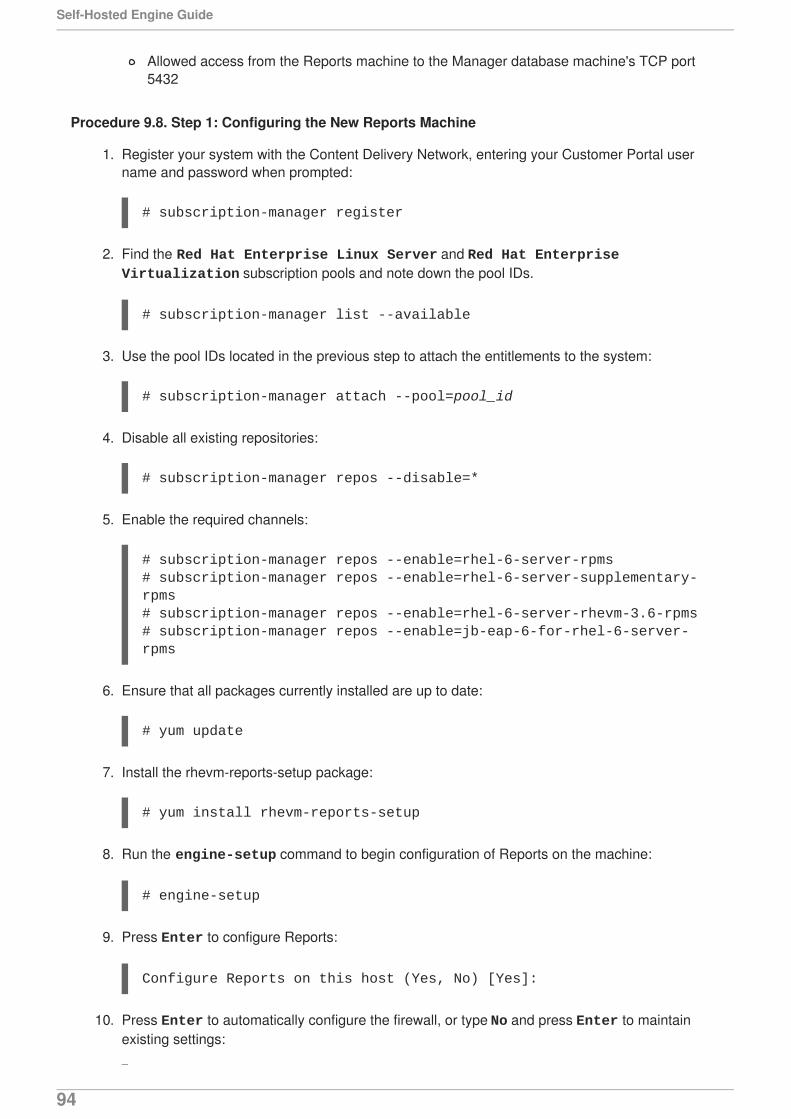
Allowed access from the Reports machine to the Manager database machine's TCP port5432
Procedure 9.8. Step 1: Configuring the New Reports Machine
1. Register your system with the Content Delivery Network, entering your Customer Portal username and password when prompted:
# subscription-manager register
2. Find the Red Hat Enterprise Linux Server and Red Hat Enterprise Virtualization subscription pools and note down the pool IDs.
# subscription-manager list --available
3. Use the pool IDs located in the previous step to attach the entitlements to the system:
# subscription-manager attach --pool=pool_id
4. Disable all existing repositories:
# subscription-manager repos --disable=*
5. Enable the required channels:
# subscription-manager repos --enable=rhel-6-server-rpms# subscription-manager repos --enable=rhel-6-server-supplementary-rpms# subscription-manager repos --enable=rhel-6-server-rhevm-3.6-rpms# subscription-manager repos --enable=jb-eap-6-for-rhel-6-server-rpms
6. Ensure that all packages currently installed are up to date:
# yum update
7. Install the rhevm-reports-setup package:
# yum install rhevm-reports-setup
8. Run the engine-setup command to begin configuration of Reports on the machine:
# engine-setup
9. Press Enter to configure Reports:
Configure Reports on this host (Yes, No) [Yes]:
10. Press Enter to automatically configure the firewall, or type No and press Enter to maintainexisting settings:
Self-Hosted Engine Guide
94
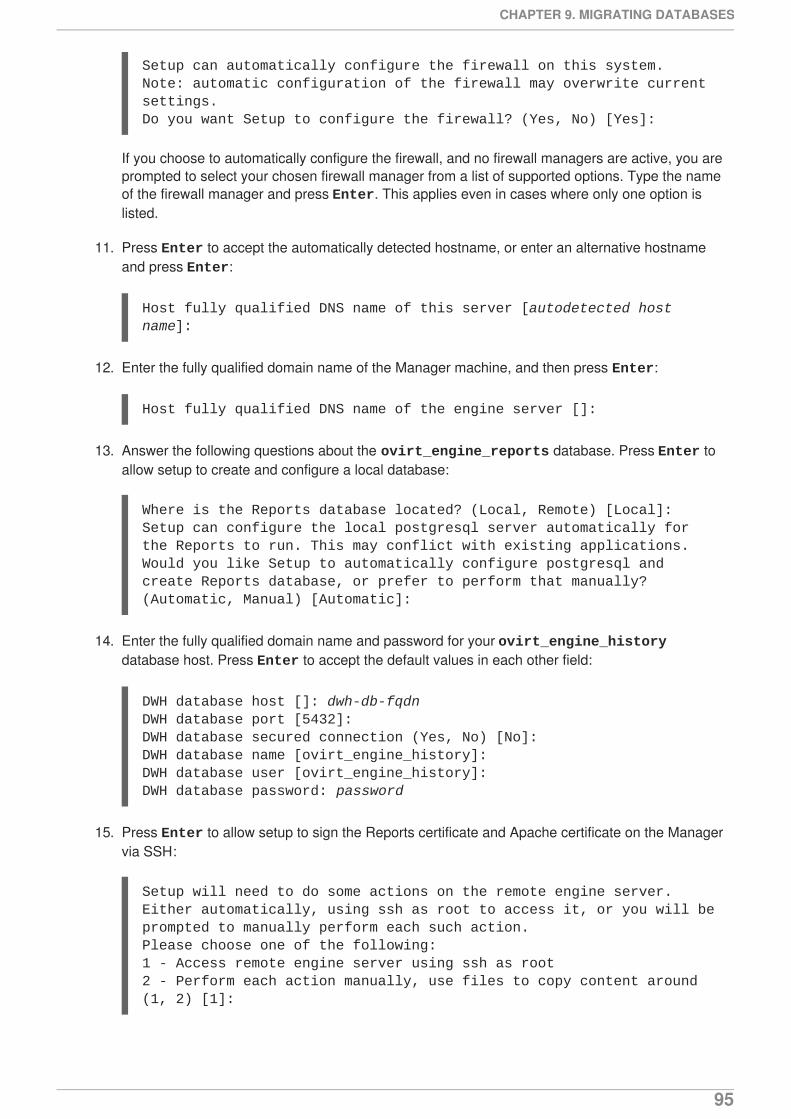
Setup can automatically configure the firewall on this system.Note: automatic configuration of the firewall may overwrite current settings.Do you want Setup to configure the firewall? (Yes, No) [Yes]:
If you choose to automatically configure the firewall, and no firewall managers are active, you areprompted to select your chosen firewall manager from a list of supported options. Type the nameof the firewall manager and press Enter. This applies even in cases where only one option islisted.
11. Press Enter to accept the automatically detected hostname, or enter an alternative hostnameand press Enter:
Host fully qualified DNS name of this server [autodetected host name]:
12. Enter the fully qualified domain name of the Manager machine, and then press Enter:
Host fully qualified DNS name of the engine server []:
13. Answer the following questions about the ovirt_engine_reports database. Press Enter toallow setup to create and configure a local database:
Where is the Reports database located? (Local, Remote) [Local]:Setup can configure the local postgresql server automatically for the Reports to run. This may conflict with existing applications.Would you like Setup to automatically configure postgresql and create Reports database, or prefer to perform that manually? (Automatic, Manual) [Automatic]:
14. Enter the fully qualified domain name and password for your ovirt_engine_historydatabase host. Press Enter to accept the default values in each other field:
DWH database host []: dwh-db-fqdnDWH database port [5432]: DWH database secured connection (Yes, No) [No]: DWH database name [ovirt_engine_history]: DWH database user [ovirt_engine_history]: DWH database password: password
15. Press Enter to allow setup to sign the Reports certificate and Apache certificate on the Managervia SSH:
Setup will need to do some actions on the remote engine server. Either automatically, using ssh as root to access it, or you will be prompted to manually perform each such action.Please choose one of the following:1 - Access remote engine server using ssh as root2 - Perform each action manually, use files to copy content around(1, 2) [1]:
CHAPTER 9. MIGRATING DATABASES
95

16. Press Enter to accept the default SSH port, or enter an alternative port number and then press Enter:
ssh port on remote engine server [22]:
17. Enter the root password for the Manager machine:
root password on remote engine server manager-fqdn.com:
18. Press Enter to allow automatic configuration of SSL on Apache:
Setup can configure apache to use SSL using a certificate issued from the internal CA.Do you wish Setup to configure that, or prefer to perform that manually? (Automatic, Manual) [Automatic]:
19. Set a password for the Reports administrative users (admin and superuser). Note that thereports system maintains its own set of credentials that are separate to those used for theManager:
Reports power users password:
You are prompted to enter the password a second time to confirm it.
20. Confirm your installation settings:
Please confirm installation settings (OK, Cancel) [OK]:
Procedure 9.9. Step 2: Migrating Saved Reports to the New Reports Machine
1. On the Manager machine, run the ovirt-engine-reports-tool command:
# ovirt-engine-reports-tool
2. Enter the number that corresponds to the export option, and press Enter:
(2) Export Jasperreports saved reports to a zip file(1, 2, 3) []: 2
3. Enter the absolute path for the zip file to export saved reports to, and press Enter:
Filename to export saved reports to: /tmp/saved-reports.zip
4. Copy the zip file to the new Reports machine:
# scp /tmp/saved-reports.zip reports-machine-fqdn:/tmp/
5. On the new Reports machine, run the ovirt-engine-reports-tool command:
# ovirt-engine-reports-tool
Self-Hosted Engine Guide
96

6. Enter the number that corresponds to the import option, and press Enter:
(3) Import a saved reports zip file to Jasperreports(1, 2, 3) []: 3
7. Enter the absolute path of the zip file from which to import, and press Enter:
Filename to import saved reports from: /tmp/saved-reports.zip
When the command completes, the saved reports are visible in the Reports Portal of the new Reportsmachine.
Procedure 9.10. Step 3: Removing the Reports Service from the Manager Machine
1. Stop the Reports service:
# service ovirt-engine-reportsd stop
2. Remove the Reports package:
# yum remove rhevm-reports
3. Remove the Reports files:
# rm -rf /etc/ovirt-engine-reports /var/lib/ovirt-engine-reports
4. Remove the Reports database and user. The default name for both is ovirt_engine_reports:
# su - postgres$ psqlpostgres=# drop database ovirt_engine_reports;postgres=# drop user ovirt_engine_reports;
NOTE
You can configure more than one working Reports instance, and continue to log in andview reports from an older instance; however, the Manager will directly connect to andhave SSO with only the last Reports instance that was configured using engine-setup.This means that the Administration Portal includes dashboards from and direct links toonly the most recent Reports installation.
CHAPTER 9. MIGRATING DATABASES
97

CHAPTER 10. DATA WAREHOUSE AND REPORTS
10.1. OVERVIEW OF CONFIGURING DATA WAREHOUSE ANDREPORTS
The Red Hat Enterprise Virtualization Manager includes a comprehensive management historydatabase, which can be utilized by any application to extract a range of information at the data center,cluster, and host levels. Installing Data Warehouse creates the ovirt_engine_history database, towhich the Manager is configured to log information for reporting purposes. Red Hat EnterpriseVirtualization Manager Reports functionality is also available as an optional component. Reportsprovides a customized implementation of JasperServer and JasperReports, an open source reportingtool capable of being embedded in Java-based applications. It produces reports that can be built andaccessed via a web user interface, and then rendered to screen, printed, or exported to a variety offormats including PDF, Excel, CSV, Word, RTF, Flash, ODT and ODS. The Data Warehouse andReports components are optional, and must be installed and configured in addition to the Manager setup.
Before proceeding with Data Warehouse and Reports installation you must first have installed andconfigured the Red Hat Enterprise Virtualization Manager. The Reports functionality depends on thepresence of the Data Warehouse; Data Warehouse must be installed and configured before Reports.
It is recommended that you set the system time zone for all machines in your Data Warehouse/Reportsdeployment to UTC. This ensures that data collection is not interrupted by variations in your local timezone: for example, a change from summer time to winter time.
To calculate an estimate of the space and resources the ovirt_engine_history database will use,use the RHEV Manager History Database Size Calculator tool. The estimate is based on the number ofentities and the length of time you have chosen to retain the history records.
10.2. DATA WAREHOUSE AND REPORTS CONFIGURATION NOTES
Behavior
The following behavior is expected in engine-setup:
Install the Data Warehouse package and the Reports package, run engine-setup, and answer No toconfiguring Data Warehouse and Reports:
Configure Data Warehouse on this host (Yes, No) [Yes]: NoConfigure Reports on this host (Yes, No) [Yes]: No
Run engine-setup again; setup no longer presents the option to configure those services.
Workaround
To force engine-setup to present both options again, run engine-setup --reconfigure-optional-components.
NOTE
To configure only the currently installed Data Warehouse and Reports packages, andprevent setup from applying package updates found in enabled repositories, add the --offline option .
Self-Hosted Engine Guide
98

10.3. DATA WAREHOUSE AND REPORTS INSTALLATION OPTIONS
Data Warehouse and Reports installation requires between one and three machines, and can beconfigured in one of the following ways:
1. Install and configure both Data Warehouse and Reports on the machine on which theManager is installed.
This configuration hosts the Data Warehouse and Reports services on your Manager machine.This requires only a single registered machine, and is the simplest to configure; however, it alsorequires that the services share CPU and memory, and increases the demand on the hostmachine. Users who require access to the Data Warehouse service or the Reports service willrequire access to the Manager machine itself.
2. Install and configure both Data Warehouse and Reports on one separate machine.
This configuration hosts Data Warehouse and Reports on a single, separate machine. Thisrequires two registered machines; however, it reduces the load on the Manager machine, andavoids potential CPU and memory-sharing conflicts on that machine. Administrators can alsoallow user access to the Data Warehouse-Reports machine, without the need to grant access tothe Manager machine. Note that the Data Warehouse and Reports services will still compete forresources on their single host.
3. Install and configure Data Warehouse on a separate machine, then install and configureReports on a separate machine.
This configuration separates each service onto its own dedicated host. This requires threeregistered machines; however, it reduces the load on each individual machine, and allows eachservice to avoid potential conflicts caused by sharing CPU and memory with other processes.Administrators can also allow user access to one particular machine, without the need to grantaccess to either of the two other machines.
4. Install and configure Data Warehouse on the Manager machine, then install and configureReports on a separate machine.
This configuration hosts Data Warehouse on the Manager machine, and Reports on a separatehost. This requires two registered machines; however, it reduces the load on the Managermachine, and avoids some memory-sharing conflicts. Administrators can allow user access tothe Reports machine, without the need to grant access to the Manager machine.
5. Install and configure Data Warehouse on a separate machine, then install and configureReports on the Manager machine.
This configuration hosts Data Warehouse on a separate machine, and Reports on the Managermachine. This requires two registered machines; however, it reduces the load on the Managermachine, and avoids some memory-sharing conflicts. Administrators can allow user access tothe Data Warehouse machine, without the need to grant access to the Manager machine.
If you choose to host the Data Warehouse database on a machine that is separate from the machine onwhich the Data Warehouse service is installed, you will require an additional machine for that purpose.The same is true if you choose to host the Reports database remotely.
NOTE
Detailed user, administration, and installation guides for JasperReports are available in /usr/share/jasperreports-server-pro/docs/
CHAPTER 10. DATA WAREHOUSE AND REPORTS
99
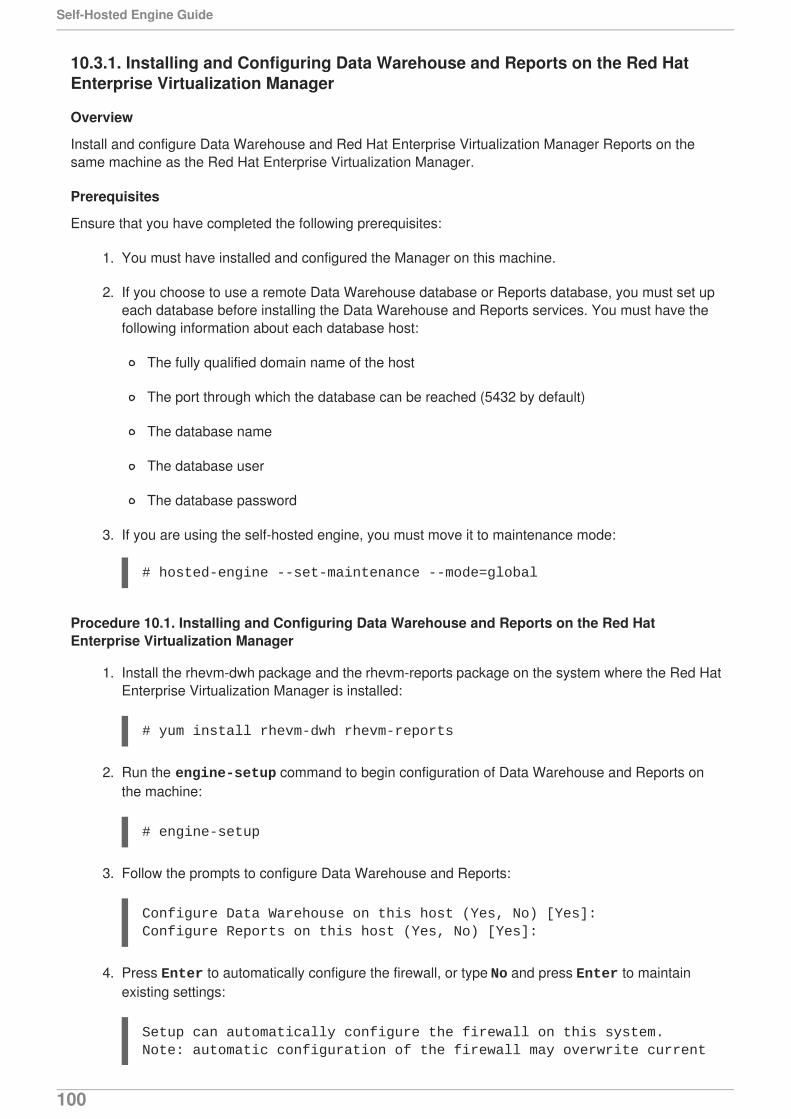
10.3.1. Installing and Configuring Data Warehouse and Reports on the Red HatEnterprise Virtualization Manager
Overview
Install and configure Data Warehouse and Red Hat Enterprise Virtualization Manager Reports on thesame machine as the Red Hat Enterprise Virtualization Manager.
Prerequisites
Ensure that you have completed the following prerequisites:
1. You must have installed and configured the Manager on this machine.
2. If you choose to use a remote Data Warehouse database or Reports database, you must set upeach database before installing the Data Warehouse and Reports services. You must have thefollowing information about each database host:
The fully qualified domain name of the host
The port through which the database can be reached (5432 by default)
The database name
The database user
The database password
3. If you are using the self-hosted engine, you must move it to maintenance mode:
# hosted-engine --set-maintenance --mode=global
Procedure 10.1. Installing and Configuring Data Warehouse and Reports on the Red HatEnterprise Virtualization Manager
1. Install the rhevm-dwh package and the rhevm-reports package on the system where the Red HatEnterprise Virtualization Manager is installed:
# yum install rhevm-dwh rhevm-reports
2. Run the engine-setup command to begin configuration of Data Warehouse and Reports onthe machine:
# engine-setup
3. Follow the prompts to configure Data Warehouse and Reports:
Configure Data Warehouse on this host (Yes, No) [Yes]: Configure Reports on this host (Yes, No) [Yes]:
4. Press Enter to automatically configure the firewall, or type No and press Enter to maintainexisting settings:
Setup can automatically configure the firewall on this system.Note: automatic configuration of the firewall may overwrite current
Self-Hosted Engine Guide
100

settings.Do you want Setup to configure the firewall? (Yes, No) [Yes]:
If you choose to automatically configure the firewall, and no firewall managers are active, you areprompted to select your chosen firewall manager from a list of supported options. Type the nameof the firewall manager and press Enter. This applies even in cases where only one option islisted.
5. Answer the following questions about the Data Warehouse database and the Reports database:
Where is the DWH database located? (Local, Remote) [Local]: Setup can configure the local postgresql server automatically for the DWH to run. This may conflict with existing applications.Would you like Setup to automatically configure postgresql and create DWH database, or prefer to perform that manually? (Automatic, Manual) [Automatic]: Where is the Reports database located? (Local, Remote) [Local]: Setup can configure the local postgresql server automatically for the Reports to run. This may conflict with existing applications.Would you like Setup to automatically configure postgresql and create Reports database, or prefer to perform that manually? (Automatic, Manual) [Automatic]:
Press Enter to choose the highlighted defaults, or type your alternative preference and thenpress Enter. If you select Remote, you are prompted to provide details about each remotedatabase host.
6. Set a password for the Reports administrative users (admin and superuser). Note that thereports system maintains its own set of credentials that are separate to those used for theManager:
Reports power users password:
You are prompted to enter the password a second time to confirm it.
7. For the configuration to take effect, the ovirt-engine service must be restarted. The engine-setup command prompts you:
During execution engine service will be stopped (OK, Cancel) [OK]:
Press Enter to proceed. The ovirt-engine service restarts automatically later in thecommand.
8. Confirm your installation settings:
Please confirm installation settings (OK, Cancel) [OK]:
Next Steps
Access the Reports Portal at http://demo.redhat.com/ovirt-engine-reports, replacing demo.redhat.comwith the fully qualified domain name of the Manager. If during the Manager installation you selected anon-default HTTP port then append :port to the URL, replacing :port with the port that you chose.
CHAPTER 10. DATA WAREHOUSE AND REPORTS
101

Log in using the user name admin and the password you set during reports installation. Note that thefirst time you log in to Red Hat Enterprise Virtualization Manager Reports, a number of web pages aregenerated and, as a result, your initial attempt to log in may take some time to complete.
10.3.2. Installing and Configuring Data Warehouse and Reports on the SameSeparate Machine
Overview
Install and configure Data Warehouse and Red Hat Enterprise Virtualization Manager Reports togetheron a separate host from that on which the Red Hat Enterprise Virtualization Manager is installed. Hostingthe Data Warehouse service and the Reports service on a separate machine helps to reduce the load onthe Manager machine. Note that hosting Data Warehouse and Reports on the same machine means thatthese processes will share CPU and memory.
Prerequisites
Ensure that you have completed the following prerequisites:
1. You must have installed and configured the Manager on a separate machine.
2. To set up the Data Warehouse and Reports machine, you must have the following:
A virtual or physical machine with Red Hat Enterprise Linux 6.6 or later versions of Red HatEnterprise Linux 6 installed.
A subscription to the Red Hat Enterprise Linux Server and Red Hat Enterprise Virtualization subscription pools.
The password from the Manager's /etc/ovirt-engine/engine.conf.d/10-setup-database.conf file.
Allowed access from the Data Warehouse-Reports machine to the Manager databasemachine's TCP port 5432.
3. If you choose to use a remote Data Warehouse database or Reports database, you must set upeach database before installing the Data Warehouse and Reports services. You must have thefollowing information about each database host:
The fully qualified domain name of the host
The port through which the database can be reached (5432 by default)
The database name
The database user
The database password
Procedure 10.2. Installing and Configuring Data Warehouse and Reports on the Same SeparateMachine
1. Register your system with the Content Delivery Network, entering your Customer Portal username and password when prompted:
# subscription-manager register
Self-Hosted Engine Guide
102

2. Find the Red Hat Enterprise Linux Server and Red Hat Enterprise Virtualization subscription pools and note down the pool IDs.
# subscription-manager list --available
3. Use the pool IDs located in the previous step to attach the entitlements to the system:
# subscription-manager attach --pool=pool_id
4. Disable all existing repositories:
# subscription-manager repos --disable=*
5. Enable the required repositories:
# subscription-manager repos --enable=rhel-6-server-rpms# subscription-manager repos --enable=rhel-6-server-supplementary-rpms# subscription-manager repos --enable=rhel-6-server-rhevm-3.6-rpms# subscription-manager repos --enable=jb-eap-6-for-rhel-6-server-rpms
6. Ensure that all packages currently installed are up to date:
# yum update
7. Install the rhevm-dwh-setup and rhevm-reports-setup packages:
# yum install rhevm-dwh-setup rhevm-reports-setup
8. Run the engine-setup command to begin configuration of Data Warehouse and Reports onthe machine:
# engine-setup
9. Follow the prompts to configure Data Warehouse and Reports:
Configure Data Warehouse on this host (Yes, No) [Yes]: Configure Reports on this host (Yes, No) [Yes]:
10. Press Enter to automatically configure the firewall, or type No and press Enter to maintainexisting settings:
Setup can automatically configure the firewall on this system.Note: automatic configuration of the firewall may overwrite current settings.Do you want Setup to configure the firewall? (Yes, No) [Yes]:
If you choose to automatically configure the firewall, and no firewall managers are active, you areprompted to select your chosen firewall manager from a list of supported options. Type the nameof the firewall manager and press Enter. This applies even in cases where only one option is
CHAPTER 10. DATA WAREHOUSE AND REPORTS
103
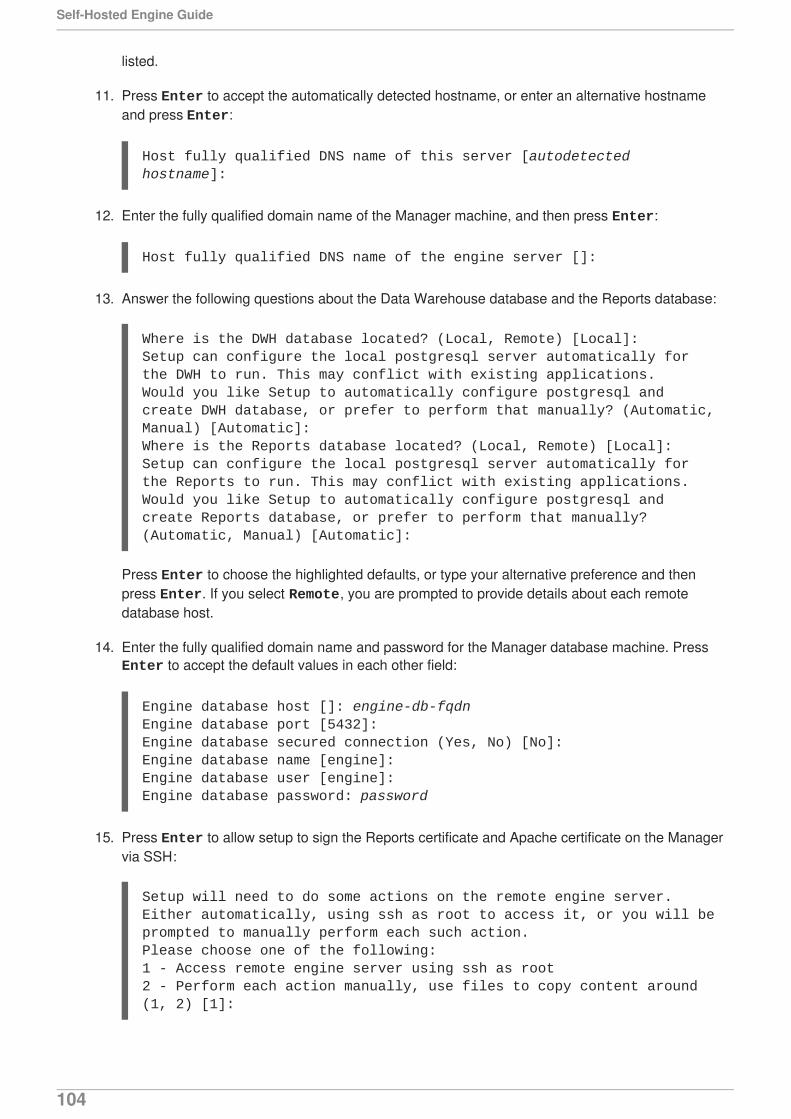
listed.
11. Press Enter to accept the automatically detected hostname, or enter an alternative hostnameand press Enter:
Host fully qualified DNS name of this server [autodetected hostname]:
12. Enter the fully qualified domain name of the Manager machine, and then press Enter:
Host fully qualified DNS name of the engine server []:
13. Answer the following questions about the Data Warehouse database and the Reports database:
Where is the DWH database located? (Local, Remote) [Local]: Setup can configure the local postgresql server automatically for the DWH to run. This may conflict with existing applications.Would you like Setup to automatically configure postgresql and create DWH database, or prefer to perform that manually? (Automatic, Manual) [Automatic]: Where is the Reports database located? (Local, Remote) [Local]: Setup can configure the local postgresql server automatically for the Reports to run. This may conflict with existing applications.Would you like Setup to automatically configure postgresql and create Reports database, or prefer to perform that manually? (Automatic, Manual) [Automatic]:
Press Enter to choose the highlighted defaults, or type your alternative preference and thenpress Enter. If you select Remote, you are prompted to provide details about each remotedatabase host.
14. Enter the fully qualified domain name and password for the Manager database machine. Press Enter to accept the default values in each other field:
Engine database host []: engine-db-fqdnEngine database port [5432]: Engine database secured connection (Yes, No) [No]: Engine database name [engine]: Engine database user [engine]: Engine database password: password
15. Press Enter to allow setup to sign the Reports certificate and Apache certificate on the Managervia SSH:
Setup will need to do some actions on the remote engine server. Either automatically, using ssh as root to access it, or you will be prompted to manually perform each such action.Please choose one of the following:1 - Access remote engine server using ssh as root2 - Perform each action manually, use files to copy content around(1, 2) [1]:
Self-Hosted Engine Guide
104

16. Press Enter to accept the default SSH port, or enter an alternative port number and then press Enter:
ssh port on remote engine server [22]:
17. Enter the root password for the Manager machine:
root password on remote engine server manager-fqdn.com:
18. Press Enter to allow automatic configuration of SSL on Apache:
Setup can configure apache to use SSL using a certificate issued from the internal CA.Do you wish Setup to configure that, or prefer to perform that manually? (Automatic, Manual) [Automatic]:
19. Set a password for the Reports administrative users (admin and superuser). Note that thereports system maintains its own set of credentials that are separate to those used for theManager:
Reports power users password:
You are prompted to enter the password a second time to confirm it.
20. Confirm your installation settings:
Please confirm installation settings (OK, Cancel) [OK]:
Next Steps
Access the Reports Portal at http://demo.redhat.com/ovirt-engine-reports, replacing demo.redhat.comwith the fully qualified domain name of the Manager. If during the Manager installation you selected anon-default HTTP port then append :port to the URL, replacing :port with the port that you chose.
Log in using the user name admin and the password you set during reports installation. Note that thefirst time you log in to Red Hat Enterprise Virtualization Manager Reports, a number of web pages aregenerated and, as a result, your initial attempt to log in may take some time to complete.
10.3.3. Installing and Configuring Data Warehouse and Reports on SeparateMachines
Overview
Install and configure Data Warehouse on a separate host from that on which the Red Hat EnterpriseVirtualization Manager is installed, then install and configure Red Hat Enterprise Virtualization ManagerReports on a third machine. Hosting the Data Warehouse and Reports services on separate machineshelps to reduce the load on the Manager machine. Separating Data Warehouse and Reports ontoindividual machines further reduces the demand each service places on its host machine, and avoidsany conflicts caused by sharing CPU and memory with other processes.
Installing this scenario involves two key steps:
1. Install and configure Data Warehouse on a separate machine.
CHAPTER 10. DATA WAREHOUSE AND REPORTS
105

2. Install and configure Reports on a separate machine.
Prerequisites
Ensure that you have completed the following prerequisites:
1. You must have installed and configured the Manager on a separate machine.
2. To set up the Data Warehouse machine, you must have the following:
A virtual or physical machine with Red Hat Enterprise Linux 6.6 or later versions of Red HatEnterprise Linux 6 installed.
A subscription to the Red Hat Enterprise Linux Server and Red Hat Enterprise Virtualization subscription pools.
The password from the Manager's /etc/ovirt-engine/engine.conf.d/10-setup-database.conf file.
Allowed access from the Data Warehouse machine to the Manager database machine's TCPport 5432.
3. To set up the Reports machine, you must have the following:
A virtual or physical machine with Red Hat Enterprise Linux 6.6 or later versions of Red HatEnterprise Linux 6 installed.
A subscription to the Red Hat Enterprise Linux Server and Red Hat Enterprise Virtualization subscription pools.
The password from the Data Warehouse machine's /etc/ovirt-engine-dwh/ovirt-engine-dwhd.conf.d/10-setup-database.conf file.
Allowed access from the Reports machine to the Manager database machine's TCP port5432.
4. If you choose to use a remote Data Warehouse database or Reports database, you must set upeach database before installing the Data Warehouse and Reports services. You must have thefollowing information about each database host:
The fully qualified domain name of the host
The port through which the database can be reached (5432 by default)
The database name
The database user
The database password
Procedure 10.3. Step 1: Installing and Configuring Data Warehouse on a Separate Machine
1. Register your system with the Content Delivery Network, entering your Customer Portal username and password when prompted:
# subscription-manager register
Self-Hosted Engine Guide
106
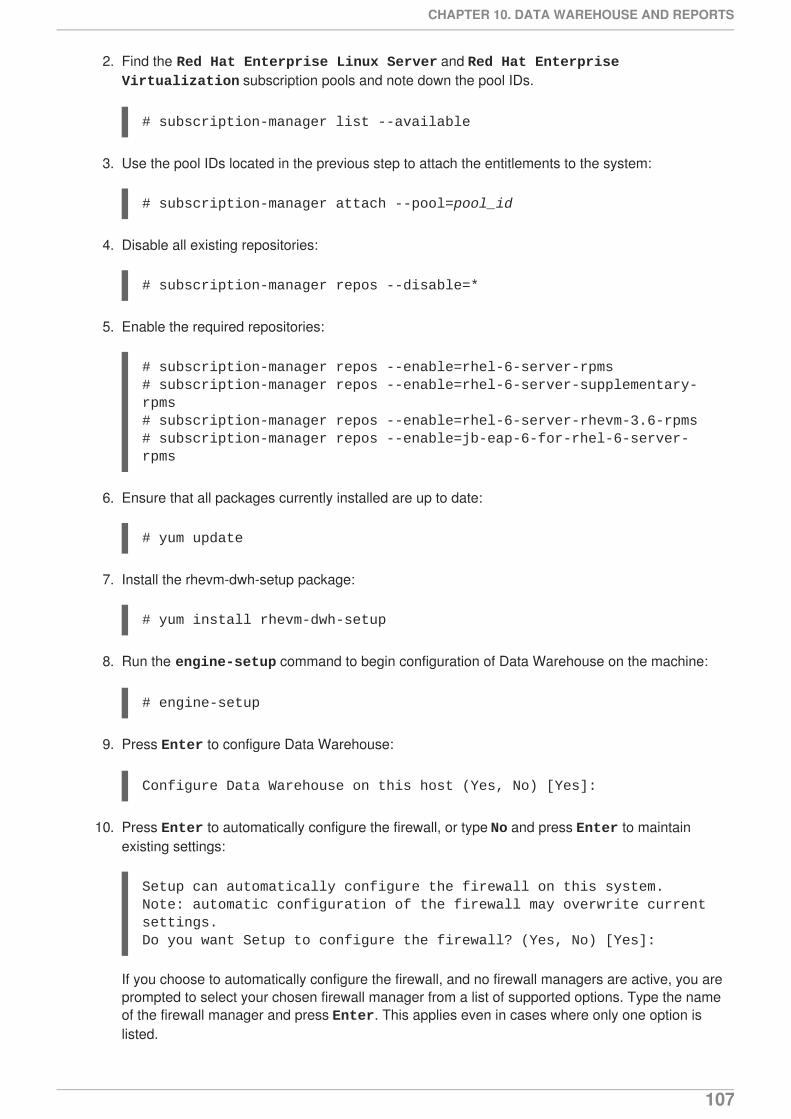
2. Find the Red Hat Enterprise Linux Server and Red Hat Enterprise Virtualization subscription pools and note down the pool IDs.
# subscription-manager list --available
3. Use the pool IDs located in the previous step to attach the entitlements to the system:
# subscription-manager attach --pool=pool_id
4. Disable all existing repositories:
# subscription-manager repos --disable=*
5. Enable the required repositories:
# subscription-manager repos --enable=rhel-6-server-rpms# subscription-manager repos --enable=rhel-6-server-supplementary-rpms# subscription-manager repos --enable=rhel-6-server-rhevm-3.6-rpms# subscription-manager repos --enable=jb-eap-6-for-rhel-6-server-rpms
6. Ensure that all packages currently installed are up to date:
# yum update
7. Install the rhevm-dwh-setup package:
# yum install rhevm-dwh-setup
8. Run the engine-setup command to begin configuration of Data Warehouse on the machine:
# engine-setup
9. Press Enter to configure Data Warehouse:
Configure Data Warehouse on this host (Yes, No) [Yes]:
10. Press Enter to automatically configure the firewall, or type No and press Enter to maintainexisting settings:
Setup can automatically configure the firewall on this system.Note: automatic configuration of the firewall may overwrite current settings.Do you want Setup to configure the firewall? (Yes, No) [Yes]:
If you choose to automatically configure the firewall, and no firewall managers are active, you areprompted to select your chosen firewall manager from a list of supported options. Type the nameof the firewall manager and press Enter. This applies even in cases where only one option islisted.
CHAPTER 10. DATA WAREHOUSE AND REPORTS
107

11. Press Enter to accept the automatically detected hostname, or enter an alternative hostnameand press Enter:
Host fully qualified DNS name of this server [autodetected host name]:
12. Answer the following questions about the Data Warehouse database:
Where is the DWH database located? (Local, Remote) [Local]: Setup can configure the local postgresql server automatically for the DWH to run. This may conflict with existing applications.Would you like Setup to automatically configure postgresql and create DWH database, or prefer to perform that manually? (Automatic, Manual) [Automatic]:
Press Enter to choose the highlighted defaults, or type your alternative preference and thenpress Enter. If you select Remote, you are prompted to provide details about the remotedatabase host.
13. Enter the fully qualified domain name and password for the Manager database machine. Press Enter to accept the default values in each other field:
Engine database host []: engine-db-fqdnEngine database port [5432]: Engine database secured connection (Yes, No) [No]: Engine database name [engine]: Engine database user [engine]: Engine database password: password
14. Confirm your installation settings:
Please confirm installation settings (OK, Cancel) [OK]:
Procedure 10.4. Step 2: Installing and Configuring Reports on a Separate Machine
1. Register your system with the Content Delivery Network, entering your Customer Portal username and password when prompted:
# subscription-manager register
2. Find subscription pools containing the repositories required to install Reports:
# subscription-manager list --available | grep -A8 "Red Hat Enterprise Linux Server"# subscription-manager list --available | grep -A8 "Red Hat Enterprise Virtualization"
3. Use the pool identifiers located in the previous step to attach the Red Hat Enterprise Linux Server and Red Hat Enterprise Virtualization entitlements to the system:
# subscription-manager attach --pool=pool_id
Self-Hosted Engine Guide
108

4. Disable all existing repositories:
# subscription-manager repos --disable=*
5. Enable the required repositories:
# subscription-manager repos --enable=rhel-6-server-rpms# subscription-manager repos --enable=rhel-6-server-supplementary-rpms# subscription-manager repos --enable=rhel-6-server-rhevm-3.6-rpms# subscription-manager repos --enable=jb-eap-6-for-rhel-6-server-rpms
6. Ensure that all packages currently installed are up to date:
# yum update
7. Install the rhevm-reports-setup package:
# yum install rhevm-reports-setup
8. Run the engine-setup command to begin configuration of Reports on the machine:
# engine-setup
9. Press Enter to configure Reports:
Configure Reports on this host (Yes, No) [Yes]:
10. Press Enter to automatically configure the firewall, or type No and press Enter to maintainexisting settings:
Setup can automatically configure the firewall on this system.Note: automatic configuration of the firewall may overwrite current settings.Do you want Setup to configure the firewall? (Yes, No) [Yes]:
If you choose to automatically configure the firewall, and no firewall managers are active, you areprompted to select your chosen firewall manager from a list of supported options. Type the nameof the firewall manager and press Enter. This applies even in cases where only one option islisted.
11. Press Enter to accept the automatically detected hostname, or enter an alternative hostnameand press Enter:
Host fully qualified DNS name of this server [autodetected host name]:
12. Enter the fully qualified domain name of the Manager machine, and then press Enter:
Host fully qualified DNS name of the engine server []:
CHAPTER 10. DATA WAREHOUSE AND REPORTS
109
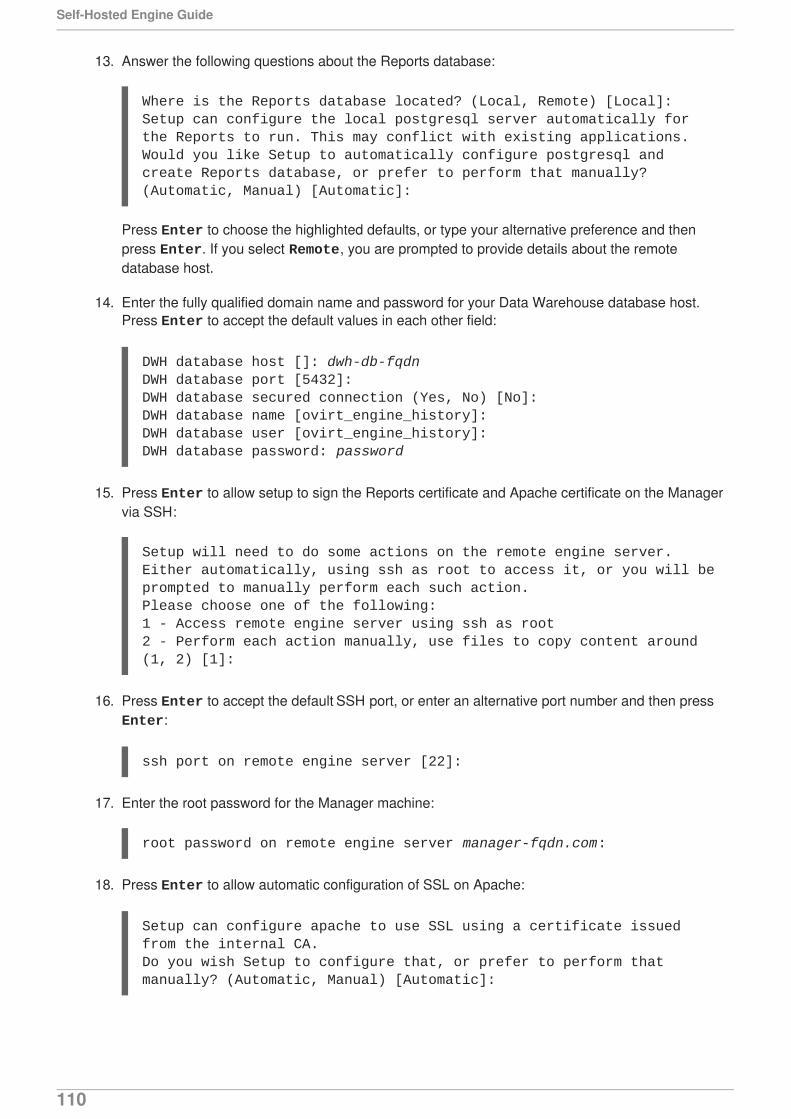
13. Answer the following questions about the Reports database:
Where is the Reports database located? (Local, Remote) [Local]: Setup can configure the local postgresql server automatically for the Reports to run. This may conflict with existing applications.Would you like Setup to automatically configure postgresql and create Reports database, or prefer to perform that manually? (Automatic, Manual) [Automatic]:
Press Enter to choose the highlighted defaults, or type your alternative preference and thenpress Enter. If you select Remote, you are prompted to provide details about the remotedatabase host.
14. Enter the fully qualified domain name and password for your Data Warehouse database host.Press Enter to accept the default values in each other field:
DWH database host []: dwh-db-fqdnDWH database port [5432]: DWH database secured connection (Yes, No) [No]: DWH database name [ovirt_engine_history]: DWH database user [ovirt_engine_history]: DWH database password: password
15. Press Enter to allow setup to sign the Reports certificate and Apache certificate on the Managervia SSH:
Setup will need to do some actions on the remote engine server. Either automatically, using ssh as root to access it, or you will be prompted to manually perform each such action.Please choose one of the following:1 - Access remote engine server using ssh as root2 - Perform each action manually, use files to copy content around(1, 2) [1]:
16. Press Enter to accept the default SSH port, or enter an alternative port number and then press Enter:
ssh port on remote engine server [22]:
17. Enter the root password for the Manager machine:
root password on remote engine server manager-fqdn.com:
18. Press Enter to allow automatic configuration of SSL on Apache:
Setup can configure apache to use SSL using a certificate issued from the internal CA.Do you wish Setup to configure that, or prefer to perform that manually? (Automatic, Manual) [Automatic]:
Self-Hosted Engine Guide
110
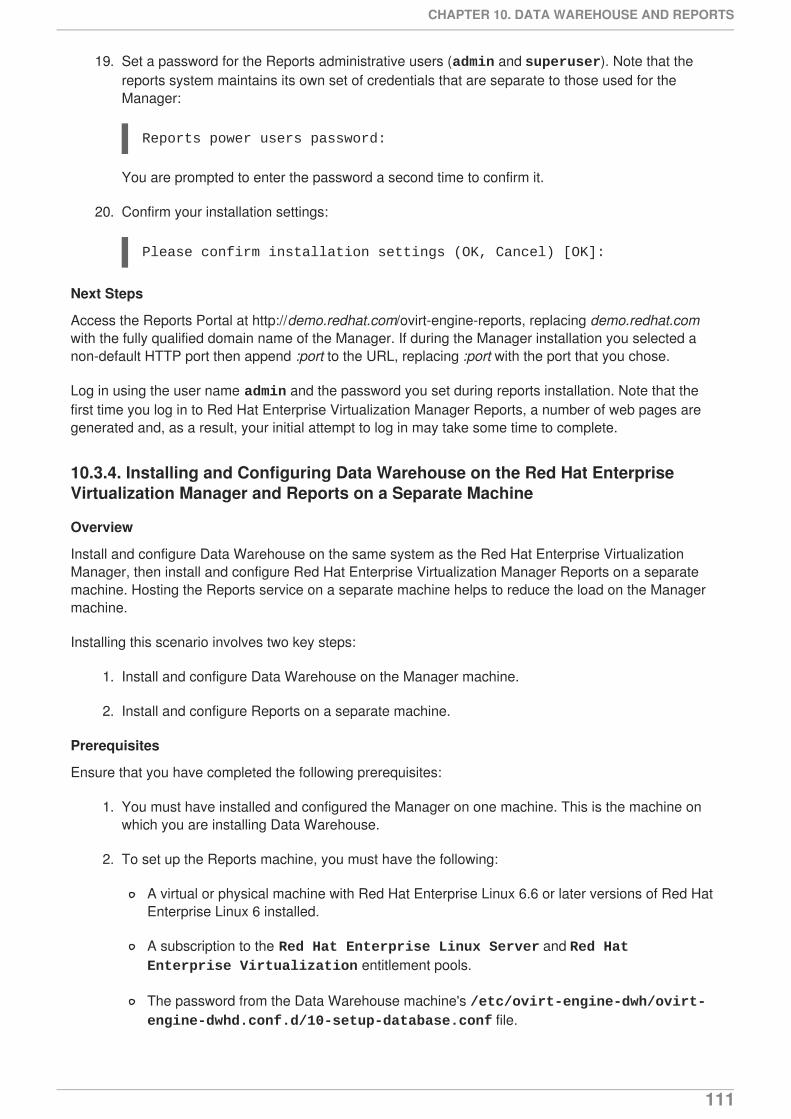
19. Set a password for the Reports administrative users (admin and superuser). Note that thereports system maintains its own set of credentials that are separate to those used for theManager:
Reports power users password:
You are prompted to enter the password a second time to confirm it.
20. Confirm your installation settings:
Please confirm installation settings (OK, Cancel) [OK]:
Next Steps
Access the Reports Portal at http://demo.redhat.com/ovirt-engine-reports, replacing demo.redhat.comwith the fully qualified domain name of the Manager. If during the Manager installation you selected anon-default HTTP port then append :port to the URL, replacing :port with the port that you chose.
Log in using the user name admin and the password you set during reports installation. Note that thefirst time you log in to Red Hat Enterprise Virtualization Manager Reports, a number of web pages aregenerated and, as a result, your initial attempt to log in may take some time to complete.
10.3.4. Installing and Configuring Data Warehouse on the Red Hat EnterpriseVirtualization Manager and Reports on a Separate Machine
Overview
Install and configure Data Warehouse on the same system as the Red Hat Enterprise VirtualizationManager, then install and configure Red Hat Enterprise Virtualization Manager Reports on a separatemachine. Hosting the Reports service on a separate machine helps to reduce the load on the Managermachine.
Installing this scenario involves two key steps:
1. Install and configure Data Warehouse on the Manager machine.
2. Install and configure Reports on a separate machine.
Prerequisites
Ensure that you have completed the following prerequisites:
1. You must have installed and configured the Manager on one machine. This is the machine onwhich you are installing Data Warehouse.
2. To set up the Reports machine, you must have the following:
A virtual or physical machine with Red Hat Enterprise Linux 6.6 or later versions of Red HatEnterprise Linux 6 installed.
A subscription to the Red Hat Enterprise Linux Server and Red Hat Enterprise Virtualization entitlement pools.
The password from the Data Warehouse machine's /etc/ovirt-engine-dwh/ovirt-engine-dwhd.conf.d/10-setup-database.conf file.
CHAPTER 10. DATA WAREHOUSE AND REPORTS
111

Allowed access from the Reports machine to the Manager database machine's TCP port5432.
3. If you choose to use a remote Data Warehouse database or Reports database, you must set upeach database before installing the Data Warehouse and Reports services. You must have thefollowing information about each database host:
The fully qualified domain name of the host
The port through which the database can be reached (5432 by default)
The database name
The database user
The database password
4. If you are using the self-hosted engine, you must move it to maintenance mode:
# hosted-engine --set-maintenance --mode=global
Procedure 10.5. Step 1: Installing and Configuring Data Warehouse on the Manager Machine
1. Install the rhevm-dwh package:
# yum install rhevm-dwh
2. Run the engine-setup command to begin configuration of Data Warehouse on the machine:
# engine-setup
3. Press Enter to configure Data Warehouse:
Configure Data Warehouse on this host (Yes, No) [Yes]:
4. Press Enter to automatically configure the firewall, or type No and press Enter to maintainexisting settings:
Setup can automatically configure the firewall on this system.Note: automatic configuration of the firewall may overwrite current settings.Do you want Setup to configure the firewall? (Yes, No) [Yes]:
If you choose to automatically configure the firewall, and no firewall managers are active, you areprompted to select your chosen firewall manager from a list of supported options. Type the nameof the firewall manager and press Enter. This applies even in cases where only one option islisted.
5. Answer the following questions about the Data Warehouse database:
Where is the DWH database located? (Local, Remote) [Local]: Setup can configure the local postgresql server automatically for the DWH to run. This may conflict with existing applications.
Self-Hosted Engine Guide
112
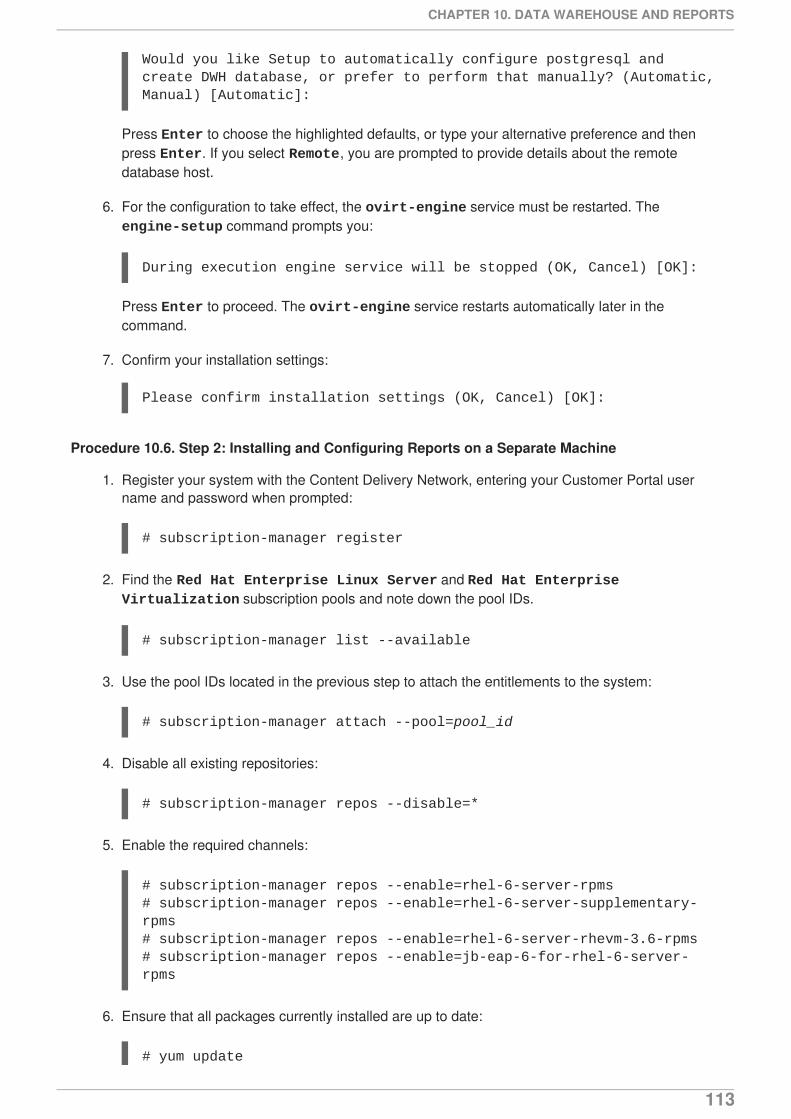
Would you like Setup to automatically configure postgresql and create DWH database, or prefer to perform that manually? (Automatic, Manual) [Automatic]:
Press Enter to choose the highlighted defaults, or type your alternative preference and thenpress Enter. If you select Remote, you are prompted to provide details about the remotedatabase host.
6. For the configuration to take effect, the ovirt-engine service must be restarted. The engine-setup command prompts you:
During execution engine service will be stopped (OK, Cancel) [OK]:
Press Enter to proceed. The ovirt-engine service restarts automatically later in thecommand.
7. Confirm your installation settings:
Please confirm installation settings (OK, Cancel) [OK]:
Procedure 10.6. Step 2: Installing and Configuring Reports on a Separate Machine
1. Register your system with the Content Delivery Network, entering your Customer Portal username and password when prompted:
# subscription-manager register
2. Find the Red Hat Enterprise Linux Server and Red Hat Enterprise Virtualization subscription pools and note down the pool IDs.
# subscription-manager list --available
3. Use the pool IDs located in the previous step to attach the entitlements to the system:
# subscription-manager attach --pool=pool_id
4. Disable all existing repositories:
# subscription-manager repos --disable=*
5. Enable the required channels:
# subscription-manager repos --enable=rhel-6-server-rpms# subscription-manager repos --enable=rhel-6-server-supplementary-rpms# subscription-manager repos --enable=rhel-6-server-rhevm-3.6-rpms# subscription-manager repos --enable=jb-eap-6-for-rhel-6-server-rpms
6. Ensure that all packages currently installed are up to date:
# yum update
CHAPTER 10. DATA WAREHOUSE AND REPORTS
113

7. Install the rhevm-reports-setup package:
# yum install rhevm-reports-setup
8. Run the engine-setup command to begin configuration of Reports on the machine:
# engine-setup
9. Press Enter to configure Reports:
Configure Reports on this host (Yes, No) [Yes]:
10. Press Enter to automatically configure the firewall, or type No and press Enter to maintainexisting settings:
Setup can automatically configure the firewall on this system.Note: automatic configuration of the firewall may overwrite current settings.Do you want Setup to configure the firewall? (Yes, No) [Yes]:
If you choose to automatically configure the firewall, and no firewall managers are active, you areprompted to select your chosen firewall manager from a list of supported options. Type the nameof the firewall manager and press Enter. This applies even in cases where only one option islisted.
11. Press Enter to accept the automatically detected hostname, or enter an alternative hostnameand press Enter:
Host fully qualified DNS name of this server [autodetected host name]:
12. Enter the fully qualified domain name of the Manager machine, and then press Enter:
Host fully qualified DNS name of the engine server []:
13. Answer the following questions about the Reports database:
Where is the Reports database located? (Local, Remote) [Local]: Setup can configure the local postgresql server automatically for the Reports to run. This may conflict with existing applications.Would you like Setup to automatically configure postgresql and create Reports database, or prefer to perform that manually? (Automatic, Manual) [Automatic]:
Press Enter to choose the highlighted defaults, or type your alternative preference and thenpress Enter. If you select Remote, you are prompted to provide details about the remotedatabase host.
14. Enter the fully qualified domain name and password for your Data Warehouse database host.Press Enter to accept the default values in each other field:
Self-Hosted Engine Guide
114
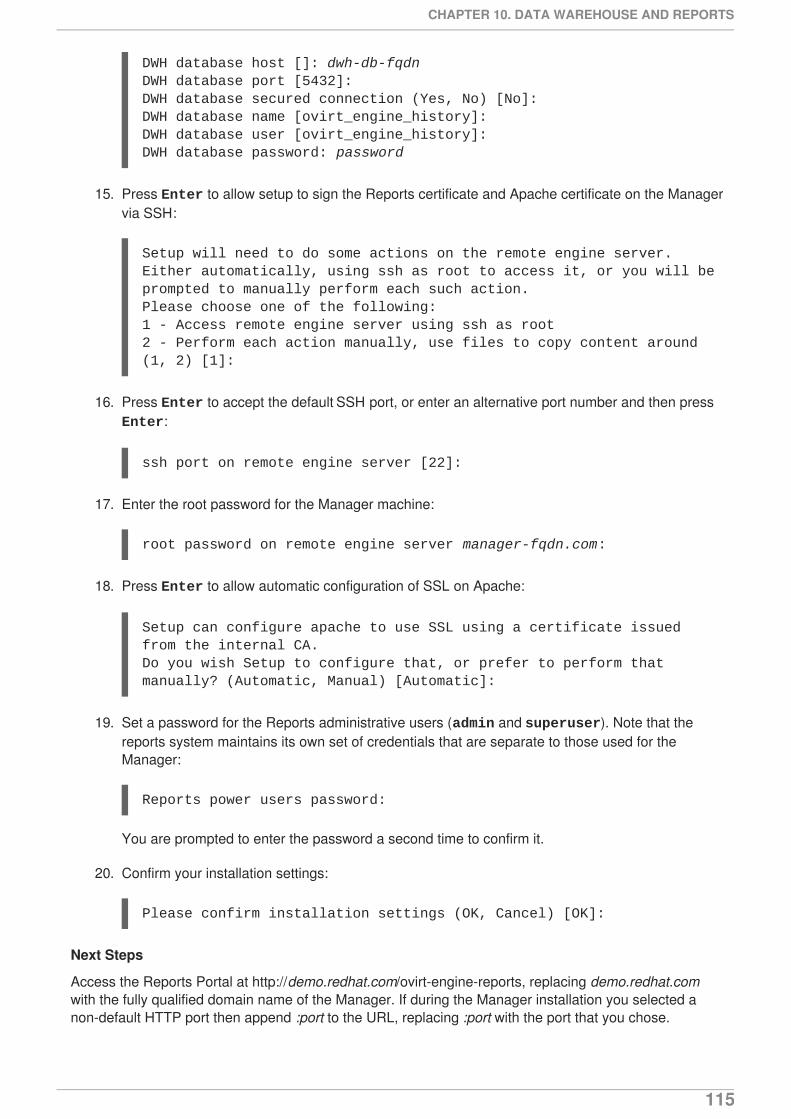
DWH database host []: dwh-db-fqdnDWH database port [5432]: DWH database secured connection (Yes, No) [No]: DWH database name [ovirt_engine_history]: DWH database user [ovirt_engine_history]: DWH database password: password
15. Press Enter to allow setup to sign the Reports certificate and Apache certificate on the Managervia SSH:
Setup will need to do some actions on the remote engine server. Either automatically, using ssh as root to access it, or you will be prompted to manually perform each such action.Please choose one of the following:1 - Access remote engine server using ssh as root2 - Perform each action manually, use files to copy content around(1, 2) [1]:
16. Press Enter to accept the default SSH port, or enter an alternative port number and then press Enter:
ssh port on remote engine server [22]:
17. Enter the root password for the Manager machine:
root password on remote engine server manager-fqdn.com:
18. Press Enter to allow automatic configuration of SSL on Apache:
Setup can configure apache to use SSL using a certificate issued from the internal CA.Do you wish Setup to configure that, or prefer to perform that manually? (Automatic, Manual) [Automatic]:
19. Set a password for the Reports administrative users (admin and superuser). Note that thereports system maintains its own set of credentials that are separate to those used for theManager:
Reports power users password:
You are prompted to enter the password a second time to confirm it.
20. Confirm your installation settings:
Please confirm installation settings (OK, Cancel) [OK]:
Next Steps
Access the Reports Portal at http://demo.redhat.com/ovirt-engine-reports, replacing demo.redhat.comwith the fully qualified domain name of the Manager. If during the Manager installation you selected anon-default HTTP port then append :port to the URL, replacing :port with the port that you chose.
CHAPTER 10. DATA WAREHOUSE AND REPORTS
115

Log in using the user name admin and the password you set during reports installation. Note that thefirst time you log in to Red Hat Enterprise Virtualization Manager Reports, a number of web pages aregenerated and, as a result, your initial attempt to log in may take some time to complete.
10.3.5. Installing and Configuring Data Warehouse on a Separate Machine andReports on the Red Hat Enterprise Virtualization Manager
Overview
Install and configure Data Warehouse on a separate host from that on which the Red Hat EnterpriseVirtualization Manager is installed, then install and configure Red Hat Enterprise Virtualization ManagerReports on the Manager machine. Hosting the Data Warehouse service on a separate machine helps toreduce the load on the Manager machine. Note that hosting the Manager and Reports on the samemachine means that these processes will share CPU and memory.
Installing this scenario involves two key steps:
1. Install and configure Data Warehouse on a separate machine.
2. Install and configure Reports on the Manager machine.
Prerequisites
Ensure that you have completed the following prerequisites:
1. You must have installed and configured the Manager on a separate machine.
2. To set up the Data Warehouse machine, you must have the following:
A virtual or physical machine with Red Hat Enterprise Linux 6.6 or later versions of Red HatEnterprise Linux 6 installed.
A subscription to the Red Hat Enterprise Linux Server and Red Hat Enterprise Virtualization entitlement pools.
The password from the Manager's /etc/ovirt-engine/engine.conf.d/10-setup-database.conf file.
Allowed access from the Data Warehouse machine to the Manager database machine's TCPport 5432.
3. To set up the Reports machine, you must have the following:
The password from the Data Warehouse machine's /etc/ovirt-engine-dwh/ovirt-engine-dwhd.conf.d/10-setup-database.conf file.
4. If you choose to use a remote Data Warehouse database or Reports database, you must set upeach database before installing the Data Warehouse and Reports services. You must have thefollowing information about each database host:
The fully qualified domain name of the host
The port through which the database can be reached (5432 by default)
The database name
The database user
Self-Hosted Engine Guide
116

The database password
5. If you are using the self-hosted engine, you must move it to maintenance mode:
# hosted-engine --set-maintenance --mode=global
Procedure 10.7. Step 1: Installing and Configuring Data Warehouse on a Separate Machine
1. Register your system with the Content Delivery Network, entering your Customer Portal username and password when prompted:
# subscription-manager register
2. Find the Red Hat Enterprise Linux Server and Red Hat Enterprise Virtualization subscription pools and note down the pool IDs.
# subscription-manager list --available
3. Use the pool IDs located in the previous step to attach the entitlements to the system:
# subscription-manager attach --pool=pool_id
4. Disable all existing repositories:
# subscription-manager repos --disable=*
5. Enable the required channels:
# subscription-manager repos --enable=rhel-6-server-rpms# subscription-manager repos --enable=rhel-6-server-supplementary-rpms# subscription-manager repos --enable=rhel-6-server-rhevm-3.6-rpms# subscription-manager repos --enable=jb-eap-6-for-rhel-6-server-rpms
6. Ensure that all packages currently installed are up to date:
# yum update
7. Install the rhevm-dwh-setup package:
# yum install rhevm-dwh-setup
8. Run the engine-setup command to begin configuration of Data Warehouse on the machine:
# engine-setup
9. Press Enter to configure Data Warehouse:
Configure Data Warehouse on this host (Yes, No) [Yes]:
CHAPTER 10. DATA WAREHOUSE AND REPORTS
117

10. Press Enter to automatically configure the firewall, or type No and press Enter to maintainexisting settings:
Setup can automatically configure the firewall on this system.Note: automatic configuration of the firewall may overwrite current settings.Do you want Setup to configure the firewall? (Yes, No) [Yes]:
If you choose to automatically configure the firewall, and no firewall managers are active, you areprompted to select your chosen firewall manager from a list of supported options. Type the nameof the firewall manager and press Enter. This applies even in cases where only one option islisted.
11. Press Enter to accept the automatically detected hostname, or enter an alternative hostnameand press Enter:
Host fully qualified DNS name of this server [autodetected host name]:
12. Answer the following questions about the Data Warehouse database:
Where is the DWH database located? (Local, Remote) [Local]: Setup can configure the local postgresql server automatically for the DWH to run. This may conflict with existing applications.Would you like Setup to automatically configure postgresql and create DWH database, or prefer to perform that manually? (Automatic, Manual) [Automatic]:
Press Enter to choose the highlighted defaults, or type your alternative preference and thenpress Enter. If you select Remote, you are prompted to provide details about the remotedatabase host.
13. Enter the fully qualified domain name and password for the Manager database machine. Press Enter to accept the default values in each other field:
Engine database host []: engine-db-fqdnEngine database port [5432]: Engine database secured connection (Yes, No) [No]: Engine database name [engine]: Engine database user [engine]: Engine database password: password
14. Confirm your installation settings:
Please confirm installation settings (OK, Cancel) [OK]:
Procedure 10.8. Step 2: Installing and Configuring Reports on the Manager Machine
1. Install the rhevm-reports package:
# yum install rhevm-reports
2. Run the engine-setup command to begin configuration of Reports on the machine:
Self-Hosted Engine Guide
118

# engine-setup
3. Press Enter to configure Reports:
Configure Reports on this host (Yes, No) [Yes]:
4. Press Enter to automatically configure the firewall, or type No and press Enter to maintainexisting settings:
Setup can automatically configure the firewall on this system.Note: automatic configuration of the firewall may overwrite current settings.Do you want Setup to configure the firewall? (Yes, No) [Yes]:
If you choose to automatically configure the firewall, and no firewall managers are active, you areprompted to select your chosen firewall manager from a list of supported options. Type the nameof the firewall manager and press Enter. This applies even in cases where only one option islisted.
5. Answer the following questions about the Reports database:
Where is the Reports database located? (Local, Remote) [Local]: Setup can configure the local postgresql server automatically for the Reports to run. This may conflict with existing applications.Would you like Setup to automatically configure postgresql and create Reports database, or prefer to perform that manually? (Automatic, Manual) [Automatic]:
Press Enter to choose the highlighted defaults, or type your alternative preference and thenpress Enter. If you select Remote, you are prompted to provide details about the remotedatabase host.
6. Enter the fully qualified domain name and password for your Data Warehouse database host.Press Enter to accept the default values in each other field:
DWH database host []: dwh-db-fqdnDWH database port [5432]: DWH database secured connection (Yes, No) [No]: DWH database name [ovirt_engine_history]: DWH database user [ovirt_engine_history]: DWH database password: password
7. Set a password for the Reports administrative users (admin and superuser). Note that thereports system maintains its own set of credentials that are separate to those used for theManager:
Reports power users password:
You are prompted to enter the password a second time to confirm it.
8. For the configuration to take effect, the ovirt-engine service must be restarted. The engine-setup command prompts you:
CHAPTER 10. DATA WAREHOUSE AND REPORTS
119

During execution engine service will be stopped (OK, Cancel) [OK]:
Press Enter to proceed. The ovirt-engine service restarts automatically later in thecommand.
9. Confirm your installation settings:
Please confirm installation settings (OK, Cancel) [OK]:
Next Steps
Access the Reports Portal at http://demo.redhat.com/ovirt-engine-reports, replacing demo.redhat.comwith the fully qualified domain name of the Manager. If during the Manager installation you selected anon-default HTTP port then append :port to the URL, replacing :port with the port that you chose.
Log in using the user name admin and the password you set during reports installation. Note that thefirst time you log in to Red Hat Enterprise Virtualization Manager Reports, a number of web pages aregenerated and, as a result, your initial attempt to log in may take some time to complete.
Self-Hosted Engine Guide
120

APPENDIX A. MANUALLY INSTALLING THE MANAGEROPERATING SYSTEMTo set up the Manager virtual machine in the self-hosted engine environment, you can choose tomanually install the Manager operating system or you can use the RHEV-M Virtual Appliance to ease theprocess. The following procedure guides you through the manual installation process.
Procedure A.1. Manually Installing the Manager Operating System
1. Configuring the Virtual MachineThe hosted-engine script creates a virtual machine to be configured as the Red HatEnterprise Virtualization Manager. The virtual machine is referred to in this procedure asHostedEngine-VM. Specify the boot device and, if applicable, the path name of the installationmedia, the CPU type, the number of virtual CPUs, and the disk size. Specify a MAC address forHostedEngine-VM, or accept a randomly generated one. The MAC address can be used toupdate your DHCP server prior to installing the operating system on the virtual machine. Specifymemory size and console connection type for the creation of HostedEngine-VM.
Please specify the device to boot the VM from (cdrom, disk, pxe) [cdrom]: The following CPU types are supported by this host: - model_Penryn: Intel Penryn Family - model_Conroe: Intel Conroe FamilyPlease specify the CPU type to be used by the VM [model_Penryn]: Please specify the number of virtual CPUs for the VM [Defaults to minimum requirement: 2]: Please specify the disk size of the VM in GB [Defaults to minimum requirement: 25]: You may specify a MAC address for the VM or accept a randomly generated default [00:16:3e:77:b2:a4]: Please specify the memory size of the VM in MB [Defaults to minimum requirement: 4096]: Please specify the console type you want to use to connect to the VM (vnc, spice) [vnc]:
2. Configuring the Hosted EngineSpecify the name for the self-hosted engine host to be identified in the Red Hat EnterpriseVirtualization environment, and the password for the admin@internal user to access theAdministration Portal. Provide the FQDN for HostedEngine-VM; this procedure uses the FQDNmanager.example.com. Finally, provide the name and TCP port number of the SMTP server, theemail address used to send email notifications, and a comma-separated list of email addressesto receive these notifications.
Enter the name which will be used to identify this host inside the Administrator Portal [hosted_engine_1]: Host-HE1Enter 'admin@internal' user password that will be used for accessing the Administrator Portal: Confirm 'admin@internal' user password: Please provide the FQDN for the engine you want to use. This needs to match the FQDN that you will use for the engine installation within the VM: manager.example.comPlease provide the name of the SMTP server through which we will send notifications [localhost]: Please provide the TCP port number of the SMTP server [25]:
APPENDIX A. MANUALLY INSTALLING THE MANAGER OPERATING SYSTEM
121

Please provide the email address from which notifications will be sent [root@localhost]: Please provide a comma-separated list of email addresses which will get notifications [root@localhost]:
3. Configuration PreviewBefore proceeding, the hosted-engine script displays the configuration values you haveentered, and prompts for confirmation to proceed with these values.
Bridge interface : eth1Engine FQDN : manager.example.comBridge name : rhevmSSH daemon port : 22Firewall manager : iptablesGateway address : X.X.X.XHost name for web application : Host-HE1Host ID : 1Image size GB : 25Storage connection : storage.example.com:/hosted_engine/nfsConsole type : vncMemory size MB : 4096MAC address : 00:16:3e:77:b2:a4Boot type : pxeNumber of CPUs : 2CPU Type : model_Penryn
Please confirm installation settings (Yes, No)[Yes]:
4. Creating HostedEngine-VMThe script creates the virtual machine to be configured as HostedEngine-VM and providesconnection details. You must install an operating system on HostedEngine-VM before the hosted-engine script can proceed on Host-HE1.
[ INFO ] Stage: Transaction setup...[ INFO ] Creating VMYou can now connect to the VM with the following command: /usr/bin/remote-viewer vnc://localhost:5900Use temporary password "5379skAb" to connect to vnc console.Please note that in order to use remote-viewer you need to be able to run graphical applications.This means that if you are using ssh you have to supply the -Y flag (enables trusted X11 forwarding).Otherwise you can run the command from a terminal in your preferred desktop environment.If you cannot run graphical applications you can connect to the graphic console from another host or connect to the console using the following command:virsh -c qemu+tls://Test/system console HostedEngineIf you need to reboot the VM you will need to start it manually using the command:hosted-engine --vm-startYou can then set a temporary password using the command:hosted-engine --add-console-password
Self-Hosted Engine Guide
122
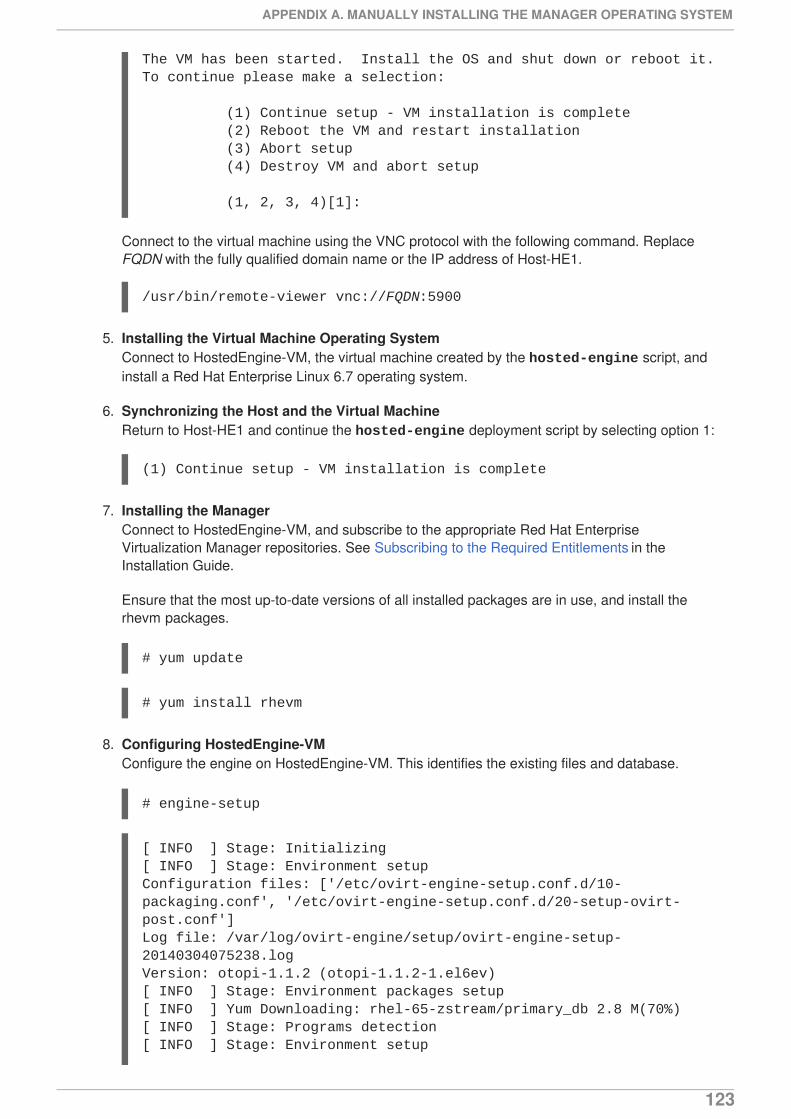
The VM has been started. Install the OS and shut down or reboot it. To continue please make a selection: (1) Continue setup - VM installation is complete (2) Reboot the VM and restart installation (3) Abort setup (4) Destroy VM and abort setup (1, 2, 3, 4)[1]:
Connect to the virtual machine using the VNC protocol with the following command. ReplaceFQDN with the fully qualified domain name or the IP address of Host-HE1.
/usr/bin/remote-viewer vnc://FQDN:5900
5. Installing the Virtual Machine Operating SystemConnect to HostedEngine-VM, the virtual machine created by the hosted-engine script, andinstall a Red Hat Enterprise Linux 6.7 operating system.
6. Synchronizing the Host and the Virtual MachineReturn to Host-HE1 and continue the hosted-engine deployment script by selecting option 1:
(1) Continue setup - VM installation is complete
7. Installing the ManagerConnect to HostedEngine-VM, and subscribe to the appropriate Red Hat EnterpriseVirtualization Manager repositories. See Subscribing to the Required Entitlements in theInstallation Guide.
Ensure that the most up-to-date versions of all installed packages are in use, and install therhevm packages.
# yum update
# yum install rhevm
8. Configuring HostedEngine-VMConfigure the engine on HostedEngine-VM. This identifies the existing files and database.
# engine-setup
[ INFO ] Stage: Initializing[ INFO ] Stage: Environment setupConfiguration files: ['/etc/ovirt-engine-setup.conf.d/10-packaging.conf', '/etc/ovirt-engine-setup.conf.d/20-setup-ovirt-post.conf']Log file: /var/log/ovirt-engine/setup/ovirt-engine-setup-20140304075238.logVersion: otopi-1.1.2 (otopi-1.1.2-1.el6ev)[ INFO ] Stage: Environment packages setup[ INFO ] Yum Downloading: rhel-65-zstream/primary_db 2.8 M(70%)[ INFO ] Stage: Programs detection[ INFO ] Stage: Environment setup
APPENDIX A. MANUALLY INSTALLING THE MANAGER OPERATING SYSTEM
123

[ INFO ] Stage: Environment customization --== PACKAGES ==-- [ INFO ] Checking for product updates...[ INFO ] No product updates found --== NETWORK CONFIGURATION ==-- Setup can automatically configure the firewall on this system.Note: automatic configuration of the firewall may overwrite current settings.Do you want Setup to configure the firewall? (Yes, No) [Yes]: [ INFO ] iptables will be configured as firewall manager. --== DATABASE CONFIGURATION ==-- --== OVIRT ENGINE CONFIGURATION ==-- Skipping storing options as database already prepared --== PKI CONFIGURATION ==-- PKI is already configured --== APACHE CONFIGURATION ==-- --== SYSTEM CONFIGURATION ==-- --== END OF CONFIGURATION ==-- [ INFO ] Stage: Setup validation[ INFO ] Cleaning stale zombie tasks --== CONFIGURATION PREVIEW ==-- Database name : engine Database secured connection : False Database host : X.X.X.X Database user name : engine Database host name validation : False Database port : 5432 NFS setup : True Firewall manager : iptables Update Firewall : True Configure WebSocket Proxy : True Host FQDN : manager.example.com NFS mount point : /var/lib/exports/iso Set application as default page : True Configure Apache SSL : True Please confirm installation settings (OK, Cancel) [OK]:
Self-Hosted Engine Guide
124

Confirm the settings. Upon completion, the setup provides an SSH fingerprint and an internalCertificate Authority hash.
9. Synchronizing the Host and the ManagerReturn to Host-HE1 and continue the hosted-engine deployment script by selecting option 1:
(1) Continue setup - engine installation is complete
[ INFO ] Engine replied: DB Up!Welcome to Health Status![ INFO ] Waiting for the host to become operational in the engine. This may take several minutes...[ INFO ] Still waiting for VDSM host to become operational...[ INFO ] The VDSM Host is now operational Please shutdown the VM allowing the system to launch it as a monitored service. The system will wait until the VM is down.
10. Shutting Down HostedEngine-VMShut down HostedEngine-VM.
# shutdown -h now
11. Setup ConfirmationReturn to Host-HE1 to confirm it has detected that HostedEngine-VM is down.
[ INFO ] Enabling and starting HA services Hosted Engine successfully set up[ INFO ] Stage: Clean up[ INFO ] Stage: Pre-termination[ INFO ] Stage: Termination
APPENDIX A. MANUALLY INSTALLING THE MANAGER OPERATING SYSTEM
125

APPENDIX B. REVISION HISTORY
Revision 3.6-23 Wed 24 Jan 2018 Red Hat Enterprise VirtualizationDocumentation Team
BZ#1529957 - Added a procedure for upgrading from a RHEL 6 environment to a RHEL 7 environment.
Revision 3.6-22 Thu 3 Aug 2017 Red Hat Enterprise VirtualizationDocumentation Team
BZ#1369690 - Added information about updating the network name.
Revision 3.6-21 Wed 1 Mar 2017 Red Hat Enterprise VirtualizationDocumentation Team
BZ#1386337 - Added self-hosted engine storage information.
Revision 3.6-20 Fri 2 Dec 2016 Red Hat Enterprise VirtualizationDocumentation Team
BZ#1349351 - Corrected the order of steps for removing a RHEV-H self-hosted engine host.
BZ#1364266 - Updated the instructions for upgrading hosts in a cluster from Red Hat Enterprise Linux 6 to Red Hat Enterprise
Linux 7.
Revision 3.6-19 Mon 12 Sep 2016 Red Hat Enterprise VirtualizationDocumentation Team
BZ#1328382 - Updated the upgrade instructions.
Revision 3.6-18 Wed 24 Aug 2016 Red Hat Enterprise VirtualizationDocumentation Team
BZ#1331644 - Added an installation options section and moved the workflow diagram to the first chapter.
Revision 3.6-17 Wed 27 July 2016 Red Hat Enterprise VirtualizationDocumentation Team
BZ#1353824 - Updated the Manager OS requirements to 6.6 or later versions of Red Hat Enterprise Linux 6.
Revision 3.6-16 Mon 4 July 2016 Red Hat Enterprise VirtualizationDocumentation Team
BZ#1350314 - Updated the steps for adding self-hosted engine hosts on RHEV-H.
Revision 3.6-15 Wed 29 June 2016 Red Hat Enterprise VirtualizationDocumentation Team
BZ#1258754 - Added troubleshooting information for redeploying failed self-hosted engine deployments.
BZ#1317740 - Clarified the storage requirement for the RHEV-M Virtual Appliance.
BZ#1335315 - Added a note on the importance of synchronizing system clocks.
Revision 3.6-14 Wed 25 May 2016 Red Hat Enterprise VirtualizationDocumentation Team
BZ#1312224 - Updated engine-backup examples to show that the --scope parameter can be used multiple times in one
command.
BZ#1315668 - Separated the screen command from hosted-engine deploy command.
BZ#1288966 - Added a procedure on Migrating to a Self-Hosted Environment using the RHEV-M Virtual Appliance.
BZ#1301447 - Updated the RHEL 6 to 7 upgrade procedure with in-cluster upgrade instructions.
BZ#1334777 - Updated instructions to highlight the importance of creating another data domain in the self-hosted engine setup
procedures.
Revision 3.6-13 Mon 18 Apr 2016 Red Hat Enterprise VirtualizationDocumentation Team
Self-Hosted Engine Guide
126

BZ#1317740 - Updated the storage requirements for RHEV-H installation, and corrected the link to the RHEVM Virtual
Appliance.
BZ#1306517 - Added an overview and diagrams of the backup and restoration procedure.
BZ#1293971 - Added basic troubleshooting commands.
Revision 3.6-12 Wed 23 Mar 2016 Red Hat Enterprise VirtualizationDocumentation Team
BZ#1317378 - Added a link to a Customer Portal solution that outlines steps for enabling a new Manager virtual machine and
removing a dead Manager virtual machine in scenarios where the Manager database is restored successfully, but the Manager
virtual machine appears to be Down and cannot be migrated to another self-hosted engine host.
Revision 3.6-11 Fri 11 Mar 2016 Red Hat Enterprise VirtualizationDocumentation Team
BZ#1306212 - Changed 'yum update rhevm-setup' to 'yum update rhevm\*setup\*' so that any installed data warehouse, reports,
or vmconsole packages will get updated as well.
Revision 3.6-10 Wed 09 Mar 2016 Red Hat Enterprise VirtualizationDocumentation Team
BZ#1188679 - Added instructions on how to upgrade from a 3.5 self-hosted engine running on version 6 hosts to a 3.6 self-
hosted engine environment running on version 7 hosts.
BZ#1282280 - Updated the overview and prerequisites section of the Backing up and Restoring a RHEL-Based Self-Hosted
Environment chapter.
BZ#1263955 - Added the --provision-db option to the Restoring the Self-Hosted Engine Manager section.
BZ#1288942 - Added content on the two new buttons available in the Hosted Engine screen.
Revision 3.6-9 Tue 01 Mar 2016 Red Hat Enterprise VirtualizationDocumentation Team
Updated 3.5 documentation links to 3.6.
Revision 3.6-8 Mon 22 Feb 2016 Red Hat Enterprise VirtualizationDocumentation Team
Initial revision for Red Hat Enterprise Virtualization 3.6 general availability.
Revision 3.6-7 Fri 19 Feb 2016 Red Hat Enterprise VirtualizationDocumentation Team
BZ#1301411 - Added installation workflow diagrams.
Revision 3.6-6 Wed 27 Jan 2016 Red Hat Enterprise VirtualizationDocumentation Team
BZ#1279930 - Removed superfluous rhel-7-server-optional-rpms and rhel-7-server-supplementary-rpms channels.
BZ#1293623 - Updated repos in upgrade topics.
BZ#1151265 - Added new topic 'Removing a Host from a Self-Hosted Engine Environment'.
BZ#1288672 - Added a note warning that configuring a bonded and vlan-tagged network interface as the management bridge is
currently not supported.
Revision 3.6-5 Wed 23 Dec 2015 Red Hat Enterprise VirtualizationDocumentation Team
BZ#1283796 - Updated self-hosted engine installation steps to include a manual Manager installation procedure, and clarify that
using the RHEV-M Virtual Appliance is optional.
Revision 3.6-4 Tue 08 Dec 2015 Red Hat Enterprise VirtualizationDocumentation Team
BZ#1275504 - Clarified the topic 'Migrating to a Self-Hosted Environment'.
BZ#1285598 - Added procedure 'Migrating the Self-Hosted Engine Database to a Remote Server Database'.
BZ#1218312 - Added a note that SSH password authentication is not enabled by default, and steps to enable it.
APPENDIX B. REVISION HISTORY
127

Revision 3.6-3 Wed 18 Nov 2015 Red Hat Enterprise VirtualizationDocumentation Team
Final revision for Red Hat Enterprise Virtualization 3.6 beta.
Revision 3.6-2 Wed 18 Nov 2015 Red Hat Enterprise VirtualizationDocumentation Team
BZ#1255231 - Updated information on using engine appliance for deploying self-hosted engine.
BZ#1279930 - Added 'rhel-7-server-optional-rpms' to required repos.
BZ#1200649 - Implemented suggested style updates.
BZ#1281642 - Added step to disable all repositories after subscribing to a pool id.
Revision 3.6-1 Mon 31 Aug 2015 Red Hat Enterprise VirtualizationDocumentation Team
Initial creation for the Red Hat Enterprise Virtualization 3.6 release.
Self-Hosted Engine Guide
128