Embed Size (px)
Citation preview

instrumentation and software for research
- 1 - DOC-234 Rev. 1.1 Copyright © 2017
Med Associates, Inc.
RABBIT CYSTOMETRY SUPPLEMENT TO THE MEDCMGTM MANUAL
DOC-234
Rev. 1.1
Copyright ©2017 All Rights Reserved
Med Associates Inc. P.O. Box 319 St. Albans, Vermont 05478
Phone: 802.527.2343 Fax: 802.527.5095 www.med-associates.com
instrumentation and software for research
- 2 - DOC-234 Rev. 1.1 Copyright © 2017
Med Associates, Inc.
Peristaltic Pump Connections
Route all Pump Cables through the Sound Attenuating Cubicle’s (SAC’s) cable exit side port.
1. Place the syringe pump, on the shelf, inside the SAC.
2. Connect the CAB-NULL-MODEM-10 cable to the serial-to-USB adapter cable. Use this to connect the
RS-232 IN connector on the back of the pump to any available USB port on the computer.
NOTE: DO NOT use the USB port on the pump.
3. It may be necessary to install the Serial-to-USB Adapter driver. If so, refer to the Serial-to-USB
Adapter Cable User’s Manual (on the Serial-to-USB Adapter CD) for detailed instructions regarding
driver installation.
4. Use the included A/C power cord to connect the pump to a standard wall outlet.
Pump Calibration
Pump calibration must be performed each time a new tubing set is loaded into the pump.
1. Load the tubing according to the pump user’s manual.
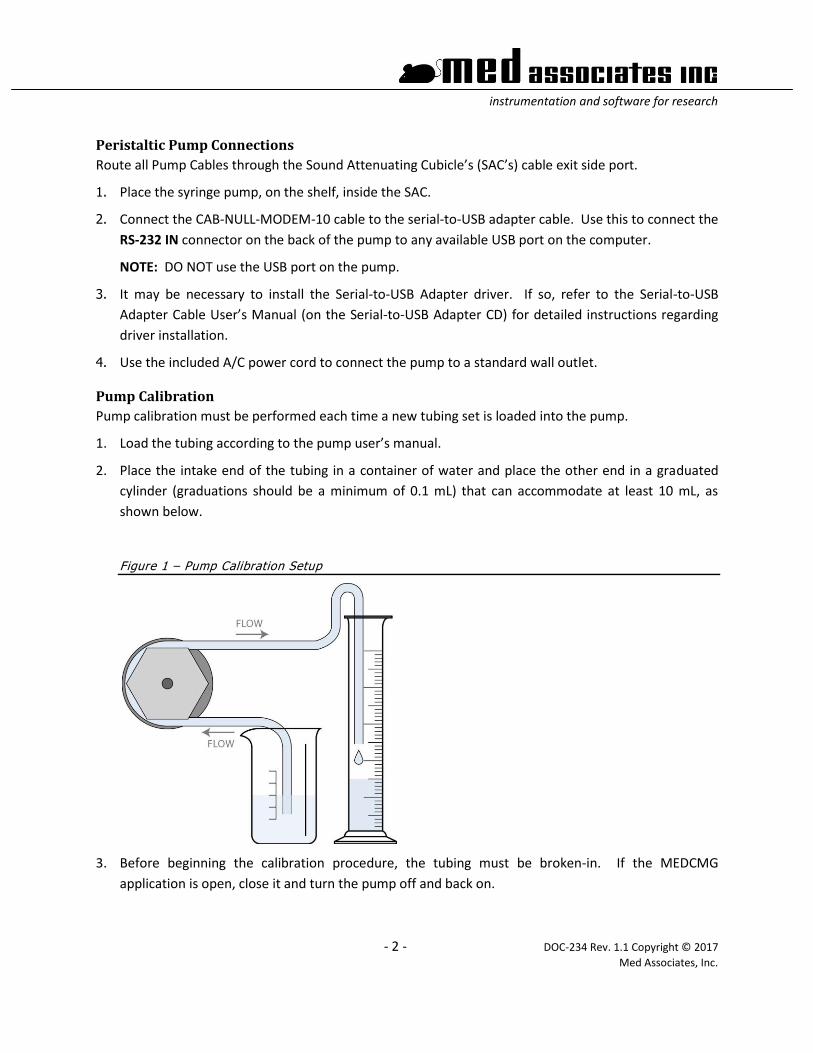
2. Place the intake end of the tubing in a container of water and place the other end in a graduated
cylinder (graduations should be a minimum of 0.1 mL) that can accommodate at least 10 mL, as
shown below.
Figure 1 – Pump Calibration Setup
3. Before beginning the calibration procedure, the tubing must be broken-in. If the MEDCMG
application is open, close it and turn the pump off and back on.
instrumentation and software for research
- 3 - DOC-234 Rev. 1.1 Copyright © 2017
Med Associates, Inc.
4. Run the pump for at least ten minutes to break in the tubing. Refer to the pump user’s manual for
detailed instructions (the user’s manual is on the pump CD).
5. Empty the graduated cylinder.
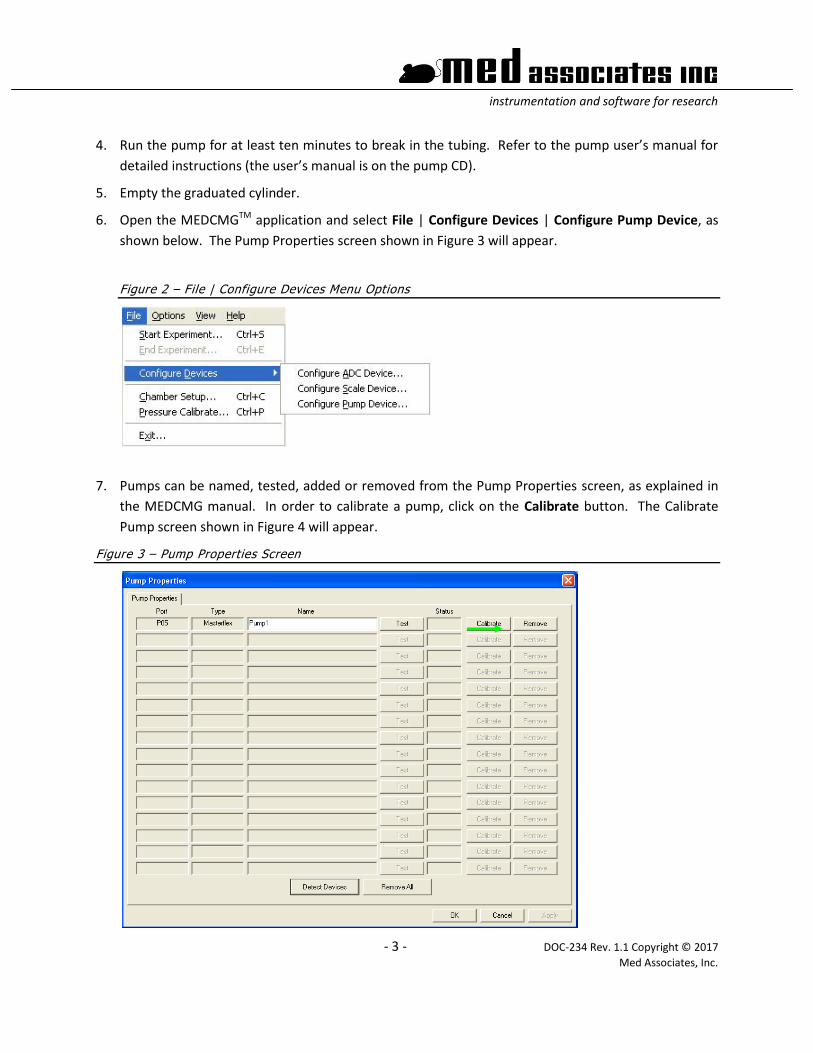
6. Open the MEDCMGTM application and select File | Configure Devices | Configure Pump Device, as
shown below. The Pump Properties screen shown in Figure 3 will appear.
Figure 2 – File | Configure Devices Menu Options
7. Pumps can be named, tested, added or removed from the Pump Properties screen, as explained in
the MEDCMG manual. In order to calibrate a pump, click on the Calibrate button. The Calibrate
Pump screen shown in Figure 4 will appear.
Figure 3 – Pump Properties Screen
instrumentation and software for research
- 4 - DOC-234 Rev. 1.1 Copyright © 2017
Med Associates, Inc.
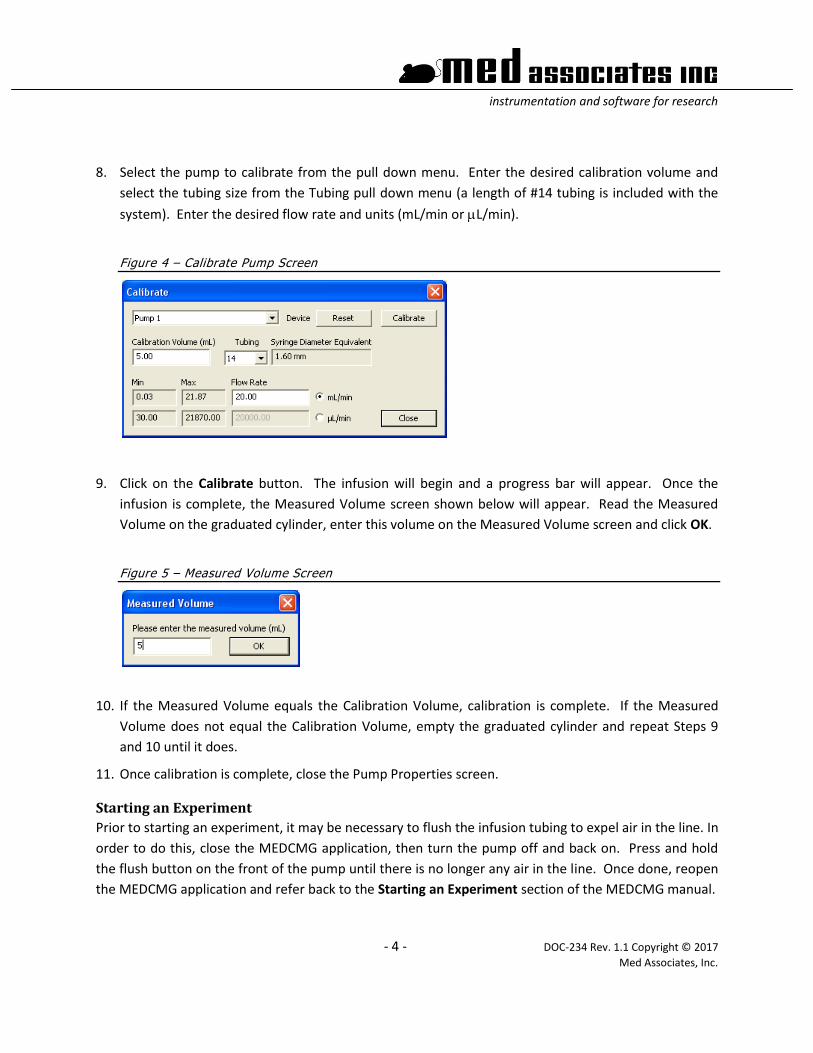
8. Select the pump to calibrate from the pull down menu. Enter the desired calibration volume and
select the tubing size from the Tubing pull down menu (a length of #14 tubing is included with the
system). Enter the desired flow rate and units (mL/min or L/min).
Figure 4 – Calibrate Pump Screen
9. Click on the Calibrate button. The infusion will begin and a progress bar will appear. Once the
infusion is complete, the Measured Volume screen shown below will appear. Read the Measured
Volume on the graduated cylinder, enter this volume on the Measured Volume screen and click OK.
Figure 5 – Measured Volume Screen
10. If the Measured Volume equals the Calibration Volume, calibration is complete. If the Measured
Volume does not equal the Calibration Volume, empty the graduated cylinder and repeat Steps 9
and 10 until it does.
11. Once calibration is complete, close the Pump Properties screen.
Starting an Experiment
Prior to starting an experiment, it may be necessary to flush the infusion tubing to expel air in the line. In
order to do this, close the MEDCMG application, then turn the pump off and back on. Press and hold
the flush button on the front of the pump until there is no longer any air in the line. Once done, reopen
the MEDCMG application and refer back to the Starting an Experiment section of the MEDCMG manual.
instrumentation and software for research
- 5 - DOC-234 Rev. 1.1 Copyright © 2017
Med Associates, Inc.
CONTACT INFORMATION
Please contact Med Associates, Inc. for information regarding any of our products.
For Technical questions, email [email protected].
For Sales questions, email [email protected].
Visit our website at www.med-associates.com.
Phone: 802.527.2343
Fax: 802.527.5095