Embed Size (px)
Citation preview
QuickStart
Nero ShowTime 2
Nero AG
Information on copyright and trademarks
The Nero ShowTime 2 user manual and all its contents are protected by copyright and are the property of Nero AG. All rights reserved. This user manual contains material that is protected by internationally valid copyright. This manual may not - in whole or in part - be copied, transmitted or otherwise reproduced without the express written permission of Nero AG.
All trademark names and trademarks are the property of the respective owners.
Nero AG rejects any claims that transcend the legal guarantee rights. Nero AG does not undertake any liability for the correctness of the contents of the Nero ShowTime 2 user manual. The contents of the software supplied, as well as of the Nero ShowTime 2 user manual, may be changed without prior warning.
The trademarks mentioned here are listed only for information purposes.
Copyright © 2003-2005 Nero AG
REV 2.1
Nero ShowTime General Information • 3
Contents
1 General Information .......................................................................... 5 1.1 About Nero ShowTime 2.................................................................. 5 1.2 Technical Data.................................................................................. 5 1.2.1 Supported Formats............................................................................. 5 1.2.2 Video Features................................................................................... 5 1.2.3 Audio Features................................................................................... 6 1.2.4 Hardware Optimisation....................................................................... 6 1.2.5 Features ............................................................................................. 6
2 Overview of Functions ...................................................................... 8 2.1 User Interface ................................................................................... 8
3 The 'Preferences' menu .................................................................. 13 3.1 Calling up the 'Preferences' menu................................................ 13 3.2 General Settings............................................................................. 14 3.2.1 OSD setting...................................................................................... 15 3.2.2 Keyboard and mouse settings.......................................................... 16 3.2.3 Capture to ........................................................................................ 17 3.2.4 Toolbar setting ................................................................................. 18 3.2.5 Tool tips setting ................................................................................ 19 3.3 DVD general .................................................................................... 20 3.3.1 Bookmarks editor ............................................................................. 21 3.3.2 Parental Control ............................................................................... 22 3.4 Video Settings ................................................................................ 23 3.4.1 Video mode ...................................................................................... 25 3.4.2 Video quality..................................................................................... 26 3.4.3 Nero Digital settings ......................................................................... 27 3.4.4 Image settings.................................................................................. 28 3.5 Audio ............................................................................................... 29 3.6 DNC ................................................................................................. 30 3.7 Skin browser................................................................................... 31
Nero ShowTime General Information • 4
4 Reproduce media ............................................................................ 32 4.1 Video ............................................................................................... 32 4.1.1 Video formats supported .................................................................. 32 4.1.2 Playing DVD-Videos......................................................................... 32 4.1.3 Playing VCD, SVCD and miniDVDs................................................. 33 4.1.4 Playing other video formats.............................................................. 33 4.2 Audio ............................................................................................... 34 4.2.1 Audio formats supported .................................................................. 34 4.2.2 Play audio tracks.............................................................................. 34 4.3 Playlists........................................................................................... 35 4.3.1 Creating and storing playlists ........................................................... 35 4.3.2 Loading the playlist........................................................................... 36 4.3.3 Editing the playlist ............................................................................ 37 4.4 Control during playback................................................................ 38 4.4.1 Skin .................................................................................................. 38 4.4.2 Toolbar ............................................................................................. 38 4.4.3 Context menu................................................................................... 39
5 FAQ................................................................................................... 40
6 Contact ............................................................................................. 41 6.1 Contact Information ....................................................................... 41
7 Glossary ........................................................................................... 42
8 Index................................................................................................. 45
Nero ShowTime General Information • 5
1 General Information
1.1 About Nero ShowTime 2 Nero ShowTime 2 provides you with a high-performance software DVD player that takes you to a new dimension in DVD's. Its cinema-like sound and excellent image quality for all digital pictures make an adventure of every film! What is more, Nero ShowTime 2 supports all DVD-Video formats and can play them from a disc and from the hard drive.
But Nero ShowTime 2 does much more! You can take snapshots while the film is running, organize your video clip collection or protect your films with integrated parental control. And these are only a few of the functions included in Nero ShowTime 2.
1.2 Technical Data
1.2.1 Supported Formats DVD-Video1
VCD 2.0/ SVCD with highlighted buttons
DVD+VR/-VR
miniDVD (DVD files on CD)
Nero Digital (incl. subtitles and 5.1 channel audio)
DVD-Video and (S)VCD playback from folder
MPEG-1/MPEG-2/MPEG-4 / AVI and ASF file playback
All country codes (5 changes allowed with non-regional disk drives)
1.2.2 Video Features Full ISO-compliant MPEG decoding
NTSC and PAL support
Image adjustment (brightness, contrast, saturation, luma, chroma)
Interlaced and progressive sources
Different MPEG-4 post-processing levels for optimal visual quality (manual- and autoadjustment)
1 If you do not have a licence for MPEG-2, one may be purchased in the form of an DVD-Video plug-in, at http://www.nero.com.
Nero ShowTime General Information • 6
Advanced adaptive deinterlacing for best possible picture quality from interlaced DVDs (e.g. TV-show DVDs, home video DVDs) with fine tuning view for perfect configuration
Full screen/scalable video window
16:9 wide screen support
Customizable on-screen display Inverse Telecine support on NTSC DVD titles for more fluidity Nero Digital support Multi monitor support
1.2.3 Audio Features Dolby Digital AC3
Dolby Digital / Dolby Surround
LPCM
MPEG-1
MPEG-2
S/PDIF Edition for digital sound
1.2.4 Hardware Optimisation Dynamic noise control for CD/DVD drives during playback
Full DXVA support
Power management support (APM and ACPI)
Hardware IDCT support
Dual CPU support
Optimized for MMX, SSE, SSE-2 and AMD
1.2.5 Features Changeable Skins
Parental control with password protection (8 levels)2
Multiangle support (seamless/non-seamless)
Remember last position played (autoresume) for each disc
Bookmark management
Configurable snapshot during playback
Software eject
Digital zoom of selected area with pan option
Configurable toolbar
All player features available by right-hand mouse-click
2 This may not be included, depending on the version!
Nero ShowTime General Information • 7
Chapter jump slider
AB Repeat/AB bookmark repeat
Configurable OSD
Nero DVD Navigator
Hotkeys (keyboard shortcuts)
Autoplay on insert
Seamless integration into Nero SmartStart, the control centre for all Nero applications
Mouse scroll settings
Double-click on display changes to full screen
Double-click on full screen changes to normal window
Nero ShowTime Overview of Functions • 8
2 Overview of Functions
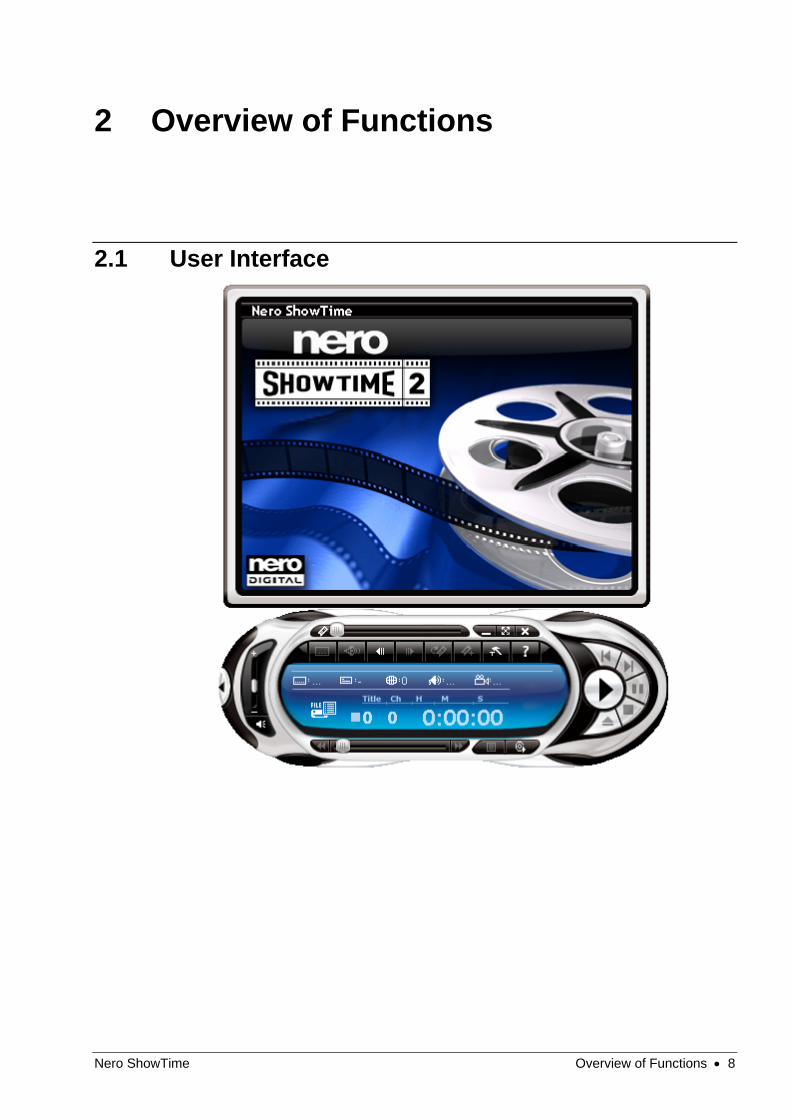
2.1 User Interface
Nero ShowTime Overview of Functions • 9
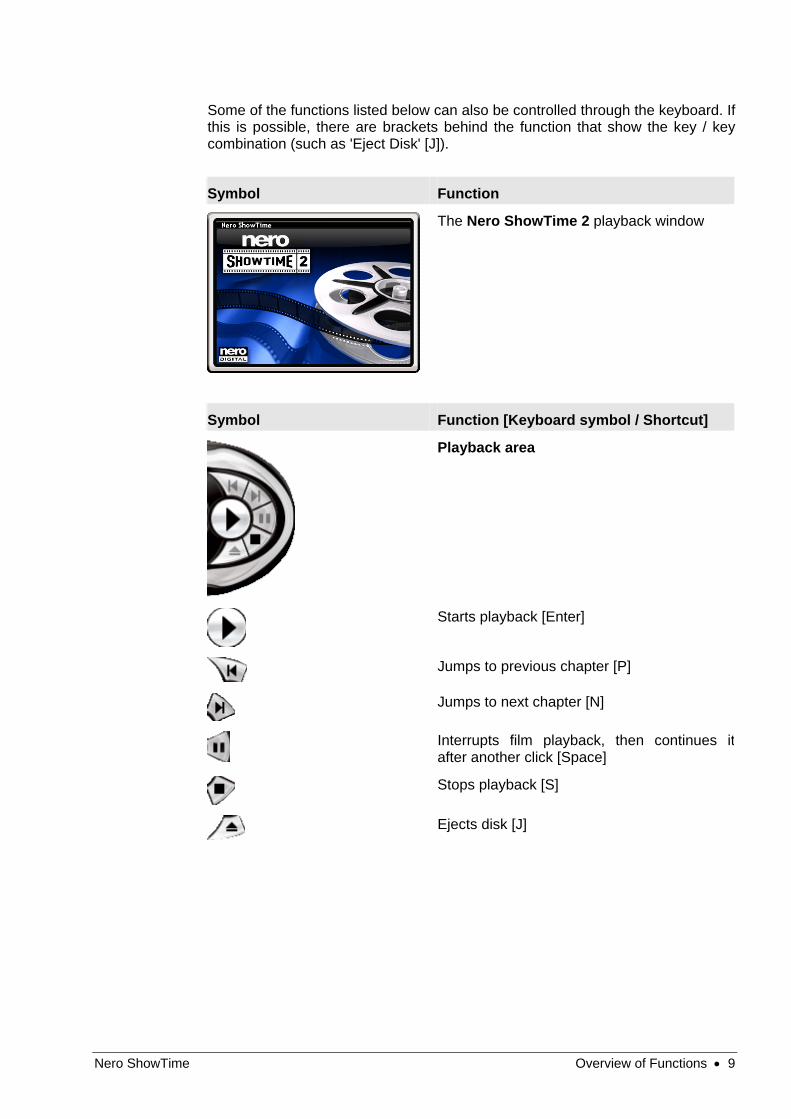
Some of the functions listed below can also be controlled through the keyboard. If this is possible, there are brackets behind the function that show the key / key combination (such as 'Eject Disk' [J]).
Symbol Function
The Nero ShowTime 2 playback window
Symbol Function [Keyboard symbol / Shortcut]
Playback area
Starts playback [Enter]
Jumps to previous chapter [P]
Jumps to next chapter [N]
Interrupts film playback, then continues itafter another click [Space]
Stops playback [S]
Ejects disk [J]
Nero ShowTime Overview of Functions • 10
Symbol Function [Keyboard symbol / Shortcut]
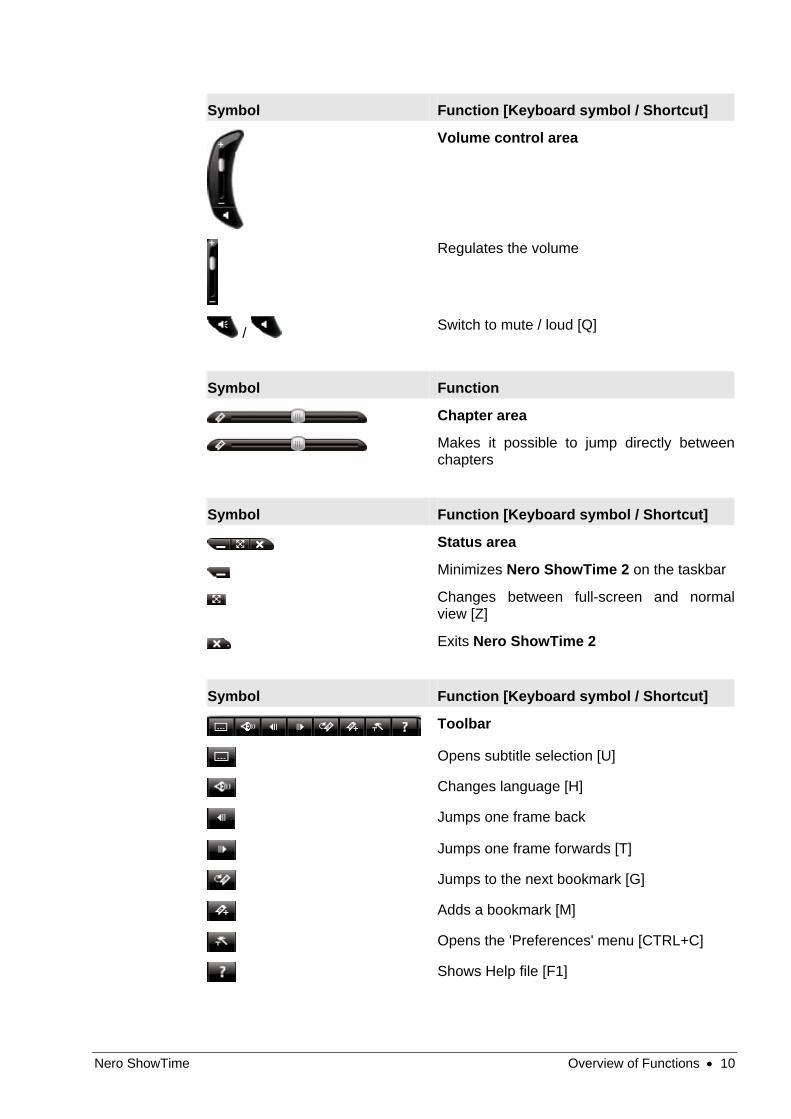
Volume control area
Regulates the volume
/ Switch to mute / loud [Q]
Symbol Function
Chapter area
Makes it possible to jump directly betweenchapters
Symbol Function [Keyboard symbol / Shortcut]
Status area
Minimizes Nero ShowTime 2 on the taskbar
Changes between full-screen and normalview [Z]
Exits Nero ShowTime 2
Symbol Function [Keyboard symbol / Shortcut]
Toolbar
Opens subtitle selection [U]
Changes language [H]
Jumps one frame back
Jumps one frame forwards [T]
Jumps to the next bookmark [G]
Adds a bookmark [M]
Opens the 'Preferences' menu [CTRL+C]
Shows Help file [F1]
Nero ShowTime Overview of Functions • 11
Symbol Function
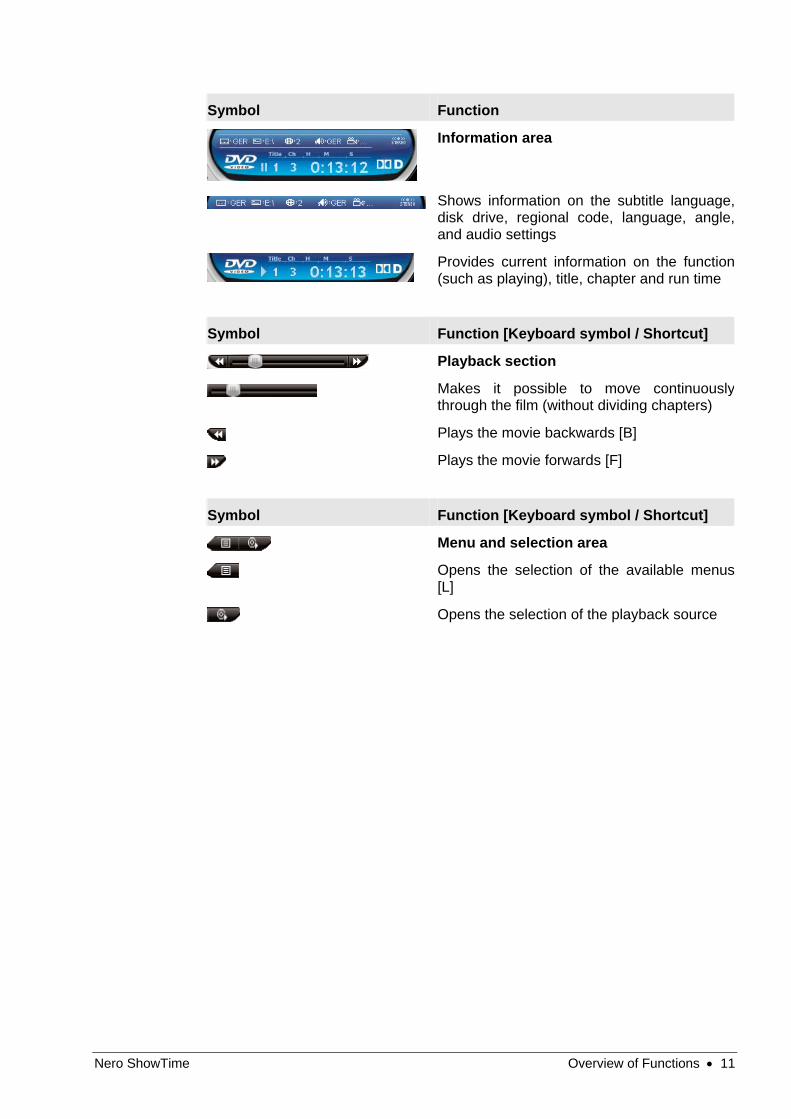
Information area
Shows information on the subtitle language,disk drive, regional code, language, angle,and audio settings
Provides current information on the function(such as playing), title, chapter and run time
Symbol Function [Keyboard symbol / Shortcut]
Playback section
Makes it possible to move continuouslythrough the film (without dividing chapters)
Plays the movie backwards [B]
Plays the movie forwards [F]
Symbol Function [Keyboard symbol / Shortcut]
Menu and selection area
Opens the selection of the available menus[L]
Opens the selection of the playback source
Nero ShowTime Overview of Functions • 12
Symbol Function [Keyboard symbol / Shortcut]
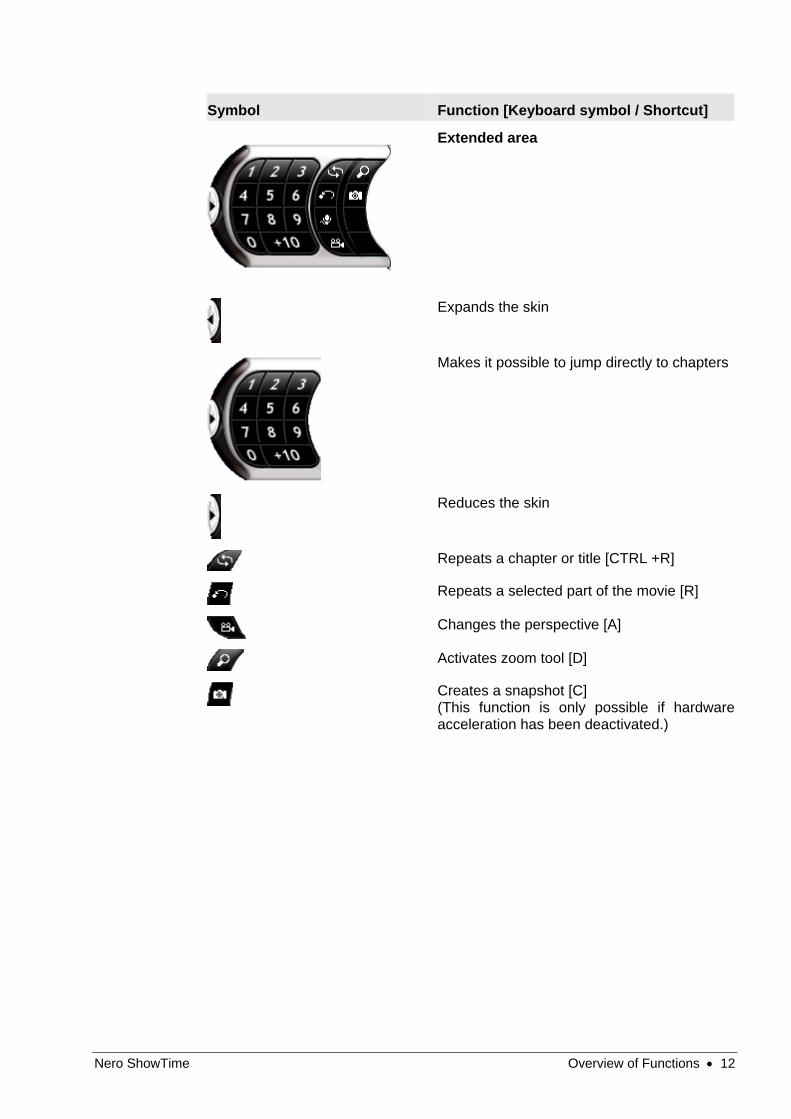
Extended area
Expands the skin
Makes it possible to jump directly to chapters
Reduces the skin
Repeats a chapter or title [CTRL +R]
Repeats a selected part of the movie [R]
Changes the perspective [A]
Activates zoom tool [D]
Creates a snapshot [C] (This function is only possible if hardwareacceleration has been deactivated.)
Nero ShowTime The 'Preferences' menu • 13
3 The 'Preferences' menu
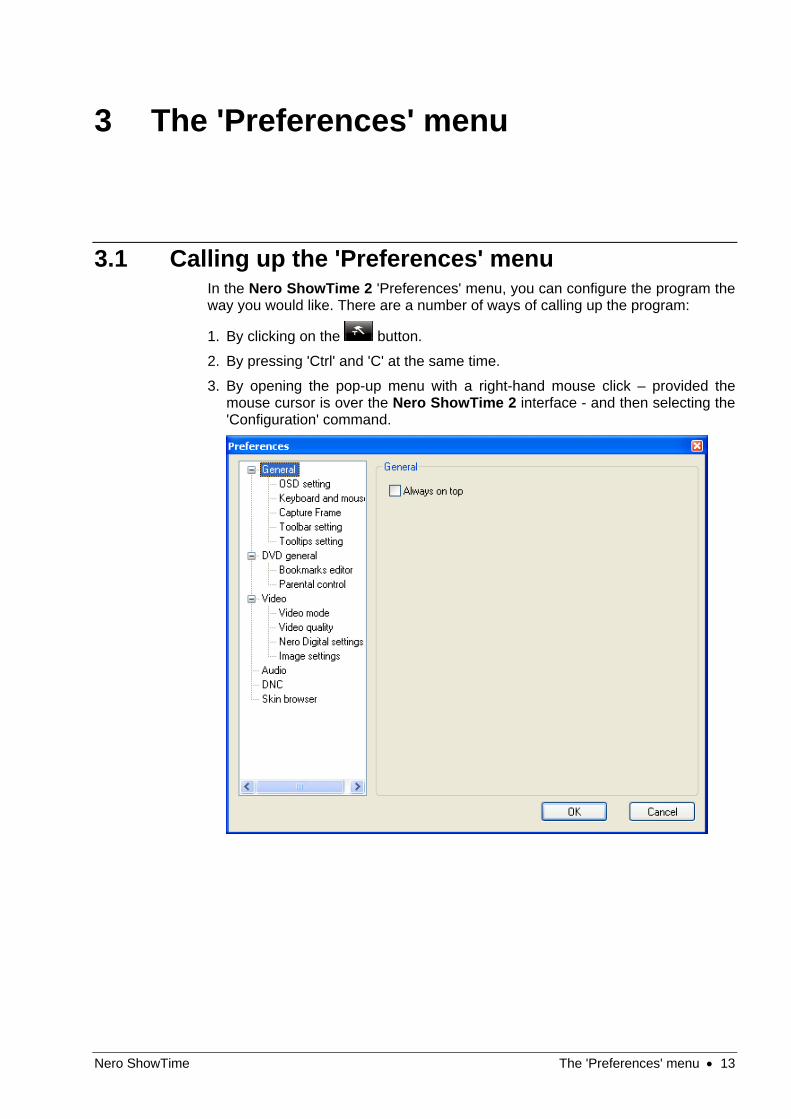
3.1 Calling up the 'Preferences' menu In the Nero ShowTime 2 'Preferences' menu, you can configure the program the way you would like. There are a number of ways of calling up the program:
1. By clicking on the button.
2. By pressing 'Ctrl' and 'C' at the same time.
3. By opening the pop-up menu with a right-hand mouse click – provided the mouse cursor is over the Nero ShowTime 2 interface - and then selecting the 'Configuration' command.
Nero ShowTime The 'Preferences' menu • 14
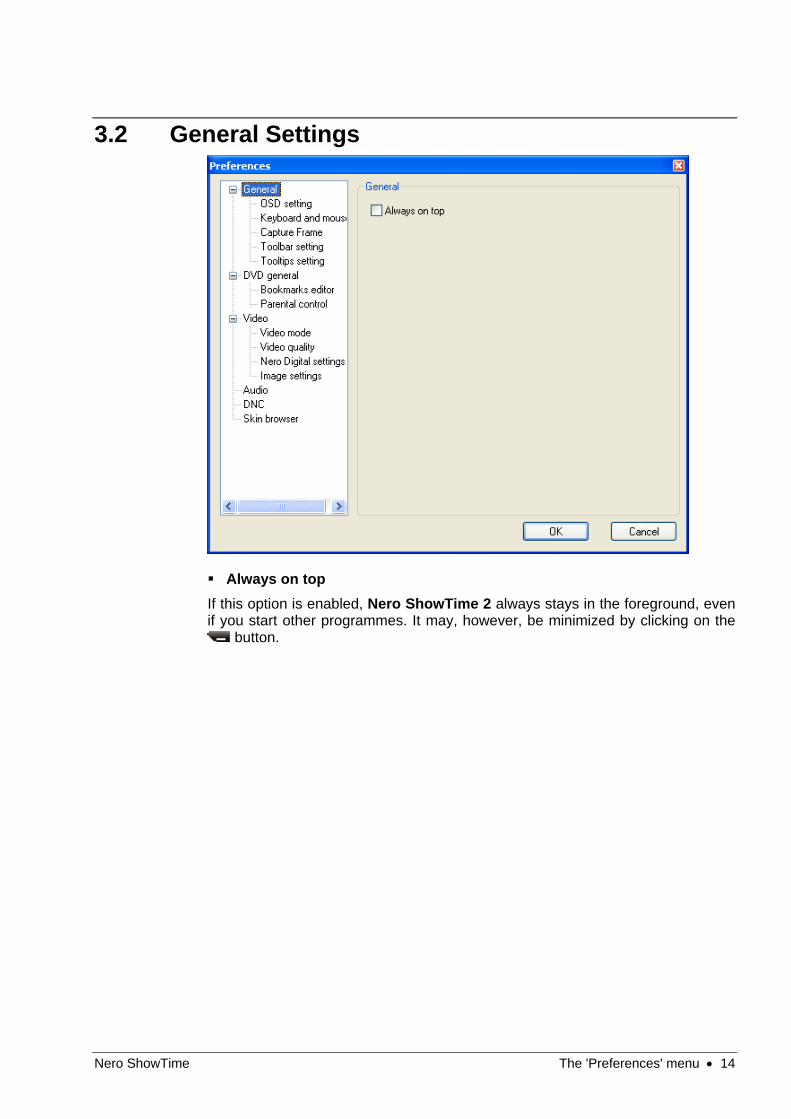
3.2 General Settings
Always on top If this option is enabled, Nero ShowTime 2 always stays in the foreground, even if you start other programmes. It may, however, be minimized by clicking on the
button.
Nero ShowTime The 'Preferences' menu • 15
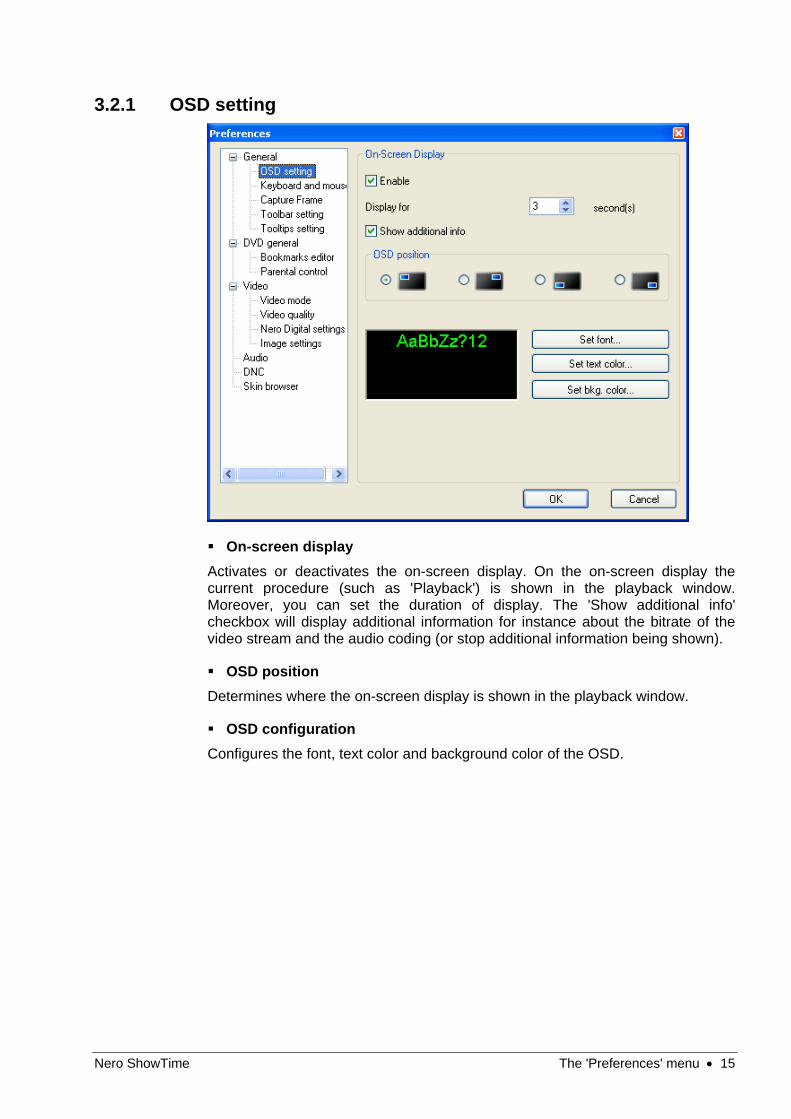
3.2.1 OSD setting
On-screen display Activates or deactivates the on-screen display. On the on-screen display the current procedure (such as 'Playback') is shown in the playback window. Moreover, you can set the duration of display. The 'Show additional info' checkbox will display additional information for instance about the bitrate of the video stream and the audio coding (or stop additional information being shown).
OSD position Determines where the on-screen display is shown in the playback window.
OSD configuration Configures the font, text color and background color of the OSD.
Nero ShowTime The 'Preferences' menu • 16
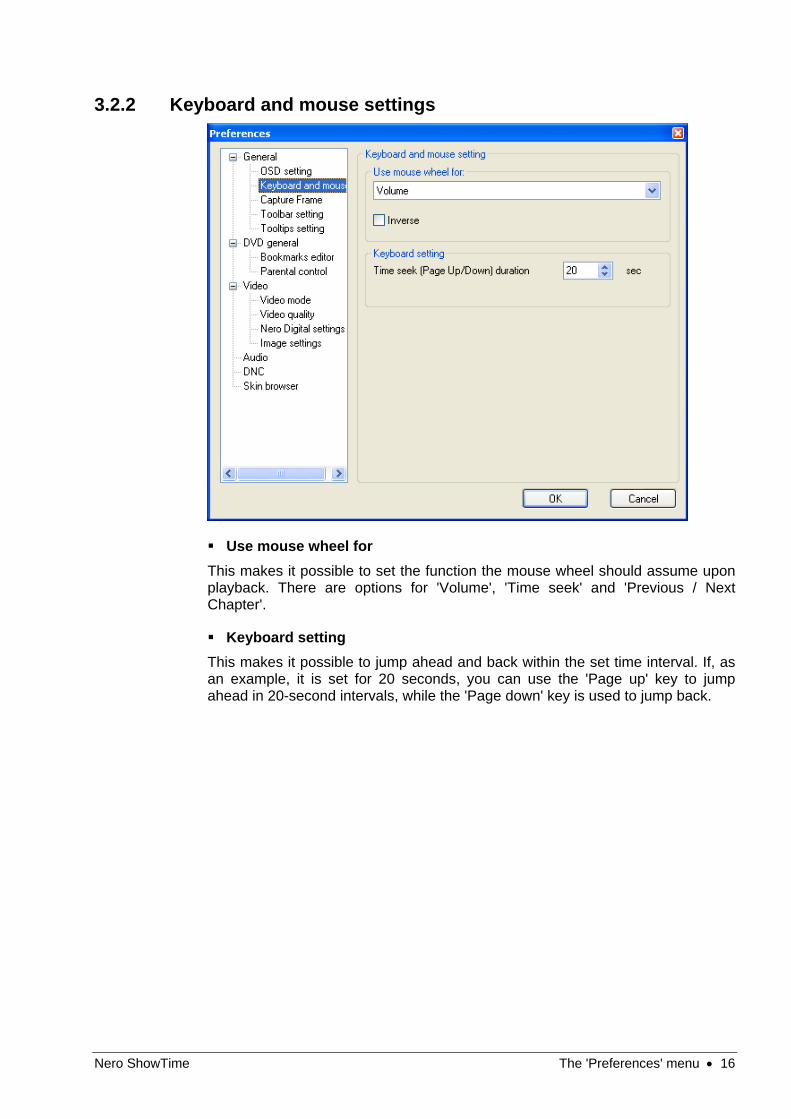
3.2.2 Keyboard and mouse settings
Use mouse wheel for This makes it possible to set the function the mouse wheel should assume upon playback. There are options for 'Volume', 'Time seek' and 'Previous / Next Chapter'.
Keyboard setting This makes it possible to jump ahead and back within the set time interval. If, as an example, it is set for 20 seconds, you can use the 'Page up' key to jump ahead in 20-second intervals, while the 'Page down' key is used to jump back.
Nero ShowTime The 'Preferences' menu • 17
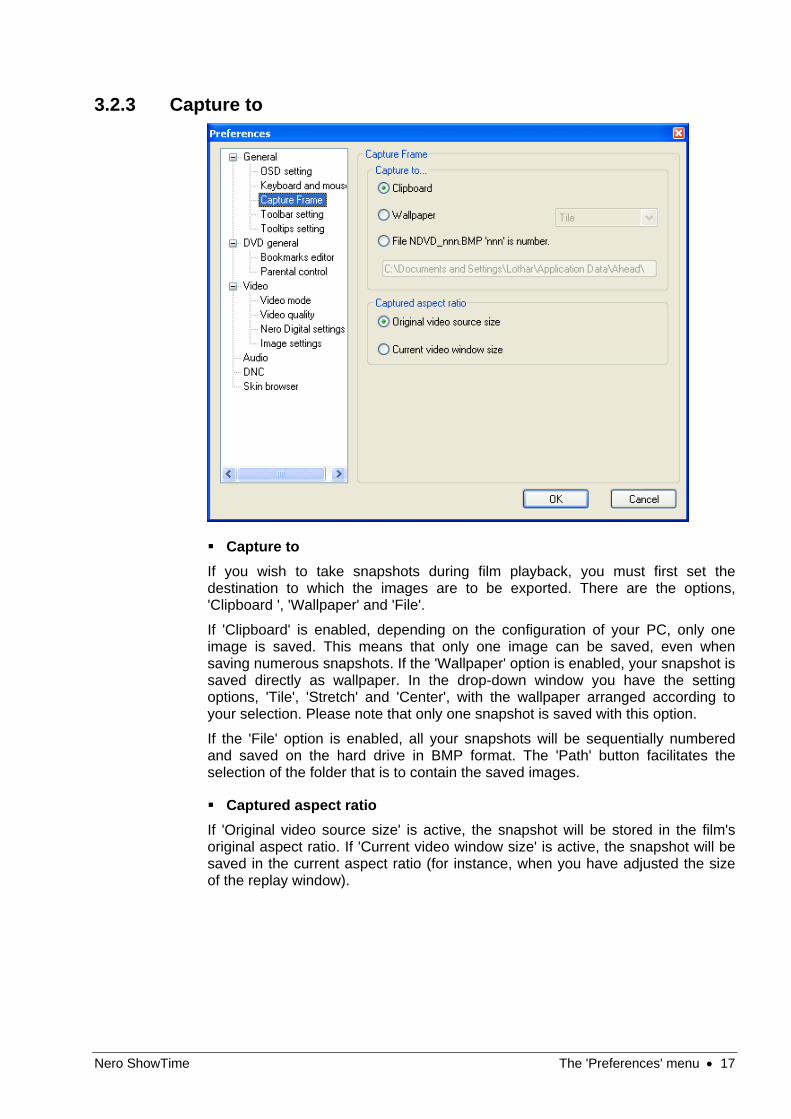
3.2.3 Capture to
Capture to If you wish to take snapshots during film playback, you must first set the destination to which the images are to be exported. There are the options, 'Clipboard ', 'Wallpaper' and 'File'.
If 'Clipboard' is enabled, depending on the configuration of your PC, only one image is saved. This means that only one image can be saved, even when saving numerous snapshots. If the 'Wallpaper' option is enabled, your snapshot is saved directly as wallpaper. In the drop-down window you have the setting options, 'Tile', 'Stretch' and 'Center', with the wallpaper arranged according to your selection. Please note that only one snapshot is saved with this option.
If the 'File' option is enabled, all your snapshots will be sequentially numbered and saved on the hard drive in BMP format. The 'Path' button facilitates the selection of the folder that is to contain the saved images.
Captured aspect ratio If 'Original video source size' is active, the snapshot will be stored in the film's original aspect ratio. If 'Current video window size' is active, the snapshot will be saved in the current aspect ratio (for instance, when you have adjusted the size of the replay window).
Nero ShowTime The 'Preferences' menu • 18
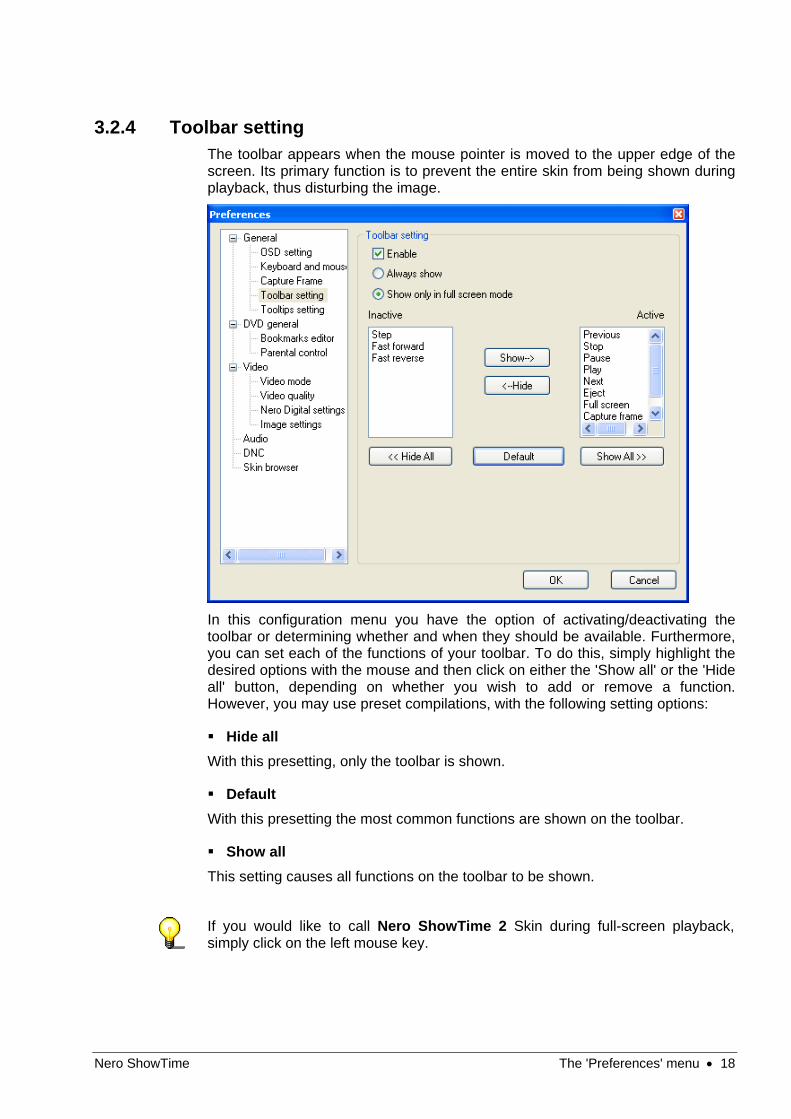
3.2.4 Toolbar setting The toolbar appears when the mouse pointer is moved to the upper edge of the screen. Its primary function is to prevent the entire skin from being shown during playback, thus disturbing the image.
In this configuration menu you have the option of activating/deactivating the toolbar or determining whether and when they should be available. Furthermore, you can set each of the functions of your toolbar. To do this, simply highlight the desired options with the mouse and then click on either the 'Show all' or the 'Hide all' button, depending on whether you wish to add or remove a function. However, you may use preset compilations, with the following setting options:
Hide all With this presetting, only the toolbar is shown.
Default With this presetting the most common functions are shown on the toolbar.
Show all This setting causes all functions on the toolbar to be shown.
If you would like to call Nero ShowTime 2 Skin during full-screen playback, simply click on the left mouse key.
Nero ShowTime The 'Preferences' menu • 19
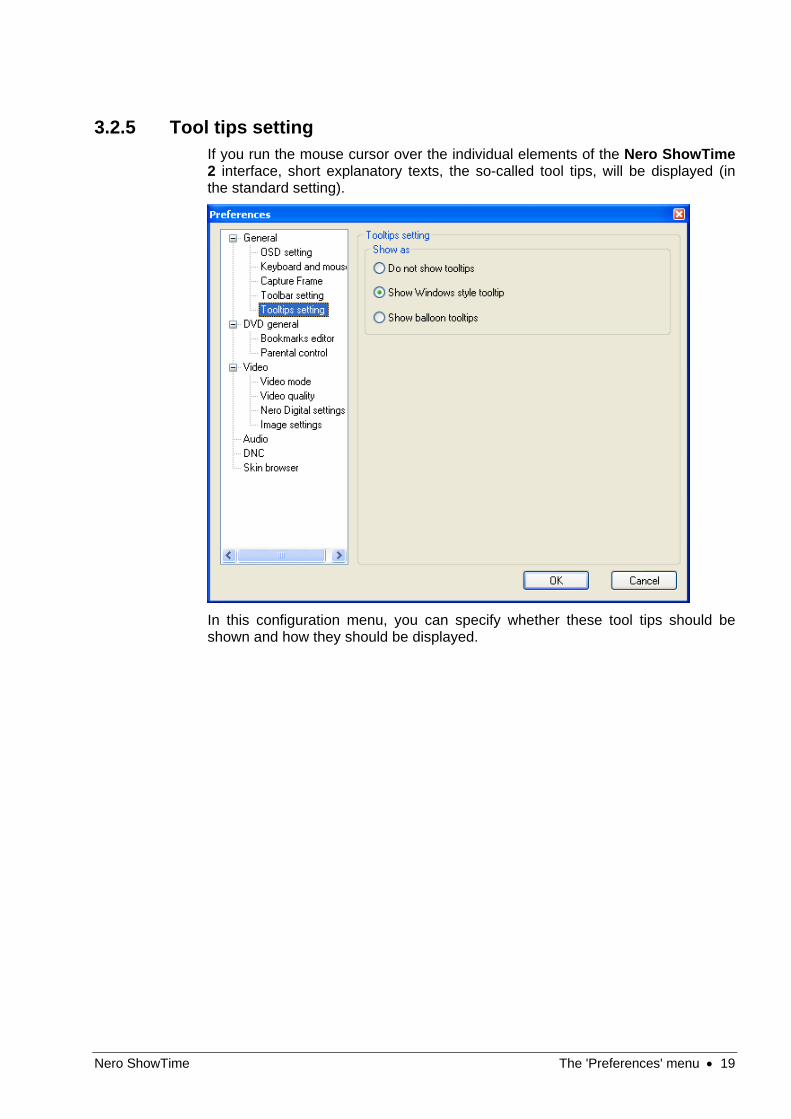
3.2.5 Tool tips setting If you run the mouse cursor over the individual elements of the Nero ShowTime 2 interface, short explanatory texts, the so-called tool tips, will be displayed (in the standard setting).
In this configuration menu, you can specify whether these tool tips should be shown and how they should be displayed.
Nero ShowTime The 'Preferences' menu • 20
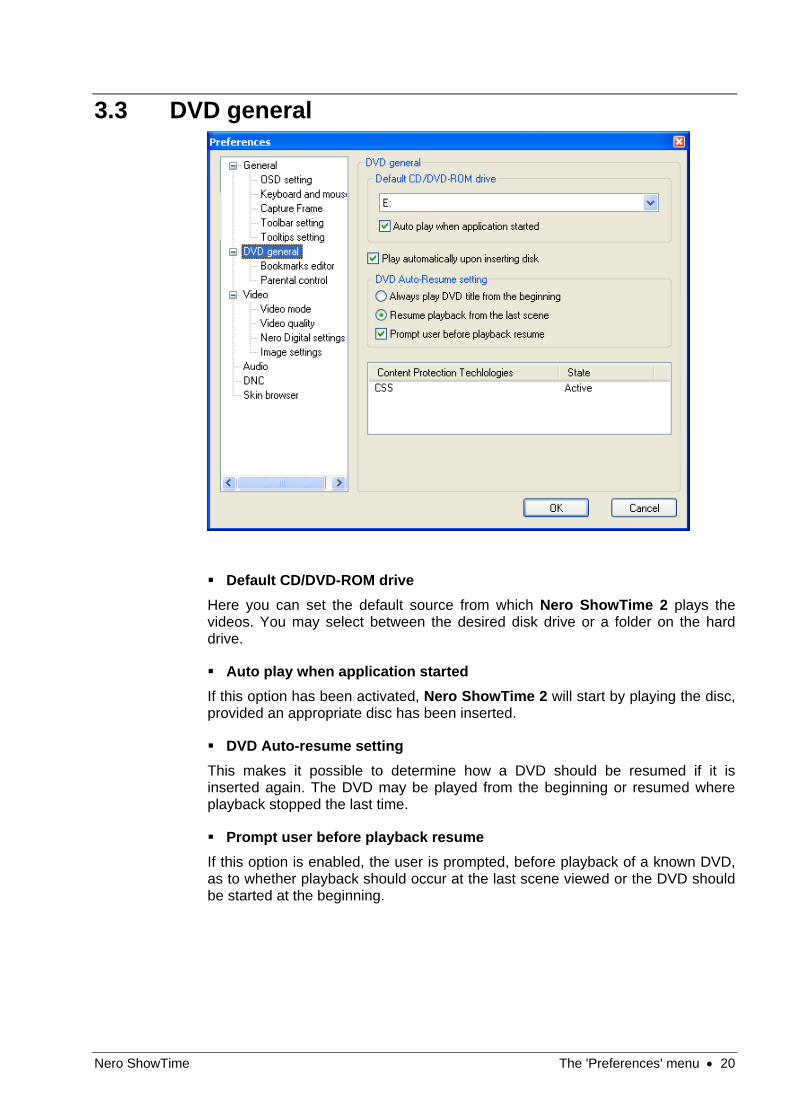
3.3 DVD general
Default CD/DVD-ROM drive Here you can set the default source from which Nero ShowTime 2 plays the videos. You may select between the desired disk drive or a folder on the hard drive.
Auto play when application started If this option has been activated, Nero ShowTime 2 will start by playing the disc, provided an appropriate disc has been inserted.
DVD Auto-resume setting This makes it possible to determine how a DVD should be resumed if it is inserted again. The DVD may be played from the beginning or resumed where playback stopped the last time.
Prompt user before playback resume If this option is enabled, the user is prompted, before playback of a known DVD, as to whether playback should occur at the last scene viewed or the DVD should be started at the beginning.
Nero ShowTime The 'Preferences' menu • 21
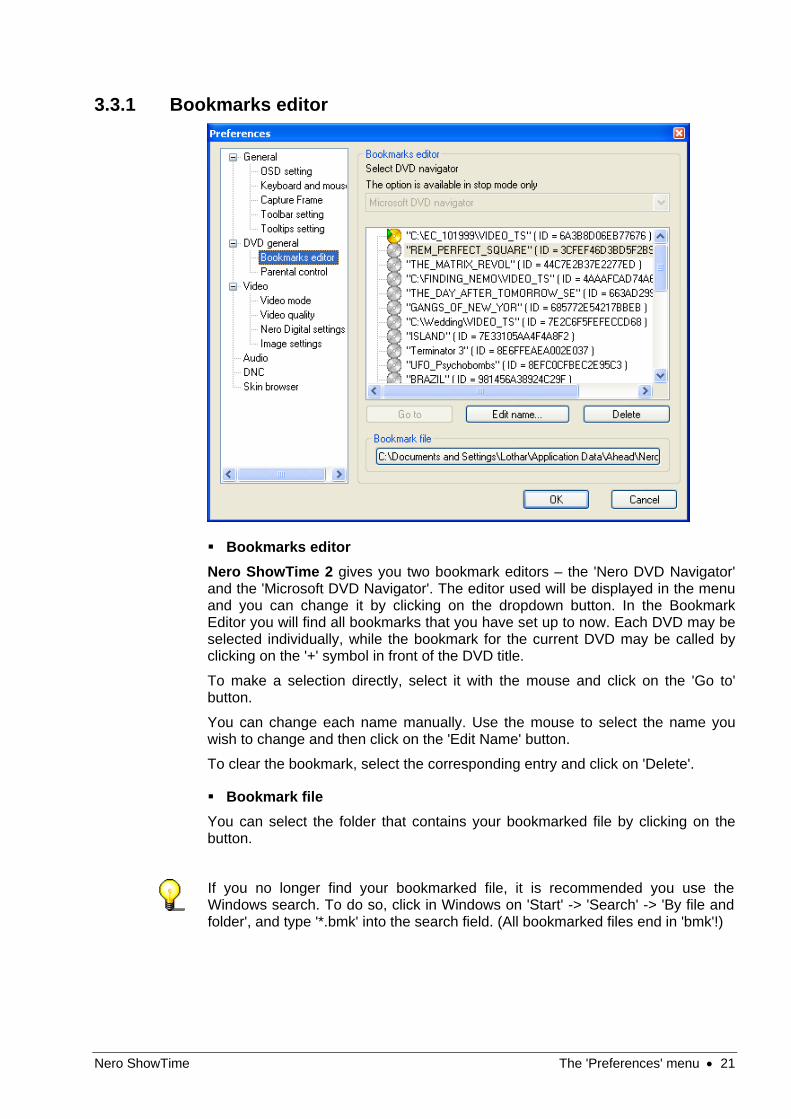
3.3.1 Bookmarks editor
Bookmarks editor Nero ShowTime 2 gives you two bookmark editors – the 'Nero DVD Navigator' and the 'Microsoft DVD Navigator'. The editor used will be displayed in the menu and you can change it by clicking on the dropdown button. In the Bookmark Editor you will find all bookmarks that you have set up to now. Each DVD may be selected individually, while the bookmark for the current DVD may be called by clicking on the '+' symbol in front of the DVD title.
To make a selection directly, select it with the mouse and click on the 'Go to' button.
You can change each name manually. Use the mouse to select the name you wish to change and then click on the 'Edit Name' button.
To clear the bookmark, select the corresponding entry and click on 'Delete'.
Bookmark file You can select the folder that contains your bookmarked file by clicking on the button.
If you no longer find your bookmarked file, it is recommended you use the Windows search. To do so, click in Windows on 'Start' -> 'Search' -> 'By file and folder', and type '*.bmk' into the search field. (All bookmarked files end in 'bmk'!)
Nero ShowTime The 'Preferences' menu • 22
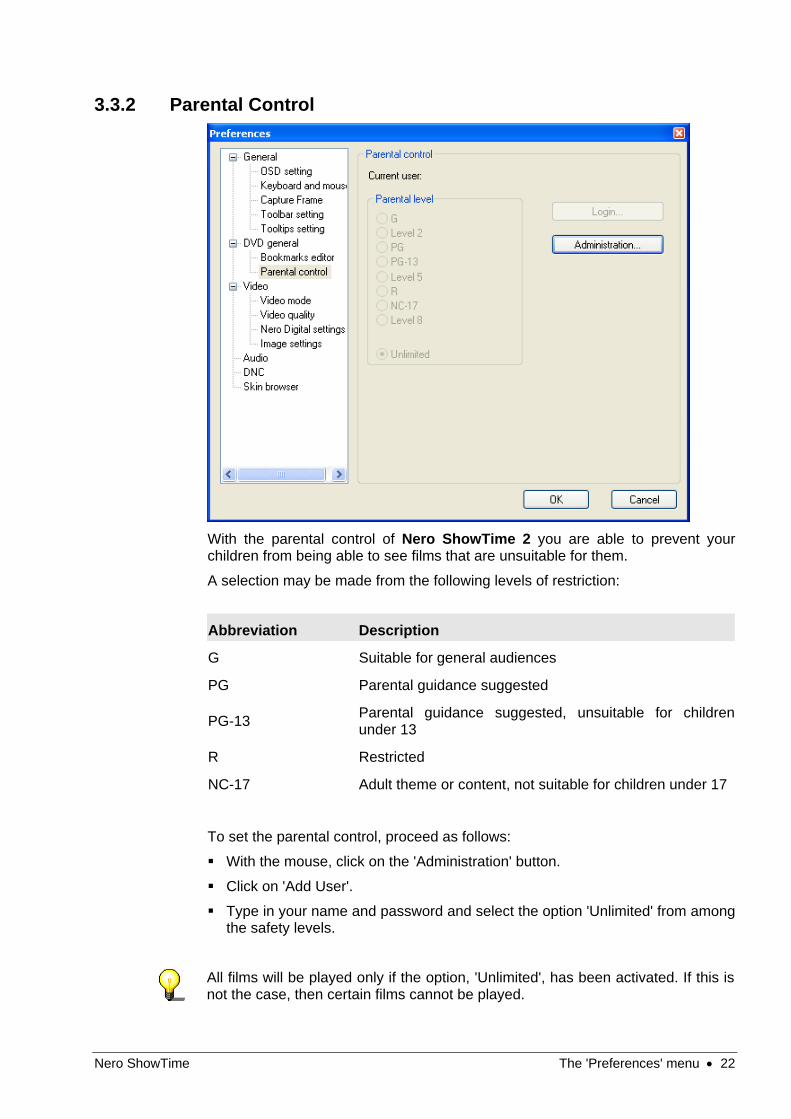
3.3.2 Parental Control
With the parental control of Nero ShowTime 2 you are able to prevent your children from being able to see films that are unsuitable for them.
A selection may be made from the following levels of restriction:
Abbreviation Description
G Suitable for general audiences
PG Parental guidance suggested
PG-13 Parental guidance suggested, unsuitable for childrenunder 13
R Restricted
NC-17 Adult theme or content, not suitable for children under 17
To set the parental control, proceed as follows:
With the mouse, click on the 'Administration' button.
Click on 'Add User'.
Type in your name and password and select the option 'Unlimited' from among the safety levels.
All films will be played only if the option, 'Unlimited', has been activated. If this is not the case, then certain films cannot be played.
Nero ShowTime The 'Preferences' menu • 23
Confirm your entry by clicking on 'OK'.
Now you are registered as an administrator. Next, create the profile for your parental control.
The next time a DVD is inserted, for which the parental control criteria are relevant, then a login window appears. There you or another user must log in with the established profile to watch the film.
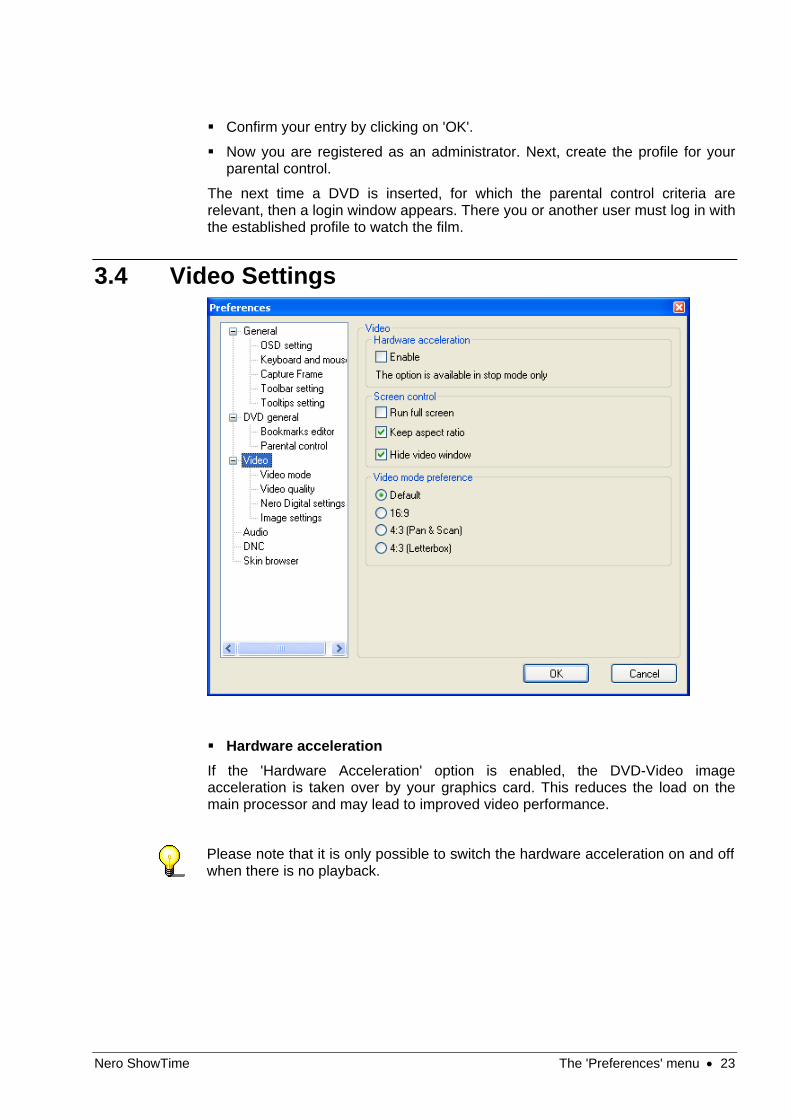
3.4 Video Settings
Hardware acceleration If the 'Hardware Acceleration' option is enabled, the DVD-Video image acceleration is taken over by your graphics card. This reduces the load on the main processor and may lead to improved video performance.
Please note that it is only possible to switch the hardware acceleration on and off when there is no playback.
Nero ShowTime The 'Preferences' menu • 24
Screen control In this menu you set the appearance of the playback window at the start of Nero ShowTime 2.
If the 'Run Full-screen' option is enabled, the film played is automatically shown on the entire screen.
If the 'Keep Aspect Ratio' option is enabled, the film will be shown in its original aspect ratio (or rather, height x width).
If the 'Hide Video Window' option is enabled, then the playback window is first shown when the film is played. Prior to that time it is invisible.
Video mode preference In this menu you can specify the video playback mode.
Standard: The video will be shown in the format in which it was recorded.
16 x 9: The video will be shown in 16 x 9 ratio.
4 x 3 (Pan & Scan): A video in wide screen format, such as 16 x 9 for instance, will be shown in 4 x 3 format. The pan & scan procedure makes use of the whole height of the screen, so that the contents of the left and right edges of the picture are lost. On the other hand, no black strips are seen at the top and bottom of the picture, as occurs with the 'letterbox' procedure.
4 x 3 (Letterbox): A video in wide screen format, such as 16 x 9, will be shown in 4 x 3 format. As all the visual information is displayed, black strips will be seen at the top and bottom of the screen.
Nero ShowTime The 'Preferences' menu • 25
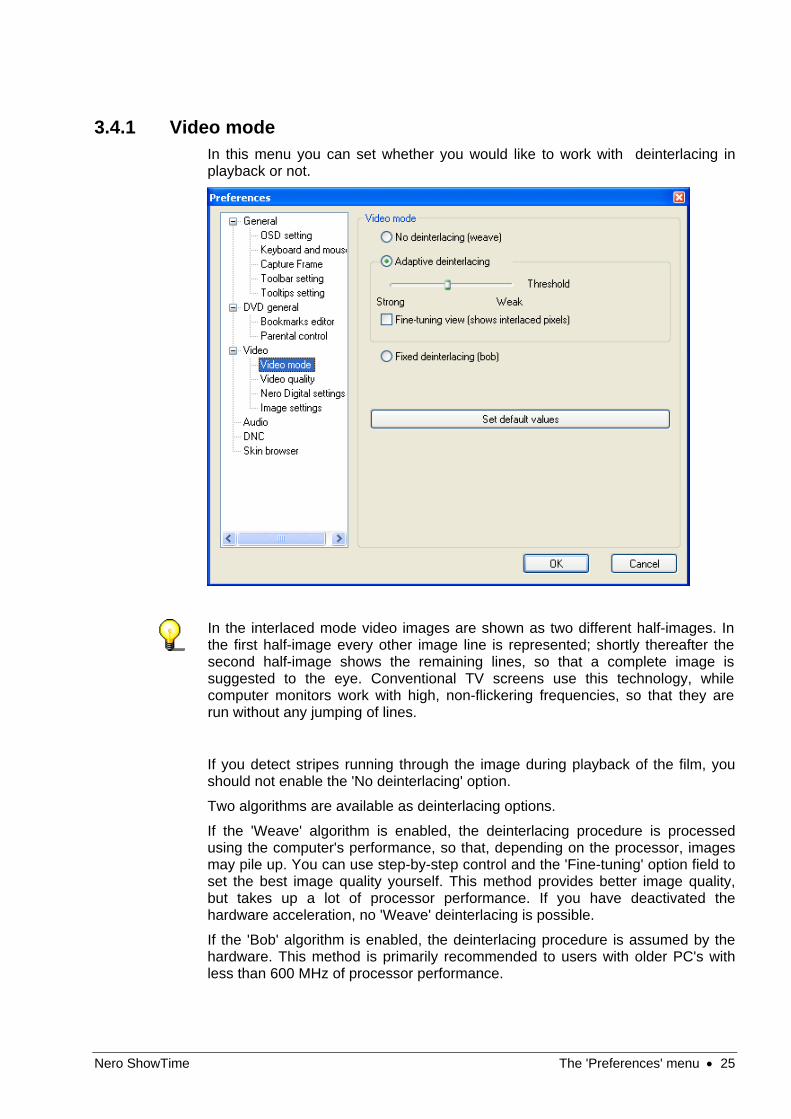
3.4.1 Video mode In this menu you can set whether you would like to work with deinterlacing in playback or not.
In the interlaced mode video images are shown as two different half-images. In the first half-image every other image line is represented; shortly thereafter the second half-image shows the remaining lines, so that a complete image is suggested to the eye. Conventional TV screens use this technology, while computer monitors work with high, non-flickering frequencies, so that they are run without any jumping of lines.
If you detect stripes running through the image during playback of the film, you should not enable the 'No deinterlacing' option.
Two algorithms are available as deinterlacing options.
If the 'Weave' algorithm is enabled, the deinterlacing procedure is processed using the computer's performance, so that, depending on the processor, images may pile up. You can use step-by-step control and the 'Fine-tuning' option field to set the best image quality yourself. This method provides better image quality, but takes up a lot of processor performance. If you have deactivated the hardware acceleration, no 'Weave' deinterlacing is possible.
If the 'Bob' algorithm is enabled, the deinterlacing procedure is assumed by the hardware. This method is primarily recommended to users with older PC's with less than 600 MHz of processor performance.
Nero ShowTime The 'Preferences' menu • 26
If you would like detailed information on the subject of interlacing / deinterlacing, we recommend: 'http://www.dvddemystified.com', where you will find a great deal of information on the subject.
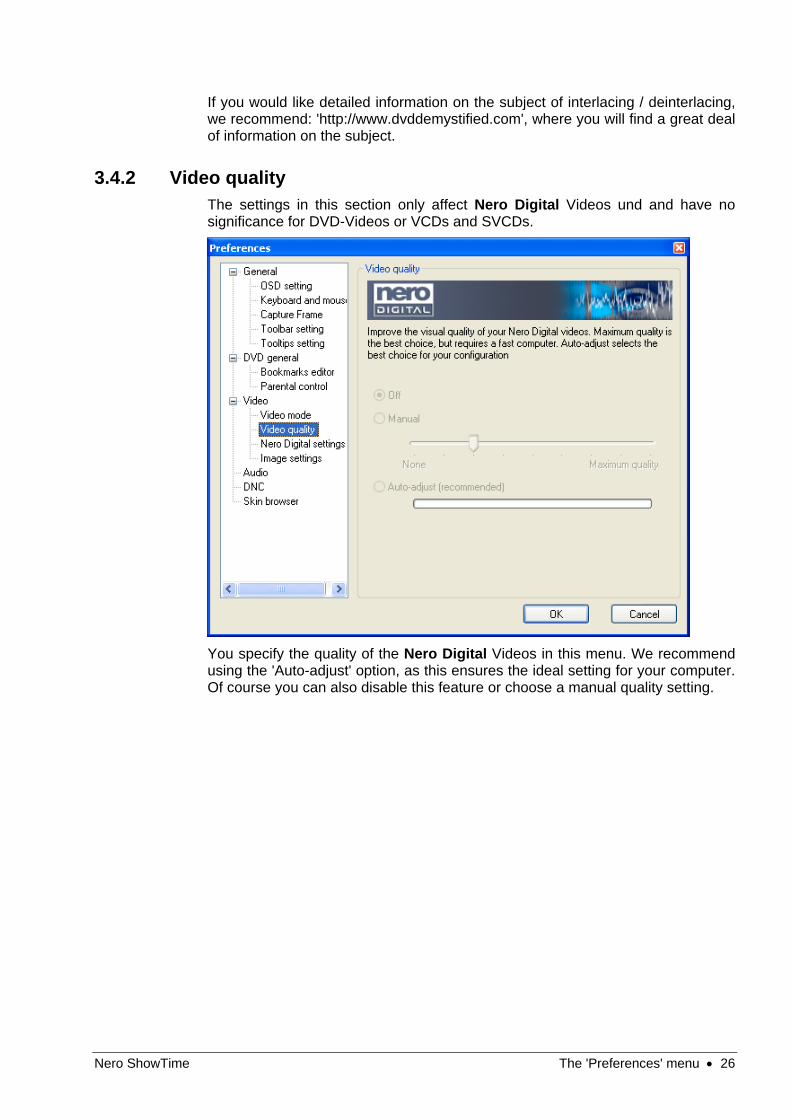
3.4.2 Video quality The settings in this section only affect Nero Digital Videos und and have no significance for DVD-Videos or VCDs and SVCDs.
You specify the quality of the Nero Digital Videos in this menu. We recommend using the 'Auto-adjust' option, as this ensures the ideal setting for your computer. Of course you can also disable this feature or choose a manual quality setting.
Nero ShowTime The 'Preferences' menu • 27
3.4.3 Nero Digital settings
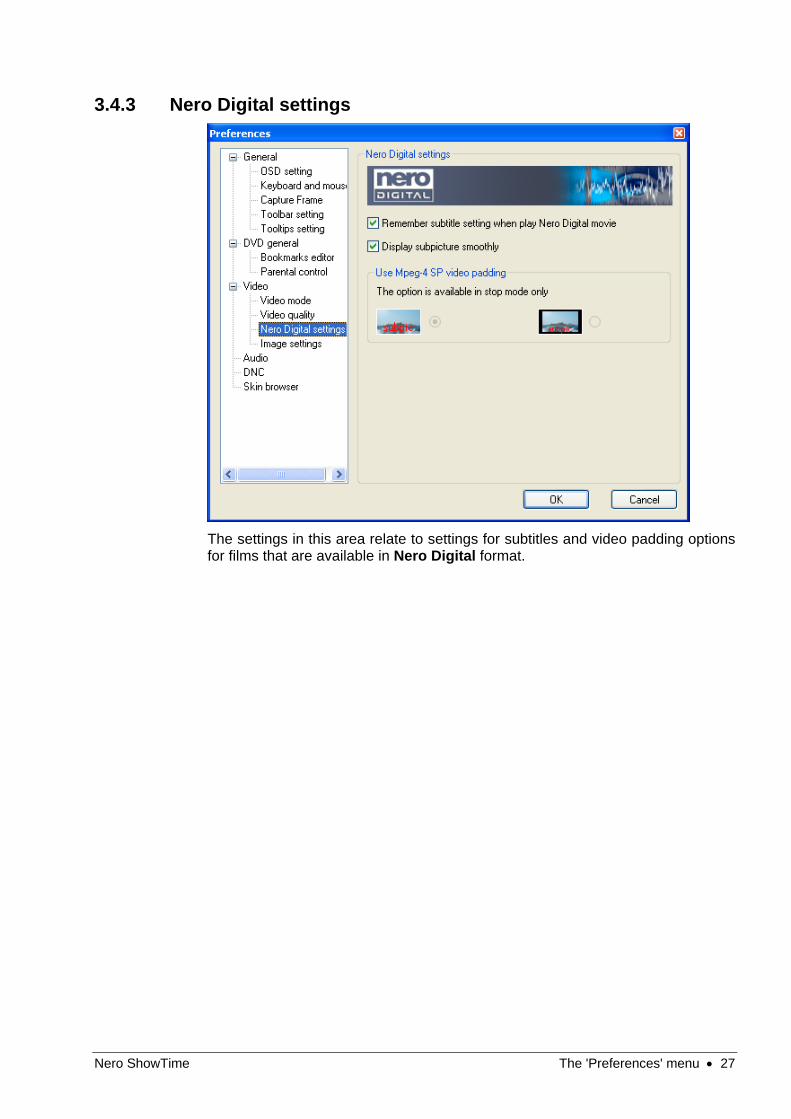
The settings in this area relate to settings for subtitles and video padding options for films that are available in Nero Digital format.

Nero ShowTime The 'Preferences' menu • 28
3.4.4 Image settings In this menu you can change the image settings such as brightness, contrast and saturation. You can also vary particular film effects like luma (brightness information) and chroma (color information). However, this is only possible if the checkbox 'Use image settings' has been ticked.
Nero ShowTime The 'Preferences' menu • 29
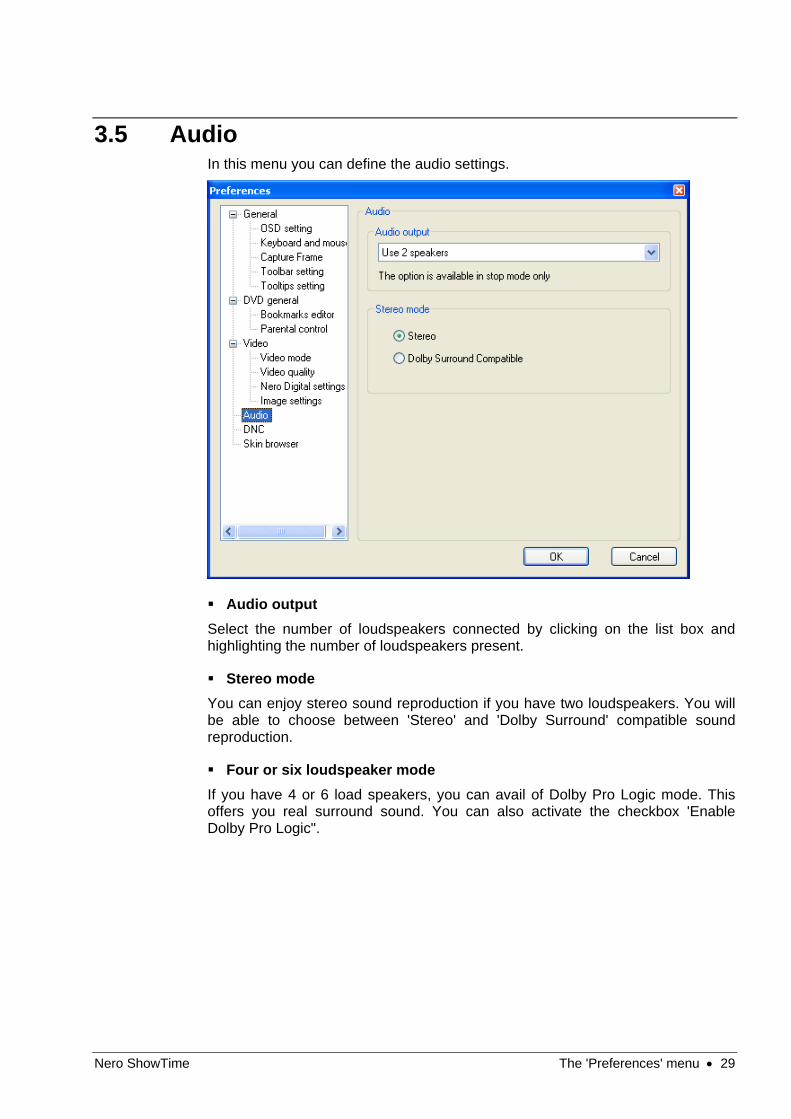
3.5 Audio In this menu you can define the audio settings.
Audio output Select the number of loudspeakers connected by clicking on the list box and highlighting the number of loudspeakers present.
Stereo mode You can enjoy stereo sound reproduction if you have two loudspeakers. You will be able to choose between 'Stereo' and 'Dolby Surround' compatible sound reproduction.
Four or six loudspeaker mode If you have 4 or 6 load speakers, you can avail of Dolby Pro Logic mode. This offers you real surround sound. You can also activate the checkbox 'Enable Dolby Pro Logic".
Nero ShowTime The 'Preferences' menu • 30
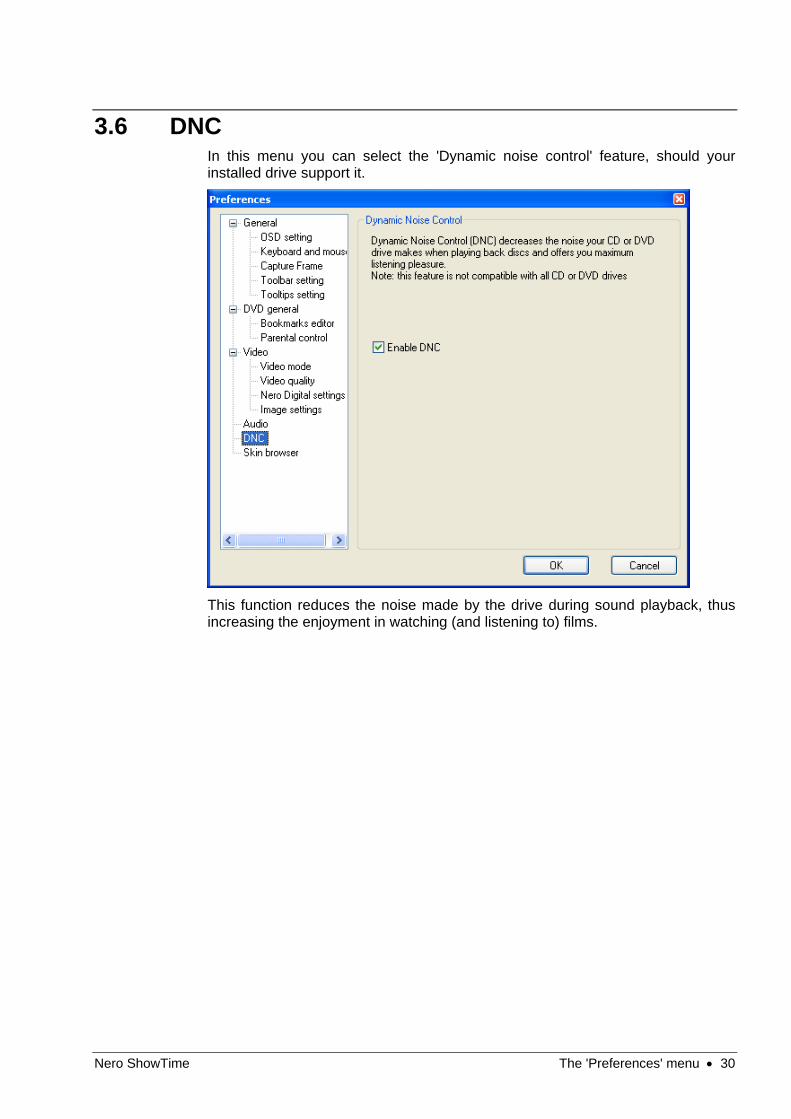
3.6 DNC In this menu you can select the 'Dynamic noise control' feature, should your installed drive support it.
This function reduces the noise made by the drive during sound playback, thus increasing the enjoyment in watching (and listening to) films.
Nero ShowTime The 'Preferences' menu • 31
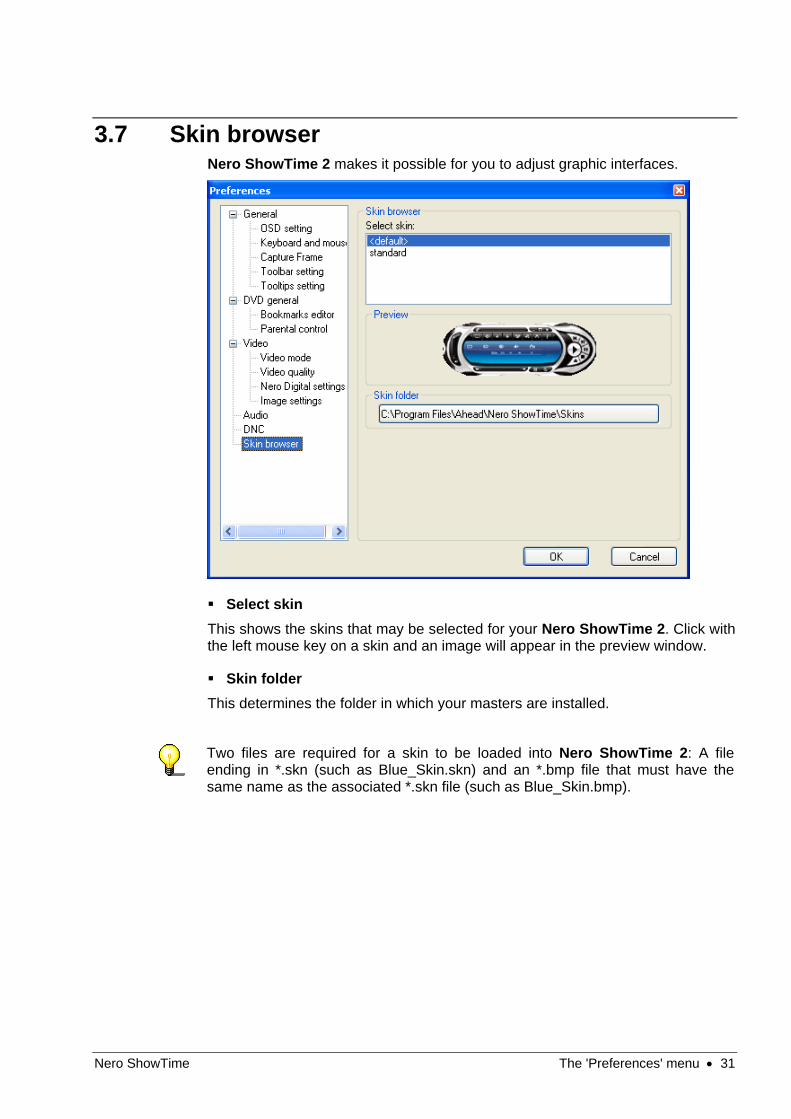
3.7 Skin browser Nero ShowTime 2 makes it possible for you to adjust graphic interfaces.
Select skin This shows the skins that may be selected for your Nero ShowTime 2. Click with the left mouse key on a skin and an image will appear in the preview window.
Skin folder This determines the folder in which your masters are installed.
Two files are required for a skin to be loaded into Nero ShowTime 2: A file ending in *.skn (such as Blue_Skin.skn) and an *.bmp file that must have the same name as the associated *.skn file (such as Blue_Skin.bmp).
Nero ShowTime Reproduce media • 32
4 Reproduce media
4.1 Video
4.1.1 Video formats supported Nero ShowTime 2 can show films in the following video formats:
DVD-Video
VCD / SVCD with interactive menu buttons
DVD+VR/-VR
miniDVD (DVD files on CD)
Nero Digital (including subtitles and 5.1 channel audio)
DVD-Video and (S)VCD reproduction from the hard disk
MPEG-1 / MPEG-2 / MPEG-4 / AVI /DAT /DVR-MS / DV / MOV / WMV and ASF file reproduction
4.1.2 Playing DVD-Videos
To play a DVD-Video, you need a DVD disk drive in your PC!
Proceed as follows to play a DVD-Video:
1. Start Nero ShowTime 2 via 'Start' -> 'Programs' -> 'Nero' -> 'Nero Vision Express 3' -> 'Nero ShowTime' (or launch the program using Nero StartSmart).
2. Insert the DVD-Video in your disk drive. If the DVD-Video is located on the computer's hard disk, click on , select 'Display from folder', highlight the selected folder and click on 'OK' to confirm your input and to close the window.
3. Click in your Nero ShowTime 2 on . (The graphics depend on the active skin!) The first time you insert the DVD, it will begin playing from the first title. If the DVD was already played, the 'Automatic DVD Playback' window appears. Here you can set it either to play the DVD from the beginning or to return to the last scene viewed.
4. In the DVD menu, select the film (or the other desired titles), specify the language, image size and other options and start reproduction by clicking on
Nero ShowTime Reproduce media • 33
the appropriate section of the DVD menu or on a number on the path at the side of the device.
Normally, each DVD-Video has a menu with various options, such as selecting the language of the film, viewing bonus material and much more. These menus are independent of Nero ShowTime 2 and are therefore different on each DVD-Video.
4.1.3 Playing VCD, SVCD and miniDVDs Of course, Nero ShowTime 2 does not just play DVD-Videos, but also VCDs, SVCDs and miniDVDs.
1) Start Nero ShowTime 2 via 'Start' -> 'Programs' -> 'Nero' -> 'Nero Vision Express 3' -> 'Nero ShowTime' (or launch the program using Nero StartSmart).
2) Insert the VCD, SVCD or miniDVD in the drive. If the video contents are located on the computer's hard disk, click on , select 'Display from folder', highlight the selected folder or the chosen file and click on 'OK' to confirm your input and to close the window.
3) Click in your Nero ShowTime 2 on . (The graphics depend on the active skin!)
4) In the disc menu, select the film and start playing by clicking on the appropriate section of the menu or on a number on the path at the side of the device.
4.1.4 Playing other video formats Of course, Nero ShowTime 2 can not just play DVD-Videos, VCDs, SVCDs and miniDVDs, but also many other video formats.
1) Start Nero ShowTime 2 via 'Start' -> 'Programs' -> 'Nero' -> 'Nero Vision Express 3' -> 'Nero ShowTime' (or launch the program using Nero StartSmart).
2) Insert the disc with the video information in the drive. If the video files are located on the hard disk of the computer, click on , select 'Media files' and go to the directory containing the file. Highlight the file you would like to play and click on the 'Add' button to attach the file to the playlist, or double-click on the file. Repeat this for all the other files that are to be played. Click on the 'OK' button to confirm your entry and to close the window.
3) The playlist will be played immediately, starting with the first file.

Nero ShowTime Reproduce media • 34
4.2 Audio
4.2.1 Audio formats supported Nero ShowTime 2 supports the reproduction of the following audio formats:
Nero Digital Audio
Dolby Digital / Dolby Surround
LPCM
MPEG-1
MPEG-2
MPEG-4
S/PDIF output for digital sound
4.2.2 Play audio tracks Of course, Nero ShowTime 2 does not just play video files but also the most common audio formats.
1) Start Nero ShowTime 2 via 'Start' -> 'Programs' -> 'Nero' -> 'Nero Vision Express 3' -> 'Nero ShowTime' (or launch the program using Nero StartSmart).
2) Insert the disc with the audio information in the drive. If the audio files are located on the hard disk of the computer, click on , select 'Media files' and go to the directory containing the file. Highlight the file you would like to play and click on the 'Add' button to attach the file to the playlist, or double-click on the file. Repeat this for all the other files that are to be played. Click on the 'OK' button to confirm your entry and to close the window.
3) The playlist will be played immediately, starting with the first file.
Nero ShowTime Reproduce media • 35
4.3 Playlists
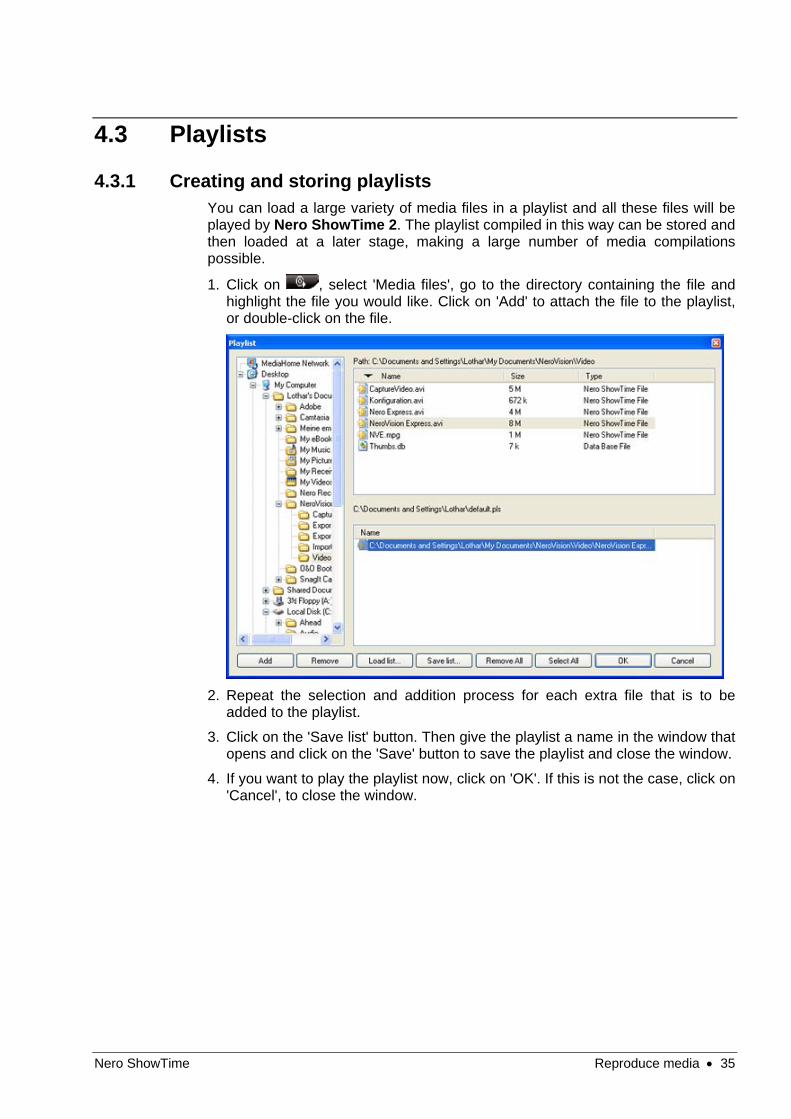
4.3.1 Creating and storing playlists You can load a large variety of media files in a playlist and all these files will be played by Nero ShowTime 2. The playlist compiled in this way can be stored and then loaded at a later stage, making a large number of media compilations possible.
1. Click on , select 'Media files', go to the directory containing the file and highlight the file you would like. Click on 'Add' to attach the file to the playlist, or double-click on the file.
2. Repeat the selection and addition process for each extra file that is to be
added to the playlist.
3. Click on the 'Save list' button. Then give the playlist a name in the window that opens and click on the 'Save' button to save the playlist and close the window.
4. If you want to play the playlist now, click on 'OK'. If this is not the case, click on 'Cancel', to close the window.
Nero ShowTime Reproduce media • 36
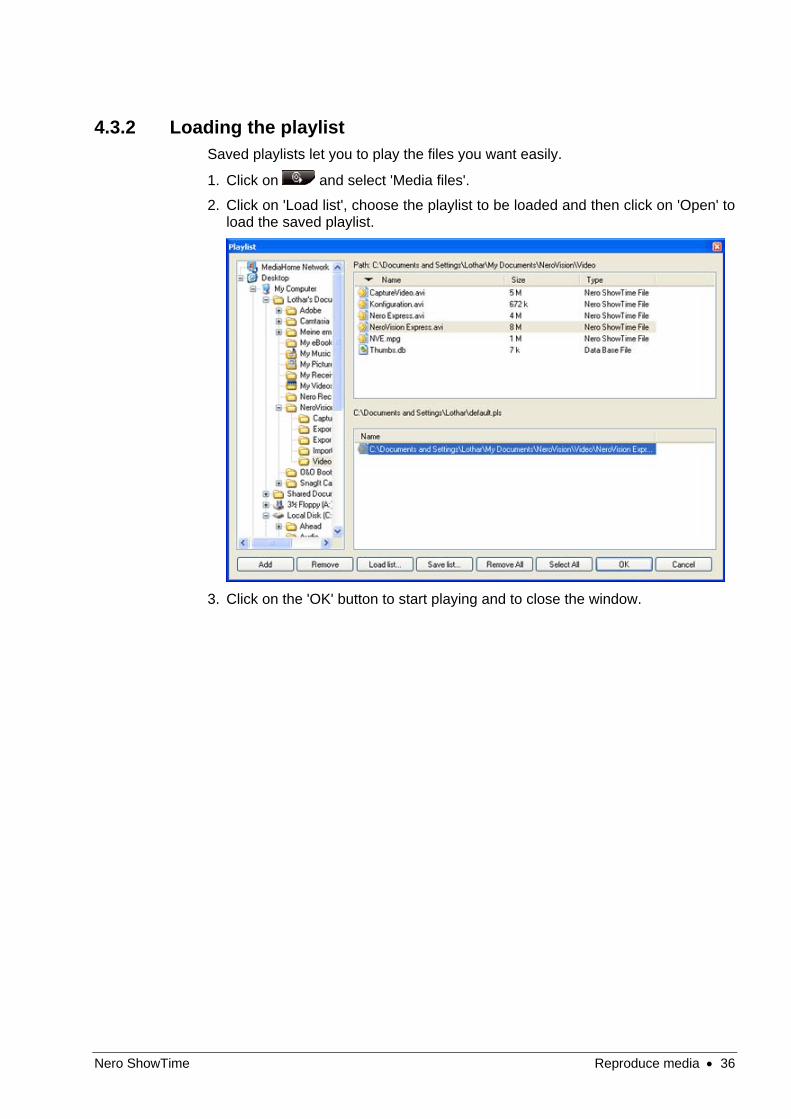
4.3.2 Loading the playlist Saved playlists let you to play the files you want easily.
1. Click on and select 'Media files'.
2. Click on 'Load list', choose the playlist to be loaded and then click on 'Open' to load the saved playlist.
3. Click on the 'OK' button to start playing and to close the window.
Nero ShowTime Reproduce media • 37
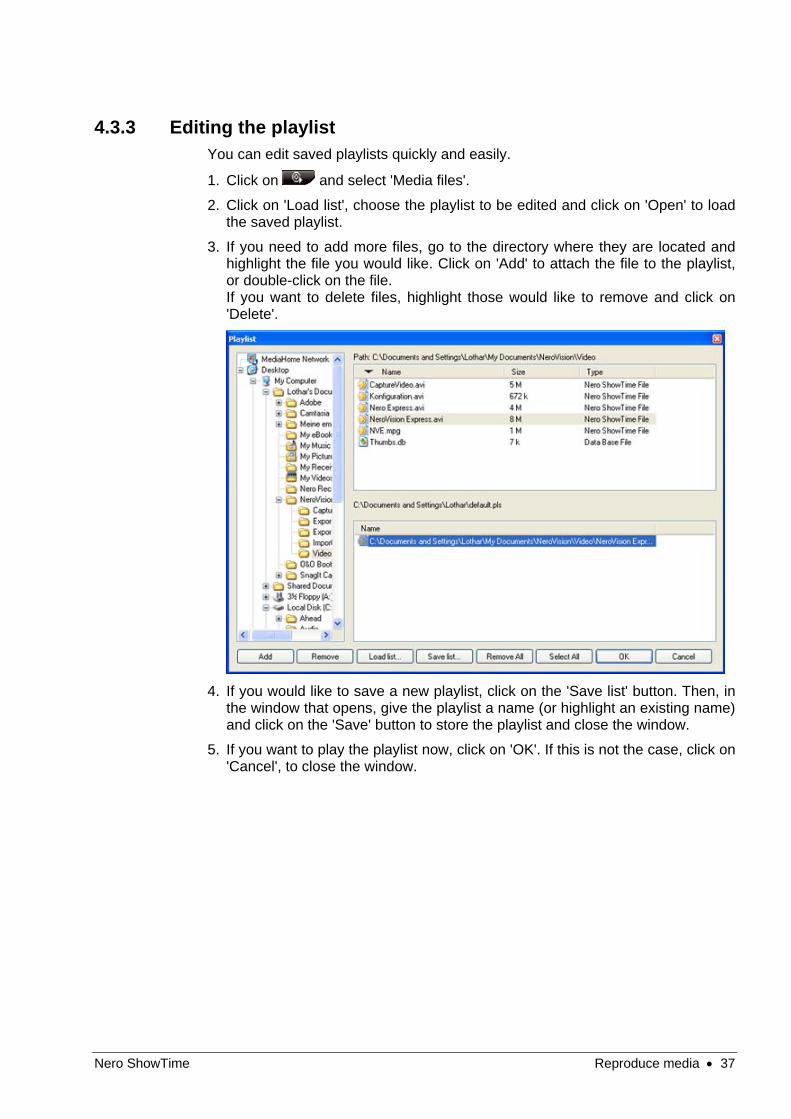
4.3.3 Editing the playlist You can edit saved playlists quickly and easily.
1. Click on and select 'Media files'.
2. Click on 'Load list', choose the playlist to be edited and click on 'Open' to load the saved playlist.
3. If you need to add more files, go to the directory where they are located and highlight the file you would like. Click on 'Add' to attach the file to the playlist, or double-click on the file. If you want to delete files, highlight those would like to remove and click on 'Delete'.
4. If you would like to save a new playlist, click on the 'Save list' button. Then, in
the window that opens, give the playlist a name (or highlight an existing name) and click on the 'Save' button to store the playlist and close the window.
5. If you want to play the playlist now, click on 'OK'. If this is not the case, click on 'Cancel', to close the window.

Nero ShowTime Reproduce media • 38
4.4 Control during playback The following settings may be selected in full-screen or normal mode! The precise configuration depends on the information in the 'Settings' dialogue window (also see Chapter 3 'The 'Preferences' menu').
4.4.1 Skin
The Nero ShowTime 2 Skin is your main control room, where you will find all functions available during playback. The function for each individual button may be found in Chapter 2.1 'User Interface'.
4.4.2 Toolbar The toolbar can be displayed by moving the mouse pointer to the top edge of the screen.
By selecting the 'Unhide All' setting in the 'Settings' dialogue window you will have the following options:
Icon Function of the symbol [Keyboard symbol / Shortcut]
Open the 'Settings' menu [CTRL+C]
Interrupts playback of the film, then continues it after a second click [space]
Jump to the next chapter [N]
Copies the current frame to the clipboard and saves it as wallpaper or as a file [C]
Jump to the previous chapter [P]
Stop playback [S]
Start playback [Enter]
Slowly continue playback [T]
Nero ShowTime Reproduce media • 39
Fast forward [F]
Rewind [R]
Eject disk [J]
Change between full-screen and normal view [Z]
Makes it possible to move continuously through the film (without dividing chapters).
Show playback time
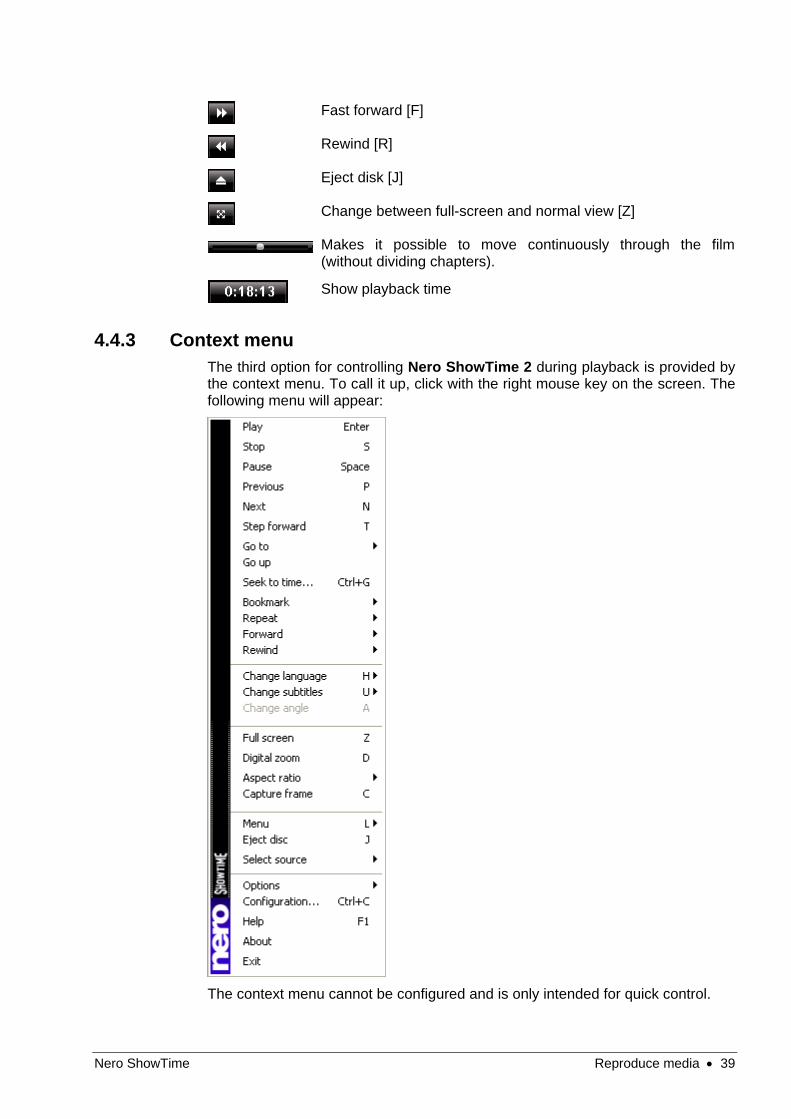
4.4.3 Context menu The third option for controlling Nero ShowTime 2 during playback is provided by the context menu. To call it up, click with the right mouse key on the screen. The following menu will appear:
The context menu cannot be configured and is only intended for quick control.
Nero ShowTime FAQ • 40
5 FAQ
I can't find Nero ShowTime 2 under 'Start' -> 'Programs' -> 'Nero'. What's wrong? Nero ShowTime 2 is installed together with the NeroVision Express 3 installation packet. If you have only installed the Nero Burning ROM series, you can always install it later at any time. To do so, simply place the Nero 6 CD into your disk drive and install the NeroVision Express 3 packet.
I get a regional code error message! How can I avoid this? Almost every DVD has a so-called 'Regional Code' that only allows DVD devices from the same region to play it. However, you have the option of changing the regional code setting of your DVD disk drive up to 5 times. After the fifth time, however, the regional code continues to exist.
To change the regional code of your DVD player, perform the following steps: Start your Windows Explorer. With the right mouse key, click on your DVD disk drive and select the
'Properties' option from the dialogue window. Now select your DVD disk drive on the 'Hardware' heading and click on the
'Properties' button. You may now select a country with the desired country code under the
'Extended Settings' heading (also 'DVD Region' on some systems). Confirm your selection by clicking on the 'OK' button.
I activated the hardware acceleration, but my picture jiggles or the picture is worse than before! What should I do? In principle, we recommend that you always install the newest driver of your graphics card. This procedure will often spare you the most frequently occurring errors. If replacing the driver does not lead to an improvement in the picture feed, it is recommended that you deactivate the hardware acceleration again. Any updates that appear from Nero ShowTime 2 and/or your graphics card driver should be downloaded and installed. This will likely solve your problem.
I have an AVI file and would like to play it. However, I only hear the sound and the picture is missing! What should I do? You probably have not installed an AVI Codec on your computer. The installation of a Codec is necessary – otherwise, Nero ShowTime 2 cannot play anything with an AVI format. We therefore recommend that you download from the Internet and install an AVI Codec. After installation, restart Nero ShowTime 2 and you should see the picture with sound. If your questions and problems are not listed here, please go to '[email protected]'.

Nero ShowTime Contact • 41
6 Contact
6.1 Contact Information
Nero ShowTime 2 is a product from Nero AG.
Nero AG
Im Stoeckmaedle 18
76307 Karlsbad
Germany
Web: www.nero.com
Help: http://englishsupport.nero.com
Mail: [email protected]
Fax: +49 7248 928 499
Copyright © 2003 -2005 Nero AG. All rights reserved.
Nero ShowTime Glossary • 42
7 Glossary
Container format A container format defines type and structure, in other words sets out the framework for packing the file types. AIFF for audio, AVI for video, MPG for audio, video, and subtitles, etc. as well as MP4 for audio, video, and subtitles, for instance are particularly widespread containers.
DRM Abbreviation of Digital Rights Management. A procedure that attempts to protect intellectual property from bootleg copying, and for making payment for licenses feasible.
Dolby Surround Dolby Surround is an analog system that makes four channels from two audio tracks. As well as the stereo channels (left and right) it also provides two surround channels (left rear and right rear). The surround signal is mono and is extracted from the two stereo channels. However, the frequency range is limited.
Dolby Surround Pro Logic II Dolby Surround Pro Logic II is a further improvement on Dolby Surround. The surround channels are in stereo and the rear channels have no frequency restrictions.
dts Stands for Digital Theater System. With video DVDs, this multi-channel sound format works with a bitrate of either 754.5 kbps or 1509.25 kbps. The dts system works with higher data rates than 'Dolby Digital' and thus uses more memory on the DVD disc.
High Efficiency AAC Audio High-Efficiency AAC Audio is an audio compression process based on the MPEG-4 specification. Compared to other formats such as MP3, High-Efficiency AAC Audio has a variety of advantages, for instance improved quality at the same file size or support for multichannel audio with up to 48 sound channels.
miniDVD In principle, a miniDVD is nothing other than a CD-R or CD-RW, upon which a DVD structure has been written in UDF format. It offers the same technical benefits and qualities as a DVD, whether this be the ability to create chapters or animated menus, support for subtitles or a number of audio tracks (even in real digital multichannel sound). miniDVDs can easily be played by a computer, while reproduction is not guaranteed with all types of DVD players.
Nero ShowTime Glossary • 43
MPEG Is short for Motion Picture Experts Group. This is a group of experts concerned (among other things) with standardizing audio and video compression or container formats.
MPEG-1 MPEG-1 is a compression standard for video and audio files. It has been specially developed for the multimedia sector, where only a limited memory (Video CD) or restricted data rates are available. The quality roughly corresponds to that of a VHS video cassette. The 'MPEG-1 Audio-Layer 3' audiocoding process is popularly known as "MP3".
MPEG-2 MPEG-2 is a compression standard for video and audio files. On the video side, the quality of MPEG-2-compressed videos is higher than those encoded by MPEG-1, due to the higher data rates. MPEG-2-coded videos are used both SVCDs and DVDs. There has been an improvement with audio files leading to lower data rates and more channels (5.1).
MPEG-3 MPEG-3 was originally planned as the standard for high-definition television (HDTV). This did not occur because it has meanwhile been implemented in the MPEG-2 standard.
MPEG-4 MPEG-4 is a further development of the MPEG-2 format. In comparison with MPEG-2, the data is compressed even more and the format has been extended to support video objects, 3-D contents, artificial objects, and so on. In the audio sector, a number of standards such as AAC have been defined and support has been provided for Digital Rights Management (DRM).
Nero Digital Nero Digital is the next generation of MPEG-4-compatible compression technology – with algorithms for premium-quality video encoding and with full 'High Efficiency AAC Audio'. Nero Digital is compatible with ISO/14496-2/3, MPEG-4 and is completely compatible with all MPEG-4 applications.
S/PDIF Abbreviation of 'Sony / Philips Digital Interface'. S/PDIF is a standardized transmission format for audio data. The interface is found on digital audio devices such as DAT recorders or on high-value desktop sound cards. S/PDIF permits digital transmission from one device to another, without the need to first convert the data to produce an analog signal, a process which could lead to a loss in quality.
Super Video CD Stands for Super Video Compact Disc. Films and audio/video data are stored on a Super Video CD using the MPEG-2 compression standard. The image quality is improved in comparison to VCD, however, digital surround sound is not possible.
Nero ShowTime Glossary • 44
Video CD In full, "Video Compact Disc". Films and audio/video data are stored on CDs using the MPEG-1 compression standard. The basis for this is also an ISO file system, and digital video films are also included. A VCD can be played by most CD-ROMs, DVD players and DVD-ROM drives with the help of software. The picture is in ratio 4:3 and the sound is in stereo. However, it is not possible to have a number of soundtracks and a selection of subtitles.
Nero ShowTime Index • 45
8 Index
A
About Nero ShowTime 2 5 Audio Features 6 Audio settings 29 Audio tracks
Playing 34
B
Bookmarks Editor 21
C
Contact 41 Control during playback
Context menu 39
Skin 38
Toolbar 38
D
DNC 30 DVD
General settings 20 DVD-Video
Playing 32
F
FAQ 40
AVI doesn’t play 40
I can’t find Nero 40
I get a regional code 40
My picture jiggles 40 Formats supported
Audio 34
Video 32
G
General settings
Capture frame 17
DVD 20
Keyboard and mouse settings 16
OSD settings 15
Tool tips setting 19
Toolbar setting 18
H
Hardware Optimisation 6
I Image settings 28
K
Keyboard symbols 9
M
miniDVD
Playing 33
N
Nero Digital settings 27 Nero Digital Video quality 26
O
Other Video formats
Playing 33
Nero ShowTime Index • 46
P
Parental control 22 Playing
Audio tracks 34
DVD-Video 32
miniDVD 33
Other video formats 33
SVCD 33
VCD 33 Playlist
Editing 37
Loading 36
Saving 35 Programme features 6
S
Skins 31 Supported formats 5 SVCD
Playing 33
U
User Interface 8
V
VCD
Playing 33 Video Features 5 Video Mode 25 Video settings 23