Embed Size (px)
Citation preview
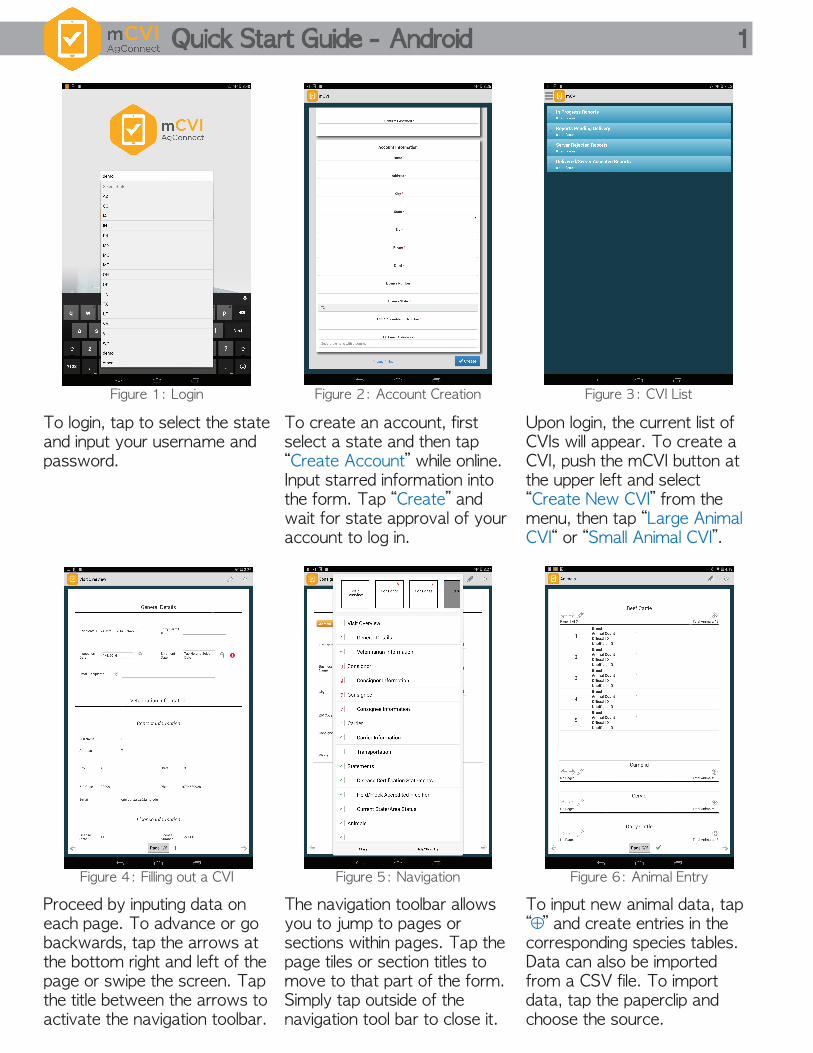
Figure 1: Login Figure 2: Account Creation Figure 3: CVI List
Figure 4: Filling out a CVI Figure 5: Navigation Figure 6: Animal Entry
The navigation toolbar allows you to jump to pages or sections within pages. Tap the page tiles or section titles to move to that part of the form. Simply tap outside of the navigation tool bar to close it.
Proceed by inputing data on each page. To advance or go backwards, tap the arrows at the bottom right and left of the page or swipe the screen. Tap the title between the arrows to activate the navigation toolbar.
To login, tap to select the state and input your username and password.
To create an account, first select a state and then tap “Create Account” while online. Input starred information into the form. Tap “Create” and wait for state approval of your account to log in.
Upon login, the current list of CVIs will appear. To create a CVI, push the mCVI button at the upper left and select “Create New CVI” from the menu, then tap “Large Animal CVI“ or “Small Animal CVI”.
To input new animal data, tap “+” and create entries in the corresponding species tables. Data can also be imported from a CSV file. To import data, tap the paperclip and choose the source.
Quick Start Guide - Android 1
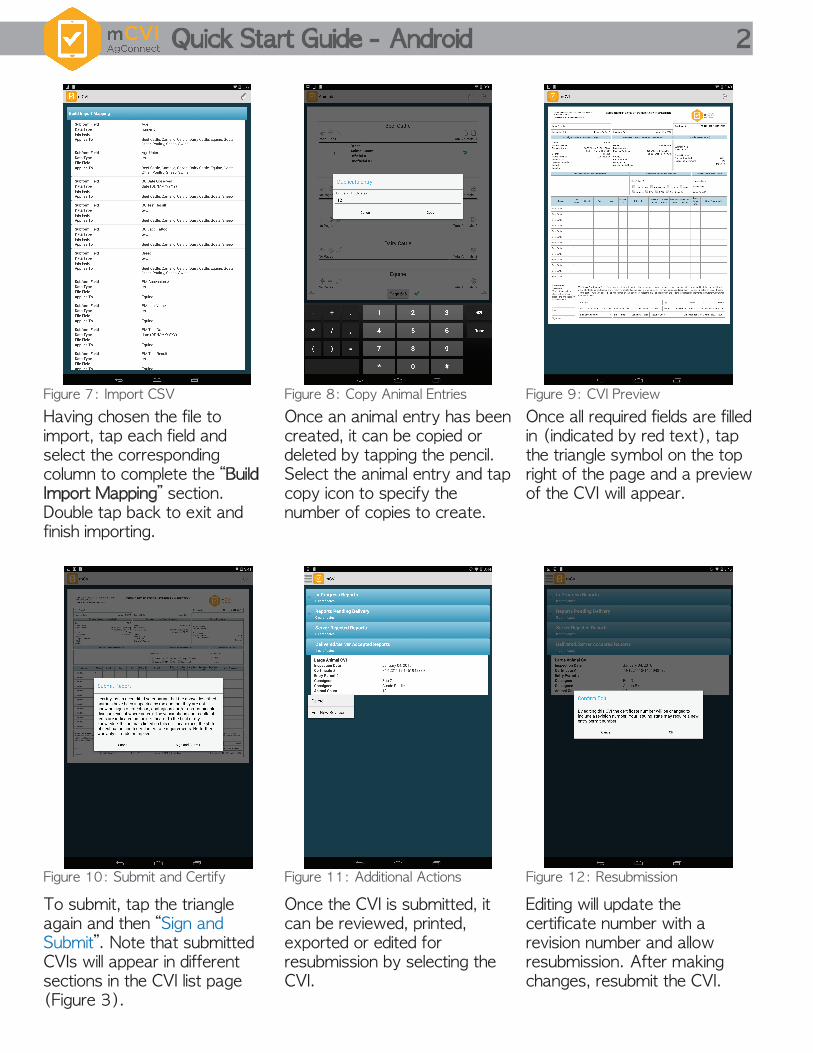
Figure 7: Import CSV Figure 8: Copy Animal Entries Figure 9: CVI Preview
Figure 10: Submit and Certify Figure 11: Additional Actions Figure 12: Resubmission
To submit, tap the triangle again and then “Sign and Submit”. Note that submitted CVIs will appear in different sections in the CVI list page (Figure 3).
Once the CVI is submitted, it can be reviewed, printed, exported or edited for resubmission by selecting the CVI.
Editing will update the certificate number with a revision number and allow resubmission. After making changes, resubmit the CVI.
Once an animal entry has been created, it can be copied or deleted by tapping the pencil. Select the animal entry and tap copy icon to specify the number of copies to create.
Once all required fields are filled in (indicated by red text), tap the triangle symbol on the top right of the page and a preview of the CVI will appear.
Having chosen the file to import, tap each field and select the corresponding column to complete the “Build Import Mapping” section. Double tap back to exit and finish importing.
Quick Start Guide - Android 2