Embed Size (px)
Citation preview
Polycom RAS200A
Getting Started GuideVersion 1.0.0
October 2006
P/N 1725-18101-001D

Trademark InformationPolycom®, the Polycom logo design, SoundStation®, SoundStation VTX 1000®, ViaVideo®, ViewStation®, and Vortex® are registered trademarks of Polycom, Inc. Conference Composer™, Global Management System™, ImageShare™, iPower™, MGC™, PathNavigator™, People+Content™, PowerCam™, Pro-Motion™, Siren™, StereoSurround™, Visual Concert™, VS4000™, and VSX™ are trademarks of Polycom, Inc. in the United States and various other countries.
All other brand and product names are trademarks or registered trademarks of their respective companies.
Patent InformationThe accompanying product is protected by one or more U.S. and foreign patents and/or pending patent applications held by Polycom, Inc.
DisclaimerThis software is provided 'as is' with no explicit or implied warranties in respect of its properties, including, but not limited to, correctness and fitness for purpose.
Copyright Information© 2006 Polycom, Inc. All rights reserved.
Polycom Inc.4750 Willow RoadPleasanton, CA 94588-2708USA
No part of this document may be reproduced or transmitted in any form or by any means, electronic or mechanical, for any purpose, without the express written permission of Polycom, Inc. Under the law, reproducing includes translating into another language or format.
As between the parties, Polycom, Inc. retains title to, and ownership of, all proprietary rights with respect to the software contained within its products. The software is protected by United States copyright laws and international treaty provision. Therefore, you must treat the software like any other copyrighted material (e.g., a book or sound recording).
Every effort has been made to ensure that the information in this manual is accurate. Polycom, Inc. is not responsible for printing or clerical errors. Information in this document is subject to change without notice.
Portions of the VSX software are copyright © 2001 by Dr. Brian Gladman. The following terms and disclaimer apply only to Dr. Gladman's AES encryption implementation:
Copyright © 2001, Dr. Brian Gladman, [email protected], Worcester, UK. All rights reserved.
License Terms
The free distribution and use of this software in both source and binary form is allowed (with or without changes) provided that:1. distributions of this source code include the above copyright notice, this list of conditions and the
following disclaimer;2. distributions in binary form include the above copyright notice, this list of conditions and the following
disclaimer in the documentation and/or other associated materials;3. the copyright holder's name is not used to endorse products built using this software without specific
written permission.
Contents
iii
Contents
About This Guide. . . . . . . . . . . . . . . . . . . . . . . . . . . . . . . . . . . . . . . vDocumentation Resources . . . . . . . . . . . . . . . . . . . . . . . . . . . . . . . . . . . . . . . . -vConventions . . . . . . . . . . . . . . . . . . . . . . . . . . . . . . . . . . . . . . . . . . . . . . . . . . . . -v
1 Setting up the Polycom RAS200A . . . . . . . . . . . . . . . . . . . . . . . 1-1Inspecting the Package . . . . . . . . . . . . . . . . . . . . . . . . . . . . . . . . . . . . . . . . . . 1-1Specifying Required Materials and Equipment . . . . . . . . . . . . . . . . . . . . . . 1-1Ensuring System Safety . . . . . . . . . . . . . . . . . . . . . . . . . . . . . . . . . . . . . . . . . . 1-2
Electrical Safety Precautions . . . . . . . . . . . . . . . . . . . . . . . . . . . . . . . . . . 1-2Rack-Mount Safety Precautions . . . . . . . . . . . . . . . . . . . . . . . . . . . . . . . 1-2
Identifying System Connections and Controls . . . . . . . . . . . . . . . . . . . . . . 1-3Setting up the System . . . . . . . . . . . . . . . . . . . . . . . . . . . . . . . . . . . . . . . . . . . 1-4
Changing the Computer Network Settings . . . . . . . . . . . . . . . . . . . . . 1-5Connected Directly . . . . . . . . . . . . . . . . . . . . . . . . . . . . . . . . . . . . . . 1-5Connected Via Crossover Cable . . . . . . . . . . . . . . . . . . . . . . . . . . . 1-5Connected Via Hub . . . . . . . . . . . . . . . . . . . . . . . . . . . . . . . . . . . . . . 1-6
Configuring the PC Network to Connect to the RAS200A . . . . . . . . . 1-6
2 Completing the First Time Setup . . . . . . . . . . . . . . . . . . . . . . . 2-1Logging In the First Time . . . . . . . . . . . . . . . . . . . . . . . . . . . . . . . . . . . . . . . . 2-1Obtaining Software Licensing Information . . . . . . . . . . . . . . . . . . . . . . . . . 2-4Changing the Configuration . . . . . . . . . . . . . . . . . . . . . . . . . . . . . . . . . . . . . . 2-5Navigating in Polycom RAS200A . . . . . . . . . . . . . . . . . . . . . . . . . . . . . . . . . 2-5
3 System Specifications . . . . . . . . . . . . . . . . . . . . . . . . . . . . . . . . . 3-1Electrical . . . . . . . . . . . . . . . . . . . . . . . . . . . . . . . . . . . . . . . . . . . . . . . . . . . . . . 3-1Physical . . . . . . . . . . . . . . . . . . . . . . . . . . . . . . . . . . . . . . . . . . . . . . . . . . . . . . . 3-1Environmental . . . . . . . . . . . . . . . . . . . . . . . . . . . . . . . . . . . . . . . . . . . . . . . . . 3-1Regulatory Compliance . . . . . . . . . . . . . . . . . . . . . . . . . . . . . . . . . . . . . . . . . . 3-2
Electromagnetic Emissions . . . . . . . . . . . . . . . . . . . . . . . . . . . . . . . . . . . 3-2Electromagnetic Immunity . . . . . . . . . . . . . . . . . . . . . . . . . . . . . . . . . . . 3-2Safety . . . . . . . . . . . . . . . . . . . . . . . . . . . . . . . . . . . . . . . . . . . . . . . . . . . . . . 3-2

Getting Started Guide
iv

v
About This Guide
This document, Polycom RAS200A Getting Started Guide, describes how to set up the Polycom RAS200A server.
Documentation ResourcesIn addition to this guide, the available documentation that describes the Polycom RAS200A server includes:
• RAS200A Administrator’s Guide
• Deployment Guide
• Alcatel OmniPCX Enterprise User’s Guide
ConventionsThis guide follows these conventions:
• Boldface indicates an action that you perform in the application.
• Blue italics indicate references to other sections in this document.
• Italics indicate another related document.

Polycom RAS200A Getting Started Guide
vi

1 - 1
1Setting up the Polycom RAS200A
This chapter describes the steps for setting up the Polycom RAS200A server, which include:
• Inspecting the Package
• Specifying Required Materials and Equipment
• Ensuring System Safety
• Identifying System Connections and Controls
• Setting up the System
Inspecting the PackageInspect the shipping box for the system and record any damage. If the system has been damaged, file a claim with the delivery carrier.
Note: Polycom is not responsible for damage sustained during reshipment of this product.
The package should include the following items:
• Polycom RAS200A system, with preinstalled video conferencing management application software
• Power cord
• Rack-mount brackets
Specifying Required Materials and EquipmentThe materials and equipment required to set up the system include:
• Polycom RAS200A system

Getting Started Guide
1 - 2
• Power cord (already included)
• Client computer, with a keyboard, monitor, and mouse
Ensuring System Safety To ensure system safety, follow these guidelines:
• Keep the area around the Polycom RAS200A system clean and uncluttered.
• The system weighs about 23 lbs (10.5 kg). To lift the system, two people (stationed one at each end) should lift slowly, with their feet spread apart to distribute the weight evenly. Always keep your back straight and lift with your legs.
Electrical Safety PrecautionsTo ensure electrical safety, follow these guidelines:
• Note the locations of the power on-off switch on the chassis and the room's emergency power-off switch, disconnection switch, or electrical outlet. If an electrical accident occurs, you can then shut off power quickly.
• Do not work alone when handling high-voltage components.
• Do not use mats designed to decrease static electrical discharge for protection from electrical shock. Use rubber mats that have been designed specifically as electrical insulators instead.
• The power supply power cords must include a grounding plug and be plugged into grounded electrical outlets.
Rack-Mount Safety PrecautionsTo ensure rack-mount safety, follow these guidelines:
• Determine a suitable location for the equipment rack that holds the system. The location should be a clean, dust-free, well-ventilated area that is near a grounded power outlet. Avoid areas where heat, electrical noise, and electromagnetic fields are generated.
• Ensure that the leveling jacks on the bottom of the rack are fully extended to the floor, so that the full weight of the rack is resting on them.
• In a single-rack installation, make sure stabilizers have been attached to the rack.

Setting up the Polycom RAS200A
1 - 3
• In multiple-rack installations, make sure the racks have been coupled together.
• Make sure the rack is stable before you extend a component from the rack.
• You should extend only one component at a time. If you extend two or more components simultaneously, the rack may become unstable.
• Before you install the rails, determine the placement of each component in the rack.
• Install the heaviest components on the bottom of the rack first, and then work up.
• Use a regulating, uninterruptable power supply (UPS) to protect the system from power surges, voltage spikes, and power failures.
• Allow the power supply to cool before you touch it.
• To maintain proper cooling, keep the rack's front door and all panels and components on the systems closed, except during servicing.
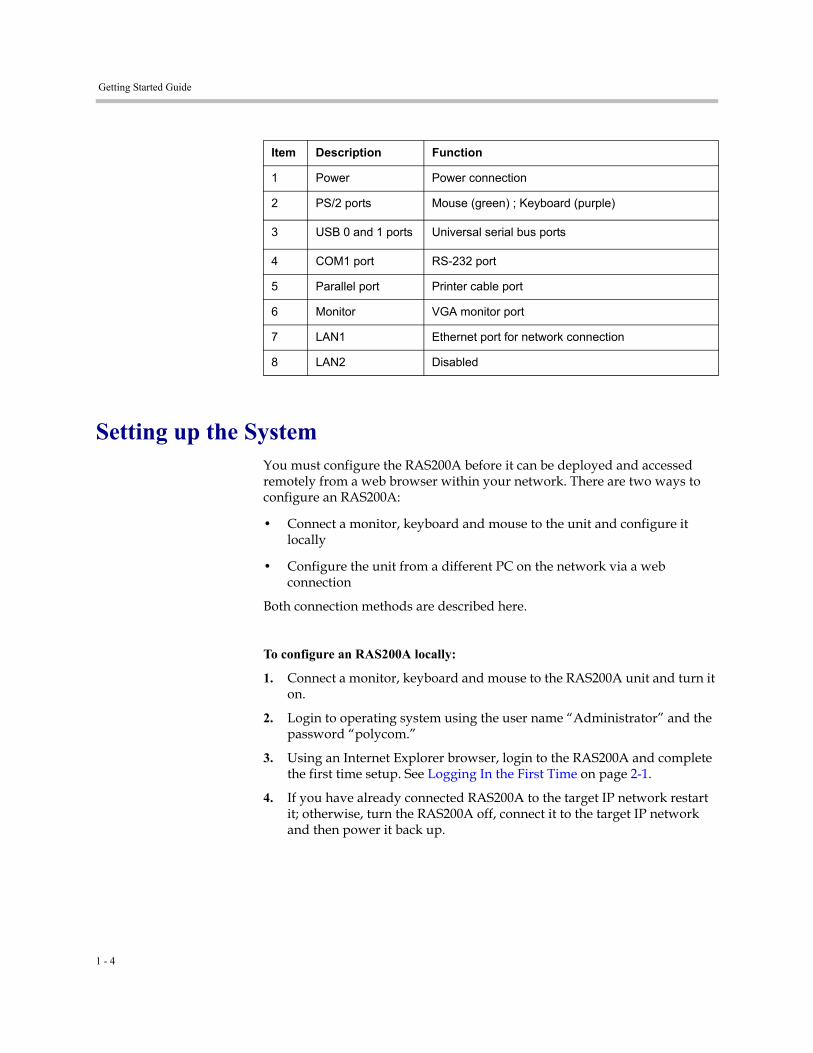
Identifying System Connections and ControlsThe system has front and rear panels. The front panel includes two lights to help you confirm when the system has power and the hard drive is working. The rear panel includes the main power switch and connections for power, network, and Universal Serial Bus (USB) ports, as shown in the following diagram.
The following table describes the items shown in the diagram.
Getting Started Guide
1 - 4
Setting up the SystemYou must configure the RAS200A before it can be deployed and accessed remotely from a web browser within your network. There are two ways to configure an RAS200A:
• Connect a monitor, keyboard and mouse to the unit and configure it locally
• Configure the unit from a different PC on the network via a web connection
Both connection methods are described here.
To configure an RAS200A locally:
1. Connect a monitor, keyboard and mouse to the RAS200A unit and turn it on.
2. Login to operating system using the user name “Administrator” and the password “polycom.”
3. Using an Internet Explorer browser, login to the RAS200A and complete the first time setup. See Logging In the First Time on page 2-1.
4. If you have already connected RAS200A to the target IP network restart it; otherwise, turn the RAS200A off, connect it to the target IP network and then power it back up.
Item Description Function
1 Power Power connection
2 PS/2 ports Mouse (green) ; Keyboard (purple)
3 USB 0 and 1 ports Universal serial bus ports
4 COM1 port RS-232 port
5 Parallel port Printer cable port
6 Monitor VGA monitor port
7 LAN1 Ethernet port for network connection
8 LAN2 Disabled
Setting up the Polycom RAS200A
1 - 5
To configure an RAS200A via a web connection:
1. Connect the RAS200A directly to an ethernet port on the PC via a crossover cable or connect both the RAS200A and the PC to the same ethernet switch (or hub) using standard ethernet cables.
2. Verify that the RAS200A and the PC are ON.
3. Configure the PC network settings of the PC so that it can connect to the RAS200A, by entering the following TCP/IP properties
— IP Address: 192.168.1.37
— Subnet Mask: 255.255.255.0
Note: Note: This procedure assume you are using Microsoft Windows XP. If you have a different version of Windows, change the steps for your operating system.
4. From the PC launch an Internet Explorer browser and type the default system IP address (192.168.1.254) into the address field.
5. Login to the RAS200A and complete the first time setup. See Logging In the First Time on page 2-1.
6. Turn the RAS200A off, connect it to the target network and power it back up.
Changing the Computer Network Settings
Connected Directly
If you are connected to the RAS200A system directly with a keyboard, monitor,and mouse, skip this section and go to Chapter 2, ,Completing the First Time Setup.
Connected Via Crossover Cable
If you are using a PC connected to the RAS200A via a crossover cable, you must change the TCP/IP settings on the PC to:
• IP Address: 192.168.1.37
• Subnet Mask: 255.255.255.0
To do this, see Configuring the PC Network to Connect to the RAS200A on page 1-6.
Getting Started Guide
1 - 6
Connected Via Hub
If you are using a PC connected to the RAS200A system via a hub, you must:
1. Change your computer’s network’s settings. To do this, see Configuring the PC Network to Connect to the RAS200A on page 1-6.
2. Configure the Polycom RAS200A. See Chapter 2, ,Completing the First Time Setup.
3. Restore your computer’s orginal network settings.
Configuring the PC Network to Connect to the RAS200A
To configure network settings on your local computer
1. Record the original IP address and subnet mask of your computer, so that you can restore these values after you have finished system setup.
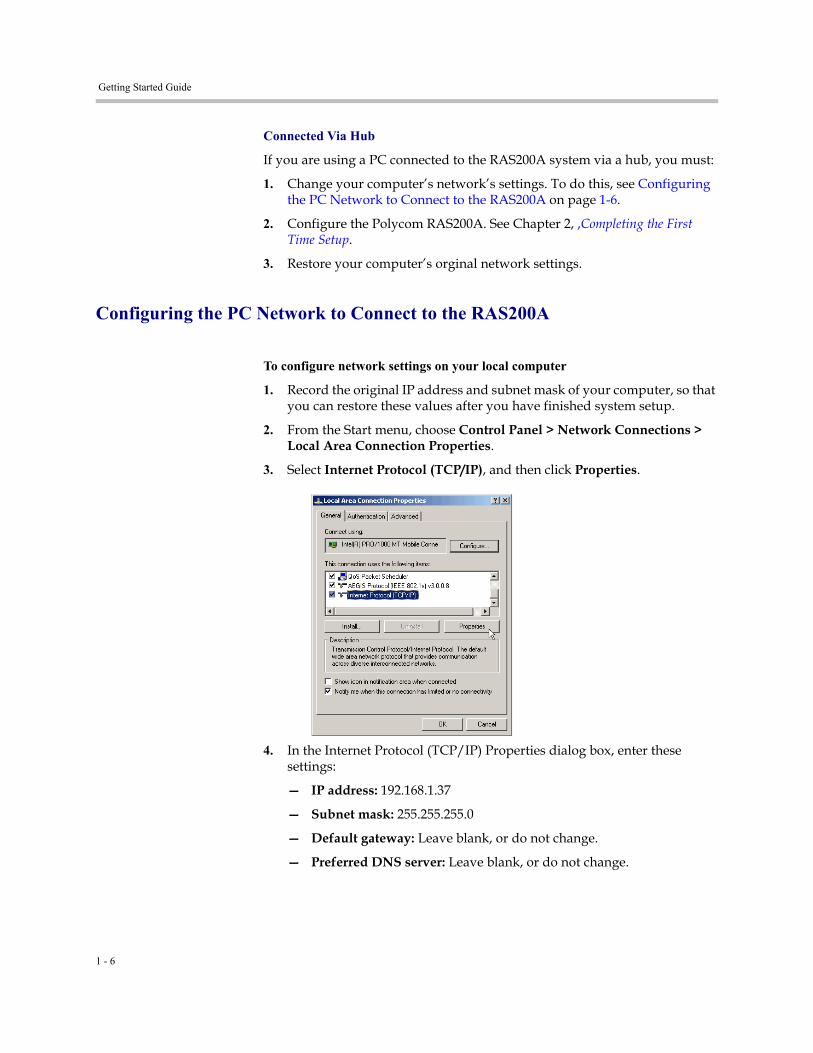
2. From the Start menu, choose Control Panel > Network Connections > Local Area Connection Properties.
3. Select Internet Protocol (TCP/IP), and then click Properties.
4. In the Internet Protocol (TCP/IP) Properties dialog box, enter these settings:
— IP address: 192.168.1.37
— Subnet mask: 255.255.255.0
— Default gateway: Leave blank, or do not change.
— Preferred DNS server: Leave blank, or do not change.

Setting up the Polycom RAS200A
1 - 7
— Alternate DNS server: Leave blank, or do not change.
5. Click OK twice to close the Internet Protocol (TCP/IP) Properties and Local Area Connection Properties dialog boxes.

Getting Started Guide
1 - 8

2 - 1
2Completing the First Time Setup
This chapter describes the procedure for setting up the Polycom RAS200A server for the first time.
Logging In the First TimePolycom RAS200A provides a default Administrator’s password for the configuration process. After you have completed system setup, you can change the default password.
To log in to Polycom RAS200A
1. Open Microsoft Internet Explorer and type the system’s IP address in the Address field.
2. When the Login screen appears, enter the default Administrator’s password, admin.
Figure 2-1 Login Screen

Getting Started Guide
2 - 2
3. Click Login.
The First Time Setup - Welcome screen appears.
Figure 2-2 First Time Setup - Welcome Screen
4. Read the license agreement and click Accept to accept the terms and continue.
The First Time Setup - System Information screen appears.
Figure 2-3 First Time Setup - System Information Screen

Completing the First Time Setup
2 - 3
5. Enter the following information for your RAS200A system. If you are not sure what values to use, contact your IT administrator.
System Setup Item Description
System Name Enter the NetBIOS name of the Windows server. The name must be between 6 and 16 characters. Dashes and underscores may be included in the name.
IP Address Enter the static IP address for the unit. This IP address should be different from the default IP address shipped with the system so that it will be accessible on the network.
Subnet Mask Enter the network subnet mask for the server IP address.
Default Gateway Enter the static IP address of the gateway to be used by the server.
DNS Server Enter the IP address of the DNS Server to be used by the server.
Current Date Enter the current date. This will become the date for the system.
Current Time Enter the current time. This will become the time for the system.
Server Time Zone Set the time zone for where the server will reside.
Auto adjust for daylight savings? Check this box if you want the time to be automatically adjusted during daylight savings time.
Getting Started Guide
2 - 4
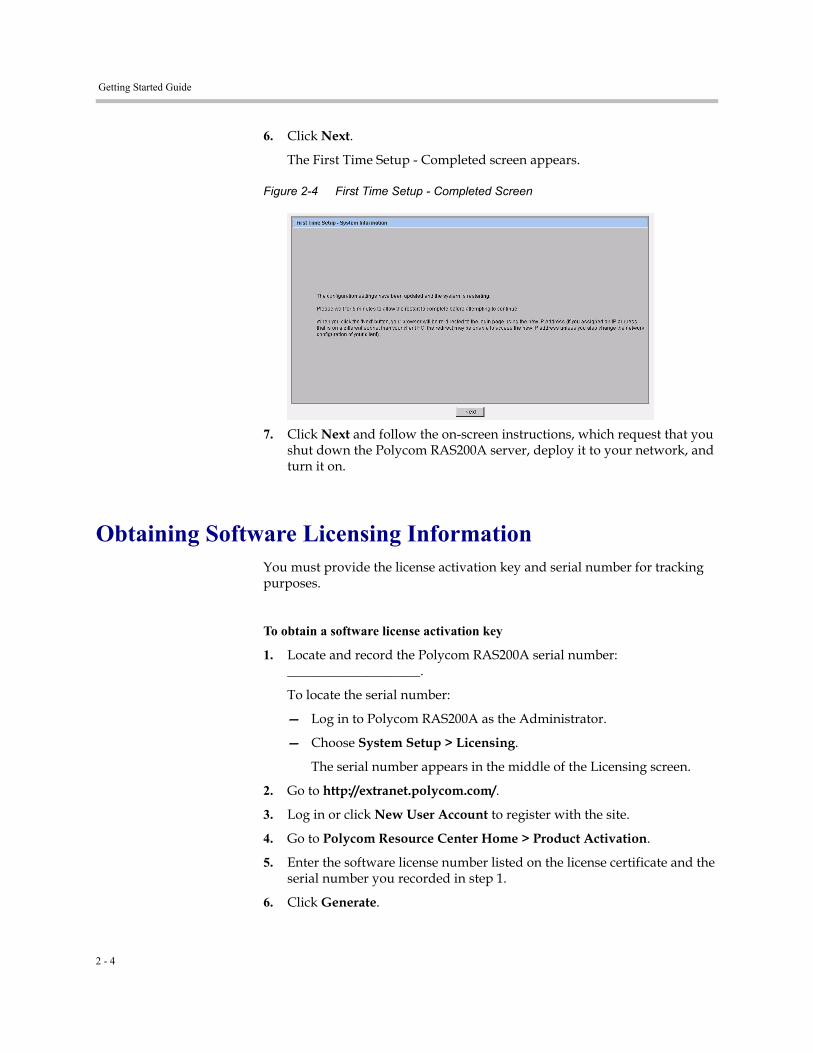
6. Click Next.
The First Time Setup - Completed screen appears.
Figure 2-4 First Time Setup - Completed Screen
7. Click Next and follow the on-screen instructions, which request that you shut down the Polycom RAS200A server, deploy it to your network, and turn it on.
Obtaining Software Licensing InformationYou must provide the license activation key and serial number for tracking purposes.
To obtain a software license activation key
1. Locate and record the Polycom RAS200A serial number: ____________________.
To locate the serial number:
— Log in to Polycom RAS200A as the Administrator.
— Choose System Setup > Licensing.
The serial number appears in the middle of the Licensing screen.
2. Go to http://extranet.polycom.com/.
3. Log in or click New User Account to register with the site.
4. Go to Polycom Resource Center Home > Product Activation.
5. Enter the software license number listed on the license certificate and the serial number you recorded in step 1.
6. Click Generate.
Completing the First Time Setup
2 - 5
7. When the activation key appears, record it in the space provided:
__________-__________-_________-___________
__________-__________-_________-___________
To enter the activation key in Polycom RAS200A
1. Go to System Setup > Licensing.
2. On the Licensing screen, enter the new activation key and click Add.
The activation key and license appear in the list.
Changing the ConfigurationAfter the first time setup is finished, you can change the Polycom RAS200A configuration. For instructions, see the Polycom RAS200A Administrator’s Guide.
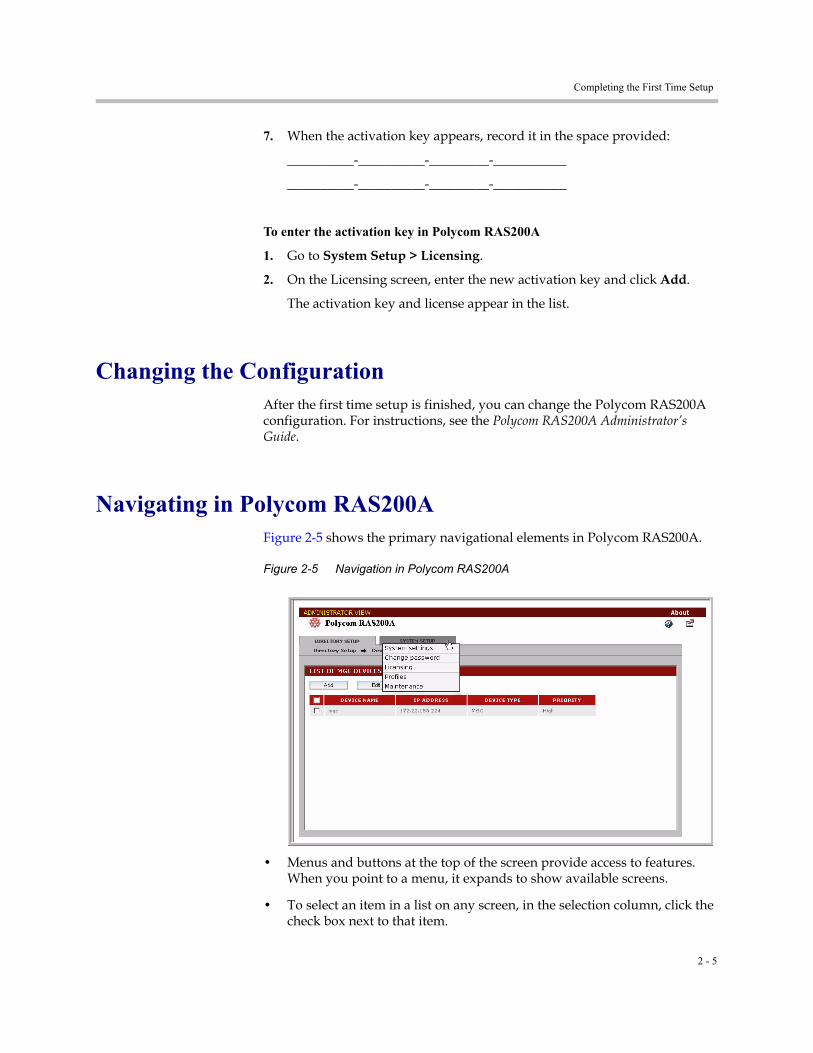
Navigating in Polycom RAS200AFigure 2-5 shows the primary navigational elements in Polycom RAS200A.
Figure 2-5 Navigation in Polycom RAS200A
• Menus and buttons at the top of the screen provide access to features. When you point to a menu, it expands to show available screens.
• To select an item in a list on any screen, in the selection column, click the check box next to that item.

Getting Started Guide
2 - 6
• Click the question mark, , to download a PDF file of the Polycom RAS200A Administrator’s Guide.
• Click the red arrow, , to log out of Polycom RAS200A.
3 - 1
3System Specifications
This chapter lists the electrical, physical, environmental, and regulatory compliance specifications for the Polycom RAS200A server.
Electrical• Power supply: 260 watts (Model Number SP262-1S, Part Number
PWS-0055)
• AC voltage: 100 to 240 volts auto-range
Physical• Form factor: Mini 1U, 17-inch rack-mount
• Height: 1.7 in. (44 mm)
• Width: 16.7 in. (424 mm)
• Depth: 14 in. (356 mm)
• Gross weight: 23 lbs (10.5 kg)
Environmental• Operating temperatures: 10° C to 35° C (50° to 95° F)
• Storage temperatures: -40° C to 70° C (-40° to 158° F)
• Relative humidity: 8% to 90% (non-condensing)

Getting Started Guide
3 - 2
Regulatory Compliance
Electromagnetic Emissions• FCC Class B
• EN 55022 Class B
• EN 61000-3-2 or EN 61000-3-3
• CISPR 22 Class B
Electromagnetic Immunity• EN 55024 or CISPR 24
• EN 61000-4-2 through EN 61000-4-6, EN 61000-4-8, and EN 61000-4-11
Safety• EN 60950-compliant or IEC 60950-compliant
• UL Listed (USA)
• CUL Listed (Canada)
• TUV Certified (Germany)
• CE Marking (Europe)