Embed Size (px)
Citation preview
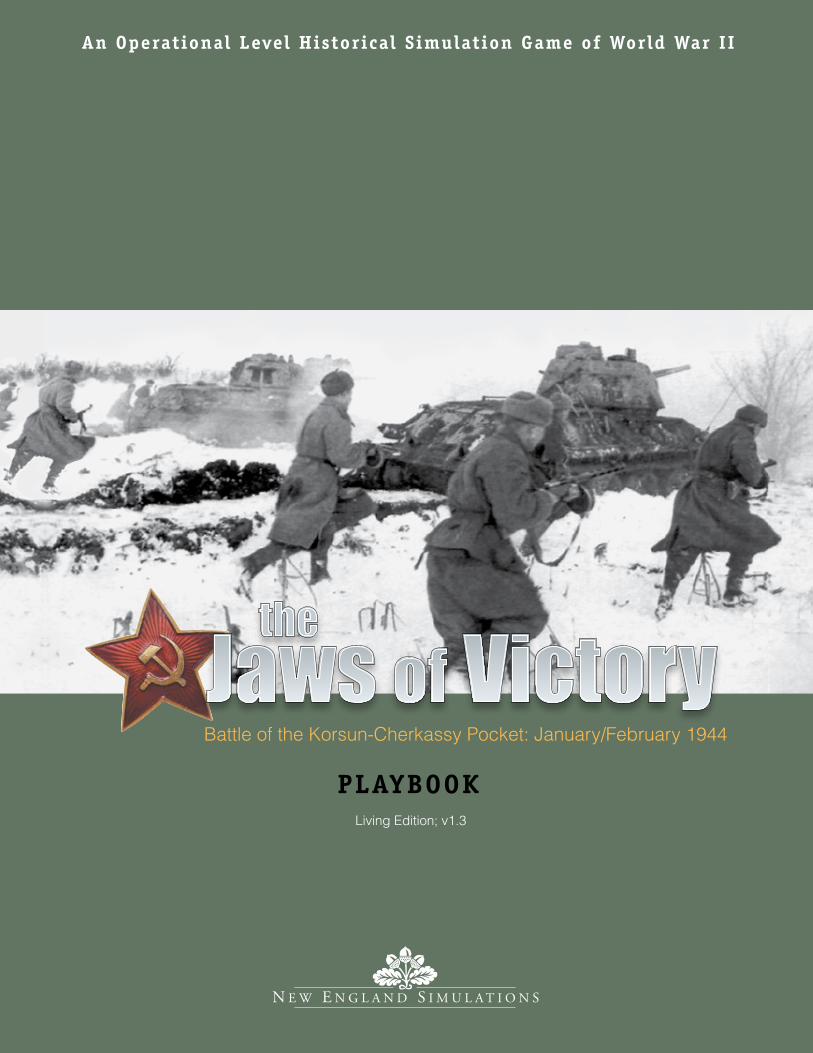
Battle of the Korsun-Cherkassy Pocket: January/February 1944
An Operational Level Historical Simulation Game of World War II
PLAYBOOKLiving Edition; v1.3

No game can truly capture the horrific and tragic struggle that became known as the
Battle of the Korsun-Cherkassy Pocket. The Soviets were planning to repeat their success at Stalingrad
while the Germans were desperately trying to avoid it. The ensuing battle raged on for more than two weeks
as both sides committed their best, massed armor and infantry formations. With this project, it is my hope that players of both sides will
experience some small sense of the desperation and intensity—as did their historical counterparts—as they struggle through
to victory or defeat.
I am grateful for Gary Moody’s assistance with proof-testing the initial game mechanics. Special thanks go to Mike Resch and
Ken Guerin for creating the playtest counter artwork. Also, thanks to the many playtesters that pitched in during the course of the
design. Their comments and insight were invaluable. Finally, a special thanks to my wife, Joyce for enduring the six years that I spent
researching and designing the game.
— Milt Janosky.
19.0 Introduction . . . . . . . . . . . . . . . . . . . 3
20.0 Prelude to the Battle . . . . . . . . . . . 3
21.0 Setting up the Game . . . . . . . . . . . 421.1 The Maps, Charts and Tables . . . 421.2 The Playing Pieces . . . . . . . . . . . 421.3 Scenario Set-up and
Reinforcement Schedule . . . . . . 422.0 General Scenario Rules . . . . . . . . 4
22.1 German “Continuous Front” . . . 422.2 Bridges . . . . . . . . . . . . . . . . . . . . 522.3 Soviet Artillery Barrage Units . . 522.4 Breakdown Units and Boxes . . . 522.5 German Multi-counter Armor
Units . . . . . . . . . . . . . . . . . . . . . . 522.6 Play Restrictions. . . . . . . . . . . . . 622.7 Hidden Charts and Tracks . . . . 6
22.8 Optional Rules and Scenario Variations. . . . . . . . . . . 6
22.9 Single Map Scenarios Cases . . . 622.10 Map Edge Play . . . . . . . . . . . . . . 622.11 Soviet Command Restrictions . . 622.12 Multiplayer Options . . . . . . . . . 6
23.0 The Scenarios . . . . . . . . . . . . . . . . . 723.1 Konev Springs the Trap! . . . . . . 7
The 2nd Ukrainian Front Attacks 723.2 Vatutin Strikes the Second Blow
The 1st Ukrainian Front Attacks 923.3 A Brittle Sword Breaks
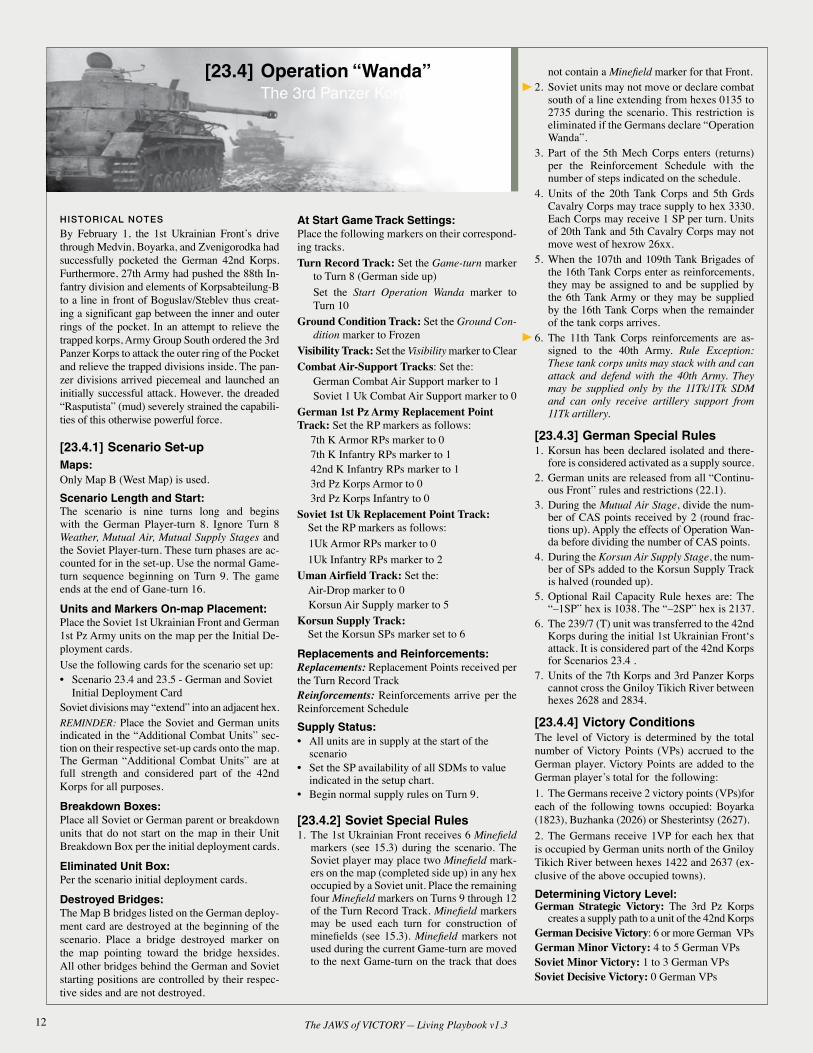
v. Vormann Reluctantly Strikes 1123.4 Operation “Wanda”
The 3rd Panzer Korps Attacks . 1223.5 A Cold Wind to Valhalla
The Germans Counterattack. . . 1323.6 from the Jaws of Victory
The Campaign Game . . . . . . . . 14
23.7 Through “Hell’s Gate” The Breakout . . . . . . . . . . . . . . 16
23.8 Stemmermann Holds On Defending the Pocket . . . . . . . . 17
24.0 Design and Players Notes . . . . 1824.1 Historical Basis of the
Game Design . . . . . . . . . . . . . . 1824.2 Players Notes . . . . . . . . . . . . . . 1924.3 Order of Battle Notes . . . . . . . . 22
25.0 Examples of Play . . . . . . . . . . . . . 2325.1 Movement . . . . . . . . . . . . . . . . 2325.2 Supply . . . . . . . . . . . . . . . . . . . 2325.3 Combat . . . . . . . . . . . . . . . . . . . 2425.4 Engineering . . . . . . . . . . . . . . . 2625.5 German Air Supply to Korsun . 26
26.0 References and Sources. . . . . . 27
Table of Contents
Reader’s Note on the Living Playbook The Living Rules for the Jaws of Victory is an ongoing rules set which provide players with the latest corrections, additions, and clarifications. To help readers identify only those rules that have been affected, a yellow arrow points to the lowest level rules number or text.
3The JAWS of VICTORY — Play Book
Battle of the Korsun-Cherkassy Pocket: January/February 1944
PLAYBOOK
19.0 IntroductionThe PLAYBOOK is organized into the following sections:20.0 Prelude to the Battle 21.0 Setting up the Game22.0 General Scenario Rules23.0 Scenarios 24.0 Design and Player Notes 25.0 Examples of Play 26.0 References and Sources
20.0 Prelude to the BattleDesigner’s Note: There are a number of very good narratives describing the battle of the Korsun-Cherkassy Pocket. The following histor-ical preamble is provided to give players a brief appreciation of the condition and structure of the forces opposing one another, and provide a wider sense of situational context while playing the game.
The Soviet Fall-Winter OffensiveFollowing the defeat of the German Kursk Of-fensive in July of 1943 the Soviets unleashed a series of major offensives to clear the Ukraine. By mid-January of 1944 they had liberated the Ukraine north and east of the Dnepr, crossed the Dnepr bend reaching Kirovograd, captured Kiev, and driven deep into the western Ukraine cap-turing Zhitomir and Berdichev. The Germans, however, did maintain a hold on the Dnepr near Korsun in an exposed salient 70 miles southwest of Kiev and west of Cherkassy. Hitler insisted on holding the salient and refused requests from his field commanders to withdraw to more defensi-ble positions. This salient was a tempting target for the Soviets. In the second week of January, 1944 Stavka ordered the 1st and 2nd Ukrain-ian Fronts to conduct major operations against the base of the salient. The purpose would be
to surround and eliminate two German Corps believed to be in the salient. The 2nd Ukrainian Front would attack from the east on the 25th through Shpola toward Zvenigorodka while the 1st Ukrainian Front would attack from the west the following day and link up with the 2nd at Zvenigorodka. The ensuing battle for the Korsun salient forms the basis for the game’s scenarios.
The Soviet Forces“There is no need to worry, Comrade Stalin, the enemy is encircled and cannot escape” — General Ivan Konev
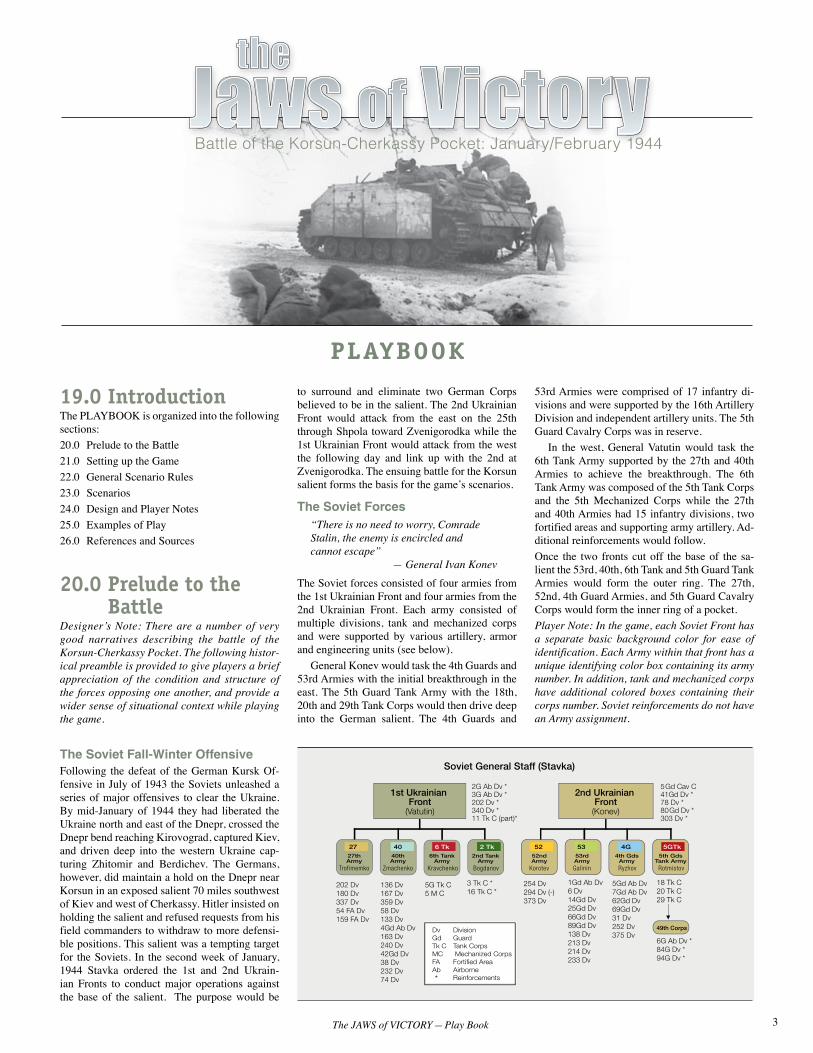
The Soviet forces consisted of four armies from the 1st Ukrainian Front and four armies from the 2nd Ukrainian Front. Each army consisted of multiple divisions, tank and mechanized corps and were supported by various artillery, armor and engineering units (see below). General Konev would task the 4th Guards and 53rd Armies with the initial breakthrough in the east. The 5th Guard Tank Army with the 18th, 20th and 29th Tank Corps would then drive deep into the German salient. The 4th Guards and
53rd Armies were comprised of 17 infantry di-visions and were supported by the 16th Artillery Division and independent artillery units. The 5th Guard Cavalry Corps was in reserve. In the west, General Vatutin would task the 6th Tank Army supported by the 27th and 40th Armies to achieve the breakthrough. The 6th Tank Army was composed of the 5th Tank Corps and the 5th Mechanized Corps while the 27th and 40th Armies had 15 infantry divisions, two fortified areas and supporting army artillery. Ad-ditional reinforcements would follow.Once the two fronts cut off the base of the sa-lient the 53rd, 40th, 6th Tank and 5th Guard Tank Armies would form the outer ring. The 27th, 52nd, 4th Guard Armies, and 5th Guard Cavalry Corps would form the inner ring of a pocket.Player Note: In the game, each Soviet Front has a separate basic background color for ease of identification. Each Army within that front has a unique identifying color box containing its army number. In addition, tank and mechanized corps have additional colored boxes containing their corps number. Soviet reinforcements do not have an Army assignment.
Dv DivisionGd GuardTk C Tank CorpsMC Mechanized CorpsFA Fortified AreaAb Airborne * Reinforcements
202 Dv180 Dv337 Dv54 FA Dv159 FA Dv
5G Tk C5 M C
136 Dv167 Dv359 Dv58 Dv133 Dv4Gd Ab Dv163 Dv240 Dv42Gd Dv38 Dv232 Dv74 Dv
3 Tk C *16 Tk C *
254 Dv294 Dv (-)373 Dv
18 Tk C20 Tk C29 Tk C
49th Corps
6G Ab Dv *84G Dv *94G Dv *
5Gd Ab Dv7Gd Ab Dv62Gd Dv69Gd Dv31 Dv252 Dv375 Dv
1Gd Ab Dv6 Dv14Gd Dv25Gd Dv66Gd Dv89Gd Dv138 Dv213 Dv214 Dv233 Dv
2G Ab Dv *3G Ab Dv *202 Dv *340 Dv *11 Tk C (part)*
5Gd Cav C41Gd Dv *78 Dv *80Gd Dv *303 Dv *
ZmachenkoTrofimemko Kravchenko Bogdanov Korotev Galinin Ryzhov Rotmistov
1st Ukrainian Front
(Vatutin)
2nd Ukrainian Front
(Konev)
Soviet General Staff (Stavka)
2 Tk 5GTk6 Tk40 4G53522740th Army
4th Gds Army
52nd Army
53rd Army
6th Tank Army
2nd Tank Army
5th Gds Tank Army
27th Army
4 The JAWS of VICTORY — Living Playbook v1.3
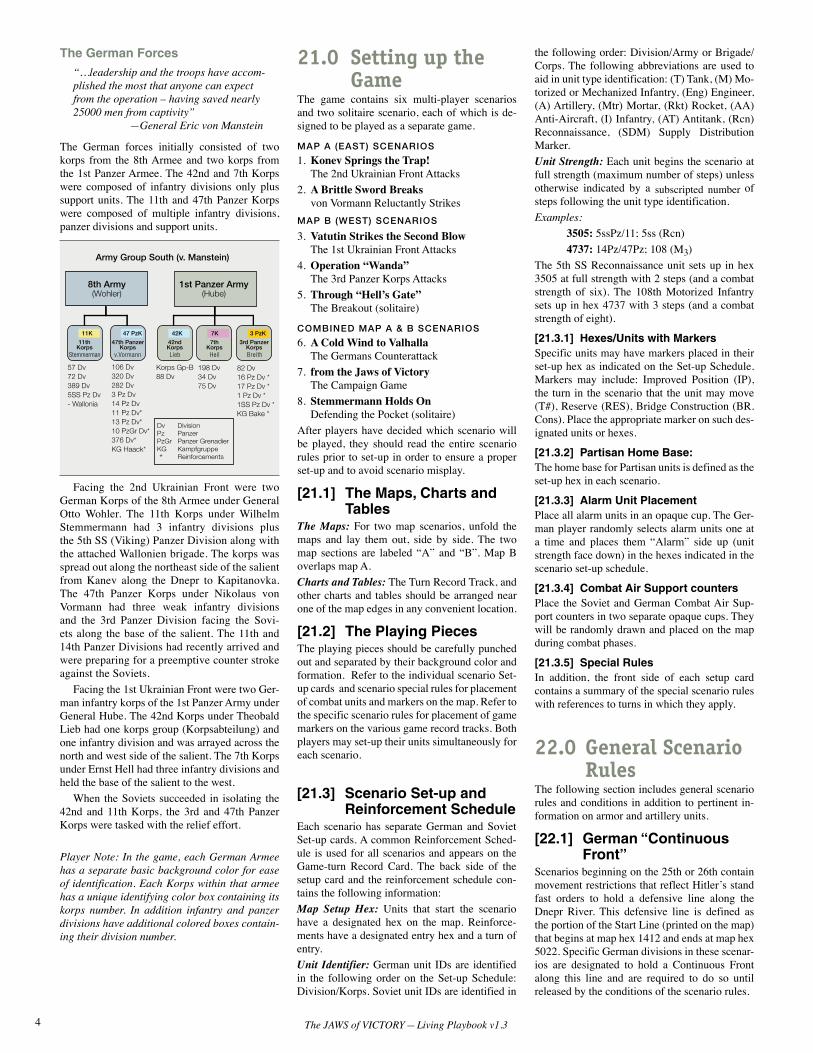
The German Forces“…leadership and the troops have accom-plished the most that anyone can expect from the operation – having saved nearly 25000 men from captivity” —General Eric von Manstein
The German forces initially consisted of two korps from the 8th Armee and two korps from the 1st Panzer Armee. The 42nd and 7th Korps were composed of infantry divisions only plus support units. The 11th and 47th Panzer Korps were composed of multiple infantry divisions, panzer divisions and support units.
Facing the 2nd Ukrainian Front were two German Korps of the 8th Armee under General Otto Wohler. The 11th Korps under Wilhelm Stemmermann had 3 infantry divisions plus the 5th SS (Viking) Panzer Division along with the attached Wallonien brigade. The korps was spread out along the northeast side of the salient from Kanev along the Dnepr to Kapitanovka. The 47th Panzer Korps under Nikolaus von Vormann had three weak infantry divisions and the 3rd Panzer Division facing the Sovi-ets along the base of the salient. The 11th and 14th Panzer Divisions had recently arrived and were preparing for a preemptive counter stroke against the Soviets. Facing the 1st Ukrainian Front were two Ger-man infantry korps of the 1st Panzer Army under General Hube. The 42nd Korps under Theobald Lieb had one korps group (Korpsabteilung) and one infantry division and was arrayed across the north and west side of the salient. The 7th Korps under Ernst Hell had three infantry divisions and held the base of the salient to the west. When the Soviets succeeded in isolating the 42nd and 11th Korps, the 3rd and 47th Panzer Korps were tasked with the relief effort.
Player Note: In the game, each German Armee has a separate basic background color for ease of identification. Each Korps within that armee has a unique identifying color box containing its korps number. In addition infantry and panzer divisions have additional colored boxes contain-ing their division number.
[21.3] Scenario Set-up and Reinforcement Schedule
Each scenario has separate German and Soviet Set-up cards. A common Reinforcement Sched-ule is used for all scenarios and appears on the Game-turn Record Card. The back side of the setup card and the reinforcement schedule con-tains the following information:Map Setup Hex: Units that start the scenario have a designated hex on the map. Reinforce-ments have a designated entry hex and a turn of entry. Unit Identifier: German unit IDs are identified in the following order on the Set-up Schedule: Division/Korps. Soviet unit IDs are identified in
the following order: Division/Army or Brigade/Corps. The following abbreviations are used to aid in unit type identification: (T) Tank, (M) Mo-torized or Mechanized Infantry, (Eng) Engineer, (A) Artillery, (Mtr) Mortar, (Rkt) Rocket, (AA)Anti-Aircraft, (I) Infantry, (AT) Antitank, (Rcn) Reconnaissance, (SDM) Supply Distribution Marker. Unit Strength: Each unit begins the scenario at full strength (maximum number of steps) unless otherwise indicated by a subscripted number of steps following the unit type identification.Examples:
3505: 5ssPz/11; 5ss (Rcn)4737: 14Pz/47Pz; 108 (M3)
The 5th SS Reconnaissance unit sets up in hex 3505 at full strength with 2 steps (and a combat strength of six). The 108th Motorized Infantry sets up in hex 4737 with 3 steps (and a combat strength of eight).
[21.3.1] Hexes/Units with Markers Specific units may have markers placed in their set-up hex as indicated on the Set-up Schedule. Markers may include: Improved Position (IP), the turn in the scenario that the unit may move (T#), Reserve (RES), Bridge Construction (BR. Cons). Place the appropriate marker on such des-ignated units or hexes.
[21.3.2] Partisan Home Base: The home base for Partisan units is defined as the set-up hex in each scenario.
[21.3.3] Alarm Unit PlacementPlace all alarm units in an opaque cup. The Ger-man player randomly selects alarm units one at a time and places them “Alarm” side up (unit strength face down) in the hexes indicated in the scenario set-up schedule.
[21.3.4] Combat Air Support counters Place the Soviet and German Combat Air Sup-port counters in two separate opaque cups. They will be randomly drawn and placed on the map during combat phases.
[21.3.5] Special RulesIn addition, the front side of each setup card contains a summary of the special scenario rules with references to turns in which they apply.
22.0 General Scenario Rules The following section includes general scenario rules and conditions in addition to pertinent in-formation on armor and artillery units.
[22.1] German “Continuous Front”
Scenarios beginning on the 25th or 26th contain movement restrictions that reflect Hitler’s stand fast orders to hold a defensive line along the Dnepr River. This defensive line is defined as the portion of the Start Line (printed on the map) that begins at map hex 1412 and ends at map hex 5022. Specific German divisions in these scenar-ios are designated to hold a Continuous Front along this line and are required to do so until released by the conditions of the scenario rules.
21.0 Setting up the GameThe game contains six multi-player scenarios and two solitaire scenario, each of which is de-signed to be played as a separate game.
MAP A (EAST) SCENARIOS
1. Konev Springs the Trap! The 2nd Ukrainian Front Attacks2. A Brittle Sword Breaks von Vormann Reluctantly StrikesMAP B (WEST) SCENARIOS
3. Vatutin Strikes the Second Blow The 1st Ukrainian Front Attacks4. Operation “Wanda” The 3rd Panzer Korps Attacks5. Through “Hell’s Gate” The Breakout (solitaire)
COMBINED MAP A & B SCENARIOS
6. A Cold Wind to Valhalla The Germans Counterattack7. from the Jaws of Victory The Campaign Game8. Stemmermann Holds On Defending the Pocket (solitaire)After players have decided which scenario will be played, they should read the entire scenario rules prior to set-up in order to ensure a proper set-up and to avoid scenario misplay.
[21.1] The Maps, Charts and Tables
The Maps: For two map scenarios, unfold the maps and lay them out, side by side. The two map sections are labeled “A” and “B”. Map B overlaps map A. Charts and Tables: The Turn Record Track, and other charts and tables should be arranged near one of the map edges in any convenient location.
[21.2] The Playing PiecesThe playing pieces should be carefully punched out and separated by their background color and formation. Refer to the individual scenario Set-up cards and scenario special rules for placement of combat units and markers on the map. Refer to the specific scenario rules for placement of game markers on the various game record tracks. Both players may set-up their units simultaneously for each scenario.
5The JAWS of VICTORY — Living Playbook v1.3
[22.1.1] Holding a Continuous FrontEach hex along the above start line must be within two hexes of a German divisional unit at the end of each German Movement Phase. Units holding a Continuous Front may consist of any combination of infantry (including breakdown battalions), reconnaissance, fusilier, armor, anti- tank, or combat engineers. Non–attack-capable units may not be used to hold a Continuous Front. Divisional units above and beyond those needed to hold a Continuous Front are free to move and declare combat once released by the conditions of the scenario..
[22.1.2] Non-Activated and Activated UnitsDivisional units designated to hold a Continuous Front at the start of a scenario are considered non--activated and cannot move. Non-activated units become activated if a.) they retreat due to com-bat, b). they are within two hexes of a German unit that has retreated due to combat during the current turn, or c.) a Soviet unit crosses the start line and enters a hex within two hexes of that unit. Once activated, these units may move and/or declare combat but are not required to restore the original continuous front. However, they must attempt to maintain a Continuous Front as close as possible to the current Continuous Front line until released. Note: Optional Partisan units do not activate German units (Section 18.1).
[22.1.3] Surrounded UnitsGerman units that are required to hold a Con-tinuous Front are deemed to be surrounded if all six of its surrounding hexes are either in the Zone-of-Control (ZOC) or Zone-of-Influence (ZOI) of a Soviet unit even if any of their six sur-rounding hexes are occupied by another German unit. Surrounded units may move and/or declare combat until they are no longer surrounded in which case they must revert to holding a con-tinuous front as close as possible to the current Continuous Front line.
[22.1.4] Release from “Continuous Front”The scenarios contain rules for release from the continuous front requirement. In addition, the following release procedure applies beginning with Turn 3 of the scenario.
PROCEDURE:1. The German player rolls two dice during the
German Release Segment of the Event Phase.2. If the sum of the two dice is less than or equal
to the current turn number then all designated units in the scenario are released from the continuous front requirement. They are free to move and declare combat for the remainder of the scenario.
[22.1.5] Division Artillery Unit MovementGerman division artillery units are not bound by the above Continuous Front movement or sce-nario restrictions. They may move during the pe-riod that their division is required to maintain a Continuous Front as long as they end movement within their artillery support range of at least one unit in their division. They may move freely once their division is released from the Continu-ous Front requirement.
[22.2] BridgesRiver and stream hexsides that are crossed by a connecting road are assumed to have an intact bridge across the hexside. These bridge hex-sides are considered intact unless identified as destroyed in the specific scenario rules. Place a bridge destroyed marker in hexes with destroyed bridges with the arrow pointing to the destroyed bridge hexside. Bridges behind the scenario start line are considered controlled by their respective sides.
[22.3] Soviet Artillery Barrage Units
The following units form the components of two Soviet artillery Barrage units. Note: they con-tain a “B” on the top of their counter for easy identification.16th Artillery Division Barrage Unit (16 Art): The 16th Artillery Division Barrage unit has three Barrage Effect markers with barrage val-ues of: 3/2, 3/2, and 3/2 (front/back). It is com-posed of the following 16th Artillery Division units: 61Cn, 52How, 90H, 109SH, and 14 (Mtr).4th Guard Army Barrage Unit (4G Art) The 4th Guard Army Barrage unit has three Barrage Effect markers with barrage values of: 3/2, 2/2, and 2/2 (front/back). It is composed of the following 4th Guard Army artillery units: 568Cn, 42Lt, 98H, 97H, 1328Cn.Design Note: The 4th Guard Army supporting artillery was not as strong as the 16th Artillery Division of the 53rd Army. The 4th Guard Bar-rage unit has a reduced barrage capability.
[22.4] Breakdown Units and Boxes
Each map has unit breakdown boxes that are used to hold counters for Soviet and German units that breakdown into lower formations. Place either the parent or the breakdown units in these boxes in accordance with the scenario set-up instructions.[22.4.1] Soviet Breakdown UnitsAll infantry divisions of the Soviet 27th and 52nd Armies have dedicated breakdown count-ers. They may breakdown into their three com-ponent regiments or recombine their component regiments into their parent division. The two FA divisions of the 27th Army are broken down into battalions and cannot combine into a division. The motorized infantry brigades of the 18th, 20th and 29th Tank Corps may breakdown into their dedicated component regiments or recom-bine their component regiments into their parent brigade. Three generic breakdown regiments are provided for the motorized infantry brigades of the 5th G, 3rd, or 16th Tank Corps of the 1st Ukrainian Front. Note: Some scenarios begin with Soviet divisions already broken down into regiments. Also, the
Soviet 294th Division had only two of its three regiments present for the battle.
[22.4.2] German Breakdown UnitsThe infantry regiments of the 5th SS, 57th, 72nd and 389th Divisions and Ka-B may breakdown into their two component battalions or recom-bine their component battalions into their par-ent regiment. Dedicated breakdown counters (battalions) are provided for these regiments. A limited number of generic breakdown battal-ions are provided for German regiments of other divisions. They are specific to their korps and must be used accordingly. Players are free to add additional breakdown and extension markers to the counter mix. The final step of a German 3-step battalion is its regiment cadre unit.Note: Some scenarios begin with German regi-ments already broken down into battalions.
[22.5] German Multi-Counter Armor Units
Most German armor battalions have either one or two steps and are represented by a single counter. However, some German armor bat-talions have more than two steps due to larger numbers of tanks. These units are provided with a second counter that replaces the first counter after the unit takes its second step loss. The sec-ond counter has the same unit ID but is identi-fied by a broad striped band across the center of the counter. The following armor units are multi-counter units: 202/7, 503/3Pz, 506/16Pz, ii/23Pz (Bäke), 2/1/1Pz, 3/1/1Pz, 1/15/11Pz, 3/4/13Pz, 2/36/14Pz, 2/2/16Pz, 3/2/16Pz, 2/36/17Pz, Trn/5ss/5SS and 2/5ss/5SS.Three specific panzer battalions during the battle had 40 to 50 tanks each. These are represented by two separate company size units; i/1/1 and ii/1/1 of the 1st Pz Division, i/1/2 and ii/1/2 of the 16th Pz Division and i/1/26 and ii/1/26 as-signed to the 47th Panzer Korps. Each company is a multi-counter armor unit. • Both maps contains “Multi-step Armor
Unit” holding boxes for placement of the second multi-counter unit. Place the second multi-counter units in their corresponding
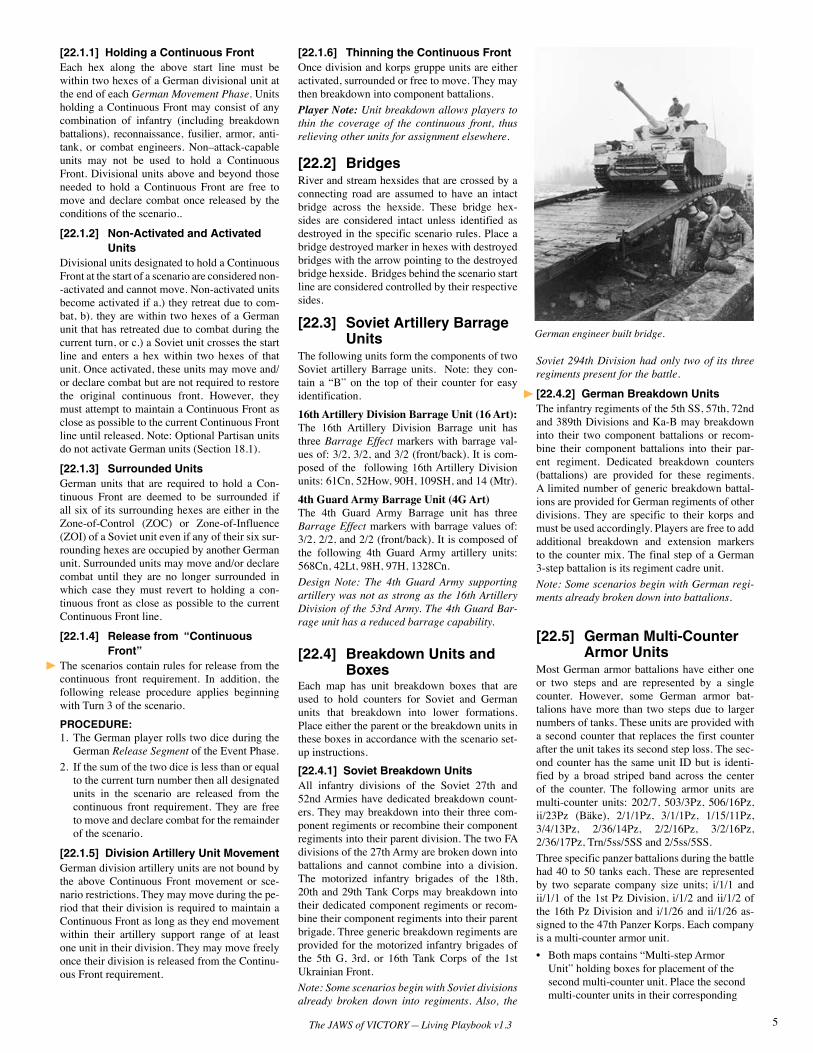
German engineer built bridge.
[22.1.6] Thinning the Continuous FrontOnce division and korps gruppe units are either activated, surrounded or free to move. They may then breakdown into component battalions. Player Note: Unit breakdown allows players to thin the coverage of the continuous front, thus relieving other units for assignment elsewhere.
6 The JAWS of VICTORY — Living Playbook v1.3
holding box at the top of the map until they are needed for reduced steps for their unit.
[22.6] Play RestrictionsHistorical Note: During 1944 on the Ukrainian Front, both sides had difficulty in assessing exact enemy strength and coordinating their own forces to achieve maximum impact. This inability cou-pled with variations in unit morale and capability often resulted in unexpected combat results.
Restrictions: In the spirit of the game, players should abide by the following limitations that increase uncertainty about the opponent’s strength and condition.1. Players may not record unit strengths of the
opposing units.2. Players may only observe an opponent’s top
unit in a stack and may not examine other counters in a stack except during Combat Odds Determination. The following informa-tion markers do not apply for this purpose: Out-of-Supply, Out-of-Ammo, Disorganized/Regroup, and all Bridge markers. Players may not examine units placed under improved po-sitions or minefields
3. Once all combat modifiers are declared, an opposing player may examine an enemy unit’s strength (counters) only to determine combat odds at the instant that a given combat is to be resolved.
4. A player must notify his opponent if units in a hex exert a ZOC but only at the moment of entry or exit into the adjacent hex.
5. Players should (but are not required to) advise the opposing player if an opportunity exists to destroy a bridge during the opposing player’s movement or combat phase.
6. Players may not observe the value of Com-bat Air Support counters until the appropriate segment of the combat sequence.
7. Players may not choose to withdraw from combat, remove or change units participating in a combat, or change combat option decla-rations once declarations have been made or combat strengths have been revealed.
8. The Soviet player may not examine the com-bat value of Alarm units once they are placed on the map.
[22.7] Hidden Charts and Tracks
Player Note: The entire air availability process should be “blind” to the opponent. While not required, players should attempt to separate their Combat Air Support Tracks such that their die rolls and available air are not seen by their opponent.The following die rolls and associated tracks should be hidden from the opposing player with the intent of adding an additional degree of un-certainty for the opposing player.• Both players’ Combat Air Support Tracks• Both players’ Replacement Point Tracks• German Korsun Supply Track• German Uman Airfield Track
[22.8] Optional Rules and Scenario Variations
Players should agree upon all optional rules and scenario variations prior to start of play.
[22.9] Single Map Scenarios Cases
1. CAS and Korsun Supply: German Combat Air Support and Supply Points to the Korsun Airfield are reduced by one-half (rounded up) for single map scenarios. 2. Map Usage: Half hexes are playable for all single map scenarios.
[22.10] Map Edge PlayThe four hexes at the east and west edges of the map are provided for historical context. On the West Map (B). the German 82nd and Soviet 163rd and 4th Guard divisions did not actively participate in the battle. On the East Map (A). the Soviet 5th Guard Army supported the 53rd Army
but generally remained passive during the battle. The German 282nd Division was shifted to the west to relieve panzer divisions for the counter attack. It was replaced in the line by German reinforcements. Players should (but are not re-quired to) avoid combat in these map edge hexes.
[22.11] Soviet Command Restrictions
The nominal boundary line between the 1st and 2nd Ukrainian Fronts is hex 2729 – 2926 – 3218. Units of each Soviet Front are prohibited from crossing to the opposites side of the boundary line. The boundary may be moved as the battle develops as long as the above prohibition for crossing is maintained. The boundary is removed if Stalin intervenes per optional rule 18.13. In ad-dition, units of the 1st and 2nd Ukrainians Front may not attack the same German unit during a given Game-turn
[22.12] Multiplayer Options The two campaign games; a Cold Wind to Val-halla and from the Jaws of Victory, are ideally suited for four players: two Soviet and two Ger-man. Alternately, a fifth player can be added to play the German pocket (42nd and 11th Korps). When playing with four or more players the fol-lowing rules more realistically reflect the com-mand situations of the Soviet and German higher commands.SOVIETS:• Soviet players should use the optional Stalin
intervenes rule (see 18.13).• In addition if the 2nd Ukrainian Front was
the cause of the intervention then the 1st Ukrainian Front player assumes command of all Soviet forces in the inner ring including the 53rd and 4th Guards Armies. If the 1st Ukrainian Front was the cause of the inter-vention then the 2nd Ukrainian Front player assumes command of all Soviet forces in the inner ring including the 27th Army/
• Soviet players may not communicate regard-ing tactical operations, plans, combat declara-tion or other strategy and tactics consider-ations unless Stalin intervenes.
• Units of the 1st and 2nd Ukrainian fronts may not declare or conduct combat against the same German unit(s) during a given turn unless Stalin intervenes.
GERMAN:The following assignments are recommended when playing with two or three German players.Two German players: The 8th Armee player as-sumes command of the 42nd Korps during the turn in which all rail and road paths from Korsun to a supply source are cut by the Soviets.Three German players: A third German player assumes command of the 11th and 42nd Korps during the turn in which all railroad and road connected hexes from Korsun to a supply source are cut by the Soviets.
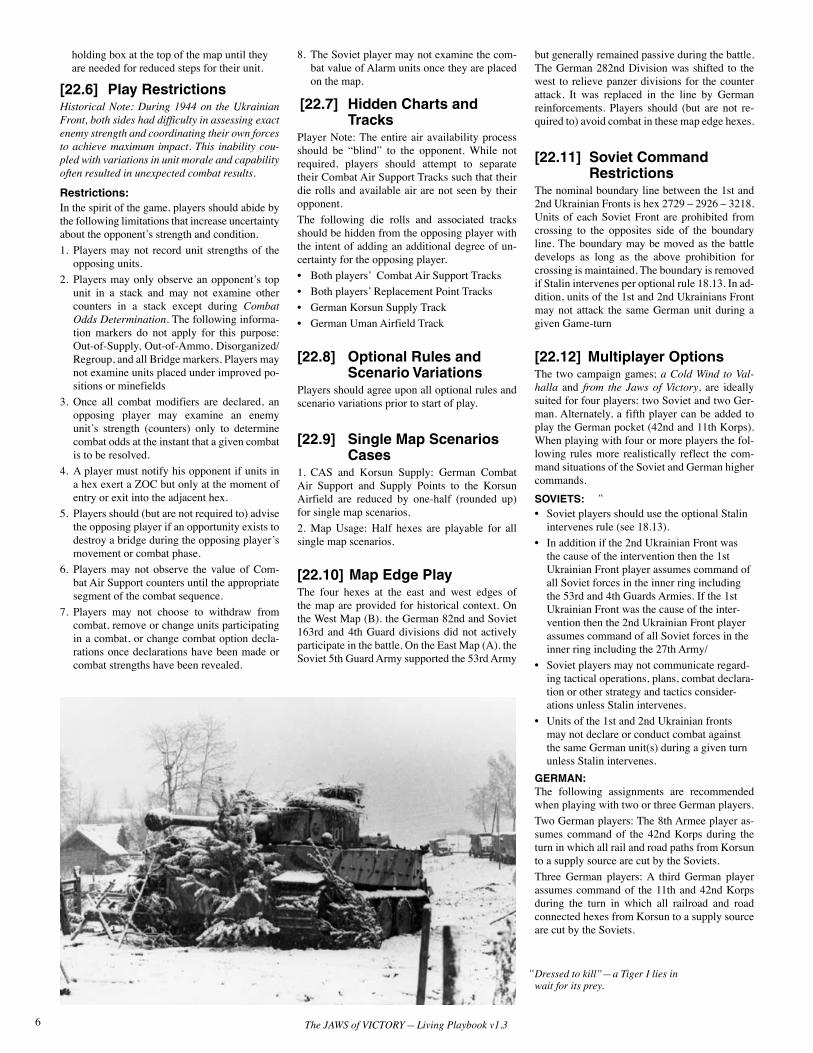
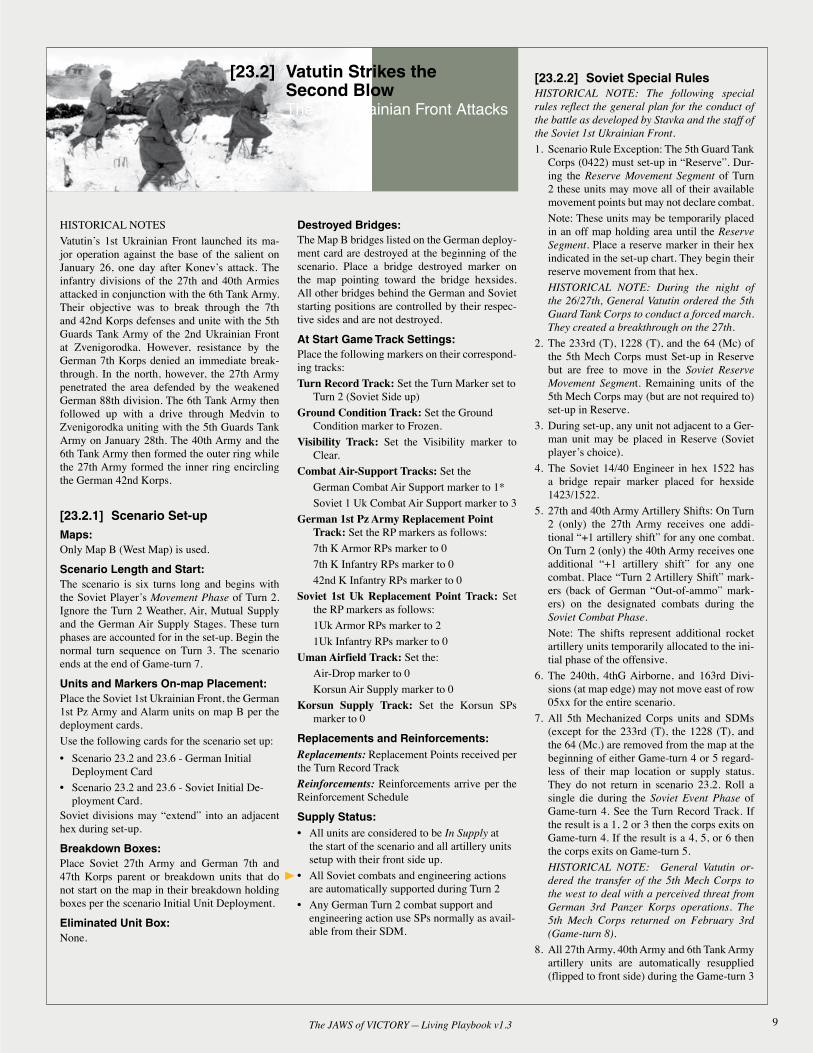
Dressed to kill”—a Tiger I lies in wait for its prey.
“
“
7The JAWS of VICTORY — Living Playbook v1.3
HISTORICAL NOTES
The 2nd Ukrainian Front launched its major op-eration against the salient on January 25, 1944. The plan was to conduct a massive artillery bar-rage against the German main line of defense followed by infantry assaults by the 53rd Army and 4th Guard Army. Once the breakthrough had occurred the 5th Guard Tank Army would drive deep into the German rear area through Shipola and onto Zvenigorodka. Once the link up occurred with Vatutin’s 1st Ukrainian Front, the 5th Guard Tank Army and 53rd Army would form the outer ring of the pocket. The 4th and 52nd Armies along with the 5th Guard Cavalry Corps would form the inner ring and destroy the German units within the Korsun Pocket.
[23.1.1] Scenario Set-upMaps:Only Map A is used.
Scenario Length and Start:The scenario is seven turns long and begins with the Soviet Player’s Artillery Barrage Segment of the Event Phase of Game-turn 1. Ignore the Turn 1 Weather, Air, Mutual Supply and Ger-man Air Supply Stages. These turn phases are accounted for in the set-up. Begin the normal Game-turn Sequence of Play starting on turn 2. The scenario ends at the end of Game-turn 7.
Units and Markers On-map Placement:Place the Soviet 2nd Ukrainian Front, the Ger-man 8th Army and Alarm units on Map A per the deployment cards. Any Soviet division may “extend” into an adjacent hex during the set-up. Use the following scenario cards for the set up:• Scenario 23.1 and 23.6 - German Initial
Deployment Card • Scenario 23.1 and 23.6 - Soviet Initial
Deployment Card Breakdown Boxes: Soviet: Place the 5 component units of the 4th Guards artillery (marked with a B) and the 16th Artillery Division (53rd Army artillery units marked with a “B”), and their Barrage Effects
markers in their Artillery Division Holding Boxes per the scenario set-up card (see 22.3). Place all Soviet and German parent or break-down units that do not start on the map in their breakdown holding box per the initial deploy-ment cards.Eliminated Unit Box: None.
Destroyed Bridges:The Map A bridges listed on the German deploy-ment card are destroyed at the beginning of the scenario. Place a bridge destroyed marker on the map pointing toward the bridge hexsides. All other bridges behind the German and Soviet starting positions are controlled by their respec-tive sides and are not destroyed.
At Start Game Track Settings:Place the following markers on their correspond-ing tracks:Turn Record Track: Set the Turn Marker to Turn 1 (Soviet side up)Ground Condition Track: Set the Ground Con-dition marker to Frozen.Visibility Track: Set the Visibility marker to Clear.Combat Air-Support Tracks: Set the: German Combat Air Support marker to 1* Soviet 2 Uk Combat Air Support marker to 3 German 8th Army Replacement Point Track: Set the RP markers as follows: 11th Korps Armor RPs marker to 0 47th Pz Armor RPs marker to 0 47th Pz Infantry RPs marker set to 0Soviet 2nd Uk Replacement Point Track: Set the RP markers as follows: 2Uk Armor RPs marker to 2 2Uk Infantry RPs marker to 0Uman Airfield Track: Set the: Air Drop marker to 0 Korsun Air Supply marker to 0Korsun Supply Track: Set the Korsun SPs marker to 0.
23.0 The Scenarios Each scenario contains specific rules, restrictions and conditions which reflect the historical con-ditions and constraints that occurred during the course of the battle. They generally deal with Hitler’s insistence on “no retreat” and Stavka’s restrictions placed on the 1st and 2nd Ukrainian
Front pocket operations. Players should abide by these constraints in order to experience the his-torical flow of the battle. The campaign scenar-ios do contain optional rules that remove these restrictions once players are experienced with the game.
Replacements and Reinforcements:Replacements: Replacement Points received per the Turn Record TrackReinforcements: Reinforcements arrive per the Reinforcement Schedule
Supply Status:• All units are considered to be In Supply at
the start of the scenario and all artillery units setup with their front side up.
• All Soviet combats and engineering actions are automatically supported during Turn 1
• Any German Turn 1 combat support and engineering action use SPs normally as avail-able from their SDM.
• For scenario 23.1 only, the rail line hex on Map A at 3132 is a map edge supply source.
[23.1.2] Soviet Special Rules HISTORICAL NOTE: The following special rules reflect the general plan for the conduct of the battle as developed by Stavka and the staff of the Soviet 2nd Ukrainian Front.
1. The 4th Guard and 16th Artillery Divisions may (but are not required to) conduct an ar-tillery barrage on Game-turn 1. Note: If a bar-rage attack is not conducted, then exchange the Barrage marker with its component units in its Artillery Division Holding Box. Avoid stacking violations.
2. The 6th Infantry Division of the 53rd Army must start the scenario in Reserve. It may move and have combat during the Turn 1 Soviet Reserve Segment.
3. Place all units of the 29th and 20th Tank Corps in Reserve. These units may move and have combat during the Turn 1 Soviet Reserve Seg-ment.
Note: Do to the high stacking density, these units may be temporarily placed in an off map holding area until the Reserve Segment. Place a reserve marker in their hex indicated in the deployment card. They begin their reserve movement from that hex.
4. During set-up, any unit not adjacent to a Ger-man unit may be placed in Reserve (Soviet player’s choice).
5. The entire 18th Tank Corps (5730), 5th Guard Cavalry Corps (5930) and 5th Guard Tank Army Support units (5929 and 6030) may not move until Turn 3. These units may be placed off map until their movement in Game-turn 3. They begin their movement from their set-up hex. Place a Soviet Activate Turn 3 marker on each of the above hexes.
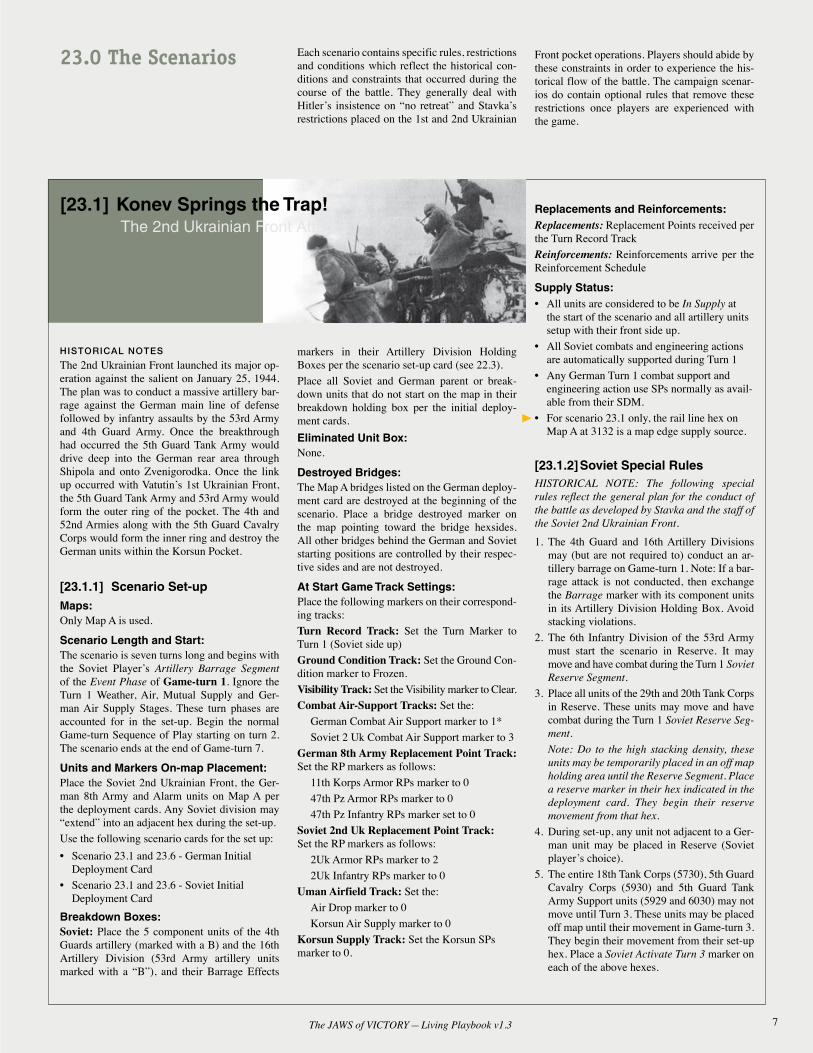
[23.1] Konev Springs the Trap! The 2nd Ukrainian Front Attacks
8 The JAWS of VICTORY — Living Playbook v1.3
6. The 173/4G armor brigade (5828) and the following 2nd Ukrainian Front support units may not move until Game-turn 2: the three (1, 2, & 3) 2AT regiments (6129). Place a Soviet Activate Turn 2 marker on each hex.
7. Units of the 5th Guard Army (at map edge) may not move or declare combat until Turn 5. However, they may move across the start line into vacant hexes if ZOC movement rules permit. If adjacent units of the 53rd Army ad-vance or retreat then the 5th Guard Army may move so as to retain connected ZOC/ZOIs be-tween the 53rd Army and the map edge.
8. All 53rd and 4th Guard Army artillery units are automatically resupplied (flipped to front side) during the Game-turn 2 Artillery Resup-ply Phase.
9. Soviet units may not move or declare combat south of a line extending from hexes 2837 to 4537 during the scenario. Note: This is a his-torical restriction and reflects the Soviet high command’s plan for the battle.
[23.1.3] German Special Rules HISTORICAL NOTE: The following restrictions reflect Hitler’s insistence on holding a defensive position (a continuous front) along the Dnepr River. He forbade withdrawal, even in the face of the significant penetration by the 2nd Ukrain-ian Front. Also, the Germans were generally not aware of the magnitude of the Soviet operation for the first two days.
1. Continuous Front: Units of the 57th, 5th SS and Wallonien Brigade must maintain a Con-tinuous Front, as defined by section 22.1. In maintenance of the continuous front the fol-lowing units have additional restrictions:A. Release from Continuous Front: Any unit required to maintain a continuous front is released at the instant either of the following conditions occur:• Any Soviet unit enters within 6 hexes
of Korsun or 4 hexes of Gorodishche (3821/3822)
• The German player declares “11 Korps Iso-lation”
• “Release from Continous Front” by die roll (see 22.1.4).
B. 57th Infantry Division: Units of the 57th Infantry Division may not move during Turns 1 and 2 unless activated, surrounded or released. On Turn 3 they are releived of the Continuous Front obligation and free to move. Exception: The 676/57 unit may move freely beginning Turn 2.
C. 5th SS Panzer, Wallonien Brigade: Units of the 5SS Pz Division and Wallonien Bri-gade are required to hold a continuous front per rule 22.1. Turns 1 and 2: They cannot move during Turns 1 or 2 unless activated, surrounded or released. Rotate these units as a reminder. EXCEPTION: The three 5 SS Pz units in hexes 5031 and 4831 may move and declare combat freely beginning Game-turn 1. Turn 3: Beginning on Turn 3 these units must still hold a continuous front, but are free to move in order to extend a continuous front for positions vacated by the 57th Division. Note: The 72nd Division may move in order to meet the “Continuous Front” obligation for positions vacated by the 57th Division.Any unit of the 5th SS, Wallonien and 72nd di-vision that is not needed to maintain a contin-uous front along the start line, is free to move beginning Turn 3. Turn 4: Beginning on Turn 4, units of the 5th SS division that are north of the Rossawa River may move south of the Rossawa. Upon moving south of the Rossawa they must hold a continuous front along the Rossawa that connects to the starting line (at 4109).
2. 11th Korps artillery, engineering or armor support units may not move during Turn 1 unless a Soviet unit enters within six hexes of the unit. They are free to move beginning Turn 2 for the remainder of the scenario. Ro-tate these units clockwise as a reminder.
3. Units of the 282nd Division (at the east map edge) may not move or declare combat until Turn 3. Rotate these units clockwise as a re-minder.
4. Units of the 11th and 14th Panzer Divisions may only move at half their movement point allowance during Game-turn 1.
Historical note: The 14th Panzer Division was scheduled to conduct a preemptive attack on January 26th to disrupt an expected Soviet attack. But when the Soviets launched their offensive on the 25th, the 14Pz was ordered to conduct a counter attack to close the gap created by the Soviet offensive. They attacked in the late afternoon of the 25th.
5. Units of the 3rd, 11th, and 14th Panzer divisions may only move and declare combat east of hexes 45xx during Turn 1 and east of hexes 44xx during Turn 2. Beginning Turn 3, they may move freely for the remainder of the scenario.
Historical note: The 11th and 14th Panzer Divisions were ordered to attack the southern flank of the Soviet penetration in order to cut off and seal the penetration.
6. The 11th and 13th Panzer Divisions enter as reinforcements at 1/2 their Movement Allowences. They may not use strategic movement on their turn of entry. All other reinforcements enter at their full Movement Allowence and may use strategic movement.
7. During the Mutual Air Stage, the number of CAS Points received is halved (rounded up).
8. Upon declaration of “Korsun Isolated”, the Korsun SPs marker is set to 8 (not 15) on the Korsun Supply Track for Scenario 23.1 only. This represents that only one-half (round-ed up) of the supply points are available for the Map A scenario. During the Korsun Air Supply Stage the number of SPs added to the Korsun Supply Track is halved (rounded up).
9. Truck Movement: The German player may employ the optional truck movement rule (see 18.5) starting on Game-turn 3.
[23.1.4] Victory Conditions The level of Victory is determined by the total number of Victory Points (VPs) accrued to the Soviet player. Victory Points are added to the So-viet player’s total for the following: 1. The Soviet player adds 1 victory point (VP) for occupying each of the following towns: Shpola (3831 & 3931; both hexes needed), Lebedin (4233), Kozatskoye (3129), Topil’no (3529) and Kapitanovka (4733 & 4834 -both hexes needed). The occupying units must be able to trace a line-of-supply via any road to the east edge of Map A in order to receive VPs. 2. The Soviets adds 2 VPs for occupying each of the following towns regardless of whether the occupying units can trace a line-of-supply to the east edge of Map A: Orlovets (4224), Vyazovok (3826) and Olshana (3225). For Scenario 23.1, no Soviet unit may enter hexes worth 2 victo-ry points until one Soviet tank brigade and one mechanized brigade exit the west edge of the map (i.e. captures Zvenigorodka off map).3. The Soviets subtracts 1 VP for each unit of the 5SS Pz, 52nd, and 72nd divisions and Wallonien brigade that can trace a line of supply to a road that leads to the south edge of the map and that road is not occupied or in the ZOC/ZOI of a So-viet unit.4. The Soviets subtracts 1 VP for each unit that is OOS2 (other that those units occupying towns in 2 above).
Victory LevelsSoviet Decisive Victory: 6 or more VPsSoviet Marginal Victory: 0 to 5 VPsGerman Marginal Victory: –1 to –20 VPsGerman Decisive Victory: –21 or less VPs
9The JAWS of VICTORY — Living Playbook v1.3
[23.2] Vatutin Strikes the Second Blow The 1st Ukrainian Front Attacks
HISTORICAL NOTESVatutin’s 1st Ukrainian Front launched its ma-jor operation against the base of the salient on January 26, one day after Konev’s attack. The infantry divisions of the 27th and 40th Armies attacked in conjunction with the 6th Tank Army. Their objective was to break through the 7th and 42nd Korps defenses and unite with the 5th Guards Tank Army of the 2nd Ukrainian Front at Zvenigorodka. However, resistance by the German 7th Korps denied an immediate break-through. In the north, however, the 27th Army penetrated the area defended by the weakened German 88th division. The 6th Tank Army then followed up with a drive through Medvin to Zvenigorodka uniting with the 5th Guards Tank Army on January 28th. The 40th Army and the 6th Tank Army then formed the outer ring while the 27th Army formed the inner ring encircling the German 42nd Korps.
[23.2.1] Scenario Set-upMaps:Only Map B (West Map) is used.
Scenario Length and Start:The scenario is six turns long and begins with the Soviet Player’s Movement Phase of Turn 2. Ignore the Turn 2 Weather, Air, Mutual Supply and the German Air Supply Stages. These turn phases are accounted for in the set-up. Begin the normal turn sequence on Turn 3. The scenario ends at the end of Game-turn 7.
Units and Markers On-map Placement:Place the Soviet 1st Ukrainian Front, the German 1st Pz Army and Alarm units on map B per the deployment cards.Use the following cards for the scenario set up:• Scenario 23.2 and 23.6 - German Initial
Deployment Card • Scenario 23.2 and 23.6 - Soviet Initial De-
ployment Card.Soviet divisions may “extend” into an adjacent hex during set-up.
Breakdown Boxes: Place Soviet 27th Army and German 7th and 47th Korps parent or breakdown units that do not start on the map in their breakdown holding boxes per the scenario Initial Unit Deployment.
Eliminated Unit Box: None.
Destroyed Bridges:The Map B bridges listed on the German deploy-ment card are destroyed at the beginning of the scenario. Place a bridge destroyed marker on the map pointing toward the bridge hexsides. All other bridges behind the German and Soviet starting positions are controlled by their respec-tive sides and are not destroyed.
At Start Game Track Settings:Place the following markers on their correspond-ing tracks:Turn Record Track: Set the Turn Marker set to
Turn 2 (Soviet Side up)Ground Condition Track: Set the Ground
Condition marker to Frozen.Visibility Track: Set the Visibility marker to
Clear.Combat Air-Support Tracks: Set the German Combat Air Support marker to 1* Soviet 1 Uk Combat Air Support marker to 3 German 1st Pz Army Replacement Point
Track: Set the RP markers as follows: 7th K Armor RPs marker to 0 7th K Infantry RPs marker to 0 42nd K Infantry RPs marker to 0Soviet 1st Uk Replacement Point Track: Set
the RP markers as follows: 1Uk Armor RPs marker to 2 1Uk Infantry RPs marker to 0Uman Airfield Track: Set the: Air-Drop marker to 0 Korsun Air Supply marker to 0Korsun Supply Track: Set the Korsun SPs
marker to 0
Replacements and Reinforcements:Replacements: Replacement Points received per the Turn Record TrackReinforcements: Reinforcements arrive per the Reinforcement Schedule
Supply Status:• All units are considered to be In Supply at
the start of the scenario and all artillery units setup with their front side up.
• All Soviet combats and engineering actions are automatically supported during Turn 2
• Any German Turn 2 combat support and engineering action use SPs normally as avail-able from their SDM.
[23.2.2] Soviet Special Rules HISTORICAL NOTE: The following special rules reflect the general plan for the conduct of the battle as developed by Stavka and the staff of the Soviet 1st Ukrainian Front. 1. Scenario Rule Exception: The 5th Guard Tank
Corps (0422) must set-up in “Reserve”. Dur-ing the Reserve Movement Segment of Turn 2 these units may move all of their available movement points but may not declare combat.
Note: These units may be temporarily placed in an off map holding area until the Reserve Segment. Place a reserve marker in their hex indicated in the set-up chart. They begin their reserve movement from that hex.
HISTORICAL NOTE: During the night of the 26/27th, General Vatutin ordered the 5th Guard Tank Corps to conduct a forced march. They created a breakthrough on the 27th.
2. The 233rd (T), 1228 (T), and the 64 (Mc) of the 5th Mech Corps must Set-up in Reserve but are free to move in the Soviet Reserve Movement Segment. Remaining units of the 5th Mech Corps may (but are not required to) set-up in Reserve.
3. During set-up, any unit not adjacent to a Ger-man unit may be placed in Reserve (Soviet player’s choice).
4. The Soviet 14/40 Engineer in hex 1522 has a bridge repair marker placed for hexside 1423/1522.
5. 27th and 40th Army Artillery Shifts: On Turn 2 (only) the 27th Army receives one addi-tional “+1 artillery shift” for any one combat. On Turn 2 (only) the 40th Army receives one additional “+1 artillery shift” for any one combat. Place “Turn 2 Artillery Shift” mark-ers (back of German “Out-of-ammo” mark-ers) on the designated combats during the Soviet Combat Phase.
Note: The shifts represent additional rocket artillery units temporarily allocated to the ini-tial phase of the offensive.
6. The 240th, 4thG Airborne, and 163rd Divi-sions (at map edge) may not move east of row 05xx for the entire scenario.
7. All 5th Mechanized Corps units and SDMs (except for the 233rd (T), the 1228 (T), and the 64 (Mc.) are removed from the map at the beginning of either Game-turn 4 or 5 regard-less of their map location or supply status. They do not return in scenario 23.2. Roll a single die during the Soviet Event Phase of Game-turn 4. See the Turn Record Track. If the result is a 1, 2 or 3 then the corps exits on Game-turn 4. If the result is a 4, 5, or 6 then the corps exits on Game-turn 5.
HISTORICAL NOTE: General Vatutin or-dered the transfer of the 5th Mech Corps to the west to deal with a perceived threat from German 3rd Panzer Korps operations. The 5th Mech Corps returned on February 3rd (Game-turn 8).
8. All 27th Army, 40th Army and 6th Tank Army artillery units are automatically resupplied (flipped to front side) during the Game-turn 3
10 The JAWS of VICTORY — Living Playbook v1.3
Artillery Resupply Phase as long as they can trace a supply path of any length to their sup-ply source.
9. Soviet units may not move or declare combat south of a line extending from hexes 0135 to 2735 during the scenario.
DESIGNER’S NOTE: This is a historical re-striction and reflects the Soviet high com-mand’s plan for the battle.
[23.2.3] Soviet Tish units The Soviet “Tish” unit in Tikhonovka (hex 1929) contains units of the 136th division and the 6G/5GTk motorized brigade. It is isolated by Kampfgruppe Renz and is OOS1. The Tish unit is free to move and have combat but may only move toward units of the 40th or 6th Tank Armies. Reminder: it cannot move ZOC-to-ZoC.• The Soviet player must remove the “Tish”
unit from the map the instant that it moves adjacent to any unit of the 40th Army or 6th Tank Army. Place it on the Turn Record Track two turns ahead of the current turn. During the Soviet Replacement Phase in which the turn marker reaches the turn containing the “Tish” unit, remove the “Tish” unit from the scenario and increase the number of steps in both the Soviet 136th/40A Infantry Division and 6G/5GTk brigade by one step each. Place a Regroup marker on each unit during the turn in which the step increases occur.
• If the “Tish” unit is eliminated due to combat “prior to rescue” then remove the “Tish” unit from the map (no step increases occur).
[23.2.4] German Special Rules HISTORICAL NOTE: The following restrictions reflect Hitler’s insistence on holding a defensive position (a continuous front) along the Dnepr River. He forbade withdrawal, even in the face of the significant penetration by the 1st Ukrainian Front. Also, the Germans were generally not aware of the magnitude of the Soviet operation for the first two days.
General Rule:1. Continuous Front: Units of Ka-B and the 88th Division must maintain a Continuous Front as defined by section 22.1. In mainti-nence of the continuous front the following units have additional restrictions:A. Any unit required to maintain a continuous
front is released at the instant either of the following conditions occur:
• Any Soviet unit enters within 6 hexes of Korsun or 4 hexes of Mironovka (2411)
• The German player declares “42 Korps Isolation”
• “Release from Continuous Front” by die roll (see 22.1.4).
B. Units of Ka-B and the 88th Division north of the Ross River are required to hold a continuous front (see 22.1). They cannot move during Game-turns 2 through 3 unless activated, surrounded or released. Rotate
these units as a reminder. Exception: 475/Ka-B (1913), 472/KaB (AT) (1913), and the Fus/88 (1814) are free to move and declare combat beginning Turn 2 for the remainder of the scenario.
C. Units of Ka-B and the 88th Division north of the Ross River may withdraw (move) to the south side of the Rossawa River beginning on Turn 4. Upon moving they must establish a continuous front along the south side of the Rossawa River (extending to Karapyschi at 1911). Units (including breakdown units) above and beyond those needed to hold a continuous front along the Rossawa/ Karapyschi line are free to move and declare combat for the duration of the scenario.
2. The 88th Division units south of the Ross are free to move and declare combat beginning Turn 2 for the remainder of the scenario.
3. All units of 7th Korps (389th, 34th and 75th divisions and support) units may move and de-clare combat for the duration of the scenario.
4. All units of the 82nd Division (recently trans-ferred to 3rd Pz Army) at the west map edge cannot move east of row 05xx for the duration of the scenario.
5. The German player may employ the optional Truck Movement rule starting on Turn 3 (see 18.5).
6. During the Mutual Air Stage, the number of CAS Points received is halved (rounded up).
7. The Korsun rail terminal is a supply source at the start of scenario 23.2. During Turn 3, (a) the rail line to Korsun from Map A is cut during the Soviet Player-turn, (b) the Ger-man player must declare Korsun isolated during his Turn 3 Event Phase, and the Kor-sun Airfield is activated with 8 SPs (not 15), (c) during Turn 4, Korsun becomes a supply source. During subsequent Korsun Air Supply Stages the number of SPs added to the Korsun Supply Track is halved (rounded up).
8. Scenario 23.2 only: Units of the 11th Korps may be supplied only from Korsun and may not move farther than six hexes south of Korsun (hexrow xx24).
9. The 529Sch (Eng) and the Erzatz/5ss (I) can-not move until Turn 3.
[23.2.5] Victory Conditions The level of Victory is determined by the total number of Victory Points (VPs) accrued to the Soviet player. Victory Points are added to the So-viet player’s total for the following: 1. The Soviet player receives 1 Victory Point (VP) for occupying each of the following towns and villages: Medvin (2020&2021-both hexes needed), Lisyanka (2225), Vinograd (1526), Tikhonovka (1929), and Zvenigorodka (2730&2731-both hexes needed). The occupy-ing units must be able to trace a line-of-supply via any road to the east edge of Map B in order to receive VPs.2. The Soviets receive 2 VPs for occupying each of the following towns regardless of whether the occupying units can trace a line-of-supply to the east edge of Map B: Novaya Greblya (1129), Bo-guslav (2215), and Steblev (2819).3. The Soviets lose 1 VP for each unit of Ka-B or the 88th Division that can trace a line of supply to a road (west of hexes 31xx) that leads to the south edge of the map and that road is not occu-pied or in the ZOC/ZOI of a Soviet unit.4. The Soviets lose 1 VP for each unit that is OOS2 (other that those units occupying townsin 2 above).
Victory LevelsSoviet Decisive Victory: 6 or more VPs Soviet Marginal Victory: 0 to 5 VPsGerman Marginal Victory: –1 to –5 VPsGerman Decisive Victory: –5 or less VPs
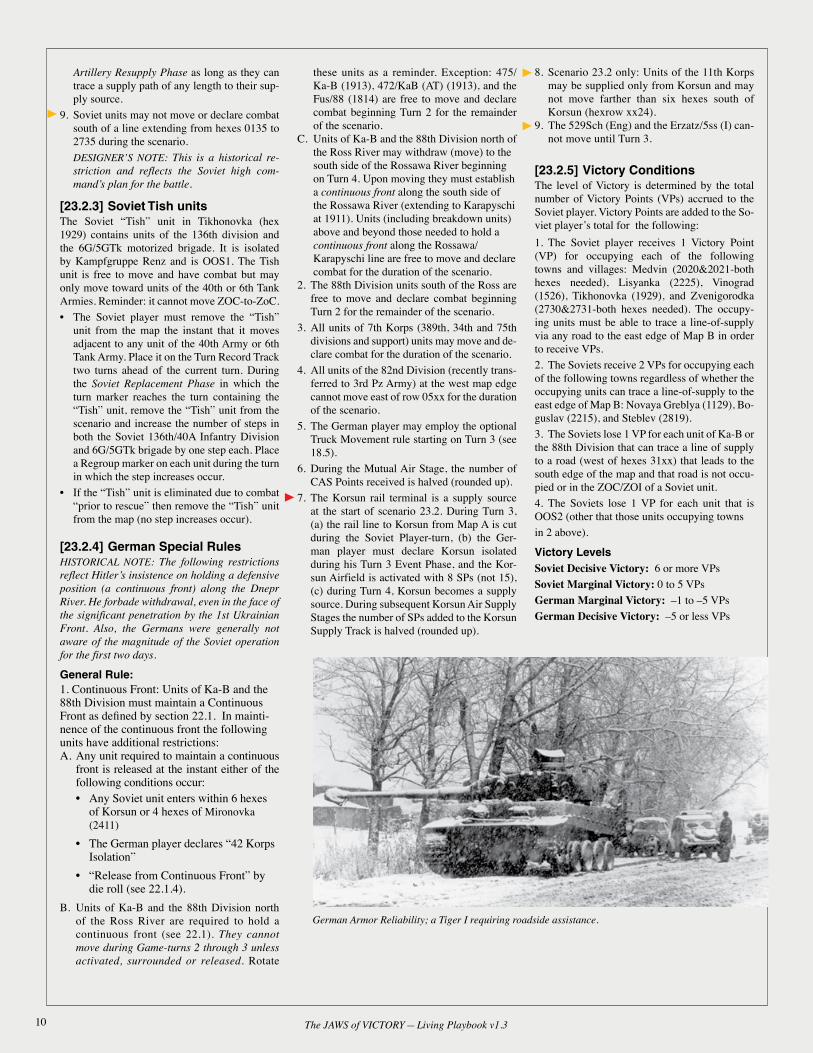
German Armor Reliability; a Tiger I requiring roadside assistance.
11The JAWS of VICTORY — Living Playbook v1.3
HISTORICAL NOTES
By February 1, the 2nd Ukrainian Front’s drive through Lebedyn, Shpola and Zvenigorodka had successfully pocketed the German 11th Korps. Furthermore, 4th Guards Army had pushed the infantry divisions of 11th Korps to a line behind the Gniloi Tashlyk thus creating a narrow gap between the inner and outer rings of the pock-et. In an attempt to relieve the trapped Korps, Army Group South ordered the Panzer Divisions of 47th Pz Korps to attack the outer ring of the Pocket and relieve the trapped divisions. This scenario simulates that counterattack.
[23.3.1] Scenario Set-upMaps:Only Map A (East Map) is used.
Scenario Length and Start:The scenario is nine turns long and begins with the German Movement Phase of Game-turn 8. Ignore the Turn 8 Weather, Mutual Air, Mutual Supply Stages and the Soviet Player Turn. These turn phases are accounted for in the set-up. Begin the normal turn sequence beginning on Game-turn 9. The scenario ends at the end of Game-turn 16.
Units and Markers On-map Placement:Place the Soviet 2nd Ukrainian Front, the Ger-man 8th Army and Alarm units on Map A per the Initial Deployment cards. Any Soviet division may “extend” into an adjacent hex during set-up. Use the following scenario cards for the set up:• Scenario 23.3 and 23.5 - German Initial
Deployment Card • Scenario 23.3 and 23.5 - Soviet Initial De-
ployment Card Breakdown Boxes: Soviet: Place the 4th Guard’s and 16th Artillery Division Barrage units and their three Barrage Effect markers in their Artillery Division Hold-ing Box per the scenario set-up card. Place all Soviet or German parent or breakdown units that do not start on the map in their Unit Breakdown Box per the initial deployment cards.Eliminated Unit Box: .Place German eliminated units per the scenario initial deployment cards.
Destroyed Bridges:The Map A bridges listed on the German deploy-ment card are destroyed at the beginning of the scenario. Place a bridge destroyed marker on the map pointing toward the bridge hexsides. All other bridges behind the German and Soviet starting positions are controlled by their respec-tive sides and are not destroyed.
At Start Game Track Settings:Place the following markers on their correspond-ing tracks.Turn Record Track: Set the Game-turn Marker to Turn 8 (German
side up) Set the Start Operation Wanda marker to
Turn 10Ground Condition Track: Set the Ground Con-
dition marker to Frozen Visibility Track: Set the Visibility marker to Clear.Combat Air-Support Tracks: Set the German Combat Air Support marker to 1 Soviet 2 Uk Combat Air Support marker to 0 German 8th Army Replacement Point Track:
Set the RP markers as follows: 11th Korps Infantry RPs marker to 1 47th Pz Korps Armor RPs marker to 1 47th Pz Korps Infantry RPs marker to 1Soviet 2nd Uk Replacement Point Track:
Set the RP markers as follows: 2Uk Armor RPs marker to 0 2Uk Infantry RPs marker to 2Uman Airfield Track: Set the Air-Drop marker to 0 Set the Korsun Air Supply marker to 5Korsun Supply Track: Set the Korsun SPs
marker to 6
Replacements and Reinforcements:Replacements: Replacement Points received per the Turn Record TrackReinforcements: Reinforcements arrive per the Reinforcement Schedule
Supply Status:• All units are considered to be In Supply at the
start of the scenario.• Set the SP availability of all SDMs to the
value indicated in the setup chart.• Begin normal supply rules on Turn 9.
[23.3.2] Soviet Special Rules 1. The 2nd Ukrainian Front receives 6 Minefield
markers during the scenario. The Soviet player may place two Minefield markers on the map (completed side up) in any hex occupied by a Soviet unit. Place the remaining four Mine-field markers on Game-turns 9 through 12 of the Turn Record Track. Minefield markers may be used on those turns for construction of minefields (see 15.3). Minefield markers not used during the current Game-turn are moved to the next turn on the Turn Record Track that
does not contain a Minefield marker for that Front.
2. Soviet units may not move or attack south of a line extending from hexes 2837 to 4537 for the duration of the scenario. This restriction is removed if the German player declares “Op-eration Wanda”.
3. The three breakdown regiments of the 206 Di-vision (27Army) are automatically in supply during the 23.3 Scenario.
[23.3.3] German Special Rules 1. Korsun has been declared isolated and there-
fore is considered activated as a supply source (see 13.1.3 and 14.5).
2. German units are released from all “Continu-ous Front” rules and restrictions (22.1).
3. During the Mutual Air Stage, divide the num-ber of CAS points received by 2 (round frac-tions up).
4. During the Korsun Air Supply Stage the num-ber of SPs added to the Korsun Supply Track is halved (rounded up).
5. Hex 3644 serves as a supply source for the 13th Panzer Divsion and Kampfgruppe Haake.
6. Part of the 108th Grenadier Regiment of the14th Panzer Division was caught in the pocket. It is represented by the L2/47Pz break-down unit. It may stack with, and be supplied by, the 11th Korps. The remainder of the regi-ment remains with the 14th Panzer Division.
7. The 24th Panzer Division (option rule 18.7) is available beginning on turn 10 at hex 3644.
8. Units identified as Kampfgruppe Haake may be supplied by either the Haake or 47th Pan-zer Korps SDM.
[23.3.4] Victory ConditionsThe level of Victory is determined by the total number of Victory Points (VPs) accrued to the German player. Victory Points are added to the German player’s total for the following: 1. The Germans receive 1 victory point (VP) for each 47th Pz Korps unit that is north of the Shpolka River between hexes 3132 and 3731. 2. The Germans receive 1 VP for each 47th Pz Korps unit that is north of the Turiya River be-tween hexes 4232 and 4634.3. The Germans receive 1 VP for each non- isolated unit of the 11th Korps that is south of hexrow xx26.
Victory LevelsGerman Decisive Victory: The 47th Panzer Korps creates a supply path to any unit of the 11th Korps. German Substantive Victory: 5 or more VPsGerman Minor Victory: 3 to 4 VPsSoviet Minor Victory: 1 to 2 VPsSoviet Decisive Victory: 0 VPs
[23.3] A Brittle Sword Breaks von Vormann Reluctantly Strikes
12 The JAWS of VICTORY — Living Playbook v1.3
HISTORICAL NOTES
By February 1, the 1st Ukrainian Front’s drive through Medvin, Boyarka, and Zvenigorodka had successfully pocketed the German 42nd Korps. Furthermore, 27th Army had pushed the 88th In-fantry division and elements of Korpsabteilung-B to a line in front of Boguslav/Steblev thus creat-ing a significant gap between the inner and outer rings of the pocket. In an attempt to relieve the trapped korps, Army Group South ordered the 3rd Panzer Korps to attack the outer ring of the Pocket and relieve the trapped divisions inside. The pan-zer divisions arrived piecemeal and launched an initially successful attack. However, the dreaded “Rasputista” (mud) severely strained the capabili-ties of this otherwise powerful force.
[23.4.1] Scenario Set-upMaps:Only Map B (West Map) is used. Scenario Length and Start:The scenario is nine turns long and begins with the German Player-turn 8. Ignore Turn 8 Weather, Mutual Air, Mutual Supply Stages and the Soviet Player-turn. These turn phases are ac-counted for in the set-up. Use the normal Game-turn sequence beginning on Turn 9. The game ends at the end of Gane-turn 16.
Units and Markers On-map Placement:Place the Soviet 1st Ukrainian Front and German 1st Pz Army units on the map per the Initial De-ployment cards. Use the following cards for the scenario set up:• Scenario 23.4 and 23.5 - German and Soviet
Initial Deployment Card Soviet divisions may “extend” into an adjacent hex. REMINDER: Place the Soviet and German units indicated in the “Additional Combat Units” sec-tion on their respective set-up cards onto the map. The German “Additional Combat Units” are at full strength and considered part of the 42nd Korps for all purposes.
Breakdown Boxes: Place all Soviet or German parent or breakdown units that do not start on the map in their Unit Breakdown Box per the initial deployment cards.
Eliminated Unit Box: Per the scenario initial deployment cards.
Destroyed Bridges:The Map B bridges listed on the German deploy-ment card are destroyed at the beginning of the scenario. Place a bridge destroyed marker on the map pointing toward the bridge hexsides. All other bridges behind the German and Soviet starting positions are controlled by their respec-tive sides and are not destroyed.
At Start Game Track Settings:Place the following markers on their correspond-ing tracks.Turn Record Track: Set the Game-turn marker
to Turn 8 (German side up) Set the Start Operation Wanda marker to
Turn 10Ground Condition Track: Set the Ground Con-
dition marker to Frozen Visibility Track: Set the Visibility marker to ClearCombat Air-Support Tracks: Set the: German Combat Air Support marker to 1 Soviet 1 Uk Combat Air Support marker to 0German 1st Pz Army Replacement Point Track: Set the RP markers as follows: 7th K Armor RPs marker to 0 7th K Infantry RPs marker to 1 42nd K Infantry RPs marker to 1 3rd Pz Korps Armor to 0 3rd Pz Korps Infantry to 0Soviet 1st Uk Replacement Point Track:
Set the RP markers as follows: 1Uk Armor RPs marker to 0 1Uk Infantry RPs marker to 2Uman Airfield Track: Set the: Air-Drop marker to 0 Korsun Air Supply marker to 5Korsun Supply Track:
Set the Korsun SPs marker set to 6
Replacements and Reinforcements:Replacements: Replacement Points received per the Turn Record TrackReinforcements: Reinforcements arrive per the Reinforcement ScheduleSupply Status:• All units are in supply at the start of the
scenario• Set the SP availability of all SDMs to value
indicated in the setup chart.• Begin normal supply rules on Turn 9.
[23.4.2] Soviet Special Rules1. The 1st Ukrainian Front receives 6 Minefield
markers (see 15.3) during the scenario. The Soviet player may place two Minefield mark-ers on the map (completed side up) in any hex occupied by a Soviet unit. Place the remaining four Minefield markers on Turns 9 through 12 of the Turn Record Track. Minefield markers may be used each turn for construction of minefields (see 15.3). Minefield markers not used during the current Game-turn are moved to the next Game-turn on the track that does
not contain a Minefield marker for that Front.2. Soviet units may not move or declare combat
south of a line extending from hexes 0135 to 2735 during the scenario. This restriction is eliminated if the Germans declare “Operation Wanda”.
3. Part of the 5th Mech Corps enters (returns) per the Reinforcement Schedule with the number of steps indicated on the schedule.
4. Units of the 20th Tank Corps and 5th Grds Cavalry Corps may trace supply to hex 3330. Each Corps may receive 1 SP per turn. Units of 20th Tank and 5th Cavalry Corps may not move west of hexrow 26xx.
5. When the 107th and 109th Tank Brigades of the 16th Tank Corps enter as reinforcements, they may be assigned to and be supplied by the 6th Tank Army or they may be supplied by the 16th Tank Corps when the remainder of the tank corps arrives.
6. The 11th Tank Corps reinforcements are as-signed to the 40th Army. Rule Exception: These tank corps units may stack with and can attack and defend with the 40th Army. They may be supplied only by the 11Tk/1Tk SDM and can only receive artillery support from 11Tk artillery.
[23.4.3] German Special Rules 1. Korsun has been declared isolated and there-
fore is considered activated as a supply source.2. German units are released from all “Continu-
ous Front” rules and restrictions (22.1).3. During the Mutual Air Stage, divide the num-
ber of CAS points received by 2 (round frac-tions up). Apply the effects of Operation Wan-da before dividing the number of CAS points.
4. During the Korsun Air Supply Stage, the num-ber of SPs added to the Korsun Supply Track is halved (rounded up).
5. Optional Rail Capacity Rule hexes are: The “–1SP” hex is 1038. The “–2SP” hex is 2137.
6. The 239/7 (T) unit was transferred to the 42nd Korps during the initial 1st Ukrainian Front‘s attack. It is considered part of the 42nd Korps for Scenarios 23.4 .
7. Units of the 7th Korps and 3rd Panzer Korps cannot cross the Gniloy Tikich River between hexes 2628 and 2834.
[23.4.4] Victory ConditionsThe level of Victory is determined by the total number of Victory Points (VPs) accrued to the German player. Victory Points are added to the German player’s total for the following: 1. The Germans receive 2 victory points (VPs)for each of the following towns occupied: Boyarka (1823), Buzhanka (2026) or Shesterintsy (2627). 2. The Germans receive 1VP for each hex that is occupied by German units north of the Gniloy Tikich River between hexes 1422 and 2637 (ex-clusive of the above occupied towns).Determining Victory Level:German Strategic Victory: The 3rd Pz Korps
creates a supply path to a unit of the 42nd Korps German Decisive Victory: 6 or more German VPsGerman Minor Victory: 4 to 5 German VPsSoviet Minor Victory: 1 to 3 German VPsSoviet Decisive Victory: 0 German VPs
[23.4] Operation “Wanda” The 3rd Panzer Korps Attacks
13The JAWS of VICTORY — Living Playbook v1.3
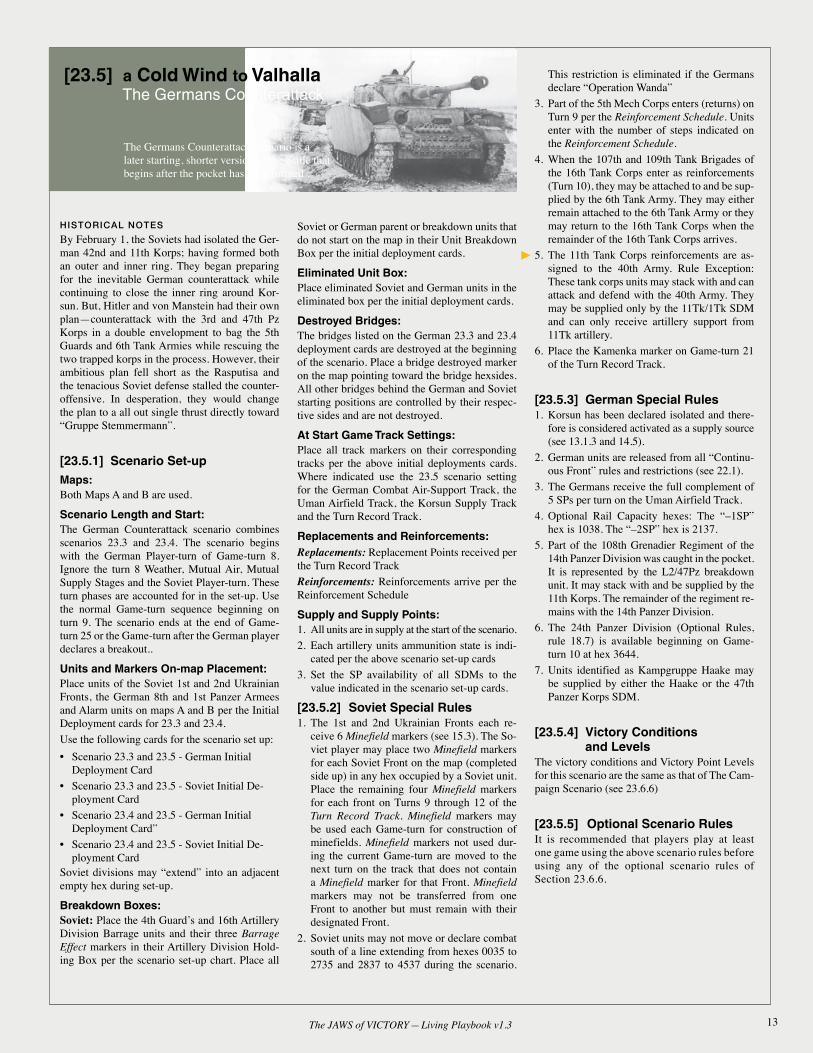
[23.5] a Cold Wind to Valhalla The Germans Counterattack
HISTORICAL NOTES
By February 1, the Soviets had isolated the Ger-man 42nd and 11th Korps; having formed both an outer and inner ring. They began preparing for the inevitable German counterattack while continuing to close the inner ring around Kor-sun. But, Hitler and von Manstein had their own plan—counterattack with the 3rd and 47th Pz Korps in a double envelopment to bag the 5th Guards and 6th Tank Armies while rescuing the two trapped korps in the process. However, their ambitious plan fell short as the Rasputisa and the tenacious Soviet defense stalled the counter- offensive. In desperation, they would change the plan to a all out single thrust directly toward “Gruppe Stemmermann”.
[23.5.1] Scenario Set-upMaps:Both Maps A and B are used.
Scenario Length and Start:The German Counterattack scenario combines scenarios 23.3 and 23.4. The scenario begins with the German Player-turn of Game-turn 8. Ignore the turn 8 Weather, Mutual Air, Mutual Supply Stages and the Soviet Player-turn. These turn phases are accounted for in the set-up. Use the normal Game-turn sequence beginning on turn 9. The scenario ends at the end of Game-turn 25 or the Game-turn after the German player declares a breakout..
Units and Markers On-map Placement:Place units of the Soviet 1st and 2nd Ukrainian Fronts, the German 8th and 1st Panzer Armees and Alarm units on maps A and B per the Initial Deployment cards for 23.3 and 23.4. Use the following cards for the scenario set up:• Scenario 23.3 and 23.5 - German Initial
Deployment Card • Scenario 23.3 and 23.5 - Soviet Initial De-
ployment Card • Scenario 23.4 and 23.5 - German Initial
Deployment Card” • Scenario 23.4 and 23.5 - Soviet Initial De-
ployment Card Soviet divisions may “extend” into an adjacent empty hex during set-up.
Breakdown Boxes: Soviet: Place the 4th Guard’s and 16th Artillery Division Barrage units and their three Barrage Effect markers in their Artillery Division Hold-ing Box per the scenario set-up chart. Place all
Soviet or German parent or breakdown units that do not start on the map in their Unit Breakdown Box per the initial deployment cards.
Eliminated Unit Box: Place eliminated Soviet and German units in the eliminated box per the initial deployment cards.
Destroyed Bridges:The bridges listed on the German 23.3 and 23.4 deployment cards are destroyed at the beginning of the scenario. Place a bridge destroyed marker on the map pointing toward the bridge hexsides. All other bridges behind the German and Soviet starting positions are controlled by their respec-tive sides and are not destroyed.
At Start Game Track Settings:Place all track markers on their corresponding tracks per the above initial deployments cards. Where indicated use the 23.5 scenario setting for the German Combat Air-Support Track, the Uman Airfield Track, the Korsun Supply Track and the Turn Record Track.
Replacements and Reinforcements:Replacements: Replacement Points received per the Turn Record TrackReinforcements: Reinforcements arrive per the Reinforcement Schedule
Supply and Supply Points: 1. All units are in supply at the start of the scenario.2. Each artillery units ammunition state is indi-
cated per the above scenario set-up cards3. Set the SP availability of all SDMs to the
value indicated in the scenario set-up cards.
[23.5.2] Soviet Special Rules1. The 1st and 2nd Ukrainian Fronts each re-
ceive 6 Minefield markers (see 15.3). The So-viet player may place two Minefield markers for each Soviet Front on the map (completed side up) in any hex occupied by a Soviet unit. Place the remaining four Minefield markers for each front on Turns 9 through 12 of the Turn Record Track. Minefield markers may be used each Game-turn for construction of minefields. Minefield markers not used dur-ing the current Game-turn are moved to the next turn on the track that does not contain a Minefield marker for that Front. Minefield markers may not be transferred from one Front to another but must remain with their designated Front.
2. Soviet units may not move or declare combat south of a line extending from hexes 0035 to 2735 and 2837 to 4537 during the scenario.
This restriction is eliminated if the Germans declare “Operation Wanda”
3. Part of the 5th Mech Corps enters (returns) on Turn 9 per the Reinforcement Schedule. Units enter with the number of steps indicated on the Reinforcement Schedule.
4. When the 107th and 109th Tank Brigades of the 16th Tank Corps enter as reinforcements (Turn 10), they may be attached to and be sup-plied by the 6th Tank Army. They may either remain attached to the 6th Tank Army or they may return to the 16th Tank Corps when the remainder of the 16th Tank Corps arrives.
5. The 11th Tank Corps reinforcements are as-signed to the 40th Army. Rule Exception: These tank corps units may stack with and can attack and defend with the 40th Army. They may be supplied only by the 11Tk/1Tk SDM and can only receive artillery support from 11Tk artillery.
6. Place the Kamenka marker on Game-turn 21 of the Turn Record Track.
[23.5.3] German Special Rules 1. Korsun has been declared isolated and there-
fore is considered activated as a supply source (see 13.1.3 and 14.5).
2. German units are released from all “Continu-ous Front” rules and restrictions (see 22.1).
3. The Germans receive the full complement of 5 SPs per turn on the Uman Airfield Track.
4. Optional Rail Capacity hexes: The “–1SP” hex is 1038. The “–2SP” hex is 2137.
5. Part of the 108th Grenadier Regiment of the 14th Panzer Division was caught in the pocket. It is represented by the L2/47Pz breakdown unit. It may stack with and be supplied by the 11th Korps. The remainder of the regiment re-mains with the 14th Panzer Division.
6. The 24th Panzer Division (Optional Rules, rule 18.7) is available beginning on Game-turn 10 at hex 3644.
7. Units identified as Kampgruppe Haake may be supplied by either the Haake or the 47th Panzer Korps SDM.
[23.5.4] Victory Conditions and Levels
The victory conditions and Victory Point Levels for this scenario are the same as that of The Cam-paign Scenario (see 23.6.6)
[23.5.5] Optional Scenario RulesIt is recommended that players play at least one game using the above scenario rules before using any of the optional scenario rules of Section 23.6.6.
The Germans Counterattack scenario is a later starting, shorter version of the battle that begins after the pocket has been formed .
14 The JAWS of VICTORY — Living Playbook v1.3
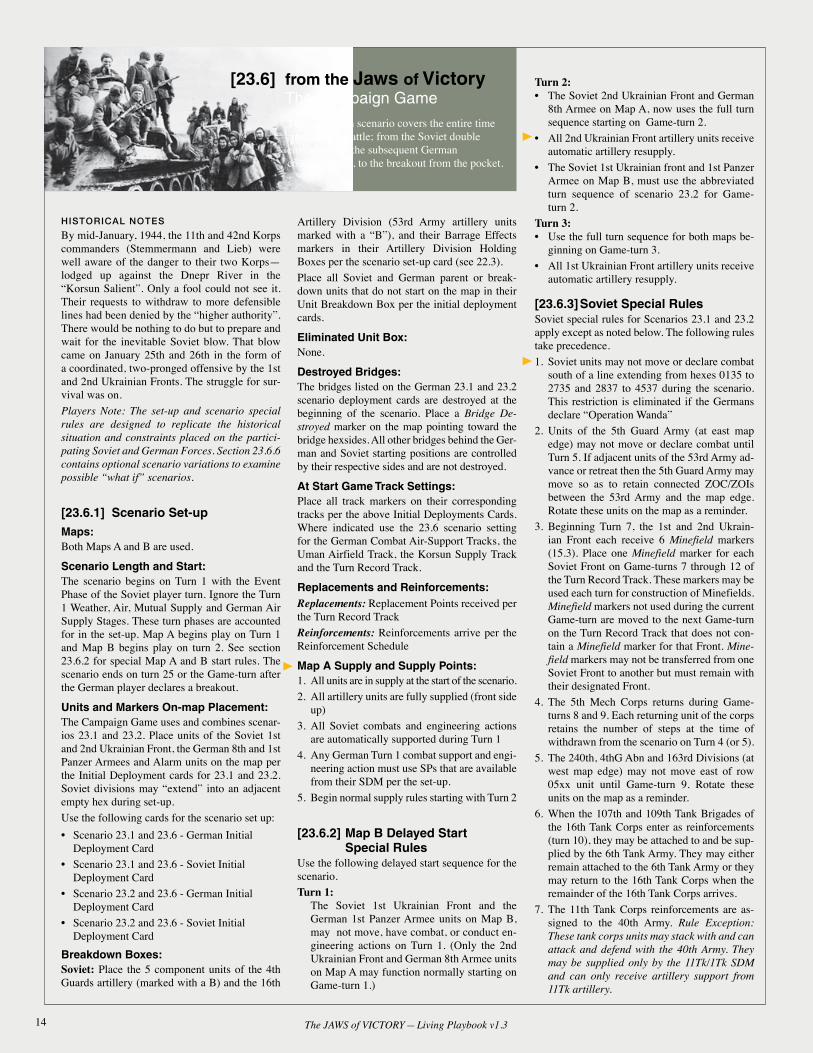
HISTORICAL NOTES
By mid-January, 1944, the 11th and 42nd Korps commanders (Stemmermann and Lieb) were well aware of the danger to their two Korps—lodged up against the Dnepr River in the “Korsun Salient”. Only a fool could not see it. Their requests to withdraw to more defensible lines had been denied by the “higher authority”. There would be nothing to do but to prepare and wait for the inevitable Soviet blow. That blow came on January 25th and 26th in the form of a coordinated, two-pronged offensive by the 1st and 2nd Ukrainian Fronts. The struggle for sur-vival was on. Players Note: The set-up and scenario special rules are designed to replicate the historical situation and constraints placed on the partici-pating Soviet and German Forces. Section 23.6.6 contains optional scenario variations to examine possible “what if” scenarios.
[23.6.1] Scenario Set-upMaps:Both Maps A and B are used.
Scenario Length and Start:The scenario begins on Turn 1 with the Event Phase of the Soviet player turn. Ignore the Turn 1 Weather, Air, Mutual Supply and German Air Supply Stages. These turn phases are accounted for in the set-up. Map A begins play on Turn 1 and Map B begins play on turn 2. See section 23.6.2 for special Map A and B start rules. The scenario ends on turn 25 or the Game-turn after the German player declares a breakout.
Units and Markers On-map Placement:The Campaign Game uses and combines scenar-ios 23.1 and 23.2. Place units of the Soviet 1st and 2nd Ukrainian Front, the German 8th and 1st Panzer Armees and Alarm units on the map per the Initial Deployment cards for 23.1 and 23.2. Soviet divisions may “extend” into an adjacent empty hex during set-up.Use the following cards for the scenario set up:• Scenario 23.1 and 23.6 - German Initial
Deployment Card• Scenario 23.1 and 23.6 - Soviet Initial
Deployment Card • Scenario 23.2 and 23.6 - German Initial
Deployment Card • Scenario 23.2 and 23.6 - Soviet Initial
Deployment Card Breakdown Boxes: Soviet: Place the 5 component units of the 4th Guards artillery (marked with a B) and the 16th
Artillery Division (53rd Army artillery units marked with a “B”), and their Barrage Effects markers in their Artillery Division Holding Boxes per the scenario set-up card (see 22.3). Place all Soviet and German parent or break-down units that do not start on the map in their Unit Breakdown Box per the initial deployment cards.
Eliminated Unit Box: None.
Destroyed Bridges:The bridges listed on the German 23.1 and 23.2 scenario deployment cards are destroyed at the beginning of the scenario. Place a Bridge De-stroyed marker on the map pointing toward the bridge hexsides. All other bridges behind the Ger-man and Soviet starting positions are controlled by their respective sides and are not destroyed.
At Start Game Track Settings:Place all track markers on their corresponding tracks per the above Initial Deployments Cards. Where indicated use the 23.6 scenario setting for the German Combat Air-Support Tracks, the Uman Airfield Track, the Korsun Supply Track and the Turn Record Track.
Replacements and Reinforcements:Replacements: Replacement Points received per the Turn Record TrackReinforcements: Reinforcements arrive per the Reinforcement Schedule
Map A Supply and Supply Points: 1. All units are in supply at the start of the scenario.2. All artillery units are fully supplied (front side
up)3. All Soviet combats and engineering actions
are automatically supported during Turn 14. Any German Turn 1 combat support and engi-
neering action must use SPs that are available from their SDM per the set-up.
5. Begin normal supply rules starting with Turn 2
[23.6.2] Map B Delayed Start Special Rules
Use the following delayed start sequence for the scenario.Turn 1: The Soviet 1st Ukrainian Front and the
German 1st Panzer Armee units on Map B, may not move, have combat, or conduct en-gineering actions on Turn 1. (Only the 2nd Ukrainian Front and German 8th Armee units on Map A may function normally starting on Game-turn 1.)
Turn 2:• The Soviet 2nd Ukrainian Front and German
8th Armee on Map A, now uses the full turn sequence starting on Game-turn 2.
• All 2nd Ukrainian Front artillery units receive automatic artillery resupply.
• The Soviet 1st Ukrainian front and 1st Panzer Armee on Map B, must use the abbreviated turn sequence of scenario 23.2 for Game-turn 2.
Turn 3: • Use the full turn sequence for both maps be-
ginning on Game-turn 3.• All 1st Ukrainian Front artillery units receive
automatic artillery resupply.
[23.6.3] Soviet Special RulesSoviet special rules for Scenarios 23.1 and 23.2 apply except as noted below. The following rules take precedence.1. Soviet units may not move or declare combat
south of a line extending from hexes 0135 to 2735 and 2837 to 4537 during the scenario. This restriction is eliminated if the Germans declare “Operation Wanda”
2. Units of the 5th Guard Army (at east map edge) may not move or declare combat until Turn 5. If adjacent units of the 53rd Army ad-vance or retreat then the 5th Guard Army may move so as to retain connected ZOC/ZOIs between the 53rd Army and the map edge. Rotate these units on the map as a reminder.
3. Beginning Turn 7, the 1st and 2nd Ukrain-ian Front each receive 6 Minefield markers (15.3). Place one Minefield marker for each Soviet Front on Game-turns 7 through 12 of the Turn Record Track. These markers may be used each turn for construction of Minefields. Minefield markers not used during the current Game-turn are moved to the next Game-turn on the Turn Record Track that does not con-tain a Minefield marker for that Front. Mine-field markers may not be transferred from one Soviet Front to another but must remain with their designated Front.
4. The 5th Mech Corps returns during Game-turns 8 and 9. Each returning unit of the corps retains the number of steps at the time of withdrawn from the scenario on Turn 4 (or 5).
5. The 240th, 4thG Abn and 163rd Divisions (at west map edge) may not move east of row 05xx unit until Game-turn 9. Rotate these units on the map as a reminder.
6. When the 107th and 109th Tank Brigades of the 16th Tank Corps enter as reinforcements (turn 10), they may be attached to and be sup-plied by the 6th Tank Army. They may either remain attached to the 6th Tank Army or they may return to the 16th Tank Corps when the remainder of the 16th Tank Corps arrives.
7. The 11th Tank Corps reinforcements are as-signed to the 40th Army. Rule Exception: These tank corps units may stack with and can attack and defend with the 40th Army. They may be supplied only by the 11Tk/1Tk SDM and can only receive artillery support from 11Tk artillery.
[23.6] from the Jaws of Victory The Campaign Game
The Campaign scenario covers the entire time frame of the battle; from the Soviet double envelopment, the subsequent German counterattacks, to the breakout from the pocket.
15The JAWS of VICTORY — Living Playbook v1.3
8. The town of Kamenka (5728) becomes a sup-ply source for all units of the 4th Guard Army and the 5th Guards Tank Army beginning on Game-turn 21. Place the Kamenka supply source marker on Game turn 21 of the Turn Record Track as a reminder.
[23.6.4] German Special Rules1. German special rules for Scenarios 23.1 and
23.2 apply except as noted below.2. The German player rolls for Combat Air Sup-
port starting Turn 2.3. Optional Rail Capacity hexes: The “–1SP”
hex is 1038. The “–2SP” hex is 2137.4. The 24th Panzer Division (Optional Rule
18.7) is available beginning on Game-turn 10 at hex 3644.
5. Units identified as Kampfgruppe Haake may be supplied by either the Haake or the 47th Panzer Korps SDMs. Artillery units of Kamp-fgruppe Haake may provide artillery support to units of the 47th Panzer Korps.
6. All units of the 82nd Division (3rd Pz Army)at the west map edge cannot move east of row 05xx until Turn 8.
[23.6.5] Victory ConditionsIn the Campaign Game victory is determine by the number of unit steps from the 11th and 42nd Korps that are able to escape isolation (the pocket) at the end of Game-turn 25 or the Game-turn after the German player declares a break-out. Victory Points are only added to the German Player’s Victory Point total. 1. The German player receives 1 Victory Point (VP) for every step from units of “Group Stem-merman” (see 14.5.1) that can trace a supply path to a German map edge supply source. Units
must be able to trace a supply path to either of the following two supply sources:• tracing directly to a German supply source or
rail terminal or ...• tracing to an SDM that can trace to a supply
source or rail terminal.Eliminated units do not count as victory points.Note: The above steps may include a.) units that evaded inclusion in the pocket, but have not been eliminated in combat, b.) units placed in supply due to the “Breakout” rule of Section 16.3, and c.) other 11th and 42nd Korps units that can trace a line of supply to the south map edge. Victory LevelsThe level of victory is determined by the number of German VPs at the end of the game. German Decisive Victory: 110 VPs or greaterGerman Minor Victory: 61 to 109 VPsGerman Propaganda Victory: 21 to 60 VPsSoviet Minor Victory: 11 to 20 VPsSoviet Decisive Victory: less than 10 VPsAutomatic German Victory If the Soviets fail to isolate Korsun by the end of Turn 7, then the German player automatically wins a Decisive Victory. Korsun is considered isolated if there is no supply path via rail or road of any length from Korsun to a German supply source. (If this actually occurs, start over or find another Soviet player.)
[23.6.6] Optional Scenario RulesIt is recommended that players play at least one game using the above scenario special rules be-fore agreeing to use any of the below optional scenario rules. Note that the below optional rules
have not been extensively play tested in all com-binations nor are victory conditions provided. 1. Ignore the Soviet restriction on movement
south of rows 0035 through 4237. 2. Ignore the restrictions of Soviet Tank and
Mechanized Corps that Set-up in “reserve” (i.e. they may move in the first movement phase).
3. The Soviet 5th Mech Corps is not with-drawn. If this option is used, then the entry of KG Bäke, and the 17th, 16th, 1st SS and 1st Panzer Divisions should be advanced by two or three turns.
4. Allow all German units to move and declare combat on Game-turn 3.
5. Ignore the Turn 1 through 3 movement re-strictions placed on the 11th and 14th Panzer Divisions.
6. Ignore the Mud Rules (a great what-if scenario).
7. The entire 24th Panzer Division arrives on Game-turn 10 (ignoring the die roll).
8. Four player variation on “Stalin intervenes”: If the Stalin Intervenes event occurs (18.13) then the Soviet player (Front) that allowed the event to occur relinquishes control of his inner ring forces to the other Soviet player.
9. The Soviet player may choose to reposition any or all of his tank/mechanized corps, the cavalry corps and army support units. This includes elimination of all reserve and turn release restrictions.
10. Players should feel free to experiment with the scenario set-up and scenario rules to cre-ate other “what if” conditions.
16 The JAWS of VICTORY — Living Playbook v1.3
.
[23.7] Through “Hell’s Gate” The Breakout
HISTORICAL NOTES
“ ... You must advance silently and fall upon the enemy with bayonets affixed. ..”
—Group Stemmermann, 1a Nr. 236/44, dated 15.2.44
On the morning of February 15th it became clear to Manstein that Breith’s 3rd Panzer Corps would not be able to break through to the two pocketed korps. That day, Manstein ordered General Stemmermann to breakout and join Breith’s korps at Lisyanka. General Stem-mermann ordered the abandonment of Korsun on the 15th and attacked with his two korps to the southwest the next day. The Breakout began at 23:00 on the night of the 16th. In the moon-light gloom, the two korps launched a desperate assault through the Soviet lines toward Hill 239 and Lisyanka. It would be every man for him-self through “Hells Gate”.
[23.7.1] Scenario Set-upThe setup for the scenario is contained in the fol-lowing sections. No setup card is provided.
Maps:Only Map B is used.
Scenario Length and Start:The Breakout scenario begins with the historical situation on the night of February 16th (Turn 23) and consists of only the German Breakout Phase of the turn sequence.
Unit Placement:Units are placed on the map in accordance with the Scenario Set-up schedule in section 23.7.5.
Breakdown Boxes: Add German regimental units as needed when forming new regiments.
Eliminated Unit Box: Not applicable.
Destroyed Bridges:No units.
At Start Game Track Settings:Turn Marker: not usedGround Condition Track: Ground Condition set to frozen for the entire scenario.Visibility Track: Visibility is set to Clear. for the entire scenario.Combat Air-Support Tracks: Combat Air Support not availability for both sides.
Replacements and Reinforcements:Replacements: No replacements from the Turn Record Track, but available through recombination
Reinforcements: No reinforcements for this scenario
Supply and Supply Points:1. All units are In Supply at the start of the scenario.2. Supply Points (SPs) are not used.
[23.7.2] Soviet Special RulesThe Soviet units do not move or initiate combat during this scenario.
[23.7.3] German Special Rules:1. A “Breakout” has been declared and the Ger-man Movement, Combat, Engineering, and Re-group Phases have been completed.2. The German player conducts the four break-out stages of the Breakout Phase (Section 16.5) following the below special Breakout Sequence:A. Unit Consolidation/Recombination (16.5.1)B. One hex movement (16.5.2)C. Staged breakout (16.5.3)
Wave 1 movement and combatWave 2 movement and combatWave 3 movement and combatWave 4 movement and combatSee Procedure in 16.5.3.
3. In this scenario only; German units may only enter a Soviet occupied hex in a southwesterly direction.
[23.7.4] Units and Markers On-map Placement
German: Group StemmermanHistorical note: The following set-up approxi-mates the actual battle lines between the Soviet and German forces on the evening of February 16th, the night of the breakout.
11th Korps
5th SS Panzer Division 5ss Pz 11
2721: Ger (M3), 5ss (Rcn1), 5ss (AA1)2722: Wst (M3), 5ss (Eng), 3/5ss (T1)SS Walonien & FW (5ss/11)2822: i/1/ Wal (M2), ii/2/ Wal (M2), FW (M1)57th Division 1157
2821: 199 (I2), 217 (I3)2820: 676 (I2), Fus (I1), (A) 72nd Division 1172
2522: 266 (I4), 124 (I2)2623: 105(I3), Pio (Eng1)389th Division 11389 2620: 544 (I3)2719: Pio (Eng1)
11th Korps Support Units 11
2720: 529 Eng Sch (Eng2), 410 Con (Eng1), 228 (T2)
42nd Korps
Korps Group B 42Ka-B
2520 475 (I3), 678 (I3), Fus (I2),2521: 258 (I2), 110 (I3), (AA1),
88th Division 88 42
2621: 1/248 (I3), RG 593 (I2), 318+ Sec (I2)
7th Korps
198th Division 198 7
2428: 326 (I3)2328: (A)
3rd Panzer Korps
16th Panzer Division 16 Pz 3Pz 2023: ii/1/2 (T2), 274 (AA2), 64 (M2)2024: i/1/2 (T2)2123: 506 (T2), 79 (M3), 2/2 (T2)2025: 16 (A)1923: 16 (Eng2), 3/2 (T2)1st Panzer Division 1 Pz 3Pz
2324: 4 (Rcn1), ii/1/1 (T2), 113 (M2) 2224: 1 (M3), i/1/1 (T2), 2/1 (T1)2225: 73 (A)1st SS Panzer Division 1ss Pz 3Pz
2426: 2/1ss (T2), 3/1ss (T2), 2ss (M3)2427: 1/1ss (T2), 1ss (M3), 1ss (T1)2326: 1ss (A)2327: 1ss (AA)Kampfgruppe Bäke 3PzBake
2223: ii/23 (T2), 11 (M2), 503 (T2)2124: 23 (A)3rd Panzer Korps Support 3Pz
1927: 3Pz (SDM-4/1)
Soviet: 2nd Ukrainian Front
52nd Army
52nd Army Divisions 52
2919: 254 (I3)2818: 294 (I2)2918: 373 (I4)52nd Army Support Units 52
2917: 490 (A)
4th Gds Army
4th Gds Army Divisions 4G
2523: 5G (I4)2921: 31 (I4)2527: 69G (I4)2920: 252 (I4)4th Gds Army Support Units 4G
2921: 438 (AT1)3021: 466 (A)
The Breakout scenario is a one map, solitaire scenario that allows players to practice the breakout.
17The JAWS of VICTORY — Living Playbook v1.3
[23.8] Stemmermann Holds On Defending the Pocket
Defending the Pocket scenario is a two map, solitaire scenario that allows players to practice defending the pocket.
5th Gds Tank Army
18th Tank Corps 5GTk18Tk
2321: 292 (A), 106G (Rkt)2423: 170 (T2), 32 (M2)2422: 181 (T4), 110 (T1)
20th Tank Corps 5G20Tk
2222: 8 (T4), 291 (A), 406G (Rkt)2322: 80 (T3), 1895 (T1), 1505 (AT1),2323: 155 (T3), 70G (M3), 1834H (T1),
29th Tank Corps 5GTk29Tk 2624: 25 (T2), 53G (M2), 108 (AT1)2524: 31 (T2), 32 (T2), 1446 (T1)2724: 271 (A)
2nd Uk Front Units2424: 41G (I5) – Extended (2425)5th G Cavalry Corps 5G Cav 2823: 11G (Cav2), 150G (AT)2824: 12G (Cav3), 12G (T1)2922: 63 (Cav2), 1896 (T2), 72G (A)
Soviet: 1st Ukrainian Front
27th Army27th Army Divisions 27
2519: 512/59FA (I2), 404/59FA (I2),2619: 496/59FA (I2),2421: 180 (I4)2718: 337 (I3)27th Army Support Units 27
2518: 480 (A)
6th Tank Army
5th Mech Corps 5M 6Tk
2525: 45 (M2), 745 (T2)2526: 2 (M2), 233 (T2), 2626: 548 (A)
2nd Tank Army
3rd Tank Corps 2Tk3 Tk 1922: 50 (T4),2122: 51 (T2), 103 (T2), 1818 (T1)2022: 57 (M2), 1540 (T2)
1st Uk Front Divisions2420: 202 (I5)
Players Note: Ignoring the defensive ar-rangement of the pocket may well cause the German player to lose the game. Once formed, the pocket presents a number of unique and difficult problems associated with creating successive defensive lines against the Soviet onslaught. The German player must also manage a dwindling sup-ply resource; all the while attempting to cre-ate a reserve force for an attempted break-out. The defense of the pocket can be a game unto itself. Accordingly, players may wish to practice defending the pocket prior to undertaking a campaign game.
[23.8.1] Scenario Set-upThe scenario begins with the German Play-er-turn of Game-turn 8 (as in Scenario 23.5). Only units of the Soviet Inner Ring and the German pocket are used. Use the following setup cards:• Scenario 23.3 and 23.5 - German Initial
Deployment Card • Scenario 23.3 and 23.5 - Soviet Initial
Deployment Card • Scenario 23.4 and 23.5 - German Initial
Deployment Card • Scenario 23.4 and 23.5 - Soviet Initial
Deployment Card Maps:Both Maps A and B are used.
[23.7.4] Victory ConditionsVictory conditions are the same as the campaign scenario based on the number of steps that es-cape the pocket. In addition, German units stacked with Soviet units do not count as victory points
Unit Placement: 1. Set-up only the German 11th and 42nd
Korps units per Scenario 23.5. 2. Set-up units only from the Soviet 27th
Army, 52nd Army, 4th Guards Army, 5th Gds Cavalry Corps, and the follow-ing units of the 5th Guards Tank Army: 96/20Tk (Mc), 1895/20Tk (T) and the 1G (Mc) per Scenario 23.5.
Breakdown Boxes: Per the above setup cards.
Eliminated Unit Box: Per the above setup cards.
Destroyed Bridges:Per the above setup cards. Note: Players need only place Bridge Destroyed markers on those bridges within the German-Soviet front line area of “the pocket”.
Replacements and Reinforcements: Replacements: There are no replacements for the scenario.Reinforcements: Do not use any German or Soviet Reinforcements.
[23.7.2] Special RulesUse only the Soviet and German special rules of scenario 23.5 that apply to the “the pocket”.
[23.7.3] Victory Conditions There are no Victory Conditions. Play the scenario as a solitaire game until comfortable with German delaying tactics and natural de-fensive lines.
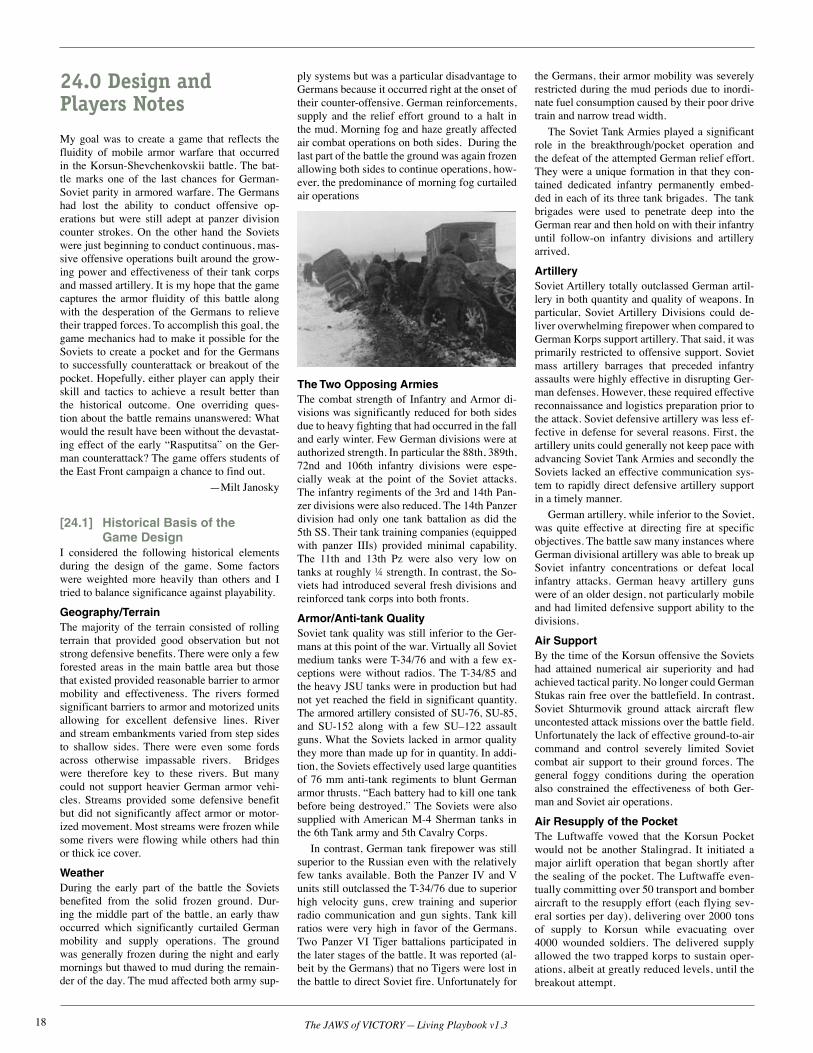
18 The JAWS of VICTORY — Living Playbook v1.3
24.0 Design and Players NotesMy goal was to create a game that reflects the fluidity of mobile armor warfare that occurred in the Korsun-Shevchenkovskii battle. The bat-tle marks one of the last chances for German- Soviet parity in armored warfare. The Germans had lost the ability to conduct offensive op-erations but were still adept at panzer division counter strokes. On the other hand the Soviets were just beginning to conduct continuous, mas-sive offensive operations built around the grow-ing power and effectiveness of their tank corps and massed artillery. It is my hope that the game captures the armor fluidity of this battle along with the desperation of the Germans to relieve their trapped forces. To accomplish this goal, the game mechanics had to make it possible for the Soviets to create a pocket and for the Germans to successfully counterattack or breakout of the pocket. Hopefully, either player can apply their skill and tactics to achieve a result better than the historical outcome. One overriding ques-tion about the battle remains unanswered: What would the result have been without the devastat-ing effect of the early “Rasputitsa” on the Ger-man counterattack? The game offers students of the East Front campaign a chance to find out.
—Milt Janosky
[24.1] Historical Basis of the Game Design
I considered the following historical elements during the design of the game. Some factors were weighted more heavily than others and I tried to balance significance against playability.
Geography/TerrainThe majority of the terrain consisted of rolling terrain that provided good observation but not strong defensive benefits. There were only a few forested areas in the main battle area but those that existed provided reasonable barrier to armor mobility and effectiveness. The rivers formed significant barriers to armor and motorized units allowing for excellent defensive lines. River and stream embankments varied from step sides to shallow sides. There were even some fords across otherwise impassable rivers. Bridges were therefore key to these rivers. But many could not support heavier German armor vehi-cles. Streams provided some defensive benefit but did not significantly affect armor or motor-ized movement. Most streams were frozen while some rivers were flowing while others had thin or thick ice cover.
WeatherDuring the early part of the battle the Soviets benefited from the solid frozen ground. Dur-ing the middle part of the battle, an early thaw occurred which significantly curtailed German mobility and supply operations. The ground was generally frozen during the night and early mornings but thawed to mud during the remain-der of the day. The mud affected both army sup-
ply systems but was a particular disadvantage to Germans because it occurred right at the onset of their counter-offensive. German reinforcements, supply and the relief effort ground to a halt in the mud. Morning fog and haze greatly affected air combat operations on both sides. During the last part of the battle the ground was again frozen allowing both sides to continue operations, how-ever, the predominance of morning fog curtailed air operations
The Two Opposing ArmiesThe combat strength of Infantry and Armor di-visions was significantly reduced for both sides due to heavy fighting that had occurred in the fall and early winter. Few German divisions were at authorized strength. In particular the 88th, 389th, 72nd and 106th infantry divisions were espe-cially weak at the point of the Soviet attacks. The infantry regiments of the 3rd and 14th Pan-zer divisions were also reduced. The 14th Panzer division had only one tank battalion as did the 5th SS. Their tank training companies (equipped with panzer IIIs) provided minimal capability. The 11th and 13th Pz were also very low on tanks at roughly ¼ strength. In contrast, the So-viets had introduced several fresh divisions and reinforced tank corps into both fronts.
Armor/Anti-tank QualitySoviet tank quality was still inferior to the Ger-mans at this point of the war. Virtually all Soviet medium tanks were T-34/76 and with a few ex-ceptions were without radios. The T-34/85 and the heavy JSU tanks were in production but had not yet reached the field in significant quantity. The armored artillery consisted of SU-76, SU-85, and SU-152 along with a few SU–122 assault guns. What the Soviets lacked in armor quality they more than made up for in quantity. In addi-tion, the Soviets effectively used large quantities of 76 mm anti-tank regiments to blunt German armor thrusts. “Each battery had to kill one tank before being destroyed.” The Soviets were also supplied with American M-4 Sherman tanks in the 6th Tank army and 5th Cavalry Corps. In contrast, German tank firepower was still superior to the Russian even with the relatively few tanks available. Both the Panzer IV and V units still outclassed the T-34/76 due to superior high velocity guns, crew training and superior radio communication and gun sights. Tank kill ratios were very high in favor of the Germans. Two Panzer VI Tiger battalions participated in the later stages of the battle. It was reported (al-beit by the Germans) that no Tigers were lost in the battle to direct Soviet fire. Unfortunately for
the Germans, their armor mobility was severely restricted during the mud periods due to inordi-nate fuel consumption caused by their poor drive train and narrow tread width. The Soviet Tank Armies played a significant role in the breakthrough/pocket operation and the defeat of the attempted German relief effort. They were a unique formation in that they con-tained dedicated infantry permanently embed-ded in each of its three tank brigades. The tank brigades were used to penetrate deep into the German rear and then hold on with their infantry until follow-on infantry divisions and artillery arrived.
ArtillerySoviet Artillery totally outclassed German artil-lery in both quantity and quality of weapons. In particular, Soviet Artillery Divisions could de-liver overwhelming firepower when compared to German Korps support artillery. That said, it was primarily restricted to offensive support. Soviet mass artillery barrages that preceded infantry assaults were highly effective in disrupting Ger-man defenses. However, these required effective reconnaissance and logistics preparation prior to the attack. Soviet defensive artillery was less ef-fective in defense for several reasons. First, the artillery units could generally not keep pace with advancing Soviet Tank Armies and secondly the Soviets lacked an effective communication sys-tem to rapidly direct defensive artillery support in a timely manner. German artillery, while inferior to the Soviet, was quite effective at directing fire at specific objectives. The battle saw many instances where German divisional artillery was able to break up Soviet infantry concentrations or defeat local infantry attacks. German heavy artillery guns were of an older design, not particularly mobile and had limited defensive support ability to the divisions.
Air SupportBy the time of the Korsun offensive the Soviets had attained numerical air superiority and had achieved tactical parity. No longer could German Stukas rain free over the battlefield. In contrast, Soviet Shturmovik ground attack aircraft flew uncontested attack missions over the battle field. Unfortunately the lack of effective ground-to-air command and control severely limited Soviet combat air support to their ground forces. The general foggy conditions during the operation also constrained the effectiveness of both Ger-man and Soviet air operations.
Air Resupply of the PocketThe Luftwaffe vowed that the Korsun Pocket would not be another Stalingrad. It initiated a major airlift operation that began shortly after the sealing of the pocket. The Luftwaffe even-tually committing over 50 transport and bomber aircraft to the resupply effort (each flying sev-eral sorties per day), delivering over 2000 tons of supply to Korsun while evacuating over 4000 wounded soldiers. The delivered supply allowed the two trapped korps to sustain oper-ations, albeit at greatly reduced levels, until the breakout attempt.
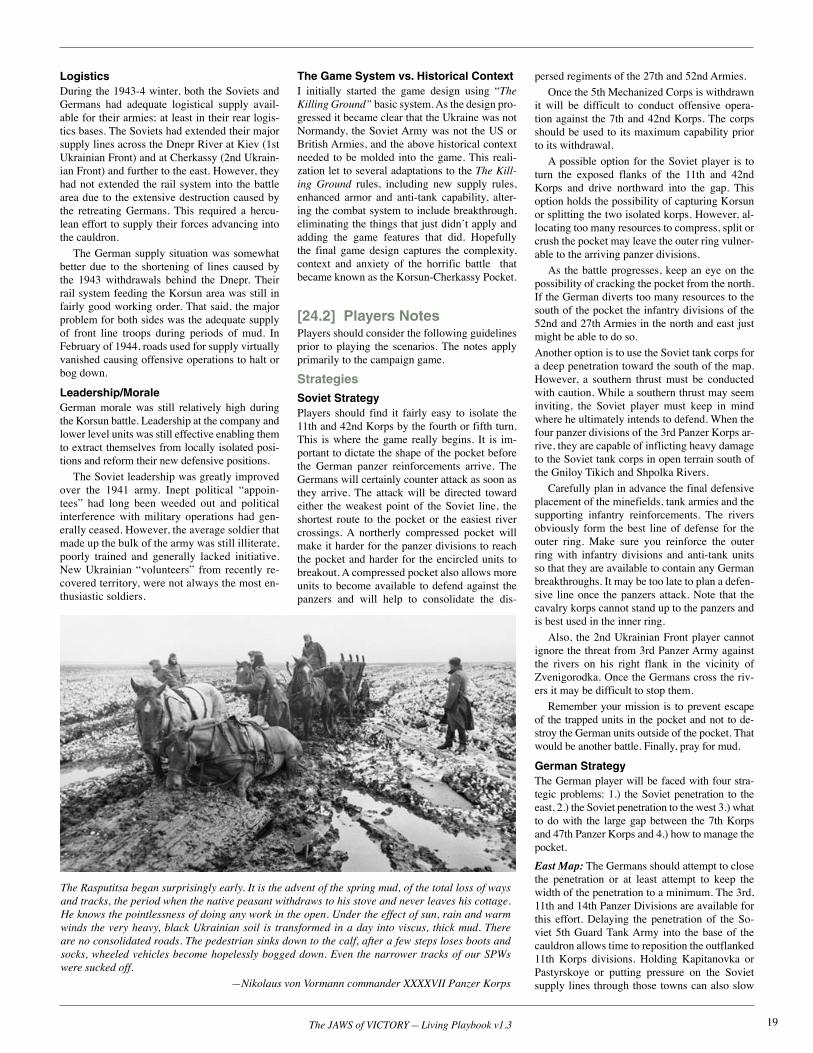
19The JAWS of VICTORY — Living Playbook v1.3
Logistics During the 1943-4 winter, both the Soviets and Germans had adequate logistical supply avail-able for their armies; at least in their rear logis-tics bases. The Soviets had extended their major supply lines across the Dnepr River at Kiev (1st Ukrainian Front) and at Cherkassy (2nd Ukrain-ian Front) and further to the east. However, they had not extended the rail system into the battle area due to the extensive destruction caused by the retreating Germans. This required a hercu-lean effort to supply their forces advancing into the cauldron. The German supply situation was somewhat better due to the shortening of lines caused by the 1943 withdrawals behind the Dnepr. Their rail system feeding the Korsun area was still in fairly good working order. That said, the major problem for both sides was the adequate supply of front line troops during periods of mud. In February of 1944, roads used for supply virtually vanished causing offensive operations to halt or bog down.
Leadership/MoraleGerman morale was still relatively high during the Korsun battle. Leadership at the company and lower level units was still effective enabling them to extract themselves from locally isolated posi-tions and reform their new defensive positions. The Soviet leadership was greatly improved over the 1941 army. Inept political “appoin-tees” had long been weeded out and political interference with military operations had gen-erally ceased. However, the average soldier that made up the bulk of the army was still illiterate, poorly trained and generally lacked initiative. New Ukrainian “volunteers” from recently re-covered territory, were not always the most en-thusiastic soldiers.
The Game System vs. Historical ContextI initially started the game design using “The Killing Ground” basic system. As the design pro-gressed it became clear that the Ukraine was not Normandy, the Soviet Army was not the US or British Armies, and the above historical context needed to be molded into the game. This reali-zation let to several adaptations to the The Kill-ing Ground rules, including new supply rules, enhanced armor and anti-tank capability, alter-ing the combat system to include breakthrough, eliminating the things that just didn’t apply and adding the game features that did. Hopefully the final game design captures the complexity, context and anxiety of the horrific battle that became known as the Korsun-Cherkassy Pocket.
[24.2] Players NotesPlayers should consider the following guidelines prior to playing the scenarios. The notes apply primarily to the campaign game.
StrategiesSoviet Strategy Players should find it fairly easy to isolate the 11th and 42nd Korps by the fourth or fifth turn. This is where the game really begins. It is im-portant to dictate the shape of the pocket before the German panzer reinforcements arrive. The Germans will certainly counter attack as soon as they arrive. The attack will be directed toward either the weakest point of the Soviet line, the shortest route to the pocket or the easiest river crossings. A northerly compressed pocket will make it harder for the panzer divisions to reach the pocket and harder for the encircled units to breakout. A compressed pocket also allows more units to become available to defend against the panzers and will help to consolidate the dis-
persed regiments of the 27th and 52nd Armies. Once the 5th Mechanized Corps is withdrawn it will be difficult to conduct offensive opera-tion against the 7th and 42nd Korps. The corps should be used to its maximum capability prior to its withdrawal. A possible option for the Soviet player is to turn the exposed flanks of the 11th and 42nd Korps and drive northward into the gap. This option holds the possibility of capturing Korsun or splitting the two isolated korps. However, al-locating too many resources to compress, split or crush the pocket may leave the outer ring vulner-able to the arriving panzer divisions. As the battle progresses, keep an eye on the possibility of cracking the pocket from the north. If the German diverts too many resources to the south of the pocket the infantry divisions of the 52nd and 27th Armies in the north and east just might be able to do so. Another option is to use the Soviet tank corps for a deep penetration toward the south of the map. However, a southern thrust must be conducted with caution. While a southern thrust may seem inviting, the Soviet player must keep in mind where he ultimately intends to defend. When the four panzer divisions of the 3rd Panzer Korps ar-rive, they are capable of inflicting heavy damage to the Soviet tank corps in open terrain south of the Gniloy Tikich and Shpolka Rivers. Carefully plan in advance the final defensive placement of the minefields, tank armies and the supporting infantry reinforcements. The rivers obviously form the best line of defense for the outer ring. Make sure you reinforce the outer ring with infantry divisions and anti-tank units so that they are available to contain any German breakthroughs. It may be too late to plan a defen-sive line once the panzers attack. Note that the cavalry korps cannot stand up to the panzers and is best used in the inner ring. Also, the 2nd Ukrainian Front player cannot ignore the threat from 3rd Panzer Army against the rivers on his right flank in the vicinity of Zvenigorodka. Once the Germans cross the riv-ers it may be difficult to stop them. Remember your mission is to prevent escape of the trapped units in the pocket and not to de-stroy the German units outside of the pocket. That would be another battle. Finally, pray for mud.
German StrategyThe German player will be faced with four stra-tegic problems: 1.) the Soviet penetration to the east, 2.) the Soviet penetration to the west 3.) what to do with the large gap between the 7th Korps and 47th Panzer Korps and 4.) how to manage the pocket.East Map: The Germans should attempt to close the penetration or at least attempt to keep the width of the penetration to a minimum. The 3rd, 11th and 14th Panzer Divisions are available for this effort. Delaying the penetration of the So-viet 5th Guard Tank Army into the base of the cauldron allows time to reposition the outflanked 11th Korps divisions. Holding Kapitanovka or Pastyrskoye or putting pressure on the Soviet supply lines through those towns can also slow
The Rasputitsa began surprisingly early. It is the advent of the spring mud, of the total loss of ways and tracks, the period when the native peasant withdraws to his stove and never leaves his cottage. He knows the pointlessness of doing any work in the open. Under the effect of sun, rain and warm winds the very heavy, black Ukrainian soil is transformed in a day into viscus, thick mud. There are no consolidated roads. The pedestrian sinks down to the calf, after a few steps loses boots and socks, wheeled vehicles become hopelessly bogged down. Even the narrower tracks of our SPWs were sucked off.
—Nikolaus von Vormann commander XXXXVII Panzer Korps
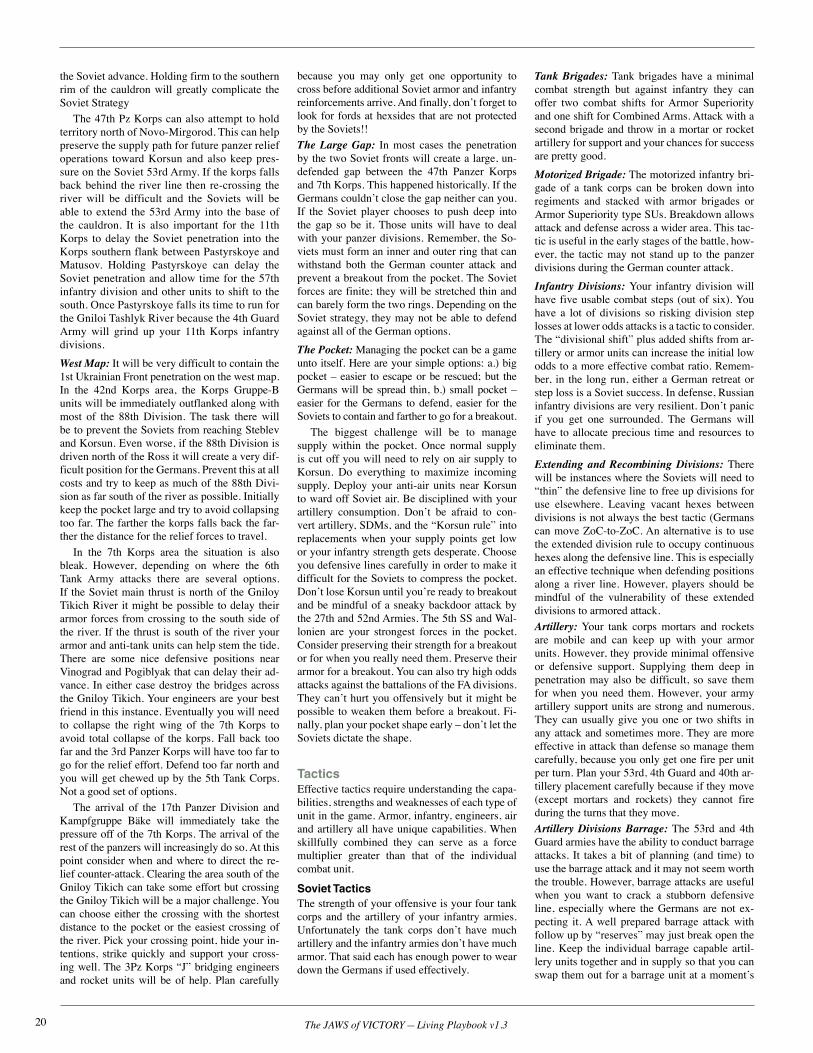
20 The JAWS of VICTORY — Living Playbook v1.3
the Soviet advance. Holding firm to the southern rim of the cauldron will greatly complicate the Soviet Strategy The 47th Pz Korps can also attempt to hold territory north of Novo-Mirgorod. This can help preserve the supply path for future panzer relief operations toward Korsun and also keep pres-sure on the Soviet 53rd Army. If the korps falls back behind the river line then re-crossing the river will be difficult and the Soviets will be able to extend the 53rd Army into the base of the cauldron. It is also important for the 11th Korps to delay the Soviet penetration into the Korps southern flank between Pastyrskoye and Matusov. Holding Pastyrskoye can delay the Soviet penetration and allow time for the 57th infantry division and other units to shift to the south. Once Pastyrskoye falls its time to run for the Gniloi Tashlyk River because the 4th Guard Army will grind up your 11th Korps infantry divisions.West Map: It will be very difficult to contain the 1st Ukrainian Front penetration on the west map. In the 42nd Korps area, the Korps Gruppe-B units will be immediately outflanked along with most of the 88th Division. The task there will be to prevent the Soviets from reaching Steblev and Korsun. Even worse, if the 88th Division is driven north of the Ross it will create a very dif-ficult position for the Germans. Prevent this at all costs and try to keep as much of the 88th Divi-sion as far south of the river as possible. Initially keep the pocket large and try to avoid collapsing too far. The farther the korps falls back the far-ther the distance for the relief forces to travel. In the 7th Korps area the situation is also bleak. However, depending on where the 6th Tank Army attacks there are several options. If the Soviet main thrust is north of the Gniloy Tikich River it might be possible to delay their armor forces from crossing to the south side of the river. If the thrust is south of the river your armor and anti-tank units can help stem the tide. There are some nice defensive positions near Vinograd and Pogiblyak that can delay their ad-vance. In either case destroy the bridges across the Gniloy Tikich. Your engineers are your best friend in this instance. Eventually you will need to collapse the right wing of the 7th Korps to avoid total collapse of the korps. Fall back too far and the 3rd Panzer Korps will have too far to go for the relief effort. Defend too far north and you will get chewed up by the 5th Tank Corps. Not a good set of options. The arrival of the 17th Panzer Division and Kampfgruppe Bäke will immediately take the pressure off of the 7th Korps. The arrival of the rest of the panzers will increasingly do so. At this point consider when and where to direct the re-lief counter-attack. Clearing the area south of the Gniloy Tikich can take some effort but crossing the Gniloy Tikich will be a major challenge. You can choose either the crossing with the shortest distance to the pocket or the easiest crossing of the river. Pick your crossing point, hide your in-tentions, strike quickly and support your cross-ing well. The 3Pz Korps “J” bridging engineers and rocket units will be of help. Plan carefully
because you may only get one opportunity to cross before additional Soviet armor and infantry reinforcements arrive. And finally, don’t forget to look for fords at hexsides that are not protected by the Soviets!!The Large Gap: In most cases the penetration by the two Soviet fronts will create a large, un-defended gap between the 47th Panzer Korps and 7th Korps. This happened historically. If the Germans couldn’t close the gap neither can you. If the Soviet player chooses to push deep into the gap so be it. Those units will have to deal with your panzer divisions. Remember, the So-viets must form an inner and outer ring that can withstand both the German counter attack and prevent a breakout from the pocket. The Soviet forces are finite; they will be stretched thin and can barely form the two rings. Depending on the Soviet strategy, they may not be able to defend against all of the German options.The Pocket: Managing the pocket can be a game unto itself. Here are your simple options: a.) big pocket – easier to escape or be rescued; but the Germans will be spread thin, b.) small pocket – easier for the Germans to defend, easier for the Soviets to contain and farther to go for a breakout. The biggest challenge will be to manage supply within the pocket. Once normal supply is cut off you will need to rely on air supply to Korsun. Do everything to maximize incoming supply. Deploy your anti-air units near Korsun to ward off Soviet air. Be disciplined with your artillery consumption. Don’t be afraid to con-vert artillery, SDMs, and the “Korsun rule” into replacements when your supply points get low or your infantry strength gets desperate. Choose you defensive lines carefully in order to make it difficult for the Soviets to compress the pocket. Don’t lose Korsun until you’re ready to breakout and be mindful of a sneaky backdoor attack by the 27th and 52nd Armies. The 5th SS and Wal-lonien are your strongest forces in the pocket. Consider preserving their strength for a breakout or for when you really need them. Preserve their armor for a breakout. You can also try high odds attacks against the battalions of the FA divisions. They can’t hurt you offensively but it might be possible to weaken them before a breakout. Fi-nally, plan your pocket shape early – don’t let the Soviets dictate the shape.
TacticsEffective tactics require understanding the capa-bilities, strengths and weaknesses of each type of unit in the game. Armor, infantry, engineers, air and artillery all have unique capabilities. When skillfully combined they can serve as a force multiplier greater than that of the individual combat unit.
Soviet TacticsThe strength of your offensive is your four tank corps and the artillery of your infantry armies. Unfortunately the tank corps don’t have much artillery and the infantry armies don’t have much armor. That said each has enough power to wear down the Germans if used effectively.
Tank Brigades: Tank brigades have a minimal combat strength but against infantry they can offer two combat shifts for Armor Superiority and one shift for Combined Arms. Attack with a second brigade and throw in a mortar or rocket artillery for support and your chances for success are pretty good. Motorized Brigade: The motorized infantry bri-gade of a tank corps can be broken down into regiments and stacked with armor brigades or Armor Superiority type SUs. Breakdown allows attack and defense across a wider area. This tac-tic is useful in the early stages of the battle, how-ever, the tactic may not stand up to the panzer divisions during the German counter attack.Infantry Divisions: Your infantry division will have five usable combat steps (out of six). You have a lot of divisions so risking division step losses at lower odds attacks is a tactic to consider. The “divisional shift” plus added shifts from ar-tillery or armor units can increase the initial low odds to a more effective combat ratio. Remem-ber, in the long run, either a German retreat or step loss is a Soviet success. In defense, Russian infantry divisions are very resilient. Don’t panic if you get one surrounded. The Germans will have to allocate precious time and resources to eliminate them.Extending and Recombining Divisions: There will be instances where the Soviets will need to “thin” the defensive line to free up divisions for use elsewhere. Leaving vacant hexes between divisions is not always the best tactic (Germans can move ZoC-to-ZoC. An alternative is to use the extended division rule to occupy continuous hexes along the defensive line. This is especially an effective technique when defending positions along a river line. However, players should be mindful of the vulnerability of these extended divisions to armored attack.Artillery: Your tank corps mortars and rockets are mobile and can keep up with your armor units. However, they provide minimal offensive or defensive support. Supplying them deep in penetration may also be difficult, so save them for when you need them. However, your army artillery support units are strong and numerous. They can usually give you one or two shifts in any attack and sometimes more. They are more effective in attack than defense so manage them carefully, because you only get one fire per unit per turn. Plan your 53rd, 4th Guard and 40th ar-tillery placement carefully because if they move (except mortars and rockets) they cannot fire during the turns that they move. Artillery Divisions Barrage: The 53rd and 4th Guard armies have the ability to conduct barrage attacks. It takes a bit of planning (and time) to use the barrage attack and it may not seem worth the trouble. However, barrage attacks are useful when you want to crack a stubborn defensive line, especially where the Germans are not ex-pecting it. A well prepared barrage attack with follow up by “reserves” may just break open the line. Keep the individual barrage capable artil-lery units together and in supply so that you can swap them out for a barrage unit at a moment’s
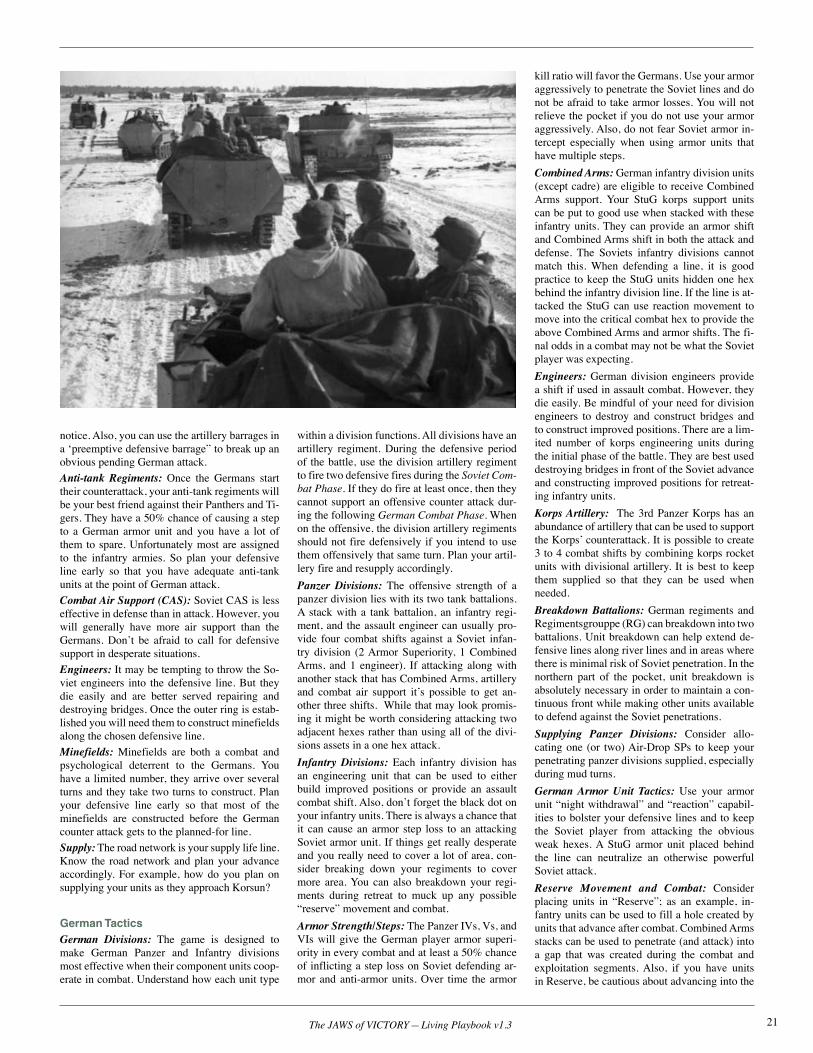
21The JAWS of VICTORY — Living Playbook v1.3
notice. Also, you can use the artillery barrages in a ‘preemptive defensive barrage” to break up an obvious pending German attack. Anti-tank Regiments: Once the Germans start their counterattack, your anti-tank regiments will be your best friend against their Panthers and Ti-gers. They have a 50% chance of causing a step to a German armor unit and you have a lot of them to spare. Unfortunately most are assigned to the infantry armies. So plan your defensive line early so that you have adequate anti-tank units at the point of German attack.Combat Air Support (CAS): Soviet CAS is less effective in defense than in attack. However, you will generally have more air support than the Germans. Don’t be afraid to call for defensive support in desperate situations.Engineers: It may be tempting to throw the So-viet engineers into the defensive line. But they die easily and are better served repairing and destroying bridges. Once the outer ring is estab-lished you will need them to construct minefields along the chosen defensive line. Minefields: Minefields are both a combat and psychological deterrent to the Germans. You have a limited number, they arrive over several turns and they take two turns to construct. Plan your defensive line early so that most of the minefields are constructed before the German counter attack gets to the planned-for line. Supply: The road network is your supply life line. Know the road network and plan your advance accordingly. For example, how do you plan on supplying your units as they approach Korsun?
German TacticsGerman Divisions: The game is designed to make German Panzer and Infantry divisions most effective when their component units coop-erate in combat. Understand how each unit type
within a division functions. All divisions have an artillery regiment. During the defensive period of the battle, use the division artillery regiment to fire two defensive fires during the Soviet Com-bat Phase. If they do fire at least once, then they cannot support an offensive counter attack dur-ing the following German Combat Phase. When on the offensive, the division artillery regiments should not fire defensively if you intend to use them offensively that same turn. Plan your artil-lery fire and resupply accordingly. Panzer Divisions: The offensive strength of a panzer division lies with its two tank battalions. A stack with a tank battalion, an infantry regi-ment, and the assault engineer can usually pro-vide four combat shifts against a Soviet infan-try division (2 Armor Superiority, 1 Combined Arms, and 1 engineer). If attacking along with another stack that has Combined Arms, artillery and combat air support it’s possible to get an-other three shifts. While that may look promis-ing it might be worth considering attacking two adjacent hexes rather than using all of the divi-sions assets in a one hex attack.Infantry Divisions: Each infantry division has an engineering unit that can be used to either build improved positions or provide an assault combat shift. Also, don’t forget the black dot on your infantry units. There is always a chance that it can cause an armor step loss to an attacking Soviet armor unit. If things get really desperate and you really need to cover a lot of area, con-sider breaking down your regiments to cover more area. You can also breakdown your regi-ments during retreat to muck up any possible “reserve” movement and combat.Armor Strength/Steps: The Panzer IVs, Vs, and VIs will give the German player armor superi-ority in every combat and at least a 50% chance of inflicting a step loss on Soviet defending ar-mor and anti-armor units. Over time the armor
kill ratio will favor the Germans. Use your armor aggressively to penetrate the Soviet lines and do not be afraid to take armor losses. You will not relieve the pocket if you do not use your armor aggressively. Also, do not fear Soviet armor in-tercept especially when using armor units that have multiple steps.Combined Arms: German infantry division units (except cadre) are eligible to receive Combined Arms support. Your StuG korps support units can be put to good use when stacked with these infantry units. They can provide an armor shift and Combined Arms shift in both the attack and defense. The Soviets infantry divisions cannot match this. When defending a line, it is good practice to keep the StuG units hidden one hex behind the infantry division line. If the line is at-tacked the StuG can use reaction movement to move into the critical combat hex to provide the above Combined Arms and armor shifts. The fi-nal odds in a combat may not be what the Soviet player was expecting.Engineers: German division engineers provide a shift if used in assault combat. However, they die easily. Be mindful of your need for division engineers to destroy and construct bridges and to construct improved positions. There are a lim-ited number of korps engineering units during the initial phase of the battle. They are best used destroying bridges in front of the Soviet advance and constructing improved positions for retreat-ing infantry units.Korps Artillery: The 3rd Panzer Korps has an abundance of artillery that can be used to support the Korps’ counterattack. It is possible to create 3 to 4 combat shifts by combining korps rocket units with divisional artillery. It is best to keep them supplied so that they can be used when needed.Breakdown Battalions: German regiments and Regimentsgrouppe (RG) can breakdown into two battalions. Unit breakdown can help extend de-fensive lines along river lines and in areas where there is minimal risk of Soviet penetration. In the northern part of the pocket, unit breakdown is absolutely necessary in order to maintain a con-tinuous front while making other units available to defend against the Soviet penetrations.Supplying Panzer Divisions: Consider allo-cating one (or two) Air-Drop SPs to keep your penetrating panzer divisions supplied, especially during mud turns.German Armor Unit Tactics: Use your armor unit “night withdrawal” and “reaction” capabil-ities to bolster your defensive lines and to keep the Soviet player from attacking the obvious weak hexes. A StuG armor unit placed behind the line can neutralize an otherwise powerful Soviet attack.Reserve Movement and Combat: Consider placing units in “Reserve”; as an example, in-fantry units can be used to fill a hole created by units that advance after combat. Combined Arms stacks can be used to penetrate (and attack) into a gap that was created during the combat and exploitation segments. Also, if you have units in Reserve, be cautious about advancing into the
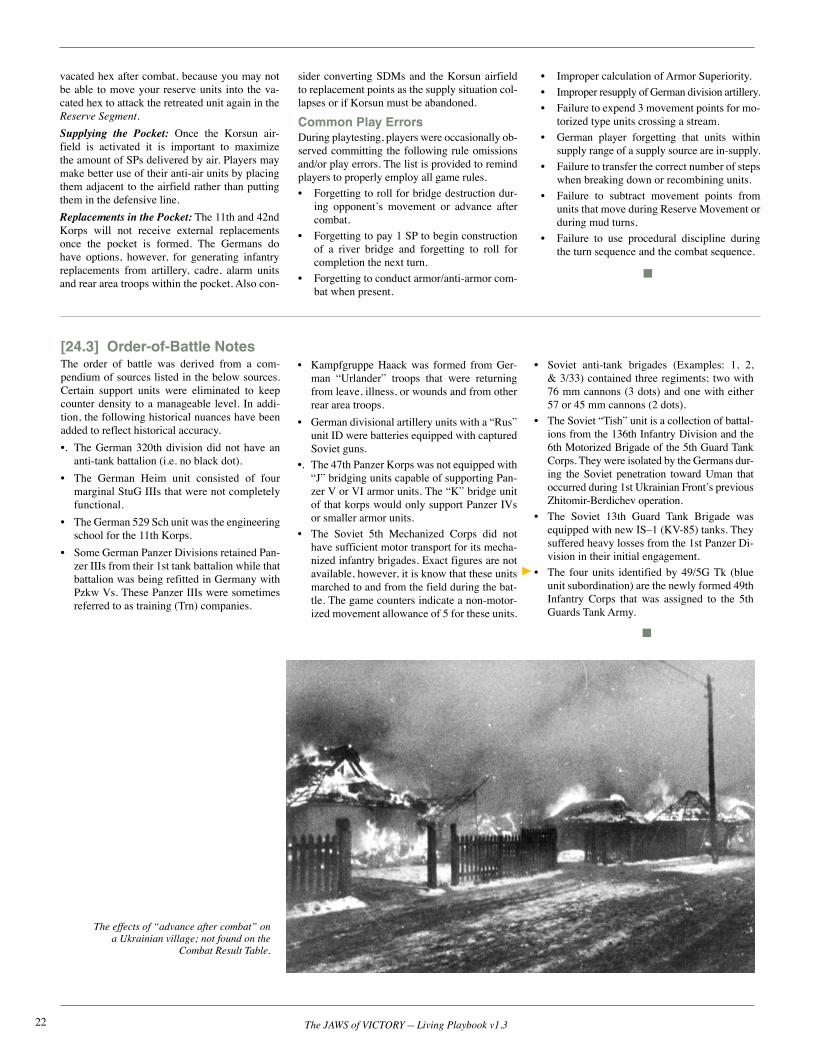
22 The JAWS of VICTORY — Living Playbook v1.3
vacated hex after combat, because you may not be able to move your reserve units into the va-cated hex to attack the retreated unit again in the Reserve Segment.Supplying the Pocket: Once the Korsun air-field is activated it is important to maximize the amount of SPs delivered by air. Players may make better use of their anti-air units by placing them adjacent to the airfield rather than putting them in the defensive line.Replacements in the Pocket: The 11th and 42nd Korps will not receive external replacements once the pocket is formed. The Germans do have options, however, for generating infantry replacements from artillery, cadre, alarm units and rear area troops within the pocket. Also con-
[24.3] Order-of-Battle NotesThe order of battle was derived from a com-pendium of sources listed in the below sources. Certain support units were eliminated to keep counter density to a manageable level. In addi-tion, the following historical nuances have been added to reflect historical accuracy.•. The German 320th division did not have an
anti-tank battalion (i.e. no black dot).• The German Heim unit consisted of four
marginal StuG IIIs that were not completely functional.
• The German 529 Sch unit was the engineering school for the 11th Korps.
• Some German Panzer Divisions retained Pan-zer IIIs from their 1st tank battalion while that battalion was being refitted in Germany with Pzkw Vs. These Panzer IIIs were sometimes referred to as training (Trn) companies.
The effects of “advance after combat” on a Ukrainian village; not found on the
Combat Result Table.
sider converting SDMs and the Korsun airfield to replacement points as the supply situation col-lapses or if Korsun must be abandoned.
Common Play ErrorsDuring playtesting, players were occasionally ob-served committing the following rule omissions and/or play errors. The list is provided to remind players to properly employ all game rules.• Forgetting to roll for bridge destruction dur-
ing opponent’s movement or advance after combat.
• Forgetting to pay 1 SP to begin construction of a river bridge and forgetting to roll for completion the next turn.
• Forgetting to conduct armor/anti-armor com-bat when present.
• Kampfgruppe Haack was formed from Ger-man “Urlander” troops that were returning from leave, illness, or wounds and from other rear area troops.
• German divisional artillery units with a “Rus” unit ID were batteries equipped with captured Soviet guns.
•. The 47th Panzer Korps was not equipped with “J” bridging units capable of supporting Pan-zer V or VI armor units. The “K” bridge unit of that korps would only support Panzer IVs or smaller armor units.
• The Soviet 5th Mechanized Corps did not have sufficient motor transport for its mecha-nized infantry brigades. Exact figures are not available, however, it is know that these units marched to and from the field during the bat-tle. The game counters indicate a non-motor-ized movement allowance of 5 for these units.
• Improper calculation of Armor Superiority.• Improper resupply of German division artillery.• Failure to expend 3 movement points for mo-
torized type units crossing a stream.• German player forgetting that units within
supply range of a supply source are in-supply.• Failure to transfer the correct number of steps
when breaking down or recombining units.• Failure to subtract movement points from
units that move during Reserve Movement or during mud turns.
• Failure to use procedural discipline during the turn sequence and the combat sequence.
• Soviet anti-tank brigades (Examples: 1, 2, & 3/33) contained three regiments; two with 76 mm cannons (3 dots) and one with either 57 or 45 mm cannons (2 dots).
• The Soviet “Tish” unit is a collection of battal-ions from the 136th Infantry Division and the 6th Motorized Brigade of the 5th Guard Tank Corps. They were isolated by the Germans dur-ing the Soviet penetration toward Uman that occurred during 1st Ukrainian Front’s previous Zhitomir-Berdichev operation.
• The Soviet 13th Guard Tank Brigade was equipped with new IS–1 (KV-85) tanks. They suffered heavy losses from the 1st Panzer Di-vision in their initial engagement.
• The four units identified by 49/5G Tk (blue unit subordination) are the newly formed 49th Infantry Corps that was assigned to the 5th Guards Tank Army.
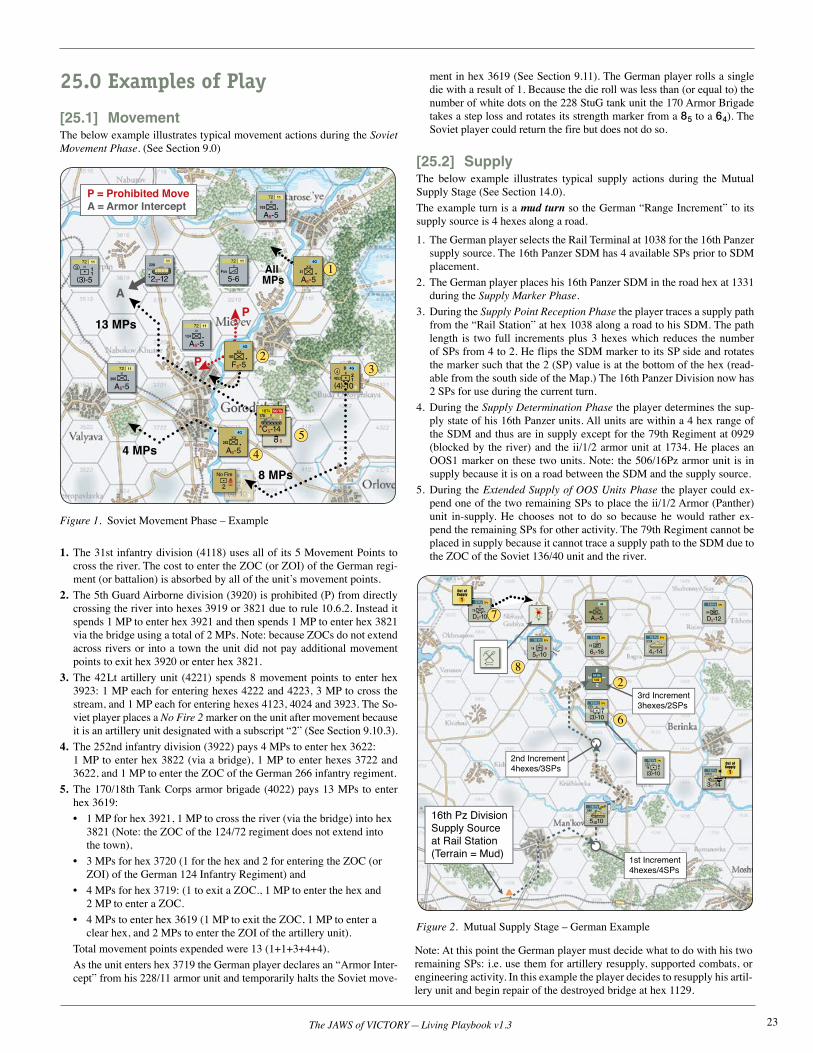
23The JAWS of VICTORY — Living Playbook v1.3
25.0 Examples of Play
[25.1] MovementThe below example illustrates typical movement actions during the Soviet Movement Phase. (See Section 9.0)
ment in hex 3619 (See Section 9.11). The German player rolls a single die with a result of 1. Because the die roll was less than (or equal to) the number of white dots on the 228 StuG tank unit the 170 Armor Brigade takes a step loss and rotates its strength marker from a 85 to a 64). The Soviet player could return the fire but does not do so.
[25.2] SupplyThe below example illustrates typical supply actions during the Mutual Supply Stage (See Section 14.0).The example turn is a mud turn so the German “Range Increment” to its supply source is 4 hexes along a road. 1. The German player selects the Rail Terminal at 1038 for the 16th Panzer
supply source. The 16th Panzer SDM has 4 available SPs prior to SDM placement.
2. The German player places his 16th Panzer SDM in the road hex at 1331 during the Supply Marker Phase.
3. During the Supply Point Reception Phase the player traces a supply path from the “Rail Station” at hex 1038 along a road to his SDM. The path length is two full increments plus 3 hexes which reduces the number of SPs from 4 to 2. He flips the SDM marker to its SP side and rotates the marker such that the 2 (SP) value is at the bottom of the hex (read-able from the south side of the Map.) The 16th Panzer Division now has 2 SPs for use during the current turn.
4. During the Supply Determination Phase the player determines the sup-ply state of his 16th Panzer units. All units are within a 4 hex range of the SDM and thus are in supply except for the 79th Regiment at 0929 (blocked by the river) and the ii/1/2 armor unit at 1734. He places an OOS1 marker on these two units. Note: the 506/16Pz armor unit is in supply because it is on a road between the SDM and the supply source.
5. During the Extended Supply of OOS Units Phase the player could ex-pend one of the two remaining SPs to place the ii/1/2 Armor (Panther) unit in-supply. He chooses not to do so because he would rather ex-pend the remaining SPs for other activity. The 79th Regiment cannot be placed in supply because it cannot trace a supply path to the SDM due to the ZOC of the Soviet 136/40 unit and the river.
Figure 1. Soviet Movement Phase – Example
1. The 31st infantry division (4118) uses all of its 5 Movement Points to cross the river. The cost to enter the ZOC (or ZOI) of the German regi-ment (or battalion) is absorbed by all of the unit’s movement points.
2. The 5th Guard Airborne division (3920) is prohibited (P) from directly crossing the river into hexes 3919 or 3821 due to rule 10.6.2. Instead it spends 1 MP to enter hex 3921 and then spends 1 MP to enter hex 3821 via the bridge using a total of 2 MPs. Note: because ZOCs do not extend across rivers or into a town the unit did not pay additional movement points to exit hex 3920 or enter hex 3821.
3. The 42Lt artillery unit (4221) spends 8 movement points to enter hex 3923: 1 MP each for entering hexes 4222 and 4223, 3 MP to cross the stream, and 1 MP each for entering hexes 4123, 4024 and 3923. The So-viet player places a No Fire 2 marker on the unit after movement because it is an artillery unit designated with a subscript “2” (See Section 9.10.3).
4. The 252nd infantry division (3922) pays 4 MPs to enter hex 3622: 1 MP to enter hex 3822 (via a bridge), 1 MP to enter hexes 3722 and 3622, and 1 MP to enter the ZOC of the German 266 infantry regiment.
5. The 170/18th Tank Corps armor brigade (4022) pays 13 MPs to enter hex 3619: • 1 MP for hex 3921, 1 MP to cross the river (via the bridge) into hex
3821 (Note: the ZOC of the 124/72 regiment does not extend into the town),
• 3 MPs for hex 3720 (1 for the hex and 2 for entering the ZOC (or ZOI) of the German 124 Infantry Regiment) and
• 4 MPs for hex 3719: (1 to exit a ZOC., 1 MP to enter the hex and 2 MP to enter a ZOC.
• 4 MPs to enter hex 3619 (1 MP to exit the ZOC, 1 MP to enter a clear hex, and 2 MPs to enter the ZOI of the artillery unit).
Total movement points expended were 13 (1+1+3+4+4). As the unit enters hex 3719 the German player declares an “Armor Inter-
cept” from his 228/11 armor unit and temporarily halts the Soviet move-
Figure 2. Mutual Supply Stage – German Example
Note: At this point the German player must decide what to do with his two remaining SPs: i.e. use them for artillery resupply, supported combats, or engineering activity. In this example the player decides to resupply his artil-lery unit and begin repair of the destroyed bridge at hex 1129.
32
1
45
2
6
7
8
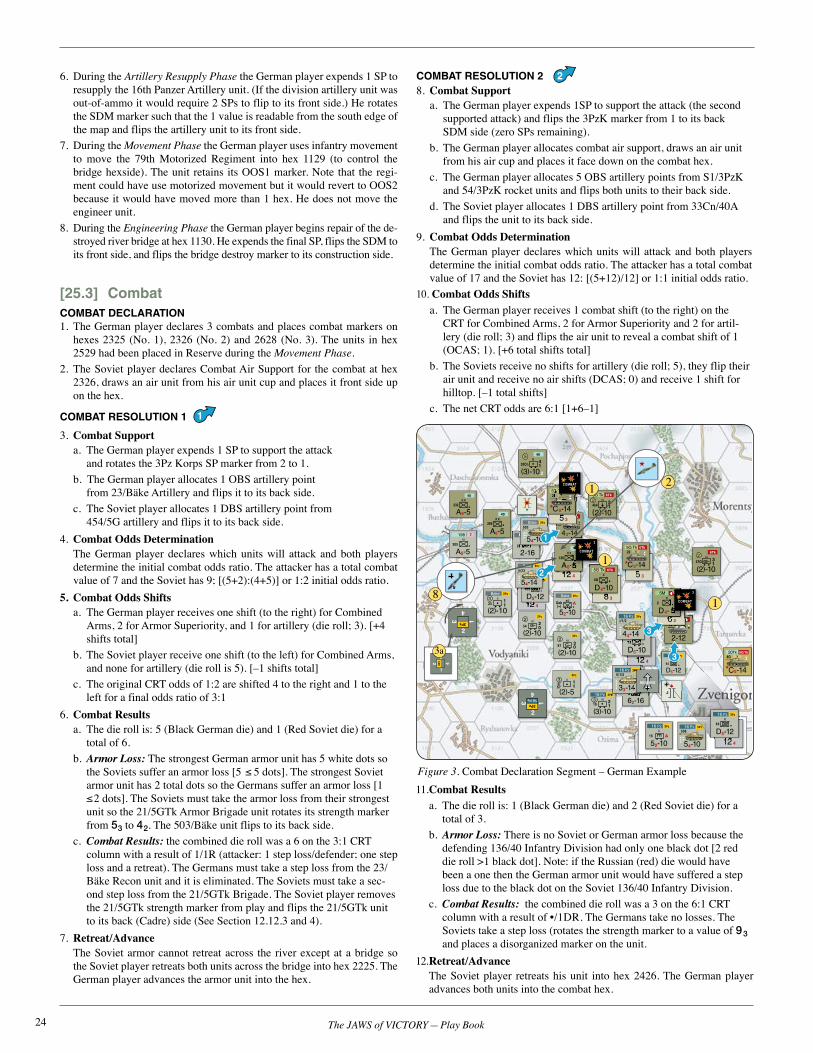
24 The JAWS of VICTORY — Play Book
6. During the Artillery Resupply Phase the German player expends 1 SP to resupply the 16th Panzer Artillery unit. (If the division artillery unit was out-of-ammo it would require 2 SPs to flip to its front side.) He rotates the SDM marker such that the 1 value is readable from the south edge of the map and flips the artillery unit to its front side.
7. During the Movement Phase the German player uses infantry movement to move the 79th Motorized Regiment into hex 1129 (to control the bridge hexside). The unit retains its OOS1 marker. Note that the regi-ment could have use motorized movement but it would revert to OOS2 because it would have moved more than 1 hex. He does not move the engineer unit.
8. During the Engineering Phase the German player begins repair of the de-stroyed river bridge at hex 1130. He expends the final SP, flips the SDM to its front side, and flips the bridge destroy marker to its construction side.
[25.3] CombatCOMBAT DECLARATION1. The German player declares 3 combats and places combat markers on
hexes 2325 (No. 1), 2326 (No. 2) and 2628 (No. 3). The units in hex 2529 had been placed in Reserve during the Movement Phase.
2. The Soviet player declares Combat Air Support for the combat at hex 2326, draws an air unit from his air unit cup and places it front side up on the hex.
COMBAT RESOLUTION 1
3. Combat Supporta. The German player expends 1 SP to support the attack
and rotates the 3Pz Korps SP marker from 2 to 1.b. The German player allocates 1 OBS artillery point
from 23/Bäke Artillery and flips it to its back side.c. The Soviet player allocates 1 DBS artillery point from
454/5G artillery and flips it to its back side.4. Combat Odds Determination The German player declares which units will attack and both players
determine the initial combat odds ratio. The attacker has a total combat value of 7 and the Soviet has 9; [(5+2):(4+5)] or 1:2 initial odds ratio.
5. Combat Odds Shiftsa. The German player receives one shift (to the right) for Combined
Arms, 2 for Armor Superiority, and 1 for artillery (die roll; 3). [+4 shifts total]
b. The Soviet player receive one shift (to the left) for Combined Arms, and none for artillery (die roll is 5). [–1 shifts total]
c. The original CRT odds of 1:2 are shifted 4 to the right and 1 to the left for a final odds ratio of 3:1
6. Combat Resultsa. The die roll is: 5 (Black German die) and 1 (Red Soviet die) for a
total of 6.b. Armor Loss: The strongest German armor unit has 5 white dots so
the Soviets suffer an armor loss [5 ≤ 5 dots]. The strongest Soviet armor unit has 2 total dots so the Germans suffer an armor loss [1 ≤2 dots]. The Soviets must take the armor loss from their strongest unit so the 21/5GTk Armor Brigade unit rotates its strength marker from 53 to 42. The 503/Bäke unit flips to its back side.
c. Combat Results: the combined die roll was a 6 on the 3:1 CRT column with a result of 1/1R (attacker: 1 step loss/defender; one step loss and a retreat). The Germans must take a step loss from the 23/Bäke Recon unit and it is eliminated. The Soviets must take a sec-ond step loss from the 21/5GTk Brigade. The Soviet player removes the 21/5GTk strength marker from play and flips the 21/5GTk unit to its back (Cadre) side (See Section 12.12.3 and 4).
7. Retreat/Advance The Soviet armor cannot retreat across the river except at a bridge so
the Soviet player retreats both units across the bridge into hex 2225. The German player advances the armor unit into the hex.
COMBAT RESOLUTION 28. Combat Support
a. The German player expends 1SP to support the attack (the second supported attack) and flips the 3PzK marker from 1 to its back SDM side (zero SPs remaining).
b. The German player allocates combat air support, draws an air unit from his air cup and places it face down on the combat hex.
c. The German player allocates 5 OBS artillery points from S1/3PzK and 54/3PzK rocket units and flips both units to their back side.
d. The Soviet player allocates 1 DBS artillery point from 33Cn/40A and flips the unit to its back side.
9. Combat Odds Determination The German player declares which units will attack and both players
determine the initial combat odds ratio. The attacker has a total combat value of 17 and the Soviet has 12: [(5+12)/12] or 1:1 initial odds ratio.
10. Combat Odds Shiftsa. The German player receives 1 combat shift (to the right) on the
CRT for Combined Arms, 2 for Armor Superiority and 2 for artil-lery (die roll; 3) and flips the air unit to reveal a combat shift of 1 (OCAS; 1). [+6 total shifts total]
b. The Soviets receive no shifts for artillery (die roll; 5), they flip their air unit and receive no air shifts (DCAS; 0) and receive 1 shift for hilltop. [–1 total shifts]
c. The net CRT odds are 6:1 [1+6–1]
Figure 3. Combat Declaration Segment – German Example
1
1
1
2
8
3a
11. Combat Resultsa. The die roll is: 1 (Black German die) and 2 (Red Soviet die) for a
total of 3.b. Armor Loss: There is no Soviet or German armor loss because the
defending 136/40 Infantry Division had only one black dot [2 red die roll >1 black dot]. Note: if the Russian (red) die would have been a one then the German armor unit would have suffered a step loss due to the black dot on the Soviet 136/40 Infantry Division.
c. Combat Results: the combined die roll was a 3 on the 6:1 CRT column with a result of •/1DR. The Germans take no losses. The Soviets take a step loss (rotates the strength marker to a value of 93 and places a disorganized marker on the unit.
12. Retreat/Advance The Soviet player retreats his unit into hex 2426. The German player
advances both units into the combat hex.
1
2
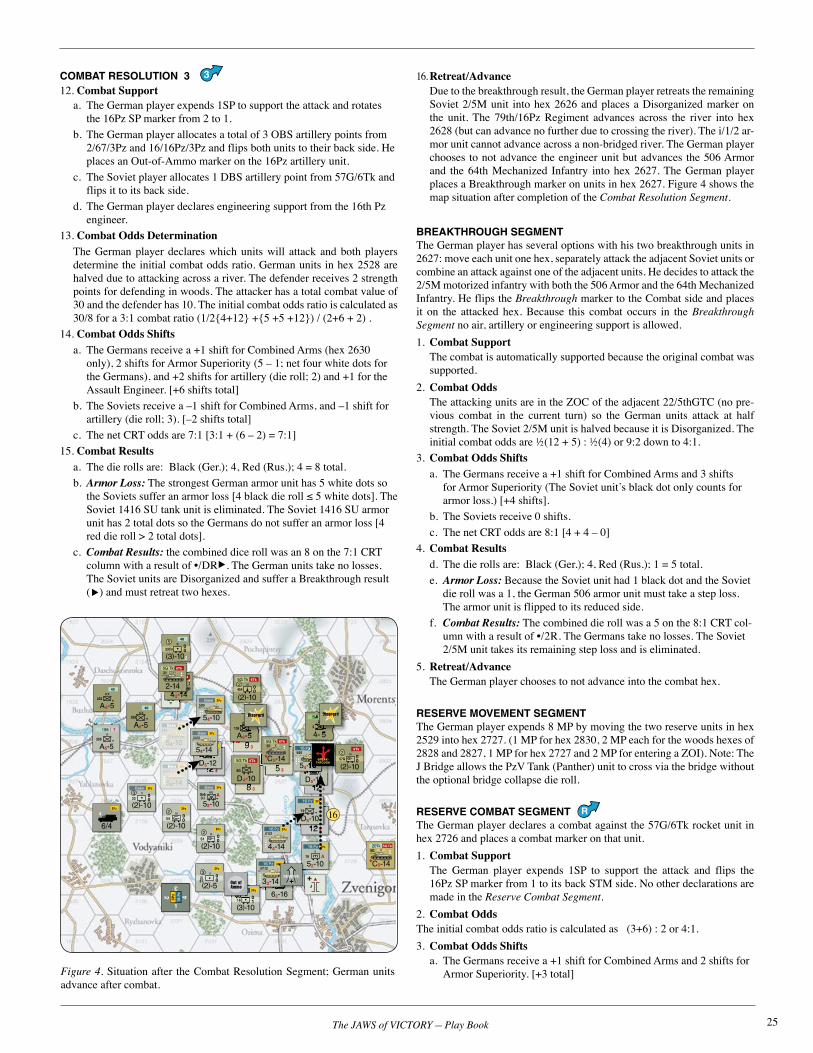
25The JAWS of VICTORY — Play Book
COMBAT RESOLUTION 312. Combat Support
a. The German player expends 1SP to support the attack and rotates the 16Pz SP marker from 2 to 1.
b. The German player allocates a total of 3 OBS artillery points from 2/67/3Pz and 16/16Pz/3Pz and flips both units to their back side. He places an Out-of-Ammo marker on the 16Pz artillery unit.
c. The Soviet player allocates 1 DBS artillery point from 57G/6Tk and flips it to its back side.
d. The German player declares engineering support from the 16th Pz engineer.
13. Combat Odds Determination The German player declares which units will attack and both players
determine the initial combat odds ratio. German units in hex 2528 are halved due to attacking across a river. The defender receives 2 strength points for defending in woods. The attacker has a total combat value of 30 and the defender has 10. The initial combat odds ratio is calculated as 30/8 for a 3:1 combat ratio (1/2{4+12} +{5 +5 +12}) / (2+6 + 2) .
14. Combat Odds Shiftsa. The Germans receive a +1 shift for Combined Arms (hex 2630
only), 2 shifts for Armor Superiority (5 – 1; net four white dots for the Germans), and +2 shifts for artillery (die roll; 2) and +1 for the Assault Engineer. [+6 shifts total]
b. The Soviets receive a –1 shift for Combined Arms, and –1 shift for artillery (die roll; 3). [–2 shifts total]
c. The net CRT odds are 7:1 [3:1 + (6 – 2) = 7:1]15. Combat Results
a. The die rolls are: Black (Ger.); 4, Red (Rus.); 4 = 8 total.b. Armor Loss: The strongest German armor unit has 5 white dots so
the Soviets suffer an armor loss [4 black die roll ≤ 5 white dots]. The Soviet 1416 SU tank unit is eliminated. The Soviet 1416 SU armor unit has 2 total dots so the Germans do not suffer an armor loss [4 red die roll > 2 total dots].
c. Combat Results: the combined dice roll was an 8 on the 7:1 CRT column with a result of •/DRE. The German units take no losses. The Soviet units are Disorganized and suffer a Breakthrough result (E) and must retreat two hexes.
16. Retreat/Advance Due to the breakthrough result, the German player retreats the remaining
Soviet 2/5M unit into hex 2626 and places a Disorganized marker on the unit. The 79th/16Pz Regiment advances across the river into hex 2628 (but can advance no further due to crossing the river). The i/1/2 ar-mor unit cannot advance across a non-bridged river. The German player chooses to not advance the engineer unit but advances the 506 Armor and the 64th Mechanized Infantry into hex 2627. The German player places a Breakthrough marker on units in hex 2627. Figure 4 shows the map situation after completion of the Combat Resolution Segment.
BREAKTHROUGH SEGMENTThe German player has several options with his two breakthrough units in 2627: move each unit one hex, separately attack the adjacent Soviet units or combine an attack against one of the adjacent units. He decides to attack the 2/5M motorized infantry with both the 506 Armor and the 64th Mechanized Infantry. He flips the Breakthrough marker to the Combat side and places it on the attacked hex. Because this combat occurs in the Breakthrough Segment no air, artillery or engineering support is allowed. 1. Combat Support The combat is automatically supported because the original combat was
supported.2. Combat Odds The attacking units are in the ZOC of the adjacent 22/5thGTC (no pre-
vious combat in the current turn) so the German units attack at half strength. The Soviet 2/5M unit is halved because it is Disorganized. The initial combat odds are ½(12 + 5) : ½(4) or 9:2 down to 4:1.
3. Combat Odds Shiftsa. The Germans receive a +1 shift for Combined Arms and 3 shifts
for Armor Superiority (The Soviet unit’s black dot only counts for armor loss.) [+4 shifts].
b. The Soviets receive 0 shifts. c. The net CRT odds are 8:1 [4 + 4 – 0]
4. Combat Resultsd. The die rolls are: Black (Ger.); 4, Red (Rus.); 1 = 5 total.e. Armor Loss: Because the Soviet unit had 1 black dot and the Soviet
die roll was a 1, the German 506 armor unit must take a step loss. The armor unit is flipped to its reduced side.
f. Combat Results: The combined die roll was a 5 on the 8:1 CRT col-umn with a result of •/2R. The Germans take no losses. The Soviet 2/5M unit takes its remaining step loss and is eliminated.
5. Retreat/Advance The German player chooses to not advance into the combat hex.
RESERVE MOVEMENT SEGMENTThe German player expends 8 MP by moving the two reserve units in hex 2529 into hex 2727. (1 MP for hex 2830, 2 MP each for the woods hexes of 2828 and 2827, 1 MP for hex 2727 and 2 MP for entering a ZOI). Note: The J Bridge allows the PzV Tank (Panther) unit to cross via the bridge without the optional bridge collapse die roll. RESERVE COMBAT SEGMENTThe German player declares a combat against the 57G/6Tk rocket unit in hex 2726 and places a combat marker on that unit.1. Combat Support The German player expends 1SP to support the attack and flips the
16Pz SP marker from 1 to its back STM side. No other declarations are made in the Reserve Combat Segment.
2. Combat OddsThe initial combat odds ratio is calculated as (3+6) : 2 or 4:1.3. Combat Odds Shifts
a. The Germans receive a +1 shift for Combined Arms and 2 shifts for Armor Superiority. [+3 total]Figure 4. Situation after the Combat Resolution Segment; German units
advance after combat.
3
16
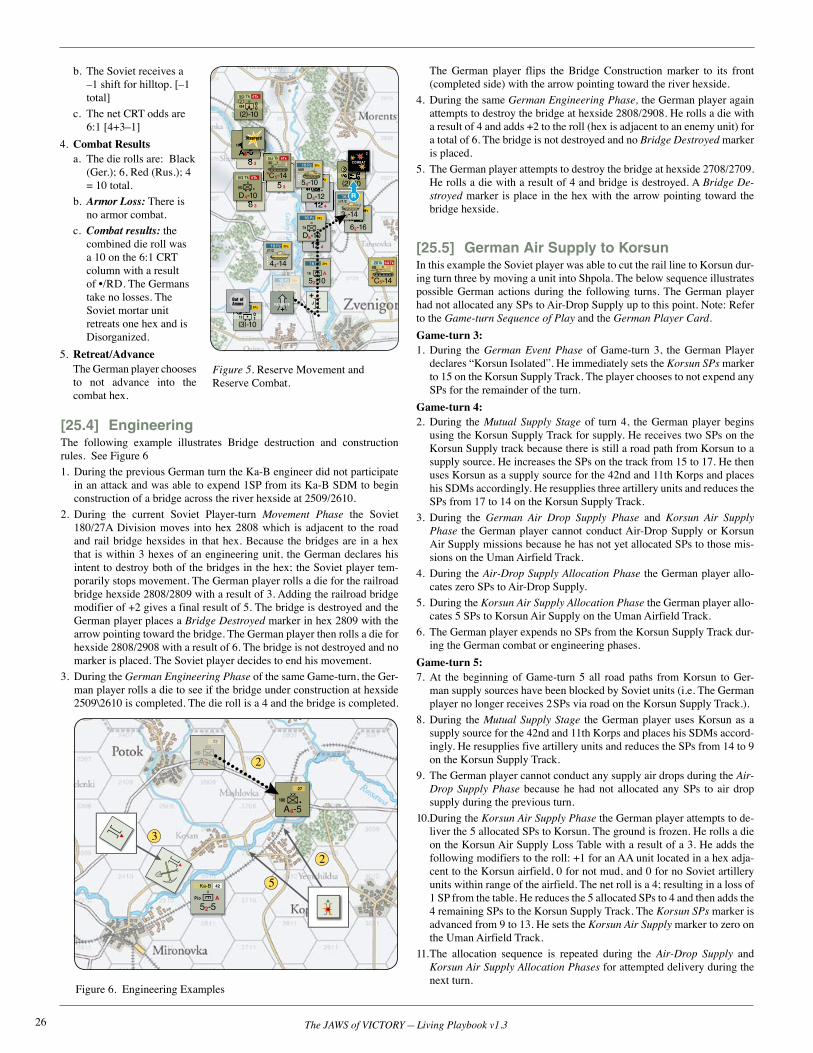
26 The JAWS of VICTORY — Living Playbook v1.3
b. The Soviet receives a –1 shift for hilltop. [–1 total]
c. The net CRT odds are 6:1 [4+3–1]
4. Combat Resultsa. The die rolls are: Black
(Ger.); 6, Red (Rus.); 4 = 10 total.
b. Armor Loss: There is no armor combat.
c. Combat results: the combined die roll was a 10 on the 6:1 CRT column with a result of •/RD. The Germans take no losses. The Soviet mortar unit retreats one hex and is Disorganized.
5. Retreat/Advance The German player chooses
to not advance into the combat hex.
The German player flips the Bridge Construction marker to its front (completed side) with the arrow pointing toward the river hexside.
4. During the same German Engineering Phase, the German player again attempts to destroy the bridge at hexside 2808/2908. He rolls a die with a result of 4 and adds +2 to the roll (hex is adjacent to an enemy unit) for a total of 6. The bridge is not destroyed and no Bridge Destroyed marker is placed.
5. The German player attempts to destroy the bridge at hexside 2708/2709. He rolls a die with a result of 4 and bridge is destroyed. A Bridge De-stroyed marker is place in the hex with the arrow pointing toward the bridge hexside.
[25.5] German Air Supply to KorsunIn this example the Soviet player was able to cut the rail line to Korsun dur-ing turn three by moving a unit into Shpola. The below sequence illustrates possible German actions during the following turns. The German player had not allocated any SPs to Air-Drop Supply up to this point. Note: Refer to the Game-turn Sequence of Play and the German Player Card.Game-turn 3:1. During the German Event Phase of Game-turn 3, the German Player
declares “Korsun Isolated”. He immediately sets the Korsun SPs marker to 15 on the Korsun Supply Track. The player chooses to not expend any SPs for the remainder of the turn.
Game-turn 4:2. During the Mutual Supply Stage of turn 4, the German player begins
using the Korsun Supply Track for supply. He receives two SPs on the Korsun Supply track because there is still a road path from Korsun to a supply source. He increases the SPs on the track from 15 to 17. He then uses Korsun as a supply source for the 42nd and 11th Korps and places his SDMs accordingly. He resupplies three artillery units and reduces the SPs from 17 to 14 on the Korsun Supply Track.
3. During the German Air Drop Supply Phase and Korsun Air Supply Phase the German player cannot conduct Air-Drop Supply or Korsun Air Supply missions because he has not yet allocated SPs to those mis-sions on the Uman Airfield Track.
4. During the Air-Drop Supply Allocation Phase the German player allo-cates zero SPs to Air-Drop Supply.
5. During the Korsun Air Supply Allocation Phase the German player allo-cates 5 SPs to Korsun Air Supply on the Uman Airfield Track.
6. The German player expends no SPs from the Korsun Supply Track dur-ing the German combat or engineering phases.
Game-turn 5:7. At the beginning of Game-turn 5 all road paths from Korsun to Ger-
man supply sources have been blocked by Soviet units (i.e. The German player no longer receives 2SPs via road on the Korsun Supply Track.).
8. During the Mutual Supply Stage the German player uses Korsun as a supply source for the 42nd and 11th Korps and places his SDMs accord-ingly. He resupplies five artillery units and reduces the SPs from 14 to 9 on the Korsun Supply Track.
9. The German player cannot conduct any supply air drops during the Air-Drop Supply Phase because he had not allocated any SPs to air drop supply during the previous turn.
10. During the Korsun Air Supply Phase the German player attempts to de-liver the 5 allocated SPs to Korsun. The ground is frozen. He rolls a die on the Korsun Air Supply Loss Table with a result of a 3. He adds the following modifiers to the roll: +1 for an AA unit located in a hex adja-cent to the Korsun airfield, 0 for not mud, and 0 for no Soviet artillery units within range of the airfield. The net roll is a 4; resulting in a loss of 1 SP from the table. He reduces the 5 allocated SPs to 4 and then adds the 4 remaining SPs to the Korsun Supply Track. The Korsun SPs marker is advanced from 9 to 13. He sets the Korsun Air Supply marker to zero on the Uman Airfield Track.
11. The allocation sequence is repeated during the Air-Drop Supply and Korsun Air Supply Allocation Phases for attempted delivery during the next turn.
[25.4] EngineeringThe following example illustrates Bridge destruction and construction rules. See Figure 61. During the previous German turn the Ka-B engineer did not participate
in an attack and was able to expend 1SP from its Ka-B SDM to begin construction of a bridge across the river hexside at 2509/2610.
2. During the current Soviet Player-turn Movement Phase the Soviet 180/27A Division moves into hex 2808 which is adjacent to the road and rail bridge hexsides in that hex. Because the bridges are in a hex that is within 3 hexes of an engineering unit, the German declares his intent to destroy both of the bridges in the hex; the Soviet player tem-porarily stops movement. The German player rolls a die for the railroad bridge hexside 2808/2809 with a result of 3. Adding the railroad bridge modifier of +2 gives a final result of 5. The bridge is destroyed and the German player places a Bridge Destroyed marker in hex 2809 with the arrow pointing toward the bridge. The German player then rolls a die for hexside 2808/2908 with a result of 6. The bridge is not destroyed and no marker is placed. The Soviet player decides to end his movement.
3. During the German Engineering Phase of the same Game-turn, the Ger-man player rolls a die to see if the bridge under construction at hexside 2509\2610 is completed. The die roll is a 4 and the bridge is completed.
Figure 5. Reserve Movement and Reserve Combat.
Figure 6. Engineering Examples
3
2
2
5
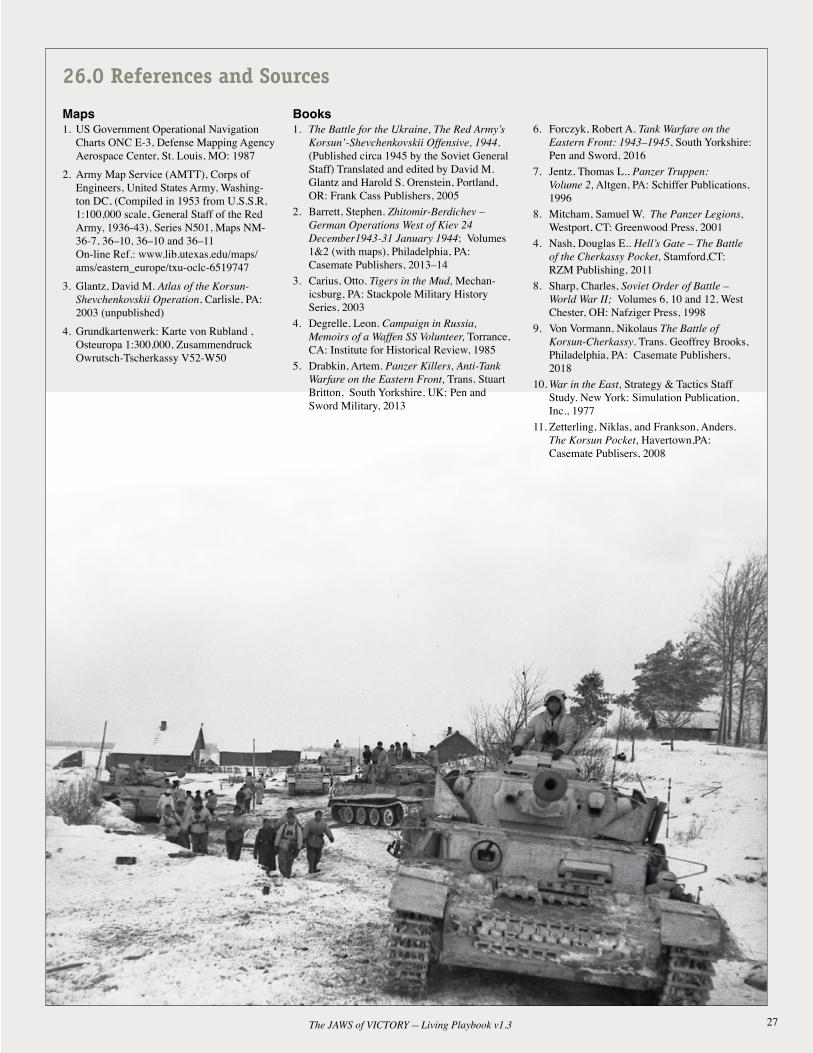
27The JAWS of VICTORY — Living Playbook v1.3
26.0 References and Sources
Maps1. US Government Operational Navigation
Charts ONC E-3, Defense Mapping Agency Aerospace Center, St. Louis, MO: 1987
2. Army Map Service (AMTT), Corps of Engineers, United States Army, Washing-ton DC, (Compiled in 1953 from U.S.S.R, 1:100,000 scale, General Staff of the Red Army, 1936-43), Series N501, Maps NM-36-7, 36–10, 36–10 and 36–11
On-line Ref.: www.lib.utexas.edu/maps/ams/eastern_europe/txu-oclc-6519747
3. Glantz, David M. Atlas of the Korsun- Shevchenkovskii Operation, Carlisle, PA: 2003 (unpublished)
4. Grundkartenwerk: Karte von Rubland , Osteuropa 1:300,000, Zusammendruck Owrutsch-Tscherkassy V52-W50
Books1. The Battle for the Ukraine, The Red Army’s
Korsun’-Shevchenkovskii Offensive, 1944. (Published circa 1945 by the Soviet General Staff) Translated and edited by David M. Glantz and Harold S. Orenstein, Portland, OR: Frank Cass Publishers, 2005
2. Barrett, Stephen. Zhitomir-Berdichev – German Operations West of Kiev 24 December1943-31 January 1944; Volumes 1&2 (with maps), Philadelphia, PA: Casemate Publishers, 2013–14
3. Carius, Otto. Tigers in the Mud, Mechan-icsburg, PA: Stackpole Military History Series, 2003
4. Degrelle, Leon. Campaign in Russia, Memoirs of a Waffen SS Volunteer, Torrance, CA: Institute for Historical Review, 1985
5. Drabkin, Artem. Panzer Killers, Anti-Tank Warfare on the Eastern Front, Trans. Stuart Britton, South Yorkshire, UK: Pen and Sword Military, 2013
6. Forczyk, Robert A. Tank Warfare on the Eastern Front: 1943–1945, South Yorkshire: Pen and Sword, 2016
7. Jentz, Thomas L., Panzer Truppen: Volume 2, Altgen, PA: Schiffer Publications, 1996
8. Mitcham, Samuel W. The Panzer Legions, Westport, CT: Greenwood Press, 2001
4. Nash, Douglas E.. Hell’s Gate – The Battle of the Cherkassy Pocket, Stamford,CT: RZM Publishing, 2011
8. Sharp, Charles, Soviet Order of Battle – World War II; Volumes 6, 10 and 12, West Chester, OH: Nafziger Press, 1998
9. Von Vormann, Nikolaus The Battle of Korsun-Cherkassy. Trans. Geoffrey Brooks, Philadelphia, PA: Casemate Publishers, 2018
10. War in the East, Strategy & Tactics Staff Study. New York: Simulation Publication, Inc., 1977
11. Zetterling, Niklas, and Frankson, Anders. The Korsun Pocket, Havertown,PA: Casemate Publisers, 2008

Copyright © 2019 New England Simulations, Nashua, NH 03062The Jaws of Victory is New England Simulations’ trademark for its
World War II East Front game of the Korsun-Cherkassy Pocket, 1944.www.carpatina.com/nes
PLAYBOOK: P05002-JV 12/2020 Printed in U.S.A.
Living Playbook Edition; v1.3