Embed Size (px)
Citation preview
Pennsylvania EMS Registry
New System User Manual
January 23, 2018
Table of Contents General Information ..................................................................................................................................... 5
Logging in for the First Time ..................................................................................................................... 5
User Accounts ........................................................................................................................................... 5
EMS Providers ....................................................................................................................................... 5
EMS Agencies for Licensure .................................................................................................................. 5
Education Institutes and Continuing Education Sponsors .................................................................... 6
Overview of EMS System Organizations ....................................................................................................... 7
Overview of User Permissions ...................................................................................................................... 8
EMS Providers ............................................................................................................................................. 10
Provider Functions Required to Maintain Certification .......................................................................... 10
Maintaining Current Demographic Information ................................................................................. 10
Entering Current CPR Certification Information ................................................................................. 10
Reregistration of Certification ............................................................................................................ 10
Continuing Education .......................................................................................................................... 11
Reporting Criminal History and Disciplinary Actions .......................................................................... 11
Provider Profile Overview ....................................................................................................................... 11
Applicant Data Tab .............................................................................................................................. 12
Certifications Tab ................................................................................................................................ 17
Con-Ed Tab .......................................................................................................................................... 17
Notes Tab ............................................................................................................................................ 20
Certification by Endorsement Tab ...................................................................................................... 20
EMS Instructors ........................................................................................................................................... 21
Searching for and Enrolling in Con-Ed Classes ............................................................................................ 22
Searching for Con-Ed Classes .................................................................................................................. 22
Enrolling in Con-Ed Classes ..................................................................................................................... 22
View Upcoming Enrolled Classes ............................................................................................................ 23
EMS System Organization ........................................................................................................................... 24
EMS System Organization Application .................................................................................................... 24
General Information Tab ..................................................................................................................... 24
Acknowledgement Tab ....................................................................................................................... 24
Adding Users to the EMS System Organization ...................................................................................... 24
Adding Users ....................................................................................................................................... 25
Editing Users ....................................................................................................................................... 25
Deleting Users ..................................................................................................................................... 25
Continuing Education Sponsors .................................................................................................................. 26
Con-Ed Sponsor Application.................................................................................................................... 26
Submitting Con-Ed Sponsor Amendment and Renewal Applications ................................................ 26
General (ConED Sponsor) Tab ............................................................................................................. 26
Acknowledgement (ConED Sponsor) Tab ........................................................................................... 27
Users (ConED Sponsor) Tab ................................................................................................................ 27
Processing (ConED Sponsor) Tab ........................................................................................................ 27
Associations (ConED Sponsor) Tab ..................................................................................................... 27
Notes (Sponsor) Tab ............................................................................................................................ 27
Adding Users to the Con-Ed Sponsor ...................................................................................................... 27
Adding Users ....................................................................................................................................... 27
Editing Users ....................................................................................................................................... 28
Deleting Users ..................................................................................................................................... 28
Registering a New Course for Continuing Education .............................................................................. 28
Search for Courses Approved for Continuing Education ........................................................................ 30
Searching for Courses under the Con-Ed Sponsor .............................................................................. 30
Searching for Courses under another Con-Ed Sponsor ...................................................................... 30
Registering a Continuing Education Class ............................................................................................... 30
Search for Classes Approved ................................................................................................................... 32
Searching for Classes under the Con-Ed Sponsor ............................................................................... 32
Submitting a Continuing Education Class Roster .................................................................................... 32
Education Institutes .................................................................................................................................... 37
Education Institutes Application ............................................................................................................. 37
Submitting Education Institute Amendment and Renewal Applications ........................................... 37
General Information (Education Institute) Tab ................................................................................... 37
Personnel (Education Institute) Tab ................................................................................................... 38
Facilities (Education Institute) Tab ...................................................................................................... 38
Acknowledgement (Education Institute) Tab ..................................................................................... 38
Users (Education Institute) Tab........................................................................................................... 38
Processing (Education Institute) Tab .................................................................................................. 38
Associations (Education Institute) Tab ................................................................................................ 38
Notes (Education Institute) Tab .......................................................................................................... 39
Adding Users to the Education Institute ................................................................................................. 39
Adding Users ....................................................................................................................................... 39
Editing Users ....................................................................................................................................... 39
Deleting Users ..................................................................................................................................... 39
Registering a Certification Class .............................................................................................................. 39
Search for Classes Approved ................................................................................................................... 41
Searching for Classes under the Education Institute .......................................................................... 41
Submitting a Certification Class Roster ................................................................................................... 41
New Provider/User Applications ................................................................................................................. 44
Certification by Endorsement ................................................................................................................. 44
New Student/Provider Certification Application .................................................................................... 45
General Information
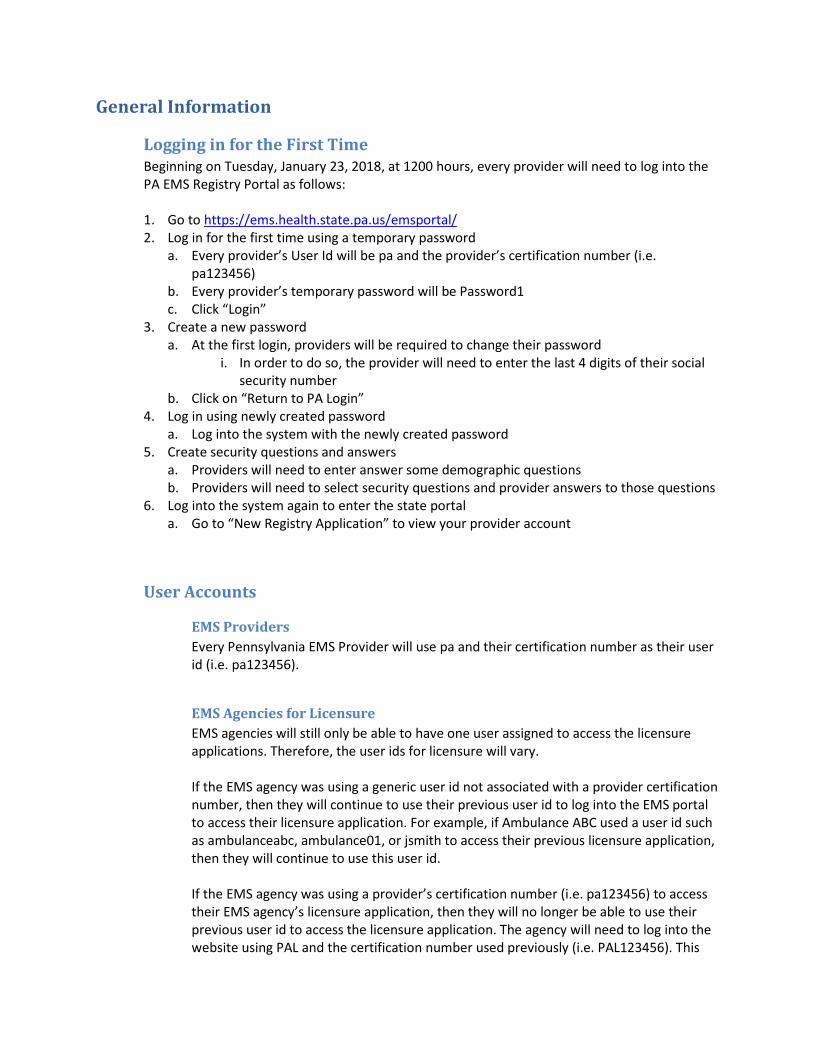
Logging in for the First Time Beginning on Tuesday, January 23, 2018, at 1200 hours, every provider will need to log into the PA EMS Registry Portal as follows: 1. Go to https://ems.health.state.pa.us/emsportal/ 2. Log in for the first time using a temporary password
a. Every provider’s User Id will be pa and the provider’s certification number (i.e. pa123456)
b. Every provider’s temporary password will be Password1 c. Click “Login”
3. Create a new password a. At the first login, providers will be required to change their password
i. In order to do so, the provider will need to enter the last 4 digits of their social security number
b. Click on “Return to PA Login” 4. Log in using newly created password
a. Log into the system with the newly created password 5. Create security questions and answers
a. Providers will need to enter answer some demographic questions b. Providers will need to select security questions and provider answers to those questions
6. Log into the system again to enter the state portal a. Go to “New Registry Application” to view your provider account
User Accounts
EMS Providers Every Pennsylvania EMS Provider will use pa and their certification number as their user id (i.e. pa123456).
EMS Agencies for Licensure EMS agencies will still only be able to have one user assigned to access the licensure applications. Therefore, the user ids for licensure will vary. If the EMS agency was using a generic user id not associated with a provider certification number, then they will continue to use their previous user id to log into the EMS portal to access their licensure application. For example, if Ambulance ABC used a user id such as ambulanceabc, ambulance01, or jsmith to access their previous licensure application, then they will continue to use this user id. If the EMS agency was using a provider’s certification number (i.e. pa123456) to access their EMS agency’s licensure application, then they will no longer be able to use their previous user id to access the licensure application. The agency will need to log into the website using PAL and the certification number used previously (i.e. PAL123456). This
will allow one user id to access only the licensure application and not the EMS provider account profile and continuing education record.
Education Institutes and Continuing Education Sponsors Education institutes and continuing education sponsors will be able to have multiple users assigned to manage their application and process class registrations. Every user will log in with the same user id used to view their EMS provider account profile and continuing education record (i.e. pa123456). The administrator or primary contact for the education institute and/or continuing education sponsor will assign user rights to personnel by using pa and their certification number. Therefore, EMS stakeholders will only need one user id to manage their personal certification and any education institutes and/or continuing education sponsors regardless of the number of affiliations.

Overview of EMS System Organizations The Bureau of EMS established the new EMS Registry to function in a tiered process. Every organization will be in the system as an EMS System Organization, and then they will pick and choose which functions they want operate, such as Education Institute, Continuing Education Sponsor, EMS Agency, and Medical Command Facility. This is similar to how EMS agencies are used to being a licensed EMS agency and then selecting to operate as QRS, BLS, IALS, ALS, and/or CCT. With the new EMS Registry, organizations will be an EMS System Organization who will select to operate as an education institute, con-ed sponsor, and in the future as a licensed EMS agency and medical command facility.
EMS System Organization
Education Institute
Continuing Education Sponsor
EMS Agency Medical
Command Facility
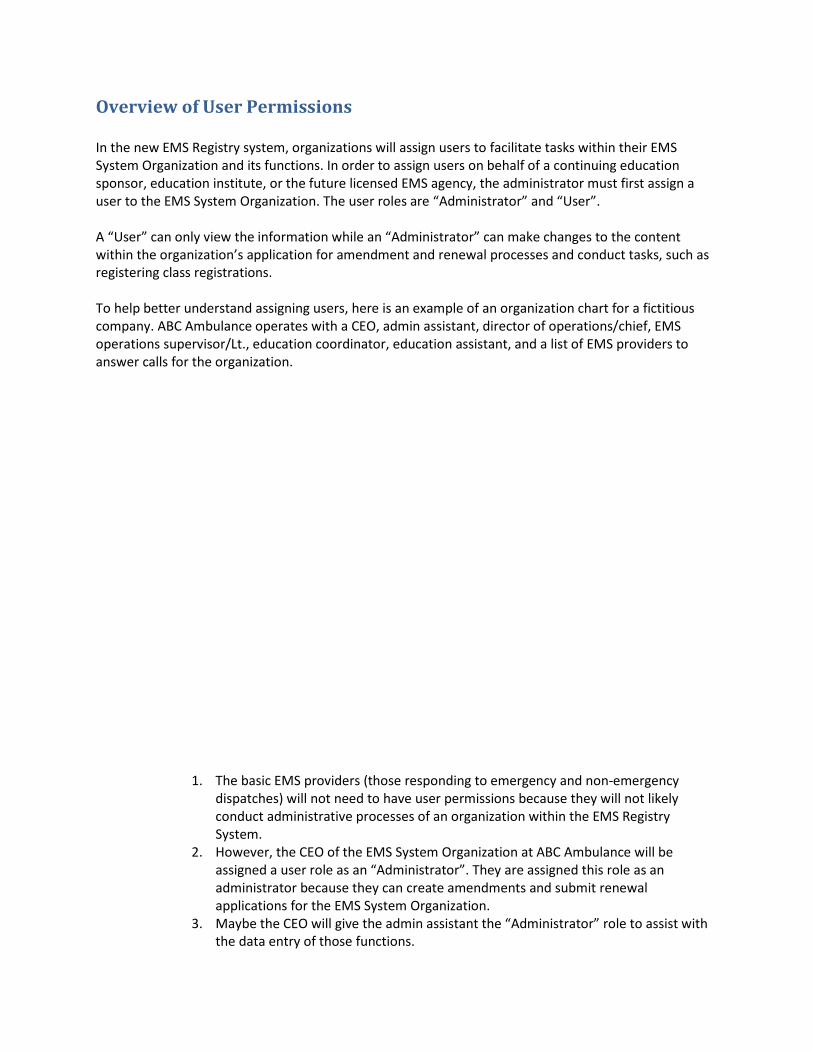
Overview of User Permissions In the new EMS Registry system, organizations will assign users to facilitate tasks within their EMS System Organization and its functions. In order to assign users on behalf of a continuing education sponsor, education institute, or the future licensed EMS agency, the administrator must first assign a user to the EMS System Organization. The user roles are “Administrator” and “User”. A “User” can only view the information while an “Administrator” can make changes to the content within the organization’s application for amendment and renewal processes and conduct tasks, such as registering class registrations. To help better understand assigning users, here is an example of an organization chart for a fictitious company. ABC Ambulance operates with a CEO, admin assistant, director of operations/chief, EMS operations supervisor/Lt., education coordinator, education assistant, and a list of EMS providers to answer calls for the organization.
1. The basic EMS providers (those responding to emergency and non-emergency dispatches) will not need to have user permissions because they will not likely conduct administrative processes of an organization within the EMS Registry System.
2. However, the CEO of the EMS System Organization at ABC Ambulance will be assigned a user role as an “Administrator”. They are assigned this role as an administrator because they can create amendments and submit renewal applications for the EMS System Organization.
3. Maybe the CEO will give the admin assistant the “Administrator” role to assist with the data entry of those functions.
4. However, at the EMS System Organization level, the remaining leadership staff will only be given the “User” role permission because they should not have access to make changes to the application.
5. If ABC Ambulance does not operate as an education institute, they will not have an application or users for this function.
6. However, if they operate as a con-ed sponsor, they will have an application and need to assign users to the con-ed sponsor.
a. If a user is not assigned to the EMS System Organization, they cannot be added to the con-ed sponsor as a user.
b. For example, maybe ABC Ambulance will have their CEO still hold the “Administrator” role under the con-ed sponsor.
c. They may also allow their education coordinator to have the “Administrator” role so he/she can make changes to the con-ed sponsorship application for amendments and renewals.
d. They may provider “Administrator” role to the Education Coordinator to allow the individual to submit class registrations for future con-ed classes.
e. In addition, they may provide the “User” level permission to the education assistant, so the education assistant can see the con-ed sponsor application and registered classes but not be able to make changes.
f. ABC Ambulance may not provide the operations leadership team any user access to the con-ed sponsor. However, they may be granted permission as users and administrators under the licensure component once the system is built in the summer of 2018.
EMS Providers
Provider Functions Required to Maintain Certification This section provides information every EMS provider will be required to do in order to maintain current EMS certification in Pennsylvania. Providers will be required to do the following:
Maintaining Current Demographic Information Providers will be required to update their mailing address and other contact information in their provider account. If a change of residence involves a change of county, please choose the appropriate county.
Entering Current CPR Certification Information Providers will be required to enter their CPR information into their account. The region will no longer receive copies of CPR cards to enter on the behalf of providers. Providers will find the CPR section under “EMS Application” within their account in the new system. Providers will enter the issue and expiration date of their CPR certification, training center name, and instructor name as printed on their CPR certification card. Providers can choose to upload a copy of their current CPR card into their profile. The provider will then click “Update CPR”. A message will display asking if the provider wishes to update their CPR. The provider must click “Yes” to save the information they entered. The region will be required to audit 10% of providers each certification quarter. If the CPR card is uploaded into the system, the region will be able to conduct the audit seamlessly. If the CPR car is not uploaded into the system, the region will contact the provider to send a copy of their CPR card to the regional office. In the event the information entered by the provider does not match the CPR certification card, the region will forward the information to the Bureau of EMS for further investigation.
Reregistration of Certification Between 30 and 90 days from a provider’s certification expiration date, they will be required to submit an electronic application for reregistration to maintain their EMS certification. The provider will log into their provider account. Under “Applicant Data”, they will scroll to the bottom of the page and select “Reregistration” from the drop down menu under “Manage Certification”. They will be directed to the reregistration page. If the provider is within 90-days of their certification expiration date and met the con-ed and CPR requirements, they will select the box on the right of their certification level and click “Begin Recertification”. The provider will answer the questions as appropriate to complete the process. After completing this process, the provider’s certification will automatically renew to the next cycle.
If a provider does not complete the electronic reregistration process, then their certification will not renew regardless if the provider has enough con-ed credits and current CPR in the system.
Continuing Education Providers will be able to view their con-ed record in their provider account under the “Con-Ed” tab. If a provider takes a con-ed class that is not approved for PA DOH con-ed credit (i.e. a conference outside of Pennsylvania, such as JEMS or an online class through Boundtree University), they will no longer send the certificate to the region for credit. Providers will be entering their own con-ed by endorsement request for the region to approve. In the provider account under the “Con-Ed” tab, the provider will scroll to the bottom of the page to the “Add ConED by Endorsement” section. The provider will click on “Add Endorsement”. They will need to scroll back down to the bottom of the page to enter the needed information about the class attended. The provider will need to upload the certificate or class information. After the provider clicks on “Submit Endorsement”, the information will be sent to the region for approval. The region will either approve or request additional information within 14 business days.
Reporting Criminal History and Disciplinary Actions Providers who have been convicted of a crime other than a summary or similar offense are required to report the conviction information to the Bureau of EMS within 30 days from the date of the conviction along with disciplinary actions against a certification, license, or authority to practice any procession or occupation. Providers will report criminal history through their provider account. Under “Applicant Data”, they will scroll near the bottom of the page to the “Criminal History/Disciplinary Actions” section. They will select “yes” or “no” as appropriate. When selecting “yes” to a criminal history, a new tab will appear in the top tier of tabs called “Criminal History”. The provider will go to the respective tab and enter the requested information. When selecting “yes” to a disciplinary actions, a new tab will appear in the second tier of tabs called “Disciplinary Actions”. The provider will go to the respective tab and enter the requested information.
Provider Profile Overview This section will offer providers a detailed explanation of the various tabs within their provider account. When a provider first logs into their provider account for the first time and then every 60-days, the system will generate a message reminding the provider they must report any conviction
other than a summary offense within 30-days according to the EMS Act. The provider must click “Accept” to acknowledge the reminder. Once the provider enters the profile, they will be able to see their name, certification number, certification level, certification issue/expiration dates, and certification status.
Under their certification information will be a variety of tabs. The tabs are as follows:
Applicant Data Tab The first tab in the top tier is “Applicant Data”. Then there are a variety of second tier tabs.
General Information Tab The first section seen in the “General Information” tab is the “Practitioner Picture and Signature” section. The photo and signature as uploaded by the region if in the system will be seen here by the provider. The provider does not have the ability to upload a photo or signature to their profile. Only the regional council staff can do this.
Changing Demographic Information: The second section seen in the “General Information” tab is the “Applicant Data” section. The provider cannot change their name. If they have a legal name change, they will need to contact the region. However, the provider can change and should update their mailing address, phone number, and e-mail address. It is important for providers to change their county as appropriate. Also, the county selected will determine which region will process their certification. If they select a state other than Pennsylvania, the county will default to out-of-state. However, they will need to select the regional council. The provider cannot change their date of birth or social security number. After the provider makes changes to their contact information, they will click the “Update Data” button. They will get a confirmation message saying it has been updated.
Reporting Criminal Histories and Disciplinary Actions: The third section seen in the “General Information” tab is the “Criminal History/Disciplinary Actions” section. If a provider needs to report a criminal conviction or disciplinary action, this is where they will click the radio button “Yes” as appropriate. After clicking “Yes” to a criminal history conviction, a new tab called “Criminal History” will appear in the top tier. The provider will click on the “Criminal History” tab and complete the information requested. When the information is submitted, it will be sent to the Bureau of EMS for review. If the provider clicks “Yes” to disciplinary actions, a new tab called “Disciplinary Actions” will appear in the second tier of tabs.
Managing Certifications: The final section seen in the “General Information” tab is the “Manage My Certifications” section. This is where providers will create applications. There are a variety of options.
Add-On: The first option in the drop down menu is “Add-On”. When the provider clicks “Add-On”, they will be directed to the “Add-Ons” tab. Here EMSVO and EMS Instructor will display if the provider does not already hold those certifications.
Adding EMSVO Certification: If a provider is currently EMSVO certified, that information will merge over from the old system into the new. They will not need to do an add-on. In fact, EMSVO will not be an option within the Add-On section. However, if a provider does not have EMSVO, then they need to submit an application through this add-on process to be able to drive an EMS vehicle. The provider will select “EMSVO” and go to the “Driving History” tab in the second tier of tabs. In the “Driving History” tab, the provider will upload a copy of their driver’s license and EVOC certificate. To upload these documents, the provider will click “Browse” to locate their file electronically. Once the file turns green, they will click “Add”. The file will then show in the table. After uploading the two required documents, they will answer the “General Questions” and “Driving History Questions”. If the provider answers yes to any of the driving history questions, then they must upload a driving history record. Once the provider is complete with entering the information, the provider will return to the “Add-On” tab and click “Submit”. It will go to the region for review and processing. The region will either approve or request additional information within 14 business days.
Adding EMS Instructor Certification: If a provider is currently an EMS instructor, the information will merge over from the old system into the new system. They will not need to complete an add-on. If a provider is requesting EMS instructor certification, then they will submit an application through the Add On process. When in the Add-On tab, they will click on the box beside EMS Instructor. This will populate the “Instructor” tab in the second tier of tabs. The provider will go to the “Instructor” tab. Here they will answer the “Instructor Application Questions”. Once complete, the provider will return to the “Add-On” tab and click “Submit”. It will go to the region for review and processing. The region will need proof of completion of the EMS instructor course and hours of observation teaching.
Downgrade: The second option in the drop down menu is “Downgrade”. This is how a provider will downgrade their certification to a lower level if desired. When the provider clicks “Downgrade”, they will be directed to the “Downgrade” tab. They will select the lower-level of certification they wish to hold and click “Submit”. The application will go to the region for review and processing.
Reregistration: The third option in the drop down menu is “Reregistration”. This is an important function. This is how a provider will select to reregister the registration of their certification. In the new system, when a provider has completed their con-ed requirements and has their CPR information up to date in the system, they will not automatically renew. Their certification will not renew until they choose to reregister. When the provider clicks “Reregistration”, they will be directed to the “Reregistration” tab. Here we may see three different views. 1. If the provider is not within 90-days of their expiration,
they will see a message in red providing they cannot reregister their certification because they are not within 90 days.
2. If the provider is within 90-days of their expiration date but does not have enough con-ed or their CPR up to date in the system, they will see a table listing their certification(s). However, the meet requirements tab will say “No”. The provider will not see why they did not meet the requirements. They will have to navigate their profile to see what is missing. They will not be able to click the “Select” box and will not see the “Begin Reregistration” button.
3. If the provider is within 90-days of their expiration date and has enough con-ed and their CPR up to date in the system, they will see a table listing their certification(s), and the meet requirements tab will say “Yes”. The provider will click the box(es) under “Select” and click “Begin Recertification”. The provider will answer the questions as appropriate to complete the process. After completing this process, the provider’s certification will automatically renew to the next cycle.
If a provider does not complete the electronic reregistration process, then their certification will not renew regardless if the provider has enough con-ed credits and current CPR in the system.
Military Reinstatement The fourth option in the drop down menu is “Military Reinstatement”. This will open and automatically direct the provider to the “Military Reinstatement” tab. This is how a provider who was active duty can get an extension for their certification if thy expired during active duty or within one year of returning from active duty.
Certification by Endorsement Upgrade The fifth option in the drop down menu is “Certification by Endorsement Upgrade”. This will open and automatically direct the provider to the “Certification by Endorsement” tab. Here is how a certified BLS provider who obtains their Paramedic certification outside of Pennsylvania can be processed as a Pennsylvania Paramedic.
Update Criminal and Discipline The sixth option in the drop down menu is “Update Criminal and Discipline”. When the provider clicks this option, they will need to click on the radio buttons above the drop down menu to open the “Criminal History” or “Disciplinary” tab to supply the required information.
Upgrade Using Professional License The seventh option in the drop down menu is “Upgrade Using Professional License”. Once the provider choses this option, a second drop down box will display below asking the provider to “Select Certification Level”. The provider will select the level of certification requesting (i.e. Pre-Hospital Registered Nurse). The provider will then click “Submit Update”. The provider will need to provide the region with proof of their professional license and complete the required testing process, if applicable.
Upgrade Via Certification Class The eighth option in the drop down menu is “Upgrade Via Certification Class”. This is where a certified EMS provider enrolling in a certification class through a Pennsylvania Education Institute will submit an application for the class. For example, an EMT enrolling in an AEMT or Paramedic class will use this feature. Instructions on how to complete the provider certification application will be providing by the education institute at the time of registration.
EMS Application Tab The second tab under “Applicant Data” is the “EMS Application” tab.
Application The first section is “Application”. The provider will see the level of certification in which they previously applied. This section will be inactive/not able to be changed by the provider.
EMS Certification Previously Held or Currently Held in PA, Other States, or US Territories The second section is “EMS Certification Previously Held or Currently Held in PA, Other States, or US Territories”. This section will have content if the provider submitted information about other state certifications at the time of the provider certification application. This section will be inactive/not able to be changed by the provider.
CPR Card The third section is “CPR Card”. Providers will be entering their own CPR information in this section. They will no longer send copies of their CPR cards to the region. In this section, the provider will enter the information as displayed on their CPR card. The only courses available in the drop down menu are those approved by the Bureau of EMS. If the provider does not see a name matching the name on their card, then they did not complete a program approved by the Bureau of EMS. They will need to obtain an approved CPR certification. Providers will enter the issue and expiration date of their CPR certification, training center name, and instructor name as printed on their CPR certification card. Providers can choose to upload a copy of their current CPR card into their profile. The provider will then click “Update CPR”. A message will display asking if the provider wishes to update their CPR. The provider must click “Yes” to save the information they entered. The region will be required to audit 10% of providers each certification quarter. If the CPR card is uploaded into the system, the region will be able to conduct the audit seamlessly. If the CPR car is not uploaded into the system, the region will contact the provider to send a copy of their CPR card to the regional office. In the event the information entered by the provider does not match the CPR certification card, the region will forward the information to the Bureau of EMS for further investigation.
Education Tab The third tab under “Applicant Data” is the “Education” tab. This tab will list any prior EMS Education institutes attended. It is likely this section will display “no training found” for EMS providers certified prior to the new EMS Registry system.
Other Tabs under Applicant Data Depending on the individual record, providers may see additional second-tier tabs under “Applicant Data”. If a provider is certified as an EMSVO or an EMS Instructor, those tabs will appear in this tier. If a provider submitted disciplinary action information, the disciplinary action tab will appear in this tier. If the provider submitted a downgrade for certification, the downgrade tab will appear.
Certifications Tab Unless the provider was processed as a certification by endorsement, the second tab in the top tier is “Certifications”. The “Certifications” tab does not have any second-tier tabs. When a provider opens the “Certifications” tab, they will find four sections.
Certification History The first section seen in the “Certifications” tab is “Certification History”. The provider will see the certifications pertaining to them. Information about each certification will be visible.
Print History The second section seen in the “Certifications” tab is “Print History”. In this section, the provider will see the date their certification material was printed by the region. If the provider submitted for reregistration and questions the status of receiving their new wallet card, they can come to this section. If they notice their materials were printed a few days ago, they should allow time for the materials to arrive by mail. However, if they submitted reregistration and see the materials were printed more than two weeks ago, they should verify their address in their record is accurate, and then contact the region.
Certification Class History The third section seen in the “Certifications” tab is “Certification Class History”. In this section, the provider will see the certification classes attended. It is likely current providers will see “no results found”.
Tests The fourth section seen in the “Certifications” tab is “Tests”. In this section, the provider will see their psychomotor exam results for certification. It is likely current providers will see “there were no tests found”.
Con-Ed Tab Unless the provider was processed as a certification by endorsement, the third tab in the top tier is “Con-Ed”. The “Con-Ed” tab does not have any second-tier tabs. When a provider opens the “Con-Ed” tab, they will find various sections.
EMS Practitioner Status Report The first section seen in the “Con-Ed” tab is “EMS Practitioner Status Report”. The provider will be able to generate a PDF displaying their con-ed record. They can choose to see con-ed for their current registration, last registration, or a date range. Once the provider clicks “Print Status Report”, a PDF will open.
Current ConEd The second section seen in the “Con-Ed” tab is “Current ConED”. This will display the provider’s con-ed record. If the provider is certified for multiple years, they can select the year in the drop down menu to view con-ed relevant to the respective year. The provider can select how many records they wish to display in the table before having to go to the next page. When looking at the con-ed record, they will see classes as soon as the roster is finalized by the con-ed sponsor.
If a provider completes a con-ed class from a con-ed sponsor, they will have the option to view their certificate here. They will click on “Print Certificate” to retrieve a PDF version of the certificate.
If the provider received con-ed by endorsement, the class number will display with “999999”. The provider will see “Print Document”. The provider will not have a certificate to view, but they will be able to see the documents sent to the region for review when requesting con-ed by endorsement.
If the provider received con-ed through Train PA, the course title and credit hours will appear. However, the provider will need to log into Train PA for a copy of the completion certificate.
If a provider was marked “incomplete” or “did not attend” by the con-ed sponsor, the course information will display with zero con-ed awarded. The result column will display as “Did not Attend” or “Incomplete”.
When reviewing the con-ed information, providers will need to understand “CPC” means clinical patient care, which is similar to the old medical/trauma verbiage. EMSVO hours are now tracked and required. A provider who does not complete their EMSVO con-ed will not be able to reregister the EMSVO certification. Con-ed classes awarding EMSVO credit will only count toward the EMSVO requirement. The additional hours cannot be applied toward your EMS certification for con-ed credit in the other category.
ConED Summary The third section seen in the “Con-Ed” tab is “ConED Summary”. This displays the primary certification and cleanly displays how many hours of con-ed are required and how many were earned within a registration cycle.
EMSVO Information If the provider is certified as an EMSVO, then the fourth section seen in the “Con-Ed” tab is “EMSVO Information”. This provides a con-ed countdown. It will display the hours required in comparison to the hours earned. If a provider completes more EMSVO con-ed than required, the excess con-ed credits will not apply to other in their primary certification.
Add ConED by Endorsment The last section seen in the “Con-Ed” tab is “Add ConED by Endorsement”. This is an important section for providers. Providers will no longer be able to submit certificates or conference materials to the region to process con-ed by endorsement on behalf of the provider. The provider must come to this section of the registry and submit it to the region through the electronic process. The provider will click “Add Endorsement”. The provider will then need to scroll back down to the bottom of the page. Here they will enter the information being asked: organization name, city, state, CAPCE number (if applicable), and title of course. The provider will enter how many con-ed credits should be awarded in clinical patient care (CPC), EMSVO, and other. The hours requested must match the proof provided by the provider. Next the provider will upload the file(s) to support the endorsement (i.e. certificate of completion, syllabus, conference schedule, etc.) Last, the provider will click “Submit Endorsement”. If the provider scrolls down to the bottom of the page, they will see a table of the endorsement(s) in review. Providers should allow 14 business days for processing. Once the region approves the endorsement, the provider will see it in the con-ed listing above. Providers can submit con-ed from a conference in one bulk upload. However, if they wish to have each individual session listed on their profile, then they will need to submit each session as a separate endorsement. Prehospital Physicians can submit a transcript of their CMEs as one bulk endorsement

Notes Tab The last tab is the “Notes” tab, which will display processing notes created by the region or Bureau of EMS.
Certification by Endorsement Tab If the provider was processed through certification by endorsement, they will see the “Certification by Endorsement” tab between the “Applicant Data” and “Certification” tabs. The information uploaded to the region will be visible here.
EMS Instructors When a provider is a certified EMS instructor, they will have the “Instructor” tab under their provider profile. In the “Instructor” tab, the provider will first see information about their instructor hours. Here the instructor can easily view how many hours they instructed and how many more hours are needed to renew. Next, they will see the information as submitted when they applied for the instructor certification. When they scroll to the bottom of the page, they will see the instructor classes where instructor hours were granted. When the instructor expiration date is within 90-days, the instructor will need to reregister their certification just as they do for their primary EMS certification. To be eligible to reregister the EMS instructor certification, the instructor must teach 60 hours over the three-year registration period. The expiration date of the instructor registration may not be the same as their primary certification. The EMS certification wallet card will list the EMS instructor endorsement on the back of the card and list the EMS instructor expiration date.
Searching for and Enrolling in Con-Ed Classes
Searching for Con-Ed Classes Providers can search for upcoming classes to obtain con-ed. When a provider searches for con-ed classes, they will find classes registered by a con-ed sponsor and approved by the Bureau of EMS for con-ed. When logged into the system, the provider will go to the gray menu bar at the top of the webpage. They will go to “Education” and the click on “Course/Class Search”. A course is a course that has been approved for con-ed by the Department. A class is a course that has now been registered or scheduled to be hosted by a sponsor. Providers can search for courses approved by the Department. However, if they want to find a scheduled con-ed class to attend, they will need to search for a class. The provider will click on the “Class” radio button. The “Class Criteria” section will display. The provider can enter information based on what type of class or where they would like to travel to attend a class. The provider can select the region and county where the class will be held and start dates. Once the search criteria are determined, click “Search”. Now a table will appear with all upcoming classes meeting the search criteria. To learn more about the class, click on the class number hyperlink. When clicking on the link, the class details will appear.
Enrolling in Con-Ed Classes After a provider searches for an upcoming con-ed class, they have the option to enroll in the class if the class is listed as “open”. After the provider selects a class from the search, they will find an “Enroll” button listed in the class details page. By clicking “Enroll” the provider is assigning themselves to attend the class. Their name will automatically display on the con-ed sponsor’s roster. After the class runs, the con-ed sponsor will mark the attendee as complete, incomplete, or did not attend. Once the provider enrolls, the button will change to “Withdraw”. Here the provider can select to opt out of the class. Their name will be removed from the con-ed sponsor’s roster. If the class is registered as an open class but the maximum seat requirement is met/the class is full, the provider will see a button to “Send Email”. The provider should be able to send a direct e-mail to the con-ed sponsor to request permission to attend the class. The e-mail will be sent from a no-reply e-mail, so be sure to provide return contact information to the con-ed sponsor. Providers can also contact the con-ed sponsor directly through the contact information listed on the class details section.
If the class is registered as a closed class, the provider will see a button to “Send Email”. The provider should be able to send a direct e-mail to the con-ed sponsor to request permission to attend the class. The e-mail will be sent from a no-reply e-mail, so be sure to provide return contact information to the con-ed sponsor. Providers can also contact the sponsor through the contact information listed on the class details section.
View Upcoming Enrolled Classes Once providers enroll in classes, they can see their upcoming class schedule. The provider will need to go to “Education” in the gray menu bar, and click on “MyConEd”. The provider’s upcoming classes to take will display in a table. If the provider clicks “Select” by a class listed, they will be directed to the class detail page with information about the class, contact information for the class, and the option to withdraw.
EMS System Organization Every EMS Education Institute and Continuing Education Sponsor will be listed within the new EMS Registry under an EMS System Organization.
EMS System Organization Application This information is for providers with permissions to an EMS System Organization. To access the EMS System Organization, the user will go to the gray menu bar to “Organization” and click on “EMS System Organization”. If the provider does not have an affiliation to an EMS System Organization, they will not see any associations. However, if the provider is affiliated with one or more EMS System Organizations, they will display in a table. In the table where the associated organization displays, click on “Manage”. This will open the application information about the EMS System Organization under the first tab “General Information”.
General Information Tab The section within the “General Information Tab” is “General Information”. The application types will display if the EMS system organization is a “Sponsor” or “Education Institute”. If either box is selected, then additional tabs will appear to manage those specific applications.
Any users assigned as “Administrators” can change the content within the EMS system organization. When changes are made to the general information, physical address, mailing address, or president/CEO contact information to the EMS System Organization information, the user will have to click submit the changes through the “Acknowledgment Tab”
Acknowledgement Tab The second tab is the “Acknowledgement Tab”. After a user makes changes, they need to open the “Acknowledgement” tab. They must click the box to acknowledge the notice. Then they will click on “Submit EMS System Organization Amendment”. The amendment application goes to the region to process within 14 business days.
Adding Users to the EMS System Organization EMS System Organizations can add users without making amendment to their application. In the EMS System Organization, the third tab is the “Users” tab. Here every user associated with the organization will appear along with their role or permission level.
Adding Users To add a user to the EMS system organization, click “Add”. The administrator can then search for the new user by name or login name. After clicking “Search”, the results will display in a table. The administrator will click on “Select”. Next, they will determine the user role and click “Submit”. This user will now be added as a user of the EMS System Organization.
Editing Users To edit the role or permission level of an associated user, the administrator will click on “Edit” by the respective user. They will change the user role and click “Submit”.
Deleting Users To delete an associated user, the administrator will click on “Delete” by the respective user.
Continuing Education Sponsors
Con-Ed Sponsor Application This information is for providers with permissions to Continuing Education Sponsor under an EMS system organization. In order to be in the system as a Continuing Education Sponsor, the continuing education sponsor must be listed under an EMS System Organization. To access the Continuing Education Sponsor, the user must first access the EMS System Organization. The user will go to the gray menu bar to “Organization” and click on “EMS System Organization”. If the provider does not have an affiliation to an EMS System Organization, they will not see any associations. However, if the provider is affiliated with one or more EMS System Organizations, they will display in a table. In the table where the associated organization displays, click on “Manage”. This will open the application information about the EMS System Organization under the first tab “General Information”. The user will open the “ConED Sponsors” tab. A table will display listing every Con-ed Sponsor associated with the EMS System Organization. The user will click on “Manage” next to the respective Con-Ed Sponsor. When the user clicks on “Manage”, the EMS System Organization tabs stay above and a second tier of tabs appear. The second layer of tabs will allow the user to navigate through their Con-ed Sponsor application. The Con-ed Sponsor number, name, and issue/expiration dates will appear above those tabs.
Submitting Con-Ed Sponsor Amendment and Renewal Applications The user will also see an action button to submit applications. If the Con-ed Sponsor is more than 90-days from their expiration, the button will say “Submit Sponsor Amendment”. However, if the Con-ed Sponsor is within 90-days of their expiration, the button will say “Submit Sponsor Renewal”. This is how a Con-ed Sponsor will submit their amendment and renewal applications. The process will no longer involve the paper application.
General (ConED Sponsor) Tab The “General (ConED Sponsor)” tab will display the information that makes up the application for the Continuing Education Sponsor. The first section is “General Information”. If the user clicks on the click “here” hyperlink above thhe sponsor name, the system will populate the general information to match the content in my EMS System Organization’s application. The second section is the “Physical Address”. The third section is the “Mailing address”.
The fourth section is the “Contact Person”. The final section is the “Accreditation Renewal Information”. In the accreditation renewal information, the con-ed sponsor is reminded five classes are required to meet the accreditation requirements. The con-ed sponsor will also see a table of every class ran within their current accreditation cycle. If the con-ed sponsor clicks on the “Class Roster” hyperlink a PDF will open listing those who attended the class.
Acknowledgement (ConED Sponsor) Tab The second tab is the “Acknowledgement (ConED Sponsor) Tab”. After a user makes changes, they need to open the “Acknowledgement” tab. They must click the box to acknowledge the notice. Then they will click on “Submit Sponsor Amendment”. The amendment application goes to the region to process within 14 business days.
Users (ConED Sponsor) Tab The third tab is the “Users (ConED Sponsor) Tab”. This is where the con-ed sponsor will add users and permission levels for management of the con-ed sponsor application and registration of classes and their rosters.
Processing (ConED Sponsor) Tab The fourth tab is the “Processing (ConED Sponsor) Tab”. This is where the con-ed sponsor will see the processing history of the application.
Associations (ConED Sponsor) Tab The fifth tab is the “Associations (ConED Sponsor) Tab”. This is where the con-ed sponsor will see courses and classes associated with the con-ed sponsor.
Notes (Sponsor) Tab The fifth tab is the “Notes (Sponsor) Tab”. This is where the con-ed sponsor will see notes entered by the region during processing of the application.
Adding Users to the Con-Ed Sponsor Continuing Education Sponsors can add users without making an amendment to their application. In the Con-Ed Sponsor, the third tab is the “Users” tab. Here every user associated with the Con-Ed Sponsor will appear along with their role or permission level.
Adding Users To add a user to the Con-Ed Sponosor, click “Add”. A list of users will appear who are listed within the EMS System Organization. The administrator will click on “Select”.
Next, they will determine the user role and click “Submit”. This user will now be added as a user of the Con-Ed Sponsor.
Editing Users To edit the role or permission level of an associated user, the administrator will click on “Edit” by the respective user. They will change the user role and click “Submit”.
Deleting Users To delete an associated user, the administrator will click on “Delete” by the respective user.
Registering a New Course for Continuing Education Before a Continuing Education Sponsor can select a course to register a con-ed class, the course must be approved by the Department for EMS continuing education. Here is how a Con-ed Sponsor can register a new course for continuing education.
1. To submit a new course application, the application must be submitted under a con-ed sponsor by a user with the appropriate permission/role
2. Go to “Education” in the gray menu bar 3. Under “Continuing Education”, click on “Register a New Course Application” 4. First only the “General” tab will appear until a sponsor is selected 5. Select a sponsor from the drop down menu
a. Only sponsors the user is associated will appear 6. The sponsorship information will automatically populate from the con-ed sponsor
application in the system a. Changes can be made to the information if needed
7. Now additional tabs will appear to complete the new course application 8. Open the “Public Contact Information” tab 9. If the user clicks on the hyperlink “Populate from Sponsor Record”, the public contact
information in the respective con-ed sponsor application will automatically appear a. Changes can be made to the information if needed
10. Open the “Course Information & Objectives” tab a. Complete the content requested
i. Name for the new course ii. Brief description
iii. Keywords a provider or sponsor may search when looking for a course iv. Answer yes or no regarding if the course was approved by the Department
before v. Length of course
vi. Total ConED hours requested
vii. Type of Course: ALS, BLS, EMSVO 1. A type of course as ALS does not mean a BLS provider cannot receive con-
ed. The type of course helps providers understand the level of content being taught.
viii. Assign the con-ed to be awarded. This must total the length of class time. 1. Clinical patient care 2. Other 3. EMSVO
ix. References used (optional box) 1. You will be required to enter this information in the next tab
x. Minimum class size xi. Instructor to student ratio
xii. Prerequisites, if applicable xiii. Course format xiv. CAPCE number, if applicable.
11. Open the “Objectives” tab a. To enter your first objective:
i. Select a main category ii. Select a sub category
iii. Document the objective, content, minutes, and teaching strategies iv. Click “Add Course Objective”
b. The saved objective will display in a table c. Continue entering objectives as needed d. Additional information about the course can be uploaded
12. Open the “Course Checklist” tab a. Here the con-ed sponsor can choose to check each box on the left side and enter
the content in the textboxes provided or can upload a document with the content and click the box “I am uploading all materials for checklist”. i. This section provides information on the course outline, evaluation
mechanisms, instructor requirements, material descriptions, successful completion criteria, and references cited
13. Open the “Course Distribution” tab a. Select if the course can be available to all con-ed sponsors or if the con-ed sponsor
wishes to keep it proprietary b. Read and select the acknowledgement box
14. When complete, click the “Submit” box above the tabs a. If the application is complete, a confirmation of submission is provided b. If the application is missing information, a list will appear above the tabs and
required fields will turn pink
Search for Courses Approved for Continuing Education Continuing Education sponsors can view courses submitted under their con-ed sponsor and by other con-ed sponsors.
Searching for Courses under the Con-Ed Sponsor 1. Go to “Education” in the gray menu bar 2. Under “Continuing Education”, click on “View ConED Courses/Classes” 3. Click on the radio button “My Courses” 4. A table of con-ed courses submitted by the user’s con-ed sponsor will appear 5. Clicking on “Manage” will open the course application submitted for approval
Searching for Courses under another Con-Ed Sponsor 1. Go to “Education” in the gray menu bar 2. Click on “Course/Class Search” 3. Click on the radio button “Course” 4. Course Criteria will display for the search 5. Enter search criteria as desired 6. Click “Search” 7. To learn more about the course, click on the course number hyperlink
Registering a Continuing Education Class Once the Continuing Education Sponsor has a course approved for continuing education by the Department or they find a course available in the system, they can register the con-ed class to provide education and continuing education credits to EMS providers. Here is how a Con-ed Sponsor can register a continuing education class.
1. To submit a con-ed class registration, the application must be submitted under a con-ed sponsor by a user with the appropriate permission/role
2. Go to “Education” in the gray menu bar 3. Under “Continuing Education”, click on “Register a ConED Class” 4. First only the “Sponsor Information” tab will appear until a sponsor is selected 5. The associated sponsor drop down menu will only list sponsors the user is
associated. 6. Select the sponsor
a. The con-ed sponsor number will automatically populate 7. Next select the course
a. Courses in the drop down menu are courses created and approved for con-ed by the respective sponsor
b. If the con-ed sponsor wants to use a course they did not create, they will click on “Search Courses”
i. When searching for a course, it is helpful to first locate the course by searching through “Education” and “Course/Class Search”. The search will allow the user to review the information about the course.
ii. To search for a course within the class registration application, you can search by course number, name, or keywords. After clicking “Search”, a table of courses appears. Click “Select” to choose a course.
c. Once the sponsor and course is selected, additional tabs will appear d. Open the “Class Location” tab
i. I f the user clicks on the hyperlink “Populate from Sponsor Record”, the class location information in our con-ed sponsor application will automatically appear
1. Changes can be made to the information if needed e. Open the “Public Information” tab
i. If the user clicks on the hyperlink “Populate from Sponsor Record”, the public information in our con-ed sponsor application will automatically appear
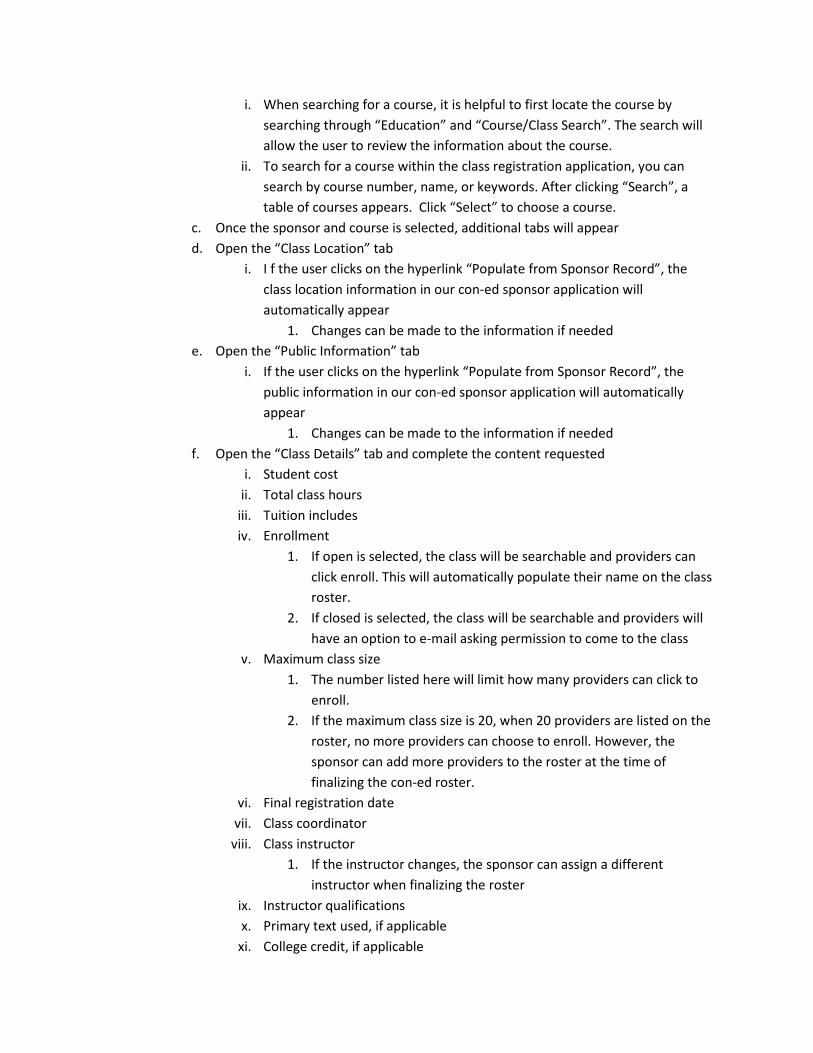
1. Changes can be made to the information if needed f. Open the “Class Details” tab and complete the content requested
i. Student cost ii. Total class hours
iii. Tuition includes iv. Enrollment
1. If open is selected, the class will be searchable and providers can click enroll. This will automatically populate their name on the class roster.
2. If closed is selected, the class will be searchable and providers will have an option to e-mail asking permission to come to the class
v. Maximum class size 1. The number listed here will limit how many providers can click to
enroll. 2. If the maximum class size is 20, when 20 providers are listed on the
roster, no more providers can choose to enroll. However, the sponsor can add more providers to the roster at the time of finalizing the con-ed roster.
vi. Final registration date vii. Class coordinator
viii. Class instructor 1. If the instructor changes, the sponsor can assign a different
instructor when finalizing the roster ix. Instructor qualifications x. Primary text used, if applicable
xi. College credit, if applicable
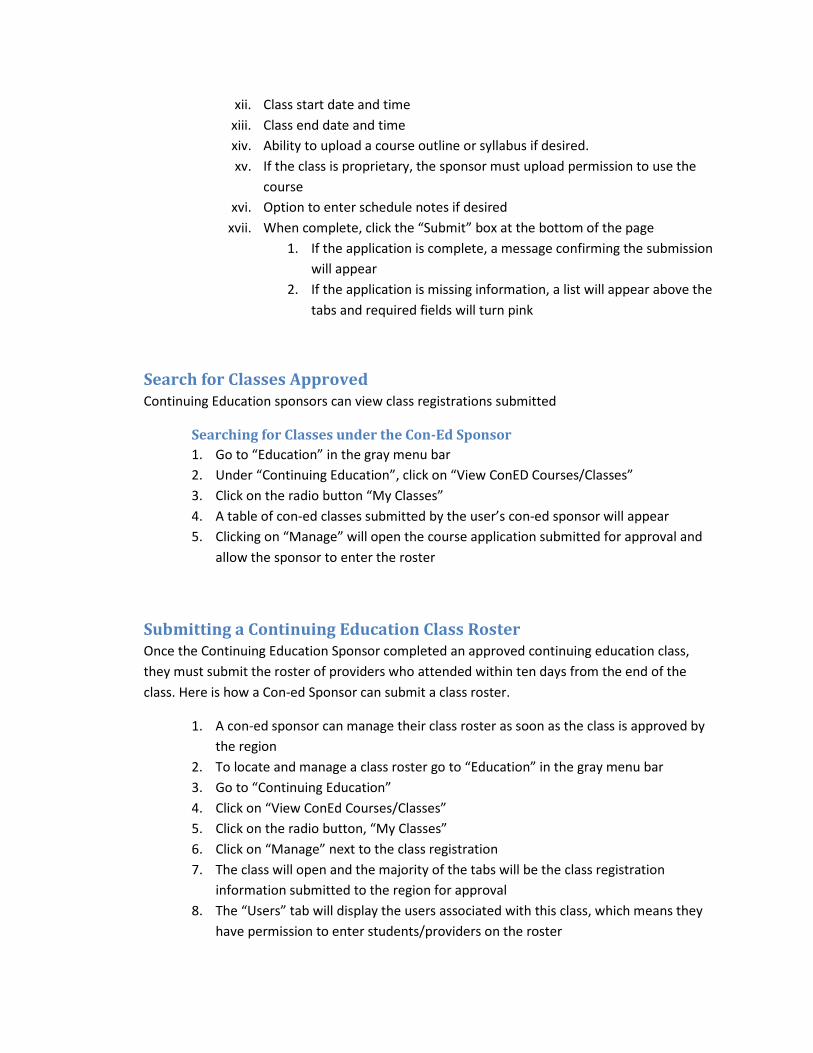
xii. Class start date and time xiii. Class end date and time xiv. Ability to upload a course outline or syllabus if desired. xv. If the class is proprietary, the sponsor must upload permission to use the
course xvi. Option to enter schedule notes if desired
xvii. When complete, click the “Submit” box at the bottom of the page 1. If the application is complete, a message confirming the submission
will appear 2. If the application is missing information, a list will appear above the
tabs and required fields will turn pink
Search for Classes Approved Continuing Education sponsors can view class registrations submitted
Searching for Classes under the Con-Ed Sponsor 1. Go to “Education” in the gray menu bar 2. Under “Continuing Education”, click on “View ConED Courses/Classes” 3. Click on the radio button “My Classes” 4. A table of con-ed classes submitted by the user’s con-ed sponsor will appear 5. Clicking on “Manage” will open the course application submitted for approval and
allow the sponsor to enter the roster
Submitting a Continuing Education Class Roster Once the Continuing Education Sponsor completed an approved continuing education class, they must submit the roster of providers who attended within ten days from the end of the class. Here is how a Con-ed Sponsor can submit a class roster.
1. A con-ed sponsor can manage their class roster as soon as the class is approved by the region
2. To locate and manage a class roster go to “Education” in the gray menu bar 3. Go to “Continuing Education” 4. Click on “View ConEd Courses/Classes” 5. Click on the radio button, “My Classes” 6. Click on “Manage” next to the class registration 7. The class will open and the majority of the tabs will be the class registration
information submitted to the region for approval 8. The “Users” tab will display the users associated with this class, which means they
have permission to enter students/providers on the roster
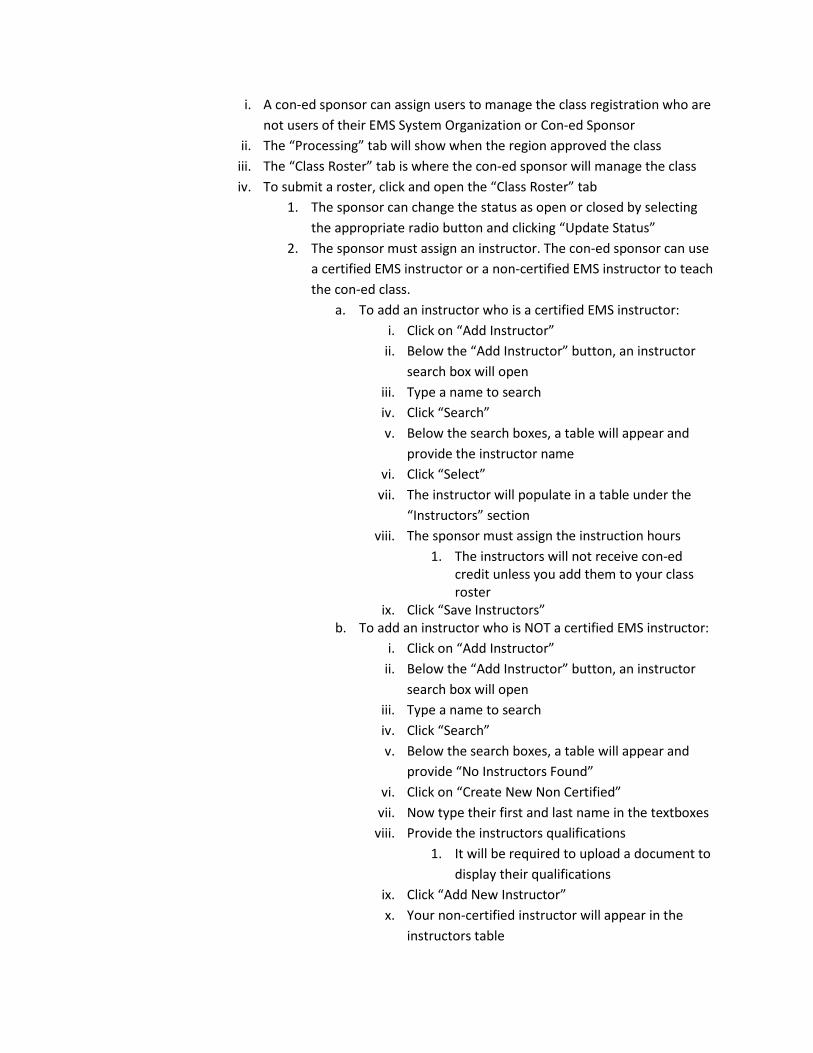
i. A con-ed sponsor can assign users to manage the class registration who are not users of their EMS System Organization or Con-ed Sponsor
ii. The “Processing” tab will show when the region approved the class iii. The “Class Roster” tab is where the con-ed sponsor will manage the class iv. To submit a roster, click and open the “Class Roster” tab
1. The sponsor can change the status as open or closed by selecting the appropriate radio button and clicking “Update Status”
2. The sponsor must assign an instructor. The con-ed sponsor can use a certified EMS instructor or a non-certified EMS instructor to teach the con-ed class.
a. To add an instructor who is a certified EMS instructor: i. Click on “Add Instructor”
ii. Below the “Add Instructor” button, an instructor search box will open
iii. Type a name to search iv. Click “Search” v. Below the search boxes, a table will appear and
provide the instructor name vi. Click “Select”
vii. The instructor will populate in a table under the “Instructors” section
viii. The sponsor must assign the instruction hours 1. The instructors will not receive con-ed
credit unless you add them to your class roster
ix. Click “Save Instructors” b. To add an instructor who is NOT a certified EMS instructor:
i. Click on “Add Instructor” ii. Below the “Add Instructor” button, an instructor
search box will open iii. Type a name to search iv. Click “Search” v. Below the search boxes, a table will appear and
provide “No Instructors Found” vi. Click on “Create New Non Certified”
vii. Now type their first and last name in the textboxes viii. Provide the instructors qualifications
1. It will be required to upload a document to display their qualifications
ix. Click “Add New Instructor” x. Your non-certified instructor will appear in the
instructors table
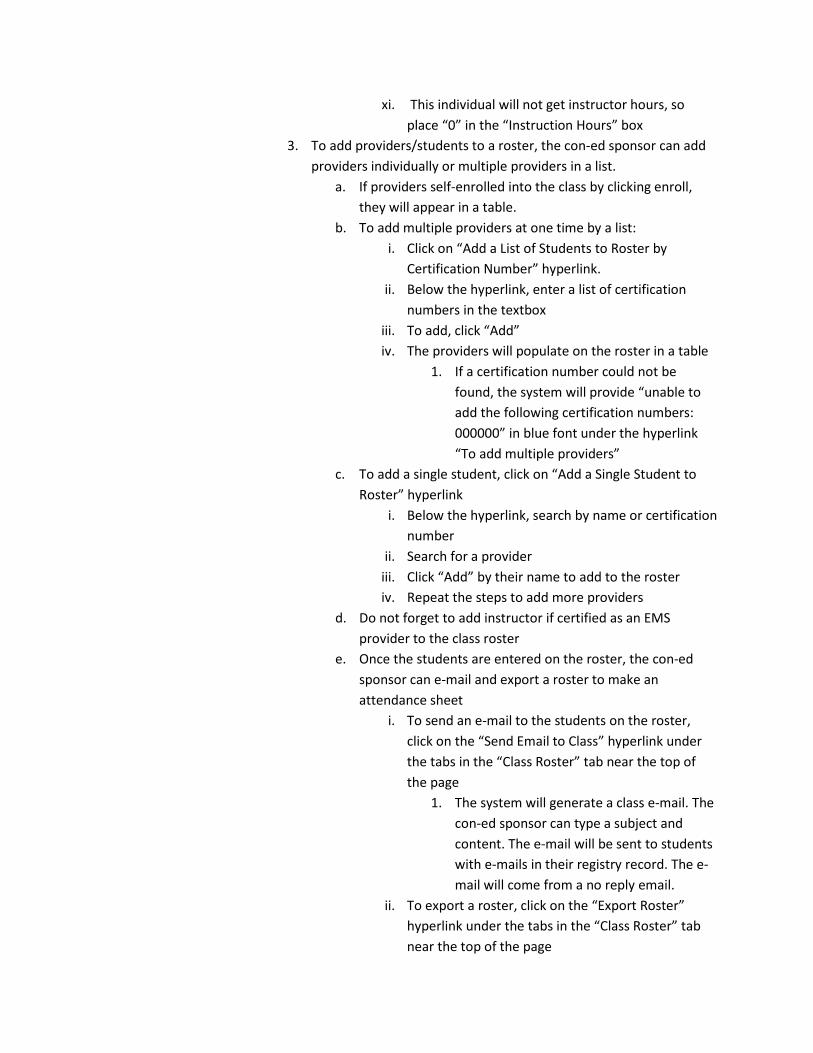
xi. This individual will not get instructor hours, so place “0” in the “Instruction Hours” box
3. To add providers/students to a roster, the con-ed sponsor can add providers individually or multiple providers in a list.
a. If providers self-enrolled into the class by clicking enroll, they will appear in a table.
b. To add multiple providers at one time by a list: i. Click on “Add a List of Students to Roster by
Certification Number” hyperlink. ii. Below the hyperlink, enter a list of certification
numbers in the textbox iii. To add, click “Add” iv. The providers will populate on the roster in a table
1. If a certification number could not be found, the system will provide “unable to add the following certification numbers: 000000” in blue font under the hyperlink “To add multiple providers”
c. To add a single student, click on “Add a Single Student to Roster” hyperlink
i. Below the hyperlink, search by name or certification number
ii. Search for a provider iii. Click “Add” by their name to add to the roster iv. Repeat the steps to add more providers
d. Do not forget to add instructor if certified as an EMS provider to the class roster
e. Once the students are entered on the roster, the con-ed sponsor can e-mail and export a roster to make an attendance sheet
i. To send an e-mail to the students on the roster, click on the “Send Email to Class” hyperlink under the tabs in the “Class Roster” tab near the top of the page
1. The system will generate a class e-mail. The con-ed sponsor can type a subject and content. The e-mail will be sent to students with e-mails in their registry record. The e-mail will come from a no reply email.
ii. To export a roster, click on the “Export Roster” hyperlink under the tabs in the “Class Roster” tab near the top of the page
1. The system will generate a spreadsheet with the students listed
iii. When in the class roster section, the con-ed sponsor can click on a student’s name as a hyperlink. A box will open with their contact information as populated in the provider record.
4. Manage Class Roster a. After the class concludes and the con-ed sponsor is ready to
process the roster and submit for con-ed, they will need to mark the class completion status for each student in the class roster section.
i. In the “Class Roster” section, click on the “Mark all as Complete” hyperlink. Each student will change from “Scheduled” to “Complete” under “Class Completion”
ii. The sponsor can choose from “did not attend” and “incomplete”
1. These two options will populate on the provider’s profile without con-ed credit hours awarded
iii. The sponsor can also select “Remove” to have the student removed from the roster
1. This option will not populate the class information on the provider’s con-ed record.
b. Again, do not forget to add the instructor(s) if certified as an EMS provider to the class roster
c. Once the class roster information is complete, click “Finalize”.
i. The con-ed sponsor will receive a confirmation asking are they sure they want to finalize the roster
1. Once a roster is finalized, it cannot be reopened. If a con-ed sponsor misses a provider, the provider cannot be added later
a. If a con-ed sponsor forgot to add a provider to the roster, they will need to generate a certificate or letter on letterhead to provide the provider proof of completion. The provider will need to submit the

documentation as a con-ed by endorsement
2. As soon as the con-ed sponsor finalizes a con-ed class. Each participant will receive an e-mail saying they completed the course and to log into the EMS Registry to view their certificate. The con-ed will populate on the provider record and the certificate will be available in their record as soon as the roster is finalized.
Education Institutes
Education Institutes Application This information is for providers with permissions to Education Institutes under an EMS system organization. In order to be in the system as a Education Institute, the Education Institute must be listed under an EMS System Organization. To access the Education Institute, the user must first access the EMS System Organization. The user will go to the gray menu bar to “Organization” and click on “EMS System Organization”. If the provider does not have an affiliation to an EMS System Organization, they will not see any associations. However, if the provider is affiliated with one or more EMS System Organizations, they will display in a table. In the table where the associated organization displays, click on “Manage”. This will open the application information about the EMS System Organization under the first tab “General Information”. The user will open the “Education Institute” tab. A table will display listing every Education Institute associated with the EMS System Organization. The user will click on “Manage” next to the respective Education Institute. When the user clicks on “Manage”, the EMS System Organization tabs stay above and a second tier of tabs appear. The second layer of tabs will allow the user to navigate through their Education Institute application. The Education Institute accreditation number, name, and issue/expiration dates will appear above those tabs.
Submitting Education Institute Amendment and Renewal Applications The user will also see an action button to submit applications. If the Education Institute is more than 90-days from their expiration, the button will say “Submit Ed. Inst. Amendment”. However, if the Education Institute is within 90-days of their expiration, the button will say “Submit Ed. Inst. Renewal”. This is how an Education Institute will submit their amendment and renewal applications. The process will no longer involve the paper application.
General Information (Education Institute) Tab The “General Information (Education Institute)” tab will display the information that makes up the application for the Education Institute. The first section is “General Information”. If the user clicks on the click “here” hyperlink above the sponsor name, the system will populate the general information to match the content in my EMS System Organization’s application. The second section is the “Contact Person”. The third section is the “Accrediation”.
The fourth section is the “Contact Person”.
Personnel (Education Institute) Tab The “Personnel (Education Institute)” tab will display additional information that makes up the application for the Education Institute. The first section is “Administrative/Program Director”. The second section is “Medical Director”. The third section is “Clinical/Course/Coordinator”. The fourth section is “Faculty”.
Facilities (Education Institute) Tab The “Facilities (Education Institute)” tab will display additional information that makes up the application for the Education Institute. The first section is “Educational Facilities”. The second section is “Clinical Facilities”. The third section is “Field Affiliations”. The fourth section is “Equipment”.
Acknowledgement (Education Institute) Tab The “Acknowledgement (Education Institute) Tab” must be completed after a user makes changes. They must click the box to acknowledge the notice. Then they will click on “Submit Ed. Inst. Amendment”. The amendment application goes to the region to process within 14 business days.
Users (Education Institute) Tab The “Users (Education Institute) Tab” is where the Education Institute will add users and permission levels for management of the Education Institute application and registration of classes and their rosters.
Processing (Education Institute) Tab The “Processing (Education Institute) Tab” shows the processing history of the application.
Associations (Education Institute) Tab The “Associations (Education Institute) Tab” shows the courses and classes associated with the con-ed sponsor.
Notes (Education Institute) Tab The “Notes (Education Institute) Tab” shows notes entered by the region during processing of the application.
Adding Users to the Education Institute Education Institutes can add users without making an amendment to their application. In the Education Institute, the “Users” tab is where every user associated with the Education Institute will appear along with their role or permission level.
Adding Users To add a user to the Education Institute, click “Add”. A list of users will appear who are listed within the EMS System Organization. The administrator will click on “Select”. Next, they will determine the user role and click “Submit”. This user will now be added as a user of the Education Institute.
Editing Users To edit the role or permission level of an associated user, the administrator will click on “Edit” by the respective user. They will change the user role and click “Submit”.
Deleting Users To delete an associated user, the administrator will click on “Delete” by the respective user.
Registering a Certification Class Here is how an Education Institute can register a certification class.
8. To submit a certification class registration, the application must be submitted under an Education Institute by a user with the appropriate permission/role
9. Go to “Education” in the gray menu bar 10. Under “Certification Class”, click on “Register Certification Class” 11. First only the “Course/Institute Information” tab will appear until an Education
Institute is selected 12. The associated Education Institute drop down menu will only list Education Institute
the user is associated. 13. Select the Education Institute
a. The Education Institute accreditation number will automatically populate 14. Next select the level of certification for the course a. Once the Education Institute and course areselected, additional tabs will appear
b. Open the “Class Location” tab i. I f the user clicks on the hyperlink “Populate from Sponsor Record”, the
class location information in the Education Institute application will automatically appear
1. Changes can be made to the information if needed c. Open the “Public Information” tab
i. If the user clicks on the hyperlink “Populate from Sponsor Record”, the public information in the Education Institute application will automatically appear
1. Changes can be made to the information if needed d. Open the “Class Details” tab and complete the content requested
i. Student cost ii. Total class hours
iii. Tuition includes iv. Enrollment
1. If open is selected, the class will be searchable and providers can click enroll. This will automatically populate their name on the class roster.
2. If closed is selected, the class will be searchable and providers will have an option to e-mail asking permission to come to the class
v. Maximum class size 1. The number listed here will limit how many providers can click to
enroll. 2. If the maximum class size is 20, when 20 providers are listed on the
roster, no more providers can choose to enroll. However, the sponsor can add more providers to the roster at the time of finalizing the con-ed roster.
vi. Final registration date vii. Class coordinator
viii. Class instructor ix. Instructor qualifications x. Primary text used, if applicable
xi. College credit, if applicable xii. Class start date and time
xiii. Class end date and time xiv. Ability to upload a course outline or syllabus if desired. xv. Option to enter schedule notes
1. Enter the days of the week the class is held xvi. When complete, click the “Submit” box at the bottom of the page
1. If the application is complete, a message confirming the submission will appear
2. If the application is missing information, a list will appear above the tabs and required fields will turn pink
Search for Classes Approved Education Institute can view class registrations submitted
Searching for Classes under the Education Institute 1. Go to “Education” in the gray menu bar 2. Under “Certification Classes”, click on “Show Certification Classes” 3. Click on the radio button “My Classes” 4. A table of con-ed classes submitted by the user’s Education Institute will appear 5. Clicking on “Manage” will open the class application submitted for approval and
allow the Education Institute to enter the roster
Submitting a Certification Class Roster Once the Education Institute completed an approved certification class, they must submit the roster of candidates who are eligible to test for certification. Here is how an Education Institute can submit a class roster.
1. An Education Institute can manage their class roster as soon as the class is approved by the region
2. To locate and manage a class roster go to “Education” in the gray menu bar 3. Go to “Certification Classes” 4. Click on “Show Certification Classes” 5. Click on the radio button, “My Classes” 6. Click on “Manage” next to the class registration 7. The class will open and the majority of the tabs will be the class registration
information submitted to the region for approval 8. The “Users” tab will display the users associated with this class, which means they
have permission to enter students/providers on the roster a. An Education Institute can assign users to manage the class registration who
are not users of their EMS System Organization or Education Institute b. The “Processing” tab will show when the region approved the class c. The “Class Roster” tab is where the Education Institute will manage the class d. To submit a roster, click and open the “Class Roster” tab
i. The Education Institute can change the status as open or closed by selecting the appropriate radio button and clicking “Update Status”
ii. The Education Institute must assign an instructor. 1. To add an instructor who is a certified EMS instructor:
a. Click on “Add Instructor” b. Below the “Add Instructor” button, an instructor search box
will open c. Type a name to search d. Click “Search” e. Below the search boxes, a table will appear and provide the
instructor name f. Click “Select” g. The instructor will populate in a table under the “Instructors”
section iii. To add candidates/students to a roster, the Education Institute can add
providers individually 1. If students self-enrolled into the class by clicking enroll, they will
appear in a table. 2. To add a single student, click on “Add a Single Student to Roster”
hyperlink a. Below the hyperlink, search by name b. Search for a student c. Click “Add” by their name to add to the roster d. Repeat the steps to add more students
iv. Once the students are entered on the roster, the Education Institute can e-mail and export a roster to make an attendance sheet 1. To send an e-mail to the students on the roster, click on the “Send
Email to Class” hyperlink under the tabs in the “Class Roster” tab near the top of the page
2. The system will generate a class e-mail. The con Education Institute can type a subject and content. The e-mail will be sent to students with e-mails in their registry record. The e-mail will come from a no reply email.
3. To export a roster, click on the “Export Roster” hyperlink under the tabs in the “Class Roster” tab near the top of the page
4. The system will generate a spreadsheet with the students listed 5. When in the class roster section, the Education Institute can click on a
student’s name as a hyperlink. A box will open with their contact information as populated in the provider record.
9. Manage Class Roster a. After the class concludes and the Education Institute is ready to process the
roster to mark the students eligible for certification, they will need to mark the class completion status for each student in the class roster section. i. In the “Class Roster” section, click on the “Mark all as Complete” hyperlink.
Each student will change from “Scheduled” to “Complete” under “Class Completion”

ii. The Education Institute can choose other options to mark as incomplete
New Provider/User Applications
Certification by Endorsement This information is for providers certified in another state or through National Registry EMS and requesting PA EMS certification. Before beginning the electronic application, be sure to have electronic copies ready to attach. Candidates will not be able to save the progress of their applications for completion at a later date. Copies of the following documents will be needed:
1. Copy of government issued photo identified 2. Copy of current, DOH approved CPR card 3. Copy of current EMS certification from other states/NREMT 4. Criminal History Background Check from the State of EMS Certification 5. Criminal History Background Check from the State of Residence 6. Completed Affiliation Agreement with an Pennsylvania Employer or Organization
The EMS verification form must be completed by the state of current EMS certification. The provider must send the verification form to their state EMS office. The state EMS office will send the completed form to the Pennsylvania Department of Health Bureau of EMS directly. The provider will NOT be uploading this form into their application. To complete the application, follow the instructions below:
1. Go to https://ems.health.state.pa.us/emsportal/ 2. Click “New Provider Application” (left side of the webpage) 3. Select the level of certification applying for in Pennsylvania 4. Read the functional position description and click the box acknowledging it was read
and understood 5. Scroll to the bottom of the page and click on the “Continue EMS Application” button 6. Under the “Applicant Data”, go to “General Information” tab
a. Enter applicant data in the “General Information” tab b. Under “Criminal History/Disciplinary Actions”, answer “yes” or “no” as
appropriate i. If answering “Yes” an additional tab will appear to complete additional
information c. Under the “Additional Information” section, click “Yes” by “Do you want to
apply for Certification by Endorsement?” 7. The “Certification by Endorsement” tab will appear in the top tier of tabs 8. Navigate to the “EMS Application” tab
a. Enter CPR certification information as listed on the current CPR card and upload a copy of the card
9. Navigate to the “Certification by Endorsement” tab a. Upload the following documents in the first section, “Certification by
Endorsement Documentation”: i. Copy of government issued photo identified
ii. Copy of current EMS certification from other states/NREMT iii. Completed Affiliation Agreement with an Pennsylvania Employer or
Organization

b. Under “Certification by Endorsement” section, enter certification information from where current state or NREMT certification is held
c. Under “State Certified Criminal History” upload the following documents: i. Criminal History Background Check from the State of EMS Certification
ii. Criminal History Background Check from the State of Residence 10. Navigate to the “Applicant Data” tab and go to the “Release and Consent” tab
a. Read the section and check the box b. Click “Submit”
11. Once the application is submitted, it will go to the region for review and processing. Once the state verification form is received by the Pennsylvania Bureau of EMS, the region will process the application within 14 business days.
New Student/Provider Certification Application This information is for students/candidates enrolling in a new EMS certification class through a Pennsylvania accreditation education institute. Before beginning the electronic application, be sure to have electronic copies ready to attach. Candidates will not be able to save the progress of their applications for completion at a later date. Copies of the following documents will be needed:
1. If under 18 years of age – parental consent form 2. If under 18 years of age – assumption of risk form
To complete the application, follow the instructions below:
1. Go to https://ems.health.state.pa.us/emsportal/ 2. Click “New Provider Application” (left side of the webpage) 3. Select the level of certification applying for in Pennsylvania based on the class
enrollment through a Pennsylvania education institute 4. Read the functional position description and click the box acknowledging it was read
and understood 5. Scroll to the bottom of the page and click on the “Continue EMS Application” button 6. Under the “Applicant Data”, go to “General Information” tab
a. Enter applicant data in the “General Information” tab b. Under “Criminal History/Disciplinary Actions”, answer “yes” or “no” as
appropriate ii. If answering “Yes”, an additional tab will appear to complete additional
information c. Under the “Additional Information” section:
iii. Click “No” by “Do you want to apply for Certification by Endorsement?” iv. Click “Yes” or “No” regarding the need for accommodations during the
certification exam process 1. If answering “Yes”, an additional tab “Accommodations” will
appear and need to be completed 7. Navigate to the “EMS Application” tab
a. In most cases, new students/candidates will leave this section blank i. If EMS certification from Pennsylvania or another state is held or
currently held, enter the information requested.
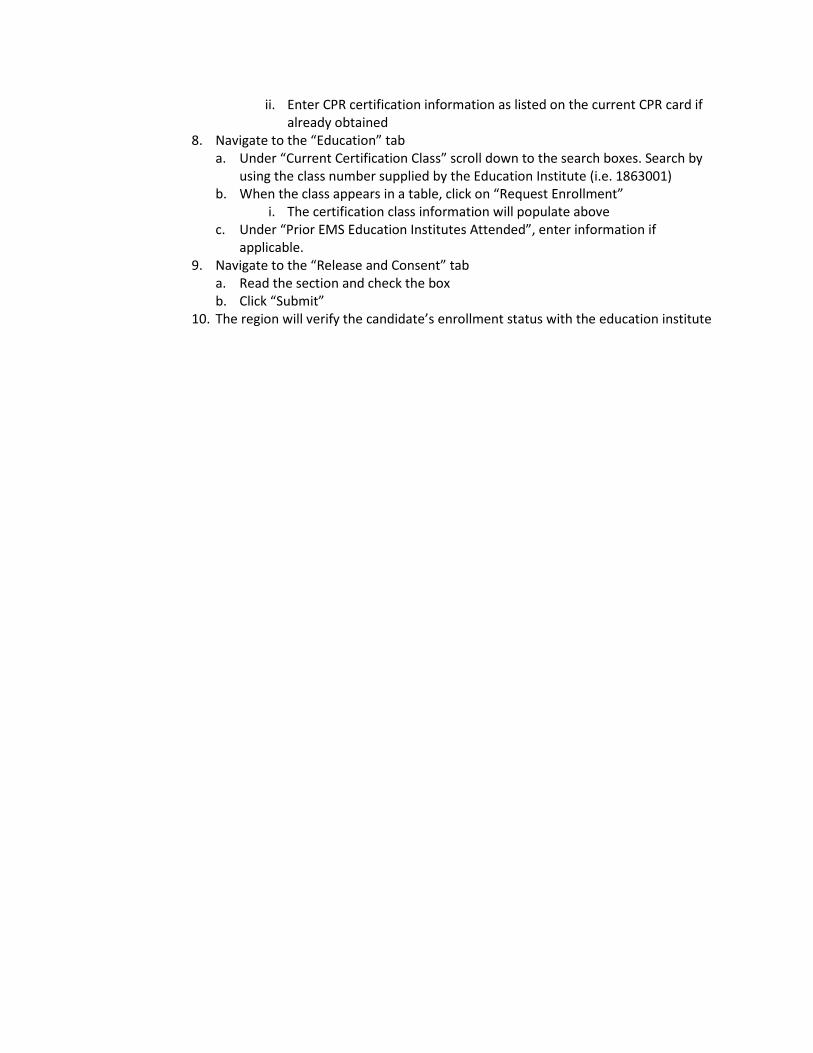
ii. Enter CPR certification information as listed on the current CPR card if already obtained
8. Navigate to the “Education” tab a. Under “Current Certification Class” scroll down to the search boxes. Search by
using the class number supplied by the Education Institute (i.e. 1863001) b. When the class appears in a table, click on “Request Enrollment”
i. The certification class information will populate above c. Under “Prior EMS Education Institutes Attended”, enter information if
applicable. 9. Navigate to the “Release and Consent” tab
a. Read the section and check the box b. Click “Submit”
10. The region will verify the candidate’s enrollment status with the education institute