Embed Size (px)
Citation preview
facetjewelry.comFCT-
MW
-091
816_
04
©2012 Kalmbach Publishing Co. This material may not be reproduced in any form without permission from the publisher.
PROJECTBEGINNER | METAL
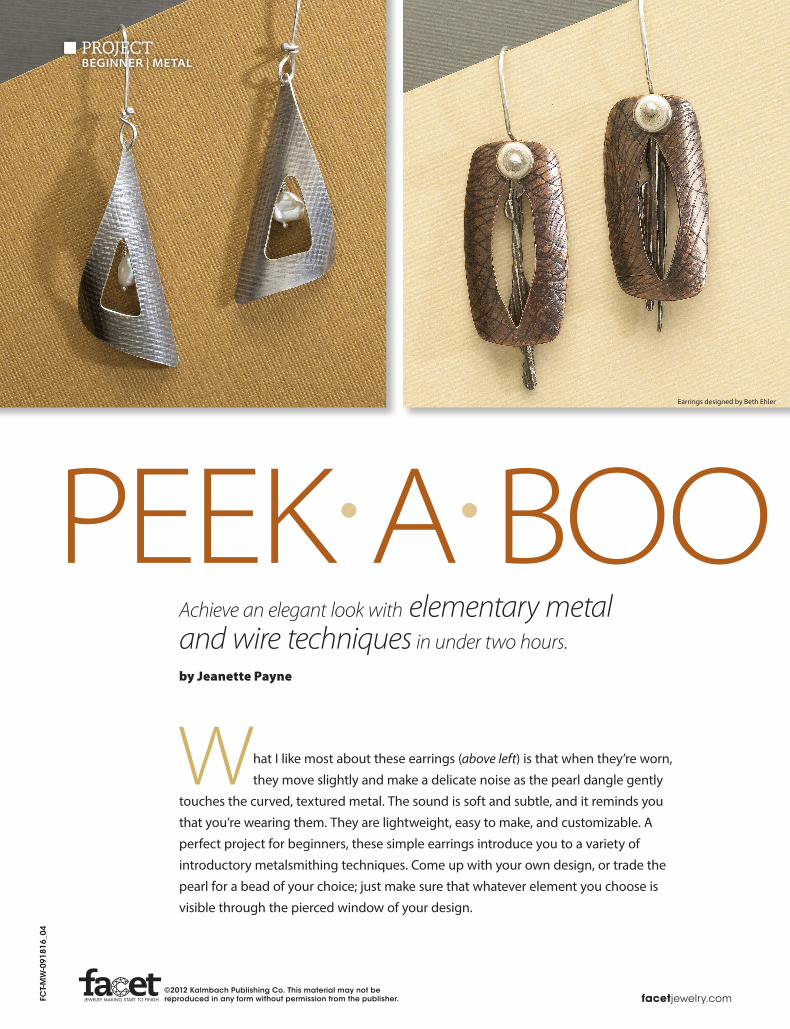
What I like most about these earrings (above left) is that when they’re worn,
they move slightly and make a delicate noise as the pearl dangle gently
touches the curved, textured metal. The sound is soft and subtle, and it reminds you
that you’re wearing them. They are lightweight, easy to make, and customizable. A
perfect project for beginners, these simple earrings introduce you to a variety of
introductory metalsmithing techniques. Come up with your own design, or trade the
pearl for a bead of your choice; just make sure that whatever element you choose is
visible through the pierced window of your design.
PEEK A BOO PEARL EARRINGSAchieve an elegant look with elementary metal and wire techniques in under two hours.
by Jeanette Payne
Earrings designed by Beth Ehler

PEEK A BOO PEARL EARRINGSNOTE: Before you make these earrings in sterling silver, I recom-mend that you make them in a base metal to become familiar with the process.
Roll-print the metal. Fold a 1½ x 3½-in. (38 x 89 mm) piece of grosgrain ribbon in half, and place a 19/16 x 13/16-in. (40 x 30 mm) piece of 24-gauge (0.5 mm) sterling silver sheet in the middle. Place the ribbon and silver between the rollers of a rolling mill, and tighten the rollers until you can barely push the metal through by hand.
NOTE: To protect the rollers of your rolling mill, place a scrap sheet of copper or brass on each side of the ribbon when roll-printing your metal. Even though I don’t use scrap metal when using ribbon to texture my metal, I recommend you do if you want to keep your rollers in pristine condition.
Remove the ribbon and silver from the rollers, and tighten the rollers one-quarter turn. Roll the ribbon and silver through the rolling mill [1].
Rotate the silver in the ribbon slightly, and roll it through the rolling mill again [2]. Anneal the silver, let it cool, and place
1 2
Earrings designed by Hazel Wheaton
it in pickle until it’s clean. Rinse the silver in water, and dry it thoroughly.
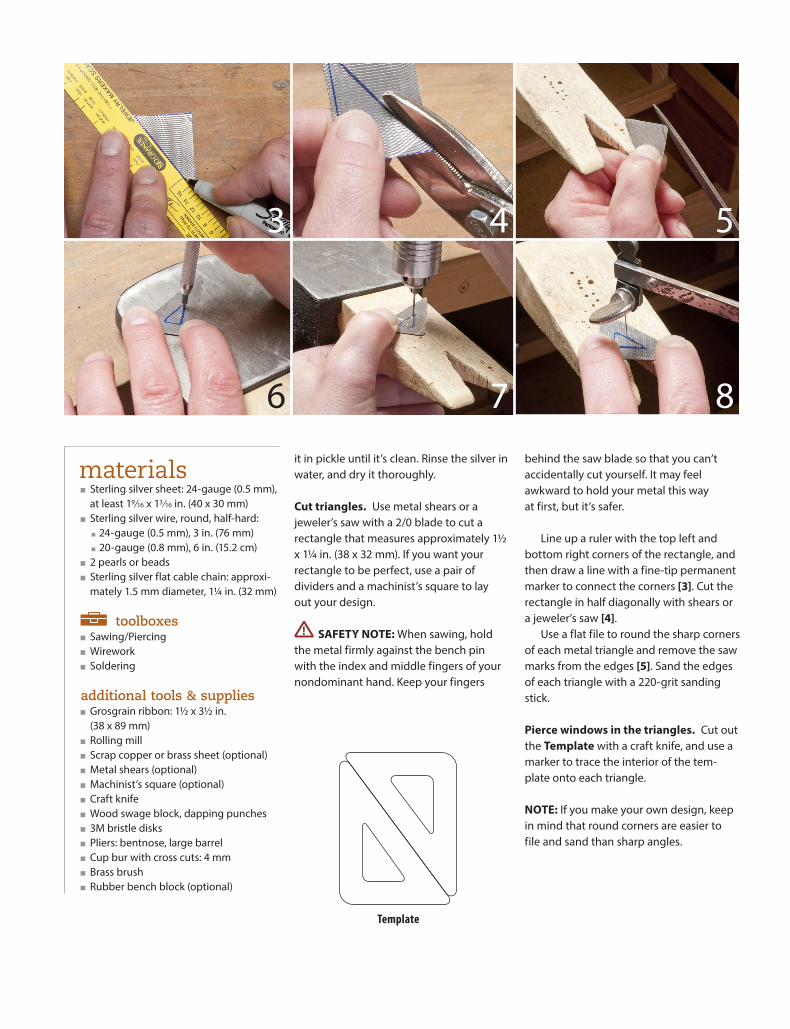
Cut triangles. Use metal shears or a jeweler’s saw with a 2/0 blade to cut a rectangle that measures approximately 1½ x 11/4 in. (38 x 32 mm). If you want your rectangle to be perfect, use a pair of dividers and a machinist’s square to lay out your design.
SAFETY NOTE: When sawing, hold the metal firmly against the bench pin with the index and middle fingers of your nondominant hand. Keep your fingers
behind the saw blade so that you can’t accidentally cut yourself. It may feel awkward to hold your metal this way at first, but it’s safer.
Line up a ruler with the top left and bottom right corners of the rectangle, and then draw a line with a fine-tip permanent marker to connect the corners [3]. Cut the rectangle in half diagonally with shears or a jeweler’s saw [4].
Use a flat file to round the sharp corners of each metal triangle and remove the saw marks from the edges [5]. Sand the edges of each triangle with a 220-grit sanding stick.
Pierce windows in the triangles. Cut out the Template with a craft knife, and use a marker to trace the interior of the tem- plate onto each triangle.
NOTE: If you make your own design, keep in mind that round corners are easier to file and sand than sharp angles.
materials ■ Sterling silver sheet: 24-gauge (0.5 mm), at least 19 /16 x 13 /16 in. (40 x 30 mm)
■ Sterling silver wire, round, half-hard: ■ 24-gauge (0.5 mm), 3 in. (76 mm) ■ 20-gauge (0.8 mm), 6 in. (15.2 cm)
■ 2 pearls or beads ■ Sterling silver flat cable chain: approxi-mately 1.5 mm diameter, 11/4 in. (32 mm)
toolboxes ■ Sawing/Piercing ■ Wirework ■ Soldering
additional tools & supplies ■ Grosgrain ribbon: 1½ x 3½ in. (38 x 89 mm)
■ Rolling mill ■ Scrap copper or brass sheet (optional) ■ Metal shears (optional) ■ Machinist’s square (optional) ■ Craft knife ■ Wood swage block, dapping punches ■ 3M bristle disks ■ Pliers: bentnose, large barrel ■ Cup bur with cross cuts: 4 mm ■ Brass brush ■ Rubber bench block (optional)
3 4 5
6 7 8
Template
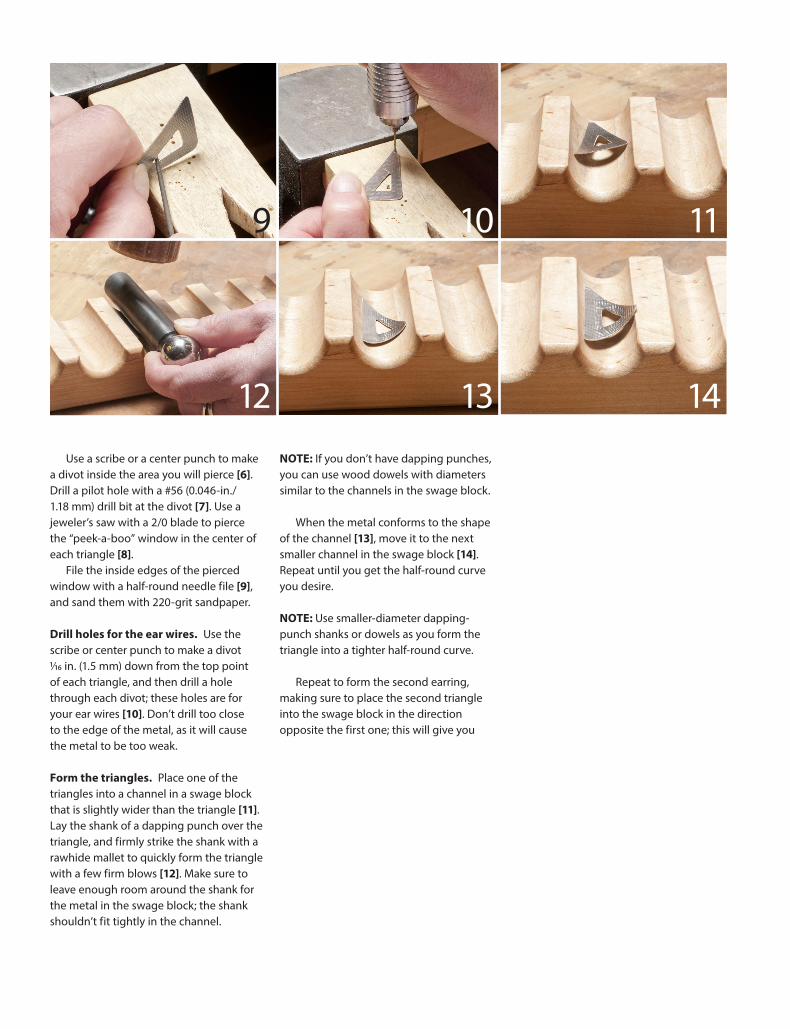
Use a scribe or a center punch to make a divot inside the area you will pierce [6]. Drill a pilot hole with a #56 (0.046-in./ 1.18 mm) drill bit at the divot [7]. Use a jeweler’s saw with a 2/0 blade to pierce the “peek-a-boo” window in the center of each triangle [8].
File the inside edges of the pierced window with a half-round needle file [9], and sand them with 220-grit sandpaper.
Drill holes for the ear wires. Use the scribe or center punch to make a divot 1/16 in. (1.5 mm) down from the top point of each triangle, and then drill a hole through each divot; these holes are for your ear wires [10]. Don’t drill too close to the edge of the metal, as it will cause the metal to be too weak.
Form the triangles. Place one of the triangles into a channel in a swage block that is slightly wider than the triangle [11]. Lay the shank of a dapping punch over the triangle, and firmly strike the shank with a rawhide mallet to quickly form the triangle with a few firm blows [12]. Make sure to leave enough room around the shank for the metal in the swage block; the shank shouldn’t fit tightly in the channel.
NOTE: If you don’t have dapping punches, you can use wood dowels with diameters similar to the channels in the swage block.
When the metal conforms to the shape of the channel [13], move it to the next smaller channel in the swage block [14]. Repeat until you get the half-round curve you desire.
NOTE: Use smaller-diameter dapping-punch shanks or dowels as you form the triangle into a tighter half-round curve.
Repeat to form the second earring, making sure to place the second triangle into the swage block in the direction opposite the first one; this will give you
9 10 11
12 13 14
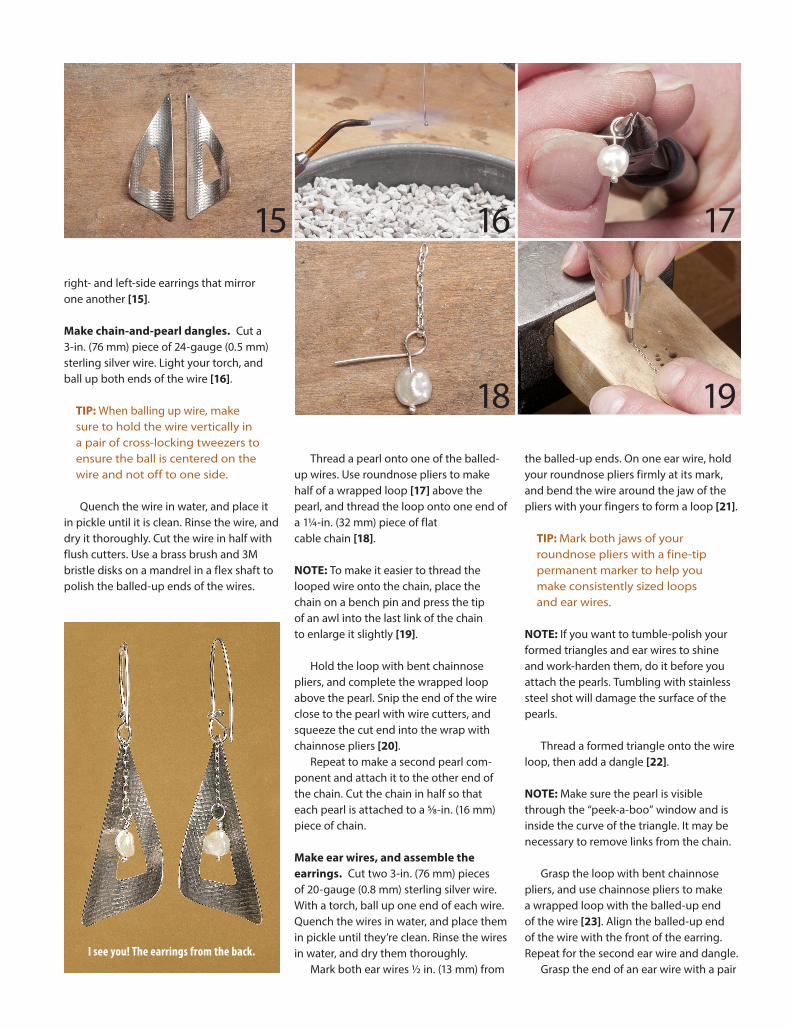
right- and left-side earrings that mirror one another [15].
Make chain-and-pearl dangles. Cut a 3-in. (76 mm) piece of 24-gauge (0.5 mm) sterling silver wire. Light your torch, and ball up both ends of the wire [16].
TIP: When balling up wire, make sure to hold the wire vertically in a pair of cross-locking tweezers to ensure the ball is centered on the wire and not off to one side.
Quench the wire in water, and place it in pickle until it is clean. Rinse the wire, and dry it thoroughly. Cut the wire in half with flush cutters. Use a brass brush and 3M bristle disks on a mandrel in a flex shaft to polish the balled-up ends of the wires.
Thread a pearl onto one of the balled- up wires. Use roundnose pliers to make half of a wrapped loop [17] above the pearl, and thread the loop onto one end of a 11/4-in. (32 mm) piece of flat cable chain [18].
NOTE: To make it easier to thread the looped wire onto the chain, place the chain on a bench pin and press the tip of an awl into the last link of the chain to enlarge it slightly [19].
Hold the loop with bent chainnose pliers, and complete the wrapped loop above the pearl. Snip the end of the wire close to the pearl with wire cutters, and squeeze the cut end into the wrap with chainnose pliers [20].
Repeat to make a second pearl com- ponent and attach it to the other end of the chain. Cut the chain in half so that each pearl is attached to a 5/8-in. (16 mm) piece of chain.
Make ear wires, and assemble the earrings. Cut two 3-in. (76 mm) pieces of 20-gauge (0.8 mm) sterling silver wire. With a torch, ball up one end of each wire. Quench the wires in water, and place them in pickle until they’re clean. Rinse the wires in water, and dry them thoroughly.
Mark both ear wires ½ in. (13 mm) from
the balled-up ends. On one ear wire, hold your roundnose pliers firmly at its mark, and bend the wire around the jaw of the pliers with your fingers to form a loop [21].
TIP: Mark both jaws of your roundnose pliers with a fine-tip permanent marker to help you make consistently sized loops and ear wires.
NOTE: If you want to tumble-polish your formed triangles and ear wires to shine and work-harden them, do it before you attach the pearls. Tumbling with stainless steel shot will damage the surface of the pearls.
Thread a formed triangle onto the wire loop, then add a dangle [22].
NOTE: Make sure the pearl is visible through the “peek-a-boo” window and is inside the curve of the triangle. It may be necessary to remove links from the chain.
Grasp the loop with bent chainnose pliers, and use chainnose pliers to make a wrapped loop with the balled-up end of the wire [23]. Align the balled-up end of the wire with the front of the earring. Repeat for the second ear wire and dangle.
Grasp the end of an ear wire with a pair
15 16 17
18 19
I see you! The earrings from the back.

ASK THE ARTIST: JEANETTE PAYNE
If you had to switch media tomorrow, which would you choose, and why?I would choose mixed media. As do many artists, I like to collect interesting pieces of “stuff” as I walk through life, and I don’t know what to do with all of it. My mixed-media creations would also be green, because I would repurpose items that sometimes end up in landfills, which is impor-tant to me.
20 21 22
23 24
26
25
27
of barrel pliers, and form it into a gentle curve [24]. Repeat to curve the second ear wire. Mark both ear wires at their midpoint with a fine-tip permanent marker [25]. Use roundnose pliers to grip an ear wire at the mark; grip the wire at the thickest point of the pliers’ jaws. Use your thumb to bend the wire around the pliers’ jaw [26]. Repeat to form the second ear wire.
TIP: To be secure, gravity earrings (earrings without a catch) must extend behind the ear at least ¾ in. (19 mm) and preferably 1 in. (25.5 mm). You can also use clear plastic ear nuts for added security.
Finish the earrings. Place a 4 mm cup bur in a flex shaft, lubricate the cup bur, and hold the end of an ear wire into the cup of the bur. Work at a slow speed, and rotate the bur at a slight angle in a circular motion to smooth and round the end of each ear wire [27].
Scrub the earrings with a dry brass brush to give them a light sheen.
NOTE: I like to set my pieces on a rubber bench block while brass-brushing them. The rubber holds the pieces in place so they don’t slip.
Photo by Larry Sanders, 2000.