Embed Size (px)
Citation preview
Peek-A-Boo Ghost Kit Assembly Instructions (VLG 1g)
Page 1 of 11
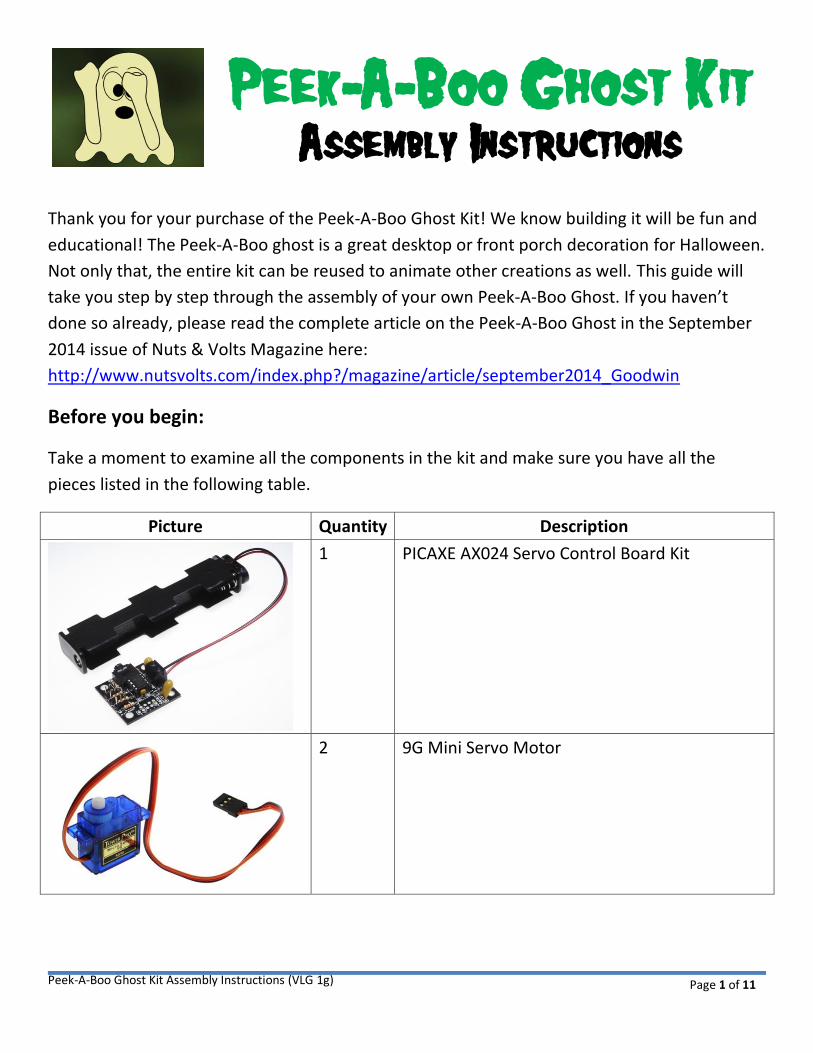
Peek-A-Boo Ghost Kit
Assembly Instructions
Thank you for your purchase of the Peek-A-Boo Ghost Kit! We know building it will be fun and
educational! The Peek-A-Boo ghost is a great desktop or front porch decoration for Halloween.
Not only that, the entire kit can be reused to animate other creations as well. This guide will
take you step by step through the assembly of your own Peek-A-Boo Ghost. If you haven’t
done so already, please read the complete article on the Peek-A-Boo Ghost in the September
2014 issue of Nuts & Volts Magazine here:
http://www.nutsvolts.com/index.php?/magazine/article/september2014_Goodwin
Before you begin:
Take a moment to examine all the components in the kit and make sure you have all the
pieces listed in the following table.
Picture Quantity Description
1 PICAXE AX024 Servo Control Board Kit
2 9G Mini Servo Motor
Peek-A-Boo Ghost Kit Assembly Instructions (VLG 1g)
Page 2 of 11
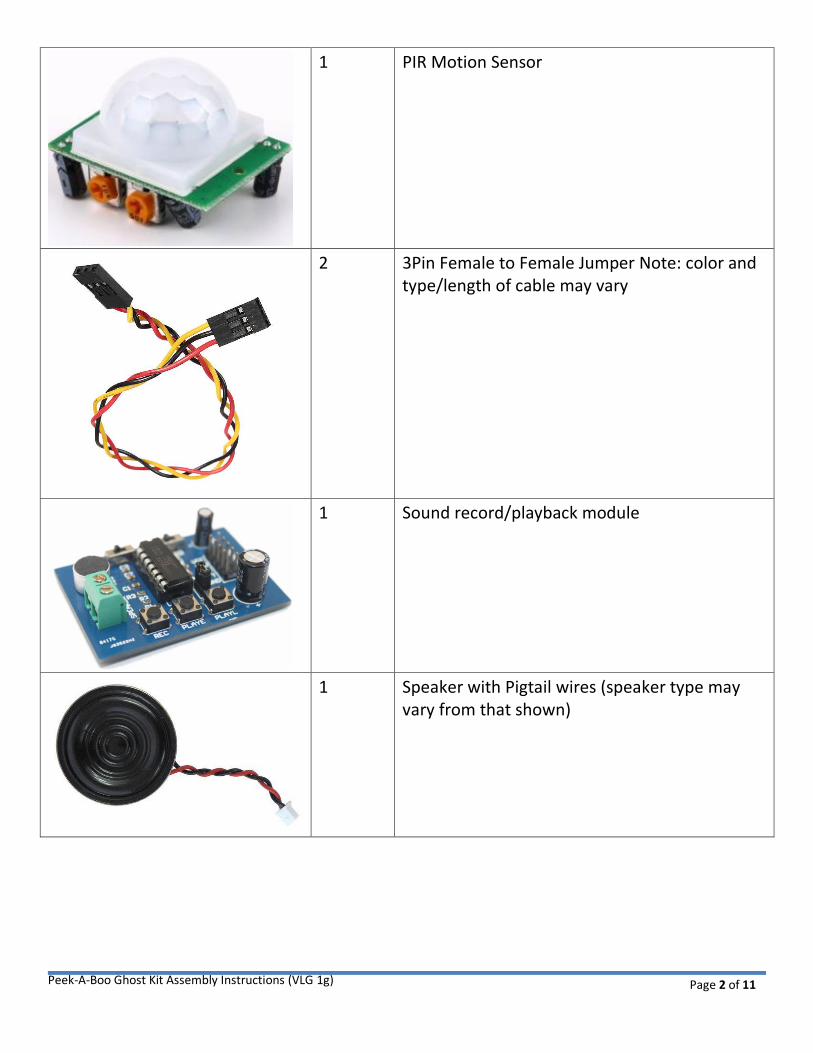
1 PIR Motion Sensor
2 3Pin Female to Female Jumper Note: color and type/length of cable may vary
1 Sound record/playback module
1 Speaker with Pigtail wires (speaker type may vary from that shown)
Peek-A-Boo Ghost Kit Assembly Instructions (VLG 1g)
Page 3 of 11
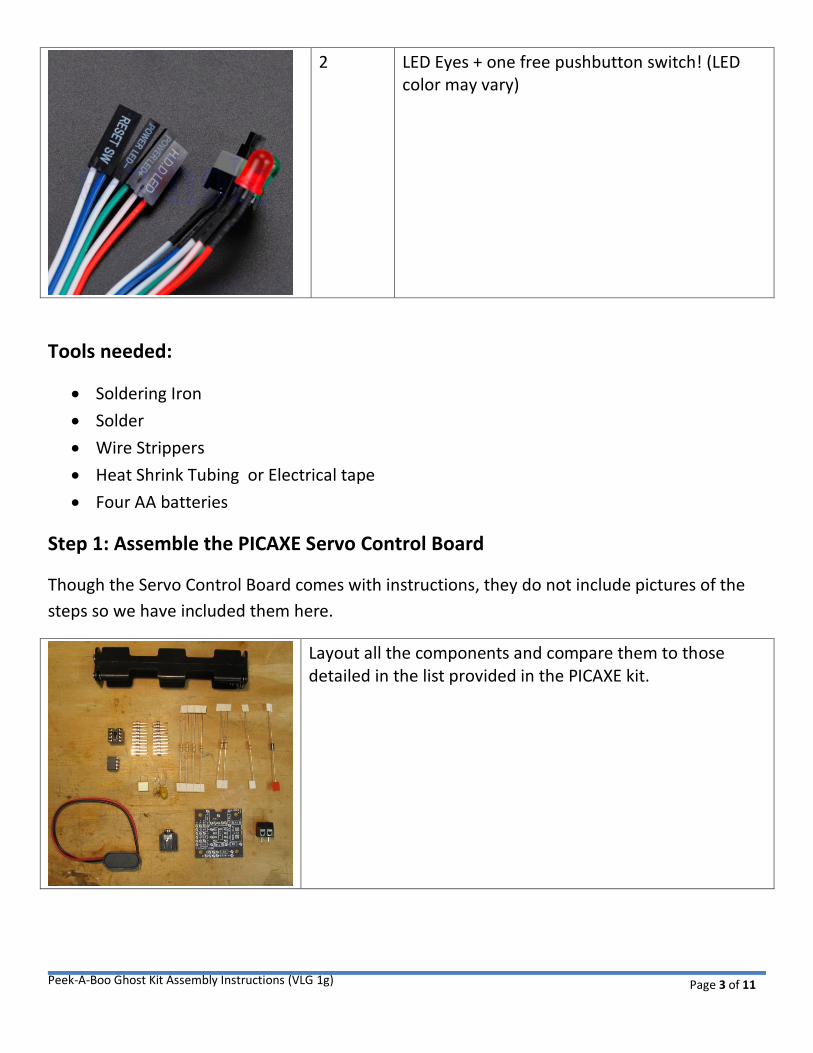
2 LED Eyes + one free pushbutton switch! (LED color may vary)
Tools needed:
Soldering Iron
Solder
Wire Strippers
Heat Shrink Tubing or Electrical tape
Four AA batteries
Step 1: Assemble the PICAXE Servo Control Board
Though the Servo Control Board comes with instructions, they do not include pictures of the
steps so we have included them here.
Layout all the components and compare them to those detailed in the list provided in the PICAXE kit.
Peek-A-Boo Ghost Kit Assembly Instructions (VLG 1g)
Page 4 of 11
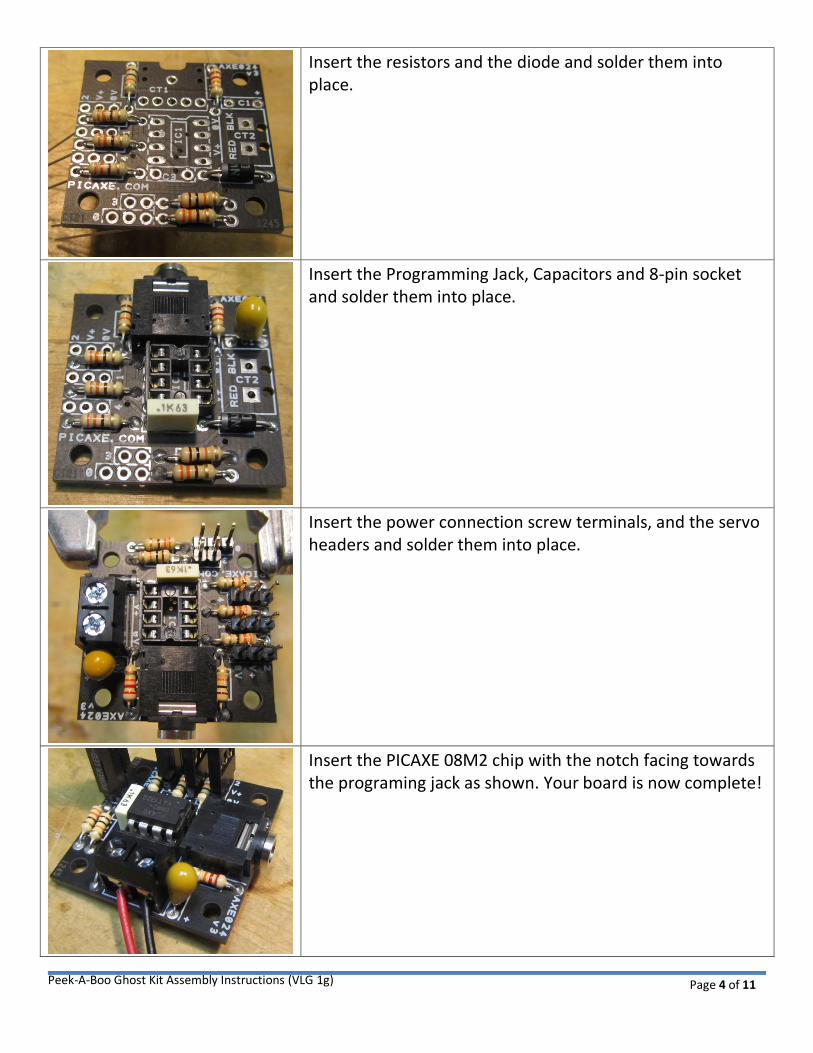
Insert the resistors and the diode and solder them into place.
Insert the Programming Jack, Capacitors and 8-pin socket and solder them into place.
Insert the power connection screw terminals, and the servo headers and solder them into place.
Insert the PICAXE 08M2 chip with the notch facing towards the programing jack as shown. Your board is now complete!
Peek-A-Boo Ghost Kit Assembly Instructions (VLG 1g)
Page 5 of 11
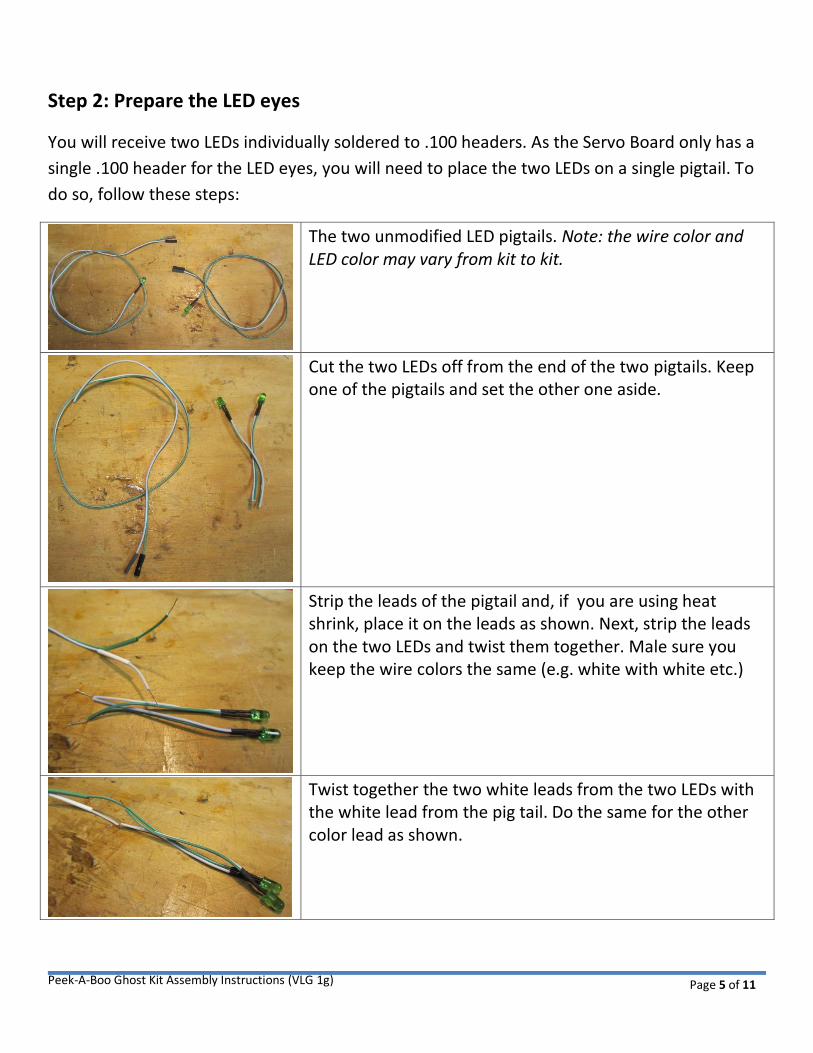
Step 2: Prepare the LED eyes
You will receive two LEDs individually soldered to .100 headers. As the Servo Board only has a
single .100 header for the LED eyes, you will need to place the two LEDs on a single pigtail. To
do so, follow these steps:
The two unmodified LED pigtails. Note: the wire color and LED color may vary from kit to kit.
Cut the two LEDs off from the end of the two pigtails. Keep one of the pigtails and set the other one aside.
Strip the leads of the pigtail and, if you are using heat shrink, place it on the leads as shown. Next, strip the leads on the two LEDs and twist them together. Male sure you keep the wire colors the same (e.g. white with white etc.)
Twist together the two white leads from the two LEDs with the white lead from the pig tail. Do the same for the other color lead as shown.
Peek-A-Boo Ghost Kit Assembly Instructions (VLG 1g)
Page 6 of 11
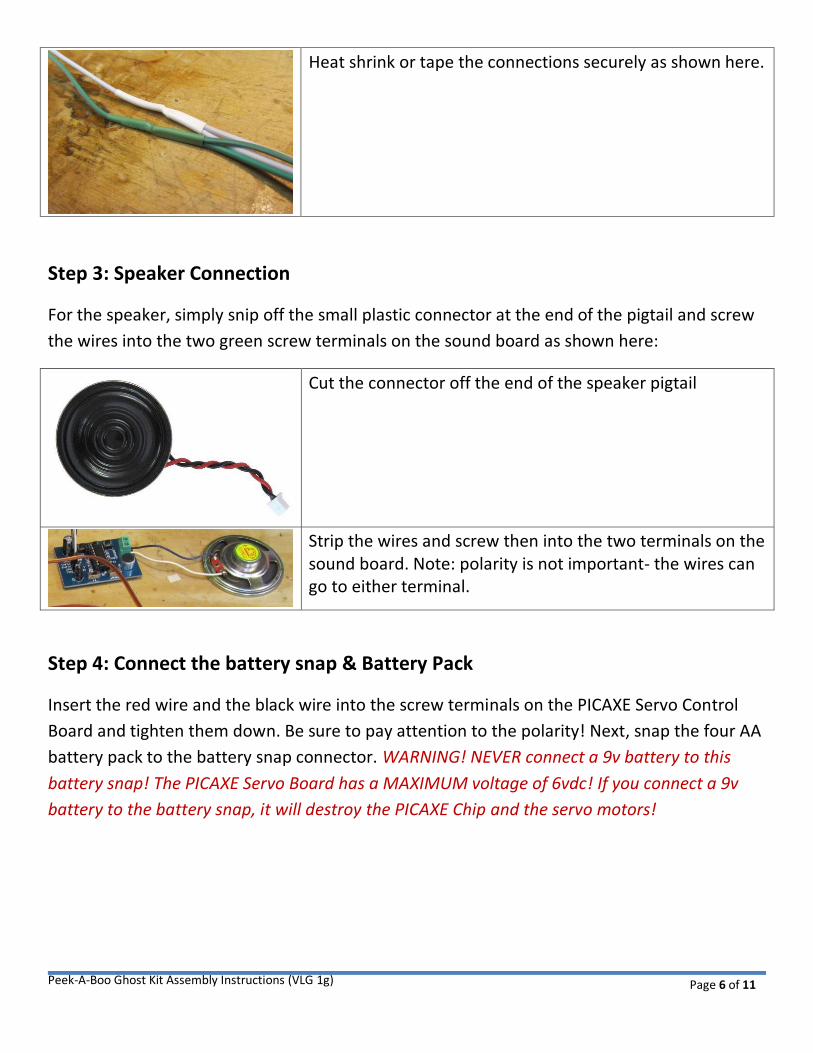
Heat shrink or tape the connections securely as shown here.
Step 3: Speaker Connection
For the speaker, simply snip off the small plastic connector at the end of the pigtail and screw
the wires into the two green screw terminals on the sound board as shown here:
Cut the connector off the end of the speaker pigtail
Strip the wires and screw then into the two terminals on the sound board. Note: polarity is not important- the wires can go to either terminal.
Step 4: Connect the battery snap & Battery Pack
Insert the red wire and the black wire into the screw terminals on the PICAXE Servo Control
Board and tighten them down. Be sure to pay attention to the polarity! Next, snap the four AA
battery pack to the battery snap connector. WARNING! NEVER connect a 9v battery to this
battery snap! The PICAXE Servo Board has a MAXIMUM voltage of 6vdc! If you connect a 9v
battery to the battery snap, it will destroy the PICAXE Chip and the servo motors!
Peek-A-Boo Ghost Kit Assembly Instructions (VLG 1g)
Page 7 of 11
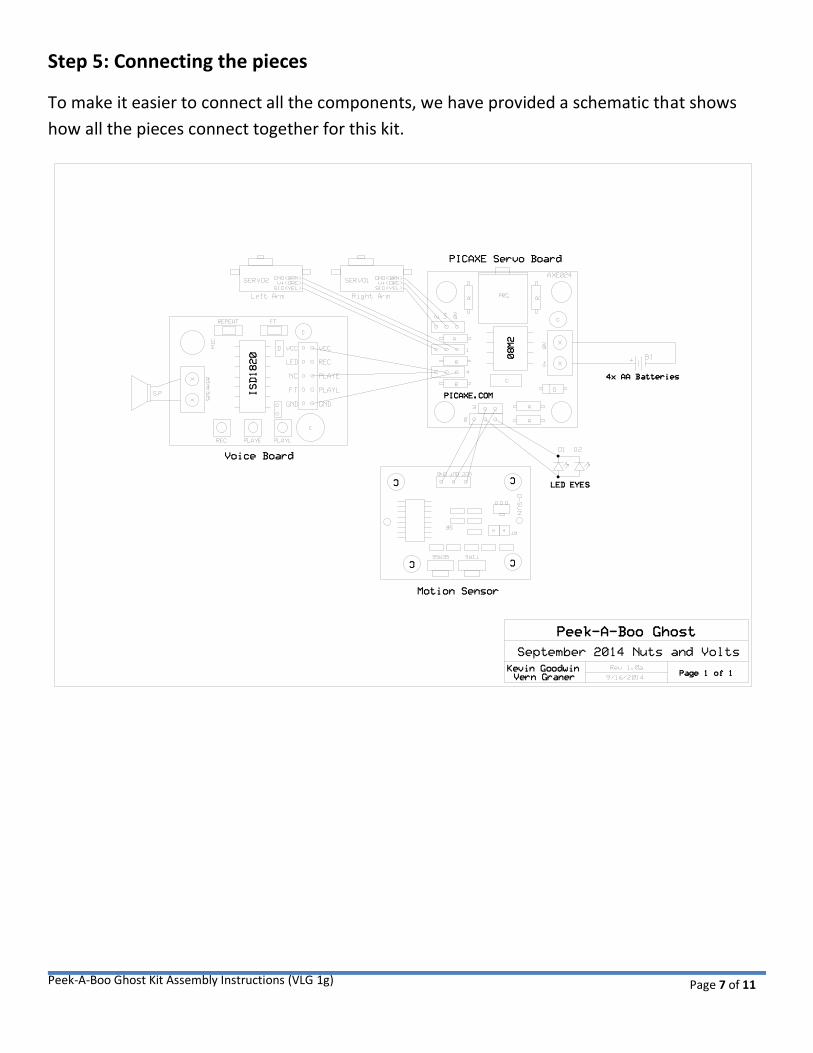
Step 5: Connecting the pieces
To make it easier to connect all the components, we have provided a schematic that shows
how all the pieces connect together for this kit.
Peek-A-Boo Ghost Kit Assembly Instructions (VLG 1g)
Page 8 of 11
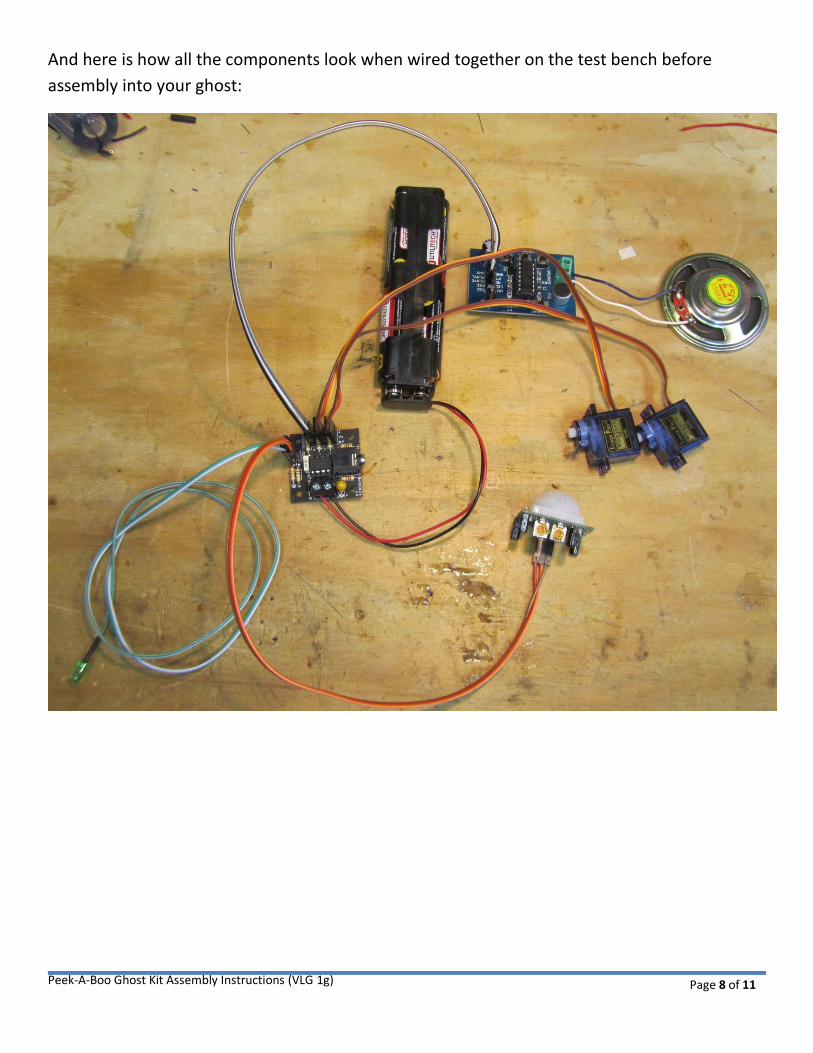
And here is how all the components look when wired together on the test bench before
assembly into your ghost:
Peek-A-Boo Ghost Kit Assembly Instructions (VLG 1g)
Page 9 of 11
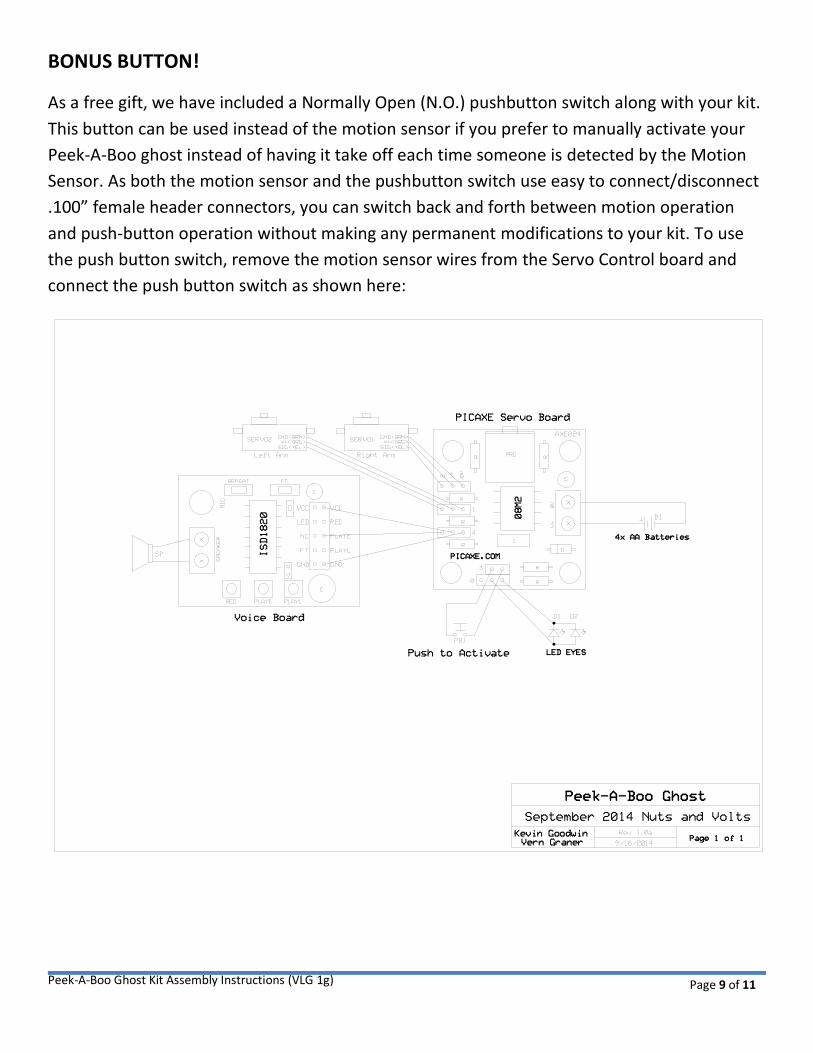
BONUS BUTTON!
As a free gift, we have included a Normally Open (N.O.) pushbutton switch along with your kit.
This button can be used instead of the motion sensor if you prefer to manually activate your
Peek-A-Boo ghost instead of having it take off each time someone is detected by the Motion
Sensor. As both the motion sensor and the pushbutton switch use easy to connect/disconnect
.100” female header connectors, you can switch back and forth between motion operation
and push-button operation without making any permanent modifications to your kit. To use
the push button switch, remove the motion sensor wires from the Servo Control board and
connect the push button switch as shown here:
Peek-A-Boo Ghost Kit Assembly Instructions (VLG 1g)
Page 10 of 11
Ghost Assembly Q&A
How do I attach the arms so they’re position correctly?
Once you have the servo horns glued to the arms, and the servo motors glued to the ghost,
simply activate the ghost (using the optional push button or the motion sensor) and let it run
through its routine. When it stops, the servos will be in the “eyes covered” position. At this
point, you simply press-fit the arms to the servos positioned so that the eyes are covered.
Is there a way to improve the sound quality/volume?
When mounting the speaker on the back of the ghost, first make sure you have holes to allow
the sound to escape. Second, you should make sure that where speaker is attached to the
back side of the ghost, you seal all the edges to avoid air leakage around the speaker cone. It is
important to make sure that you have as close to an air-tight barrier as possible between the
front and the back of the speaker. Additionally, if the back of the speaker is enclosed by a
container, the audio quality and volume will typically increase. One simply way to do this is to
place a paper cup or plastic bottle top on the back of the speaker once it is mounted on the
ghost.
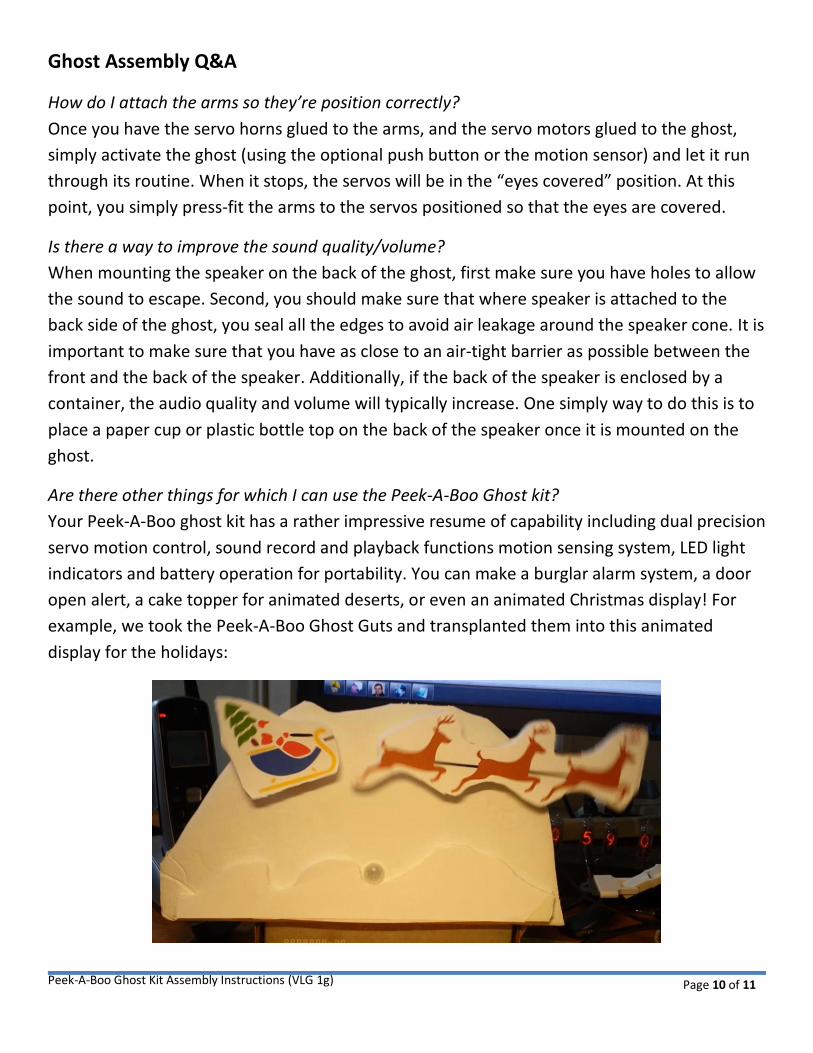
Are there other things for which I can use the Peek-A-Boo Ghost kit?
Your Peek-A-Boo ghost kit has a rather impressive resume of capability including dual precision
servo motion control, sound record and playback functions motion sensing system, LED light
indicators and battery operation for portability. You can make a burglar alarm system, a door
open alert, a cake topper for animated deserts, or even an animated Christmas display! For
example, we took the Peek-A-Boo Ghost Guts and transplanted them into this animated
display for the holidays:
Peek-A-Boo Ghost Kit Assembly Instructions (VLG 1g)
Page 11 of 11
Troubleshooting Guide
The following are a few common issues and how to solve them.
Symptom Fix
PIR sensor doesn’t detect motion
Make sure the connections are correct! Slightly adjust the potentiometer labeled “Sx” to change motion sensitivity.
Intermittent/unstable operation
Make sure you have fresh batteries! The PICAXE will become unstable and not perform properly if the batteries are low! This is especially true if the batteries are rechargeable as they are typically 1.2v per cell.
No movement or sound Batteries. Seriously. You have no idea how often low batteries have caused people to go bananas troubleshooting only to find a handful of fresh double-A’s have fixed them right up. So, if you’re sure your batteries are fresh, then double check all the wiring! Make sure you have all the jumpers properly connected.
Movement but no Sound
Make sure you have recorded something. Test your sound by pressing the “PLAYE” button. It is easy to bump the REC button accidentally and even a very short press will overwrite the recorded sound.
Ghost says inappropriate things.
Keep the record button a secret to avoid this issue! ;)
Software Updates
The software that is available to download from the Nuts & Volts web site is really just a start!
It is possible to add different arm motions, or make the LED eyes flash in different patterns. If
you do have a chance to play with the code, please do share back you improvements and
changes by going to http://forum.nutsvolts.com