Embed Size (px)
Citation preview
Lignomat USA Ltd
14345 NE Morris Ct. Portland OR 97230 USA
800-227-2105
503-257-8957
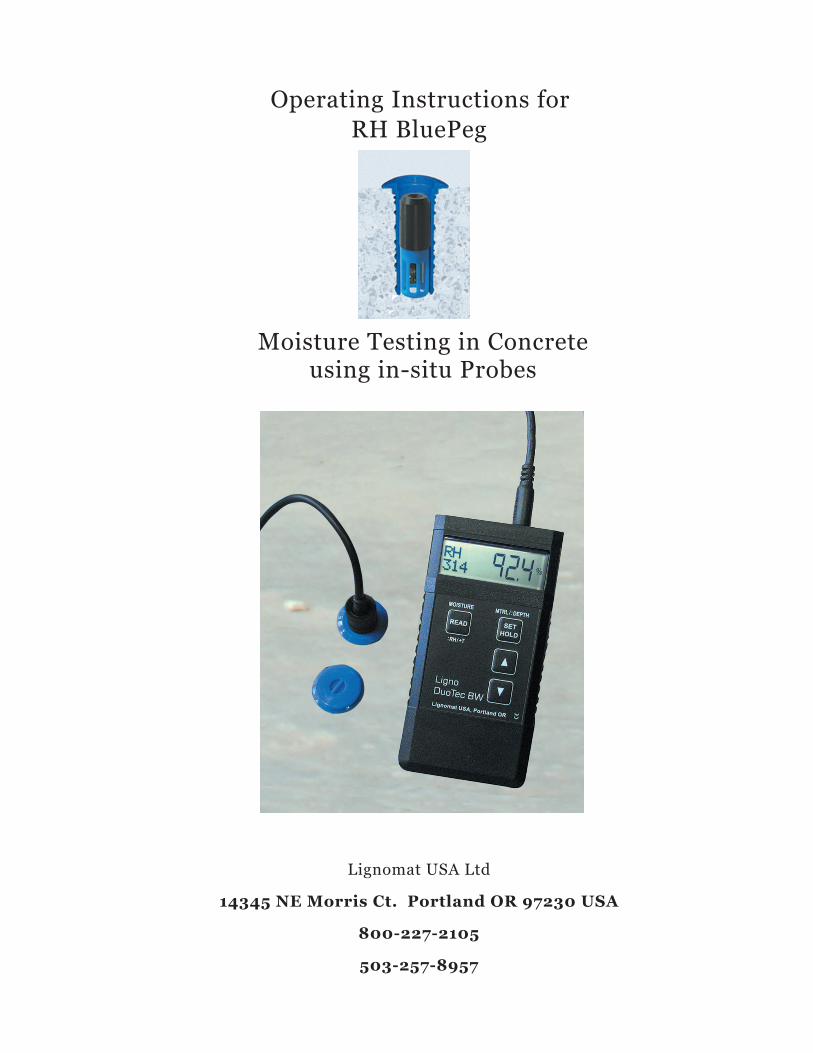
Moisture Testing in Concreteusing in-situ Probes
Operating Instructions forRH BluePeg
Table of Contents
Using the RH BluePeg System 1
Preparations 2
Measurements 3
Obtaining Measurements 4
Lignomat’s RH BluePeg System 5 - 7
Using the RH BluePeg System to avoid Floor Covering Failure
The RH BluePeg is a relative humidity and temperature sensor, designed to be placed
inside a hole liner (sleeve), which has been inserted into a predrilled hole in the
concrete test area. The cap is used to seal the sleeve to allow acclimation to the
moisture released by the concrete inside the hole. To conform to ASTM F2170-11
standards, the sleeve should be in the concrete and sealed from the outside
atmosphere for 72 hrs before taking readings. After approval of ASTM 2170-11, the RH
Probe and the sleeves were changed to comply with the new standard 2170-11.
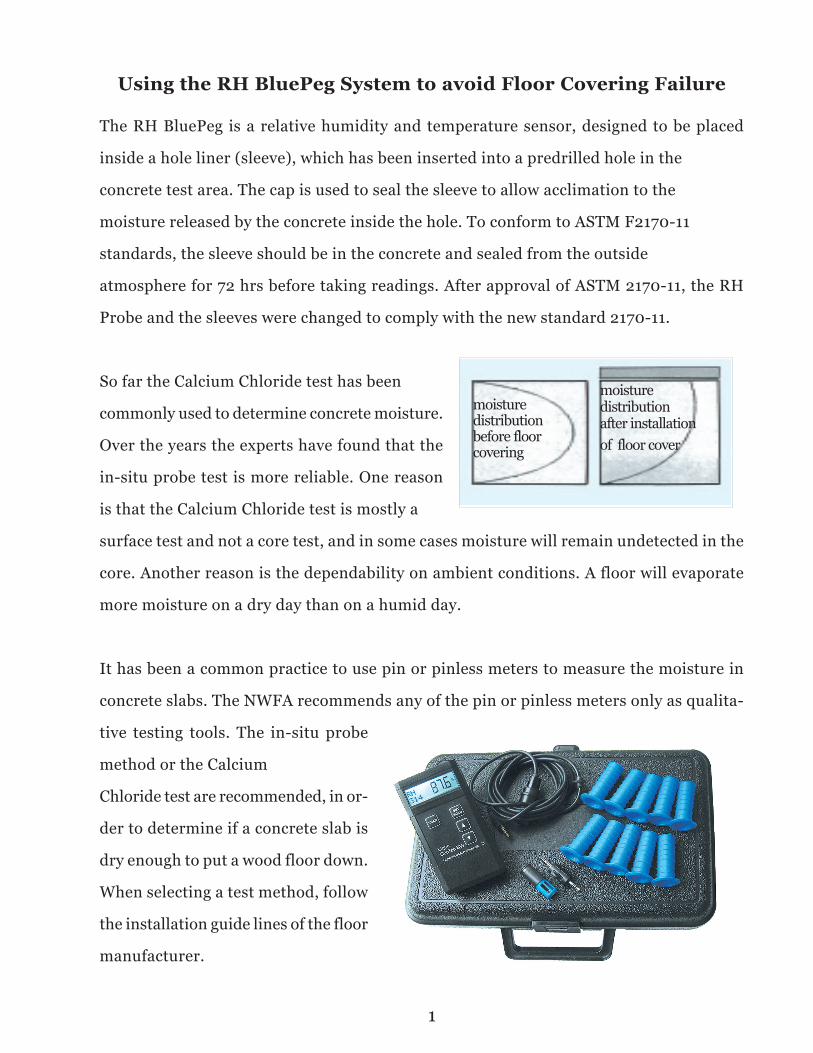
So far the Calcium Chloride test has been
commonly used to determine concrete moisture.
Over the years the experts have found that the
in-situ probe test is more reliable. One reason
is that the Calcium Chloride test is mostly a
surface test and not a core test, and in some cases moisture will remain undetected in the
core. Another reason is the dependability on ambient conditions. A floor will evaporate
more moisture on a dry day than on a humid day.
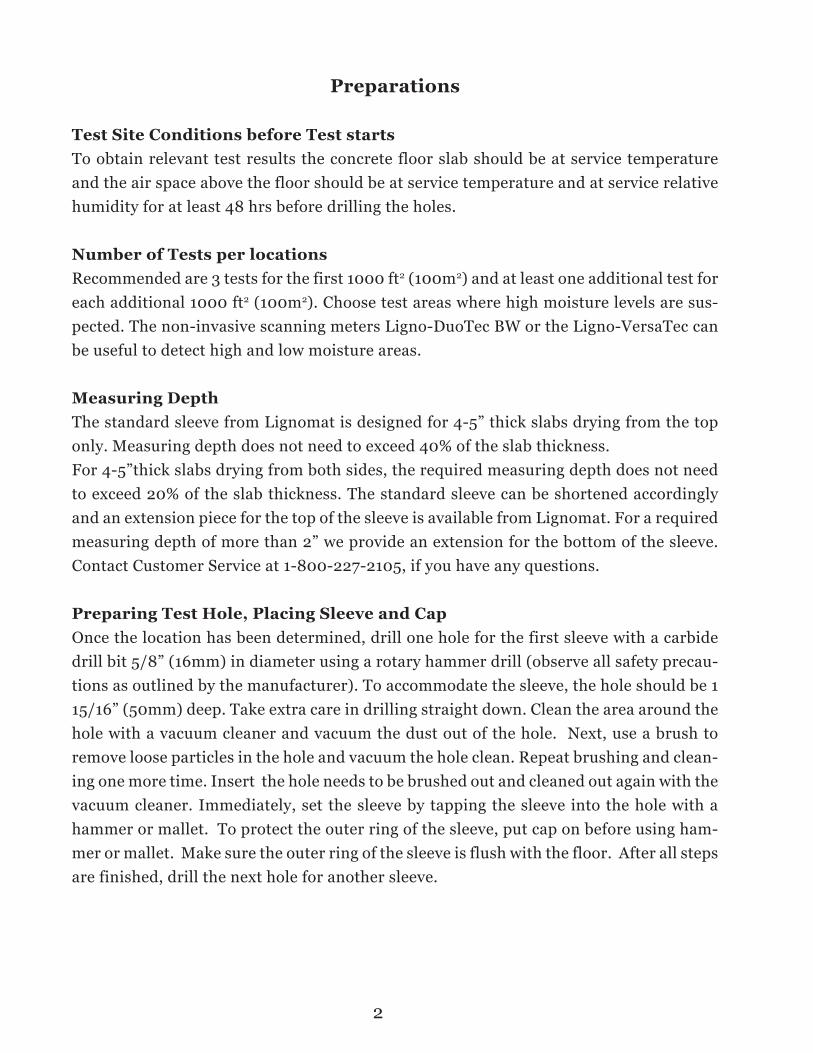
It has been a common practice to use pin or pinless meters to measure the moisture in
concrete slabs. The NWFA recommends any of the pin or pinless meters only as qualita-
tive testing tools. The in-situ probe
method or the Calcium
Chloride test are recommended, in or-
der to determine if a concrete slab is
dry enough to put a wood floor down.
When selecting a test method, follow
the installation guide lines of the floor
manufacturer.
moisturedistributionafter installationof floor cover
moisturedistributionbefore floorcovering
1
Preparations
Test Site Conditions before Test startsTo obtain relevant test results the concrete floor slab should be at service temperatureand the air space above the floor should be at service temperature and at service relativehumidity for at least 48 hrs before drilling the holes.
Number of Tests per locationsRecommended are 3 tests for the first 1000 ft2 (100m2) and at least one additional test foreach additional 1000 ft2 (100m2). Choose test areas where high moisture levels are sus-pected. The non-invasive scanning meters Ligno-DuoTec BW or the Ligno-VersaTec canbe useful to detect high and low moisture areas.
Measuring DepthThe standard sleeve from Lignomat is designed for 4-5” thick slabs drying from the toponly. Measuring depth does not need to exceed 40% of the slab thickness.For 4-5”thick slabs drying from both sides, the required measuring depth does not needto exceed 20% of the slab thickness. The standard sleeve can be shortened accordinglyand an extension piece for the top of the sleeve is available from Lignomat. For a requiredmeasuring depth of more than 2” we provide an extension for the bottom of the sleeve.Contact Customer Service at 1-800-227-2105, if you have any questions.
Preparing Test Hole, Placing Sleeve and CapOnce the location has been determined, drill one hole for the first sleeve with a carbidedrill bit 5/8” (16mm) in diameter using a rotary hammer drill (observe all safety precau-tions as outlined by the manufacturer). To accommodate the sleeve, the hole should be 115/16” (50mm) deep. Take extra care in drilling straight down. Clean the area around thehole with a vacuum cleaner and vacuum the dust out of the hole. Next, use a brush toremove loose particles in the hole and vacuum the hole clean. Repeat brushing and clean-ing one more time. Insert the hole needs to be brushed out and cleaned out again with thevacuum cleaner. Immediately, set the sleeve by tapping the sleeve into the hole with ahammer or mallet. To protect the outer ring of the sleeve, put cap on before using ham-mer or mallet. Make sure the outer ring of the sleeve is flush with the floor. After all stepsare finished, drill the next hole for another sleeve.
2
Measurements
The RH in-situ probe measurement is regulated by the ASTM F2170-11 standard guide-lines. Following the ASTM F2170-11 guidelines, the sleeves have to be placed in the con-crete for 72 hrs and the sensors have to be acclimated before test results are valid and canbe documented. If waiting times are cut short the resulting measurements could be toohigh or too low.
Test ProcedureThe ASTM F2170-11 requires the sleeves to be set in the concrete slab and capped off for72 hrs before recording any readings. If the sensors are inserted after 72 hrs, they stillneed acclimatization time to show true readings. If the acclimatization time is cut short,readings could be too low. In your report note: times when the sleeves are placed, thesensors are inserted and the readings are taken. If not enough sensors are on hand, thesensors can be leap-frogged and used to measure the next set of holes, an advantage ofremovable sensors. Leap froged sensors acclimate fast to the true readings.
To avoid extended waiting periods beyond the 72 hrs required by ASTM F2170-11, ** youcan insert the sensors at the time the sleeves are placed. Wait at least one hour for thedrilling heat to dissipate before inserting the sensors. Then, after 15 minutes the readingsfrom the sensors are a good indication of the moisture conditions. Wait 72 hrs beforedocumenting readings.
If you are on site, a good time to insert the sensors would be 48 hours after the holes havebeen drilled. Then for sure the drilling heat has dissipated and after 72 hrs the sensors areacclimated. And again, the sensors can be leap-frogged.These “acclimated” leap frogged sensors show true readings within 15 minutes.
In any case, the sleeves have to sit for at least 72 hrs and readings have to be stable.
The same sensor can be read multiple times in short time intervals, if the sensor is notremoved from the sleeve. The “soft seal” on top of the sensor prohibits outside air fromentering the sleeve. Between readings, either cover the sleeve with the red cap or leavecable-end-cover in place.
Please note, that the dust protection over the sensing element slows acclimation to ambi-ent air conditions once the sensor is removed from the concrete. For that reason we rec-ommend using a different sensor if the ambient air temperature and relative humidity areto be measured in the room/building after the tests have been completed.
** The manufacturer of the sensing element recommends not to expose the sensors overan extended period of time to high relative humdity (over 95%). Please check if those highhumidity conditions exist inside the sleeves and make sure the sensors are not left forhours in these conditions.
3
Obtaining Measurements-Connect RH BluePeg Probe to meter via RH cable or RH Adaptor.(RH meters: Ligno-Tec RH, Ligno-DuoTec BW or Ligno-VersaTec)
- Press the READ button. RH, T, DP, GPP and the sensor number appear on theleft side of the display. The corresponding measured value appears to the right.- Press or keys to toggle between RH, T, GPP, DP.
Taking Readings in Concrete: Remove red cap, connect 3.5 mm Plug (P). The plugfits into the sensor easily. Do not remove the sensor from the sleeve to connect thecable, this disturbs the acclimatization of the sensor and the climate in the hole. Next,push cable-guard (C) firmly into the lip of the sleeve and press the middle cylinder
down to secure cable connection while taking readings.
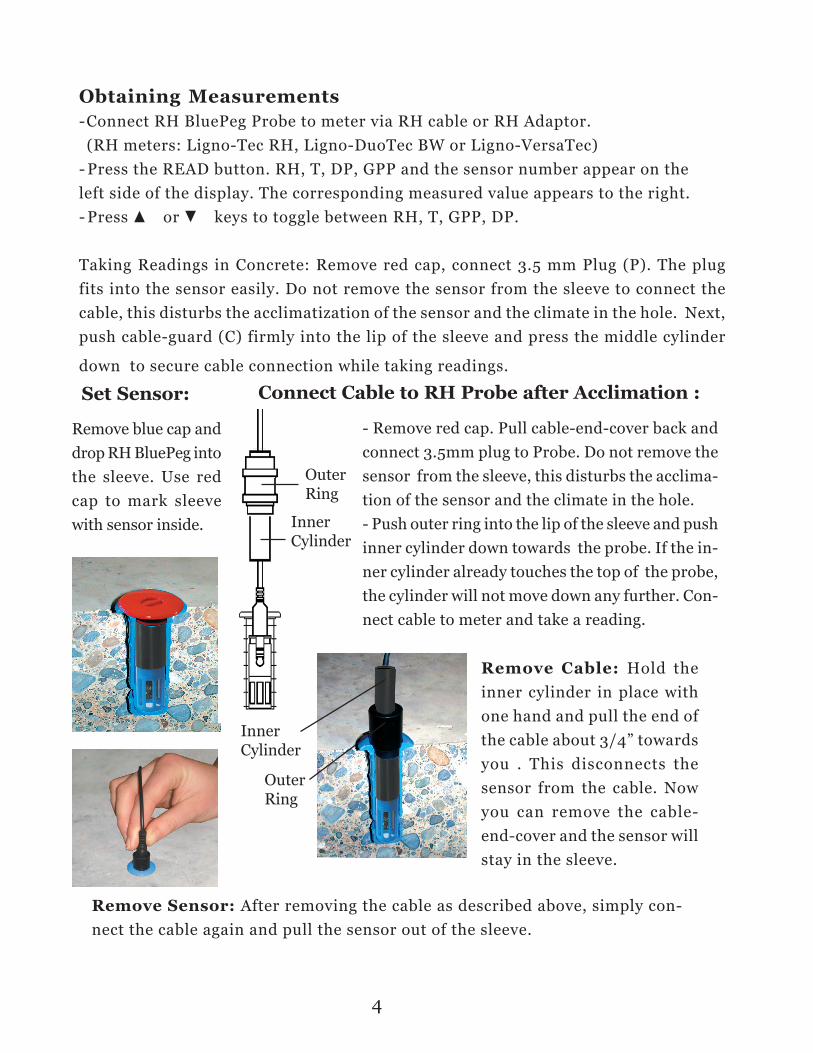
Set Sensor:
Remove blue cap anddrop RH BluePeg intothe sleeve. Use redcap to mark sleevewith sensor inside.
Connect Cable to RH Probe after Acclimation :
- Remove red cap. Pull cable-end-cover back andconnect 3.5mm plug to Probe. Do not remove thesensor from the sleeve, this disturbs the acclima-tion of the sensor and the climate in the hole.- Push outer ring into the lip of the sleeve and pushinner cylinder down towards the probe. If the in-ner cylinder already touches the top of the probe,the cylinder will not move down any further. Con-nect cable to meter and take a reading.
Remove Cable: Hold theinner cylinder in place withone hand and pull the end ofthe cable about 3/4” towardsyou . This disconnects thesensor from the cable. Nowyou can remove the cable-end-cover and the sensor willstay in the sleeve.
OuterRing
InnerCylinder
Remove Sensor: After removing the cable as described above, simply con-nect the cable again and pull the sensor out of the sleeve.
InnerCylinder
OuterRing
4
After a test series is finished, all sensors should be removed. The sleeves areunusable after the test, since the fins which seal the air are rubbed off. Remove thelip of the sleeve and close the hole with a cementitious patching compound toproduce a smooth surface.
Once a test series is finished, the same holes should not be used for another testseries at a later time.
MaintenanceAfter testing is finished the RH BluePeg sensors should be stored in the originalpackaging and kept in a dry location. We recommend 20 to 60% relative humidityand 500F to 1200F (100C to 500C). Visible dust should be removed.
CalibrationThe RH Blue Peg uses a single microchip calibrated to NIST standards. Themicrochip manufacturer assures long term calibration stability.
According to ASTM F2170-11 probes should be checked within 30 days before use.During the one year warranty period, Lignomat offers to check the calibration free ofcharge three times.
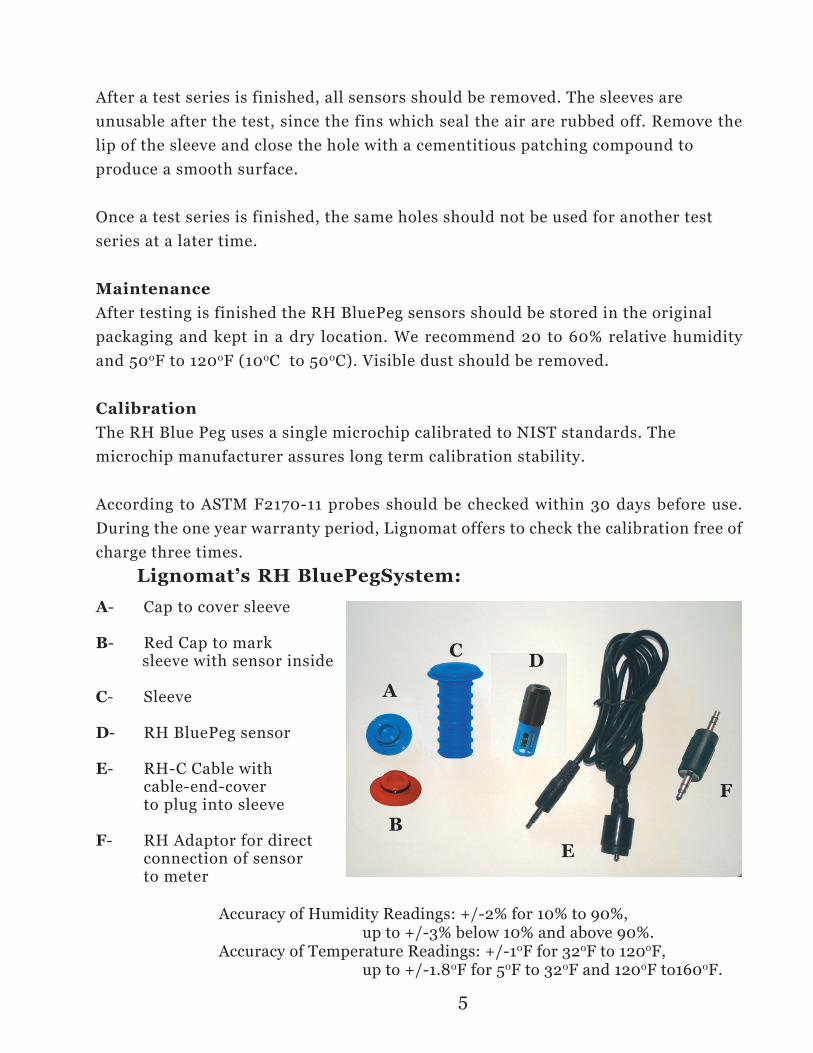
A- Cap to cover sleeve
B- Red Cap to mark sleeve with sensor inside
C- Sleeve
D- RH BluePeg sensor
E- RH-C Cable withcable-end-coverto plug into sleeve
F- RH Adaptor for directconnection of sensorto meter
Lignomat’s RH BluePegSystem:
Accuracy of Humidity Readings: +/-2% for 10% to 90%,up to +/-3% below 10% and above 90%.
Accuracy of Temperature Readings: +/-10F for 320F to 1200F,up to +/-1.80F for 50F to 320F and 1200F to1600F.
A
B
C D
E
F
5
Sleeves with Caps 20 Pack:The sleeve is the liner for the test hole, drilled with a 5/8”concrete drill bit. The cap seals the opening.
RH-S20 pack containes 20 sleeves and 20 caps with sealrings. Following ASTM standard, the slots have been re-moved and the opening is at the bottom.
RH Cable with Cable-End-Cover:Easy-to-use 3.5 mm plug conncets and disconnects the cablefrom the RH-BluePeg sensor. Cable-end-cover holds thecable in place while taking readings and is used to discon-nect the cable from the RH BluePeg sensor, while the sensorstays in the sleeve and the cap can be put back.
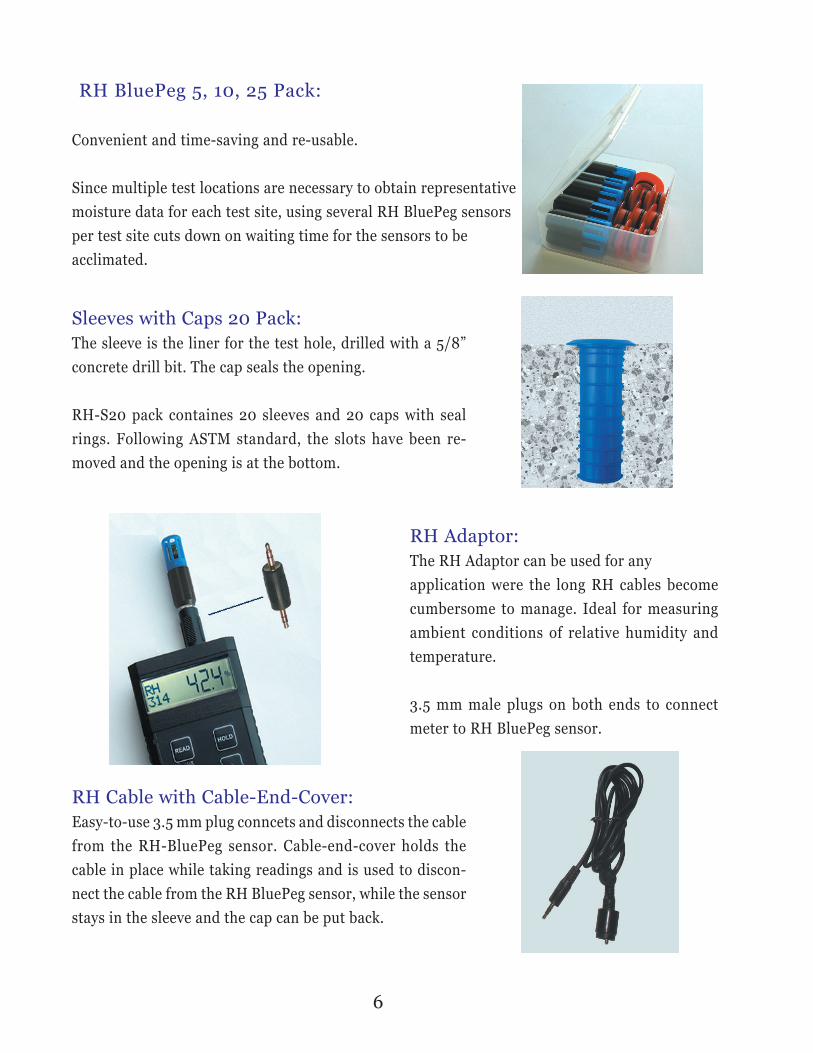
RH Adaptor:The RH Adaptor can be used for anyapplication were the long RH cables becomecumbersome to manage. Ideal for measuringambient conditions of relative humidity andtemperature.
3.5 mm male plugs on both ends to connectmeter to RH BluePeg sensor.
Convenient and time-saving and re-usable.
Since multiple test locations are necessary to obtain representativemoisture data for each test site, using several RH BluePeg sensorsper test site cuts down on waiting time for the sensors to beacclimated.
RH BluePeg 5, 10, 25 Pack:
6
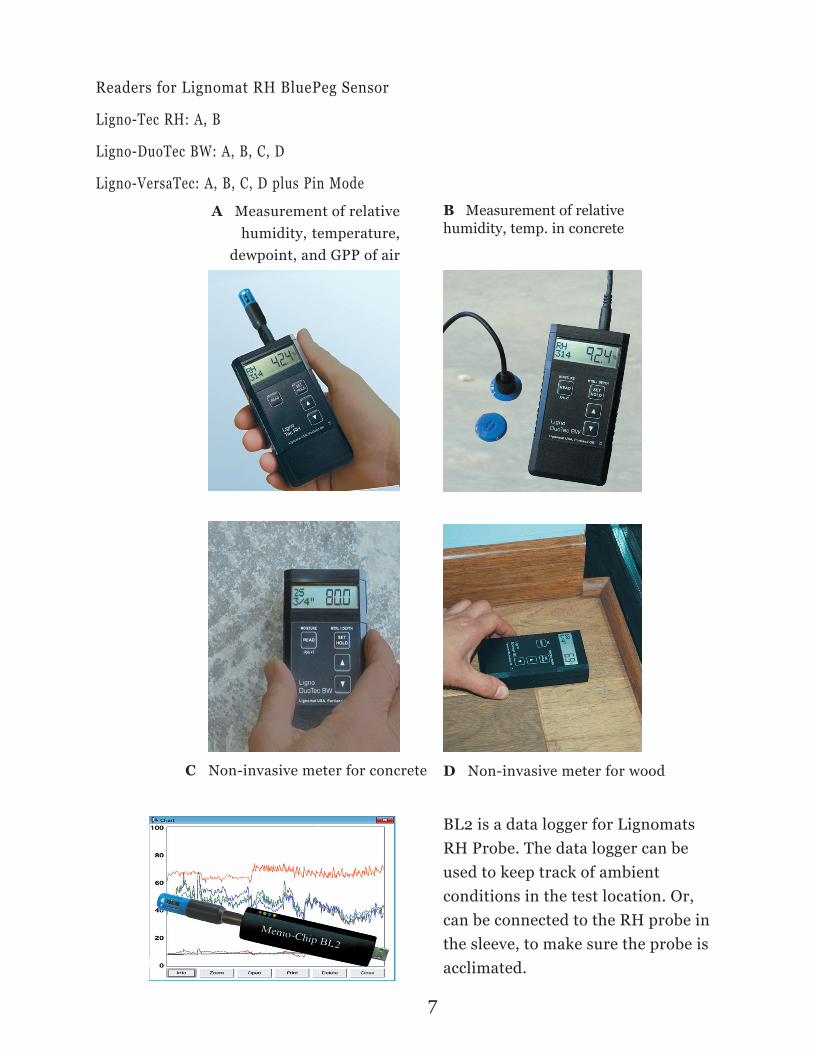
Readers for Lignomat RH BluePeg Sensor
Ligno-Tec RH: A, B
Ligno-DuoTec BW: A, B, C, D
Ligno-VersaTec: A, B, C, D plus Pin Mode
A Measurement of relativehumidity, temperature,
dewpoint, and GPP of air
B Measurement of relativehumidity, temp. in concrete
BL2 is a data logger for LignomatsRH Probe. The data logger can beused to keep track of ambientconditions in the test location. Or,can be connected to the RH probe inthe sleeve, to make sure the probe isacclimated.
C Non-invasive meter for concrete D Non-invasive meter for wood
7