Embed Size (px)
Citation preview

Issued By TECHNICAL DEPT Dated: August 2014 Approved KS
Operating and InstallationInstructions for the SR-plus
hot water boiler
0088

2
Contents Page
Material in this publication may not be reproduced without the company's written permission.
Hoval reserve the right to change specifications without notice.Hoval Ltd, Northgate, Newark, Notts, NG24 1JN, Tel: 01636 672711 Fax: 01636 673532 e-mail: [email protected]
Table of Contents
Introduction
Gas Safety(Installation & Use)
Sample Nameplate
Delivery, Offloading , Storage.
Description of the SR-plus boiler
Technical & Performance Details
Installation
-Space requirements
- Noise levels
-Ventilation,
-Open Vented & Pressurised Systems
-Flues & Chimneys
-Filling the system with water/ water treatment
-Burner matching , Fitting the Burner
- Water flow & return temperatures
- Control details
- Boosters
Commissioning
Operating Instructions, including sequencing of boilers under BMS control
Maintenance
- Inspection & Servicing
- Boiler & Burner Servicing
- Summer Shutdown
- Burner Maintenance
Oil Burner Fault Finding Chart
Gas Burner Fault Finding Chart
3
4
4
4
5
6-8
9-15
9
9
10
10
11
12
13
13
14
15
16-17
18
19-22
19
20-21
21
22
23-24
25-26
IMPORTANTThese instructions should be read and understood before attempting to install, commission or oper-ate this unit. The boiler has been tested to comply with the Gas Appliances Directive (90/396/EEC) & the Boiler Efficiency Directive (92/42/EEC) Certification No. CE-0085 .
August 2014
3Introduction
Introduction
These instructions have been written to give a brief description of the SR-plus hot water boilers, their installation, commissioning, operation and subsequent maintenance.
The installation of boilers and their ancillary equipment is normally carried out by the Heating Engineer, and for the purpose of this manual he / she is regarded as the installer, and, as such, it is his / her responsibility to ensure that he / she has read and understood the contents of this manual before installing the boiler.
It is essential that each boiler has all services connected to it before commissioning.
A note should be entered below by the person responsible for the plant, giving the boiler model, output, reference 'K' number, and burner reference number. These numbers are indicated on the appropriate nameplates.
For completion by Plantroom Attendant
Boiler Model: Burner Ref. No.
Output (kW): Fuel:
K No. Commissioning Date
For technical, servicing or parts enquiries, telephone, fax or e-mail to Hoval
quoting the boiler(s) serial number, as above
The installation should be in accordance with current I.E.E. Regulations, relevant British Standard and Codes of Practice, Building Regulations and Local Authority Bylaws.
Hoval Engineers will normally commission the boiler and if the heating engineer is present at the time, he will be instructed on the day-to-day operation of the boiler. If this is not possible, or additional training is required, this can be arranged through Hoval.
The boiler combustion figures are recorded on the commis-sioning report and a copy of this will be issued for retention with this manual (see example).
Commissioning/Combustion Report
August 2014

4
Delivery, Offloading & StorageBoilers and associated equipment are normally delivered by our own transport on a mutually agreed date. The boiler can be offloaded by the crane lorry if specifically booked at the time of ordering. Adequate lifting points are provided on the boiler shell. All boilers are delivered fitted with casings and control panel complete with flying lead.
On delivery, the installer should check all items against the delivery note and should then store them in a safe and dry place.NOTE:There are other small items such as ceramic strip packing, cleaning tools and safety valves which are transported in the boiler combustion chamber. These should be removed, checked and stored also.
Gas Safety (Installation and Use) Regulations '98.It is the law that all gas appliances are installed by a CORGI registered installer in accordance with the above regulations. Failure to install appliances correctly could lead to prosecution. It is in your own interest, and that of safety, to ensure that the law is complied with. The Hoval SR-plus range, with both standard and low NOx burners, have been Certified against the requirements of prEN676 for natural gas.
The installation of the boiler must be in accordance with relevant British Standards, the Gas Safety Regulations, Building Regulations, I.E.E. Regulations and the by laws of the local Water Authorities. A flat level fire proof floor should be provided and the location should permit the provision of a satisfactory flue system and adequate air supply.
Gas Safety, Nameplate & Delivery
GeneralBS6644 Installation of Gas Fired ...BS6880 LowTemperature Hot WaterCP342:2 Centralised Hot Water Supply
HovalHoval, Northgate, Newark, Notts, NG24 1JN Tel: 01636 672711
Boiler TypeK number YearOutput (gas/oil) kW Input (gas/oil) kWMaximum MinimumHeat Output kW Output Gas OilFlue Temp (gas/oil) oC kW kW Pressurised VentedOperating temperatureOil Min oC Maximum oCGas Min oC Maximum oCEfficiency classNOx ratingWorking TestPressure(max) bar Pressure barElectrical connection3N-/50Hz 400/230 v Power input Maximum A
PI Number:0085 AQ 0670
0088This appliance must be installed in accordance with the rules in force and used only in a suf-ficiently ventilated space. consult insrtuctions before installation and use of this appliance
Sample nameplate
British Gas PublicationsIGE-UP-1 Soundness testing and purging of industrial and commercial gas installations.IGE-UP-2 Gas installation pipework, boosters and compressors on industrial and commercial premises.IGE-UP-10 Installation of gas appliances in industrial commercial premises. Part 1: Flued Aplliances.
August 2014

5Description of the SR-plus boiler
Description of the SR-plus boilerApplicationsThese boilers are intended for heating commercial and industrial premises within the limits of temperature and pressure stated in this manual. They may also be used to supply D.H.W. to such premises in conjunction with an indirect calorifier.
Benefits & Features• UK design & manufacture• Where applicable full compliance with the Pressure Equipment Regulations.• no minimum flow rate• compact, space saving design• standing losses less than 0.4%• nett efficiency to 91.6%• suitable for operation with a range of matched burners for use with oil, gas or dual fuel
General DetailsThe boilers are of mild steel welded construction in which the outer shell forms a water space around the combustion chamber.The third pass water jacketed gas passage ways with turbulators provide an effective secondary heating surface. Flue gases pass to a rear mounted flue outlet box and horizontal flue outlet. The flue outlet has a spigot/flange for connecting to the installers flue pipe, and is fitted with a door for cleaning and access.
The SR-plus is tested and manufactured to European boiler design codes and is offered in outputs from 500 to 4150KW. The boilers are suitable for working pressures up to 6 bar and operating temperatures to a maximum of 100 °C.
GeneralThe maximum operating temperature is governed by the pressure available at the highest point of the system. Take the 17oC anti-flash margin from the saturated temperature of steam at that pressure to find the maximum operating temperature.
Door HingingThe hinged side door nuts are supplied with a locknut at the back of the door boss. Hoval should be advised of the door and gas burner handing when the boiler is ordered or at the very earliest date. For installation space requirements and for changing door hinging see page 9.
On request- flue gas thermometer- separately mounted altitude gauge- boiler door hinged on left hand side- volt free contacts for B.M.S.- hours run meter- Modulating controller
Insulation / Cladding100mm mineral fibre wrap with woven aluminium surface around boiler shell, complete with Hoval red cladding panels.
Electrical Power SupplyA single phase 230V supply is required for the control panel operation. Single phase burners are electrically supplied via the control panel. Three phase burners require a separate three phase isolated supply (by the installer) direct to the burner, incorporating a flexible connection to allow for boiler/burner door opening. In this case control cables fitted with wieland plug/socket will still run between the control panel and the burner. All power supplies to the boiler/burner/other associated equipment (ie: gas booster, separate oil pump, etc.) should be isolated via the same switched isolator.
OperationNormal operation is fully automatic in conjuction with a simple time switch or other form of control i.e. BEMS
August 2014

6 SR-plus Technical & Performance Details
(1) Based on a maximum limit thermostat setting of 110oC.
(2) Boiler efficiencies at 100% load are based on a mean operating temperature of 70oC, at 30% efficiencies are based on a mean temperature of 50oC.
(3) Based on gross CV 38.5 MJ/m3.
(4) Based on gross CV 45.5 MJ/kg and specific gravity 0.835.
(5) Hydraulic resistance (mbar) = (Flow rate (m3/h))2 x z Figures are based on the maximum boiler outputs.
Type 500 600 700 900 1200 1500 • Maximum output kW 500 600 750 1000 1250 1500• Minimum output kW 225 300 375 500 625 750• Boiler input at maximum output kW 546.45 656.50 818.77 1094.09 1366.12 1646.54• Boiler input at minimum output kW 240.60 322.23 401.50 534.76 667.74 803.86 • Maximum boiler operating temperature (1) °C 100 100 100 100 100 100• Minimum return temperature (oil/gas) °C 60/55 60/55 60/55 60/55 60/55 60/55• Minimum flue gas temperature °C 140 140 140 140 140 140• Maximum working pressure / test pressure bar 6/9 6/9 6/9 6/9 6/9 6/9
• Boiler efficiency net (2) at 100%PN % 91.5 91.4 91.6 91.4 91.5 91.1 at 30%PN % 93.5 93.1 93.4 93.5 93.6 93.3• Standing losses qB at 70°C Watt 1250 1500 1725 1800 2375 2400• Insulation thickness mm 100 100 100 100 100 100 • Fuel Consumption at maximum output Nat Gas (3) m3/hr 56.35 68.07 84.90 113.45 141.66 170.73 35 seconds oil (4) litres/hr 55.17 66.13 77.22 99.37 137.87 166.16
• Hydraulic resistance through the boiler (5) z-factor 0.020 0.020 0.010 0.011 0.011 0.009• Hydraulic resistance with 11 K T m bar 30.55 44.00 34.36 67.20 105.00 122.31• Hydraulic resistance with 20 K T m bar 9.25 13.31 10.39 20.33 31.77 37.43• Water Flow rate with 11 K T m3 / h 39.08 46.90 58.62 78.16 97.71 117.25• Water Flow rate with 20 K T m3 / h 21.50 25.80 32.24 42.99 53.74 64.49
• Boiler water content litres 800 770 1340 1250 1320 1330• Dry Weight (without burner) (6) kg 1700 1754 2463 2616 3350 3650
Type 1750 2000 2250 2500 3000 3500 4000
• Maximum output kW 1760 2050 2350 2650 3000 3500 4150• Minimum output kW 880 1025 1175 1325 1500 1750 2075• Boiler input at maximum output kW 1931.94 2242.89 2573.93 2908.89 3285.87 3837.72 4555.43• Boiler input at minimum output kW 945.22 1100.97 1260.73 1418.63 1602.56 1871.66 2226.40
• Maximum boiler operating temperature (1) °C 100 100 100 100 100 100 100• Minimum return temperature (oil/gas) °C 60/55 60/55 60/55 60/55 60/55 60/55 60/55• Minimum flue gas temperature °C 140 140 140 140 140 140 140• Maximum working pressure / test pressure bar 6/9 6/9 6/9 6/9 6/9 6/9 6/9
• Boiler efficiency net (2) at 100%PN % 91.1 91.4 91.3 91.1 91.3 91.2 91.1 at 30%PN % 93.1 93.1 93.2 93.4 93.6 93.5 93.2• Standing losses qB at 70°C Watt 2475 2510 2530 2570 2960 3070 3160• Insulation thickness mm 100 100 100 100 100 100 100 • Fuel Consumption at maximum output Nat Gas (3) m3/hr 200.33 232.58 266.90 300.97 340.35 397.51 455.30 35 seconds oil (4) litres/hr 194.96 226.34 259.75 276.93 330.87 387.86 443.09
• Hydraulic resistance through the boiler (5) z-factor 0.008 0.006 0.006 0.0015 0.0015 0.0015 0.0017• Hydraulic resistance with 11 K T m bar 151.40 154.06 202.45 64.36 82.48 112.96 166.19• Hydraulic resistance with 20 K T m bar 45.80 46.60 61.24 19.47 24.95 33.96 50.27• Water Flow rate with 11 K T m3 / h 137.57 160.24 183.69 207.14 234.49 277.57 312.66• Water Flow rate with 20 K T m3 / h 75.66 88.13 101.03 113.92 128.97 150.47 171.96
• Boiler water content litres 2150 2690 3350 3660 3670 4020 4130- Dry Weight (without burner) (6) kg 4325 4600 5400 5900 6525 8700 10850
SR-plus 1750 - 4000
(6) Dry weights based on the 6 bar boiler. To calculate the weight of an 8 bar version add 30%.
SR-plus 500 - 1500
August 2014

7SR-plus Technical & Performance Details
Dimensions and Technical InformationSR-plus heating boiler (models 500 to 900)
Key
1 Flow 4 Hydraulic Drain 7 Flue gas Test Point
2 Return 5 Flue Outlet 8 Smokebox CondensateDrain Connection
3 Safety Valve Connection 6 Smokebox Cleaning Door 9 Control Panel
A single phase 230V supply is required for the control panel operation. Single phase burners are electrically supplied via the control panel. Three phase burners require a separate three phase isolated supply (by the installer
to allow for boiler/burner door opening. A separate
run between the control panel and the burner. All power supplies to the boiler/burner/other associated equipment (ie: gas booster, separate oil pump, etc.) should be isolated via the same switched isolator.
2
L
DF
JH
G
C
M
E
3
8
4
9
9
BurnerCL
1
6
5
7
Elevation view
N
205
SR-Plus
Model
kW Ratingat high A B C D E F G H J L M N
Flow/return
BS4504 PN16
Safety valve Flue I/D
Dry Weight
kg
Water Content
litres
500 411-500 1413 1262 2323 1958 766 190 1320 920 280 766 1486 1371 100 N/B R 2" 250 1700 800
600 501-600 1413 1262 2323 1958 766 190 1320 920 280 766 1486 1371 100 N/B R 2" 250 1754 770
700 601-750 1582 1440 2809 2414 856 220 1780 1330 365 856 1650 1535 125 N/B R 2" 300 2463 1340
900 876-1000 1582 1440 2809 2414 856 220 1780 1330 365 856 1650 1535 125 N/B R 2" 300 2616 1250
L
F
A
Rear view
B
5
6
9
91
4
BurnerCL
8
2
7 7 205
Control panels aremounted on top of the boiler as standard up to SR-plus 900. Side mounting (left or right)can also be accommodated.
Note:
August 2014

8 SR-plus Technical & Performance Details
Dimensions and Technical Information
SR-plus heating boiler (models 1200 to 4000)
Key1 Flow 4 Hydraulic Drain 7 Flue Gas Test Point
2 Return 5 Shell Access Connection 8 Flue Outlet
3 Safety Valve Connection 6 Smokebox Cleaning Door 9 Control Panel
10 Smokebox Condensate Drain Connection
A single phase 230V supply is required for the control panel operation. Single phase burners are electrically supplied via the control panel. Three phase burners require a separate three phase isolated supply
connection to allow for boiler/burner door opening. A separate
the control panel and the burner. All power supplies to the boiler/burner/other associated equipment (ie: gas booster, separate oil pump, etc.) should be isolated via the same switched isolator.
SR-Plus
Model
kW Ratingat high A B C D E F G H J L M N
Flow/Return
BS4504 PN16
Safety valve Flanged
to BS4504 PN16
(from model 1750)
Flue I/DDry
Weight kg
Water Content
litres
1200 1151-1250 1626 1500 2909 2514 876 220 1795 1345 380 876 1745 1630 125 N/B R2” 350 3350 1320
1500 1426-1500 1722 1590 2909 2514 927 220 1806 1356 466 927 1833 1718 150 N/B R2” 400 3650 1330
1750 1625-1760 1852 1720 3361 2966 992 220 2137 1687 500 992 1990 1875 150 N/B 100 N/B 400 4325 2150
2000 1900-2050 1952 1820 3381 2966 1042 240 2137 1687 590 1042 2090 1983 150 N/B 100 N/B 450 4600 2690
2250 2200-2350 2103 1970 3494 3069 1118 250 2200 1750 590 1118 2260 2145 150 N/B 100 N/B 450 5400 3350
2500 2450-2650 2143 2016 3585 3140 1135 270 2372 1922 600 1135 2323 2208 200 N/B 100 N/B 450 5900 3660
3000 2900-3000 2261 2120 3674 3219 1200 280 2502 2052 600 1200 2448 2333 200 N/B 100 N/B 500 6525 3670
3500 3250-3500 2477 2300 4235 3720 1327 340 2652 2112 812 1327 2628 2513 200 N/B 100 N/B 500 8700 4020
4000 3750-4150 2660 2400 4270 3759 1460 340 2662 2162 812 1460 2702 2587 200 N/B 100 N/B 550 10850 4130
Control panel can be mounted on left or right hand side.
2
L
DF
JH
G
C
M
E
3
8
4
9
9
BurnerCL
1
6
5
7
Elevation view
N
L
F
A
Rear view
B
5
6
9
991
4
BurnerCL
8
2
7 7
August 2014
9Space requirements, boiler plant house noise levels
Space RequirementsWhere ever possible space should be left around the boiler to enable all parts to be examined and the cubicle casings to be fitted or removed easily.
Clearancesa) Back clearance is required for the system water, flue connections and access to cleaning door.b) Front clearance is required to swivel the boiler door ncluding burner by 90o, (standard to the right optional to left) Space requirements to right when right hinged 80mm (plus burner length).Clearance is equal to approximately the length of the boiler base (D) should be allowed for tube cleaning and tube repairs. Shorter clearances are possible subject to cleaning methods and plantroom layout.c) When the boiler is gas fired, allowance must be made for bringing the gas piping up to the boiler front and to leaving space for the gas pipework at he side of the boiler or in the most suitable directione) It is possible to install two boilers without intermediate space. (Important boiler door on left boiler must be swivelled to the left and boiler door on the right boiler to the right).
Additional pointsWhen pipework is being connected to the boiler, care must be taken not to damage the casings, which are not designed to be stood on.External weight or thrust from system pipework attached to the boiler should be avoided by carefuldesign of pipework runs and the use of expansion joints as required.
Measures can be adopted to reduce noise levels if it is considered that any of the following sources will be objectionable:
1) Direct transmission through the building structure, e.g. rooftop boilerhouses causing vibration and sound to be transmitted to the space below.2) Sound transmission through the boilerhouse fabric e.g. dwellings very close to the boilerhouse may be subject to objectionable noise from a building, without sound insulation, through the walls and air ventilation openings.3) From the chimney outlet e.g. where dwellings are located very close by the boilerhouse or above the chimney outlet. Natural gas fired plant has low frequency sound pressure levels which are disturbing to nearby residents when the boilers are operating, particularly at night.
The following are sound and vibration control measures which can be taken in respect of the points raisedabove:
• Acoustic burner and booster shrouds• Acoustic air intake baffle or acoustic louvres.• Heavy construction or sound insulated external walls, double glazing, heavy and close fitting doors to the boilerhouse.• Heavy construction flue with insulated cavity all round when the flue rises within the occupied areas of the building. Double skin insulated flues for flues installed outside the building.• Flue noise attenuator.• Anti-vibration mounts for the boiler case.• Peripheral gaps around pipes to be sealed with suitable acoustic material.• Anti-vibration connections to pipework and pumps.• Heavy construction of suspended floor or ceiling.
Boiler Plant Noise Levels
Changing the door hinged sideThe boiler door is substantially hinged to carry the full burner weight but no extra weight should be imposed. 1. Open the door as hinged and screw on two spare locknuts on the door hinge bolts to locate the door bosses on the new side.2. Close the door. Adjust the locknuts temperorarily and replace one door nut tightly.3. Change the other nut over with its plain diagonal counterpart from the other side of the door and tighten both.4. Adjust the locknuts so that a seal is obtained all round the fibre joint.5. Open the door and remove the original locknuts.Important• Always have two nuts tightened to prevent the door falling.• It is essential that the door seal is in place correctly after closing the door every time. Replace the joint if in doubt and check there are no fumes escaping.
This is a specialist subject and where noise due to vibration, combustion or mechanical sources is likely to be a problem, Hoval should be advised.
August 2014

10
Boilerhouse Ventilation
Natural Ventilation - General GuidelinesThe permanent ventilation of the boilerhouse (not including doors and windows which may be closed) is essential.Boilerhouse ventilation serves two essential purposes. One is to permit combustion air to flow freely to the burners from outside the building and the second is to maintain a clean atmosphere within the boilerhouse at a reasonable temperature level.Heat released from the boiler, the piping and the flues should not increase the boilerhouse temperature above 30oC.
Air Inlet RequirementsIt is essential that fixed air openings are provided at high and low level adjacent to the boiler front.Free inlet area of louvres required for ventilation and combustion air should not be less than 640mm2/kW rating (30in3 per therm) (1m2 per 1500kW boiler rating). The inlet opening should be at low level with a further ventilation opening of half that area at high level.
Air inlets and ventilation outlets are best disposed at low level and high level respectively, so that air convection across the boilers will create the necessary air changes.
Boilerhouse ventilation should conform with the relevant British Standards, Codes of Practice etc.
Preferably the high level openings should not be too close to the low level opening such that short circuiting of air, without ventilation across the boilers, can occur. Where louvres are utilised in the boilerhouse door, louvres over the full door height are satisfactory.For boilerhouses below ground level, arrangements should be made to induce fresh air into the boilerhouse where a natural flow of air is restricted by the buoyancy of air leaving higher level openings.
Air Supply by Mechanical Ventilation - General GuidelinesThe supply of air to a space housing the boiler by mechanical means should be mechanical inlet with natural or mechanical extraction. Mechanical extract ventilation with natural inlet must not be used.
Any mechanical means of entering air into a basement boilerhouse should have a balancing outlet so that the air pressure in the boilerhouse does not exceed 0.05" W.G. (12.5 Pa).
Where mechanical inlet and mechanical extract system is applied, the design extraction rate should not exceed one third of the design inlet rate.
Note: All air inlet and extract fans should be fitted with automatic controls interlocked with the boiler controls to give a safe shutdown or lockout in the
Open Vented / Pressurised SystemsOpen Vented Systems
A primary make up water and expansion tank is required for open vented systems. With low head on calorifier primary system, Hoval Technical Department should be consulted.
The cold feed pipe should be connected into the return water piping on the boiler side of any valve.
An open vented connection is provided at the boiler rear. The vent pipe should be installed with a continuous rise to a position over the primary feed tank.
A safety valve should be installed in a tee piece as near to the boiler as possible with no intervening valve. It should be sized to the relevant British Standard.
Pressurised Systems
For independently pressurised systems the vent connection must be fitted with an automatic air vent, a safety valve (sized to the relevant British Standard) and a pressure switch. No intervening valve is permissible between the safety valve and boiler.
The pressure switch should be interlocked with the boilers control circuit to safely close the burner down in the event of pressure loss.
The pressurisation unit control should also be interlocked with the boiler(s) controls to safely close the burner down in the event of malfunction.
Hoval recommend that a Level Probe Switch is fitted in the flow pipe rising from the boiler. It should be drained down for proving its operation periodically. It should be interlocked with the burner control system.
Ventilation, Open Vented & Pressurised Systems
August 2014

11Flues & Chimneys
Flues and ChimneysGuidance for sizing flues and chimneys is given in CIBSE and HVCA guides and also HovalTechnical Data Sheets. Flues should conform to the relevant British Standards, Codes of Practice etc.
General Guidelines
• Individual chimneys and flues should be used whenever possible for multi-boiler plants so that combustion conditions are not disturbed by the operation of other boilers. Consideration should be given to the condition of one boiler at low fire with regard to low temperature and condensation problems.
• Specialist flues are available for difficult situations such as a low level flue adjacent to a tall building. In this case a vertical balanced flue can be helpful. Refer to Hoval for further details.
Fan Dilution Systems - General Guidelines
In circumstances where the provision of a conventional or natural draught flue is impracticable because of the location of the boiler plant, a fan dilution system may be used.
Dilution fan capacity (m3s) = 9.7 x boiler rating (kW) at normal 3600 x 0.8 temperature and pressure (N.T.P)
To adjust for the normal diluted outlet temperature of 50oC, multiply the N.T.P. figure by 1.1154.
The dilution air intake should be independent of the boilerhouse combustion and ventilation air supply.
Velocities in the fan intake and exit ducts should not exceed 7.5l/s to avoid ductwork resonance noise.
Air flow switch to be interlocked with burner controls.
Local Authority approval of height of the diluted flue outlet is generally required.
Attention is also drawn to the need to include the fan and its proving switches as in the normal routine boiler maintenance programme.
Chimney sizes and height will need to take into account the following:
1) Clean Air Act.2) Local Regulations.3) Environmental Protection Act 1990.4) Considerations to adjacent buildings.5) Transmission of noise, particularly low frequency sound pressure levels in quiet periods of the day or night from natural gas fired plant if dwellings are very close.6) F lue gases d ischarged to the atmosphere which contribute to health dangers should be minimised by maintaining the burner and boiler to ensure correct combustion and high efficiency to reduce running time to a minimum and to maintain low levels of CO2 (Greenhouse effect); CO and NOx ( d a n g e r o u s g a s e s ) . C u r r e n t regulations for NOx limits (1993) are maximum 260 mg/kWh (148ppm at 0% O2). Burners supplied with Hoval boilers fully meet this requirement.
• Adequate doors should be provided in flues and chimneys for cleaning and inspection purposes. Square tees must not be used for creating a drain point at a flue change of direction as this creates difficulties in firing the burner.
• Flues should be supported independently to prevent undue weight and forces due to expansion being transmitted to the boiler outlet connection.
• Where high gas outlet velocities are required from the chimney, a coned outlet can be used. The additional loss of draught due to this should be taken into account in the chimney design.
• Steps should be taken in designing to prevent or minimise condensation forming by using double skin and/or insulated flue systems ad suitably insulated brick stack or double skin steel chimney. This helps prevent condensation from gas fired plants.
• Header cross sectional areas should take account of the quantity of gas flowing at each intersection. Allow for condensation points in chimney and f lue. Condensation should be drained at the base of the vertical run. Horizontal runs should drain away from the boiler.
• Where flues from two or more boilers join the header the gas streams should be flowing in the same direction at the point of intersection with the header.
• If two flues must enter into one common stack they they should be posit ioned to cause the least disturbance to the other gas stream (i.e. not opposite to each other).
• In deciding the flue run, the chimney height buoyancy should provide a negative pressure condition at the boiler flue outlet of 15 pascals.
• Flues should not be less in diameter than the boiler outlet connection size.
• Use of short runs of flues and with the minimum of large radius bends without horizontal runs before entering the main chimney at a 45o are recommended and will cause the least resistance.
IMPORTANTA condensate drain point is provided in the boiler flue outlet box and this should be piped to drain via a drain trap to prevent flue gases escaping. No isolating valve should be fitted in this pipework.
August 2014

12
Filling the system
RecommendationIt is recommended that each system
should be filled or refilled with treated water and specialist firms will be able to
advise in this respect
Water treatment
There is basic need to treat water contained in all heating and indirect hot water systems, particularly open vented systems.
One millimetre of lime reduces the heat conversion from flame via metal to water by 10%.
In practice the deposition of these salts is liable to cause noises from the boiler body or even premature boiler failure. Corrosion and the formation of black iron oxide sludge will ultimately result in premature radiator failure.
Open vented systems are not completely sealed off from the atmosphere as it is essential to provide a tank open to atmosphere if proper venting and expansion of system water is to be achieved. The same tank is used to fill the water and it is through the cold feed pipe that system water expands into the tank when the boiler passes heat into the system.
Conversely when the system cools, water previously expanded is drawn back from the tank into the system together with a quantity of dissolved oxygen.
Even if leakage from the heating and hot water systems is eliminated there will be evaporation losses from the surface of the tank which, depending on ambient temperature, may be high enough to evaporate a large portion of the system water capacity over a full heating session.
There will always be corrosion within a heating hot water system to a greater or lesser degree irrespective of water characteristics unless the initial fill water from the mains is treated. Even the water in closed systems will promote corrosion unless treated.
For these reasons Hoval strongly recommend that when necessary the system be thoroughly cleaned, prior to the use of a stable inhibitor, which does not require continual topping up to combat the effects of hardness salts and corrosion.
Hoval advise contact directly with major specialists on water treatment such as Grace & Dearborn or Houseman..
Check the following:
• all connections are made and tightened
• instrument pockets are fitted and water tight
• spare sockets are fitted with plugs and are water tight
• all valves in the heating circuit are open
• mixing or diverting valves are opened half way, then gradually fill with water until the altitude gauge (if fitted) indicates the correct head and the header tank is filled to appropriate level
• the installation is completely vented
• if a pressurisation unit is installed reference should be made to the makers filling instructions and applied
• installation debris and any deposits from the system are not allowed into the boiler
• the boiler is flushed out through the drain connection to ensure that the boiler is clean inside
• a large strainer is fitted to older systems to remove deposits before the return enters the boiler.
ImportantThe whole system must be thoroughlyflushed with water to wash out foreign matter and impurities in accordance
with CIBSE/BSRIA guidelines.
Filling the System
August 2014

13Fitting the Burner
Fitting the Burner
The burner is normally attached to the boiler and is pre-wired. In the event that the burner is supplied separately, then the following procedure should be used. An adaptor plate suitable for the type of burner being used is supplied fitted to the boiler door.
ImportantCheck from the nameplate that the burner received is the one indicated on the advice note and that the electrical supply details and the fuel shown agree with those available on site.
Most burners can be lifted manually, but care should be taken not to damage components and help should be sought for handling the larger burners.
Fitting the burner• Fit the burner to the door using the gasket and studs provided. If an acoustic shroud with a backplate is being used, refer to the notes below before fitting the burner.• When the burner is securely fixed, check that the boiler door will open fully 90o.• In the case of oil fired burner, the position of the oil strainer at the end of the fixed oil supply pipe should allow the door to open fully when the flexible oil piping is connected.
Dual fuel burners - important noteFor dual fuel burners, the installer should fit solenoid oil supply valves with micro switches to interlock with the burner and similarly the gas supply valve should have micro switches.
Check for shrouds with wheels that space has been allowed to wheel the shroud away from the burner on a flat and level floor in front of the burner.
Fire Sensor for gas or oil burnersThis should be located just in front of the boiler door and above it so that the door can be opened without hindrance. This applies whether an acoustic shroud is fitted or not.
For dual fuel burners which do not have a clutch release system for the oil supply when operating on gas, arrangements should be made to circulate the oil through flexible piping for at least 5 metres so that the pump does not overheat.
Gas burner valve trains should be located within 300mm of the burner and supported independently of the boiler at the opposite side to the door hinge so that the door can open after 'breaking' a connecting joint.
Sealing of the burner draught tubeA small annular space is necessary around the burner draught tube in the door refractory to enable the burner to be withdrawn. Seal this gap with the ceramic strip supplied.
Acoustic ShroudsAcoustic shrouds are available to special order for the burner and gas booster.
Check that the shroud instructions for fitting and space requirements are to hand and studied before fitting. These instructions are not in this manual.
Water flow & return temperaturesConsideration will already have been given to the system flow and return temperatures but please note:-1) The flow temperature can be adjusted to the maximum operating temperature, as outlined in page 5.2) The return temperatures should be controlled to be not less than 60oC for oil and 55oC for gas at all times by the use of suitable bypass/diverting controls.3) Differentials between the flow and return should not exceed 25K. Where a differential is to exceed 20K advise Hoval as considerations are necessary and alternative solutions can be suggested.
Burner matchingThe boiler will normally be supplied by Hoval complete with a burner which is CE marked and is CE approved for firing with the boiler. Where it is required to fit an alternative burner, to comply with CE Directives, the boiler must only be used with a burner having CE marking in accordance with Directive 90/396/EEC and Standard EN 676 (Gas) or EN 267 (Oil). The fuel suppy requirements will be stated on the burner data plate.
The burner CE approval must also be based on a test in a test tank having dimensions no larger than the rel-evant boiler combustion chamber dimensions.
Please consult Hoval Technical Department for further information, if required.
Always fit the front casing before burner on SR plus boilers up to and including the SR plus 600.
August 2014

14 Control Details
The control box is located at the top front of the boiler and encloses the appropriate thermostats. Check that it also contains the correct wiring diagram.
Control Details
• Burner control circuit switch: Switching the boiler ON: Setting the switch to the On position will allow the boiler to be switched on/off by any external controls, e.g. time switch. When external controls are in the ON position, the boiler will switch on/off at the dictates of the control thermostats. In the case of a gas burner if the boiler has been off for a long period,or the gas supply has been disconnected, ensure gas is purged to the boiler, and the main pilot gas cocks are turned on before switching to the ON position.• Limit thermostat: The maxiumum setting of the limit thermostat is 110oC. The limit thermostat should normally be set 10oC above the control thermostat (access to the limit thermostat adjustment is gained from inside the control panel ( isolate electrical supply before removing control panel cover). Note: Once turned down, the limit thermostat cannot be turned up to a higher temperature). If the boiler temperature exceeds this, the boiler will be switched off and the high temperature cut out light will be illuminated (the boiler will not operate until the limit thermostat is manually reset).
• High temperature cut out light If the high temp cut out light is illuminated, the limit thermostat will need to be manually reset. Allow the boiler to cool down, then unscrew the protective cover of the reset button. Press the button in and replace the cover. The boiler will automatically resume operation. If there are repeated faults, contact the Hoval Service Department.• Burner lockout light: I f the burner lockout l ight is i l luminated, the burner control will have gone to lockout. To rectify this, press the illuminated button on the burner control box. If the burner goes to lockout several times in a short period, contact the Hoval Service Department.• Terminals Terminals are provided in the control panel for linking in additional controls e.g. time switch, pressurisation unit, interlocks etc.
The control panel (as illustrated) is generally supplied for mounting on top of the boiler casing by the installer. For normal high/low operation the control stat is set by the Hoval commissioning engineer at the required lev-el e.g. 80oC . The limit stat will be set at a minimum of 6oC above this and the high/low stat at 3 to 5oC below the operating stat setting (where fitted). For other special requirements refer to the wiring diagram. A flexible lead is provided from the control panel which has to be wired into the burner terminals by the Installer prior to commissioning. (See important note below)
• Control thermostat: The control thermostat should normally be set in the range 70-83oC. It can, however, be set higher, up to 100oC maximum. Access to the control thermostat adjustment is gained by removing the circular disc on the front of the control panel.
1 6 7 8
Key 1. Burner control circuit switch2. Burner run light3. High fire run light4. High temperature cutout light5. Burner lockout light6. Control thermostat adjustment7. 2nd stage thermostat adjustment (where fitted)8. 3rd stage thermostat adjustment (where fitted)9. Limit thermostat manual reset10. 3 Amp control circuit fuse11. 6.3 Amp burner control circuit fuse12. Space for optional burner hours run meter13. Boiler flow temperature thermometer14. Space for optional burner modulation controller
9 10 11 12 14
2345
IMPORTANT - A single phase 230V supply is required for the control panel operation. Single phase burners are electrically supplied via the control panel. Three phase burners require a separate three phase isolated supply (by the installer) direct to the burner, incorporating a flexible connection to allow for boiler/burner door opening. In this case control cables fitted with wieland plug/sockets will still run between the control panel and the burner. All power supplies to the boiler/burner/other associated equipment (ie: gas booster, separate oil pump, etc.) should be isolated via the same switched isolator.
!August 2014

15
Key 1. Burner control circuit switch2. Burner run light3. High fire run light4. High temperature cutout light5. Burner lockout light6. Control thermostat adjustment7. 2nd stage thermostat adjustment (where fitted)8. 3rd stage thermostat adjustment (where fitted)9. Limit thermostat manual reset10. 3 Amp control circuit fuse11. 6.3 Amp burner control circuit fuse12. Space for optional burner hours run meter13. Boiler flow temperature thermometer14. Space for optional burner modulation controller
Gas BoostersInstallation - Gas Boosters
A booster is required when the gas pressure at the burner is below the value specified by the burner manufacturer at the flow rate attained at maximum burner rating.
Gas Regulations require that no more than 0.5" WG pressure is lost due to pipe work resistance between the supply meter and the gas inlet.
Booster Installation
It is usually preferably to locate the boosters as near as possible to the burner served rather than close to the meter.
• Leave adequate access for servicing drive belts, fan bearing assemblies, electrical motors and any acoustic shroud.
• Ensure that the room in which the gas booster is to be installed is well ventilated and free from dust.
• Before running the booster the machine should be cleaned thoroughly, taking particular care to make sure that pulleys and the belt are free from abrasive dust etc, which may have settled on the machine during installation.
• If the booster is in the boilerhouse then the ventilation and air inlet louvres for the boiler will also serve for the booster to keep the ambient temperature satisfactory, providing the full recommendations for free area and position are fulfilled.
• Standard boosters are designed to operate in ambient temperatures not exceeding 40oC. When the booster is housed separately to the boiler, ventilation must be provided to keep the ambient temperature below this. Ventilation openings in this case must be sized relative to any heat emiters in the room and the effects of solar gain.
• The booster control enables the booster to work automatically. Gas flow through the booster is required to stop any excessive increase in operating temperature and we recommend that the booster should only operate in conjunction with the burner. Prolonged periods of operation without any gas flow will cause an increase in temperature, shortening the life of the booster and increasing service frequency. If however the plant is required to work under such conditions, consideration should be given to the use of a purpose-designed bypass to dissipate the excess heat and the installation of a twin duty stand-by system to allow for regular inspection. Where a stand-by booster is fitted, it should be operated regularly or in rotation. If the booster is operating in rotation auto cycling may have been installed as an option.
ImportantIf a vital function is served, install
a standby gas booster.
Do not test the fan chamber assembly by hydraulic pressure: this practice will inevitably damage the fan bearing assembly.
All booster assemblies are tested for gas tightness by means of air at a pressure of 0.69 bar during manufacture.
• Concrete floors should be sealed.
• Locate the booster on a firm, flat horizontal plinth approximately 450mm high to raise the unit to a convenient level.
• Noise attenuation and absence resonance are best obtained by supporting the booster on anti-vibration mounts.
• For the same reasons, connecting pipework needs to be accurately aligned and properly supported. The use of flexible pipes between the inlet and outlet ports of the booster and pipework is strongly recommended. These flexible pipes will reduce risk of resonance in the pipework system and eliminate strain on the fan chamber.
• Changes in pipwork sizing are best made close to the booster ports. The use of expanders and reducers are recommended to minimise pressure losses.
• Where it is necessary to reduce or increase pipe sizes, the fittings should be sized to minimise pressure losses by changing cross section of pipework in easy stages.
• Connections for pressure testing or for pressure switches should be located at points in the system where there is not excessive turbulence i.e. where there is a straight run of pipework at both sides of the switch (i.e. at least 10 diameters of straight pipe).
NOTE :- If a gas booster is located in a meter/governor room then the associated electrical equipment, i.e:- control panel, motor, pressure switches should be suitable for use in a Zone 2 area with group II A gases (refer to BS4683, part 3)
NOTE: Flexible piping should be examined by the operator on a monthly basis. Change if there are any signs of deterioration or cracking.
August 2014
16
Commissioning
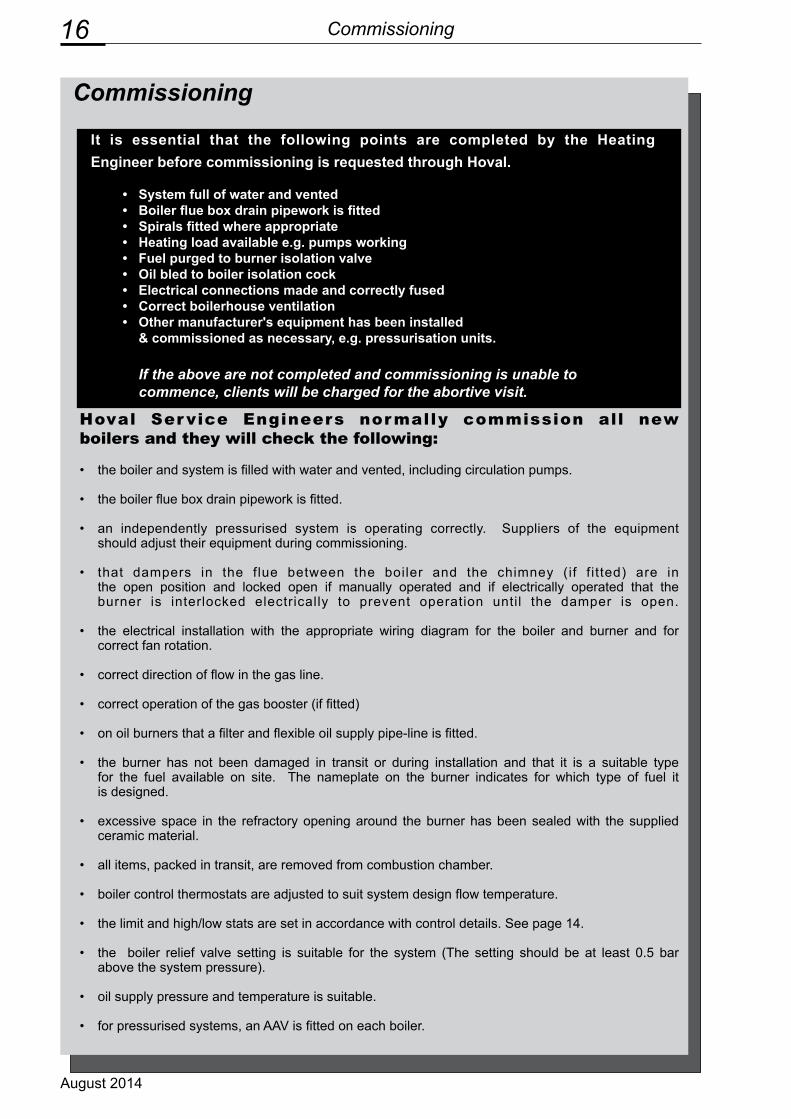
It is essential that the following points are completed by the HeatingEngineer before commissioning is requested through Hoval.
• System full of water and vented• Boiler flue box drain pipework is fitted• Spirals fitted where appropriate• Heating load available e.g. pumps working• Fuel purged to burner isolation valve• Oil bled to boiler isolation cock• Electrical connections made and correctly fused• Correct boilerhouse ventilation• Other manufacturer's equipment has been installed & commissioned as necessary, e.g. pressurisation units.
If the above are not completed and commissioning is unable to commence, clients will be charged for the abortive visit.
Hoval Service Engineers normally commission all newboilers and they will check the following:
• the boiler and system is filled with water and vented, including circulation pumps.
• the boiler flue box drain pipework is fitted.
• an independently pressurised system is operating correctly. Suppliers of the equipment should adjust their equipment during commissioning.
• that dampers in the flue between the boiler and the chimney (if f itted) are in the open position and locked open if manually operated and if electrically operated that the burner is interlocked electrically to prevent operation until the damper is open.
• the electrical installation with the appropriate wiring diagram for the boiler and burner and for correct fan rotation.
• correct direction of flow in the gas line.
• correct operation of the gas booster (if fitted) • on oil burners that a filter and flexible oil supply pipe-line is fitted.
• the burner has not been damaged in transit or during installation and that it is a suitable type for the fuel available on site. The nameplate on the burner indicates for which type of fuel it is designed.
• excessive space in the refractory opening around the burner has been sealed with the supplied ceramic material.
• all items, packed in transit, are removed from combustion chamber.
• boiler control thermostats are adjusted to suit system design flow temperature.
• the limit and high/low stats are set in accordance with control details. See page 14.
• the boiler relief valve setting is suitable for the system (The setting should be at least 0.5 bar above the system pressure).
• oil supply pressure and temperature is suitable.
• for pressurised systems, an AAV is fitted on each boiler.
Commissioning
August 2014

17
All settings both on boiler andburner will be recorded on acommissioning report which
will be supplied to the customers representative.
Commissioning Report
Commissioning
• commissioning is in accordance with burner makers requirements.
• controls are proved and stats are adjusted in line with temperature indicated on the boiler thermometer.
• that the boiler is fired up at a rate allowing the door refractory to reach a uniform temperature through its thickness thereby preventing any damage. • burner is adjusted to give optimum combustion, together with flame shape and penetration.
• the Heating Engineer will have the opportunity to receive instruction on the correct operation of the plant during commissioning and to aquaint himself with the fault finding chart on pages 23-26. He will also be advised on how much of the ‘action’ columns can be dealt with by site staff.
August 2014

18 Operating Instructions
Operating InstructionsPLEASE READ: Important Notes for the Boiler Attendant
Starting up after cleaning the boiler or a Summer shut down.Ensure that fuel lines are fully purged and that fuel is available at the burner at the correct pressure and temperature.
That spirals/retarders if supplied are refitted
On a gas-fired boiler, if the boiler has not been run for some time, or if a fuel supply pipe has been disconnected, purge the piping via the bleed nipple up stream of the burner to ensure that a gas/air mixture is avoided.
On an oil-fired boiler using class D oil in conjunction with a single-pipe supply system, ensure that air is bled from the system if the oil pipe has beendisconnected.
Ensure fuel supply valves are open. Where a pump is incorporated in an oil fuel supply system, ensure the pump is switched ON. Check all switches, e.g. time switch, and thermostats are in the ‘calling’ for heat condition. Switch ON electrical supply to the burner at the main switch. Switch the control panel mounted switch to ON. The burner control box should now monitor the burner through its prescribed sequenceto reach 'main flame on'.
Normal Running
The boiler will switch on/off under the dictates of the control thermostat. The boiler temperature at any particular moment can be seen from the boilerthermometer.
Allow the boiler to reach its set temperature and then check the burner flame through boiler door sight orifice; the flame should extend well into the combustion chamber. Also check the flame characteristics at the burner through the burner inspection window. If any deterioration is noted, the heating engineer shouldensure the necessary action is taken.
These instructions are the minimum necessary to enable an operator to start, run and stop the boiler.They cover also the simple routine servicing procedures necessary. Except where specifically noted, they are applicable irrespective of the fuel used - gas or oil - BS class D (35 sec).
If the heating system designer or installer has prepared operating and maintenance instructions specifically for the whole plant, those instructions should be referred to in the first instance.
Instruments and Controls
Instruments are generally mounted at the top front of the boiler.A boiler flow water thermometer will always be present, an altitude gauge may also be provided.
The basic controls for any boiler will be:-
a) A sequence-control box (mounted on the burner) which automatically governs the firing sequence of pre-purge, ignition, pilot or reduced start, and provides for safety lock-out in the event of flame failure or other unsafe condition.
This control box will have advisible indication of lock out and a manual-reset button for use in the event of flame failure.
b) A control thermostat which allows adjustment of the boiler flow temperature is fitted behind the instrument panel facia to discourage unauthorised adjustment after it has been set by the commissioning engineer.
c) A safety-limit thermostat which comes into operation should the control thermostat fail to shut the burner down.The limit stat is usually set at 10oC above the control thermostat’s maximum setting. No automatic control may be interfered with by the boiler attendant but must be adjusted only by a qualified Service Engineer.
There may be special burner controls equipment or additional controls to be integrated with the standard burner control equipment. The function and setting of these will be covered by the suppliers e.g. BMS., sequence controls high and low pressure switches and water level controls, associated with independendently pressurised systems.
NOTE: A gas/air mixture is dangerous as it will explode if subjected to a spark.
Sequencing of boilers under BMS control.When a bank of boilers are sequenced to operate under the dictates of a BMS control system, it is veryimportant that on-line boilers are "properly" matched to the available heating load at any one time.This will avoid too frequent cycling of the burners as they stop and start (introducing cold pre & post purge air into the boiler each time this happens).Over time this can result in the boilers suffering from thermal shock and premature failure of the pressure parts.
August 2014

19
A qualified boiler/burner service engineer will be required to carry out work other than the follow-ing: boiler cleaning, inspection of components for damage, starting up the boiler, and the specified testing and minorfault rectification.
Inspection & Servicing
Maintenance - Inspection & Servicing
No special equipment is required for normal boiler servicing.
Tools for cleaning the boiler heating surfaces are provided withthe boiler. If a hard scale forms from oil fired corrosive elements,a proprietary cleaning medium (e.g. Carbonex by Arrow ChemicalsLtd) is advantageous for softening and easier removal of suchdeposits.
The service engineers' equipment will include any necessaryspecial tools and also a combustion efficiency test kit.
Periodic InspectionThe following periodic inspections should be madebetween main servicing periods.
• Examine boiler casing panels for obvious signs of damage, corrosion or other deterioration, and for security. (Badly fitting casings and damaged insulation materials leads to wasted heat and an increase in the boilerhouse ambient temperature).
• Examine the flue pipe and gasket for obvious signs of damage, corrosion, flue-gas leakage, and for security. Similarly inspect the cleaning explosion door at rear of boiler.
• Examine the flue and chimney, as far as possible, for partial blockage, debris, etc.
• Ensure that condensation drains at the chimney base are clear and that the boiler flue box drain socket is connected to a drain pipe with a water trap.
• Keep the boilerhouse floor clear of dust and debris which may be drawn into the burner and cause damage.
• Examine all fuel and water valves, connection and burner etc, for obvious signs of damage or leakage, and for security.
In an open-vented heating system, check: - Level of water in the feed and expansion tank. - That the ball valve is free to operate correctly. - Al l air vents are operating correctly.
NOTE: No continuous make-up of water should be taking place. (In this event check where a leak may be occurring or if pumping over is taking place).
• On the boiler door, examine the ceramic-strip seal, and check that there are no flue gas leaks. Leaks can be detected by heat marks or deterio- ration of the metal ring holding the joint. In the event of such signs, replace the joint immedi- ately. Check the filler material around the burner tube and the door lining for deterioration. Replace when required.
• Initially examine boiler interior after one month when using class D oil to determine necessity for boiler cleaning. When heavy oil is being used, examine after two weeks. The amount of use, the number of cold starts involved, and the mean operating temperatures all affect the rate of soot and scale formation.
A consistent pattern will then be established to determine the frequency of cleaning required. With gas much longer periods between cleaning are usually possible. If condensation occurs due to low return water temperatures then a build up can occur more quickly. Establish a pattern to see if cleaning can coincide with service visits.
After a boiler is first commissioned, examinations should initially be more frequent until a reason- able, consistent pattern can be established.
• On oil/gas burners periodically remove photo electric ultraviolet cell and clean the window of the cell.
• Check that the flame shape and penetration remain as at the initial commissioning. Report any unusual a l terat ions in th is respect.
Report any occurrences which indicate that the boiler, the firing equipment or the system controls are not operating correctly.
August 2014

20
Boiler & Burner ServicingIn addition to the periodic inspections given on page 19 it is recommended that a complete check is carriedout on all components at appropriate intervals.
These checks must be made by a qualified boiler/burner service engineer, ideally under an annual sevice andmaintenance contract.
Hoval Service Department normally provides this service and will be pleased to provide a written quotation on request. This would typically cover the operation, cleanliness, combustion efficiency etc., of the fuel burner and associated controls. In the case of gas burners it would include a check on the gas tightness of the gas control valves at the burner if a gas leak detection unit is not fitted. In addition if a gas booster is fitted itcould also be covered in this service.
Please note No adjustment of internal components is permissible on either gas or oil burners except by a qualified service/burner engineer.
If flexible pipes are used for connecting the gas burner make a monthly leak test on these pipes.
Maintenance - Boiler & Burner Servicing
Boiler Cleaning for Heating Surface
Frequency of cleaning will be dependent on usage in conjunction with the condition of the boiler at the periodicinspections, but the minimum requirements when using the various fuels are:-
1) Run the boiler until the burner automatically switches off under action of the control thermostat. (It is easier to clean a warm boiler).
2) Switch OFF electrical supply to the burner. Where a plug connection is fitted in the cable from the boiler to the burner, disconnect at this point. Switch OFF electrical supply to the booster.
3) Turn OFF all fuel shut-off valves at the burner.
4) Where rigid fuel pipes to burner are employed, e.g. gas burners, disconnect pipe(s) to allow the boiler door to open.
5) Fully open the boiler door complete with burner.
6) Clean the tubes using the supplied brush. Similarly clean the combustion chamber when required. Avoid damage to the ceramic sealing strip against which the door closes. NB remove spirals if fitted.
7) Remove rear cleaning/explosion door. Clear loose soot from the smoke outlet box and thoroughly clean the box. Clean and examine the boiler backplate; no hard deposit should be present. Remove any build up occuring between the projecting tube ends.
8) Refit spirals if originally fitted.
(9) Check conditions of cleaning/explosion door gasket. Refit door, ensuring it seats correctly on the gasket tighten the wing nuts only two full turns against spring compression.
Gas (natural or LPG) - once per heating seaonOil BS Class D (35 sec) - twice per heating seasonOil heavy grades - 3 to 4 times per heating season
NOTE: Lengthy periods between cleaningshould only be resorted to when theperiodic inspections prove this is possible.
NOTE: Where any hard scaling is present, use a propietary cleaning medium to soften and assist removal.
NOTE: Where heavy oil is being used on a circulatory fuel system, ensure that fuel pump(s) heaters and tracers are left in operation at all times.
August 2014

21
9) Check condition of boiler door ceramic seal. Inspect the lining material on the door and fille material around burner tube. Minor damage to insulating material can be carefully rectified using a mouldable refractory (e.g. Pyruma) on refractory lined doors. Where a door is lined with ceramic fibre is unlikely to suffer damage in normal use but in the unlikely event please consult Hoval. Any serious damage must be reported to the Service Engineer for repair. Filler material can be repaired similarly. The door sealing strip must be in good condition and must be replaced when an effective seal cannot be obtained under normal pressure. Replace seal ing str ip annual ly. Refer to Burner Maintenance Instructions Page 22 whilst the door is open.
10) Close the boiler door, and evenly tighten the nuts using a tommy bar/spanner.
Maintenance - Summer shut down
11) If disconnected, plug in the boiler/burner electrical connection.
12) Check boiler door is effectively closed (ineffective closure will be detectable by sight or smell).
13) It is recommended that, when the boiler has become thoroughly hot, a combustion efficiency check is made by the Service Engineer.
14) If the boiler is not immediately to be used, switch OFF electrical supply to burner and turn OFF fuel supply. Where using heavy oil do not switch off fuel heaters and tracers. Switch off electrical supply to gas booster.
Summer Shut DownIf the boiler is to be out of operation for a long period, e.g. during the Summer, the boilerinterior should be thoroughly cleaned. Atmospheric condensation, activating acidic deposits in the boiler, is responsible for considerable corrosion and metal wastage. Every effort should be made to reduce this bythe most thorough cleaning and by keeping the boiler dry.
A tray of absorbing material placed in the combustion chamber is helpful in this respect. Close the boiler door.
August 2014

22 Maintenance - Burners
Burner Maintenance
Impor-Before carrying out any work on the burner ensure that the main electrical isolating switch is in the OFF position and the fuel isolating valve closed.
These instructions are provided for the benefit of the operator and are intended to be of assistance in making minor adjustments and provifing the burner with proper maintenance, cleaning and lubrication. Additional information can be obtained through your installer or from the manufacturer.
• Fuel The unit is designed to burn the fuel stated on the burner nameplate. Under no circumstances must any other type of oil or gas be used.
In the case of burner fuel conversion, check to see that the fuel used corresponds with that marked on the new burner nameplate.
• Starting and Stopping
• Emergency Stop The burner can be stopped in an emergency by switching off the mains isolating switch provided on the line between the burner and the electric supply. The installer must identify the switch. Check position of this switch or any "panic button" available.
• Check the Burner Operation Inspect burner flame periodically. If it becomes lop sided or there is any noticeable change in flame colour, call the service engineer.
When cleaning the room housing the heater unit, always switch off the burner to reduce the amount of dust and lint drawn in through the air inlet.
• Preventive Maintenance Consult your heating engineer for advice on regular prevetive maintenance intervals.
• Gas Supply Should the gas supply be interrupted, the system may require venting of air that may have accumulated, before the burner is restarted. This is achieved by unscrewing the pressure test point situated down-stream of the main govenor or combination valve and venting the air to atmosphere until gas has reached the test point.
WARNING: No smoking or naked lights to be allowed as a gas/air mixture is dangerous.
Periodical examination of all pipework should be carried out. The recommended method is to brush a soap solution around all the jointed areas. A leak in the system would have the effect of forming bubbles.
CAUTION: Do not place any items in the boiler combustion chamber as it is not suitable for burning waste.
• Oil pump See burner manufacturers manual.
• Gas train items and gas leak detectors For maintenance of these units refer to the manufacturers manual.
• Motor Keep the burner motor clean and dry. Any deposits of dust or lint should be blown out occasionally. On motors provided with oiling holes, a few drops of high quality SAE 20 oil should be injected every six months. Surplus lubricant spreading from the bearings should be wiped away. Some motors have sealed-for-l i fe bearings; these require no maintenance.
• Fan Runner Keep the fan blades clean and free from oil and build up of dust or deposits picked up from a dusty boilerhouse.
• Oil Strainer/Filter Replace filter element anually.
• Nozzles, Flame Plate and Electrodes Maintenance by the boiler operator is usually limited to checking the condition of these items only whilst the boiler door is open. Servicing the oil or gas nozzle, which may require dismantling, and replacement of parts should be left to the service engineer.
The boiler operator may wipe off deposits of soot and oil from the flame plate and nozzle taking care not to disturb the parts. Check the electrodes are set correctly after referring to the burner manufacturers manual.
• Flame Sensor Remove and clean the flame sensor which is an ultraviolet cell for gas or photo-electric cell for oil with methylated spirit on a lint free cloth. Do not handle window of the flame sensor after cleaning.
NOTE: Remove the flame sensor before attempting to remove the burner inner assembly.
August 2014

23
NOTE: Rectification of any internal burner component must be done by a qualified burner engineer.
Symptom
A. Burner will not start
B. Burner starts i.e. burner motor runs but will not light and burner goes to 'lockout'.
C. Burner lights but rapidly extinguishes.
Possible Cause Action
1. Electrical supply failure
2. Control thermostat time or water pressure switches or other boiler systems controls at fault
3. Manual reset on limit thermostat tripped (when fitted)
4. When using heavy oil tem-pertures incorrect in oil pip-ing or in burner preheater.
1. Check the following: a) Main isolating switch of the burner is on. b) Overload protective device of the burner motor.
2. Check that power is available at the control panel and all switches are closed.
3. Reset and check also control stat setting and operation.
4. Check temperatures: ensure preheating equipment is operating.
1. Switch off burner. Check spark plug gap. Check H.T. leads and connections. Check and clean ignition electrode(s) and insula- tor
2. Open door and check whether oil has been sprayed into combustion chamber; if no evidence of spray, clean or replace burner nozzle(s).
3. Check as above. If no spray, c h e c k t h e f o l l o w i n g : a) There is oil in the fuel tank. b) All necessary valves are open. c) The oil filter is clear. d) There is no airlock in the fuel pump (listen for any unusual sound from pump). e) For air leakage into the fuel feed pump. f) The fire valve or fire link has not closed in oil line.
1. Remove cell, clean and refit.
2. Replace cell with new.
1. No ignition spark.
2. No oil spray into combustion chamber but pressure indicated on burner gauge (if fitted).
3. No oil spray into combustion chamber and no pressure indicated on the oil gauge.
1. Dirty photocell (causing 'lockout' action).
2. Faulty photocell (causing 'lock- out' action).
Oil Burner Fault Finding Chart
Oil Burner Fault Finding Chart
August 2014

24
Symptom
D. Smoky flame and/or fumes from burner. Flame shape alters from normal. Boiler door becomes hotter than usual.
Possible Cause
1. Air inlet damper accidently masked or other obstruction to airflow.
2. Alteration to air inlet damper position.
3. Burner nozzle(s) dirty or badly fitted.
4. Incorrect nozzle(s).
5. Excessive oil pressure.
6. Boiler tubes, flue or chimney blocked or re stricted. Flue damper closed.
7. Burner draught tube or flame plate misplaced or faulty.
8. Door refractory failure.
Action
1. Clear obstruction.
2. Reset damper and make a combustion check (special instruments required).
3. Replace nozzle(s).
4. Replace with correct nozzle(s).
5. Reset pump pressure regulator.
6. Clean tubes. Open flue damper and check why it became closed. Clear blockage or restriction.
7. Call Service Engineer to correct and replace if necessary.
8. Check for damage, replace if damage severe.
Oil Burner Fault Finding Chart
Oil Burner Fault Finding Chart / 2
August 2014

25
NOTE: Rectification of any internal burner component must be done by a qualified burner engineer.
Symptom
A. Burner will not start
B. Burner starts i.e. burner motor runs but will not light and burner control box goes to 'lockout'.
C. Burner motor starts but stops and re-cycles.
D. Bur ner shuts down during operation and recycles.
E. Bur ner shuts down during operation and goes to 'lockout'.
Possible Cause
1. Electrical supply failure.
2. Air pressure switch on burner not operating.
3. Control thermostat, time, water pressure switches or other boiler system controls at fault.
1. No ignition spark.
2. Gas starvation.
3. Ultra-violet cell fault.
1. Air pressure switch on the burner.
As C1 above.
1. Flame failure
2. Ultra-violet cell fault.
Action
1. Check: a) Main isolator switch is on and power is available at the control panel. b) Overload protective devices of burner motors (if fitted).
2. Switch contacts must be in the burner start position. Check switch is not stuck in the satisfied position.
3. Check: a) That all switches are closed b) Booster is not locked out due to low inlet gas pressure and that pressure switches function correctly.
4. Reset and check. Also check control thermostat setting and operation.
1. See action B1. (Page 27)
2. Purge gas pipe, check pilot valve operation.
3. Remove, clean and check connections and replace if necessary.
1. Check: a) burner damper is open to usual extent. b) air inlet to switch is not blocked. c) switch is not stuck. d) electrical connection.
As C1 above.
1. Check gas supply and pressure.
2. As B3 above.
Gas Burner Fault Finding Chart
Gas Burner Fault Finding Chart
August 2014
26
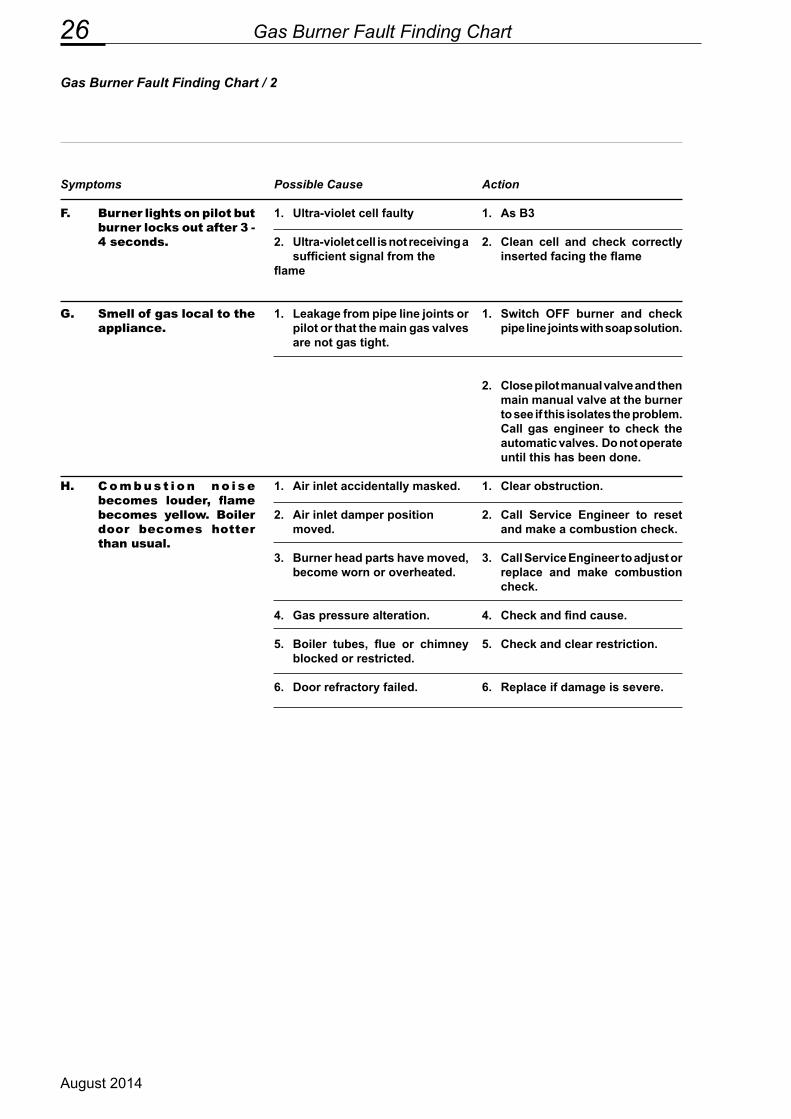
Symptoms
F. Burner lights on pilot but burner locks out after 3 - 4 seconds.
G. Smell of gas local to the appliance.
H. C o m b u s t i o n n o i s e becomes louder, flame becomes yellow. Boiler door becomes hotter than usual.
Possible Cause
1. Ultra-violet cell faulty
2. Ultra-violet cell is not receiving a sufficient signal from the flame
1. Leakage from pipe line joints or pilot or that the main gas valves are not gas tight.
1. Air inlet accidentally masked.
2. Air inlet damper position moved.
3. Burner head parts have moved, become worn or overheated.
4. Gas pressure alteration.
5. Boiler tubes, flue or chimney blocked or restricted.
6. Door refractory failed.
Action
1. As B3
2. Clean cell and check correctly inserted facing the flame
1. Switch OFF burner and check pipe line joints with soap solution.
2. Close pilot manual valve and then main manual valve at the burner to see if this isolates the problem. Call gas engineer to check the automatic valves. Do not operate until this has been done.
1. Clear obstruction.
2. Call Service Engineer to reset and make a combustion check.
3. Call Service Engineer to adjust or replace and make combustion check.
4. Check and find cause.
5. Check and clear restriction.
6. Replace if damage is severe.
Gas Burner Fault Finding Chart / 2
Gas Burner Fault Finding Chart
August 2014

Conservation of EnergyProtection of the Environment
Hoval Limited, Northgate, Newark, Notts NG24 1JNTelephone: 01636 672711 Fax: 01636 673532
e-mail: [email protected] Site: www.hoval.co.uk
Mar
ch 2
014